11. Producer
Oracle Financial Services Lending and Leasing is capable to create and service direct as well as indirect Lease. Indirect Lease are generated through Producer Entities like Dealerships and Agents. It is essential to create and maintain such entities to enable incentive tracking and business development achieved through each entity.
Applications are sent to financial institutions indirectly through producer entities like dealers or agents on behalf of a customer. Specifying Producer details is mandatory while creating a application since the system associates a credit application with the producer entity which sent it, on the Application Entry, Underwriting, and Funding screens. When the credit application is approved and funded, the system associates the account with the producer entity.
The following three different status are defined for Producer Entities in OFSLL:
- Active: Only if Producer Status is Active, the application sourced through that Producer Entity can be funded.
- Inactive: If the Producer Status is Inactive, the application sourced through that Producer Entity cannot be funded.
- Temporary: If the Producer Status is Temporary, the application sourced through that Producer Entity can only be reviewed. However it cannot be funded.
The producers are paid for their participation, either:
- Up front during funding
-or-
- Up front on a monthly basis
-or-
- When the interest is earned
-or-
- When the payment is received from customer based on the set up compensation plans.
The Producer Setup screen contains pages that enable you to maintain and administer producer compensation, compensation payments, charge back plans, and chargeback parameters.
While setting up Producer entities it is also essential to setup the Producer Cycles under 'Setup' in main menu. For more details, refer to Configuring Lending and Leasing guides.
While working with the Producer Setup screen, you will primarily use the following sub tabs:
- Payment Details
- Tracking Attributes
- Contracts
- Comments
- Summary
The Producers screen, completed during setup, can be used to view and maintain producer details.
11.1 Producer Details
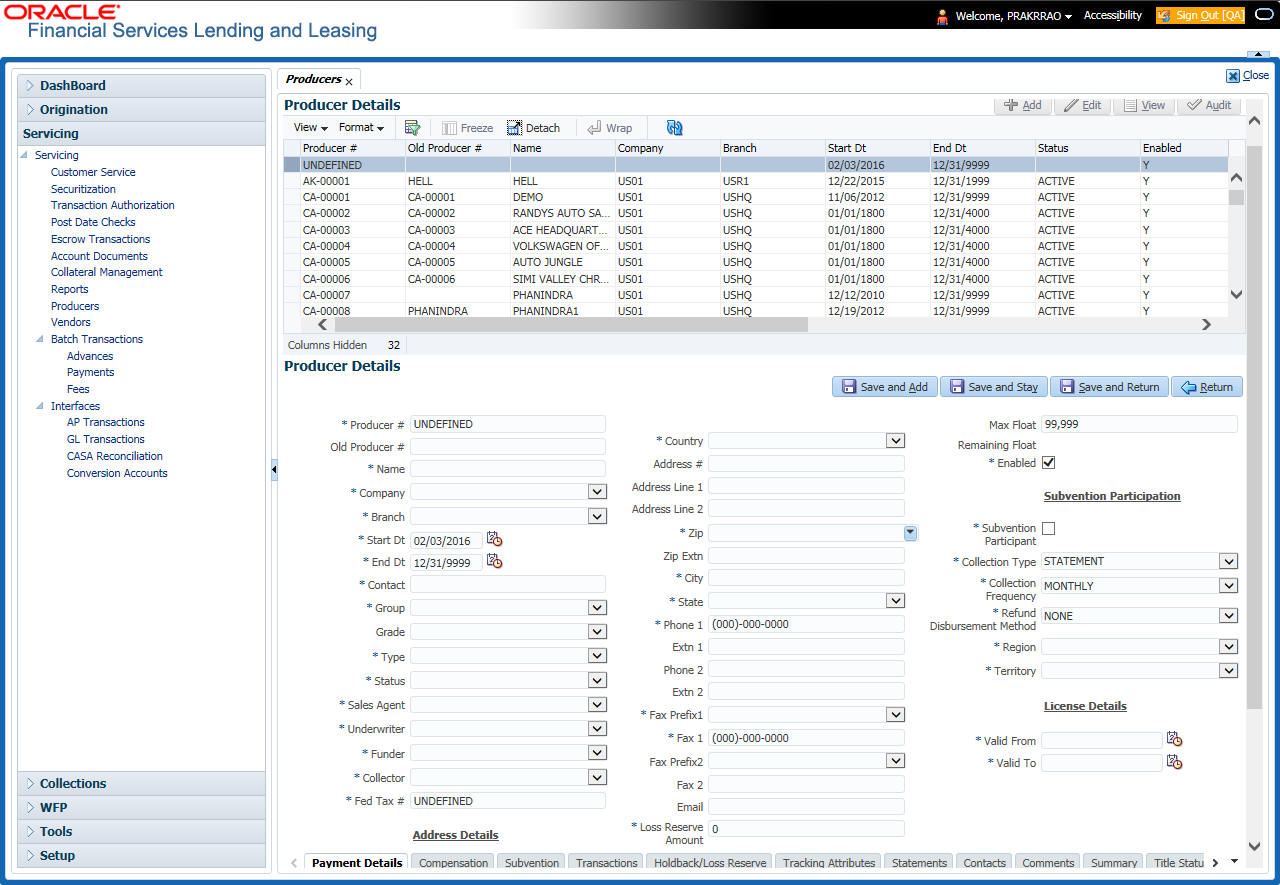
The Producer details screen allows you to record or edit basic information about the producer. You can set up dealers or producers for a company and branch. You can also set up a default underwriter and a default collector for a producer. The system uses this information in the origination work flow to select a queue.
The producer number, name, contact information, company and branch to which the producer is associated with, federal tax number, status, and license information can be stored in this screen.
Navigating to Producer
- On the Oracle Financial Services Lending and Leasing home screen, click Collection > Collections > Producers.
- The system displays the Producers setup screen.
To set up the Producer
- In the Producer section, perform any of the Basic Operations mentioned in Navigation chapter.
A brief description of the fields is given below:
Field: |
Do this: |
Producer # |
Based on the system setup, either: Specify the producer number -or- The system generates producer number. Producer will be activated on the next system date (current system date + 1) and not on the start date. |
Old Producer # |
Specify the old producer number. |
Name |
Specify the producer name. |
Company |
Select the company from the drop-down list. |
Branch |
Select the branch from the drop-down list. |
Start Dt |
Select the producer start date by clicking on the adjoining Calendar icon. |
End Dt |
Select the producer end date by clicking on the adjoining Calendar icon. |
Contact |
Specify the producer contact. |
Group |
Select the producer contact group from the drop-down list. |
Grade |
Select the producer grade as per business processes from the drop-down list. The list consist of values which are used only for categorizing at the producer level and can be changed periodically as per business requirement. |
Type* |
Select the producer type from the drop-down list. The Group and Type fields help in setting up the pricing schemes on Pricing screen. |
Status |
Select the appropriate status from the drop-down list. The contents of this field can be linked to edits in Lease origination cycle so that only applications from Producers whose status is 'Active' can be funded. |
Sales Agent |
Select the sales agent associated with this producer from the drop-down list. |
Underwriter |
Select the default underwriter assigned to this producer from the drop-down list. Only users with a responsibility for an underwriter can be designated as underwriters for producers. |
Funder |
Select the users with responsibility as Funding Specialist, from the drop-down list. |
Collector |
Select the default collector or agent assigned to this producer from the drop-down list. (This will appear in the Collector field in Delinquency Information section of Account Details screen on the Customer Service screen). |
Fed Tax # |
Specify the federal tax identification number. If the organizational parameter UIX_HIDE_RESTRICTED_DATA is set to Y, this appears as a masked number; for example, XXXXX1234. |
Address section |
|
Country |
Select the country code from the drop-down list. |
Address Line 1 |
Specify address line 1 |
Address Line 2 |
Specify address line 2 |
Zip |
Select the zip code from the drop-down list. |
Zip Extn |
Specify the extension of the zip code. |
City |
Specify the city. |
State |
Select the state from the drop-down list. |
Phone 1 |
Specify phone number 1. |
Exnt 1 |
Specify phone number 1 extension. |
Phone 2 |
Specify phone number 2. |
Extn2 |
Specify phone number 2 extension. |
Fax Prefix1 |
Select fax prefix number 1 from the drop-down list. |
Fax1 |
Specify fax number 1. |
Fax Prefix2 |
Select fax prefix number 2 from the drop-down list. |
Fax2 |
Specify fax number 2. |
Specify the producer mail address. |
|
Loss Reserve Amount |
Specify the loss reserve amount |
Max Float |
Specify the value of maximum float allowed for the Producer. A Float represents the application sourced by the producer that is Funded and awaiting 'Title perfection' from the concerned authorities for marking lien. If you do not know the exact value but want to provide a maximum float, then specify the value as 99999. |
Remaining Float |
System automatically displays the available number of floats by calculating the remaining float value based on 'Max Float' and Title perfections under processing. |
Enabled |
Check this box to enable the product. |
Subvention Participation Details |
|
Subvention Participant |
Check this box to maintain the producer as subvention participant |
Collection Type |
Select the collection type from the drop-down list. |
Collection Frequency |
Select the collection frequency from the drop-down list. |
Refund Disbursement Method |
Select the refund disbursement method from the drop-down list. |
Region |
Select the region of producer from the drop-down list. |
Territory |
Select the territory of producer from the drop-down list. |
License Details |
|
Valid From |
Specify the date from when the producer’s license is valid. |
Valid To |
Specify the date till when the producer’s license is valid. |
- Perform any of the Basic Actions mentioned in Navigation chapter.
Note
Oracle Financial Services Software recommends that you double-check the fax numbers (especially the 10 digit number) and email addresses you enter on this screen, since the system uses this information to send its system-generated underwriting decisions.
11.1.1 Payment Details
You can setup ACH as the payment mode for a dealer or producer on Payment Details sub screen. The Payment Details sub screen stores information regarding the payment mode, currency and producer’s bank details, such as bank’s name, routing number, account type, account number, BIC and IBAN. Once the details are updated the same has to be verified and approved in the payment details section before processing.
The dashboard of Oracle Financial Services Lending and Leasing displays all the producers whose payment details are either APPROVED or WAITING FOR APPROVAL in the ‘Producers Count By ACH Status’ section. You can click on the respective links to view the details in ‘Producers’ screen.
To complete the Payment Details
- Click Collection > Collections > Producers > Payment Details.
- In the Payment Details section, perform any of the Basic Operations mentioned in Navigation chapter.
A brief description of the fields is given below:
Field: |
Do this: |
Pmt Mode |
Select the payment mode from the drop-down list. |
Bank |
Specify the ACH bank name. |
Start Dt |
Select ACH start date if payment mode is ACH. You can even select the date from adjoining Calendar icon. |
Routing # |
Specify the ACH bank routing number. |
Account Type |
Select the ACH bank account type from the drop-down list. |
Account # |
Specify the ACH bank account number. |
Currency |
View the currency of the Producer. System defaults the currency depending on the Company or Branch selected for the Producer. |
BIC |
Select the Business Identifier Code from the drop-down list. The list displays the BIC codes defined in the system. |
IBAN |
Specify the IBAN (International Bank Account Number). IBAN is used for identifying bank accounts across national borders with a minimal of risk of propagating transcription errors. Ensure that value entered satisfies the check-digit validation based on modulo 97. On save, system automatically validates the IBAN number length based on country code, characters, white spaces, and checksum. Validation is also done during posting non-monetary transaction (ACH Maintenance). You can maintain the IBAN length and other details required as per the country code in the user defined table (Setup > Administration > System > User Defined Tables). Note: IBAN for 'NL' country code (IBAN_FORMAT_NL) is defined by default with length of IBAN as 18. |
Disbursement Currency |
Select the disbursement currency from the drop-down list. System defaults the currency depending on the Company or Branch selected for the Producer. |
Approval Detail section - When the payment details are approved, system automatically populates the following fields with the approver details along with the status as ‘Approved’. However on subsequent update, the details are reset till further approval and status is changed to ‘Waiting for approval’. |
|
Approved By |
View the user who has approved the payment details. |
Approved Dt |
View the date and time when the payment details were approved. |
Status |
View the status of producer payment details. |
Perform any of the Basic Actions mentioned in Navigation chapter.
To Approve Payment Details
You can verify and approve the producer payment details defined by another user in the Producers > Payment Details section. You can either directly select the required record in the ‘Producers’ screen or sort the list of payment details awaiting approval using the Dashboard.
Before you proceed, ensure that you have approval rights assigned to your login. Else, contact your system administrator.
- To access the payment details to be approved, do one of the following:
- Click Collection > Collections > Producers.
- Click Dashboard and navigate to ‘Producer’ section. In the ‘Producers Count By ACH Status’ sub section, click WAITING FOR APPROVAL. The payment details are sorted accordingly and displayed in ‘Producers’ screen.
- In the Producer Details section, select the required Producer. The payment details associated with the producer are displayed in the ‘Payment Details’ section.
- In the ‘Payment Details’ section, click Approve Payment Detail.
The payment details are approved and approver information is captured in Approval Detail section. Also on approval, the Dashboard counters in ‘Producers Count By ACH Status’ section are updated.
11.1.2 Tracking Attributes
The Tracking Attributes sub screen allows you to link information to a producer who is not tracked in the system, by default, however is part of company’s business practices.
To complete the Tracking Attributes
- Click Collection > Collections > Producers > Tracking Attributes.
- In the Tracking section, you can edit the parameter and Value details.
- A brief description of the fields is given below:
Field:
View this:
Sub-Parameter
View the sub-parameter details.
Parameter
View the parameter details.
Value
Enter the required value for the selected parameter.
- In the Statements Transactions section, view
the following information:
Field:
View this:
Effective Dt
The statement transaction date.
Transaction
The statement transaction.
Account
The statement account number.
Debit Amt
The statement debit amount.
Credit Amt
The statement credit amount.
11.1.3 Contacts
The Contacts sub screen allows you to record information regarding contacts associated with a producer, such as employees at a dealership.
To complete the Contacts
- Click Collection > Collections > Producers > Contacts sub tab.
- On the Contacts sub screen, perform any of the Basic Operations mentioned in Navigation chapter.
A brief description of the fields is given below:
Field: |
Do this: |
Contact Type |
Select the producer contact type from the drop-down list. |
Name |
Specify the producer contact name. |
Phone |
Specify producer contact phone number. |
Extn |
Enter phone number extension. |
Fax |
Enter producer contact fax number. |
Enabled |
Check this box to indicate this is a current contact. |
- Perform any of the Basic Actions mentioned in Navigation chapter.
11.1.4 Comments
The Comments sub screen allows you to view and enter comments regarding the producer.
To enter a comment on the Comments
- Click Collection > Collections > Producers > Comments sub tab.
- In the Comments section, perform any of the Basic Operations mentioned in Navigation chapter.
A brief description of the fields is given below:
Field: |
Do this: |
Comment |
Enter comment. |
Comment By |
Displays user id. |
Comment Dt |
Displays comment date. |
- Perform any of the Basic Actions mentioned in Navigation chapter.
11.1.5 Summary
The display only Summary sub screen allows you to view summary information regarding the producer.
To view summary on the Summary
- Click Collection > Collections > Producers > Summary sub tab.
- In the Summary section, view the following information.
A brief description of the fields is given below:
Field: |
View this: |
Year Month |
The year and month. |
Total Apps |
The application total status count. |
Approved |
The application approved status count. |
Conditioned |
The application conditioned status count. |
Rejected |
The application rejected status count. |
Withdrawn |
The application rejected status count. |
Funded |
The application withdrawn status count. |
Amount |
The application funded status total amount. |
11.1.6 Title Status Summary
The Title Status Summary screen displays the various stages of titles of assets for applications sourced by the producer. The details are available for specific periods like last 1 day, 2 days, 5 days, 7 days and All (entire history) and results are displayed for selected period with each date as new row.
For example, if user has selected 2 days and the system date is 2nd June 2014, then system will group statuses in mentioned buckets and displays data for each 'Lien event date'.
To view Title Status Summary on the Summary
- Click Collection > Collections > Producers > Summary sub tab.
- On the Title Status Summary screen, perform any of the Basic Operations mentioned in Navigation chapter.
- Select the Title Status Summary period as 1 day/2 days/5 days/7 days/All.
A brief description of the fields are given below:
Field: |
View this: |
New Status |
Displays lien status as 'New' |
Perfection Processing Status |
Displays lien status as either Sent for Perfection/ Sent for Re-perfection |
Perfected Status |
Displays if lien status has 'Perfected Title' |
Release Processing Status |
Displays lien status as either Sent for Title Release/Re-sent for Title Release |
Released Status |
Displays lien status as either Service Requested/Pending Delete |
Hold Release |
Displays lien Hold Release status |
To be Released |
Displays lien status if ‘To be released’ |
Closed Status |
Displays lien status if ‘Deleted’ |
Exception Status |
Displays lien status as either Pending Lien Holder/ Pending DMV |
Lien Event Date |
Displays lien Event Date attached against each status. |