7. Repossession
7.1 Introduction
After an application has cycled through the Lease origination process, it becomes an account. Account maintenance and collections tasks can be performed with Oracle Financial Services Lending and Leasing’s Repossession screen.
The Repossession screen enables you to view and manage all customer information in a centralized location to ensure data integrity and provide better service. Oracle Financial Services Lending and Leasing provides online real-time information about the applicant(s), contract, account balances, dues, transactions, call activities, and comments. Oracle Financial Services Lending and Leasing also supports back-dating of financial transactions till the account’s opening date.
Activating an Account
An account is automatically activated when you fund the contract using the Funding main tab or convert from a legacy system.
Posting and Reversing Payments
A payment can be posted and reversed on the Payments screen.
Account Mask
After an application completes the Lease origination cycle and is funded or is ported into the system, it becomes an account and receives an account number. The system assigns account numbers using the following logic:
YYYYMMNNNNNNNX
where:
YYYYMM = contract date
NNNNNNN = serial number
X = check digit
The system sorts accounts using the NNNNNN portion only. That portion is referred to as the account ID.
7.2 Search Tab
There are two types of search available.
- Account
- Customer
7.2.1 Searching for a Customer or Account
There are a number of different ways to load the customer details on Repossession screen.
- Use the Search screen by selecting Customer Centric option(s).
- Use the Quick Search section to search for the customer by Account Number, or Customer Id, or by specifying the last four digits of Primary SSN (SSN of the primary applicant).
- Use the Next Account feature to load the customer from a predefined queue.
For details on how to search and load the customer or account details using Search screen, refer Search Using Customer Details section in Search Function chapter.
7.3 Customer Service screen
Most screens on the Customer Service screen contain the Account(s) and Customer(s) sections as a header. The Account(s) section provides a quick overview of an account by displaying its company, branch, account number, product, payoff amount and amount due, status, and oldest due date. The information on Customer Service screen always refers to the account selected in this section.
The Customer(s) section displays information about customer(s) attached to the account. The information on Customer Service screen always refers to the customer selected in this section.
To view account details in the Account(s) and Customer(s) sections, open Repossession screen and load the account you want to work with.
On the Customer Service screen’s Account(s) section, you can view the information based on your selection.
For details on this screen refer Customer Service screen section in Customer Service chapter.
7.4 Customer Service screen’s Summary tab
Open the Repossession screen and load the account you want to work with. By default the Customer Service screen opens the Summary tab.

For details on this screen refer Customer Service screen’s Summary tab section in Customer Service chapter.
7.5 Customer Service screen’s Customer Service tab
Open the Repossession screen and load the account you want to work with. Click the Customer Service tab to view the sections under it.
7.5.1 Call Activities sub tab
With the Call Activities section, system enables you to record the details of all actions you performed regarding this account. This includes calls from the customer, calls you make regarding the account, or changes to condition of the account. Entries in the Call Activities section are listed in reverse chronological order of follow-up date and are user-defined.
Each action and result has a code and description. The code for the call action and call result is what appears on Call Activity sub screen.
7.5.1.1 Recording a Call Activity
To record a call activity
- Open the Repossession screen and load the account you want to work with.
- Click Customer Service sub tab and then click
Call Activities tab under it. Click Add. The system displays
the following screen.
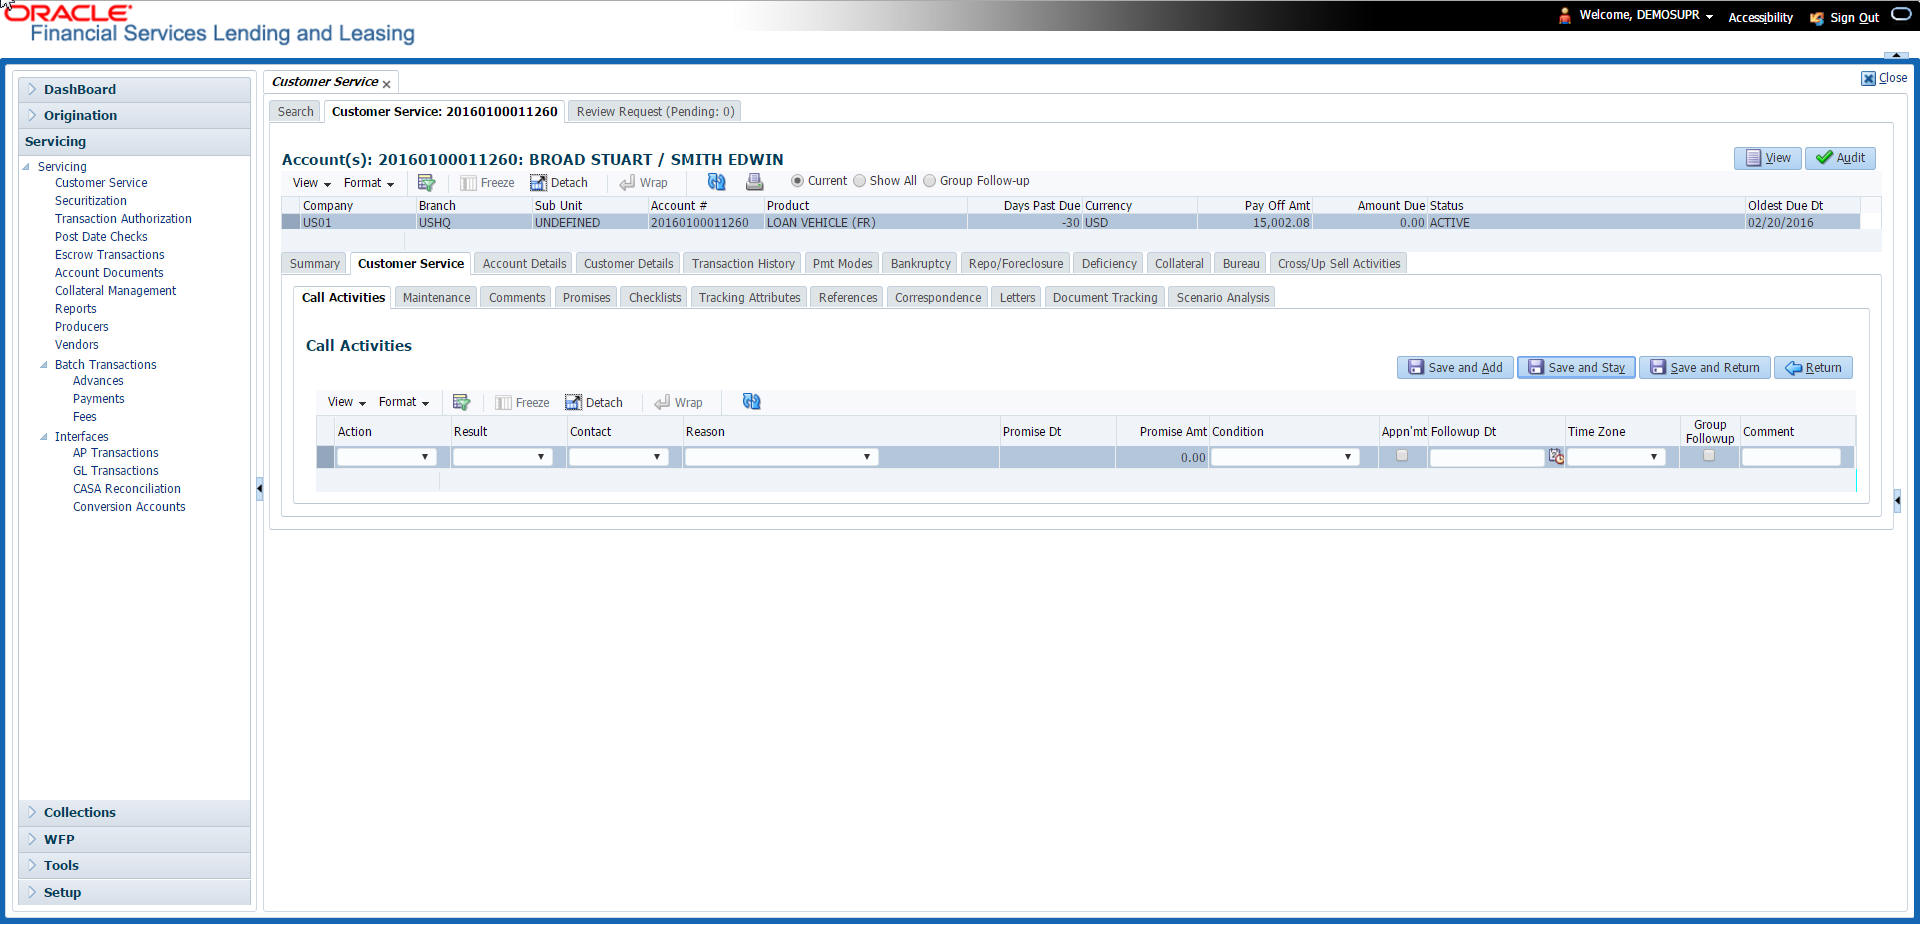
For details on this screen refer Customer Service screen’s Customer Service tab section in Customer Service chapter.
7.6 Customer Service screen’s Account Details tab
Open the Repossession screen and load the account you want to work with. Click the Account Details tab to view the sections under it.
7.6.1 Account Details sub tab
Oracle Financial Services Lending and Leasing enables you to view account details using Account Details sub tab.
In the Account Information section click View.
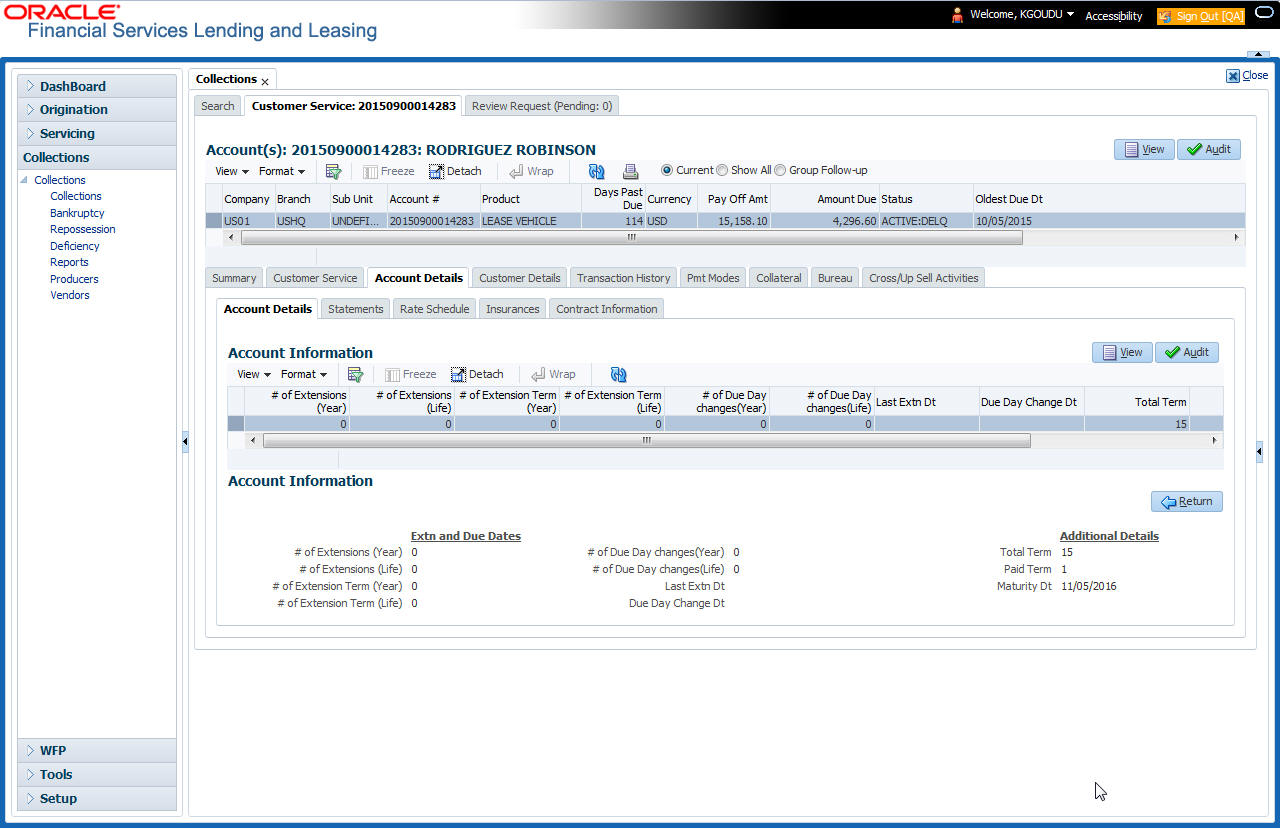
For details on this screen refer Customer Service screen’s Account Details tab section in Customer Service chapter.
7.7 Customer Service screen’s Customer Details tab
Open the Repossession screen and load the account you want to work with. Click the Customer tab to view the sections under it.
Information gathered on the application entry process regarding the customer and customer’s address, employment data, and phone numbers appears on Customer Details screen. Using the Customer Service screen’s Customer Details tab, you can update or add to a customer’s address, employment information, or phone listing.All the information about the customer can be changed using Maintenance screen.
To view or edit customer information
- Open the Customer Service screen and load the account you want to work with.
- Click Customer Details sub tab.

For details on this screen refer Customer Service screen’s Customer Details tab section in Customer Service chapter.
7.8 Customer Service screen’s Transaction History tab
Open the Repossession screen and load the account you want to work with. Click the Transaction History tab to view the sections under it.
![]()
For details on this screen refer Customer Service screen’s Transaction History tab section in Customer Service chapter.
7.9 Customer Service screen’s Pmt Modes tab
Open the Repossession screen and load the account you want to work with. Click the Pmt Modes sub tab to view the sections under it.
7.9.1 ACH sub tab
If used, the ACH section displays information about automated clearing house and electronic fund transfers.
To view the ACH information screen
- Open the Customer Service screen and load the account you want to work with.
Click Pmt Modes tab, then click ACH sub tab.
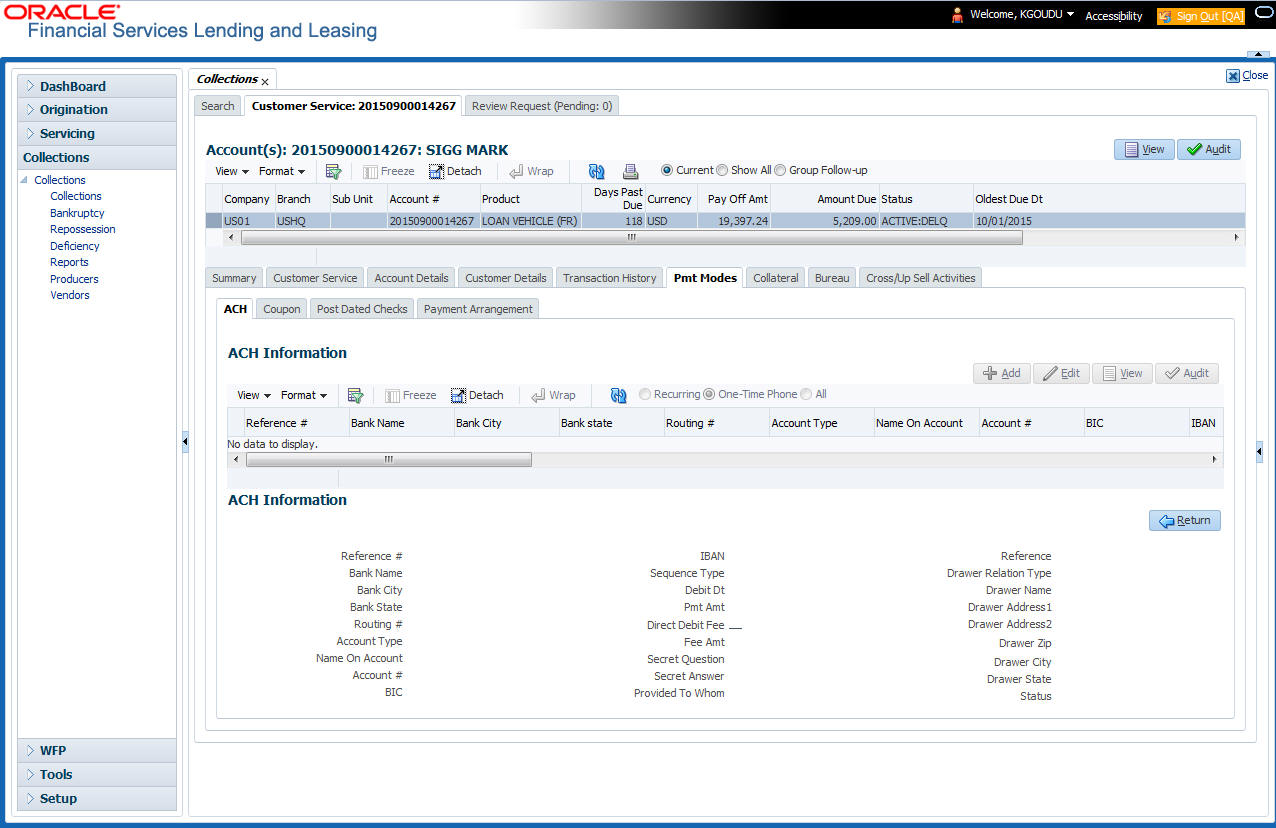
For details on this screen refer Customer Service screen’s Pmt Modes tab section in Customer Service chapter.
7.10 Customer Service screen’s Repo/Foreclosure tab
The Repossession/Foreclosure screen enables you to record information regarding repossessions/foreclosure in a manner similar to how bankruptcies are recorded on the Bankruptcy screen. You can track each stage of the repossession/foreclosure process based on the follow-up date and record information using Details and Tracking section.
7.10.1 Repossession sub tab
On occasion, a lender performs multiple repossessions for the same Lease. The Create New Repossession button on the Repossession screen enables you to create a new repossession record for a different collateral and different start and end dates. You can also use the Repossession screen to view previous repossession information using the Next and Previous buttons in Details section. The Current box in Details section indicates the current repossession record for each asset.
This tab will be available only when the collateral type associated with the Lease account is a Vehicle.
You can update the current record, but previous records cannot be modified.
To Specify repossession details for an account
- Open the Repossession screen and load the account you want to work with.
- Click the Repo/Foreclosure sub tab, then click Repossession.
- In the Repossession Details section, select the repossession record you want to work with.
-or-
- Click Add to refresh the Repossession screen
to create a new record.

For details on this screen refer Customer Service screen’s Repo/Foreclosure tab section in Customer Service chapter.
7.11 Customer Service screen’s Collateral tab
The Collateral screen displays information regarding any assets associated with an account. Collateral can be a vehicle, home, or something else, such as household goods. The Collateral screen contains the Home and Seller sub tabs.
To view the collateral details
- Open the Repossession screen and load the account you want to work with.
- Click Collateral tab. The system displays the following
screen:

- If the account’s collateral is a vehicle, the Collateral screen opens at the Vehicle tab:
- If the account’s collateral is a home, the Collateral screen opens at the Home tab.
- If the account’s collateral is neither a vehicle nor a home, the Collateral screen opens at the Other Collateral.
For details on this screen refer Customer Service screen’s Collateral tab section in Customer Service chapter.
7.12 Customer Service screen’s Bureau tab
The Customer Service screen Bureau screen enables you to view credit bureau reports associated with the account that were pulled during Lease servicing for the account. You can also use the Bureau screen to create and pull additional credit bureau reports and view the results as a text only file.
To view an existing credit bureau report
- Open the Customer Service screen and load the account you want to work with.
- On the Customer Service link bar, click Bureau.

For details on this screen refer Customer Service screen’s Collateral tab section in Customer Service chapter.
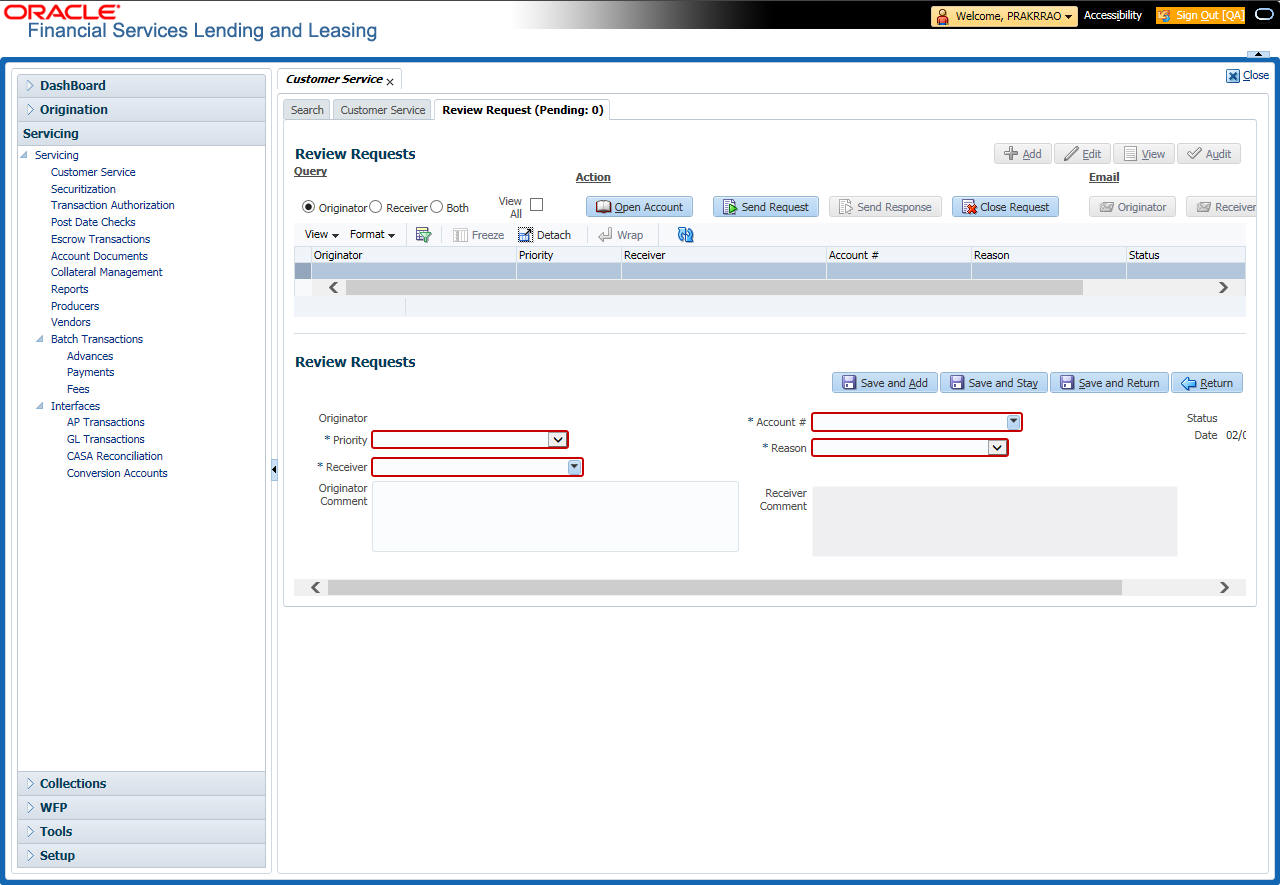
7.13 Review Request
The Review Requests page is primarily a work flow tool used to flag an account or an application for the attention of another Oracle Financial Services Lending and Leasing user and ask for feedback. It allows the system users to send and receive requests (including e-mail) commenting on a specific account or application.
In this chapter, you will learn how to compete the following tasks:
- Reviewing a request
- Sending a review request
- Responding to a review request
- E-mailing a Review Request
- Closing a review request
Note the following:
- You can complete the above tasks for an Account Review Request using Review Request page in the Servicing master tab.
- To complete the above mentioned tasks for an Application Review Request, use Review Request page available in the Origination master tab.
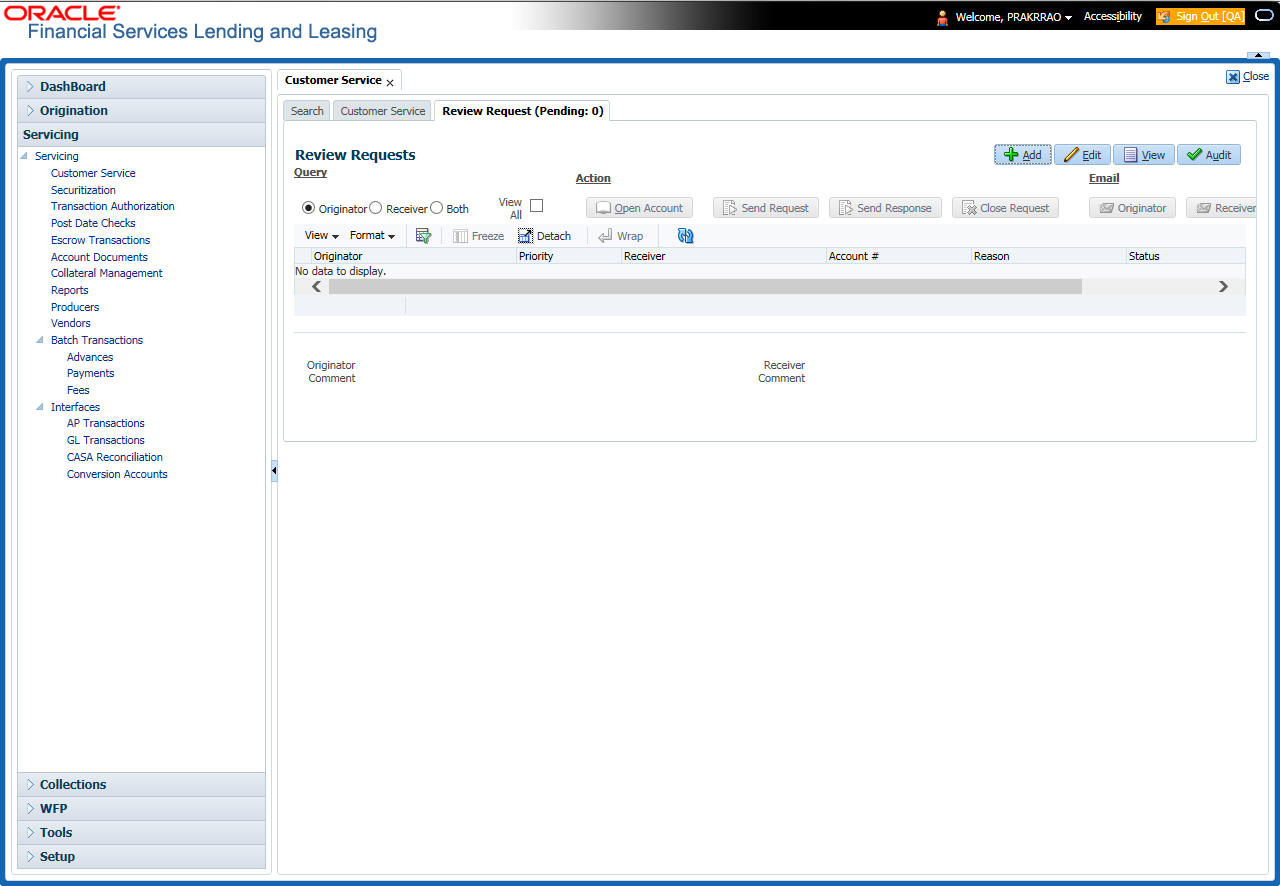
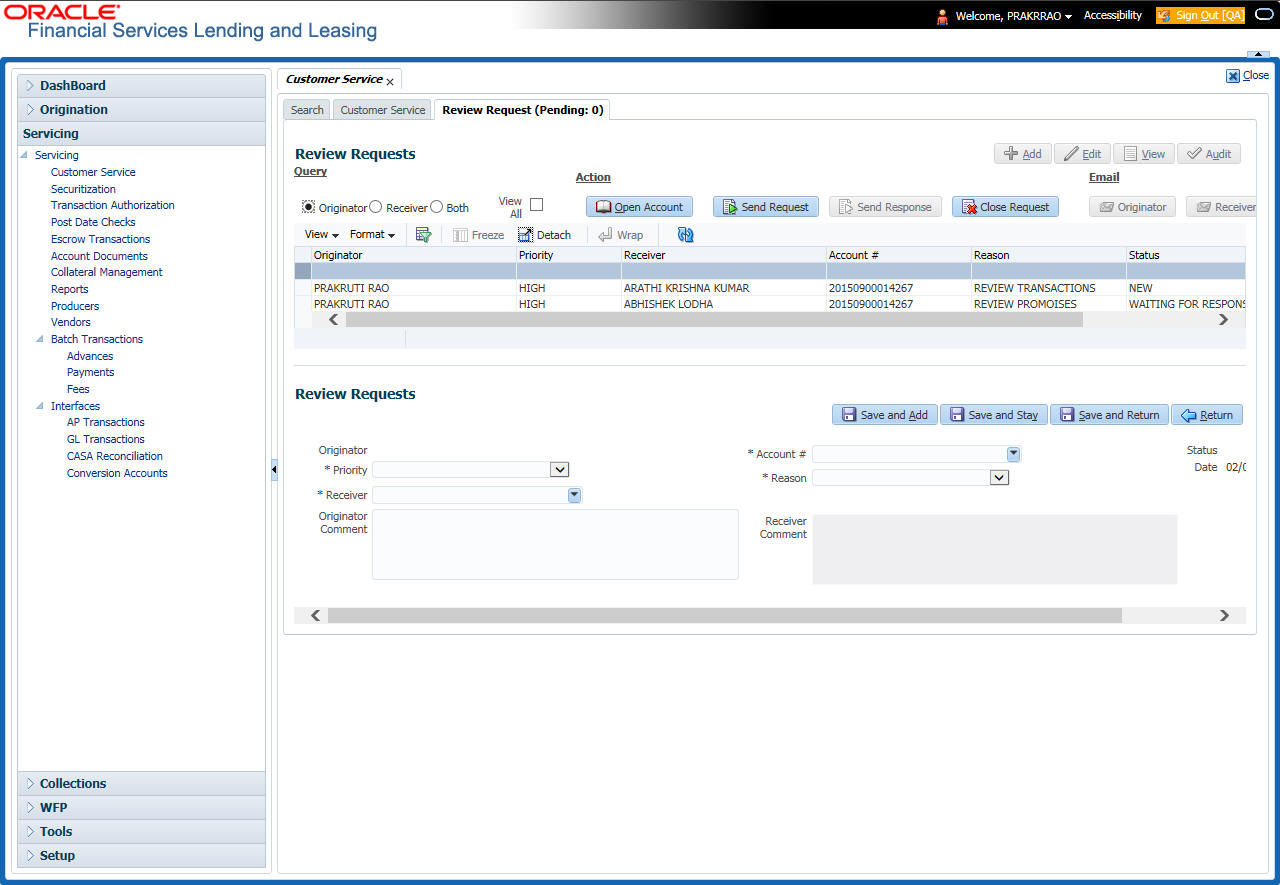
7.13.1 Review Requests Tab
The Review Requests page contains the following sections:
- Query Section
- Action Section
- Email Section
- Review request records
- Comments Sections
Query Section
The Query section enables you to filter records according to priority levels i.e.high, normal or low based on any of the following:
Query Options |
Descriptions |
Originator |
Displays the records of all the active review requests you created. |
Receiver |
Displays the records of all the active review requests you received. |
Both |
Displays all the review requests records you have created as well as received with the status other than ‘CLOSED’. |
View All |
Displays all the review requests records you sent and received, both active and closed. |
Action Section
The Action section enables you to send, respond or close the review request.
Action Options |
Descriptions |
Open Application/Account |
Opens the application details page to review the request. (if you open it from origination it’s application and if from servicing den account) |
Send Request |
Sends a review request to another Oracle Financial Services Lending and Leasing user. |
Send Response |
Sends a response to a review request from another Oracle Financial Services Lending and Leasing user. |
Close Request |
Changes the status of review request to CLOSED and removes its record from the Review Request page. The status can be viewed by selecting ‘View All’ in the ‘Query’ section.
|
Email Section:
The Email section enables you to send an email to either originator or receiver of the review request which cannot be responded or replied back from email recipient.
Email Options |
Descriptions |
Originator |
Sends an email of review request information to the person listed in the Originator column on Review Request page. |
Receiver |
Sends an email of review request to the person listed in the Receiver column on Review Request page. |
Comments Sections
The Comments section enables originator or receiver to specify additional information that needs to be sent with the request.
Comments From |
Descriptions |
Originator Comment |
Displays comments specified by the originator of review request at the time of creating a request. |
Receiver Comment |
Displays comments specified by the receiver of review request at the time of reviewing a request. |
7.13.1.1 Reviewing a Request
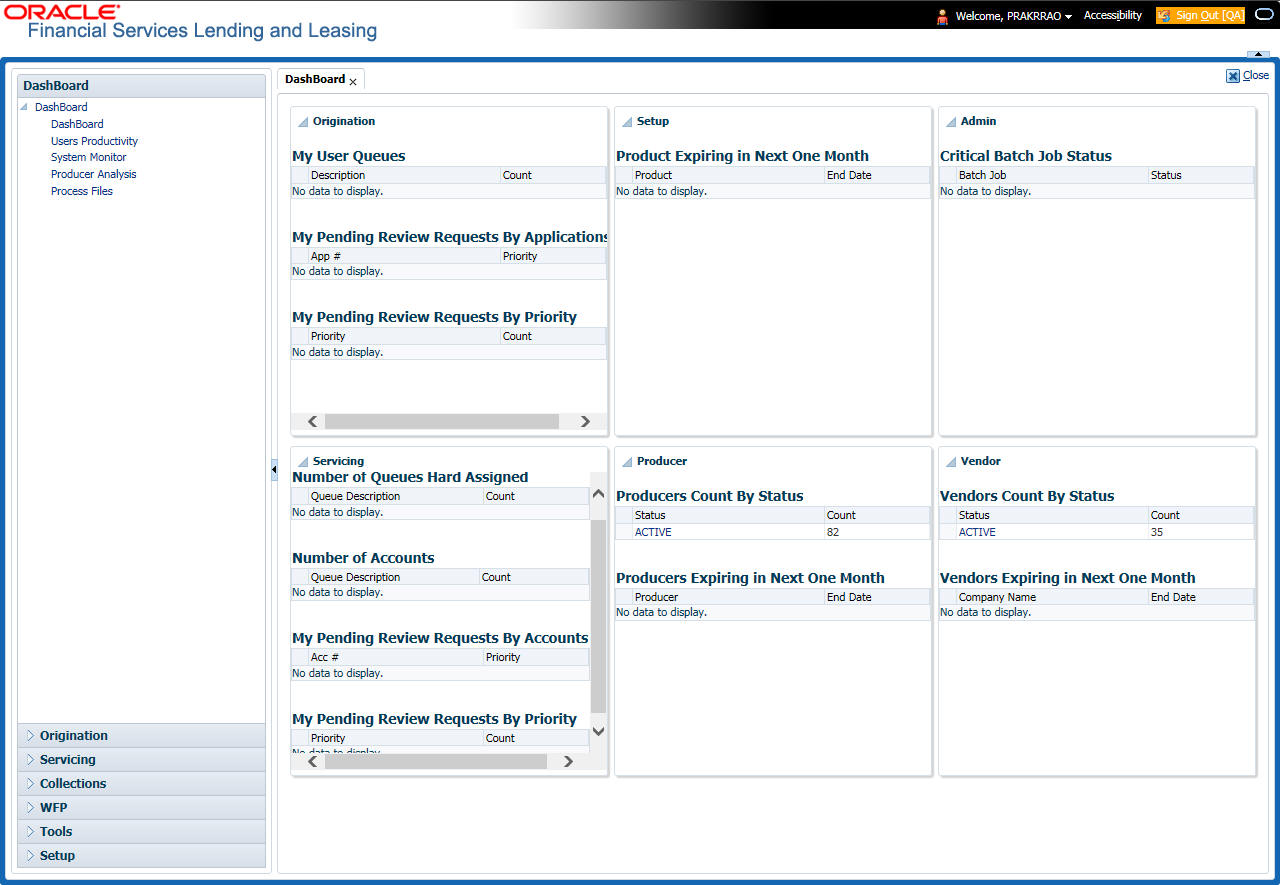
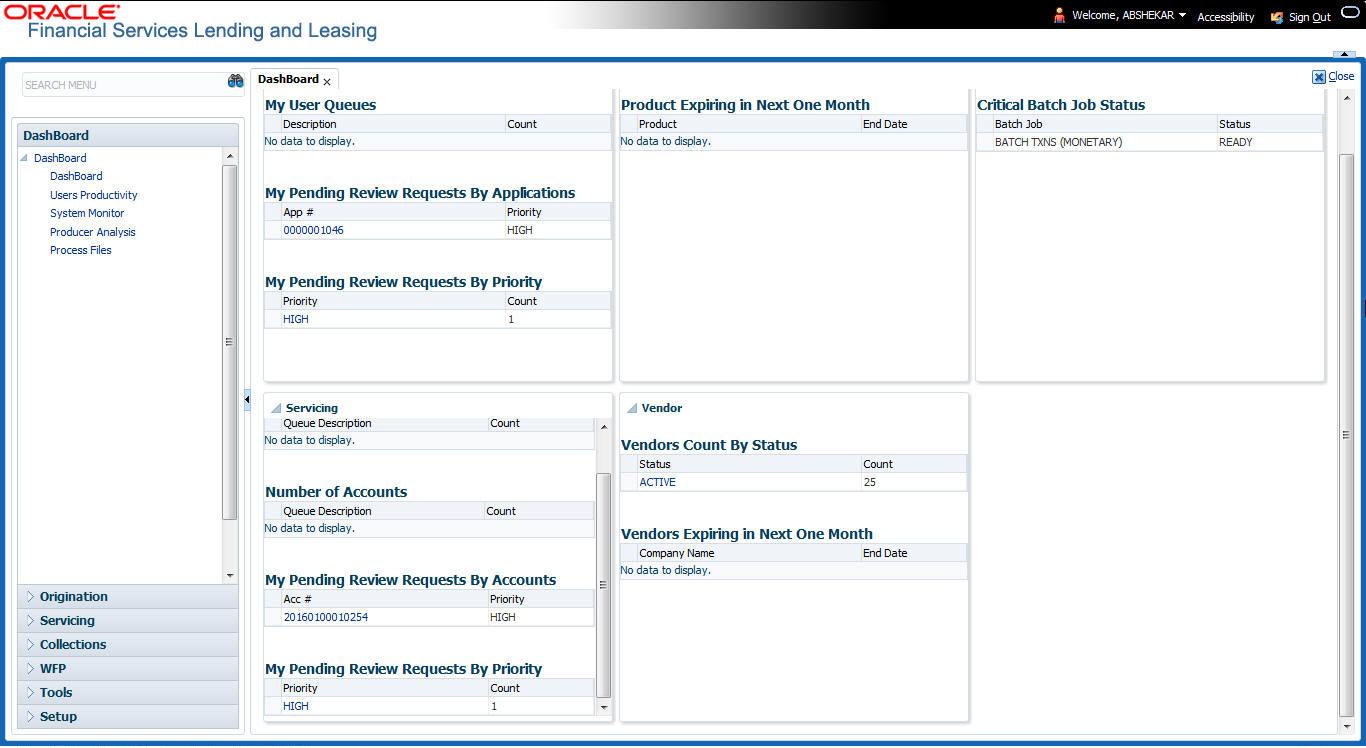
System displays the priority and the number of requests ready for review, if any, for your user id at My Pending Review Requests By Priority section in the Servicing Dash Board window.
To review requests
- On the Oracle Financial Services Lending and Leasing application
home page, click Servicing main tab and then click Servicing
drop-down link. Click Customer Service link.
The Customer Service window appears, opened at the Results tab. Under Customer Service screen, click Review Requests tab. - In the Query section, click Receiver.
In the Review Request record, the system displays all open review request you have received.
- In the Review Request record, select the record you want
to view and click View. The following screen is displayed.
- For
the selected Review Request record, view the following information:
Fields
Descriptions
Originator
The user id of the request originator.
Priority
The request priority: HIGH, NORMAL, or LOW.
Receiver
The recipient of the request.
Account #
The account number which needs review.
Transaction
The transaction selected.
Reason
The review reason.
Status
The request status.
Date
The date and time when the request was created.
Originator Comment
The comment by the originator which creating a request.
Receiver Comment
The comment by the receiver after reviewing a request.
Note
If you click Open Account, system loads the account in review request and displays the Account Details page.
7.13.1.2 Sending a Review Request
The Send Request button enables you to send a review request to another the system user. However, the Send Request button is enabled only if you have specified the receiver while creating a review request and have saved it.
To send a review request
- On the Oracle Financial Services Lending and Leasing Application home page, click the Servicing main tab and then click Servicing drop-down link. Click Review Requests tab.
- In theReview Requests page in the Query section, select Originator.
- Click Add to create a new review request.
The following screen is displayed:
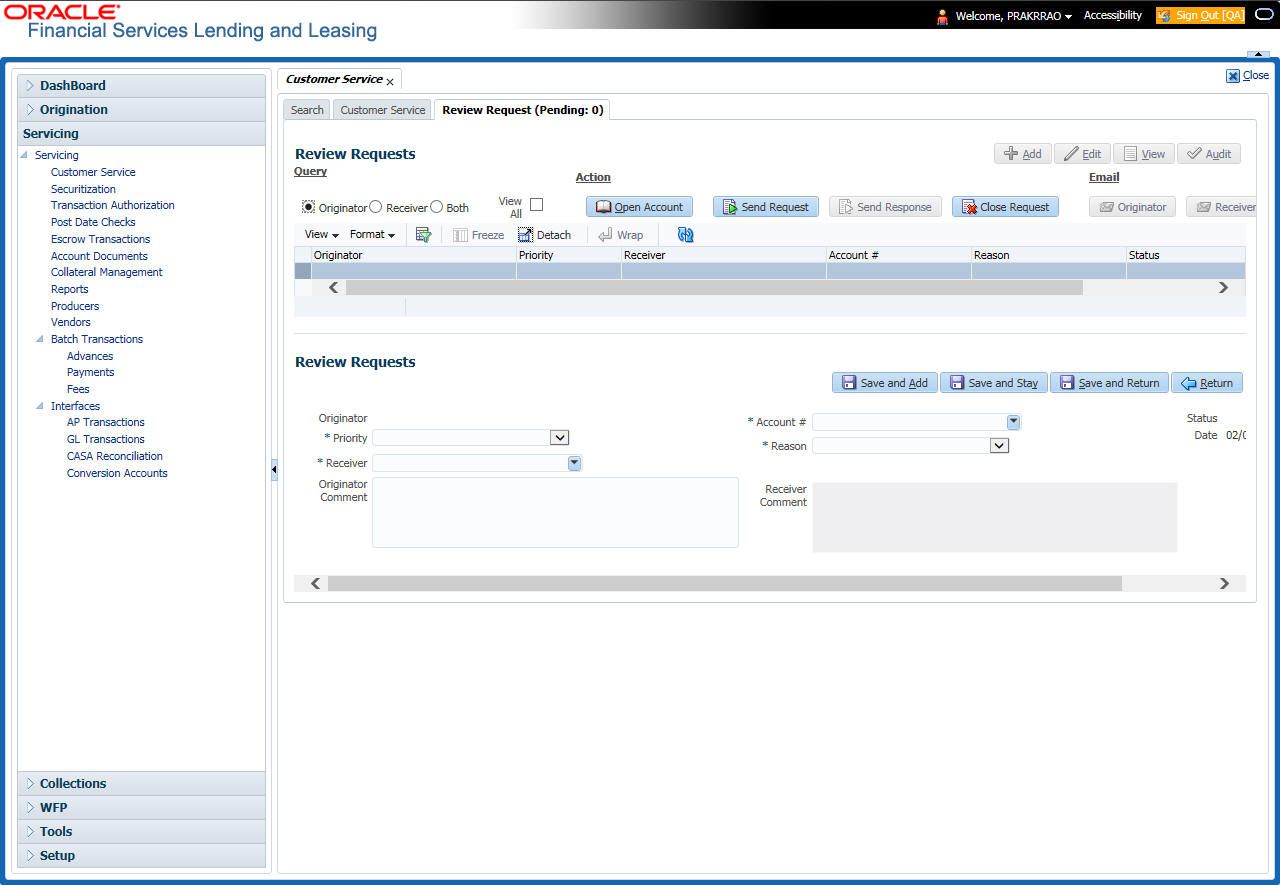
- In the Priority field, select the priority of review request: High, Normal, or Low which helps the recipient in responding to requests. It does not affect the order in which messages are sent or received.
- In Receiver field, select the person you want to receive the message.
- In Account # field, select the account involved with the review request. The default value NEW appears in the Status field.
- In Reason field, select the purpose for the review request.
- In Originator Comment field, specify any additional message you want to send along with the review request.
- Click Save And Add/Save And Return. The review
request is created and Send Request button is enabled in the Action section.

- In the Action section, click Send Request.
The system sends your request to the recipient’s, where it appears on My Pending Review Request window in Dash Board with status Sent to Originator.
7.13.1.3 Responding to a Review Request
When you receive a review request, the system notifies you by creating an entry in My of Pending Review Requests By Priority section in Dash Board with the number of unseen messages. In the following example, one review request is waiting on the Review Request page.
To respond to a review request
- On the Oracle Financial Services Lending and Leasing Application home page, click Servicing main tab and then click Servicing drop-down link. Click Customer Service link. If the Number of Pending Review Requests tab displays a number, click Review Requests tab. On the Review Request page Query section, select Receiver.
The system displays the unread review requests in Review Request record.
- In the Review Request record, select the record
you want to view and click View.
- Click Open Account.
The system loads the account on Customer Service screen and displays Account Details page.
- Perform requested task on review request on the account.
Click Review Request tab and selecting request, click Edit. Specify
your response in the Receiver Comment field. Click Save
And Return.

- In the Action section, click Send Request.
The system sends your response to the originator, where it appears on Review Request page with status Return to Originator.
The recipient can view sent response by clicking Receiver or View All in Query section. (The request has a status as RETURN TO ORIGINATOR.)
- In the Action section, click Close Request
It will remove the message from the Review Request section.
Back on the originator’s Review Request page, the message appears when Originator is selected in Query section. The request has a status as Return to Originator.
7.13.1.4 E-mailing a Review Request
While system updates My Pending Review Requests By Priority section in the DashBoard to notify you about the new requests, you can also e-mail a review request to both the originator and a receiver, as applicable. The system will use e-mail address recorded for both the originator and receive in User Definition section in User page.
To e-mail a review request
- On the Oracle Financial Services Lending and Leasing Application home page, click Servicing main tab and then click Servicing drop-down link.
- Click Customer Service link.
- On the Customer Service link, click Review Requests tab.
- Select the request you want to e-mail in the Review Request section.
- In Email section, click Originator to send the message to the person listed in Originator field.
-or-
- Click Receiver to send it to the person listed in the Receiver field.
The system emails the details of selected record to e-mail address recorded in user setup.
7.13.1.5 Closing a Review Request
You can close a review request you created at anytime, regardless of status. However, you can only close review requests that have your user id in the Originator field. When you close a review request, the system removes it from Review Request record.
To close a review request
- On the Oracle Financial Services Lending and Leasing Application home page, click Servicing main tab and then click Servicing drop-down link.
- Click Customer Service link.
- On the Customer Service link, click Review Requests tab.
- Select the request you want to close in the Review Request section.
- In the Action section, click Close Request.
The system assigns the request as Closed and removes it from your Review Request record. The closed accounts can be reviewed anytime by selecting View All in the Query section.