13. Image Maintenance
You can view any image in the Oracle Financial Services Lending and Leasing system in the upper list box of the Image Maintenance link.
To view an image
- On the Oracle Financial Services Lending and Leasing home
screen, click Origination > Origination > Image Maintenance.
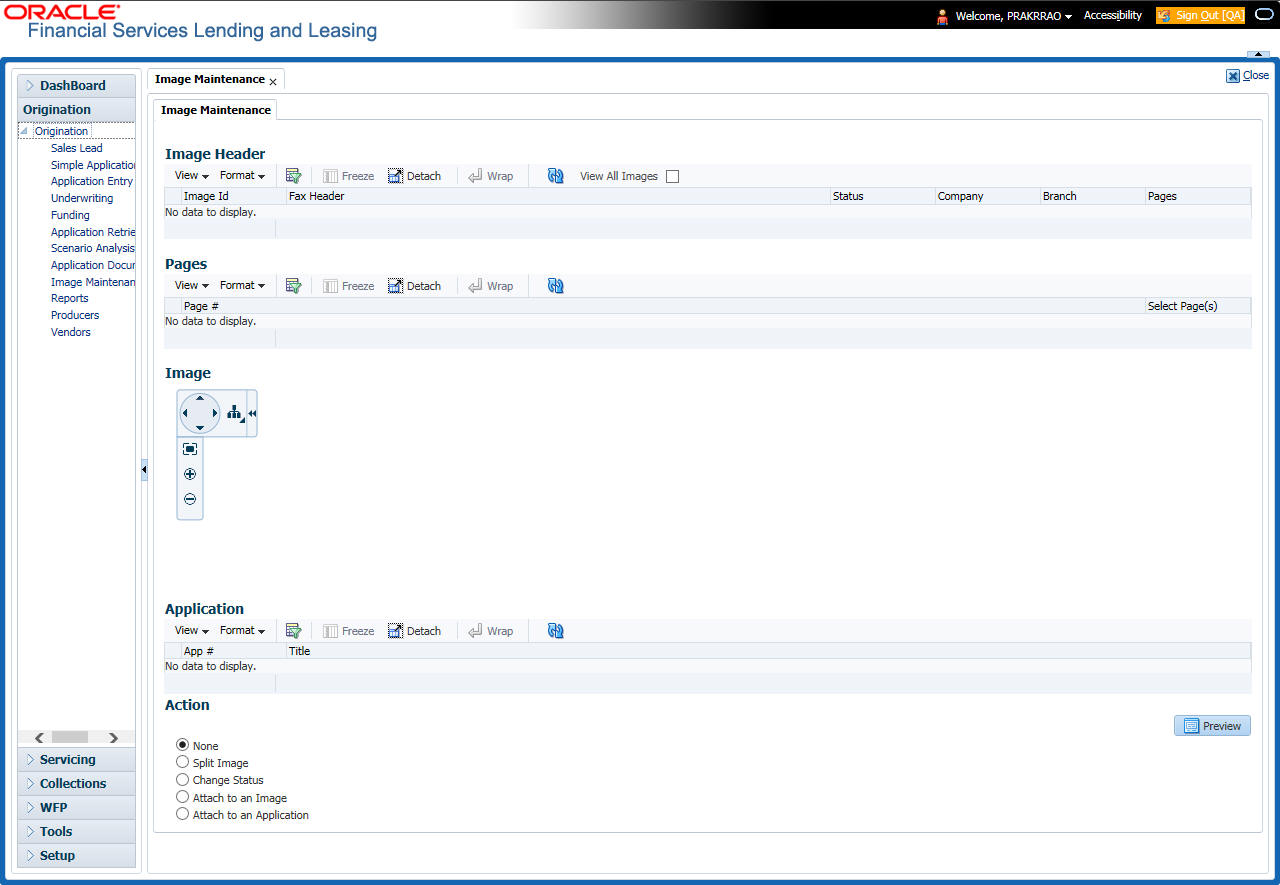
- The Image Header section displays the images in the Oracle Financial Services Lending and Leasing system.
- In the Image Header section, select the image you want to work with.
The Image Header section displays the following information for each image:
Branch |
Branch |
Select |
If selected, indicates that this is the current record. |
Image Id |
The image identification number. |
Fax Header |
The fax header. |
Status |
The image status. |
Pages |
The total number of pages of the image. |
Company |
The company the image came from. |
Branch |
The branch the image came from. |
- If an image is more than one page long, select the page you want to view in the Pages section and click on the page number to preview the image.
- Select the required transpose type to change the appearance of the image.
Splitting an Image
If an image is more than one page long, you can split it into two separate images using the Split Image button in the Action section. This option button is only available when an image contains more than one page. Also, you cannot split images with a status of “PROCESSED” or “SKIP.”
To split an image
- On the Image Maintenance section Image Header section, select the multiple page image you want to split.
- In the Action section, select Split Image.
The Pages and New Image Id fields appear in the Action block.
- In the Pages block, select the page where you want to split the image.
The selected pages appear in the Pages field on the Action section.
You can select more than one page; however, you cannot select page # 1.
- In the Action section, click Post.
Oracle Financial Services Lending and Leasing removes the selected pages and completes the New Image Id field with the image id of the new image.
The new image does not appear in the Image Header section after you click Post. However, if you refresh the Image Maintenance screen by closing and opening the screen, the new image id appears in the Image Header section and the change of page length in the original image is displayed.
Changing the Status of an Image
The Action section on the Image Maintenance screen allows you to change the status of the image.
The Image Maintenance screen uses the following statuses:
Status: |
What is does: |
Rush |
Moves the image to the front of the queue of images to be processed. |
New |
Places an image in a queue in the order of which it was received and allows you to process it as an application. |
Skip |
Makes the image unavailable for processing until the status is changed. |
Bad |
Notes that the image is illegible and should be deleted. |
Processed |
Notes that the information on the image has been entered and is attached to an application or account. |
Only images with a status of Rush or New can be attached to an application or account.
To change the status of an image
- On the Image Maintenance screen’s Image Header section, select the image whose status you want to change.
- In the Action section, select Change Status.The Status field appears.
- In the Status field, select the new status for the image.
- In the Action section, click Post.
Oracle Financial Services Lending and Leasing changes the status of the image.
Attaching an Image to an Existing Image
You can combine two images to make one image. This is the reverse of splitting an image.
To combine images
- On the Image Maintenance screen’s Image Header section, select the image to which you want to attach an existing image.
- In the Action section, select Attach to an Image.
The Image Id field appears.
- In the Image Id field, select the image id of the image to which you want to attach the selected image.
- In the Action section, click Post.
Oracle Financial Services Lending and Leasing joins the two images: the Id of the image you selected in step 3 remains on the Image Header section. The image you selected in step 1 now appear as part of the remaining image.
Attaching an Image to an Existing Credit Application
You can attach one or more images to an existing credit application. To attach specific pages from a multiple page image to an application or account you have to split the image to isolate the pages you want to attach. You can then attach those pages and, if necessary, link pages of the original image back together.
To attach an image to an existing application image
- On the Image Maintenance screen’s Image Header section, select the image you want to attach to an existing application.
- In the Action section, select Attach to an Application. The App# field appears.
- In the App # field, select the application number of the application to which you want to attach the image.
- In the Action section, click Post.
Oracle Financial Services Lending and Leasing attaches the image to the application. You can view the image in the Image (8) master tab on the Underwriting and Funding forms.
Printing an Image
The Print Image button sends the selected image to a predefined printer.
To print an image
- On the Image Maintenance screen’s Image Header section, select the image you want to print.
- In the Action section, click Print Image.