6. Transaction Authorization
Transaction Authorization enables you to validate transactions (which have the Authorize property enabled) that were entered on the Customer Service screen’s Maintenance screen by a different Oracle Financial Services Lending and Leasing user. You can view these transactions on the Transaction Authorization screen before they are posted. This process is referred to as ‘Maker-Checker’, as one Oracle Financial Services Lending and Leasing user enters (or ‘makes’) the transaction on Maintenance screen and another validates (or ‘checks’) the transaction on the Transaction Authorization screen. As an example, the checker might review transactions to determine if the transaction will increase the credit limit to an acceptable level or decrease the payment to an unacceptable level.
Type |
Description |
Maker |
The person who posts (or makes) transaction on the Maintenance screen. |
Checker |
The person who checks the details entered by the maker and either accepts or rejects the transaction in the Transaction Authorization screen. |
While defining transaction code, the maker and checker responsibilities can be defined using the access type field available under access grid sub tab. Maker-Checker concept applies only to manual transactions, and not the automated ones.
6.1 Transaction Authorization screen
The Transaction Authorization screen displays the transactions posted on Customer Services screen that requires authorization.
On the Customer Service screen, follow the process for posting transactions on the Maintenance screen and clicking Post. If the Authorization check box is selected for the transaction on the Administration screen’s Transaction tab (i.e. Setup > Administration > User > Access > Transaction tab), rather than being posted, the transaction receives a status of WAITING FOR APPROVAL and the message “Transaction in Waiting for Approval” appears on the Results section.
A checker can use the Authorization screen to view transactions with the status waiting for approval, then approve or reject the transactions. As a checker you can view all the transactions listed within/under your hierarchy, but can authorize or reject only those transactions which qualify the conditions defined for authorization. The same user who initiated the request cannot authorize the transaction even though that user might have the checker responsibility.
The maker uses the Authorization screen to view the transactions posted with a status of POSTED, Error or Reject.
- Posted transactions are those which have been approved by the checker.
- Transactions with an Error status are those which have invalid business rules such as the parameter value is incorrect or has a back dated date and so on.
- Transactions with a REJECT status are those which have been rejected by the checker.
In both statuses (Error or Reject), the maker can modify the transaction and re-post it for the checker to review.
To authorize or reject a transaction the Authorization screen
- On the Oracle Financial Services Lending and Leasing Application
home screen, click the Servicing > Servicing > Transaction
Authorization > Authorization.
- In the Transaction Authorization screen you can click on the following options to filter the Transactions:
- Checker - To display all transactions within/under logged-in Checker’s hierarchy for authorization and having status as ‘Waiting For Approval’.
- Maker - To display data in descending order of date in the below
order:
- Waiting For Approval
- Rejected
- Error
- Posted
- Both - To display all records with Checker responsibility and having status as Rejected, Error and Posted.
- Click one of the following to limit the display of transactions
in the Transaction section according to when the transaction was posted:
Click:
The system displays:
1 Day
The transactions posted within the last one day.
2 Day
The transactions posted within the last two days.
5 Day
The transactions posted within the last five days.
All Days
The posted transactions.
The system displays transactions entered on the Maintenance screen with status as error or waiting for approval. If you want to view all transactions with only ERROR status, select View Failed check box.
To Authorize or Reject Transactions
- In the Transactions section, select the required transaction. The transaction parameters are displayed in ‘Parameters’ section and processing details are displayed in ‘Transaction Processing Details’ section.
- Click Edit. You can perform any of the Basic Actions mentioned in Navigation chapter.
- To Authorize the transaction, click Authorize in the ‘AuthRej’ section.
- To Reject the transaction, click Reject in the ‘AuthRej’ section.
- Add a comment and your decision regarding the transaction in the ‘Comments’ column.
- In the Action section, click Post.
Based on comment input, the system authorizes or rejects the transaction and removes it from the Transaction section.
You can view the transaction result on the Transaction Authorization screen’s Authorization History screen.
The results of the decision can be viewed on the Customer Service screen’s Maintenance screen.
The system user who posted the transaction on the Customer Service screen’s Maintenance screen and received a waiting for approval status can open the Authorization screen, click Maker in the Query section and view all the transaction they posted that have a status of POSTED, error or reject.
- If the transaction has a status of Error or Reject, make the required changes to the original transaction on the Authorization screen and click Post in the Action section.
- If you click the Void in Action section, the system removes the transaction from the Transaction Authorization screen.
Note
If the transaction remains unauthorized beyond the number of days specified in the system parameter “AUTH_TXN_VOID_LIMIT”, then the transaction is marked as “void”. The daily batch job checks for inactivity of authorization transactions against this parameter.
6.2 Authorization History tab
The Authorization History screen displays the all the transactions with a status of Open, Void, Error, Posted, waiting for approval, and reject. Aged transactions will not be displayed. The Search Criteria section enables you to select the transactions you want to view in the Results section.
To search for accounts using the Authorization History screen
- On the Oracle Financial Services Lending and Leasing home
screen, click the Servicing > Servicing > Transaction
Authorization > Authorization History.
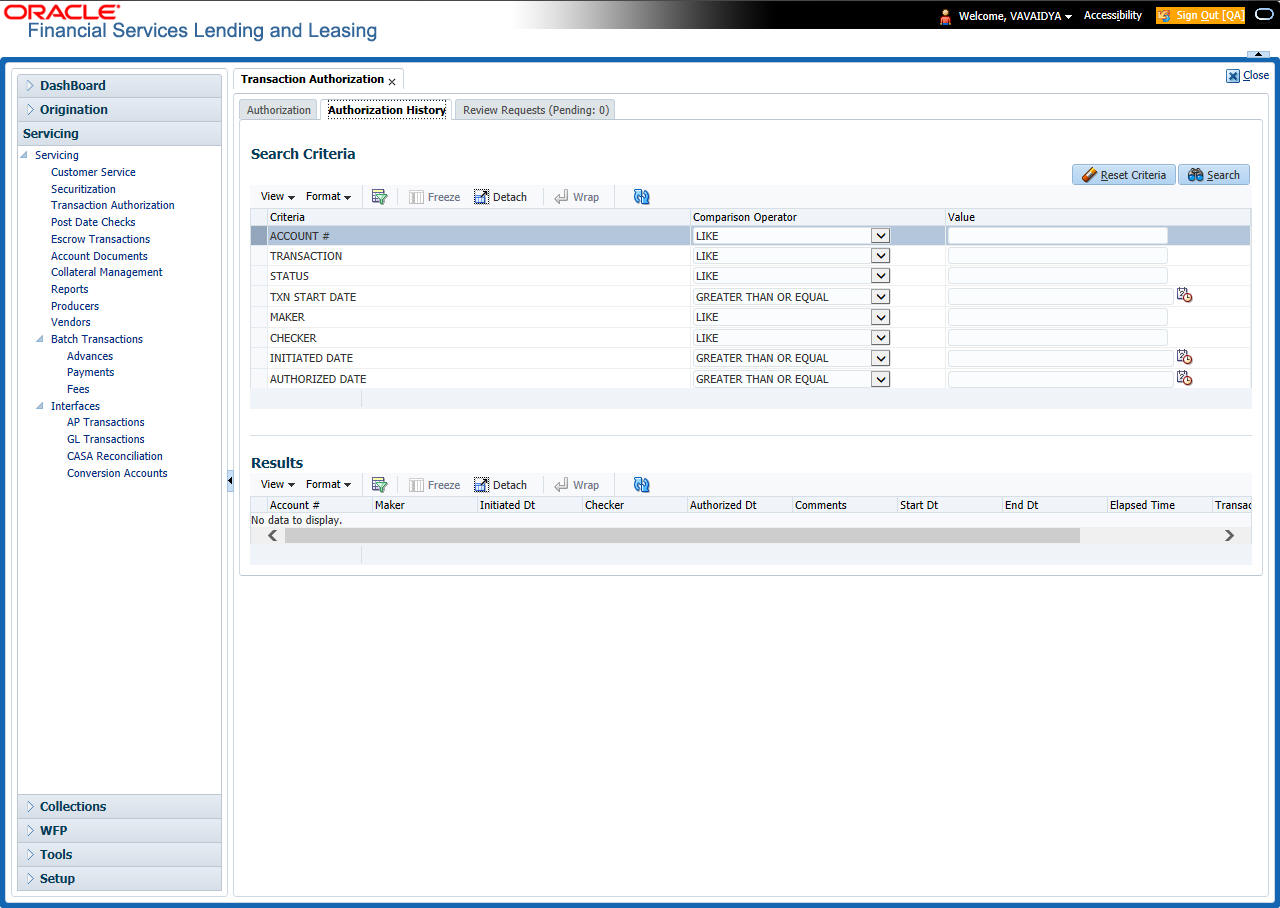
- In the Authorization History screen’s Search Criteria section, use the Comparison Operator and Value columns to enter the search criteria you want to use to locate an account.
- Click Search. The system displays the result of the search in the Results section at the bottom of the screen. You can click Reset Criteria at any time to clear the Comparison Operator and Values columns on the Search screen.
- In the Results section, view the following
information:
Field:
View this:
Account #
The account number.
Transaction
The transaction.
Status
The status of the transaction.
Maker
View the user Id of the person who entered the transaction on the Customer Service screen.
Initiated Dt
View the date and time the transaction was initially posted on the Customer Service screen.
Checker
View the user Id of the person who validated the transaction on the Authorization screen.
Authorized Dt
The authorized date.
Comments
Any comment attached to the transaction.
Start Date
The transaction start date.
End Date
The transaction end date.
Elapsed Time
The elapsed time of the transaction.
End of Day (EOD) processing
The Transaction Authorization screen’s Authorization screen employs the 24 x 7 accessibility feature. You can continue working with the Authorization screen and post transactions even when end of day (EOD) batch process is running. When you post a transaction on the Transaction Authorization screen’s Authorization screen and the transaction posting is deferred or cannot be posted at the present time, “System Under Maintenance. Transaction Posting Deferred” appears in the Results section. If transaction posting is deferred, the system automatically posts the transactions once it completes batch processing.
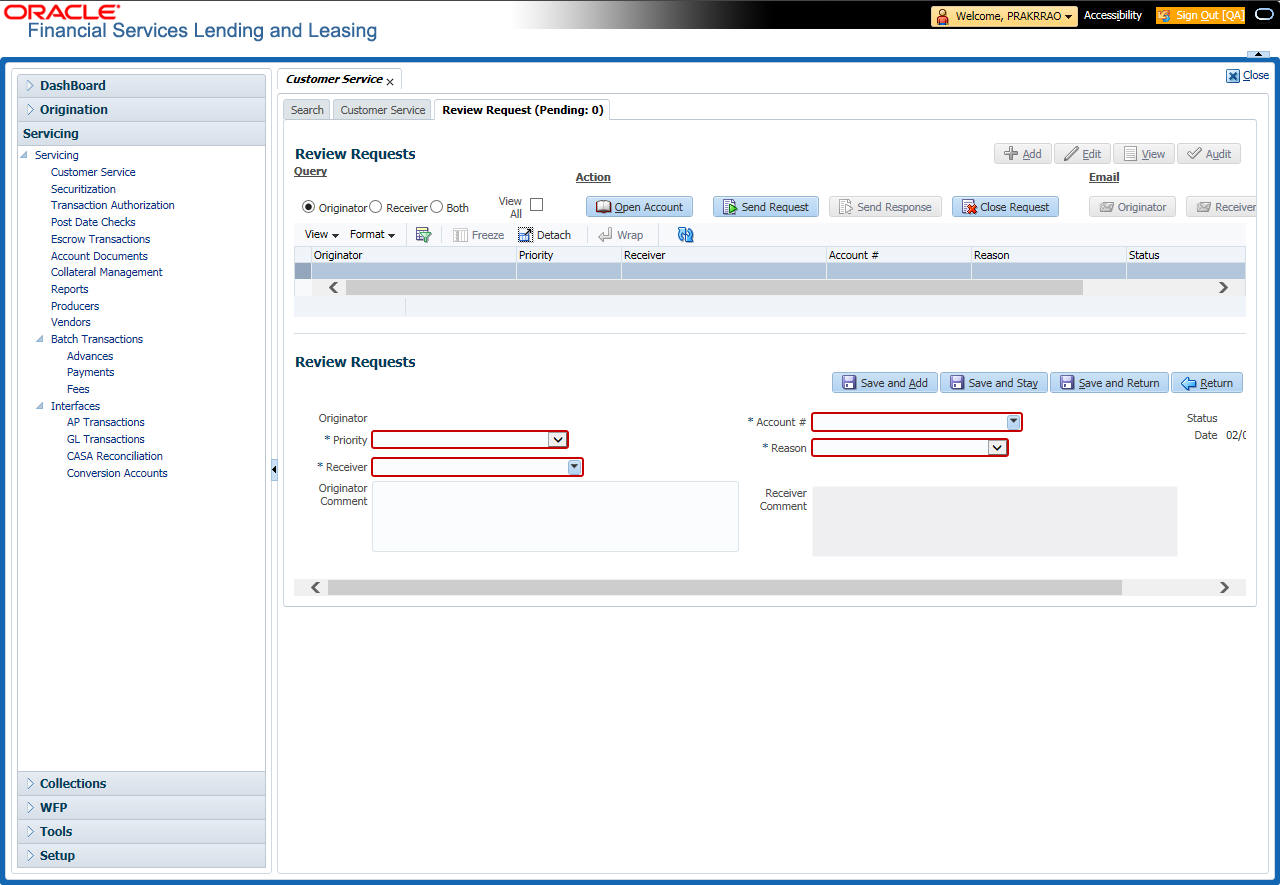
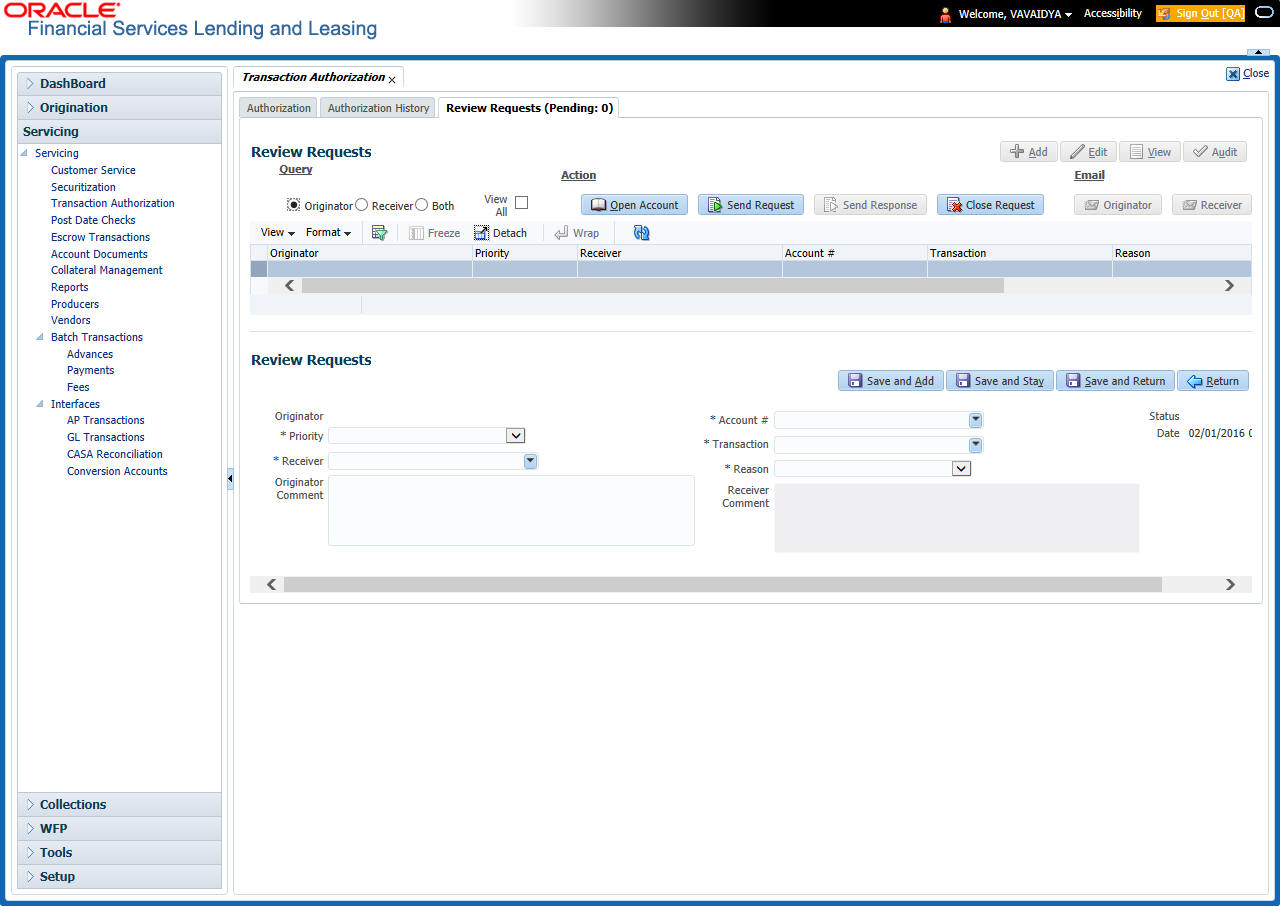
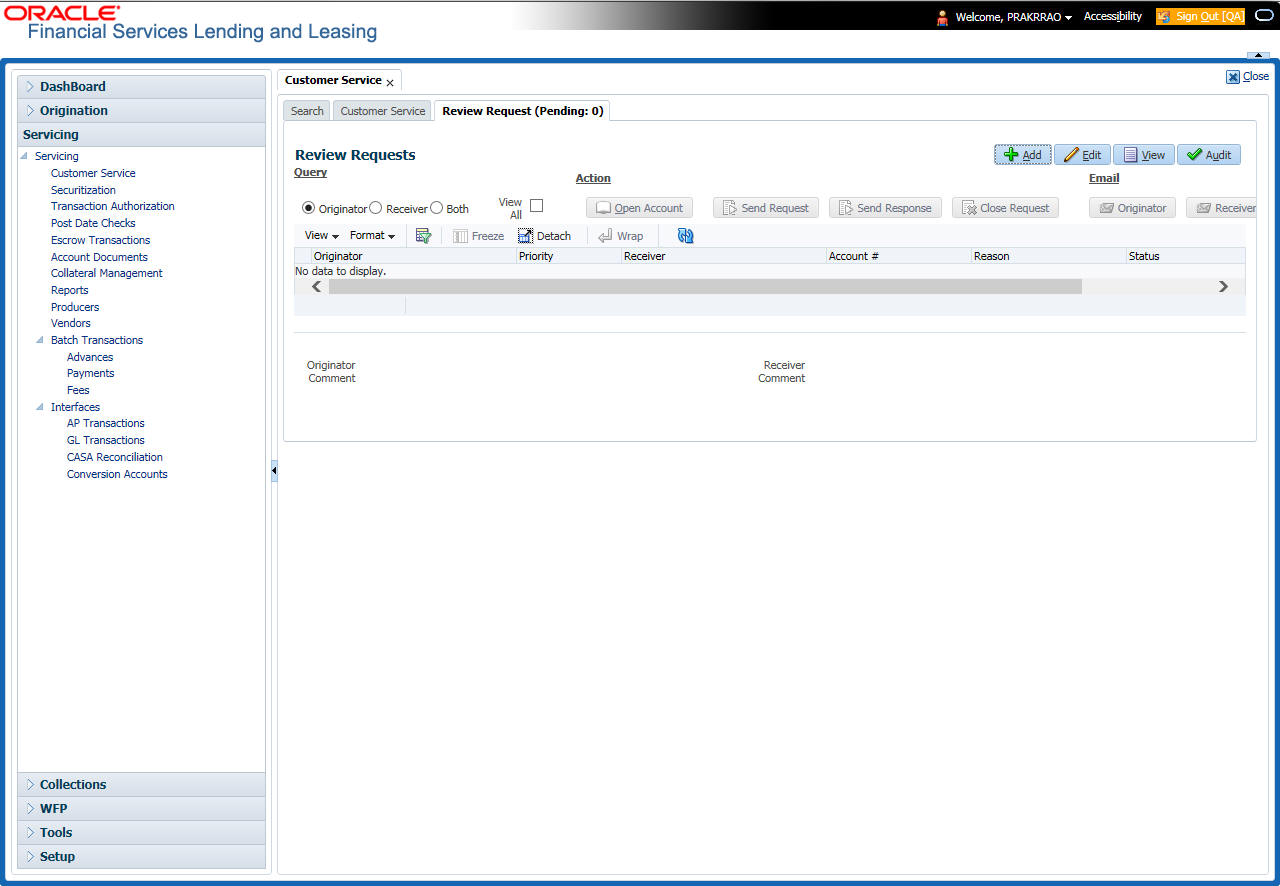
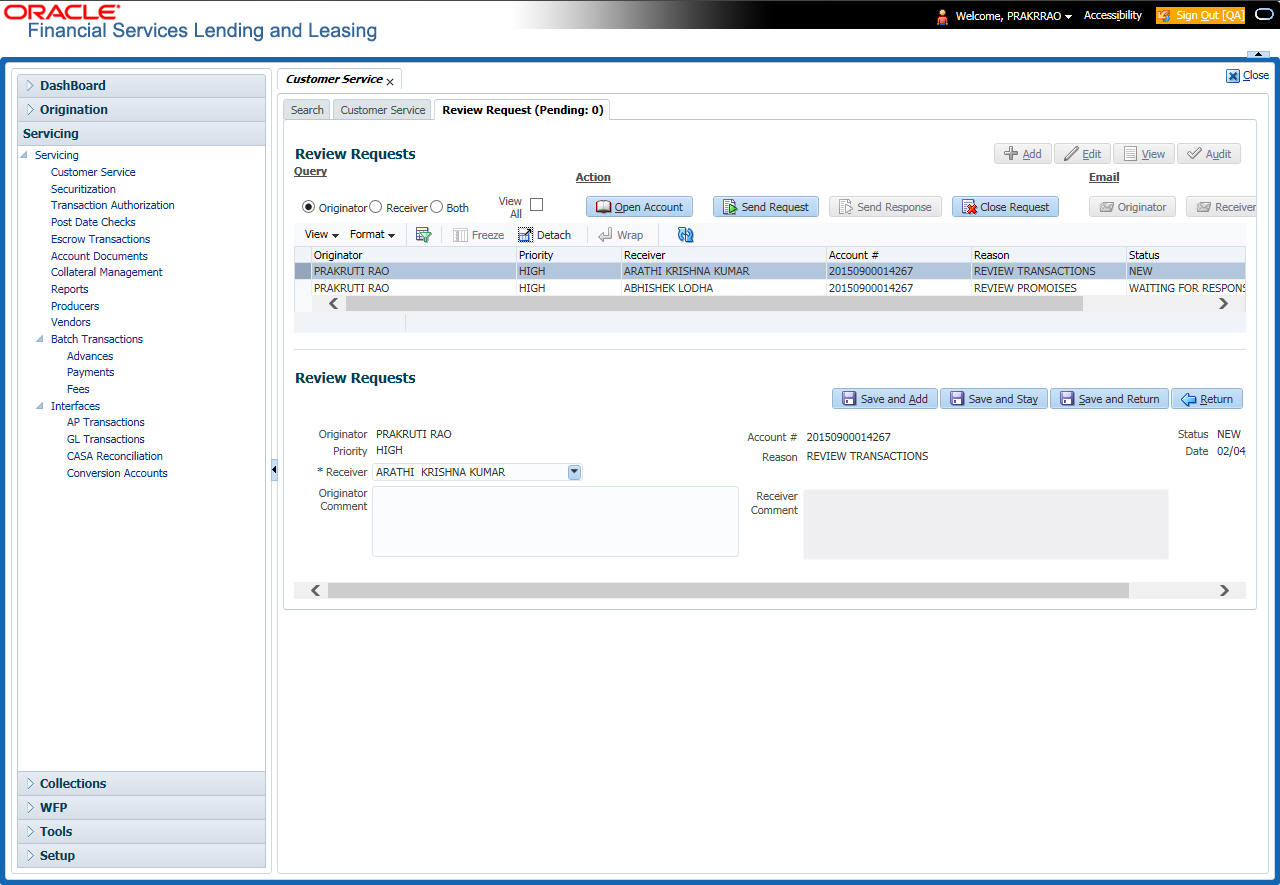
6.3 Review Request Tab
The Review Requests screen allows for effective communication between the Maker and Checker. The Transaction Authorization screen’s Review Request screen operates the same way as the existing Review Request screen in Customer Service screen. One difference is that the Transaction Authorization screen’s Review Request screen contains the Transaction field.
Review requests created on the Transaction Authorization screen can be viewed in the Customer Service screen’s Review Request screen. However, the Transaction Authorization screen’s Review Request screen will only display transaction authorization requests.
To view the Review Request screen
- On the Oracle Financial Services Lending and Leasing home
screen, click the Servicing > Servicing > Transaction
Authorization > Review Request tab.
6.4 Review Request
The Review Requests page is primarily a work flow tool used to flag an account or an application for the attention of another Oracle Financial Services Lending and Leasing user and ask for feedback. It allows the system users to send and receive requests (including e-mail) commenting on a specific account or application.
In this chapter, you will learn how to compete the following tasks:
- Reviewing a request
- Sending a review request
- Responding to a review request
- E-mailing a Review Request
- Closing a review request
Note the following:
- You can complete the above tasks for an Account Review Request using Review Request page in the Servicing master tab.
- To complete the above mentioned tasks for an Application Review Request, use Review Request page available in the Origination master tab.
6.4.1 Review Requests Tab
The Review Requests page contains the following sections:
- Query Section
- Action Section
- Email Section
- Review request records
- Comments Sections
Query Section
The Query section enables you to filter records according to priority levels i.e.high, normal or low based on any of the following:
Query Options |
Descriptions |
Originator |
Displays the records of all the active review requests you created. |
Receiver |
Displays the records of all the active review requests you received. |
Both |
Displays all the review requests records you have created as well as received with the status other than ‘CLOSED’. |
View All |
Displays all the review requests records you sent and received, both active and closed. |
Action Section
The Action section enables you to send, respond or close the review request.
Action Options |
Descriptions |
Open Application/Account |
Opens the application details page to review the request. (if you open it from origination it’s application and if from servicing den account) |
Send Request |
Sends a review request to another Oracle Financial Services Lending and Leasing user. |
Send Response |
Sends a response to a review request from another Oracle Financial Services Lending and Leasing user. |
Close Request |
Changes the status of review request to CLOSED and removes its record from the Review Request page. The status can be viewed by selecting ‘View All’ in the ‘Query’ section.
|
Email Section:
The Email section enables you to send an email to either originator or receiver of the review request which cannot be responded or replied back from email recipient.
Email Options |
Descriptions |
Originator |
Sends an email of review request information to the person listed in the Originator column on Review Request page. |
Receiver |
Sends an email of review request to the person listed in the Receiver column on Review Request page. |
Comments Sections
The Comments section enables originator or receiver to specify additional information that needs to be sent with the request.
Comments From |
Descriptions |
Originator Comment |
Displays comments specified by the originator of review request at the time of creating a request. |
Receiver Comment |
Displays comments specified by the receiver of review request at the time of reviewing a request. |
6.4.1.1 Reviewing a Request
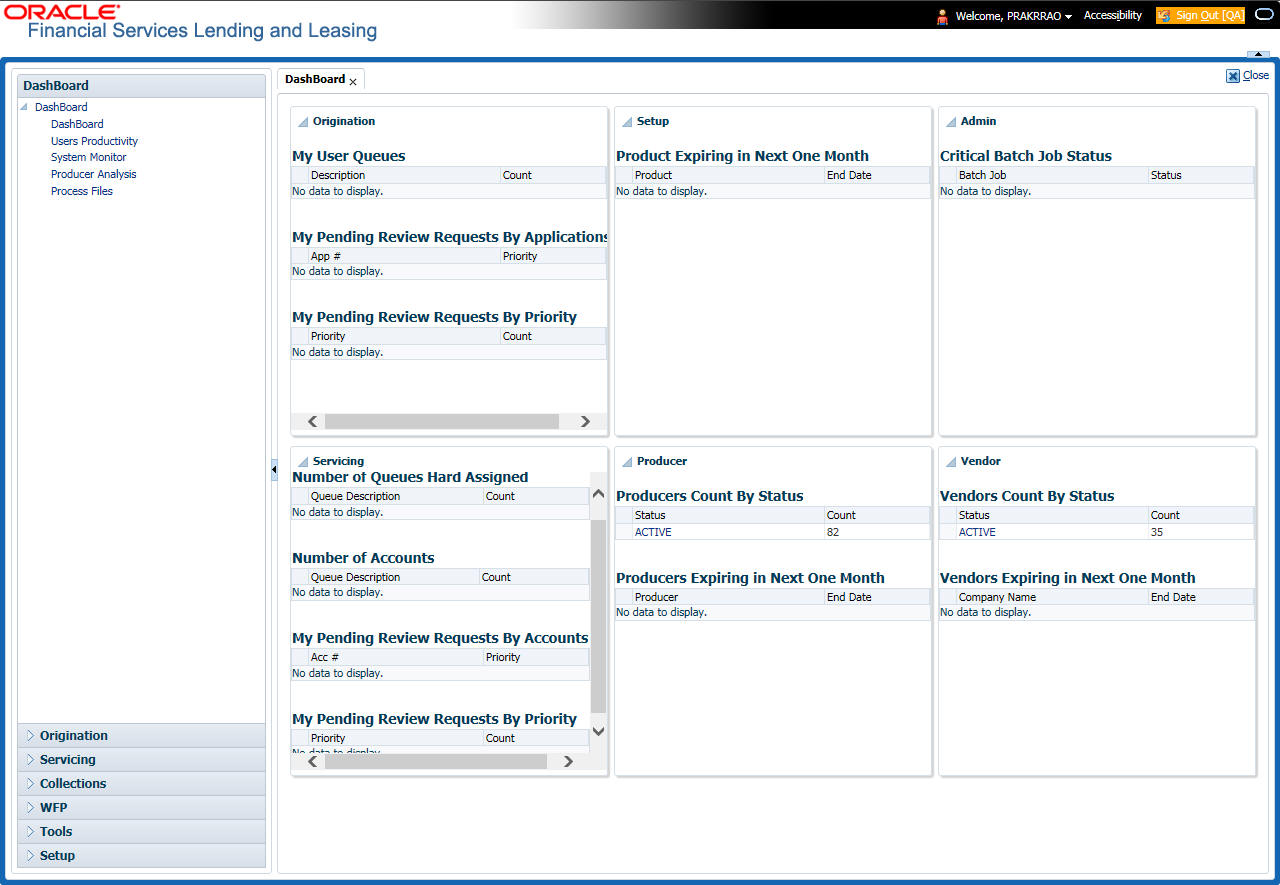
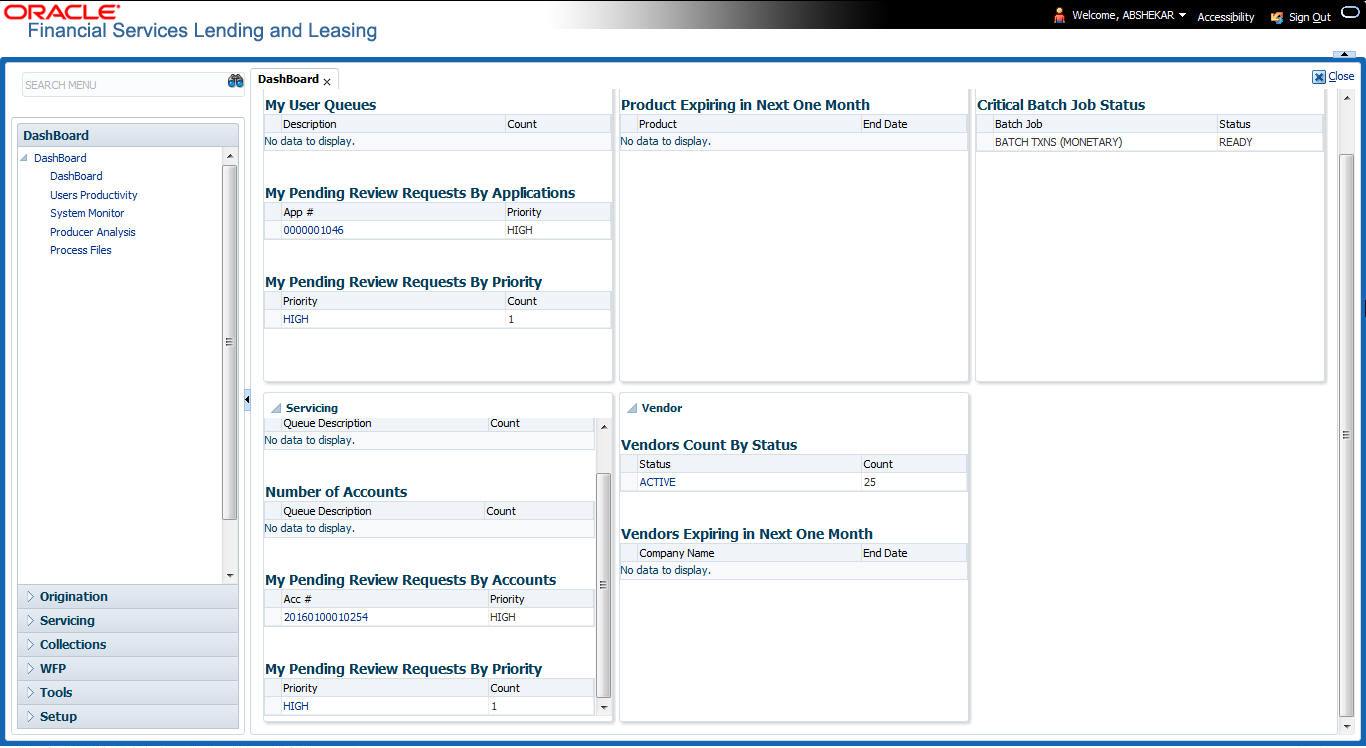
System displays the priority and the number of requests ready for review, if any, for your user id at My Pending Review Requests By Priority section in the Servicing Dash Board window.
To review requests
- On the Oracle Financial Services Lending and Leasing application
home page, click Servicing main tab and then click Servicing
drop-down link. Click Customer Service link.
The Customer Service window appears, opened at the Results tab. Under Customer Service screen, click Review Requests tab. - In the Query section, click Receiver.
In the Review Request record, the system displays all open review request you have received.
- In the Review Request record, select the record you want
to view and click View. The following screen is displayed.
- For
the selected Review Request record, view the following information:
Fields
Descriptions
Originator
The user id of the request originator.
Priority
The request priority: HIGH, NORMAL, or LOW.
Receiver
The recipient of the request.
Account #
The account number which needs review.
Transaction
The transaction selected.
Reason
The review reason.
Status
The request status.
Date
The date and time when the request was created.
Originator Comment
The comment by the originator which creating a request.
Receiver Comment
The comment by the receiver after reviewing a request.
Note
If you click Open Account, system loads the account in review request and displays the Account Details page.
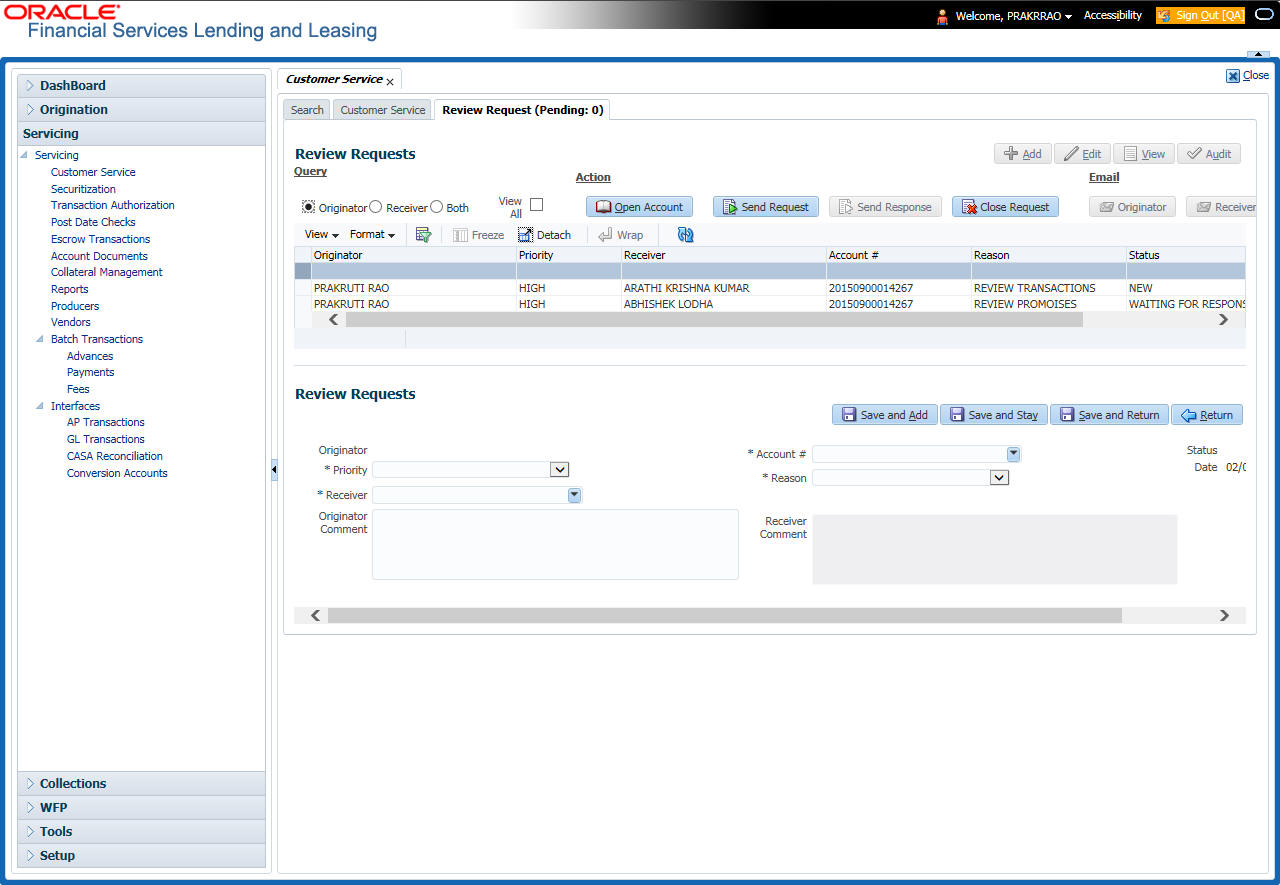
6.4.1.2 Sending a Review Request
The Send Request button enables you to send a review request to another the system user. However, the Send Request button is enabled only if you have specified the receiver while creating a review request and have saved it.
To send a review request
- On the Oracle Financial Services Lending and Leasing Application home page, click the Servicing main tab and then click Servicing drop-down link. Click Review Requests tab.
- In theReview Requests page in the Query section, select Originator.
- Click Add to create a new review request.
The following screen is displayed:

- In the Priority field, select the priority of review request: High, Normal, or Low which helps the recipient in responding to requests. It does not affect the order in which messages are sent or received.
- In Receiver field, select the person you want to receive the message.
- In Account # field, select the account involved with the review request. The default value NEW appears in the Status field.
- In Reason field, select the purpose for the review request.
- In Originator Comment field, specify any additional message you want to send along with the review request.
- Click Save And Add/Save And Return. The review
request is created and Send Request button is enabled in the Action section.
- In the Action section, click Send Request.
The system sends your request to the recipient’s, where it appears on My Pending Review Request window in Dash Board with status Sent to Originator.
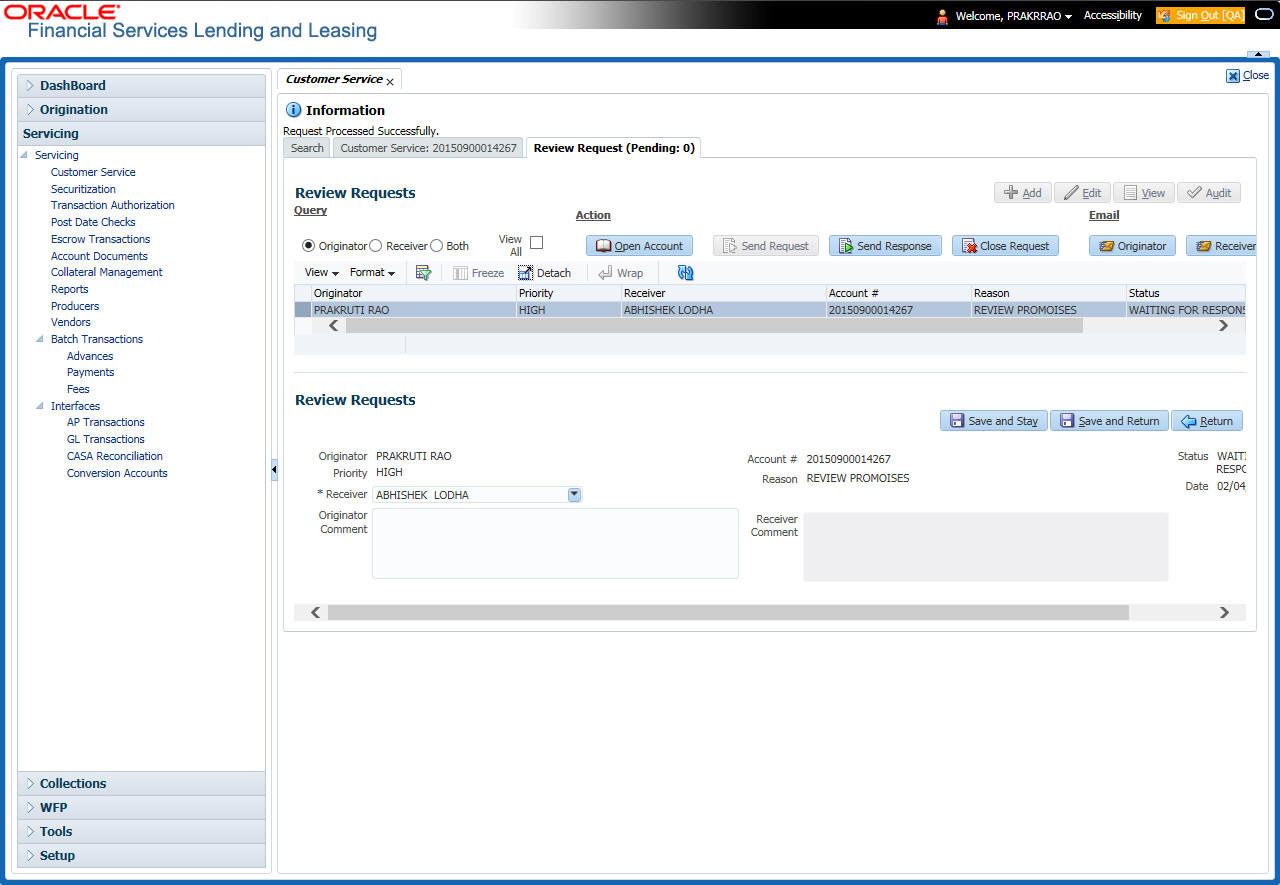
6.4.1.3 Responding to a Review Request
When you receive a review request, the system notifies you by creating an entry in My of Pending Review Requests By Priority section in Dash Board with the number of unseen messages. In the following example, one review request is waiting on the Review Request page.
To respond to a review request
- On the Oracle Financial Services Lending and Leasing Application home page, click Servicing main tab and then click Servicing drop-down link. Click Customer Service link. If the Number of Pending Review Requests tab displays a number, click Review Requests tab. On the Review Request page Query section, select Receiver.
The system displays the unread review requests in Review Request record.
- In the Review Request record, select the record
you want to view and click View.
- Click Open Account.
The system loads the account on Customer Service screen and displays Account Details page.
- Perform requested task on review request on the account.
Click Review Request tab and selecting request, click Edit. Specify
your response in the Receiver Comment field. Click Save
And Return.
- In the Action section, click Send Request.
The system sends your response to the originator, where it appears on Review Request page with status Return to Originator.
The recipient can view sent response by clicking Receiver or View All in Query section. (The request has a status as RETURN TO ORIGINATOR.)
- In the Action section, click Close Request
It will remove the message from the Review Request section.
Back on the originator’s Review Request page, the message appears when Originator is selected in Query section. The request has a status as Return to Originator.
6.4.1.4 E-mailing a Review Request
While system updates My Pending Review Requests By Priority section in the DashBoard to notify you about the new requests, you can also e-mail a review request to both the originator and a receiver, as applicable. The system will use e-mail address recorded for both the originator and receive in User Definition section in User page.
To e-mail a review request
- On the Oracle Financial Services Lending and Leasing Application home page, click Servicing main tab and then click Servicing drop-down link.
- Click Customer Service link.
- On the Customer Service link, click Review Requests tab.
- Select the request you want to e-mail in the Review Request section.
- In Email section, click Originator to send the message to the person listed in Originator field.
-or-
- Click Receiver to send it to the person listed in the Receiver field.
The system emails the details of selected record to e-mail address recorded in user setup.
6.4.1.5 Closing a Review Request
You can close a review request you created at anytime, regardless of status. However, you can only close review requests that have your user id in the Originator field. When you close a review request, the system removes it from Review Request record.
To close a review request
- On the Oracle Financial Services Lending and Leasing Application home page, click Servicing main tab and then click Servicing drop-down link.
- Click Customer Service link.
- On the Customer Service link, click Review Requests tab.
- Select the request you want to close in the Review Request section.
- In the Action section, click Close Request.
The system assigns the request as Closed and removes it from your Review Request record. The closed accounts can be reviewed anytime by selecting View All in the Query section.