7. Configuring RESTful WebService
Follow the below steps to configure RESTful WebService.
- Create Data Source for RESTful WebService
- Deploy RESTful WebService
7.1 Create Data Sources for RESTful WebService
- Login to Oracle Weblogic 12c console (http://hostname:port/console).
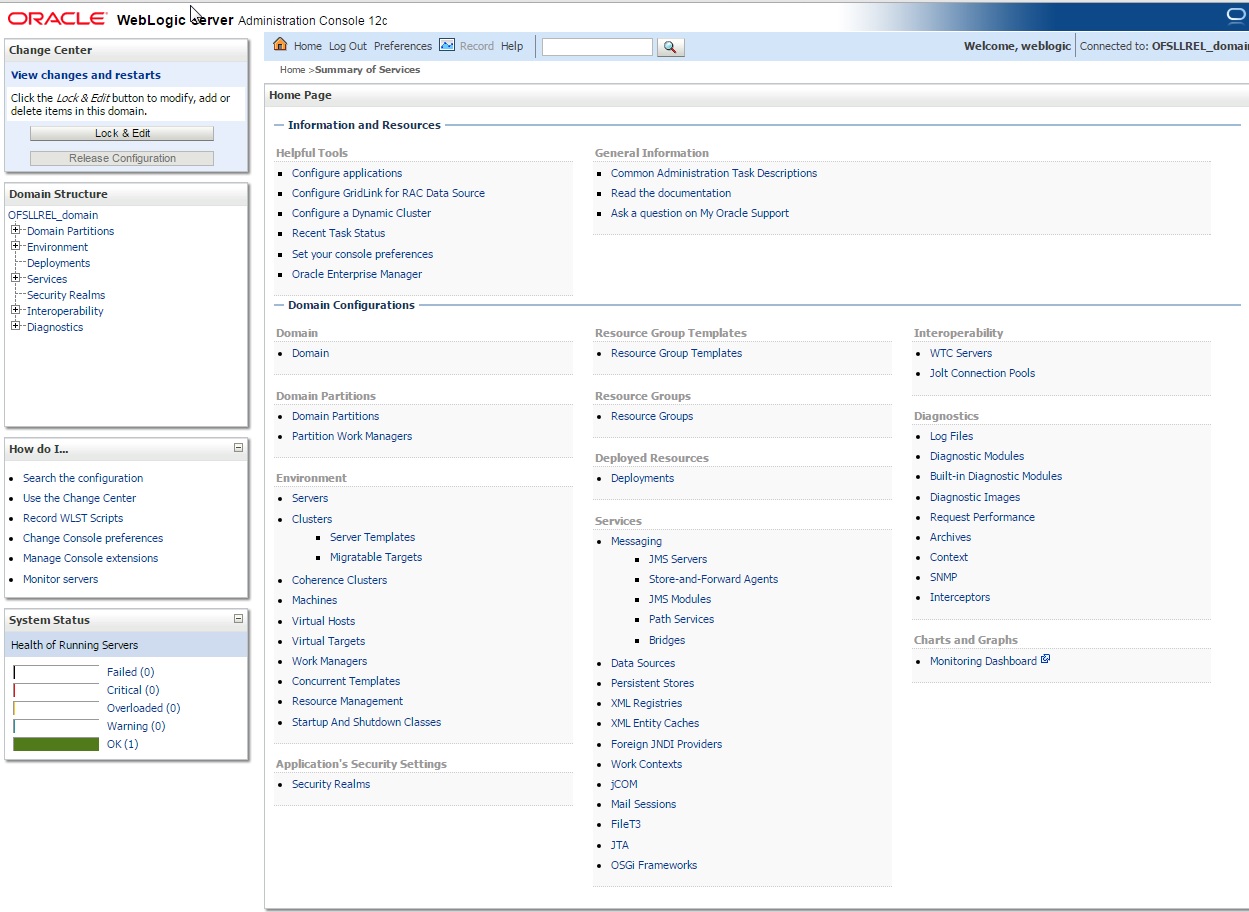
- On
successful login, the following window is displayed.
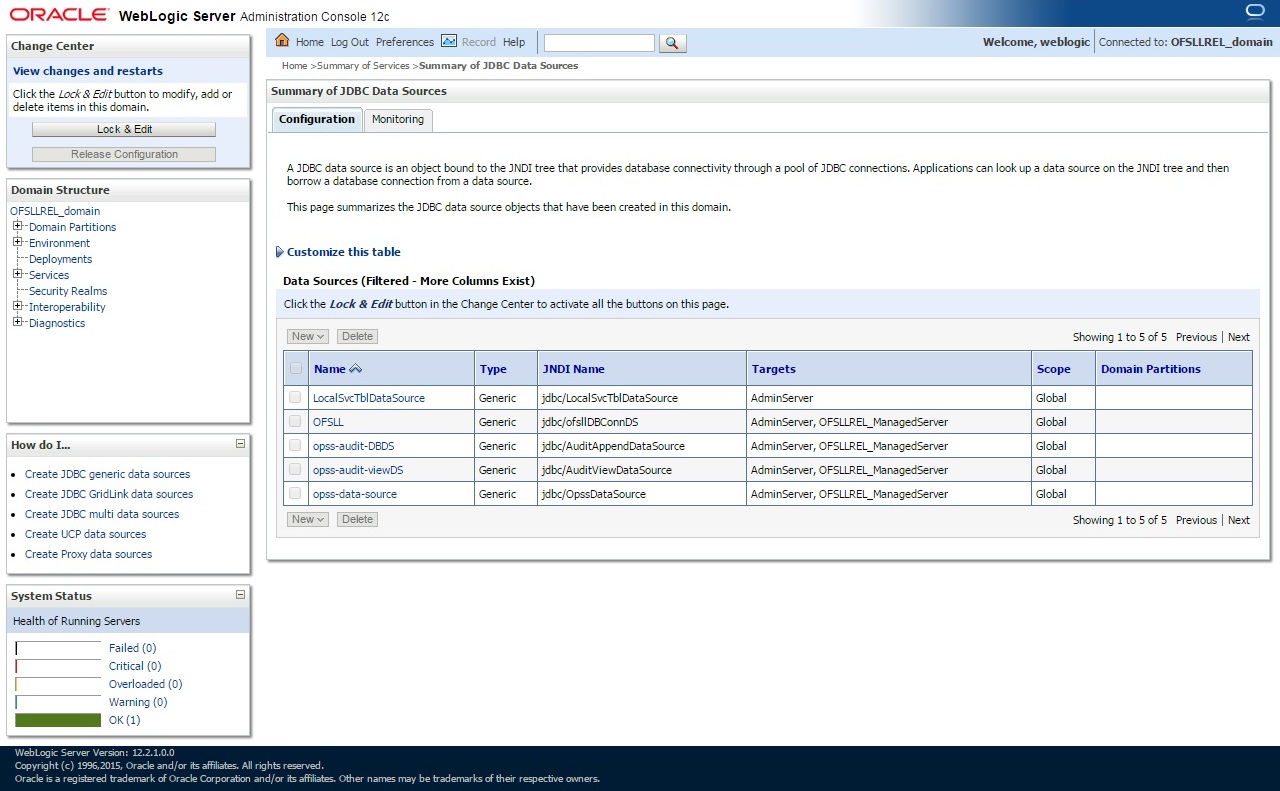
- Click
Domain Name > Services > Data Sources. The following window is
displayed.
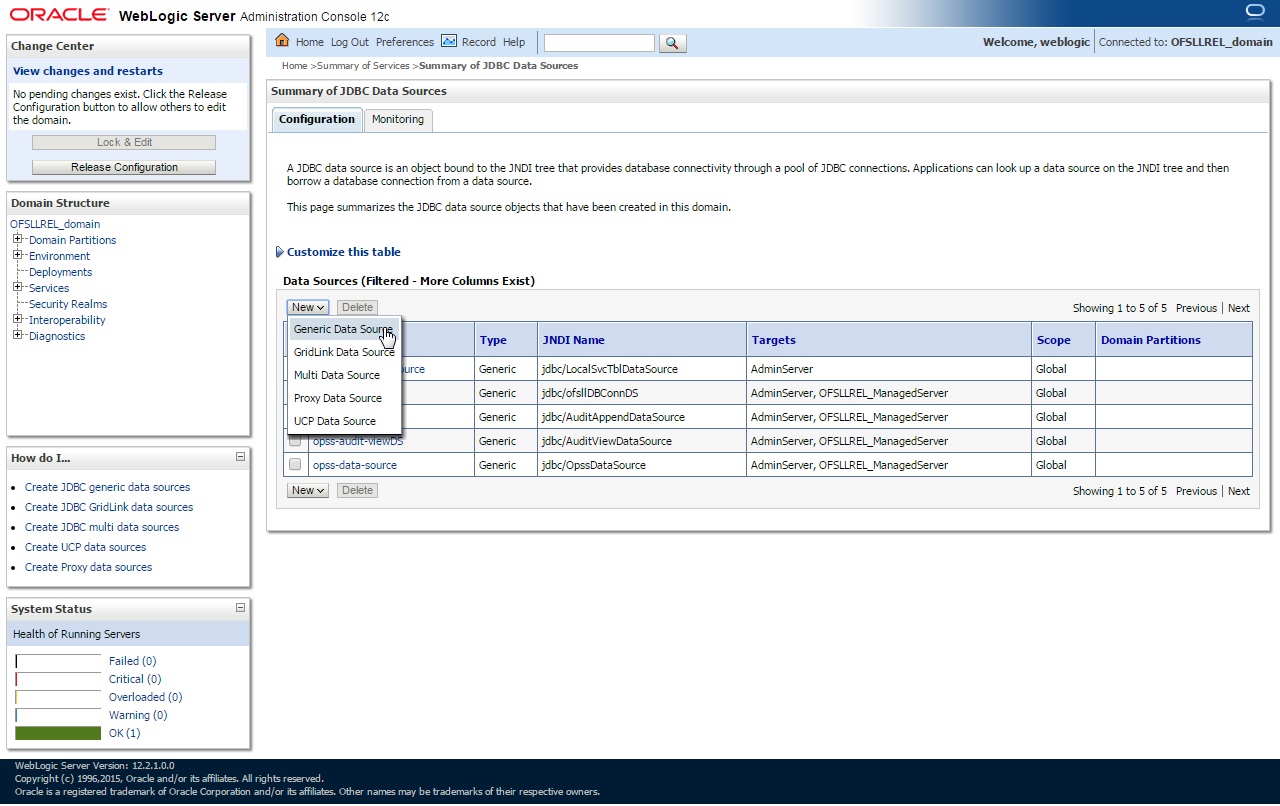
- Click
‘Lock & Edit’ button on the left panel. Click ‘New’
on right panel and select ‘Generic Data Source’.
- The
following window is displayed.
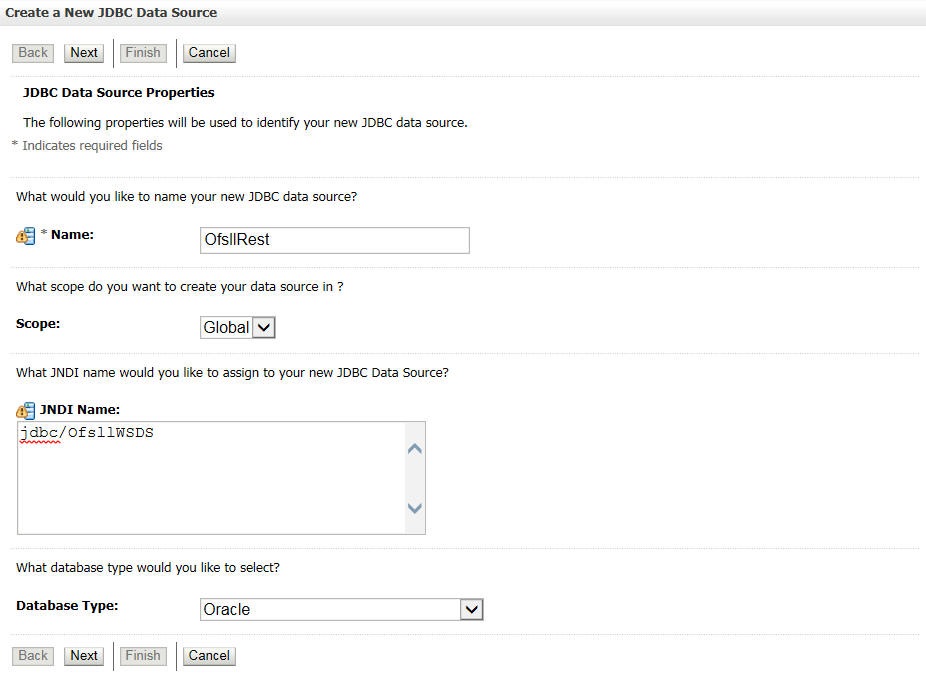
- Specify the following details:
- Enter Data source Name
- Enter the JNDI Name as ‘jdbc/ofsllWSDS’.
- Select ‘Oracle’ as Database Type.
- Click ‘Next’. The following window is displayed.
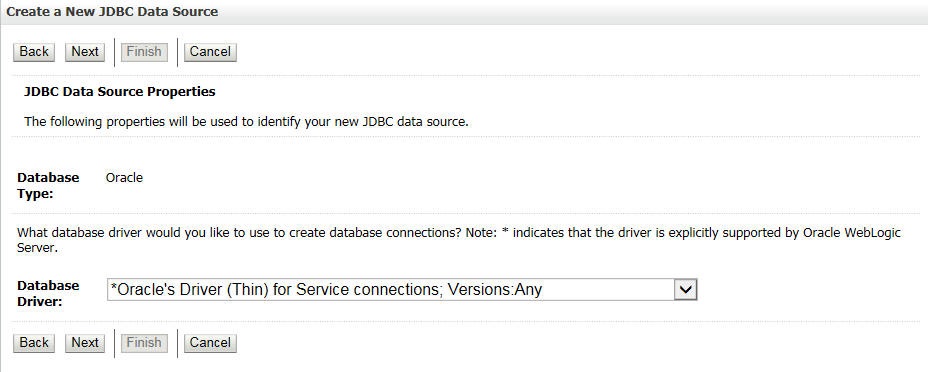
- Select the Database Driver ‘Oracle's Driver(Thin) for Services connections;Versions:Any’.
- Click ‘Next’. The following window is displayed.
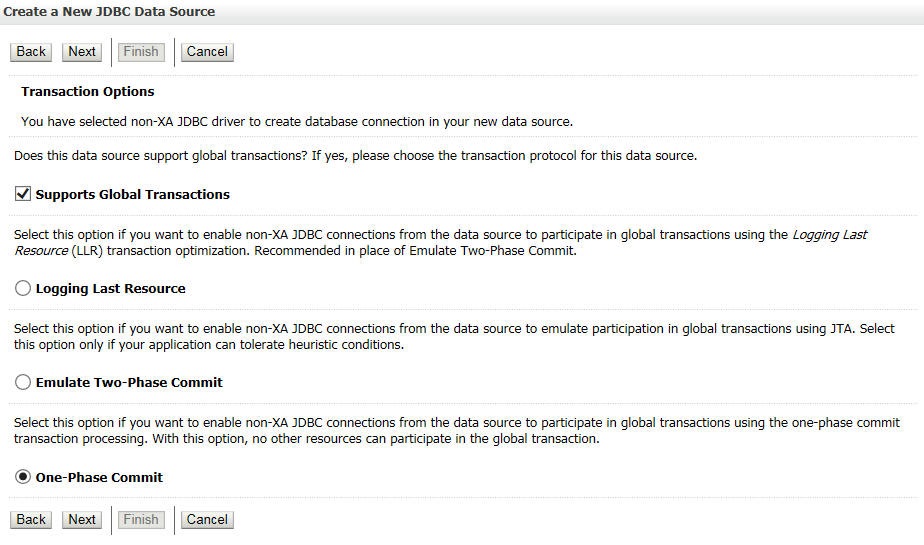
- Click ‘Next’.
The following window is displayed.
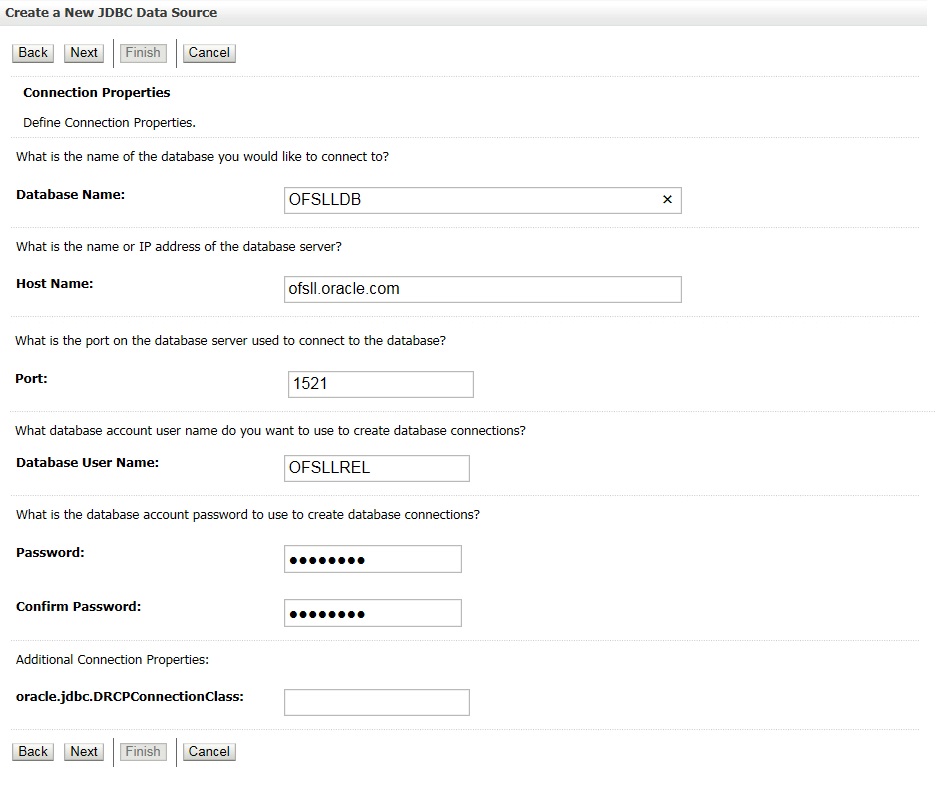
- Enter the Database details.
- Click ‘Next’. The following window is displayed.
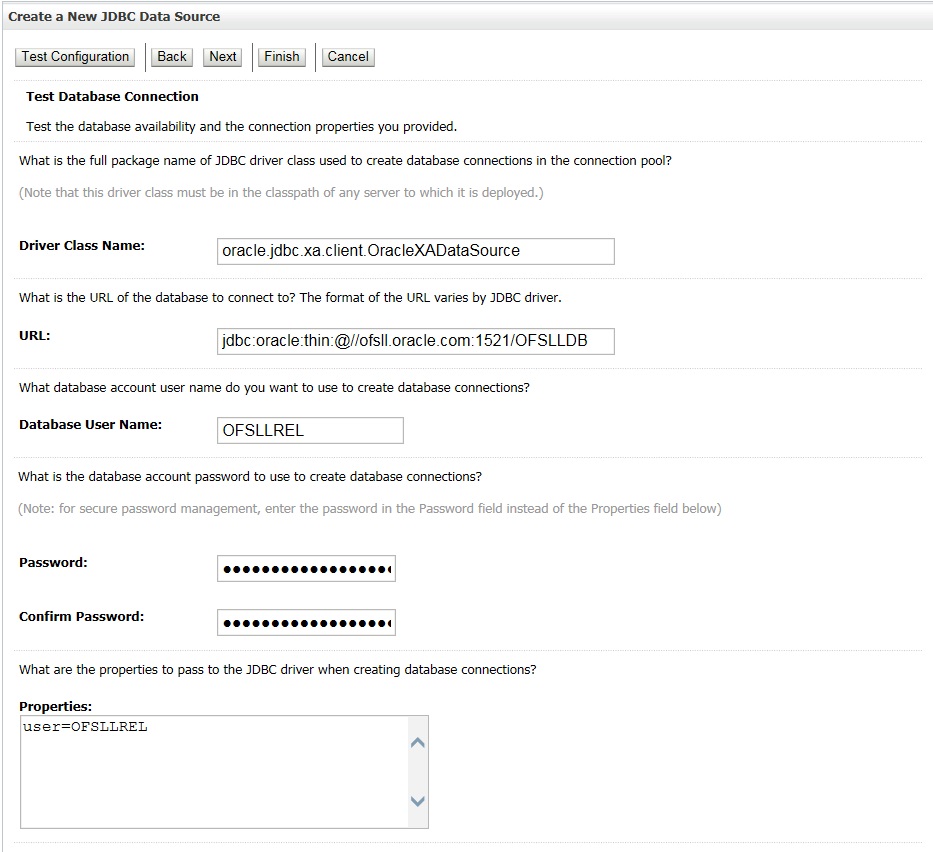
- Click ‘Test Configuration’. On completion, displays a confirmation message as ‘Connection test succeeded’.
- Click ‘Next’. The following window is displayed.
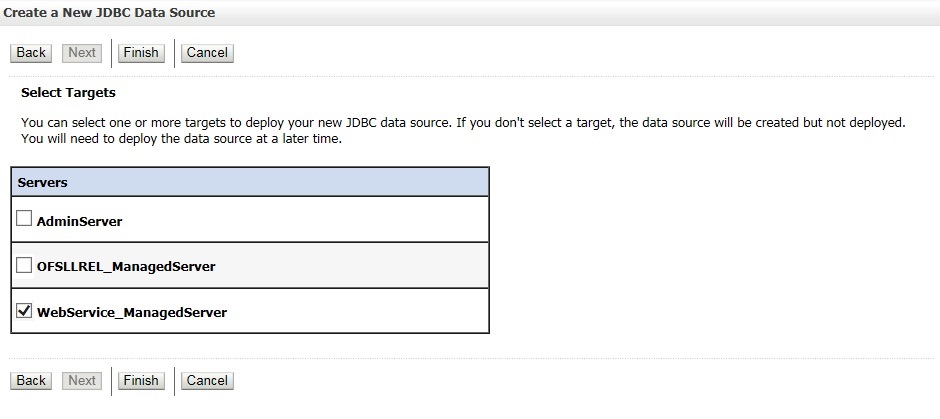
- Select target Server as ‘WebService_ManagedServer’.
- Click ‘Finish’ to activate the changes.
7.2 Deploy RESTful WebService
- Login to Web Logic application server enterprise manager
(e.g.:http://hostname:port/em)
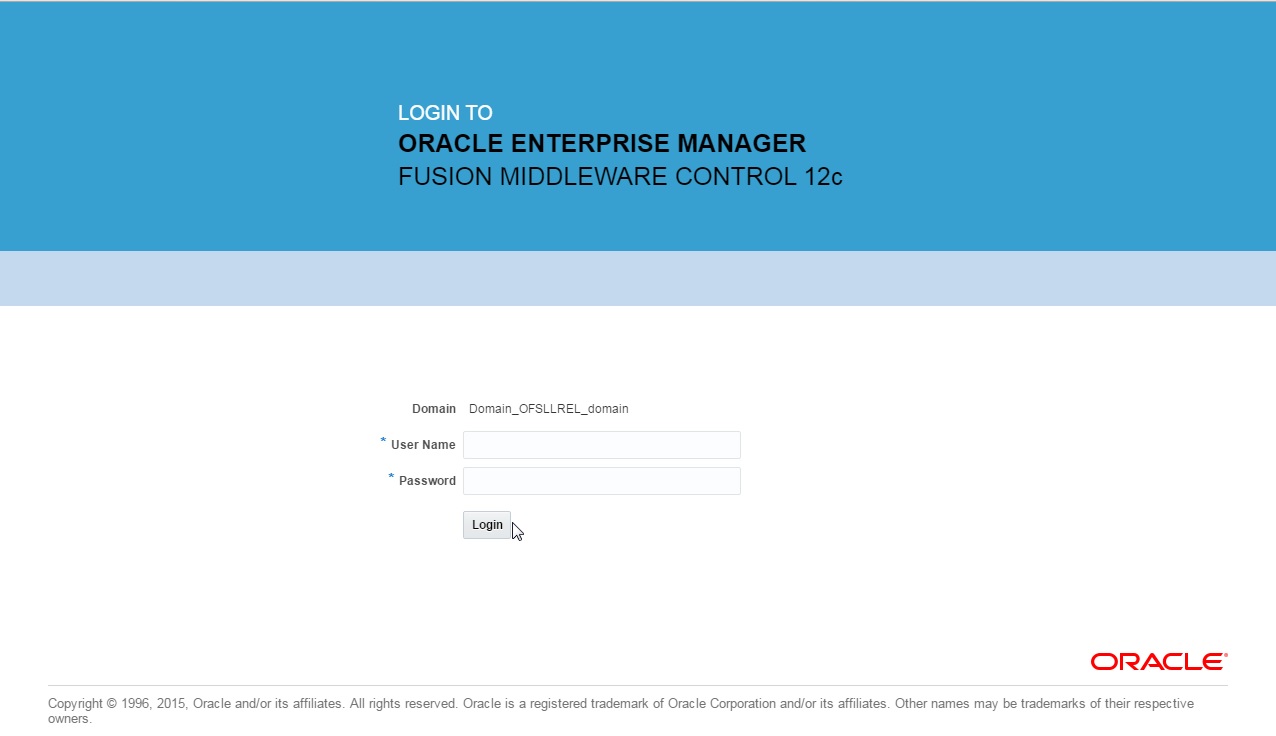
- Enter valid login credentials. The following window is displayed.
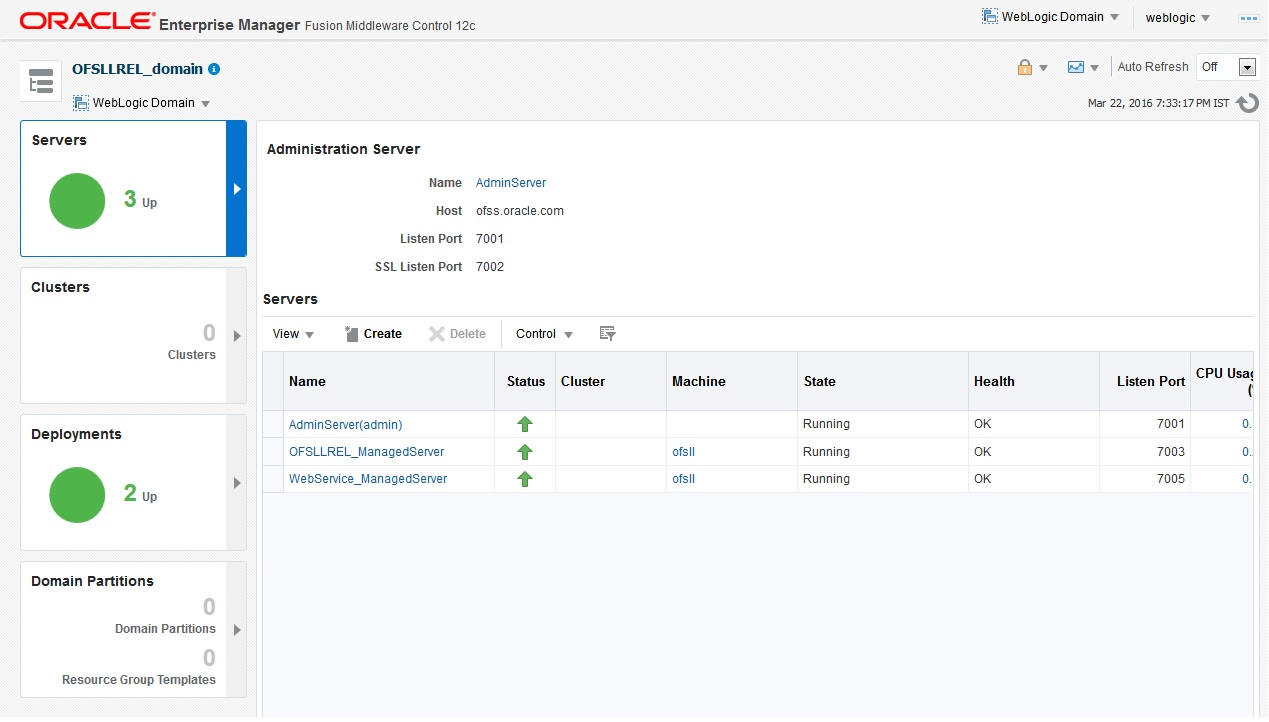
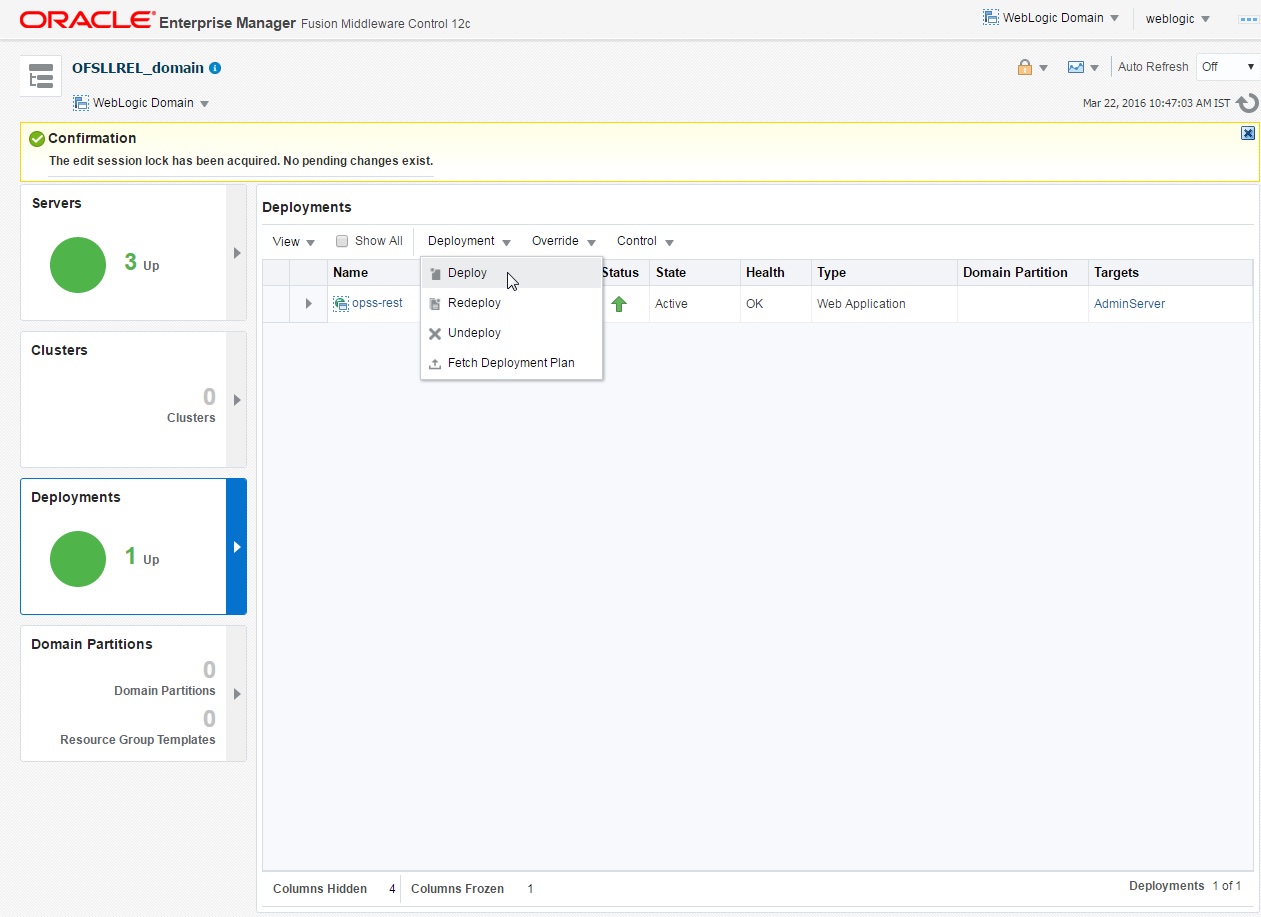
- Click ‘Deployment’ in the left panel.
- Select ‘Lock & Edit’ option in the lock
drop-down list available in the header. The following window is displayed.

- Select ‘Deploy’ from the Deployment drop-down list.
The following window is displayed.
- The following window is displayed.
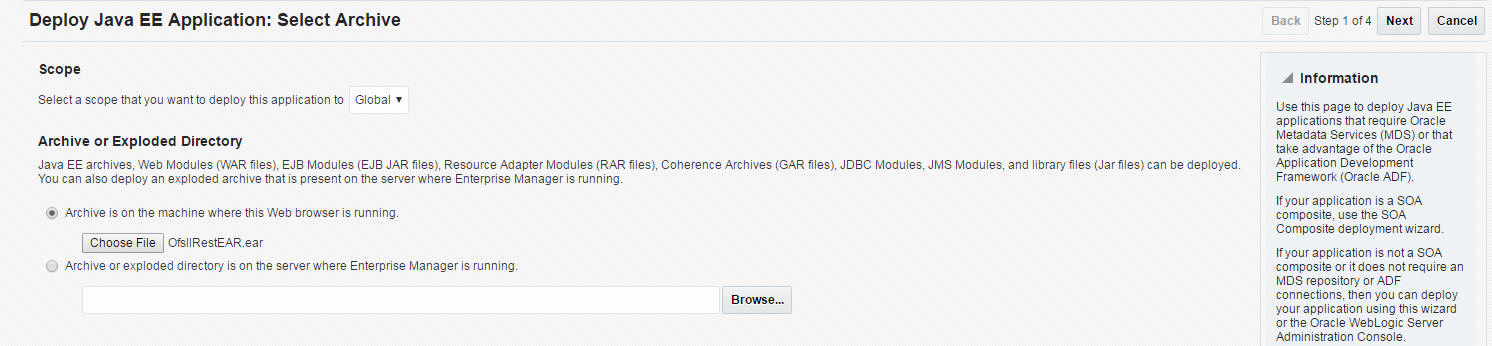
- Browse to the folder containing the WebService. Eg: C:/OfsllRestEAR.ear
- Click ‘Next’. The following window is displayed.
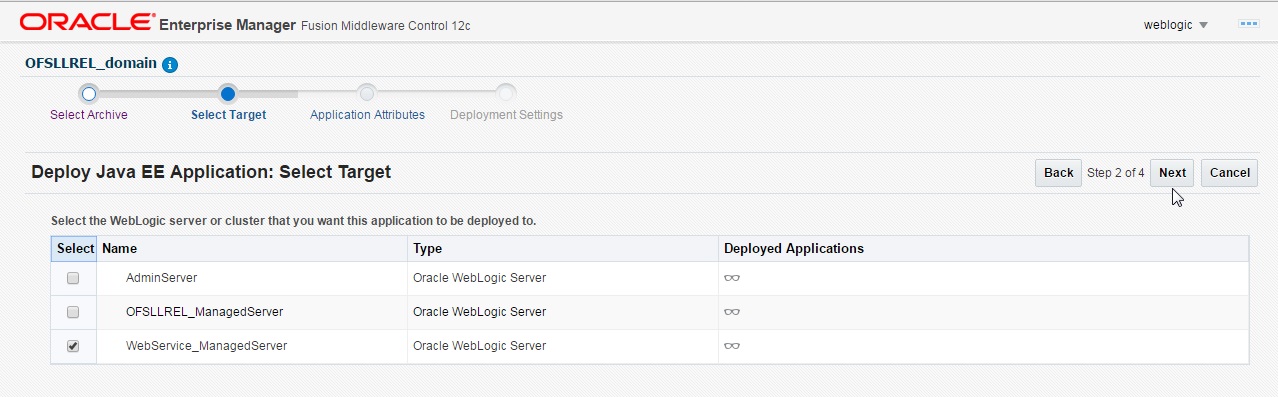
- Select the server on which the WebService needs to be deployed.
- Click ‘Next’. The following window is displayed.
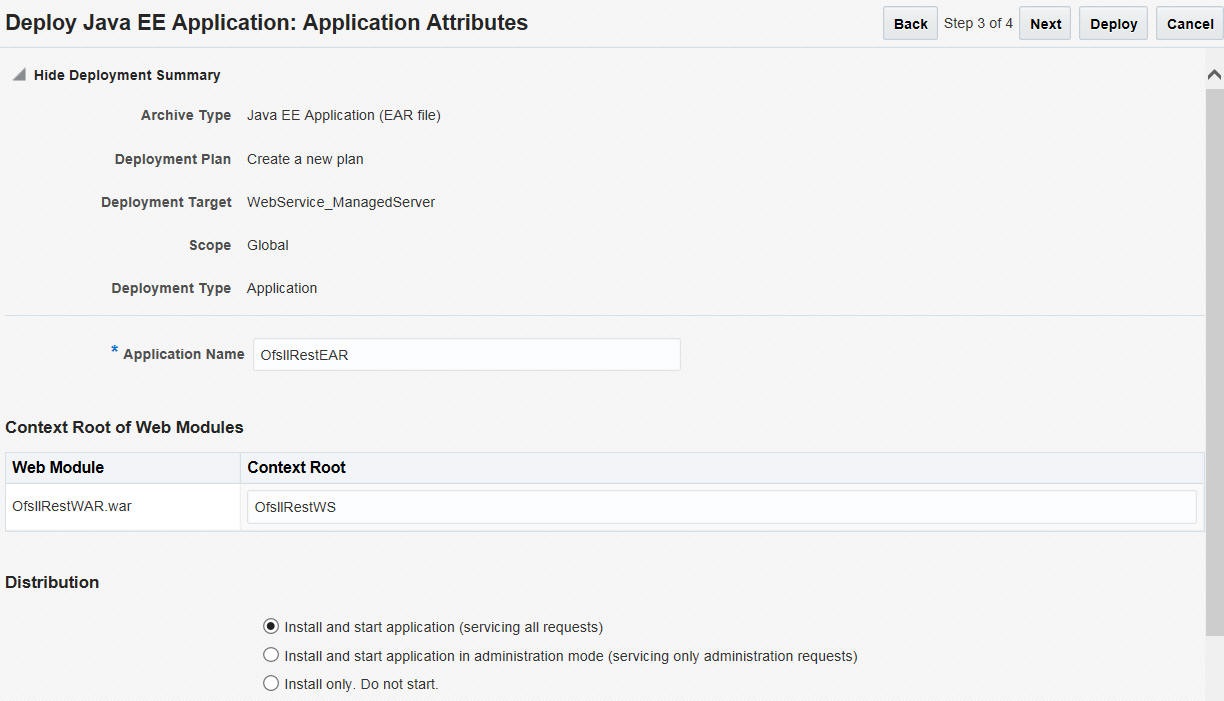
- Select the option ‘Install and start application (servicing all requests)’.
- Check the context root and click ‘Next’.The
following window is displayed.
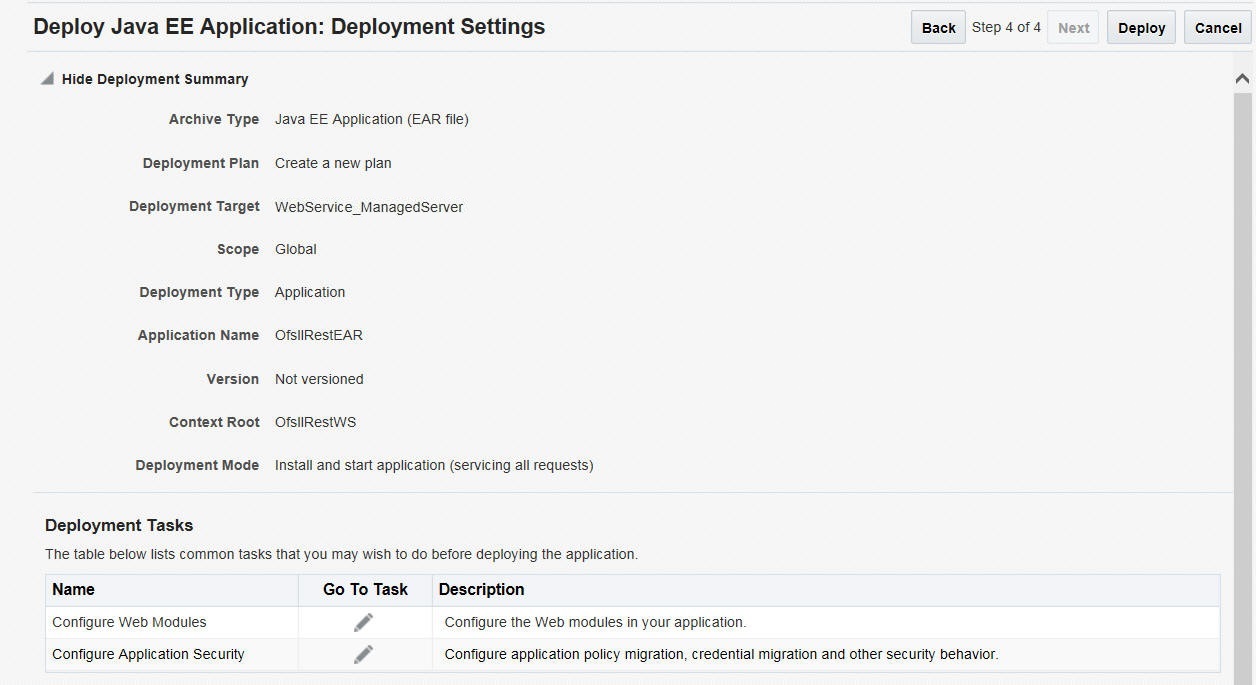
- Click ‘Deploy’.
On successful deployment, the following window is displayed.
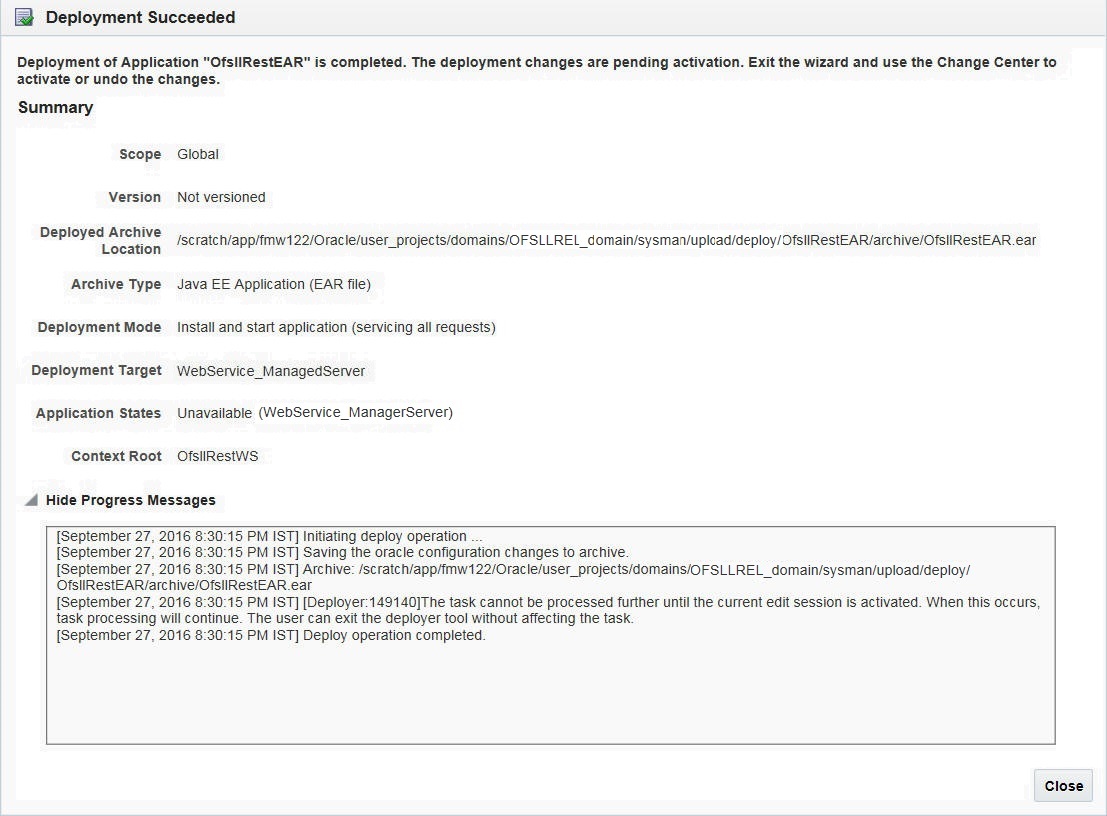
- Click ‘Close’. Post deployment, you need to activate the changes by selecting ‘Active Changes’ option from ‘Edit Session’ drop-down list as indicated in step 4 above.
To Identify the RESTful Webservice URL
- Login to WebLogic Server 12c console (http://hostname:port/console).
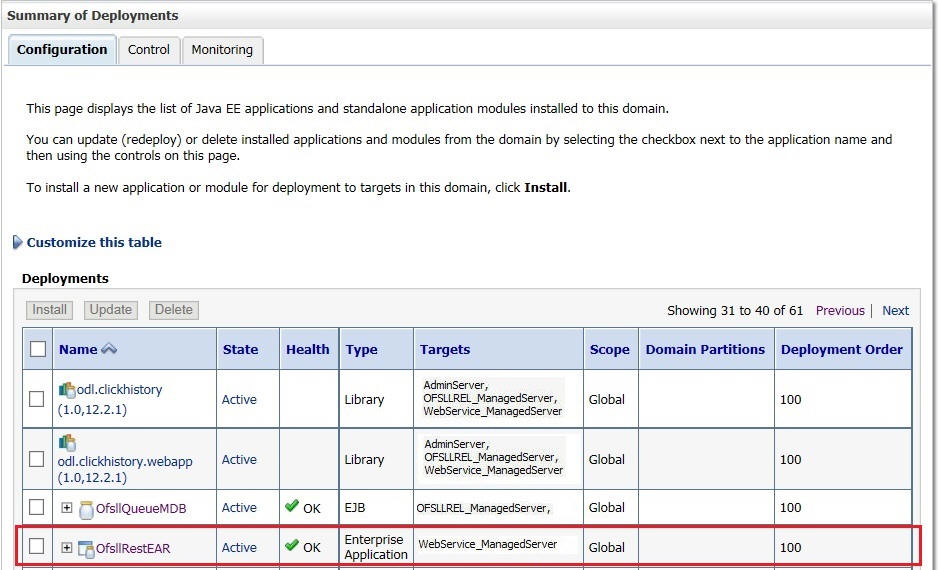
- Click ‘Deployments’ Under Configuration tab
and select ‘OfsllRestEAR’ services. The following window
is displayed.
- Click ‘Testing’
tab and expand ‘OfsllRestWS’. The following window is displayed.
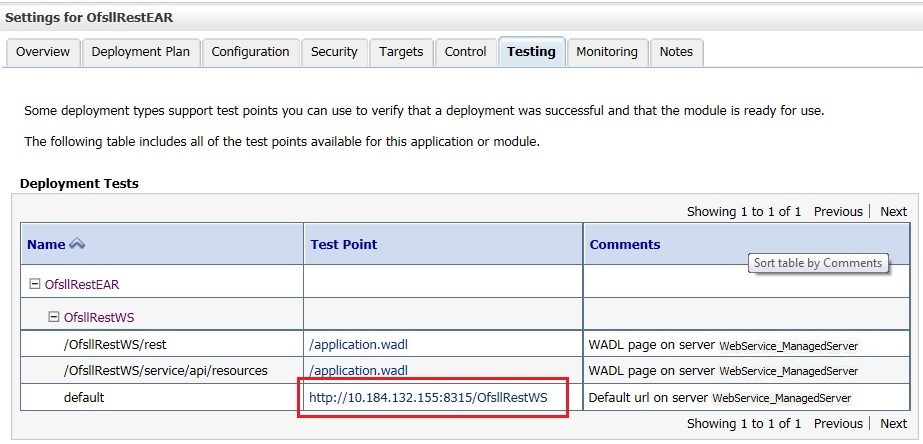
- You can view the 'OfsllRestful' Services URL as shown.