6. Processing Outgoing Messages
Here, the procedure involved in generating an outgoing message is explained. To recall, you have already maintained:
- The type of messages that can be generated at your bank
- Formats for the various messages
- The media through which messages should be transmitted
- A media control system to receive and transmit messages for a given media
- The addresses for a customer for a given media
In each module of Oracle Lending, you can define products. While defining products you also indicate the messages that should be associated with an event in the life cycle of a contract involving the product.
A contract goes through several events during it’s life-cycle. A message for an event is triggered for generation when the event is authorized.
For example, you have defined a product to cater to short term loans. You have indicated that the following messages should be generated when events take place:
Event |
Message |
INITIATION |
Initiation Advice |
LIQUIDATION |
Liquidation Advice |
When you initiate a short-term loan involving the product an Initiation Advice is triggered for generation. Similarly, if you make a repayment on the loan, the liquidation advice defined for the event is triggered for generation.
Note
In this context advices and messages are commonly referred to as messages.
Depending on the product - message - customer details that you have set up, Oracle Lending determines the address and the media through which the message should be transmitted.
If a message is to be transmitted through mail, it has to be printed. If the message is to be transmitted through Telex, you have to enter the test word (if it is required for the message). The messages that are to be transmitted through media like Telex and SWIFT are sent by the Media Control System (MCS) which is connected to the node in which the database of your branch is installed.
A message that is triggered for generation can be sent in the background or can be generated on-line. An outgoing message is processed based on the preference that you state.
Note
The messages that are triggered by an automatic event like the generation of a tracer for an LC, billing notice and delinquency notice for a loan, and so on., is put in the Outgoing Browser by the automatic function itself. This is because events triggered by an automatic function do not require authorization.
This chapter contains the following sections:
- Section 6.1, "Outgoing Messages Browser Summary"
- Section 6.2, "Bulk Monitor"
- Section 6.3, "Bulking and SWIFTNet Operations Monitor"
- Section 6.4, "Outbound File Browser"
- Section 6.5, "Inbound File Browser"
6.1 Outgoing Messages Browser Summary
This section contains the following topics:
- Section 6.1.1, "Generating Messages from Outgoing Browser"
- Section 6.1.2, "Performing Operations on an Outgoing Message"
6.1.1 Generating Messages from Outgoing Browser
If the background message process is not running, all the messages that are triggered for generation are displayed in the Outgoing Message Browser from where you can generate the message.
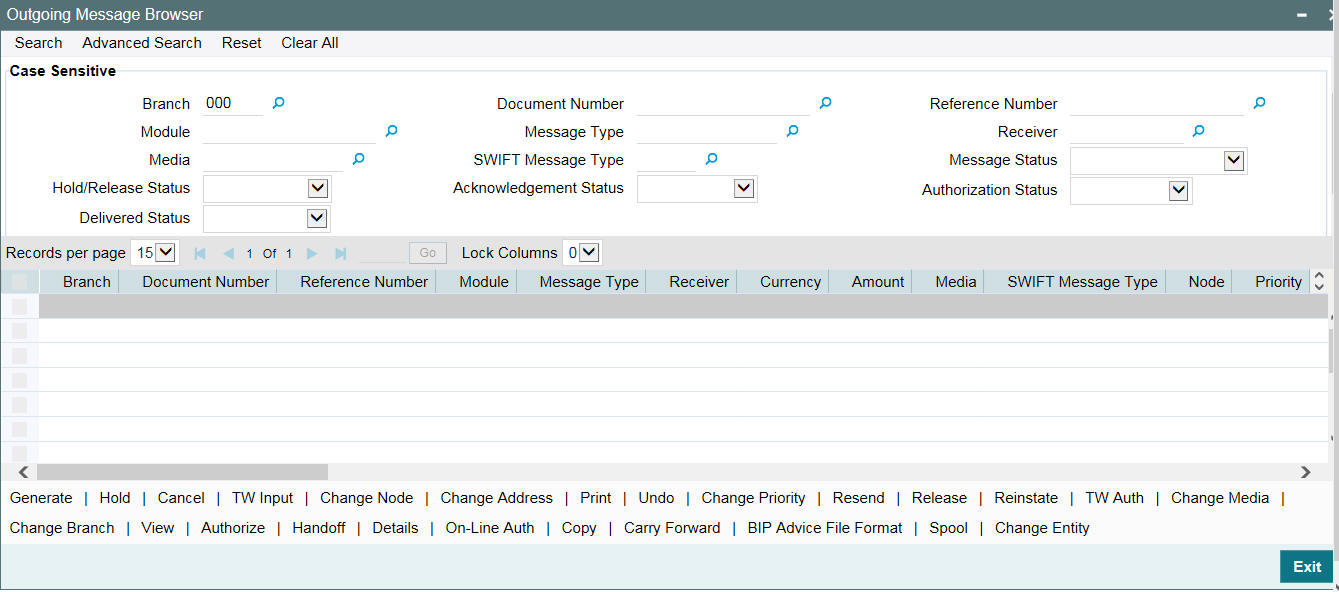
You can generate messages from the Outgoing Browser at any time in the day. You can invoke the ‘Outgoing Message Browser Summary’ screen by typing ‘OLSOUTBR’ in the field at the top right corner of the Application tool bar and clicking on the adjoining arrow button.
Viewing Outgoing Messages
You can view features of the outgoing messages based on any of the following criteria.
- Branch
- Document Number
- Reference Number
- Module
- Message Type
- Receiver
- Media
- Swift Message Type
- Hold/Release Status
- Acknowledgement Status
- Authorization Status
- Delivered Status
- Bulk Reference Number
- Bulk Preference Name
- Bulk Status - The bulk status can be one of the following:
- INPROGRESS - Indicates that bulking is identified for the DCN
- BULK_SUCC - Indicates that the bulking operation is successfully completed
- BULK_FAIL - Indicates that the bulking operation failed
- FILESENT_SUCC- Indicates that the bulked file is sent to the destination
- FILESENT_FAIL - Indicates that bulked file was not sent as sending failed
Click ‘Search’ button. The system identifies all outgoing messages satisfying the specified criteria and displays the following details for each outgoing message:
- Branch
- Document Number
- Reference Number
- Module
- Message Type
- Receiver
- Currency
- Amount
- Media
- Swift Message Type
- Node
- Priority
- Customer Name
- Address
- Address2
- Address3
- Address4
- Location
- Message Status
- Testword
- Exception
- Running number
- Hold/Release Status
- Test Amount
- Test date
- Test Currency
- Test word Narrative
- Acknowledgement Status
- Hold Mail
- External Reference
- Delivery By
- RTGS Network
- Entry By
- Maker Date Stamp
- Authorized By
- Checker Date Stamp
- Authorization Status
- Once Authorized
- Modification Number
- DCN LIST
- Bulk
- Selected
- Testing Status
- Any or Original
- Original DCN
- Delivered Status
- RTGS Network will be defaulted for the following message types:
CUST_TSFR_RTGS
BANK_TSFR_RTGS
COVER_RTGS
DIRDR_RTGS
RTGS Message type and its description are shown in the table below:
Message |
Description |
SWIFT Message |
CUST_TSFR_RTGS |
Used when a Pay message generation is for a corporate and sent through the RTGS Network. |
MT 103 |
BANK_TSFR_RTGS |
Used when a message belongs to an interbank deal and sent through the RTGS Network. |
MT 202 |
DIRDR_RTGS |
Used when a direct debit message is sent through the RTGS Network. |
MT 204 |
COVER_RTGS |
Used when a cover payment is sent through the RTGS Network. |
MT 202 |
Note
- If none of the criteria is selected, then the system displays all the messages in the outgoing browser.
- Funding Status is updated during the processing of incoming MT102 and MT109.
6.1.2 Performing Operations on an Outgoing Message
The operations that you can perform on an outgoing message are determined by the rights that you are assigned with, at Security Management System (SMS) level. If a function in the Outgoing Browser is disabled, then the function is not allowed for the record.
Check the box against the message(s) for which you need to perform an operation and then click the corresponding operation. The action performed will require authorization, if maintained at the Messaging Branch Preferences level.
The following operations can be performed on the outgoing messages:
Generate
Click to generate an outgoing message. You can generate un-generated and repaired messages.
When you click ‘Generate’, the system checks the contract status for which the message is generated and will not generate a message in the following condition:
- If the contract is reversed
- If the message is on hold
- If the message maintenance is not authorized and the message is moved to repair queue
Hold
Click if you need to temporarily stop generating an outgoing message. Authorizing Supervisor can view details and then release the messages or change their status to Carry Forward, which in turn can be released on further authorization.
Note
Messages with Hold status must either be carried forward or released, before you execute the EOD processes at the branch; else the system displays an error message. However, if the message is cancelled, then the system does not display error message, though the status is ‘Hold’.
Cancel
Click if you need to cancel an outgoing message. You can cancel messages with ‘Un-generated’ and ‘Hold’ status.
TW Input
Click if you need to input testword for Telex messages which were moved to ‘Repair’ status.
Change Node
Click if you need to change the node from which an outgoing message is generated.
In a distributed environment, the database of one or more branches of your bank is located at a node or a server. Hence a Media Control System is installed and defined specifying the node at which it is installed.
When you click ‘Node’, the system displays the details of the individual message providing an option to change the ‘Node’. Select the node you need to change from the adjoining option list.
Note
MCS status at the node in which the database of your bank is installed should be passive.
Change Address
Click if you need to change the address to which an outgoing message has to be sent. Enter the new address to which the message should be sent and click ’OK’ to save.
Note
Change of address can be done only before a message is generated.
Print/Spool
Click if you need to print an outgoing message. When you click ‘Print’, option is provided to select spool or print on-line.
Messages that are transmitted through mail and those cancelled should be printed. You can also choose to print the details of messages transmitted through other media types.
The system provides an option to spool the advices in PDF format. When you click the ‘Print/Spool’ button, you can view the selected advice in PDF file. You can also view the SWIFT tag description.
Undo
Click if you need to reverse the last action you performed on an outgoing message at ‘Outgoing Messages Browser’ level
Change Priority
Click if you need to change the priority, for sending a payment message which is yet to be generated.
Note
In the Background, Oracle Lending generates messages on the priority basis.
Resend
Click if you need to regenerate and resend a message which was generated and sent.
Release
Click if you need to release a message which is on hold.
Reinstate
Click if you need to reinstate cancelled outgoing messages.
TW Auth
Click if you are provided rights to authorize test word entered for a Telex message. While authorizing you have to reenter the test word.
Change Media
Click if you need to change the media through which a message is transmitted, before it would be generated. Media of transmission of a message is changed if there is a failure of the medium at the recipient’s end.
Note
The selected media through which a message is transmitted should be available to the recipient.
Change Branch
Click if you need to send an outgoing message from another branch. Select the branch to which the message needs to be moved from the adjoining option list.
You change the branch of a message for the following reasons:
- If there is a failure of a medium at the bank’s or the counterparty’s end
- If the branch is located closer to the location of the customer’s address.
View
Click if you need to view the contents of a generated outgoing message. Viewing multiple messages is not supported.
Authorize
Click to authorize, if you are provided authorization rights for an operation at the Messaging Branch Preferences level. Messages should be authorized before sending them.
HandOff
Click if you need to hand-off a generated message to MCS to save the date in an ASCII format.
Details
Click if you need to view the details of a generated outgoing message. Viewing details of multiple messages is not supported
On-line Auth
Click to authorize online, if you are provided online authorization rights for an operation at the Messaging Branch Preferences level. Messages should be authorized before sending them.
Copy
Click if you need to send a copy of an outgoing message to another customer involved in a contract. You will provide the following to options:
- Any–Select to implement the following changes:
- Select media from an adjoining option list
- Specify name of the recipient
- Specify the location of the recipient
- Specify the address of the recipient
- Original–Select to copy the message in the original form
Carry Forward
Click if you need to Carry Forward an outgoing message which is on ‘Hold’ for subsequent days.
Note
Messages which have been Carried Forward can be put back on Hold.
BIP Advice
Click if you need to generate advice in PDF format.
Note
- Advice ACST_DETAILED as part of AC module.
- Only ACST_DETAILED and Credit Instrument Liquidation Advices (i.e., DD and BC) as part of Branch Advice are supported in PDF format.
You can generate BIP advice messages for Branch advices by maintaining ‘BRANCH_ADV_TYPE’ as ‘BIP’. Generation of these BIP advices is similar to ‘Host’ advices.
If an advice is not generated, then the system generates, spools, and moves it to the client work station.
6.2 Bulk Monitor
You can monitor the messages and executions in bulk using 'Bulk Monitor Summary' screen. To invoke this screen, type 'MSSBLKMN' in the field at the top right corner of the application toolbar and click the adjoining arrow button.
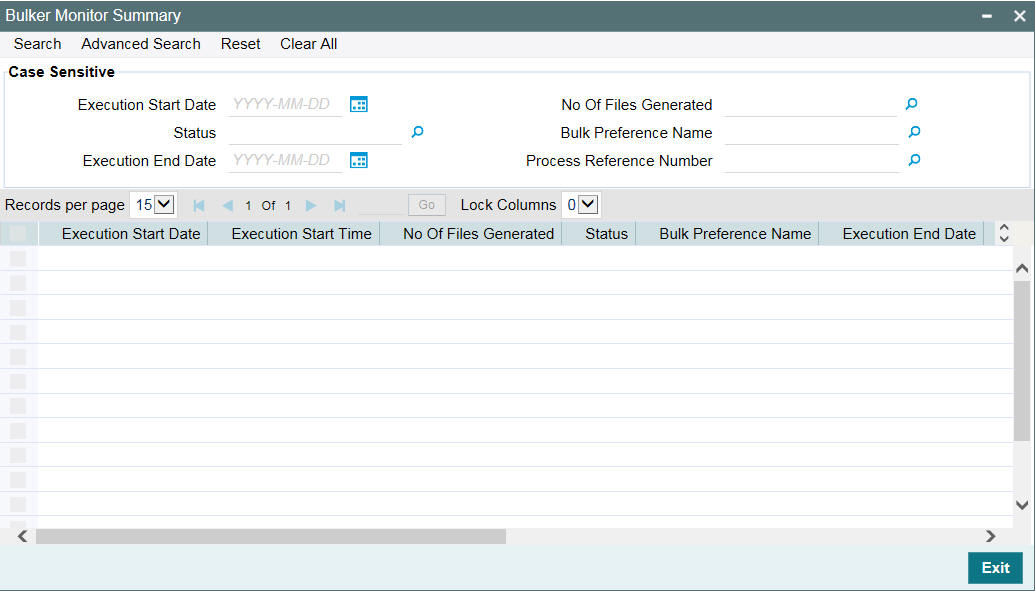
You can search for the records based on one or more of the following parameters.
- Execution start time
- Execution end time
- Bulk preference
- Status
- Number of files generated
Once you have specified the search parameters, click 'Execute Query' button. The system displays the following details of the records that match the filter criteria.
You can view the details of each record in the results. Double-click a record from the results to view the details in 'Bulk Monitor' (MSDBLKMN) screen.
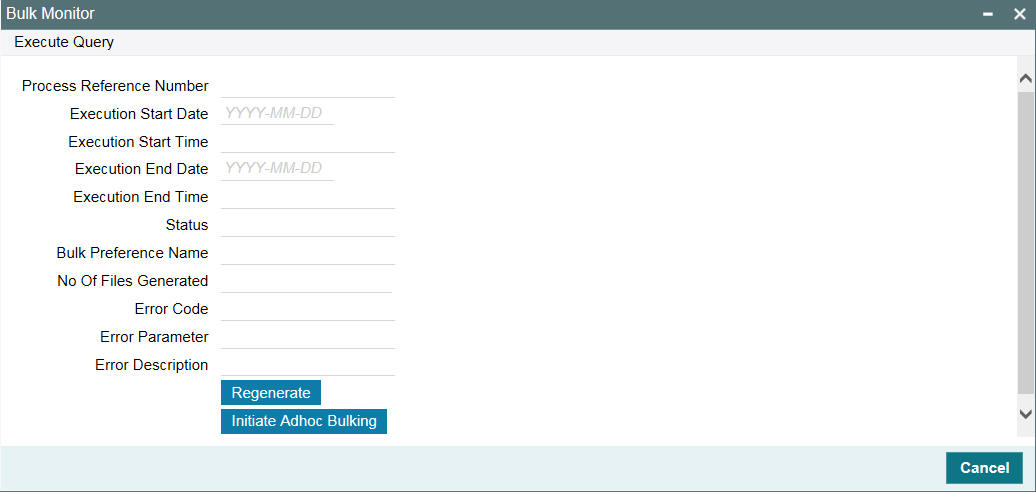
This screen displays the following details of the record.
- Process reference number
- Execution start date
- Execution start time
- Execution end date
- Execution end time
- Status
- Bulk preference name
- Number of files generated
- Error code
- Error parameter
- Error description
You can regenerate the files by clicking 'Regenerate' button. You can also bulk a selected bulk preference ad-hoc using 'Initiate Adhoc Bulking' button.
6.3 Bulking and SWIFTNet Operations Monitor
This section contains the following topics:
6.3.1 Managing Connectivity Operations
You can start or stop the connectivity operations from 'Connectivity Operation Manager' screen. To invoke this screen, type 'MSDCNMGR' in the field at the top right corner of the application toolbar and click the adjoining arrow button.

Specify the following details to search for the connectivity.
Connectivity Line
Specify the connectivity line name. The option list displays all valid connectivity lines maintained in the system. Select the appropriate one.
Operation Mode
Select the operation mode based on which you need to filter the connectivity line search. You can select one of the following operation modes.
- Inbound
- Outbound
Once you have specified the above details, click 'Search' button. The system displays the connectivity lines based on the search parameters specified, with the following details.
- Connectivity line
- Operation mode
- Status, whether running or stopped
- Operation
You can select one or more connectivity lines that you wish to manage, by checking the adjoining check-box. Following buttons are available on the screen to manage the operations.
- Start - Click 'Start' button to start the operation.
- Stop - Click 'Stop' button to stop the operation.
6.4 Outbound File Browser
You can use the outbound file browser for searching and viewing the outbound files. To invoke the screen, type 'MSSFLBRW' in the field at the top right corner of the application toolbar and click the adjoining arrow button.
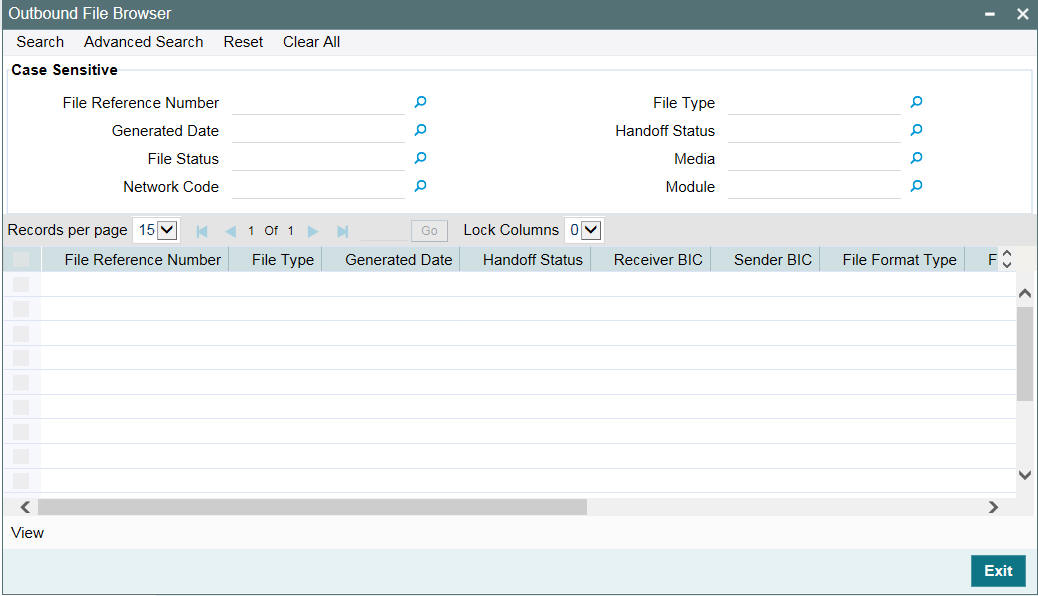
You can search for the records based on one or more of the following parameters:
- File name of the bulked file
- Bulk reference number
- Generated date
- Status
- Bulk preference
Once you have specified the above details, click 'Execute Query' button. The system displays the records that match the search criteria. You can double-click a record to view the details in the 'Outbound File Browser Details' (MSDFLBRW) screen. You can view the following details in this screen.
- File name
- Bulk reference number
- File ID
- Generated date
- Generated time
- Status
- Bulk preference
- Number of transactions
- File size
You can resend the selected file from this screen using the 'Resend' button.
6.5 Inbound File Browser
You can use the inbound file browser for searching and viewing the inbound files. To invoke the screen, type 'MSSIFBRW' in the field at the top right corner of the application toolbar and click the adjoining arrow button.
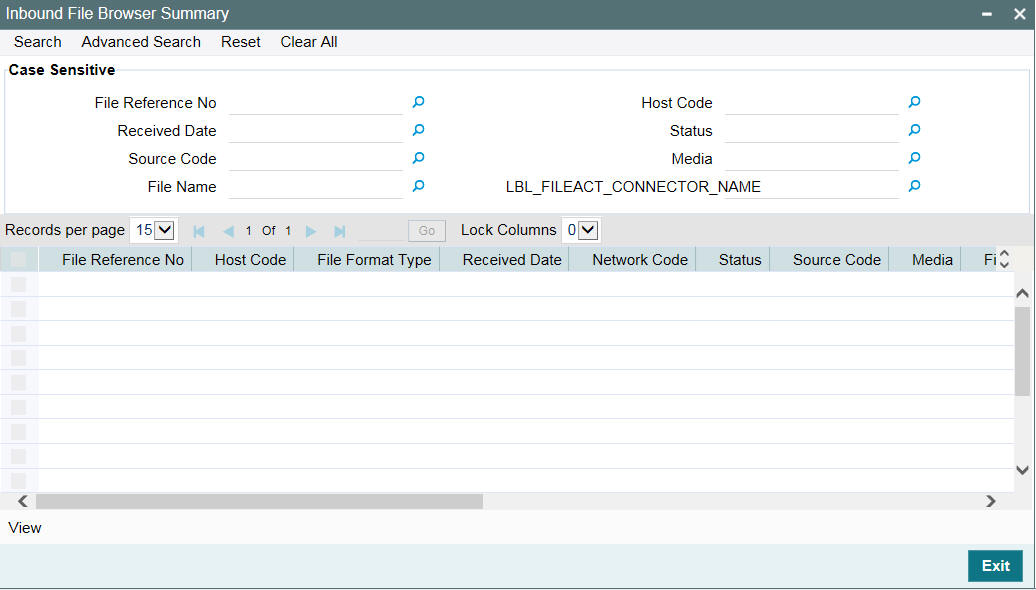
You can search for the records based on one or more of the following parameters:
- File name
- Received date
- Status
- Logical file name
- Transaction ID
- File Act connector name
Once you have specified the above details, click 'Execute Query' button. The system displays the following details of records that match the search criteria.
- File name
- Received Date
- Received Time
- Status
- File Size
- Logical File Name
- Transaction Id
- FileAct Connector Name
- Error Code
- Error Parameter
- Error Description