11. Reports
Every action that results in a debit or credit to the customer’s monetary account is recorded. The advices are generated and sent to the customer depending on the advice generation frequency that you have specified.
You can generate the following reports:
- IRA Statement
- Minimum Withdrawal Advice
- Charge Advice
- IRS Form 5498
- IRS Form 1099-R
- Customer Account Opening Confirmation
- Float Extension Report
- Netting
- Combined Statement Reports
- Missing Signature Report
This chapter contains the following sections:
- Section 11.1, "Maintaining Printing Options for Reports"
- Section 11.2, "IRA Statement Reports"
- Section 11.3, "Minimum Withdrawal Advice Reports"
- Section 11.4, "Charge Advice Reports"
- Section 11.5, "IRS Form 5498"
- Section 11.6, "IRS Form 1099-R"
- Section 11.7, "Customer Account Opening Confirmation Report"
- Section 11.8, "Report for NSF Returned Cheque"
- Section 11.9, "Report of Blacklisted Customers"
- Section 11.10, "Report of Blacklisted Customers from Central Bank"
- Section 11.11, "Report for Actions Triggered During NSF Status Change"
- Section 11.12, "Netting Report"
- Section 11.13, "Combined Statement Reports"
- Section 11.14, "Missing Signature Report"
- Section 11.15, "Large Credit Transaction Report"
- Section 11.16, "Large Debit Transaction Report"
- Section 11.17, "Daily Account Opening Statistics Report"
- Section 11.18, "Dormant Account Reactivated Report"
- Section 11.19, "360 Degree Customer Report"
- Section 11.20, "Netting Group Transaction Report"
- Section 11.21, "Print Maintenance Control Log Report"
11.1 Maintaining Printing Options for Reports
You can indicate preferences to print a report, while generating a report; however, the preferences are general.
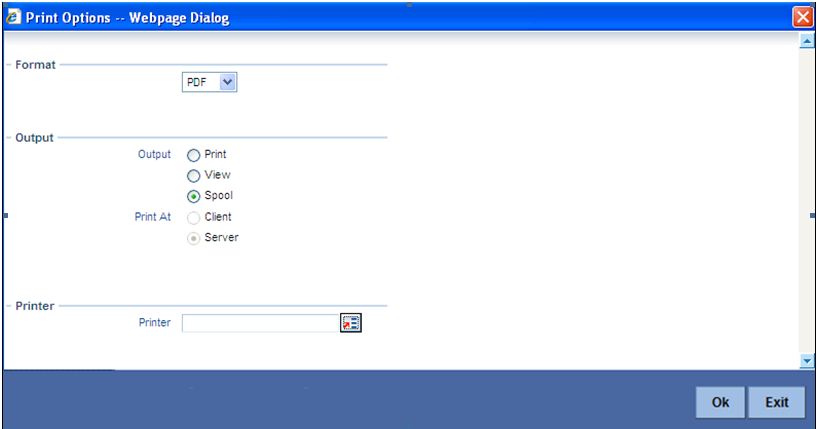
The following are the common preferences you can maintain to print a report:
Format
Select the format in which you want the report to be generated from the options provided in the drop-down list. The following options are available:
- HTML
- RTF
- Excel
Output
Select the output for the report from the options provided. The following options are available:
- Print – select this option if you wish to print the report
- View – select this option if you wish to view the contents of the report
- Spool – select this option if you wish to spool the report for further use
Printer At
Select location where you wish to print the report from the adjoining drop-down list. This list displays the following values:
- Client – Select if you need to print at the client location.
- Server – Select if you need to print at the server location
Printer
Specify the name of the printer or select it from the option list provided. All the configured printers are displayed in the list.
This is applicable only if you have specified the output as ‘Print’.
11.2 IRA Statement Reports
This section contains the following topics:
- Section 11.2.1, "Generating IRA Statement Reports"
- Section 11.2.2, "Selection Options"
- Section 11.2.3, "Contents of the Report"
11.2.1 Generating IRA Statement Reports
An IRA statement is a statement of accounts for an IRA plan. You will be able to generate statements for a list of all the transactions carried out in an IRA plan for the statement generation frequency specified for the plan. You also have the option of generation on an ad-hoc basis.
11.2.2 Selection Options
You can choose to generate the account statements for transactions involving all plans within your branch or for transaction within a single plan or for a range of plans.
You will also have to indicate the date range for the generation of the report.
11.2.3 Contents of the Report
The options that you specified while generating the report are printed at the beginning of the report. The contents of the IRA Statement have been discussed under the following heads:
Header
The Header carries the title of the Report, information on the branch code, the date and time at which the report was generated and the page number of the report.
Body of the Report
Field Name |
Description |
Customer Information |
The CIF Number, full Name and mailing address of the customer as recorded in the CIF Maintenance screen |
Plan Number |
The reference number of the plan involving the transaction |
Plan Type |
The plan type involving the plan |
Period of the statement |
The period for which you are generating the statement |
Statement Number |
The statement number of the statement |
Plan Balances |
The balances in the plan at the beginning and end of statement period (Current and Previous Years) Note: The current balance is reflected for the current year and the year ending balance (after considering contributions and distributions done during the current year for the previous year) for the previous year. Total Contributions Excess Contributions Total Distributions Total Employer Contributions (where applicable) Excess Employer Contributions |
Transaction Information |
Transaction type (Contributions, Distributions, Monetary Account Interest). Transaction Reference Number Amount and Currency Transaction Year Monetary Account Breakup Account (Branch, Account, Currency) Amount and Currency Withholding Tax information (where applicable) Tax Withheld (Amount and Currency) Transaction Remark (if any) Plan Balance after the transaction (current and previous year balances) Transactions are sequenced in the manner in which they were processed in the system. |
11.3 Minimum Withdrawal Advice Reports
This section contains the following topics:
- Section 11.3.1, "Generating Minimum Withdrawal Advice Reports"
- Section 11.3.2, "Apart from the header the following details are printed for the report:"
- Section 11.4.2, "Contents of the Report"
11.3.1 Generating Minimum Withdrawal Advice Reports
This advice is sent to all customers approaching the minimum distribution age. The advice contains information about all the plans held by the customer under the plan type.
Since it is not generated automatically, you have to invoke the advice generation screen and identify the Plan Type and the Reference Number of the plan involving the plan type for which the minimum distribution age advice is to be generated.
11.3.2 Apart from the header the following details are printed for the report:
Body of the Report
Field Name |
Description |
Customer Information |
The CIF Number, full Name and mailing address of the customer as recorded in the CIF Maintenance screen. |
Plan Type |
The plan type involving the plan. |
Plans Held |
This information includes: Plan Number. Plan Balances (current year only) Plan Balance Total Contributions Excess Contributions Total Distributions Total Employer Contributions (where applicable) Excess Employer Contributions Plan Remarks (if any) |
11.4 Charge Advice Reports
This section contains the following topics:
11.4.1 Generating Charge Advice Reports
This advice is sent to all customers on whom you are levying a charge as a result of the IRA Charge set-up. The system generates this advice automatically as part of the EOD processes on the day the charge liquidation takes place.
11.4.2 Contents of the Report
Apart from the header the following details are printed for the report:
Body of the Report
Field Name |
Description |
Customer Information |
The CIF Number, full Name and mailing address of the customer as recorded in the CIF Maintenance screen. |
Charge Code |
The Code associated with the Charge for which you are charging the customer. |
Charge Level |
Indicates the level at which charging is being done: CIF Level or Plan level |
Plan Type |
The plan type involving the plan. |
Charge Amount and Currency |
The charge is always charged in the local currency of your branch. |
Liquidation Date |
The date on which the charge amount was liquidated. |
Debit Account Information |
The Branch, Account Number and Currency of the account involved in the transaction. |
11.5 IRS Form 5498
This section contains the following topics:
- Section 11.5.1, "Generating IRS Form 5498"
- Section 11.5.2, "Generating Form 5498 as Part of Initial Filing"
- Section 11.5.3, "Generating Form 5498 after Tax Filing"
- Section 11.5.4, "Details printed on Form 5498"
11.5.1 Generating IRS Form 5498
Oracle FLEXCUBE allows you to generate Form 5498 for reporting contributions to IRA plans for any year to the Internal Revenue Service (IRS). You can generate this report for:
- Filing with IRS authorities;
- Providing a copy to your customer;
- Keeping an internal copy for you.
You can generate Form 5498 either as part of initial filing with the IRS or after you have filed tax returns for that particular year.
11.5.2 Generating Form 5498 as Part of Initial Filing
During normal generation of Form 5498 as part of your initial filing with the IRS, the system will include all transactions entered in the previous year for the previous year. For example, during normal generation of Form 5498 on, say, January 20, 2003, all transactions entered during 2002 and pertaining to the financial year 2002 will be reported.
11.5.3 Generating Form 5498 after Tax Filing
During corrected generation post the date of tax filing, the system will include, apart from all the transactions included in normal generation, such transactions which are entered in the current year for the previous year. The report shows the total contributions for the year.
11.5.4 Details printed on Form 5498
Oracle FLEXCUBE generates Form 5498 customer-wise and plan-wise – that is, for each customer for each type of plan held by the customer. The type of plan can be Traditional IRA, Roth IRA, SEP, SIMPLE, etc.
The form contains the following details:
- Your bank’s name and address;
- The customer’s name, social security number and address;
- The plan/product type for which the form is being generated;
- The year for which the report is being generated;
- Total rollover contributions – this is the total of all contributions into plans of the selected type with ‘Rollover’ as the contribution code;
- Roth IRA conversion amount – while usually applicable for Roth IRAs, this, in the general case, is the total contribution into plans of the selected type with ‘Conversion’ as the contribution code;
- Total re-characterized contributions – this is the total of all contributions into plans of the selected type with ‘Re-characterization’ as the contribution code;
- New contributions – this is the total of all contributions into plans of the selected type with ‘New’ as the contribution code;
- Other contributions – this is the total of all contributions into plans of the selected type with contribution codes different from any of those mentioned above;
- Fair Market Value – this is the total year-end balance of all the plans of the selected type.
Note
IRA codes that you have marked for not reporting to the IRS will be left out of all of the above summations.
11.6 IRS Form 1099-R
This section contains the following topics:
- Section 11.6.1, "Generating IRS Form 1099-R"
- Section 11.6.2, "Generating Form 1099-R as Part of Initial Filing"
- Section 11.6.3, "Generating Form 1099-R after Tax Filing"
- Section 11.6.4, "Details printed on Form 1099-R"
11.6.1 Generating IRS Form 1099-R
Oracle FLEXCUBE allows you to generate Form 1099-R for reporting distributions from a selected type of IRA plan for any year to the Internal Revenue Service (IRS). You can generate this report for:
- Filing with IRS authorities;
- Providing a copy to your customer;
- Keeping an internal copy for you.
You can generate Form 1099-R either as part of initial filing with the IRS or after you have filed tax returns for that particular year.
11.6.2 Generating Form 1099-R as Part of Initial Filing
During normal generation of Form 1099-R as part of your initial filing with the IRS, the system will include all transactions entered in the previous year for the previous year. For example, during normal generation of Form 1099-R on, say, January 20, 2003, all transactions entered during 2002 and pertaining to the financial year 2002 will be reported.
11.6.3 Generating Form 1099-R after Tax Filing
During corrected generation post the date of tax filing, the system will include, apart from all the transactions included in normal generation, such transactions, which are entered in the current year for the previous year. The report shows the total contributions for the year.
11.6.4 Details printed on Form 1099-R
Oracle FLEXCUBE generates Form 1099-R for each customer for a distribution code. You have the option of combining distributions with the same code from any number of different plan/product types.
Note
IRA codes that you have marked for not reporting to the IRS will not be available for generation of 1099-R forms.
Form 1099-R contains the following details:
- Your bank’s name, address and identification number;
- The customer’s name, social security number and address;
- Plan/product types that are being reported;
- The distribution code and description;
- Gross distribution – this is the total distribution amount for the distribution code that you have chosen across all the selected plan types;
- Taxable amount – this is the same as the total (gross) distribution amount.
- Total distribution – this is a confirmation that the gross distribution amount mentioned in the form is the total distribution for the selected distribution code.
- Federal Income Tax withheld – this is the total amount withheld as tax for all the distributions (from all the selected plan/product types) for the selected distribution code.
11.6.4.1 Filling IRS Forms Electronically
IRS regulations stipulate that any entity filing 250 or more forms of each type must do so in electronic or magnetic form. You can access IRS’s Filing Information Returns Electronically (FIRE) system over a dial-up network and through a browser or through communication software like ProComm. You can log on to the system using the logon name, password and PIN provided to you by the IRS.
11.7 Customer Account Opening Confirmation Report
You can generate a report for the customer, confirming that his / her account with the bank has been successfully opened. This report contains the following details:
- Customer number
- Client account number
- Matter
- Account details
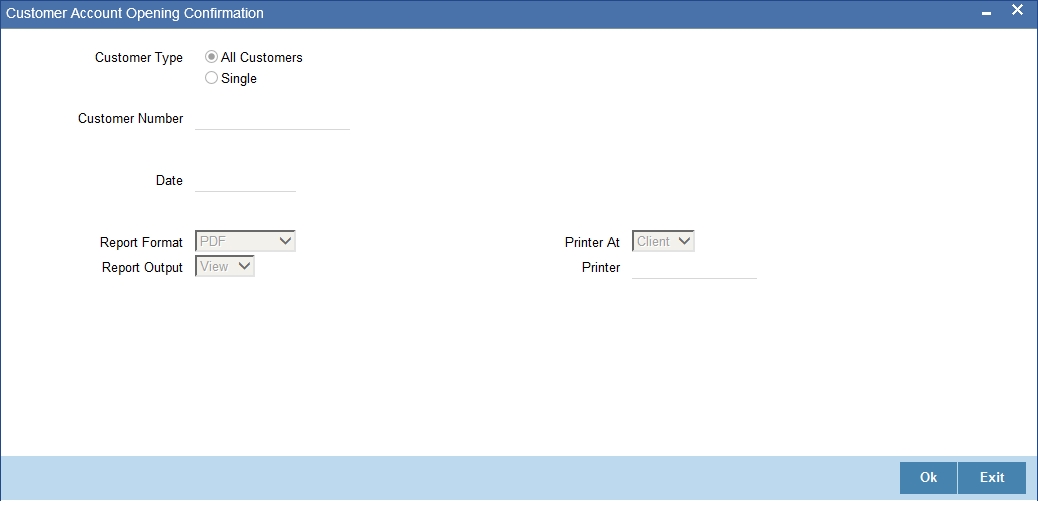
You can generate the Customer Account Opening Confirmation report for one customer or all the customers at once, as of a specific date. To generate the report, invoke ‘Customer Account Opening Confirmation’ screen.
You can invoke this screen by typing ‘CSRPACCO’ in the field at the top right corner of the Application tool bar and click on the adjoining arrow button.
The screen is as shown below:
Customer Report
You can generate customer account opening confirmation report for one or all the customers. Indicate your choice here. If you select ‘Single Customer’, you have to specify the customer number in the space provided.
Customer Number
If you wish to generate a report specific to one customer, specify the customer number. The option list displays all valid customer numbers maintained in the system. Select the appropriate one.
Date
Specify the date as of which you want to generate the report.
Once you have set the preferences, click ‘OK’ button. The system displays the print option screen, where you can set your preferences as to viewing and printing the report.
11.8 Report for NSF Returned Cheque
This section contains the following topics:
- Section 11.8.1, "Generating Report for NSF Returned Cheque"
- Section 11.8.2, "Contents of the Report"
11.8.1 Generating Report for NSF Returned Cheque
You can generate NSF report to list the returned cheque details. You can invoke ‘Cheque return Data Over Counter’ screen by typing ‘STRNSFC’ in the field at the top right corner of the Application tool bar and clicking on the adjoining arrow button.
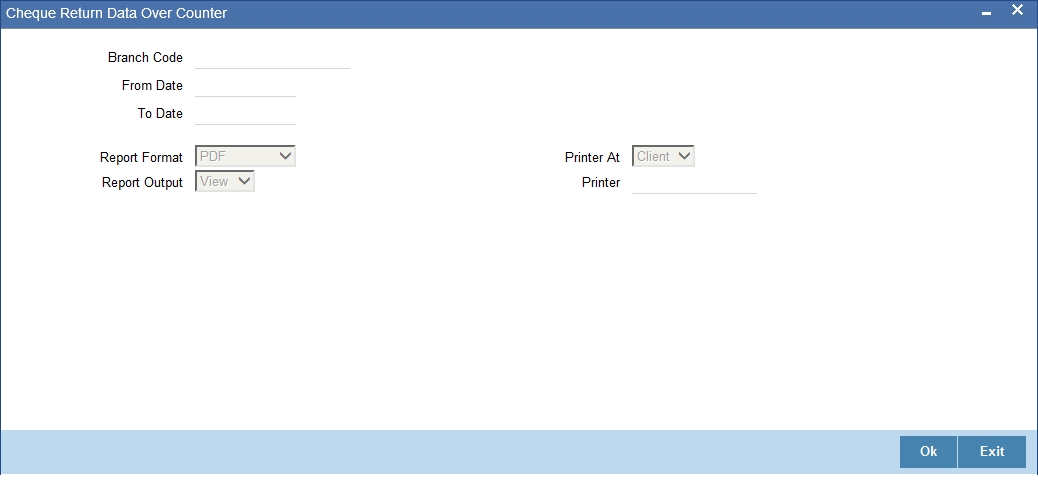
Specify the following here:
Branch Code
Select the transaction branch of the float extension from the adjoining option list.
From Date
Indicate the date from which transactions are extended. The system defaults current date. From Date should be lesser than or equal to ‘To Date’.
To Date
Indicate the date to which the transactions are extended. The system defaults current date. To Date should be lesser than or greater to ‘From Date’
11.8.2 Contents of the Report
The contents of the report are discussed under the following heads:
Header
The header carries the Branch Code, Account Type, Application Date.
Body of the Report
Field Name |
Description |
Bank Code |
Indicates the bank code |
Cheque No |
Indicates the Cheque No which is returned in the counter |
Account No |
Indicates the Account Number of the customer whose cheque is returned in the counter |
Blacklist Type |
Indicates the type of blacklist. |
Account Type |
Indicates the type of the account whose cheque has been rejected |
Reason |
Indicates the reason for the rejection |
Customer Name |
Indicates the name of the customer whose cheque has been rejected over the counter |
Customer Type |
Indicates the type of the customer (Individual / Joint). |
Unique Number |
Indicates the unique reference number for identifying the transaction. |
Date of Birth |
Indicates the date of birth of the customer. |
Address |
Indicates the contact address for the customer whose cheque has been rejected. |
City |
Indicates city of the customer. |
11.9 Report of Blacklisted Customers
This section contains the following topics:
11.9.1 Generating Blacklisted Customers Report
You can generate a report for blacklisted customers from internal banks and agencies. To invoke ‘Blacklisted Customers from Internal Bank’ screen, type ‘STRNSFBC’ in the field at the top right corner of the Application tool bar and click the adjoining arrow button.
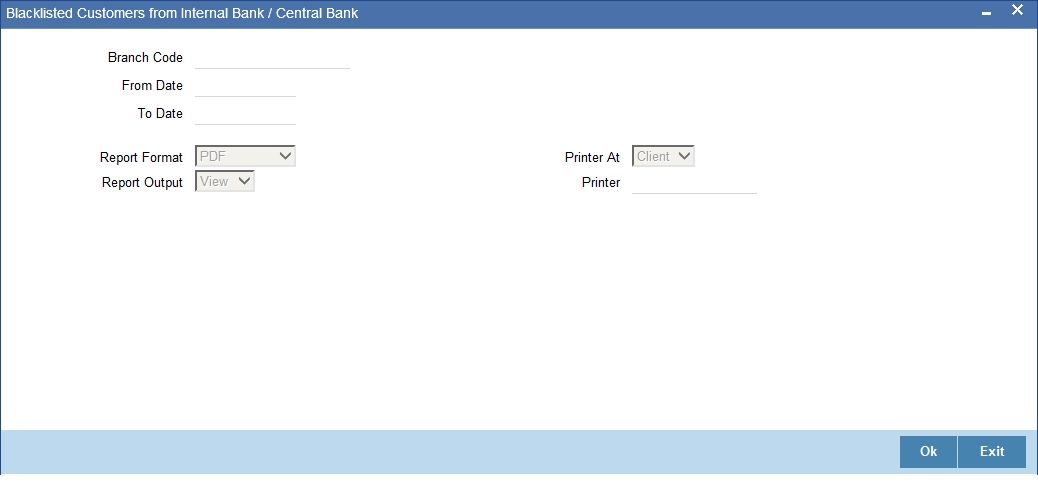
Specify the following here:
Branch Code
Select the transaction branch of the float extension from the adjoining option list.
From Date
Indicate the date from which transactions are extended. The system defaults current date. From Date should be lesser than or equal to ‘To Date’.
To Date
Indicate the date to which the transactions are extended. The system defaults current date. To Date should be lesser than or greater to ‘From Date’
Report Format
Select the format in which you need to generate the report from the adjoining drop-down list. This list displays the following values:
- HTML - Select to generate report in HTML format.
- RTF - Select to generate report in RTF format.
- PDF - Select to generate report in PDF format.
- EXCEL - Select to generate report in EXCEL format.
Report Output
Select the report output in which you need to generate the report from the adjoining drop-down list. This list displays the following values:
- Print - Select to print the report.
- View - Select to print the report.
- Spool - Select to spool the report to a specified folder so that you can print it later.
PrinterAt
Select location where you wish to print the report from the adjoining drop-down list. This list displays the following values:
- Client - Select if you need to print at the client location.
- Server - Select if you need to print at the server location
Printer
Select printer using which you wish to print the report from the adjoining option list.
11.9.2 Contents of the Report
The contents of the report are discussed under the following heads:
Header
The header carries the Branch Code, Blacklisted Type, Application Date.
Body of the Report
Field Name |
Description |
Cust No |
Indicates the customer identification number of the customer who is marked as blacklisted customer in central bank / internal bank |
A/c No |
Indicates the primary account no of the customer who is marked as blacklisted customer |
Brn Code |
Indicates the branch of the customer account |
NSF Level |
Indicates the current NSF level for the customer |
Description |
Indicates the NSF level description |
IB Status |
Indicates the Internal blacklist status, |
IB Status Desc |
Indicates the description for the internal blacklist |
IB Eff Date |
Indicates the effective date from which the customer is marked as internally blacklisted customer |
IB ExpDate |
Indicates the effective date till which the customer is marked as internally blacklisted customer |
CB Status |
Indicates the central bank blacklist status of the customer |
CB Status Desc |
Indicates the description for the central bank blacklist status |
CB Eff Date |
Indicates the effective date from which the customer is marked as central bank blacklist status |
CB Exp Date |
Indicates the effective date till which the customer is marked as central bank blacklist status |
11.10 Report of Blacklisted Customers from Central Bank
This section contains the following topics:
- Section 11.10.1, "Generating Central Bank Blacklisted Customers Report"
- Section 11.10.2, "Contents of the Report"
11.10.1 Generating Central Bank Blacklisted Customers Report
You can generate a report for blacklisted customers from central bank or agencies. You can invoke ‘Blacklisted Customers from Central Bank’ screen by typing ‘STRNSFCB’ in the field at the top right corner of the Application tool bar and clicking on the adjoining arrow button.
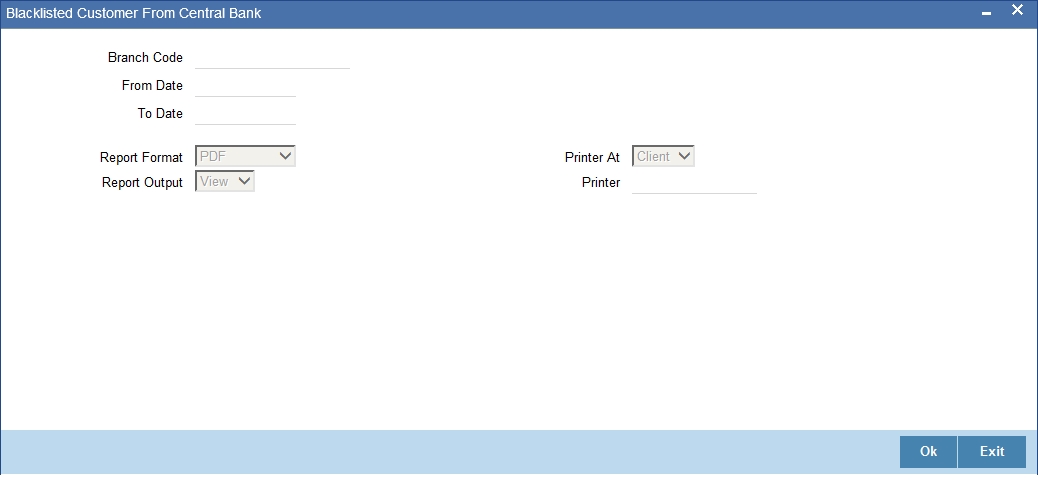
Specify the following here:
Branch Code
Select the transaction branch of the float extension from the adjoining option list.
From Date
Indicate the date from which transactions are extended. The system defaults current date. From Date should be lesser than or equal to ‘To Date’.
To Date
Indicate the date to which the transactions are extended. The system defaults current date. To Date should be lesser than or greater to ‘From Date’.
Report Format
Select the format in which you need to generate the report from the adjoining drop-down list. This list displays the following values:
- HTML - Select to generate report in HTML format.
- RTF - Select to generate report in RTF format.
- PDF - Select to generate report in PDF format.
- EXCEL - Select to generate report in EXCEL format.
Report Output
Select the report output in which you need to generate the report from the adjoining drop-down list. This list displays the following values:
- Print - Select to print the report.
- View - Select to print the report.
- Spool - Select to spool the report to a specified folder so that you can print it later.
PrinterAt
Select location where you wish to print the report from the adjoining drop-down list. This list displays the following values:
- Client - Select if you need to print at the client location.
- Server - Select if you need to print at the server location
Printer
Select printer using which you wish to print the report from the adjoining option list.
11.10.2 Contents of the Report
The contents of the report are discussed under the following heads:
Header
The header carries the Branch Code, Blacklisted Type, Application Date.
Body of the Report
Field Name |
Description |
Customer No |
Indicates the customer identification number of the customer who is marked as blacklisted customer in central bank |
Branch Code |
Indicates the branch of the customer account |
Account No |
Indicates the customer account number |
NSF Level |
Indicates the current NSF level for the customer |
NSF Level Description |
Indicates the NSF level description |
Account No |
Indicates the primary account no of the customer who is marked as blacklisted customer |
IB Status |
Indicates the Internal blacklist status, |
IB Status Description |
Indicates the description for the internal blacklist |
IB Effective Date |
Indicates the effective date from which the customer is marked as internally blacklisted customer |
IB Expiry Date |
Indicates the effective date till which the customer is marked as internally blacklisted customer |
CB Status |
Indicates the central bank blacklist status of the customer |
CB Status Description |
Indicates the description for the central bank blacklist status |
CB Effective Date |
Indicates the effective date from which the customer is marked as central bank blacklist status |
CB Expiry Date |
Indicates the effective date till which the customer is marked as central bank blacklist status |
11.11 Report for Actions Triggered During NSF Status Change
This section contains the following topics:
- Section 11.11.1, "Generating Actions Triggered During NSF Status Change Report"
- Section 11.11.2, "Contents of the Report"
11.11.1 Generating Actions Triggered During NSF Status Change Report
You can generate a report to list the actions which are triggered during the NSF status change. You can invoke ‘NSF Action Details’ screen by typing ‘STRNSACT’ in the field at the top right corner of the Application tool bar and clicking on the adjoining arrow button.

Specify the following here:
Branch Code
Select the transaction branch of the float extension from the adjoining option list.
Customer No
Specify a valid customer number for which you want to generate the report from the adjoining option list.
From Date
Indicate the date from which transactions are extended. The system defaults current date. From Date should be lesser than or equal to 'To Date'.
To Date
Indicate the date to which the transactions are extended. The system defaults current date. To Date should be lesser than or greater to 'From Date'
Report Format
Select the format in which you need to generate the report from the adjoining drop-down list. This list displays the following values:
- HTML - Select to generate report in HTML format.
- RTF - Select to generate report in RTF format.
- PDF - Select to generate report in PDF format.
- EXCEL - Select to generate report in EXCEL format.
Report Output
Select the report output in which you need to generate the report from the adjoining drop-down list. This list displays the following values:
- Print - Select to print the report.
- View - Select to print the report.
- Spool - Select to spool the report to a specified folder so that you can print it later.
PrinterAt
Select location where you wish to print the report from the adjoining drop-down list. This list displays the following values:
- Client - Select if you need to print at the client location.
- Server - Select if you need to print at the server location
Printer
Select printer using which you wish to print the report from the adjoining option list.
11.11.2 Contents of the Report
The parameters specified while generating the report are printed at the beginning of the report.
The contents of the report are discussed under the following heads:
Header
The header carries the title of the report, branch code, branch name, module code, report generation date and time, user ID of the user who generated the report and the page number of the report.Body of the Report
Field Name |
Description |
Customer No |
Indicates the customer identification number of the customer who is marked as blacklisted customer |
Event No |
Indicates the Event number |
Action No |
Indicates the Action Number |
Action Comp |
Indicates the Action Component |
Status |
Indicates the Status |
Remarks |
Indicates the Remarks |
Err Code |
Indicates the Error Code |
Err Desc |
Indicates the Error Description |
Action Date |
Indicates the Action Date |
11.12 Netting Report
This section contains the following topics:
11.12.1 Generating Netting Report
You can generate a Customer, Currency and Date wise report to retrieve details of contracts/amounts that were netted.
You can specify the following preferences for the report:
- Report Type - You can indicate whether the report should contain details of contracts/amounts that have the same Value Date or whether the details should be generated as per the Netting Reference Number. If you indicate that the report should be generated for a Netting Reference Number you will have to identify the number in the respective field.
- Date – indicate whether you would like to generate the report for a specific date range or for all dates. Depending on your specification the netting details report will be generated for all contracts that were netted within your branch for the given date range (start and end date inclusive) or it will be generated for all contracts regardless of the date on which they were netted.
- Customer – indicate whether the report should contain details of all customers whose contracts were netted or for a single customer. For a single customer you will have to identify the CIF ID of the customer from the option list.
- Currency - You can indicate whether the report should be generated for all currencies or for a specific currency. Identify the currency for which the report should be generated in case of a single currency.
Note
- If you fail to specify a date, the generated report will return data for the Current System Date.
- If you indicate that the report should be generated for a specific Currency and fail to specify the Currency, the report will contain details of all currencies. Similarly, if you indicate that the report should be generated for a specific Customer and fail to identify the customer the report will be generated for all customers.
11.12.2 Contents of the Report
The report options that you selected while generating the report are printed at the beginning of the report.
The contents of the report are discussed below:
Body of the Report
Field Name |
Description |
Counterparty |
This is the name of the counterparty whose netted contract details are being displayed. |
Contract Reference Number |
This is the reference number of the contract which was netted. |
Component |
This is the name of the component (Amount Tag) involved in the transaction. |
Amount |
This is the amount for which the particular entry was passed. |
Account Due |
This is the account to which the netted amount is either debited/credited. |
11.13 Combined Statement Reports
This section contains the following topics:
11.13.1 Generating Combined Statement Reports
This report is an ad-hoc combined statement of accounts for a customer, generated for a particular period. This report is grouped account class wise. This report helps in providing a single statement to the customers who own multiple accounts.
You can invoke ‘Statement of Combined Generation’ screen by typing ‘CSRCSTAD’ in the field at the top right corner of the Application tool bar and clicking on the adjoining arrow button.
The screen is as shown below:
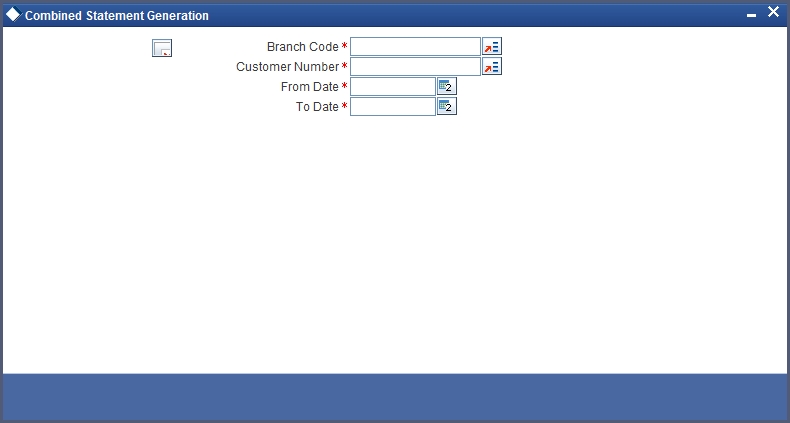
Specify the following details here:
Branch Code
Select the branch code from the adjoining option-list. The list displays all valid branch codes.
Customer No
Select the customer number from the adjoining option-list. This list displays all valid customers maintained in the system.
From Date
Select the From date for statement generation. By default the current application date is displayed here.
To Date
Select the To date for statement generation. By default the current application date is displayed here.
Click ‘OK’ button to generate the report. Click ‘Exit’ to return to the Reports Browser.
11.13.2 Contents of the Report
The contents of the report are discussed under the following heads:
Header
The header carries the Customer Name, Customer Address, Account Class, Account Number, Opening balance, Currency and Branch.
Body of the Report
Field Name |
Description |
Account Class |
This indicates the account class |
Account Number |
This indicates the account number |
Branch |
This indicates the branch code |
Opening Balance |
This indicates the opening balance |
Transaction Date |
This indicates the transaction date |
Transaction Reference |
This indicates the transaction reference |
Transaction Code |
This indicates the transaction code |
Description |
This is the description of the transaction |
Ccy |
This indicates the currency of the transaction |
Credit Amount |
This indicates the Credit amount |
Debit Amount |
This indicates the Debit amount |
Balance |
This indicates the Balance |
11.14 Missing Signature Report
This section contains the following topics:
11.14.1 Generating Missing Signature Report
This is an exception report listing all the customers, of a specified branch, whose signatures have not yet been captured in the system.
While opening accounts, customer's signature/photographs/thumb impression are captured and linked to the account. This facilitates the signature verification in the system at the time of making payment. Branches can generate this ad-hoc report, and capture the missing signature in the system.
You can invoke ‘Signatures not Captured’ screen by typing ‘CSRSNREP’ in the field at the top right corner of the Application tool bar and clicking on the adjoining arrow button.
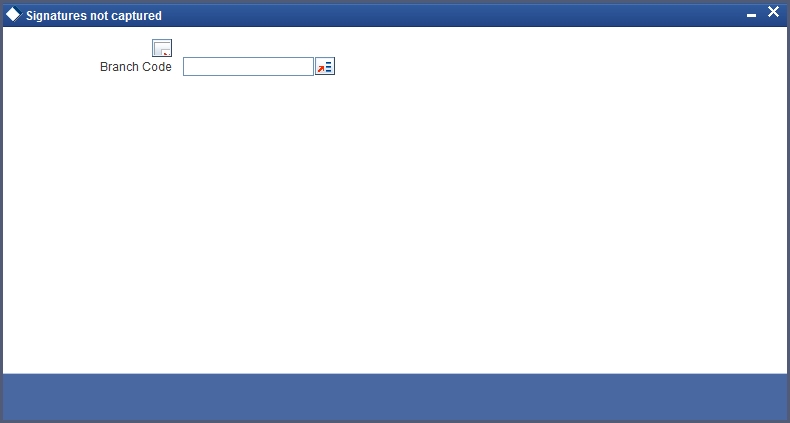
Specify the following details here:
Branch Code
Select the branch code from the adjoining option-list. The list displays all valid branch codes.
Click ‘OK’ button to generate the report. Click ‘Exit’ to return to the Reports Browser.
11.14.2 Contents of the Report
The contents of the report are discussed under the following heads:
Header
The Header carries the Branch, Date, User ID and the Module for which the report is generated.
Body of the report
The generated report will have the following information:
Field Name |
Description |
Customer ID |
This indicates the unique id of the customer |
Customer Name |
This indicates the name of the customer |
CIF Creation Date |
This indicates the creation date of the customer |
Check ID |
This indicates the id of the check ID of the authorizer |
11.15 Large Credit Transaction Report
This section contains the following topics:
- Section 11.15.1, "Generating Large Credit Transaction Report"
- Section 11.15.2, "Contents of the Report"
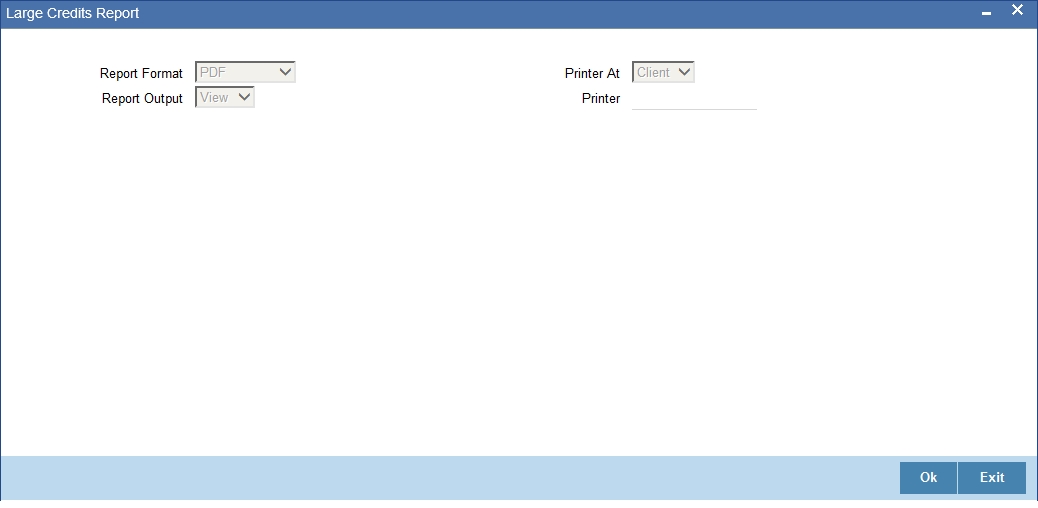
11.15.1 Generating Large Credit Transaction Report
You can invoke 'Large Credits Report' screen by typing 'CSRCRDR' in the field at the top right corner of the Application tool bar and clicking on the adjoining arrow button.
The screen is as shown below:
11.15.2 Contents of the Report
The contents of the report are discussed under the following heads:
Header
The header carries the Report Name, Branch, Branch Date, User Id, Module, Run Date and Time.
Body of the Report
Field Name |
Field Description |
Branch Code |
Indicates the branch code |
Account Number |
Indicates the account number |
Customer Name |
This indicates the name of the customer |
Amount Credited |
Indicates the amount credited. The credit transaction amount of the current day is displayed which is greater than 50,000 or 500,000. For retail customers an amount greater than 50,000 is displayed. For corporate customers an amount greater than 500,000 is displayed. |
Total Amount Credited |
Indicates the total amount credited. The total of credit transactions for the last 60 days including the current is displayed. |
Average Credit |
Indicates the average credit. This value is calculated as the total amount credited (including the current day’s transactions) / 60. |
Largest Credit |
Indicates the largest credit. The highest credit transaction for the last 60 days (including the current day’s transaction) is displayed. The amount displayed should be greater than 50,000 or 500,000. |
Date of Largest Credit |
Indicates the date of the largest credit |
Customer MIS code |
Indicates the customer MIS code |
11.16 Large Debit Transaction Report
This section contains the following topics:
- Section 11.16.1, "Generating Large Debit Transaction Report"
- Section 11.16.2, "Contents of the Report"
11.16.1 Generating Large Debit Transaction Report
You can invoke 'Large Debits Report' screen by typing 'CSRDEBR' in the field at the top right corner of the Application tool bar and clicking on the adjoining arrow button.
The screen is as shown below:

11.16.2 Contents of the Report
The contents of the report are discussed under the following heads:
Header
The header carries the Report Name, Branch, Branch Date, User Id, Module, Run Date and Time.
Body of the Report
Field Name |
Field Description |
Branch Code |
Indicates the branch code |
Account Number |
Indicates the account number |
Customer Name |
This indicates the name of the customer |
Amount Debited |
Indicates the amount debited. The debit transaction amount of the current day is displayed which is greater than 50,000 or 500,000. For retail customers an amount greater than 50,000 is displayed. For corporate customers an amount greater than 500,000 is displayed. |
Total Amount Debited |
Indicates the total amount debited. The total of debit transactions for the last 60 days including the current is displayed. |
Average Debit |
Indicates the average debit. This value is calculated as the total amount debited (including the current day’s transactions) / 60. |
Largest Debit |
Indicates the largest debit. The highest debit transaction for the last 60 days (including the current day’s transaction) is displayed. The amount displayed should be greater than 50,000 or 500,000. |
Date of Largest Debit |
Indicates the date of the largest debit |
11.17 Daily Account Opening Statistics Report
This section contains the following topics:
- Section 11.17.1, "Generating Daily Account Opening Statistics Report"
- Section 11.17.2, "Contents of the Report"
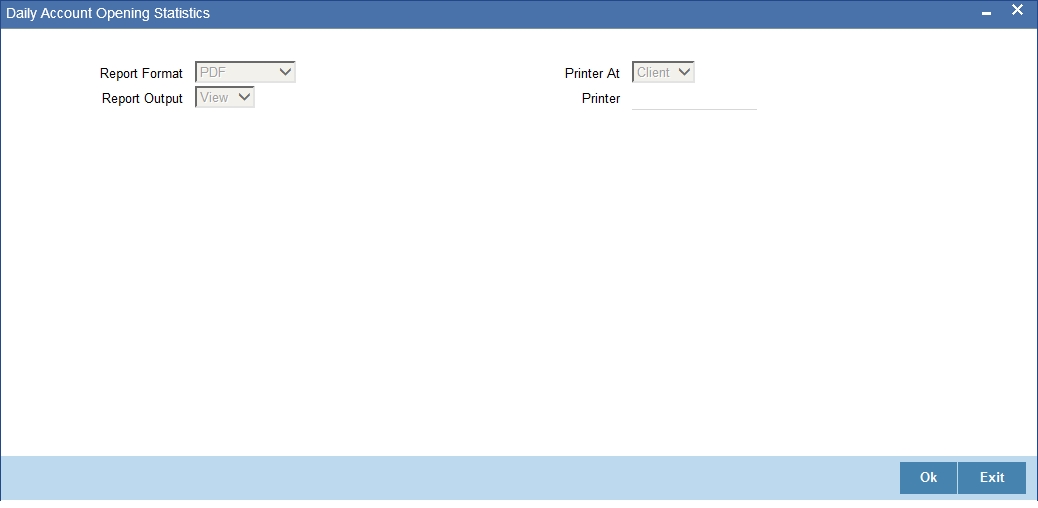
11.17.1 Generating Daily Account Opening Statistics Report
You can invoke 'Daily Account Opening Statistics Report' screen by typing 'CSRDLACC' in the field at the top right corner of the Application tool bar and clicking on the adjoining arrow button.
The screen is as shown below:
11.17.2 Contents of the Report
The contents of the report are discussed under the following heads:
Header
The header carries the Report Name, Branch, Branch Date, User Id, Module, Run Date and Time.
Body of the Report
Field Name |
Field Description |
Branch |
Indicates the branch |
Account Number |
Indicates the account number |
Account Type |
Indicates the type of the account |
Account Name |
Indicates the name of the account |
Processor ID |
Indicates the processor Id |
Authorizer ID |
Indicates the authorizer Id |
Customer Name |
This indicates the name of the customer |
11.18 Dormant Account Reactivated Report
This section contains the following topics:
- Section 11.18.1, "Generating Dormant Account Reactivated Report"
- Section 11.16.2, "Contents of the Report"
11.18.1 Generating Dormant Account Reactivated Report
You can invoke 'Dormant Account Reactivated Report' screen by typing 'CSRDRMAC' in the field at the top right corner of the Application tool bar and clicking on the adjoining arrow button.
The screen is as shown below:
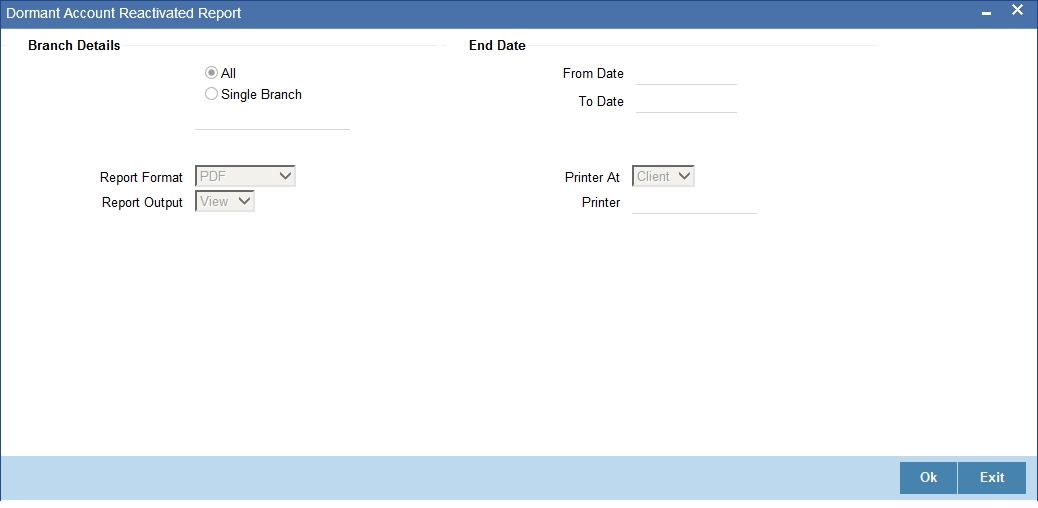
Branch Code
You can generate this report for all the branches or a single branch alone. You can indicate the branch for which the report is being generated using the following options:
- All - If you choose this, the system will generate the report for all the branches.
- Single - If you choose this, you need to specify the branch code for which the report should be generated. The option list displays all valid branch codes maintained in the system. Choose the appropriate one.
From Date
Specify a valid date from when you wish to generate the report from the adjoining calendar.
To Date
Specify a valid date till when you wish to generate the report from the adjoining calendar.
11.18.2 Contents of the Report
The parameters specified while generating the report are printed at the beginning of the report. Other content displayed in the report is as follows:
Header
The header carries the Report Name, Branch, Branch Date, User Id, Module, Run Date and Time.
Body of the Report
Field Name |
Field Description |
Customer Ac No |
Indicates the account number of the customer |
Customer Type |
Indicates the type of the account |
Customer Name |
This indicates the name of the customer |
Currency |
Indicates the currency |
Re-activation Date |
Indicates the re-activation date |
Dormancy Start Date |
Indicates the start date of dormancy |
Local Branch |
Indicates the local branch |
Branch Code |
Indicates the branch code |
Branch Name |
Indicates the name of the branch |
Checker ID |
Indicates the identification of the checker who authorized the record |
Checker Date |
Indicates the date on which the record was authorized |
Maker ID |
Indicates the identification of the maker of the record |
Maker Date |
Indicates the date when the record was created |
11.19 360 Degree Customer Report
This section contains the following topics:
11.19.1 Generating 360 Degree Customer Report
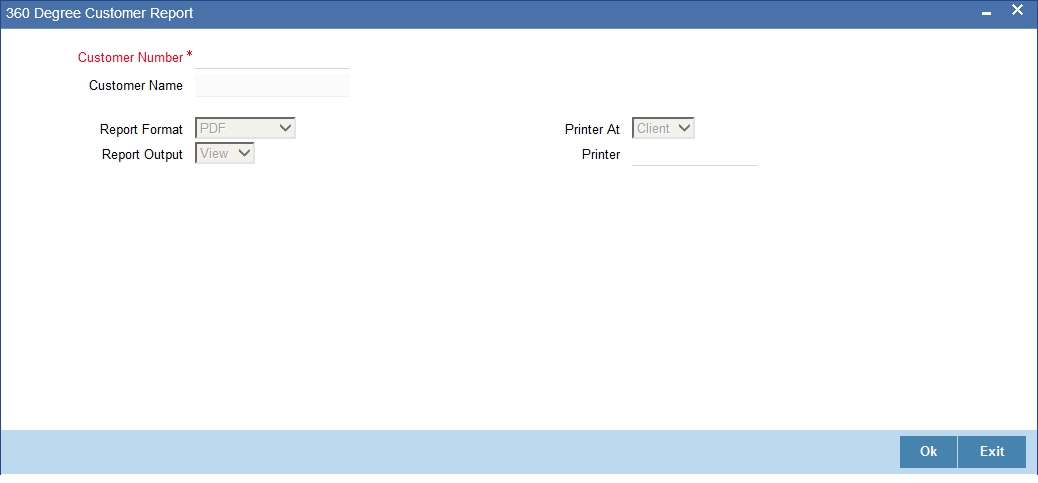
The 360 Degree Customer report provides 360 Degree Customer details. You can invoke the screen by typing 'STRCUSRP' in the field at the top right corner of the Application tool bar and click on the adjoining arrow button.
You can specify the following parameters:
Customer Number
Specify a valid customer number for which you want to generate the report from the adjoining option list.
Customer Name
System defaults the customer name of the selected customer number.
11.19.2 Contents of the Report
The parameters specified while generating the report are printed at the beginning of the report. Other content displayed in the report is as follows:
Header
The following details are displayed in the header section:
Field Name |
Field Description |
Branch |
Indicates Branch Code and Branch Name |
Branch Date |
Indicates Current Date of the Branch |
User ID |
Indicates User ID |
Date & Time |
Indicates the Date and Time when the report was generated |
Module |
Indicates module for which report is generated. |
Body of the Report
The following details are displayed as body of the generated report:
Field Name |
Field Description |
Customer Details |
Displays Customer Details |
Retail Deposit Details |
Displays Retail Deposit Details |
Corporate Deposit Details |
Displays Corporate Deposit Details |
Islamic Deposit Details |
Displays Islamic Deposit Details |
Consumer Loans |
Displays Consumer Loans Details |
Mortgage |
Displays Mortgage Details |
Leasing |
Displays Leasing Details |
Syndicate Loan Details |
Displays Syndicate Loan Details |
Islamic Financing |
Displays Islamic Financing Details |
CASA Deposits |
Displays CASA Deposits Details |
Islamic Accounts |
Displays Islamic Accounts Details |
Bills Details |
Displays Bills Details |
Islamic Bills |
Displays Islamic Bills Details |
LC Details |
Displays LC Details |
Islamic LC Details |
Displays Islamic LC Details |
Foreign Exchange Details |
Displays Foreign Exchange Details |
Money Market Details |
Displays Money Market Details |
Security Portfolio |
Displays Security Portfolio Details |
Derivatives |
Displays Derivatives Details |
OTC Options |
Displays OTC Options Details |
ETD Portfolio Details |
Displays ETD Portfolio Details |
Islamic Money Market Details |
Displays Islamic Money Market Details |
Islamic Derivatives |
Displays Islamic Derivatives Details |
Upcoming Events |
Displays Upcoming Events Details |
Overdue Loans |
Displays Overdue Loans Details |
Term Deposits Matured But Not Liquidated or Renewed |
Displays Term Deposits Matured But Not Liquidated or Displays Renewed Details |
Corporate Deposits Matured But Not Liquidated or Renewed |
Displays Corporate Deposits Matured But Not Liquidated or Displays Renewed Details |
Locker Due |
Displays Locker Due Details |
Cheque Return |
Displays Cheque Return Details |
Amount Blocks |
Displays Amount Blocks Details |
Stop Payments |
Displays Stop Payments Details |
Limits |
Displays Limits Details |
Line Details |
Displays Line Details |
Collateral Details |
Displays Collateral Details |
SCHEMES |
Displays Schemes Details |
Fund Transfer Details |
Displays Fund Transfer Details |
Payments and Collections Details |
Displays Payments and Collections Details |
Mutual Fund |
Displays Mutual Fund Details |
Insurance |
Displays Insurance Details |
Credit Card |
Displays Credit Card Details |
11.20 Netting Group Transaction Report
This section contains the following topics:
- Section 11.20.1, "Generating Netting Group Transaction Report"
- Section 11.20.2, "Contents of the Report"
11.20.1 Generating Netting Group Transaction Report
The Netting Group Transaction report provides netting group transaction details. You can invoke the screen by typing 'STRGRNET' in the field at the top right corner of the Application tool bar and click on the adjoining arrow button.

You can specify the following parameters:
Group Code
Specify a valid group code for which you want to generate the report from the adjoining option list.
Account Number
You can generate the report based on the following account number criteria. The following options are available for section:
- All
- One
Specify a valid account number for which you want to generate the report from the adjoining option list, if you have selected 'One'.
Date
You can generate the report based on the following date criteria. The following options are available for section:
- All
- One
Specify a valid date for which you want to generate the report from the adjoining option list, if you have selected 'One'.
11.20.2 Contents of the Report
The parameters specified while generating the report are printed at the beginning of the report. Other content displayed in the report is as follows:
Header
The following details are displayed in the header section:
Field Name |
Field Description |
Branch |
Indicates Branch Code and Branch Name |
Branch Date |
Indicates Current Date of the Branch |
User ID |
Indicates User ID |
Date & Time |
Indicates the Date and Time when the report was generated |
Module |
Indicates module for which report is generated. |
Body of the Report
The following details are displayed as body of the generated report:
Field Name |
Field Description |
Netting Reference Number |
Indicates Netting Reference Number |
Netting Date |
Indicates Netting Date |
Account Number |
Indicates Account Number |
Account Branch |
Indicates Account Branch |
Account Currency |
Indicates Account Currency |
Transaction Reference Number |
Indicates Transaction Reference Number |
Transaction Date |
Indicates Transaction Date |
Debit Amount |
Indicates Debit Amount |
Credit Amount |
Indicates Credit Amount |
Total Debit |
Indicates Total Debit |
Total Credit |
Indicates Total Credit |
Net Debit |
Indicates Net Debit |
Net Credit |
Indicates Net Credit |
11.21 Print Maintenance Control Log Report
This section contains the following topics:
- Section 11.21.1, "Generating Print Maintenance Control Log Report"
- Section 11.21.2, "Contents of the Report"
11.21.1 Generating Print Maintenance Control Log Report
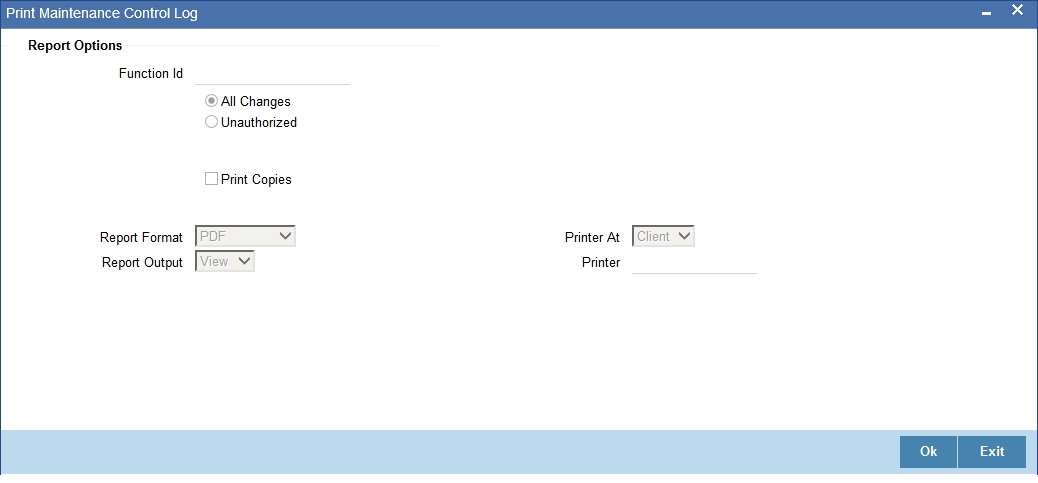
The Print Maintenance Control Log report provides print maintenance control log details. You can invoke the screen by typing 'STRMSMLG' in the field at the top right corner of the Application tool bar and click on the adjoining arrow button.
You can specify the following parameters:
Report Options
You can specify the following parameters:
Function ID
Specify a valid Function ID for which you want to generate the report from the adjoining option list.
You can generate the report based on the following change criteria. The following options are available for section:
- All changes
- Unauthorized
Print Copies
Check this box if you wish to print copies of the report.
11.21.2 Contents of the Report
The parameters specified while generating the report are printed at the beginning of the report. Other content displayed in the report is as follows:
Header
The following details are displayed in the header section:
Field Name |
Field Description |
Branch |
Indicates Branch Code and Branch Name |
Branch Date |
Indicates Current Date of the Branch |
User ID |
Indicates User ID |
Date & Time |
Indicates the Date and Time when the report was generated |
Module |
Indicates module for which report is generated. |
Body of the Report
The following details are displayed as body of the generated report:
Field Name |
Field Description |
Maintenance Program |
Indicates Maintenance Program |
Action |
Indicates Action |
Mod Number |
Indicates Mod Number |
Field Name |
Indicates Field Name |
New Value |
Indicates New Value |
Old Value |
Indicates Old Value |
Maker ID |
Indicates Maker ID |
Maker Date |
Indicates Maker Date |
Checker ID |
Indicates Checker ID |
Checker Date |
Indicates Checker Date |