3. Maintenances and Operations
Before you begin using the Consumer Lending module, you must maintain the following information in the system:
Bank Parameters
These are parameters that you need to specify at the bank level. These will include the following:
- Interest calculation parameters
- Amount blocks on inactive accounts
- Splitting of accounting entries for the offset leg
- Site specific maintenances
Branch Parameters
These are parameters that you need to specify at the branch level. These will determine the following:
- Batch processing during holidays
- Netting of accounting entries for accrual, liquidation and status change
- Default Settlement Accounts
- Format/Mask for generation of Account numbers etc
- The structure of the schedule
- Schedule gap treatment
In addition, you also have to maintain the following:
UDE (User Data Elements) Rules
UDEs are used to build formulae to calculate the amount of interest applicable. These include entities like Interest Rate, Amount Slab etc. that will hold values you provide. The UDEs themselves are defined at the product level but you can use these UDEs to build rules with different conditions based on which the UDE value should be arrived at.
You can maintain the UDE values at Product and Account level. You can also maintain Fixed amount UDEs in other currencies.
Repayment holiday periods
For a calendar year, you can define holiday periods for customers during which they can avail a repayment holidays.
Check Lists
For different events, you can maintain check lists. The check lists that you maintain here will be validated during the execution of that event while processing the loan.
System Data Elements (SDEs)
Information that is constantly updated by the system, for instance, the balance in an account, number of transactions processed etc. is referred to as SDEs. This information is readily available for computation of penalties, Interest or charges. You need to identify the SDEs applicable for this module.
You can maintain floating rates for a Rate Code, Currency, Amount Slab and Effective Date combination
User Defined Policies
These are validation and operations that are performed during the life cycle of a loan
Promotions
Promotions are special offers whereby you can offer special incentives/ concessions to customers. You can link loans to one or more promotions
The above maintenances are discussed in detail in this chapter.
This chapter contains the following sections:
- Section 3.1.1, "Maintaining Inter Branch Parameters"
- Section 3.2.1, "Maintaining Bank Parameters"
- Section 3.3.1, "Maintaining Branch Parameters"
- Section 3.4, "UDE Value Maintenance for Loans"
- Section 3.5, "Adhoc Charge Maintenance"
- Section 3.7.1, "Maintaining Holiday Periods "
- Section 3.8, "Maintaining Check Lists"
- Section 3.9, "Maintaining System Data Elements "
- Section 3.10, "Maintaining Floating Interest Rates"
- Section 3.11, "Maintaining User Defined Policies "
- Section 3.12, "Maintaining Standard Policies"
- Section 3.13, "Maintaining Bulk Payment Preferences"
- Section 3.14, "Account Class Status Maintenance"
- Section 3.15, "Lending Event Class Maintenance"
3.1 Inter Branch Account Maintenance
This section contains the following topic:
3.1.1 Maintaining Inter Branch Parameters
You can modify Inter branch parameters screen to capture inter branch parameters for Contingent GLs. The balances are transferred from contingent GL from one branch to another during branch transfer of commitments and for Loan, Islamic Financing and Mortgage accounts for which there is accrual for contingent GLs. During transfer of the balances from this GL, one leg (Dr/Cr) of the accounting entry would be posted from source branch and the other leg (Dr/Cr) from the target branch. System would use the GLs maintained in this screen to post the Inter branch entries. You can invoke this screen by typing ‘ACDIBMNT’ in the field at the top right corner of the Application toolbar and clicking on the adjoining arrow button.
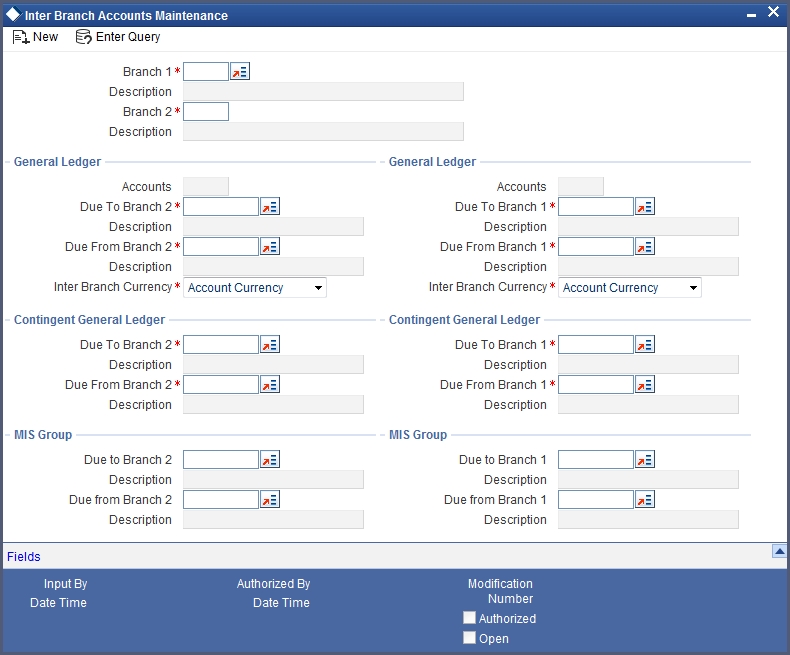
Specify the following here:
Due to Branch 2
Specify the intermediary GL due to branch 2.
Description
Specify the GL description.
Due to Branch 1
Specify the intermediary GL due to branch 1.
Description
Specify the GL description for Due to branch 1.
Due from Branch 2
Specify the intermediary GL due from branch 2.
Description
Specify the GL description for Due from Branch 2.
Due from Branch 1
Specify the intermediary GL due from branch 1.
Description
Specify the GL description for Due from branch 1.
3.2 Lending Bank Parameters
This section contains the following topic:
3.2.1 Maintaining Bank Parameters
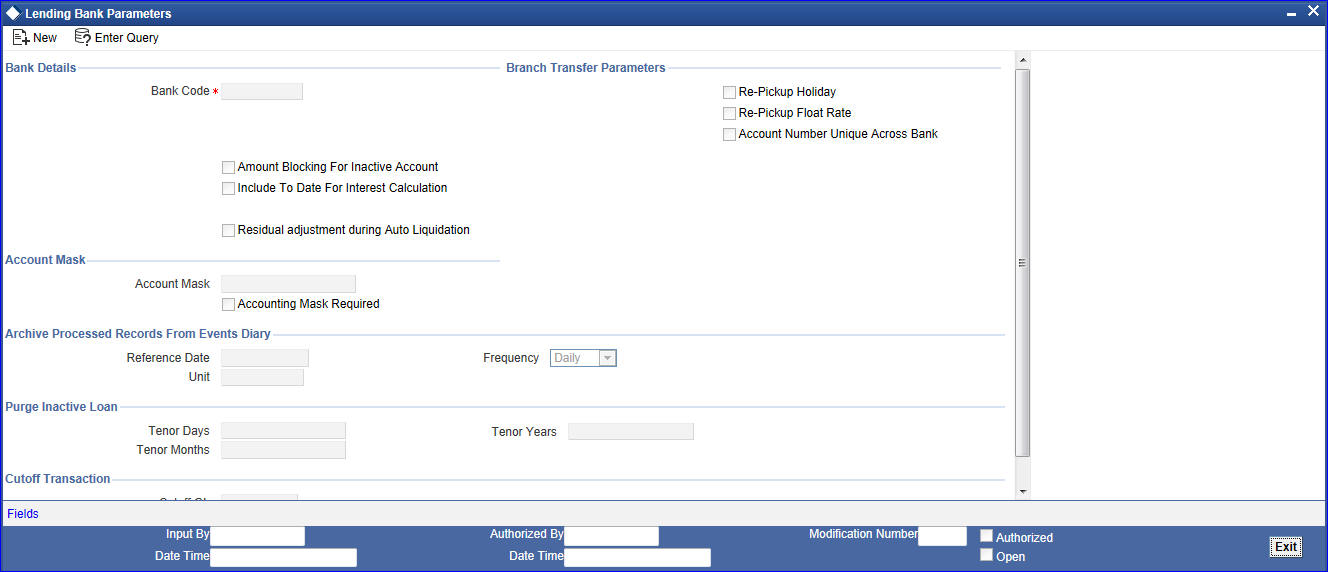
You can maintain the bank parameters in the ‘Retail Lending – Bank Parameters’ screen. You can invoke this screen by typing ‘CLDBKPMT’ in the field at the top right corner of the Application toolbar and clicking on the adjoining arrow button.
Here you can capture the following details:
Bank Code
Specify the code that represents your bank.
Include To date for Interest Calc
If you check this option, then accrual entries will be passed from the value date + 1 till the maturity date. However, if this box is not checked, then accrual entries will be passed from the value date till the maturity date - 1.
Amount Blocking for inactive account
Indicate whether an amount block needs to be imposed on an inactive account or not
Residual Adjustment during auto liquidation
Check this box to perform Excess/Lower payment adjustment during auto liquidation.This flag will be unchecked by default.
Split Offset Leg
Check this box if you wish to have split accounting entries for the offset leg of a transaction. For example, if a certain transaction debits a particular GL and credits two different GLs (as in off balance sheet entries), the system will pass two debit entries for the first GL to be in sync with the credit entries to the other GLs. If this option is not checked the accounting entries will be as under:
Dr/Cr |
Account |
Amount |
Dr |
00000001 |
50 |
Cr |
00000011 |
20 |
Cr |
00000022 |
30 |
If this option is checked the accounting entries will be as under:
Branch Transfer Parameters
Dr/Cr |
Account |
Amount |
Dr |
00000001 |
20 |
Cr |
00000011 |
20 |
Dr |
00000001 |
30 |
Cr |
00000022 |
30 |
Re-pickup Float Rate
Check Re-pickup Float rate to specify if re-pickup of float rate should be done for the new branch on transfer.
Re-pickup Holiday
Check Re-pickup Holiday to specify if re-pickup of holiday needs to be done for the new branch on transfer.
Account Number Unique Across Bank
Check this box to specify if account number has to be unique across bank or not.
Account number is unique for branch transfer. It can be unchecked for banks that do not implement branch transfer feature.
Account Mask
Account Number Mask is unique across the bank so that the account number can be retained while transferring loans to branches. To retain the account number the account number mask is maintained at the bank level or the branch code is maintained at the branch level.
Accounting Mask Required
Check Accounting Mask Required to specify if accounting mask is required or not.
Account Mask
Specify the Account Mask
If the account number is manually input, then the system validates the account number as unique across the bank and if not, system displays an error message.
Archive Processed Records from events diary
The parameter Reference Date, Frequency, Unit will be used to archive the processed records in Event Diary
The archival will be done in EOD by batch function. If this parameter is not set then no archive will be done.
Purge Inactive Loans
Specify the tenor in units of days, months and year, for which you want to keep the inactive loans for purging.
Cut off Transactions
Select the Cutoff GL from the option list. Transactions after 2:00 pm on a day will be considered on the next working day. The accounting entries for such transactions will be passed into the Cutoff GL and not the Settlement GL.
3.3 Consumer Lending Branch Parameters
This section contains the following topics:
3.3.1 Maintaining Branch Parameters
You can maintain the branch parameters in the ‘Consumer Lending – Branch Parameters’ screen. You can invoke this screen by typing ‘CLDBRPMT’ in the field at the top right corner of the Application tool bar and clicking on the adjoining arrow button.

Branch parameters include the following:
Branch Code
You have to indicate the code of the branch for which the parameters have to be maintained. The codes of the various branches of your bank are available in the option list provided.
When you select the code, the branch name is also displayed alongside.
Process Till Next Working Day – 1
This specification will determine the day on which automatic events such accrual, liquidation etc. falling due on a holiday, should be processed. If you select this option, events scheduled for a holiday will be processed on the last working day before the holiday.
If you do not select this option, processing will be done upto the system date i.e. the current date. The automatic events due on a holiday will be processed as part of the batch program run at BOD on the next working day after the holiday.
Consider the example discussed above, if you do not check this option, the events due on 16th and 17th will be processed as part of BOD operations on 18th May ’05, which the next working day after the holidays.
Netting
Here, you need to indicate the netting preference for posting entries during accrual, liquidation and status change.
If you opt to net, the system will post a single consolidated entry for a GL and Currency combination. If you do not select this option, entries are posted individually for each account.
The GL netting status change option can also be used to indicate installment level status change.
The Netting of Notices across Accounts can be used to indicate that for or all accounts for which the payments falls due on a particular date, the requests for invoice generation should be consolidated.
The loan accounts for which the reminder or demand note should be sent is tracked based on the status of the account. The SDE ‘Next Schedule Date’ is set up to arrive at how many no. of days in advance the payment notice should be generated. Based on the status of the loan account the corresponding payment invoice format is set up.
The Auto allocate part payment option can be used if you want to do a partial payment through auto allocation. For accounts which are marked for manual allocation of partial amount the payment can be done in bulk using the ‘Consumer Lending – Bulk Payments’ screen.
For more details on Bulk payments refer section ‘Bulk Payments’ in the ‘Operations’ chapter of Retail lending module.
Settlement
The settlement accounts for processing lending transactions have to be specified here. You have to specify the Bridge GL/Account to be used for the settlement of the debit and credit legs of transactions that would be processed at your branch. You can select the accounts from the option lists provided for the same.
In order to interact with multimode settlement with CL, this bridge settlement concept was brought so that the GL defined can interface with the other system and that would be the single GL for reconciliation in the multimode settlement for the external system maintained over there.
Account Auto Generated
You can select this option for automatic generation of account numbers. The system generates the account numbers automatically when you create loan accounts through the ‘Account Details’ screen. If this option is not checked, you have to capture the account number yourself.
For details on creating an account, refer the ‘Account Creation’ chapter of this User Manual.
Accounting Mask Required and Account Mask
To maintain uniformity in the account numbers generated/captured across a branch, you can specify a format/mask for account numbers. If you specify that account numbers should conform to a specific format, you have to specify the mask in the ‘Account Mask’ field.
For example,
You may want the account numbers of your branch to be a combination of:
- Branch Code (3 Characters)
- Product (4 Characters)
- Currency (3 Character currency code)
- 5 digit running sequence number
The account mask in this case would be: @ (BRN)@(PROD)@(CCY)@(SEQ:5)
An example of an account number conforming to the above mask would be DOC3ROLUSD60021.
If you opt for auto generation of account numbers but do not specify a mask, the generated number will, by default, conform to the following format:
- 3 character Branch Code
- 4 character Product Code
- Date in Julian format (YYDDD)
- 4 digit running sequence number
An example of an account conforming to the above format is ‘DOCVSIM040960021’ where:
- ‘DOC’ is the Branch Code
- ‘VSIM’ is the Product Code
- ‘04096’ is the date equivalent to 5th April 2004 (04 – Year and 096 is the number of days that have elapsed in the year).
- ‘0021’ is the running sequence number.
Also, if you maintain an account mask but do not opt to auto generate the account numbers, then, during account capture you have to conform to the account mask maintained for the branch. If the account is not as per the mask, an error message is displayed as “Account number entered is not conforming to the account mask”.
Unique Reference per Message
Check this box to generate unique reference number for each payment message generated for the loan account. If unchecked, payment messages will be populated with account number or user reference number as selected in branch parameters for all payment messages.
User Reference Number in Messages
Check this box to indicate that the User Reference Number provided in the account screen has to be used in Tag 20 of MT103 and Tag 21 of MT202. If the box is unchecked, the loan account number will be used instead of the User Ref no.
Auto Gen User ref
Check this box to auto generate user ref no during account creation.
IRR Processing
Check this box to trigger the YACR (Yield Accrual) event for the branch batch.
Schedule Structure
This option is used to indicate if the schedule definitions should honour the end dates or honor the frequencies when the two contradict. The options are:
- Frequency Based
- Non-Frequency Based (the end dates contradict each other)
First Payment Schedule Gap Treatment
Here, you have to specify the manner in which you would like to treat the period/gap between the loan disbursement date and the first payment. The options are:
- Treat as Payment
- Treat as Moratorium
Intermediate Schedule Gap Treatment
Here, you have to specify the manner in which the system should handle gaps between two schedules. The available options are:
- Create New Schedule
- Advance current schedule
- Extend previous schedule
Pre-Payment Penalty Year
Indicate the type of pre-payment penalty year. You can select one of the following options:
- Loan Year
- Financial Year
- Calendar Year
Computation of prepaid amount in a year depends upon the selection of the above option. Based on the option selected, the date range is interpreted by the system for considering the ceiling of prepaid amount in a year. You can not change this option after the first authorization of the CL branch parameters.
Loan Year ranges between value date of the loan and completion of that particular year. Financial Year ranges between start date of the financial year and the end date of the financial year. Calendar Year ranges between the start date of the calendar year and end date of the calendar year.
The amount prepaid is stored in a data store year-wise. This data store is value date based. This table is updated at the time of save of payment. Also during deletion and reversal operations this table is updated correctly. The impact of prepaid amount is cancelled from the table during deletion/reversal. The pre-payment penalty amount collected is also stored in the same data store.
At the product level you have to maintain a UDE for handling maximum prepayment amount in a financial year. Let us assume that the UDE is maintained as MAX_PREPAID_PCT. You can maintain the default value of the above UDE from the product. System validates that the extent of pre-paid amount doesn’t exceed the percentage maintained at product level at the time of pre-payment.
After setting up the branch parameters, you have to save the details. Click Save icon to save the details in the system. However, the parameters take effect only after your supervisor authorizes the same.
3.4 UDE Value Maintenance for Loans
This section contains the following topics:
- Section 3.4.1, "Defining UDE Rules"
- Section 3.4.2, "Providing UDE Values "
- Section 3.4.3, "Applying the UDE Cascade Function"
3.4.1 Defining UDE Rules
User Defined Elements (UDEs) refer to entities like Interest Rates, Amount/Tier Slabs whose value you can specify and at the same time maintain different values with different effective dates. For instance, you can indicate that interest should be calculated at five percent on a certain date and specify a higher rate effective at a later date.
The UDEs, per say, are defined at the product level and the actual values are provided for a combination of Product, Currency, UDE Rule, and Effective Date in the ‘UDE Values’ screen. This will be defaulted at the account level and you can override the same with account specific values.
You can define UDE Rules based on which the UDE Values will be picked up at the account level. UDE Rules are conditional expressions built using the SDEs like Loan Amount, Tenor, Rate, Customer Category etc. These rules can be created independently and later attached at the time of maintaining UDE Values. You can associate multiple rules and specify UDE values for each rule. You can maintain the rules in the ‘UDE Rules’ screen. You can invoke this screen by typing ‘CLDUDRMT’ in the field at the top right corner of the Application tool bar and clicking on the adjoining arrow button.
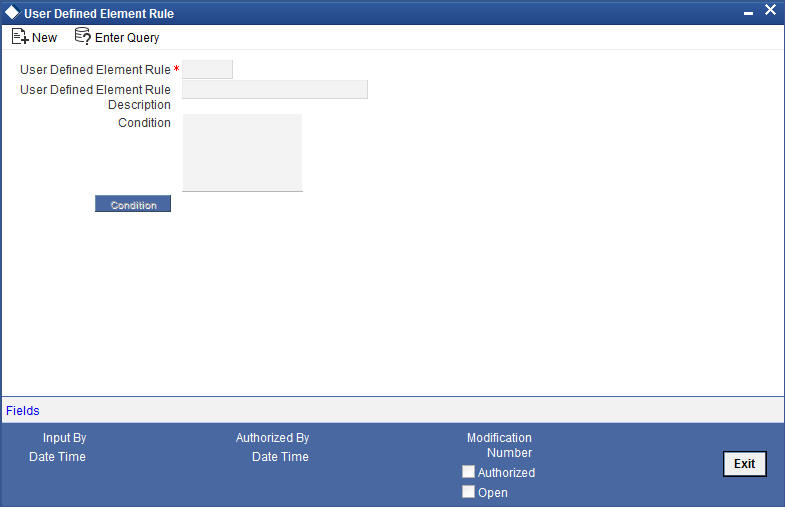
The following information should be captured to create a UDE Rule:
Rule Code
You have to specify a unique code consisting of a maximum of four alphanumeric characters, to identify the rule in Oracle FLEXCUBE. This is mandatory to save the record.
Condition
You can build multiple conditions for a rule. To do this, click on ‘Condition’ in the screen above. The following screen is displayed:

You can create conditions using the following:
- Fields: The SDEs that are factory shipped or maintained in the ‘System Data Elements’ screen are available in this list.
- Operators: This list includes the mathematical operators:
- Equal To
- Greater Than
- Greater Than or Equal To
- Less Than
- Less Than or Equal To
- Like
- Not Like
- Not Equal To
- Logical Operators:
- And: Use ’And’
- Or: Use ’OR”
- Value: The value of the SDE selected to define the condition should be entered here. The value may be numeric or alphanumeric, as required for the condition.
Refer the section titled ‘Specifying product Main details’ in the ‘Defining Product Categories and Products’ chapter of this User Manual for details on defining UDEs.
3.4.2 Providing UDE Values
The actual values for the UDEs defined during product creation (in the ‘Main’ tab of the ‘Consumer Lending Product’ screen) is maintained in the ‘UDE Values’ screen. You can invoke this screen by typing ‘CLDUDVMT’ in the field at the top right corner of the Application tool bar and clicking on the adjoining arrow button.

In this screen, you can maintain values for a ‘Product Code + Description + Currency Code + UDE Rules + UDE Dates + UDE Values’ combination. The following details have to be captured here.
Product Code
You have to select the product for which the UDE values have to be maintained. The products offered at your bank are available for selection in the option list provided.
Description
After selecting the product the system will automatically generate a description for the product.
Currency Code
For the product selected, specify the relevant currency. This becomes the UDE currency and the values you capture for the UDE is expressed in this currency. The option list will include the currencies maintained in the ‘Currency Definition’ screen. You can select a relevant code from this list.
For details on ‘Currency Definition’ screen, refer the ‘Currency Maintenance’ chapter of the Core Services User Manual.
UDE Rules
Here, you have to associate the relevant UDE Rule(s). The rules maintained in the ‘UDE Rules’ screen are available in the option list. For each associated rule, you can specify UDE values with different effective dates and depending on the rule that the loan satisfies, the corresponding UDE values become applicable to the loan and same are picked for Interest, Charge, Tax, Commission and Fee computation.
Note
The UDE Rule is mandatory to save the record. The system will automatically link the default rule if you do not associate a rule.
Effective Date
You have to specify the effective dates for the UDE values. This is the date on which the UDE value becomes applicable in the system. The date should be in MM-DD-YYYY format. For a rule, you can maintain UDE values with different effective dates.
UDE ID
The UDEs defined for the selected product is automatically displayed here.
UDE Value
For each UDE displayed for the selected product, enter the UDE value. As mentioned, you can maintain values with different effective dates. Note that the UDE values should fall within the minimum and maximum limit specified for the UDEs linked to the product.
You can capture negative value for a CL product if negative interest rate is allowed for a product with main component of type Interest.
Rate Code
If you want the UDE to have a floating interest rate, select the applicable rate code from the option list. Depending on the rate code selected, the rates are picked up from the ‘Floating Rate Code Definition’ screen. In this case, the value captured for the UDE becomes the spread against the rate code. Term deposit is attached to rate code to link the term deposit interest rate with loan interest rate. When term deposit interest rate changes the interest rate of loan account also changes to same rate based on code usage defined for the account.
Note
If the main interest UDE has a term deposit account in Rate Code and UDE has future effective dated values, then the system displays an error message.
For instance, assume that the rate code is ‘MIBOR’ and the UDE value is 2 (positive spread). If the rate picked up as per the rate code (taking into consideration the effective date, amount slab and tenor) is 5%, then the actual interest applicable would be 7% (5 + 2). Similarly, if it were a negative spread, the interest would be 3% (5 – 2).
For details on maintaining floating rate codes, refer the section titled ‘Maintaining Floating Interest Rates’ in this chapter.
UDE Currency
The Currency of the UDE for UDE of Amount type will be captured.
Rate Basis
The system displays the rate basis based on product maintenance. You can modify the value if required.
Code Usage
This is applicable only if you associate a ‘Rate Code’ with the UDE. It indicates the frequency at which you want to refresh the floating rates. The options are:
- Automatic: This implies that the rates will be automatically refreshed every time a rate change occurs. Therefore, rates are reapplied to the loans as and when there is a rate change.
- Periodic: This means that the rates will be refreshed based on the Rate Revision Schedule maintained at the component level (in the ‘Components’ tab of the ‘Consumer Lending Product’ screen).
It is mandatory to specify the Rate Code usage if the rate code is maintained.
Cascade
You can change the UDE values even after creating accounts under the product. The cascade feature is used to determine the manner in which the change should be handled. If you choose to cascade (select ‘YES’), the change becomes applicable to all the existing accounts under the product. However, if you do not cascade the changes, the new UDE values become applicable only to accounts created subsequent to the change.
3.4.2.1 Maintaining Fixed Amount UDEs in other Currency
To maintain UDEs in a currency different from the loan currency, you have to maintain the values separately for each currency. At the time of loan creation, the values defined for the UDE Currency is picked up and is displayed (in the ‘UDE Value’ field of the ‘Account Details’ screen) after conversion into the loan currency equivalent.
The values, however, are displayed after conversion into the loan currency equivalent.
3.4.3 Applying the UDE Cascade Function
You also have the feature to change the value of a UDE for all the existing accounts under a product. However, the change will be applicable only to the existing accounts. UDE values for new accounts created under the product will be picked as per your specifications in the ‘UDE Values’ screen.
You can define new UDE values for existing accounts in the ‘UDE Cascade’ screen. To invoke this screen type ‘CLDUDCMT’ in the field at the top right corner of the Application tool bar and click the adjoining arrow button.

The code of the login branch is displayed here. The following information is captured in this screen:
Reference
After saving the UDE cascade function, Reference will be generated by system itself
Branch code
Input the branch code in which the relevant data is maintained
CCY Code
Select a currency maintained for the product from the option list provided. The UDE value is applied in the currency selected here
Product Code
Select a product for which you have to change the UDE value. The change becomes applicable to all the existing accounts under the product.
Product Description
The system displays description of the specified product code.
UDE Effective Date
The date on which the new UDE value is brought into effect is captured here. The date format should be ‘MM-DD-YYYY’
After you specify the effective date, the system automatically generates a unique ‘Reference’ Number
UDE Id
The option list will display the UDEs defined for the selected product. Select the UDE that requires a change in value. When you select the UDE, the ‘Old Ude Value’ is also displayed in the next field.
New UDE Value
Provide the new value for the selected UDE.
3.5 Adhoc Charge Maintenance
This section contains the following topics:
- Section 3.5.1, "Maintaining Adhoc Charge Types"
- Section 3.5.2, "Maintaining Adhoc Charges"
- Section 3.5.3, "Events Button"
- Section 3.6, "Ad-hoc Charge Authorize"
3.5.1 Maintaining Adhoc Charge Types
In order to maintain the various ad hoc charge types invoke the ‘Adhoc Charges Type’ screen. This screen allows you to capture and store ad hoc charge types such as legal fees, notary fees, and administration fees etc. which are applicable at the collection stage of the loan. You can invoke this screen by typing ‘CLDADCMT’ in the field at the top right corner of the Application tool bar and clicking on the adjoining arrow button.
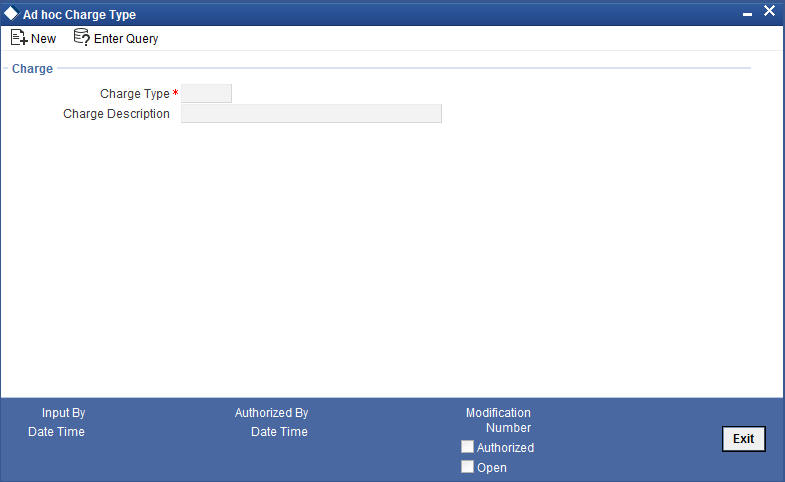
Charge Type
Specify the charge type that can be levied on a loan in case of any delayed repayments. The valid values are of the type Admin Fee, Legal Fee, etc
Charge Desc
Specify a detailed description of the Charge Type.
3.5.2 Maintaining Adhoc Charges
You can maintain adhoc charges in the system using the ‘Adhoc Charges’ screen. You can invoke this screen by typing ‘CLDADOCH’ in the field at the top right corner of the Application tool bar and clicking on the adjoining arrow button.

You need to enter the following details in the screen above:
Branch
Select the branch code of the bank that is servicing the loan.
Account Number
Select the account number on which the charges are to be levied from the option list.
Internal Ref No
A unique identifier for the specific ad hoc charge is displayed here. This is system generated.
Component Name
Select the component that is to be used to track the ad hoc charge from the option list.
Customer ID
The system displays ID of the customer holding the specified account number.
Customer Name
The system displays name of the displayed customer ID.
Credit Account
The system defaults the credit settlement account based on the details maintained for account number and component. However, you can specify the account (GL) to which the ad hoc charges collected are to be credited from the option list. This in most cases is the account of the Collection Agency.
Account Description
The system displays description for the credit account after you specify the account number. If you change the credit account, then the system defaults the description from list option list.
Charge Type
Select the charge type to be levied on a loan from the option list. The values in the option list are the charge types maintained using the Adhoc Charge Type maintenance.
Charge Incurred date
Specify the date on which the charge is to be levied on the customer. This cannot be a future date. Also, it should pass the accounting for ad hoc charges with a back date.
Reason
Specify the reason for which the charge is being levied on the account.
Currency
Select the currency for the adhoc charge.
Amount
Specify the amount of the ad hoc charge to be levied on the customer account.
Original Exchange Rate
The base or actual exchange rate between the adhoc charge component currency and account currency gets displayed here.
Exchange Rate
For a customer availing any Relationship Pricing scheme, the customer specific exchange rate derived by adding the original exchange rate and the customer spread maintained for the relationship pricing scheme gets displayed here.
If Relationship Pricing is not applicable, Exchange Rate will be the same as the Original Exchange Rate.
For more details on customer specific exchange rates, refer the section titled ‘Specifying Pricing Benefit Details’ in Relationship Pricing user manual.
You can reverse the adhoc charges entered in the system. The Reversal button is enabled for all authorized adhoc charges entered in the system. The contract status for the adhoc charge will have the value as ‘PAID’ or ‘REVERSED’. Post reversal of the adhoc charge, the contract status is displayed as ‘REVERSED’.
At the time of Authorizing of reversal of Adhoc Charges, re-computation of IRR is done by the system if IRR is applicable for the product. The unauthorized reversals can be deleted and authorized. The delete and Authorize buttons will be enabled for unauthorized reversals.
The event code used for reversal of adhoc charge is RADC (Reversal of Adhoc Charge).
Adhoc charge reversal is not allowed if any event happens after the adhoc charge event. In such case, the event needs to be reversed first and then only adhoc charge can be reversed. The possible events are ALIQ/MLIQ, VAMI, DSBR, REVN.
3.5.3 Events Button
You can view event entries in ‘Events Dairy’ screen. Click ‘Events’ button in ‘Adhoc Charges’ screen.

The system defaults the values for all the fields available in the screen based on the details maintained in the main screen.
You can view the accounting entries under in two tabs based on the status of the event:
- Processed Tab – Displays records which are processed
- Unprocessed Tab– Displays records which are unprocessed
3.6 Ad-hoc Charge Authorize
This section contains the following topic:
3.6.1 Authorizing Ad-hoc Charges
You can invoke the ‘Ad-hoc Charge Authorize’ screen by typing ‘CLDADOAU’ in the field at the top right corner of the Application tool bar and clicking on the adjoining arrow button.
The ‘Ad-hoc Charge Authorize’ screen is shown below:
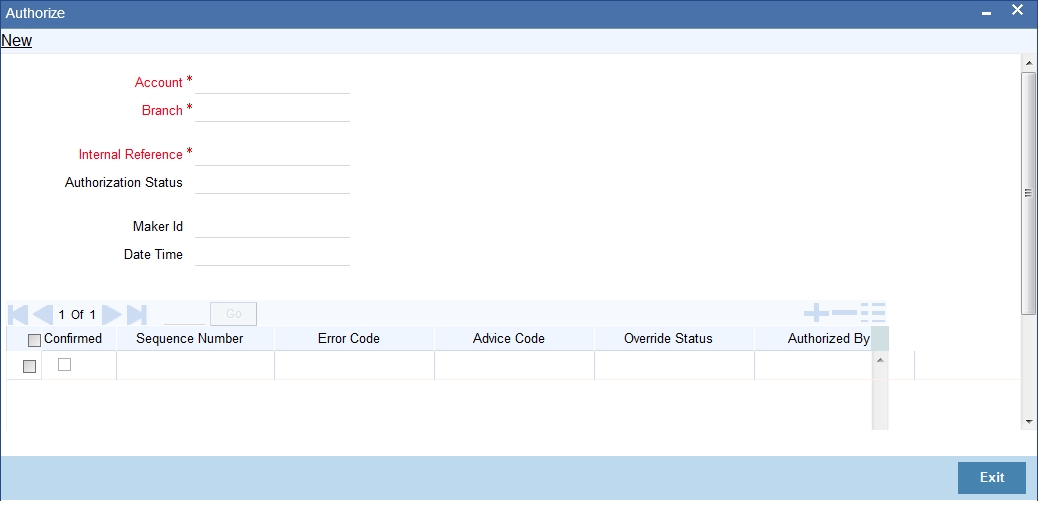
Click the Enter Query button to enter the following query criteria.
Internal Reference
Specify the internal reference number.
3.7 Holiday Period Maintenance
This section contains the following topics:
3.7.1 Maintaining Holiday Periods
You can identify certain periods in the calendar as holiday periods when customers would have other expenses and would like to avail a repayment holiday. This would typically be during Christmas/New Year or for anniversary celebrations. Although, Interest computation continues for this period, repayments are not scheduled.
You can define repayment holiday periods in the ‘Holiday Period’ screen.
You can invoke this screen by typing ‘CLDHOLMT’ in the field at the top right corner of the Application tool bar and clicking on the adjoining arrow button.
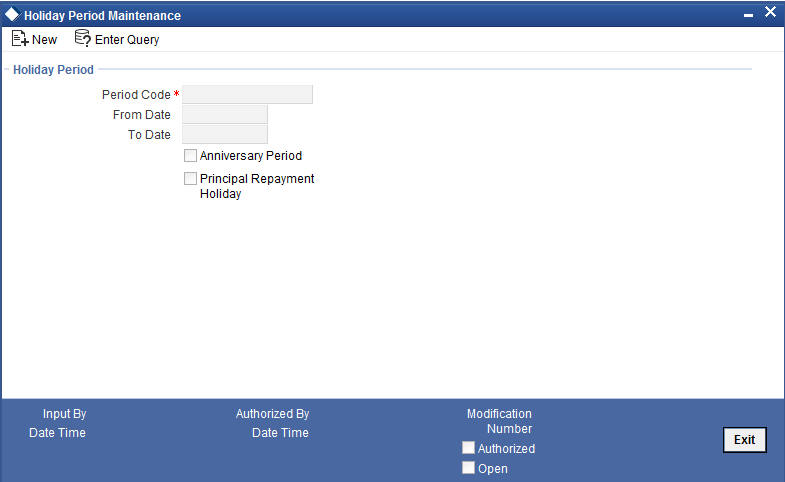
The following information is captured to define a holiday period:
Period Code
You have to capture a unique code to identify the period in the system. The code can comprise of 30 alphanumeric characters.
Date From and Date To
For the period code specified, capture the holiday period i.e. the start date and end date for the holidays. The date format should be ‘MM-DD-YYYY’. It is mandatory to specify the date range to save the holiday period.
Anniversary Period
This option is used to define an anniversary period. If you check this option, the holidays will be repeated every year for the given range of dates. By default, the system checks this option.
Principal Repayment Holiday
If you check this option, the system will apply the holiday period to the principal component alone. The simple interest formula defined at the product level will not be affected. By default, this option is unchecked. However, you may modify it.
While defining a loan contract, you may apply the holiday period codes maintained using this screen.
For example,
Suppose that a product has dual formula for the MAIN_INT component as shown:
Formula Name |
Formula Type |
FRM_MAIN_INT |
Amortized |
FRM_MAIN_INT_1 |
Non-amortized |
A holiday period ‘PRINHOL’ is maintained as shown below:
Field |
Value |
Period Code |
PRINHOL |
From Date |
1-Oct-00 |
To Date |
1-Nov-00 |
Anniversary Period |
Y |
Principal Repayment Holiday |
Y |
Contract details are shown in the following table:
Particular |
Value |
Value Date |
01-Jan-2000 |
Maturity Date |
31-Dec-2000 |
Once ‘PRINHOL’ has been linked as holiday period linkage, the system will generate Comp SCH as shown in the following table:
Formula |
First Due Date |
No. of Schedules |
Frequency |
Schedule Type |
FRM_MAIN_INT |
01-Feb-2000 |
8 |
1 |
Monthly |
FRM_MAIN_INT_1 |
01-Oct-2000 |
2 |
1 |
Monthly |
FRM_MAIN_INT |
01-Dec-2000 |
1 |
1 |
Bullet |
3.8 Maintaining Check Lists
You can maintain check list for different events using the ‘Check List Maintenance’ screen. The check lists that you maintain here will be validated during the execution of that event while processing the loan. For E.g.- A checklist of documents required for loan processing can be maintained like ID proof, Bank statements, Income etc.
You can invoke this screen by typing ‘CLDCHKMT’ in the field at the top right corner of the Application tool bar and clicking on the adjoining arrow button.
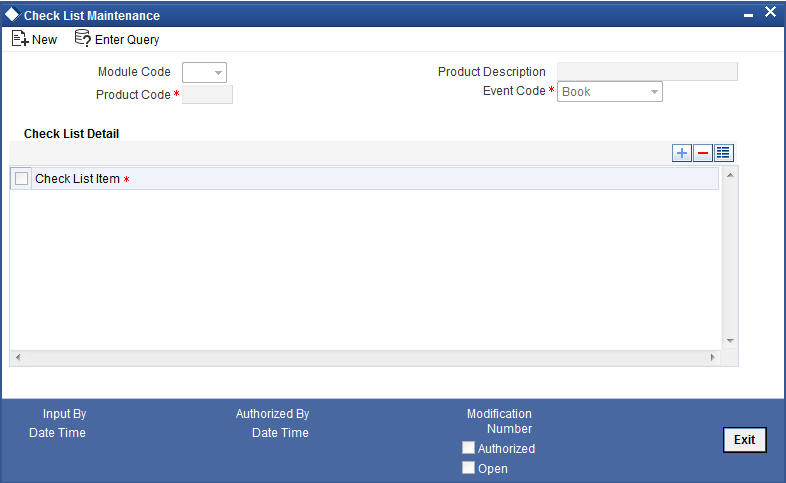
The following details have to be captured here:
Event Code
Select the event code for which check list items have to be maintained from the drop down list.
Check List Item
Specify the check list item name that you want to maintain for the selected event. The check list items that you maintain here will be validated by the system during that event, while processing the loan.
3.9 Maintaining System Data Elements
The balance in the account for which the interest has to be calculated depends on the activities that take place in the customer account over a period of time. This information is constantly updated in the system and is readily available for computation of interest or charges. Data elements of this sort are called ‘System Data Elements’ (SDEs) because the values for the SDEs are necessarily picked up by the system while applying interest. You cannot input the values for these elements.
You can capture the various SDEs in the ‘System Data Elements’ screen. You can invoke this screen by typing ‘CLDSDEMT’ in the field at the top right corner of the Application tool bar and clicking on the adjoining arrow button.
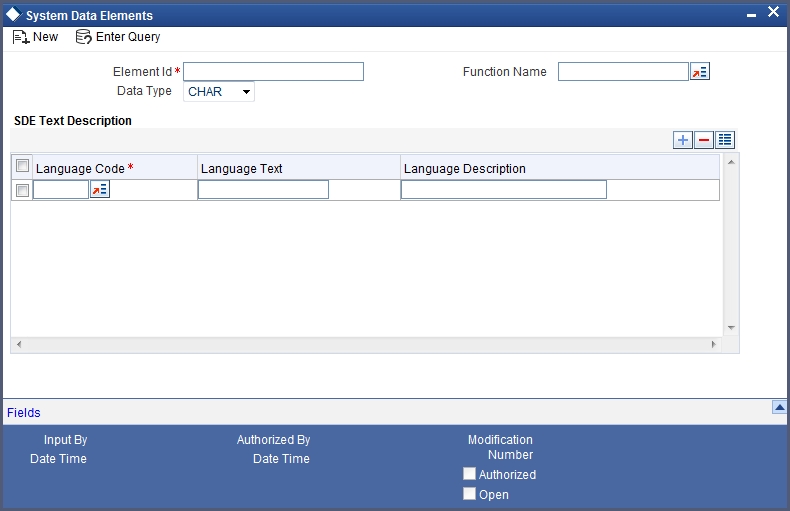
You have to maintain the following to define a SDE:
Element ID
Capture an id to uniquely identify the SDE in the system. You can devise an Id comprising a maximum of 30 alphanumeric characters.
Function Name
Here, you have to associate the Oracle function which would calculate the SDE value internally. The values available in the option list are factory shipped. The system picks up the value computed by the function for use in interest calculation.
Data Type
This indicates the nature of the data the SDE represents. The options are:
- Character
- Number
- Date
Language Code and Language Text
Select a language for the SDE being defined. You can select a code from the option list provided. The system automatically displays the corresponding text in the language selected for the SDE.
Language Description
Here, you have to provide the description of the SDE being defined, in the language selected. The description should not exceed 30 alphanumeric characters.
System Data elements can be balances like PRINCIPAL_EXPECTED, PRINCIPAL_OVERDUE etc. Some Oracle FLEXCUBE entities required for formula generation/rule set up will be factory shipped.
The list of standard SDEs available for use are given below:
Name |
Description |
TENOR |
Duration for which the loan is applied for in days |
CUSTOMER_CATEGORY |
Category of the customer of the loan which is maintained at the customer information file level |
BRANCH_CODE |
Code of the branch where the loan account is opened |
ACCOUNT_CCY |
Loan account's currency |
LOAN_STATUS |
Status of the loan account |
CUSTOMER_ID |
Primary customer's id for a loan account |
NO_OF_RPMNT_SCHS |
Number of repayment schedules excluding the moratorium ones |
INCREASED_PRINCIPAL |
Increase in the principal |
DAYS |
Days in a month |
YEAR |
Days in a year |
RISK_CLASSIFICATION |
Risk classification at line level which can be used at status change |
PREPAID_AMOUNT |
Amount that has been prepaid |
MORA_OUTSTANDING |
Total moratorium outstanding amount |
TOTAL_MORA_AMOUNT |
Total moratorium amount |
INDEX_CCY |
Index currency |
NEXT_WORKDAY |
Next working day of the branch |
LAST_WORK_DAY |
Last working day of the branch |
TODAY |
Today's branch date |
TOTAL_PRINCIPAL |
Amount for which the loan is applied for |
AMOUNT_FINANCED |
Amount for which the loan is applied for |
PRINCIPAL |
Amount disbursed |
INT_SUSPENSION_DATE |
Interest suspension date based on risk classification. If classification is C, then the suspension date is one year from today's date. If classification is D, then the suspension is immediate. |
COMPOUND_VALUE |
Amount compounded within a schedule and is used internally |
RESIDUAL_DAYS |
Tenor of the loan |
WORST_SCH |
Worst Instalment Status |
APPLICATION_DATE |
Application date in loan origination |
APPLICATION_SCORE |
Application score in loan origination |
APPLICATION_TENOR |
Application tenor in loan origination |
APPLICATION_PRINCIPAL |
Application principal amount in loan origination |
_OVR_DAYS |
<Component> overdue days |
_EXPECTED |
<Component> expected amount |
_OUTSTAND |
<Component> outstanding amount |
_CCY |
<Component> currency |
_OVERDUE |
<Component> overdue amount |
_INS_OVR_DAYS |
<Component> number of days between the schedule due date and the maturity date |
_FN_NO_REPAY_SCH |
<Component> number of schedules for a component if periodic |
NET_PRINCIPAL |
<Amount Financed> minus <Funded Amount> |
_SCHODUE |
<Component> schedule amount due less amount settled |
EMI_AMOUNT |
The EMI amount for amortized loan contracts, in the current schedule for rental cash flow type of Loans |
TOTAL_SCHODUE |
Amount overdue for the schedule. |
NUM-INSTLMNT-OVRDUE |
Number of overdue installments |
ADVISED_LINE |
Indicates the status of the facility to which the commitment is linked. If the facility is advised, the SDE returns a ‘Y’; if not it returns a ‘N’ |
COMMITMENT_CUR_UTIL |
Holds the current utilization amount for the commitment |
CUSTOMER_CREDIT_RATING |
Holds the Credit Rating information of Customer |
INT_NOTDUE_PAID |
Indicates amount paid against interest that is not due. |
PAYBACK_AMOUNT |
Returns the interest income of the main interest component which is earned between the scheduled period of the interest payback component. The SDE will be to zero if any of the repayment schedules of any of the components falling between the interest payback component schedule is not paid on or before the repayment schedule due date. |
The ‘Customer Credit Rating’ field at the Customer level will be used as a SDE CUSTOMER_CREDIT_RATING for defining status change rules. This will also be available for provision rule definition at the CL product level.
3.10 Maintaining Floating Interest Rates
You can apply interest either as ‘Fixed’ rate or as ‘Floating’ rate. A Floating Rate corresponds to the market rates for the day. These rates are maintained and updated daily (or whenever they change,) in the ‘Money Market Floating Rate Input ’ screen.
You can invoke this screen by typing ‘CFDFLTRI’ in the field at the top right corner of the Application tool bar and clicking on the adjoining arrow button.
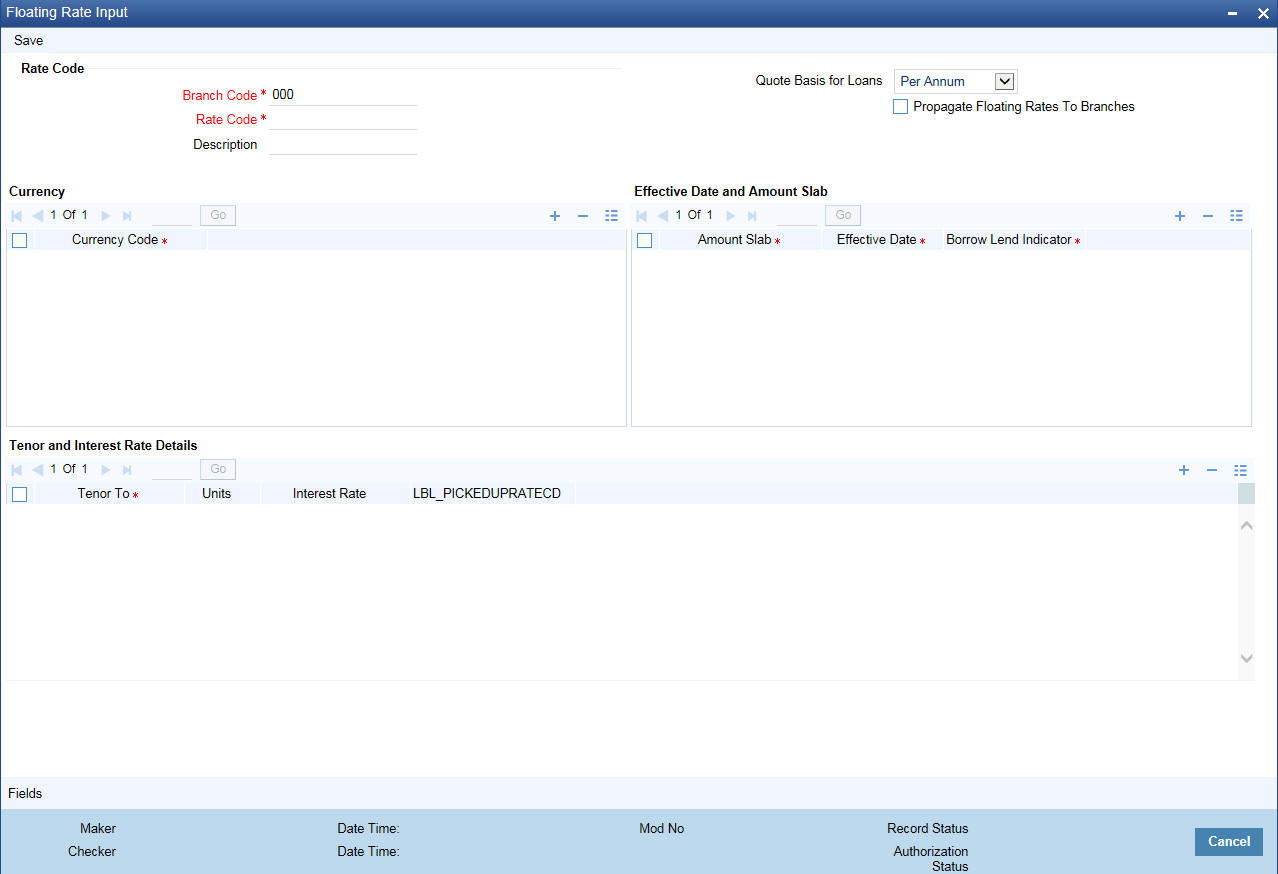
The floating interest rates are defined through this screen. A Rate Code identifies a set of rates defined for a combination of Currency, Amount Slab (optional) and Effective Date. Also, for each such combination, you can maintain rates that can differ by each tenor.
The following details have to be captured here:
Rate Code and Description
You can maintain new rate codes and also provide values for existing ones (like MIBOR, LIBOR etc). For a new code, you need to capture a unique id. The id can include a maximum 10 alphanumeric characters.
Quote Basis for Loans
Select the quote basis for calculating the float rate per annum from the drop down list. The list displays the following values:
- Exponential 252-
- Linear 360
- Exponential 365
- Per Annum
Propagate Floating Rates to Branches
Check this box to indicate that the floating rates maintained at the head office of the bank should be propagated across all the branches of your bank. Consequently, each time you maintain a floating rate for a particular rate code and currency combination at your bank, a corresponding floating rate record will be created and sent to all the branches of your bank.
Currency
You have to associate each Rate Code with a currency. You can define rates for the same Rate Code in different currencies. Select a currency from the option list provided.
Each rate that you define for a Rate Code and Currency combination should have an Effective Date associated with it. This is the date on which the rate comes into effect. Once a rate comes into effect, it will be applicable till a rate with another Effective Date is given for the same Rate Code and Currency combination.
Note
The rates will be applied to a contract depending on whether it has been defined with ‘Automatic’ Rate Code Usage or ‘Periodic’ Rate Code Usage. You can specify this in the ‘UDE Values’ screen.
For a specific Rate Code and Currency combination, you can define an amount slab. However, this is not mandatory. A rate that has been defined for an Effective Date - Amount Slab combination will be applicable to an amount less than or equal to the specified amount.
Note
A huge amount (999.9 million) has been given as the last amount limit. This denotes that after 50,000 there is no upper limit in the slab
For every Amount Slab - Effective Date combination, you should define the rate to be applied as a borrow rate, a lend rate or a mid rate. Borrow rates are applied for loans taken by the bank and lend rates applied on loans disbursed.
The rates that will be applied for a given combination of Amount Slab – Effective date – Lend/Borrow Indicator can be tenor based. In this screen, you can also define interest rates for different tenors.
For instance, for an amount slab you can maintain rates for the Rate Code LIBOR for tenors 1 - 30 Days, 30 – 90 Days and so on. If you do not maintain tenor wise interest rates, you have to maintain the tenor as ‘0’ and then specify the rate. This is mandatory to save the details.
Units
The system displays the units with days/months/years.
Picked Up Rate Code
Specify the picked up rate code. It is used for UDF values composite rates.
3.11 Maintaining User Defined Policies
User defined Policies are special validations and operations to be performed before or after a life cycle event of a loan. You can maintain policies in the ‘User Policy’ screen.
You can invoke this screen by typing ‘CLDPOLMT’ in the field at the top right corner of the Application tool bar and clicking on the adjoining arrow button.

Specify the following details to maintain a policy:
Policy Code and Policy Description
A policy code identifies a policy uniquely in the system. The code is used to link the policy to a product/account. You can devise a code consisting of a maximum of 20-alphanumeic characters.
Also, for the code captured, provide a brief description in not more than 35 alphanumeric characters. The description is used for information purposes only.
Policy Category
Select the category to which the policy should belong. This implies if the Policy is to be linked to an Application (Origination and API or Product setup). The two options are:
- Origination
- Servicing
Specifying Policy Details
Expression Line
You can maintain multiple expressions for a policy and each expression is identified by a unique serial number. The serial number can consist of a maximum 6 digits.
Policy Expression
Here, you have to specify the expression for the policy which when satisfied by the loan, will trigger the corresponding action. You can maintain multiple expressions and action codes under a policy. Depending on the expression that is evaluated successfully, appropriate ‘Action Id’ is triggered. However, an expression is not mandatory to define a policy.
Action Id
You have to select the action that is to be triggered when the corresponding expression becomes valid for the loan. This refers to the wrapper name that is mapped to the actual PL/SQL code that executes the policy. Select the action id from the option list provided. The values available in the list are factory shipped.
The policies defined through ‘User Policy’ screen become available for association at the ‘Product Category’ level.
For more details, refer the section titled ‘Maintaining Product Categories’ in the ‘Defining Product Categories and Products’ chapter of this User Manual.
3.12 Maintaining Standard Policies
You can also categorize the policies defined through the ‘User Policy’ screen as ‘Standard Policies’ in the ‘Policy Maintenance’ screen.
You can invoke this screen by typing ‘CLDSTDPL’ in the field at the top right corner of the Application tool bar and clicking on the adjoining arrow button.

To maintain a standard policy, you have to specify the following in the screen:
Module
A standard policy is defined for a Module and Event combination. You have to select the module for which the policy should be applied. The option list will display the list of valid Oracle FLEXCUBE modules.
Event Code
The events defined for the selected Module are displayed in the option list provided. You may select an event from this list.
Policy Code
The policies maintained in the ‘User Policy’ screen are available in the option list provided. Select the appropriate policy for the selected Module and Event combination.
3.13 Maintaining Bulk Payment Preferences
If indicated at the Loans/Commitments level that bulk payments need to be maintained for an account, then preferences for the bulk payments are maintained at the Bulk Payment Preferences screen. Under a Loan/Commitment a customer can make multiple disbursements under that Loan/Commitment account. These multiple payments are treated as separate transactions with separate products and interest components. On payment of the Principal amount of any of the loans the Loan/Commitment is restored to the customer. As these multiple disbursals are treated as individual transactions, hence the Bulk Payment option provides the customer to make a single payment across for multiple payments. This payment can be configured to be split automatically among the different disbursals made based on a defined rule.
The Bulk Payment Preferences screen can be used for maintaining the priority for auto as well as manual liquidation of bulk payments. Invoke this screen by typing ‘CLDBPPRF’ in the field at the top right corner of the Application tool bar and clicking on the adjoining arrow button.

The following details need to be specified for maintaining the bulk payment preferences for multiple disbursals made under a single line/commitment:
Branch
The branch where the bulk payments preferences are maintained for a CL account is displayed here. The maintenance is done at this branch. The preferences maintained for each loan/commitment are only for this branch.
Bulk Entity
Select the bulk entity applicable for these payments from the option list provided. You can select the following values
Limit Line – This option displays all the valid limit lines in the current branch which have been attached to any of the loan accounts; when the bulk payment option has been selected for the same.
Commitment – The valid commitment reference numbers attached to any of the loan accounts in the current branch are displayed on selecting this option; when the bulk payment option has been selected for the same.
All
Liability ID
Select the liability identification number based on the bulk entity type selected, from the option list. For bulk entity type limit line the liability IDs for which limit line is linked to CL account are listed. For Commitment bulk entity type the commitment IDs linked to the CL account are listed. You can select ‘All’ option if you want to display both limit line and commitment in the list of values.
Bulk Entity Reference
Specify the bulk entity reference number associated with the relevant loan account. You can also select the bulk entity reference from the adjoining option list. The list displays the reference number based on the bulk entity type and liability ID. The bulk entity reference lists values as ‘ALL’ indicating that the rule is common for all references attached to a branch and not a specific reference maintained for that particular branch.
Allow Partial Liquidation
Check this box to indicate that the partial payment is allowed for the individual loan amounts. If the payment amount is sufficient to liquidate only partially as against the total due amount then if the partial liquidation option is allowed then a partial amount is allocated against the total due amount.
Partial allocation is allowed for dues for all priority options. For all prioritization options, if the total payment amount provided for bulk payment only partially satisfies liquidation, then partial amount is allocated against the amount due, only if the Partial allocation box is checked otherwise the schedule is skipped from liquidation.
3.13.0.1 Selecting Prioritization options
Select the appropriate prioritization option. You can select the following options:
- Earliest Due First
- Highest Due First
- Component Prioritization
On selecting Component Prioritization the ‘Component Prioritization’ details are enabled for entry. However on selecting the same Account level and Schedule Level are disabled for entry.
The following Priority combinations can be selected:
- Earliest Due first /Account level/partial allocation allowed.
- Earliest Due first /Account level/partial allocation not allowed.
- Earliest Due first /Schedule level/partial allocation allowed.
- Earliest Due first /Schedule level/partial allocation not allowed.
- Highest Due first / Account level/partial allocation allowed.
- Highest Due first /Account level/partial allocation not allowed.
- Component Prioritization/ partial allocation allowed.
- Component Prioritization/ partial allocation not allowed.
Earliest due first date
When you make this selection you can only specify the account level option. When the available amount is allocated while indicating account level or schedule level, amongst the due amounts belonging to the eligible accounts, then the account priority is applied in case of multiple accounts. The schedules with earliest due date are considered first and liquidation amount is allocated based on the due date at schedules level. In case of conflict arisen, the earliest value date and highest due is considered for resolution. If the value dates and highest due are the same then the resolution is carried out on the basis of the account number, that is, the earlier account number is considered first.
Highest Due First
When you make this selection you can also specify the account level. On allocating the bulk amount while indicating account level, the highest due amount across the accounts is determined and all components due in this account are marked for payment followed by the next highest due account available among the rest. In a conflict the earliest valued date is considered. If the value dates are same then the accounts are prioritized based on the account numbers. Schedule level is not applicable for this option.
Component Prioritization
Check this box to define the order for liquidation for components across products. When you make this selection you must also select the option N/A. The liquidation order defined here overrides the product liquidation order. If Component prioritization option is chosen then the fields under component prioritization options frame will be enabled.
According to the priority defined allocation of the bulk amount is done for all accounts. Similar to the cases described above the value date and highest due is considered for allocation, in cases of conflict due to value date and highest due the resolution is brought about by account number.
Component Prioritization Options
The component details related to prioritization are enabled for entry once the ‘Component Prioritization’ is enabled
Product Code
Specify the component product code for which liquidation prioritization details are maintained.
Note
Products not listed in prioritization will be taken as lowest priority. These are allocated using the liquidation order defined in the product.
Component
Specify the component for which prioritization is maintained
Priority
Specify the priority for the component. The priority is a unique numeric character input by a user. The lower the number value the higher is the priority applied to the component.
3.13.1 Viewing Summary Records
You can view and amend details of a particular record by using the ‘Summary’ screen. You can invoke this screen by typing ‘CLSBPPRF’ the field at the top right corner of the Application tool bar and clicking on the adjoining arrow button.
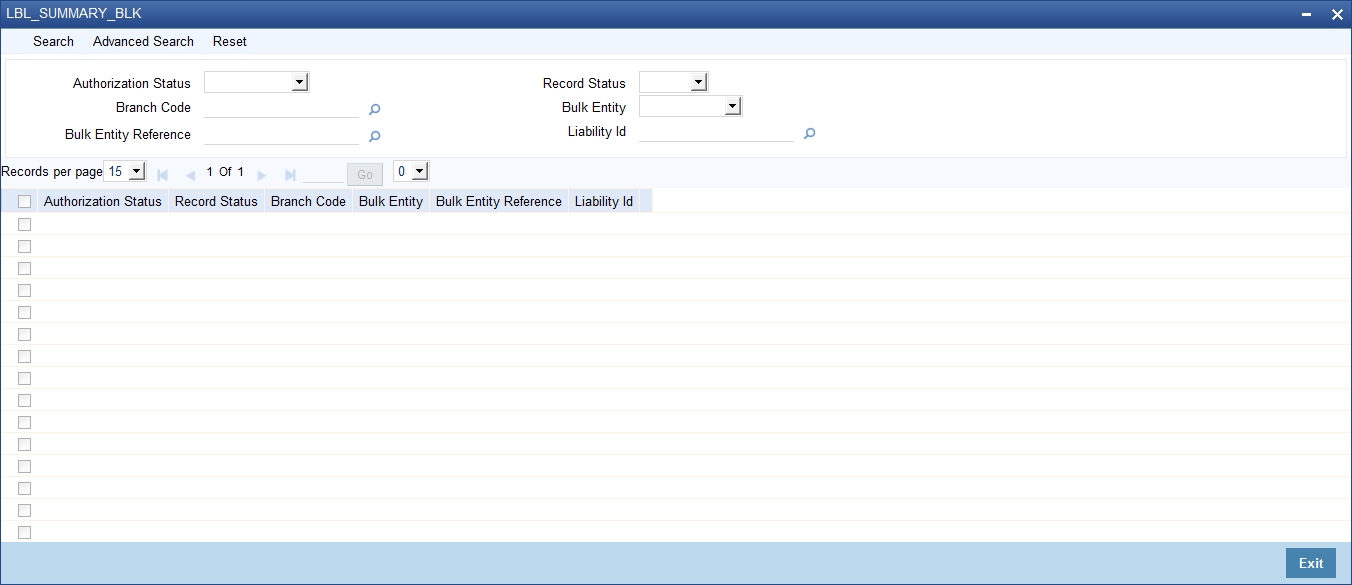
To view a particular record double click on the desired record displayed in the list of records. The required record is enabled for action.
3.14 Account Class Status Maintenance
This section contains the following topics:
- Section 3.14.1, "Maintaining Account Class Status"
- Section 3.14.2, "Accounting Entries Button"
- Section 3.14.3, "Advices Button"
3.14.1 Maintaining Account Class Status
You can maintain the account class status through the 'Account Status Class' screen. To invoke this screen type 'CLDASTCL' in the field at the top right corner of the Application tool bar and clicking on the adjoining arrow button.
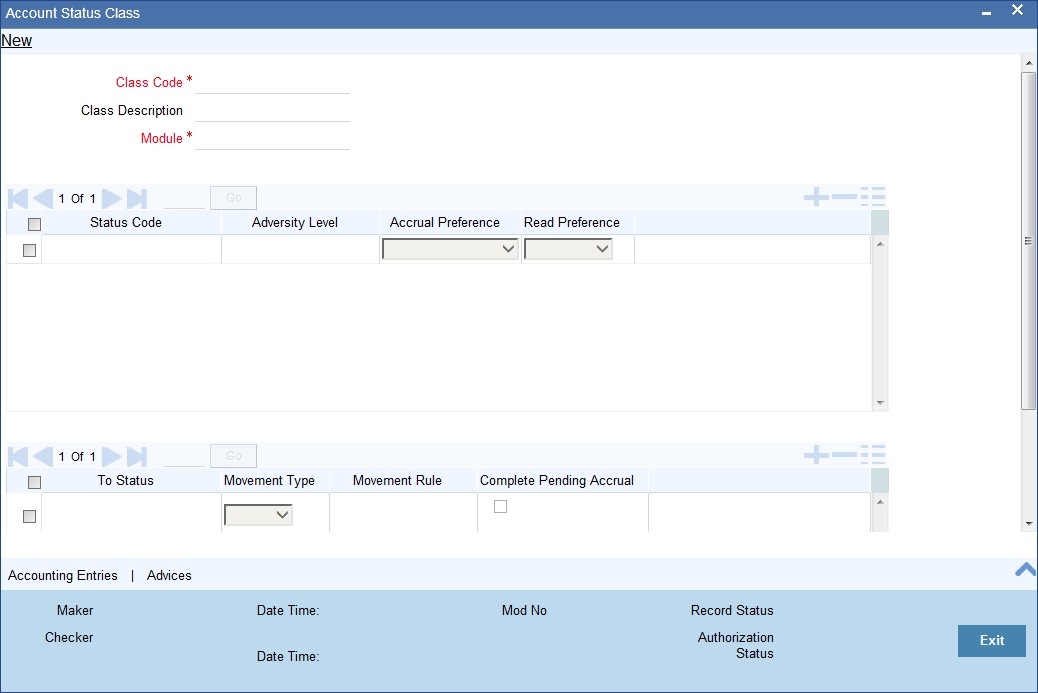
Class Code
Specify the class code.
Class Description
Give a brief description on the class.
Module
Select the module from the adjoining option list.
Status Code
Select the status code from the adjoining option list.
Adversity Level
Specify the adversity level of the account class status.
Accrual Preference
Select the accrual preference from the adjoining drop-down list. The available options are:
- Stop Accrual – accruals are frozen
- Reverse Accrual – accruals till date are reversed by transferring them to an expense GL
- Continue Accrual – accruals continue as in the previous status as per the Role to Head maintained for the status and as per the accounting entries defined
Read Preference
Select the read preference from the adjoining drop-down list.
From Status and To Status
When you highlight a status from the list of status codes maintained for the product, the selected status becomes the ‘From Status’
In the option list provided for the ‘To Status’, the status codes applicable for the product is displayed.
Movement Type
Select the movement type from the adjoining drop-down list. The movement can be:
- Auto
- Manual
- Both
Movement Rule
You have to define the status derivation rule which will determine the movement of an account from one status to the other.
Complete Pending Accrual
Check this box to indicate if the pending accruals need to be completed before the Account status changes. This is applicable only if Accrual Frequency is any one of the following:
- Monthly
- Quarterly
- Half yearly
- Yearly
This check box will not be enabled if Accrual Frequency in the ‘Consumer Lending Product’ screen is ‘Daily’.
3.14.2 Accounting Entries Button
Click on ‘Accounting Entries’ button in the ‘Account Status Class’ screen to maintain the accounting entries.
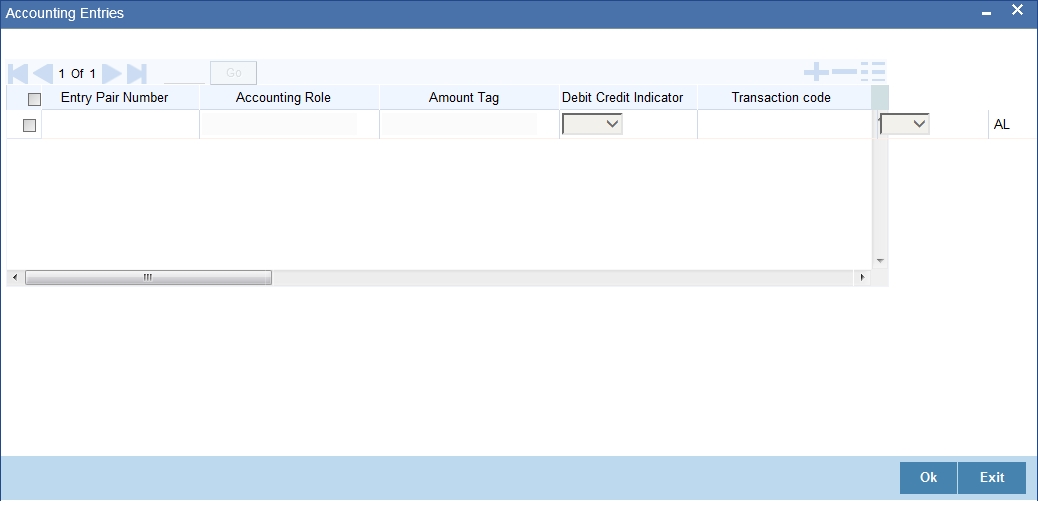
Entry Pair Number
Specify the entry pair number.
Accounting Role
Select the accounting role that should be used at the event from the adjoining option list.
Amount Tag
Specify the amount tag applicable for the Accounting Role.
Debit Credit Indicator
Indicate whether the accounting entry is a debit or credit.
Transaction Code
Select the transaction code from the adjoining option list.
Netting Indicator
Indicate the4 netting as Yes or No.
GAAP Indicator
Indicate the GAAP indicators for which the accounting entry is required.
Settlement
Select the settlement type from the adjoining drop-down list. The settlement types are:
- Yes
- No
- Reimbursement
Amount Tag Type
Select the amount tag type from the adjoining drop-down list. The options available are:
- Yes
- No
- Contra
Balance Check
Select the balance check from the adjoining drop- down list. The options available are:
- Reject
- Delinquency Tracking
- Force Debit
- Partial Delinquency
Delinquency Product
Select the delinquency product from the adjoining option list.
MIS Head
Select the MIS head from the adjoining option list.
Revaluation Required
Check this box if revaluation is required.
Profit GL
Select the profit GL from the adjoining option list.
Loss GL
Select the loss GL from the adjoining option list.
Rate Code
Select the rate code from the adjoining option list.
Revaluation Transaction Code
Select the revaluation transaction code from the adjoining option list.
Holiday treatment
Select the holiday treatment from the adjoining drop-down list. The options available are:
- Yes
- No
3.14.3 Advices Button
Click on ‘Advices’ button in the ‘Account Status Class’ screen to maintain the advices.
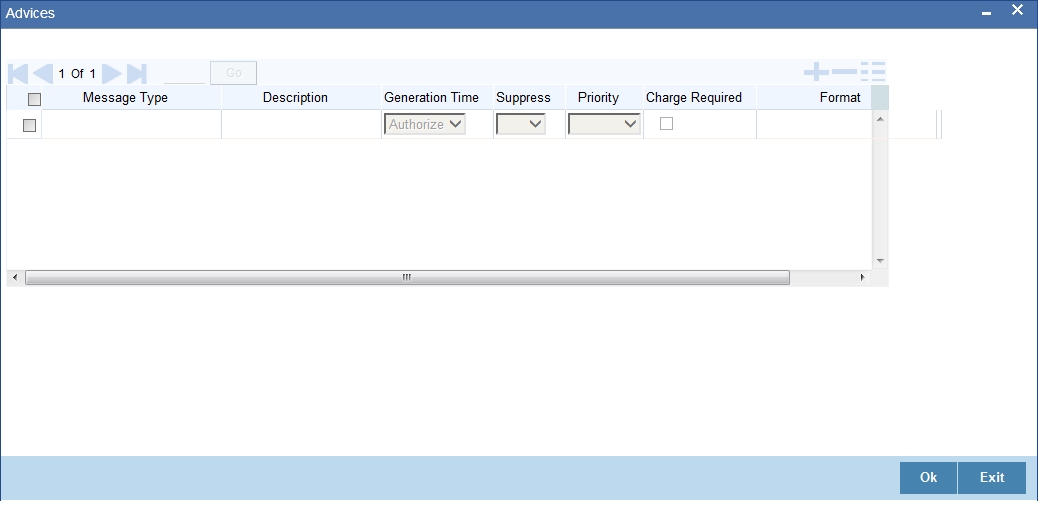
Message Type
Select the message type from the adjoining option list.
Description
Give a brief description on the advice.
Generation Time
Select the generation time from the adjoining drop-down list. The options are:
- Input
- Authorize
Suppress
Indicate whether you want to suppress the advice generation.
Priority
Select the priority of advice generation from the adjoining drop-down list.
Charge Required
Check this box if charge is required.
Format
Select the format of advice generation from the adjoining option list.
3.15 Lending Event Class Maintenance
This section contains the following topics:
- Section 3.15.1, "Maintaining Lending Event Class"
- Section 3.15.2, "Accounting Entries Button"
- Section 3.15.3, "Advices Button"
3.15.1 Maintaining Lending Event Class
You can maintain the lending event class through the ‘Lending Event Class Maintenance’ screen. To invoke this screen type ‘CLDACTCL’ in the field at the top right corner of the Application tool bar and clicking on the adjoining arrow button.

You can capture the following in this screen:
Class Code
Specify the class code.
Class Description
Give a brief description on the class.
Module
Select the module from the adjoining option list.
Module Description
Give a brief description on the module.
Event Details
Event
Select the event from the adjoining option list.
Event Description
The system displays a brief description on the event selected.
3.15.2 Accounting Entries Button
Click on ‘Accounting Entries’ button in the ‘Lending Event Class Maintenance’ screen to maintain the accounting entries.
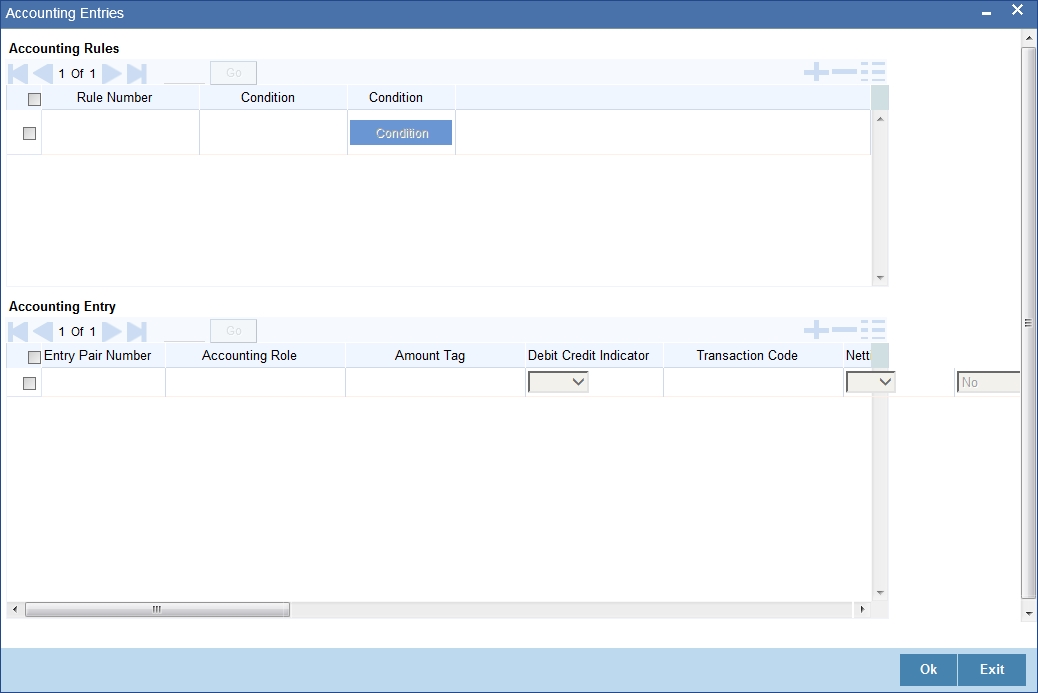
Accounting Rules
Rule Number
Specify the unique number for the rule maintained for accounting entries.
Condition
Specify the condition for generating the rule.
Accounting Entry
Entry Pair Number
Specify the entry pair number.
Accounting Role
Select the accounting role that should be used at the event from the adjoining option list.
Amount Tag
Specify the amount tag applicable for the Accounting Role.
Debit Credit Indicator
Indicate whether the accounting entry is a debit or credit.
Transaction Code
Select the transaction code from the adjoining option list.
Netting Indicator
Indicate the netting as Yes or No.
GAAP Indicator
Indicate the GAAP indicators for which the accounting entry is required.
Settlement
Select the settlement type from the adjoining drop-down list. The settlement types are:
- Yes
- No
- Reimbursement
Split Balances
Select the split balances from the adjoining drop-down list. The options available are:
- Yes
- No
- Contra
Balance Check
Select the balance check from the adjoining drop- down list. The options available are:
- Reject
- Delinquency Tracking
- Force Debit
- Partial Delinquency
Delinquency Product
Select the delinquency product from the adjoining option list.
MIS Head
Select the MIS head from the adjoining option list.
Revaluation Required
Check this box if revaluation is required.
Profit GL
Select the profit GL from the adjoining option list.
Loss GL
Select the loss GL from the adjoining option list.
Rate Code
Select the rate code from the adjoining option list.
Revaluation Transaction Code
Select the revaluation transaction code from the adjoining option list.
Holiday treatment
Select the holiday treatment from the adjoining drop-down list. The options available are:
- Yes
- No
3.15.3 Advices Button
Click on ‘Advices’ button in the ‘Lending Event Class Maintenance’ screen to maintain the advices.
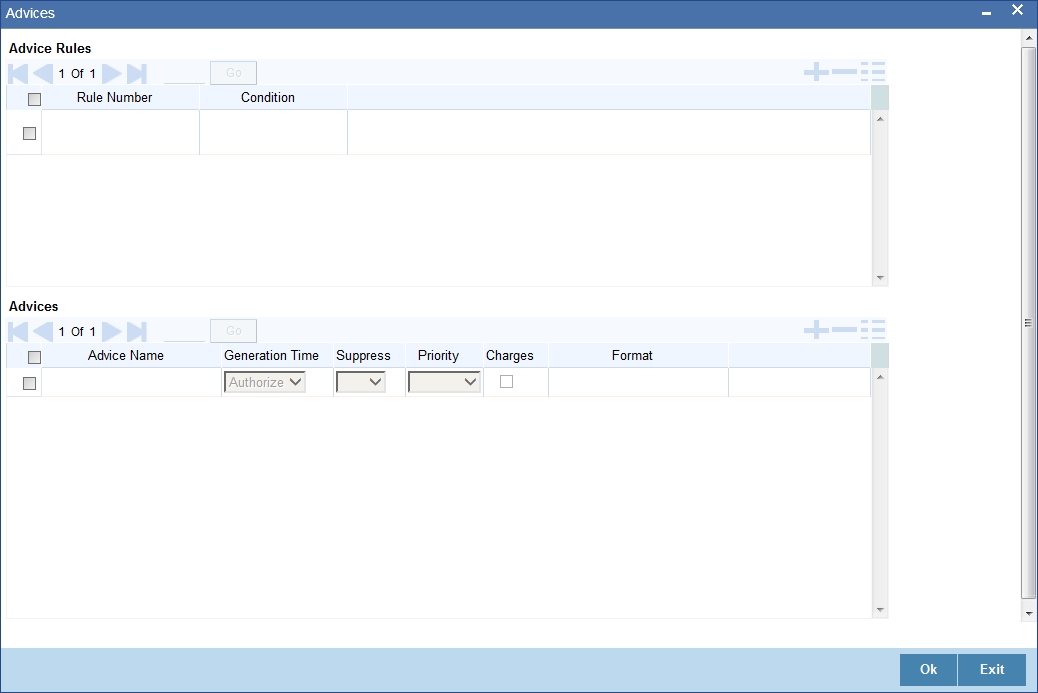
Advice Rules
Rule Number
Specify the unique number for the rule maintained for advices.
Condition
Specify the condition for generating the rule.
Advices
Advice Name
Select the advice name from the adjoining option list.
Generation Time
Select the generation time from the adjoining drop-down list. The options are:
- Input
- Authorize
Suppress
Indicate whether you want to suppress the advice generation.
Priority
Select the priority of advice generation from the adjoining drop-down list.
Charges
Check this box if charge is required.
Format
Select the format of advice generation from the adjoining option list.