4. Maintaining Retail Teller Products
4.1 Introduction
This chapter contains the following sections:
- Section 4.2, "Maintain Products"
- Section 4.3, "Transaction Reversal"
- Section 4.4, "Inter Branch Transaction Request"
- Section 4.5, "Intra Bank Transit Account Maintenance"
- Section 4.6, "Generating Notifications"
4.2 Maintain Products
This section contains the following topics:
- Section 4.2.1, "Invoke ‘RT Product Definition’ screen"
- Section 4.2.2, "Specifying Product Preferences"
4.2.1 Invoke ‘RT Product Definition’ screen
To process different teller transactions, you must maintain appropriate products. You can maintain products using the ‘RT Product Definition’ screen, which you can invoke from the Application Browser. You can invoke this screen by typing ‘DEDRTPRM’ in the field at the top right corner of the Application tool bar and clicking on the adjoining arrow button.
In this screen, you can enter basic information relating to a retail teller product such as the Product Code, the Description, etc.
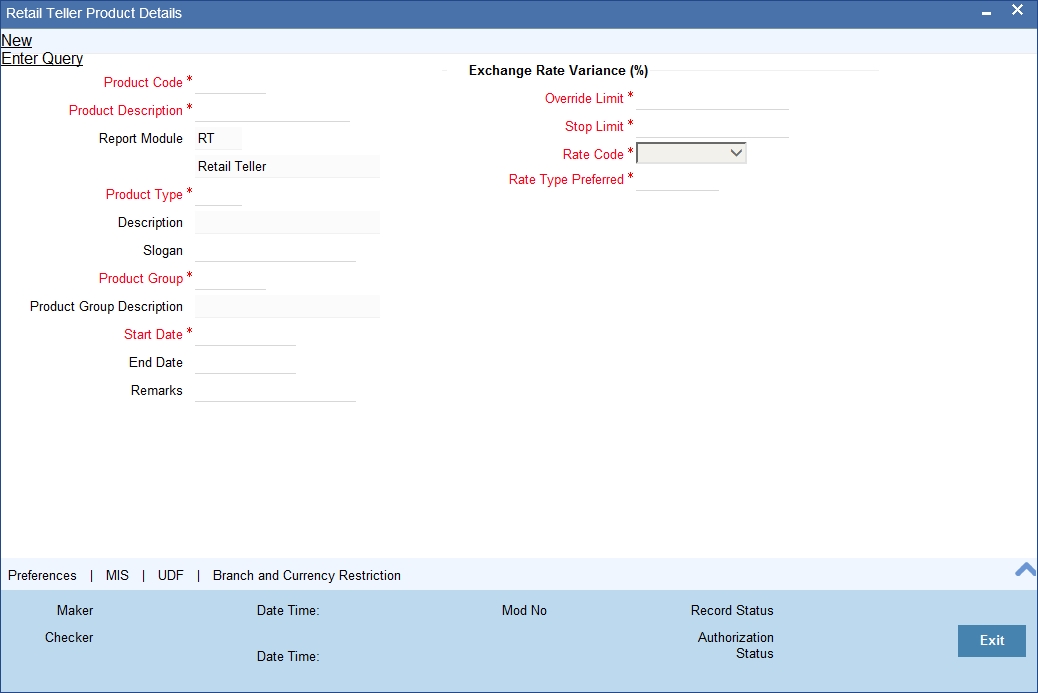
For any product you create in Oracle FLEXCUBE, you can define generic attributes by clicking on the appropriate icon in the horizontal array of icons in this screen. For a retail teller product, in addition to these generic attributes, you can specifically define other attributes. These attributes are discussed in this chapter.
You can define the attributes specific to a retail teller product in the RT Product Definition Main screen and the Retail Teller Product Preferences screen. In these screens, you can specify the product type and set the product preferences respectively.
For further information on the generic attributes that you can define for a product, please refer the Products Oracle FLEXCUBE User Manual.
Specifying the Product Type
Indicate if the product that you are creating is cash based or non-cash based. From the drop down list in the Product Type field, select ‘Cash’ from the list to indicate a cash type product, or select ‘Others’ to indicate a non-cash type product.
4.2.2 Specifying Product Preferences
You can maintain preferences for teller products from the Product Definition Main screen. Click ‘Preferences’ button to invoke the ‘Retail Teller Product Preferences’ screen.
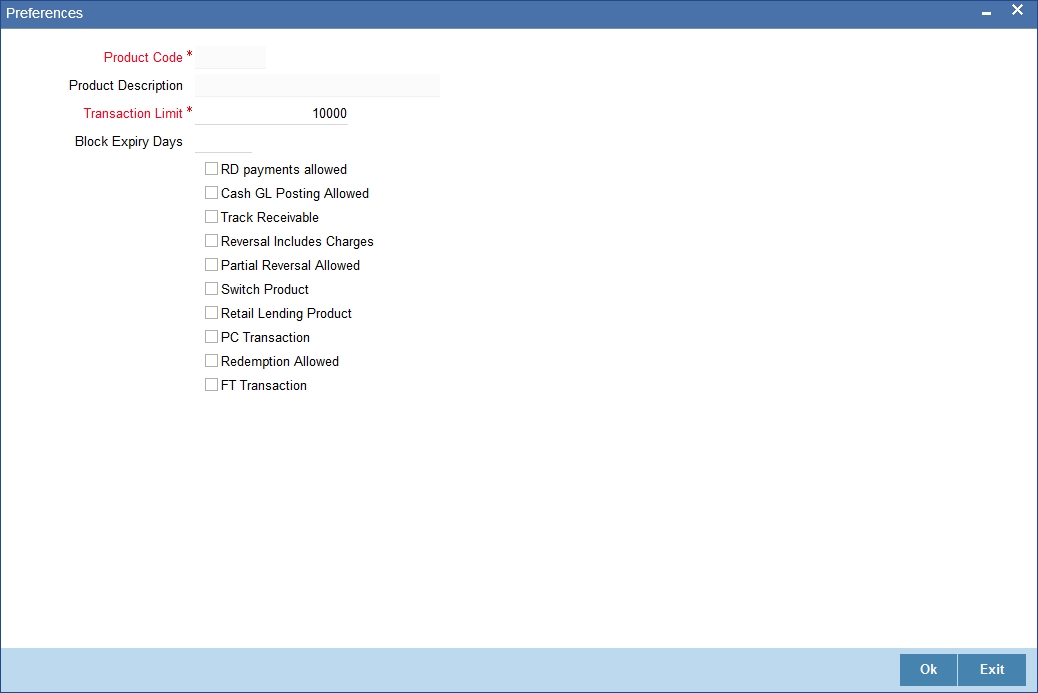
Track Receivable
During liquidation of teller transactions, if the system detects insufficient funds in the account, then you can choose to block the subsequent credit that happens to the settlement account. In other words, the system will track the account for receivables. As and when a credit happens, the funds will be allocated to the teller entry depending on the product sequence that you specify at the account class level.
Note
Refer to the Core Entity User Manual for details on maintaining funds allocation sequence.
When you post a teller transaction to an account and there are insufficient funds in the account, then the system will save the contract but the contract remains uninitiated. Accounting entries will not be posted for this contract.
During EOD processing of these contracts, when the full balance becomes available in the account, the system will post the necessary accounting entries and mark the contract as liquidated.
Your specification for this field will default to all contracts involving the product. However, you are allowed to modify it at the contract level also.
Retail Lending Product
Check this option to allow a retail lending loan account in the transaction. Only products marked as ‘Retail Lending Product’ will allow a retail lending loan account in the transaction.
PC Transaction
Check this box to generate the PC transaction for the branch transaction under this RT product.
FT Transaction
Check this box to generate the FT contract for the branch transaction under the RT product.
If the Product Code is ‘CXTR’ and the FT transaction check box is checked, you can process international cash transfers for account holders and walk in customers.
4.3 Transaction Reversal
In special circumstances, you may want to remove a transaction from the system. In Oracle FLEXCUBE you have the option of either ‘deleting’ the transaction or ‘reversing’ it
When is reversal possible?
Every transaction that is entered in the system must be ratified or, in other words, ‘authorized’ by another user with the requisite rights. An authorized transaction can only be reversed It cannot be deleted
In case you want to reverse a cash transaction, which was entered the previous day, the following validation is performed:
- the system ensures that the till used for the reversal is the same as that used in the original transaction
Reversing a transaction
In the Teller Entry form navigate to the transaction that you want to reverse. Click reverse icon in the Toolbar or choose Reverse from the Actions menu. The system will seek a confirmation of the reversal. On confirmation, the system will reverse the accounting entries that were passed for the transaction.
If cash transactions are reversed the system performs the following validations:
- the system ensures that the till used for the reversal is the same as that used in the original transaction
- the denominations are input (If the transaction is reversed the same day that it is input, the denominations of the transaction can be altered.)
- a batch is open
Note
You can reverse a transaction initiated from Oracle FLEXCUBE through FCUBS workflow process. Any cash transactions created through gateway should be reversed using reverseoperation of gateway. You should not reverse the cash transaction created in FCUBS through gateway as the gateway request will not update any of the FBTB tables including till.
4.3.1 Reversing of Online Charge
You can reverse the cash transactions using ‘Transaction Reversal’ screen. You can invoke this screen by typing ‘DEDONLRV’ in the field at the top right corner of the Application tool bar and clicking the adjoining arrow button.
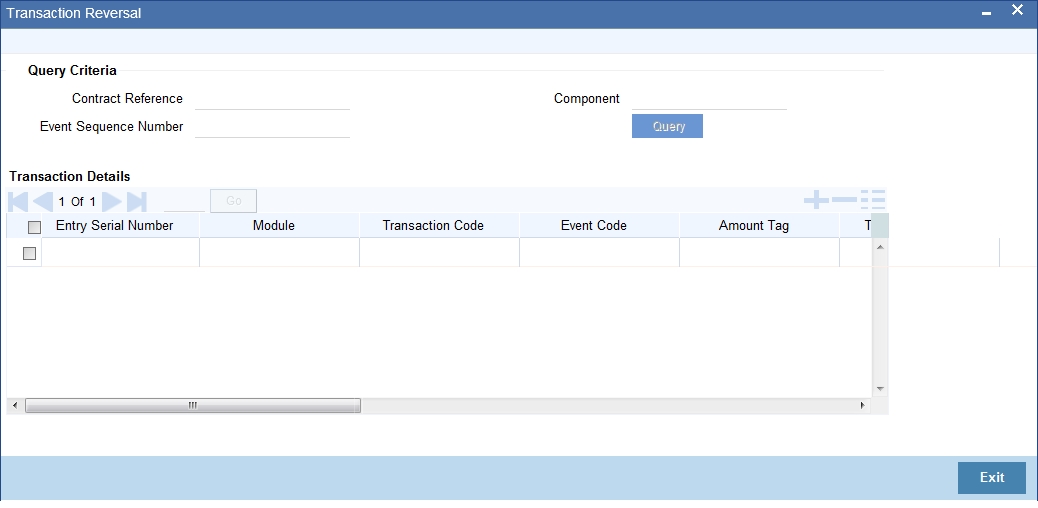
Query Criteria
You can base your query by providing any or all of the following details:
- Contract Reference - Transaction reference number for the contract
- Event Sequence Number - Event sequence number of the transaction
- Component - Charge component to be reversed
On clicking the ‘Query’ button, system identifies all records satisfying the above specified criteria and displays in the ‘Transaction Details’ section.
Transaction Details
System displays following details under ‘Transaction Details’ section.
- Entry Serial Number
- Module
- Transaction Code
- Event Code
- Amount Tag
- Transaction Date
- Value Date
- Debit/Credit
- Foreign Currency Amount
- Exchange Rate
- Local Currency Amount
- Related Reference
- Related Account
Note
You can reverse only non cash based transactions.
4.4 Inter Branch Transaction Request
One branch of your bank can request the central cash depository, which is maintained as a branch in Oracle FLEXCUBE for pickup or delivery of cash.
This section contains the following topics:
- Section 4.4.1, "Delivery of cash"
- Section 4.4.2, "Pickup of cash"
- Section 4.4.3, "Requesting Inter-branch Transactions"
- Section 4.4.4, "Viewing Summary of Inter-branch Transaction Requests"
4.4.1 Delivery of cash
A branch requests delivery of cash when it is in short cash. The process of cash delivery request is as follows:
- Requesting branch requests for delivery of cash using RTDBRTRX screen
- Remitting branch queries for the requests and accepts the request using RTDBRTRX screen
- On delivery date, the remitting branch books a transaction using 1410 screen with the denominations being sent and generates
- On the delivery date the remitting branch books a transaction input using 1410 screen, generates advices, and sends money to requesting branch
- On receiving money and advice, requesting branch uses 1411 screen to verify the denominations and saves the liquidation
4.4.2 Pickup of cash
A branch requests pickup of cash when it has excess cash.
- Requesting branch requests pickup of cash in RTDBRTRX
- Receiving branch queries for the requests and accepts the request using RTDBRTRX screen
- On date of cash pickup, receiving branch generates an advice and sends to requesting branch
- Requesting branch receives the advise and books transaction using 1410 screen
- Requesting branch generates advice and sends money and advice to receiving branch
- Receiving branch receives the money and advice, and verifies and liquidates the request using 1411screen
Note
While booking an inter branch cash transaction input through 1410, if the amount requested differs from the amount required through the ‘RTDBRTRX’ screen, then the user has the following two choices:
- Reject the current request and raise a fresh request through the ‘RTDBRTRX’ screen for the actual amount required, and follow the entire cycle again.
- Reject the request raised through ‘RTDBRTRX’ screen and directly book an inter branch cash transfer through 1410 for the requested amount without linking it with any request raised through ‘RTDBRTRX’.
4.4.3 Requesting Inter-branch Transactions
You can create inter-branch cash pickup or cash delivery requests using ‘Inter Branch Transaction Request’ screen. To invoke this screen, type ‘RTDBRTRX’ in the field at the top right corner of the application toolbar and click the adjoining arrow button.
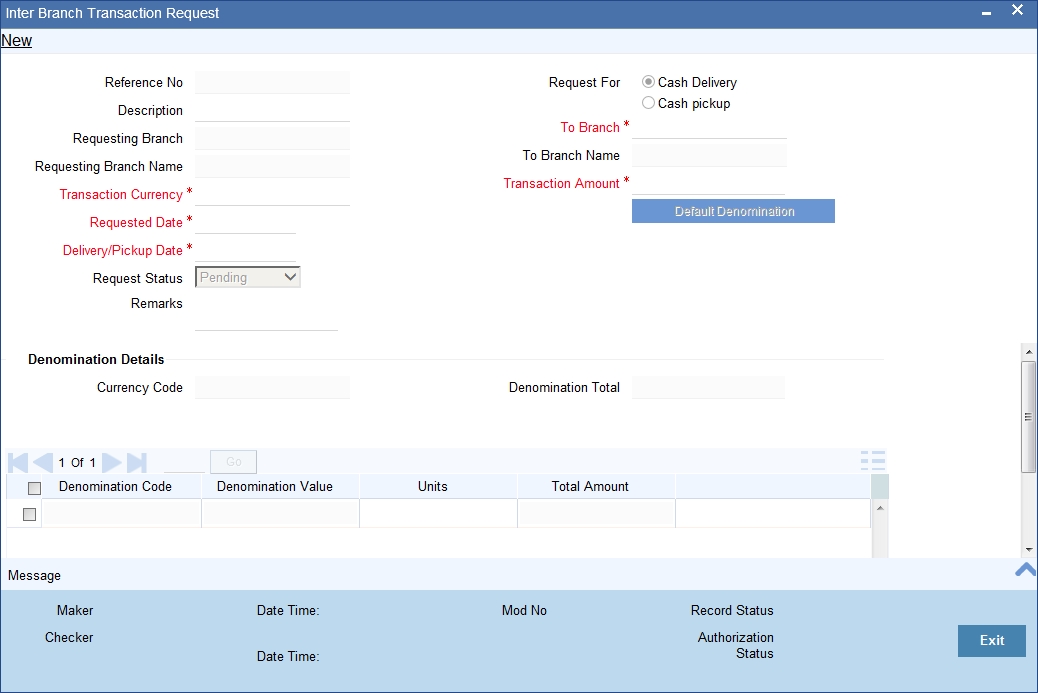
Specify the following details:
Reference Number
The system generates a reference number to identify the request.
Description
Specify the details of the request being made.
Requesting Branch
The system displays the current branch code.
Requesting Branch Name
The system displays the name of the current branch.
Request For
Select the type of request. You can select one of the following requests:
- Delivery of cash - when branch is in short of cash
- Pickup of cash - when branch has excess cash
To Branch
Select the branch code of the branch to which the request is being made.
To Branch Name
On selecting the branch code, the system displays the name of the branch.
Transaction Currency
Select the transaction currency from the option list.
Transaction Amount
Specify the amount that should be transferred.
Request Date
The system displays the current system date as request date.
Request Status
Select the status of the request. The drop-down list shows following options:
- Request - to create a new request
- Accept - to accept a request received
- Pending - system defined status indicating that the request has been sent but not accepted
- Initiated - system defined status indicating that the request has been accepted and initiated
- Liquidated - system defined status indicating that the request has been processed and liquidated
Remarks
Specify the remarks, if any.
Denomination Details
The system displays the following denomination details of a processed request:
- Currency Code
- Denomination Total
- Denomination Code
- Denomination Value
- Units
- Total Amount
4.4.3.1 Viewing Advices
Click ‘Messages’ button to view the advices.
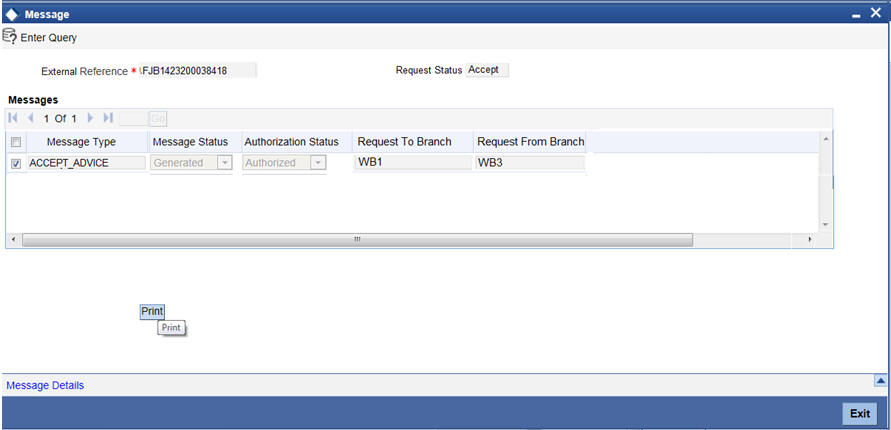
You can view the following details of generated messages:
- Message type
- Message status
- Authorization status
- Request to branch
- Request from branch
Once you have captured the details, click ‘OK’ button the create the request. The request is sent to the receiving/remitting bank for further processing.
4.4.4 Viewing Summary of Inter-branch Transaction Requests
You can view a summary of interbranch transaction requests using ‘Interbranch Transactions Requests Summary’ screen. To invoke this screen, type ‘RTSBRTRX’ in the field at the top right corner of the application toolbar and click the adjoining arrow button.
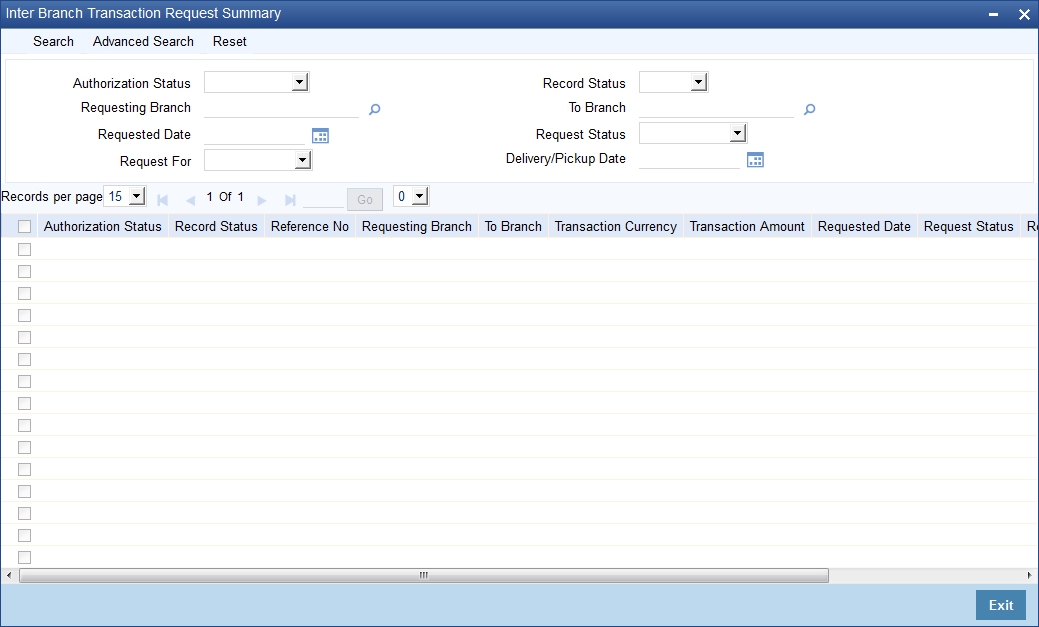
You can search for the records based on one ore more of the following parameters:
- Authorization status
- Record status
- Requesting branch
- To branch
- Requested date
- Request status
4.5 Intra Bank Transit Account Maintenance
This section contains the following topics:
4.5.1 Maintaining Intra bank Transit account
You can maintain intrabank transit account for each branch for receiver branch, vault and currency combination in the ‘Transit Account Maintenance’ screen.
You can invoke this screen by typing ‘DEDTRACC’ in the field at the top right corner of the Application tool bar and clicking the adjoining arrow button.
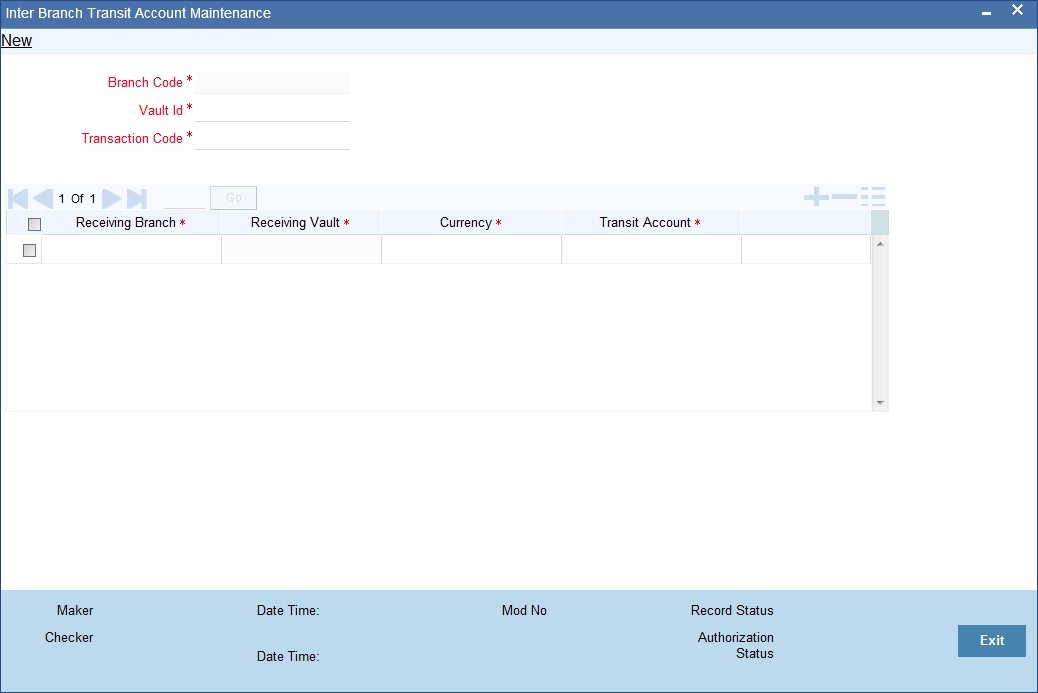
Here you can specify the following fields:
Branch Code
Specify the branch code. The adjoining option list provides all the branch codes maintained in the system. You can choose the appropriate one.
Vault
The system defaults the vault from which cash will be transferred. This is done on the basis of selected branch.
Transaction Code
Specify the transaction code. The adjoining option list provides all the valid codes maintained in the system. You can choose the appropriate one.
4.5.2 Currency Details Tab
You can specify the following details here:
Receiving Branch
Specify the destination branch to which the cash will be transferred.
Receiving Vault
The system defaults the vault in the destination branch which will receive the cash. This is done on the basis of selected branch.
Currency
The system displays the currency of the cash.
Transit GL
The system displays the transit account that is used to track the movement of cash.
4.6 Generating Notifications
Oracle FLEXCUBE provides a facility to insert notification of transactions done through the Retail Teller module in the notification table. The following list of fields is sent in the notification for a transaction done in the RT module:
- Branch Code.
- Name of the branch where the transaction is done (Branch Description)
- Transaction Reference Number
- Transaction code – To differentiate transaction like Cash Deposit, Cash Refund or Reversal, Cash Withdrawal
- Transaction Code Description
- Transaction Product Code
- Transaction Product Code Description
- Original Transaction Reference Number (for reversals)
- Debit Account Number
- Debit Account Currency.
- Debit Amount.
- Credit Account Number.
- Credit Account Currency.
- Credit Amount.
- Date of the Transaction along with Time (Time Stamp).
- Value date of the Transaction.
- Transaction Narration.
- Current balance and Available Balance in the debit account at the time of notification in Account Currency.
- Current balance and Available Balance in the credit account at the time of notification in Account Currency
Note
For the transactions done through ATM, notifications are inserted in the table by the ATM (Switch) module. Hence, sending the notification from RT module can be restricted for the same transaction.