3. Transactions Input
You can perform below mentioned activities in the Oracle FLEXCUBE Payments.
3.1 Outgoing Transaction Input
3.1.1 Capturing Transaction Details
You can book an outgoing SWIFT payment by providing input for the payment transaction in this screen. Input can be provided for a new transaction using the already saved template. Some Transaction fields are applicable only to the specific transfer type (Customer / Bank Bank transfer - Own Account).
You can invoke the ‘Cross Border Outgoing Transaction Input’ screen by typing ‘PXDOTONL’ in the field at the top right corner of the application toolbar and clicking the adjoining arrow button. Click new button on the Application toolbar.
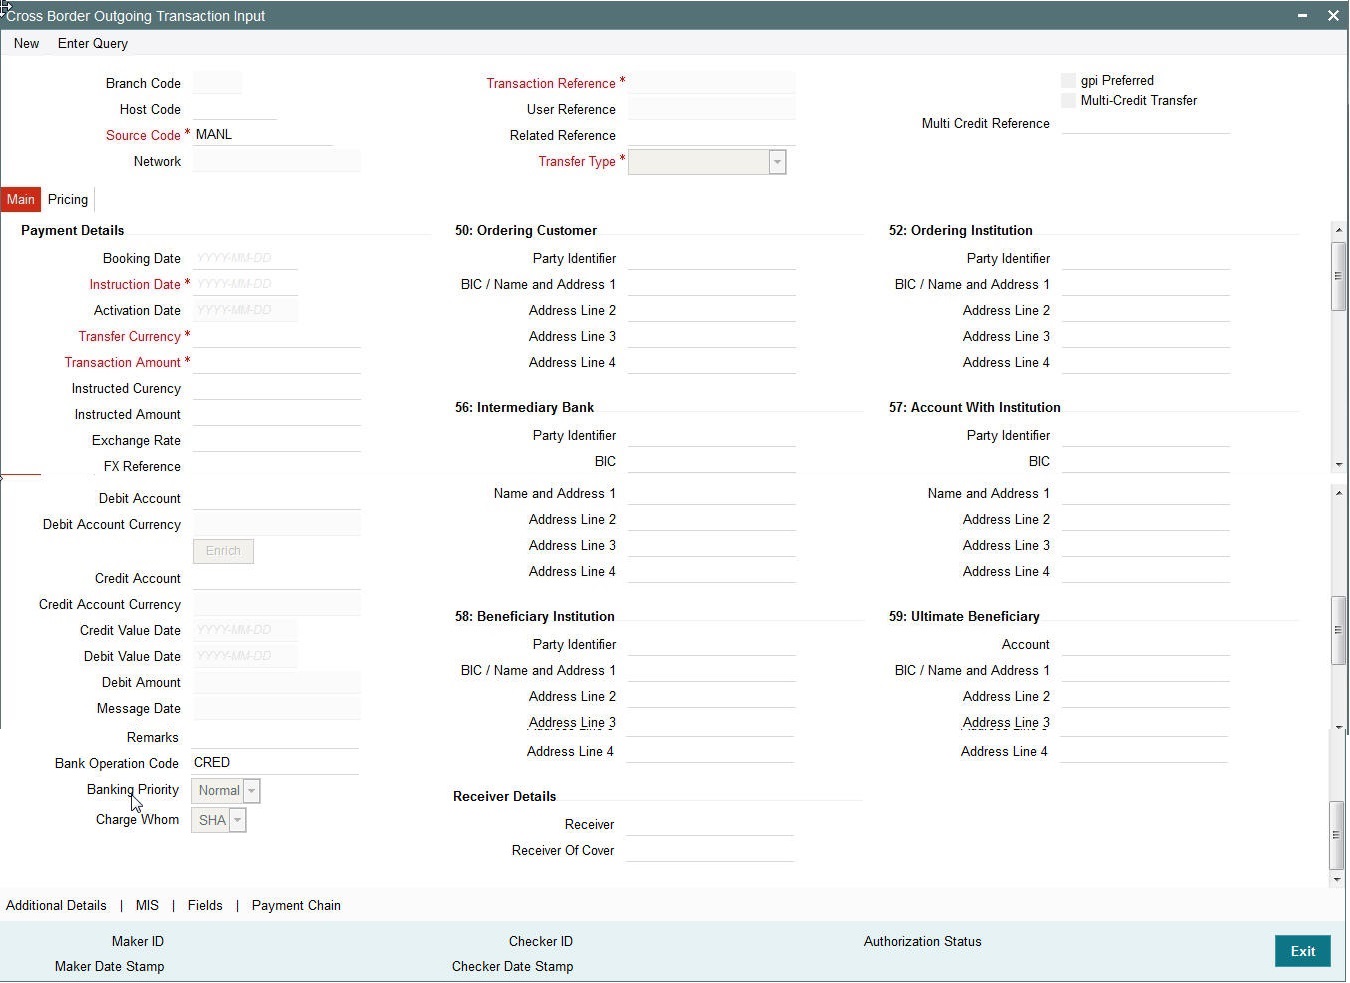
Specify the following details.
Branch Code
Displays the branch of the transaction.
Host Code
Displays the host code of the logged in user.
Source Code
The system displays the source code as MANL by default.
Transaction Reference Number
System displays auto-generated Transaction reference number. For more details on the format, refer the Payments Core User Guide.
Unique Reference Number
The system displays the auto-generated unique reference number.
Related Reference Number
After specifying Source code and clicking the Process (P) button, system generates and displays 10 digit reference numbers. The system generated value can be changed to any reference number desired by the user.
Transfer Type
Select the transfer type of the transaction. Options available are as follows:
- Customer Transfer
- Bank Transfer
- Cover Transfer
- Bank Transfer Own A/c
gpi Preferred
Check this box to indicate that this transaction is SWIFT GPI compliant.
Multi-Credit Transfer
Select this check box to indicate that this transaction is part of a multi-credit transfer batch.
Multi Credit Reference Number
Specify the Multi Credit Reference Number of an open multi-credit transfer batch of customer/bank transfers in which this transaction should included.
3.1.2 Main Tab
Click the Main tab in the ‘Cross Border Outgoing Transaction Input’ screen..
Specify the following details.
Payment Details
Booking Date
Select the booking date of transaction from the adjoining calendar.
Instruction Date
Select the customer advised Value Date of the transaction using the adjoining calender widget.
Note
- Future dated Cross Border transaction will be processed on the booking date if booking date is within the currency settlement days
- System will calculate the processing date of the transaction based on activation date which is a maximum of (instruction date – settlement days, booking date)
Activation Date
Specify the activation date of the transaction.
Note
- If activation date is equal to booking date, the transaction will be processed today
- If activation date is greater than booking date then the instruction would be processed on the derived processing date
Transfer Currency
Specify the currency in which the payment needs to be made. Alternatively, you can select the currency from the option list. The list displays all valid currencies maintained in the system.
Transaction Amount
Transaction Amount is calculated by the system based on the ‘Same As Transfer Currency’ flag and Currency conversion if applicable.
Instructed Currency
Specify the currency of the amount instructed by the customer. Alternatively, you can select the currency from the option list. The list displays all valid currencies maintained in the system.
Exchange Rate
The exchange rate is applicable for cross-currency transactions. The transaction is considered as cross-currency transaction if for an outgoing payment the debit account currency is different from the transfer currency.
FX Reference
Specify the foreign exchange reference.
Debit Account
Specify the debit account of the transaction. Alternatively, you can select the debit account from the option list. The list displays all valid accounts maintained in the system.
Debit Account Currency
The system displays the debit account currency based on the debit account selected.
Credit Account
Specify the credit account of the transaction. Alternatively, you can select the debit account from the option list. The list displays all valid accounts maintained in the system.
Credit Account Currency
The system displays the credit account currency based on the credit account selected.
Credit Value Date
Specify the Credit Value Date.
Debit Value Date
Specify the Debit Value Date.
Message Date
For outgoing transactions, the system computes the message date based on the credit value date and displays it here along with the cut-off time.
Remarks
Specify any Operations remark or additional info pertaining to this transaction.
Bank Operation Code
Select the bank operation code from the option list. Options available are as follows:
- CRED – Credit Transfer with No SWIFT Service Level
- CRTS – Credit Transfer for Test Purposes
- SPAY – Credit Transfer for SWIFT Pay Service Level
- SPRI – Credit Transfer for Priority Service Level
- SSTD – Credit Transfer for Standard Service Level
If no value is selected then system defaults this field value to “CRED”.
Note
This is applicable only for customer transfers.
Banking Priority
Specify the priority of banking. Choose between Normal, Urgent and High.
Charge Whom
Specify the charge bearer for the transaction. The list displays the following values:
- OUR
- BEN
- SHA
50:Ordering Customer
The system displays the name and address of the customer ordering the transaction, based on the debit account selected.
This is applicable only for ‘Customer Transfer’ type of transaction. The ordering customer details including name and address are defaulted based on the debit account selected. However you can modify these details.
52:Ordering Institution
Specify the details of the financial institution that has ordered for the payment to be initiated.
56: Intermediary Bank
Specify the details of intermediary bank which is the correspondent bank of Account with institution.
You can capture below mentioned details of the intermediary bank here.
- Specify the correspondent account number in the first line starting with “/”.
- Specify the bank identifier and bank code in the second and third lines. If the bank identifier is BIC then you can select the appropriate BIC code from the adjoining option list that displays all valid BICs maintained in the system.
You can also specify the Name and Address of the Intermediary bank instead of the BIC Code, in lines 4 to 7.
57: Account with Institution
Specify the financial institution at which the beneficiary maintains their account. The beneficiary can be a retail/corporate in Customer Transfers or a Bank in case of Bank Transfers. Input is mandatory for ‘Customer Transfer’ type of transactions.
- Specify the correspondent account number in the first line starting with “/”.
- Specify the bank identifier and bank code in the second and third lines. If the bank identifier is BIC then you can select the appropriate BIC code from the adjoining option list that displays all valid BICs maintained in the system.
- You can also specify the Name and Address of the Intermediary bank instead of the BIC Code, in lines 4 to 7.
- IBAN validations is conditional mandatory for Cross Border Outgoing Payments
- IBAN validation for ultimate beneficiary account is done by the system when BIC is present in tag 57(AWI) and IBAN check is set as required for AWI BIC’s country. System fetches the ISO country code from BIC code (5th & 6th char).
- IBAN validation is done based on the data maintained in the existing IBAN Information Maintenance (ISDESBAN)
- If BIC code is not present in tag 57, system fetches the ISO country code from the receiver of the payment. If IBAN check is required for the receiver country then system validates IBAN for ultimate beneficiary account.
- These validations are applied on Customer & Bank Transfer transactions, both on Origination from the system & for pass through cases.
58: Beneficiary Institution
Specify the financial institution which is the ultimate recipient of the funds being transferred.
This is applicable only to Bank Transfers.
You can capture below mentioned details of the Beneficiary Institution here.
- Specify the account number in the first line starting with “/”
- Specify the BIC code in the second line. You can also select the appropriate BIC code from the adjoining option list that displays all valid BICs maintained in the system..
- You can also specify the Name and Address of the Beneficiary Institution instead of the BIC Code, in lines 3 to 5.
59: Ultimate Beneficiary
Specify the details of the Ultimate Beneficiary of the payment. This field is available only for ‘Customer Transfer’ type of transactions.
You can capture below mentioned details of the Beneficiary here.
- In Line 1, specify the customer beneficiary account number to which the transaction amount should be credited. You can specify the IBAN of the account. Alternatively, you may search and select the account number using LOV if the beneficiary account is maintained with the bank, which is the case in Incoming payments. This field is available only for ‘Customer Transfer’ type of transactions.
- Specify the Name and Address of the Beneficiary in lines 2 to 5.
- Instead of the Name and Address, you can also specify the BIC code of the Beneficiary in line 2.
Receiver
System derives the Receiver (bank) of the outgoing payment message as part of Payment chain building activity and populates the BIC code of this bank in this field.
This field is also populated on clicking Enrich button.
You may choose to override the system derived Receiver with a different BIC code and input the same over here. On save, sytem validates if a SWIFT message can be sent to the user specified Receiver BIC code.
Receiver of Cover
System derives the Receiver of Cover (bank) of the outgoing payment message as part of Payment chain building activity if a Cover message is required to be sent in addition to the payment messages. The BIC code of this bank is populated in this field.
This field is also populated on clicking Enrich button.
- You may choose to override the system derived Receiver of Cover with a different BIC code and input the same over here. On save, system validates if the user specified Receiver of Cover is a currency correspondent and a SWIFT message can be sent to this BIC code.
3.1.3 Additional Details Button
You can capture additional information and view field values set by the system for the transaction.
You can invoke the ‘Additional Details’ sub-screen in Transaction Input by clicking the “Additional Details” link present at the bottom of the screen.
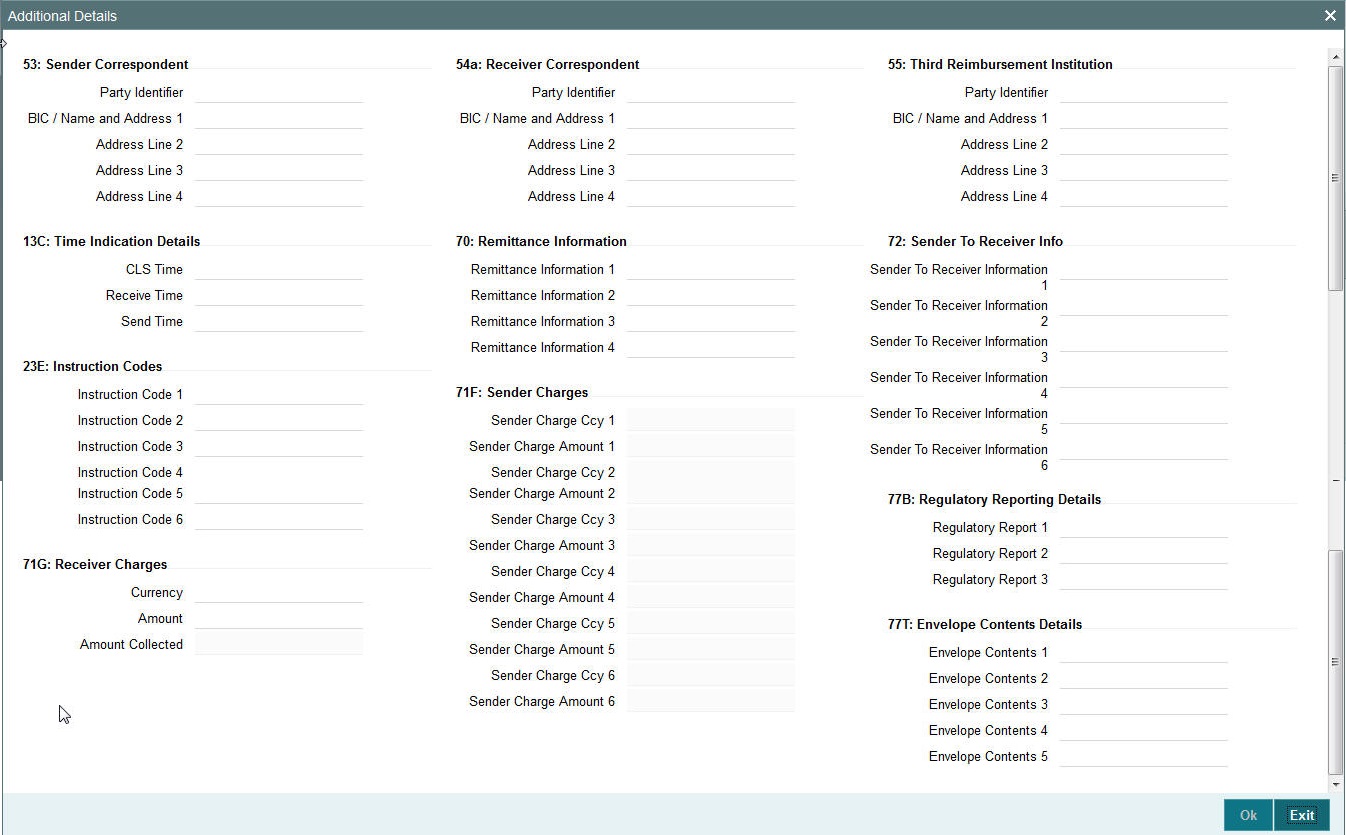
Specify the following details.
53: Sender Correspondent
The system displays the Party Identifier, BIC code or details like Name and Address of the sender’s correspondent through which the payment transaction should be routed. This value is populated after deriving the Payment chain as part of the processing. This BIC would be present in the Currency Correspondent maintenance for the Transfer currency.
Note
- If an account is present in 53B of the incoming customer transfer & bank transfer then system will debit account present in 53B and not from the currency correspondent maintenance.
- The account must be a vostro account and not a nostro account
- If system doesn’t find a valid vostro account the incoming transaction will go to repair queue
54a: Receiver Correspondent
The system displays the Party Identifier, BIC code or details like Name and Address of the branch of the receiver or another financial institution in which the funds are made available to the receiver. This value is populated after deriving the Payment chain as part of the processing. This BIC would be present in the Global Correspondent maintenance for the Transfer currency.
23E: Instruction Codes
Instruction Code 1 through to Instruction Code 6
Specify a standard Instruction code in each field and then input additional information. Alternatively you can select the standard Instruction code type from the option list. The list displays all valid instruction codes maintained in the system.
Transaction Type Code
The system displays the applicable transaction type code for the transaction.
55: Third Reimbursement Institution
The system displays the BIC code or details like Name and Address of the receiver's branch, when the funds are made available to this branch through a financial institution other than that indicated in Field 53. This value is populated after deriving the Payment chain as part of the processing. This BIC would be present in the Global Correspondent maintenance for the Transfer currency.
71G: Receiver charges
If Charge Whom field in the Preferences section of the Main tab has a value of “OUR” then you can specify the Receiver’s charges in case of ‘Customer Transfer’ if they are required to be included in the Settlement amount.
Currency
Specify the charge currency.
Amount
Specify the charge amount due to the receiver.
Amount Collected
The system populates this field based on the Receiver charges specified.
77B: Regulatory Reporting Details
Specify the statutory and/or regulatory information required by the authorities in the country of receiver or sender. You should specify this information by specifying a regulatory code (placed between ‘/’) followed by 2 character country code and followed by regulatory details. This information should be specified in up to 3 lines each containing 35 characters.
13C: Time Indication Details
Specify the standard time indication related to the processing of the payment instruction. You should input the standard Time indication code (placed between ‘/’) followed by Time, a sign (+ or -) and the Offset from UTC. Alternatively, you can select the time indication code from the option list. The list displays all valid time indications maintained in the system, which are CLSTIME, RNCTIME and SNDTIME.
70: Remittance Information
Specify the Remittance Information details from fields 1 to 4.
71F: Sender Charges
Sender Charge Ccy 1 through to Sender Charge Ccy 6
The system displays the charge currency of Sender’s charges that are deducted from the Transfer amount by this bank (Sender) or by any of the previous banks in the payment chain. These charges are applicable in case of Customer Transfers and the Charge Whom field value selected is SHA or BEN.
Sender charge Amount 1 through to Sender Charge Amount 6
The system displays the amount of Sender’s charges.
In case of an incoming Customer transfer message, each of the previous banks in the payment chain would have deducted charges from the Transfer amount and details of the same would be present in the message. The Charge currency and Charge amount of each of these charges would be populated in up to 6 sets of these fields in addition to the charges deducted by this bank
Sender to Receiver Information
Displays the details of Sender to Receiver information comprising BIC or Name and Address.
77T: Envelope Contents Details
Specify the contents of the Envelope in the lines from 1 to 5.
3.1.4 Pricing Tab
You can view the charge amount computed by the system for each of the Pricing components of the Pricing code linked to the network code of the transaction. Click the “Pricing” tab.
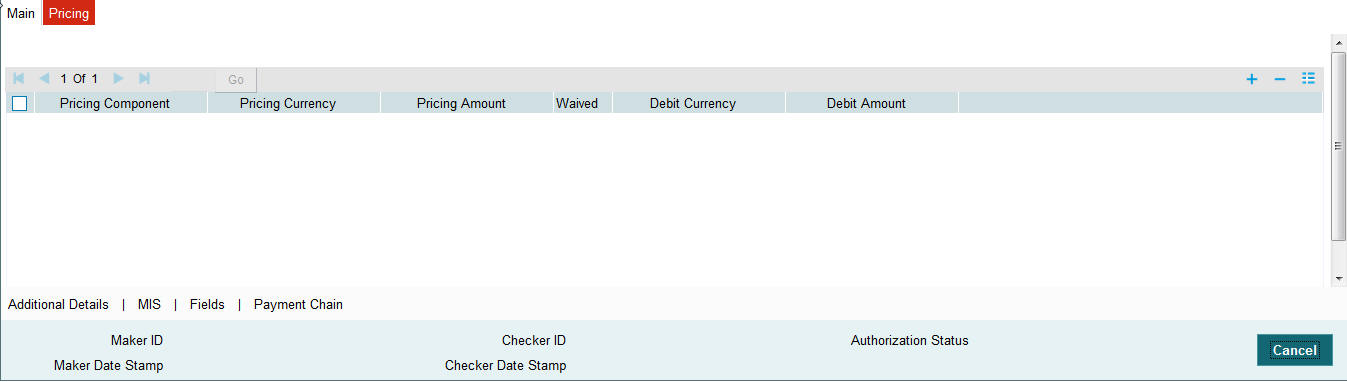
Specify the following details:
Pricing Component
The system displays each Pricing component of the Pricing code from the Pricing Code maintenance.
Pricing Currency
The system displays the Pricing currency of each Pricing component of the Pricing code.
Pricing Amount
The system displays the calculated Charge amount for each Pricing component of the Pricing code.
Waived
The system displays if charges for any Pricing component are waived in the Pricing maintenance.
Debit Currency
The system displays the currency of the Charge account to be debited for the charges.
Debit Amount
The system displays the Charge amount for each Pricing component debited to the charge account in Debit currency. If the Pricing currency is different from the Debit currency the calculated charges are converted to the Debit currency and populated in this field.
3.1.5 MIS section
You can maintain the MIS information for the Transaction. If the MIS details are not entered for the Transaction the same is defaulted from the product maintenance. Click the ‘MIS’ link to invoke the ‘MIS’ sub-screen
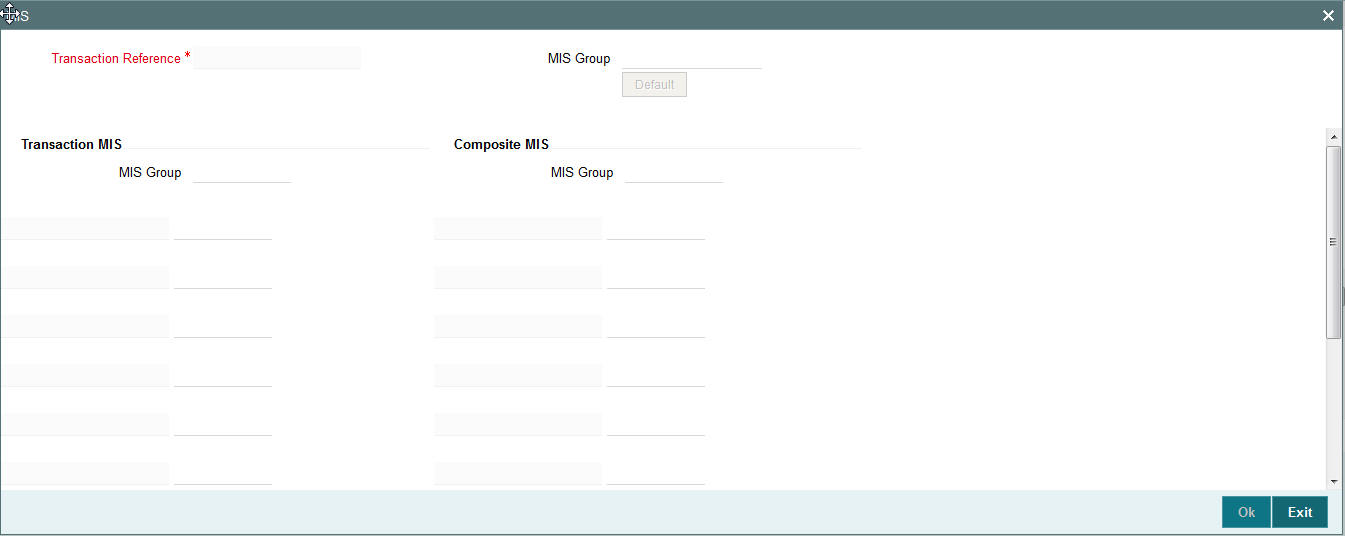
Specify the following details
Transaction Reference
The system displays the transaction reference number of the transaction.
MIS Group
Specify the MIS group code. Alternatively, you can select the MIS group code from the option list. The list MIS group displays all valid MIS groups maintained in the system for different sources in the Source maintenance. By default, the MIS group linked to the ‘Manual’ source is populated while booking a transaction from this screen.
Default button
Click this button after selecting a MIS group different from the default MIS Group (which was populated) so that any default MIS values can be populated from to link to the Transaction MIS and Composite MIS classes.
Transaction MIS
The default MIS values for Transaction MIS classes are populated for the MIS group. You can change one or more default MIS values or specify more MIS values. Alternatively, you can select MIS values from the option list.
Composite MIS
The default MIS values for Composite MIS classes are populated for the MIS group. You can change one or more default MIS values or specify more MIS values. Alternatively, you can select MIS values from the option list.
3.1.6 Fields Section
Click the ‘Fields’ Section in the Transaction Input screen to invoke the ‘Fields’ sub screen.
This sub-screen defaults values of UDF fields that are part of the UDF group specified for the ‘Manual’ source.
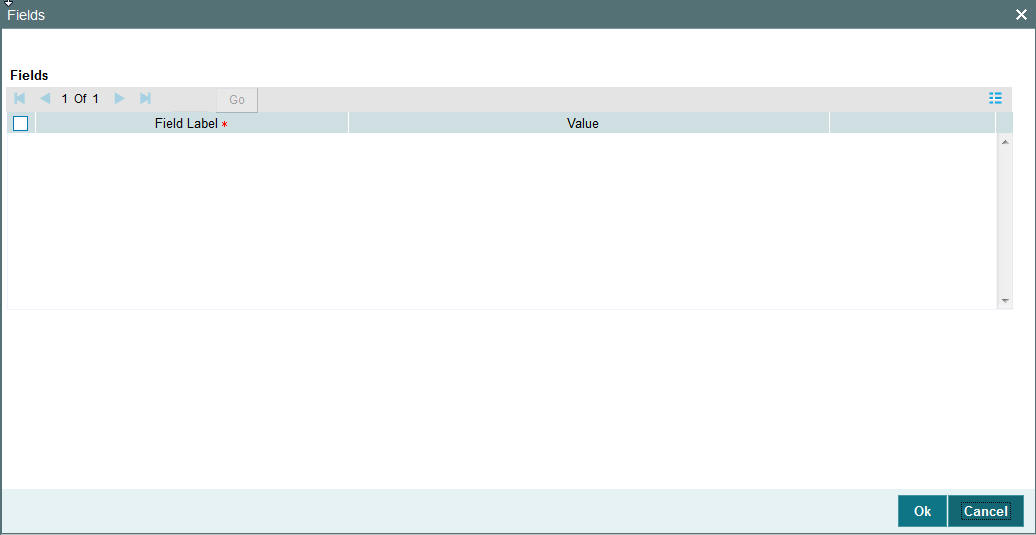
Specify the following details.
Fields
Field Label
The system displays all fields hat are part of the associated UDF group.
Value
The system displays the default value, where exists for the UDF fields. You can change the default value or specify value for other fields (where default value does not exist).
3.1.7 Payment Chain
You can view the Payment Chain details for the transaction in this screen. Click the “Payment Chain” link in the Transaction Input screen to invoke this sub-screen

Displays the following details.
Transaction Reference Number
Displays the transaction reference number.
Version Number
Displays the version number.
Chain Order
Specifies the order of banks/institutions in the payment chain
Bank Code
The system displays the BIC code of the bank/institution.
SWIFT Key Arrangement
The system displays if Sending bank has SWIFT Key Arrangement with the particular bank in the payment chain.
Account Number
The system displays the Nostro (mirror) /Vostro account number associated with the particular bank.
Field Number
The system displays the field numberused internally to identify the position of the party in the outgoing SWIFT message. E.g “53” corresponds to field 53 in SWIFT message whereas “02” is used to identify the Receiver of the message.
3.1.8 Viewing Cross Border Outgoing Transaction Summary
You can view all the outgoing SWIFT transactions created in the Host of the selected branch of the logged in user. You can also view transactions that are present in various Operations (Exception) queues. However, you cannot perform any operations.
You can invoke “Cross Border Outgoing Transaction Summary” screen by typing PXSOTONL in the field at the top right corner of the Application tool bar and clicking on the adjoining arrow button. Click new button on the Application toolbar.
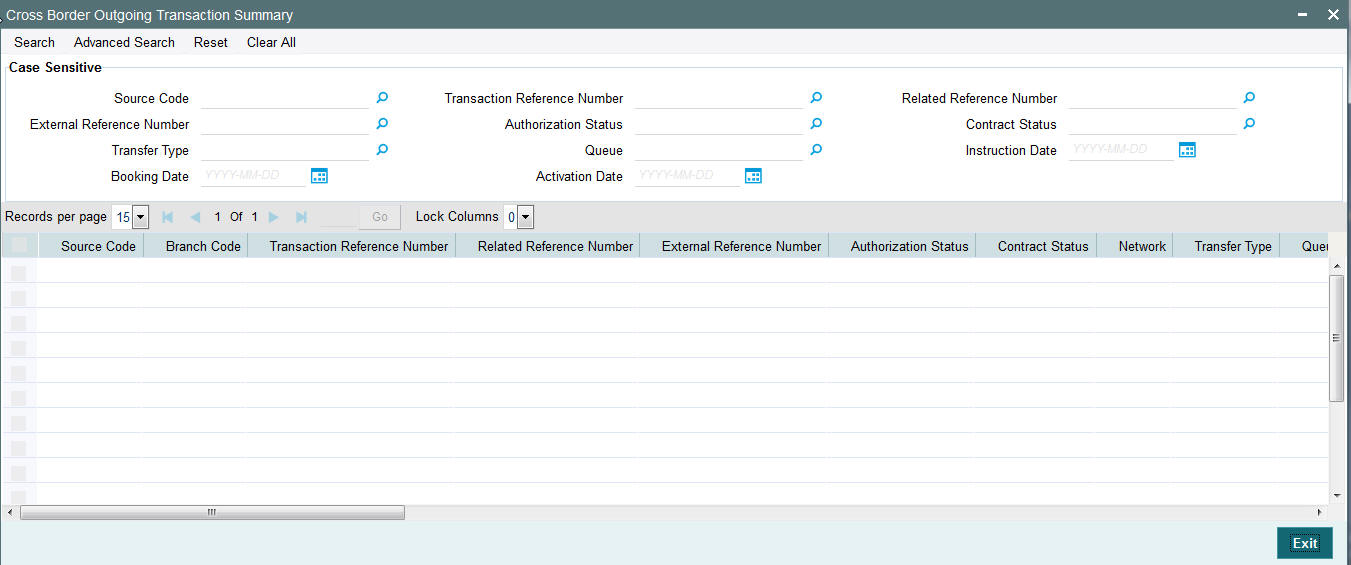
You can search using one or more of the following parameters.
- Source Code
- Transaction Reference Number
- Related Reference Number
- External Reference Number
- Authorization Status
- Contract Status
- Transfer Type
- Queue
- Instruction Date
- Booking Date
- Activation Date
Once you have specified the search parameters. Click ‘Search’ button. The system displays the records that match the search criteria containing the following details.
- Source Code
- Branch Code
- Transaction Reference Number
- Related Reference Number
- External Reference Number
- Authorization Status
- Contract Status
- Network
- Transfer Type
- Queue
- Instruction Date
- Transfer Currency
- Debit Account Number
- Credit Account Number
- Debit Account Currency
- Credit Account Currency
- Debit Value Date
- Credit Value Date
- Booking Date
- File Reference Number
- Rate Status
- SNCK Status
- ECA Status
- Cut Off Status
- Exchange Rate
- Transaction Amount
- Host Code
- Activation Date
- Maker Id
- Checker Id
3.1.9 Cross Border Outgoing Transaction View Screen
You can invoke “Cross Border Outgoing Transaction View” screen by typing ‘PXDOVIEW’ in the field at the top right corner of the Application tool bar and clicking on the adjoining arrow button. Click new button on the Application toolbar.
- From this screen, click Enter Query. The Transaction Reference field gets enabled which opens an LOV screen.
- Click the Fetch button and select the required value.
- Click Execute Query to populate the details of the transaction in the Cross Border Outgoing Transaction View screen.
3.1.10 MIS section
You can maintain the MIS information for the Transaction. If the MIS details are not entered for the Transaction the same is defaulted from the product maintenance. Click the ‘MIS’ link to invoke the ‘MIS’ sub-screen
Specify the following details
Transaction Reference
The system displays the transaction reference number of the transaction.
MIS Group
Specify the MIS group code. Alternatively, you can select the MIS group code from the option list. The list MIS group displays all valid MIS groups maintained in the system for different sources in the Source maintenance. By default, the MIS group linked to the ‘Manual’ source is populated while booking a transaction from this screen.
Default button
Click this button after selecting a MIS group different from the default MIS Group (which was populated) so that any default MIS values can be populated from to link to the Transaction MIS and Composite MIS classes.
Transaction MIS
The default MIS values for Transaction MIS classes are populated for the MIS group. You can change one or more default MIS values or specify more MIS values. Alternatively, you can select MIS values from the option list.
Composite MIS
The default MIS values for Composite MIS classes are populated for the MIS group. You can change one or more default MIS values or specify more MIS values. Alternatively, you can select MIS values from the option list.
3.1.11 Fields Section
Click the ‘Fields’ Section in the Transaction Input screen to invoke the ‘Fields’ sub screen.
This sub-screen defaults values of UDF fields that are part of the UDF group specified for the ‘Manual’ source.
Specify the following details.
Fields
Field Label
The system displays all fields hat are part of the associated UDF group.
Value
The system displays the default value, where exists for the UDF fields. You can change the default value or specify value for other fields (where default value does not exist).
3.1.12 Payment Chain
You can view the Payment Chain details for the transaction in this screen. Click the “Payment Chain” link in the Transaction Input screen to invoke this sub-screen
Displays the following details.
Transaction Reference Number
Displays the transaction reference number.
Version Number
Displays the version number.
Chain Order
Specifies the order of banks/institutions in the payment chain
Bank Code
The system displays the BIC code of the bank/institution.
SWIFT Key Arrangement
The system displays if Sending bank has SWIFT Key Arrangement with the particular bank in the payment chain.
Account Number
The system displays the Nostro (mirror) /Vostro account number associated with the particular bank.
Field Number
The system displays the field numberused internally to identify the position of the party in the outgoing SWIFT message. E.g “53” corresponds to field 53 in SWIFT message whereas “02” is used to identify the Receiver of the message.
3.1.13 All Messages
Click the “All Messages” link in the transaction input screen to invoke this sub-screen.
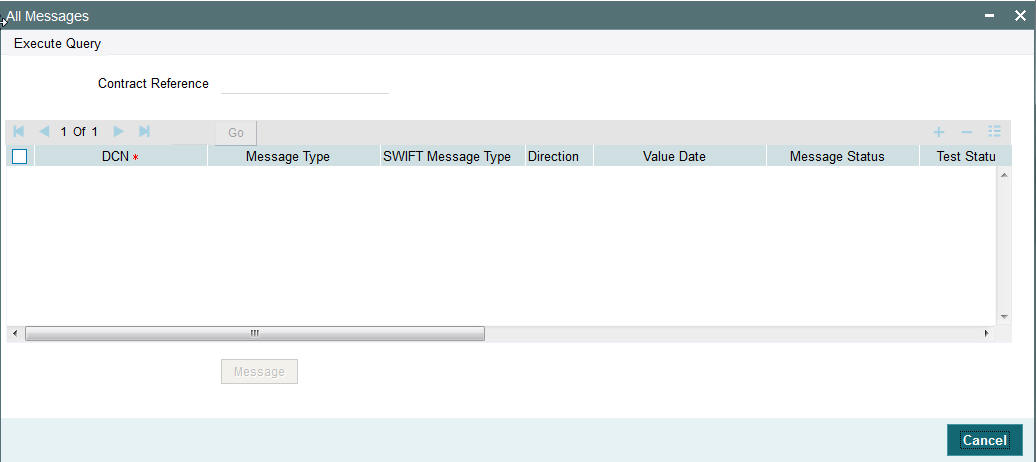
The system displays the following details in a grid form containing one or multiple rows
Contract Reference
Displays the contract (transaction) reference number.
DCN
Displays the unique DCN number assigned by the system to each generated message.
Message Type
Displays the system defined message type e.g. Cust_Transfer, Cover etc.
SWIFT Message Type
Specify the SWIFT message type of the generated message e.g. MT103, MT202COV etc.
Direction
Displays if the message is outgoing or incoming.
Media
Displays the message generation date.
Message Status
The system displays the message status. e.g. Hand-off, Repair etc.
Test Status
The system displays the Test status of the message, which would generally be “Not Applicable”.
Authorization Status
The system displays the authorization status. i.e. Authorized or Unauthorized. For incoming messages which fall into Repair or a user defined queue, this status may be “Unauthorized” if the message has been manually repaired and awaiting authorization.
Acknowledgment Status
The system displays whether Acknowledgement from SWIFT (ACK/NAK) is required or not for the outgoing SWIFT message. This value is displayed based on the message level configuration.
Media
The system displays the media of the message which is “SWIFT”.
Receiver/Sender
Displays the Customer ID of the Receiver of an outgoing SWIFT message or of the Sender of an incoming SWIFT message.
Receiver Name
Displays the name of the receiver or sender.
PDE Flag
Displays if PDE trailer is included in the incoming or outgoing message.
3.1.13.1 Message Details
You can select a particular message in the All Messages summary sub-screen (explained above) and view the message details in this screen.
Displays the following details for the selected message.
Reference Number
Specify the transaction reference number.
DCN
The system displays DCN of the message.
ESN/Version Number
The system displays the version number of the message.
Receiver/Sender
The system displays receiver/sender of the message.
Message Type
The system displays system defined message type.
SWIFT Message Type
The system displays SWIFT message type.
Message
The system displays details of the actual message including BIC and Name and Address details of the Sender and Receiver as well as the fields and values populated in the message body.
Remarks
Specify a comments or remarks for the message.
Reject Reason
The system displays the reject reason code.
Message Trailers
The system displays the message trailers.
3.1.14 Saving a Transaction
You can save the transaction after specifying at least all of the mandatory fields.
On Save, system performs Transaction Validations. If any of the validations fails then system shows an error message on the screen detailing the error. You can then correct the error and click on Save button again. If all the validations are successful then the transaction is saved and a confirmation message is shown. At the bottom of the transaction screen, the Authorization Status is shown as ‘Unauthorized’, Transaction Status as ‘Active’ and the Maker ID and Maker Date stamp is displayed. The transaction is now pending authorization by a different user after which the transaction processing will begin.
3.1.15 Performing operation
Below mentioned operations are allowed in the Transaction input screen:
| Operation | Description | ||||
|---|---|---|---|---|---|
| New | You can input a new Transaction using this option. | ||||
| Delete | You can delete unauthorized transactions from the system using this option. | The count of the transaction is decremented against the image reference number if the transaction to be deleted is an Image transaction. | Deletion of the transaction is not allowed if a transaction was authorized at least once. | ||
| Unlock | You can unlock an unauthorized transaction and change some of transaction details using this option. Amendment of an unauthorized transaction will not result in an increase of the version number. The latest version alone is modified. The party fields like 57, 56, 59 etc. can be modified.A new Transaction version is created if an authorized Transaction is amended. | ||||
| Enter Query | This is a Query option for querying an unauthorized or authorized transaction in any Transaction status and viewing its details. Transaction can be queried by entering the Transaction Reference number. | After the transaction details are loaded in the screen, any other applicable operation mentioned in this table can be performed. | |||
| Copy | You can create a Transaction using a template or copy details from a transaction using this option. | The transaction or the template to be copied can be selected in the transaction summary screen or loaded in the Transaction Input screen. The copy option in the Transaction online copies user input transaction details/template details. |
The transactions are sorted in the ascending order based on the following field:
- Message Date Time
- Instruction Date
- Amount
The following operations are available in the transaction summary screen
| Operation | Functions | ||
|---|---|---|---|
| Save | Helps you to save the search criteria for future use. | ||
| Refresh | Helps you to refresh the screen with the latest transaction details. | ||
| Reset | Clears the search results retaining the search criteria | ||
| Clear All | Clears the search results as well as the search criteria | ||
| Details | Selecting a particular transaction from the search results and clicking this menu displays the details of the transaction in the Transaction input screen. | ||
| Advanced Search | Helps to create advanced or complex search query using the search fields, logical operators and sort option of search results. |
3.1.16 Transaction Authorization/Verification (Outgoing)
From the Transaction Input screen, you can also query for a particular transaction using Enter Query option and then authorize the transaction by clicking the Authorize button..
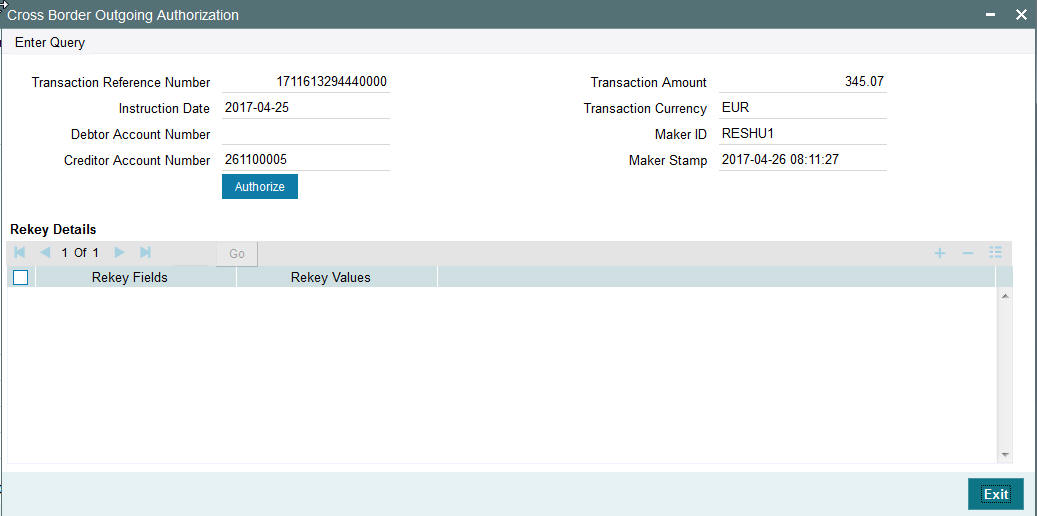
On clicking the Authorize button, the above screen is launched displaying some of the key transaction details (listed below) as seen in the above screen shot.
- Transaction Reference Number
- Transaction Amount
- Instruction Date
- Transaction Currency
- Creditor Account Number
- Maker ID
- Release Time
Rekey Details
Transaction Reference Number
The system displays the transaction reference number.
Rekey fields
The system displays the transaction fields that needs to be re-keyed. These fields are configured in the Source Network Preferences maintenance for the ‘Manual’ source and the Network code of the transaction.
Field Description
The system displays the description of the field.
Field Type
The system displays the type of field.
Rekey Values
You need to input the value for each of the re-key fields. After keying in the fields, the system validates the details input. For multiple lines input, the data is defaulted if the first line is input correctly.
Overrides Details
Override Text
The system displays override text if applicable.
Authorized By
The system displays the authorizer id of the user who authorized the override message.
Authorize Date Stamp
The system displays the authorization date stamp.
Authorization actions
Authorize button
You can click this button is you would like to authorize the transaction.
3.1.17 Transaction Authorization/Verification (Incoming)
From the Transaction Input screen, you can also query for a particular transaction using Enter Query option and then authorize the transaction by clicking the Authorize button..
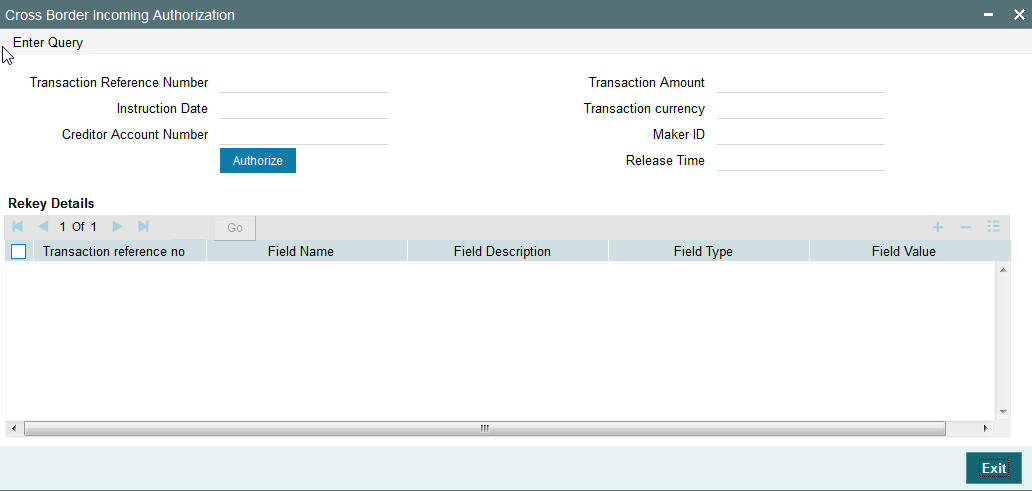
On clicking the Authorize button, the above screen is launched displaying some of the key transaction details (listed below) as seen in the above screen shot.
- Transaction Reference Number
- Transaction Amount
- Transaction Currency
- Creditor Account Number
- Maker ID
- Release Time
Rekey Details
Transaction Reference Number
The system displays the transaction reference number.
Rekey fields
The system displays the transaction fields that needs to be re-keyed. These fields are configured in the Source Network Preferences maintenance for the ‘Manual’ source and the Network code of the transaction.
Field Description
The system displays the description of the field.
Field Type
The system displays the type of field.
Rekey Values
You need to input the value for each of the re-key fields. After keying in the fields, the system validates the details input. For multiple lines input, the data is defaulted if the first line is input correctly.
Overrides Details
Override Text
The system displays override text if applicable.
Authorized By
The system displays the authorizer id of the user who authorized the override message.
Authorize Date Stamp
The system displays the authorization date stamp.
Authorization actions
Authorize button
You can click this button is you would like to authorize the transaction.
3.1.17.1 Enriching Manual Transaction before Save
Before Saving a manually booked transaction, user has an option to manually trigger some of the processing steps mentioned in the table above, and thereby enrich the transaction. On saving the transaction followed by Authorization, the outgoing transaction is processed through the remaining processing Activities as mentioned above.
On clicking the Enrich button in the main tab of the Transaction input screen, the activities till Charge computation are performed. The Enrich option is especially useful when you would like to view the Payment chain determined by the system and change any of the parties including the Receiver and Currency Correspondent, if required, based on specific customer instructions for routing the payment.
3.1.17.2 Payment Instructions received through Channels
For outgoing payment instructions received through Channels through ReST/SOAP services, system automatically creates a transaction and a Transaction Reference number. The transaction is auto-authorized. It is then processed through the activities as mentioned in the above table.
3.2 MT101 Processing
The system supports processing of incoming MT101 and initiation of outgoing MT101 message.
3.2.1 Outgoing Transaction Input - MT101
You can invoke the ‘Swift MT101 Transaction’ screen by typing ‘PXDMT101’ in the field at the top right corner of the application toolbar and clicking the adjoining arrow button.Click new button on the Application toolbar.
Specify the following fields:
Reference Number
This is auto-generated by the system once you click on New.
Host Code
The system displays the host code of the logged in user.
Requested Execution Date
The date on which the transaction is required to be executed by the bank.
Customer Number
Specify the Customer Number of the customer for which batch of MT101 transactions need to be created. Search and select from the list of available customers.
Customer Name
The system displays the customer name once you specify the customer number.
Customer Specified Reference
Specify the customer specified reference details.
Receiver
Specify the required Receiver bank of outgoing MT 101, which would also be the Account Servicing financial institution of the customer account from where payments are required to be made as per the MT101 requests. Search and select from the list of available banks.
Receiver Name
The system indicates the name of the Receiver bank once you specify the receiver BIC Code.
Authorization
Specify details of additional security provisions, for example, a digital signature, between the ordering customer/instructing party and the Receiver.
Message Index/Total
This field chains different MT101 messages by specifying the sequence number of a particular message in the total number of messages being sent to the Receiver. Specify a numeric value in the sub-field 1 of this field to indicate the sequence of this MT101 batch (message) and a value in sub-field 2 to indicate the total number of MT101 batches that are planned to be booked. However, if only one MT101 batch and hence only one MT101 message is required to be sent to the Receiver for the specified customer then specify “1” in both sub-fields.
50: Instructing Party
If the Instructing Party is applicable and is the same for all individual transactions in this MT101 batch then details of the same can be specified in these fields. Else, the Instructing party details will need to be specified for individual transactions where applicable.
Tag Option
Select the required tag option. The available options are C and L.
BIC
Specify or search and select the required BIC of the Instructing party from the list of values if the Tag option selected is ‘C’.
Party Identifier
Specify the non-BIC identifier details of the Instructing party if the Tag option selected is ‘L’.
52: Account Servicing Institution
If the Account Servicing Institution (ASI) is different than the Receiver of MT101 and is the same for all individual transactions in this MT101 batch then details of the same can be specified in these fields. Else, the ASI details could be specified for individual transactions where it is different from the Receiver of MT101.
Tag Option
Select the required tag option. The available options are A and C.
Clearing Code
Specify or search and select the clearing code identifier of the Account Servicing Institution (ASI) from the list of values.
Party Identifier
Specify the Clearing code of the ASI.
BIC
If tag option is selected as ‘A’, then specify or search and select the required BIC of the ASI from the list of values.
50: Ordering Customer
If the Ordering Customer is the same for all individual transactions in this MT101 batch then details of the same can be specified in these fields. Else, the Ordering Customer details will need to be specified for each individual transaction.
Tag Option
Select the required tag option. The options are F, G and H.
Account Number
If tag option is selected as ‘G’ or ‘H’ then specify the account number of the ordering customer’s account at the ASI.
BIC
If tag option is selected as ‘G’ then specify the BIC of the ordering customer from the list of values.
Code
If tag option is selected as ‘F’ and Party Identifier needs to be specified using an Identifier code and Country code then specify or search and select the required Identifier code from the list of values.
Country Code
If tag option is selected as ‘F’ and Party Identifier needs to be specified using an Identifier code and Country code then specify or search and select the required country code from the list of values.
Identifier
Specify the party identifier as per the selected Identifier code.
Address
If tag option is selected as ‘F’ or ‘H’ then specify the name and address of the ordering customer in 4 lines of up to 35 characters each. If tag option ‘F’ is selected, you can specify name, address lines, and/or any of the following allowed details - date of birth, place of birth, country and town, customer identification number, national identity number and additional information to complete details given in one of the preceding 3 lines.
Given below are two of the different possible combinations of details that can be input in 4 lines of this Address field when tag option ‘F’ is selected.
Example1:
1/SMITH JOHN
2/299, PARK AVENUE
3/US/NEW YORK, NY 10017
Example 2:
1/PHILIPS MARK
4/19720830
5/BE/BRUSSELS
Given below are details of the fields of the individual transactions in the MT101 batch. Click on the plus sign at the top of the individual transactions grid to add a record for a transaction in the grid.
Transaction Reference
Specify a reference for the individual transaction.
F/X Deal Reference
Specify the FX Deal Reference of the Fx contract between the ordering customer and the ASI if Fx conversion was done to arrive at the transaction amount.
Transaction Currency
Specify the currency of the transaction amount
Transaction Amount
Enter the amount of the transaction that needs to be transferred to the beneficiary.
Exchange Rate
Specify the exchange rate that was used to perform Fx conversion to arrive at the transaction amount.
Other Details
Click the Other Details button for the transaction to specify other details like Instruction Codes, Charge Account Details, Beneficiary details and so on.
3.2.1.1 Other Details
On clicking the Other Details button in the transaction record, the Other details screen is launched..
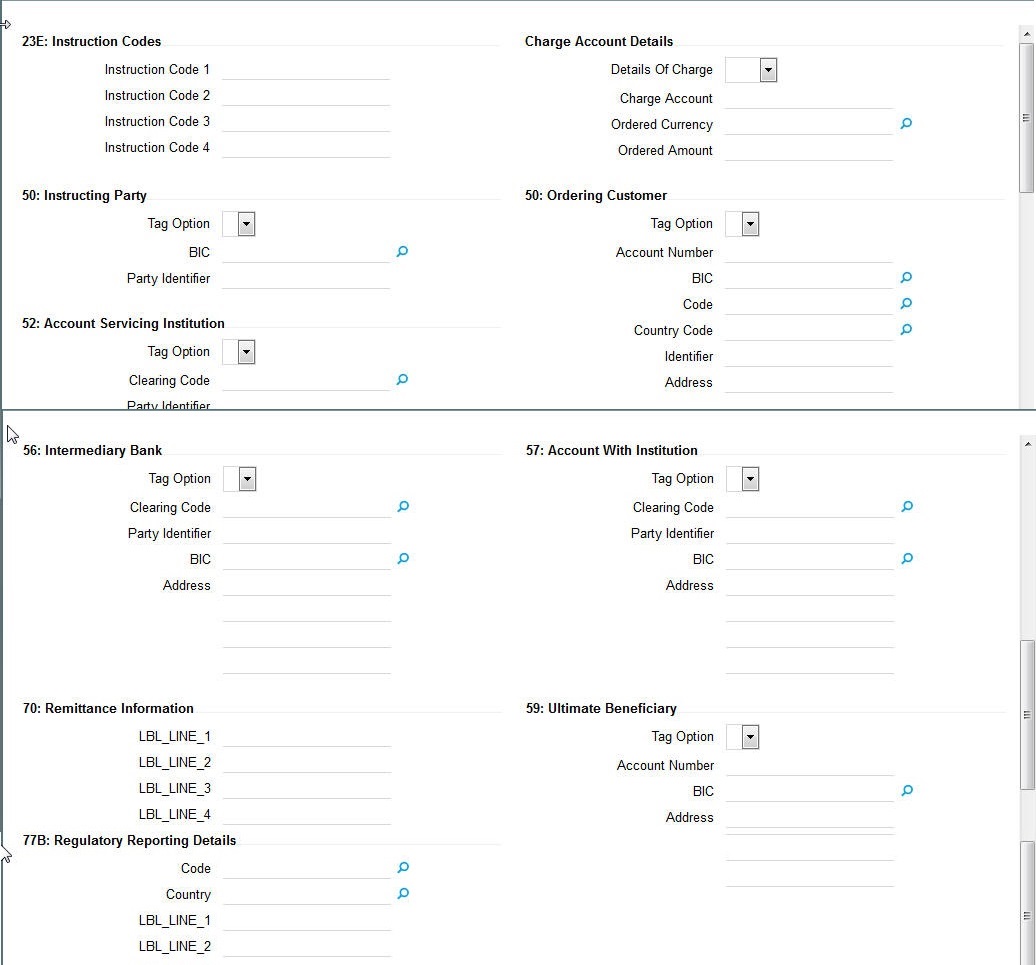
You can specify the following fields for the transaction in this screen:
23E: Instruction Codes
Instruction Code fields 1 - 4
Specify a standard Instruction code in each field and then input additional information preceded by “/”.
Charge Account Details
Details of Charge
Select any of the following Charge Whom types:
- OUR
- BEN
- SHA
Charge Account
Specify the charge account number if it is required to be different from the Debit account.
Ordered Currency
Specify the currency of the original ordered amount from the list of values.
Ordered Amount
Specify the original Ordered Amount.
50: Instructing Party
Tag Option
Select the required tag option. The options are C and L.
BIC
If tag option is selected as ‘G’ then specify the BIC of the ordering customer from the list of values.
Party Identifier
Specify the Clearing code of the ASI.
50: Ordering Customer
Specify Ordering Customer details for each transaction if the same are not specified in the header section of the screen.
Tag Option
Select the required tag option. The options are F,G and H.
BIC
If tag option is selected as ‘G’ then specify the BIC of the ordering customer from the list of values.
Code
If tag option is selected as ‘F’ and Party Identifier needs to be specified using an Identifier code and Country code then specify or search and select the required Identifier code from the list of values.
Country Code
If tag option is selected as ‘F’ and Party Identifier needs to be specified using an Identifier code and Country code then specify or search and select the required country code from the list of values.
Identifier
Specify the party identifier as per the selected Identifier code.
Address
If tag option is selected as ‘F’ or ‘H’ then specify the name and address of the ordering customer in 4 lines of up to 35 characters each. If tag option ‘F’ is selected, you can specify name, address lines, and/or any of the following allowed details - date of birth, place of birth, country and town, customer identification number, national identity number and additional information to complete details given in one of the preceding 3 lines.
Given below are two of the different possible combinations of details that can be input in 4 lines of this Address field when tag option ‘F’ is selected.
Example1:
1/SMITH JOHN
2/299, PARK AVENUE
3/US/NEW YORK, NY 10017
Example 2:
1/PHILIPS MARK
4/19720830
5/BE/BRUSSELS
52: Account Service Institution
Specify details of the Account Servicing Institution (ASI) for any transaction only if it is different from the Receiver and the same is not specified in the header section of the screen.
Tag Option
Select the required tag option. The options are A and C.
Clearing Code
Specify or search and select the clearing code identifier of the Account Servicing Institution (ASI) from the list of values.
Party Identifier
Specify the Clearing code of the ASI.
BIC
If tag option is selected as ‘C’ then specify the BIC of the ordering customer from the list of values.
56: Intermediary Bank
Tag Option
Select the required tag options. The options are A, C and D.
Clearing Code
Specify or search and select the clearing code identifier from the list of values.
Party Identifier
Specify the Clearing code of the Intermediary bank.
BIC
If the tag option is selected as ‘A’ then specify or search and select the BIC of the Intermediary bank from the list of values.
Address
If the tag option is selected as ‘D’ then specify the name and address of the Intermediary Bank.
57: Account With Institution
Tag Option
Select the required tag options. The options are A, C and D.
Clearing Code
Specify or search and select the clearing code identifier from the list of values.
Party Identifier
Specify the Clearing code of the Intermediary bank.
BIC
If the tag option is selected as ‘A’ then specify or search and select the BIC of the Intermediary bank from the list of values.
Address
If the tag option is selected as ‘D’ then specify the name and address of the Intermediary Bank.
70: Remittance Information
Line 1 -4
Specify the remittance details provided by the customer and specific to the transaction in the 4 lines up to 35 characters per line.
59: Ultimate Beneficiary
Tag Option
Select the required tag option. The available options are A and F as well as ‘No Letter Option’.
Account Number
Specify the account number of the Beneficiary.
BIC
If the tag option is selected as ‘A’ then specify the BIC of the Beneficiary from the list of values.
Address
Specify the name and address of the Beneficiary in the 4 lines provided up to 35 characters per line.
If tag option ‘F’ is selected, you can specify name, address lines, and/or country and town, of the Beneficiary in the 4 lines of this Address field. Given below are two of the different possible combinations of details that can be input in these 4 lines when tag option ‘F’ is selected.
Example1:
1/SMITH JOHN
2/299, PARK AVENUE
3/US/NEW YORK, NY 10017
Example 2:
1/DEPT OF PROMOTION OF SPICY FISH
1/CENTER FOR INTERNATIONALISATION
1/OF COMMERCE AND BUSINESS
3/CN
77B: Regulatory Reporting Details
Specify the statutory and/or regulatory information required by the authorities in the country of receiver or sender /originating customer.
Code
When the residence of either the ordering customer or the beneficiary customer is to be identified, one of the following codes should be input or selected from the list of values.
- BENEFRES
- ORDERRES
Country
In addition to the Code, specify or search and select the Country code of the ordering customer or the beneficiary customer from the list of values.
Line 1 - 3
Specify the required details of the regulatory information specific to the transaction in 3 lines with up to 35 characters in each line. This information can also be input without specifying the Code and Country.
3.2.2 Viewing Swift MT101 Outgoing Transaction Summary
You can invoke “Swift MT101 Outgoing Maintenance Summary” screen by typing ‘PXSMT101’ in the field at the top right corner of the Application tool bar and clicking on the adjoining arrow button.
You can search using one or more of the following parameters:
- Authorization Status
- Record Status
- Reference Number
- Host Code
- Customer Number
- Receiver
- Customer Specified Reference
- Message Index/Total
Once you have specified the search parameters, click ‘Search’ button. The system displays the records that match the search criteria with the following details:
- Authorization Status
- Record Status
- Reference Number
- Host Code
- Customer Number
- Receiver
- Customer Specified Reference
- Requested Execution Date
- Message Index/Total
3.3 Incoming Transaction Input
3.3.1 Capturing Transaction Details
You can book an incoming SWIFT payment by providing input for the payment transaction in this screen. Input can be provided for a new transaction using the already saved template. Some Transaction fields are applicable only to the specific transfer type (Customer / Bank Bank transfer - Own Account).
You can invoke the ‘Cross Border Incoming Transaction Input’ screen by typing ‘PXDITONL’ in the field at the top right corner of the application toolbar and clicking the adjoining arrow button. Click new button on the Application toolbar.
Specify the following details.
Branch Code
Displays the branch of the transaction.
Host Code
Displays the host code of the logged in user.
Source Code
This is defaulted to MANL by the system.
Transaction Reference Number
System displays auto-generated Transaction reference number. For more details on the format, refer the Payments Core User Guide.
Unique Reference Number
The system displays the auto-generated unique reference number.
Related Reference Number
After specifying Source code and clicking the Process (P) button, system generates and displays 10 digit reference numbers. The system generated value can be changed to any reference number desired by the user.
Transfer Type
Select the transfer type of the transaction. Options available are as follows:
- Customer Transfer
- Bank Transfer
- Cover Transfer
- Bank Transfer Own A/c
gpi Preferred
Check this box to indicate that this transaction is SWIFT GPI compliant.
3.3.2 Main Tab
Click the Main tab in the ‘Cross Border Incoming Transaction Input’ screen..
Specify the following details.
Payment Details
Booking Date
Select the booking date of transaction from the adjoining calendar.
Instruction Date
Select the customer advised Value Date of the transaction using the adjoining calender widget.
Activation Date
Specify the activation date of the transaction.
Transfer Currency
Specify the currency in which the payment needs to be made. Alternatively, you can select the currency from the option list. The list displays all valid currencies maintained in the system.
Transaction Amount
Transaction Amount is calculated by the system based on the ‘Same As Transfer Currency’ flag and Currency conversion if applicable.
Instructed Currency
Specify the currency of the amount instructed by the customer. Alternatively, you can select the currency from the option list. The list displays all valid currencies maintained in the system.
Exchange Rate
The exchange rate is applicable for cross-currency transactions. The transaction is considered as cross-currency transaction if for an incoming payment the debit account currency is different from the transfer currency.
FX Reference
Specify the foreign exchange reference.
Debit Account
Specify the debit account of the transaction. Alternatively, you can select the debit account from the option list. The list displays all valid accounts maintained in the system.
Debit Account Currency
The system displays the debit account currency based on the debit account selected.
Credit Account
Specify the credit account of the transaction. Alternatively, you can select the debit account from the option list. The list displays all valid accounts maintained in the system.
Credit Account Currency
The system displays the credit account currency based on the credit account selected.
Credit Value Date
Specify the Credit Value Date.
Debit Value Date
Specify the Debit Value Date.
Message Date
For outgoing transactions, the system computes the message date based on the credit value date and displays it here along with the cut-off time.
Remarks
Specify any Operations remark or additional info pertaining to this transaction.
Bank Operation Code
Select the bank operation code from the option list. Options available are as follows:
- CRED – Credit Transfer with No SWIFT Service Level
- CRTS – Credit Transfer for Test Purposes
- SPAY – Credit Transfer for SWIFT Pay Service Level
- SPRI – Credit Transfer for Priority Service Level
- SSTD – Credit Transfer for Standard Service Level
If no value is selected then system defaults this field value to “CRED”.
Note
This is applicable only for customer transfers.
Banking Priority
Specify the priority of banking. Choose between Normal, Urgent and High.
Charge Whom
Specify the charge bearer for the transaction. The list displays the following values:
- OUR
- BEN
- SHA
50:Ordering Customer
The system displays the name and address of the customer ordering the transaction, based on the debit account selected.
This is applicable only for ‘Customer Transfer’ type of transaction. The ordering customer details including name and address are defaulted based on the debit account selected. However you can modify these details.
52:Ordering Institution
Specify the details of the financial institution that has ordered for the payment to be initiated.
56: Intermediary Bank
Specify the details of intermediary bank which is the correspondent bank of Account with institution.
You can capture below mentioned details of the intermediary bank here.
- Specify the correspondent account number in the first line starting with “/”.
- Specify the bank identifier and bank code in the second and third lines. If the bank identifier is BIC then you can select the appropriate BIC code from the adjoining option list that displays all valid BICs maintained in the system.
You can also specify the Name and Address of the Intermediary bank instead of the BIC Code, in lines 4 to 7.
57: Account with Institution
Specify the financial institution at which the beneficiary maintains their account. The beneficiary can be a retail/corporate in Customer Transfers or a Bank in case of Bank Transfers. Input is mandatory for ‘Customer Transfer’ type of transactions.
- Specify the correspondent account number in the first line starting with “/”.
- Specify the bank identifier and bank code in the second and third lines. If the bank identifier is BIC then you can select the appropriate BIC code from the adjoining option list that displays all valid BICs maintained in the system.
- You can also specify the Name and Address of the Intermediary bank instead of the BIC Code, in lines 4 to 7.
58: Beneficiary Institution
Specify the financial institution which is the ultimate recipient of the funds being transferred.
This is applicable only to Bank Transfers.
You can capture below mentioned details of the Beneficiary Institution here.
- Specify the account number in the first line starting with “/”
- Specify the BIC code in the second line. You can also select the appropriate BIC code from the adjoining option list that displays all valid BICs maintained in the system..
- You can also specify the Name and Address of the Beneficiary Institution instead of the BIC Code, in lines 3 to 5.
59: Ultimate Beneficiary
Specify the details of the Ultimate Beneficiary of the payment. This field is available only for ‘Customer Transfer’ type of transactions.
You can capture below mentioned details of the Beneficiary here.
- In Line 1, specify the customer beneficiary account number to which the transaction amount should be credited. You can specify the IBAN of the account. Alternatively, you may search and select the account number using LOV if the beneficiary account is maintained with the bank, which is the case in Incoming payments. This field is available only for ‘Customer Transfer’ type of transactions.
- Specify the Name and Address of the Beneficiary in lines 2 to 5.
- Instead of the Name and Address, you can also specify the BIC code of the Beneficiary in line 2.
Receiver
System derives the Receiver (bank) of the outgoing payment message as part of Payment chain building activity and populates the BIC code of this bank in this field.
This field is also populated on clicking Enrich button.
You may choose to override the system derived Receiver with a different BIC code and input the same over here. On save, sytem validates if a SWIFT message can be sent to the user specified Receiver BIC code.
Receiver of Cover
System derives the Receiver of Cover (bank) of the incoming payment message as part of Payment chain building activity if a Cover message is required to be sent in addition to the payment messages. The BIC code of this bank is populated in this field.
This field is also populated on clicking Enrich button.
- You may choose to override the system derived Receiver of Cover with a different BIC code and input the same over here. On save, system validates if the user specified Receiver of Cover is a currency correspondent and a SWIFT message can be sent to this BIC code.
3.3.3 Additional Details Button
You can capture additional information and view field values set by the system for the transaction.
You can invoke the ‘Additional Details’ sub-screen in Transaction Input by clicking the “Additional Details” link present at the bottom of the screen.
Specify the following details.
53: Sender Correspondent
The system displays the Party Identifier, BIC code or details like Name and Address of the sender’s correspondent through which the payment transaction should be routed. This value is populated after deriving the Payment chain as part of the processing. This BIC would be present in the Currency Correspondent maintenance for the Transfer currency.
54a: Receiver Correspondent
The system displays the Party Identifier, BIC code or details like Name and Address of the branch of the receiver or another financial institution in which the funds are made available to the receiver. This value is populated after deriving the Payment chain as part of the processing. This BIC would be present in the Global Correspondent maintenance for the Transfer currency.
23E: Instruction Codes
Instruction Code 1 through to Instruction Code 6
Specify a standard Instruction code in each field and then input additional information. Alternatively you can select the standard Instruction code type from the option list. The list displays all valid instruction codes maintained in the system.
Transaction Type Code
The system displays the applicable transaction type code for the transaction.
55: Third Reimbursement Institution
The system displays the BIC code or details like Name and Address of the receiver's branch, when the funds are made available to this branch through a financial institution other than that indicated in Field 53. This value is populated after deriving the Payment chain as part of the processing. This BIC would be present in the Global Correspondent maintenance for the Transfer currency.
71G: Receiver charges
If Charge Whom field in the Preferences section of the Main tab has a value of “OUR” then you can specify the Receiver’s charges in case of ‘Customer Transfer’ if they are required to be included in the Settlement amount.
Currency
Specify the charge currency.
Amount
Specify the charge amount due to the receiver.
Amount Collected
The system populates this field based on the Receiver charges specified.
77B: Regulatory Reporting Details
Specify the statutory and/or regulatory information required by the authorities in the country of receiver or sender. You should specify this information by specifying a regulatory code (placed between ‘/’) followed by 2 character country code and followed by regulatory details. This information should be specified in up to 3 lines each containing 35 characters.
13C: Time Indication Details
Specify the standard time indication related to the processing of the payment instruction. You should input the standard Time indication code (placed between ‘/’) followed by Time, a sign (+ or -) and the Offset from UTC. Alternatively, you can select the time indication code from the option list. The list displays all valid time indications maintained in the system, which are CLSTIME, RNCTIME and SNDTIME.
70: Remittance Information
Specify the Remittance Information details from fields 1 to 4.
71F: Sender Charges
Sender Charge Ccy 1 through to Sender Charge Ccy 6
The system displays the charge currency of Sender’s charges that are deducted from the Transfer amount by this bank (Sender) or by any of the previous banks in the payment chain. These charges are applicable in case of Customer Transfers and the Charge Whom field value selected is SHA or BEN.
Sender charge Amount 1 through to Sender Charge Amount 6
The system displays the amount of Sender’s charges.
In case of an incoming Customer transfer message, each of the previous banks in the payment chain would have deducted charges from the Transfer amount and details of the same would be present in the message. The Charge currency and Charge amount of each of these charges would be populated in up to 6 sets of these fields in addition to the charges deducted by this bank
Sender to Receiver Information
Displays the details of Sender to Receiver information comprising BIC or Name and Address.
77T: Envelope Contents Details
Specify the contents of the Envelope in the lines from 1 to 5.
3.3.4 Pricing Tab
You can view the charge amount computed by the system for each of the Pricing components of the Pricing code linked to the network code of the transaction. Click the ‘Pricing’ tab.
Specify the following details:
Pricing Component
The system displays each Pricing component of the Pricing code from the Pricing Code maintenance.
Pricing Currency
The system displays the Pricing currency of each Pricing component of the Pricing code.
Pricing Amount
The system displays the calculated Charge amount for each Pricing component of the Pricing code.
Waived
The system displays if charges for any Pricing component are waived in the Pricing maintenance.
Debit Currency
The system displays the currency of the Charge account to be debited for the charges.
Debit Amount
The system displays the Charge amount for each Pricing component debited to the charge account in Debit currency. If the Pricing currency is different from the Debit currency the calculated charges are converted to the Debit currency and populated in this field.
3.3.5 Viewing Cross Border Incoming Transaction Summary
You can view all the incoming SWIFT transactions created in the Host of the selected branch of the logged in user. You can also view transactions that are present in various Operations (Exception) queues. However, you cannot perform any operations.
You can invoke “Cross Border Incoming Transaction Summary” screen by typing ‘’ in the field at the top right corner of the Application tool bar and clicking on the adjoining arrow button. Click new button on the Application toolbar.
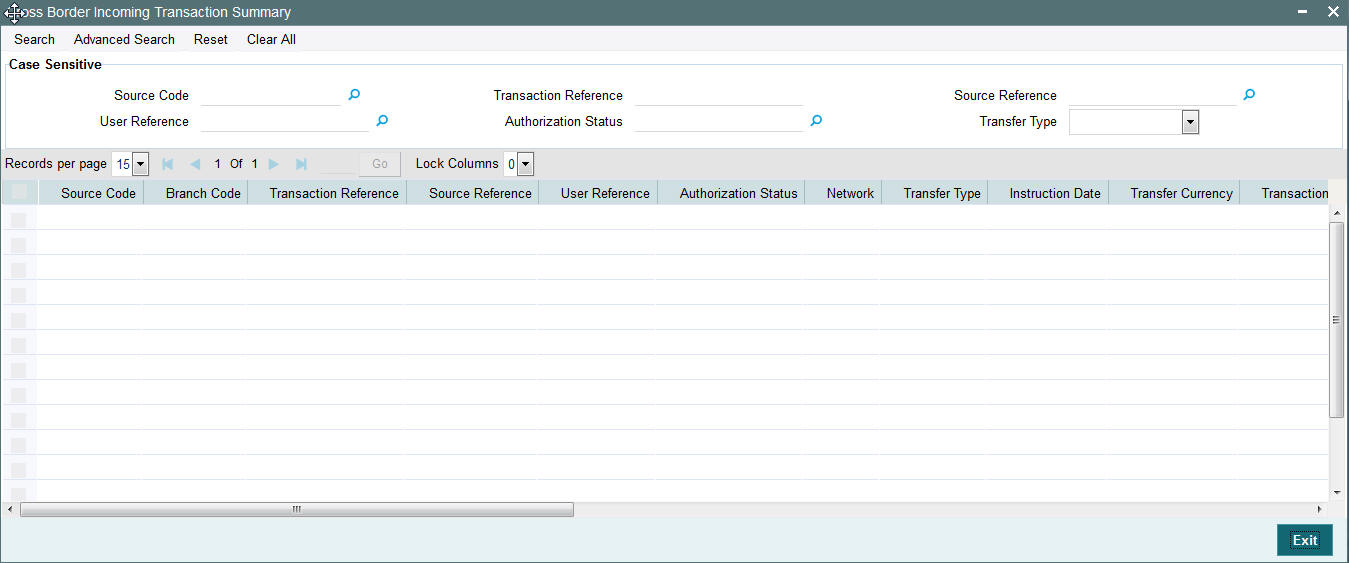
You can search using one or more of the following parameters.
- Source Code
- Transaction Reference Number
- Related Reference Number
- External Reference Number
- Authorization Status
- Contract Status
- Transfer Type
- Queue
- Instruction Date
- Booking Date
- Activation Date
Once you have specified the search parameters. Click ‘Search’ button. The system displays the records that match the search criteria containing the following details.
- Source Code
- Branch Code
- Transaction Reference Number
- Related Reference Number
- External Reference Number
- Authorization Status
- Contract Status
- Network
- Transfer Type
- Queue
- Instruction Date
- Transfer Currency
- Debit Account Number
- Credit Account Number
- Debit Account Currency
- Credit Account Currency
- Debit Value Date
- Credit Value Date
- Booking Date
- File Reference Number
- Rate Status
- SNCK Status
- ECA Status
- Cut Off Status
- Exchange Rate
- Transaction Amount
- Host Code
- Activation Date
- Maker Id
- Checker Id
3.3.6 Cross Border Incoming Transaction View Screen
You can invoke “Cross Border Incoming Transaction View” screen by typing ‘PXDIVIEW’ in the field at the top right corner of the Application tool bar and clicking on the adjoining arrow button. Click new button on the Application toolbar.
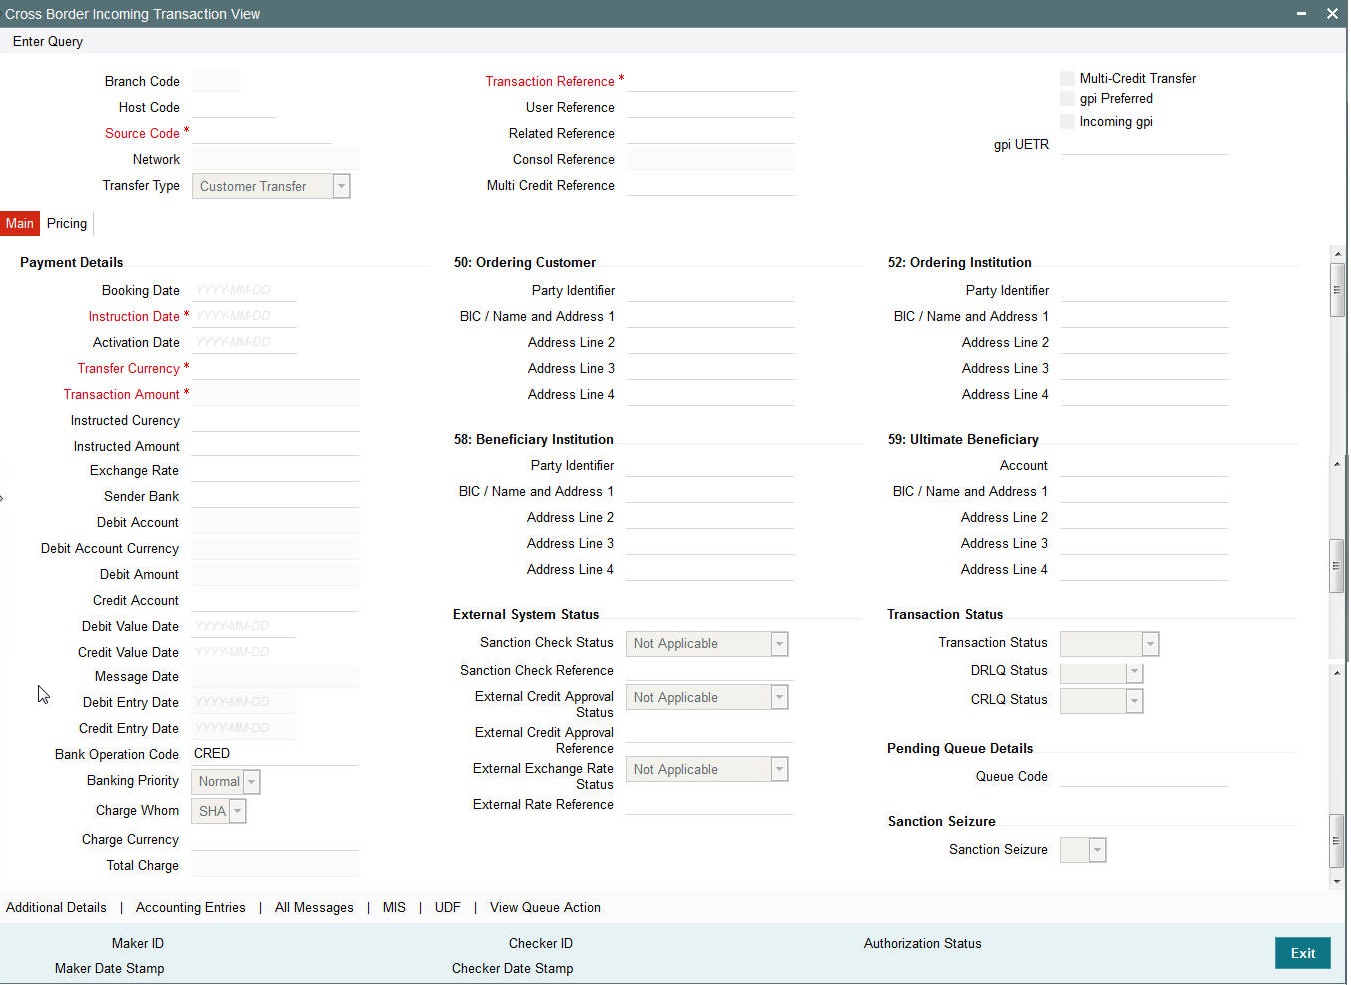
- From this screen, click Enter Query. The Transaction Reference field gets enabled which opens an LOV screen.
- Click the Fetch button and select the required value.
- Click Execute Query to populate the details of the transaction in the Cross Border Incoming Transaction View screen.
3.3.6.1 All Messages
Click the “All Messages” link in the transaction input screen to invoke this sub-screen.
The system displays the following details in a grid form containing one or multiple rows
Contract Reference
Displays the contract (transaction) reference number.
DCN
Displays the unique DCN number assigned by the system to each generated message.
Message Type
Displays the system defined message type e.g. Cust Transfer, Cover etc.
SWIFT Message Type
Specify the SWIFT message type of the generated message e.g. MT103, MT202COV etc.
Direction
Displays if the message is outgoing or incoming.
Media
Displays the message generation date.
Message Status
The system displays the message status. e.g. Hand-off, Repair etc.
Test Status
The system displays the Test status of the message, which would generally be “Not Applicable”.
Authorization Status
The system displays the authorization status. i.e. Authorized or Unauthorized. For incoming messages which fall into Repair or a user defined queue, this status may be “Unauthorized” if the message has been manually repaired and awaiting authorization.
Acknowledgment Status
The system displays whether Acknowledgement from SWIFT (ACK/NAK) is required or not for the outgoing SWIFT message. This value is displayed based on the message level configuration.
Media
The system displays the media of the message which is “SWIFT”.
Receiver/Sender
Displays the Customer ID of the Receiver of an outgoing SWIFT message or of the Sender of an incoming SWIFT message.
Receiver Name
Displays the name of the receiver or sender.
PDE Flag
Displays if PDE trailer is included in the incoming or outgoing message.
3.3.6.2 Message Details
You can select a particular message in the All Messages summary sub-screen (explained above) and view the message details in this screen.
Displays the following details for the selected message.
Reference Number
Specify the transaction reference number.
DCN
The system displays DCN of the message.
ESN/Version Number
The system displays the version number of the message.
Receiver/Sender
The system displays receiver/sender of the message.
Message Type
The system displays system defined message type.
SWIFT Message Type
The system displays SWIFT message type.
Message
The system displays details of the actual message including BIC and Name and Address details of the Sender and Receiver as well as the fields and values populated in the message body.
Remarks
Specify a comments or remarks for the message.
Reject Reason
The system displays the reject reason code.
Message Trailers
The system displays the message trailers.
3.4 Facility to Generate MT103 and MT205 in LVTS Format
- For all Canadian dollar payment messages with the value date as today’s date should be sent as a LVTS message. LVTS is a Canadian payment system used for large value settlements. LVTS accepts MT103 and MT205. The LVTS messages need to have a user header in the message header. Following is the format of the user header:
{3 :{ 103: CAD} {108 :< Tranche No>}}
- In MT103 & 205 messages field 103 should always contain CAD and field 108 should have the tranche number used for the payment. LVTS payments can be in Tranche 1 or 2 or R. Tranche 2 is by default. If Tranche needs to be changed for a payment message, then it will be changed manually before releasing the payment message in SWIFT alliance.
- The presence of the user header in the message enables Y-copy supported by SWIFT. The following diagram illustrates the flow of payment messages between two LVTS members:
-
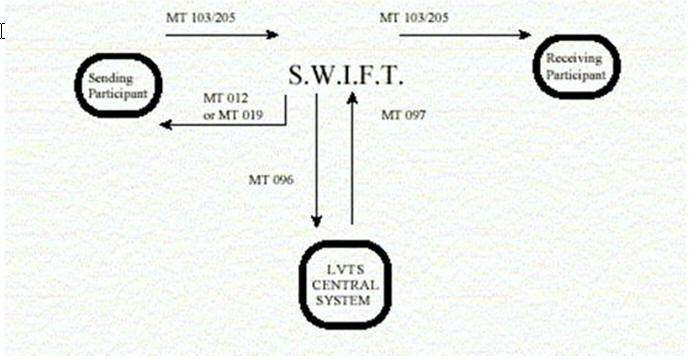
- MT103 – Customer Payment Message
- MT205 – Inter-Bank Payment Message
- MT096 – Partial message sent to LVTS by SWIFT
- MT097 – Message from LVTS to SWIFT containing the payment
- MT012 – Acceptance notice sent to sender
- MT019 – Reject notice sent to sender
3.5 Manual Liquidation of Consolidated Transaction Batch
A consolidated batch of transactions can be manually liquidated at any time before the Cut-off time by a user of the branch where the transaction was created. This would be enabled through a separate screen called Outgoing Consolidated Queue.
Note
This screen is applicable to MT102, MT201 and MT203 consolidated batches that are pending liquidation.
3.5.1 Transaction Consol Summary
This Summary screen displays all the batches with different statuses like Closed, Open, Reversed etc. From this screen ,you can query for the desired batch and view a a summary of the batch including details of the individual (child) transactions in the consolidated batch.
You can invoke “Transaction Consol Summary” screen by typing ‘PXSCONSL’ in the field at the top right corner of the Application tool bar and clicking on the adjoining arrow button. Click new button on the Application toolbar.
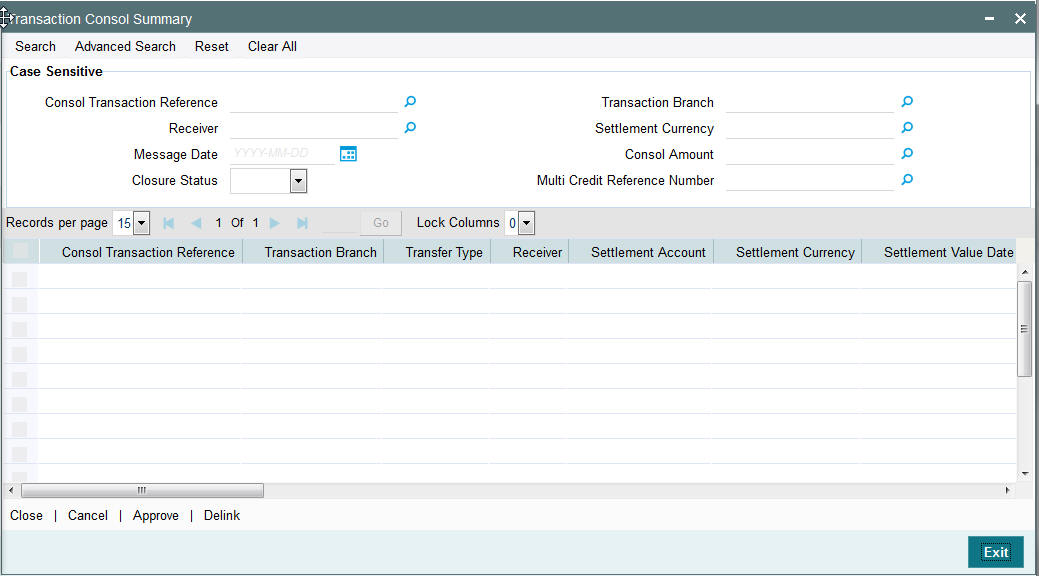
You can search using one or more of the following parameters.
- Consol Transaction Reference
- Transaction Branch
- Multi Credit Reference Number
- Message Date
- Settlement Currency
- Receiver
- Consol Amount
- Closure Status
Once you have specified the search parameters. Click ‘Search’ button. The system displays the records that match the search criteria containing the following details.
- Consol Transaction Reference
- Transaction Branch
- Transfer Type
- Receiver
- Settlement Amount
- Settlement Currency
- Settlement Value Date
- Message Date
- Consol Amount
- Consol Amount in Local Currency
- Consol Receiver Charge
- Consol Receiver Charge in Local Currency
- Consol Transaction Count
- Consol Transaction Limit
- Cutoff Time Maintained
- Actual Closure Time
- Closure Status
- Closure Mode
- Liquidation Status
- Autoclosure Trigger
- Mutli-Credit Reference Number
- Bank Operation Code
The following operations are available in the Summary screen
| Operation | Functions | ||
|---|---|---|---|
| Close | Helps you to close the consolidated batch and initiate Liquidation of the batch. Once Closed, no new child transactions can be added to the batch. | ||
| Cancel | You can select a batch and click this link to to cancel the consolidated batch provided the batch is not liquidated. | ||
| Approve | You can approve the action taken on a selected batch.. | ||
| Delink | You can delink contracts from the batch. | ||
| All Messages | You can view all the generated messages for the selected batch, which would include the MT102/MT201/MT203 depending on the Transfer type. Refer Section 3.1.10.1 for the description of this sub-screen for a single transaction. | ||
| Reverse | You can select a batch and click this link to to reverse the consolidated batch provided the batch is not liquidated. | ||
| Accounting Entries | You can view the generated consol Accounting Entries for the selected consolidated batch whose Consol Status is Closed. |
3.5.2 Transaction Console View Summary
You can invoke “Transaction Console View Summary” screen by typing ‘PXSCONVW’ in the field at the top right corner of the Application tool bar and clicking on the adjoining arrow button. Click new button on the Application toolbar.
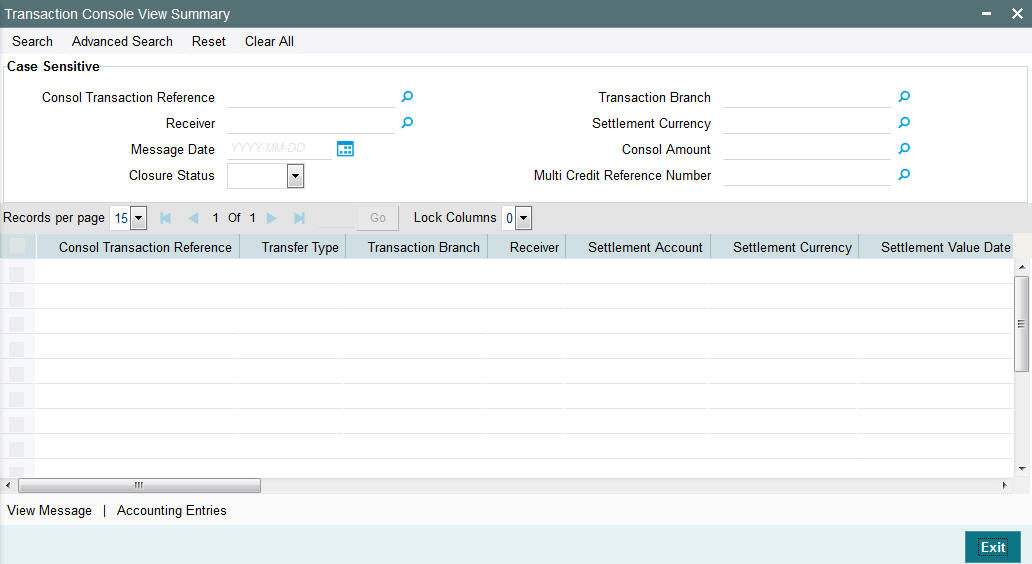
You can search using one or more of the following parameters.
- Consol Transaction Reference
- Transaction Branch
- Multi Credit Reference Number
- Message Date
- Settlement Currency
- Receiver
- Consol Amount
- Closure Status
Once you have specified the search parameters. Click ‘Search’ button. The system displays the records that match the search criteria containing the following details.
- Consol Transaction Reference
- Transaction Branch
- Transfer Type
- Receiver
- Settlement Amount
- Settlement Currency
- Settlement Value Date
- Message Date
- Consol Amount
- Consol Amount in Local Currency
- Consol Receiver Charge
- Consol Receiver Charge in Local Currency
- Consol Transaction Count
- Consol Transaction Limit
- Cutoff Time Maintained
- Actual Closure Time
- Closure Status
- Closure Mode
- Liquidation Status
- Autoclosure Trigger
- Mutli-Credit Reference Number
- Bank Operation Code
The following operations are available in the Summary screen
| Operation | Functions | ||
|---|---|---|---|
| All Messages | You can view all the generated messages for the selected batch, which would include the MT102/MT201/MT203 depending on the Transfer type. Refer Section 3.1.10.1 for the description of this sub-screen for a single transaction. | ||
| Accounting Entries | You can view the generated consol Accounting Entries for the selected consolidated batch whose Consol Status is Closed. |
3.6 STP of Incoming Messages
This section contains the following topics:
- Section 3.6.1, "STP of Incoming Messages"
- Section 3.6.2, "Processing of MT200 message"
- Section 3.6.3, "Processing Of MT203 message"
- Section 3.6.4, "Processing of MT205 message"
- Section 3.6.5, "Cover Matching"
- Section 3.6.6, "Charge Claim Processing"
3.6.1 STP of Incoming Messages
Incoming SWIFT payment and non-payment messages are received by the EMS message sub-system of Oracle FLEXCUBE Payments and stored in the incoming directory The STP function then reads and processes the messages.
The system first resolves the source code of the transaction and routes it to a particular system (e.g. SWIF, COVR) or user defined queue based on the Cover Queue Rule maintenance. For messages routed to SWIF queue, the STP function then creates transactions of the following types for the payment messages:
- Incoming Customer Transfer
- Incoming Bank transfer
- Incoming Bank Transfer for Own Accounts
- Outgoing Customer Transfer (in case of Incoming pass-through payment)
- Outgoing Customer Transfer with cover (in case of Incoming pass-through payment)
- Outgoing Bank Transfer (in case of Incoming pass-through payment)
In case of any exceptions during the STP of an incoming message, the transaction’s Repair Type is marked as ‘Yes’.
The Transaction is auto-authorized.
3.6.2 Processing of MT200 message
On receipt of an incoming MT200 message, a Transaction is booked with Transfer type as ‘Bank Transfer’. An outgoing bank transfer message (i.e. MT202) is generated as part of the message generation activity of this Transaction.
3.6.3 Processing Of MT203 message
STP job splits incoming MT203 message into multiple MT202 messages. Then these MT202 messages are again picked up by another STP job for processing. MT202 messages are processed as normal bank transfer as per the existing functionality.
STP job performs the below mentioned validations before splitting an MT203 message:-
- The amount in field 19 must be equal to the sum of the amounts in all occurrences of field 32B.
- The currency code in the amount field 32B should be the same for all occurrences of this field in the message.
- The repetitive sequence must appear at least twice but not more than ten times.
- If field 56a is present in a transaction, then, field 57a should also be present.
3.6.4 Processing of MT205 message
STP process for Payments module supports upload of incoming MT205 message.
For an incoming MT205, a Transaction is booked in PX with Transfer type as ‘Bank Transfer’ and processed similar to an incoming MT202 message.
3.6.5 Cover Matching
Cover Matching is supported for MT103 with Cover messges of MT202COV, MT205COV or MT910. Similarly, Cover matching is supported for MT202 with another MT202 as Cover message.
Based on the rule condition mentioned in the Cover Queue Rule maintenance, an incoming payment message (MT103/MT202) is routed to a ‘COVR’ queue. All payment messages in this queue await Cover matching. Incoming Cover messages are also routed to this queue based on the Cover queue rule condition.
A job tries to match the payment messages with the cover messages based on the following criteria for cover matching is
- Field 20 of MT103 = Field 21 of MT202COV or MT910
- Amount and Currency
- Value date
After Cover matching is done the payment message gets picked up for STP
3.6.6 Charge Claim Processing
When an incoming MT103 payment is received having Charge Whom field value as “OUR” and no charges are included in the Settlement amount (i.e. 71G is not present), after the payment is processed (transaction is Liquidated), system automatically generates a MT191 Charge Claim message and sends it to the Sender of the MT103.
Similarly, when an outgoing MT103 with Charge Whom specified as “OUR” with no 71G is sent then a MT191 Charge Claim may be received later from the Receiver of MT103. The incoming MT191 is processed to send an outgoing MT202 Charge payment. This is achieved in one of the two ways mentioned below.
Auto-STP of incoming MT191 to generate and send MT202
Manual approval of Charge Claim leading to STP of Bank Transfer and generation of MT202
3.6.7 Viewing Charge Claim Summary
You can invoke the ‘Charge Claim’ screen by typing ‘PXSCHGCM’ in the field at the top right corner of the application toolbar and clicking the adjoining arrow button. Click new button on the Application toolbar.
You can search using one or more of the following parameters:
- Reference No
- Related Reference Number
- Sender
- Claim Currency
- Claim Amount
- Message Date
- Authorization Status
- Status
Once you have specified the search parameters, click ‘Search’ button. The system displays the records that match the search criteria for the following
- Reference No
- Related Reference Number
- Sender
- Claim Currency
- Claim Amount
- Message Date
- Authorization Status
- Status
3.6.8 Invoking Charge Claim Details
You can invoke “Charge Claim Details” screen by typing ‘PXDCHGCM’ in the field at the top right corner of the Application tool bar and clicking on the adjoining arrow button. Click new button on the Application toolbar. Alternatively, you can select a Charge Claim record in the Charge Claim Summary screen explained above, to view its details in this screen.
Charge Claim Details
The system displays the following fields based in the MT191 message.
Reference No
Displays the reference number (field 20) of the MT 191 message.
Message Date
Displays the date on which the MT 191 message was sent.
Related Reference Number
Displays the field 20 reference of the MT103 (Transaction Reference number) sent earlier.
Claim Currency
Indicates the currency of claim amount.
DCN
Displays the unique DCN number assigned by the system to the incoming MT191.
Claim Amount
Displays the amount claimed in the MT191.
Branch Code
Displays the branch code of the identified processing branch of the MT191.
Sender
Displays the BIC of Sender of MT191 message.
52: Ordering Institution
Displays the Ordering Institution details if mentioned in the MT191 message.
57: Account With Institution
Displays the Account with Institution details if mentioned in the message.
71B: Charge Details
Displays the Charge Details from the MT191 message.
72: Sender To Receiver Info
Indicates the sender to receiver details.
Bank Transfer Details
Instruction Date
Defaults the message date of the MT191 as the instruction date. This is editable and you can specify the current date or a future date.
Transaction currency
Defaults the currency of the Claimed amount in MT191. This is editable and you can specify any other currency if required.
Debit Account
Defaults the GL code (if maintained) from the Currency Correspondent maintenance for the Sender of MT191. This is editable and you can specify any GL code using the LOV.
Transaction Amount
Defaults the claimed amount in the MT191 message. This is editable and you can specify a different amount.
Charge Payment Sent
Indicates whether the Charge Payment was sent or not.
Generated Reference Number
Displays the generated reference number of the outgoing Charge payment transaction after it is auto created on approval of this Charge Claim record.
The following operations are available in this screen
| Operation | Functions | |||
|---|---|---|---|---|
| Unlock | Helps you to input or modify the values of editable fields of Charge Claim detail record and then save the record. | |||
| Authorize | You can authorize the modified or un-edited Charge Claim record so that system can auto-create the Bank Transfer transaction and process it. | Authorization should be done by a user different from the one who modified the Charge Claim record. | ||
| Enter Query | When you directly launch this details screen from the menu or using the Function Id then you can click this link to input a Charge Claim Reference number and view its details.’ |
3.7 Common Group Messages
Usage of this screen
The Common Group Messages screen is used to manually initiate outward Common Group Messages. The following Common Group Messages like can be manually initiated from this screen:
- MT190, MT290– Advice of charges
- MT191, MT291 – Request for charges
- MT192, MT292 – Request for cancellation
- MT195, MT295 – Queries
- MT196, MT296 – Answers
- MT198, MT298 – Proprietary Message
- MT199, MT299 – Free Format Message
This message types are exchanged between banks for investigations regarding payment messages and initiating non-value requests like cancellation.
3.7.1 Advice of Charges
You can invoke “Advice of Charges” screen by typing ‘PXDCMN90’ in the field at the top right corner of the Application tool bar and clicking on the adjoining arrow button.
Specify the following details.
Branch Code
Displays the selected branch of the logged-in user.
Reference Number
Displays the Reference Number by default.
Receiver
Specify the Receiver from the list of values.
Receiver Name
The system displays the name of the Receiver upon the selection of Receiver.
SWIFT Message Type
Specify the SWIFT Message Type from the list of values.
Related Reference
Specify the Related Reference Number from the list of values.
Account Identification(25)
Specify the account from the list of values.
Value Date
Specify the Value Date.
Currency
Specify the Currency from the list of values.
Amount
Specify the Amount.
Ordering Institution(52)
Specify the Ordering Institution details.
Details of Charges(71B)
Specify the Details of Charges(71B) details.
Sender to Receiver Information(72)
Specify the Sender to Receiver Information(72) details.
3.7.2 Viewing Advice of Charges Summary
You can invoke “Advice of Charges Summary” screen by typing ‘PXSCMN90’ in the field at the top right corner of the Application tool bar and clicking on the adjoining arrow button.
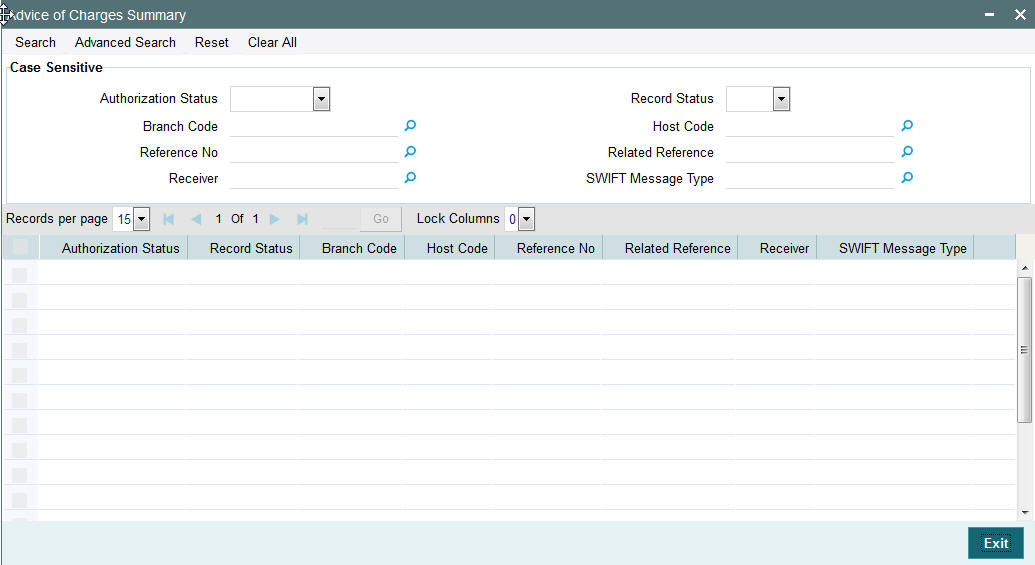
You can search using one or more of the following parameters:
- Authorization Status
- Record Status
- Branch Code
- Host Code
- Reference Number
- Related Reference
- Receiver
- SWIFT Message Type
Once you have specified the search parameters, click ‘Search’ button. The system displays the records that match the search criteria for the following
- Authorization Status
- Record Status
- Branch Code
- Host Code
- Reference Number
- Related Reference
- Receiver
- SWIFT Message Type
3.7.3 Request for Payment of Charges
You can invoke “Request for Payment of Charges” screen by typing ‘PXDCMN91’ in the field at the top right corner of the Application tool bar and clicking on the adjoining arrow button.
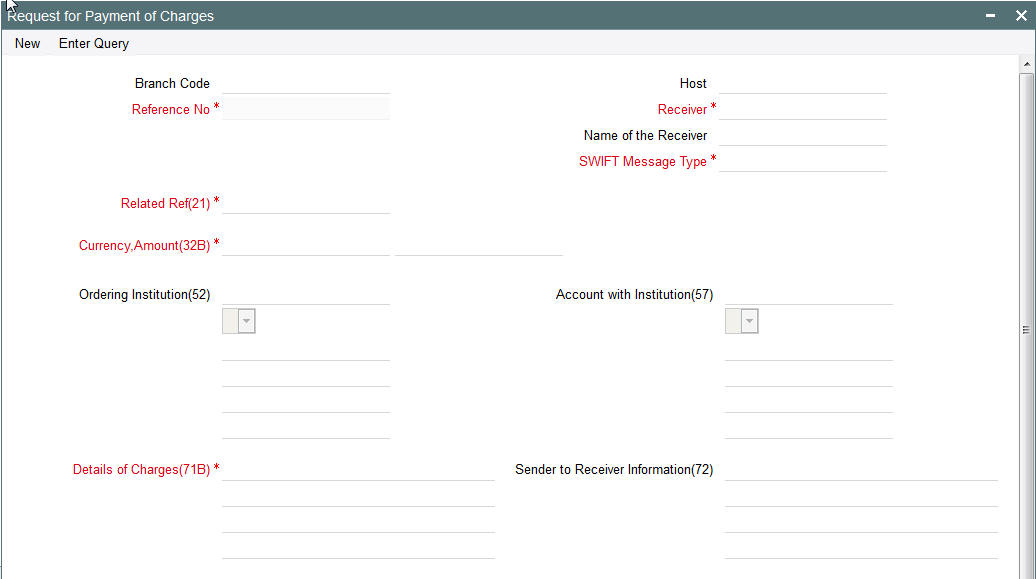
Specify the following details.
Branch Code
Displays the selected branch of the logged-in user.
Host Code
Displays the Host Code of the logged-in user.
Reference Number
Displays the Reference Number by default.
Receiver
Specify the Receiver from the list of values.
Receiver Name
The system displays the name of the Receiver upon the selection of Receiver.
SWIFT Message Type
Specify the SWIFT Message Type from the list of values.
Related Reference(21)
Specify the Related Reference Number from the list of values.
Currency
Specify the Currency from the list of values.
Amount (32B)
Specify the Amount.
Ordering Institution(52)
Specify the Ordering Institution details.
Account with Institution(57)
Specify the Ordering Institution details.
Details of Charges(71B)
Specify the Details of Charges(71B) details.
Sender to Receiver Information(72)
Specify the Sender to Receiver Information(72) details.
3.7.4 Viewing Request for Payment of Charges Summary
You can invoke “Request for Payment of Charges Summary” screen by typing ‘PXSCMN91’ in the field at the top right corner of the Application tool bar and clicking on the adjoining arrow button.
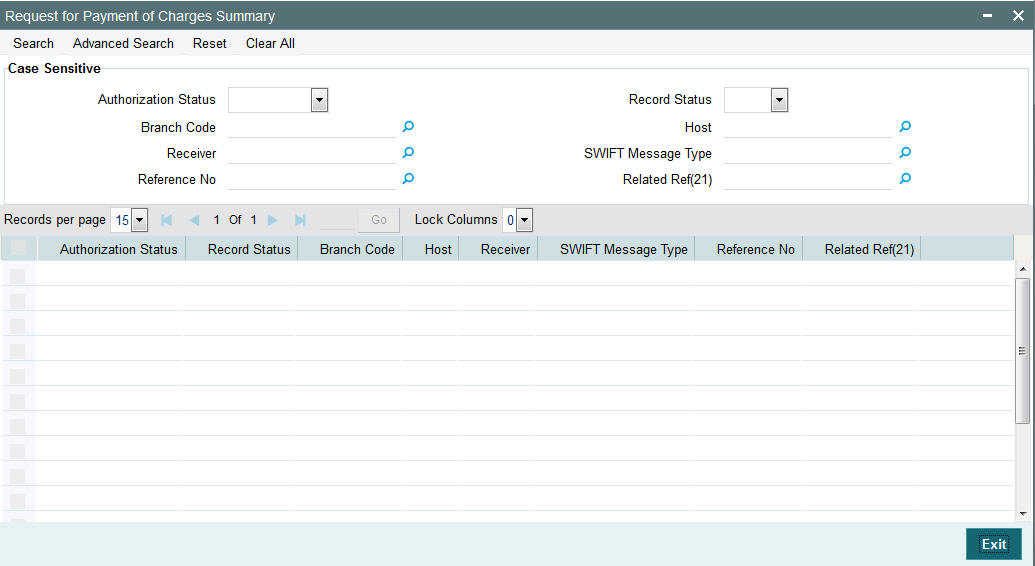
You can search using one or more of the following parameters:
- Authorization Status
- Record Status
- Branch Code
- Host
- Receiver
- SWIFT Message Type
- Reference No
- Related Ref(21)
Once you have specified the search parameters, click ‘Search’ button. The system displays the records that match the search criteria for the following
- Authorization Status
- Record Status
- Branch Code
- Host
- Receiver
- SWIFT Message Type
- Reference No
- Related Ref(21)
3.7.5 Proprietary Message
You can invoke “Proprietary Message” screen by typing ‘PXDCMN98’ in the field at the top right corner of the Application tool bar and clicking on the adjoining arrow button.
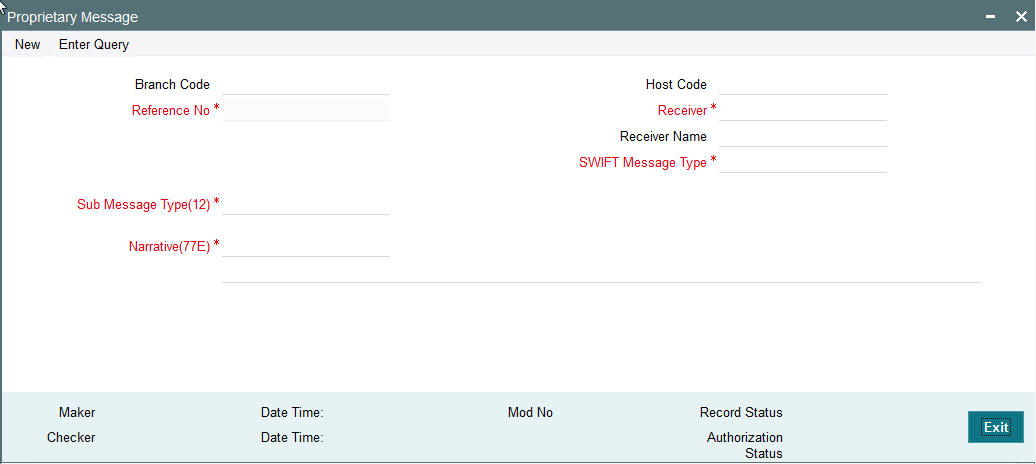
Specify the following details.
Branch Code
Displays the selected branch of the logged-in user.
Reference Number
Displays the Reference Number by default.
Receiver
Specify the Receiver from the list of values.
Receiver Name
The system displays the name of the Receiver upon the selection of Receiver.
SWIFT Message Type
Specify the SWIFT Message Type from the list of values.
Sub Message Type(12)
Specify the value for Sub Message Type(12).
Narrative(77E)
Specify the value for Narrative(77E)
3.7.6 Viewing Proprietary Message Summary
You can invoke “Proprietary Message Summary” screen by typing ‘PXSCMN98’ in the field at the top right corner of the Application tool bar and clicking on the adjoining arrow button.
You can search using one or more of the following parameters:
- Authorization Status
- Record Status
- Branch Code
- Host Code
- Receiver
- SWIFT Message Type
- Reference No
Once you have specified the search parameters, click ‘Search’ button. The system displays the records that match the search criteria for the following:
- Authorization Status
- Record Status
- Branch Code
- Host Code
- Receiver
- SWIFT Message Type
- Reference No
3.7.7 Free Format Message
You can invoke “Free Format Message” screen by typing ‘PXDCMN99’ in the field at the top right corner of the Application tool bar and clicking on the adjoining arrow button.
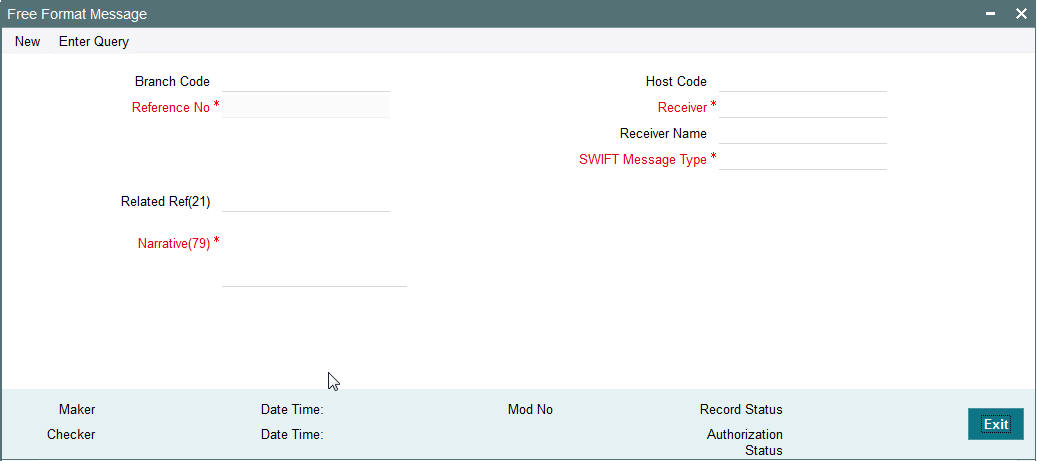
Specify the following details.
Branch Code
Displays the selected branch of the logged-in user.
Host Code
Displays the host code of the logged-in user.
Reference Number
Displays the Reference Number by default.
Receiver
Specify the Receiver from the list of values.
Receiver Name
The system displays the name of the Receiver upon the selection of Receiver.
SWIFT Message Type
Specify the SWIFT Message Type from the list of values.
Related Ref(21)
Specify the related reference from the list of values.
Narrative(77E)
Specify the value for Narrative(77E)
3.7.8 Viewing Free Format Message Summary
You can invoke “Free Format Message Summary” screen by typing ‘PXSCMN99’ in the field at the top right corner of the Application tool bar and clicking on the adjoining arrow button.

You can search using one or more of the following parameters:
- Authorization Status
- Record Status
- Branch Code
- Host Code
- Receiver
- SWIFT Message Type
- Reference No
Once you have specified the search parameters, click ‘Search’ button. The system displays the records that match the search criteria for the following:
- Authorization Status
- Record Status
- Branch Code
- Host Code
- Receiver
- SWIFT Message Type
- Reference No
3.7.9 Request for Cancellation
You can invoke “Request for Cancellation” screen by typing ‘PXDCMN92’ in the field at the top right corner of the Application tool bar and clicking on the adjoining arrow button.
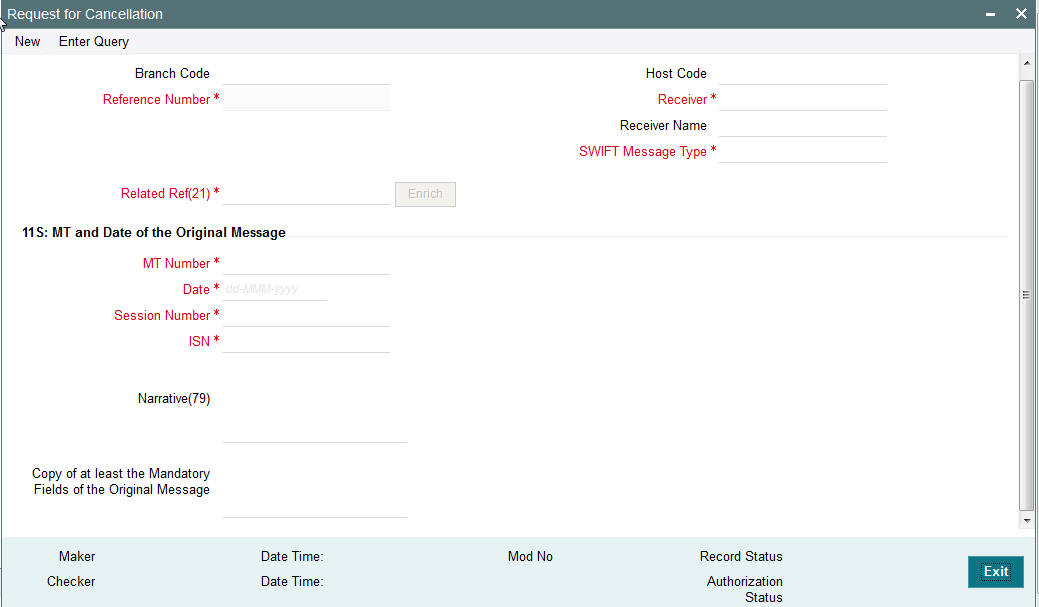
This screen is used to generate a Cancellation request n92 message for a payment message sent earlier.
Specify the following details.
Branch Code
Displays the selected branch of the logged-in user.
Host Code
Displays the host code of the selected branch of the logged-in user.
Reference No
Displays the reference number of the generated Common Group message when viewed in the Query mode.
Receiver
Specify or search and select the BIC code of the bank which is desired to be the Receiver of the generated Common Group message.
Name of the Receiver
Displays the name of the bank corresponding to the selected BIC.
SWIFT Message Type
Select the required Common Group message type. The available values for selection include the following:
- 192
- 292
- 392
- 492
- 592
- 692
- 792
- 892
- 992
Related Ref(21)
Specify or search and select the transaction (contract) reference number of the associated customer or bank transfer transaction.
MT and Date of the Original Message
Specify the following details of the original (referenced) outward/inward message.
- Drop-down – Select either ‘S’ or ‘R’ depending on whether original message being referred was sent or received.
- 1st text-box – MT Number – Specify the MT number of the original message e.g. 103, 202, 102 etc.
- 2nd text-box – Date – Specify or select date (from calendar LOV) of original message
- 3rd text-box – Session Number – Specify Session number (1st 4 digits from the last 10 digits in Block1 of ACK received) of original message
- 4th text-box – ISIN (Input Sequence Number) – Specify ISIN (last 6 digits from the last 10 characters in Block1 of ACK received) of original message.
Narrative (79)
Specify narrative text for describing the original message, or all transactions in the original multi-credit Customer/Bank transfer message that is being referenced by this Common Group message. Alternatively, this field can also be used for specifying free format text in case of MT199/MT299. This field can contain up to a 1750 characters.
Copy of at least the Mandatory Fields of the Original Message
Specify at least the mandatory fields of the original message that is being referenced by this Common Group message. This field can be input instead of ‘Narrative 79’ field but never both.
3.7.10 Viewing Request for Cancellation Summary
You can invoke “Request for Cancellation Summary” screen by typing ‘PXSCMN92’ in the field at the top right corner of the Application tool bar and clicking on the adjoining arrow button.
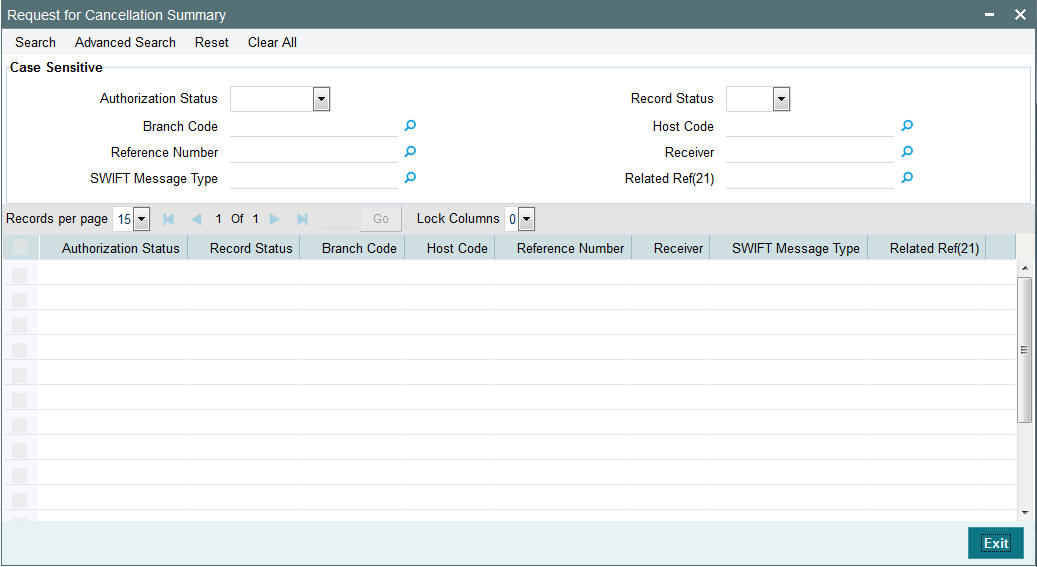
You can search using one or more of the following parameters:
- Authorization Status
- Record Status
- Branch Code
- Host Code
- Reference Number
- Receiver
- SWIFT Message Type
- Related Ref(21)
Once you have specified the search parameters, click ‘Search’ button. The system displays the records that match the search criteria for the following
- Authorization Status
- Record Status
- Branch Code
- Host Code
- Reference Number
- Receiver
- SWIFT Message Type
- Related Ref(21)
3.7.11 Queries
You can invoke “Queries” screen by typing ‘PXDCMN95’ in the field at the top right corner of the Application tool bar and clicking on the adjoining arrow button.
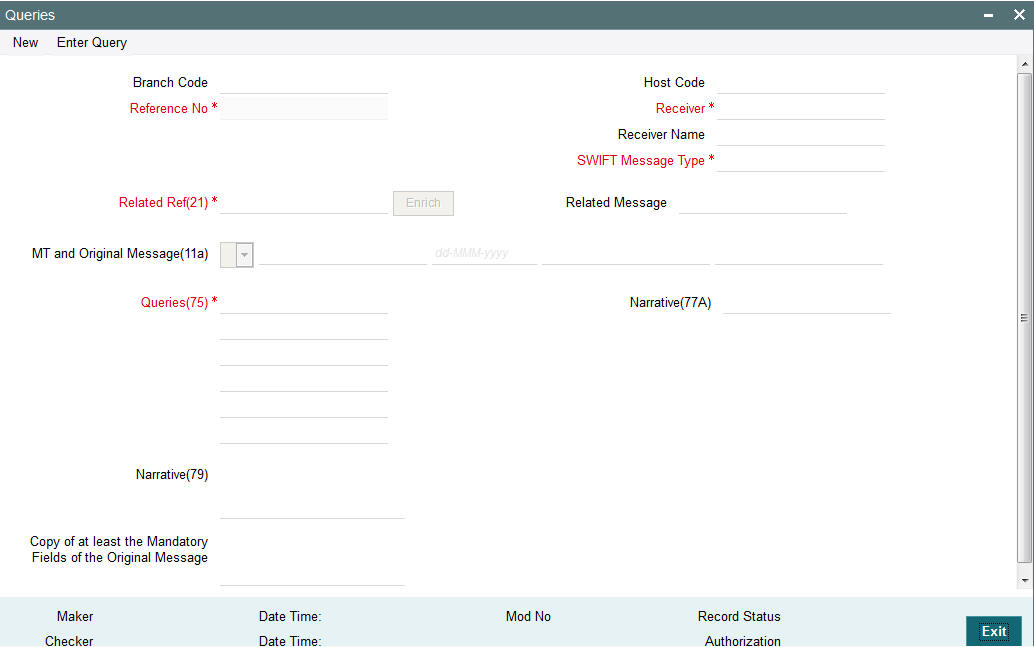
Specify the following details.
Branch Code
Displays the selected branch of the logged-in user.
Host Code
Displays the host code of the selected branch of the logged-in user.
Receiver
Specify or search and select the BIC code of the bank which is desired to be the Receiver of the generated Common Group message.
SWIFT Message Type
Select the required Common Group message type. The available values for selection include the following:
- 195
- 295
- 395
- 495
- 595
- 695
- 795
- 895
- 995
Related Ref(21)
Specify or search and select the transaction (contract) reference number of the associated customer or bank transfer transaction.
Related Message
Specify the related SWIFT message.
MT and Date of the Original Message
Specify the following details of the original (referenced) outward/inward message.
- Drop-down – Select either “11S” or “11R” depending on whether original message being referred was sent or received.
- 1st text-box – MT Number – Specify the MT number of the original message e.g. 103, 202, 102 etc.
- 2nd text-box – Date – Specify or select date (from calendar LOV) of original message
- 3rd text-box – Session Number – Specify Session number (1st 4 digits from the last 10 digits in Block1 of ACK received) of original message
- 4th text-box – ISIN (Input Sequence Number) – Specify ISIN (last 6 digits from the last 10 characters in Block1 of ACK received) of original message.
Queries
Specify or search and select (using LOV) a standard Query code. You can then input additional text or query following the selected Query code, You may specify upto 6 different queries in each of the 6 text boxes.
Narrative (77A)
Specify additional details about the Queries or Answers input in one of the above mentioned fields. The Narrative text can contain up to 700 characters.
Narrative (79)
Specify narrative text for describing the original message, or all transactions in the original multi-credit Customer/Bank transfer message that is being referenced by this Common Group message. Alternatively, this field can also be used for specifying free format text in case of MT199/MT299. This field can contain up to a 1750 characters.
Copy of at least the Mandatory Fields of the Original Message
Specify at least the mandatory fields of the original message that is being referenced by this Common Group message. This field can be input instead of ‘Narrative 79’ field but never both.
3.7.12 Viewing Queries Summary
You can invoke “Queries Summary” screen by typing ‘PXSCMN95’ in the field at the top right corner of the Application tool bar and clicking on the adjoining arrow button.
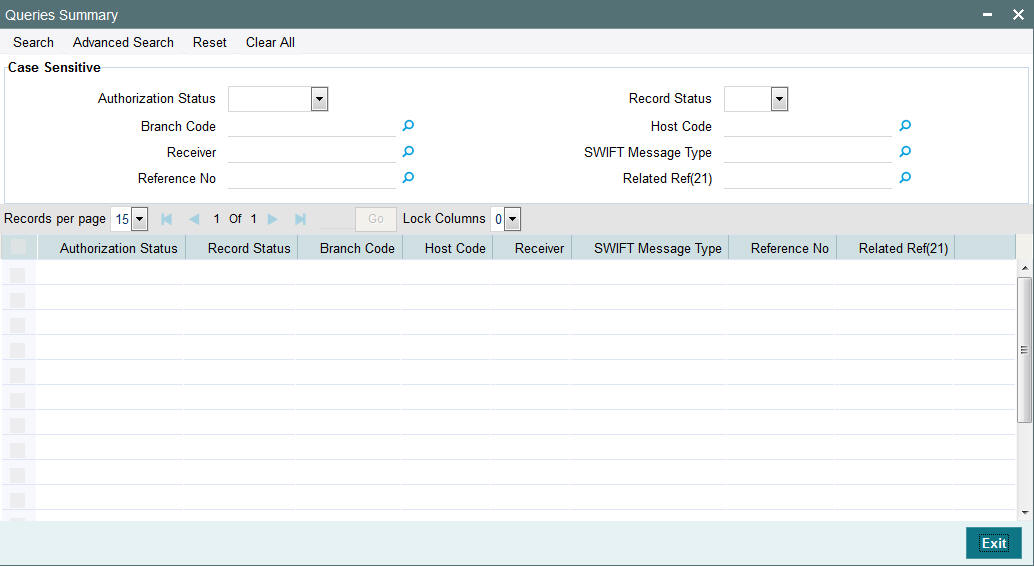
You can search using one or more of the following parameters:
- Authorization Status
- Record Status
- Branch Code
- Host Code
- Receiver
- SWIFT Message Type
- Reference Number
- Related Ref(21)
Once you have specified the search parameters, click ‘Search’ button. The system displays the records that match the search criteria for the following
- Authorization Status
- Record Status
- Branch Code
- Host Code
- Receiver
- SWIFT Message Type
- Reference Number
- Related Ref(21)
3.7.13 Answers
You can invoke ‘Answers’ screen by typing ‘PXDCMN96’ in the field at the top right corner of the Application tool bar and clicking on the adjoining arrow button.
Specify the following details.
Branch Code
Displays the selected branch of the logged-in user.
Host Code
Displays the host code of the selected branch of the logged-in user.
Receiver
Specify or search and select the BIC code of the bank which is desired to be the Receiver of the generated Common Group message.
SWIFT Message Type
Select the required Common Group message type. The available values for selection include the following:
- 196
- 296
- 396
- 496
- 596
- 696
- 796
- 896
- 996
Related Ref(21)
Specify or search and select the transaction (contract) reference number of the associated customer or bank transfer transaction.
Related Message
Specify the related SWIFT message.
MT and Date of the Original Message
Specify the following details of the original (referenced) outward/inward message.
- Drop-down – Select either “11S” or “11R” depending on whether original message being referred was sent or received.
- 1st text-box – MT Number – Specify the MT number of the original message e.g. 103, 202, 102 etc.
- 2nd text-box – Date – Specify or select date (from calendar LOV) of original message
- 3rd text-box – Session Number – Specify Session number (1st 4 digits from the last 10 digits in Block1 of ACK received) of original message
- 4th text-box – ISIN (Input Sequence Number) – Specify ISIN (last 6 digits from the last 10 characters in Block1 of ACK received) of original message.
Queries
Specify or search and select (using LOV) a standard Query code. You can then input additional text or query following the selected Query code, You may specify upto 6 different queries in each of the 6 text boxes.
Narrative (77A)
Specify additional details about the Queries or Answers input in one of the above mentioned fields. The Narrative text can contain up to 700 characters.
Narrative (79)
Specify narrative text for describing the original message, or all transactions in the original multi-credit Customer/Bank transfer message that is being referenced by this Common Group message. Alternatively, this field can also be used for specifying free format text in case of MT199/MT299. This field can contain up to a 1750 characters.
Copy of at least the Mandatory Fields of the Original Message
Specify at least the mandatory fields of the original message that is being referenced by this Common Group message. This field can be input instead of ‘Narrative 79’ field but never both.
3.7.14 Viewing Answers Summary
You can invoke “Answers Summary” screen by typing ‘PXSCMN96’ in the field at the top right corner of the Application tool bar and clicking on the adjoining arrow button.
You can search using one or more of the following parameters:
- Authorization Status
- Record Status
- Branch Code
- Host Code
- Receiver
- SWIFT Message Type
- Reference Number
- Related Ref(21)
Once you have specified the search parameters, click ‘Search’ button. The system displays the records that match the search criteria for the following:
- Authorization Status
- Record Status
- Branch Code
- Host Code
- Receiver
- SWIFT Message Type
- Reference Number
- Related Ref(21)
3.7.15 Free Format Message – MT99x
Screen PXDCMN99 supports booking of the following common group messages:
- MT991
- MT992
- MT995
- MT996
- MT998
- MT999
System will allow user to input the Tag 21-Related Reference. On save & authorize system will generate the message and handoff to EMS for sending to SWIFT network.
User will able to view the outgoing message in the outgoing message browser (PMSOUTBR)
System will also support processing of incoming MT9xx messages
You can view the Free Format Messages generated using the screen PXSCMN99.
3.8 103 Remit message processing
3.8.1 Support Outgoing MT103 Remit
System supports generation of outgoing MT103 Remit message. MT103 Remit message would be generated if the below mentioned conditions are satisfied:
- Tag 77T details are present
- ‘Remit Member’ flag must be checked for both sender and receiver BIC
- Tag 70 details are not present
The system will throw error and the transaction will not be saved in the below situations:
- If tag 77T details & tag 70 details both are present
- If tag 77T details are present but ‘Remit Member’ flag is unchecked for sender and/or receiver.
- If tag 77T details are present and ‘Remit Member’ flag is checked for sender and/or receiver BIC but tag 70 details is also present
You can view outgoing MT103 Remit message details on the Outgoing Message Browser screen and on the Messages sub-screen of the Cross Border Outgoing Payment Transaction view screen.
3.8.2 Support Incoming MT103 Remit
System will support processing of incoming MT103 Remit message. MT103 Remit message would be generated if the below mentioned conditions are satisfied:
- ‘Remit Member’ flag must be checked for both sender and receiver BIC
Processing of MT103 Remit message will be same as MT103 message. You can view the contents of an incoming MT103 Remit message details on the Incoming Message Browser screen and on the Messages sub-screen of the Cross Border Incoming Payment Transaction view screen
A consolidated batch of transactions can be manually liquidated at any time before the Cut- off time by a user of the branch where the transaction was created. This is enabled through a separate screen called Outgoing Consolidated Queue.
A new queue called “Multi Credit Consolidation Queue” will be available in the system that would maintain all consolidated pool of transactions. The same can be queried, viewed and auctioned from the above mentioned screen.
The purpose of the global payments innovation (gpi) initiative is to improve the customer experience in cross-border payments by increasing the speed, transparency, and end-to-end tracking of cross-border payments. SWIFT is implementing a new service level agreement
(SLA) tying the gpi participants to a set of standards promoting transparency of fees, improved settlement timing, and data flow.
3.9 SWIFT GPI
- SWIFT gpi changes done for cross-border payments enables the following:
- Maintenance for bilateral gpi agreement with correspondent banks for currency- wise cut-off time specifications
- Maintenance for correspondent bank charges
- Marking of gpi enables transactions as part of processing based on maintenances and directory details
- Pricing requirements
- Incoming/outgoing MT 103 handling between gpi enabled banks
- Outgoing message -Block 3 –Tags 111& 121 population
- Generation & population of UETR Unique End to End Transaction Reference based on IETF’s RFC 4122 Version 4 of generation algorithm
- Straight through processing of incoming MT 103 messages received with gpi header
- Handling of incoming/outgoing MT 199 confirmation messages with
- gpi related status code and reject reason code population
- Upload of gpi Directory (in SWIFTRef Reach Plus directory format)
3.9.1 Outgoing gpi payment Processing
- During processing of an outgoing non-RTGS SWIFT payment, if gpi Preferred
flag is checked at transaction level, then system validates:
- Processing branch BIC and currency is a gpi member.
- Receiver BIC and transaction currency is a gpi member and can act as correspondent or intermediary based on gpi directory information
- Sender to Receiver agreement is present and gpi enabled flag is checked at the agreement level
If the above conditions are satisfied,the transaction is stamped as ‘gpi Enabled’ and processed accordingly.
- In pass through case, if the inward message is gpi Enabled, pass through outgoing message generation will be tried considering gpi Preferred as Y. if the gpi validations, as specified in outgoing message generation, are succeeded, then pass through outgoing message isl also be stamped as outward gpi Enabled.
- For the gpi outgoing transaction (originating from us) if the charge bearer is OUR, then system will populate 71G from gpi Receiver Charge field maintained in Sender to Receiver agreement screen for the receiver BIC and the transaction currency. Population of 71G is done during processing of transaction charges (during enrichment or during transaction processing). User can modify the receiver charges from the input screen
- For outgoing gpi Customer Transfer, MT103 message will be generated
with block 3 header with tag 111 & 121
- Value of Tag 111 is populated as ‘001’
- Value of Tag 121 is populated with UETR generated for the transaction. For pass through transaction, the UETR received in the incoming message is carried forward.
3.9.2 Incoming gpi payment Processing
- For inward gpi message, the transaction is processed as an Incoming gpi transaction if the receiver BIC is a gpi member and if the message has gpi tags in Block 3. Else it is processed as a normal incoming swift payment.
3.9.3 Charge Processing
- For Incoming and outgoing gpi SWIFT transactions system will calculate the charges based on the gpi Price Code maintained in the network currency preferences
3.9.4 MT199 Messages
- Processing of pass through outgoing payment and incoming payment generates outgoing MT199 message
- MT199 is dispatched to the Tracker BIC TRCKCHZZ if the transaction is successful.
- Incoming MT199 is uploaded to daily Message In data store is linked to the original MT103 gpi contract
3.9.5 GPI Directory Maintenance
You can invoke the ‘GPI Directory’ screen by typing ‘PMDGPIDR’ in the field at the top right corner of the application toolbar and clicking the adjoining arrow button. You can query the records uploaded..
You can specify the following fields:
Participant ID
Participant's routing ID, reachable for receiving GPI payments is captured in this field.
PARTICIPANT_NAME
Participant’s Institution’s name is displayed in this field.
ID Type
Specify the type of identifier used for Participant Id.
Cutoff Day
Cutoff Day is used for “illiquid” currencies, where the participant cannot obtain settlement of the payment on the same day or next day because there is no spot market for buying this currency.
Platform
The platform that distinguishes the gpi directory from other directories in the SWIFTRef Reach Plus distribution.
Local Time Zone
The time zone of the participant.
Service Identification
Specify the Service type identifier (for example, the value of field 111 in block 3 of the gpi MT 103).
Act As Intermediary
Y" (Yes) or "N" (No) flag specifying whether the participant acts as the gpi Intermediary Agent for gpi payments in a given currency and over a given REACHABLE THROUGH channel.
“Y” indicates that the participant will forward incoming MT 103s payments coming from a gpi participant through this channel and in this currency to an upcoming gpi participant, per the gpi business rules.
Service Name
Specify the name of the service.
Reachable Through
Specify the channel through which the participant is reachable for gpi payment instructions for one of its gpi currencies.
Country Code
Specify the participant's two-character ISO country code.
Channel Type
The type of the REACHABLE THROUGH channel.
Participant ID
Specify the Participant's routing ID, reachable for receiving gpi payments.
Currency Code
The three-character ISO currency, accepted in field 32A of incoming gpi MT 103 payments by the PARTICIPANT ID, or by the gpi intermediary (if any) where the participant can be reached for this currency.
Start Date
Specify the future date when the record will become valid.
Cutoff Time
Specify the Participant's public gpi cut-off time for gpi payments in this currency.
Stop Date
Specify the future date until the record is valid.
3.9.6 Viewing GPI Directory Summary
You can invoke “GPI Directory Summary” screen by typing ‘PMSGPIDR’ in the field at the top right corner of the Application tool bar and clicking on the adjoining arrow button.
You can search using one or more of the following parameters:
- Authorization Status
- Record Status
- Participant ID
- Currency Code
- Channel Type
- Reachable Through
Once you have specified the search parameters, click ‘Search’ button. The system displays the records that match the search criteria.
- Authorization Status
- Record Status
- Participant ID
- Participant Name
- ID Type
- Platform
- Service Identification
- Service Name
3.9.7 GPI Directory Upload
You can invoke the ‘GPI Directory Upload’ screen by typing ‘PMDGPIUP’ in the field at the top right corner of the application toolbar and clicking the adjoining arrow button.Click new button on the Application toolbar.
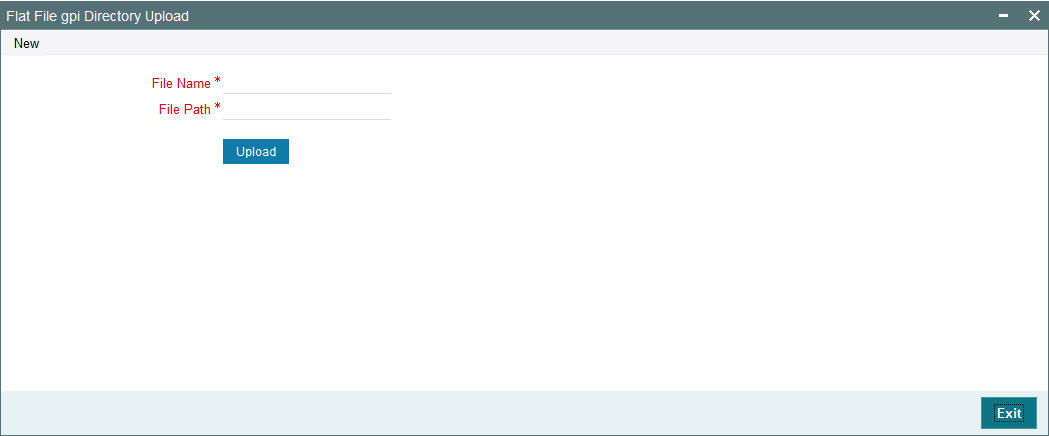
You can specify the following fields:
File Name
Specify the name of the file.
File Path
Specify the path in the server where the file is uploaded.
3.10 Sanctions check processing changes for Incoming payments
Sanctions check is done before after Payment type resolution and before Accounts and Dates resolution.
3.11 Processing an Incoming Payment by debiting the specified account in field 53B
- Field 53B indicates the Sender's account number, serviced by the Receiver, which is be used for reimbursement in the transfer.
- If an account is present in 53B of the incoming customer transfer & bank transfer then system debits account present in 53B and not from the currency correspondent maintenance.
- The account must be a vostro account and not a nostro account
- If system does not find a valid vostro account the incoming transaction goes to repair queue.