2. Exception and Investigation Queues
Exception queues are a logical stage of the payment processing where the payments are made available for further investigation or exception processing. If any exception is encountered during processing, payment transactions are moved to a queue specific to the type of exception. Actions that can be performed on a payment that is pending in a queue are predefined. Transactions with exceptions, pertaining to your logged in Host only are listed in the Queues.
Below mentioned exception and investigation queues are supported in Oracle FLEXCUBE Payments
| S.No | Payments Queue | Queue Code | ||||
|---|---|---|---|---|---|---|
| 1 | Authorization Limit 1 Queue | AL | ||||
| 2 | Authorization Limit 2 Queue | AL | ||||
| 3 | Repair Queue | TR | ||||
| 4 | Business Override Queue | BO | ||||
| 5 | Processing Exception Queue | PE | ||||
| 6 | Processing Cutoff Queue | PC | ||||
| 7 | Sanction Check Queue | SC | ||||
| 8 | Exchange Rate Queue | ER | ||||
| 9 | ECA Queue | EC | ||||
| 10 | External Exchange Rate Queue | EE | ||||
| 11 | Network Cutoff Queue | NC | ||||
| 12 | EAC Queue | EA | ||||
| 13 | External Pricing Queue | EP |
Cross border payments support the below listed queues additionally:
| S.No | Payments Queue | Queue Code | |||
|---|---|---|---|---|---|
| 1 | Prime Bank Queue | PB | |||
| 2 | Print Queue | PQ |
Note
- Exception Queues are not applicable for Faster Payments.
- Authorization limit queues are not applicable for Direct Debits.
- Network/Process cutoff queues are not applicable for Direct Debits and Book Transfers.
- Queue actions can be performed on a single transaction selected.
2.1 Payment Queues
2.1.1 Repair Queue
Usage of Repair Queues
A transaction is moved to Repair Queue if the exception is a modifiable error. Incoming transactions failed in processing for which return has to be processed are also logged in Repair Queue.
You can invoke “Repair Queue” screen by typing ‘PQSREPQU’ in the field at the top right corner of the Application tool bar and clicking on the adjoining arrow button. Click new button on the Application toolbar.
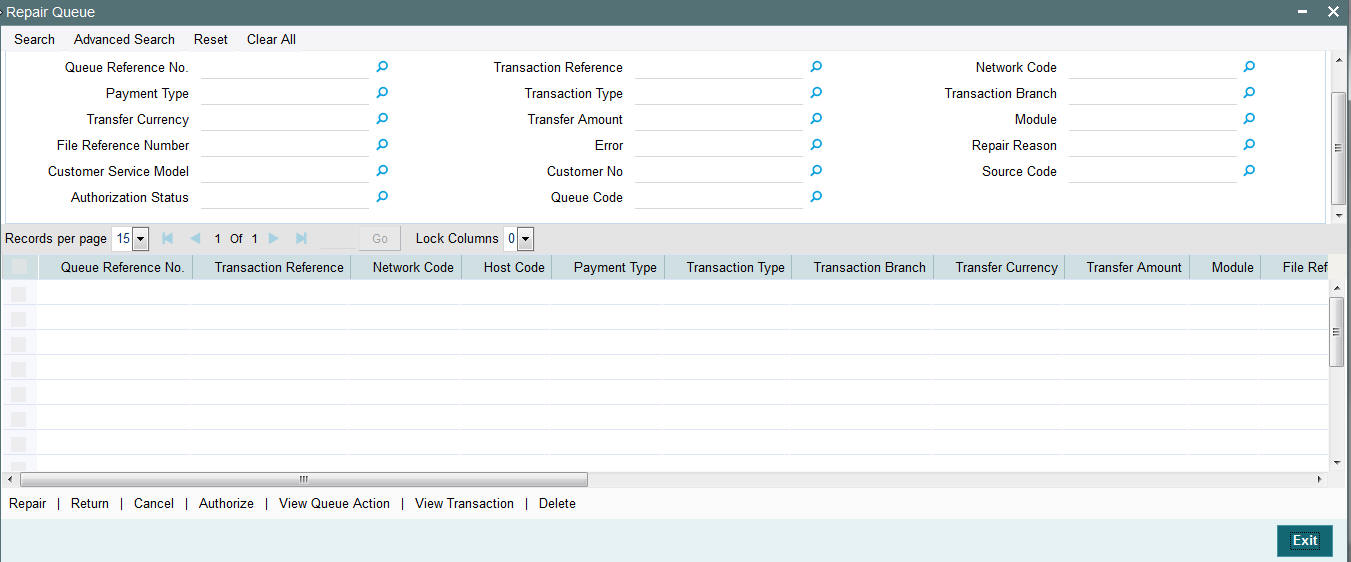
You can search using one or more of the following parameters:
- Queue Reference No.
- Network Code
- Payment Type
- Transaction Type
- Transaction Branch
- Transaction Reference
- Transfer Currency
- Transfer Amount
- Module
- File Reference Number
- Error
- Repair Reason
- Source
- Activation Date
- Customer
- Customer Service Model
- Authorization Status
Once you have specified the search parameters, click ‘Execute Query’ button. The system displays the records that match the search criteria.
The following actions can be performed for transactions in Repair queue
| Actions | Functions | |||
|---|---|---|---|---|
| Repair | This action enables you to modify the payment details and submit for re-processing. On completion of repair action, transaction is re-processed, starting from initial validations. | Note: You are allowed to modify predefined list of fields each payment type. | ||
| Cancel | This option will allow the cancellation of payments. On cancel- lation, payment will be released from the queue. Authorization will be supported.Cancellation is not supported for incoming payments. | |||
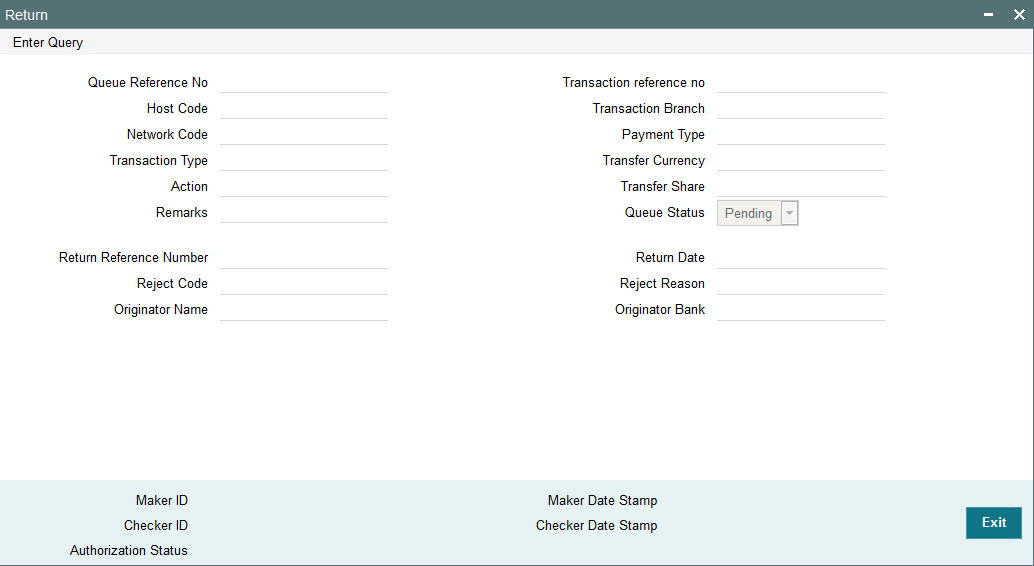
| Return | This action will help operators to return a domestic low value (ACH) incoming payment which has incorrect references to the beneficiary customer, beneficiary bank or has got invalid customer/account status. | |||
| Authorize | Cancel/Release/Carry Forward operation initiated by a user can be authorized by another user. | |||
| View Queue Actions | Displays all queue activities performed for the selected transaction. | |||
| View Trans- action | You can view the selected transaction details. | |||
| Delete | Allows the user who initiated the action, to delete the action before authorization. |
2.1.2 Repair Fields Screen
You can invoke “Repairable Fields” screen by typing ‘PQDREFLD’ in the field at the top right corner of the Application tool bar and clicking on the adjoining arrow button. Click new button on the Application toolbar.
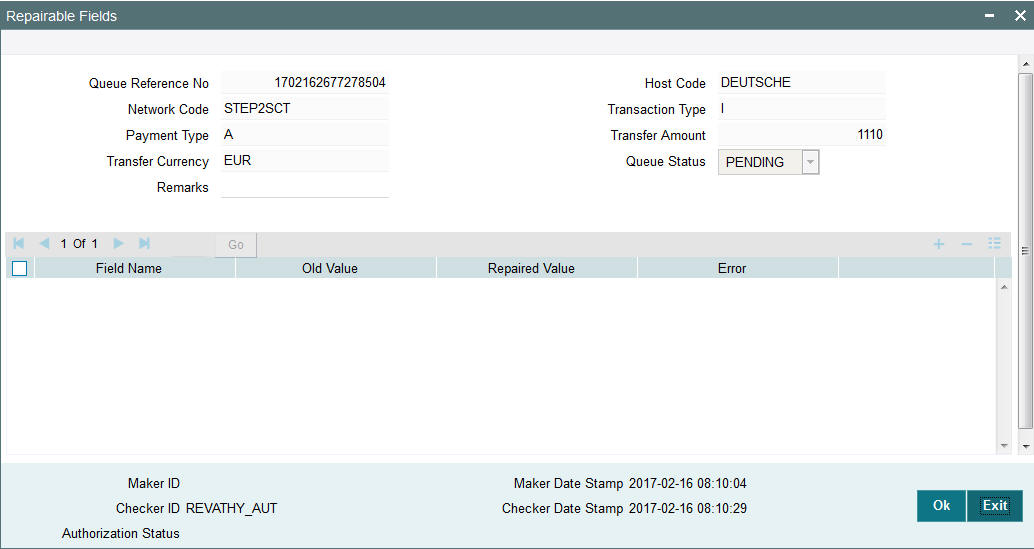
Specify the following fields:
Remarks
Specify any remarks, if any against the field that is likely to be repaired.
Repaired Value
Specify the value that was repaired.
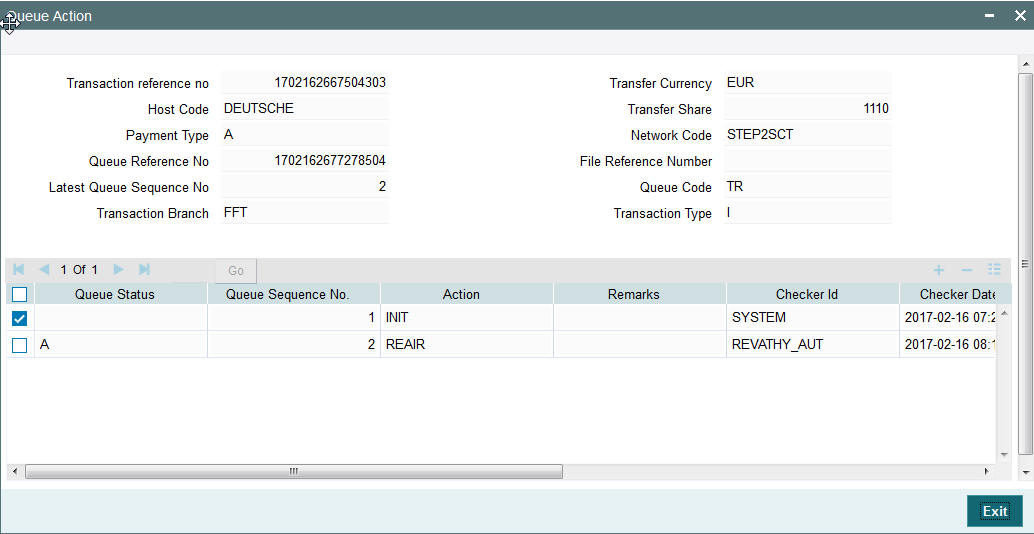
2.1.3 Repair Queue Action Screen
You can invoke “Repair Queue Action” screen by typing ‘PQDVWQAC’ in the field at the top right corner of the Application tool bar and clicking on the adjoining arrow button. Click new button on the Application toolbar.
2.1.4 Repair Queue Cancel Screen
You can invoke “Repair Queue Cancel” screen by typing ‘PQDREPCN’ in the field at the top right corner of the Application tool bar and clicking on the adjoining arrow button. Click new button on the Application toolbar.
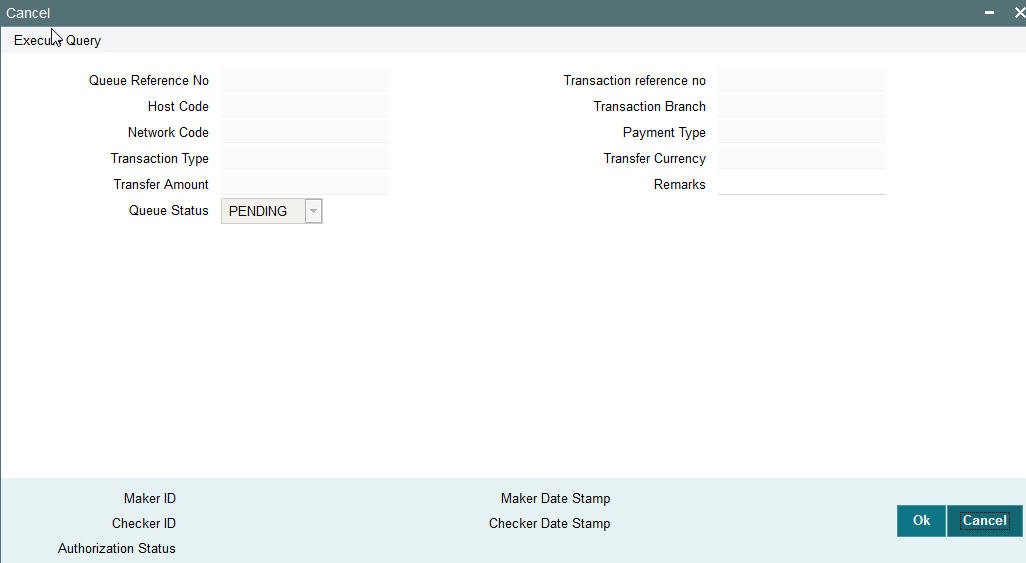
Specify the following fields:
Remarks
Specify any remarks if required, prior to the cancellation of the record.
2.1.5 Repair Queue Return Screen
You can invoke “Repair Queue Return” screen by typing ‘PQDREPRT’ in the field at the top right corner of the Application tool bar and clicking on the adjoining arrow button. Click new button on the Application toolbar.
Specify the following fields:
Remarks
Specify any remarks prior to the return of the record.
2.1.6 Business Override Queue Screen
Payment transactions are logged in Business Override Queue if the exception encountered can be accepted or rejected by you based on a valid business reason.
You can invoke the ‘Business Override Queue’ screen by typing ‘PQSOVRQU’ in the field at the top right corner of the application toolbar and clicking the adjoining arrow button.Click new button on the Application toolbar.
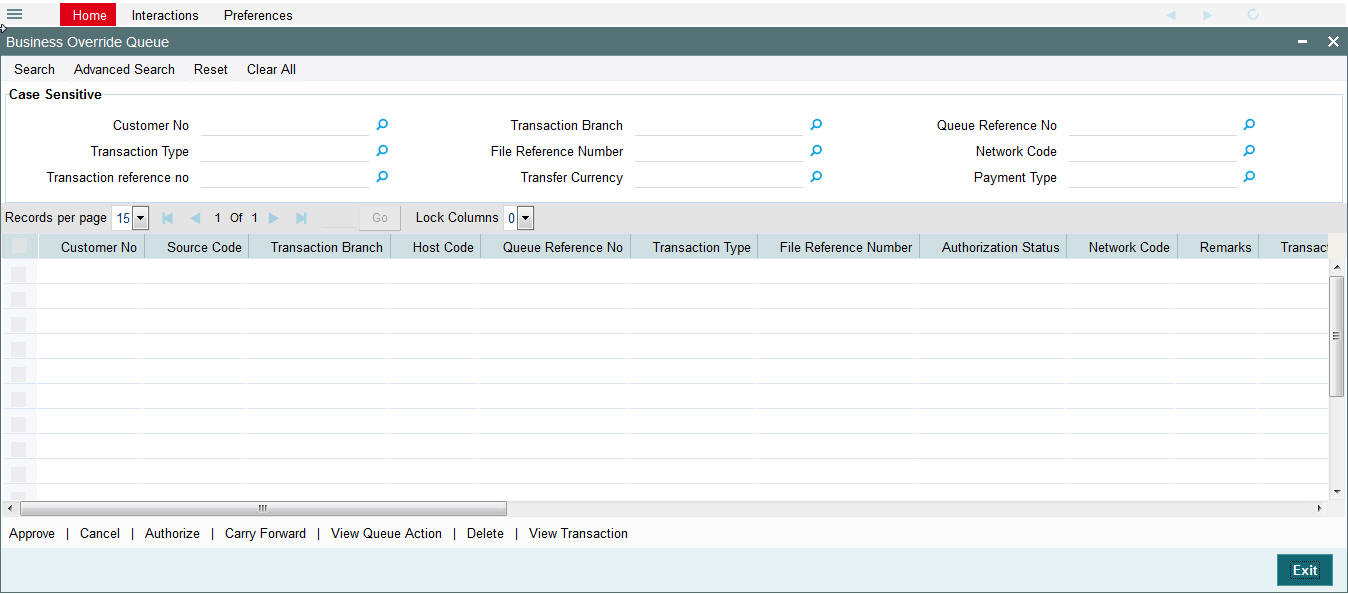
You can search using one or more of the following parameters:
- Customer No
- Transaction Type
- Transaction reference no
- Transaction Branch
- File Reference Number
- Transfer Currency
- Queue Reference No
- Network Code
- Payment Type
Once you have specified the search parameters, click ‘Search’ button. The system displays the records that match the search criteria:
The following actions can be performed for transactions in Business Override queue
| Actions | Functions | ||
|---|---|---|---|
| Approve | Approve a payment with overrides. The payment is released for further processing. | ||
| Cancel | This option will allow the cancellation of transaction. On cancellation, transaction is cancelled and released from the queue. Authorization is supported. | ||
| Authorize | Approve/Cancel operation initiated by a user can be authorized by another user. | ||
| Carry Forward | User can manually move the transaction for processing on next working day. | ||
| Delete | Allows the user who initiated the action, to delete the action before authorization. | ||
| View Queue Actions | Displays all queue activities performed for the selected transaction. | ||
| View Trans- action | You can view the selected transaction details. |
Note
- Cancel action will not be applicable for Incoming Payments.
2.1.7 Authorization Limit 1 Queue Screen
Highlights of Authorization Limit Queues
- Facility to define two levels of authorization for transaction limits.
- Authorization limit checks are applicable to Outgoing and Incoming Payments for payment types ACH, RTGS, Book Transfer and Cross Border.
Note
- Authorization Limits can be configured in Network Currency Preferences screen.
- Authorization limit checks will not be applicable for Faster Payments and bulk file uploads.
When Transfer Amount exceeds the authorization limit 1 amount configured in network currency preferences, an outgoing payment is moved to the Authorization Limit Level 1 Queue.
You can invoke the Authorization Limit Level 1 Queue Screen by typing ‘PQSAU1QU’ in the field at the top right corner of the application toolbar and clicking the adjoining arrow button.Click new button on the Application toolbar.
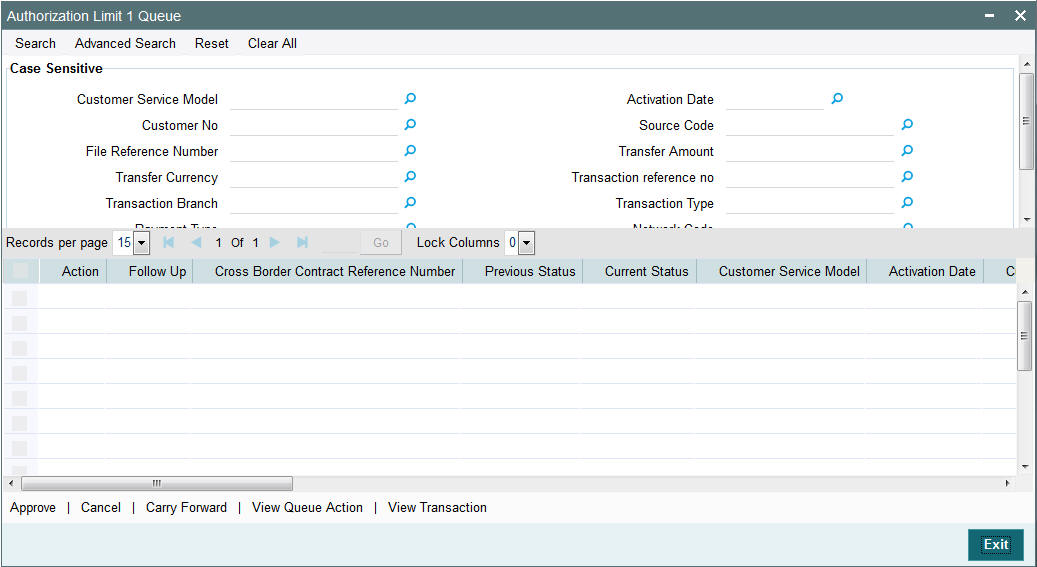
You can search using one or more of the following parameters:
- Queue Reference No.
- Payment Type
- Network Code
- Transaction Reference
- Transaction Type
- Transaction Branch
- File Reference Number
- Transfer Currency
- Error Code
- Customer
- Transaction Amount
- Source Code
- Customer Service Model
- Activation Date
Once you have specified the search parameters, click ‘Search’ button. The system displays the records that match the search criteria.
The following actions can be performed for transactions in Authorization Limit Level 1 queue
| Actions | Functions | ||
|---|---|---|---|
| Approve | This option will enable the further processing of the transaction even if the amount exceeds authorization limit level 1. On the click of Approve button, you will be re-directed to a screen to enter necessary remarks. The transaction is released for further processing after you enter the required remarks and click the OK button. | ||
| Cancel | This option will allow the cancellation of payment. On cancellation, payment will be released from the queue. | ||
| Carry Forward | User can manually move the transaction for processing on next working day. | ||
| View Queue | Displays all queue activities performed for the selected transaction. | ||
| View Transaction | You can view the selected transaction details. |
Note
Actions from Authorization Limit 1 queue are authorized automatically.
2.1.8 Authorization Limit 2 Queue Screen
Highlights of Authorization Limit Queues
- Facility to define two levels of authorization for transaction limits.
- Authorization limit checks are applicable to Outgoing and Incoming Payments for payment types like ACH, RTGS, Book Transfer and Cross Border.
Note
- Authorization Limits can be configured in Network Currency Preferences screen.
- Authorization Limit Level 2 checks is performed after Authorization Limit Level 1 checks.
- Authorization Limit Level 2 checks are not applicable for Batch Booking Payments.
- An Outgoing payment is moved to the Authorization Limit Level 2 Queue when Transfer Amount exceeds the authorization limit 2 configured in network currency preferences.
You can invoke the Authorization Limit Level 2 Queue Screen by typing ‘PQSAU2QU’ in the field at the top right corner of the application toolbar and clicking the adjoining arrow button.Click new button on the Application toolbar.
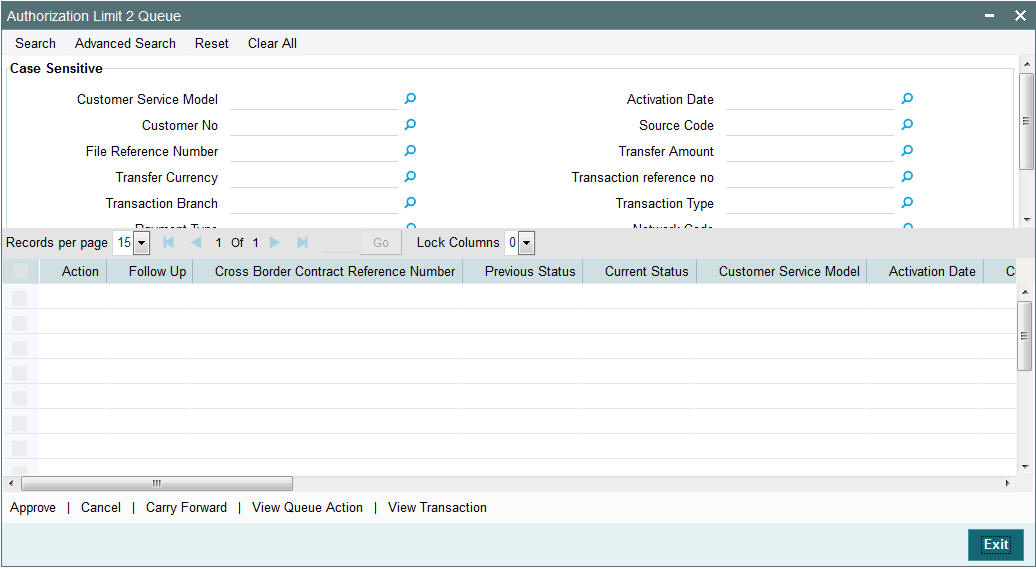
You can search using one or more of the following parameters:
- Queue Reference No.
- Payment Type
- Network Code
- Transaction Reference
- Transaction Type
- Transaction Branch
- File Reference Number
- Transfer Currency
- Error Code
- Customer
- Transaction Amount
- Source Code
- Customer Service Model
- Activation Date
Once you have specified the search parameters, click ‘Search’ button. The system displays the records that match the search criteria.
The following actions can be performed for transactions in Authorization Limit Level 2 queue
| Actions | Functions | ||
|---|---|---|---|
| Approve | This option will enable the further processing of the transaction even if the amount exceeds authorization limit level 2. On the click of Approve button, you will be re-directed to a screen to enter necessary remarks. The transaction is released from the queue for further processing after you enter the required remarks and click the OK button. | ||
| Cancel | This option will allow the cancellation of payment. On cancellation, payment will be released from the queue. | ||
| Carry Forward | User can manually move the transaction for processing on next working day. | ||
| View Queue | Displays all queue activities performed for a transaction. | ||
| View Transaction | You can view the selected transaction details. |
Note
Actions from Authorization Limit 2 queue are authorized automatically.
2.1.9 Processing Cutoff Queue
Cut off time check is done if the payment value date is less than or equal to current date based on Process Cutoff Time maintained If the cutoff time has passed, system checks whether the flag ‘Move to next working day’ is applicable in Processing Cutoff Time Preferences. If applicable, payment value date is moved forward and transaction is treated as a future dated transaction.
If’ Move to next working day ‘preference is not applicable, then payment is moved to Processing cutoff queue.
You can invoke “Processing Cutoff Queue” screen by typing ‘PQSPRCUQ’ in the field at the top right corner of the Application tool bar and clicking on the adjoining arrow button. Click new button on the Application toolbar.

You can search using one or more of the following parameters:
- Transaction Reference Number
- File Reference Number
- Queue Reference No.
- Network Code
- Payment Type
- Payment Transaction Type
- Transaction Branch
- Customer No
- Transfer Currency
- Transfer Amount
- Cutoff Time
- Value Date
- Module
- Maker ID
- Checker ID
- Customer Service Model
- Source Code
Once you have specified the search parameters, click ‘Search’ button. The system displays the records that match the search criteria.
The following actions are allowed in the Processing Cutoff Queue:
| Actions | Functions | |||
|---|---|---|---|---|
| Release | Although transaction cut off is over, payment will be released for current day processing. Payment value date will remain as current date. Authorization will be supported for this action. Payments released from Post Cutoff queue will not undergo transaction cut-off time checks again | |||
| Cancel | This option will allow the cancellation of payments. On cancellation, payment will be released from the queue. Authorization will be supported. | |||
| Carry Forward | You can manually move the transaction for processing on next working day. Value date will be moved to next working day. Existing value date will be stored in ‘Original Value Date’ field. Debit entries will be posted on same day or on new value date based on the ‘Deferred Debit’ flag unchecked or checked at processing cutoff preference. Authorization is supported for this action. | |||
| Authorize | Cancel/Release/Carry Forward operation initiated by a user can be authorized by another user. | |||
| View Queue | Displays all queue activities performed for a transaction. | |||
| Delete | Allows the user who initiated the action, to delete the action before authorization. | |||
| View Transaction | You can view the selected transaction details. |
2.1.10 Sanctions Queue
You can invoke “Sanction Queue” screen by typing ‘PQSSNCKQ’ in the field at the top right corner of the Application tool bar and clicking on the adjoining arrow button. Click new button on the Application toolbar.

You can search using one or more of the following parameters:
- Queue Reference No.
- Network Code
- Payment Type
- Payment Transaction Type
- Transaction Branch
- Transaction Reference No.
- Transfer Currency
- Transfer Amount
- Module
- Customer No
- Current Status
- Requested Date
- Response Date
- Response Status
- Sanction System Code
- Authorization Status
- File Reference Number
- Checker Id
- Cross Border Contract Reference Number
- Maker ID
Once you have specified the search parameters, click ‘Execute Query’ button. The system displays the records that match the search criteria.
Payment transaction can have the following sanction check status based on the response from Sanction check system:
- A-Approved
- R-Rejected
- O-Overrides (Any of the interim status from the external system will be treated as an override)
- T-Timed Out
All payment transactions with the status ‘R’,’O’,’T’ will be listed in Sanction check queue. If the response is received as rejected-’R’, then system will cancel the transaction automatically if the external system status code is marked for auto cancellation.
The following actions will be allowed for the Sanction Check Queue
| Actions | Functions | ||
|---|---|---|---|
| Approve | User can approve the payments. Authorization is supported for this action. Sanction check will be excluded while doing transaction processing. | ||
| Cancel | This option will allow the cancellation of payments. On cancellation, payment will be released from the queue. Authorization will be supported | ||
| Resend | This option will allow the submission of transaction for reprocessing. Bulk resend will not be allowed. Resend Action will not support authorization | ||
| Authorize | Cancel/ Approve initiated by a user can be authorized by another user. | ||
| Delete | Allows the user who initiated the action, to delete the action before authorization. | ||
| View | Displays all queue activities performed for a transaction. | ||
| View Transaction | You can view the selected transaction details. |
2.1.11 Exchange Rate Queue
The transactions are moved to exchange rate queue for the following reasons:
- Transfer amount is within small FX limit, exceptions encountered while fetching the rate.
- Transfer amount is above small FX limit and External exchange rate is not applicable
- Single payments and batch entries are logged in this queue.
You can invoke “Exchange Rate Queue” screen by typing ‘PQSEXCRQ’ in the field at the top right corner of the Application tool bar and clicking on the adjoining arrow button. Click new button on the Application toolbar.

You can search using one or more of the following parameters:
- Transaction Reference Number
- File Reference Number
- Queue Reference No.
- Network Code
- Payment Type
- Payment Transaction Type
- Transaction Branch
- Exchange Currency
- Transfer Currency
- Transfer Amount
- Module
- Source Code
- Customer Service Model
Once you have specified the search parameters, click ‘Execute Query’ button. The system displays the records that match the search criteria.
The following actions can be performed for transactions in Exchange Rate queue.
| Actions | Functions | ||
|---|---|---|---|
| Rate Input | This option will allow the user to input the exchange rate manually. This action requires authorization. | ||
| Cancel | This option will allow the cancellation of payment. On cancellation, payment will be released from the queue. Authorization will be supported | ||
| Authorizer | Cancel/ Rate Input actions initiated by a user can be authorized by another user. | ||
| Delete | Allows the user who initiated the action, to delete the action before authorization. | ||
| View Queue | Displays all queue activities performed for a transaction. | ||
| View Transaction | You can view the selected transaction details. |
2.1.12 External Exchange Rate Queue
The payment transactions are moved to external exchange rate queue for the following reasons:
- External exchange rate is applicable and the response could not be obtained from external rate system
- Request to external exchange rate system is timed out
You can invoke “External Exchange Rate Queue” screen by typing ‘PQSEXEXQ’ in the field at the top right corner of the Application tool bar and clicking on the adjoining arrow button. Click new button on the Application toolbar.

You can search using one or more of the following parameters:
- Transaction Reference Number
- File Reference Number
- Queue Reference No.
- Buy Amount
- Sell Currency
- Sell Amount
- External Exchange Rate
- Status
- Module
- Exchange Rate
- Remarks
- Authorization Status
- Maker Id
- Checker Id
- Network Code
- Payment Type
- Payment Transaction Type
- Transaction Branch
- Customer No
- Debtor Account Number
- Account Currency
- Buy Sell Indicator
- Source Code
- Customer Service Model
Once you have specified the search parameters, click ‘Execute Query’ button. The system displays the records that match the search criteria.
Single payments and batch entries are logged in this queue.
The following actions can be performed for transactions in Exchange Rate queue.
| Actions | Functions | ||
|---|---|---|---|
| Rate Input | This option will allow the user to input the exchange rate manually. This action requires authorization. | ||
| Cancel | This option will allow the cancellation of payment. On cancellation, payment will be released from the queue. Authorization will be supported | ||
| Resend | This option will allow the submission of transaction for external system. This option will be applicable for transaction that was moved to exceptions while awaiting response from external system or for the transaction request that was timed out. Bulk resend will not be allowed. Resend Action will not support authorization. | ||
| Authorize | Cancel/ Rate Input actions initiated by a user can be authorized by another user. | ||
| Delete | Allows the user who initiated the action, to delete the action before authorization. | ||
| View | Displays all queue activities performed for a transaction. | ||
| View Transaction | You can view the selected transaction details. |
2.1.13 External Account Check Queue
The External Account Check (EAC) request sent from Payment system for credit entries of an account. This request includes information about account number, account currency, CIF ID and branch code. The external DDA system has to perform the below validations:
- Existence of the account
- Currency of the account specified is correct
- Account belongs to the customer specified and the customer status
- Account exists on the specified branch
- Account is authorized, active & open
- Account status
- Credit is not restricted on the account
You can invoke “EAC Queue” screen by typing ‘PQSEACQU’ in the field at the top right corner of the Application tool bar and clicking on the adjoining arrow button. Click new button on the Application toolbar.
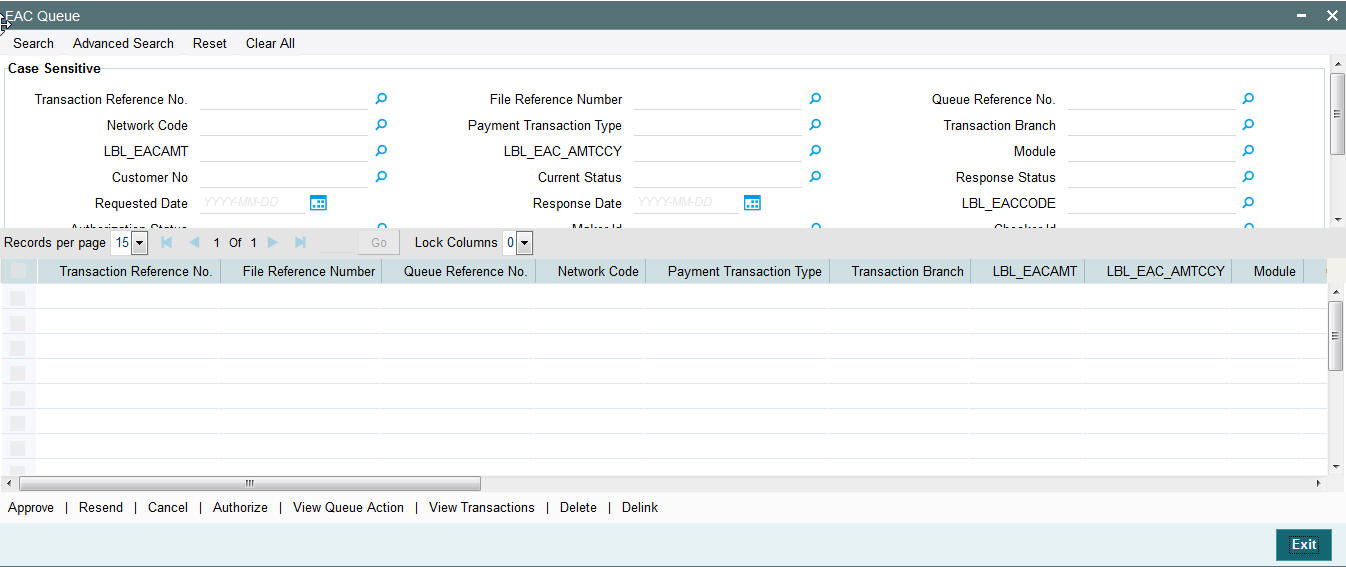
You can search using one or more of the following parameters:
- Transaction Reference No.
- File Reference Number
- Queue Reference No.
- Network Code
- Payment Transaction Type
- Transaction Branch
- EAC Amount
- EAC Currency
- Module
- Customer No
- Current Status
- Response Status
- Requested Date
- Response Date
- LBL_EACCODE
- Authorization Status
- Maker Id
- Checker Id
- Cross Border Contract Reference Number
- Payment Type
- Source Code
- Activation Date
- Customer Service Model
- Queue Code
Once you have specified the search parameters, click ‘Search’ button. The system displays the records that match the search criteria.
The following actions can be performed for transactions in this queue
| Actions | Functions | ||
|---|---|---|---|
| Approve | User can approve the payment. Transaction will be reprocessed. | ||
| Resend | This option will allow the submission of transaction for ECA again if the transaction is in 'O' or 'T' status. New reference number will be created. Bulk resend will not be allowed. Resend Action will not support authorization.s | ||
| Cancel | This option will allow the cancellation of payment. On cancellation, payment will be released from the queue. Authorization will be supported | ||
| Authorize | Cancel/ Approve initiated by a user can be authorized by another user | ||
| Delete | Allows the user who initiated the action, to delete the action before authorization. | ||
| View Queue Action | Displays all queue activities performed for a transaction. | ||
| View Transaction | You can view the selected transaction details. | ||
| Delink | This action is applicable to batch transactions. You can delink a few transactions from a batch and submit the batch for EAC again. |
2.1.13.1 Queue Details Screen
The Queue Details Screen is used to approve, resend, cancel, authorize, delete or delink a queue action.
You can invoke “Queue Details” screen by typing ‘PQDACQAU’ in the field at the top right corner of the Application tool bar and clicking on the adjoining arrow button. Click new button on the Application toolbar.
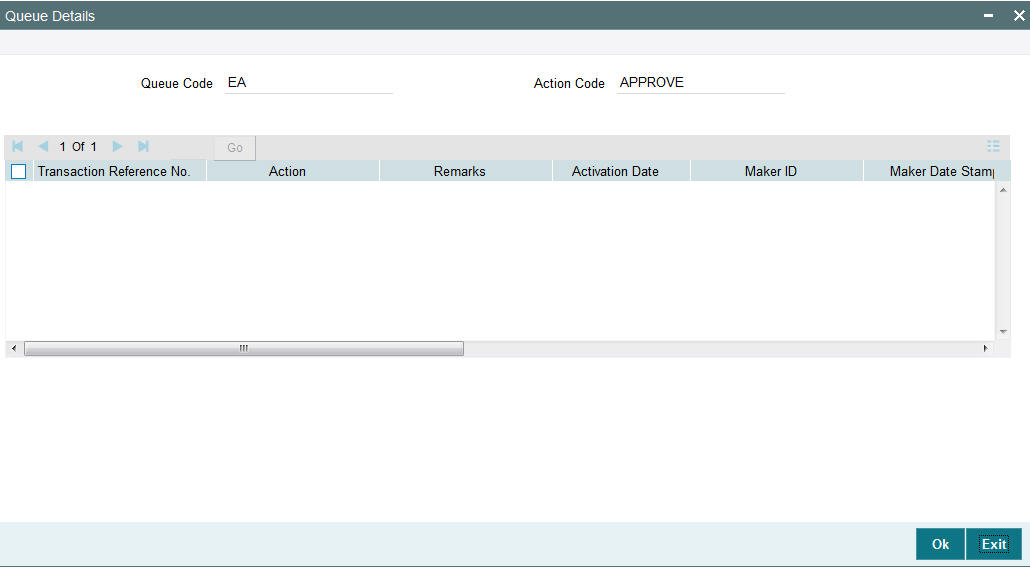
You can also invoke this screen from the EAC Queue Screen after selecting a record and clicking on any of the following buttons:
- Approve
- Resend
- Cancel
- Authorize
- Delete
- Delink
Click OK button to initiate the required queue action.
2.1.13.2 Queue Action Log Details Screen
The Queue Details Screen is used to view the log details of a transaction You can invoke “Queue Action Log Details” screen by typing ‘PQDCANQR’ in the field at the top right corner of the Application tool bar and clicking on the adjoining arrow button. Click new button on the Application toolbar.
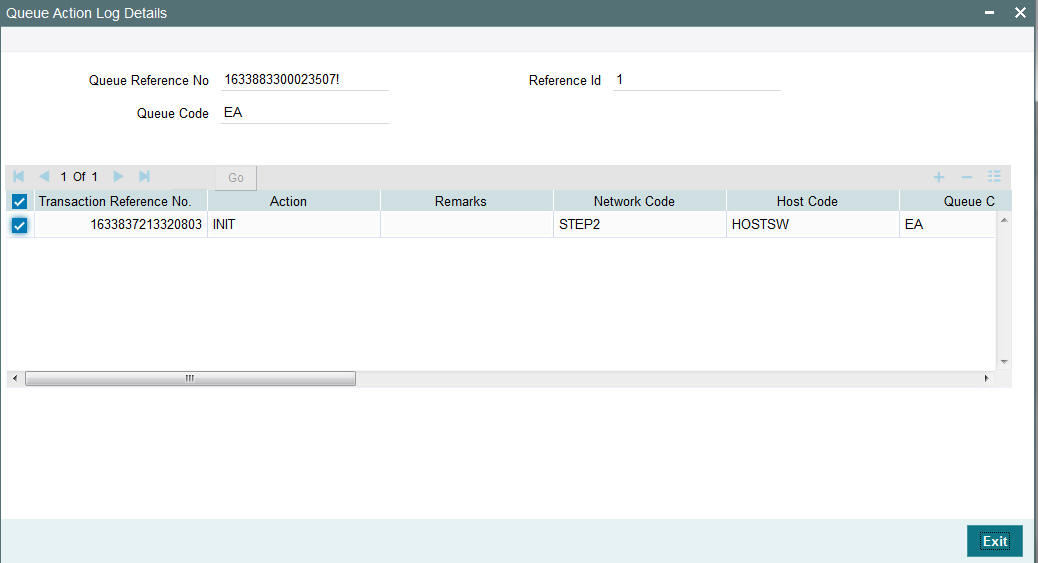
You can also invoke this screen from the EAC Queue Screen after selecting a record and then clicking on View Queue Action button.
2.1.14 External Credit Approval Queue
Payment transactions which fail Credit approval check for debit entries for credit entries with DDA system are moved to ECA queue.
ECA information sent from Payments system includes account number, account currency, CIF ID, branch code, transaction amount and value date of the transaction. The DDA system has to perform the below validations based on the received information based on the following parameters the received information:
- Existence of the account
- Currency of the account specified is correct
- Account belongs to the customer specified and customer status
- Account exists on the specified branch
- Account is authorized, active & open
- Account status
- No Debit is not enabled in the account
- Clear available balance in the account is greater than the transaction amount specified
- Expiry date of the transaction is transaction value date.
- The DDA system puts an amount block so that the specified transaction can be executed on the transaction value date.
You can invoke “External Credit Approval Queue” screen by typing ‘PQSECAQU’ in the field at the top right corner of the Application tool bar and clicking on the adjoining arrow button. Click new button on the Application toolbar.
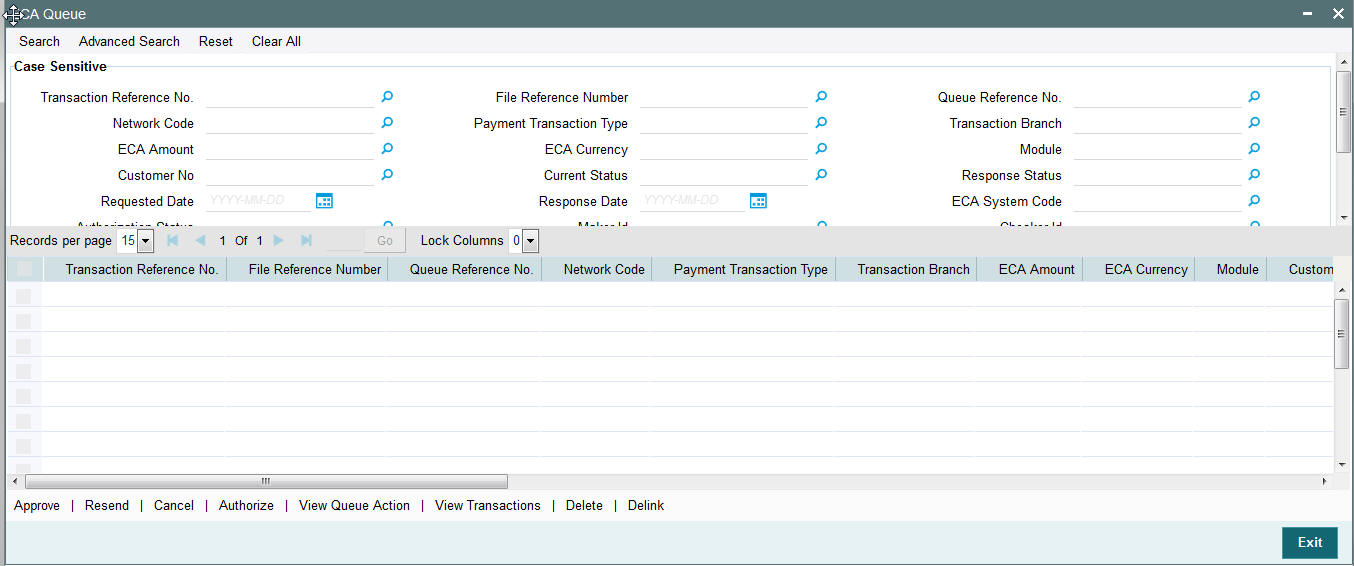
You can search using one or more of the following parameters:
- Transaction Reference No.
- File Reference Number
- Queue Reference No.
- Network Code
- Payment Transaction Type
- Transaction Branch
- ECA Amount
- ECA Currency
- Module
- Customer No
- Current Status
- Response Status
- Requested Date
- Response Date
- ECA System Code
- Authorization Status
- Maker Id
- Checker Id
- Cross Border Contract Reference Number
- Payment Type
- Source Code
- Activation Date
- Customer Service Model
- Queue Code
Once you have specified the search parameters, click ‘Search’ button. The system displays the records that match the search criteria.
Payment transactions will be moved to external credit approval queue for the following responses:
- Reject –status ‘R’
- Response resulted in overrides –status “O’
- Response is timed out -status ‘T’
If a response is received as rejected, then the system will cancel the transaction automatically. Only View Exception option will be applicable to such transactions.
Single payment and as well as batch entries will be logged into this queue
If transaction is in ‘O’ or ‘T’ status for ECA, then the following actions will be allowed in addition to view exceptions:
| Actions | Functions | ||
|---|---|---|---|
| Approve | User can approve the payment. Transaction will be reprocessed. | ||
| Cancel | This option will allow the cancellation of payment. On cancellation, payment will be released from the queue. Authorization will be supported. | ||
| Resend | This option will allow the submission of transaction for ECA again if the transaction is in 'O' or 'T' status. New reference number will be created. Bulk resend will not be allowed. Resend Action will not support authorization. | ||
| Authorize | Cancel/ Approve initiated by a user can be authorized by another user. | ||
| Delete | Allows the user who initiated the action, to delete the action before authorization. | ||
| View Queue | Displays all queue activities performed for a transaction. | ||
| View Transaction | You can view the selected transaction details. | ||
| Delink | This action is applicable to batch transactions. You can delink a few transactions from a batch and submit the batch for ECA again. |
2.1.15 Network Cutoff Queue
You can invoke “Network Cutoff Queue” screen by typing ‘PQSNETCQ’ in the field at the top right corner of the Application tool bar and clicking on the adjoining arrow button. Click new button on the Application toolbar.
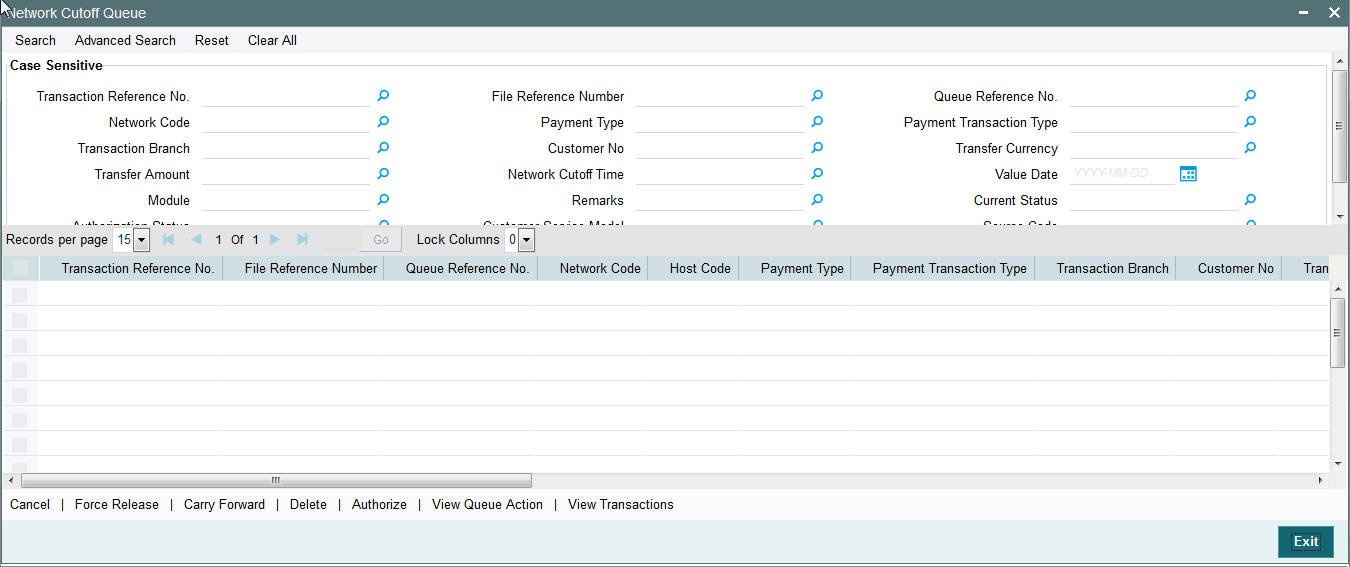
You can search using one or more of the following parameters:
- Transaction Reference No.
- File Reference Number
- Queue Reference No.
- Network Code
- Payment Type
- Payment Transaction Type
- Transaction Branch
- Customer No
- Transfer Currency
- Transfer Amount
- Network Cutoff Time
- Value Date
- Module
- Remarks
- Current Status
- Authorization Status
- Customer Service Model
- Source Code
Once you have specified the search parameters, click ‘Search’ button. The system displays the records that match the search criteria.
Payments processed after network cutoff time will be resolved as Network Post cutoff Payment Transactions. Single payment and batch entries are logged into this queue.
The following actions can be performed for transactions in Network Cutoff queue
| Actions | Functions | ||
|---|---|---|---|
| Force Release | Although transaction cut off is over, payment can be released for current day processing. Payment value date will remain as current date. Payments released from Network Cutoff queue will not undergo network cut-off time checks again. Authorization will not be required for this action. | ||
| Cancel | This option will allow the cancellation of payment. On cancellation, payment will be released from the queue. Authorization will be supported. | ||
| Carry Forward | User can manually move the transaction for processing on next working day. Value date will be moved to next working day. Existing value date will be stored in ‘Original Value Date’ field. | ||
| Authorize | Cancel/Carry Forward operation initiated by a user can be authorized by another user. | ||
| Delete | Allows the user who initiated the action, to delete the action before authorization. | ||
| View Queue | Displays all queue activities performed for a transaction. | ||
| View Transaction | You can view the selected transaction details. |
2.1.16 Queue Status Summary
In the ‘Queue Status Summary’, you can view the pending queue transactions in the following stages:
- Pending for manual action from Queue
- Any queue action is pending for authorization
You can invoke “Queue Status Summary” screen by typing ‘PMSQUEST’ in the field at the top right corner of the Application tool bar and clicking on the adjoining arrow button. Click new button on the Application toolbar.
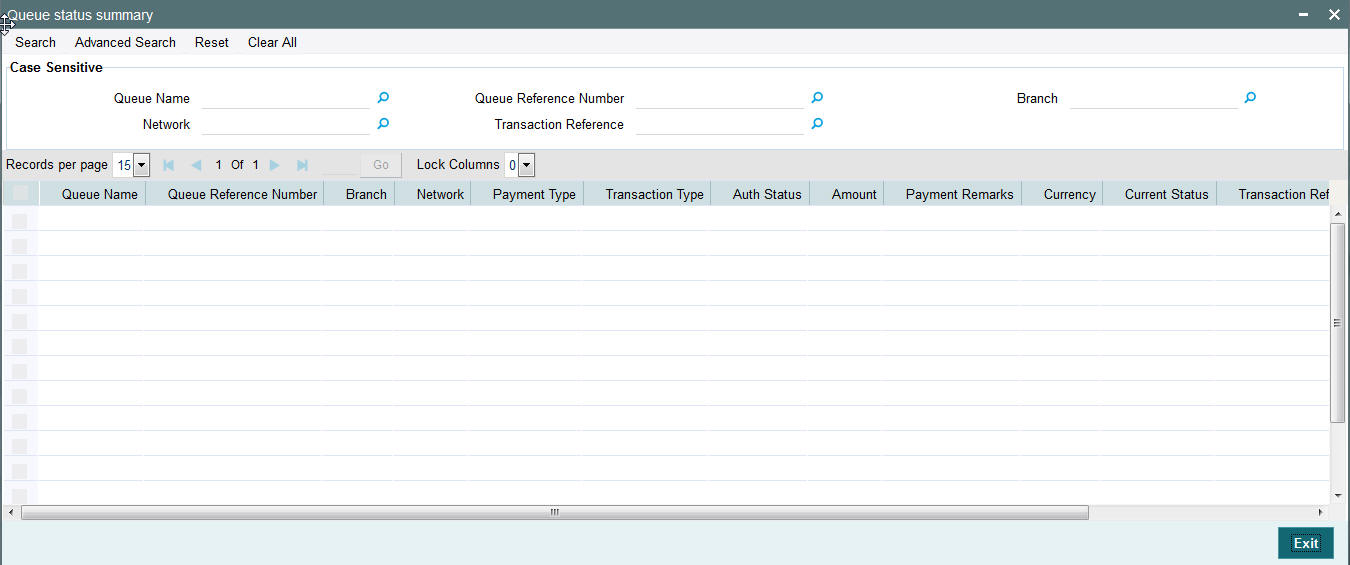
You can search using one or more of the following parameters:
- Queue Name
- Network
- Queue Reference number
- Transaction Reference
- Branch
Once you have specified the search parameters, click ‘Execute Query’ button. The system displays the records that match the search criteria for the following
- Queue Name
- Queue Reference number
- Branch
- Network
- Payment Type
- Transaction Type
- Auth Status
- Amount
- Payment Remarks
- Currency
- Currency Status
- Transaction Reference
- Host Code
- Module
2.1.17 Process Exception Queue Screen
In case of runtime errors or missing maintenance errors, Payment Transactions are moved to Process Exception Queue.
You can invoke the Process Exception Queues Screen by typing ‘PQSPRQUE’ in the field at the top right corner of the application toolbar and clicking the adjoining arrow button.Click new button on the Application toolbar.
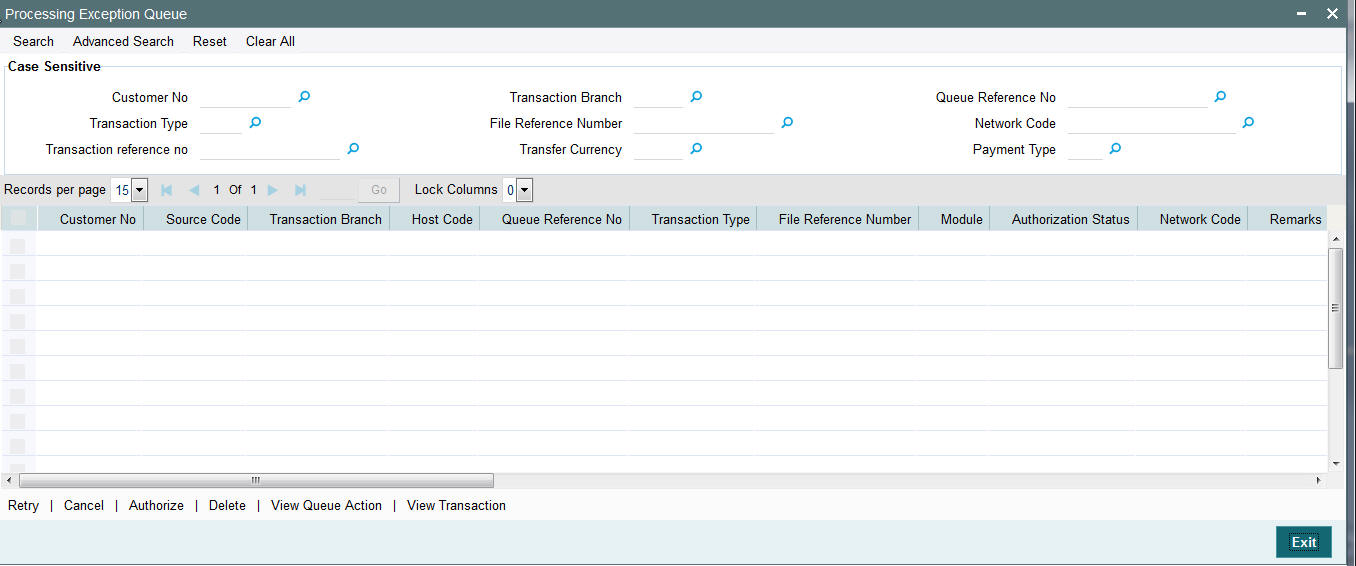
You can search using one or more of the following parameters:
- Customer No.
- Transaction Type
- Transaction reference no
- Transaction Branch
- File Reference Number
- Transfer Currency
- Queue Reference No
- Network Code
- Payment Type
Once you have specified the search parameters, click ‘Search’ button. The system displays the records that match the search criteria.
The following actions can be performed for transactions in this queue
| Actions | Functions | ||
|---|---|---|---|
| Retry | Retry a record. The record is released for further processing. | ||
| Cancel | This option will allow the cancellation of transaction. On cancellation, transaction is cancelled and is released from the queue. Authorization is supported. | ||
| Authorize | Cancel operation initiated by a user can be authorized by another user. | ||
| Delete | Allows the user who initiated the action, to delete the action before authorization. | ||
| View Action Queue | Allows the user to view the action. | ||
| View Transaction | Allows you to view the transaction of the record. | ||
| Carry Forward | User can manually move the transaction for processing on next working day. |
2.1.18 External Pricing Queue
Transaction are moved to External Pricing Exception Queue on the below scenarios:
- Response Timeout
- Unable to handle the response
You can invoke the External Pricing Queue Screen by typing ‘PQSEXPRQ’ in the field at the top right corner of the application toolbar and clicking the adjoining arrow button.Click new button on the Application toolbar.

You can search using one or more of the following parameters:
- Customer No.
- Source Code
- Queue Reference No
- Transaction Reference No
- Transaction Branch
- Host Code
- Network Code
- File Reference Number
- Transaction Type
- Authorization Status
- Remarks
- Transfer Currency
- Customer Service Model
- Payment Type
- Transfer Share
- Current Status
- Process Type
Once you have specified the search parameters, click ‘Search’ button. The system displays the records that match the search criteria.
The following actions can be performed for transactions in this queue
| Actions | Functions | ||
|---|---|---|---|
| Carry Forward | User can manually move the transaction for processing on next working day. | ||
| Cancel | This option will allow the cancellation of transaction. On cancellation, transaction is cancelled and is released from the queue. Authorization is supported. | ||
| Resend | This option will allow the submission of transaction for reprocessing. Bulk resend will not be allowed. Resend Action will not support authorization |
||
| Delete | Allows the user who initiated the action, to delete the action before authorization. | ||
| View Action Queue | Allows the user to view the action. | ||
| View Transaction | Allows you to view the transaction of the record. | ||
| Authorize | Cancel operation initiated by a user can be authorized by another user. |
2.2 Cross Border Payments Specific Queues
The below listed queues are supported for cross border payments:
| S.No | Payments Queue | Queue Code | |||
|---|---|---|---|---|---|
| 1 | Prime Bank Queue | PB | |||
| 2 | Print Queue | SC |
2.2.1 Prime Bank Queue Screen
- The transactions will be in the Prime bank queue if the prime bank overdraft limit is not maintained or if the transaction amount exceeds the available limit of the prime bank.
- The transaction details displayed in the Prime Bank queue are as in Transaction Summary Screen.
- The detailed view option of a transaction will the transaction fields in the contract online screen.
You can invoke the Prime Bank Queue screen by typing ‘PQSPBKQU’ in the field at the top right corner of the application toolbar and clicking the adjoining arrow button.Click new button on the Application toolbar.
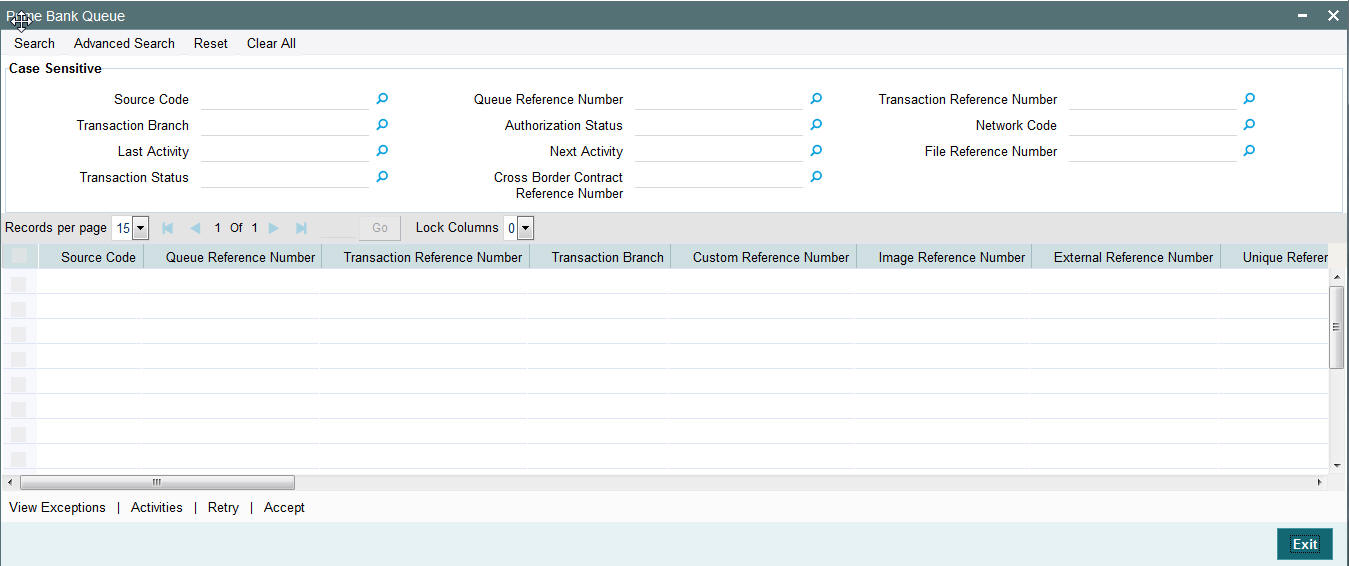
You can search using one or more of the following parameters:
- Source Code
- Queue Reference Number
- Transaction Reference Number
- Transaction Reference
- Transaction Branch
- Authorization Status
- Network Code
- Last Activity
- Next Activity
- File Reference Number
- Transaction Status
- Cross Border Contract Reference Number
Once you have specified the search parameters, click ‘Search’ button. The system displays the records that match the search criteria.
The following actions can be performed for transactions in Prime Bank Queue
| Actions | Functions | ||
|---|---|---|---|
| Exception | Displays the override messages for the transactions. | ||
| Activities | Displays the sequence of activities processed for the contract. | ||
| Retry | This option enables you to submit the transaction for reprocessing. | ||
| Accept |
|
2.2.2 Print Queue Screen
- If the message received is identified as unstructured message then the transaction is moved to Print Queue.
- The transaction details displayed in the Control queue are as in Transaction Summary Screen.
- The detailed view option of a transaction will the transaction fields in the contract online screen.
You can invoke the Print Queue screen by typing ‘PQSPRINQ’ in the field at the top right corner of the application toolbar and clicking the adjoining arrow button.Click new button on the Application toolbar.
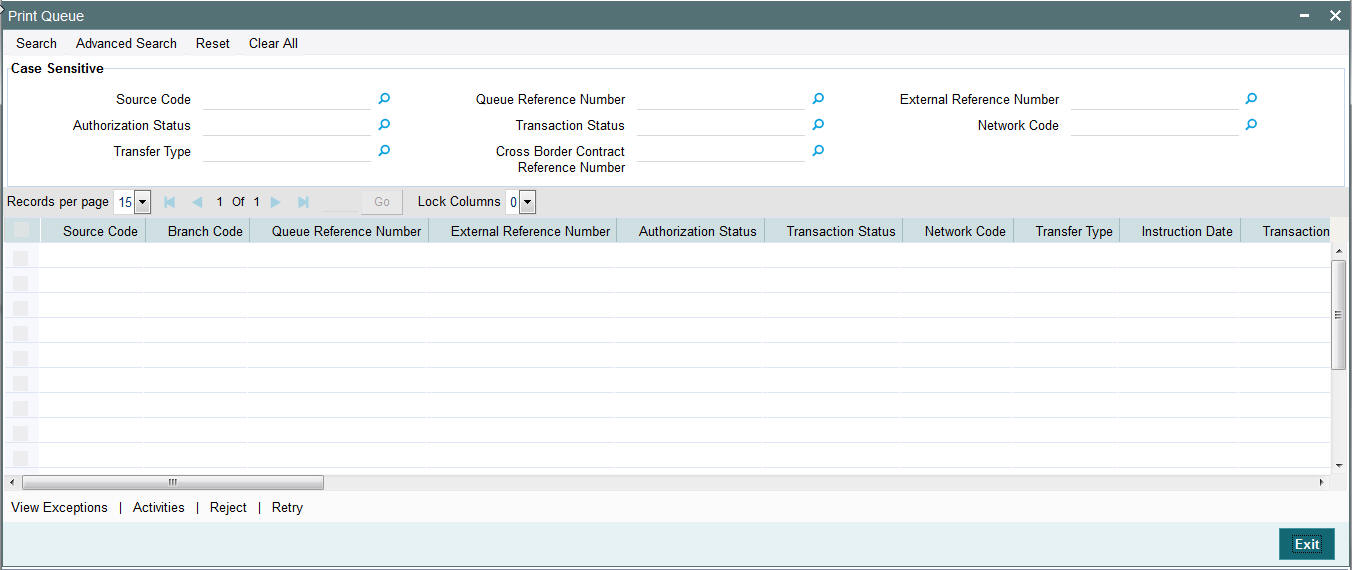
You can search using one or more of the following parameters:
- Source Code
- Queue Reference Number
- External Reference Number
- Authorization Status
- Transaction Status
- Network Code
- Transfer Type
- Cross Border Contract Reference Number
Once you have specified the search parameters, click ‘Search’ button. The system displays the records that match the search criteria.
The following actions can be performed for transactions in Future Value Payment Queue
| Actions | Functions | ||
|---|---|---|---|
| View Exception | Displays the override messages for the transactions. | ||
| Activities | Displays the sequence of activities processed for the contract. | ||
| Reject | Allows rejection of contracts. If a transaction is rejected the contract status is marked as rejected. No further processing is allowed for such transactions. If any Accounting entries are processed it shall be reversed. | ||
| Retry | This option enables to submit the transaction for reprocessing. |
2.3 Exception Queue Access Rights
Access rights can be provided for queue action at user level or at user role level.
2.3.1 Invoking User Maintenance Screen
You can maintain user access rights for queue operations in this screen. This is maintained for host code. Access rights provided at user level takes precedence over the role level rights.
You can invoke the ‘User Maintenance’ screen by typing ‘PMDUSRDF’ in the field at the top right corner of the application toolbar and clicking the adjoining arrow button.Click new button on the Application toolbar.
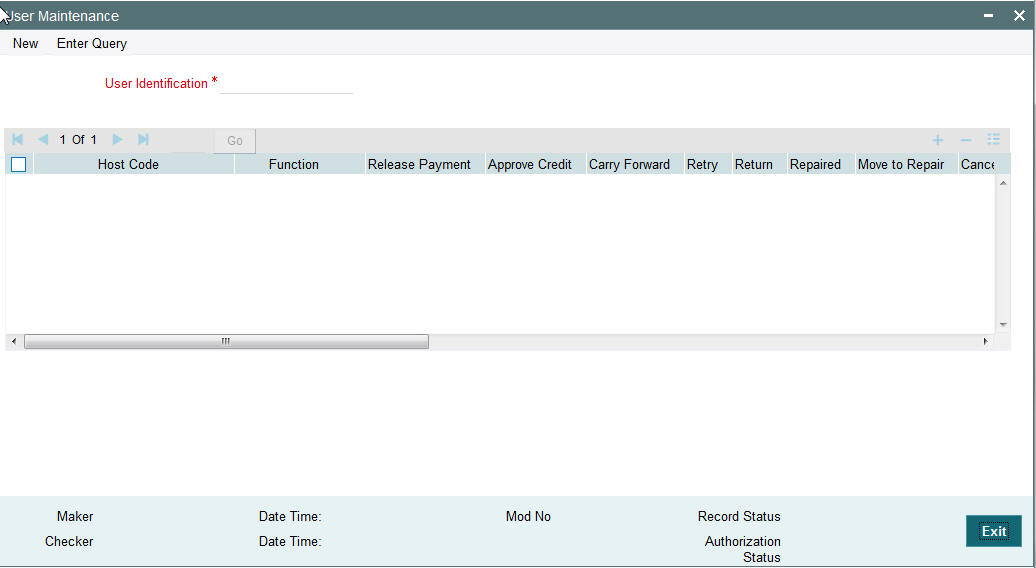
You can specify the following details
User Identification
Specify the user identification number. Alternatively, you can select the user identification number from the option list. The list displays all valid user identification numbers maintained in the system.
Host Code
Specify the host code. Alternatively, you can select the host code from the option list. The list displays all valid host codes maintained in the system.
Function
Specify the function id. Alternatively, you can select the function id from the option list. The list displays all valid function ids maintained in the system.
The following queue functions requires user level access rights for the queue actions:
- Business Override Queue
- Authorization Limit 1 Queue
- Authorization Limit 2 Queue
- Processing Cutoff
- Sanctions Queue
- Exchange Rate Queue
- External Exchange Rate Queue
- External Credit Approval Queue
- Network Cutoff Queue
- Queue Status Summary
- Process Exception Queue
- Batch Booking Queue
Access rights maintained in this function is validated when a user tries to do any action on the payment available in the queues.
Release Payment
Check this box to provide access to release payment.
Approve Credit
Check this box to provide access to approve credit.
Carry Forward
Check this box to provide access to carry forward.
Retry
Check this box to provide access to retry.
Return
Check this box to provide access to return.
Cancel
Check this box to provide access to cancel a payment.
Approve
Check this box to provide access to approve a payment
Rate Details
Check this box to provide access to input the exchange rate manually.
Authorize
Check this box to provide access to authorize a payment
Close
Check this box to provide access to close a payment
Accepted
Check this box to provide access to mark a payment transaction as accepted.
Rejected
Check this box to provide access to mark a payment transaction as rejected.
Delink
Check this box to provide access to delink.
2.3.2 User Maintenance Summary
You can invoke “User Maintenance Summary” screen by typing ‘PMSUSRDF’ in the field at the top right corner of the Application tool bar and clicking on the adjoining arrow button. Click new button on the Application toolbar.
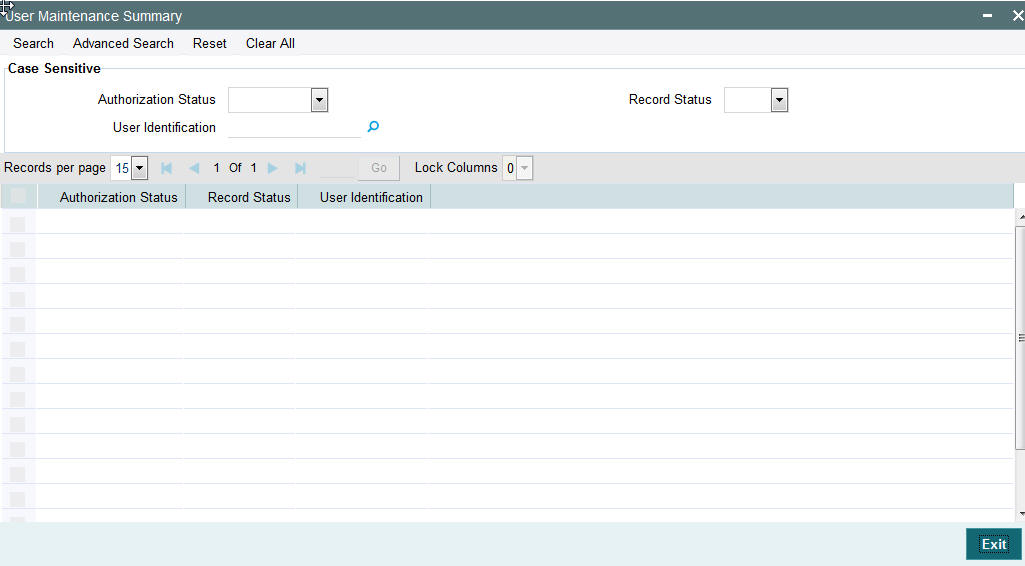
You can search using one or more of the following parameters:
- Authorization Status
- Record Status
- Role Id
- Description
- User Identification
Once you have specified the search parameters, click ‘Search’ button. The system displays the records that match the search criteria.
2.3.3 Invoking Role Maintenance Screen
You can maintain role level access rights for queue operations in this screen. Access rights provided at user level takes precedence over the role level rights
You can invoke the ‘Role Maintenance’ screen by typing ‘PMDROLDF’ in the field at the top right corner of the application toolbar and clicking the adjoining arrow button.Click new button on the Application toolbar.
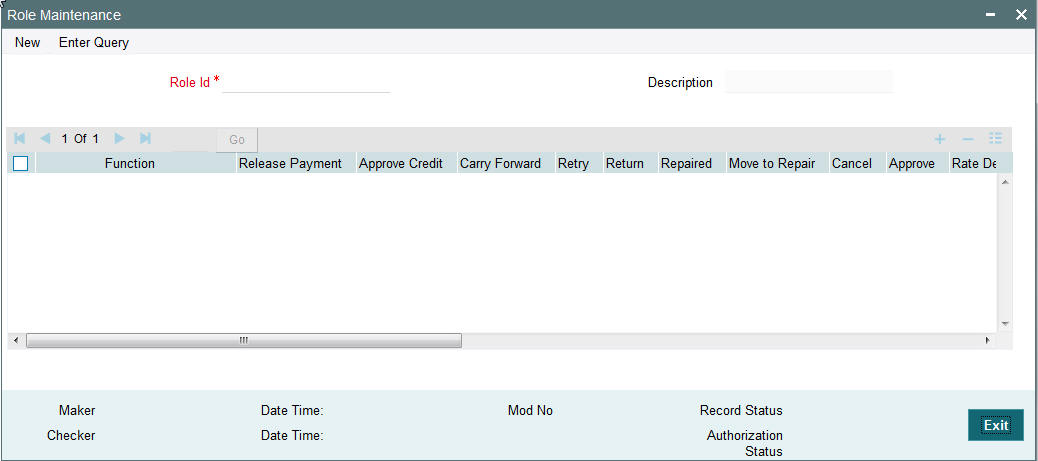
You can specify the following details:
Role Id
Specify the role id for which you want to set access. Alternatively, you can select the role id from the option list. The list displays all valid role ids maintained in the system.
Description
The system displays the role description.
Function
Specify the function. Alternatively, you can select the function from the option list. The list displays all valid functions maintained in the system.
Host Code
Specify the host code. Alternatively, you can select the host code from the option list. The list displays all valid host codes maintained in the system.
Function
Specify the function id. Alternatively, you can select the function id from the option list. The list displays all valid function ids maintained in the system.
Release Payment
Check this box to provide access to release payment.
Approve Credit
Check this box to provide access to approve credit.
Carry Forward
Check this box to provide access to carry forward.
Retry
Check this box to provide access to retry.
Return
Check this box to provide access to return.
Cancel
Check this box to provide access to cancel a payment.
Approve
Check this box to provide access to approve a payment
Rate Details
Check this box to provide access to input the exchange rate manually.
Authorize
Check this box to provide access to authorize a payment
Close
Check this box to provide access to close a payment
Accepted
Check this box to provide access to mark a payment transaction as accepted.
Rejected
Check this box to provide access to mark a payment transaction as rejected.
Delink
Check this box to provide access to delink.
2.3.4 Role Summary
You can invoke “Role Summary” screen by typing ‘PMSROLDF’ in the field at the top right corner of the Application tool bar and clicking on the adjoining arrow button. Click new button on the Application toolbar.
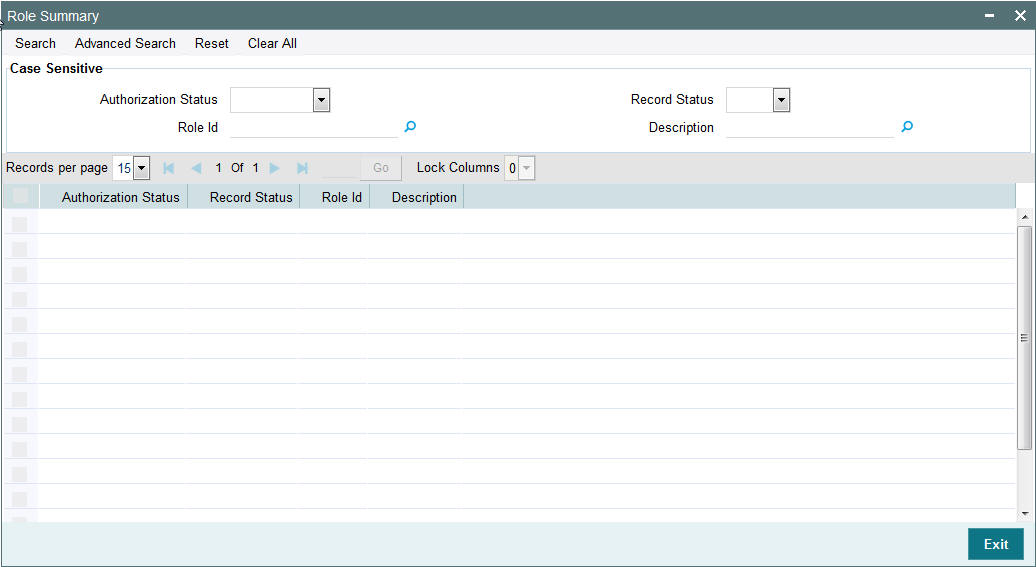
You can search using one or more of the following parameters:
- Authorization Status
- Record Status
- Role Id
- Description
Once you have specified the search parameters, click ‘Search’ button. The system displays the records that match the search criteria.