|
Using Siebel Tools > Using Workspaces in Siebel Tools > Using Workflows in Workspaces >
Creating New Workflows
You can use the New Record option under the Workflow Object List to create new workflows. To create a new workflow
- In Siebel Tools, create a new developer workspace under the Main/Integration workspace.
For more information on how to create a new developer workspace, see Creating New Workspaces.
- Under the newly created workspace, click the Workflow Process List from the Object Explorer section.
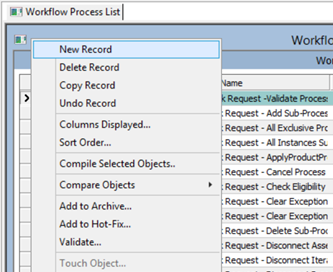
- In the Workflow Process List, right-click your mouse and select the New Record option.
This example illustrates the New Record option under the Workflow Process List.
- Enter the required information for the new record.
- Right-click your mouse and select the Edit Workflow Process option.
- Add all required workflow process steps using the Workflow Process Editor window.
For more information on how to add workflow process steps, see Siebel Business Process Framework: Workflow Guide, Adding Workflow Process Steps.
- Save the record.
- Click the Publish button in the Workflow Task editor toolbar.
- From the Workspace menu, choose Checkpoint, Submit for Delivery, and then Deliver.
- Click Start Merge in the Deliver Workspace dialog box.
- After the merge finishes, open the object in MAIN and then click the Publish/Activate button in the Workflow Task editor toolbar.
NOTE: If you are a developer who is not the owner of the root workspace, you cannot activate a workflow but you can publish the workflow. If you are a developer who is also the owner of the root workspace, you can publish and activate the workflow.
|