2. Interactions in Oracle FLEXCUBE
Oracle FLEXCUBE interacts with the bank users and customers based on certain predefined parameters. The interactions help the customers track the information related to their accounts. They also help the bank users identify the tasks that require their attention.
Oracle FLEXCUBE supports the following interactions:
Interaction |
Description |
Conversation |
Conversation is the flow of information between you and the end user. It helps you to track and address the request of the end users. |
Reminder |
Oracle FLEXCUBE allows configuring reminders to remind about important activities like making a payment, attending meetings and so on. |
Instruction |
An instruction is a piece of information that is conveyed to you and the end user simultaneously on the dashboard. You can provide different messages to different users of the same account. |
Alert |
A business alert is a message that conveys such information by email, sms or as a message on the user dashboard. The alerts can be generated to the customers and bank staff at a regular interval defined in the system. |
Spend Analysis |
Based on the type of expenditure from the account, Oracle FLEXCUBE will classify the debit transactions under different spend classes. This classification helps the customer get the details of the money spend from the account under each spend class. |
2.1 Preferences for Interactions
This section contains the following topics:
- Section 2.1.1, "Setting Preferences for Interactions"
- Section 2.1.2, "Conversation Preferences Tab"
- Section 2.1.3, "Spend Analysis Preferences Tab"
- Section 2.1.4, ".Viewing Preferences for Interactions"
2.1.1 Setting Preferences for Interactions
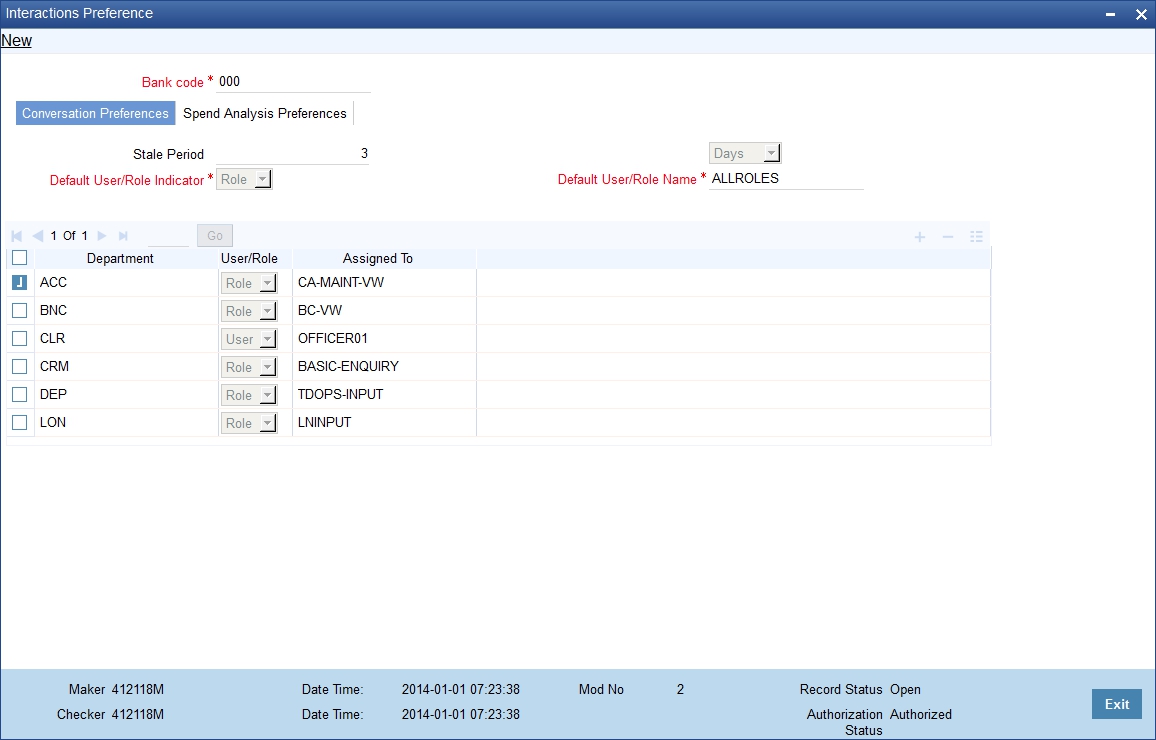
You can set your preferences for Oracle FLEXCUBE interactions using ‘Interactions Preferences Maintenance’ screen. To invoke this screen, type ‘ITDINPRF’ in the field at the top right corner of the Application toolbar and click the adjoining arrow button.
Specify the following details:
Bank Code
Specify the bank code of the corresponding head office branch. The adjoining option list displays the bank code of the head office branch.
Note
You can maintain these preferences at the head office level only.
2.1.2 Conversation Preferences Tab
You can set the preferences with respect to the conversations under the ‘Conversation Preferences’ tab. Click ‘Conversation Preferences’ tab on ‘Interaction Preferences Maintenance’ screen.
Specify the following details:
Stale Period
Specify the period after which a closed conversation is moved to Archival. You can specify the stale period in terms of number of days, months or years.
If you choose the unit as ‘Days’, you need to specify the number of days here. Similarly, if you choose the unit as ‘Months’, you need to specify the number of months during which a closed conversation will remain active.
Stale Period Unit
Specify the unit in which the stale period is specified. You can choose one of the following units:
- Days
- Months
- Years
Default User/Role Indicator
Specify whether you are setting the conversation preferences for a particular user or a user role. The drop-down list displays the following options:
- User
- Role
Choose the appropriate one.
Note
In case, the conversation is not assigned to any user or role, the system will default the corresponding conversation to a user or role.
Default User/Role Name
Specify the user ID or role name. If you are maintaining the conversation preferences for a user profile, specify the user ID. If you are maintaining the conversation preferences for a user role, specify the user role. If Department wise User/Role is not maintained, then the conversation will be assigned to the Default User/Role Name maintained.
Department
Specify the department for which you are setting the conversation preferences. The option list displays all valid department codes maintained in the system. Choose the appropriate one.
User/Role
Specify whether you are setting the conversation preferences for a particular user or a user role. The drop-down list displays the following options:
- User
- Role
Choose the appropriate one.
Assigned To
Specify the user ID or role to which the conversations are assigned. Based on the department code and the applicable class (user/role), the option list displays the user IDs and roles that are applicable. Choose the appropriate one.
You can add more rows to the list using add button. You can also delete rows by checking the respective checkboxes and clicking the delete button.
2.1.3 Spend Analysis Preferences Tab
You can set the preferences with respect to the spend analysis under the ‘Spend Analysis Preferences’ tab. Click ‘Spend Analysis Preferences’ tab on ‘Interaction Preferences Maintenance’ screen.

Specify the following details:
Spend Analysis Required
Check this box to indicate that spend analysis is applicable to the selected bank code. If you do not check this, the system will not enable spend analysis for the bank.
Archival Batch Frequency
Specify the period after which the spend entry should be considered for archival. You can specify the period in terms of number of days, months or years.
If you choose the unit as ‘Days’, you need to specify the number of days here. Similarly, if you choose the unit as ‘Months’, you need to specify the number of months after which the spend entry will be archived.
Archival Batch Frequency Unit
Specify the unit in which the archival batch frequency is specified. You can choose one of the following units:
- Days
- Months
- Years
Rule Threshold Value
Specify the rule threshold value. This is the threshold value for the negative points accumulated for a rule ID to lower its priority by a notch.
Oracle FLEXCUBE classifies debit transactions under different spend classes based on the spend rules maintained. If a transaction is reclassified under a different spend class, the system applies negative points to the Rule ID. Once the accumulated negative points exceeds the rule threshold value specified here, the system lowers the priority of the rule by a notch.
Once you have captured the above details, save the preferences.
2.1.4 .Viewing Preferences for Interactions
You can view the preferences set for Oracle FLEXCUBE interactions using 'Interactions Pref Summary' screen. To invoke this screen, type 'ITSINPRF' in the field at the top right corner of the Application toolbar and click the adjoining arrow button.
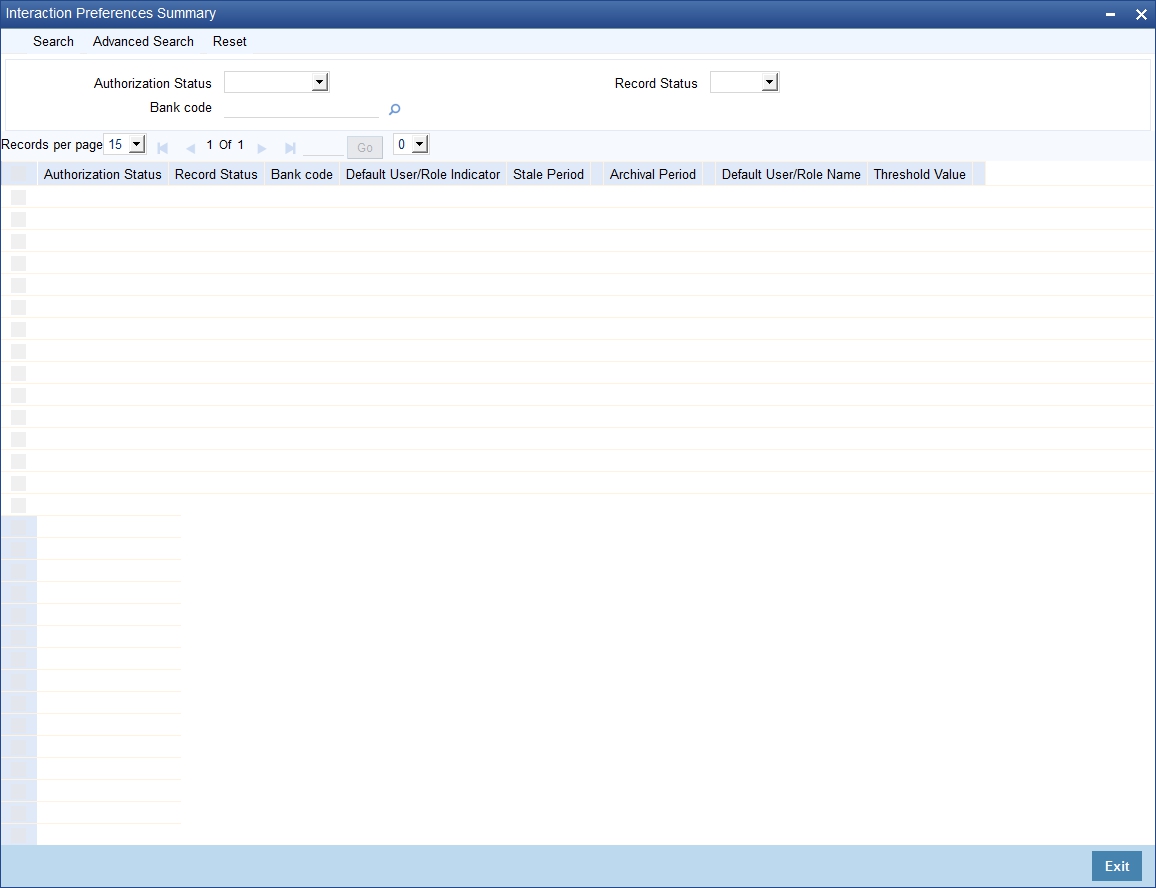
In the above screen, you can base your queries on any or all of the following parameters and fetch records:
- Authorization Status
- Bank Code
- Record Status
Select any or all of the above parameters for a query and click 'Search' button. System displays the records meeting the selected criteria:
- Authorization Status
- Record Status
- Bank Code
- Default User/ Role Indicator
- Stale Period
- Archival Period
- Default User/ Role Name
- Threshold value