8. Amending Details of LC
An amendment to an LC signifies any change made to the terms of an LC after it has been authorised. An amendment can be made at anytime after an LC has been authorised and before its expiry date.
The following are some examples when you would amend the details of an LC:
- You as the issuing bank have got an application from your customer to change the terms of the LC.
- You as the advising bank have received instructions from the issuing bank to amend an LC advised by you.
This chapter contains the following details:
- Section 8.1, "Amending LC"
- Section 8.2, "LC Amendment Details"
- Section 8.3, "Utilizing Import Licenses"
- Section 8.4, "Operations on Confirmation Record"
- Section 8.5, "Uploading LC Amendment"
8.1 Amending LC
This section contains the following details:
- Section 8.1.1, "Procedure for Amending LC"
- Section 8.1.2, "Indicating Change of Value for a Field"
- Section 8.1.3, "Commission and Charges for Amendment"
- Section 8.1.4, "Amending Import Pre-advice LC Contract"
8.1.1 Procedure for Amending LC
While in the detailed view of the LC, click unlock icon on the toolbar. All the details entered for the LC will be displayed. You can amend the details of the contract depending on whether:
- The LC has been authorized
- The LC has not been authorised even once after it was input
Depending on the authorisation status of an LC contract, you can amend its details as follows:
- When you have captured the details of a contract and it is not yet authorized, its attributes, financial as well as non-financial, can be changed, even if the details have been saved. If accounting entries are involved in the change, the old entries are deleted and new ones passed.
- Once a contract has been authorised, additional entries will be passed, depending on the nature of amendment.
For each amendment, a new version of the LC will be generated. Different versions of the LC will also be generated by events like reinstatement and reopening. In the ‘Contract Detailed View’ screen, you can view the different versions by clicking the arrow buttons for the previous and the next versions.
When a customer requests for changes in the terms of the contract, the details of the LC are amended accordingly and an amendment instrument is generated. The amendment of the following details of an LC, result in the generation of an amendment instrument:
- An amendment in the LC amount
- An amendment in the expiry date
- A change in the latest shipment date
- Any change to the free format instructions for the LC
If there are changes in the terms of the LC other than IN the amount, the expiry date or latest shipment date, indicate the same in the form of a free format instruction, for the amendment instrument.
Note
If you modify the shipment date, the system will recalculate the shipment days on confirmation of the amendment.
In case of amendment, you have the option to reissue the Guarantee. If you choose to do so, the REIS (Reissue of Guarantee) event will be triggered. The system checks for any previous amendment. In case no amendment has been performed, the system will pop up the following screen:
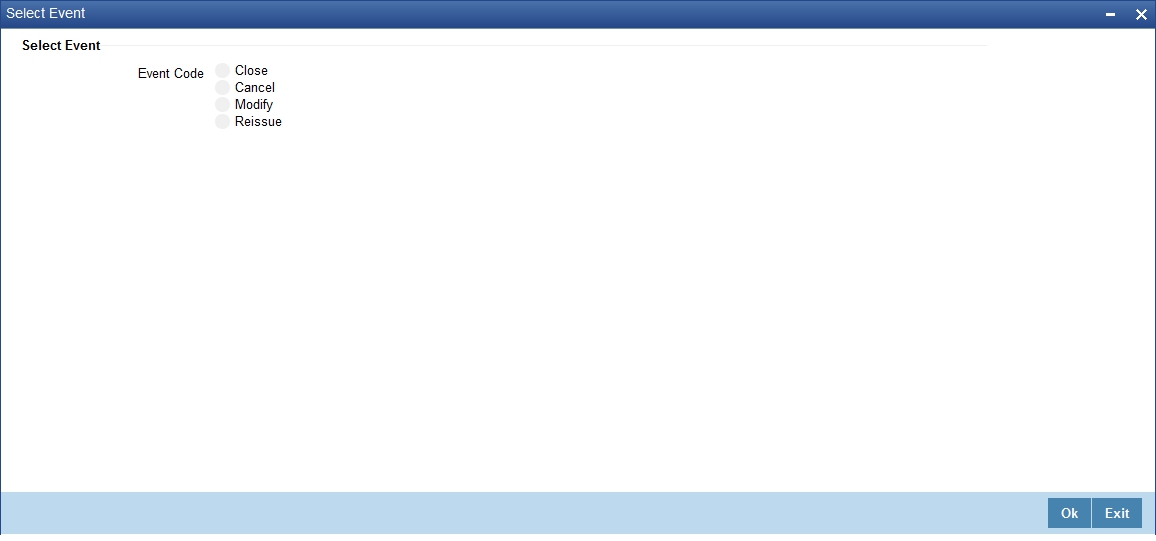
Click on OK to reissue the Guarantee or click on Cancel to process the amendment of Guarantee.
The system checks if REIS event is maintained for the product. If the event is maintained, the system does not allow any further change in the LC contract details apart from FFT fields, which can be modified/added but you cannot delete the existing data.
The system creates a new version for the Reissue event and the event inherits all the contract information defined for the authorized BISS event. The version also inherits the information from the subsystem excluding Charges and Commission. No commission is associated with the Reissue event and charges can be maintained for the REIS event, which is processed along with the reissue event.
When the Reissue event is authorized, the advices maintained in the REIS event are processed.
8.1.2 Indicating Change of Value for a Field
When the LC amount is being changed, the new amount of the LC should be indicated after the amendment.
For example the original LC amount was USD 100,000 and you want to make it USD 150,000. In the LC amount field, during amendment, enter the amount as USD 150,000. The system will calculate the increase in amount and pass the appropriate entries. The LC amendment instrument will have both the old and new values.
The original LC amount was USD 100,000 and you want to change it to USD 75,000. In the LC amount field, during amendment, enter the amount as USD 75,000. The system will calculate the decrease in amount and pass the appropriate entries. The LC amendment instrument will have both the old and new values.
When you are changing the expiry date or the latest shipment date, you should enter the new date in their respective fields.
8.1.3 Commission and Charges for Amendment
While amending the details of an LC, you can specify the commissions and charges that you want to levy for processing the amendment. These will be effective from the date of amendment. It will not affect the booking commission in any way.
Note
Amendment commission is computed based on the Claim Expiry Date. for bank guarantee and advice of guarantee.
Refer to the Commissions User Manual for details on how commission is calculated, for an amendment.
8.1.4 Amending Import Pre-advice LC Contract
Oracle FLEXCUBE facilitates amendment of Import Pre-Advice LC. You can amend an import pre-advice in two ways.
- If the applicant approaches Issuing Bank for changes in values for a Pre-advice LC, which was created early.
The system enables you to modify both financial and non-financial values of the Pre-advice LC, including the fields enabled for Operative Import LC.
- If the applicant approaches Issuing Bank with Document credit details and wishes to change pre-advice LC to an operative LC. The issuing bank amends the existing Pre-advice LC as an operative LC.
The additional details which were not entered while booking a Pre-advice LC have to be specified. You can modify LC Amount, Expiry Date, Credit Line and Collateral Amount. When LC amount is modified, the system will track additional limit and reduction of limit based on the increase or decrease of the amount, respectively.
Note
You can amend a pre-advice LC contract using ‘Letters of Credit Contract Details’ screen.
8.2 LC Amendment Details
This section contains the following details:
- Section 8.2.1, "Confirming LC Amendment"
- Section 8.2.2, "Details Tab"
- Section 8.2.3, "Parties Tab"
- Section 8.2.4, "Advices Tab"
- Section 8.2.5, "Goods Tab"
- Section 8.2.6, "Documents Tab"
- Section 8.2.7, "Specifying Draft Details"
- Section 8.2.8, "Specifying Collateral Details"
- Section 8.2.9, "Previewing Messages"
- Section 8.2.10, "Remarks"
8.2.1 Confirming LC Amendment
The option to amend these fields is also available in the ‘Letters of Credit Amendment Confirmation Input’ screen. However, the amendments will become effective only upon receiving the confirmation from the beneficiary.
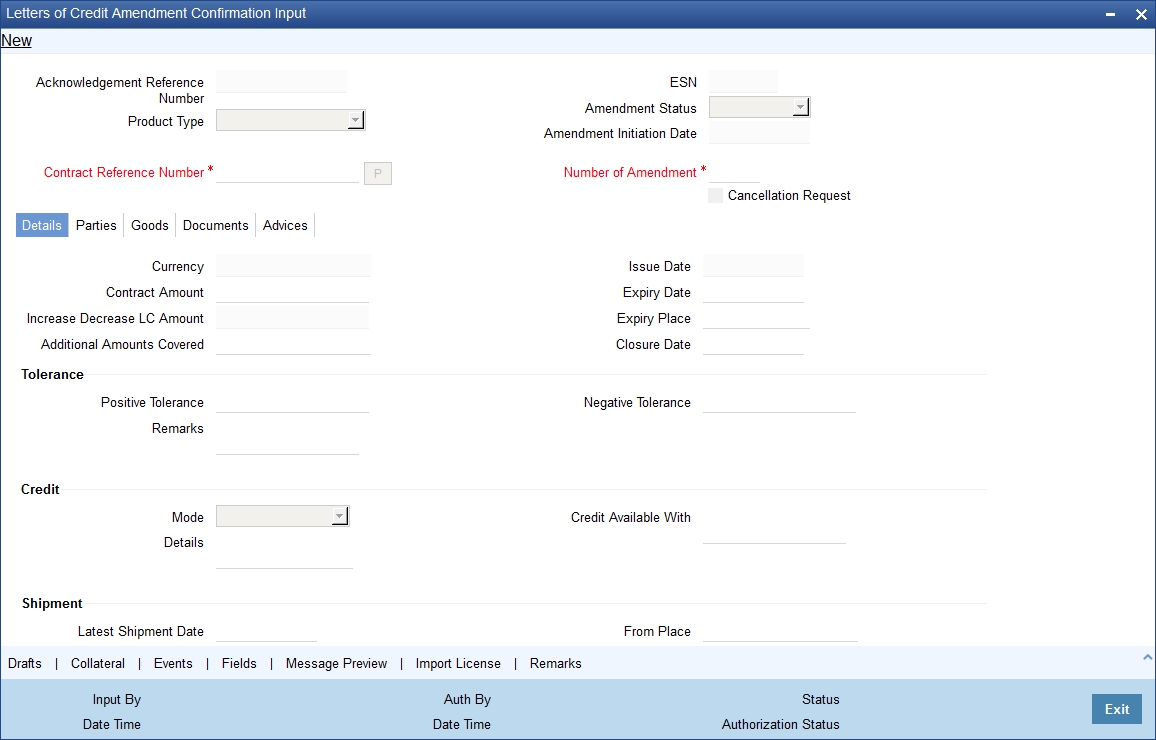
You can invoke this screen by typing ‘LCDAMEND’ in the field at the top right corner of the Application tool bar and clicking on the adjoining arrow button. The screen will be displayed without any details, as shown below:
You can specify the following details:
Acknowledgement Reference Number
Specify the acknowledgement reference number. Alternatively, you can select the reference number from the option list. The list displays all the acknowledgement reference numbers for contract amendment registered in the system.
Note
Registration status will be updated as Processed when the amendment request is processed by selecting Acknowledgment Reference Number.
Product Type
Select the type of product from the option list provided. This option list will display all the product types.
Amendment Initiation Date
The system displays the amendment initiation date.
Cancellation Request
Check this box to request cancellation.
If Cancel flag is checked, only cancel information shows a message on authorization of amendment.
If Cancel flag is enabled, other field amendments are not considered and CANCEL event is triggered on amendment confirmation.
An override message “Cancellation Request flag is checked, LC is cancelled on Confirmation” is displayed on confirmation.
Contract Ref No
Select the reference number of the contract to be amended from the option list provided. This option list will display all contracts that are authorized.
Number of Amendment
The system displays the number of amendments based on the contract reference number.
You can amend an LC multiple times before the previous amendment is confirmed or rejected.
ESN
The system displays the event sequence number.
Amendment Status
The system displays the amendment status.
If the following data elements are amended during the previous amendments and the beneficiary consent has not been updated in the system for these amendment, then the system will not allow to proceed with the current amendment:
- Expiry Date
- Remarks
- Credit Mode
- Credit Details
- Credit Available With
- Partial Shipments
- Transhipment
- Charges From Beneficiary
- INCO Term
- Applicable Rule
- Rule Narrative
- Transferrable
- May Confirm
- Period of Presentation Days
- Period of Presentation Narrative
- Contract Amount
- Positive Tolerance/Negative Tolerance
- Additional Amounts Covered
- From Place
- Port of Loading
- Port of Discharge
- To
- Latest Shipment Date
- Shipment Period
The system displays an error message in the following cases:
- If beneficiary confirmation is pending for an amendment and LC amount is modified for that amendment and if the user is initiating a fresh amendment with a change in tolerance value.
- If beneficiary confirmation is pending for an amendment and Expiry Date is modified for that amendment and if the user is initiating a fresh amendment with a change in Latest Shipment Date or Shipment Period.
- If beneficiary confirmation is pending for an amendment and Latest Shipment Date is modified for that amendment and if the user is initiating a fresh amendment with a change in Expiry date.
- If beneficiary confirmation is pending for an amendment and Latest Shipment Date is modified for that amendment and if the user is initiating a fresh amendment with a change in Shipment Period.
Once you have specified the contract reference number, click ‘P’ button. The system displays the details of the contract under three tabs viz. Details, Parties and Advices.
8.2.2 Details Tab
Under ‘Details’ tab, you can view and modify the details pertaining to shipment and tolerance of the letter of credit.
Click ‘Details’ tab on ‘Letters of Credit Amendment Confirmation Input’ screen.
Upon selection of the contract, the following details will be displayed in editable mode:
- Version Number
- Contract Amount - The amount that is availed under the LC
- Currency – The contract currency
- Issue Date - The date on which the LC is issued. You cannot specify a future date here
- Expiry Date - The date on which the LC is scheduled to expire.On confirmation of guarantee amendment, revised Expiry Date is propagated to ‘LCDTRONL’. System derives Claim Expiry date based on the new Expiry Date.
- Closure Date – This the date LC is scheduled to be closed. You can modify this particular value.
- Increase Decrease of LC Amount - A display field which indicates the amount of LC increased or decreased, as the case may be
- Additional Amounts Covered - This indicates the value to be carried in field 39C of the SWIFT messages MT700 and MT740
- Latest Shipment Date - The last date by which the shipment of the goods has to take place. This date should not be earlier than the Issue Date of the LC or later than the expiry date. If you modify the latest shipment date, the system will recalculate the shipment days on confirmation of the amendment.
- Shipment Period - The extension of the shipping period. You can enter the Shipment Period only if you have not specified the Latest Shipment Date
- Port of Loading – The port from where the goods transacted under the LC will be loaded
- Port of Discharge – The destination port to which the goods transacted under LC should be sent
- From Place - The place from where goods are to be dispatched or transported
- To Place - The final destination to which goods are to be transported/delivered
- Partial Shipments - You can select ‘Allowed’, ‘Not Allowed’, ‘Conditional’ or Blank as partial shipment.
- Transhipment - You can select ‘Allowed’, ‘Not Allowed’, ‘Conditional’ or Blank as transhipment.
- Positive Tolerance % - The percentage that is to be added to the LC amount to arrive at the Maximum LC amount
- Negative Tolerance % - The percentage that should be subtracted from the LC amount
- Charges From Beneficiary - Specify the charge amount borne by the beneficiary.
- INCO Term - Specify the INCO term related to goods that are a part of the LC instrument.
- Application Rule - The system defaults the application rule.
- Rule Narrative - This is enabled only if 'Applicable Rule' is set to 'OTHR'.
- Transferrable - To indicate LC is transferrable or not.
- May confirm - Check this option to indicate that the LC can have an associated confirmation message. In LC if May confirm option is checked cannot be amended to uncheck.
- Period of Presentation Days - This system specifies the number of calendar days after the date of shipment within which the documents must be presented for payment, acceptance or negotiation.
- Period of Presentation Narrative - The system specifies the details of the date after which the documents must be submitted.Eg:Invoice date, Shipment date
- Amendment Charge Payable by - Select the type of amendment charge payable by from the adjoining drop-down list.
- Narrative Charge - The system specifies the details of the date after which the documents must be submitted.Eg:Invoice date,Shipment date.
- Confirmation Charges Payable By - Select the type of confirmation charges payable by from the adjoining drop-down list.
- Party details in the ‘Parties’ tab of the screen – You can amend ‘Their Reference Number’ and the ‘Dated’ fields values only.
- Free Format Text details in the ‘FFT’ tab of the screen
Make the necessary amendments. Save the changes. To save, click save icon in the toolbar of the screen. On Save system validates if there are any unsettled claims and provides appropriate override
The system will update the following details in the audit trail of the screen:
- Input By – Your login id
- Date Stamp – The date and time at which you saved the contract
- Amendment Status – The status will always be ‘Unconfirmed’
- Auth Status – The status will always be ‘Unauthorized’
For details on the amendable fields, refer the chapter ‘Processing an LC contract’ in this User Manual.
8.2.3 Parties Tab
Click the ‘Parties’ tab to view and specify the following details:
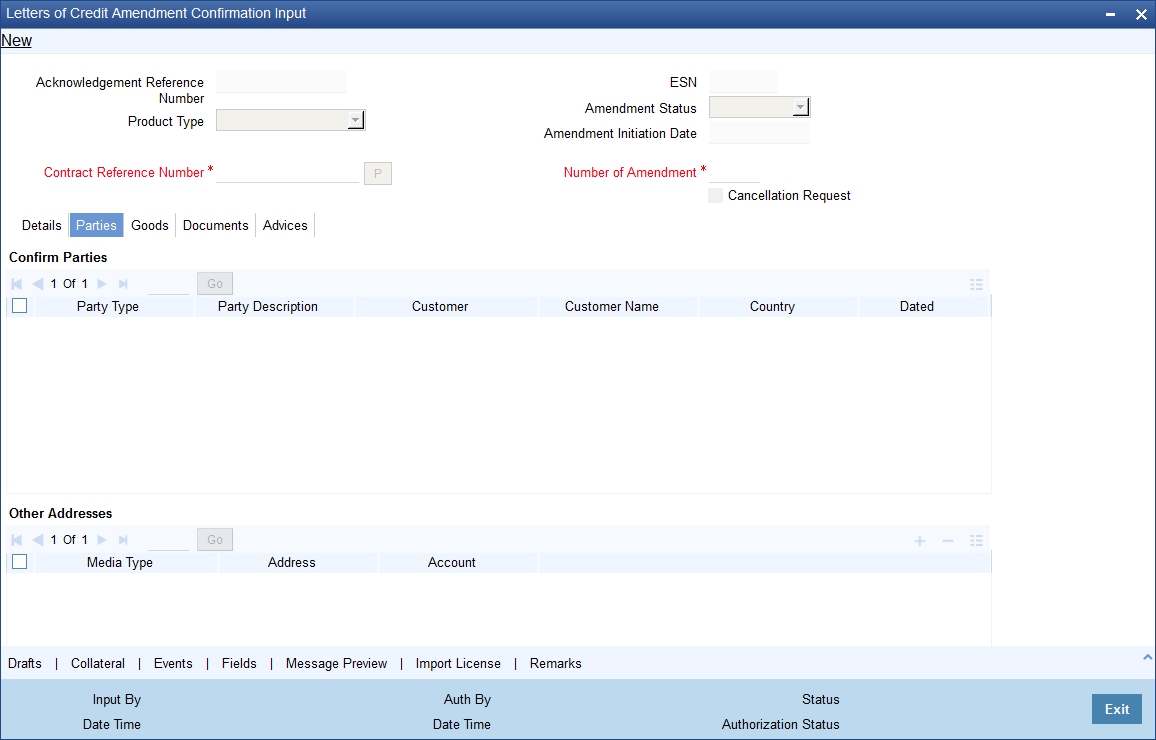
Confirm Parties
Party Type
The system defaults the party type. The user can edit the party type using the adjoining option list that displays all the party types available for the LC..
Customer
The system defaults the customer number. However, you can modify it.
Customer Name
The system defaults the customer name. However, you can modify it.
Country
The system defaults the country of the customer. However, you can modify it.
Party Description
The system defaults the party description. However, you can modify it.
Dated
The system defaults the date on which the party joined. However, you can modify it.
Customer Reference
The system defaults the customer reference number. However, you can modify it.
Address 1 to 4
The system defaults the address of the party.
Language
The system defaults the language in which advices are sent to the customer.
Issuer Bank
The system defaults the name of the issuer bank.
Other Addresses
Media Type
The system defaults the media type. You can select a different medium from the adjoining option list.
Address
The system defaults the other address of the party. However, you can edit this field.
Account
The system defaults the account number. However, you can edit this field.
8.2.4 Advices Tab
Click the ‘Advices’ tab to view and specify the following details:
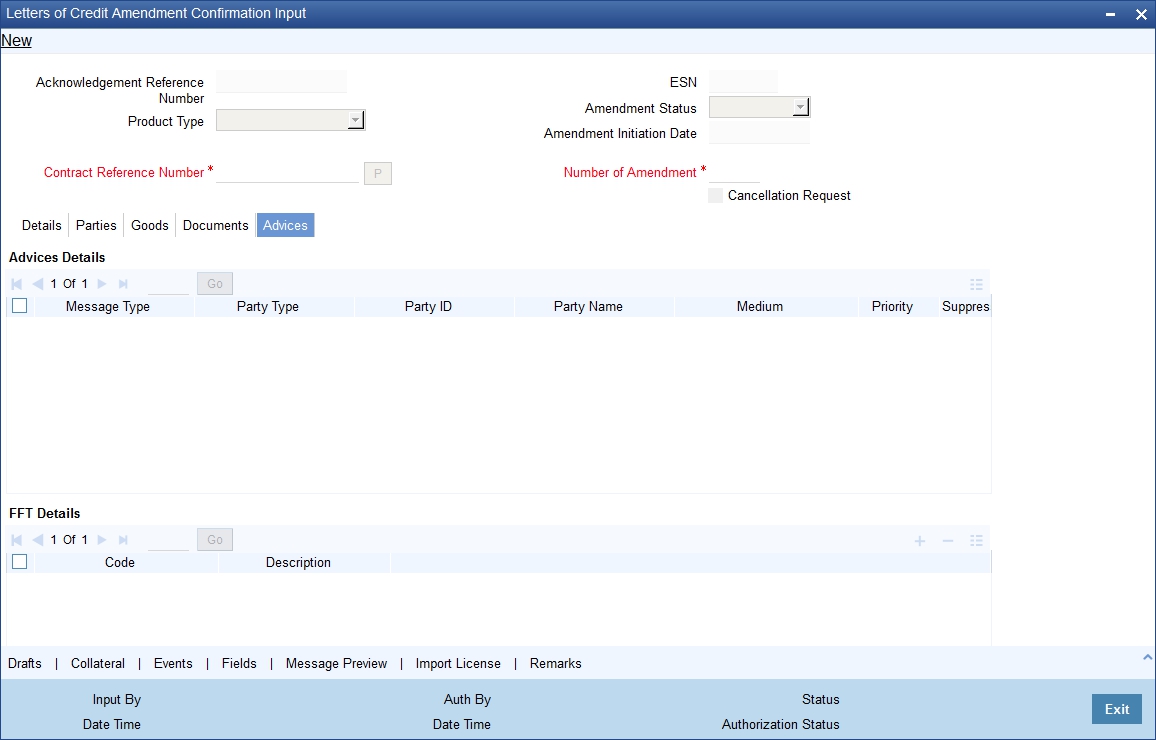
Advices Details
Message type
Check the box to view the advice details.
Party type
The system displays the party type for which the advice is generated.
Party Id
The system displays the party id for which the advice is generated.
Party Name
The system displays the name of the party for which the advice is generated.
Medium
The system displays the medium through which the advice is sent. The user can select a different medium from the list. If the medium is modified, the user must provide the new address in the ‘Other Addresses’ section, in the ‘Parties’ tab.
Priority
The system displays the priority of sending the advice. However, you can change the priority.
Suppress
The system displays if the advice is suppressed or not. However, you can edit this field.
Charges
The system displays the charges involved. However, you can edit the charges.
FFT Details
The user can select a message from the ‘Advices Details’ section and associate a code and a description to it.
Code
The user can select the appropriate code from the adjoining option list.
Description
The system displays the description of the selected code. However, you can modify this description.
Note
Advices for a party are sent to the default media maintained in the Customer Addresses table. However, you can send the advices through a different medium by doing the following:
- Maintaining media details in ‘Other Address’ in Parties screen
- Indicating the medium in the Advices screen
- Suppressing the Advices which is ‘N’ by default.
8.2.5 Goods Tab
Click on the tab titled ‘Goods’ to specify details of the goods and captures unit and price of the goods. The Goods tab maintains multiple goods details.
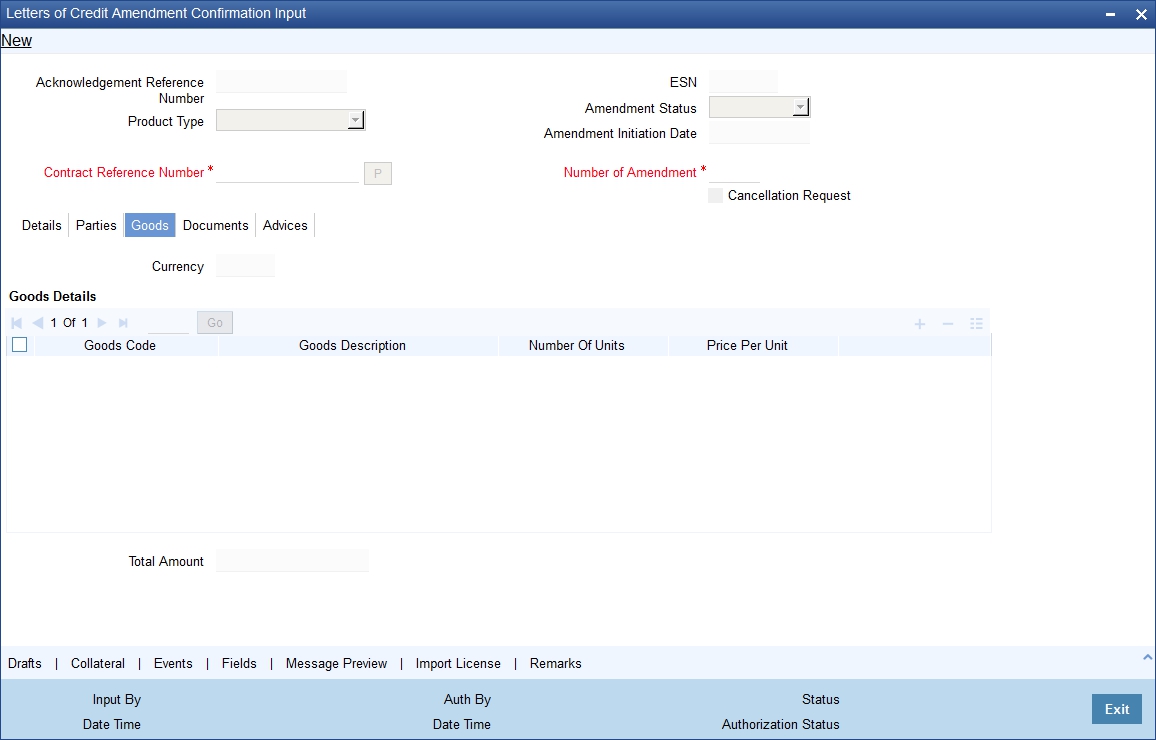
The fields are maintained as follows:
Goods Code
Select the Goods code from the list provided.
Goods Description
The system displays the description of the Goods.
Number of Units
The system displays the number of units.
Price Per Unit
The system displays the prioce per unit.
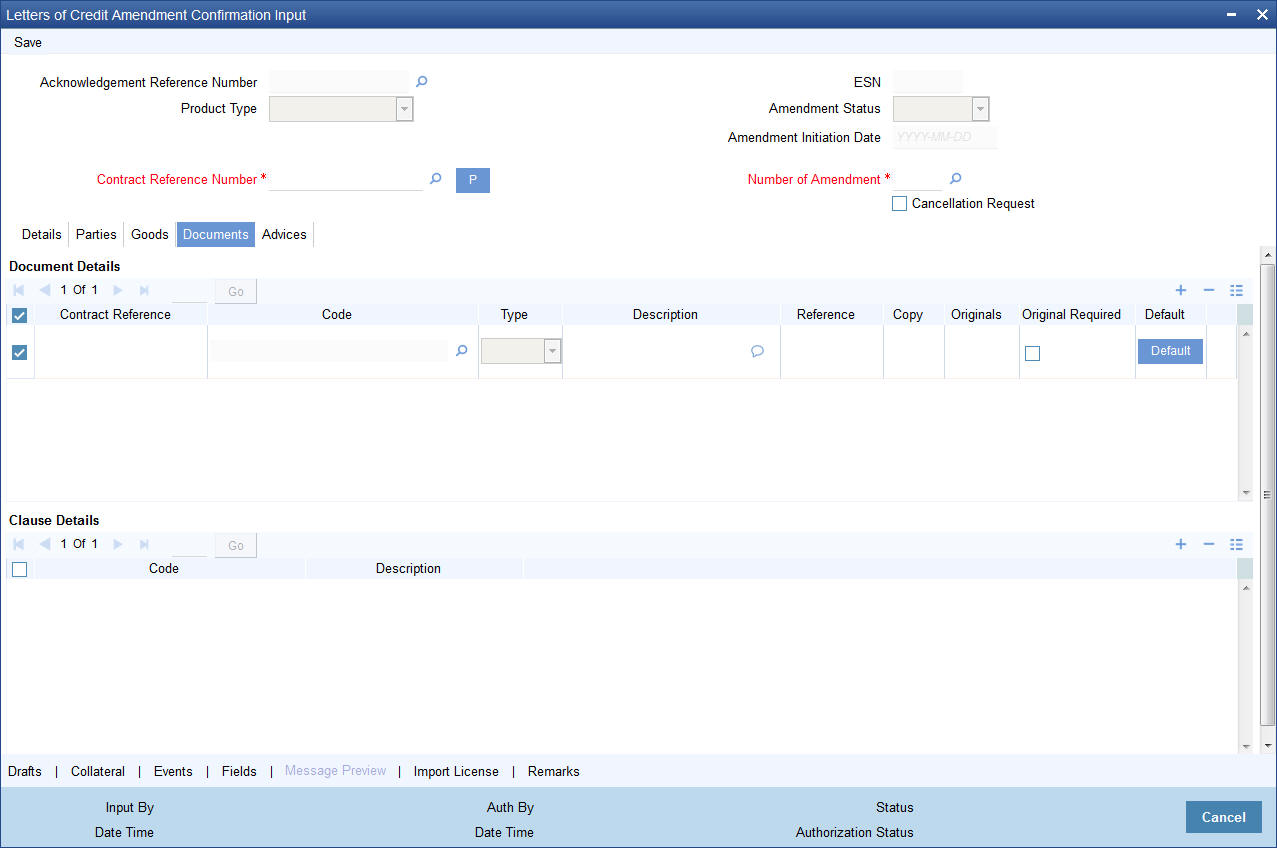
8.2.6 Documents Tab
Click on the tab titled ‘Documents’ to specify details of the documents and clauses that are part of the LC instrument and the documents that should accompany the goods.
Here you can capture the following details:
8.2.6.1 Document Details
There are some standard documents required under a documentary LC. In this screen you can specify the documents that are required under the LC being processed. These details will be a part of the LC instrument sent to the advising bank, the advice through bank or the beneficiary. All the documents specified for the product to which the LC is linked will be defaulted to this screen.
Contract Reference
Enter the contract reference number based on which the shipping gurantee issued.
Code
Enter the document code.
Type
Enter the document type.
Description
Enter the document description of the document that is defaulted to suit the LC you are processing. This field will be enabled only if the LC type is ‘Shipping Guarantee’, but not mandatory.
During copy operation, the value of this field will not be copied to the new contract.
Reference
Enter the document reference number based on which the Shipping Guarantee issued.
Copy
Enter the number of copies of the document.
Originals
Enter the originals details.
Original Required
Check this box to generate the original receipts.
Default
Cleck the default button for default generation.
8.2.7 Specifying Draft Details
You can invoke the ‘Draft Details’ screen by clicking the ‘Draft’ button in the ‘Letters of Credit Amendment Confirmation Input’ screen. In the screen, you can specify details of the draft that you collect as collateral form a customer for the LC that you process.
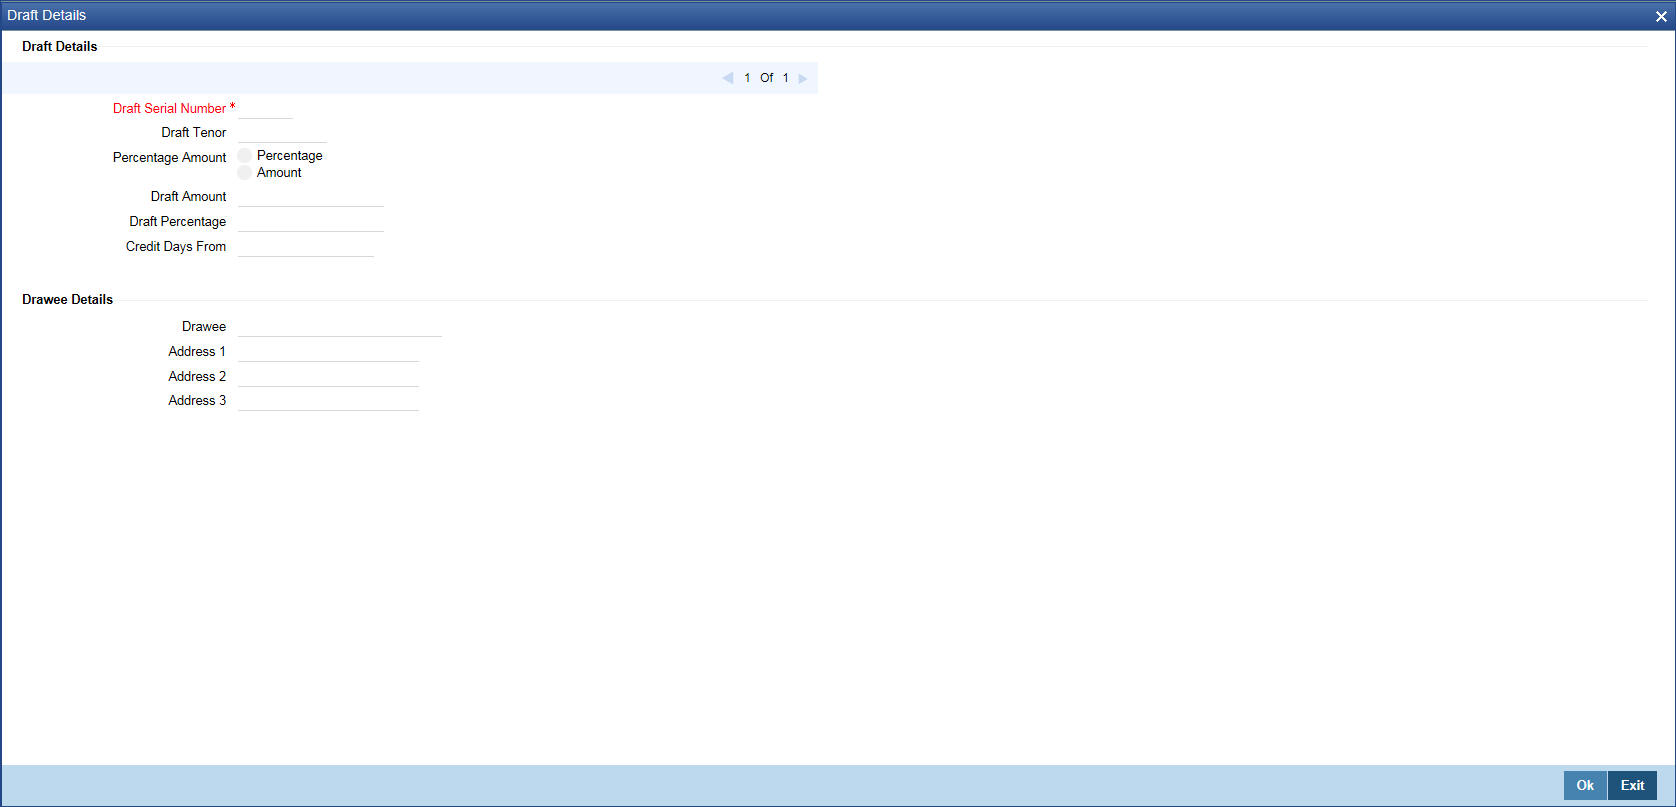
Specify the following details:
Draft Details
Draft Serial Number
The system display the draft serial number here.
Draft Tenor
Specify the details of the draft tenor.
Credit Days From
Specify the credit days frm details here.
Drawee Details
Drawee
Specify the drawee details here.
Address 1
Specify the address details. This field can be modified.
Address 2
Specify the address details. This field can be modified
Address 3
Specify the address details. This field can be modified
8.2.8 Specifying Collateral Details
You can invoke the ‘Collateral Details’ screen by clicking the ‘Collateral’ button in the ‘Letters of Credit Amendment Confirmation Input’ screen. In the screen, you can specify details of the cash that you collect as collateral form a customer for the LC that you process.
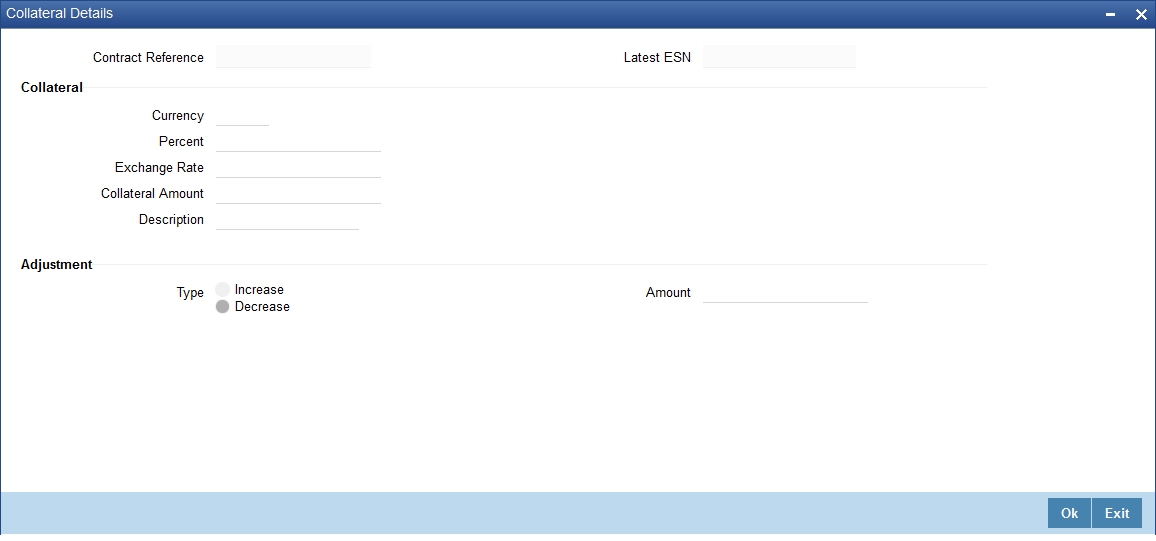
Specify the following details here. You will be allowed to amend the percentage, collateral amount, and adjustment type.
Contract Reference Number
The contract reference number is displayed here.
Latest Event Sequence Number
The system displays the event sequence number.
Collateral
Currency
The currency is displayed here.
Percent
The percentage is displayed here. However, you can modify it. An override message will be displayed when you modify the percentage.
Exchange Rate
The exchange rate is displayed here.
Collateral Amount
The collateral amount is displayed here. However, you can modify it. An override message will be displayed when you modify the collateral amount.
Description
The amount description is displayed here.
Adjustment
Type
Choose ‘increase’ if you want to increase the percentage of the collateral amount or ‘decrease’ to decrease the percentage of the collateral amount.
Amount
The new amended amount after calculation is displayed here.
Note
The system prompts override messages:
- If the LC expiry date is later than any linked collateral’s expiry date.
- If the LC expiry date extended as part of amendment is later than any limit line’s expiry date.
The system will validate when a new limit line is attached during actions other than New.
8.2.9 Previewing Messages
You can preview the messages or advices that will be generated for the contract using ‘Message Preview’ screen. To invoke this screen, click ‘Message Preview’ button on ‘Letters of Credit Amendment Confirmation Input’ screen.
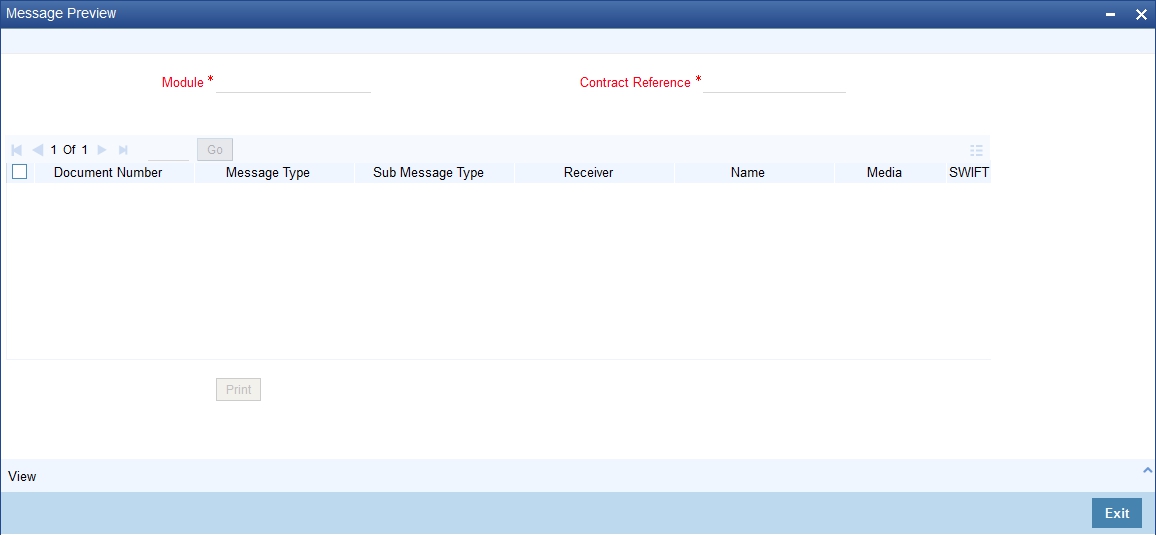
For the contract, you can view the following details of the messages:
- The document number generated for the message/advice
- Type of message generated for the event
- Customer ID of the receiver of the message/advice
- Name of the receiver of the message/advice
- Media of transmitting the message/advice (Mail/SWIFT)
- SWIFT message type of the message
- Status of the message/advice
8.2.9.1 Viewing Message/Advice
Select a message/ advice and click ‘View’ button to view the complete message/advice. The system will display the following details in a new window.
You can view the following details:
- Reference number of the message/advice
- Document number generated for the message/advice
- Version number of the message/advice
- Complete text of the message/advice
- Remarks, if any
- Reject reason, if any
- Message trailer
8.2.9.2 Printing and Spooling Message/Advices
From the ‘Message Preview’ screen, you can print or spool a message/advice using ‘Report Options’ screen. Select the message/advice and click ‘Print/Spool’ button. The system displays the following screen.
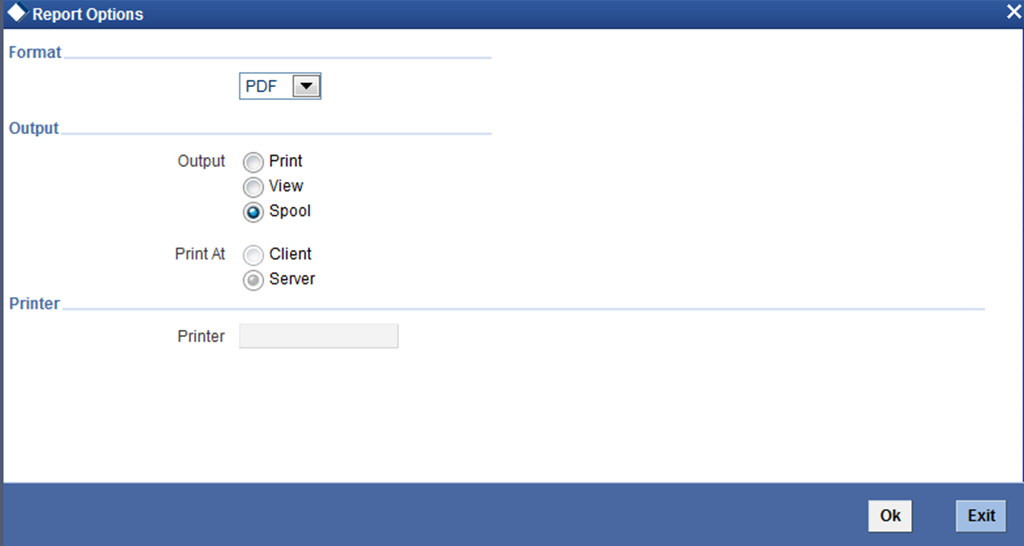
Specify the following details:
Format
Select the format in which the message/advice needs to be printed. You can select one of the following options:
- HTML
- RTF
- Excel
Output
Select the output type. You may print, view or spool the message/advice.
Print At
Specify whether the message will be printed at the server or client.
Printer
Specify the path and the name of the printer.
Set the print options and click ‘OK’ button to print or spool the message/advice.
8.2.10 Remarks
Click Remarks button to view all the instructions captured on authorization of the contract in ‘History of Remarks’ screen.
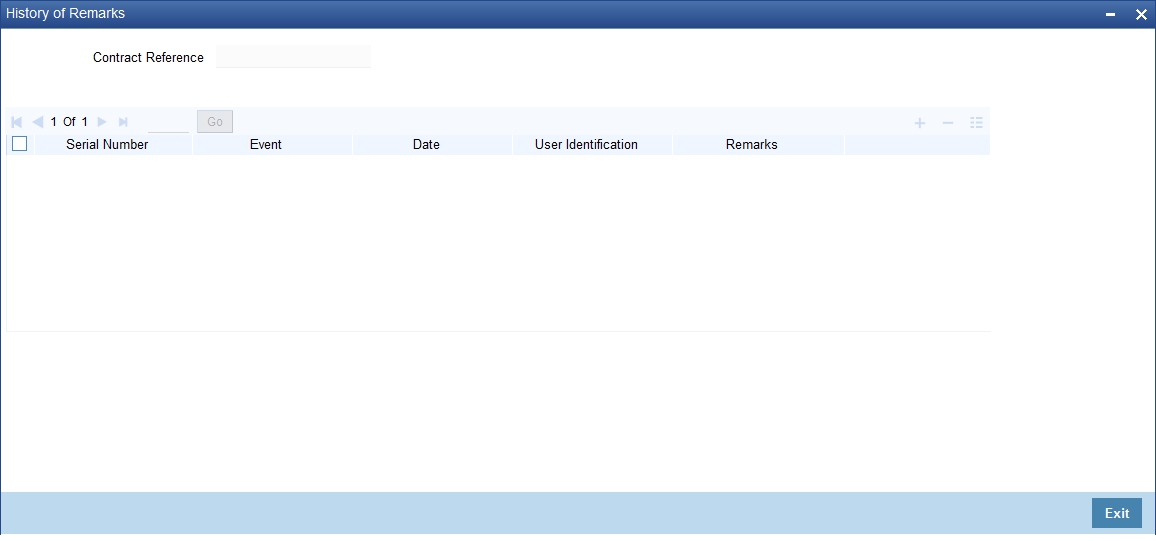
For more details on this screen refer to the section titled ‘Remarks’ in this user manual.
8.3 Utilizing Import Licenses
This section contains the following details:
- Section 8.3.1, "Utilizing Import Licenses"
- Section 8.3.2, "Specifying Events"
- Section 8.3.3, "Specifying Fields"
- Section 8.3.4, "Authorizing Amendment Details"
- Section 8.3.5, "Confirming Amended Details"
- Section 8.3.6, "Amending details using the Contract screen"
- Section 8.3.7, "Rejecting Amended Details"
8.3.1 Utilizing Import Licenses
You can link the import license to an import LC contract and update the utilization amount or quantity for the linked import licenses. Click on ‘Import License’ to invoke the import license screen.
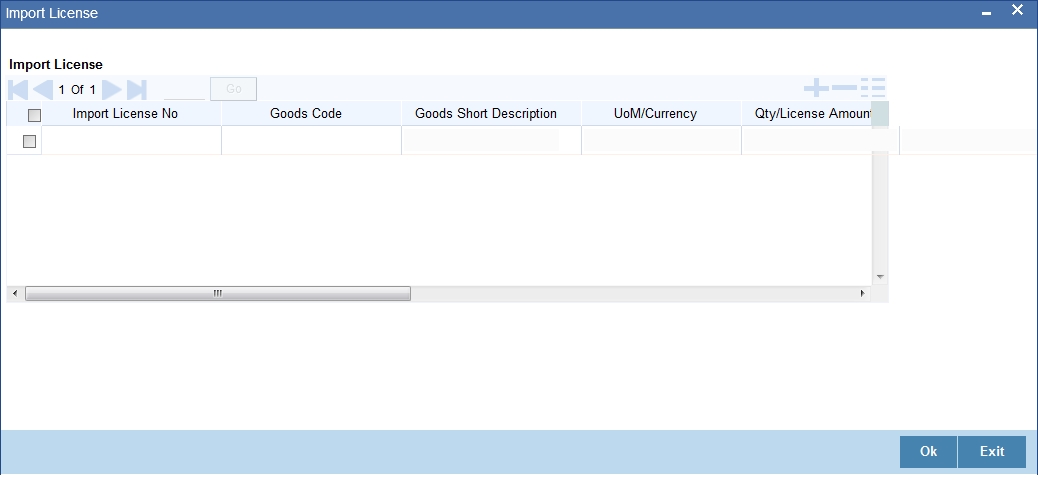
Import License No
Select the import license number from the adjoining option list.
Goods Code
Select the goods code from the adjoining option list.
Goods Short description
The system displays the goods code description maintained in the ‘Bills and Collections Commodity Code Maintenance’ screen.
UoM/Currency
The system displays the unit of measurement or currency captured for the goods code of import license.
Qty/License Amount
The system displays the Quantity or License Amount captured for the goods code of import license.
Qty/License Amt Already Utilized
The system displays the sum total of Quantity or License Amount already utilized for the goods code.
Qty/License Amt Already Reinstated
The system displays the sum total of Quantity or License Amount already reinstated for the goods code.
Available Qty/License Amt
The system displays either the Available Quantity or Available License Amount for the goods code.
Qty/License Amt Utilized
Specify the quantity or the license amount utilized.
Qty/License Amt Reinstated
Specify the quantity or the license amount reinstated.
After authorization, you cannot modify or delete import licenses linked to an LC contract.
The system allows utilization details only for an import license linked to an import LC contract. The system displays an error message if reinstatement details are specified.
The utilization maintained for an import license is updated on save of an amendment capture. Subsequently if the amendment is marked as 'rejected', then the system automatically reinstates the utilization captured.
If reinstatement details are captured for an import license, then the same should be captured while marking the amendment status as confirmed. During status marking, the system displays the import LC contract information in the LC Contract Input screen and the Import License sub-system in the screen can be accessed for input of reinstatement details. The system displays an empty Import License sub screen where the user can input or add new rows to reinstate.
When a reduction in LC amount is performed as an amendment for an import LC contract with import licenses, then the system will validate whether reinstatement details are entered for the linked import licenses. If not, the system displays an override message as “Reinstatement details are not entered”.
When a utilization for an import license is already entered as part of an amendment capture and if utilization details are captured again while marking the amendment status as 'confirmed' in LC Contract screen, the system displays an override message as “Utilization is already marked as a part of amendment capture”.
8.3.2 Specifying Events
You can invoke the Events screen by clicking the ‘Events’ button in the ‘Letters of Credit Amendment Confirmation Input’ screen.
The details of events that have already taken place on the contract will be displayed, along with the date on which the event took place.
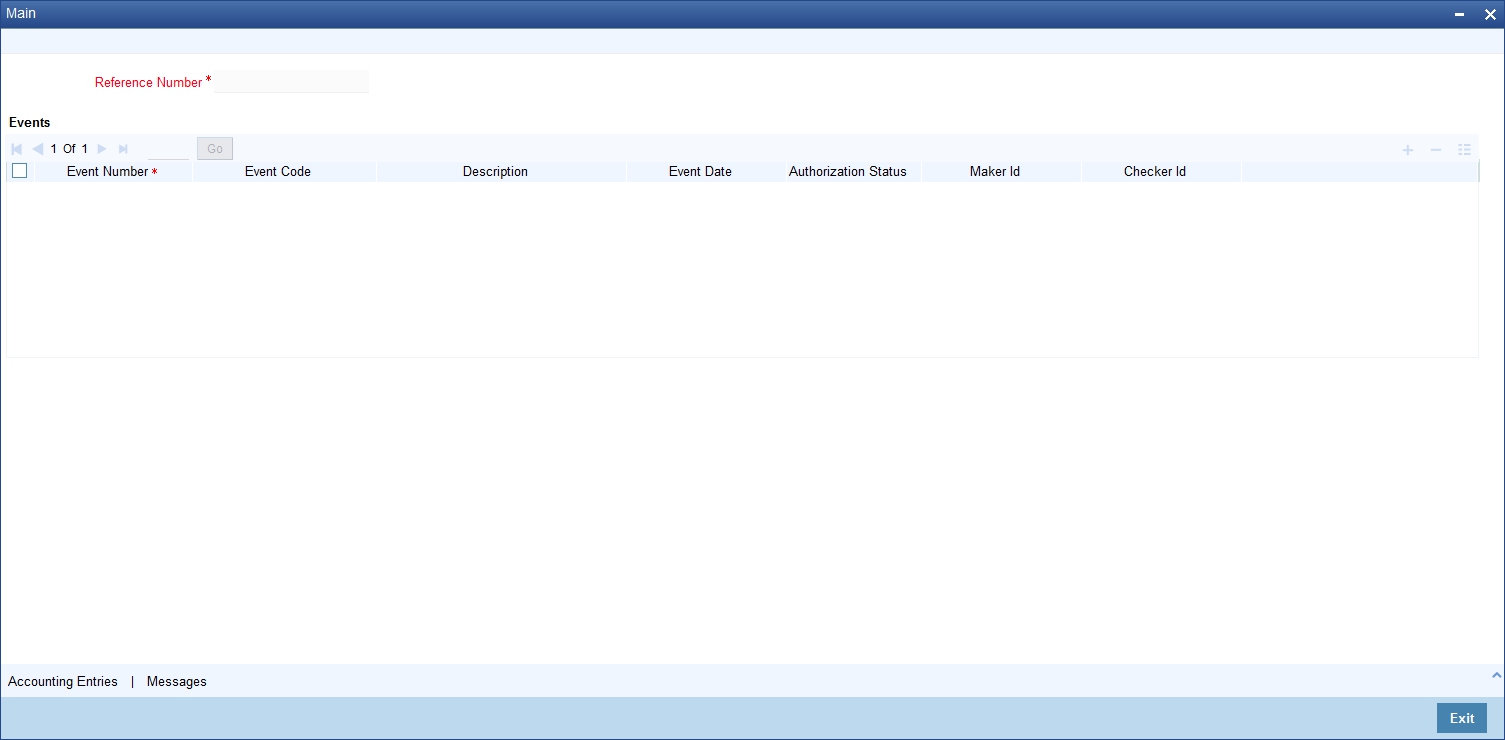
Click on ‘Accounting Entries’ button to view the accounting entries for the event that is highlighted. Click ‘Message’ button to view the messages applicable to the event. Click on ‘Exit’ button to go back to the ’Event Details’ screen.
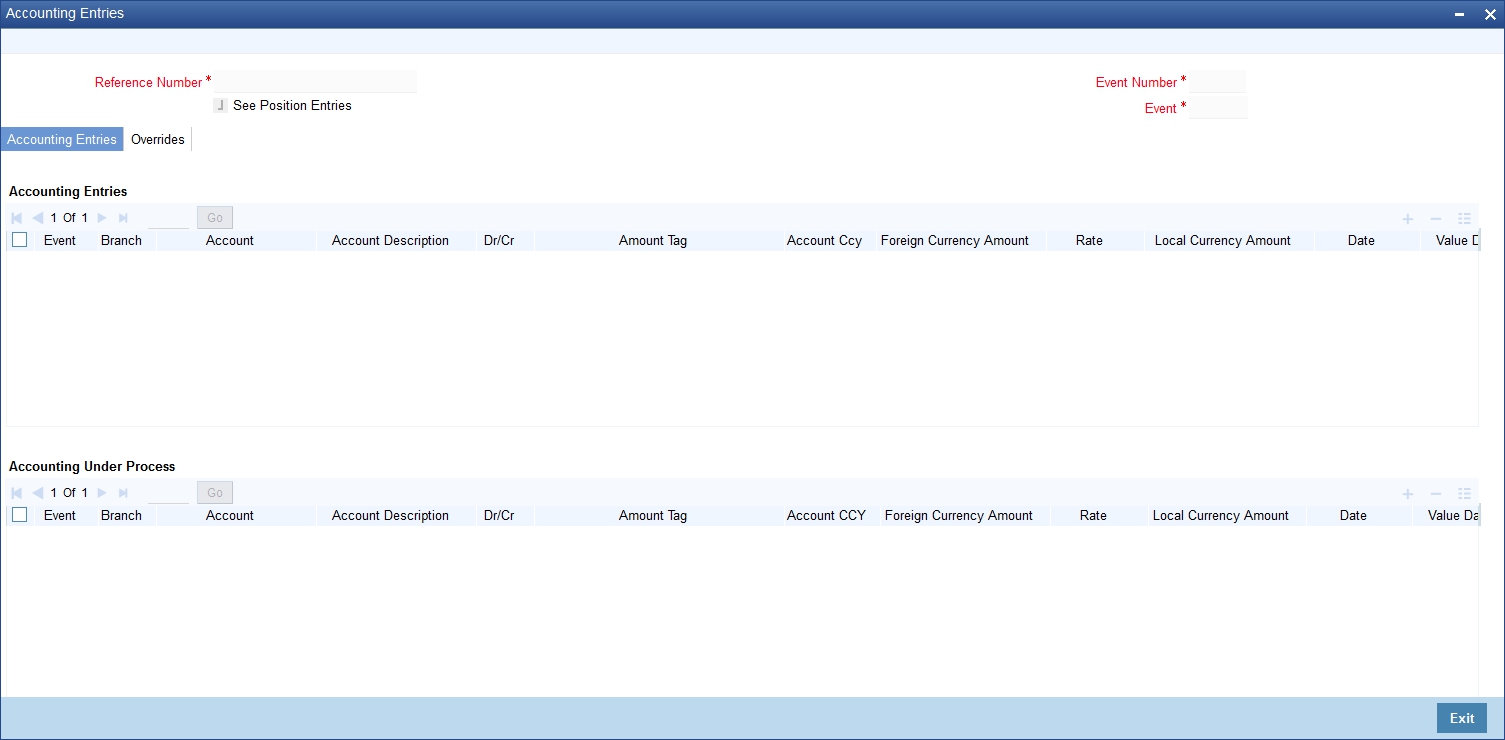
8.3.2.1 Viewing Accounting Entries
From ‘Event Details’ screen, click ’Accounting Entries’ button to view the Accounting Entries for the event.The accounting entries that are passed depends on the type of LC contract that you are processing
The following information is provided for each event:
- Branch
- Account
- Transaction Code
- Booking Date
- Value Date
- Dr/Cr indicator
- Currency
- CCY (Currency)
- Amount in contract CCY
- Amount in local currency
- All the overrides that were given for an event will also be displayed.
Click ‘Exit’ button to go back to the screen from where you invoked the ‘Accounting Entries’ screen.
8.3.2.2 Viewing Messages Applicable to a Contract
Click ‘Message’ button from the ’Event Details’ screen to view the list of advices applicable to a particular event in the lifecycle of LC.
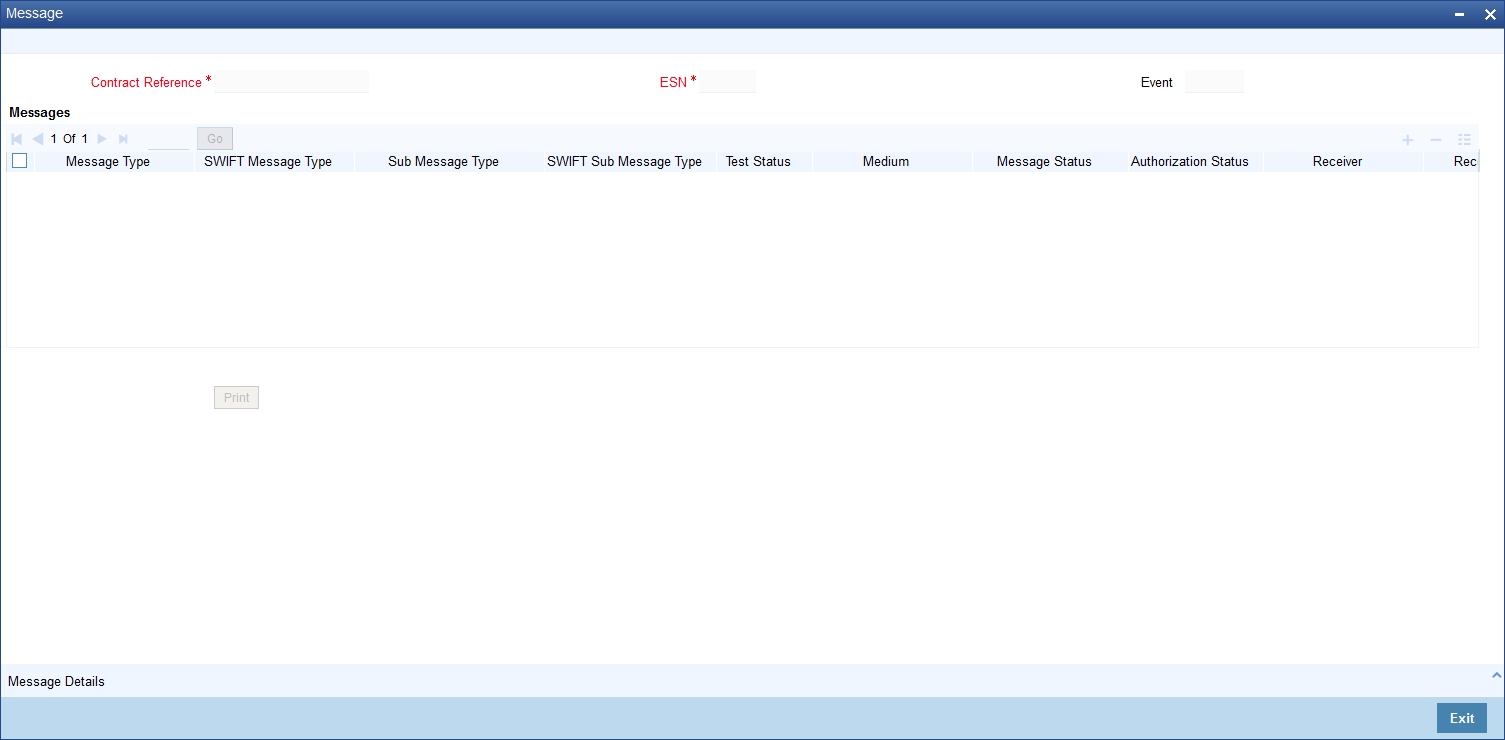
The following details of a message are displayed:
- The message type
- The Name and ID of the recipient of the message
- The status of the message
To view the text of a message, highlight the message and click on the ‘Message Details’ button. Click ‘Exit’ button to exit the screen.
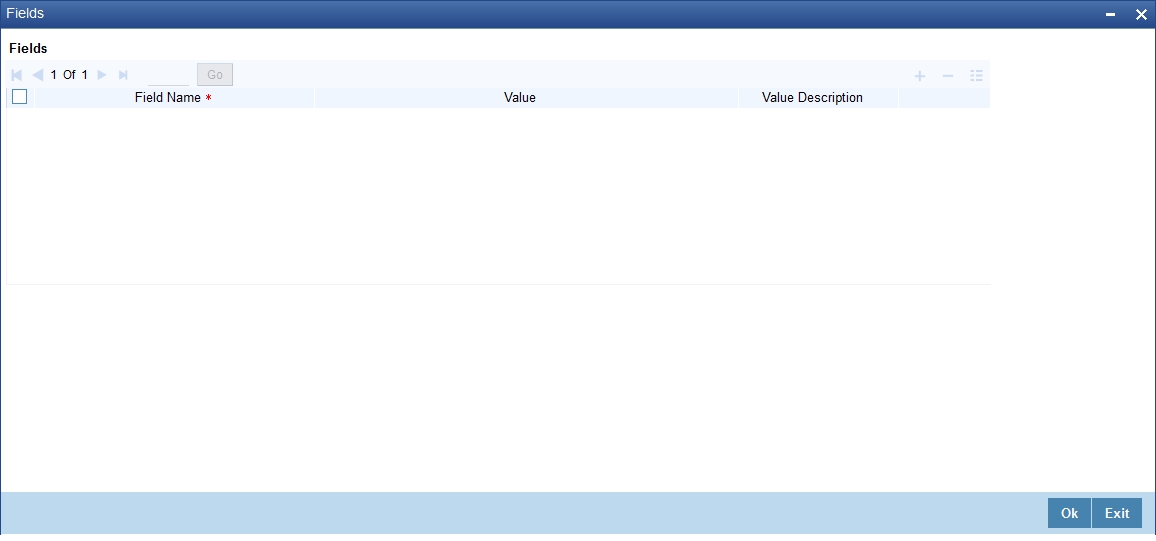
8.3.3 Specifying Fields
You can invoke the Fields screen by clicking the ‘Fields’ button in the ‘Letters of Credit Amendment Confirmation Input’ screen.
8.3.4 Authorizing Amendment Details
On saving the amendment details after entering all the required details in the system, the system validates the value of the contract amount against the following
- Product transaction limit
- User Input limit
If the transaction currency and the limit currency are different, then the system converts the amount financed to limit currency and checks if the same is in excess of the product transaction limit and user input limit. If this holds true, the system indicates the same with below override/error messages:
- Number of levels required for authorizing the transaction
- Transaction amount is in excess of the input limit of the user
You have to get a contract authorised by your supervisor. Follow the steps given below to authorize:
- Click authorise icon in the toolbar. The following screen
will be displayed:
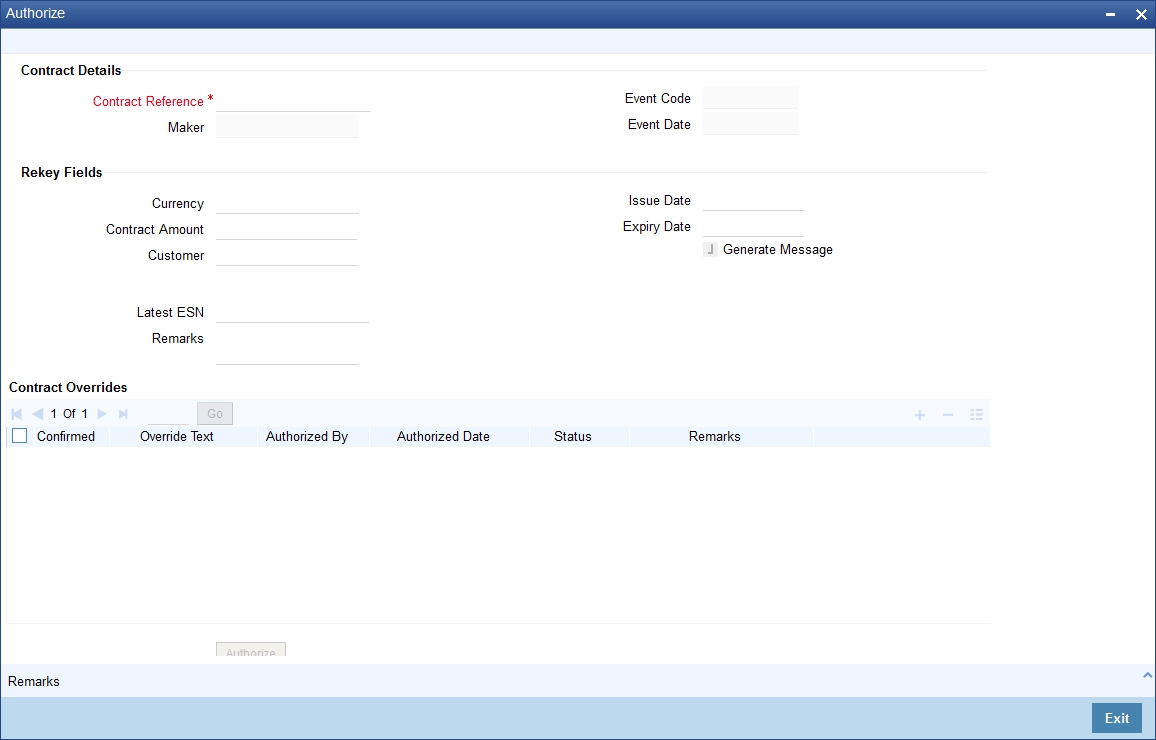
- Click ‘OK’ button to proceed. The system will seek a confirmation for generating the messages. Click ‘OK’ to proceed.
- Click ‘Cancel’ button to return to the ‘Amendment Confirmation’ screen. The system will display a message to confirm successful authorization of the record. The audit trail of the screen will now display the following details:
- Checker ID – Login id of the authorizer
- Checker Dt Stamp - The date and time at which you authorized the contract
- Auth Status – The status will updated to ‘Authorized’
The accounting entries for the amendment will be posted only after the authorization of the contract.
Note
You cannot authorise a contract in the following cases:
- the contract has multilevel of authorization pending, the same will be done using the ‘Multilevel Authorization Detailed’ screen
- the level of authorization is greater than or equal to ‘N’
- the ‘Nth’ or the final level of the users authorisation limit is less than the difference between amount financed and sum of the limits of all the users involved in authorizing a transaction, this case holds good when the ‘Cumulative’ field is checked in the ‘Product Transaction Limits Maintenance’ screen
- the transaction amount is greater than the authoriser’s authorisation limit if the ‘Cumulative’ field is unchecked in the ‘Product Transaction Limits Maintenance’ screen
8.3.5 Confirming Amended Details
Once authorized, you will not be allowed to modify these details. The system will provide option for confirming or rejecting the amendment details. To confirm the details, do the following:
- Click confirm icon in the toolbar. The system will launch
the below screen:

- Click ‘OK’ in the message window to proceed. The system will display the following message to confirm the confirmation as, “The Record is successfully confirmed.”
- Click ‘OK’ in the message window and this takes you the LC contract online screen. The charges can be waived using this screen. Note that the ‘Amnd Status’ is updated to ‘Confirmed’ and the ‘Auth Status’ is updated to ‘Unauthorized’ (in the audit trail of the screen).
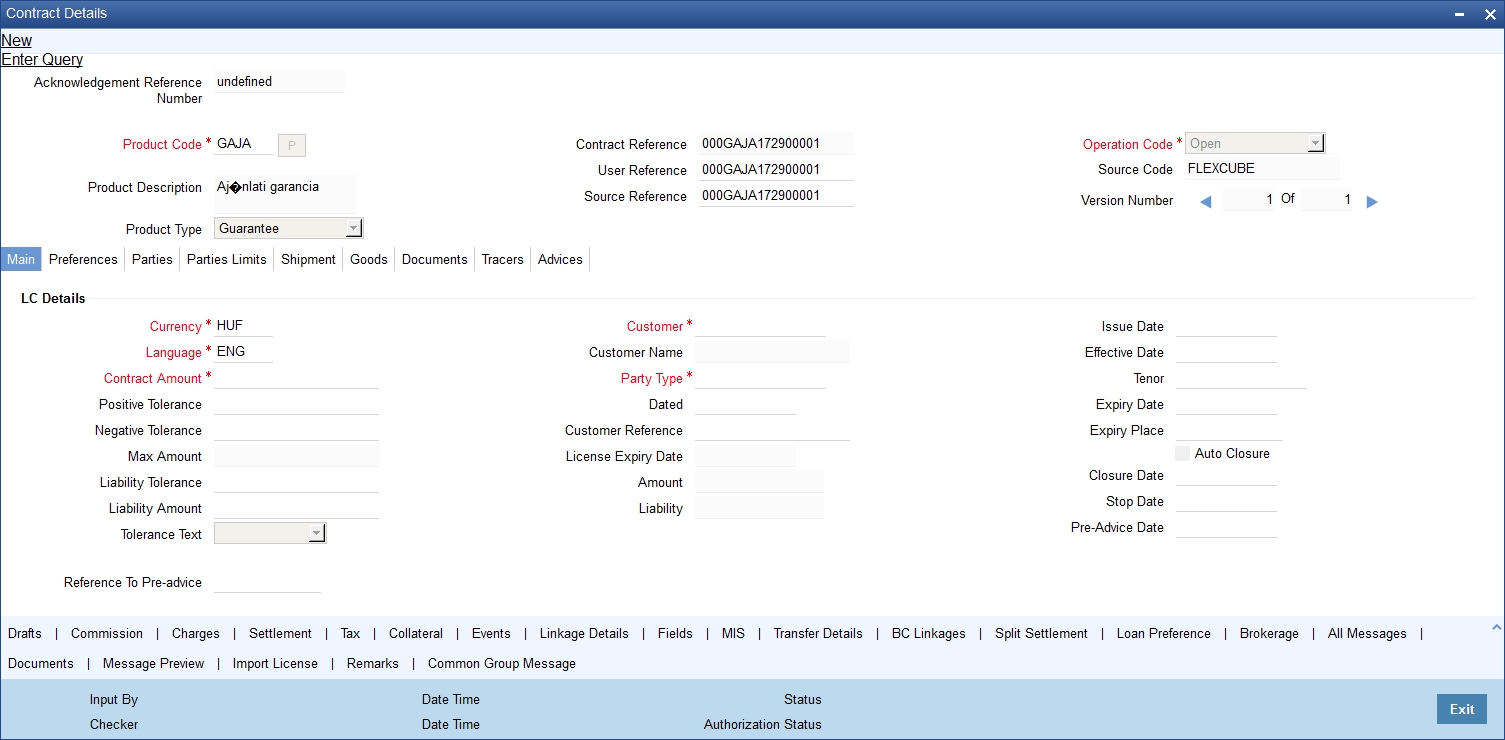
8.3.6 Amending details using the Contract screen
You can unlock the LC contract screen after clicking ‘OK’ in the message window above. The LC contract online screen is used for modifying details after confirmation of the amendment action. The system creates an amendment on the LC once the proposed amendment is confirmed. When this amendment is created the confirmation and amendment events are both left in an unauthorized state. This allows unlocking of the LC contract to make the necessary amendments.
Once the confirmation is saved on the amendment screen, the LC contract online screen is launched with the data modified, and this can be unlocked and modified, or closed as chosen by the user. These changes are directly made by launching the LC contract screen. However the amendment can only be deleted by using the amendment screen as described above.
The following LC contract screen is launched when the amendment is confirmed in the LC amendment confirmation input screen.
The amendment cannot be deleted using the LC contract screen, and can only be deleted using the amendment screen as part of the confirmation. This is done by deleting the confirmation using the amendment screen.
Hence the process is carried out as follows:
- The amendment is confirmed using the LC Credit Amendment confirmation screen. It is completed by clicking ’C’ and saving the confirmation.
- The LC contract screen is launched once the confirmation is saved. This screen contains the details of the amendments done in the confirmation input screen.
- This screen is unlocked and the details are made available for modification. Subsystem details like charges and commission can be modified or waived as required.
During an auto authorization of Amendment Confirmation, the amendment created by this confirmation is also authorized.
Note
When the LC Amount is amended from ‘LC Amendment’ screen, the values mentioned in ‘Confirmation Percent’ at the contract level are considered for confirming the amended amount.
However, you can amend the Confirmation Percent/Confirmation Amount at the contract level.
8.3.6.1 Accounting Entries for amending LC amount
On increasing the LC Amount as part of amendment):
Dr/ Cr |
Account role code |
Amount tag |
LCY Amount Description |
Dr |
LC_OCU_OFFSET (Unutilized Credit Offset) |
CNF_LIAB_INCR_AMT |
Delta Confirmation Amount |
Cr |
LC_OCU (Outstanding Credit Unutilized) |
CNF_LIAB_INCR_AMT |
Delta Confirmation Amount |
Dr |
LC_CNF (Confirmation of LC) |
CNF_LIAB_INCR_AMT |
Delta Confirmation Amount |
Cr |
LC_CNF_OFF (Confirmation of LC Offset) |
CNF_LIAB_INCR_AMT |
Delta Confirmation Amount |
On decreasing the LC Amount as part of Amendment:
Dr/ Cr |
Account role code |
Amount tag |
LCY Amount Description |
Dr |
LC_CNF_OFF (Confirmation of LC Offset) |
CNF_LIAB_DECR_AMT |
Decreased Amount |
Cr |
LC_CNF (Confirmation of LC Offset) |
CNF_LIAB_DECR_AMT |
Decreased Amount |
Dr |
LC_OCU (Outstanding Credit Unutilized) |
CNF_LIAB_DECR_AMT |
Decreased Amount |
Cr |
LC_OCU_OFF (Outstanding Credit Unutilized Offset) |
CNF_LIAB_DECR_AMT |
Decreased Amount |
8.3.6.2 Authorizing Confirmation
Your supervisor now needs authorize the confirmation to view the changes made. The steps to authorize are given below:
- After logging in, invoke the ‘Amendment Confirmation’ screen and navigate to the record that needs to be authorized.
- Click authorise icon in the toolbar of the screen. The system will create a new version of the contract and display the details of the contract in the ‘LC Contract’ screen, as shown below.
- After confirming the changes, click save icon in the toolbar of the screen to save the details.
Note
You can delete the amendment if the ‘Amnd Status’ of the contract is ‘Confirmed’ but unauthorized.
8.3.7 Rejecting Amended Details
To reject the amendment details, do the following:
Click the close icon in the toolbar of the screen. The system will display the following message to confirm the rejection:
Are you sure you want to reject the current record?
Click ‘OK’ in the message window to return to the ‘Amendment Confirmation’ screen. The system will display a message to confirm successful rejection of the record.
The ‘Amnd Status’ will be updated to ‘Rejected’.
8.3.7.1 Authorizing Rejection
Your supervisor now needs authorize the rejection. The steps to authorize are given below:
After logging in, invoke the ‘Amendment Confirmation’ screen and navigate to the record that needs to be authorized.
Click authorize icon in the toolbar. The system will display the following screen.

Click ‘OK’ icon to proceed. You will return to the ‘Amendment Confirmation’ screen and the system will display a message to confirm successful authorization of the record.
The ‘Amnd Status’ of the record will be ‘Rejected’ while the ‘Auth Status’ will be updated to ‘Authorized’.
Note
- If a contract is amended and confirmed, you can amend it again by creating a new amendment record in ‘Amendment Confirmation’ screen for already amended LC contracts.
- The system will not allow you to perform any operations on an LC pending confirmation or rejection.
- The amended details will take effect only after confirmation from the beneficiary.
- If the amendment is rejected, the system will retain the original or the last amended confirmed LC.
You can amend the same contract several times in ‘Amendment Confirmation’ screen as long as the amendment is not authorized.
8.3.8 Viewing LC Amendment
You can view the LC amendment using ‘Letters of Credit Contract Summary’ screen. To invoke this screen, type ‘LCSAMEND’ in the field at the top right corner of the Application tool bar and click the adjoining arrow button.
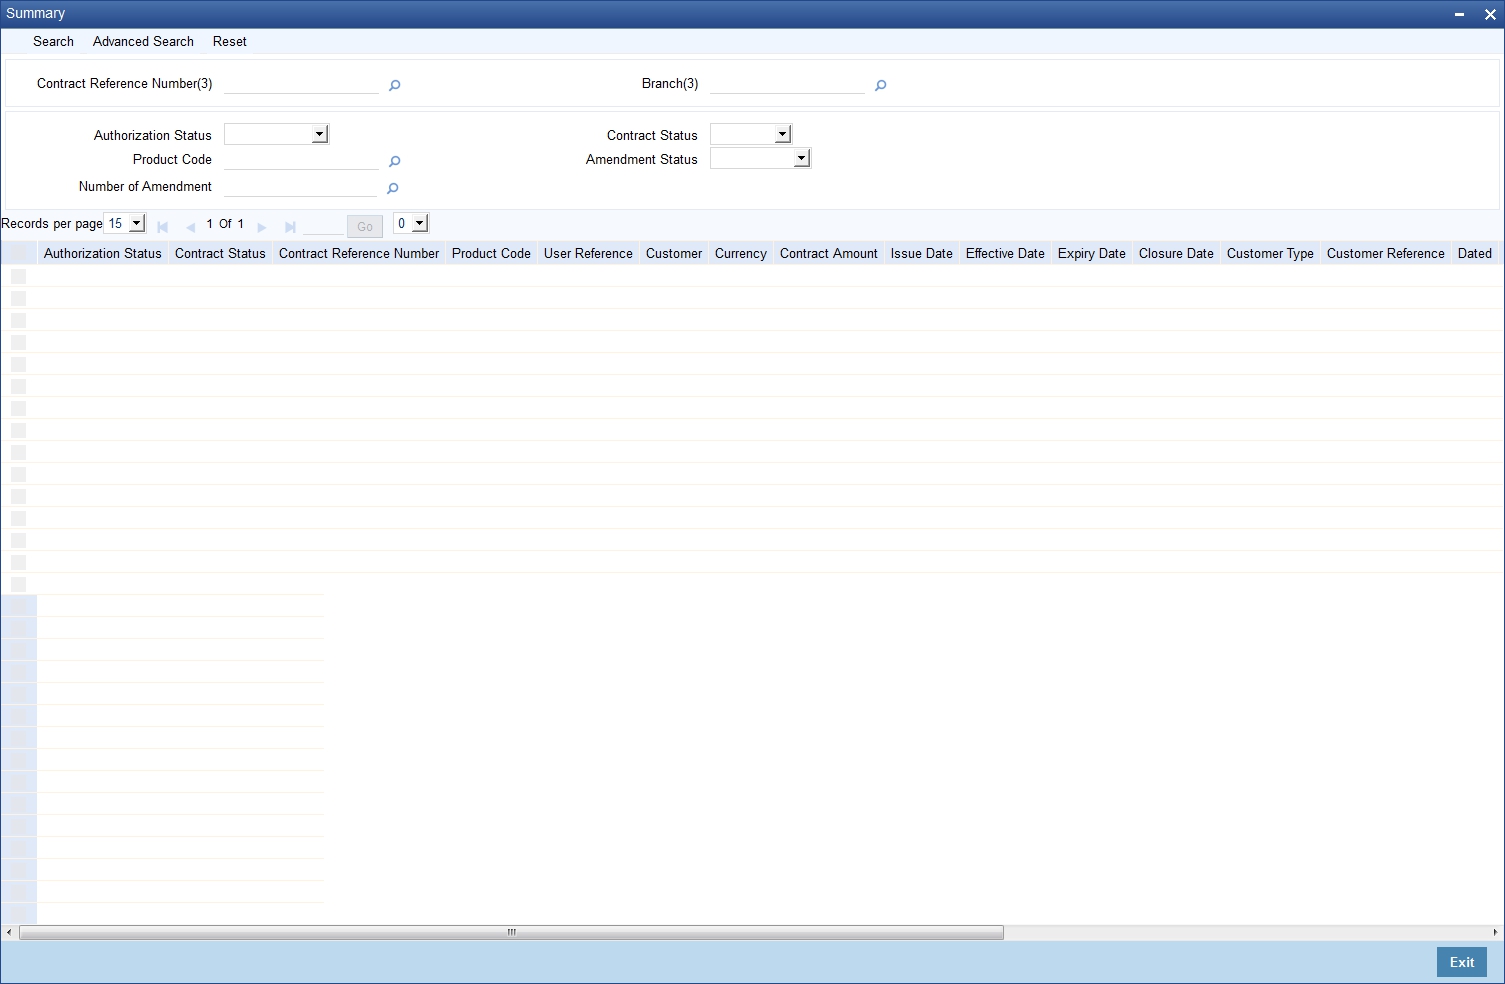
You can click ‘Search’ button to view all the pending functions. However, you can to filter your search based on any of the following criteria:
Authorization Status
Select the authorization status of the amendment from the drop-down list.
Contract Reference Number
Select the contract reference number from the option list.
Branch Code
Select the branch code for which you want to check the amendment from the option list.
Contract Status
Select the status of the amendment for which you want to check the pending function from the drop-down list.
Product Code
Select the product code from the option list.
Amendment Status
Select the amendment status from the drop-down list.
Number of Amendments
Select the number of amendments from the option list.
When you click ‘Search’ button the records matching the specified search criteria are displayed. For each record fetched by the system based on your query criteria, the following details are displayed:
- Customer
- Contract Currency
- Contract Amount
- Issue Date
- Effective Date
- Expiry Date
- Closure Date
- Customer Type
- Customer Reference Number
- Customer Reference Date
- Maximum Contract Amount
- Maximum Liability Amount
- Current Availability
- Outstanding Liability
- Latest Shipment Date
- External Reference Number
- Branch Code
- Number of Amendments
Click ‘Advanced Search’ button to query a contract based on any of the following details:
- Customer
- Contract Currency
- Contract Amount
- Issue Date
- Effective Date
- Expiry Date
- Closure Date
- Customer Type
- Customer Reference Number
- Customer Reference Date
- Maximum Contract Amount
- Maximum Liability Amount
- Current Availability
- Outstanding Liability
- Latest Shipment Date
- External Reference Number
- Branch Code
- Number of Amendment
8.4 Operations on Confirmation Record
In addition to the operations discussed above (Save, Authorize, Confirm), you can perform the following operations in the ‘Amendment Confirmation’ screen:
- New
- Delete
- Close
- Unlock
8.5 Uploading LC Amendment
While uploading an amendment, the system checks the user reference number in the contract with the external reference number of the incoming message. If a contract exists with the reference number and its status is ‘Authorized’ and ‘Active’, then the system will amend it provided the upload action is ‘AMND’.
If upload action is ‘NEW’ and the external reference number exists, the system will display an error message. In case of contract amendment through STP of MT707, the following fields are updated:
- Expiry date (31E field)
- LC amount (34B field)
- Tolerance details(Negative and positive tolerance) (39A field)
- Additional amounts covered (39C field)
- Shipment from (44A field)
- Shipment to (44B field)
- Latest date of shipment (44C field)
- Shipment period(44D field)
- Issuing bank amendment date(30 field)
Once an amendment is uploaded, the event ‘AMND’ will be triggered on the LC contract in the system.