4. Defining Attributes Specific to Payments and Collections Products
In the Local Payments (PC) module of Oracle FLEXCUBE, a product refers to a specific type of transfer of funds. For example, you may process payments that involve transfer of funds between accounts maintained at your bank. You can define this type of local payment as a product at your bank.
In this chapter, we shall discuss the manner in which you can define attributes specific to a local payments product.
This chapter contains the following sections:
- Section 4.1, "Product Detail Maintenance"
- Section 4.2, "Level 1 Authorization (A1) Details"
- Section 4.3, "Level 2 Authorization (A2) Details"
- Section 4.4, "Release Queue Details"
- Section 4.5, "Validations for Product and Collection Type Combinations"
- Section 4.6, "Outgoing Payment Transaction"
- Section 4.7, "Incoming Payment Transaction"
4.1 Product Detail Maintenance
This section contains the following topics:
- Section 4.1.1, "Invoking the Product Definition Screen"
- Section 4.1.2, "Preferences Button"
- Section 4.1.3, "Tax Button"
4.1.1 Invoking the Product Definition Screen
You can create a PC product in the ‘Payments and Collection Product Definition’ screen, invoked from the Application Browser.
You can invoke this screen by typing ‘PCDPRMNT’ in the field at the top right corner of the Application tool bar and clicking the adjoining arrow button. In this screen, you can enter basic information relating to a PC product such as the Product Code, the Description, etc.
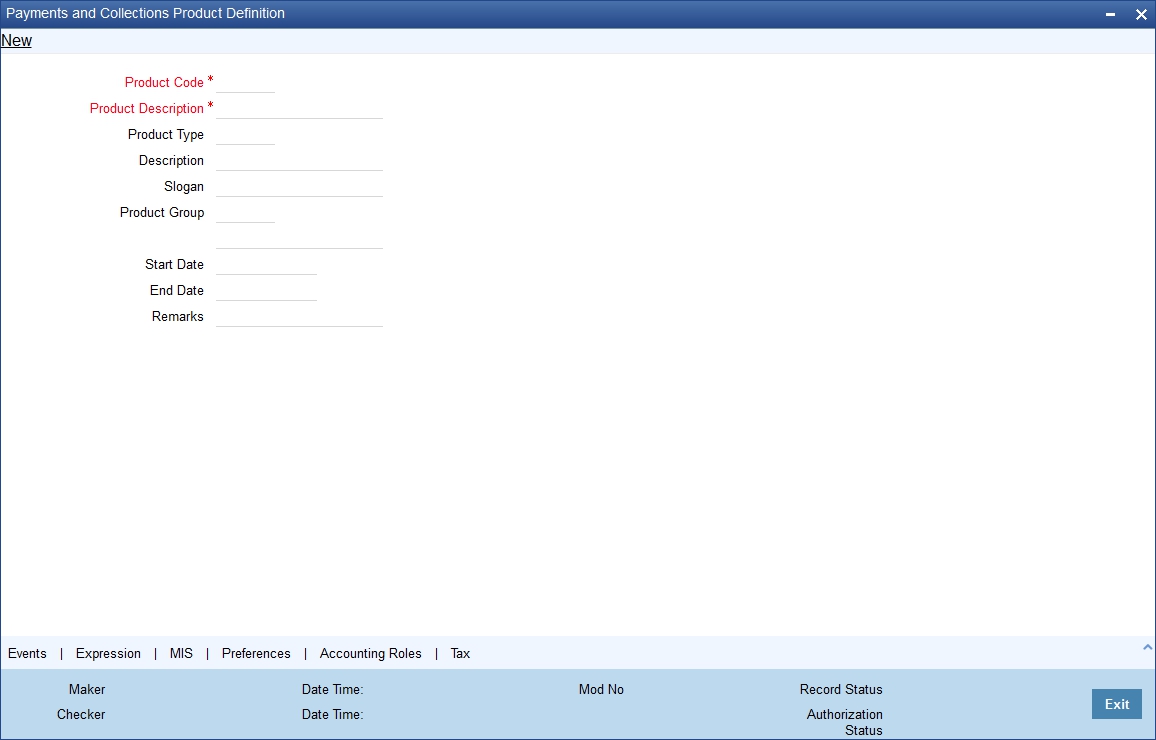
For any product you create in Oracle FLEXCUBE, you can define generic attributes, such accounting roles and heads, events and MIS details, etc., by clicking on the appropriate icon in the horizontal array of icons in this screen. For a PC product, in addition to these generic attributes, you can specifically define other attributes. These attributes are discussed in detail in this chapter.
You can define the attributes specific to a PC product in the PC Product Definition Main screen and the PC Product Preferences screen. In these screens, you can specify the product type and set the product preferences respectively.
For further information on the generic attributes that you can define for a product, refer the following Oracle FLEXCUBE User Manuals under Modularity:
- Product Definition
- User Defined Fields
- Settlements
Product Code
Specify the product code.
Description
It may be difficult to recognize a product just by its code. In the Description field, therefore, suitably describe the product code so that it can be easily identified. This description will be displayed along with the code throughout Oracle FLEXCUBE.
Product Type
An important detail in defining a product is to specify the type of product you are creating. The product type identifies the basic nature of a product. This helps to classify the product.
The entries that are passed, the messages that are generated and the processing of contracts depend on the ‘Product Type’. A payment and collection product that you define can belong to either of the following categories:
- Incoming Collection
- Incoming Payment
- Outgoing Payment
- Outgoing Collection
- Reject of Incoming Collection
- Reject of Outgoing Collection
- Recall of Incoming Collection
- Recall of Outgoing Collection
- Reject of Incoming Payments
- Reject of Outgoing Payments
- Reverse of Outgoing collection
- Reverse of Incoming collection
These product categories are referred to as product types. When you create a product, you must specify its ‘type’.
Slogan
You can enter a marketing punch line for every product you create. This slogan will be printed on all advices that are sent to customers who avail of the product.
For example, if you set up a borrowings product called Money Multiplier, you could enter the slogan ‘Watch your money grow with Money Multiplier.’
Product Group
Products can be categorized into groups based on the common elements that they share. You must associate a product with a group. This would facilitate retrieval of information of a class of products at one stroke.
For example, you can group all products involving travelers’ checks into a product group. You can group all products involving loans into a product group.
Start Date and End Date
A product can be defined to be active over a specific period. When you create a product, you can specify a ‘Start Date’ and ‘End Date’ for it. The product can only be used within the specified period (i.e. within the Start Date and End Date).
If you do not specify the Start Date, the branch date will be displayed as the Start Date.
If you do not specify an End Date for a product, it can be used for an indefinite period.
The start and end dates of a product come in handy when you are defining a product that you would like to offer over a specific period.
Remarks
Enter the free hand remarks regarding the products.
Exchange Rate Variance (in %)
You can define the exchange rate variance that you would like to allow for a PC product. This variance is expressed in terms of a percentage.
For a special customer, or in special cases, you may want to use an exchange rate (a special rate) that is greater than the exchange rate maintained for a currency pair. The variance is referred to as the Exchange Rate Variance.
When creating a product, you can express an Exchange Rate Variance Limit in terms of a percentage. This variance limit would apply to all contracts associated with the PC product.
Override Limit
If the variance between the default rate and the rate input varies by a percentage that is between the Override Limit and the Rate Stop Limit, you can save the transaction (involving the product) by providing an override.
Stop Limit
If the variance between the default rate and the rate input varies by a percentage greater than or equal to the Rate Stop Limit, you cannot save the transaction involving the product.
Rate Code
Specify the rate code that will be used to define at the product level.
Rate Type
Specify the rate type that will be used to define at the product level.
Note
You can AR or AP for ICCF components, by maintaining ‘Resultant Charge Type’ as ‘Charge Component’. If the component is marked for AP or AR, then the system creates the LQ record.
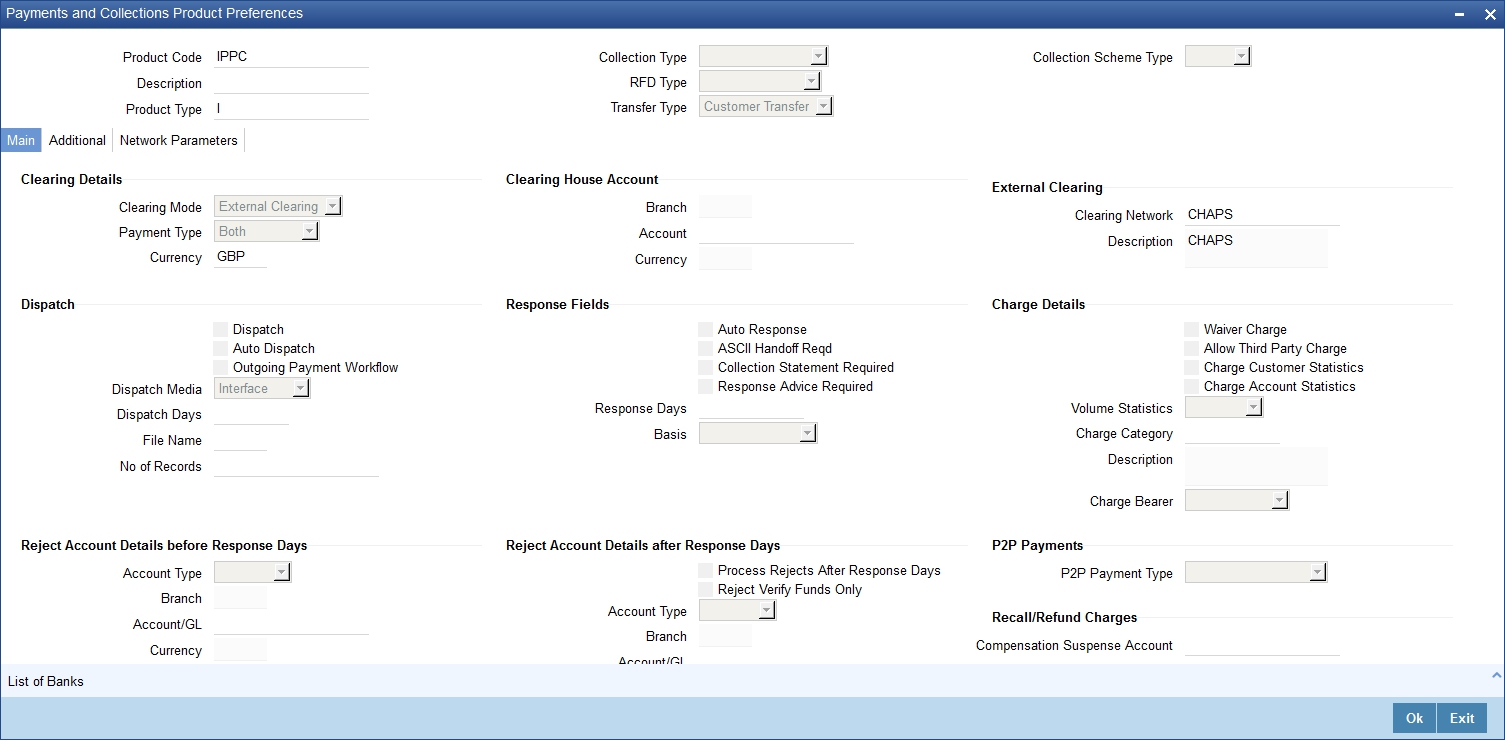
4.1.2 Preferences Button
Preferences are the options available to you for defining the attributes of a product. The options you choose, ultimately, shape the product. For example, you can specify the cutoff time, entry dates, redispatch dates and response days for transactions processed under a product. This specification will apply to all transactions processed under the product. You can invoke the ‘Payment and Collection Product Preferences’ screen by clicking ‘Preferences’ button.
Product Code
Specify the product code for which you want to maintain the preferences.
Transfer Type
Select the type of transfer. The options are:
- Customer Transfer
- Bank Transfer
- Internal Transfer Type
You can indicate the types of transfers that can be processed using the product– bank transfers or customer transfers. This specification is defaulted from the product category to which the product is linked.
Only bank transfer types of products can be mapped to product categories defined for bank transfers. Book transfer products cannot be mapped to product categories defined for bank transfers.
Similarly, only customer transfer types of outgoing payment products can be mapped to product categories defined for customer transfers.
This specification is only applicable for outgoing payment product types with external or internal Clearing Modes.
Bank transfer is allowed for outgoing payment type of products only. EXTERNAL clearing is permitted for such products. However, BOOK and INTERNAL clearings are not permitted.
Product Type
Incoming and Reject of outgoing payment product types:
- Collection Type
- RFD Type
- Max Interest Amount
- Max Split Count
- Invoice Split Required
- Collection Stmt Required
- Account details for rejection before response days
- Account details for rejection after response days
- Recall Days Details
- Re-dispatch details
- DD Agreement Required
- Creditor Agreement Required
Collection Type
For the selected collection product type, you have to indicate the collection type. The options available are:
- Direct debit
- Request for debit
If you capturing the details of Incoming or Outgoing collection product types, you must necessarily specify ‘direct debit’ as the collection type. While creating product meant for outgoing and incoming payments you will not be allowed to define product types. For outgoing/incoming collection products and for Reject of incoming/outgoing collection products you can choose either one of the collection types.
The ‘Direct Debit’ collection type can be selected for both ‘Customer Transfer’ and ‘Bank Transfer’ type of product codes and product categories.
A counterparty bank code indicates the bank from which funds will be transferred. If the counterparty bank code is an indirect participant, then the system derives the direct participant based on TARGET-2 directory maintenance and defaults the direct participant as the receiver.
The message type ‘DIRECT_DEBIT’ is available to generate MT204.
Refer the section titled Validations performed on the Product and Collection Type combination for detailed information on the various validations performed by the system depending on the Product and Collection type combination.
RFD Type
The RFD type indicates the manner in which you choose to process requests for debit for a product. While setting up products meant to cater to outgoing type of RFD’s you could choose any of the following options:
- No Tracking: indicates that the RFD is not considered for approval or rejection.
- Full Payment: indicates that the RFD is processed for payment of full transaction amount.
- Partial Payment: indicates that the RFD payments can be made in multiple installments.
Note
You will not be allowed to select the first option while setting up a product meant for Incoming RFDs.
Collection Scheme Type
Specify the value for the field from the adjoining drop-down list.
The list takes three values:
- CORE-Selected for shorter time cycle transaction products.
- COR1-Selected for standard time cycle transaction products.
- B2B-Applicable for incoming and outgoing collection products.
The field is enabled for 'Incoming' and 'Outgoing' collection products.
4.1.2.1 Main Tab
Click ‘Main’ tab to capture the essential preferences of the product.
Clearing Details
Payment Type
Payment type indicates whether the payment is within the country or outside. The options are:
- Domestic
- Cross Border
- Both
At the time of product resolution, system compares the counterparty bank code’s country with the current logged in branch country to identify whether payment is a domestic or a cross border payment. The product is then resolved appropriately.
Currency
Specify the currency in which PC contracts linked to this product should be created. The adjoining option list displays the currency codes maintained in the system. You can select the appropriate one.
Clearing House Account
Account
The accounting entries for a payment or collection transaction using the product could be passed to either a clearing vostro account, or to a clearing suspense GL. If they are to be passed to a vostro account, you must specify the appropriate vostro account in this field.
Note
If you have indicated a clearing account, the system populates the BIC of the clearing account in the advice message tag NOSTRO BIC. This tag will be null if clearing account is not specified for the PC Product.
Branch
The branch of the clearing house account is displayed.
Currency
The currency of the clearing house account is displayed.
External Clearing
Clearing Network
Indicate the preferred clearing network. All payments processed under this product will be funneled through this network to the external entity.
Minimum Divisible Amount
A key preference that you can specify for a product is the lowest denomination in which transactions involving the product can be processed.
Specifying a minimum divisible amount helps you restrict transactions to specific denominations. You can also use this facility to specify the minimum factor for the transaction amount. In such a case, the transaction amount (of transactions processed under the product) should be a multiple of the
Charge Mode
You can indicate whether charges applicable for a transaction involving the product are to be applied over and above the transaction amount (premium) or subtracted from the transaction amount (discount).
Minimum and Maximum Transactions Amount
For a Payments product, you can specify a transaction range. If a transaction is to be processed under a product, its size, in terms of the transaction amount, should be within the transaction range that you specify for the product.
The Maximum Transaction Amount and the Minimum Transaction Amount that you specify constitute the transaction range.
Invoice Split Required
If the transaction amount of a transaction involving this product exceeds the maximum amount specified for the product you can indicate that the collection transaction needs to be split into multiple transactions. You can enable this option by checking the Invoice Split Required option.
Cut Off Time
Transactions received after the cutoff time that you specify for a product will be processed according to the postcutoff parameters you maintain. Your cutoff time specifications will apply to all transactions processed under the product.
Processing Priority
When creating a product, you can define the priority with which the transactions associated with it should be processed. You can indicate this priority on a scale of one to ninety-nine.
Note
Transactions received from the different queues are processed according to the following criteria:
- The priority specified by the initiator, and if unavailable
- The priority specified for the product with which they are associated
Customer Entry days
You can specify the number of working days to be added to the activation date to determine the entry date for the customer leg of transactions processed under a product. (For outgoing transactions, the Customer Entry Date of a transaction should be earlier than or the same as the Dispatch Date. The Customer Entry Date of a transaction should also be later than or the same as the Activation Date.)
For an Outgoing product type, your specification will apply to the debit leg of the transactions processed under the product. For an Incoming product type, your specification will apply to the credit leg of the transactions processed under the product.
Customer Entry value days
You can specify the number of working days to be added to the activation date to determine the value date for the customer leg of transactions processed under a product.
For an Outgoing product type, your specification will apply to the debit leg of the transactions processed under the product. For an Incoming product type, your specification will apply to the credit leg of the transactions processed under the product.
Counterparty Entry days
When creating a product, you can specify the number of working days to be added to the activation date to determine the entry date for the counterparty leg of transactions processed under it.
For an Outgoing product type, your specification will apply to the credit leg of the transactions processed under the product. For an Incoming product, your specification will apply to the debit leg of the transactions processed under it.
Counterparty Values days
You can specify the number of working days to be added to the activation date to determine the value date for the counterparty leg of transactions processed under a product.
The Counterparty Entry Value Date of a transaction should be later than or the same as the Counterparty Entry Date.
For an Outgoing product type, your specification will apply to the credit leg of the transactions processed under the product. For an Incoming product type, your specification will apply to the debit leg of the transactions processed under the product.
Transactions received before the cutoff time you have specified will be processed according to your pre-cutoff specifications. Transactions received after the cutoff time you have specified will be processed according to your post-cutoff counterparty entry value days specification for the product.
Allow Post Cutoff Transaction
You have the option to indicate that a particular product can be used for processing payment and collection transactions beyond the specified cut-off time by enabling the Allow Post Cut-off Transactions option.
Override Overdraft
While maintaining details of products which debit the customer account (like Outgoing Payments or Incoming Collections) you have to indicate whether transactions involving these products should be sent to the Credit Exception queue or whether the credit check should be ignored.
If you enable this option, the transaction will be processed regardless of its overdraft status. If you leave this box unchecked, all such transactions are sent to the Credit Exception Queue as well as to the Referral Queue. Upon Accepting or Rejecting a transaction in the Referral Queue, these transactions are processed in the same manner as any other transaction in the Credit Exception queue.
For further details refer to the processing transactions in the Credit Exception Queue refer to the Processing Credit Exceptions section in the Processing a Payment or Collection Transaction chapter of this manual.
Dispatch Accounting
To enable the consolidation run manually after each dispatch of clearing contracts for daytime processing, Dispatch Accounting Batch in PC is available.
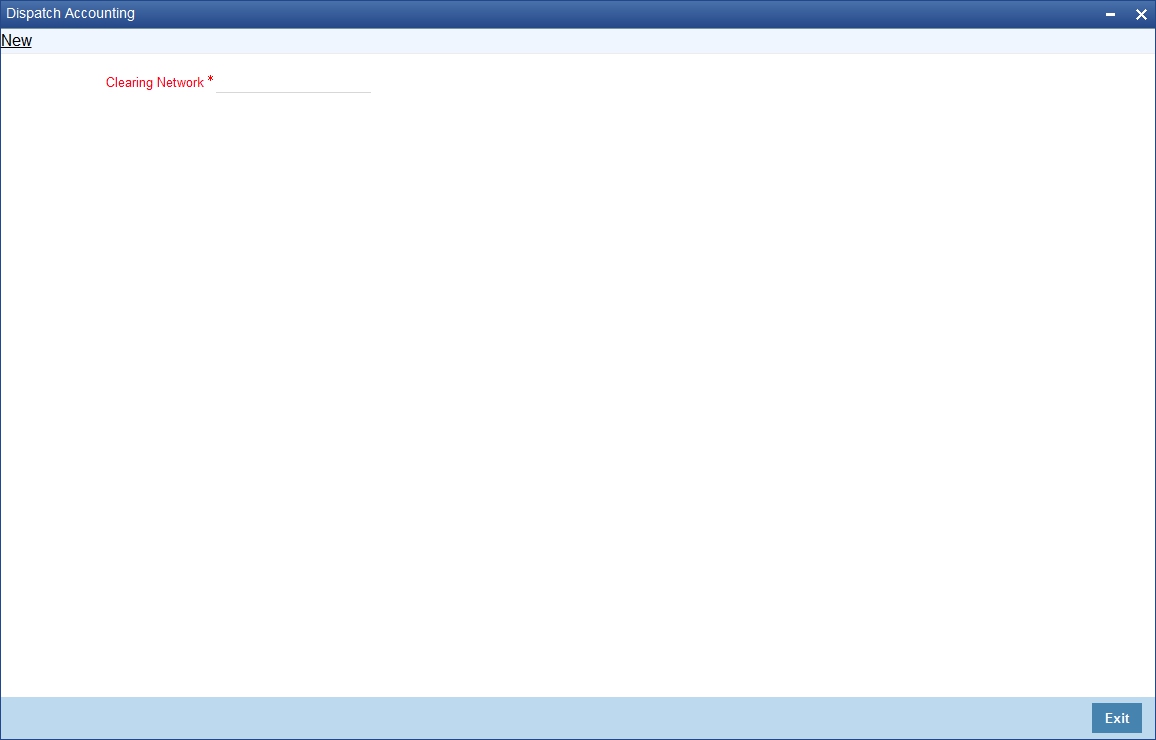
To initiate Dispatch Accounting manually after physical dispatch of a clearing file, use the Dispatch Accounting screen. To invoke this screen, select ‘Dispatch Accounting’ under ‘PC Processes’ in the Application Browser.
You can specify the Clearing Network for which the dispatch accounting needs to be triggered; if you do not specify a Clearing Network, the Dispatch Accounting would be triggered for all Clearing Networks.
In order to facilitate the processing of loan repayments by customers who have their current or settlement accounts in some other bank of the clearing network you can generate Direct Debits to these accounts ‘Loan DD Generation Days’ before the payment date. Loan DD generation days are maintained in the Branch Parameters maintenance screen.
While generating the direct debit the following entries will be passed in Oracle FLEXCUBE:
Dr |
Clearing suspense |
Cr |
Dummy Settlement Account |
Liquidation is performed on the schedule date and the accounting entries passed during liquidation are:
Dr |
Dummy Settlement Account |
Cr |
Loan Asset GL / Interest Income GL |
However, if you would like to consolidate the accounting entries you can enable the Dispatch Accounting preference for the product. As a result the Clearing Nostro GL is netted to post single debit and credit entries for each file that is dispatched. The netted accounting entries that are posted will be as follows:
Dr |
Clearing Nostro (Defined in the Dispatch Accounting details screen) |
Cr |
Clearing Suspense |
Referral Required
Referral refers to the process of handling customer transactions which force the accounts involved in such a transaction to exceed the overdraft limit. Payments and Collections are examples of typical transactions, which can force an account to move into overdraft. While maintaining the details of a PC product you can indicate whether transactions involving the product need to be considered for referral checks. Enabling this option indicates that transactions involving the product needs to be considered for referral.
If a product is marked for referral, the details of transactions resulting in the account (involved in the transaction) moving into Overdraft will be sent to the Referral Queue.
Note
If a PC transaction breaches the limits, the details of all transactions processed during the day will also be moved to the Posted Entries section in the Referral Queue. You can choose to accept or reject the transactions. The details of the transaction which has breached the limits will be displayed in the Unposted Entries section of the queue.
For further details on Referrals refer the Processing Referrals in Oracle FLEXCUBE chapter of the Core Entities manual.
Currency Calendar
While processing the contracts, if you want the system to use the currency calendar for deriving the processing days instead of the local branch calendar, check the ‘Currency Calendar’ box. This is used when the system has to derive the processing days for the following:
- Activation Date
- Customer Entry days
- Customer Entry Value days
- Counterparty Entry days
- Counterparty Entry Value days
- Dispatch days
- Payment Reject days
- Response Days
Network Calendar
Check this box to validate the system date with network calendar.
Intermediary Suspense GL Required
Check this box to generate the Intermediary Suspense GL entries if DRLQ and CRLQ are happened on same day.
Original Transaction Value Date
Specify the value for the field, to check whether back valued dated entry is allowed or not. The field takes two values-Yes, No (default).
The field is enabled for following product types-
- Reject of Incoming Collection
- Reject of Outgoing Collection
- Reject of Incoming Payment
- Reject of Outgoing Payment
- Recall of Incoming Collection
- Recall of Outgoing Collection
Restrict Automatic Upload of Mandate
Select the option for the flag. It is optional.
It has two options:
- YES - Indicates FLEXCUBE will not allow upload of Mandate automatically during Incoming collection processing
- NO- Indicates FLEXCUBE will allow upload of Mandate automatically during Incoming collection processing.
This field is applicable for 'Incoming Collection' products.
The default value for the field is 'NO', but the value should be changed to 'YES' for SEPA SDD B2B products.
Reversal without Matching
Check this box if you want the reversal of incoming collection to check the original incoming collection contract and its status. This field is applicable for 'Reverse of Incoming Collection' products.
Based on the field value 'Reversal without Matching' at product level, the system will;
- Validate the Original incoming collection contract and its status for the reversal processing when 'Reversal without Matching' at reversal of incoming product level checkbox is unchecked.
- Not validate original incoming collection contract and its status for reversal processing when 'Reversal without Matching' at reversal of incoming product level checkbox is checked. Reversal will be performed irrespective of whether the original incoming collection contract is available or not with contract status as Rejected, Reversed, Split or Deleted.
Dispatch
Dispatch
You can control the dispatch of transactions processed under a product. Choose the Dispatch option if you would like transactions involving the product to be dispatched to the Clearing Server on the basis of the Dispatch Days that you specify.
Auto Dispatch
You can indicate that outgoing transactions must be dispatched to the clearing server on authorization.
Outgoing Payment Workflow
Outgoing payment transactions could be tracked to closure, if required. Such tracking indicates monitoring of the transaction in each different status in its life cycle.
If you do not indicate this in the product preferences, then outgoing payment transactions will not be tracked through the different statuses.
Dispatch Media
Oracle FLEXCUBE provides the facility to process outgoing payment orders for the bank’s clients, through the Payments and Collections module. If the beneficiary is a client of an external bank, Oracle FLEXCUBE generates the requisite message to be sent to the clearing network.
When you create a payments and collections product for processing outgoing payments, you must indicate the medium through which the outgoing payment would be dispatched, in the ‘PC Product Preferences’ screen. The dispatch medium that you specify could be either:
- Oracle FLEXCUBEOR
- INTERFACE, in which case the dispatch will be done through the Oracle FLEXCUBE Interface system
Dispatch media should be selected as ‘INTERFACE’ for SEPA products.
Dispatch Days
Specifying the dispatch days refer to the number of working days to be added to the activation date to determine the date of dispatch to the Clearing Server.
For outgoing transactions, the Dispatch Date should be later than or the same as the Activation Date.
Transactions received before the cutoff time you have specified will be processed according to your Pre-cutoff Dipatch Days specification for the product. Transactions received after the cutoff time specified for the product will be processed only if you have enabled the Allow Post Cut-off option for the product. Such transactions will be posted with the Activation Date as the next working day.
For an outgoing payment product, the System validates that the Dispatch days can be less than the Counterparty Entry Days but not less than the Customer Entry Days. The local payments accounting process dispatches events for all Outgoing Payment contracts in respect of which the dispatch date is less than or equal to current system date, and for which the DRLQ event has been processed, but the CRLQ event has not been triggered.
Note
The cut-off time is also maintained at the Customer Agreement level (for a product and customer combination). This takes precedence over the cut-off time defined for the product.
Maximum Interest Amount (% of Transaction Amount)
Indicate the maximum percentage of the transaction amount that can be levied as interest, for recalled transactions involving the product.
Maximum Split Count
In certain cases, you may find it necessary to split an outgoing collection transaction into multiple transactions, due to restrictions on the amount of each payment that can be sent over the payment network.
In the Product Preferences, you can restrict the number of transactions into which a parent transaction would be split, by specifying the maximum split count.
Reject Account Details before Response Days Details
Account Type
Select the type of account that is used in the rejection leg. You can select any one of the following options:
- Account
- GL
Account
Specify account number that is used in the rejection leg.
While creating products which cater to outbound DDs you can indicate whether the rejects from the outbound DDs should be processed before the response days. In such as case, you will need to identify the reject suspense account, which has to replace the customer leg as a PC product preference.
Note
- If an outbound DD is rejected before the response days, the loans payment can also be reversed along with the reject processing. You can choose to reverse the loan payment for contracts involving a product by enabling the Reverse LD Payment preference in the ‘LD Product Preferences’ screen.
- This reversal is supported only if there is a single DD generated for the schedule.
Reversal Fields
Allowed Reversal Days
Specify a value for the field, to validate on the time window for the reversal operation for B2B, CORE and COR1 products. The field is applicable if the product types are 'Outgoing Collection' and 'Incoming Collection'. Configure the field as 5 for B2B type of product.
Reversal Calendar Basis
Specify a value for the field. The field is enabled and mandatory if 'Allowed Reversal Days' field is defined.It has two optional values:
- Branch Calendar-The system considers only the current branch working days to calculate the number of days allowed for reversal.
- Currency Calendar-The system considers only the currency working days of particular currency attached at product.
The field derives valid days for reversal based on the above options selected. It is configured as 'Currency Calendar' for SDD B2B, CORE and COR1 products.
Note
- Activation Date' of the contract will be considered as the from date for the calculation of number of days allowed for reversal process.
- The requirement for Reversal timeline can be achieved by configuring 'Allowed Reversal Days' as 5 and with 'Calendar Basis' as currency calendar. This is applicable for Outgoing collections and Incoming Collection Products.
- In case of manual creation of Reversal transaction in 'Payments & Collections Transaction Input' screen (PCDONONL) after 5 Currency working days from the activation date, system will display an error (PC-REVR006) message and transaction will not get saved.
- In case of Incoming Collection through upload for both Pacs.007.001.02 and Pain.007.001.02, reversal of outgoing collection transactions received after 5 Currency working days from the activation date will be moved into Transaction Repair (TR) queue.
Response Fields
Auto Response
For Outgoing requests for debit products you can indicate that the system-generated response is required for collection transactions involving this product. Enable this option by checking the Auto Response option positioned next to this field.
ASCII Handoff Required
For contracts involving the product, you can specify whether the contract information is to be written into handoff tables, to be picked up or referenced by the external agency.
Collection Stmt Required
Collection statements can be generated for contracts involving the product, if indicated in this screen.
Response Advice Required
You have the option of indicating that a response advice needs to be generated for approvals, rejections and closures by enabling the check box positioned next to the Response Advice Required field.
Response Days
The response days indicates the number of days after the activation date beyond which an incoming collection transaction using the product cannot be rejected.
Basis
If you indicate that a response advice needs to be generated you have to indicate the basis for response advice generation. The response advice generation can be based on the Event Date or on the Response Date.
P2P Payments
P2P Payment Type
Select the P2P payment type from the adjoining drop-down list. The options available are:
- Customer Debit
- Test Transaction
- P2P Final Payment
- NULL
Note
P2P Payment Type is applicable for Outgoing Payment and Reject Outgoing Payment product types only.
- If the P2P payment type is ‘Customer Debit’, then it is not mandatory to specify the Counterparty Bank Code and Counterparty Account Number as long as email ID, telephone number and facebook ID are specified for the transaction.
- If the P2P payment type is ‘Test Transaction’, ‘P2P Final Payment’ or ‘Null’, then it is mandatory to specify the Counterparty Bank Code and Counterparty Account Number during the customer debit transaction.
Processing Rejects of Inward or Outward DDs
For transaction rejects (outgoing or incoming DD) that are uploaded after the applicable response days have elapsed, an override is sought by the System. The processing for such transactions is based on two factors:
- Whether the Process After Response Days option has been set in the product preferences for the product used by the transaction
- Whether the override that is sought in such cases is accepted. Accepting the override in the case of incoming DD transactions would result in rejection of the transaction. In the case of outgoing DD, the transaction is placed in the Process Exception Queue from where it can be taken up for processing or rejected.
The processing of rejection for such transactions is depicted below:
Outward DD
Are Process Rejects After Response Days? |
Are Response Days greater than Rejection Days? |
System Action |
Override Accept? |
Action |
Yes |
Yes |
Reject the contract |
|
|
Yes |
No |
Override “Receiving Date is more than the response days. Do you want to reject the contract?” |
Yes |
Contract is placed in Process Exception with exception queue ‘PE’. It can then be unlocked and saved again if required. If so, the same override is sought again, and the contract is rejected if the override is accepted. If the override is not accepted, no processing is done. |
Yes |
No |
Override “Receiving Date is more than the response days. Do you want to reject the contract?” |
No |
No processing is done. |
No |
Yes |
Override “Receiving Date is more than the response days. Do you want to reject the contract?” |
Yes |
Contract is placed in Process Exception with exception queue ‘RR’, from where it can be deleted if required. |
No |
No |
Reject the contract |
|
|
Inward DD
Process Rejects After Response Days? |
Response Days greater than Rejection Days? |
Action |
Override Accept? |
Action |
Yes |
Yes |
Override “Do you want to reject the contract?” |
Yes |
Reject the contract |
Yes |
No |
Override “Receiving Date is more than the response days. Do you want to reject the contract?” |
No |
No processing is done. |
Yes |
No |
Override “Receiving Date is more than the response days. Do you want to reject the contract?” |
Yes |
Reject the contract |
No |
Yes |
Override “Do you want to Recall the contract?” |
Yes |
Contract is Recalled. |
No |
No |
Override “Do you want to reject the contract?” |
Yes |
Reject the contract |
Note
- For online transactions, even after the response days have passed, the System rejects the contract if the Process Rejects After Response Days option has been enabled for the product used by the contract.
- For uploaded of transactions, transactions that are rejected after response days are queued in the Process Exception Queue.
4.1.2.2 Additional Tab
Click the ‘Additional’ tab to specify the additional preferences pertaining to the product.
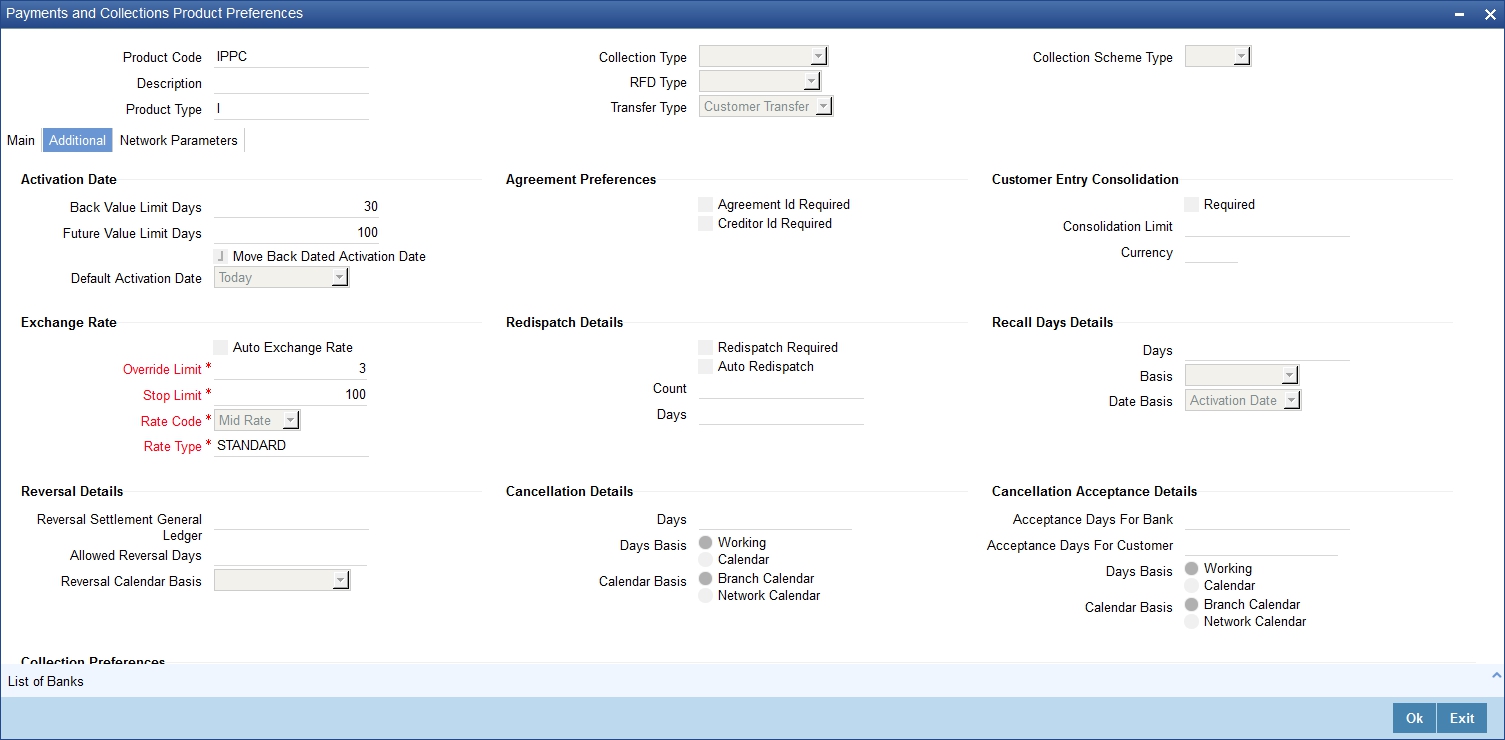
Activation Date
If at the time of booking a transaction involving the product, if you have failed to specify the transaction date the default date that you specify in this field will be picked up.
Back Value Limit Days
You can indicate the number of calendar days before the ‘Default Activation Date’ up to which back-valued transactions can be allowed.
Similarly, you can indicate the number of calendar days after the ‘Default Activation Date’ up to which future-valued transactions can be allowed.
During transaction processing you will be allowed to post back/future valued transactions up to the specified date in the past or future (no check will be done).
If you have not specified the ‘Back Value Limit Days’, the System checks against the back value limit days maintained for the branch in the Branch Parameters. If the limit in either case is exceeded, an override is sought when the transaction is saved.
For example, inn the product preferences, you have maintained the Back Value Limit Days as zero, and the Future Valued Limit Days as 1.
The Booking date of the transaction is 10th June 2003, and the Default Activation Date is ‘Today’.
- If the activation date is not specified the online screen, the Default Activation Date is considered as the activation date, which in this case is 10th June 2003. Since the activation date and Default Activation Date are the same, the back valued limit days are not exceeded, and the transaction is accepted.
- If you specify 12th June 2003 as the activation date in the online screen, the System compares it against the Default Activation Date, which is 10th June 2003. In this case, the future valued limit days are crossed, and an override is sought when the transaction is saved.
Future Value Limit Days
If the Booking date of the transaction is future date then the Default Activation Date is ‘Future Value Limit Days’.
Consider the example:
- If the activation date is not specified the online screen, the Default Activation Date is considered as the activation date, which in this case is 11th June 2003. Since there is a difference of a day between the activation date and Default Activation Date, the future valued limit days are not exceeded, and the transaction is accepted.
- If you specify 12th June 2003 as the activation date in the online screen, the System compares it against the Default Activation Date, which is 11th June 2003. Since the difference between activation date and Default Activation Date is within the future valued limit days, the transaction is accepted.
- If you specify 10th June 2003 as the activation date in the online screen, the System compares it against the Default Activation Date, which is 11th June 2003. Since the difference between activation date and Default Activation Date is not within the back valued limit days, an and an override is sought when the transaction is saved.
Move Back Dated Activation Date
You can indicate that the activation date, if in the past, is to be moved forward to the default activation date by enabling the Move Back Dated Activation Date option. If you enable this option you have to indicate the Default Activation Date as well. The default activation date can be either today’s date or the next working day.
Default Activation Date
Select the default activation date as Today, etc from the option list provided.
Move Back Dated Activation Date
You can indicate that the activation date, if in the past, is to be moved forward to the default activation date by enabling this option. If you enable this option you have to indicate the Default Activation Date as well. The default activation date can be either today’s date or the next working day.
If at the time of booking a transaction involving the product, if you have failed to specify the transaction date the default date that you specify in this field will be picked up.
Exchange Rate
You can indicate exchange rate details as part of the preferences you define for a product. The exchange rate parameters you define for a product will be used when payments involve foreign currency accounts.
Specify the Exchange Rate Code (Standard, TC, Cash, etc.) and Exchange Rate Type (Mid, Buy, or Sell) that should be picked up for transactions processed under the product. The rate corresponding to the Rate Code and Rate Type you specify will be applied on all transactions involving the product.
Auto Exchange Rate
During transaction processing, if you like to automatically apply the exchange rate that corresponds to the Rate Code and Rate Type specified for the product, choose the Automatic Exchange Rate option. This specification will apply to all payment transactions processed under the product, involving foreign currency accounts.
Alternatively, you can choose to manually apply the exchange rate on transactions processed under the product. In this case, the exchange rate value that is specified for the transaction will be validated against the Exchange Rate Variance defined for the product.
Rate Code
Specify the exchange rate code.
Rate Type
Specify the exchange rate type that should be picked up for transactions processed under the product. You can select any one of the following options:
- Mid Rate
- Buy Rate
- Sell Rate
Mandatory Fields
You can choose to validate collection transactions on the basis of the follwowing mandatory fields. These include:
Agreement ID Required
Check this box if you require customer agreement ID.
Creditor ID Required
Check this box to make a customer agreement as mandatory.
Charge Details
Waiver
You can indicate whether charge processing is required for transactions involving the product. If you would lile to process changes you can enable the check box positioned next to this field.
Allow Third Party Charge
You can indicate that third party charges are allowed for rejected outgoing DD contracts using the product.
If third party charges are allowed, the amount of a rejected outgoing collection transaction using the product is inclusive of the third party interest or charge. The charge amount is calculated as the difference between the amount of the rejected outgoing collection transaction that has been uploaded and the amount of the original transaction.
This specification is applicable only for outgoing collection transaction products.
The accounting entries while collecting third party charges are as follows:
Accounting Role |
Amount Tag |
Debit / Credit Indicator |
CUSTOMER |
THIRD_PARTY_CHG |
Debit |
CLGSUSPENSE |
THIRD_PARTY_CHG |
Credit |
Note
If the transaction amount of the reject contract is less than the original contract the contract is sent to the Processing Exception queue. This is also true for uploaded reject contracts.
Allow Third Party Charge
This field is checked when the product type is 'Recall of Outgoing Collection' or 'Reject of Outgoing Payment'. Insert the following accounting roles for Reject of Outgoing Payment.
Sl.No. |
Accounting Role |
Amount Tag |
Dr/Cr |
1 |
CHARGEACC |
TFR_AMT |
Debit |
2 |
CLGSUSREC |
TFR_AMT |
Credit |
Charge Customer Statistics
Check this option to indicate that the customer statistics is charged for collection of charge data for transactions using the product.
Charge Account Statistics
Check this option to indicate that the account statistics is charged for collection of charge data for transactions using the product.
Charge Category
The charge category indicates the category under which charge related transaction details should be collected. This is used to track the collection of statistics. You can associate the appropriate charge category with the product which you are creating.
Volume Statistics
As part of specifying the charge details you will need to indicate whether details of transactions using the product need to be tracked for charge computation or not.
Choose one of the following options to specify your choice:
- Add: To add the transaction details to the volume statistics
- Subtract: To subtract the transaction details from the volume statistics
- Ignore: To indicate that the transaction details are not to be collected for volume statistics.
You can also indicate the following levels for collection of charge data for transactions using the product:
- Customer-charge statistics
- Charge account statistics
Dispatch
File Name
In the main section of the screen if you have indicated that transactions involving the product should be dispatched to the Clearing Server on the basis of the dispatch days that you specify, then you have to indicate the dispatch file name that you wish to be generated.
Number of Records
Specify the number of record transactions to be considered while creating a dispatch file. Specify the type of clearing network to which the dispatch file would be sent.
Payment Reject Days
You can specify the number of days by which an incoming payment can be rejected. The number of days specified will be considered as per the product currency calendar if the ‘Currency Calendar’ option is checked, or else it is considered as per the local branch calendar. The payment reject days is added to the activation date of an incoming payment to arrive at the payment rejection date.
Earliest Collection Receipt Days
You can specify the number of calendar days to arrive at the earliest date by which the incoming collection transaction should be received by the debtor bank. The no. of days that you specify here will be subtracted by the activation date or the due date to arrive at the earliest collection receipt days.
System will display an override if it receives an incoming collection with activation date greater than the earliest collection receipt days maintained.
Note
- This is applicable only for incoming collection type of products.
- Earliest Collection Receipt Days is configured as 14 and ‘Calendar Basis’ as ‘Currency Calendar’ for Outgoing Collection type and Incoming Collection type of COR1 and B2B scheme.
- Existing timeline check for Earliest, First and Recurrent collections on Incoming collection transactions will be extended to check for Outgoing Collection transactions as well.
Calendar Basis
Specify the value for the field from the adjoining drop-down list ,to derive the time window for the earliest collection for CORE, COR1, and B2B schemes.The field is enabled and mandatory if ‘Earliest collection Receipt Days' field is entered.
The calendar basis field takes following values:
- Calendar Days-To consider all days in a calendar.
- Branch calendar-To consider only working days of a branch.
- Currency Calendar-To consider only working days of a currency attached at product.
Specify the value for the field as 'Currency Calendar' for CORE, COR1, and B2B Scheme Products.First Collection Receipt Days.
You can specify the number of calendar days to arrive at the latest date by which the first incoming collection transaction should be received by the debtor bank.
System will display an override message if the first collection, which is determined based on the Direct Debit sequence type, is not received within the First Collection receipt days from the activation date.
This is applicable only for incoming collection transaction
First Collection Receipt Days
You can specify the number of calendar days to arrive at the latest date by which the first incoming collection transaction should be received by the debtor bank.
System will display an override message if the first collection, which is determined based on the Direct Debit sequence type, is not received within the First Collection receipt days from the activation date.
This is applicable only for incoming collection transaction.
Reject Account Details after Response Days
Process Rejects After Response Days
If you indicate that the outbound DD is to be rejected after the response days by enabling the Process Rejects After Response Days option, the customer leg of the transaction will be replaced by the reject suspense account that you identify for this purpose.
Reject Verify Funds Only
Transactions involving a product can be rejected due to many reasons. While defining a product you can indicate whether transactions involving the product should be rejected only if the reason is insufficiency of funds.
Response Days Basis
As a product preference you have indicated whether the System needs to validate the rejects based on the maximum number of allowable days for receiving/sending the rejects. If the rejects are within the maximum number of allowable days (i.e., 04 type of transactions), a reversal of a DD is triggered for the rejects by enabling the Process Rejects After Response Days option. If the rejects are beyond the maximum number of allowable days (i.e., 05 type of transactions), an appropriate warning or exception is given for the rejects.
You can indicate whether the Response Days should be derived on the basis of the Calendar Days or Working Days. While processing transactions involving the product the Response Date is computed on the basis of your specification.
Scenario I
If you have selected Calendar as the Response Days Basis, the Response Date is computed as follows:
Activation Date + Response Days maintained for the product.
Therefore, if the Activation Date is 01-April-2003 and Response Days maintained happens to be two the Response Date will be 03-April-2003.
Scenario II
If you have selected Working as the Response Days Basis, the Response Date is computed as the Next Working Date based on the Response Days.
Account Type
Select the type of account that is used in the rejection leg. You can select any one of the following options:
- Account
- GL
Redispatch Details
Redispatch Required
You have the option of re-despatch required on the outgoing DD/RFDs involving a product. If you choose this option you will have to indicate whether such DDs and RFDs need to be re-dispatched automatically or manually.
Auto Redispatch
If you indicate that rejected DDs and RFDs need to be re-dispatched automatically you have to specify the maximum number of tries for a rejected outgoing DD / RFD. Additionally, you will also have to specify the number of working days past the activation date, after which the system will query for a rejected outgoing DD / RFD and re-dispatch, automatically.
Count
Count determines the number of times a re-dispatch should take place.
Days
Days determine the number of days in which the re-dispatch should be done.
Recall Days
Days
As part of specifying the preferences for Recall Days, you have to specify the maximum number of days past the activation date, within which the transaction entered using this product, can be recalled.
Basis
You will also need to specify whether the basis for the recall days should be counted as Working Days or as Calendar Days.
Date Basis
You need to select the date basis on which the recall date needs to be computed. You can base it either on customer debit date or the activation date of the collection. The options available in the drop-down list are Debit Date or Activation Date. By default Activation Date is selected.
Customer Entry Consolidation
Required
You can opt to consolidate the customer entry of transactions processed under a product.
Consolidated Limit
If you choose to consolidate transactions processed under a product, you can opt to specify a transaction amount limit. Any transaction that exceeds the limit you specify will not be considered for consolidation.All transactions will be considered for consolidation, if you have chosen to consolidate transactions, but do not specify a transaction amount limit.
Reversal General Ledger
Reversal Settlement General Ledger
In the Product Preference, you can specify the GL to which the entries due to the debit leg of the DRLQ (Debit Entry Liquidation) event due to a cash reversal will be posted, for transactions using the payments product.
Charge Bearer
You can select the party who will bear the charges. This is sent as part of the outgoing message for SCT and SDD.
The option available in the drop-down list is:
- SLEV – This indicates that the charges are to be applied following the rules agreed in the service level and/or the scheme.
Service Level Code
You can select an identification code for a pre-agreed level of service between the parties from the drop-down list. This service level code is used in the outgoing SCT and SDD messages of the product. The option available in the drop-down list is SEPA.
Recurrent Collection Receipt Days
System will display an override message if the recurrent collection, which determined based on the Direct Debit sequence type, is not received within the Recurrent Collection receipt days from the activation date.
You can specify the number of calendar days to arrive at the latest date by which the recurrent incoming collection transaction should be received by the debtor bank.
This is applicable only for incoming collection transaction.
First Collection Dispatch days
You can specify the number of calendar days to indicate the dispatch days for the first outgoing collection transaction. The dispatch date for the first collection, determined by the DD sequence type, will be derived by adding the first collection dispatch days to the activation date.
This is applicable only for outgoing collection products.
Recall/Refund Charges
Compensation Suspense Account
Specify the value for the field from the adjoining list.The list contains the GLs.The field is enabled for 'Recall of Incoming collection' and 'Recall of Outgoing Collection products'.
Charge Suspense Account
Specify the value for the field from the adjoining list.The list contains the GLs.The field can be used for the following:
- Recall of Incoming Collection
- Recall of Outgoing Collection
- Reject Of Incoming Payment
- Reject Of Outgoing Payment
Rejection Details
Restrict Customer Rejection
Specify the value for the field. The field has two options:
- Yes-System doesn't allow beneficiary initiated reject process.
- No-System allows beneficiary initiated reject process (default).
Restriction of beneficiary originated reject transactions are achieved by checking the 'Restrict Customer Rejection' parameter at product of type 'Incoming Payment'.
Note
System throws an error message if 'Reject Originator name' is entered at reject process, when 'Restrict Customer Rejection' is checked at product level.
Cancellation Details
Days
Specify the number of days within which the request for cancellation can be initiated for payment and collection.
Days Basis
Select Working or Calendar to indicate whether the cancellations days computation is based on Working or Calendar Days.
Calendar Days Basis
Select Branch Calendar or Network Calendar for computing the maximum cancellation request date and maximum cancellation request for duplicate transfer.
Cancellation Acceptance Details
Acceptance Days for Bank
Specify the number of days within which the incoming cancellation request with bank error needs to be accepted.
Accept Days for Customer
Specify the number of days within which the incoming cancellation request with customer error needs to be accepted.
Days Basis
Select the days basis to indicate whether the cancellation days computation is based on the working days or calendar days.
Calendar Basis
Select the calendar basis for computing the maximum acceptance date.
4.1.2.3 Network Parameters Tab
Click the ‘Network Parameters’ tab to specify the network parameters pertaining to the product.
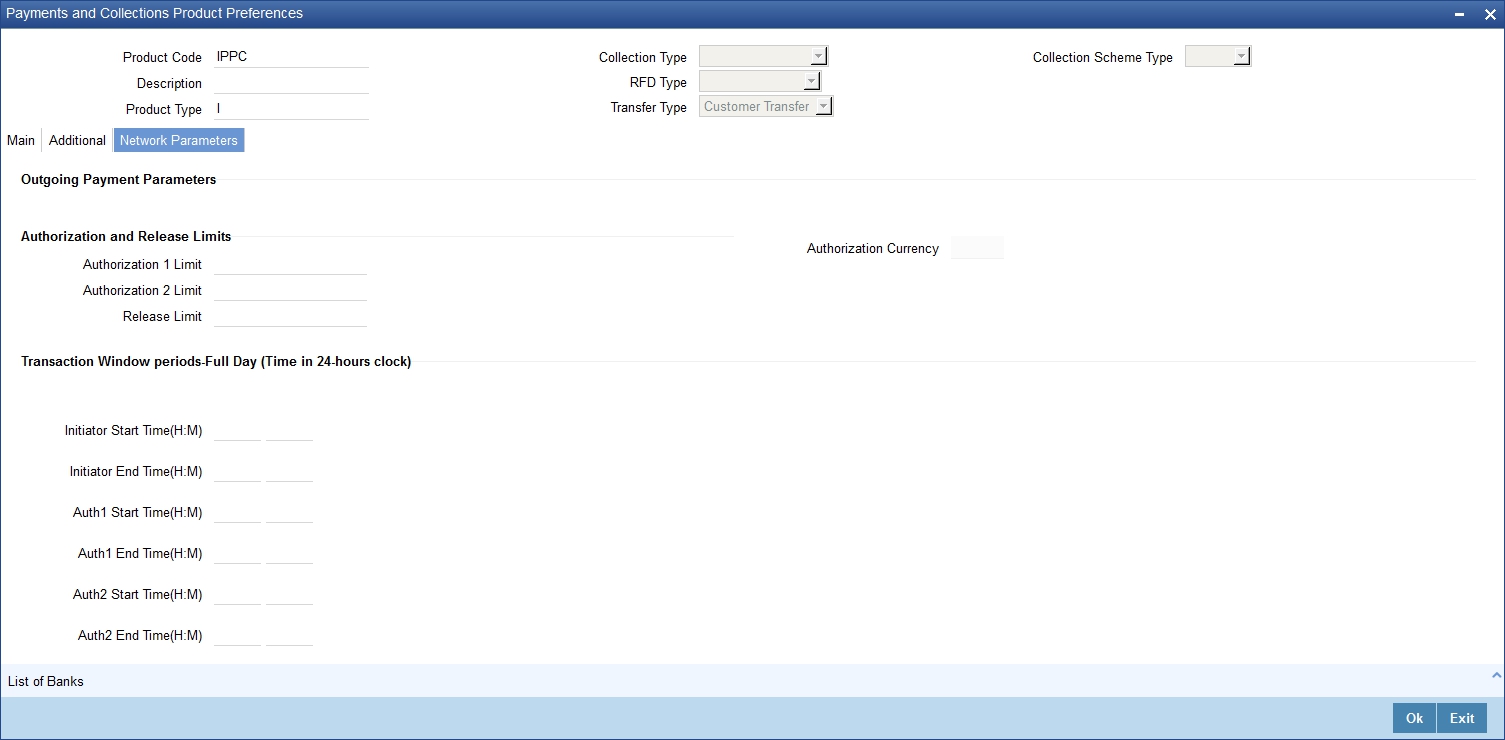
Specifying Authorization and Release Limits
Authorization 1 Limit
Specify the limit amount for level 1 authorization.
Authorization 2 Limit
Specify the limit amount for level 2 authorization.
Release Limit
Specify the limit amount for release.
Authorization Currency
The system displays the authorization currency.
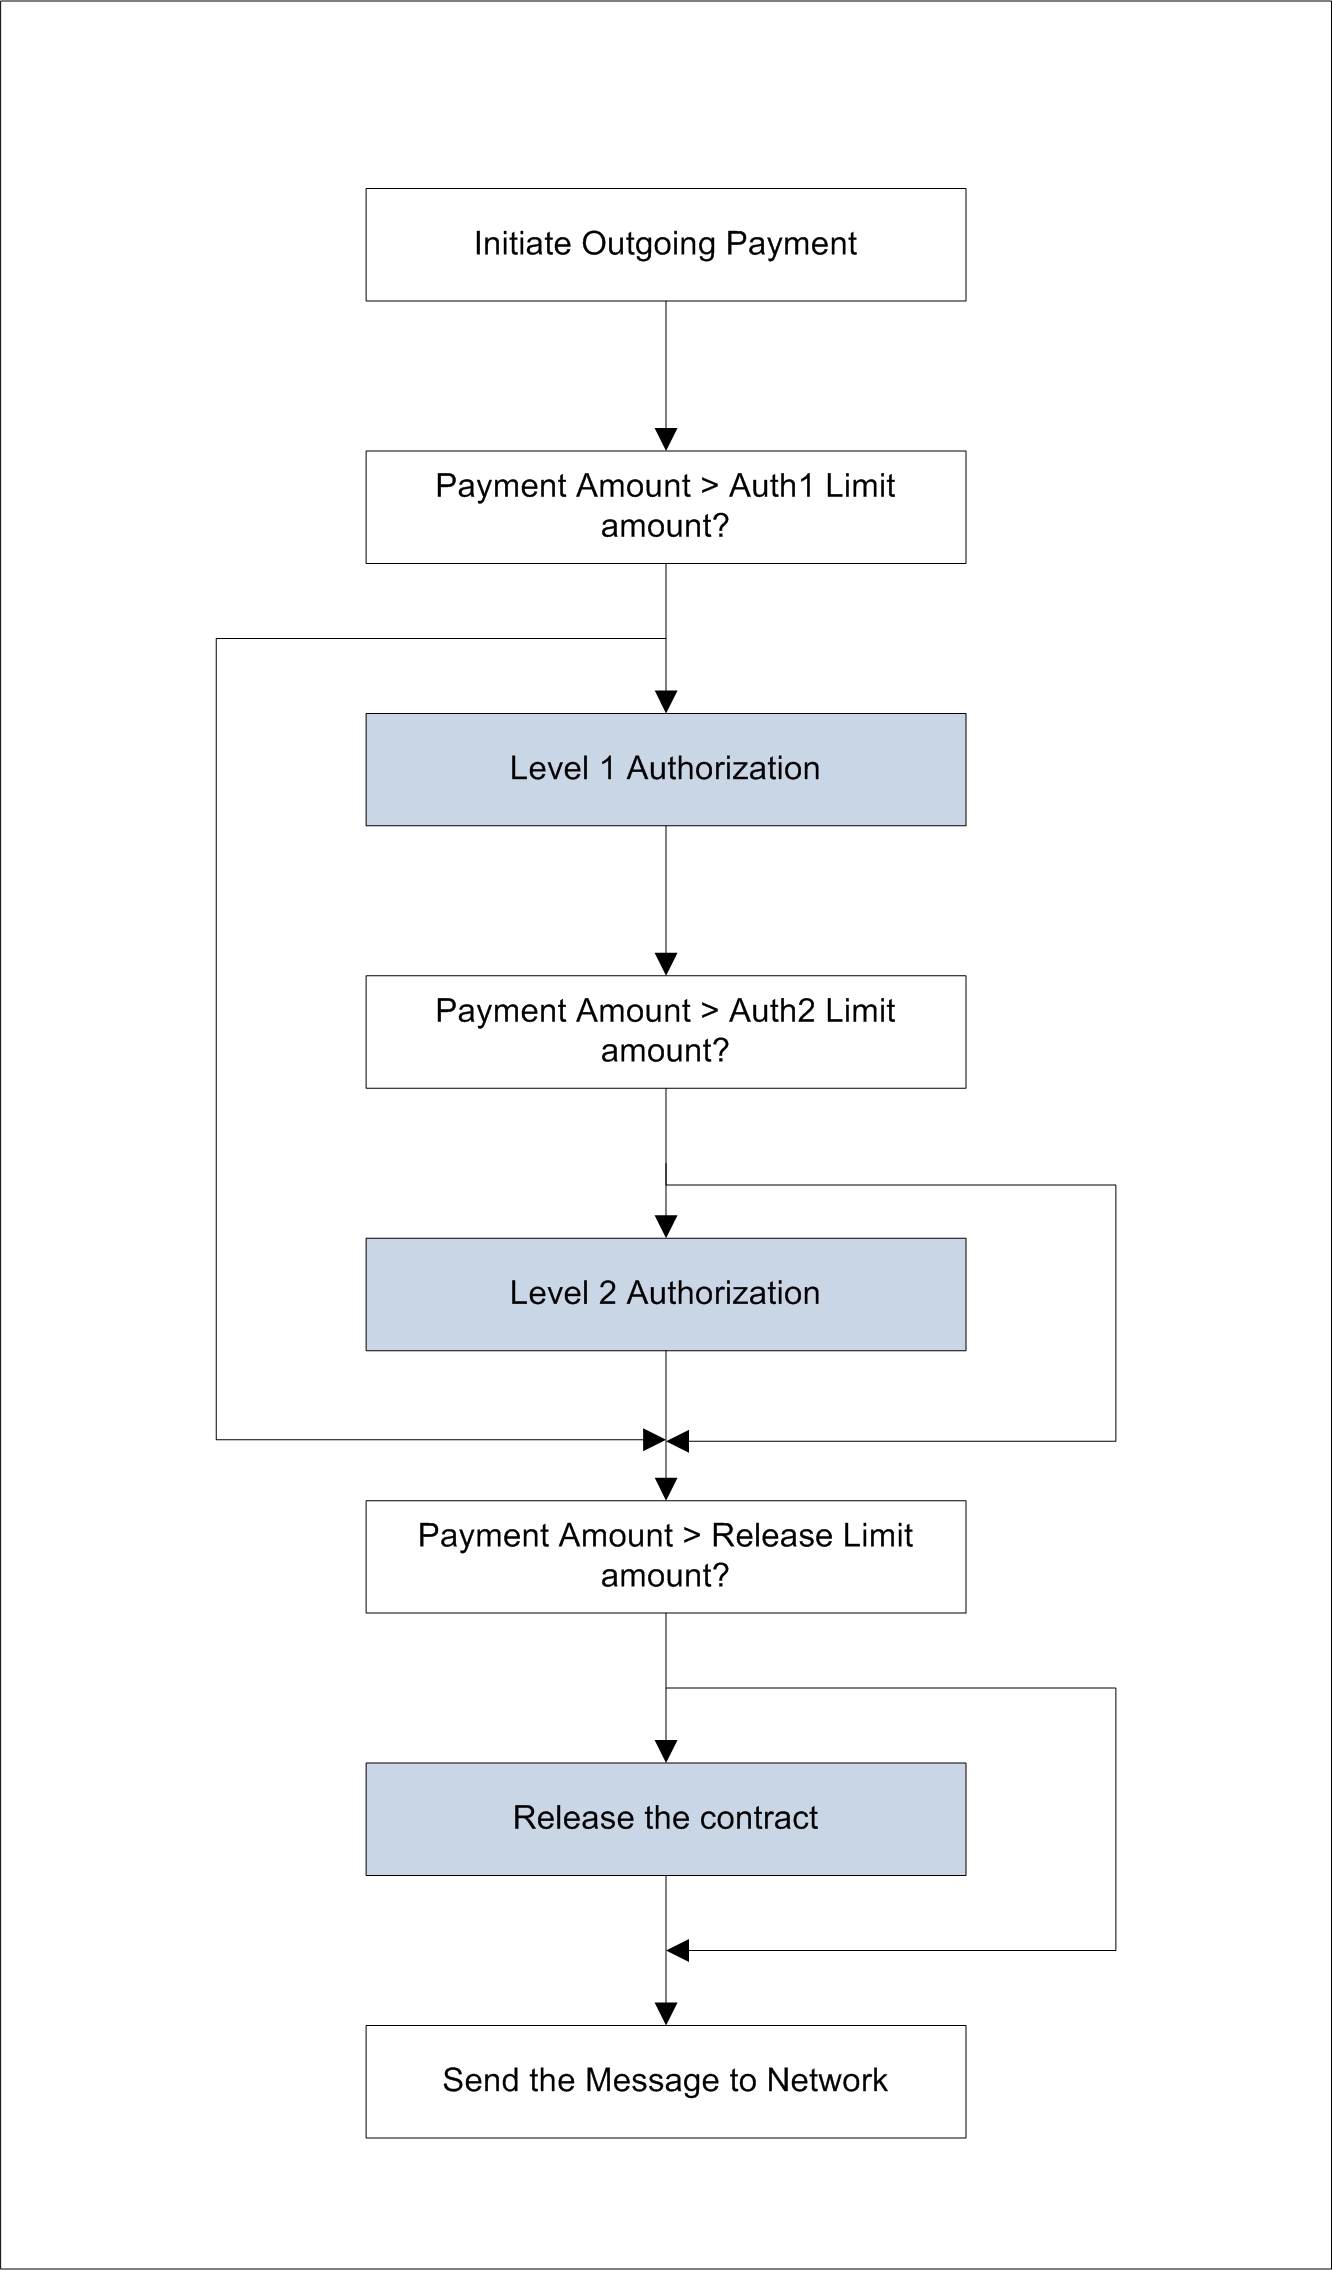
The outgoing payments will undergo one of the following treatments depending on the authorization limit and release limit:
- No authorizations and/or release are needed
- Only Level 1 authorization is needed
- Level 1 and Level 2 authorizations are needed
- Level 1 and Level 2 authorizations, and release is needed
- Level 1 authorization and release are needed
- Only Release is needed
Viewing Transaction Periods for Full Day
Initiator Start Time (HR:MN)
Specify the contract initiation start time in hours and minutes for Full Day.
Auth1 Start Time (HR:MN)
Specify the contract Level 1 Auth start time in hours and minutes for Full Day.
Auth2 Start Time (HR:MN)
Specify the contract Level 2 Auth start time in hours and minutes for Full Day.
Release Start Time (HR:MN)
Specify the contract Release start time in hours and minutes for Full Day.
Initiator End Time (HR:MN)
Specify the contract initiation end time in hours and minutes for Full Day.
Auth1 End Time (HR:MN)
Specify the contract Level 1 Auth end time in hours and minutes for Full Day.
Auth2 End Time (HR:MN)
Specify the contract Level 2 Auth end time in hours and minutes for Full Day.
Release End Time (HR:MN)
Specify the contract Release end time in hours and minutes for Full Day.
Viewing Transaction Periods for Half Day
Initiator Start Time (HR:MN)
Specify the contract initiation start time in hours and minutes for Half Day.
Auth1 Start Time (HR:MN)
Specify the contract Level 1 Auth start time in hours and minutes for Half Day.
Auth2 Start Time (HR:MN)
Specify the contract Level 2 Auth start time in hours and minutes for Half Day.
Release Start Time (HR:MN)
Specify the contract Release start time in hours and minutes for Half Day.
Initiator End Time (HR:MN)
Specify the contract initiation end time in hours and minutes for Half Day.
Auth1 End Time (HR:MN)
Specify the contract Level 1 Auth end time in hours and minutes for Half Day.
Auth2 End Time (HR:MN)
Specify the contract Level 2 Auth end time in hours and minutes for Half Day.
Release End Time (HR:MN)
Specify the contract Release end time in hours and minutes for Half Day.
Viewing Incoming Payment Parameters
When the system is unable to process an Incoming Payment because the target credit account in the message does not exist in the system, it keeps such transactions aside, by posting them to a ‘Repair Queue’, awaiting corrections to be made to the transaction. This process of manual correction of an Incoming Payment is called Repair.
Allow Transaction Repair
Check this box to allow transaction repair. The system will move the incoming payment transaction into the Repair queue if the customer account does not exist in the system.
Note
The Repair function is available only for Incoming Payments.
Authorization Limit
If the transaction amount exceeds this amount then corresponding contract will be moved into Incoming Payment Authorization queue.
Limit for Name Match
This amount is used to identify if validation is required on customer name or not.
If ‘Validate Customer Name’ checkbox is checked in product category and transaction amount also exceeds this amount, then the system will check if the customer name is available in the system or not. If it is not available then the system will move the contract to the Incoming Payment Authorization queue.
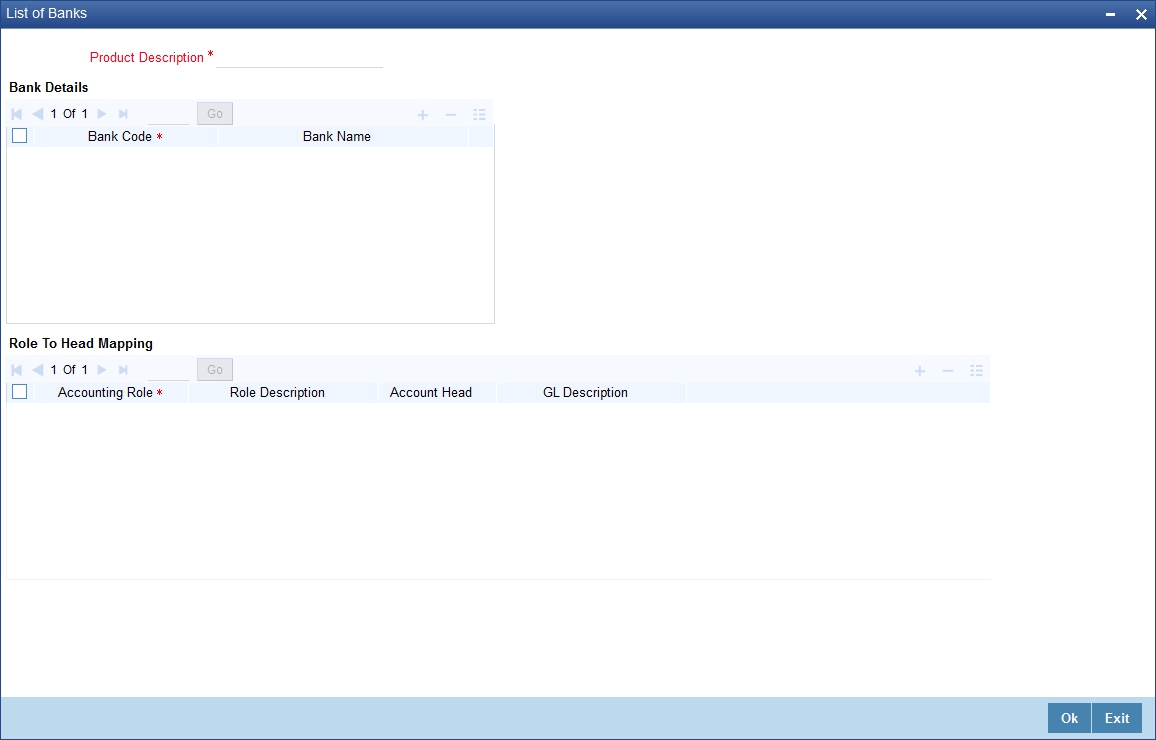
4.1.2.4 List of Banks Button
You can maintain list of the clearing branches of your bank to which the payments should be directed.Click ‘List of Banks’ button in the ‘Product Preferences’ screen to invoke the ‘List of
Banks’ screen.
4.1.3 Tax Button
You can link a tax scheme defined in the tax. Click ‘Tax’ button in the ‘Product Definition’ screen to invoke the ‘Tax’ screen. The role to head mapping of PC product maintenance will provide a GL/account details to liquidate the tax.
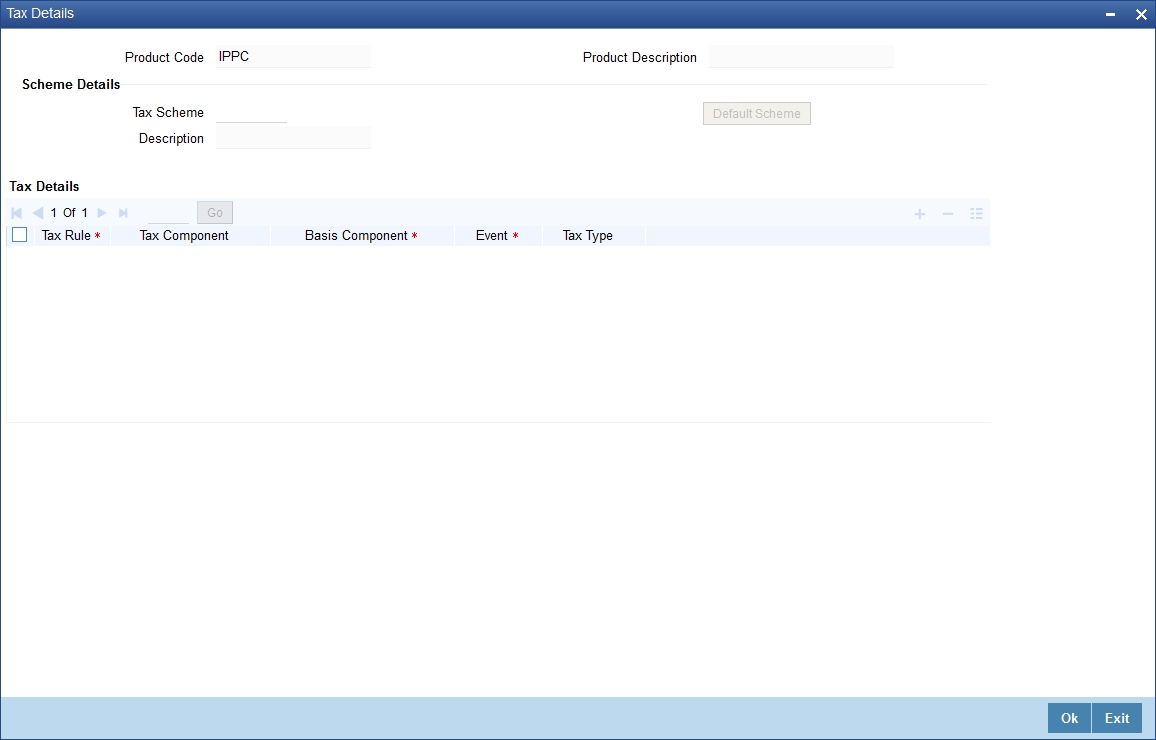
You can specify the following details:
Product Code
The system displays the product code.
Product Description
The system displays the description for the specified product code.
Scheme Details
Tax Scheme
Specify the tax scheme details. You can also select the valid tax scheme from the adjoining option list.
Description
The system displays the description for the selected tax scheme.
Tax Details
Tax Rule
The system displays the tax rule.
Tax Component
The system display the tax component.
Basis Component
Specify the basis component. You can also select the valid component from the adjoining option list.
Event
Specify the event details.
Tax Type
Select the tax type from the drop-down list. Following are the options available in the drop-down list:
- Withholding Tax
For further details on Customer FATCA maintenance, please refer ‘Customer FATCA Classification’ in Core User Manual.
4.2 Level 1 Authorization (A1) Details
This section contains the following topics:
4.2.1 Invoking the Authorizer 1 Queue Screen
You can view the Level 1 Authorization (A1) details using the ‘Payments & Collections Auth1 Queue’ screen.To invoke this screen, by typing ‘PCSAUTQ1’ in the field at the top right corner of the Application tool bar and clicking the adjoining arrow button.
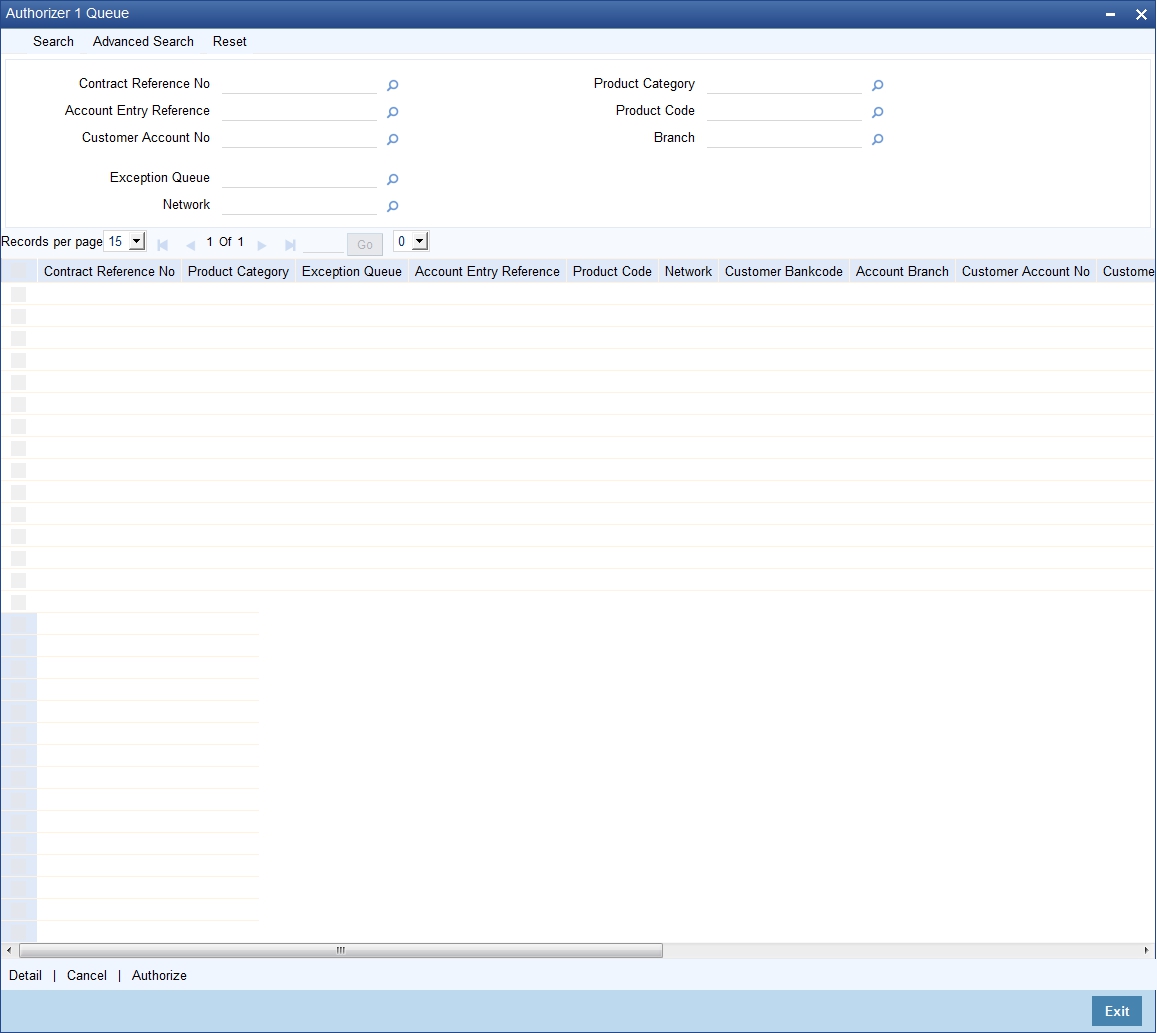
You can query the record based on the following details:
- Contract Reference Number
- Product Category
- Exception Queue
- Account Entry Reference
- Product Code
- Network
- Customer Account Number
Clicking on ‘Search’ button, the system will display all the records pertaining to the specified criteria. Double clicking on any of the records, the system will display the record details.
Clicking on ‘Authorize’ button, you can authorize the contract(s). The system will validate the contract amount against the Auth2 Limit amount. If the contract amount exceeds the Auth2 Limit amount, then the contract will be moved into Level 2 Authorization (A2) queue. If the contract amount does not exceed the Auth2 Limit then the contract will be ready for dispatch and also system will process the DRLQ event. You can select multiple contracts and authorize them in bulk.
Clicking on 'Cancel' button will delete the contract.
Clicking on ‘Details’ button, the system will display the details of the selected contract.
4.3 Level 2 Authorization (A2) Details
This section contains the following topics:
4.3.1 Invoking the Authorizer 2 Queue
You can view the Level 2 Authorization (A2) details using the ‘Payments & Collections Auth2 Queue’ screen. To invoke this screen, by typing ‘PCSAUTQ2’ in the field at the top right corner of the Application tool bar and clicking the adjoining arrow button.
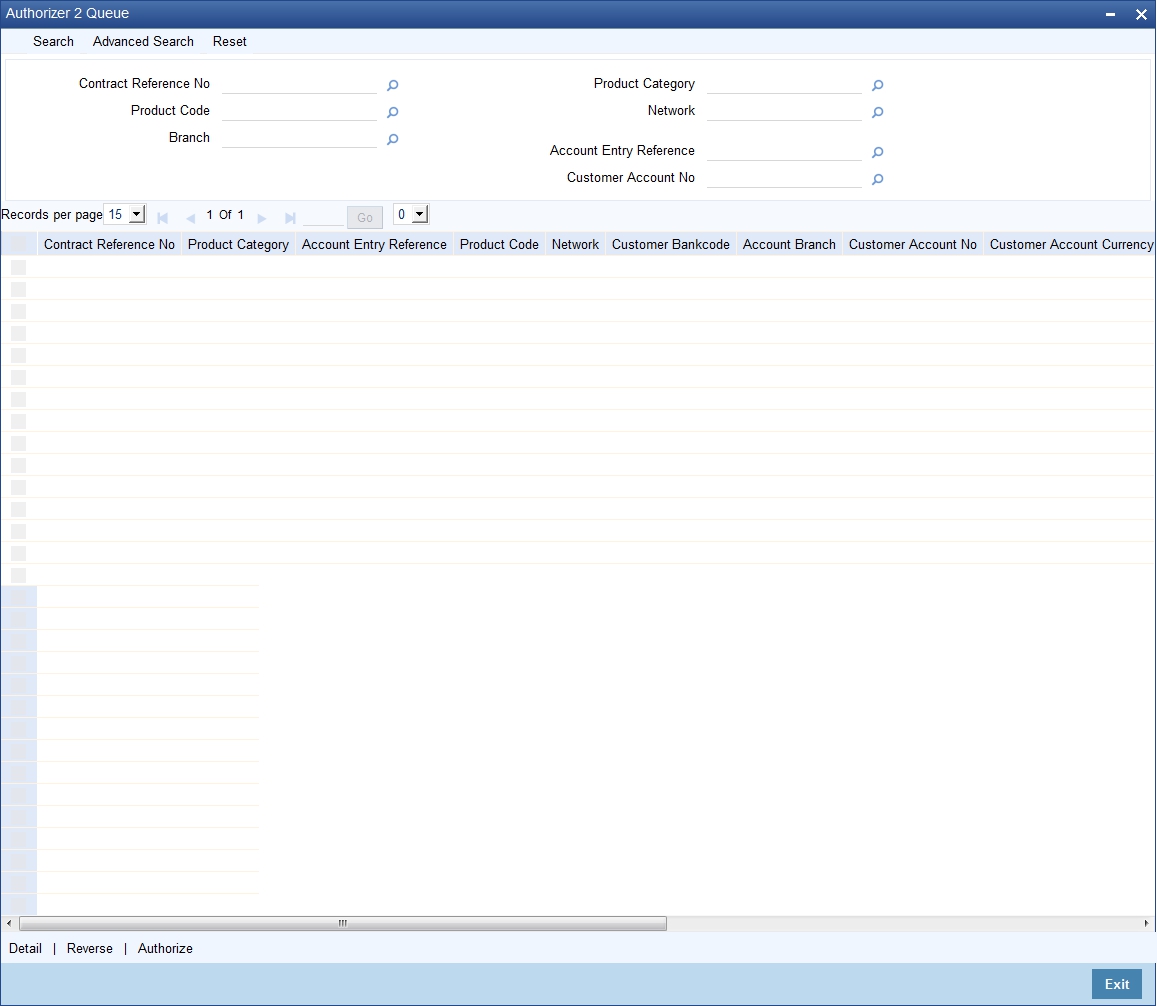
You can query the record based on the following details:
- Product Category
- Contract Reference Number
- Product Code
- Customer Account Number
- Network
- Account Entry Reference Number
Clicking on ‘Search’ button, the system will display all the records pertaining to the specified criteria. Double clicking on any of the records, the system will display the record details.
Clicking on ‘Authorize’ button, you can authorize the contract(s) and set it for dispatch. This will process the DRLQ event. You can select multiple contracts and authorize them in bulk.
Clicking on ‘Reverse’ button, you can reverse the selected contract(s). You can also select multiple contracts and reverse them in bulk.
Clicking on ‘Details’ button, the system will display the details of the selected contract.
4.4 Release Queue Details
This section contains the following topics:
4.4.1 Invoking the Transaction Release Queue
You can view the release queue details using the ‘Payments & Collections release Queue’ screen.
To invoke this screen, by typing ‘PCSRLXSQ’ in the field at the top right corner of the Application tool bar and clicking the adjoining arrow button.
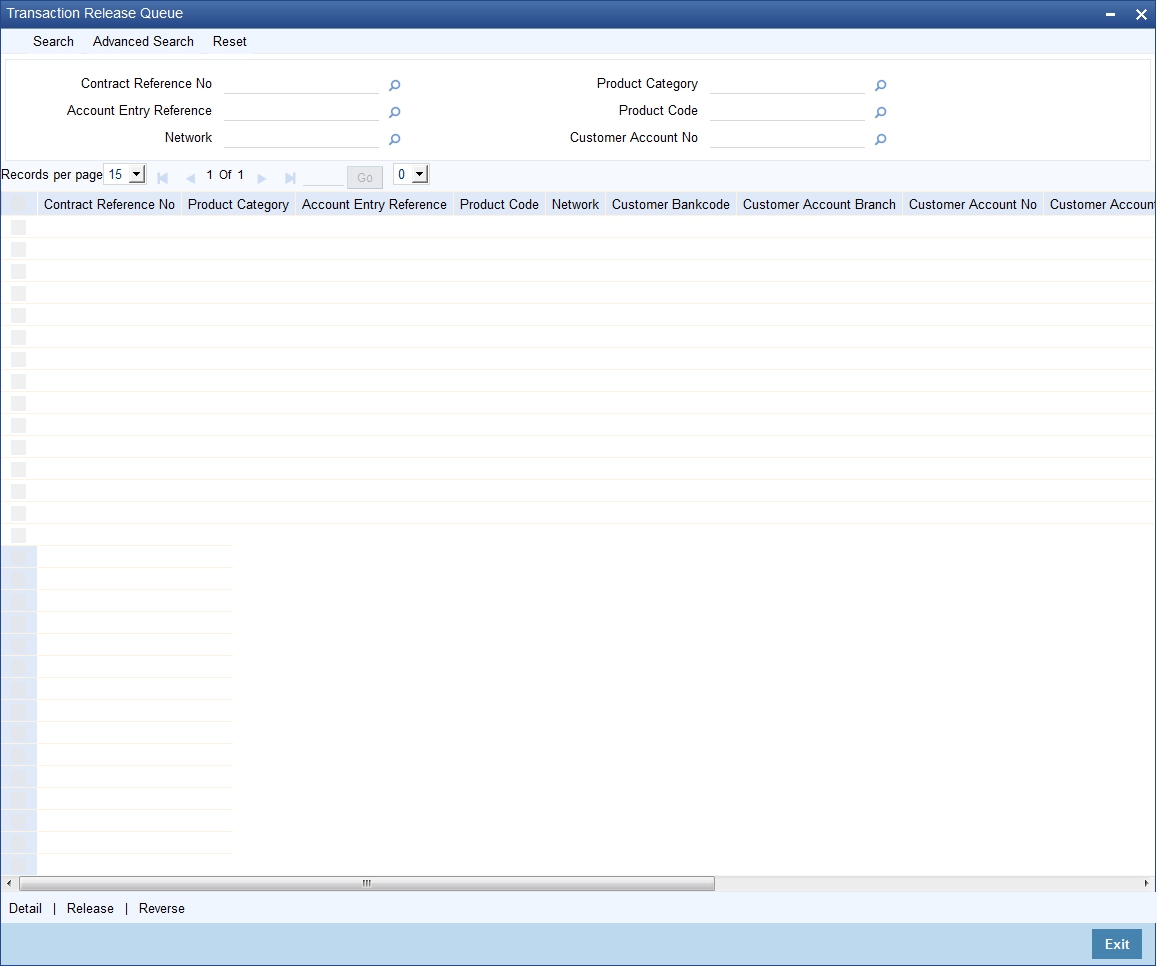
You can query the record based on the following details:
- Product Category
- Contract Reference Number
- Product Code
- Customer Account Number
- Network
- Account Entry Reference Number
Clicking on ‘Search’ button, the system will display all the records pertaining to the specified criteria. Double clicking on any of the records, the system will display the record details.
Clicking on ‘Release’ button, you can release the contract(s). If the contract is released, then further processing continues on the transaction, wherein the transaction is transmitted to the network. This will process the CRLQ event. You can select multiple contracts and release them in bulk.
Clicking on ‘Reverse’ button, you can reverse the selected contract(s). The system will reverse the accounting entries which were posted in DRLQ event. You can also select multiple contracts and reverse them in bulk.
Clicking on ‘Details’ button, the system will display the details of the selected contract.
4.5 Validations for Product and Collection Type Combinations
The system performs various validations during transaction processing based on the Product type and Collection type combination and the various dates that you have specified during product definition. These dates include:
- Customer Entry Days
- Customer Entry Value Days
- Counterparty Entry Days
- Counterparty Entry Value Days
- Dispatch Days
- Response Days
Listed below is a set of validations that you can capture while creating products for specific Product and Collection type combinations:
Product Type |
Collection Type |
Set of Validations |
Outgoing Payment |
NA |
Customer entry days should be less than or equal to counterparty entry days Customer entry value days should be less than or equal to counterparty entry value days Counterparty entry days should be less than dispatch days Auto response days should be null |
Incoming Payment |
NA |
Counterparty entry days should be less than or equal to customer entry days. Counterparty entry value days should be less than or equal to customer entry value days. Dispatch days should be null Auto response days should be null |
Outgoing Collection |
DD |
Counterparty entry days should be less than or equal to customer entry days Counterparty entry value days should be less than or equal to customer entry value days Dispatch days should be less than or equal to counterparty entry days Customer entry days should be less than or equal to auto response days |
Incoming Collection |
DD |
Customer entry days should be less than or equal to counterparty entry days Customer entry value days should be less than or equal to counterparty entry value days Dispatch days should be null Auto response days should be specified |
Reject of Incoming Collection |
DD |
Customer entry days should be less than or equal to counterparty entry days Customer entry value days should be less than or equal to counterparty entry value days Dispatch days should be specified Auto response days should be null |
Reject of Outgoing Collection |
DD |
Counterparty entry days should be less than or equal to customer entry days Counterparty entry value days should be less than or equal to customer entry value days Dispatch days should be null Auto response days should be null |
Recall of Incoming Collection |
DD |
Customer entry days should be less than or equal to counterparty entry days Customer entry value days should be less than or equal to counterparty entry value days Dispatch days should be specified Auto response should be null |
Recall of Outgoing Collection |
DD |
Counterparty entry days should be less than or equal to customer entry days Counterparty entry value days should be less than or equal to customer entry value days Dispatch days should be null Auto response days should be null |
Outgoing Collection |
RFD |
Counterparty entry days and customer entry days should be null Counterparty entry value days and customer entry value days should be null Dispatch days should be specified Dispatch days should be less than or equal to auto response days |
Incoming Collection |
RFD |
Customer entry days and counterparty entry days should be null Customer entry value days and counterparty entry value days should be null Dispatch days can be specified Dispatch days, if specified, should be less than or equal to auto response days |
Reject of Incoming Collection |
RFD |
Customer entry days and counterparty entry days should be null Customer entry value days and counterparty entry value days should be null Dispatch days should be specified Auto response days should be null |
Reject of Outgoing Collection |
RFD |
Counterparty entry days and customer entry days should be null Counterparty entry value days and customer entry value days should be null Dispatch days should be null Auto response days should be null |
4.6 Outgoing Payment Transaction
This section contains the following topics:
- Section 4.6.1, "Processing of Outgoing Payment Transaction"
- Section 4.6.2, "Window Periods for Outgoing Payments"
4.6.1 Processing of Outgoing Payment Transaction
Oracle FLEXCUBE allows you to manually authorize or release an outgoing payment transaction to the network. If the transaction amount does not exceeds any of the authorization limits and release limit, then the system will automatically send the outgoing payment transaction to the network. Else, you should send it manually.
When Outgoing Payment transactions require manual authorizations or release, a significant time delay may exist between the initiation of a transaction in the system and actual transmission of the transaction message to the network. During this time period, the balance of the account, which was found to be sufficient to support the payment at the time of initiation but if it is not sufficient at the time of authorization. This will be handled by the system in the following manner
- The system will block the funds against the account when the transaction is successfully initiated and unblock the funds and debit the account at a later and appropriate point of time.
- The system will unblock the funds if the contract gets reversed
The process is as follows:
The details of amount block processing on different stages (Initiation/Level 1 Authorization/Level 2 Authorization/Release) are explained as follows:
If the transaction goes through this workflow |
On Initiation |
On completion of Level 1 Authorization |
On completion of Level 2 Authorization |
On completion of RELEASE |
Initiation-> Network |
Account is debited and amount block will not be done |
Not applicable |
Not applicable |
Not applicable |
Initiation-> Level 1 Authorization -> Network |
Amount will be blocked on account |
Amount Block is removed and Account is debited |
Not applicable |
Not applicable |
Initiation-> Level 1 Authorization -> Release-> Network |
Amount will be blocked on account |
Amount Block is removed and Account is debited |
Not applicable |
No action |
Initiation-> Level 1 Authorization -> Level 2 Authorization -> Network |
Amount will be blocked on account |
No action |
Amount Block is removed and Account is debited |
Not applicable |
Initiation-> Level 1 Authorization -> Level 2 Authorization -> Release->Network |
Amount will be blocked on account |
No action |
Amount Block is removed and Account is debited |
No action |
Initiation-> Level 1 Authorization 1(Reject) |
Amount will be blocked on account |
Amount Block is removed on account |
Not applicable |
Not applicable |
Initiation-> Level 1 Authorization -> Level 2 Authorization (Reject) |
Amount will be blocked on account |
No action |
Amount Block is removed on account |
Not applicable |
Initiation-> Level 1 Authorization -> Release(Reject) |
Amount will be blocked on account |
Amount Block is removed and Account is debited |
Not applicable |
Account debit is reversed |
Initiation-> Level 1 Authorization -> Level 2 Authorization -> Release(Reject) |
Amount will be blocked on account |
No action |
Amount Block is removed and Account is debited |
Account debit is reversed |
Initiation-> Release-> Network |
Account is debited |
Not applicable |
Not applicable |
No action |
Initiation-> Release(Reject) |
Account is debited |
Not applicable |
Not applicable |
Account debit is reversed |
4.6.2 Window Periods for Outgoing Payments
A ‘Window Period’ is a time interval during which the operations of Initiation, Level 1 Authorization, Level 2 Authorization and Release of payment transactions are allowed. Window periods are applicable for Outgoing Payments only. The respective operations will not be allowed at times that lie outside of the window period. Window periods are defined as follows:
- For each product level, a separate window period is defined for initiation, authorization and release of payments.
- The Window period can be extended for the current date using the
separate window period modification screen.

During the contract validation, the system will check if the window period is maintained for the current date. If the window period is not maintained for current date, then the system will check the window period information from the product
Based on the details provided in the ‘Network Parameters’ tab in the ‘Payments and Collections Product Preferences’ screen, the appropriate window period validation are handled during contract Save, Level 1 Authorization, Level 2 Authorization and Release stages. If the contract fails on the above validations, then system will not process the contract further.
4.7 Incoming Payment Transaction
This section contains the following topics:
- Section 4.7.1, "Processing an Incoming Payment Transaction"
- Section 4.7.2, "Viewing Incoming Transaction Authorization Details"
- Section 4.7.3, "Viewing Repair Queue"
- Section 4.7.4, "Repair Button"
- Section 4.7.5, "Reject Button"
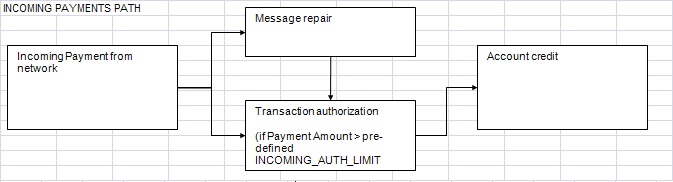
4.7.1 Processing an Incoming Payment Transaction
An Incoming Payment transaction can be defined such that it requires authorization before its target account is credited.
Incoming payment transaction limits are be defined in product level. You need to maintain a separate product for both NEFT and RTGS.
Following are the levels of authorization for incoming payments:
- A single level of authorization can be imposed on an Incoming Payment.
- Based on the transaction amount details, the system will authorize
the incoming payment. In case the incoming payment exceeds the amount
set for authorization it will require a maker and checker for authorization.
- If the incoming payment transaction amount is less than or equal to the authorization limit, then no authorization is required.
- If the incoming payment transaction amount is greater than the authorization limit, then authorization is required.
4.7.2 Viewing Incoming Transaction Authorization Details
Oracle FLEXCUBE allows you to view the incoming transaction authorization details using the ‘Payments and Collection Incoming Auth Queue’ screen. To invoke this screen, by typing ‘PCSINAUQ’ in the field at the top right corner of the Application tool bar and clicking the adjoining arrow button.
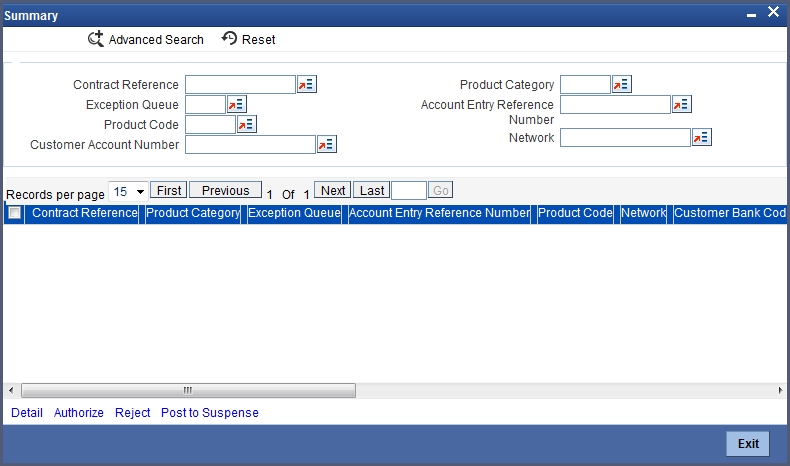
You can query the record based on the following details:
- Product Category
- Contract Reference Number
- Product Code
- Customer Account Number
- Network
- Account Entry Reference Number
- Exception Queue
Clicking on ‘Search’ button, the system will display all the records pertaining to the specified criteria. Double clicking on any of the records, the system will display the record details.
Clicking on ‘Authorize’ button, you can authorize the contract(s) and set it for dispatch. You can select multiple contracts and authorize them in bulk.
Clicking on ‘Reject’ button, you can reject the contract(s). For this action, the system will generate the return of incoming payment messages (N07 for NEFT and R41 for RTGS customer transfer and R42 for RTGS Bank transfer). Bulk operation is not allowed for this.
Clicking on ‘Post to Suspense’ button, the system will credit the unsettled GL instead of the customer account. The transaction can then be handled operationally from the Unsettle GL. This Unsettle GL is picked up from the Product category maintenance based on the product category of the contract.
Clicking on ‘Details’ button, the system will display the details of the selected contract.
4.7.3 Viewing Repair Queue
Oracle FLEXCUBE allows you to view the details of incoming payments awaiting for repair using ‘Incoming Payment Repair Queue’ screen. To invoke this screen, by typing ‘PCSIPRSQ’ in the field at the top right corner of the Application tool bar and clicking the adjoining arrow button.
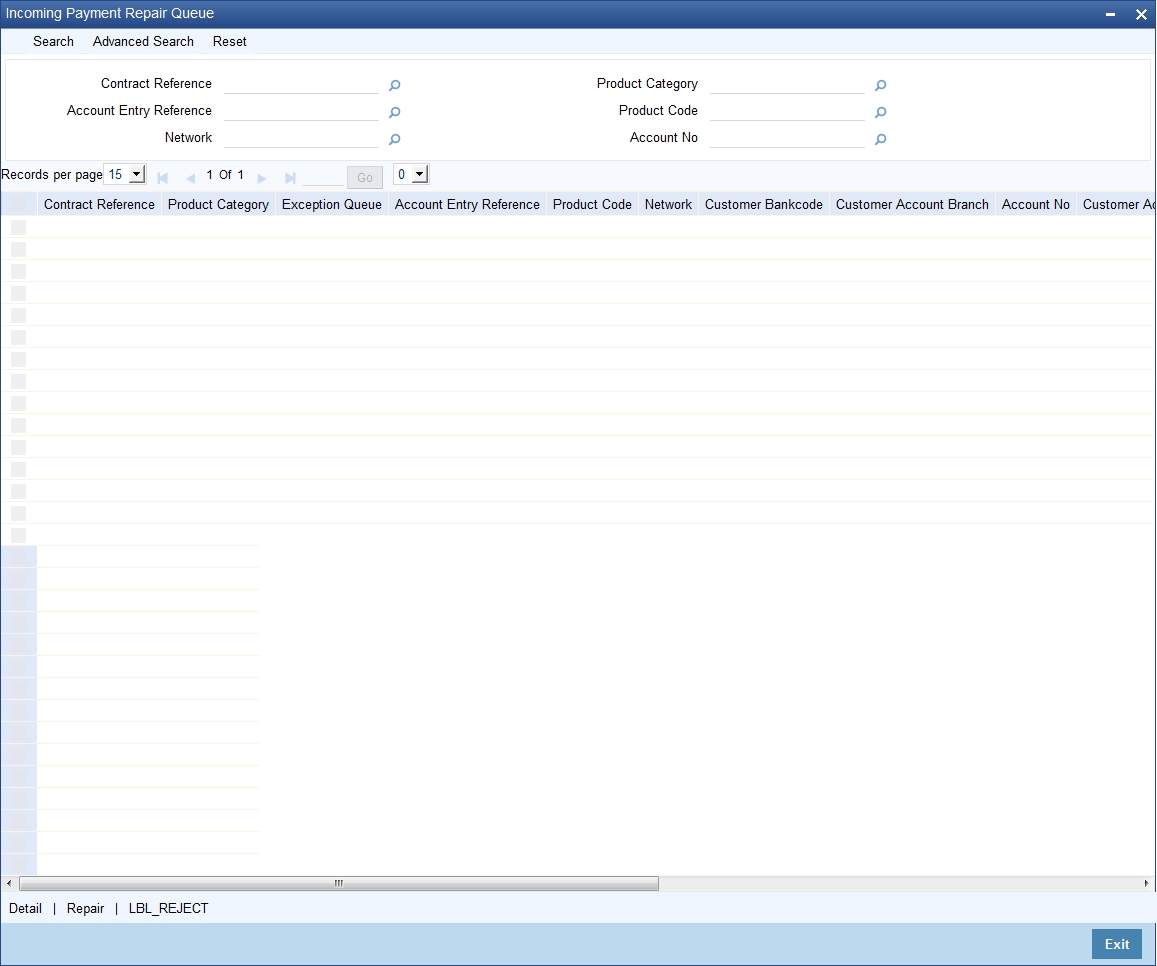
You can query the record based on the following details:
- Product Category
- Contract Reference Number
- Product Code
- Customer Account Number
- Network
- Account Entry Reference Number
Clicking on ‘Search’ button, the system will display all the records pertaining to the specified criteria. Double clicking on any of the records, the system will display the record details.
Clicking on ‘Reject’ button, you can reject the contract(s). For this action, the system will generate the return of incoming payment messages (N07 for NEFT and R41 for RTGS customer transfer and R42 for RTGS Bank transfer). Bulk operation is not allowed for this.
Clicking on ‘Details’ button, the system will display the details of the selected contract.
4.7.4 Repair Button
Clicking on ‘Repair’ button, the ‘Repair’ window is displayed as follows:
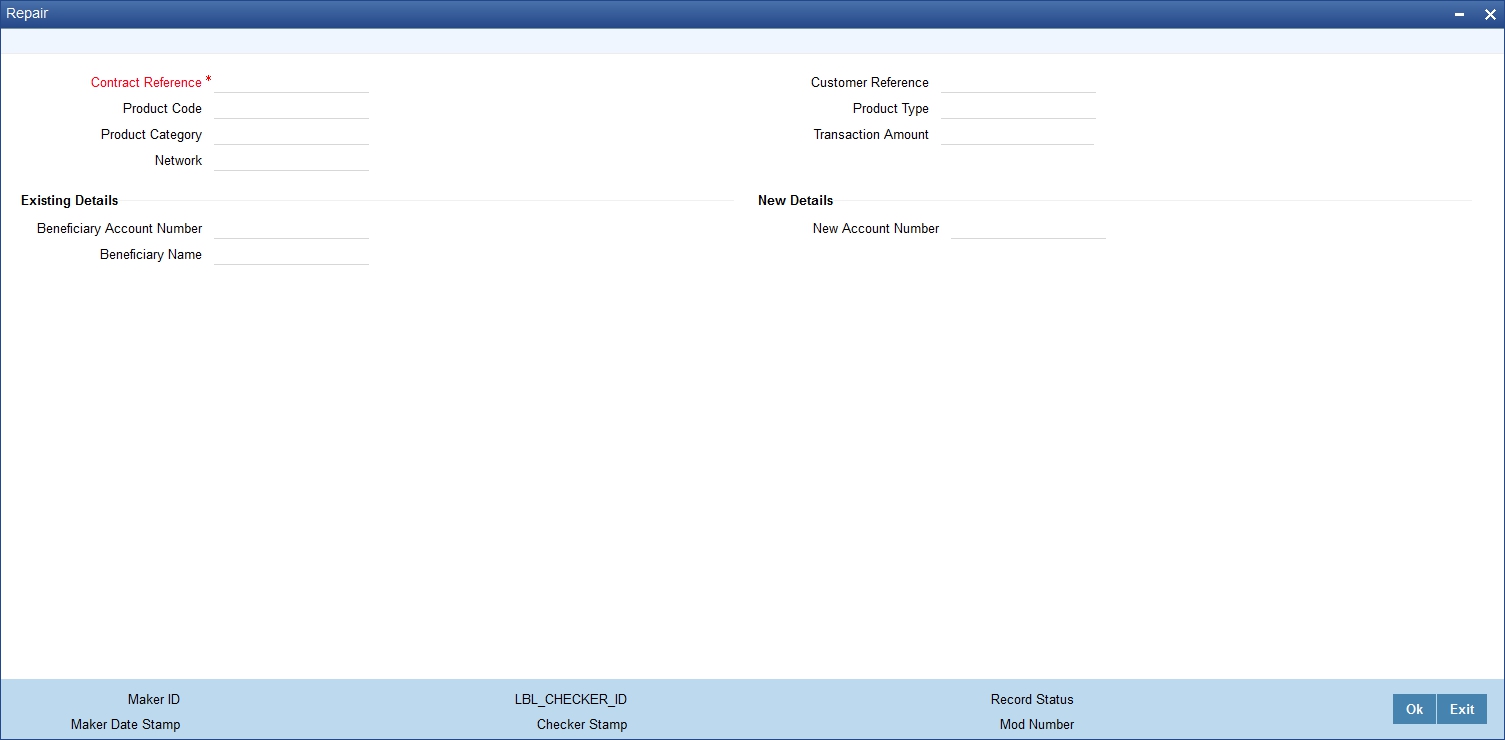
Contract Reference Number
Specify the contract reference number.
Beneficiary Account Number
Specify the customer account number.
Beneficiary Name
The system displays the beneficiary name.
New A/C No
Specify the new account number.
The above screen will display the following details of the selected contract:
- Customer Reference Number
- Product Category
- Product Type
- Product Code
- Transaction Amount
- Network
You can unlock the contract and capture the reject code.
4.7.5 Reject Button
The ‘Reject’ (PCDIAUTC) screen will reject the selected Incoming Payment and creates another transaction as Reject of Incoming Payment.
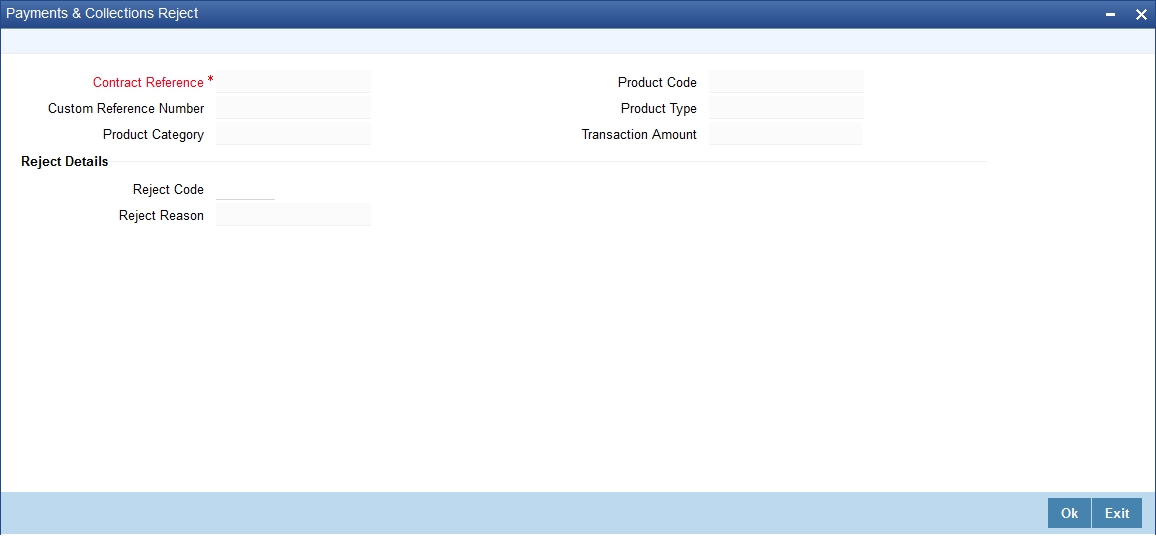
The product category for the reject of incoming payment is maintained in the Product Category of Incoming Payment.