2. Product Definition
2.1 Introduction
You will encounter the word ‘product’ frequently in the Oracle FLEXCUBE user manuals. A ‘product’ is a specific service that you offer your customers.
For example, you may offer an ‘overnight borrowing’ facility to your customers. By defining a specific overnight borrowing facility as a money market product - with certain attributes - you can group together, or categorize, all overnight borrowings that share the attributes defined for the product.
This chapter contains the following sections:
- Section 2.2, "The Advantages of Defining a Product"
- Section 2.3, "Product Definition"
- Section 2.4, "Transaction Limits"
2.2 The Advantages of Defining a Product
The attributes that you define for a product apply on all contracts that are processed under the product. By creating a product, you construct a broad framework within which you can process contracts. This helps minimize the details you have to capture when processing a contract.
The advantage of defining a product is that it simplifies the task of entering into contracts. The following example further illustrates the concept of products.
For example, a money market deal could be of any of the following types:
- Overnight Placement
- Overnight Borrowing
- Weekly Placement
- Weekly Borrowing
- Monthly Placement
- Monthly Borrowing
You can define any number of Overnight Placement products, Weekly Placement products, Monthly Borrowings, etc., having varying rates of interest. You may choose to allow or deny rollovers, apply or waive tax, specify different accrual frequencies, and so on. Each of these types of placement/borrowing definitions, with their specific set of attributes, constitutes a product.
You could allot Product Codes for each of these products as follows:
- MWP1 − Weekly Placement 1
- MOB2 − Overnight Borrowing 2
Attributes of MWP1:
- Rate of interest - 16% fixed interest
- Maximum tenor - 1 week
- Minimum tenor - 1 day
- Daily repayment schedules
- Rollover allowed
Attributes of MOB1:
- Rate of interest - Floating rate of the day applied automatically
- Maximum tenor − 1 day
- Repayment at Maturity
- No rollover
Note
In this example, only a few attributes have been defined. You can define many more attributes for a product.
All deals involving MWP1 are overnight placements, which inherit the attributes of MOB1.
MWP1 and MOB1 are examples of products.
A product is set up at the Head Office of your bank. This means that the Product Definition facility also serves as a central control mechanism — you can ensure that a service your bank provides is offered uniformly across branches.
2.3 Product Definition
This section contains the following topics:
- Section 2.3.1, "Invoking the Product Definition Screen"
- Section 2.3.2, "Defining the Other Attributes of a Product"
- Section 2.3.3, "Interest Button"
- Section 2.3.4, "Commission Button"
- Section 2.3.5, "Charges Button"
- Section 2.3.6, "Tax Button"
- Section 2.3.7, "Accounting Roles Button"
- Section 2.3.8, "Events Button"
- Section 2.3.9, "Advices Button"
- Section 2.3.10, "Branch and Currency Restrictions Button"
- Section 2.3.11, "Deal Size Button"
- Section 2.3.12, "Customers Button"
- Section 2.3.13, "Instrument Restrictions Button "
- Section 2.3.14, "Portfolio Restrictions Button"
- Section 2.3.15, "Preferences Button"
- Section 2.3.16, "MIS Button"
- Section 2.3.17, "Associating a Product with a Brokerage Rule"
- Section 2.3.18, "Specifying Free Format Texts and Instructions"
- Section 2.3.19, "Specifying Instruction Details"
- Section 2.3.20, "Document Codes Button"
- Section 2.3.21, "Tracers Button"
- Section 2.3.22, "User Defined Fields Button "
- Section 2.3.23, "Status Button "
- Section 2.3.24, "Indicating Automatic Status Change"
- Section 2.3.25, "Generating Advices for a Status Change"
- Section 2.3.26, "Specifying Status Control Details"
- Section 2.3.27, "Capturing Movement Details"
2.3.1 Invoking the Product Definition Screen
In the Product Definition screen of every module, you can enter basic information about a product such as the Product Code, the Description, etc.
The Product Definition screens of the various modules of Oracle FLEXCUBE are invoked from the Application Browser.
Note
Product Definition screen is specific to a module. To create an LC product, for instance, invoke the ‘LC Product Definition’ screen from the Application Browser. Similarly, to create an FX product, invoke the ‘Foreign Exchange Product Definition’ screen from the Application Browser.
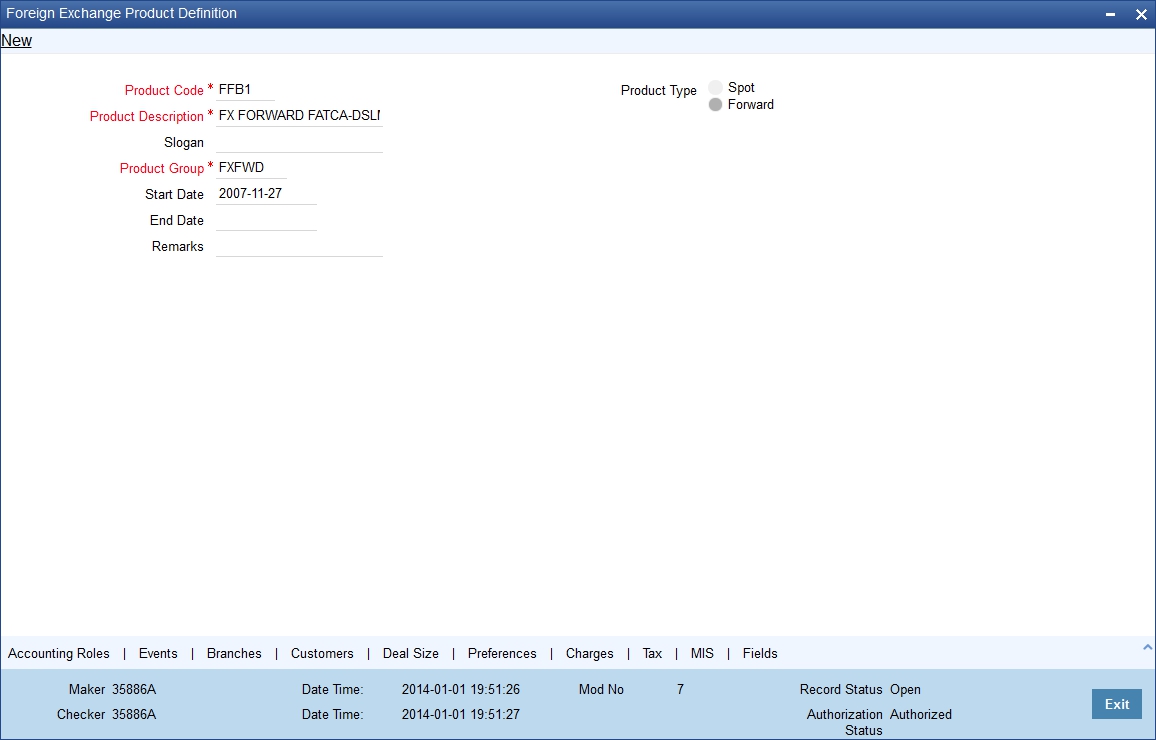
In a Product Definition screen, you should specify the following details for the products you create:
- A code unique to the product
- A brief description of the product
- The product type
- The product group
- A slogan for the product
- The life span of the product
- Your remarks
Product Code and Description
A product code identifies a product throughout Oracle FLEXCUBE. This code should be four characters in length.
When defining a new product, you should enter a code that is unique across the different modules of Oracle FLEXCUBE. For instance, if you have used MM01 for a product in the Money Market module, you cannot use it as a product code in any other module.
It may be difficult to recognize a product just by its code. In the Description field, therefore, suitably describe the product code so that it can be easily identified. This description will be displayed along with the code throughout Oracle FLEXCUBE.
Product Type
Product categories are referred to as ‘product types.’ When you create a product, you must specify the ‘type’ to which it belongs. For instance, you should specify the money market product type as ‘Placement’ if you are defining a placement product, and ‘Borrowing’ if you are defining a borrowing product. Similarly, in the Teller module, if you are setting up a Cash product, choose the ‘Cash’ option in the Product Type field. If you are setting up a product to process Traveller’s Checks, choose the ‘Others’ option in the Product Type field.
Product Group
Products can be categorized into groups based on the common elements that they share. You must associate a product with a group. This would facilitate retrieval of information of a class of products at one stroke.
For example, you can group all products involving travelers’ checks into a product group. You can group all products involving deposits into a product group.
Slogan
You can enter a marketing punch line for every product you create. This slogan will be printed on all advices that are sent to customers who avail of the product.
For example, if you set up a borrowings product called Money Multiplier, you could enter the slogan ‘Watch your money grow with Money Multiplier.’
Start Date and End Date
A product can be defined to be active over a specific period. When you create a product, you can specify a ‘Start Date’ and ‘End Date’ for it. The product can only be used within the specified period (i.e. within the Start Date and End Date).
If you do not specify the Start Date, the branch date will be displayed as the Start Date.
If you do not specify an End Date for a product, it can be used for an indefinite period.
The start and end dates of a product come in handy when you are defining a product that you would like to offer over a specific period.
For example, you have a promotional scheme for three months − ‘Special Interest Rate for Savings Bank Accounts’ − wherein you would like to pay higher interest on monthly minimum credit balances that exceed USD 20,000. This scheme is open between 1 October 1998 and 31 December 1998, and the rate of interest that you would like to pay on the balance is 5% − more than what you normally pay, that is, 2.5%.
Since the scheme ends on 31 December 1998, all those who have maintained monthly minimum credit balances exceeding USD 20,000 (for the period between 1 October 1998 and 31 December 1998) would be eligible for the higher rate of interest.
Note
If you do not specify an End Date, the product can be used till it is closed.
Remarks
When creating a product, you can enter information about the product intended for your bank’s internal reference. This information will not be printed on any correspondence with the customer.
2.3.2 Defining the Other Attributes of a Product
Once you have specified the basic details of a product, you can define the other attributes for it. From the Product Definition Main screen, you can move to the screen of your choice to define an attribute by clicking on the appropriate icon.
The other product attributes that you can define include:
- The interest, commissions, charges and fees that you would like to levy on contracts involving the product
- The taxes that apply on the contracts involving the product
- The type of accounts and the GL/SLs to which the accounting entries generated by contracts involving the product have to be posted
- The advices to be generated at different points in the life cycle of contracts involving the product
- A list of allowed or a list of disallowed branches (of your bank) that can use a product
- A list of currencies that are allowed or disallowed for a product
- Certain ‘preferences’, specific to a product
- Aging analysis related details
- Management Information System (MIS) details
- Clause/Document details
Note
The product attributes that you can define would depend on the module in which you are creating the product. For instance, the attributes that you define for a product in the Letter of Credit (LC) module would vary significantly from the product attributes that you define in the Teller module. For products you create in the LC module, you would define commission, clause, and document details, whereas, these attributes would not apply to products you create in the Teller module.
Note
There are some fields in the product definition screens in which a value must be entered. If you try to save a product without entering details in these fields, the product will not be saved. You will be prompted to enter all mandatory details before attempting to save the product.
2.3.3 Interest Button
In Oracle FLEXCUBE, the interest that applies on a contract is referred to as the interest component of the contract. Calculating the interest component for a contract is achieved by:
- Creating interest rules
- Building interest classes (specifically, for the Securities module)
- Associating a product with an interest rule (or an interest class in case of the Securities module). This rule applies on all contracts processed under the product.
- Amending, if required, certain interest details that a contract acquires from the product under which it is processed
For details relating to interest, refer the Building Interest Components User Manual.
Click ‘Interest’ button in the ‘Product Definition’ screen to invoke the ‘Interest Details’ screen.
In this screen, you can associate the product you are creating with an Interest Rule. The attributes defined for the interest rule or class that you link to a product default to all contracts processed under the product.
Note
For products created in certain modules of Oracle FLEXCUBE, you may have to specify additional interest details. These details have to be specified in the Product Preferences screen of the module.
Refer the Products chapter of the respective user manuals for details.
Link Contract as Rate Code
A floating rate component defined for a product can be linked to either a rate code, or to a contract with a fixed rate main component. This is applicable only for products in the following modules:
- Deposits (a fixed rate loan can be linked)
- Money Market (for a placement product, a fixed rate borrowing contract can be linked, and for a borrowing product, a fixed rate placement can be linked).
In the Product ICCF screen, when you specify the details for a floating rate component for the product, you can indicate that contracts using the product can be linked to a contract, instead of a rate code, as described above.
In the LD Product ICCF screen, select the ‘Link Contract as Rate Code’ field to indicate that for contracts using the deposit product, a fixed rate loan contract can be linked instead of a rate code.
In the MM Product ICCF screen, for a placements product, select this option to indicate that for contracts using the placements product, a fixed rate borrowing contract can be linked instead of a rate code. For a borrowing product, select this option to indicate that for contracts using the borrowing product, a fixed rate placement contract can be linked instead of a rate code.
If so linked, the fixed rate specified for the main component of the linked contract, is applicable to the main contract. This would work in a similar fashion to linking a rate code. The spread and customer margin is applied on the linked contract rate to arrive at the effective interest rate for the main contract.
The Code Usage can be set to Auto or Periodic, only for the FLOAT Rate Type.
Note
If the selected linked fixed rate contract involves a different customer than that of the main contract, an override is sought, which can be accepted to proceed with saving the main contract.
Whenever the fixed rate in the linked contract changes, the EOD process propagates the change to all contracts linked to it, also marking the rate revision for the contracts.
When the fixed rate in the linked contract is amended with a back value date, the effective date on which the changed rate is applied to any contracts it is linked to, is either the last liquidation date for the fixed rate contract, or the effective date of rate change for the contract it is linked to, whichever is later.
2.3.3.1 Levying Commitment Fee on Commitment Account
You have a provision for charging commitment fee on the entire balance of the commitment. The system calculates the commitment fee based on the category of the ICCF component.
When you define a product, in the Product ICCF screen, select from the following values for the ICCF component of a commitment product:
- Normal – Indicates that the commitment fee will be charged on the contract amount (Principal)
- Outstanding - Indicates that the commitment fee will be charged on the outstanding basis amount (Principal)
Note
When a value dated amendment is done, or in case of a commitment reduction schedule, the contract amount will change and hence any commission will be computed on the modified contract amount.
2.3.4 Commission Button
To process an LC contract, your bank may collect commissions calculated on different bases. In Oracle FLEXCUBE, calculating commission for LC contracts is achieved by:
- Defining commission rules
- Associating a product with a commission rule. This rule applies on all contracts processed under the product
- Amending, if required, certain commission details that a contract acquires from the product under which it is processed
For details relating to commission, refer the Building Commission Components User Manual.
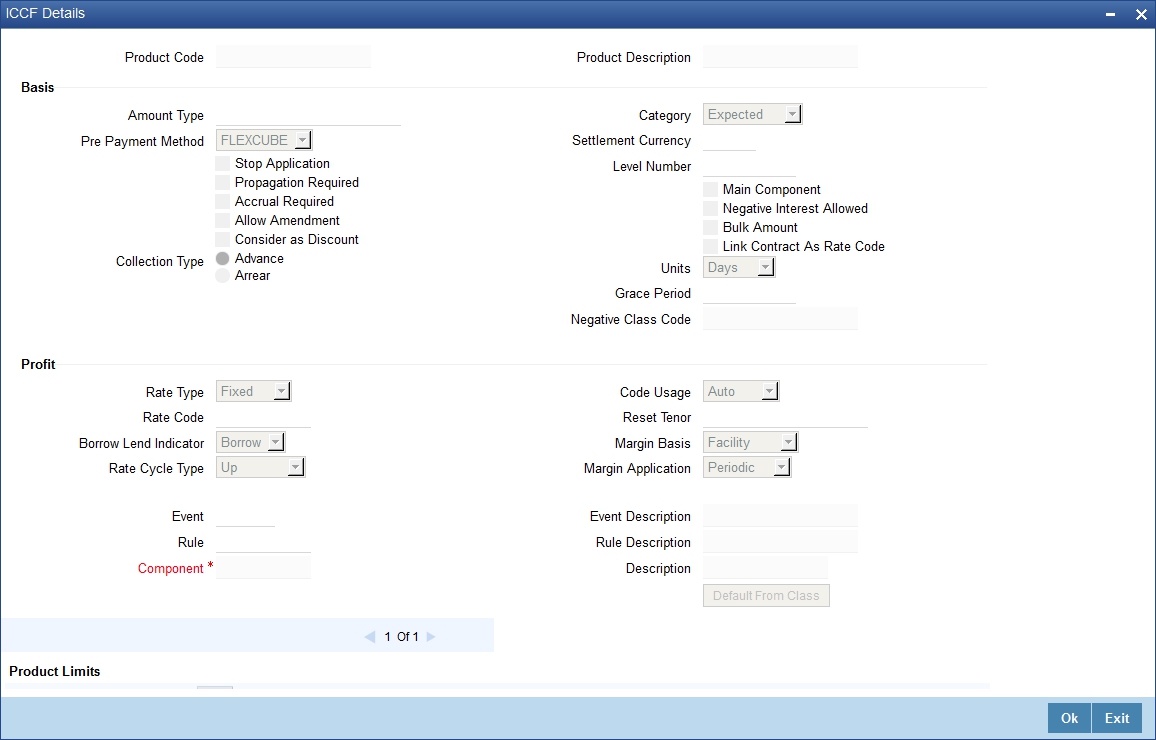
Click ‘Commission’ button in the Product Definition screen to invoke the ‘ICCF Details’ screen.

In this screen, you can associate the product you are creating with a Commission Rule. The attributes defined for the rule that you link to a product default to all contracts processed under the product.
2.3.5 Charges Button
On the transactions and contracts you enter in Oracle FLEXCUBE, you may opt to levy charges or fees. You can calculate charges and fees for a contract in the following manner:
- Define a Charge/Fee Rule
- Build a Charge Class and associate it with a rule
- Associate a product with charge classes. These classes apply on all contracts processed under the product
- Amend, if required, certain charge details that a contract acquires from the product under which it is processed
You can identify the charge component for a product in the ‘Charge Details’ screen. Click ‘Charges’ button from the Product Definition screen of any module to invoke this screen.
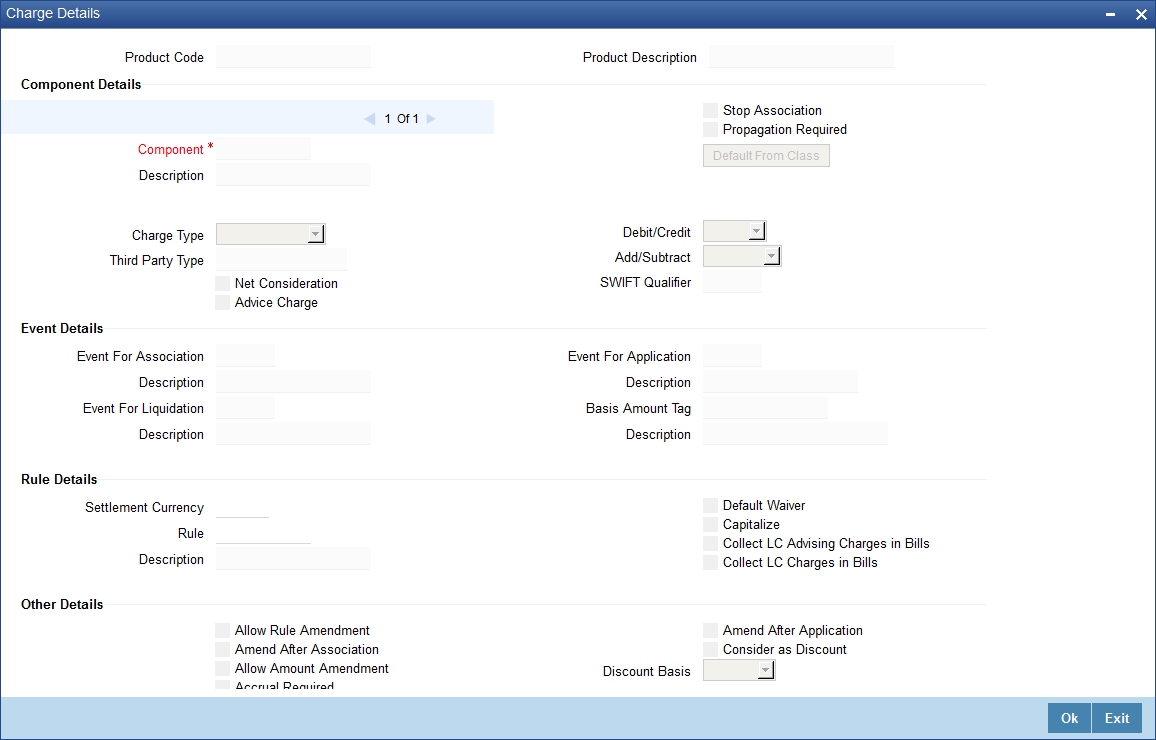
The steps involved in processing charges for a contract, i.e. defining charge rules, defining charge classes, associating charge classes with a product, and amending charge details to suit a contract are explained in the Building Charge Components User Manual.
2.3.6 Tax Button
In Oracle FLEXCUBE, you can compute the tax that applies on a contract or deal by:
- Setting up a tax rule
- Linking tax rules to create a tax scheme
- Associating a product with a tax scheme. The rules that are part of the scheme will apply on all contracts processed under the product
- Amending, if required, certain tax details that a contract acquires from the product under which it is processed
You can identify the tax components for a product in the ‘Product Tax Linkage’ screen. Click ‘Tax’ button in the ‘Product Definition’ screen of any module to invoke this screen.
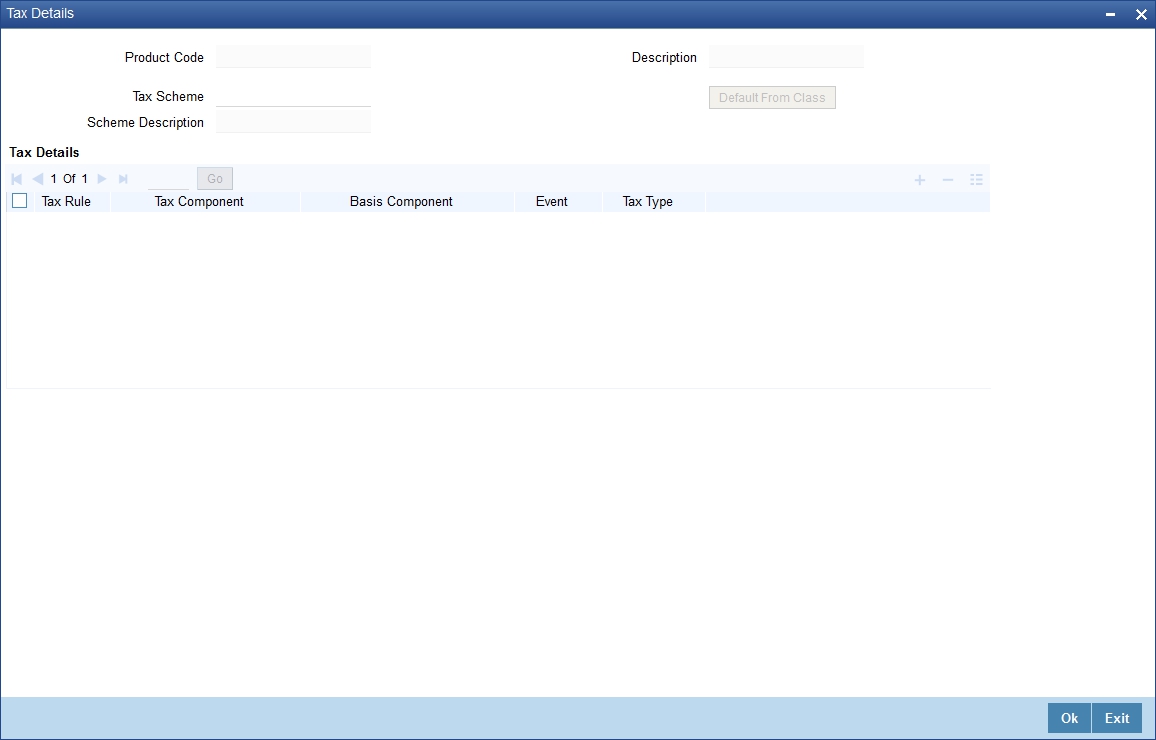
The steps involved in processing tax for a contract is explained in the Building Tax Components User Manual.
2.3.7 Accounting Roles Button
In Oracle FLEXCUBE, accounting—simplistically, posting accounting entries to the appropriate ledgers maintained in your Chart of Accounts—is automated. This is achieved by defining an intricate accounting structure that includes the Chart of Accounts, Transaction Codes and Amount Tags, and by identifying accounting roles, heads and amount tags for the products you create at your bank. As a result, the accounting entries that are generated at the various events in the life cycle of contracts are automatically posted to the ledgers specified for the product.
In this section, we shall discuss setting up of accounting details for a product.
Before we proceed with setting up accounting details for a product, we shall discuss a few terms that you will frequently encounter in this section.
- Accounting Head - In Oracle FLEXCUBE, the different General Ledgers (GLs) and Sub-Ledgers (SLs) maintained in your Chart of Accounts are referred to as accounting heads, or, simply, account heads.
- GL Types - The GL/SLs that you have maintained in your bank can be categorized into different GL Types: Asset, Liability, Income, Expense, Contingent Asset, Contingent Liability, Position GL, Position Equivalent GL, etc. When maintaining a GL in the Chart of Accounts, you have to identify its type.
- Amount Tag - A contract would typically consist of several components. For instance, a contract would consist of the principal, interest, charges, tax, etc. These amounts are referred to as the ‘components’ of a contract. In Oracle FLEXCUBE, a unique tag called the Amount Tag identifies each component.
- Accounting Roles - Accounting Roles are tags that identify the type of accounting entry that is posted to an accounting head. For instance, in the Letters of Credit (LC) module, assume you have specified the following commissions for an LC product, to be collected when issuing LCs processed under the product: ISSCOMM1 and ISSCOMM2.
The following Accounting Roles will be automatically generated in Oracle FLEXCUBE to identify all possible types of accounting entries involving these commission components:
COMMISSION 1 |
COMMISSION 2 |
Type of Accounting Entry |
ISSCOMM1_INC |
ISSCOMM2_INC |
Income |
ISSCOMM1_EXP |
ISSCOMM2_EXP |
Expense |
ISSCOMM1_PAY |
ISSCOMM2_PAY |
Payable |
ISSCOMM1_REC |
ISSCOMM2_REC |
Receivable |
ISSCOMM1_RIA |
ISSCOMM2_RIA |
Received in Advance |
ISSCOMM1_PIA |
ISSCOMM2_PIA |
Paid in Advance |
Similarly, based on your accounting set up in a module, accounting roles are automatically generated for the other components of a contract.
You can maintain the accounting details for a product in two screens:
- The Product Accounting Roles to Head Mapping Definition screen
- The Product Events Accounting Entries and Advices Maintenance screen
Before you define the accounting details for a product, you should define the various components of the contracts involving the product such as interest, charges, tax, etc.
In the Product Accounting Role to Head Mapping Definition screen, a list of accounting roles will automatically be generated based on the components you define for the product. You should map all the accounting roles that are available with the appropriate accounting heads.
You can invoke the ‘Accounting Roles’ screen by clicking ‘Accounting Roles’ button in the Product Definition screen.
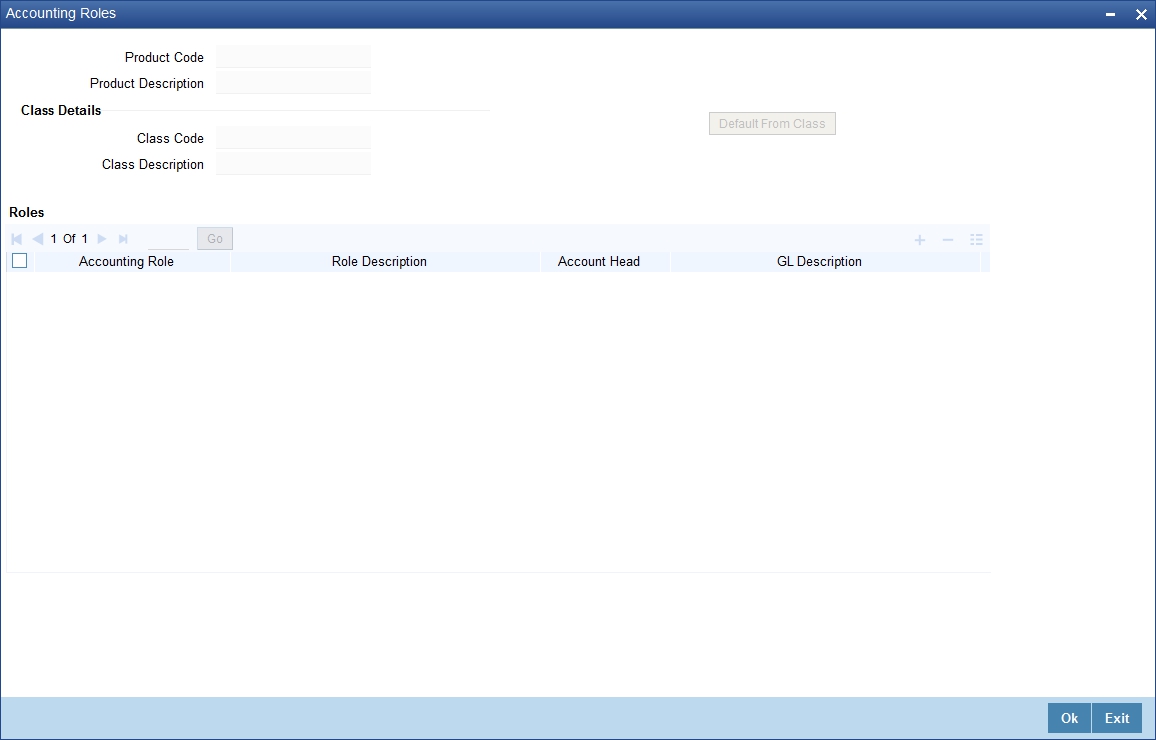
Enter the following details:
Product Code and Description
In this field, briefly describe the product that you are maintaining. The description that you enter here will help you identify the product all through the module.
Adopting either of the following procedures, you can specify the accounting roles and heads for a product:
- Associating the product with an Accounting Role to Head Mapping Class. (This is possible only if you have maintained classes of Accounting Roles and Heads specifically for the module.)
- Mapping accounting roles and heads specifically for the product
2.3.7.1 Indicating Class Details
Enter the following details:
Class Code and Description
You can opt to associate an Accounting Role to Head Mapping Definition Class (that you have maintained) with the portfolio product that you are creating. By opting to associate a class with a product, you save the effort of defining the accounting roles and heads for a product, all over again. The roles and heads defined for the class will automatically default to the portfolio product. You can change these defaults to suit the product you are defining.
Click ‘Default From Class’ button in the Product Accounting Role to Head Mapping Definition screen to associate the product you are maintaining with a class of mapped roles and heads. A list of the classes that you have defined specifically for the module will be displayed. Choose a class with the requisite accounting heads and roles mapped.
The procedure for setting up an Accounting Role to Head Mapping class is similar to mapping accounting roles and accounting heads specifically for a product. This is discussed below.
2.3.7.2 Specifying Roles
Enter the following details:
Accounting Role
If you do not use a class to define accounting role and heads for a product, in this screen, you can define them specifically for the product you are creating.
In the Accounting Roles column, select an Accounting Role from the adjoining option list. You can choose a role by double clicking on it. Next, in the Account Head column, select an accounting head from the adjoining option list. Click add icon to map the role with the corresponding head in the Accounting Head column. If you would like to delete a role to head mapping, click delete icon.
Account Head
If you choose not to associate the product with a class, you have to specify the account heads for the product, in this field. You can invoke a list of the accounting heads that you have maintained from the option list positioned next to this field. Choose a head by double clicking on it.
Description
A brief description of each accounting head that you choose will be provided in the Description field.
2.3.8 Events Button
At an event, typically, you would want to post the accounting entries to the appropriate account heads and generate the required advices. When setting up a product, you can define the accounting entries that have to be posted and the advices that have to be generated at the various events, once the products are authorized. To do this, click ‘Events’ button in the Product Definition screen. The ‘Product Event Accounting Entries’ screen is displayed.
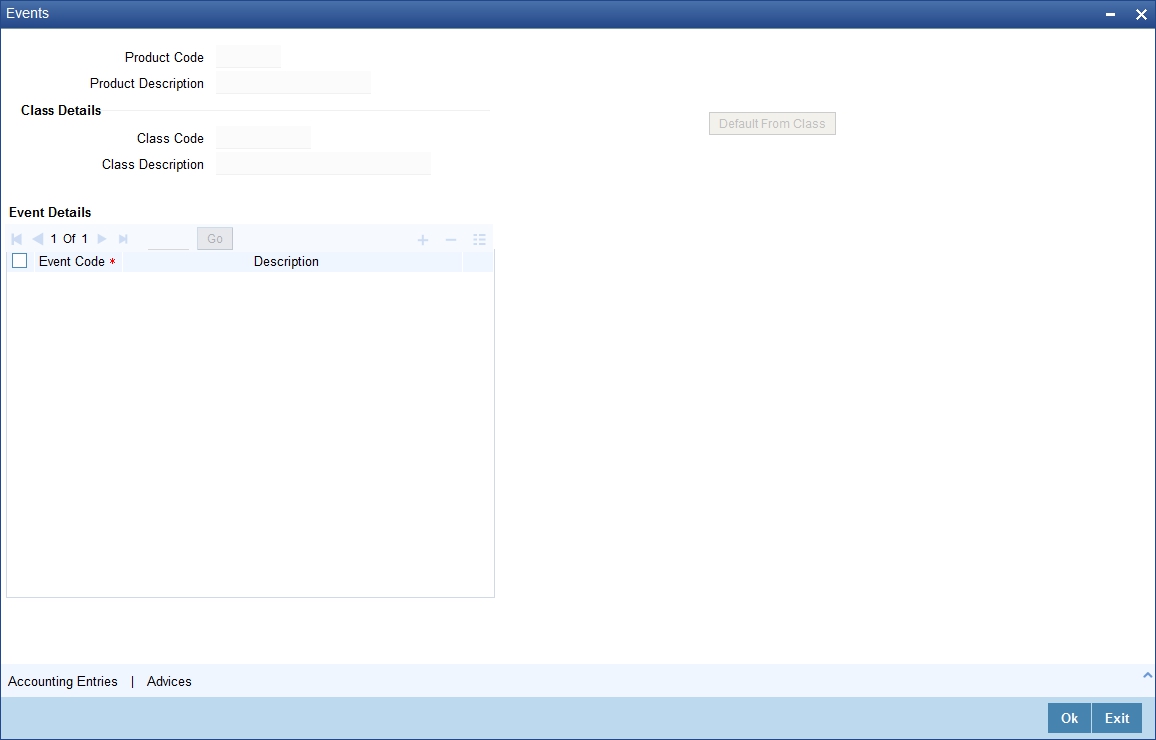
Specify the following details:
Event
A contract goes through different stages in its life cycle. In Oracle FLEXCUBE, the different stages a contract passes through in its life cycle are referred to as ‘events’.
For example, some of the stages in the lifecycle of a security are:
- Deal Booking
- Money Settlement of Securities Deal
- Settlement of Securities Deal
- Reversal of Securities Deal
- Cancellation of Securities Deal
Each stage is referred to as an Event in Oracle FLEXCUBE.
You can define the accounting entries and advices for events using either of the following methods:
- Associating a product with an Events Class. This is possible only if you have maintained Events classes specifically for the module
- By defining event details specifically for the product
Click ‘Default From Class’ button in this screen to associate the product you are maintaining with an Events class. A list of the Events classes that you have defined specifically for the module will be displayed. Choose a class with the requisite events and accounting details maintained. The product acquires the accounting entries and advices defined for the Events class you choose.
The procedure for setting up an Events class is similar to defining events and accounting details for a product. Refer the following sub-head for details.
2.3.8.1 Defining Events and Accounting Details Specifically for a Product
If you do not use an events class, you should define event details specifically for the product. In this case, select an event from the adjoining option list that displays a list of events pertaining to the module.
For every event you select, you should specify the accounting entries that should be passed and the advices that should be generated.
Click ‘Accounting Entries’ button in the Events Definition screen to specify the accounting applicable to the event.
Receiver Bank Charges
This option enables the bank to collect Receiver Bank's Charges for an outgoing FT contract with charge option as OUR.
The accounting entry definition is as follows:
Accounting Entry |
Event |
Dr. Remitter |
AMT_EQUIV |
Cr. Beneficiary |
TFR_AMT |
Dr. Custchargeacc |
CHARGES (Own) |
Cr. Charge Inc |
CHARGES (Own) |
Dr. Custchargeacc |
FT_RVR_CHGS |
Cr. Beneficiary |
RVR_CHGS |
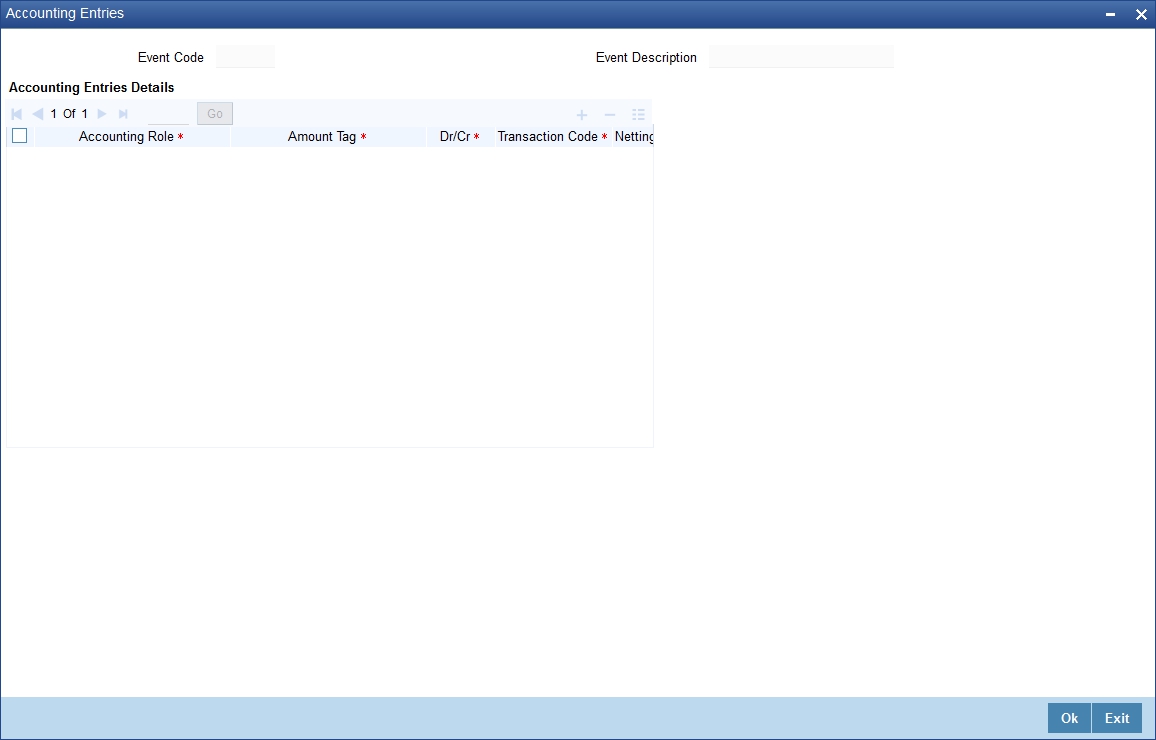
For an each event, you have to maintain accounting information, as follows.
Accounting Role
Specify the accounting role that should be used at the event. The option list displays all the accounting roles specified for the product in the Accounting Role Definition screen.
Amount Tag
Specify the tag which identifies the component that has to be posted to the account head.
Dr/Cr
Indicate whether the accounting role you specified is for the debit or credit leg of the contract event.
Txn Code
Every accounting entry in Oracle FLEXCUBE is associated with a Transaction Code that describes the nature of the entry. Specify the transaction code that should be used to post the accounting entry to the account head.
Netting
Specify whether accounting entries should be netted at an event. You can net the accounting entries that are generated at an event if the set of entries satisfy the following criteria:
- The entries belong to the same Account and Branch
- The entries to be netted are in the same currency
- The entries have the same value date
- The exchange rate to be picked up for the entries is the same
You should define details for both the legs of an accounting entry. For each accounting entry, you should specify the details of the debit and the credit leg. Thus, the first two specifications will be for one entry, the next two for another, and so on. The Transaction Code for the entry should be specified for both legs of the entries.
Note
If netting is indicated for Income/Expense GLs marked for accounting entry-based revaluation of FCY entries, an override is displayed. If the override is accepted, the offset is not identifiable and the entry is revalued as a single entry. For more information on accounting entry-based revaluation of FCY entries for an Income/Expense GL, refer the General Ledger (GL) user manual.
Adjustments are to be Made for Holidays
This parameter is available only for securities portfolio product definition in the Securities module.
For coupon events falling on holidays, you have the option of shifting the event date forward / backward or leaving it unchanged. You can maintain your specifications at the Product level to be inherited by each individual security that you define under that product, with the option of changing them for a particular security.
However, irrespective of the holiday treatment specified by you, the system will not perform any holiday adjustment for coupon events if, in the Product Event Accounting Entries Maintenance, you select ‘No’ as the Holiday Treatment parameter.
If you wish to apply holiday treatment for coupon events as specified by you either as part of product preferences or at the contract level, select ‘Yes’ in the Holiday Treatment field for accounting entries for coupon receipts or payments.
Rate Type Indicator
Select the rate type indicator used for revaluation purpose from the drop-down list. Following are the options available in the drop-down list:
- Mid
- Buy
- Sale
2.3.9 Advices Button
At an event, you can opt to generate an advice if the accounting entry involves a customer account. Click ‘Advices’ button in the Events Definition screen to define the advices that should be generated for a specified event.
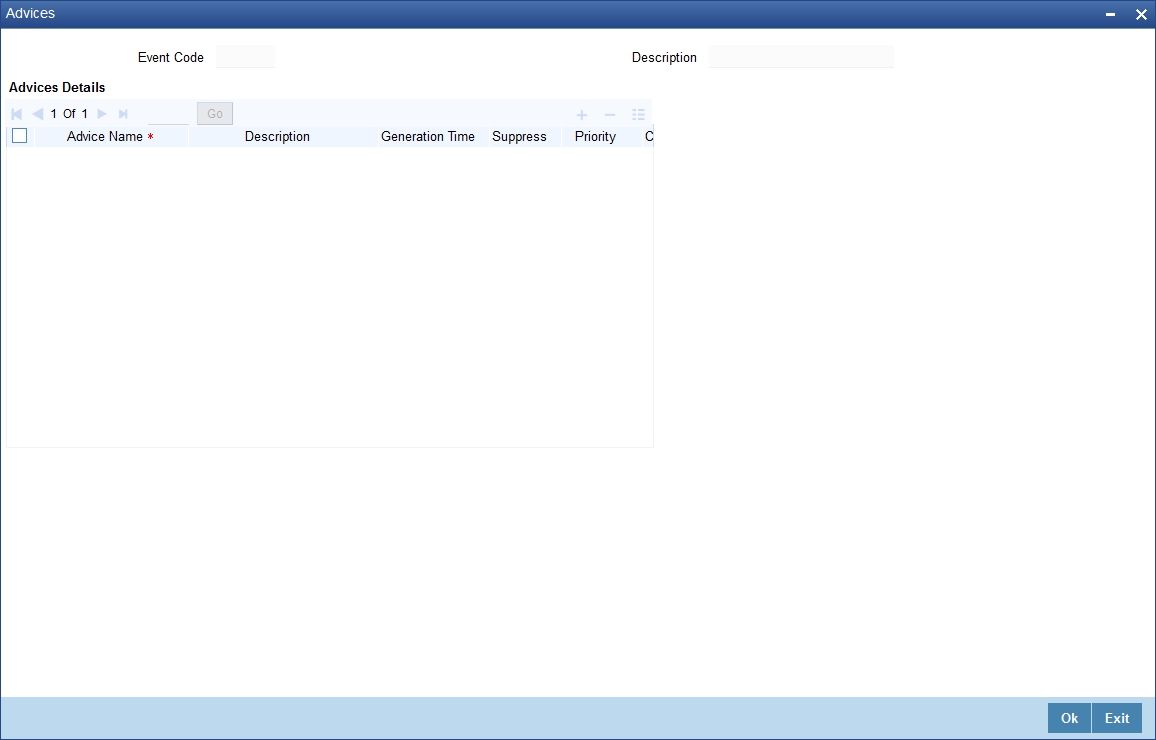
Event Code
Code of the specified event is defaulted from the Event level.
Description
Description of the specified event is defaulted from the Event level.
Advices Details
The following advice details can be maintained here:
Advice Name
Specify the advices that you would like to generate. The adjoining option list displays all advices that can be generated at an event. You can choose the appropriate one.
Description
Description of the specified advice is defaulted here.
Generation Time
Authorization is defaulted as the generation time for all advices which need to be generated for a specified Event.
Suppress
Select ‘Y’ or ‘N’ from the adjoining drop-down list to either suppress or allow the generation of some advices.
Priority
Select the importance of the advice generation from the adjoining drop-down list. This list displays the following values:
- High
- Medium
- Low
Charges
Check this box if you want to collect charges for advice generation.
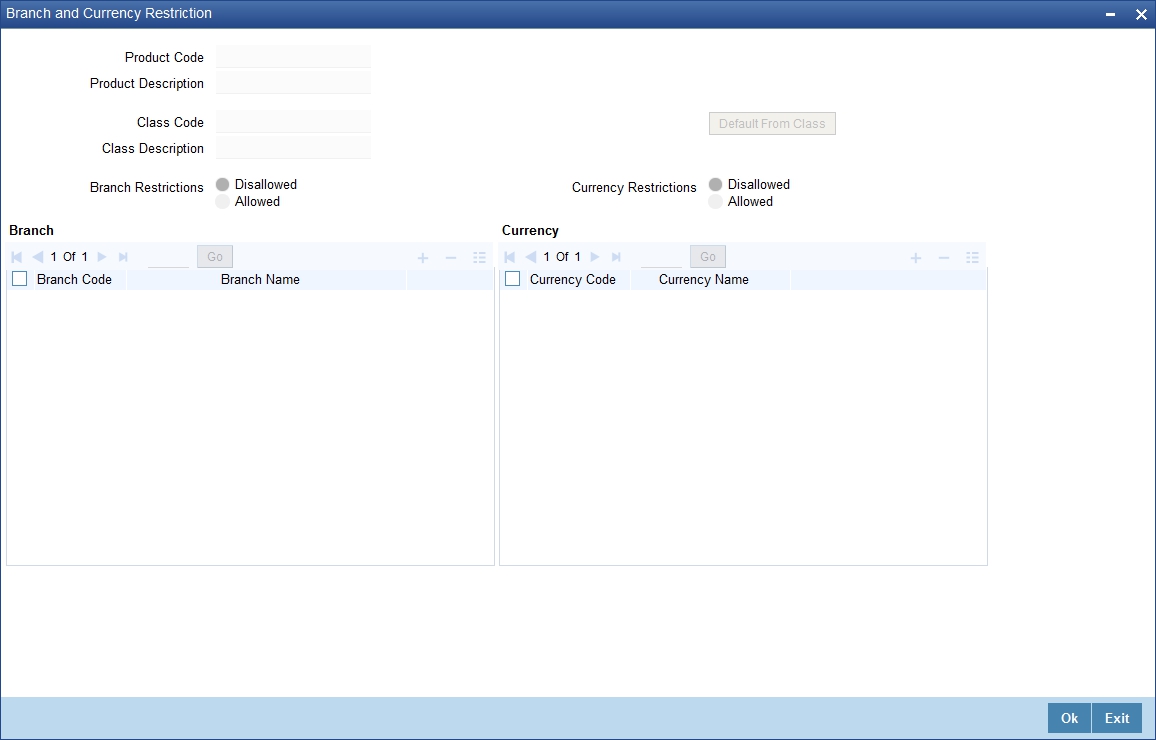
2.3.10 Branch and Currency Restrictions Button
From the head office of your bank, you may want to establish certain controls or standardize operations across the branches of your bank. For instance, you may want to restrict the products you offer to select branches and currencies. You can achieve these controls by maintaining restriction lists when creating a product. When you create a product, you can specify the branches of your bank that can offer it and the currencies that are allowed or disallowed for it.
Note
When you create a product, it is, by default, available to all the branches of your bank and in all currencies.
To maintain a list of allowed/disallowed branches and currencies, click ‘Branch & Currency’ button in the Product Definition screen. The Product ‘Branch and Currency Restrictions’ screen is displayed.
When defining a product, you can choose to specify Branch and Currency Restrictions either by:
- Associating the product with a Branch and Currency Restrictions Class
- By defining these restrictions specifically for the product in the Branch and Currency Restrictions screen
Product Code
This is defaulted from the Product Definition screen.
Product Description
This is defaulted from the Product definition screen.
Branch and Currency Restrictions Class
In Oracle FLEXCUBE, you can define a set of branch and currency restrictions as a Branch and Currency Restrictions Class. You can maintain several restriction classes of branches and currencies.
When creating a product, you can associate it with a branch and currency restrictions class that best suits your requirement. The manner of creating a branch and currency restrictions class is similar to setting up restrictions for a product, as explained below.
If you would like to associate a branch and currency restrictions class to a product, click ‘Default From Class’ button in the ‘Branch and Currency Restrictions’ screen. The product acquires the restrictions defined for the class.
If you do not use a class to indicate branch and currency restrictions, you should define these restrictions specifically for the product in the ‘Branch and Currency Restrictions’ screen.
Allowed/Disallowed
You can specify branch and currency restrictions in the form of allowed lists or disallowed lists.
If you create ‘allowed’ lists of branches and currencies, the product can only be offered in those branches and currencies that are part of the respective allowed lists. On the other hand, if you maintain ‘disallowed’ lists, the product cannot be offered by the branches and currencies on the respective disallowed lists.
You can indicate whether you are maintaining an allowed or a disallowed list type by choosing the appropriate option.
For example, you have a network of twenty branches. You would like to exclude six branches from trading in securities. You would like all other branches to deal in securities.
Since there are more branches that can offer the facility than those that cannot, you can opt to maintain a disallowed list, and include the six disallowed branches in it.
Branch/Currency Code
Under Branch and Currency Restrictions respectively specify the code of the branch and currency that should be allowed/disallowed for the product. You can select the required code from the adjoining option lists.
2.3.11 Deal Size Button
When you create a foreign exchange (FX) product, you can specify a ‘deal size’ for pairs of currencies. The term ‘deal size’ refers to the permitted deal amount.
A deal involving a currency pair, processed under the product you are creating, cannot exceed the transaction amount that you specify.
You can specify the deal size for a currency pair while defining currency restrictions for a product. Your specification will apply to all deals processed under the product. Click ‘Deal Size’ button in the ‘Foreign Exchange Product Definition’ screen and invoke the following screen.
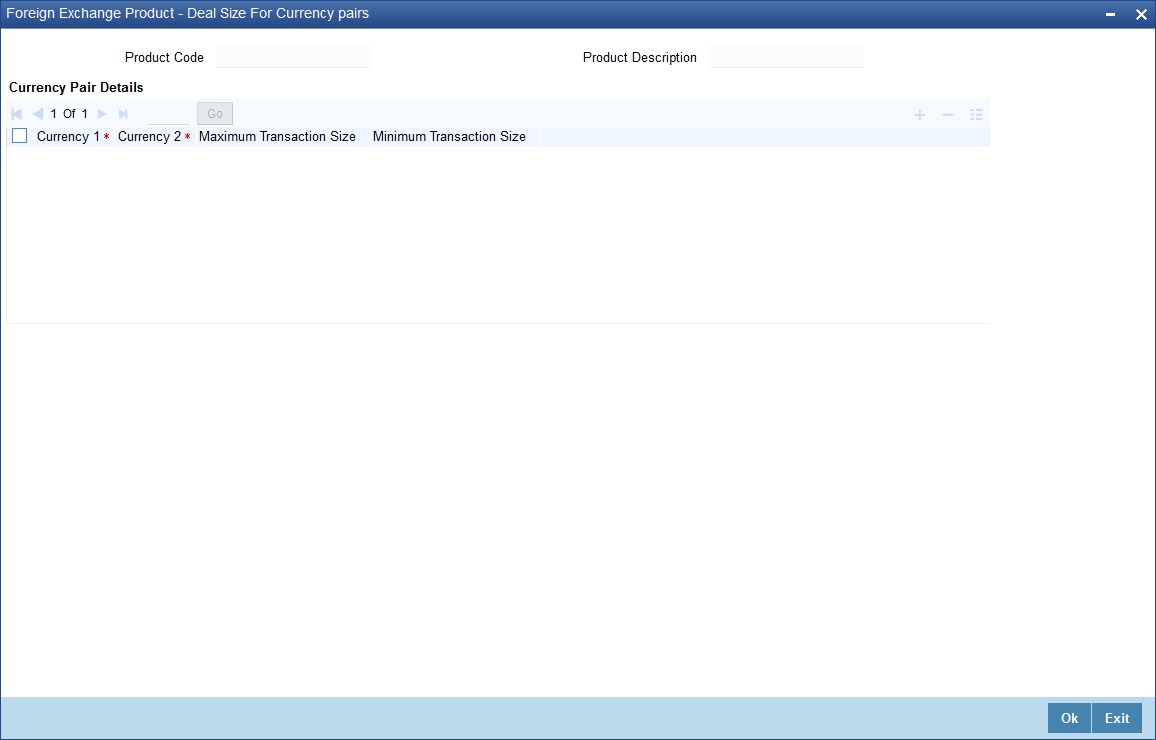
Currency 1 and 2
In the ‘Foreign Exchange Product - Deal Size for Currency Pairs’ screen, select a currency from a list of currencies that you have maintained in your bank. This would be the first currency of the pair. Select the other currency in the pair under Currency 2.
Maximum Transaction Size
In this field, you can enter the maximum transaction amount for the currency pair that you have defined. The deal amount cannot exceed the value given here.
Note
The Maximum Transaction Size that you specify should be greater than the value specified in the Minimum Transaction Size field. If you amend the maximum transaction size specified for a product, the amended value will apply only on contracts entered or rolled over after the amendment has been authorized.
Minimum Transaction Size
For a currency pair, you can also specify the minimum transaction size in the Min. Txn. Size column. This is the minimum deal amount for deals involving the currency pair.
Note
If you amend the minimum transaction size specified for a product, the amended value will apply only on deals entered or rolled over after the amendment has been authorized.
To map the details that you specified for the currency pair, click add icon. To delete the details that you entered for the currency pair, click delete icon.
After you maintain branch and currency restrictions for a product, click ’Ok’ button to confirm your specifications. Click ‘Exit’ or ‘Cancel’ button to delete your specifications. Save your specifications.
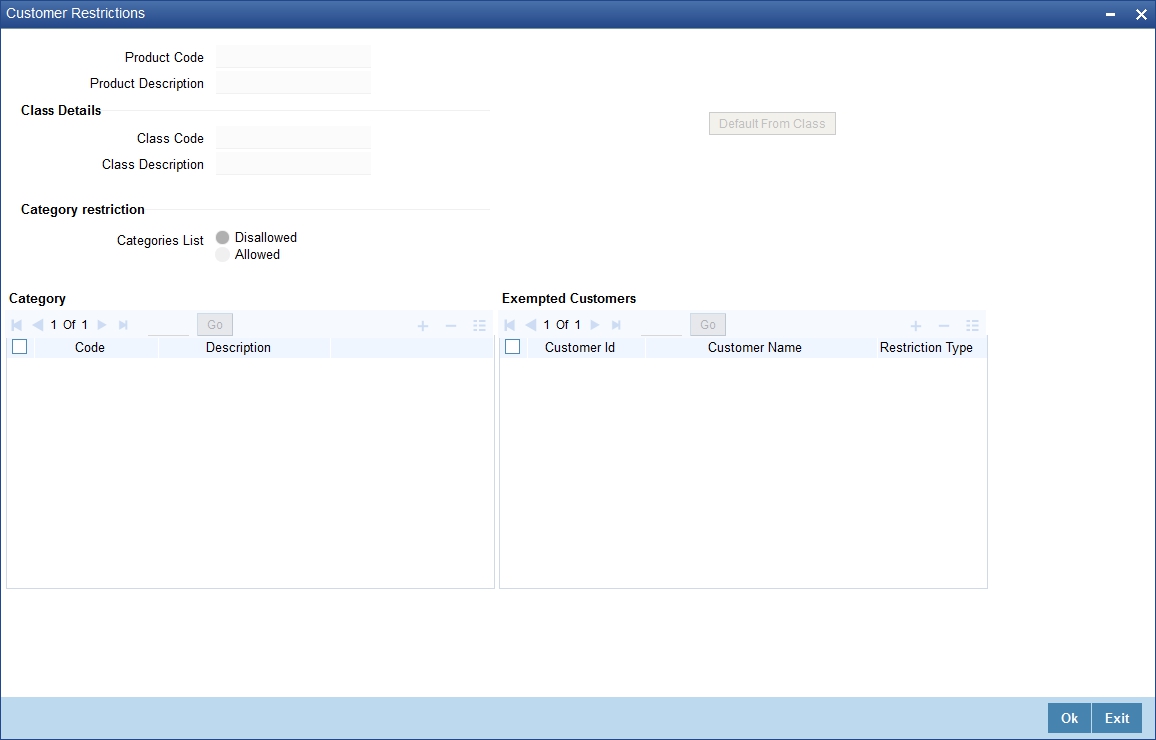
2.3.12 Customers Button
Just as you can maintain a list of allowed/disallowed branches and currencies for a product, you can maintain a list of allowed/disallowed customer categories.
What is a customer category?
You can group your customers according to the common features that they share. For example, you can group your customers into categories such as:
- Banks
- Corporates
- Financial Institutions (excluding banks)
- Individuals, etc.
You can maintain customer restrictions for a product in the Product ‘Customer Restrictions’ screen. To invoke this screen, click ‘Customers’ button in the Product Definition screen.
When defining a product, you can choose to specify Customer and Category Restrictions either by:
- Associating the product with a Class
- By defining these restrictions specifically for the product in the ‘Customer Restrictions’ screen
Class Code
In Oracle FLEXCUBE, you can define a set of customer restrictions as a class. You can maintain several restriction classes.
When creating a product, you can associate it with a customer and category restrictions class that best suits your requirement. The manner of creating a restrictions class is similar to setting up restrictions for a product, as explained below.
If you would like to associate a customer restrictions class to a product, click ‘Default From Class’ button in the ‘Customer Restrictions’ screen. The product acquires the restrictions defined for the class.
If you do not use a class to indicate branch and currency restrictions, you should define these restrictions specifically for the product in the ‘Customer Restrictions’ screen.
Allowed/Disallowed
You can specify customer and category restrictions in the form of allowed lists or disallowed lists.
If you create ‘allowed’ lists of branches and currencies, the product will be applicable only for those categories and customer types that are part of the respective allowed lists. On the other hand, if you maintain ‘disallowed’ lists, the product will not be applicable for those categories and customer types on the respective disallowed lists.
You can indicate whether you are maintaining an allowed or a disallowed list type by choosing the appropriate option.
In Oracle FLEXCUBE, you can define a set of customer restrictions as a Customer Restrictions Class. You can maintain several restrictions classes of customer categories.
When creating a product, you can associate it with a customer restrictions class that best suits your requirement. The procedure for creating a customer restrictions class is similar to setting up customer restrictions for a product, as explained below.
If you would like to associate a customer restrictions class to a product, click ‘Default From Class’ button in the Product Customers and Categories Restrictions screen. The product acquires the restrictions defined for the class.
Defining Customer Restrictions specifically for a product
If you do not use a class to indicate customer restrictions, you should define these restrictions specifically for the product in the Product Customer Restrictions screen.
Restriction Types
You can restrict customers from availing a product by maintaining an ‘allowed’ list or a ‘disallowed’ list of customer categories.
Only customer categories that are a part of an allowed list maintained for a product can avail the product. Likewise, customer categories that are part of a disallowed list cannot avail the product or service.
Category Code
Specify the category that should be allowed/disallowed for the product.
Customer ID
Specify the customer identification number of the customer that should be allowed/disallowed for the product.
Allowed
You can exempt a particular customer from the restriction specified for the product in case you are maintaining a ‘Disallowed’ list. Choose to ‘Allow’ option of the customer whom you wish to allow for the product.
After you maintain branch and currency restrictions for a product, click ‘Ok’ button to confirm your specifications. Click ‘Exit’ or ‘Cancel’ button to delete your specifications. Save your specifications.
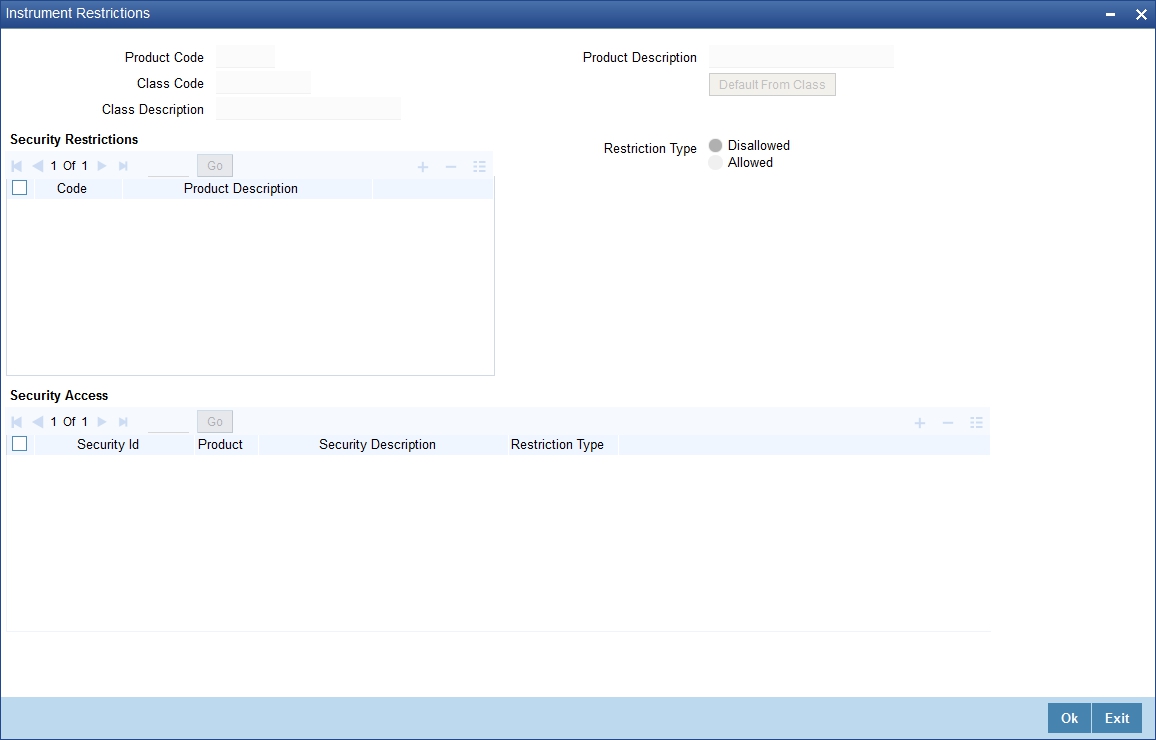
2.3.13 Instrument Restrictions Button
For security products, you can place restrictions to establish certain controls over the securities that your branches trade in by specifying ‘restrictions’. In Oracle FLEXCUBE, you can define security restrictions of the following types:
- Security restrictions specific to the portfolios that you maintain
- Security restrictions specific to the deals that you enter into
Click ‘Instrument Restrictions’ button in the ‘Product Definition’ screen and invoke the following screen.
You can maintain several sets or ‘classes’ of each type of security restriction. Thus, you can maintain several classes of security restrictions for portfolios, and several classes for deals.
When defining a portfolio product, you can opt to associate it with a Security Restrictions Class that you have maintained specifically for the Securities (Portfolio) module. In this case, the restrictions defined for the associated security restrictions class will apply on the portfolio product.
Alternatively, you can choose to define security restrictions specifically for the product.
If you would like to associate a restrictions class to a product that you are defining, click ‘Default From Class’ button in the Portfolio Product Security Restriction screen. A list of the restrictions classes that you have defined specifically for Securities (Portfolios) module will be displayed. Choose a suitable Security Restrictions class.
Alternatively, you can choose to define security restrictions specifically for the product. In this case, you would choose not to associate restriction classes with the product. You would define security restrictions for the portfolio product just as you would build a Securities Restrictions class.
2.3.13.1 Defining Restrictions Specifically for the Product
If you do not associate a restriction class to the product, you can specify security restrictions. The procedure for defining restrictions is described below.
Restriction Type
You can specify security restrictions either in the form of an allowed or disallowed list. Indicate whether you are maintaining an allowed or a disallowed list type, by choosing the appropriate option under the field Restriction type.
When you set up security restrictions, the securities that do not figure in the allowed list cannot be traded with. If you have maintained a disallowed list, securities that do not figure in it can be involved in deals linked to the product.
Exempting Specific Securities from a List
You can exempt a particular security from the restriction specified for the product with which the security is associated.
All the securities associated with securities product will be displayed in the Security ID column under Security Access. You can choose to Allow or Disallow a specific Security by choosing the appropriate option, under Restriction Type.
For example, you have maintained a Securities Product for Short Term Zero Coupon Bonds and have assigned it a product a code SZC1. You have entered five zero coupon bonds under this product with the following Security IDs: SEC01, SEC02, SEC03, SEC04, and SEC05.
You are maintaining a Securities Restrictions Class, SE_CUS_PR1. You include SZC1 in the allowed list that you maintain for the class. By default, all securities entered against this product will be allowed.
Requirement:
You would like to disallow a specific security, SEC05.
Choose the securities product, SZC1, in the Allowed column that you have maintained. All securities maintained under SZC1 will be displayed in the Security ID column, under Security Access.
Move to the security SEC05 in the Security ID column. In the Restriction Type column corresponding to SEC05, choose the disallowed option.
Result:
When you associate the restriction class SE_CUS_PR1 with a portfolio product, say CP01, you can deal in all securities involving SZC1, except the security SEC05.
2.3.14 Portfolio Restrictions Button
Just as you can place restrictions on the securities that your branches can trade in, you can also establish controls over the portfolios that your branches can deal in.
You can choose to specify portfolio restrictions for the product, by either of the following methods:
- Using a portfolio restriction class
- Defining these restrictions specifically for the product
Click ‘Portfolio Restrictions’ button in the ‘Product Definition’ screen and invoke the following screen.

You can maintain several sets or ‘classes’ of each type of portfolio restriction. Thus, you can maintain several classes of portfolio restrictions for products.
When defining a portfolio product, you can opt to associate it with a Portfolio Restrictions Class that you have maintained specifically for the Securities (Portfolio) module. In this case, the restrictions defined for the associated portfolio restrictions class will apply on the portfolio product.
Alternatively, you can choose to define security restrictions specifically for the product.
Exempting specific portfolios from a list
You can exempt a specific portfolio, from the restriction specified for the product, to which the portfolio is associated.
All the portfolios associated with the highlighted portfolio product will be displayed in the Portfolio ID column under Portfolio Access. You can Allow or Disallow a specific Portfolio by choosing the appropriate option under Restriction Type.
For example, you have maintained a Portfolio Product to cater to Bank Portfolios. You assigned the product a code PF01. You have entered five bank portfolios under this product, with the following Portfolio IDs: PB01, PB02, PB03, PB04, and PB05.
You are maintaining Portfolio Restrictions for the product and you include PF01 in the allowed list. By default, all portfolios entered against this product will be allowed.
Requirement: You would like to disallow a specific portfolio, PB05.
- Choose the portfolio product, PF01, in the Allowed column that you have maintained. All portfolios maintained under PF01 will be displayed in the Portfolio ID column under Portfolio Access.
- Highlight portfolio PB05 in the Portfolio ID column.
- In the Restriction Type column corresponding to PB05, choose the disallowed option.
Result: When you associate the restriction class with a product, you can deal in all portfolios involving PF01, except the portfolio PB05.
2.3.15 Preferences Button
‘Preferences’ are options that you can choose to give shape to a product. You can specify your preferences for the products you create in the Product Preferences screens of the respective modules. Click ‘Preferences’ button in the Product Definition screen to invoke the Product Preferences screen.
Product Preferences are specific to a module. Refer to the Products Chapter of the respective user manuals for details.
2.3.16 MIS Button
You can retrieve MIS related information for a product by linking it to a Warehouse Code. Linking a product to a warehouse code ensures that all contracts processed under the product are automatically tracked under the specified Warehouse Code.
Click ‘MIS’ button in the Product Definition Screen to define the MIS details for the product you are creating.
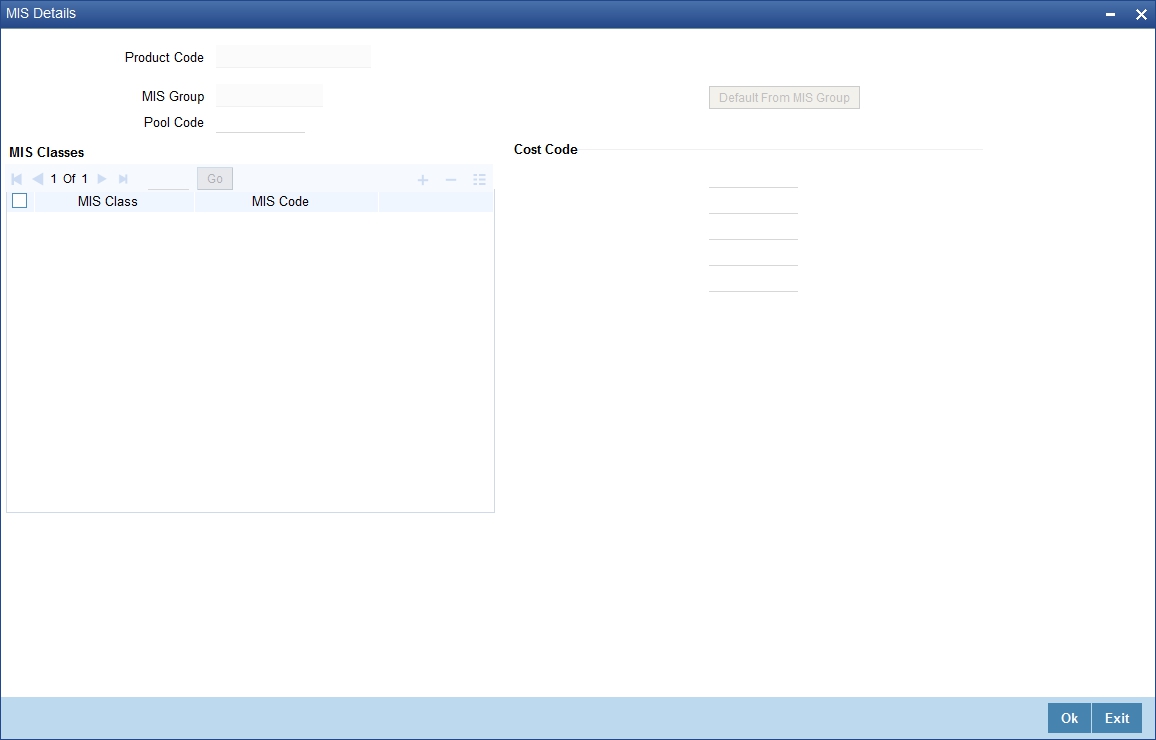
In this screen, you should capture the following MIS details for a product.
MIS Group
You should link a product to an MIS group. By doing so, you indicate the MIS group under which all transactions linked to the product should be tracked. (If you do not want to link a product to an MIS Group, you can define the individual entities under which the product should be reviewed). If you link the product to an MIS Group, the entities defined for the group will be displayed; you can change these entities. For a product, only the transaction type of MIS Class applies. The specific MIS entity (in the form of an MIS Code) will be picked up, by default, only if you have defined them for the group. If not, you have to indicate the appropriate MIS code for each applicable MIS class.
If you choose to link the product with the group, any change made to the group will be automatically applied to all transactions associated with the product. If you do not select this option, the changes made to the MIS group after the linking will not affect the transactions to which the product is associated.
Pool Code
On linking the product to an MIS group, you should also indicate the Pool code from the product will borrow and lend.
Cost Code
Similarly, if you have linked an MIS Group to the product, the cost codes defined for the group will be displayed. You have the option to change them. If you have not linked an MIS Group with the product, you can indicate the applicable cost codes.
Fund Code
For Fund products that you create, you can indicate the fund MIS codes to which the product should report.
You will not have an option to change the defaulted list of Fund MIS codes for specific funds to which the product is associated.
After you make the specifications, click ‘Ok’ button to store them. Click ‘Exit’ or ‘Cancel’ button to delete your specifications.
Please refer to the MIS User Manual for more details.
2.3.17 Associating a Product with a Brokerage Rule
You can automate the processing of brokerage on contracts by associating brokerage rules to products. Brokerage will be calculated for all contracts processed under the product on the basis of the brokerage rule associated to the product.
Refer the Processing Brokerage User Manual for information relating to brokerage.
2.3.18 Specifying Free Format Texts and Instructions
Ideally, before you set up products, you should maintain and tag Free Format Texts (FFTs) and Instructions that are typically required for the contracts you process. For the products you set up, you can specify the tags that identify these FFTs and Instructions. When contracts involving the product are processed, the FFTs and instructions you specify will automatically be printed at various events, along with the specified advices.
To associate FFTs and instructions to a product, click ‘Document’ button in the Product Definition screen and invoke the ‘Bills Product – Instructions and Free Format Text’ screen will be displayed.
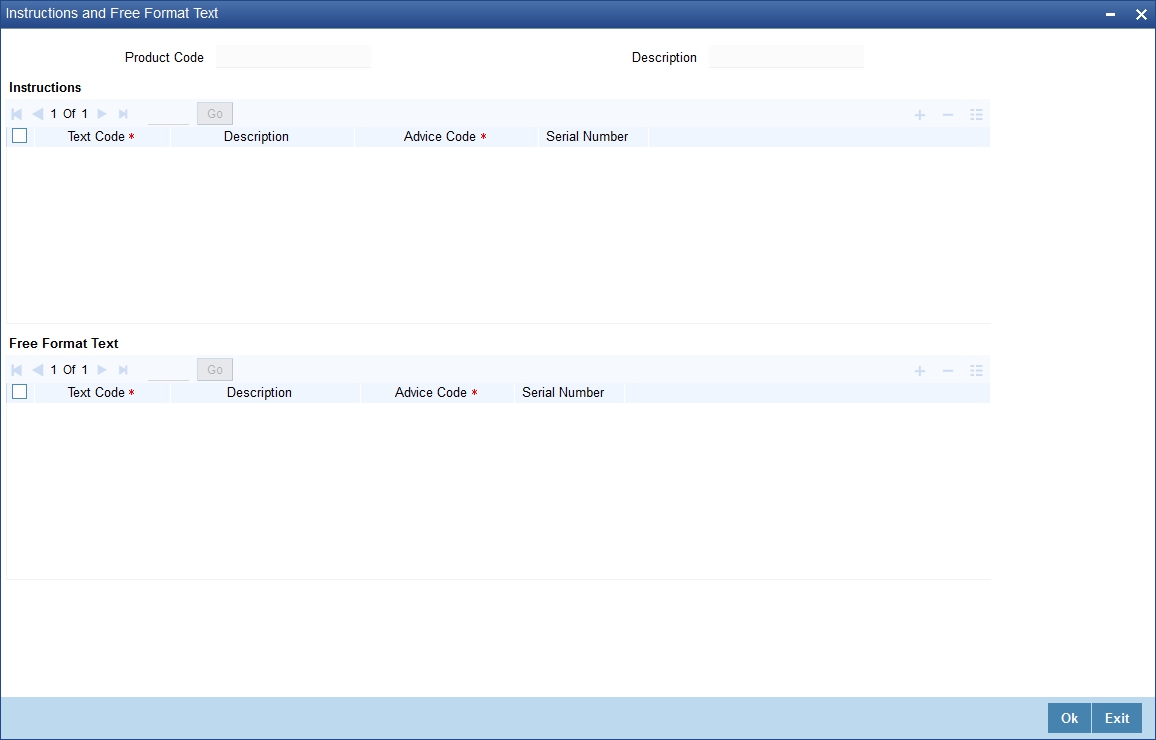
In this screen, you can specify the FFTs that are applicable to the product you are creating. (A list of standard FFTs is maintained in the Free Format Text Maintenance screen.) Select an FFT code from the list of FFTs. The description associated with the FFT code you have selected will be displayed.
You can associate several FFTs to a product you are creating. The FFTs, including the other details that you define for it, will apply on all contracts involving the product.
Advice Code
You can opt to specify whether the FFT or instruction is for the internal reference of the bank or whether it should appear on the advices generated for the contracts linked to the product.
You can indicate that the FFT or Instruction is for the internal reference of the bank by not specifying an advice code. If the FFT is to appear on the advices sent to the customer, specify the advice on which the FFT or Instruction should be printed. To do this, in the Advices screen, select an advice code from the list of the advices that you specified for the product.
After you have specified details for an FFT, click add icon to add it to the list of FFTs for the product. Click delete icon to delete an FFT specified for the product.
2.3.19 Specifying Instruction Details
Through the Product FFT and Instructions screen, you can specify the instructions that are applicable to the product you are creating. A list of the standard instructions that can accompany a product is maintained in the Instructions Codes Maintenance screen. Select an Instruction code from the list of instructions maintained.
You can associate several Instructions to the product you are creating. The instructions, including the other details that you define for it, will apply on all contracts involving the product.
Advice Code
You can indicate whether the instruction is for the internal reference of your bank or whether it should appear on the advices generated for the contracts linked to the product.
You can indicate that an instruction is for the internal reference of your bank by not specifying an advice code. If the Instruction is to appear on the advices you send your customers, specify the advice on which the Instruction should be printed. You can select an advice code from the list of the advices in the Advices screen.
After you have specified details of the Instructions applicable to a product, click add icon to add it to the list of instructions for the product. Click delete icon to delete an instruction associated with a product.
Note
While entering a contract involving this product, you can add to or delete from the defaulted list of instructions and FFTs.
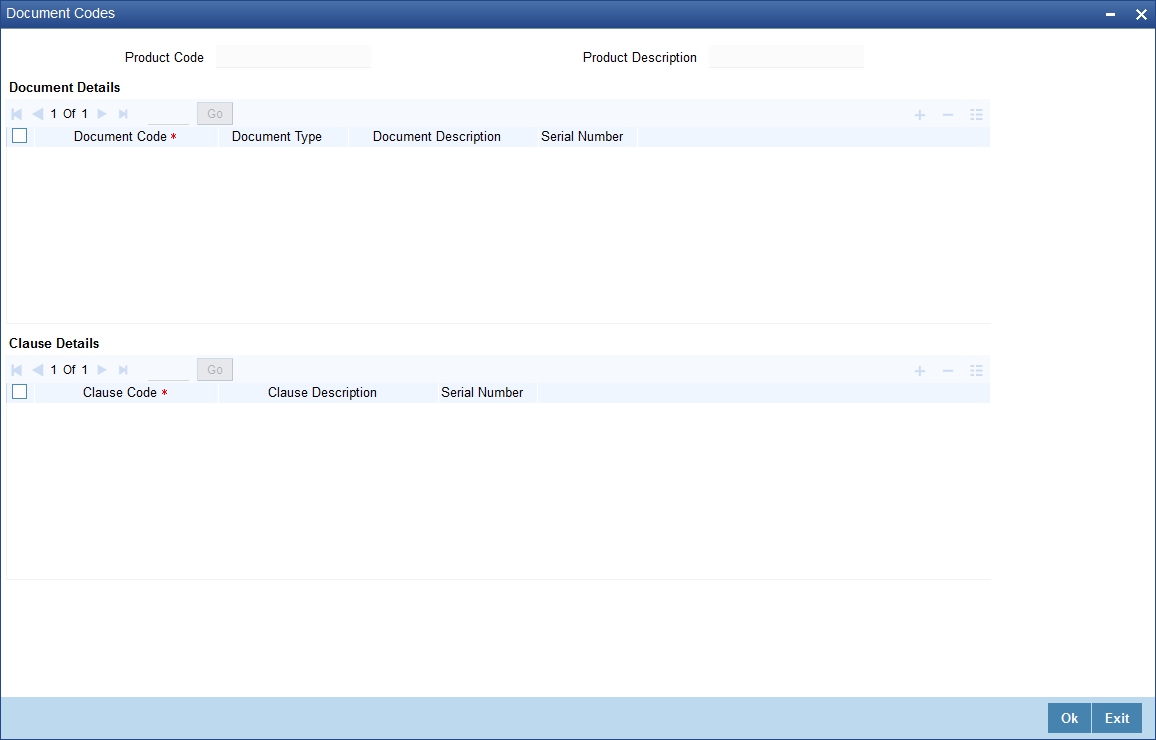
2.3.20 Document Codes Button
In addition to the Instructions and FFTs that you specify for a product, you can associate documents and clauses. From the ‘Product - Instructions and Free Format Text’ screen, click ‘Document Codes’ button to specify the documents and clauses applicable to the product you are creating. The documents that can be associated with a product are broadly classified into:
- Transport documents
- Insurance documents
- Invoices
- Other documents (includes packaging list, certificate of origin,
etc.)
There are certain standard documents that are required under a documentary product (as in the case of a Documentary LC product). You can specify the documents that are applicable to the contracts that are linked to the product.
Document Code
A list of the standard shipping documents that can accompany the contract is maintained in the Documents Maintenance screen. Along with these documents, you will also be provided with a pre-defined list of documents.
Select a document code from the list of documents maintained at your bank.
Document Type and Description
The description and the document type of the code you have selected will be displayed.
You can specify several documents for the product you are creating. All documents that you define for a product will default to the contracts involving the product.
After you have specified details of the document, click add icon to add it to the list of documents, applicable to the product. Click delete icon to delete a document specified for the product.
Clause Code
A clause is a statement that can accompany a document sent under an LC. After indicating the documents applicable to a product, you can specify the related clauses that should accompany the document.
A list of the standard clauses that can accompany a document is maintained in the Clauses Maintenance screen. From the pre-defined list of clauses, select the clauses applicable. You can attach more than one clause to a document that you have specified for a product.
By default, all the clauses, including the number of copies that you specify for the product, will be sent for all contracts involving the product.
After you have specified details of the clause, click add icon to add it to the list of clauses for the document. Click delete icon to delete a clause specified for the product.
Note
While entering a contract, you can add to or delete from the default list of documents and clauses.
2.3.21 Tracers Button
Tracers are reminders that can be sent to the various parties involved in a contract. In the Product Tracer Details screen, you can specify your preferences for the tracers that should be generated for the various exceptions that occur in the life cycle of contracts processed under the product.
To specify tracer details to be applicable on contracts involving a product, click ‘Tracers’ button in the Product Definition screen. The ‘Bills Collections Product Tracer Details’ screen is displayed.
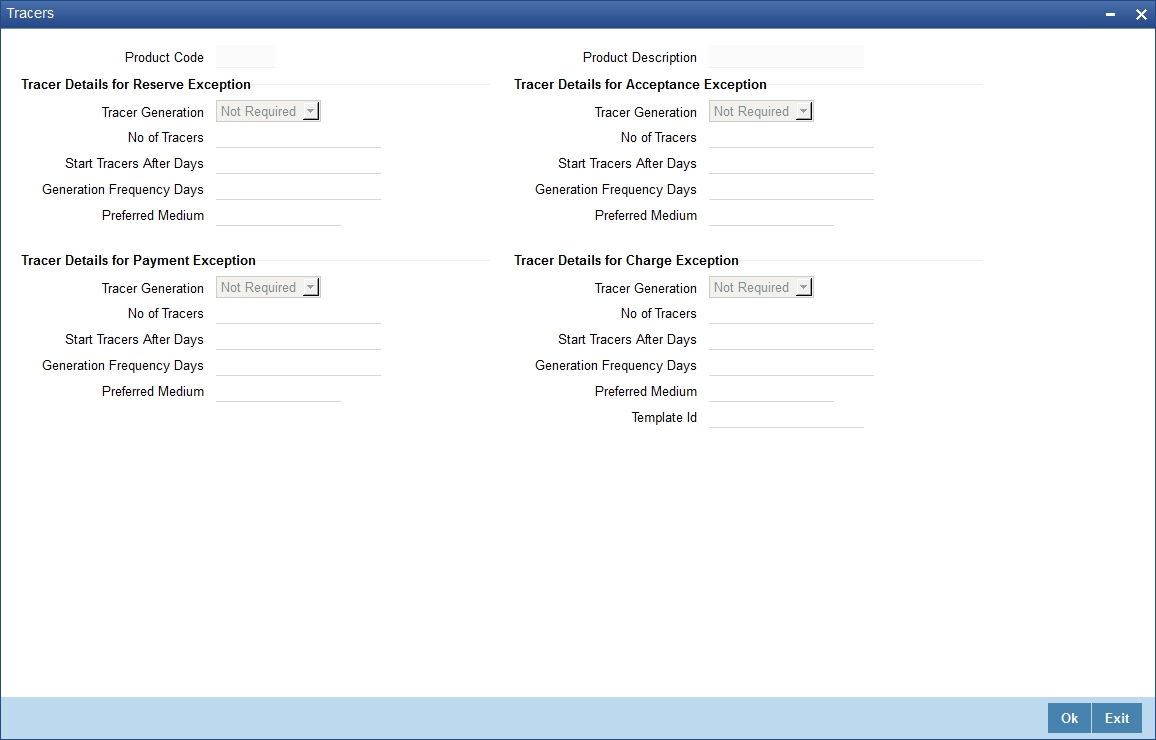
Tracer details for the following exception events can be captured through the Product Tracer Details screen:
- Reserve Exception
- Acceptance Exception
- Payment Exception
- Charges Exception
For each of these exceptions, you can generate tracers to the parties concerned.
Tracers Generation
You can indicate whether a particular exception tracer is applicable to a product you are creating. The options available are:
- Applicable - If you specify that a tracer is applicable for a product, you can also specify the number of tracers that should be sent for the exception
- Not Applicable - You can select this option to indicate that the exception tracer is not applicable to the product that you are creating
- Till resolved - If you indicate that the tracer should be generated until the exception is resolved, you need not specify the number of tracers that should be sent.
Number of Tracers Required
You can specify the maximum number of copies of a tracer that should be sent for each of the exceptions occurring in a contract involving the product you are maintaining. The default value is 9999.
Start Tracer after Days
Tracers can be generated only after a contract is authorized. You can specify the number of days that should elapse after contract authorization when the first tracer is to be sent.
By default, the first tracer for all authorized contracts linked to a product will be sent on the basis of your prescription for the product.
Generation Frequency
For the contracts linked to the product you are setting up, you can specify the frequency (in days) at which tracers should be sent to the parties involved.
Preferred Tracer Medium
For each of the exception tracers that you specify, indicate the preferred medium through which the tracer should be generated to the party concerned.
Tracers for all contracts processed under a product will be generated in the medium that you specify for the product. However, when processing a contract, you can change the medium to suit your requirements.
2.3.22 User Defined Fields Button
Fields defined in the User Defined Fields screen can be made applicable to the products that you create for the front-end modules of Oracle FLEXCUBE. At the time of creating a product, click ‘Fields’ button from the Product Definition screen.
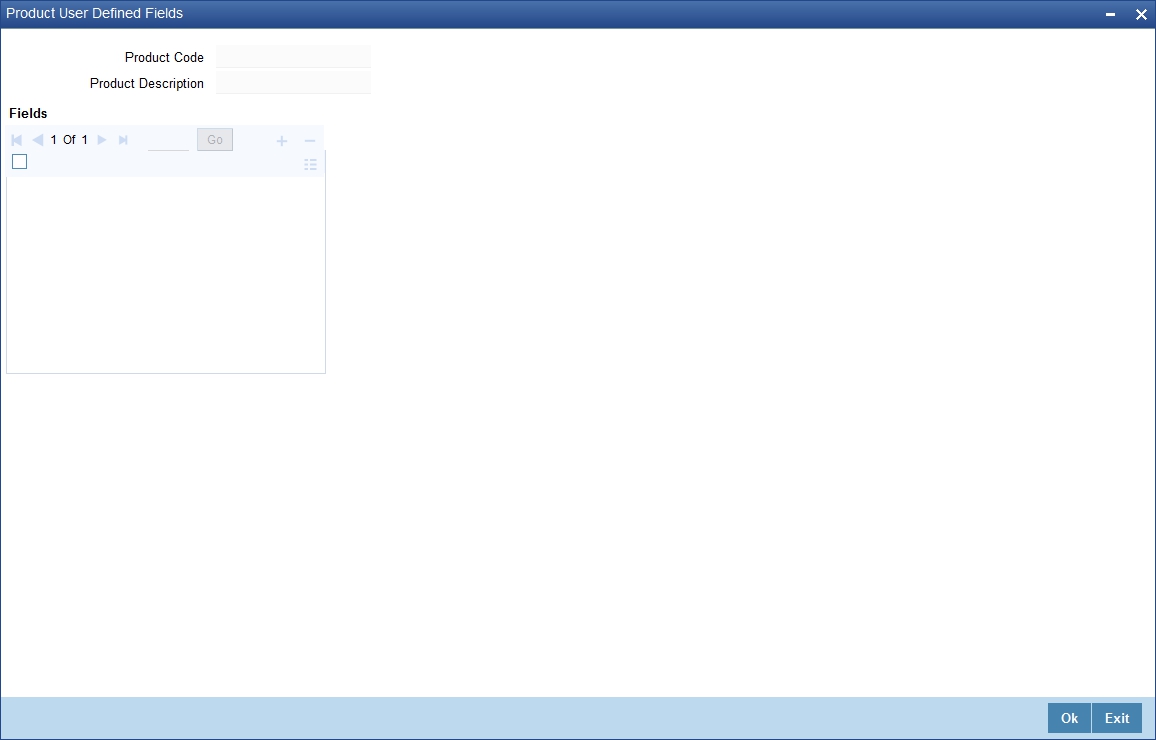
From the list of all the fields that you created, you can choose specific fields and make them applicable to the product. Besides, you can also specify the values that should be defaulted for the field.
The list of fields and the default values that you select for a product will be apply to all transactions associated with the product.
Refer to the User Manual ‘Creating User Defined Fields’ for details.
2.3.23 Status Button
A contract that is yet to reach its repayment date or on which repayments are being made on schedule may be considered as being in a ‘Normal’ status. When a payment is not made on its due date, you may want to do an aging analysis for the contract. You can do an aging analysis by changing the status of a contract on which payment is defaulted.
At any time during the life cycle of a contract, you can generate reports, which detail the status of aging contracts. This will help you follow-up on payments due. Click ‘Status’ button and invoke the following screen.
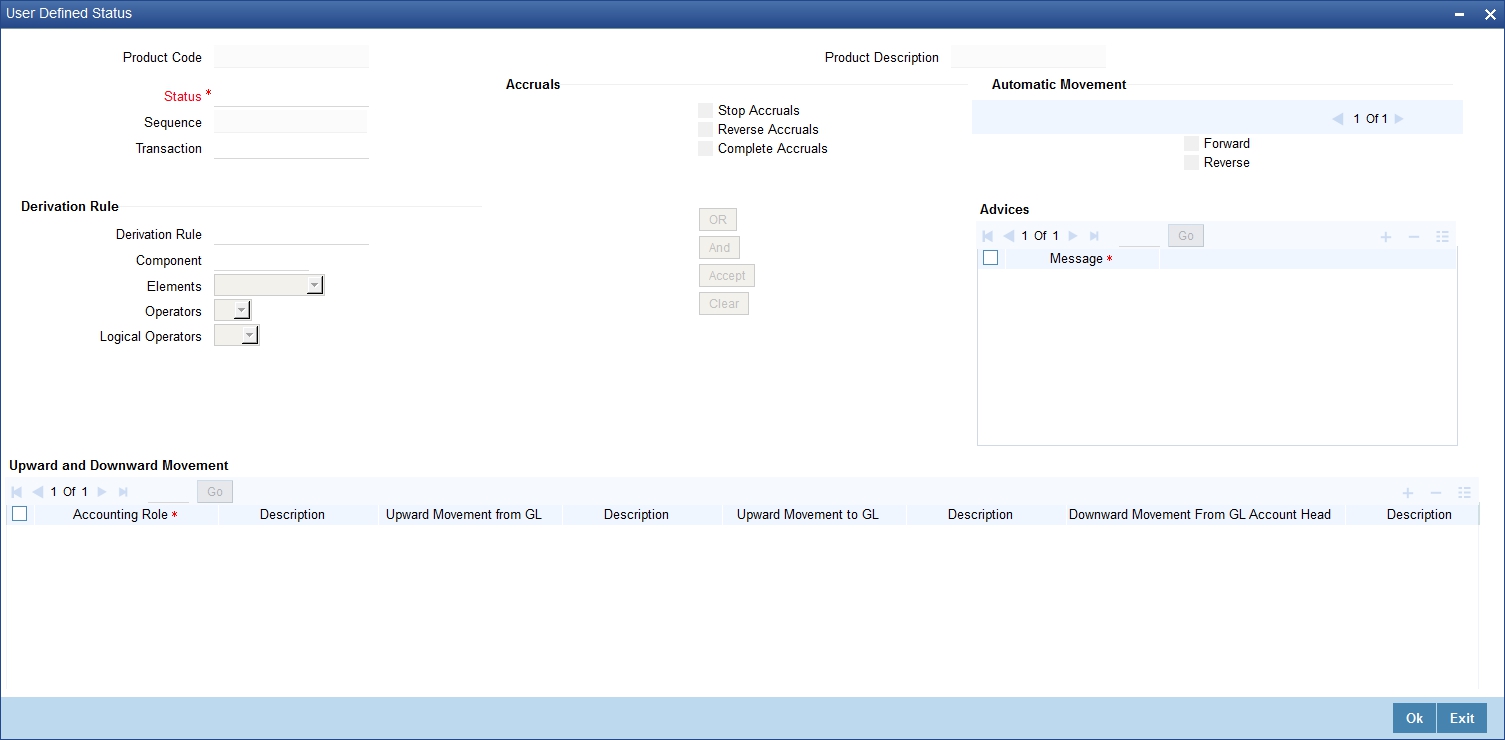
Apart from the Normal status that is automatically allotted to a contract on its initiation, a contract on which payment has not been made on the due date can pass through several other status. You can define attributes for each status through this screen. These attributes are:
- the number of days in which a contract should stay in a particular status after its repayment date has been reached
- whether the GL under which it is reported should be changed when there is a status change; and, if so
- the new GL under which it should be reported
Status
Ideally, when setting up a product, you should identify all possible status that contracts involving the product would move into. You should also indicate the sequence of status changes for contracts. Further, in this screen, you can specify the number of days after which a status change must automatically be carried out on components that remain due.
For example, you define the following status for the product, ‘Export Bills Discounted - 45 days’:
- Past Due Obligation (PDO)
- Non-accrual basis (NAB)
- Write-off (WO)
You want a bill under this product to move from one status to another in the order in which they are listed above. For such a condition, the status sequence has to be defined as follows:
- PDO -- 1
- NAB -- 2
- WO -- 3
Based on the default number of days defined for each component, a bill will first be moved from ‘Normal’ status to ‘PDO’, then to ‘NAB’, and, lastly, to ‘WO’ status.
Transaction
When the GL under which a component is reported is changed along with the status of a contract, an accounting entry is passed. A Transaction Code is associated with every accounting entry in Oracle FLEXCUBE. You should indicate the Transaction Code to be used for the GL transfer entries involved in the status change.
Specifying Accrual Preferences for the Status
You can indicate how accruals should be handled when the contract moves into the status you are defining.
Stop Accrual
You can indicate that accruals (on all accruable components of the contract) should be stopped when the contract moves to the status being defined. By doing so, you can ensure that your Receivable accounts for interest and other components are not updated for a contract on which repayment has been defaulted.
In our example of ‘Export Bills Discounted - 45 days’, the following status codes are involved:
- Past Due Obligation (PDO)
- Non-accrual basis (NAB)
- Write-off (WO)
For this product, you can specify that when the bill moves to PDO status, accruals can continue while accruals have to stop when the bill moves to NAB status.
If you choose to stop accrual entries from being passed for the contract, the date up to which accrual entries for the contract should be passed is determined by the preferences specified for the product to which the contract is associated.
Complete Accrual
If you select this option, accrual for all accruable components will continue when a contract moves into the status you are defining. Depending on the movement of the component (upward or downward) accrual entries will be passed to the new GL.
Reverse Accruals
You can indicate that the outstanding accruals (where a component has been accrued but not paid) on the contract should be reversed when it moves to the status that you are defining. If you specify so, the accrual entries passed on the contract, will be reversed when the status change is carried out.
Note
Future accruals should necessarily be stopped if, the accruals done till the date of status change have to be reversed.
In our example of the product for ‘Export Bills Discounted - 45 days’, the following statuses are involved:
- Past Due Obligation (PDO)
- Non-accrual basis (NAB)
- Write-off (WO)
Accruals on a bill should be stopped when it moves to NAB. We can specify that, besides stopping accruals, the accruals done so far have to be reversed. In such a case, the accruals done on the bill (for all accruable components), on which a payment has not been made, will be reversed out.
Suppose a bill under this product was initiated on 01 June ‘99, with the following details:
- Value (Initiation) Date -- 01 June ‘99
- Maturity Date – 14 July ‘00
- Interest Rate – 20%
- Repayment – Payment of principal and interest, on the maturity date.
In this case, there is a default on the repayment. The bill moves to PDO status on 1 March ‘99 (15 days after the maturity date) and to NAB status on 16 March ‘99 (30 days from the maturity date). Since the product has been defined for reversal of accruals along with status movement to NAB, the accruals for the 30 days of default will be reversed out.
2.3.24 Indicating Automatic Status Change
Check one of the following options:
Forward
A ‘forward’ status change is one in which the status changes from one to the next, in the sequence you have defined. In our example, the movement from Normal to PDO, PDO to NAB, and NAB to Write-Off are all forward changes.
Reverse
A ‘reverse’ status change is one in which the status changes from one to the previous. Such a situation arises when a payment is made on a contract with a status other than Normal.
If you specify that forward changes have to be carried out automatically, the status of the contract will be changed after the specified number of days. If not, you have to change the status of a contract through the contract processing function.
Even if you have specified automatic status change for a product and, therefore, a contract involving it, you can manually change the status of a contract before the automatic change is due. You can do it through the Contract On-line Details screen.
However, if a product has been specified with manual status change, you cannot specify automatic status change for a contract involving the product.
If you specify that reverse changes have to be carried out automatically, the status will be changed when a payment is made on a contract with a status other than Normal. If you specify that reverse changes should not be automatic, the status remains unchanged even if a repayment is made on the contract. You have to change the status, manually, through the Contract Processing function.
A reverse change may also become necessary when the number of days of default is increased for a product.
If you specify that forward changes or reverse changes have to be carried out automatically, the status changes will be carried out by the Automatic Contract Update function when it is executed at the Beginning of Day on the day the change falls due. If the due date for the forward or reverse status change happens to be a holiday, then, the processing would depend on your specifications in the Branch Parameters screen.
If you have not specified that the forward or reverse changes should be carried out automatically, the status remains unchanged till you specifically change it for a contract through the Contract Processing function.
2.3.25 Generating Advices for a Status Change
You can generate advices, when the components of the contract move forward from one status to the next, to notify the customer of the status change. These messages or advices are maintained in the Messaging System of Oracle FLEXCUBE.
2.3.26 Specifying Status Control Details
The number of days after which a component should be moved to a particular status can vary for each of the components of the contract.
The number of days is always counted as calendar days from the maturity date specified for the contract. The following example illustrates this concept:
In the example of ‘Export Bills Discounted - 45 days’, the following status are involved:
- Past Due Obligation (PDO)
- Non-accrual basis (NAB)
- Write-off (WO)
For PDO status, the number of days that should result in a status change for different components is defined as follows:
Component |
No. of Days |
Interest |
15 days |
Principal |
30 days |
Charges and Fees |
45 days |
You enter a bill involving the product. The customer defaults on the repayment. The status of the bill moves to ‘PDO’ status after 15 days of default in interest payment.
A bill involving this product is moved to ‘PDO’ status after 15 days of default in interest payment. The report on the bills with ‘PDO’ status will indicate that for this bill only the interest component is in ‘PDO’ status.
The principal of the bill will be reported to be in ‘PDO’ for both interest and principal 30 days after the maturity date; so also for interest and fees.
If the customer pays back only the interest and keeps the principal outstanding, the bill will be moved to PDO only after 30 days of default in principal repayment.
If the number of days you have specified for a status change varies for each component of a contract, the components will be in a different status at any given time. This again, is left to your discretion. You may tend to be more lenient with the repayment of the principal (since the principal earns interest) and specify a greater number of days for the principal to move from Normal to PDO, than you would for the main interest component. You may specify 15 days for the principal to move from Normal status to PDO while you specify just 5 days for the interest to move from Normal to PDO.
2.3.27 Capturing Movement Details
You may have a GL structure under which contracts in Normal status are reported, while those with defaulted payments are reported under different GLs, depending on their status.
For example, the GL structure for ‘Discounted bills for 45 days’ could be as follows:
Status |
GL |
Normal |
1001ASSF |
PDO |
1001ASSF |
NAB |
1110ASSC |
WO |
1111ASSE |
For each component, you should indicate the GLs from and to which accounting entries should be passed when the contract moves from one status to another.
Accounting Role and Upward Movement From GL Account Head
In this section, you need to indicate the Accounting Roles and GLs from and to which accounting entries need to be passed when contracts involving the product move forward from the current status to another.
For example, at the time when the contract moves from Normal to NPA status, the following accounting entries would need to be passed:
- To move, the Outstanding Contract Amount from Normal asset GL to the NPA asset GL.
- To square off interest from Normal INEC GL to the (NPA) INEC GL.
- To move the interest reversed GL (expense) to the suspense GL (liability).
Select the appropriate GLs from the option list. The description of the GL is also displayed. Click add icon to add to the list of From and To GLs for the product. Click delete icon to remove a set of GLs from the list.
Accounting Role and Downward Movement From GL Account Head
In this section of the screen, you need to indicate the Accounting Roles and GLs from and to which accounting entries need to be passed when contracts involving the product move backward from the current status to another.
For example, when a contract moves from the NPA status to Normal status, the following accounting entries would be passed:
- To move the outstanding contract amount from the NPA asset GL to Normal Asset GL.
- To square off interest from the (NPA) INEC GL to Normal INEC GL.
- To move the outstanding interest amount from the IIS GL (expense) to the interest recovered GL.
Select the appropriate GLs from the option list. The description of the GL is also displayed. Click add icon to add to the list of From and To GLs for the product. Click delete icon to remove a set of GLs from the list.
2.4 Transaction Limits
This section contains the following topics:
2.4.1 Maintaining Transaction Limits
Every time a transaction entered in Oracle FLEXCUBE exceeds a certain limit in a specified currency, an override is automatically generated. This feature is referred to as the Currency-wise Transaction Limits facility. Only a user with dual authorization rights (a user other than the one who authorized the transaction which led to this override) will be allowed to authorize the override.
You can maintain currency-wise transactional limits for a module and product combination through the ‘Product Transaction Limits Maintenance’ screen. You can invoke this screen by typing ‘CSDPLMNT’ in the field at the top right corner of the Application tool bar and clicking the adjoining arrow button.
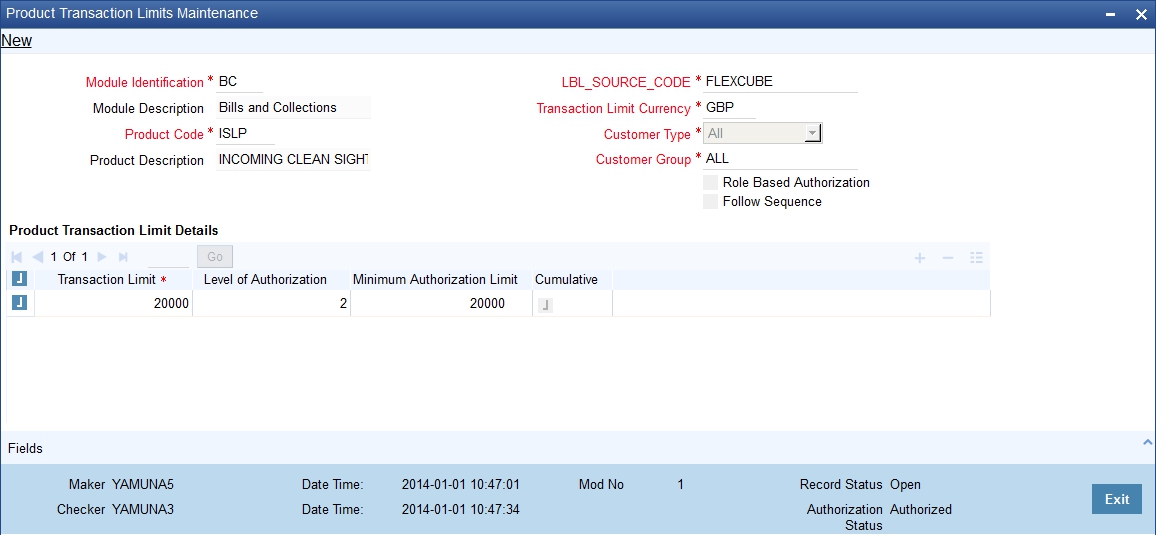
To maintain details of a new currency-wise transaction limit for a specific module and product combination, click the ‘New’ button on the Application toolbar. The Product Transaction Limit screen will be displayed without any details.
Every record that you create will be processed in Oracle FLEXCUBE only after it is authorized. A user bearing a different Login ID can authorize the record that you have created.
Module and Product
Every module in Oracle FLEXCUBE is identified by a code. First, you have to identify the module for which the currency-wise transaction limit is to be maintained. A list of all the modules of Oracle FLEXCUBE operational at your bank will be displayed in the available list. Choose the appropriate module code. The description associated with the module will be defaulted in the adjacent field.
Each module contains a number of products within it. After you identify the module, indicate the product within the module for which you would like to maintain a currency-wise transactional limit.
Note
Since, we do not define products for Journal Entry transactions, if you are maintaining currency-wise transaction limits for the Journal Entry transactions, your entries in the respective fields should be as follows:
Item |
Code |
Module |
DE/AL |
Product Code |
ZJRN/ZALP |
Transaction Amount Limit and the Limit Currency
The transaction limit currency is the currency for which you would like to maintain the amount limit. Every time you process a transaction in the specified Module-Product Code-Currency combination, the system checks whether the transaction exceeds the defined amount limit.
If a transaction exceeds the amount limit, the system displays an override message while saving the transaction. Since overrides and transactions are authorized separately, authorization has to be handled by a user with dual authorization rights.