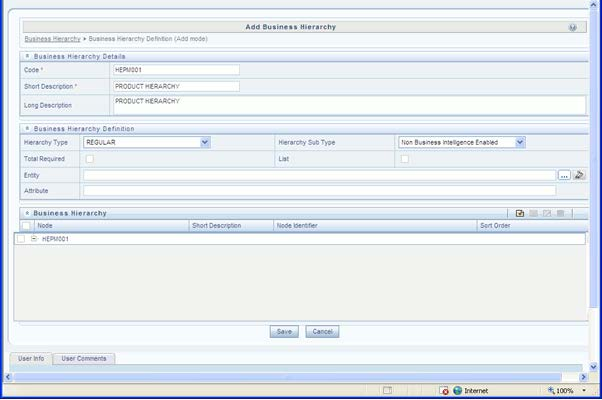
Step 1 - Add Business Hierarchy
1. To define a new Business Hierarchy, go to Unified Metadata Manager, select Business Metadata Management and choose the type of hierarchy.
Hierarchy Types are:
§ Regular: For representing non-time and non-measure dimensions in a hierarchical format. For example, this type are Product, Organization Unit, and so on.
§ Measure: For representing the measures in the hierarchical format. This corresponds to a ACCOUNT hierarchy within the ESSBASE. An example of this type is Management Reporting Line.
§ Time: For representing the calendar or date dimension in a hierarchical format. This corresponds to a TIME hierarchy within Essbase. An example of this type is Calendar hierarchy.
2. Choose Hierarchy subtype. Hierarchy SubTypes are:
§ Non Business Intelligence Enabled: For representing the hierarchy with underlying data store containing just leaves and nodes are built within the metadata of the hierarchy. This subtype is useful for modelling bucket/range, ragged, and non-additive hierarchies.
§ Business Intelligence Enabled: For representing the hierarchy with underlying data store as level-based dimension table. This subtype is useful for modelling balanced hierarchies.
§ Parent Child: For representing the hierarchy with underlying data store as a parent-child dimension table. This subtype is useful for modelling ragged hierarchies.
3. Select the "Total Required" property, if a TOTAL is required to be included as the root node of the hierarch and select the "List" property, if hierarchy is a flat list of members without any levels.
4. Choose the entity and attribute on which the hierarchy is based. The components for hierarchy definition differ for each subtype of the hierarchy.
§ If subtype is "Non Business Intelligence Enabled", then the user can add nodes and order in which the node should appear in the hierarchy (sort-order). Node identifiers
§ are SQL expressions that are specified for leaf members and data is classified based on the node identifiers.
§ If sub-type is "Business Intelligence Enabled", then the user can specify the levels and SQL expression for each level within the hierarchy.
§ If sub-type is "Parent Child", then the user can specify the column that contains the parent member and that contains the child member.
For more details, see Oracle Financial Services Analytical Applications Infrastructure User Guide.
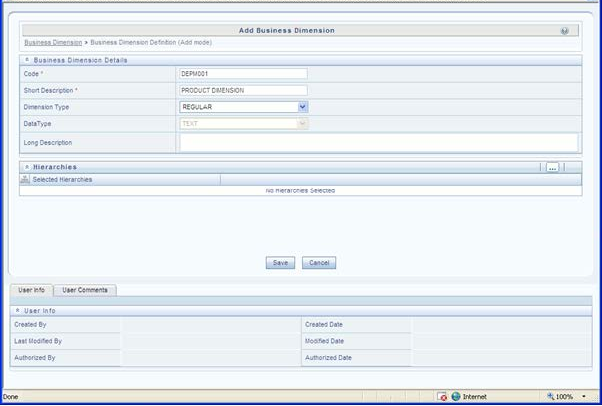
Step 2 – Add Business Dimension
A Business Dimension is a structure of one or more logical grouping (hierarchies) that classifies data. It is the categorization across which measures are viewed. A dimension can have one or more hierarchies. Business Dimension facilitates you to create a logical connection with measures. It gives you various options across which you can view measures.
5. To define a new Business Dimension, go to Unified Metadata Manager, select Business Metadata Management.
6. Choose the Dimension Type. Dimension Type is same as Hierarchy Type and helps to filter the hierarchies that will be part of the dimension. A dimension will contain one or many hierarchies. Choose the hierarchies that are part of the dimension.
The User Info grid at the bottom of the screen displays the metadata information about the Business Dimension created along with the option to add comments.
7. Click Save in Add Business Dimension screen to save the details.
For more details, see Oracle Financial Services Analytical Applications Infrastructure User Guide.
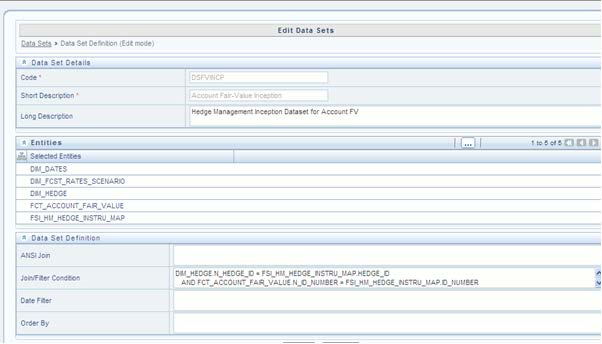
Step 3 – Modify Data Set
To modify Data Sets, go to Unified Metadata Manager --> Business Metadata Management.
Identify data sets that are based on the modified fact table. Open the data set definition. Include the new dimension table in the data set. Modify the data set JOIN to include the join clause between the fact table and new dimension table. Save the data set.
For more details, see Oracle Financial Services Analytical Applications Infrastructure User Guide.
Step 4 – Modify Cube Definition
Modify "Cubes" in Unified Metadata Manager -> Business Metadata Management.
Identify the cube that needs to be modified. Open the cube definition. Add the new dimension. Map the measures to the newly added dimension and Save the cube definition.
For more details, see Oracle Financial Services Analytical Applications Infrastructure User Guide.
Step 5 – Build Cube
Assuming that the dimension table and fact table is loaded with relevant data, cube can be built. Define batch to execute the CREATE CUBE component that will build the outline and load data in ESSBASE.
For more information on executing batch, see Oracle Financial Services Analytical Applications Infrastructure User Guide.