Absolute payment patterns are commonly used for instruments that are on a seasonal schedule, such as agricultural or construction loans that require special payment handling based on months or seasons.
When working with absolute payment patterns, it is sufficient to define payments for one calendar year. Once the term exceeds a year, the payment schedule will loop until the instrument matures.
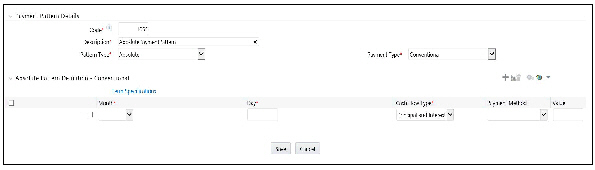
Select Absolute as the Pattern Type.
This table describes key terms used for this procedure.
Term |
Description |
|---|---|
Month |
This drop-down list allows you to select the month of the payment phase being defined. |
Day |
Used to specify the day of the month the payment is due. |
Add |
Used to add one or more rows. |
Delete |
Used to delete a row. |
1. Select the Payment Type from the drop-down list: Conventional, Level Principal, or Non-Amortizing.
Note The Payment Type determines the type of information required to successfully define the Payment Phase. |
2. Define the Payment Phases.
Note A Payment Phase is a set of payment characteristics that defines the time line of the instrument's amortization. |
a. Select a Month for the pattern.
b. Enter a Date for the pattern.
c. Select the Payment Method.
Note The available Payment Methods depend on the Payment Type. Payment Methods do not apply to the Non-Amortizing Payment Type. |
d. Enter the Value for the Payment Method you selected in the previous step for applicable Payment Types.
Note If you selected the Interest Only Payment Method in the previous step, the Value field does not apply. |
e. Click Add Another Row to add additional Payment Phases to the Pattern and click Delete corresponding to the rows you want to delete.
Note A Payment Pattern must have at least one valid Payment Phase to be successfully defined. The system raises a warning if you try to save a Payment Pattern with an incomplete Payment Phase. You can define up to 365 Payment Phases for each Payment Pattern. |
3. Click Save.
The Payment Pattern is saved and the Payment Pattern summary page is displayed.
4. You may want to utilize the Data Input Helper to copy from a row where you have already defined the pattern definition or apply a fixed value down the page. The following optional steps describe how to use this feature
a. Select the checkbox next to the rows that you want to work with or use the "Select ALL" option by selecting the checkbox on the header row.
b. Select the Data Input Helper icon.
c. From the Data Input Helper – popup screen, select Method – "Grow by Amount" or some other appropriate method.
d. Select the term points from the left side (Available Columns) of the shuttle box.
e. Select APPLY to copy assumptions to the selected rows.
5. Click Save.
The Payment Pattern is saved and the Payment Pattern summary page is displayed.
Excel import/export functionality is used for adding/editing absolute payment pattern information. For more details, refer to Excel Import/Export.
When a detail instrument using an Absolute Payment Pattern is processed for Remaining Term cash flow processing, the Next Payment Date is internally calculated to determine which Payment Phase should be used. The calculated Next Payment Date is only used for this purpose. The Next Payment Date stored on the Instrument record in the Instrument table is always the date used for processing the initial payment.
The following table describes the relationship between Payment Phase properties and Payment Types.
|
Conventional |
Level Principal |
Non Amortizing |
|---|---|---|---|
Month |
Yes |
Yes |
Yes |
Day |
Yes |
Yes |
Yes |
Payment Method |
Yes |
Yes |
|
Value |
Yes |
Yes |
|
The following table describes relationship between Payment Method and Payment Types.
Payment Method |
Conventional |
Level Principal |
Non Amortizing |
|---|---|---|---|
Percentage of Original Balance |
|
Yes |
|
Percentage of Current Balance |
|
Yes |
|
Percentage of Original Payment |
Yes |
Yes |
|
Percentage of Current Payment |
Yes |
Yes |
|
Absolute Payment |
Yes |
Yes |
|
Interest Only |
Yes |
Yes |
|