Creating Partition Schedules
PeopleSoft Applications administrator must create and setup the partition schedules.
To create a partition schedule, the administrator must add the partition schedule ID and then define the schedule parameters and the partition type. Use the Partition Schedule page (Search) to add a new partition schedule.
Select .
Click the Add a New Value tab.
Enter a partition schedule ID and click Add.
On the Partition Schedule page, define the schedule parameters and the partition type.
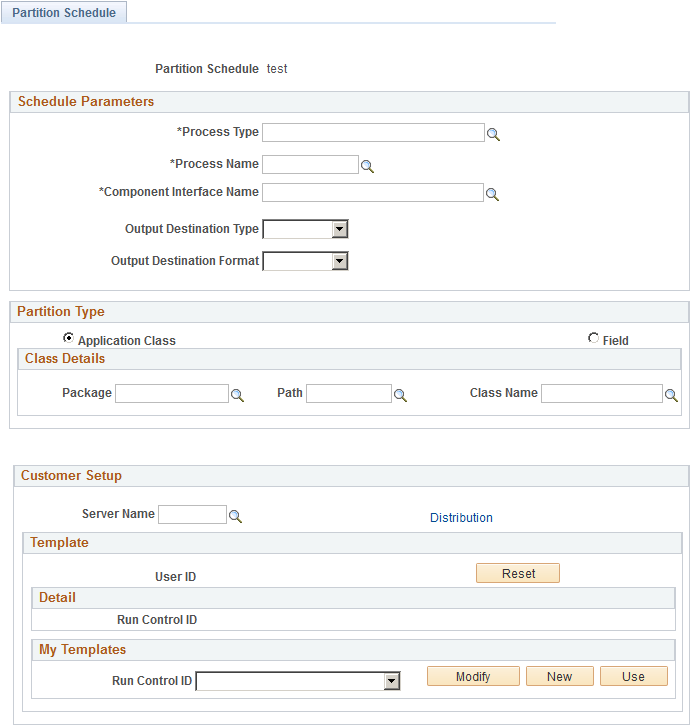
Image: Partition Schedule page
This example illustrates the fields and controls on the Partition Schedule page. You can find definitions for the fields and controls later on this page.
Schedule Parameters
|
Field or Control |
Definition |
|---|---|
| Process Type |
Enter the process type for each database and operating system platform on which you want processes to run. |
| Process Name |
Enter a process name to display. The process names available are based on the type selected. Leave blank to display all names. |
| Component Interface Name |
Enter the component interface on the run control for the process schedule. You must create a component interface in the Application Designer if it does not exist. |
| Output Destination Type |
Select the output destination for this schedule that is applicable for this process type. The process uses the values in the process type definition to determine where to send the output. |
Partition Type
|
Field or Control |
Definition |
|---|---|
| Application Class |
Specify the application class. Application class based partition is an advanced partition mechanism that returns the list of partition values. |
| Field |
Select this to specify that the partitioning needs to be done on a field that has a pre-defined prompt table with the required values for the processes. For example, a business unit, such as, US001, US002, and so on. |
Customer Setup
|
Field or Control |
Definition |
|---|---|
| Server Name |
Enter the server name to execute the schedule on the specified Server. Note: If this field is left blank, the default Process Scheduler Server assignment takes place. |
| Distribution |
Click this link to specify the distribution details. Use the Distribution Detail page to specify the users who would receive the process status notification with link to generated reports and other status information. |
| User ID |
Specify the user associated with the selected run control ID. |
| Reset |
Click this to reset the parameters in the customers setup section. This removes the run control template that is associated to this self-service schedule. Note: The run control is not deleted. |
| Detail |
Displays the selected run control ID that is used as a template. |
| Run Control ID |
Select an existing run control ID. |
| My Template |
Allows users to set the run control. |
| Modify |
Allows editing of the Run Control. It opens up the Run Control page for editing the Run Control. |
| New |
Allows creation of a new run control. |
| Use |
Sets the Run Control Id selected in the Drop-down as the Current Active Template. |