Requesting Reports in PeopleSoft Applications
This section discusses how to generate reports.
To run a report, select it from the appropriate menu in your PeopleSoft application. Many applications have a report menu that lists available reports.
Run Controls
When you want to run a report, you must tell the system when and where you want it to run. For example, you might tell the system to run the report on the database server at midnight or on a Windows server every Sunday afternoon, or make it available immediately in your browser. For most reports, you also must set parameters that define the content of the report, such as the business unit or time period on which to report.
A run control is a database record that provides values for these settings. Instead of entering the same values each time that you run a report, you create (and save) a run control with those settings. The next time that you run the report, you select the run control and the system fills in the settings.
Run Control IDs
Each run control that you create receives a unique run control ID. These IDs are product-specific. Refer to your PeopleSoft product documentation for details about the run control IDs that you will be using. When you select a report to run, the system prompts you for a run control ID. If you are in Add mode, enter a new ID for the run control that you are about to define. If you are in Update/Display mode, enter an existing run control ID or click the Search button and select from the list of available run control IDs.
Note: If you are running a number of reports from the same menu, you must enter only the run control ID for the first report. When you select a second report from the menu, the application remembers which run control you are using.
To select a report:
Select the required PeopleSoft application menu item, for example,
Select Report and then click the required report name.
When you select a report name, you can choose from these two actions:
Add a new run control ID.
Select an existing run control ID.
You can run offline processes from pages in your PeopleSoft application in a variety of ways. The way in which you use the processes depends on the application. Access the page from which you want to run your process. For many reports, you need to enter values for parameters that specify what data the report includes, such as from and to dates or business units. The parameters page appears after you enter the run control ID.
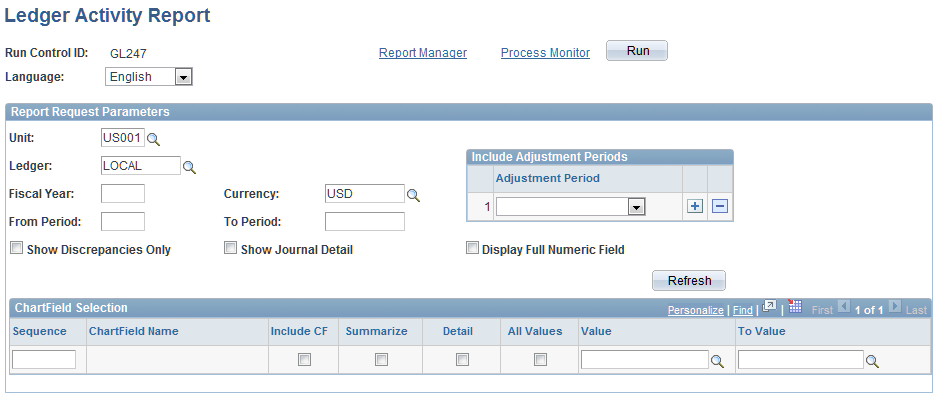
Image: Ledger Activity Report page
This example illustrates the fields and controls on the Ledger Activity Report page.
Note: The pages you use to submit report parameters in your applications may appear differently.
If you selected an existing run control ID, the values in this page reflect the settings from the selected run control; if you added a new value or if you are using a PeopleSoft Human Capital Management application, they are the default values.
You can change any of these settings. However, keep in mind that your changes are saved to the run control when you save or run the report.
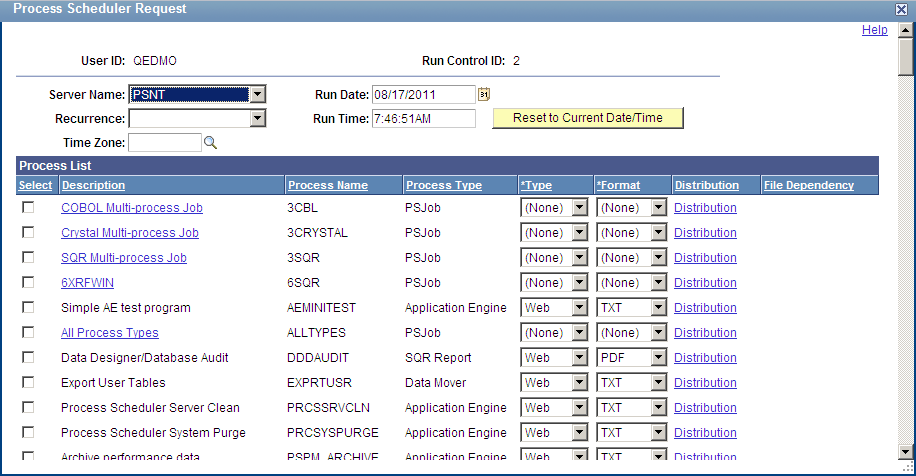
To run your report, click Run; the Process Scheduler Request page appears.
You submit a process request from the Process Scheduler Request page. This page displays the options that you have selected for a particular process request and which processes are available for you to submit. Select the options that you want to use for running your process and select the check box for each process that you want to run. Click OK to queue your process request.
The options available to you on this page are determined by your security profile. For example, each end user has a user profile, which is linked to one or more roles. Roles define groups or types of end users, such as payroll clerks, sales staff, or managers. Each role has one or more permission lists that control what a user can access. You can run only those processes that are associated with your permission list. For example, if you are in the human resources department, you probably belong to a human resources role and, therefore, can run only human resources processes. The number of processes that appear in the list on the Process Scheduler Request page is directly associated with your security profile.
Select the run options that you want to use to run your process. Depending on your security, you can select the server and the run date and time variables for your process. In the Process List group box, select the check box for each process that you want to run.
Image: Process Scheduler Request page
This example illustrates the fields and controls on the Process Scheduler Request page.
You can choose several kinds of output formats for your process. The following table lists output formats by process type and output type:
|
Process Type |
Output Type |
Output Format |
Default |
|---|---|---|---|
|
AppEngine |
FILE |
PDF, XLS, TXT, HTM |
TXT |
|
AppEngine |
WEB |
PDF, XLS, TXT, HTM |
TXT |
|
AppEngine |
WINDOW |
PDF, XLS, TXT, HTM |
TXT |
|
COBOL |
NONE |
NONE |
NONE |
|
COBOL |
WEB |
TXT |
TXT |
|
COBOL |
WINDOW |
TXT |
TXT |
|
Cube |
NONE |
NONE |
NONE |
|
nVision |
|
HTM, XLS |
XLS |
|
nVision |
FILE |
HTM, XLS |
XLS |
|
nVision |
PRINTER |
HTM, XLS |
XLS |
|
nVision |
WEB |
HTM, XLS |
XLS |
|
nVision |
WINDOW |
HTM, XLS |
XLS |
|
nVision |
DEFAULT |
DEFAULT |
DEFAULT |
|
SQR |
|
CSV, HP, HTM, LP, PDF, PS, SPF, OTHER Note: CSV output is not supported on OS390/zOS platforms. |
|
|
SQR |
FILE |
CSV, HP, HTM, LP, PDF, PS, SPF, OTHER Note: CSV output is not supported on OS390/zOS platforms. |
|
|
SQR |
PRINTER |
HP, LP, PS, WP |
PS |
|
SQR |
WEB |
CSV, HP, HTM, LP, PDF, PS, SPF, OTHER Note: CSV output is not supported on OS390/zOS platforms. |
|
|
SQR |
WINDOW |
CSV, HP, HTM, LP, PDF, PS, SPF, OTHER Note: CSV output is not supported on OS390/zOS platforms. |
|
|
WinWord |
WEB |
DOC |
DOC |
|
WinWord |
WINDOW |
DOC |
DOC |
|
Data Mover |
FILE |
TXT |
TXT |
|
Data Mover |
WEB |
TXT |
TXT |
|
Data Mover |
WINDOW |
TXT |
TXT |
|
OTHER |
NONE |
NONE |
NONE |
Note: You must have Adobe Acrobat Reader installed on your workstation to be able to read Acrobat (.pdf) files.
See Selecting Output Types and Formats.
Report Distribution
The Distribution Detail page enables you to choose the recipients of your process output. To set up distribution for your process output, click the Distribution icon.
If your process allows output that can be emailed, you can enter an email subject and message and send the output to a group of email addresses.
You can add users or roles to the distribution list by adding a row and entering the pertinent information. You can also use this page to add someone who would not normally have the proper security to view this output.
Note: If you are entering a list of email addresses, insert a semicolon between each address.