CONFIGURING OBDX APPLICATION AND MOBILE BANKING USING OAM AND WEBLOGIC
Following topics in this chapter provides detailed information on configuring OBDX Application and Mobile Banking:
- Creating WebGate Agent on OAM Console
- Manage Application Domain and Resources
- Creating Custom Login Scheme
- Add the Login Scheme to Authentication Policy
- Manage User Identity Stores
- Enabling OIC in OAM (For Mobile Banking)
- Finger Print Authentication
- Add OBDXJWTAsserter to Weblogic
- Copying the artifacts generated after registering Webgate
Creating WebGate Agent on OAM Console
Before you can use the new Oracle HTTP Server 11g WebGate agent for Oracle Access Manager, you must register the new WebGate agent with Oracle Access Manager by using the Oracle Access Manager Administration Console. Following are the steps to register a WebGate Agent:
Login to OAM Console.
For example: http://<hostname>:<oam_admin_port>/oamconsole
In the Agents block, Click the “+” and choose Create Webgate.
- Select the Version as 11g
- Enter the hostname in Name field
- Click on Apply
This creates the 11g Webgate Agent for OAM.
Note: The hostname here will be the fully qualified hostname of the server where Webagte is installed.
Manage Application Domain and Resources
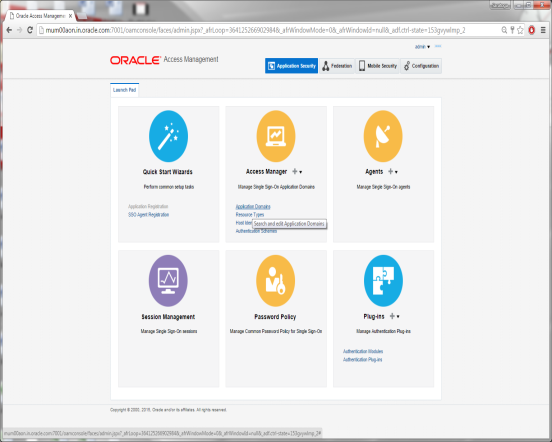
Go to Launch Pad and search for an application domain.
Click on Applications Domain in the Access Manager tab.
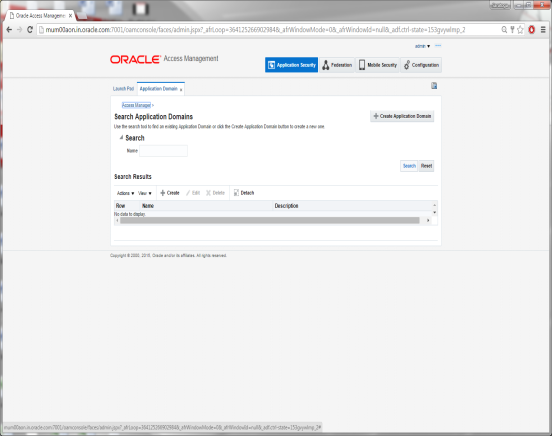
Click on Search
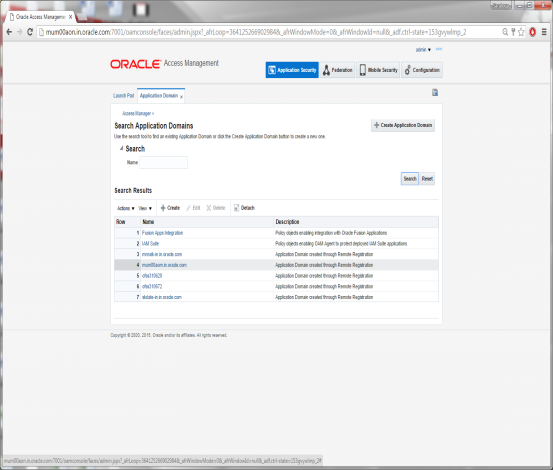
Click on the Domain Name you want to configure.
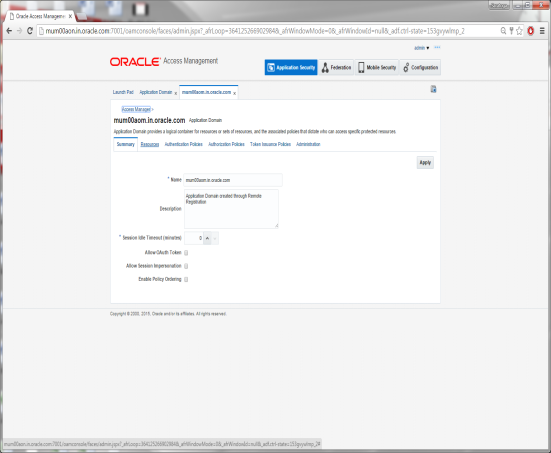
Click on the Resources Tab
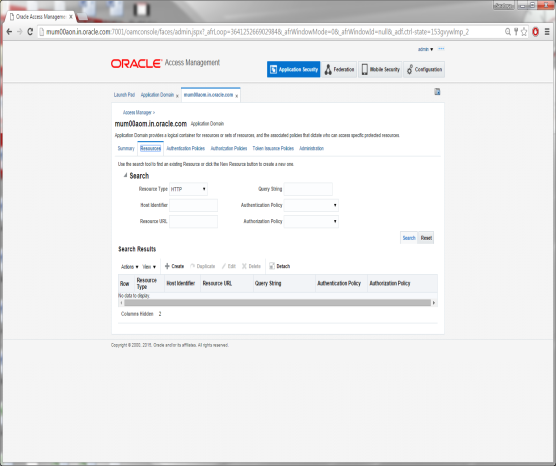
Click on Search

Search Results will show an entry for Resource URL as /** which is Protected.
Select the Resource entry and Click the Edit option.
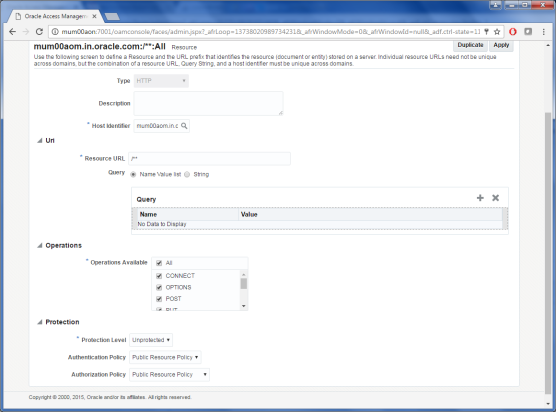
Modify the values of Protection Level, Authentication & Authorization Policy as shown.
Click on Apply to save the changes.
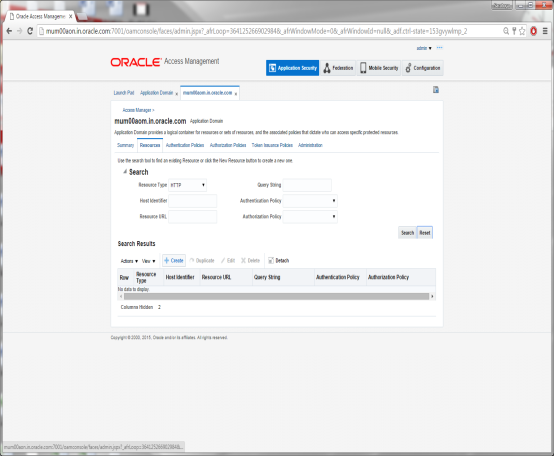
Click on the Create Icon
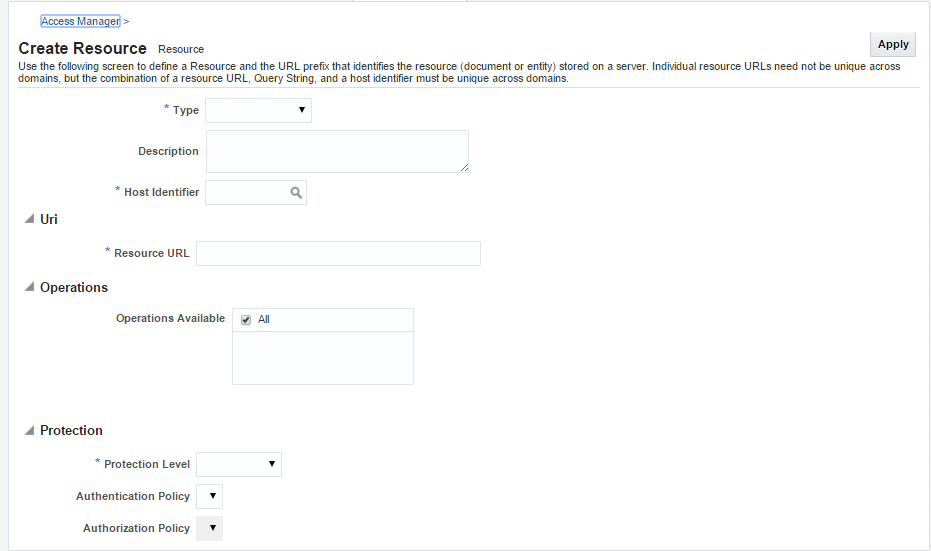
Specify the following values for each of the fields respectively:
- Type: The HTTP type is the default; it covers resources that are accessed using either the HTTP or HTTPS protocol. Policies that govern a particular resource apply to all operations.
Select Type HTTP
- Description: An optional unique description for this resource.
- Host Identifier: A list of host identifiers is available, which contains all identifiers that were defined as a shared component. You must search and choose a host identifier to assign this resource.
- Resource URL: The URL value must be expressed as a single relative URL string that represents a path component of a full URL. For example, /pages/*
- Operations: Select the required Operation from the table.
- Protection Level: Select the Protection Level from the drop-down as per the table.
- Authentication Policy: Select the required value from the drop-down.
- Authorization Policy: Select the required value from the drop-down.
Click on Apply to add the resource.
Perform the above steps to add the URLs listed in the table below:
|
Resource URLs |
Operations |
Protection Level |
Authentication Authorization Policy |
|---|---|---|---|
|
/** |
ALL |
Unprotected |
This is the LDAP Server (OUD) Hostname. |
|
/pages/* |
ALL |
Protected |
This is the LDAP Server (OUD) Port. For example: 1389. |
|
/*/pages/* |
ALL |
Protected |
This is the Administrator |
|
/digx/v1/locations/branches/* |
GET |
Excluded |
This is the Administrator Account password. |
|
/digx/v1/locations/atms/* |
GET |
Excluded |
This is the OUD user search base cn=Users, dc=in,dc=oracle,dc=com |
|
/digx/v1/locations* |
GET |
Excluded |
This is the OUD group search base cn=Groups, dc=in,dc=oracle,dc=com |
|
/digx/v1/mobileClient/verify |
ALL |
Excluded |
This is the OUD group search base cn=Groups, dc=in,dc=oracle,dc=com |

Creating Custom Login Scheme
To add a Custom Login Page, go to Launch Pad on oamconsole.
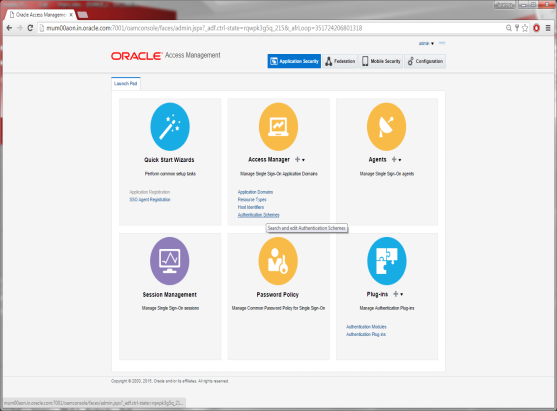
Click on Authentication Schemes from the Access Manager block.
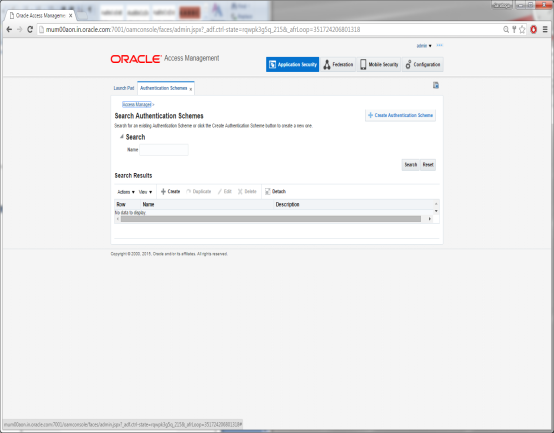
Click on Create Authentication Scheme
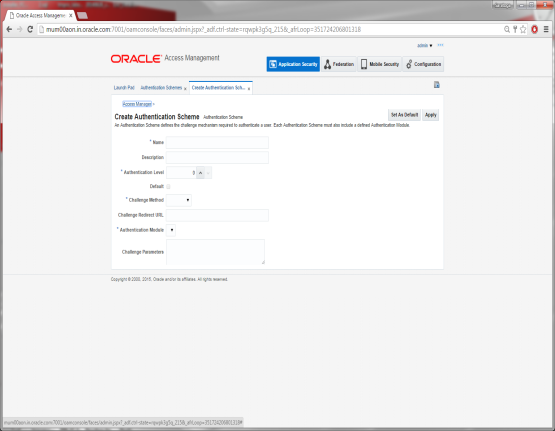
Specify the following details:
- Provide a name for the Scheme. E.g. OBDXLoginScheme
- Select the authentication level as 2.
- Choose the Challenge Method as FORM
- Enter the Challenge Re-direct URL. E.g. /oam/server
- Select the Authentication Module as LDAP
- Enter the Challenge URL which is the actual URL of the login page.
- Select the Context Type as External
Click on Apply to save the Scheme.
Add the Login Scheme to Authentication Policy
Go to the Launch Pad.
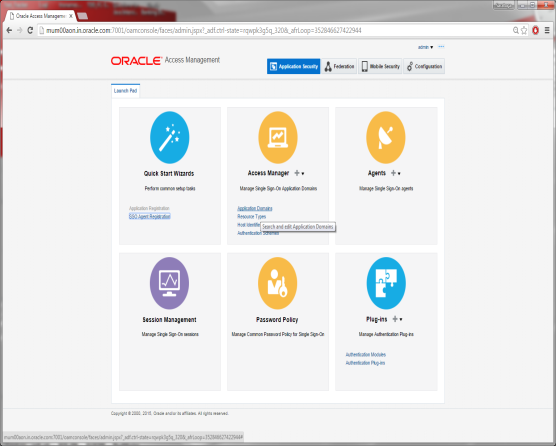
Click on Application Domain.
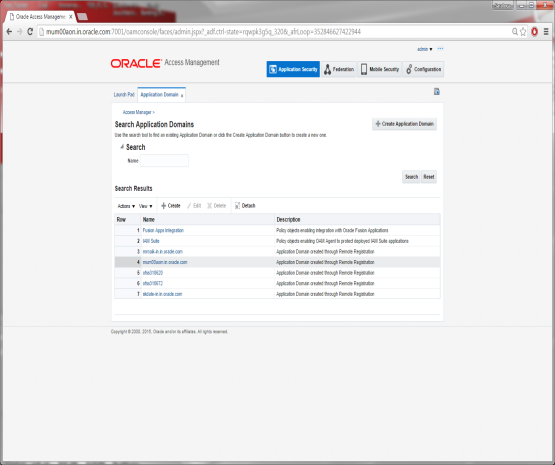
Click on Search and Select the Domain Name.
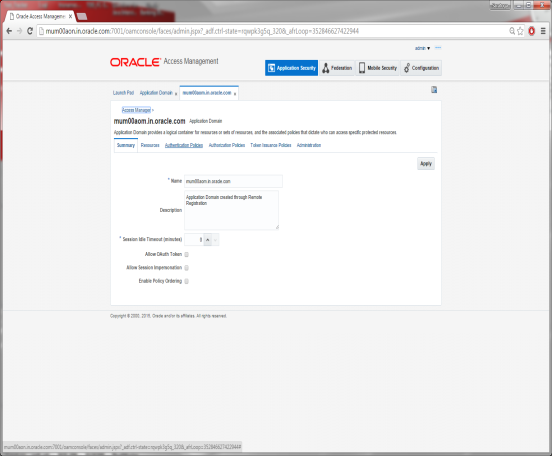
Click on Authentication Policies Tab
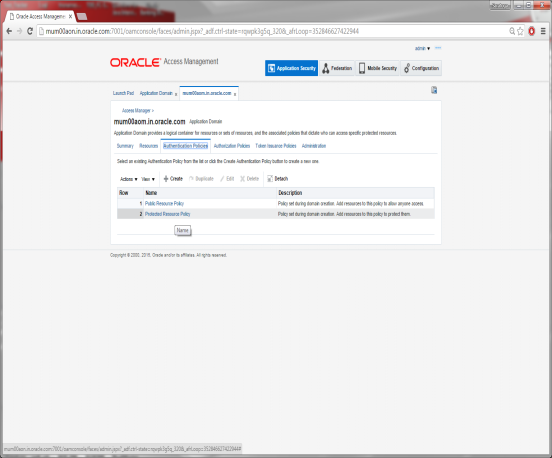
Click on Protected Resource Policy
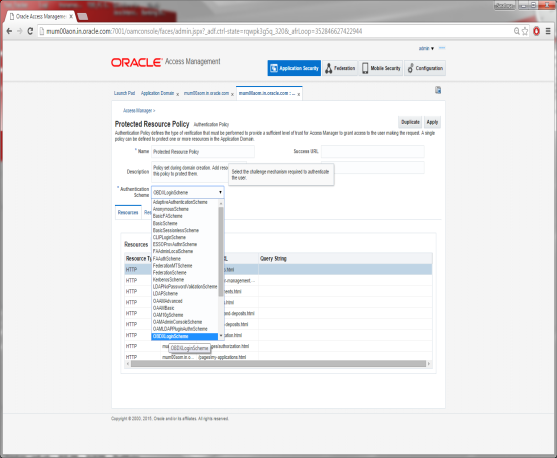
Select the Scheme create for Login from the Authentication Scheme drop-down.
Click on Apply to save the changes.
Manage User Identity Stores
For modifying the OAM Identity Store to store LDAP details, click on Configuration button available on the top-right corner.
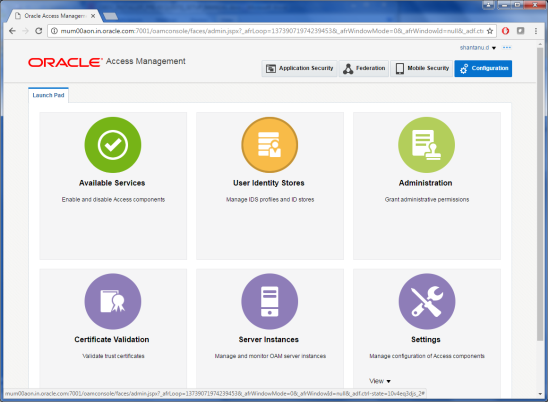
Click on User Identity Stores.
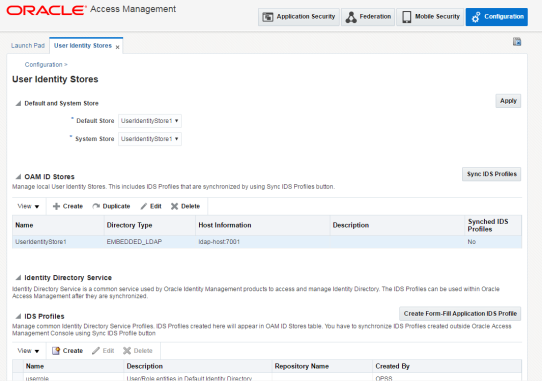
Select the entry UserIdentityStore1, under OAM ID Stores and Click the Edit option.
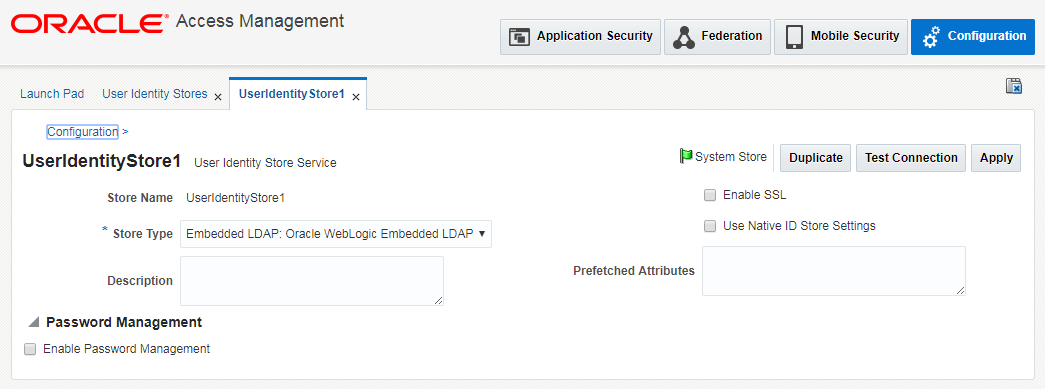
Now, Select the Store Type depending on the LDAP to be used and you will be shown additional fields to provide further details as shown below.
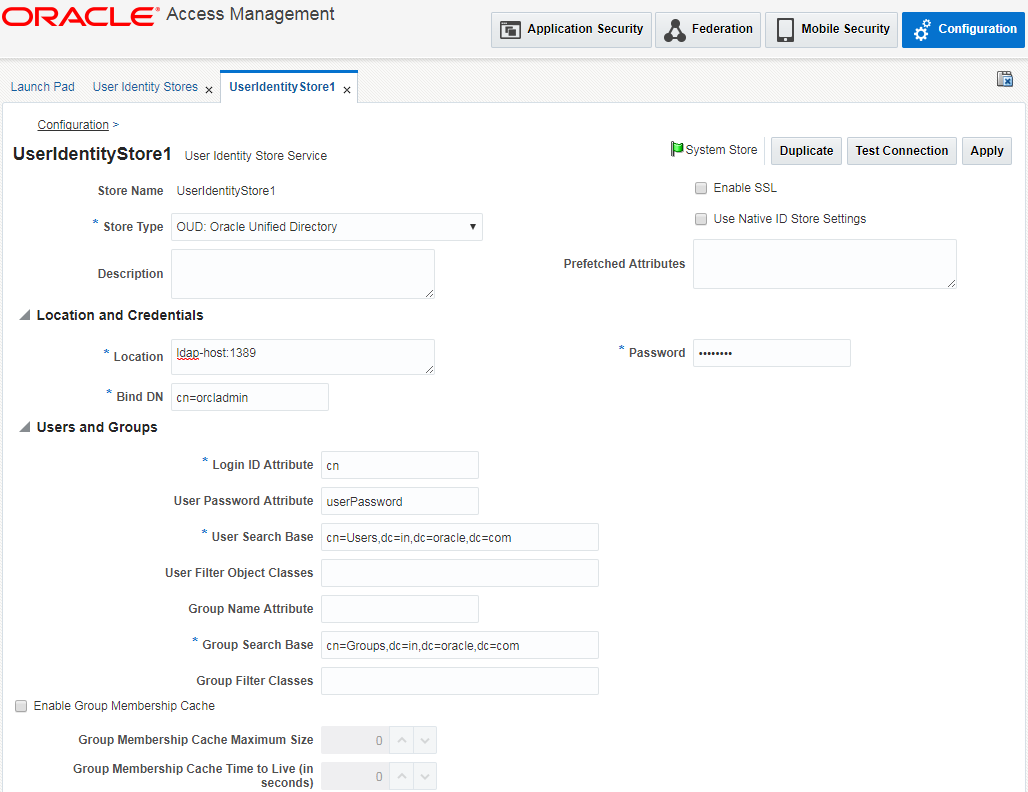
Enter the values against the mandatory field on the page:
Location: Provide LDAP hostname & port in the following form:
<ldap_hostname>:<port>
Base DN: This will be the LDAP username e.g. cn=orcladmin
Password: Enter the LDAP user’s password.
User Search Base: Provide the user search hierarchy e.g.
cn=Users,dc=in,dc=oracle,dc=com
Group Search Base: Provide the group search hierarchy e.g.
cn=Groups,dc=in,dc=oracle,dc=com
Then, check the Enable Password Management checkbox at the end and provide the details in the fields as shown below.
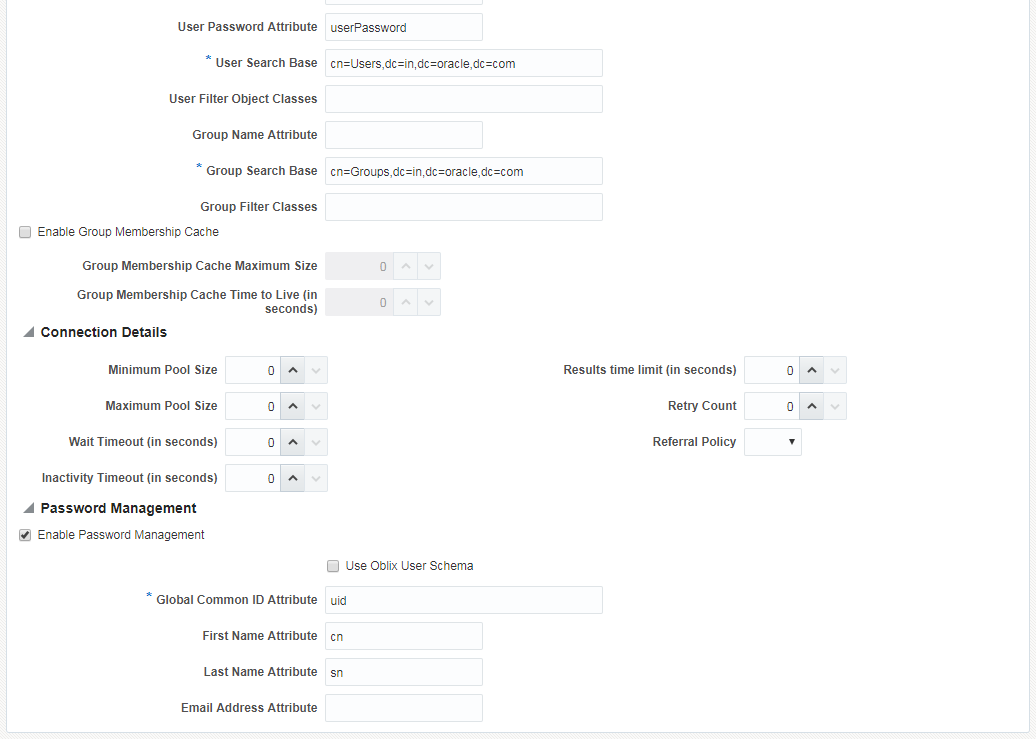
Click Apply to save the changes.
Note: After mapping the LDAP server details in OAM ID Store, login to the oamconsole will be only allowed using the LDAP admin user credentials. The user details can be found in the usergroup.ldif file attached in the Section 9.4 “Creating Attributes, Object Class, Users, Groups and Adding Optional Attributes on LDAP Server” of this document.
Enabling OIC in OAM (For Mobile Banking)
OBDX uses Oracle Identity Connect (OIC) API’s. Below are the steps to enable OIC in OAM
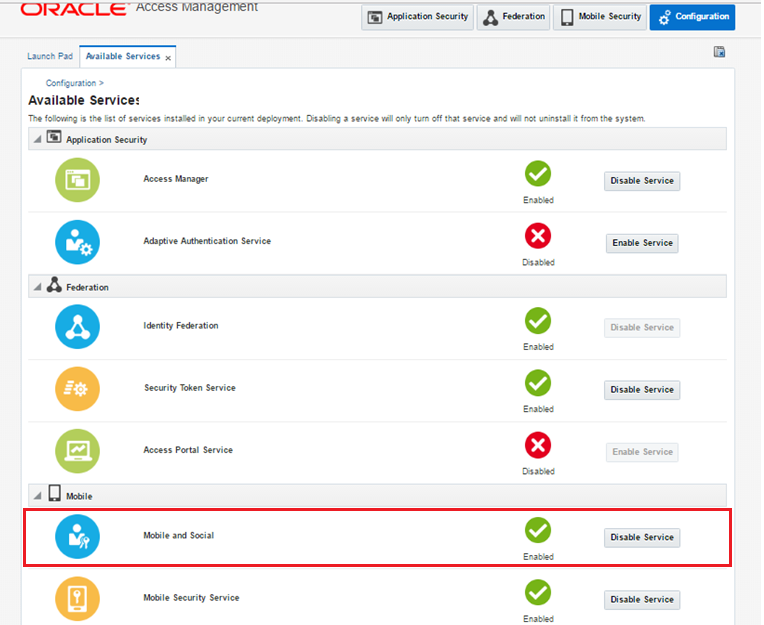
Navigate to Configuration > Available Services
Enable Mobile and Social Service.
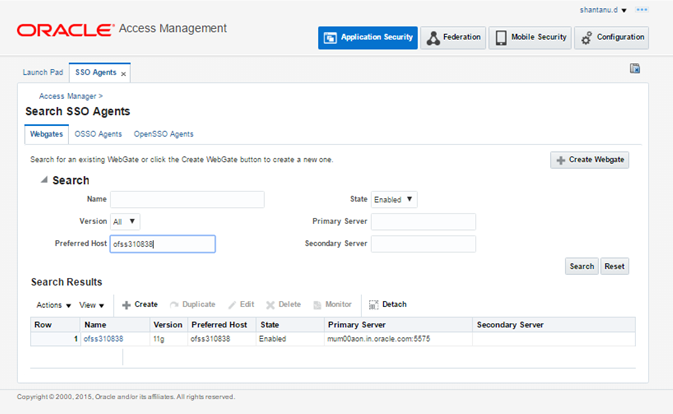
Now, go to Application Security Tab > Agents
Select the WebGate for which OIC is to be enabled.
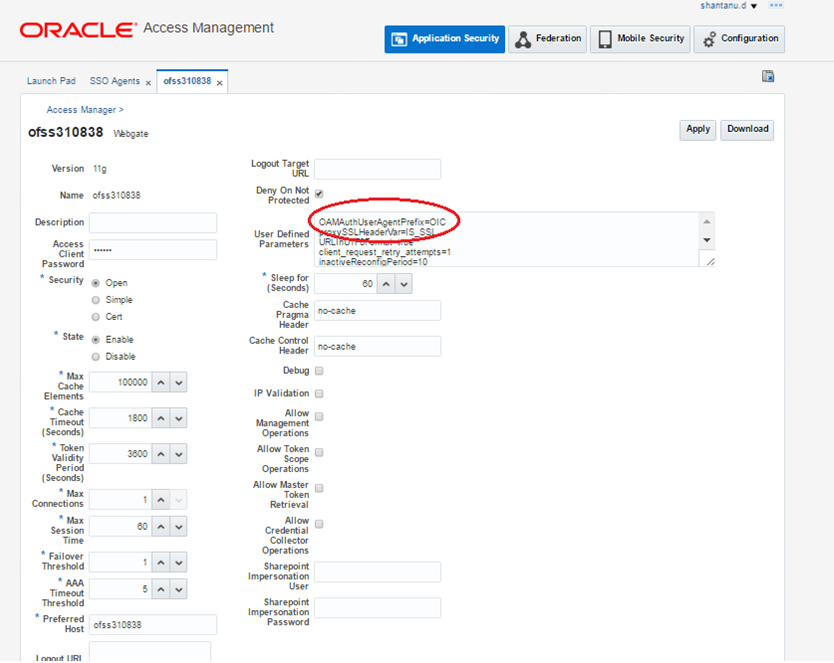
Add the below parameters in User Defined Parameters as shown and save changes.
OAMAuthUserAgentPrefix=OIC
OAMAuthAuthenticationServiceLocation=http://<OAM Host>:14100/oic_rest/rest/oamauthentication
Note: The below step is required if using non-default identity store in OAM. In such a case map the identity store to an authentication scheme and then the authentication scheme to OIC.
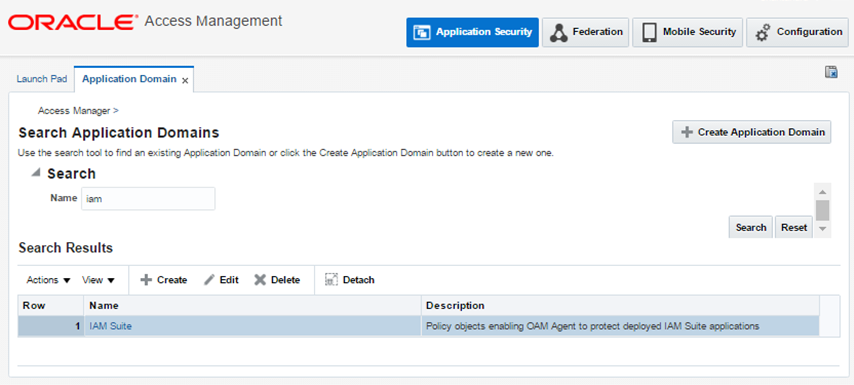
From Launch Pad, go to Application Domain > IAM Suite > Authentication Policies > OICAuthenticationPolicy
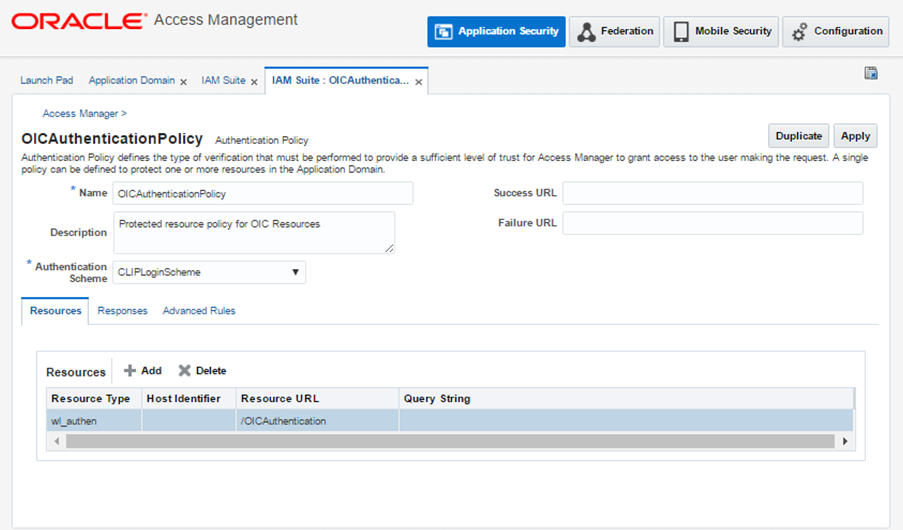
Select the OBDX Authentication Scheme created previously and click Apply.
Now, refer Section 5 in OpenLDAP-Configuration.docx to configure Mobile Banking using Weblogic Managed Authentication.
Finger Print Authentication
Finger print authentication in OBDX mobile banking is achieved using JSON Web Tokens (JWT). JWT Tokens are validated along with mobile device UUID. Below configurations are required in OAM:
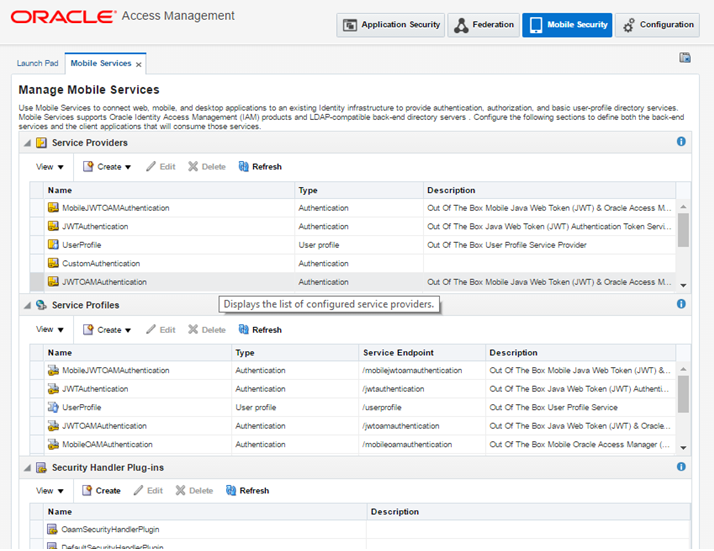
Navigate to Mobile Security Tab > Mobile & Social Services > Service Providers > JWTOAMAuthentication
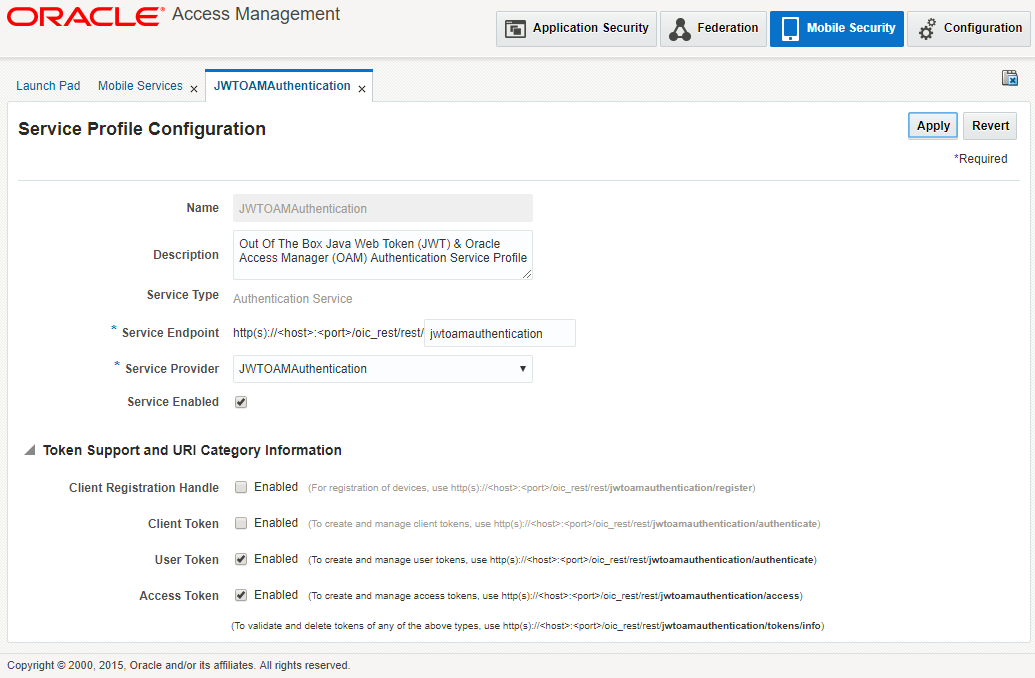
Click Edit and Change value of TokenExchangeInput to JWT_UT+CRED. Also set the validity of the token as required in seconds and Save the changes.
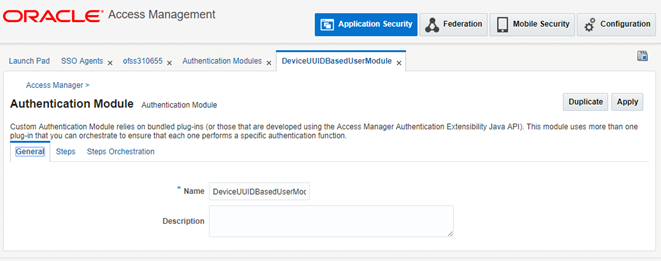
Now, Navigate to Application Security Tab > Authentication Modules Tab > Create Custom Authentication Module
Give Name eg. DeviceUUIDBasedUserModule
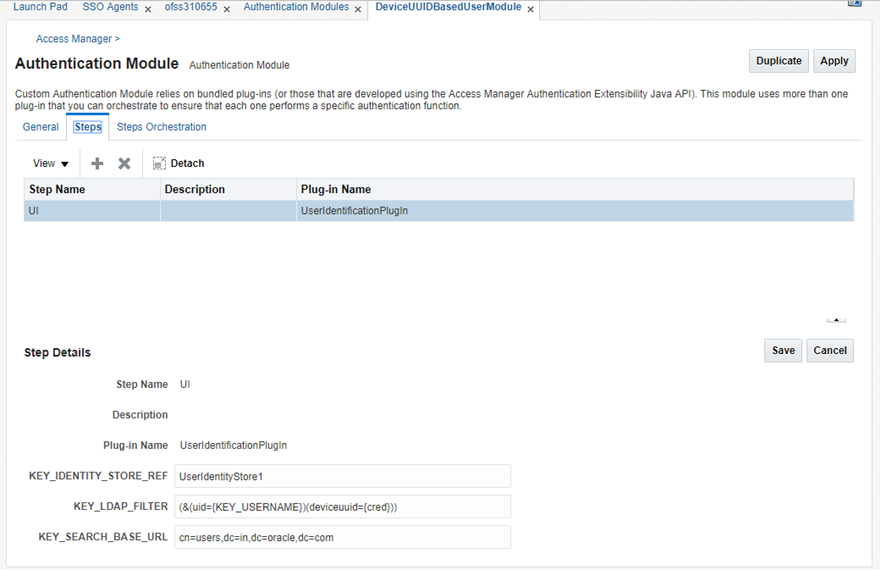
Now, configure the Steps tab as shown above.
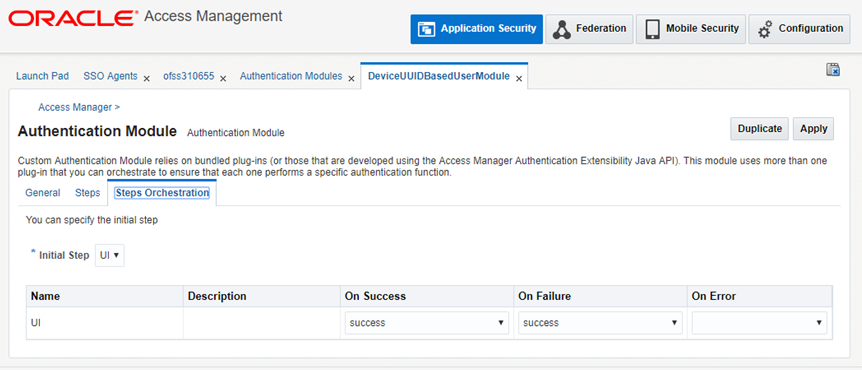
Now, configure the Step Orchestration tab as shown. Click on Apply to save the Module.
After creating the module, Navigate to Launch Pad > Authentication Scheme > Create.
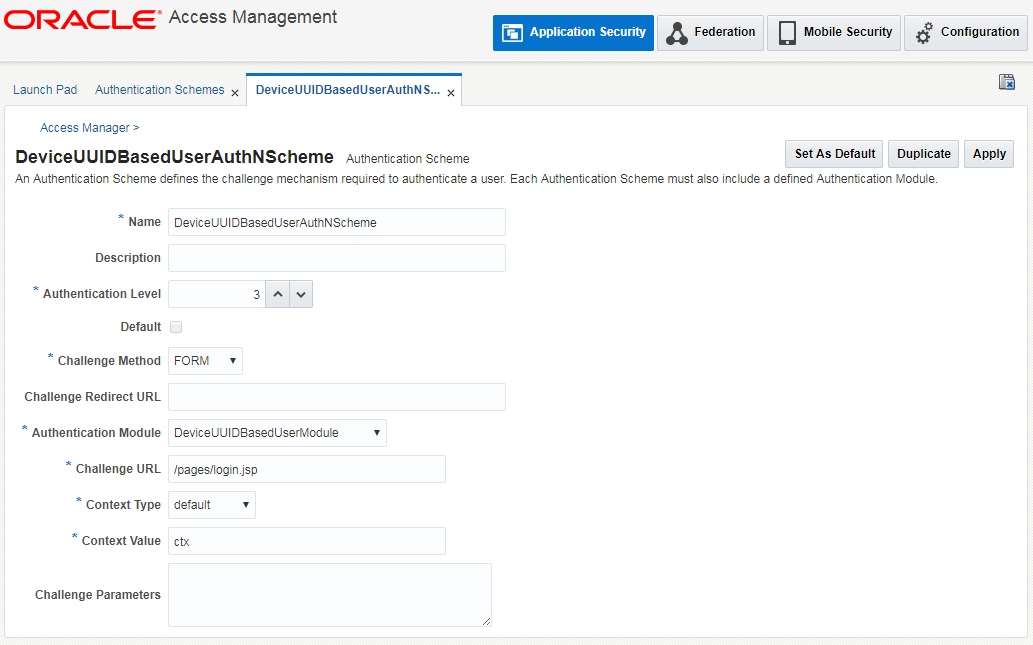
Create a new authentication scheme as shown and map the previously created module.
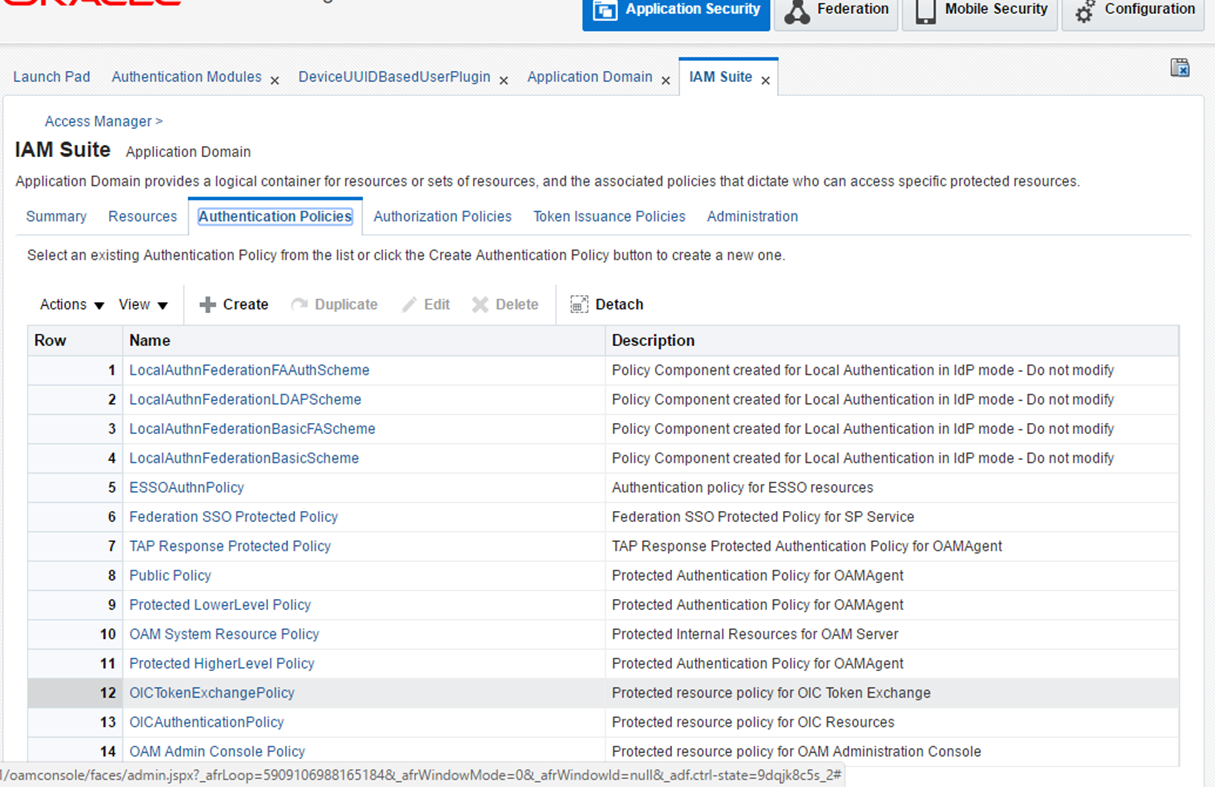
Then, go to Launch Pad > Application Domains > IAM Suite > Authentication Policies > OICTokenExchangePolicy
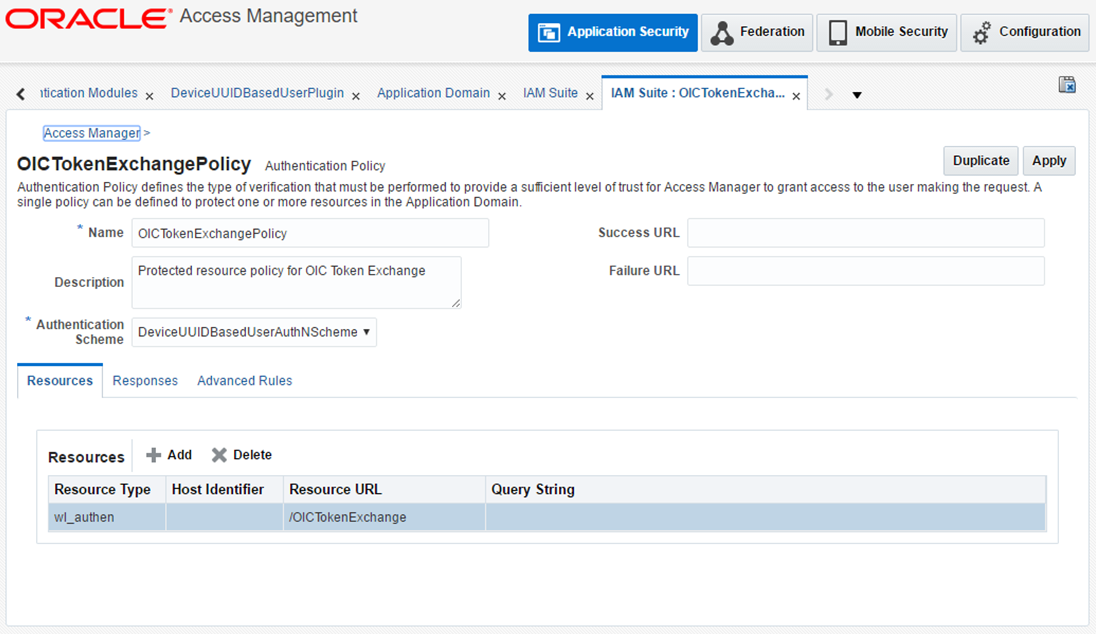
Map the DeviceUUID scheme here from the Authentication scheme dropdown.
Click Apply to save the changes.
Run below on OBDX schema
insert into digx_fw_config_all_b (PROP_ID, CATEGORY_ID, PROP_VALUE, FACTORY_SHIPPED_FLAG, PROP_COMMENTS, SUMMARY_TEXT, CREATED_BY, CREATION_DATE, LAST_UPDATED_BY, LAST_UPDATED_DATE, OBJECT_STATUS, OBJECT_VERSION_NUMBER)
values ('AUTH_PROVIDER', 'mobileconfig', 'OAM', 'N', '', 'Stores device id in OUD', 'ofssuser', sysdate, 'ofssuser', sysdate, 'Y', 1,);
Copying the artifacts generated after registering Webgate
Registering the new WebGate agent will generate the following files and artifacts either in <IDM_HOME>/oam/server/rreg/client/rreg/output/Agent_ID directory or else in <Oracle_Home>/user_projects/domains/<oam_domain>/output/Agent_ID directory:
- cwallet.sso
- ObAccessClient.xml
The user should copy the files from the above mentioned location to the <WebTier_Instance_Home>/config/OHS/ohs1/webgate/config directory and restart OHS server instance.