ORACLE IDENTITY AND ACCESS MANAGEMENT INSTALLATION AND CONFIGURATION
Oracle Identity and Access Management (IAM) components enable enterprises to manage the end-to-end lifecycle of user identities across all enterprise resources - both within and beyond the firewall. With IAM, you can deploy applications faster, apply the most granular protection to enterprise resources, automatically eliminate latent access privileges, and much more. Following components are included in IAM:
- Oracle Identity Manager
- Oracle Access Management
- Oracle Adaptive Access Manager
- Oracle Entitlements Server
- Oracle Privileged Account Manager
- Oracle Access Management Mobile and Social
- Oracle Mobile Security Suite
This chapter provides information for installing IAM and includes the following topics:
- Pre-requisite - Installing Java 1.7
- Pre-requisite - Installing Weblogic 11g
- Installing Oracle Identity and Access Management (IAM)
Pre-requisite - Installing Java 1.7
Obtain the Java tarball pack from the Oracle Java Downloads. Download jdk-7u80-linux-x64.tar.gz file to a directory.
- Change the directory in which you want to install,
- cd <Directory_Path>
- Unpack the tarball and install Java using the following command:
- tar zxvf <Path>/jdk-7u80-linux-x64.tar.gz
Note: You must enter the absolute path of the folder where the TAR file is located.
- Now, set the path and environment variable for Java as:
- export JAVA_HOME=<Java_Install_Path>/jdk1.7.0_80
- export PATH=$JAVA_HOME/bin:$PATH
Pre-requisite - Installing Weblogic 11g
Oracle WebLogic Server is a scalable, enterprise-ready Java Platform, Enterprise Edition (Java EE) application server. The WebLogic Server infrastructure supports the deployment of many types of distributed applications.
This chapter describes the installation tasks which contains the following sections:
- Section "Installing Weblogic"
- Section "Verifying the Installation"
Installing Weblogic
Obtain Weblogic 10.3.6 JAR from the Oracle Fusion Middleware Downloads. Download wls1036_generic.jar file to a directory.
- Now to start the installer, go to the directory where you downloaded the file.
- Start the installer from the same directory using the below command:
java –jar <Path>/wls1036_generic.jar
Note: You must enter the absolute path of the folder where the JAR file is located.
Follow the instructions as shown below for installation:
Welcome Screen
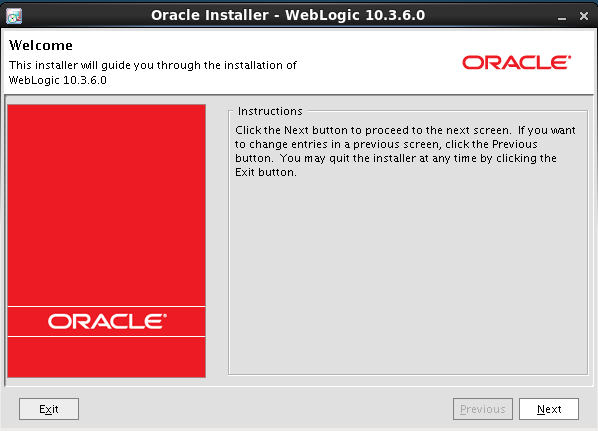
The Welcome screen is displayed each time you start the installer.
Click Next to continue.
Specify Middleware Home Screen
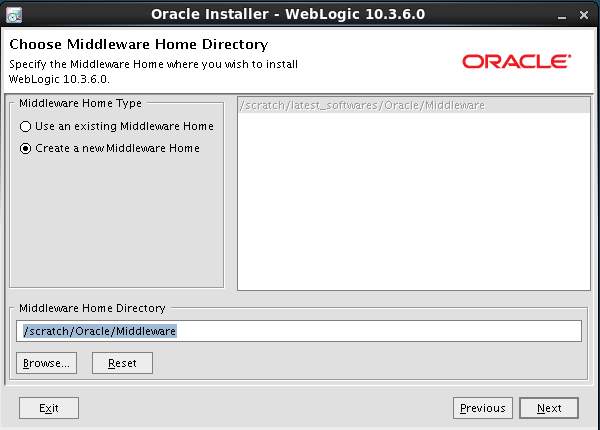
Specify the following installation locations:
- Oracle Middleware Home
The absolute path to the directory where WebLogic Server will be installed.
Click Next to continue.
Specify Security Updates Screen
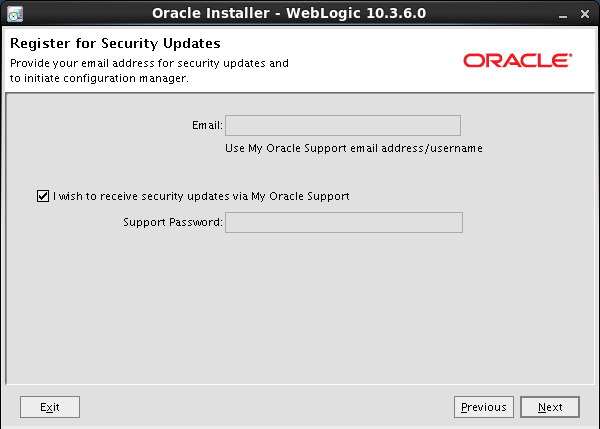
Click to uncheck the box stating “I wish to receive security updates via My Oracle Support” and the user will be prompted “Do you wish to bypass initiation of the configuration manager and remain uninformed of critical security issues in your configuration?” (Kindly follow recommended practices regarding updates depending on the setup requirements or usage.)
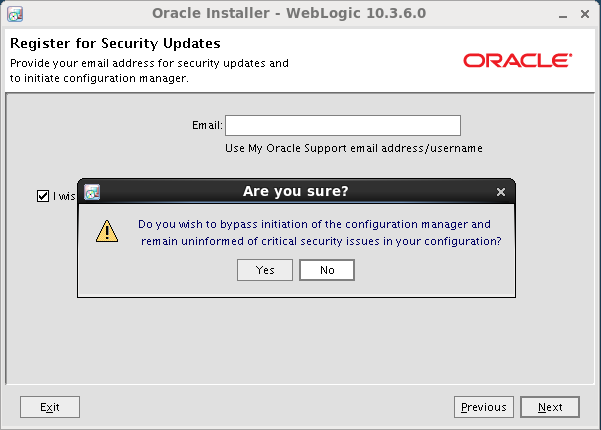
Select Yes and Click on Next.
Specify Security Updates Screen
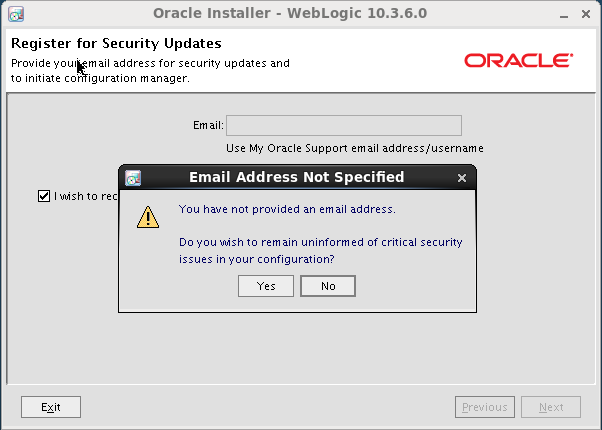
The user will now be prompted “Do you wish remain uninformed of critical security issues in your configuration?”
Select Yes and it will prompt “Do you wish to bypass initiation of the configuration manager and remain uninformed of critical security issues in your configuration?”
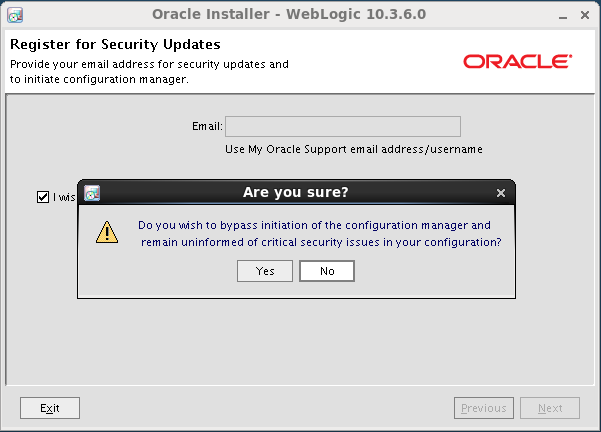
Select Yes and Click on Next to proceed.
Specify Security Updates Screen
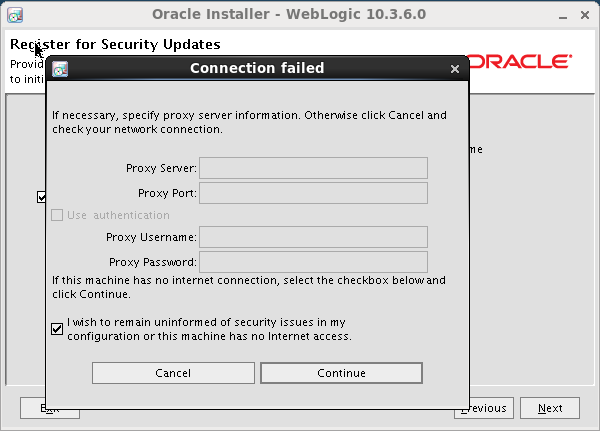
Click to select the checkbox “I wish to remain uninformed of security issues in my configuration or this machine has no Internet access.”
Click on Continue to proceed.
Specify Installation Type Screen
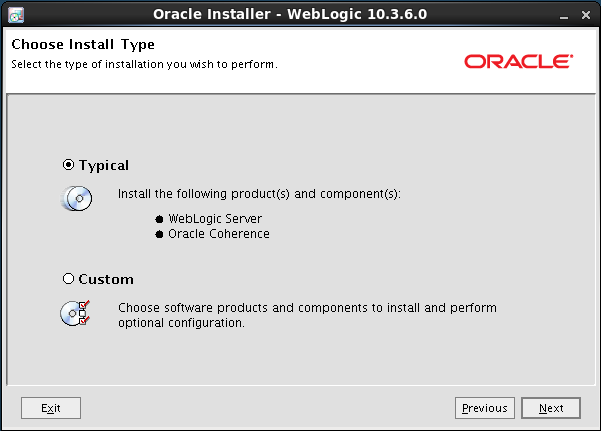
Following are the installation types:
- Typical
- Custom
Select Typical and Click Next to continue.
Specify JDK Selection Screen
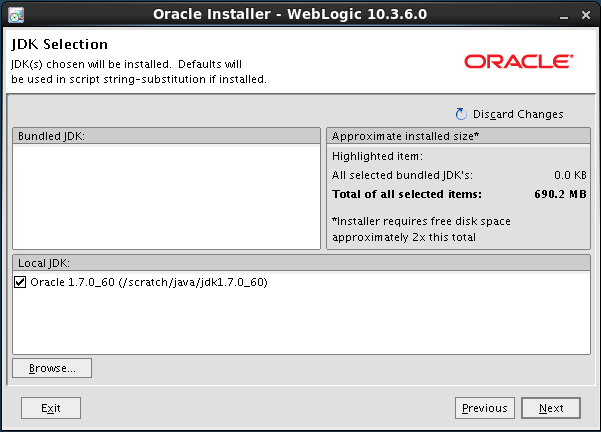
Check if the JDK Path listed is correct.
If the user wants to change the path, the user can do so by clicking on the Browse button and selecting the path where JDK is installed.
Once done, Click Next to continue.
Choose Product![]() A product is created based on the bank's business requirements and has certain typical parameters that describe its attributes or characteristics. Every product is defined under Product Class and Product Group.
For example, a product 'Fixed rate home loan' is defined under product group 'Home Loan' and product class 'Loans'. Installation Directories Screen
A product is created based on the bank's business requirements and has certain typical parameters that describe its attributes or characteristics. Every product is defined under Product Class and Product Group.
For example, a product 'Fixed rate home loan' is defined under product group 'Home Loan' and product class 'Loans'. Installation Directories Screen
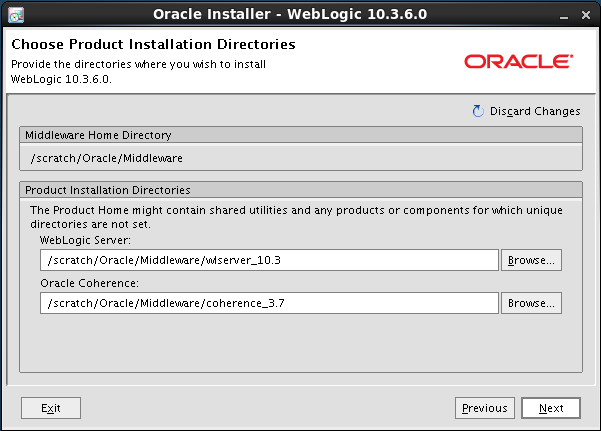
This screen shows the Middleware Home location and the Weblogic Server and Oracle Coherence Product home directories.
The user should verify the path and Click Next to continue.
Installation Summary Screen
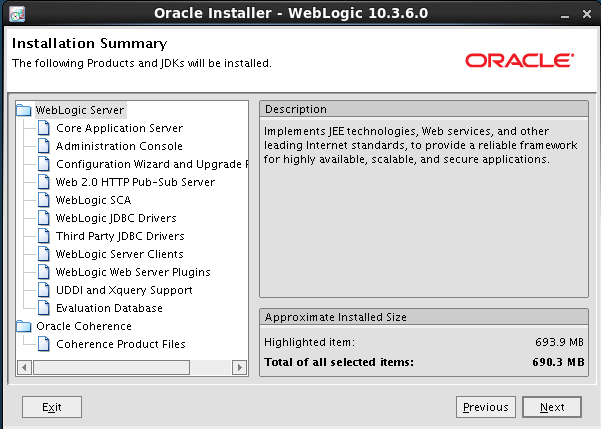
Review the information on this screen. The operations summarized on this page will be performed when you click Next.
If you want to make any changes to the configuration before starting the installation, click Previous option to navigate to the screen where you want to edit the data.
Click Next.
Then screen shows the progress of the installation.
Installation Progress Screen
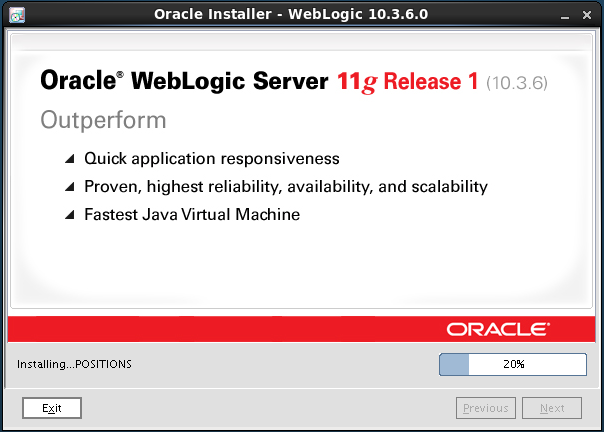
This screen shows the progress of the installation.
If you want to quit before the installation is completed, click Exit. Doing so will result in a partial installation; the portion of the software that was installed on your system before you click Exit will remain on your system, and you will have to remove it manually.
Installation Complete Screen
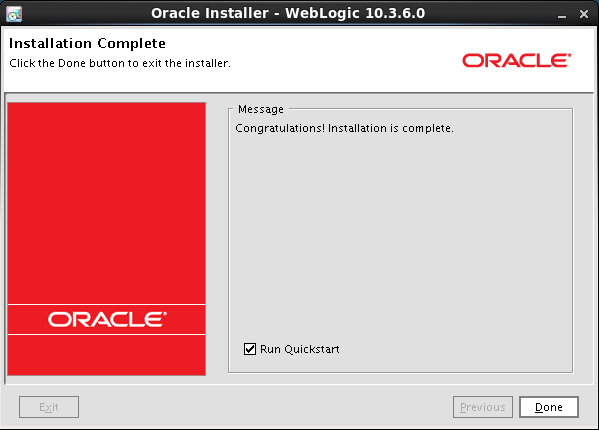
This screen summarizes the installation that was just completed with a message “Congratulations! Installation is complete.”
Click Done to dismiss the screen.
Verifying the Installation
You can perform the following tasks to verify that your installation was successful:
- Verifying the Installation Directory
Check if Oracle Home directory exists or not.
Installing Oracle Identity and Access Management
This chapter describes the installation tasks which contains the following sections:
- Section "Installing and Configuring Oracle Identity and Access Management”
- Section "Verifying the Installation"
Installing and Configuring Oracle Identity and Access Management
Obtain IAM installer version 11.1.2.3.0 from the Oracle Fusion Middleware Downloads. Download the zip file's (respective installation files) to a directory, and unpack the downloaded archive that contains the installer.
- Now to start the installer, go to the directory where you unpacked the archive file and switch to the Disk1 directory.
- Start the installer from the Disk1 directory
./runInstaller –jreLoc Java_Home/jdk
Note: You must enter the absolute path of the JRE folder located in this JDK when launching the installer.
- If you are installing on a UNIX system, and if this is the first time any Oracle product is being installed on your system with the Oracle Universal Installer, you will are asked to provide the location of an inventory directory. This is where the installer sets up subdirectories and maintains inventory data for each Oracle product that is installed on this system.
- Follow the instructions in the below table to configure the inventory directory information. For more help, click on the screen name in the table below, or click the Help button in the GUI.
Table: Inventory Directory and Group Screens
|
Screen |
Description and Action Required |
|---|---|
|
Specify Inventory Directory Screen (UNIX Only) |
Specify the Oracle inventory directory and group permissions for that directory. The group must have write permissions to the Oracle inventory directory. Click OK to continue. |
|
Inventory Location Confirmation Screen (UNIX Only) |
Run the createCentralInventory.sh script as root. Click OK to continue. |
Now, perform the steps as shown below to install and configure OUD after you start the OUD installer.
Welcome Screen
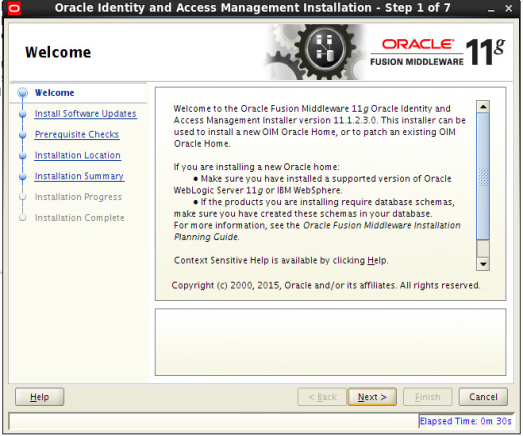
The Welcome screen is displayed each time you start the installer.
Click Next to continue.
Install Software Updates Screen
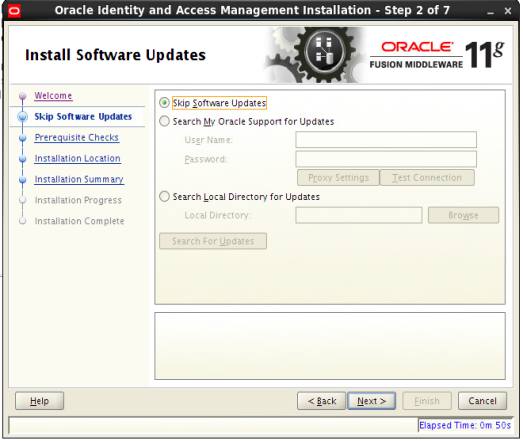
If you want to search for and download software updates from My Oracle Support, then do the following:
Select Search My Oracle Support for Updates.
Enter User name and Password.
Click Test Connection.
If you want to search your local directory for updates, then do the following:
Select Search Local Directory for Updates.
Click Search For Updates.
If you want to skip software updates, then select Skip Software Updates. (Kindly follow recommended practices regarding updates depending on the setup requirements or usage.)
Click Next to continue.
Prerequisite Checks Screen
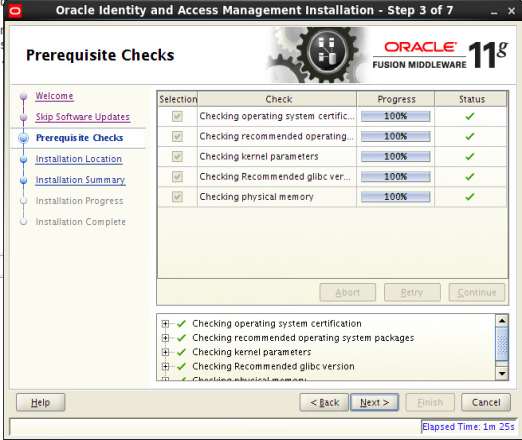
This screen shows whether the system requirements are met in order to install the software.
If there is a problem, a short error message appears in the bottom portion of the screen. Fix the error, and click Retry to try again.
If you want to ignore the error or warning messages and continue with the installation, click Continue.
To stop prerequisite checking for all components, click Abort.
Click Next to continue.
Specify Installation Location Screen
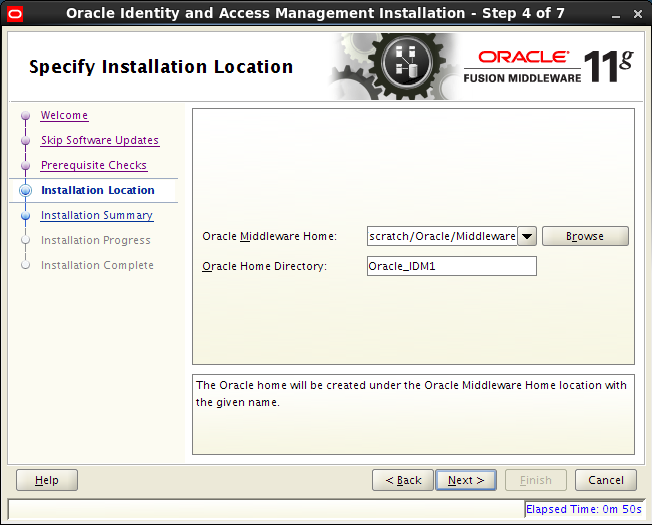
Specify the following installation locations:
- Oracle Middleware Home
- The absolute path to the directory where WebLogic Server was installed.
- Oracle Home Directory: The directory name for your Oracle home:
- You can specify a pre-existing directory that you want to use as the Oracle home; the directory must be an empty directory.
- You can specify the name of a new directory that will be created for you inside the Middleware home.
Oracle Home directory is where your products will be installed. All software binaries will reside in this directory, and no runtime process can write to this directory.
Note: This installation directory will be referred to as IDM_ORACLE_HOME throughout the remainder of this document. If you are performing an installation on a Windows operating system, be sure that your directory paths are valid, and do not contain double backslashes (\\).
Click Next to continue.
Installation Summary Screen
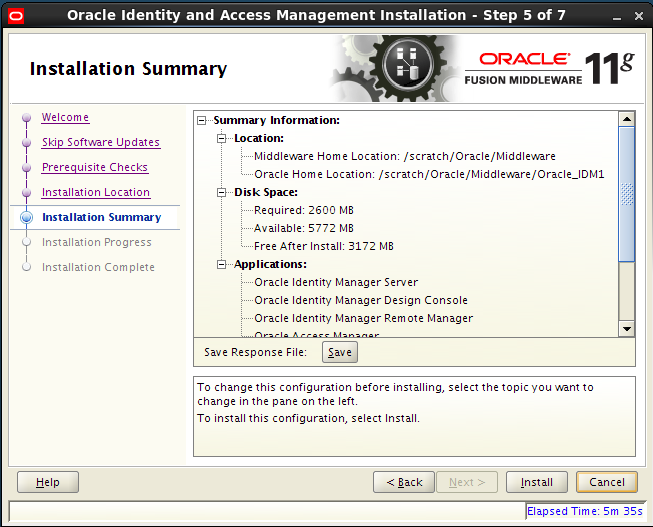
Review the information on this screen. The operations summarized on this page will be performed when you click Install.
If you want to make any changes to the configuration before starting the installation, use the navigation pane, and select the topic you want to edit.
If you want to save this configuration to a text file (called a response file), click Save. You will be prompted for the location of name of the file you want to create (for example, silent_install.rsp). This file can be used later if you choose to perform the same installation from the command line.
Click Install.
Then screen shows the progress of the installation.
Installation Progress Screen
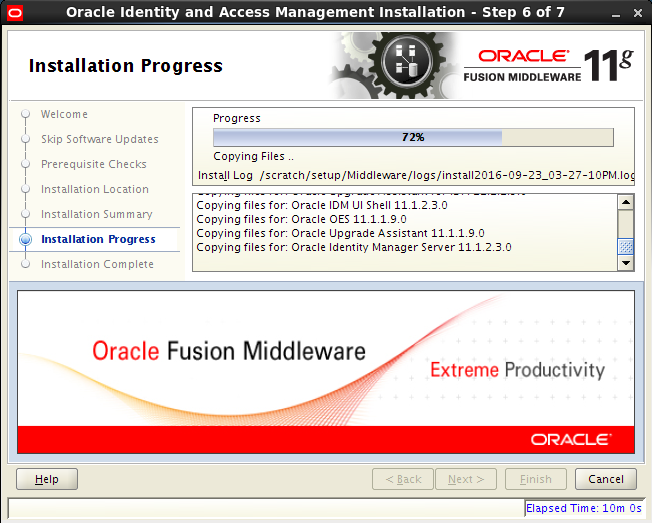
This screen shows the progress of the installation.
If you want to quit before the installation is completed, click Cancel. Doing so will result in a partial installation; the portion of the software that was installed on your system before you click Cancel will remain on your system, and you will have to remove it manually.
Installation Complete Screen
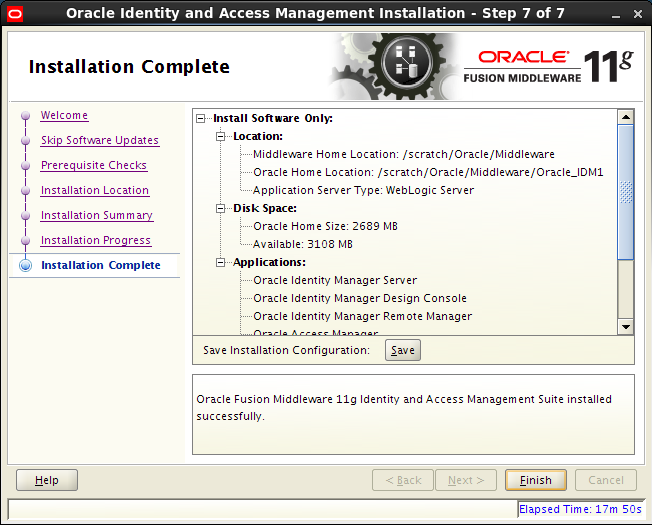
This screen summarizes the installation that was just completed.
You can also save this summary information to a file for future reference by clicking Save. You will be prompted to specify a name and location for your summary file.
Click Finish to dismiss the screen.
Verifying the Installation
You can perform any combination of the following tasks to verify that your installation was successful:
- Verifying the Installation Logs: Check for the presence of installation log files in logs directory inside your Oracle Inventory directory.
- Verifying the IDM Home Directory: Check for the presence of IDM Home directory. For example, <Oracle_Home>/Oracle_IDM1