3. Reference Information for Loan Syndication
This chapter contains the following sections:
- Section 3.1, "Introduction"
- Section 3.2, "Maintaining Administrators"
- Section 3.3, "Maintaining Party Types"
- Section 3.4, "Maintaining User Groups"
- Section 3.5, "Maintaining Reason Codes"
- Section 3.6, "Maintaining Diary Events"
- Section 3.7, "Associating Message Types to Events"
- Section 3.8, "Indicating Branch Parameters for Loan Syndication"
- Section 3.9, "Maintaining Interest Limits"
- Section 3.10, "Maintaining Status Rules for a Syndication Product"
- Section 3.11, "Maintaining Margin Component Details"
- Section 3.12, "Maintaining Borrower Rating "
- Section 3.13, "Maintaining the Daily Rate LIBOR"
- Section 3.14, "Maintaining Reporting Requirements"
- Section 3.15, "Maintaining Static Details"
- Section 3.16, "Maintaining Named Agents"
3.1 Introduction
Before you can set up products for loan syndication contracts, or process loan syndication contracts, you need to maintain certain basic reference information that you might need in order to set up products and process contracts.
In the context of loan syndication, for instance, you may need to identify administrators among the officers of your bank to whom you could assign the administration of each loan syndication contract. You may also need to define certain events that need to be processed for syndication contracts, messages to be sent to the required parties, and so on.
This chapter explains the maintenance of such reference information for the modules used for loan syndication contracts.
Reference information relating to the following needs to be maintained for loan syndication:
- Administrators
- Parties
- Diary Events
- Messages
- User-defined fields
- Ad-hoc fee components
3.2 Maintaining Administrators
Your bank may want to assign appropriate administrators to loan syndication contracts. You can maintain such administrators in the system, in the ‘Administrator Details’ screen.
You can invoke the ‘Administrator Maintenance’ screen by typing ‘OLDADMIN’ in the field at the top right corner of the Application tool bar and clicking the adjoining arrow button.
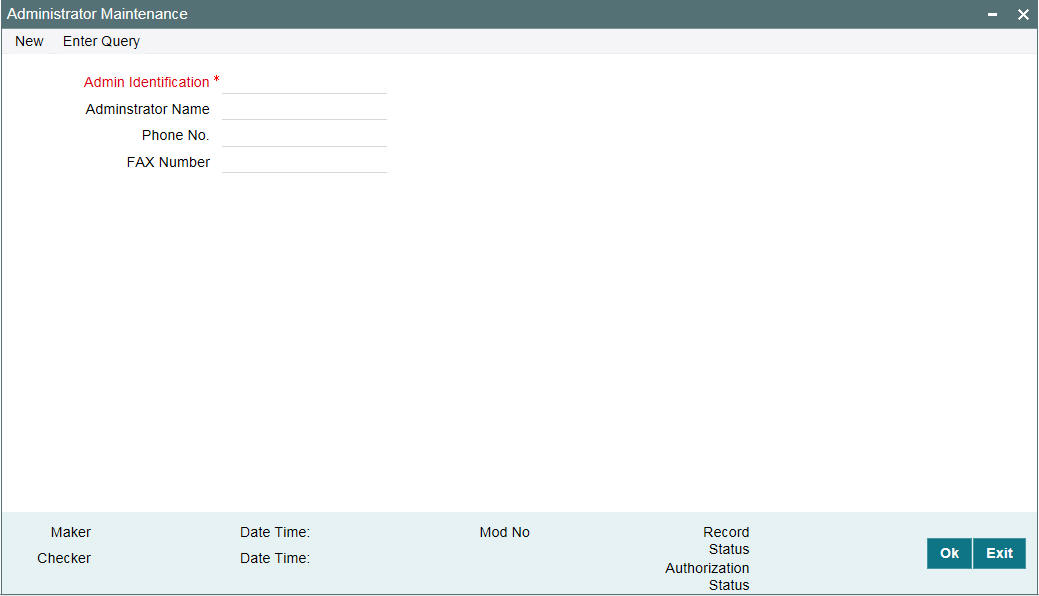
You can capture the following in this screen:
Administrator ID
You have to capture a unique id for each administrator. This helps you in identifying the administrator in the system. The Id can consist of a maximum of 10-alphanumeric characters.
Administrator Name
Specify the name of the administrator. In addition to the id, the name also helps you in identifying the administrator in the system. The name can comprise a maximum of 30-alphanumeric characters.
Phone Number
Specify the phone number of the administrator.
FAX Number
Specify the FAX number of the administrator.
3.3 Maintaining Party Types
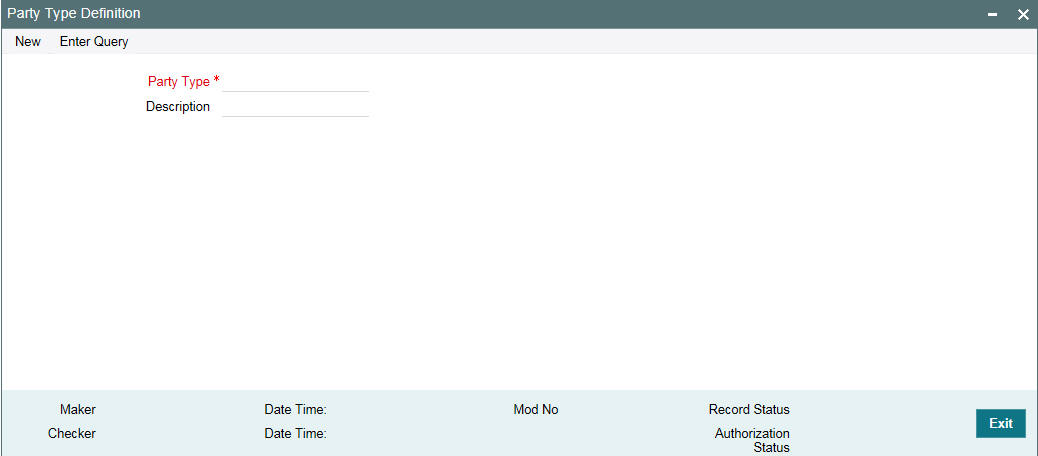
You can identify the different types of entities or parties involved in loan syndication contracts, in the system, in the ‘Party Type Definition’ screen. You can invoke the ‘Party Type Definition’ screen by typing ‘OLDPARDF’ in the field at the top right corner of the Application tool bar and clicking the adjoining arrow button.
The different types of entities that you might want to define could include:
- Originator
- Arranger
- Borrower
- Participant
For each entity type, you must specify the following:
Party Type
Capture a unique name to identify the entity/party type in the system. The id can consist of a maximum of 10-alphanumeric characters.
Party Type Description
Specify an appropriate and typical description of the party type being maintained. The description can comprise a maximum of 30-alphanumeric characters.
3.4 Maintaining User Groups
You can identify the different types of user groups involved in loan syndication contracts through the ‘User Group Maintenance’ screen. You can invoke the ‘User Group Maintenance’ screen by typing ‘OLDUSGRP’ in the field at the top right corner of the Application tool bar and clicking the adjoining arrow button.
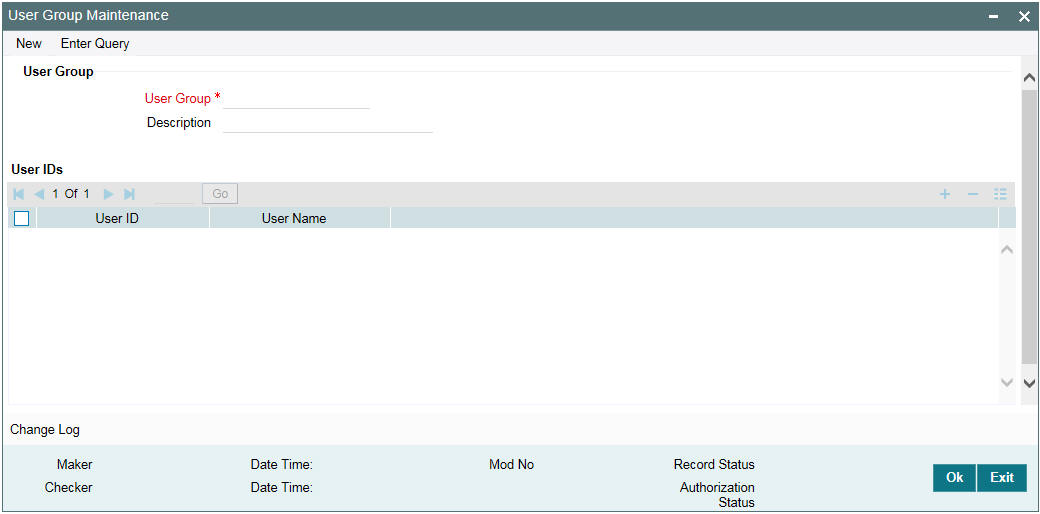
In the ‘User Group’ section, specify the following details:
User Group
Specify a name for the user group, by which you will be able to identify the same easily. The name can comprise a maximum of 20-alphanumeric characters.
Description
You can capture a brief description of the user group being maintained. The description also helps you in identifying a group in the system. The description can consist of a maximum of 30-alphanumeric characters.
In the ‘User IDs’ section of the screen, specify the following details:
User ID
Select the ID of the user you want to include in the group. The option list displays the User IDs and User Names maintained in the system. When you select an id from this list, the ‘User Name’ will also be displayed. Click the ’Add Row’ button to add another user to the group. If you wish to delete a user from the group, click the ‘Delete Row’ button.
3.5 Maintaining Reason Codes
You can maintain reason codes in the ‘Reason Maintenance’ screen. You can invoke the ‘Reason Maintenance’ screen by typing ‘LBDRSMNT’ in the field at the top right corner of the Application tool bar and clicking the adjoining arrow button.
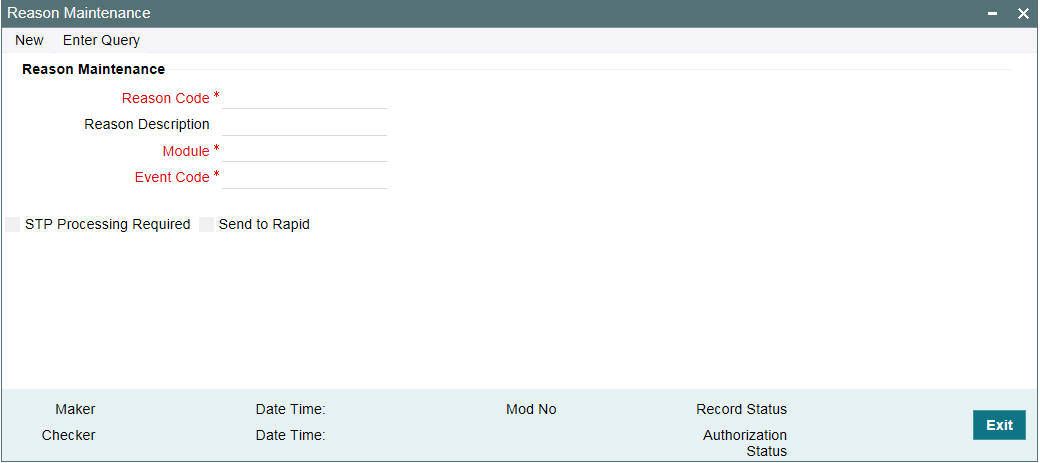
You can specify the following fields:
Reason Code
Specify the reason code here.
Reason Description
Provide the description of the reason specified.
Module
Specify the module here. The adjoining option list displays all modules available in the system.
Event Code
Specify the even code here. The adjoining option list displays all event codes available in the system.
STP Processing Required
Select this check box if STP processing is required.
Send to Rapid
Select this check box to send the auto reduction feed to rapid.
3.5.0.1 Processing Auto Reduction Feed
The system sends the Auto reduction Feed to RAPID with only the commitment reductions (VAMI) from originations having Reason code description as ‘Rapid Feed Required’ and the ‘Send to Rapid’ check box is selected.
Note
- You have to manually choose this reason code while performing commitment reduction in OL module for the commitment contract.
- The Reason code is factory shipped with the flag ‘Send to Rapid’ deselected by default.
- This reason code is applicable only for commitment VAMI and not applicable for Loan VAMI. This should be controlled operationally
- You are allowed to select / deselect the flag ‘Send to Rapid’ only for OL module
The Commitment contracts with LC sub-limit amount is allowed to select this reason code and hence those contracts are not considered in Auto feed.
3.6 Maintaining Diary Events
You can define the diary events to be associated with each of the loan syndication modules in the ‘Diary Event Maintenance’ screen. A diary event signifies occurrences (other than accounting entries being passed) in the life cycle of a contract, at which appropriate messages would need to be generated.
You can invoke the ‘Diary Event Maintenance’ screen by typing ‘OLDDIAEV’ in the field at the top right corner of the Application tool bar and clicking the adjoining arrow button.
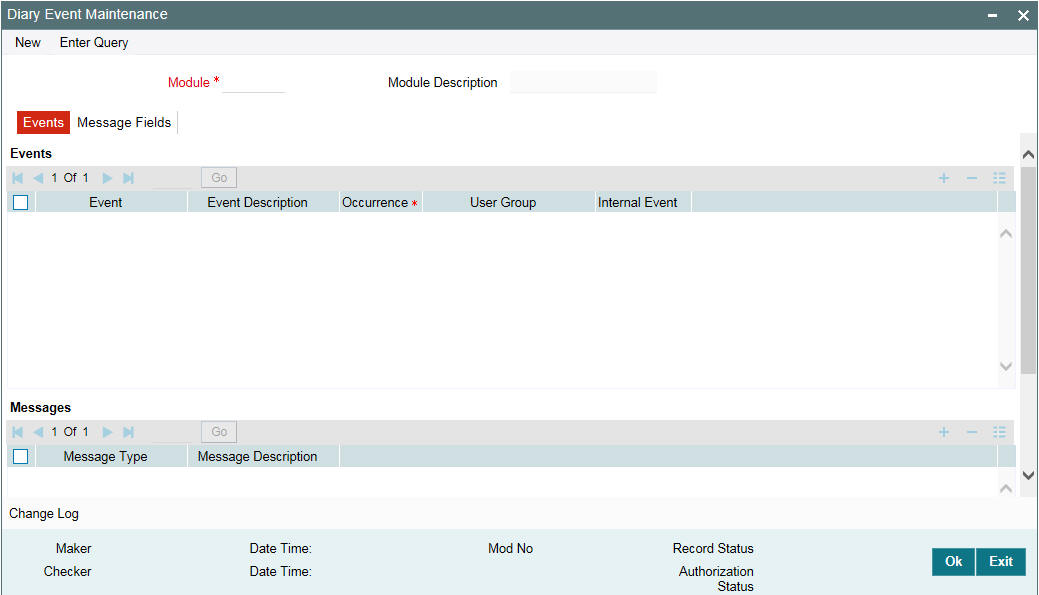
Specify the following details in this screen:
Module
You must first specify the module to which the diary events you are defining, will apply. Select the Module ‘LB’ to indicate that the diary events are being maintained for loan syndication contracts.
3.6.1 Capturing Event Details
In the ‘Events’ section of the ‘Events’ tab, specify the following:
Event
Define the diary event that is to be applicable for contracts processed in the LB module. The event name can consist of four alphanumeric characters (one should definitely be an alphabet).
Event Description
Specify an appropriate description for the diary event that you are defining. The description can consist of a maximum of 30-alphanumeric characters.
Occurrence
Specify whether the event should occur only ‘Once’ or ‘Multiple’ times in the life cycle of an LB contract.
User Group
Select the user group to which the message should be sent out, from the option list provided. The option list includes all user groups you have maintained in the ‘User Group Maintenance’ screen.
Note
You can select a User Group only if you have marked the event as an ‘Internal Event’.
Internal Event
You have to select this option to identify the event as an internal event. In this case, the message is an internal message to the user group.
In the ‘Messages’ section of the ‘Events’ tab, specify the following:
Message Type
Specify the type of message to be generated for the module. The name of the message type can consist of a maximum of 15-alphanumeric characters.
Description
Give a brief description about the message type captured. The description can consist of a maximum of 35-alphanumeric characters
After you have identified the diary events in the ‘Diary Event Maintenance’ screen, you must also:
- Define the message types and message formats to be available for the module
- For each module, associate the appropriate message type to be generated at the occurrence of each diary event. You can do this in the ‘Diary Event Messages’ screen.
3.6.2 Maintaining Message Types for a Module
You can maintain the message types that are to be available for generation at the occurrence of a diary event in the ‘Diary Event Maintenance’ screen.
When you make the appropriate message types available for each module in this manner, you can associate the available message type with the appropriate diary event applicable to a contract in the ‘Diary Event Messages screen’.
For more details on this screen, refer the heading titled ‘Associating message types to events’ in this chapter.
For the message types captured in the ‘Messages’ section in the ‘Events’ tab of the ‘Diary Event Maintenance’ screen, you can maintain the desired format for each message type, by specifying the appropriate field tags. You can do this in the ‘Message Fields’ tab of the ‘Diary Event Maintenance’ screen.
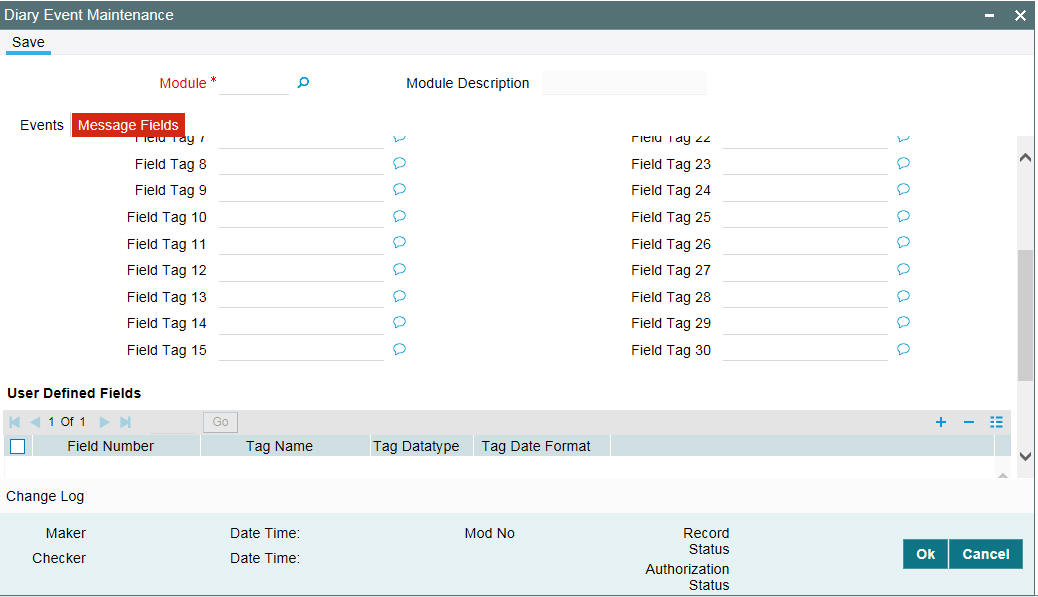
In the above screen, you can do the following:
- Capture the required field tags
- Capture user defined field tags
3.6.2.1 Defining Field Tags
You can capture a name for each field tag. You can specify up to 30 field tags. The selected field tags are used in the message.
3.6.2.2 Maintaining User Defined Field Tags
You can maintain field tags for user-defined information in the ‘User Defined Fields’ section of the screen. You can maintain up to 10 different such tags here.
For each field tag, you must specify:
Tag Name
Specify a name to identify the user-defined field (UDF). The name can use upto 20-alphanumeric characters. The system displays a serial number for each field added.
Tag Datatype
Specify the type of data that can be entered as the UDF value. The available options are:
- Character
- Numeric
- Date
Tag Date Format
If you specify that the value of the UDF should be of ‘Date’ type, then you also have to specify the date format. The available options are:
- DD/MON/YYYY
- DD/MM/YYYY
- MM/DD/YYYY
3.7 Associating Message Types to Events
After you have defined the diary events to be applicable for a module, and also made available the requisite message types (in the ‘Diary Event Maintenance’ screen) you can associate the type of message to be used to generate messages for each diary event, in the ‘Diary Event Messages’ screen.
You can invoke the ‘Diary Event Messages’ screen by typing ‘OLDDRYMS’ in the field at the top right corner of the Application tool bar and clicking the adjoining arrow button.
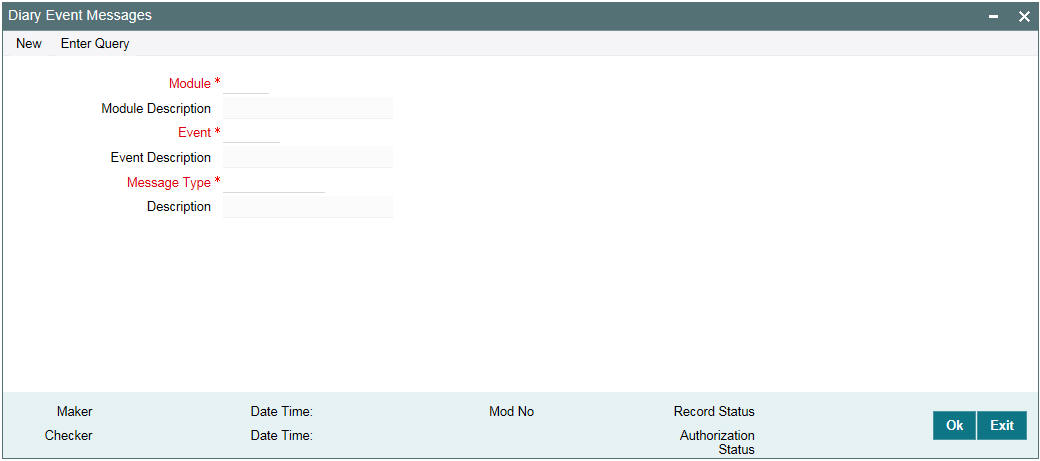
Select the following in this screen:
Module
You have to select the module for which you want to specify the message type to be generated. Select the module ‘LB’ here to indicate the details are applicable to the Loans Syndication module. When you select the module, its description is also displayed.
Event
To an event code, you can only associate a message type that has not been already mapped. The option list displays only those events which are not marked as an ‘Internal Event’ (in the ‘Diary Event Maintenance’ screen).
Message Type
Select the type of message that is to be generated for an event. The message types defined for the ‘LB’ module (in the ‘Events’ tab of the ‘Diary Event Maintenance’ screen) is available in the option list provided. When you select a type, the description is also displayed.
3.8 Indicating Branch Parameters for Loan Syndication
In the ‘Syndication Loans and Commitments – Branch Parameters’ screen, you can define loan syndication details to be applicable for your branch such as the reporting currency for syndication contracts and the exchange rate that would be used to convert outstanding contract balances to reporting currency equivalent.
You can also indicate the participant to whom the rounding difference between amounts collected and amounts disbursed, must be routed. You can invoke the ‘Branch Parameters Detail’ screen by typing OLDBRPRM in the field at the top right corner of the Application tool bar and clicking the adjoining arrow button.
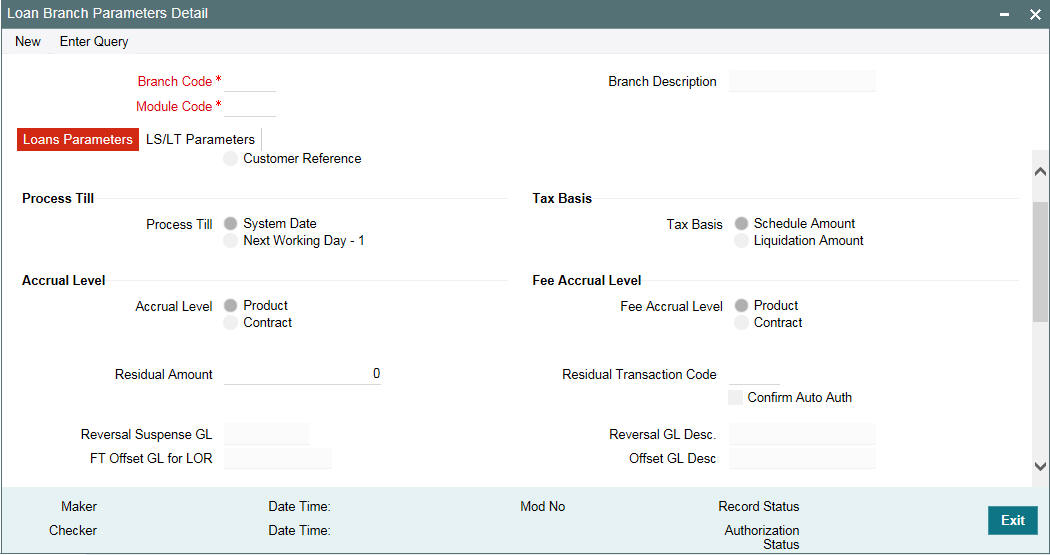
Process Till
Specify till which date the automatic processes of your branch should be executed if they fall due on holidays. The options available are:
- System Date: If you specify that processing of automatic events should be done upto the ‘System Date’, automatic events scheduled till (inclusive of) the current system date will be processed.
- Next Working Day-1: This specification means that events scheduled for a holiday should be processed on the last working day before the holiday. If you indicate this, all the events that fall on a day between the current system date and the next working day are processed.
Example
Case 1: System Date
Assume today is 20th October 2005, and 21st October 2005 and 22nd October 2005 are holidays. If you select ‘System Date’, during the Automatic Batch Update function run for your branch, only the events scheduled for 20th October 2005 are processed.
The events scheduled for the holidays, that is, 21st October 2005 and 22nd October 2005 are processed during the Automatic Batch Update function run during beginning of day operations on 23rd October 2005.
Case 2: Next Working Date -1
Assume that today is 20th October 2005, and 21st October 2005 and 22nd October 2005 are holidays. If you click this field, during the Automatic Batch Update function run at EOD on 20th October 2005, all the events scheduled that are scheduled for 21st and 22nd October 2005 are also processed.
Reporting Currency
Specify the currency that is displayed in the syndication contracts. This is the currency in which the principal contract amount outstanding balance of tranches and drawdowns is expressed.
Reporting Rate Type
This is the exchange rate type, which is used to convert the principal amount and outstanding balance in case the syndication contract currency is different from the reporting currency that you have specified in the previous field.
Choose the exchange rate type from the option list given.
Rounding Participant
The system creates a new participant contract to route the rounding difference amount that was created due to rounding difference between the amount collected and the amount disbursed.
When the amount collected from the borrower is disbursed to the participants, you could encounter rounding differences. You need to choose the rounding participant from the option list to indicate that the participant to whom the rounding difference is to be routed.
Netting Suspense GL
If on the maturity date of a drawdown, a borrower books another drawdown, you have the option of netting the payment. This netting of payment can be done for the principal, interest, tax, charge, and fee components associated with the drawdown. Select the Netting Suspense GL into which the accounting entries during netting are posted.
FT Offset GL
FT offset GL can be used to select FT contracts for settling the net amount to be transferred to the buyer/seller with the same or different counter parties of a CUSIP in which Borrower has made the interest payment.
An incoming and an outgoing FT products are maintained as the default products as internal parameters for the actual settlement. Based on the net settlement amount (either Payable or receivable) for the counter party, Branch and Currency combinations, system picks up the appropriate Outgoing/ Incoming FT products from the internal parameters and use this product for the settlement.
Capturing Sighting Funds Parameters
Sighting Funds Applicable
Select this field to indicate that sighting funds is applicable for the branch. On selecting this field, you can capture the fields described as follows.
Sighting Funds suspense GL
Specify a valid GL as the suspense GL for sighting funds. You can choose the appropriate one from the option list as well.
Sighting Funds GL
Specify a valid GL as the GL for sighting funds. You can choose the appropriate one from the option list as well.
PNL Account
Specify a valid account as the PNL Account for sighting funds. You can choose the appropriate one from the option list as well.
Collateral Customers
Specify the collateral customer details:
Col Settlement Customer
Specify the collateral settlement customer number for collateral settlement contract. The adjoining option list displays all valid collateral settlement numbers that are maintained in the system. You can select the appropriate one.
Col Online Customer
Specify the collateral online customer number for collateral online contract. The adjoining option list displays all valid collateral online numbers that are maintained in the system. You can select the appropriate one.
Capturing Forward Event Processing Details
You can process transactions before the scheduled date, but hold back the messages till the Spot Date or Value Date. This is known as Forward Processing.
Limit Days
The number you enter here, is the number of days after the ‘System Date’ for which events marked for forward processing are shown in the Forward Processing Queue.
Example
The System Date is 30th August 2005. The ‘Limit Days’ you enter is 7. Any event marked for forward processing, occurring within the next seven days, are in the Forward Processing Queue.
Archive Days
When a payment message is sent out for an event marked for forward processing, the event can be archived. The archive days are the number of the days before the System Date prior to which any event confirmed for forward processing are archived.
Example
The System Date is 30th August 2005. The ‘Archive Days’ you enter is 7. Any event confirmed for forward processing, having occurred more than seven days before the System Date, are archived.
For details on forward processing, refer the heading titled ‘Forward processing of events’ in the ‘Loan Syndication Contracts’ chapter of this User Manual.
Collateral Min Tranche Bal
Specify the minimum tranche balance amount for the collateral. The amount maintained here are validated in Tranche currency.
Collateral MaxdrawDown Bal
Specify the maximum drawdown balance amount for the collateral. The amount maintained here will be validated in drawdown currency.
New Availability Amount for collateral is computed by the system based on the following formula:
- New Availability Amount = (Least of Net Available Collateral Amount for the Drawdown Value Date and Tranche Amount) – (Total Outstanding))
On saving the details, an override message is displayed and the transaction requires dual authorization.
An e-mail is sent to the participants of the tranche whenever the override message is displayed. The message is as follows:
If the new availability amount is less than the specified collateral minimum tranche balance amount, the following message is displayed:
Tranche Availability is less than -collateral Min Tranche balance amount
If the new drawdown amount exceeds the specified collateral maximum drawdown balance amount, the following message is displayed:
Drawdown amount is greater than - Collateral Max drawdown balance
FTI Handoff Required
Select this check box to indicate that the FTI handoff is required. The system handoff all the payment messages in branch local currency to FTI system through MQ only if this check box is selected.
Chinese Characters in Payment
Select this check box to indicate that Chinese character should be allowed during payment. The system allows you to enter Chinese characters in the field 57, 59 and 70 of the ‘Settlement Instructions’ screen only if this check box is selected.
3.9 Maintaining Interest Limits
You can maintain component-wise interest limit for a product in Loan Syndication module using the ‘Interest Limits’ screen. You can invoke the ‘Interest Limits Detail’ screen by typing ‘OLDINTLM’ in the field at the top right corner of the Application tool bar and clicking the adjoining arrow button.
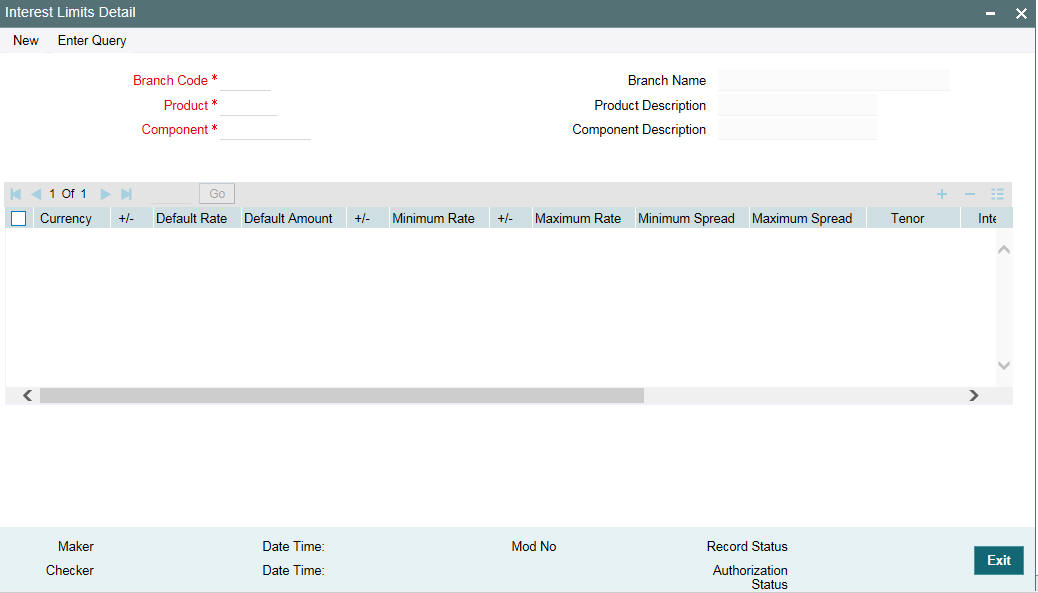
You can maintain tenor based, currency-wise interest limits for a combination of Product and Interest Component through this screen.
For more details on this maintenance, refer the heading titled ‘Specifying limits for Interest Rate application’ in the ‘Processing Interest’ chapter of the Interest User Manual.
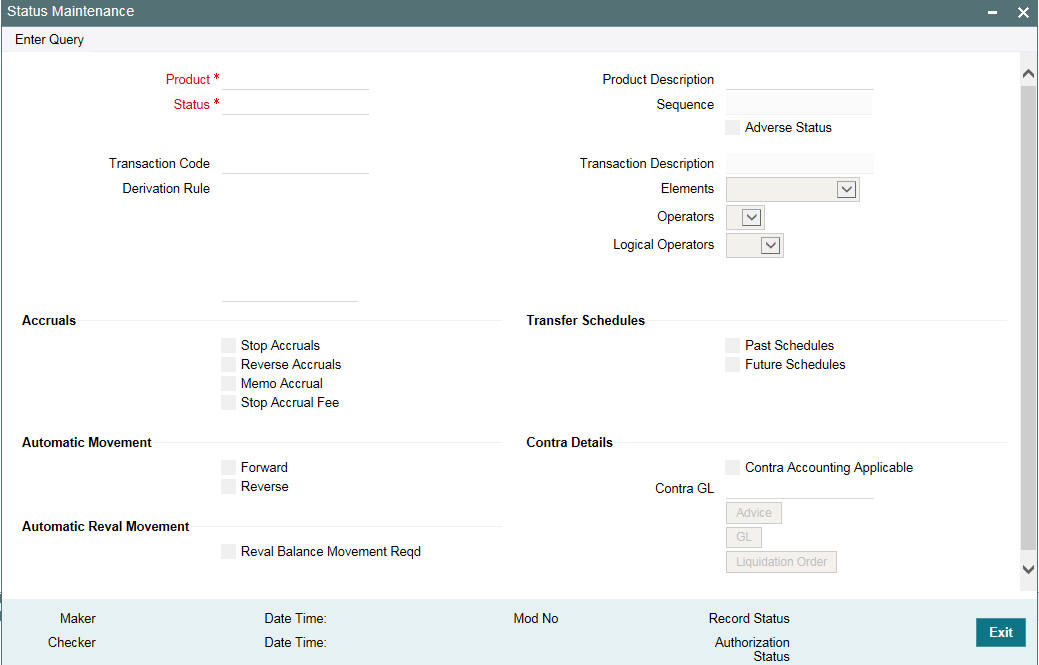
3.10 Maintaining Status Rules for a Syndication Product
You can maintain the status rules for a product in loan syndication module using the ‘Status Maintenance’ screen. You can invoke the ‘Status Maintenance’ screen by typing ‘OLDSTATS’ in the field at the top right corner of the Application tool bar and clicking the adjoining arrow button.
Product Code
You can define status rules for a Product, Status, and Transaction Code combination. Identify the code of the product for which you are defining Status Rules in this field.
Status
You can define status rules for a Product, Status, and Transaction Code combination. Specify the Status Code for which you are defining status rules. The option list displays the Status Codes associated with the selected product.
Transaction Code
You have to select the Transaction Code which is to be used for tracking entries involving this status. Rules defined for the combination of Product, Status, and Transaction Code are applicable for moving a contract from the current status to the status being defined. The option list displays all the transaction codes maintained in the system (through the ‘Transaction Code Maintenance’ screen).
Adverse Status
A contract can move to adverse status due to two reasons:
- If the counterparty involved in the contract defaults
- If the status is derived due to other attributes (delinquency, tenor in deposit, and so on )
While defining statuses which are to be associated with a product, you can select this option to indicate if a status is to be considered for delinquency tracking.
Derivation Rule
You can set-up any number of status rules for a given product, status and transaction code combination. Each status rule that you define should have a unique derivation logic associated with it. For instance, you can create a status rule which can be made applicable when a particular interest payment is overdue for more than 15 days and the contract is being moved to the PDO status.
A particular customer can have multiple loan contracts and you could be tracking the status of all of them. Oracle FLEXCUBE allows you to move all contracts for a particular customer to a delinquent status when any one or more of the contracts are defaulted upon. The derivation rule allows for this facility.
Elements
You can build Derivation Rules using a combination of Elements, Operators, and Logical Operators. The elements, which you can use, are as follows:
- Classification – Refers to the Customer Classification – Excellent, Good, Bad, and so on.
- Transfer Days – Refers to the Overdue Days. For contract level processing, transfer days are calculated as the Current Processing Date minus the Earliest Component Schedule Due Date. For schedule processing, it refers to the Current processing date minus the Component Schedule due date.
- Maturity Days – Refers to the Overdue days from contract maturity. It is calculated as Current Processing Date minus the Contract Maturity Days.
- Delinquency – Refers to Customer delinquency. For example if a customer’s defaults on the contract, the customer is marked as delinquent. Additionally all contracts involving the customer which are in the normal status are reclassified to an appropriate status to facilitate better risk management.
- Tenor Days – Refers to the tenor days of a deposit and is calculated as Maturity Date minus the Value Date
- Any Schedule – this is applicable for schedule level processing and denotes any principal component schedule. Is calculated as Current processing Date minus the Principal component Schedule Due Date. Generally, Any Schedule component can be used to reclassify Future Principal Schedules.
- Component – Refers to the components maintained for the loan product For example, . Principal, Interest
Operators
Choose the operator to arrive at the derivation rule. The operators available are +, - , /, *.
Logical Operators
Choose the logical operators to arrive at the derivation rule. The logical operators available are =, <>, <=, >=, NOT, AND, OR.
Stop Accrual
Select this check box to indicate that for a given product code, status and transaction code combination, the accruals should be frozen during status change.
Reverse Accrual
Select this check box to indicate that for a given product code, status and transaction code combination, the accruals till date should be reversed by transferring them to an expense GL.
Memo Accrual
Select this check box to indicate that for a given product code, status and transaction code combination, the future accruals and past accruals (if reverse accrual option has been enabled) will be tracked in a Memo GL.
Note
Memo GLs are contingent in nature.
Past Schedules
Select this check box to indicate that the entries for the past schedules have to be transferred to the new GLs for each component. If checked, this option enables transfer of all past-due schedules (including principal and accruals) to be transferred to new GLs rather than transferring only the schedule that is affected by the current status.
Future Schedules
Select this check box to indicate that the entries for the future schedules have to be transferred to the new GLs for each component. If selected this option enables the transfer of only the principal schedules due in the future to the designated GL.
Forward
Select this check box to indicate that the status should change from the current status to the next status, in the sequence you have defined.
If you specify that forward changes have to be carried out automatically, the status of the contract is changed after the specified number of days. If not, you have to change the status of a contract through the contract processing function.
Even if you have specified automatic status change for a product and, therefore, a contract involving it, you can manually change the status of a contract before the automatic change is due. You can do this through the Contract Online Details screen.
Reverse
Select this check box to indicate that the status should change from the current status to the previous status.
If you specify that reverse changes have to be carried out automatically, the status is changed when a payment is made on a contract with a status other than Normal. If you specify that reverse changes should not be automatic, the status remains unchanged even if a repayment is made on the contract. You have to change the status, manually, through the Contract Processing function.
A reverse change may also become necessary when the number of days of default is increased for a product. If you have not specified that the forward or reverse changes should be carried out automatically, the status remains unchanged till you specifically change it for a contract through the Contract Processing function.
Reval Balance Movement Reqd
Select this check box to transfer the revaluation balance automatically while processing the status change for the contract. The system transfers the revaluation balance for the contract when the status of the contract moves from an adverse status to a normal status. To indicate this, you first need to enable the ‘Transfer of Revaluation Balances’ in the Product Preferences screen.
Consequently, you can indicate whether the transfer of the revaluation balances has to be in the reverse direction/ backward direction in the Status maintenance screen. In case you select the ‘Reverse’ check box, the system transfers the balances in the reverse direction. Leave the check box deselected to indicate otherwise.
For further details on transfer of the revaluation balance and validations performed, refer the heading titled ‘Specifying the status/revaluation during status change process’ in the ‘Defining the Attributes specific to a Loan product’ chapter of the Loans User Manual.
Contra Accounting Applicable
You can select this check box if, for a particular status, you want to book the income received to a Contra GL and not the Income GL. If you select this check box, you have to select the applicable contra GL for the same.
Contra GL
If you have selected the ‘Contra Accounting Applicable’ check box, you have to select the Contra GL from the option list provided.
When there is a status change to the one specified, the balance that has been booked into the GL that was previously specified, is moved into the GL specified for the present status. If the status change involves movement of the balance from an Income GL to a Contra GL or from one Contra GL to another, the same is done.
3.10.1 Identifying the Advices for a Status Change
You can generate advices, when the components of the contract move forward from one status to the next, to notify the customer of the status change. These messages or advices are maintained in the Messaging System of Oracle FLEXCUBE. Click the ‘Advice’ to associate the required advices with the status rule.
You can associate the message to be generated for a particular status of the product by selecting the Message code in the above screen.
3.10.2 Specifying Transfer GLs for Status Change
You may have a GL structure under which loans in Normal status are reported, while those associated with other statuses (for example, status pertaining to defaulted and future schedules) are reported under different GLs, depending on their status. For each component, you should indicate the GLs from and to which balances should be transferred when the loan moves from one status to another.
Click the ‘GL’ button and invoke the Transfer GLs screen to associate existing accounting roles to the new GLs that entries should be posted to after status change.
The following details can be captured in this screen:
Accounting Role
Select the accounting role whose balance is to be transferred to the GL you specify.
Transfer GL
Select the GL to which the balance should be transferred.
Description
Select a description here.
Reversal GL
You have to indicate the GLs from and to which balances should move during a status movement. For interest income components, you have two options for transferring balances during a forward status movement:
- Debit the Interest Income GL maintained for a particular status and credit the Interest Income GL for the next status.
- Post the Debit entry into a Reversal GL instead of posting it into the Interest Income GL maintained for the previous status.
You can select the latter option by specifying Reversal GLs against the respective interest income components (accounting roles). If you do not specify Reversal GL against a particular interest income component, the former option defaults for that component.
Trf Amt
For an income/expense account, the existing balance in the role (as on the date of status change) is transferred to the specified GL only if you check this box. The box is checked by default for every income/expense role-GL combination that you specify.
Transfer at Historic Rate
For all Asset or liability GLs with internal GL types as Contract, you can choose to transfer the balance at historic rate for each accounting role.
If you enable this option, the system takes the existing LCY balance without further computation. If the option is left unchecked, the LCY equivalent of the FCY amount being transferred is recomputed based on the current exchange rate from the currency rates maintenance.
For all the loan contracts, you can modify this option only if you specified ‘Transfer at Historic Rate’ in the Product Preferences screen.
3.10.3 Specifying Liquidation Order of Components for a Particular Status
Specifications of component-wise liquidation order made as part of Product Preferences maintenance hold true for a loan as long as it is in the NORMAL status. For each adverse status of a loan, you need to maintain the liquidation order separately.
Click the ‘Liquidation Order’
icon to invoke the ‘Component Liquidation Order’ screen.
The following details are captured:
Component
Select the components to be liquidated.
No.
The priority in which the components are liquidated is displayed here. It is in incremental order.
Auto Liq
In the Component Liquidation Order screen, you can select the ‘Auto Liq’ box for those components that you want to be automatically liquidated. These selected components are automatically liquidated in the order assigned in this screen.
Any components for which you do not select the ‘Auto Liq’ box must be liquidated manually.
Gen Mesg
Select this check box to indicate that a message needs to be generated when that component is liquidated.
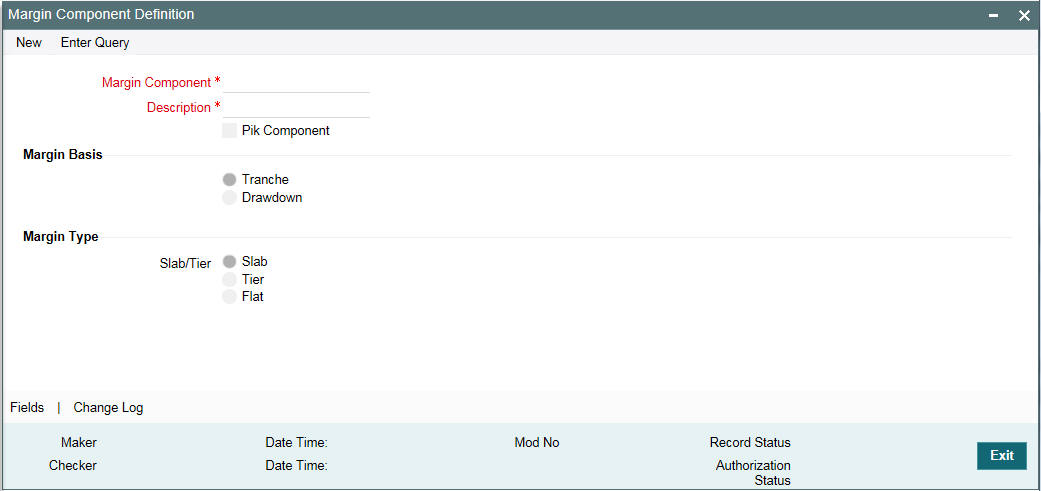
3.11 Maintaining Margin Component Details
Oracle FLEXCUBE allows you to define margin components through the ‘Margin – Definition’ screen. You can invoke the ‘Margin Component Definition’ screen by typing ‘LFDMGMNT’ in the field at the top right corner of the Application tool bar and clicking the adjoining arrow button.
In this screen, specify the following:
Margin Component
Give the margin component you are defining, a unique code by which you can identify easily. The code can consist of a maximum of 10-alphanumeric characters.
Description
Provide a brief description of the margin component being defined. The description can comprise a maximum of 50-alphanumeric characters.
Margin Basis
Specify the margin basis by selecting the appropriate option. The available options are:
- Tranche
- Drawdown
Slab/Tier
If the margin basis is ‘Tranche’, you are allowed to select the slab or tier option. You can then specify further details in the contract screen.
PIK Component
Select this option to indicate that the margin specified is a PIK margin.
Note
In the ‘Margin Maintenance’ screen (invoked from the ‘LB Tranche Contract Online’ screen) you can define the Slab/Tier structures (for tranche utilization percentage) with different effective dates for margin types of ‘Tranche’ basis.
For details on this maintenance, refer the heading titled ‘Maintaining Margin Slab/Tier structure’ in the ‘Loan Syndication Contracts’ chapter of this User Manual.
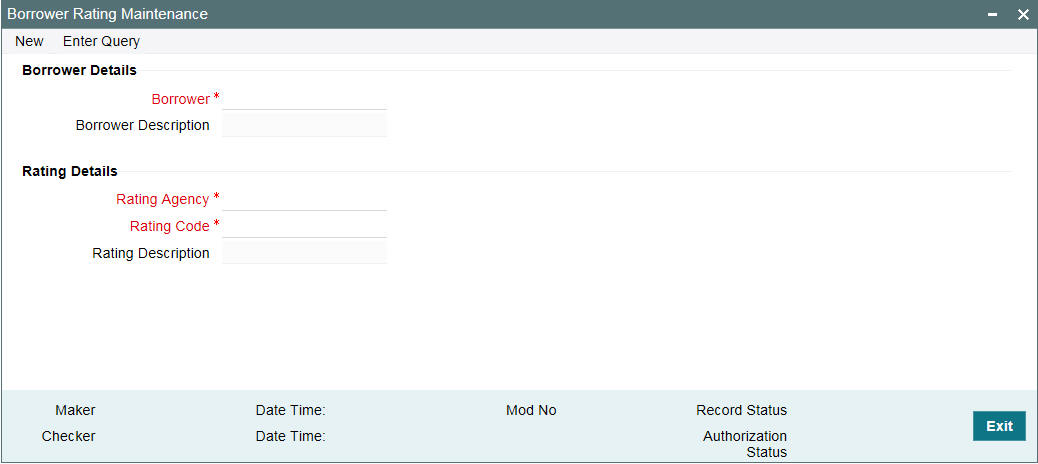
3.12 Maintaining Borrower Rating
Oracle FLEXCUBE allows you to associate a margin rating agency to each customer. You can do this through the ‘Borrower Rating Maintenance’ screen.
You can invoke the ‘Borrower Rating Maintenance’ screen by typing ‘LBDBRTAY’ in the field at the top right corner of the Application tool bar and clicking the adjoining arrow button.
Here, you need to specify the following:
Borrower
Select the CIF ID of your customer (borrower) against whom you are maintaining the margin rate here.
Note
All valid CIF IDs maintained at your bank head office are made available here.
On choosing the same, the short name of your customer is displayed alongside.
Rating Agency
Select / specify the rating agency name. All valid rating agencies maintained at your bank head office (through the ‘Margin Rating Maintenance’ screen) are made available here.
On choosing the ‘Rating Agency’, the corresponding description is displayed here.
Rating Code
Based on the ‘Rating Agency’ chosen by you, all corresponding rating codes (maintained at your bank head office through the ‘Margin Rating Maintenance’ screen) are made available here. You need to choose the relevant rating code here.
3.13 Maintaining the Daily Rate LIBOR
Oracle FLEXCUBE allows you to receive LIBOR/EURIBOR rates from PMC. You can view this through the ‘Daily Rate LIBOR’ screen.
You can invoke the ‘Daily Rate LIBOR Detail’ screen by typing ‘LBDPMCFC’ in the field at the top right corner of the Application tool bar and clicking the adjoining arrow button.
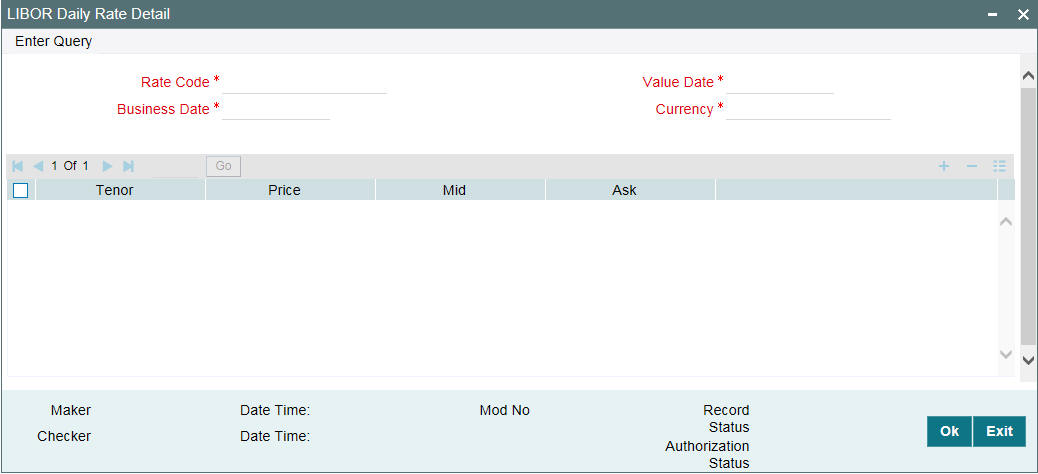
All rates that is received from PMC are displayed below.
Rate Code
The system displays the rate code.
Currency
The system displays the currency.
Business Date
The system displays the application date on which the rates are received from PMC.
Value Date
The system displays the same date which is received from the PMC.
Tenor
The system displays the rates received for the combination of Rate Code, Value Date, Currency and Tenor, with Maker/Checker as SYSTEM
Bid Rate
The system displays the rates received for the combination of Rate Code, Value Date, Currency and Tenor, with Maker/Checker as SYSTEM
Mid Rate
The system displays the rates received for the combination of Rate Code, Value Date, Currency and Tenor, with Maker/Checker as SYSTEM.
For more details on negative rate processing, refer the title ‘Maintaining Loans Parameters Details’ in the chapter ‘Bank Parameters’ in Core Services User Manual.
You can maintain negative rate even if the flag ‘Disallow Negative Base Rate Processing’ is checked. However, rate gets fixed as zero during auto rate set process.
Ask Rate
The system displays the rates received for the combination of Rate Code, Value Date, Currency and Tenor, with Maker/Checker as SYSTEM
Below operations will be allowed in the screen
- Unlock
- Save
- Authorize
- Close
- Reopen
Note
You are allowed to amend the rate from this screen. But Dual authorization will be required to authorize such amendments. The system will process Daily LIBOR rate feed from PMC and display in Daily LIBOR rate screen irrespective of the rate codes.
Note
You are allowed to amend the rate details for the rate code received from PMC but you are not allowed to maintain a new set of rate details for a rate code which is not received from PMC
- If Rate details are not received from PMC for a rate code which is associated with a Drawdown, then Auto Rate fixing is not done. This is explained in detail in the subsequent sections
- At the End of Day the Batch is not processed if there is any unauthorized maintenance exists from this screen
- If the file is received from PMC on holidays with value dates as holiday then the value date in Daily LIBOR Rate maintenance is the holiday date and not the system application Date
For Example:
The system receives file on 21-Jun-2014 with Value date as Business date. 21-Jun-2014 is a holiday and the system application date is 22-Jun-2014 which is next working date.
The Rate gets populated with business date and value date as 21-Jun-2014 in Daily LIBOR Rate maintenance screen (Oracle FLEXCUBE application date is 22-jun-2014)
The Rate set the events with the effective date of 22-Jun-2014, will be processed on 22-Jun-2014 only when the system receives file on 22-Jun-2014 and 21-Jun-2014 file is not considered.
3.14 Maintaining Reporting Requirements
Oracle FLEXCUBE allows you to maintain a list of reporting requirements for Borrower Facility, Borrower Tranche and Borrower Drawdown products. You can also link these reporting requirements to the underlying contracts.
You can capture the reporting requirements as Disclosure Code in Oracle FLEXCUBE. The Disclosure Code is defined in the ‘Disclosure Maintenance’ screen.
You can invoke the ‘Disclosure Maintenance’ screen by typing ‘OLDDSMNT’ in the field at the top right corner of the Application tool bar and clicking the adjoining arrow button.
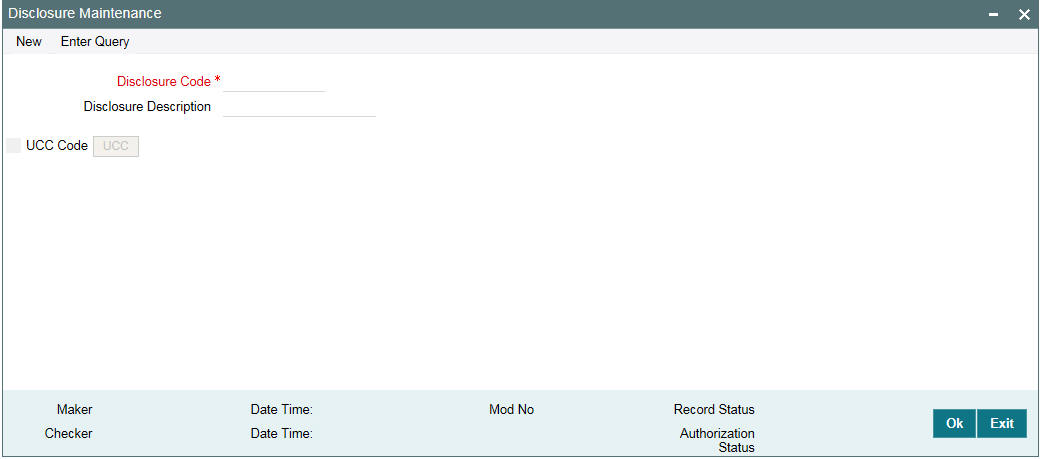
You can maintain the following details in this screen:
Disclosure Code
Specify a code for the reporting requirement. This code should have a maximum of 12 characters.
Disclosure Description
Specify a description for the reporting requirement. The maximum allowed characters is 35.
UCC Code
Select this check box if the disclosure code is considered a Uniform Commercial Code (UCC). If checked, the ‘UCC’ button gets enabled.
Note
Once this check box is selected for a disclosure code and authorized, this check box is disabled and you cannot amend this check box by unlocking the record.
3.14.1 Maintaining UCC Details
You can maintain UCC details pertaining to a disclosure code using the ‘UCC Details’ screen. To invoke this screen, click on ‘UCC’ button on the ‘Disclosure Maintenance’ screen.
You can maintain the following details in this screen:
Expiry Date
Specify the expiry date of the UCC code. Input to this field is mandatory if you check the ‘UCC Code’ check box on the ‘Disclosure Maintenance’ screen.
Propagation Required
Select this check box if expiry date is to be propagated to all linked contracts when expiry date of UCC is modified.
You can maintain any number of reporting requirements using the ‘Disclosure Maintenance’ screen.
After maintaining the disclosure code, the same is authorized by a checker.
Once you maintain the reporting requirements, you can link the same to a product. When you book a new contract, you can specify the reporting requirements that need to be linked to the contracts.
Note
You cannot delete a disclosure code if it is linked to any of the contracts within a product.
All the fields can be amended on the ‘UCC Details’ screen by unlocking the Disclosure Maintenance record and clicking the ‘UCC’ button.
Note
If the UCC is not linked to any contracts, there is no contract level impact of such amendments. If the UCC is linked to contracts, on authorization of the amendment, the new expiry date is automatically propagated to existing contracts if the ‘Propagation Required’ box is selected. If this check box is deselected during modification, then the new expiry date is not propagated to the existing contracts.
3.15 Maintaining Static Details
The system allows you to maintain static maintenance. You can invoke the ‘Static Maintenance - Detail’ screen by typing ‘OLDSFMNT’ in the field at the top right corner of the Application tool bar and clicking the adjoining arrow button.
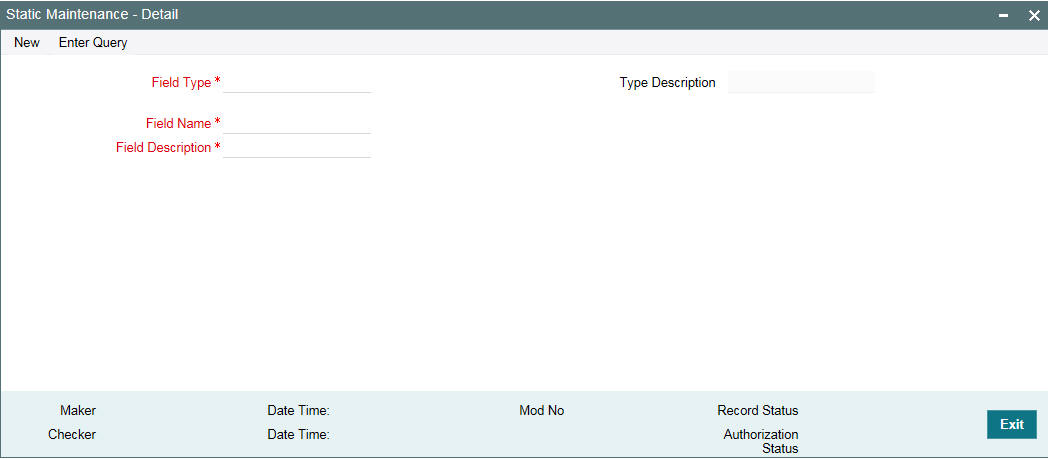
You can maintain the following details in this screen:
Field Type
Select the field type from the option list provided. To specify watch list details select the field type as ‘WL’.
Field Name
Specify name for field as ‘WLREMARKS’.
Field Description
Provide a description for the watch list entry. You can specify the reason for including the facility in the watch list.
3.15.0.1 Maintaining Paying Agent
You need to maintain the paying agents using the ‘Static Maintenance’ as per the details given below:
- You need to select the ‘Field Type’ as ‘PA’
- You need to select the ‘Field Name’ as ‘Paying Agent’
- You need to select the ‘Field Description’ as ‘Paying Agent Code’
While saving the record, the system displays the below error message if the field name is not Paying Agent for the field type ‘PA’.
The field name should be PAYINGAGENT for field type PA
3.15.0.2 Maintaining Fedwire Values
You can maintain Fedwire values for payments involving the Fedwire payment system using the ‘Static Maintenance - Detail’ screen as per the details given below:
- You need to select the ‘Field Type’ as ‘FW’ for Fedwire values
- You need to specify the Field Name as FWACCOUNT
- Specify the Fedwire value in the ‘Field Description’ field
- You can maintain more than one value for a combination of the Field Type and Field Name
3.15.0.3 Maintaining Tax Types
You can maintain the insurance types using the ‘Static Maintenance – Detail’ screen.
To maintain new insurance type, select ‘ESC1’ from ‘Field Type’ option list and enter the required field name and description. This must be maintained for all tax types offered by the bank.
To maintain two-digit code of states, select ‘STAT’ from ‘Field Type’ option list and specify the required field name and field description. This field description is displayed as ‘Tax Authority State’ in ‘Additional Details’ section of ‘Tax Maintenance’ screen, based on the two-digit state code from ‘Tax Authority ID’ field.
To maintain five-digit code of county (first 2 digits corresponding to the state code and last 3 digits corresponding to the county code), select ‘CNTY’ from ‘Field Type’ option list and specify the required name description. This field description is displayed as ‘Tax Authority County’ in the ‘Additional Details’ section of ‘Tax Maintenance’ screen, based on the three-digit county code from ‘Tax Authority ID’ field.
3.16 Maintaining Named Agents
You can invoke the ‘Named Agent Maintenance’ screen by typing ‘LBDNAMNT’ in the field at the top right corner of the Application tool bar and clicking the adjoining arrow button.
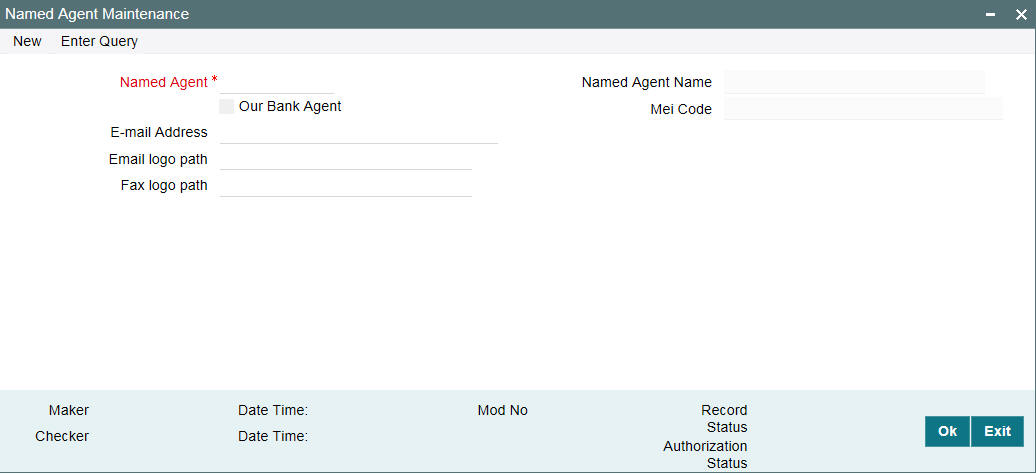
You can maintain the following details in this screen:
Named Agent
Select an appropriate named agent from the adjoining option list.
Named Agent Name
System displays the customer name of the customer you have selected as the named agent.
Email Address
Specify the path of the e-mail logo of the named agent.
If the ‘Email logo path’ is not maintained for the named agent, then system does not attach any logo in the outgoing e-mail messages.
Note
This logo is attached in all outgoing e-mail messages for the participant/borrower associated with the named agent tranche/drawdown in the private label branch.
Fax Logo Path
Specify the path of the logo for the named agent. This logo is attached in all outgoing automatic / free format fax messages for the participant/borrower associated with the named agent tranche/drawdown in Private label branch.
Expense Code
System defaults the expense code. However, you can amend the expense code/proof code.
Note
- Amendment of expense code is not allowed in the named agent maintenance, if the named agent is associated with any active tranche.
- You must ensure that only one expense code is created under private label branch for all the named agents. System doesnot perform any validation for multiple expense codes maintained under the private label branch.
Proof Code
System defaults the proof code. However, you can amend the expense code/proof code.
Note
- Amendment of expense code/proof code is not allowed in the named agent maintenance, if the named agent is associated with any active tranche.
- You must ensure that only one proof code is created under private label branch for all the named agents. System does not perform any validation for multiple proof codes maintained under the private label branch.
MEI Code
System displays the MEI code UDF value maintained in the Customer Maintenance screen in this field. If no MEI code is maintained for the customer, then system does not display any value.
Note
System does not allow you to close the named agent maintenance, if any active tranches are associated with the named agent.
3.16.1 Maintaining Advice Format for Named Agents
3.16.1.1 Maintaining Templates for Automatic Messages
The UDF ‘Named Agent’ is added in 'Format File Maintenance' screen to facilitate automatic messages.
The Named Agent option list of the UDF displays all the valid named agents from ‘Named Agent Maintenance’ screen. You can select an appropriate named agent while maintaining advice formats for a named agent.
If you amend an UDF, the amendment is applicable only for the subsequent messages that are generated; existing messages are not impacted.
After maintaining the details in the Format File Maintenance screen, all required message types and its related formats should be maintained for the named agent in the ‘Customer Address Maintenance’ screen
The 'Customer Address Maintenance' screen lists the message types and its formats for the specific named agent (formats maintained with Named Agent UDF value as the customer number), if the customer number is a named agent
If the customer is not a named agent, then system displays the message types and its formats maintained in system that are not associated with the named agents (formats maintained with Named Agent UDF value as blank).
3.16.1.2 Maintaining Templates for Free Format Messages
A new set of free format message templates should be maintained in the 'Message Format Template Maintenance' screen to generate free format messages for the tranches/drawdowns associated with the named agents.
The UDF field 'Named Agent' is added in the 'Message Format Template Maintenance' screen to facilitate templates for free format messages.
The 'Named Agent' option list displays all the valid named agents from the ‘Named agent Maintenance’ screen and you need to select an appropriate named agent while maintaining advice formats for a named agent.
3.16.2 Generating Messages for Named Agents
During automatic or free format advice generation for tranche and drawdown, system picks up the correct advice formats for private label contracts. Private label templates are used for Sub-agented contracts while generating the advices.
3.16.2.1 Generating Automatic Advices
While generating participant/borrower advices, system derives the appropriate advice format as detailed below:
- System validates if the tranche belongs to " agented" or " Sub-agented"
- If the named agent at tranche level is not blank, then the tranche is considered as " sub-agented", else the tranche is considered as agented
- If a tranche is sub-agented, then system derives the advice name associated with the tranche or drawdown product
- System searches for an appropriate format maintained for the combination of advice name and the named agent associated with the tranche/drawdown, in customer address maintenance.
- If a matching message type is found, then system gets the appropriate format in format file maintenance and message generation is done accordingly.
- If system fails to find the message type in customer address maintenance, then message generation fails with message status as ‘Repair’, and with the exception ‘Message format not found’.
- If system fails to find the format in format file maintenance, then the message generation fails with message status as ‘Repair’ with the exception ‘Message format not found’
- There should be only one advice format maintained for the combination of message type and named agent. System does not perform any validation for this.
- If you maintain more than one advice format for the combination of message type and named agent, system picks up the first format maintained and generate the advice.
- If the tranche is agented then advice is automatically generated. However, the Named agent must be blank for agented contracts in the tranche online as well as in format file maintenance screens.
3.16.2.2 Generating Free Format Messages
While generating free format messages for participant or borrower under ‘LS/LD Free format Messages’:
- If the borrower or participant is associated with a sub agent tranche, then system lists out the templates maintained for the named agent associated with the tranche
- If the borrower or participant is associated with the agented tranche, then system lists out all the templates that are maintained with the named agent UDF value as blank
3.16.2.3 Processing FpML Messages
The branch MEI code is replaced with the named agent MEI code for the outgoing FpML messages generated for private label branch or Named Agents.
Branch description is replaced with the named agent name in the ‘PartyName’ tag for agents in the outgoing FpML messages generated for private label branch.
3.16.3 Paying Agent Settlement Instructions
You can provide the instructions for settlement for a paying Agent in the ‘Paying Agent Settlement Instructions’ screen.
You can invoke the ‘Paying agent settlement instructions’ screen by typing ‘LBDPYSTL’ in the field at the top right corner of the Application tool bar and clicking the adjoining arrow button.
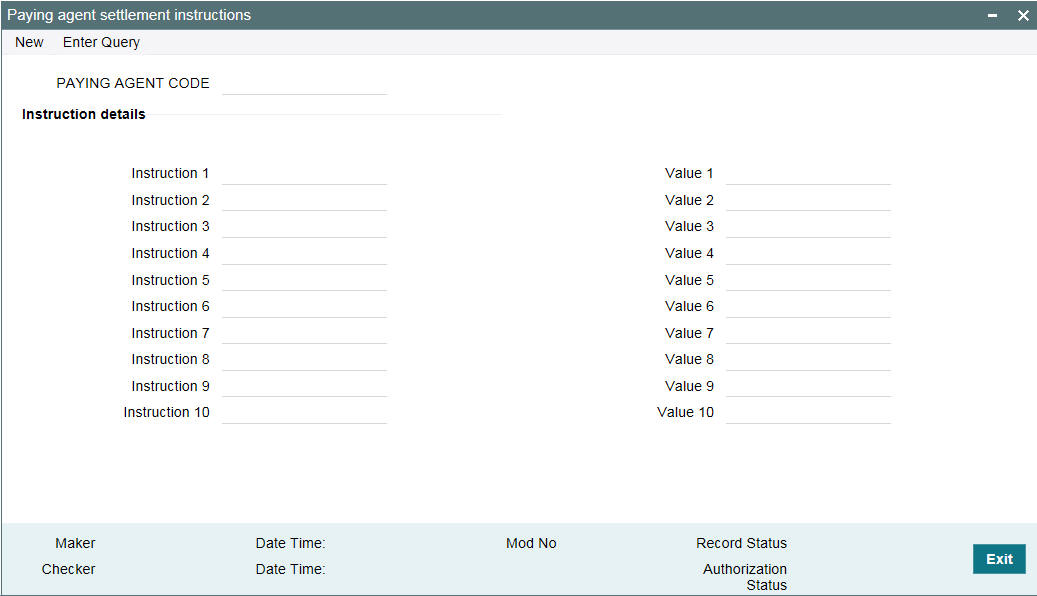
Specify the following details:
Paying Agent
Select the paying agent from the adjacent list of options for maintaining settlement instructions. The LOV list all the paying agents maintained in the ‘Static Maintenance’ screen.
Note
Each instruction allows you to capture field the name and values for settlement instructions.
Below operations are allowed in the above screen:
- New
- Save
- Authorize
- Unlock
- Delete - only before authorization of record.
- Open
- Close