6. Loan Syndication Contracts - Part 2
This chapter contains the following sections:
- Section 6.1, "Processing a Drawdown"
- Section 6.2, "Capturing Drawdown Details"
- Section 6.3, "Amending Drawdown SKIM Details"
- Section 6.4, "Processing Future Value Dated Payments"
- Section 6.5, "Processing Revaluation of Drawdowns"
- Section 6.6, "Allowing Back Valued Activities on a Drawdown Beyond the Trade Date"
- Section 6.7, "Amending Global Amount for a Contract"
- Section 6.8, "Processing Participant Contracts"
- Section 6.8, "Processing Participant Contracts"
- Section 6.9, "Viewing Participant Contracts"
- Section 6.10, "Modifying Participant Details"
- Section 6.11, "Participant Position Summary"
- Section 6.12, "Transferring Participant Assets "
- Section 6.13, "Processing Sighting Fund Rollover/Reprice"
- Section 6.14, "Remitting Withheld Tax"
- Section 6.15, "Refunding Withheld Tax"
- Section 6.16, "Processing Back Valued Interest and Fee for Payables and Receivables "
- Section 6.17, "Viewing Borrower/Participant Contract Processing Status"
- Section 6.18, "Maintaining Special Penalty Component Waiver Details"
- Section 6.19, "Viewing the Waiver Details of Special Penalty Components"
- Section 6.20, "Netting Cash Flows for a Tranche"
- Section 6.21, "Free Format Messages for Loan Syndication Contracts"
- Section 6.22, "Processing the Release of Payment Messages"
- Section 6.23, "Settlement Instruction Maintenance Information"
- Section 6.24, "Viewing Syndication Contracts"
6.1 Processing a Drawdown
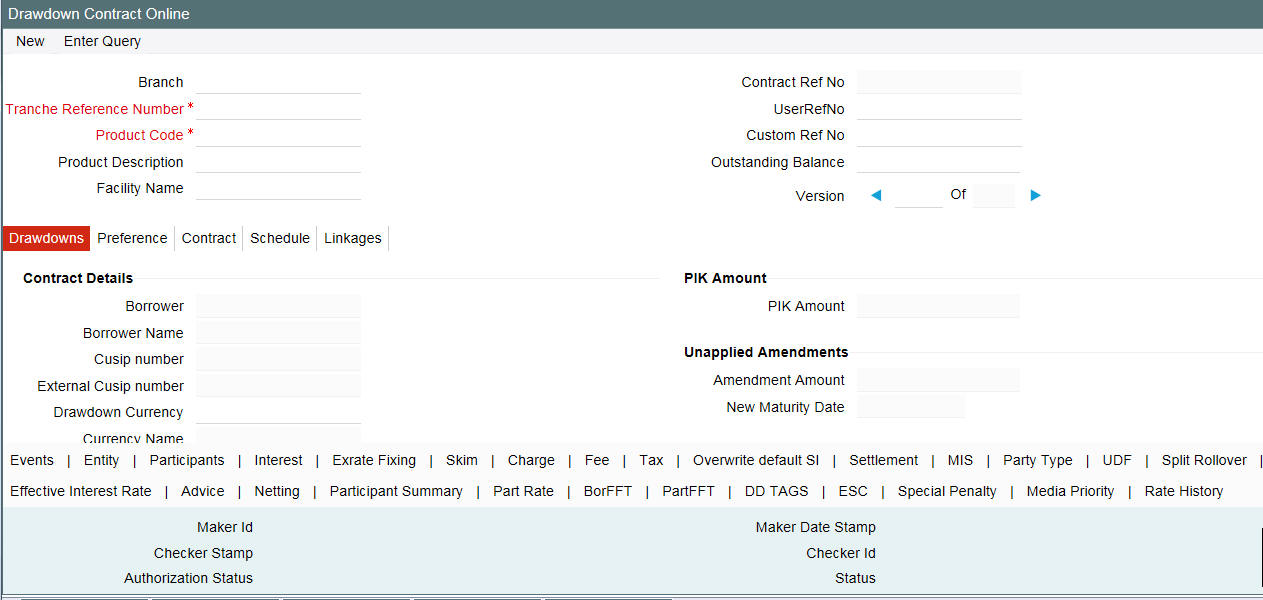
You can process a drawdown contract in the ‘Drawdown Contract Online’ screen. TYou can invoke the ‘DrawDown Online’ screen by typing ‘LBDDDONL’ in the field at the top right corner of the Application tool bar and clicking the adjoining arrow button.
The screen is displayed with details of an existing drawdown contract, as shown below.
When you are capturing a new drawdown, Oracle FLEXCUBE validates the following:
- The current outstanding under the tranche including the new drawdown
should be within the tranche current limit amount.
If there is LC drawdown increase or decrease in principal movements, LC drawdown VAMI using an LC Issuer is validated against the LC Sublimits defined at the tranche level.
You can capture a drawdown contract either by:
- Copying the details from an existing contract
- Associating a product
For more details, refer the heading ‘Entering the facility details’ in this chapter.
6.1.1 A description of the ‘Drawdown Contract Online’ Screen
You can capture the following in for a drawdown:
- The main facility contract under which the drawdown is being entered
- The product under which the contract is processed
- A unique user reference number for the contract
- The counterparty (customer) and currency
- Value date and maturity date
- Transaction Amount, and so on
You capture information pertaining to the drawdown in the following tabs of the screen:
- DrawDown
- Preference
- Contract
- Schedule
- Linkages
In addition, a vertical toolbar provided in the screen, may be used to invoke other sub-systems meant to capture important information for the drawdown.
These buttons are same as the ones available for the ‘LB Tranche Contract Online’ screen, except for the following:
‘Entity’ |
Click this tab to view/modify the entity details for the drawdown |
‘Exrate Fixing |
Click this tab to fix the exchange rate for a cross currency drawdown |
‘Interest’ |
Click this tab to view the interest and margin components |
Split Rollover |
Click this tab to specify the spilt rollover details if applicable for the drawdown |
‘Effective Interest Rate’ |
Click this tab to view the Effective Interest (EI) rates for the drawdown |
‘Media Priority’ |
Click this tab to specify the media for message generation |
6.2 Capturing Drawdown Details
To capture a new drawdown, click New from the menu.
The ‘Drawdown Type’ is displayed as ‘New’. The contract inherits the details of the template. Alternatively, you can also select the following details to capture a new drawdown:
Branch
Branch for which the drawdown is processed. You can process inter-branch contracts too.
Tranche Ref No
You have to select the reference number of the tranche under which you want to book a drawdown. The option list displays all active and authorized Tranche contracts. When you select the tranche, the system also displays the Tranche User Reference Number and the tranche borrower. In addition, the reference number of the borrower facility contract is also displayed.
Note
When you select a tranche, you have to ensure that all existing drawdowns under the tranche are authorized. If there are unauthorized drawdowns under the selected tranche, the system displays a message to indicate the same when you click the ‘Ok’ button. You are required to select another tranche or authorize the unauthorized drawdown (s) before you proceed.
Agent Ref No
The system displays the FpML Contract Identification number. However, you can modify it.
Borrower
By default, the borrower specified for the selected tranche is displayed here. You can specify a different borrower, if required. The option list displays all the borrowers specified for the tranche.
Drawdown Product
Select the drawdown product you want to use for the drawdown. The option list displays all the drawdown products associated with the tranche under which the drawdown is being processed. The following information defaults to the ‘DRAWDOWN’ tab of the screen (based on the preference defined for the underlying DD product and the tranche):
- Facility Reference Number and Tranche Reference Number
- Drawdown No
- Tranche Amount and Currency
- Customer code and name
- CUSIP No - This is mandatory during Tranche contract input
- Booking Date: This is the date on which the drawdown is captured in the system. This is equal to the current system date and you cannot change it. This date is only for information purposes. The actual accounting entries are passed only as of the Value Date of the drawdown.
- Drawdown Date, Original Start Date and Maturity Date defaults based on the tranche under which the drawdown is being processed.
- Drawdown Type – New
- SSI Pickup At – Component/Currency so on
- Administrator, Agreement Title and Remarks
In the header section of the screen, you have to specify the following:
User Reference Number
The reference number is the identification that you specify for the borrower drawdown. You can specify any identification number. In addition to the Contract Reference Number generated by the system, this number is also be used to retrieve information about the drawdown.
By default, the Contract Reference Number generated by the system is considered to be the User Reference Number for the drawdown.
Custom Ref No
You can capture a unique reference number for the drawdown. This number is used to identify the drawdown in the system. You can also query the drawdown based on this number. The reference number can consist of a maximum of 16 alphanumeric characters.
6.2.1 Capturing Details in the ‘Drawdowns’ and Preferences Tab
You can change some of the default values for a drawdown. You can also capture additional information specific to a drawdown in the ‘Drawdowns’ tab of the screen.
The details that default and those that you can change are discussed below:
External CUSIP/ISIN
Internal and External CUSIP/ISIN is defaulted from the tranche for new drawdowns and cannot be changed at the drawdown level.
If there is a change in the External CUSIP at the tranche level, it gets propagated to the drawdowns for the tranche. The updated details for the drawdown are sent to Markit, a financial system that acts as an inventory for all agency activities, through FpML messages.
Refer the chapter ‘FpML Messaging’ for more details on the updation process
For more information on Internal and External CUSIP Number refer section ‘Capturing Contract Details’ in this chapter.
Currency
You have to select the currency for the drawdown. The option list displays the currencies allowed for the tranche. If the drawdown currency is different from the tranche currency, the system displays the following message:
Exchange Rate needs to be fixed!
The ‘Exchange Rate Fixing Date’ displays the current system date (booking date of the drawdown).
Note
If the drawdown currency is different from the tranche currency and the ‘Exchange Rate Code’ that defaults from the product is not maintained for the currency pair (tranche and drawdown currencies), the system displays an error message.
For more details on exchange rate fixing, refer the heading ‘Fixing exchange rate for the DD currency’ in this chapter.
Amount
Specify the amount being availed by the customer through the drawdown. This amount should be between the minimum and maximum DD amount specified at the tranche level. When you capture the amount, system displays its equivalent in the tranche currency (‘Amount in Tranche Ccy’ field). The sum of all drawdown amounts must not exceed that of the borrower tranche, total facility amount, and global LC sublimit at the tranche level.
Note
- Collateral net available amount is included in the validation for drawdown amount.
- New borrowings are allowed only if the drawdown amount is less than or equal to ((Least of Net Available Collateral Amount for the Drawdown Value Date and Tranche Amount) – (Total Outstanding)).
- If the Borrower is classified, the drawdown amount entered here requires dual-authorization.
- LC drawdown (Issuance) amount for a borrower should not exceed the LC Sublimit defined for the borrower for that currency and the participant.
- The sum of all drawdown amounts are calculated based on the value date of the transaction.
Example
In our first example of the facility contract with Mr. Robert Carr, the drawdown schedules requested by him for the first tranche were as follows:
Portion of loan desired in the first tranche: 50000 USD.
- 20000 USD on 30th January
- 15000 USD on 29th February
- 15000 USD on 31st March
For each drawdown that you enter, you would specify the required amount as specified above.
PIK Margin
The PIK amount carried forward from the parent contract during rollover gets displayed here.
Unapplied Amount
The total uninitiated amount for an increase in drawdown principal for each value dated amendment is displayed here.
New Maturity Date
The unapplied maturity date for a value dated amendment is displayed here.
Drawdown Date
By default, the drawdown date is equal to the value date of the tranche. You can change the date to any date within the tranche period. In addition, the date should be later than the start date of the drawdown product. The date should be captured in ‘DD-MMM-YYYY’ format. The system displays an override if the specified drawdown falls on a holiday of the local currency. The system generates SWIFT messages to be sent to the participants before the drawdown date, intimating them to fulfill their commitment contracts.
Example
In our first example of the facility contract with Mr. Robert Carr, the drawdown schedules requested by him were as follows:
Portion of loan desired in the first tranche: 50000 USD.
- 20000 USD on 30th January
- 15000 USD on 29th February
- 15000 USD on 31st March
Portion of loan desired in the second tranche: 50000 USD.
- 20000 USD on 30th April
- 15000 USD on 31st May
- 15000 USD on 30th June
When you enter this schedule into the system, the drawdown dates you would specify are 30th January, 28th February, 31st March, 30th April, 31st May and 30th June.
Original Start Date
By default, the original start date of the tranche is applicable to the drawdown. You can specify a different date provided the new date is not earlier than the tranche original start date and not later than the tranche maturity date.
Maturity Date
By default, the tranche maturity date is applied. You can change the maturity date such that it is earlier than the tranche maturity date and less than or equal to the drawdown date. If the drawdown is completely paid ahead of the maturity date, then the maturity date is automatically be changed to the date of the drawdown paid.
DD Notice Date
This date is displayed based on the notification days maintained for the DD currency at the tranche level (in the ‘Currency Details’ screen). The notification date is arrived at using the notification holiday processing rules maintained for the tranche.
For details on maintaining notification days and holiday processing rules, refer the heading ‘Specifying currency details for the tranche’ in this chapter.
In case of current dated or back dated drawdowns, the booking date gets defaulted here. You can change the date beyond the booking date but less than or equal to the value date (if the value date and booking date are different). The system displays an override if the notification date is less than the current application date.
Int Rate Fixing Date
The interest fixing date for the DD currency is displayed based on the ‘Interest rate fixing days’ defined for the tranche and the list of holiday currencies maintained for each currency allowed for the tranche.
The interest rate fixing date is the date (prior to the drawdown date) as of which the interest rate is fixed for a new drawdown or for the new rate fix period. If you change the drawdown currency or the drawdown date, the system re-computes the interest rate fixing date and displays the same here.
Exch Rate Fixing Date
Similarly, the exchange rate fixing date for the drawdown currency is displayed based on the ‘Exchange rate fixing days’ defined for the tranche and the list of holiday currencies maintained for each currency allowed for the tranche. Exchange rate fixing for the new drawdown or the new rate fix period is done on this day.
For details on maintaining exchange rate and interest fixing days and holiday processing rules, refer the heading ‘Specifying currency details for the tranche’ in this chapter.
Special Amount
Specify the special amount disbursal, if any.
Note
- For new drawndown, if you enter the negative value in this field, an override message will be displayed.
- If the separate payment message is to be sent for the special amount, the message netting should be set to ‘No’ in the ‘Accounting Entry Definition’ screen of the drawdown product for INIT event.
Industry Code
Specify the industry code. The adjoining option list displays all industry codes maintained in the system. You can choose the appropriate one.
Global DD Amount
The Global Drawdown amount is computed and populated during new drawdown booking based on the Tranche, Global Tranche, and Drawdown amounts. The Global Drawdown Amount is computed as follows:
Global Drawdown Amount = (Global Tranche Amount / Tranche Amount) * Drawdown Amount.
You can amend this amount only for non-lead drawdowns and only if the corresponding Tranche has ‘Cascade Participation’ set to ‘No’. You cannot amend this amount if the underlying Tranche has ‘Cascade Participation’ set to ‘Yes’. The latest Global Amount as on the date of handoff is used for handoff of the Commitment Reduction to the Loans QT system.
However, only those Drawdown Global Amounts, with cascade participation set to N, can be amended using the new screen Global Amount Update/Amendment screen.
Note
The Global Drawdown amount cannot be updated during drawdown amendments.
Drawdown Type
This indicates whether you are defining a new drawdown or renewing an existing drawdown. For a new drawdown, ‘New’ is displayed and you cannot change it.
Renewal Type
The ‘Rollover Method’ you specify for the drawdown product will default here. You can change it at the drawdown level. Specify the manner in which the drawdown should be renewed/rolled over. The options available are:
- Normal: A single new contract is created for the amount you want to rollover.
- Consolidated: Several drawdowns are consolidated into a single new drawdown.
- Split: You can split the original drawdown into multiple drawdowns.
Note
Irrespective of the type of renewal you select here, the system allows you to capture instructions for any one of the renewal types mentioned above. Depending on the type of instructions you capture, the system automatically updates the ‘Renewal Type’ with the latest value when you save the instructions.
Split Message Type
You can select this message type only if the ‘Renewal Type’ is specified as ‘Split’. The message types available are:
- Individual: Select this option to indicate that messages are to be sent only for the individual drawdown schedule being defined.
- Consolidated: Select this option to indicate that messages are to be sent for all drawdown schedules created as a result of the split.
INIT Mode
This specification defaults from the tranche. You can change it for the drawdown, if required. This will indicate the mode of initiating the drawdown in the system. The following options are available:
- Auto: If you select this option, the system automatically initiate the contract on the Value Date. The event ‘INIT’ is fired on this date.
- Semi-Auto: You can select this option to indicate that forward processing is applicable to the borrower drawdown contract during the INIT event. The system processes the events, but hold the messages associated with the event.
For more details on this screen, refer the heading ‘Specifying participant details for the tranche’ in this chapter.
Suppress B.V Fixing Advice
You can check this option to stop the generation of payment messages when back valued schedules for a back-dated drawdown (with initiation date before today’s date) is liquidated.
Ancillary Drawdown
Oracle FLEXCUBE allows you to process Ancillary drawdowns under a tranche. Check this option to indicate that you want to process an Ancillary Drawdown.
This check box is enabled under the following conditions:
- If the drawdown product selected has the ‘Suppress Advices’ option maintained at the product level
- If the tranche contract is of revolving type
A pro-rata tranche is converted to a ‘Non-Cascade’ type once you save the drawdown and it remains as Non-Cascade even on repayment of the drawdown. You can send out participant FFT messages to all the lenders in the syndicate in case of ancillary drawdowns and amendments of the same. You need to maintain a separate advice template for this which you can choose in the FFT screen.
Note
- You can have multiple ancillaries under a tranche.
- You cannot perform back value dated ancillary drawdowns.
Swing Line Drawdown
You can check this option while booking the new drawdown to identify a swing line drawdown. You cannot make any changes to this during the amendments of the drawdown at the contract level.
For more information on swing line refer to Loan Syndication – An Overview chapter.
Note
If you process a swing line drawdown under a tranche for which the ‘Cascade Participation’ option is checked, the system automatically converts the tranche into a non-cascade participation type.
Further, it triggers the event ‘CASC’ to indicate this conversion.
Bidding Contract
You can select this check box to specify whether the contract is of competitive bidding type.
Note
You can process a bidding contract under tranches for which the ‘Cascade Participation’ option is not checked.
Sighting Funds Applicable
The value for this field is defaulted from the corresponding tranche and you are not allowed to modify this value.
Note
- If the field is selected, then the system does the following validations:
- INIT mode and RENEWAL mode cannot be SEMI-AUTO.
- Liquidation mode is Manual.
- Liquidate Back valued Schedules are set to ‘No’.
- You are not allowed to do any action that result in cascade conversion (swing line, ancillary or non-prorata drawdown).
- You are not allowed to define schedules for the compensatory component. They are defaulted based on the schedules for main interest component.
Liqd Interest on Prepayment
Select this check box to indicate if interest should be liquidated as part of prepayment. This check box is enabled only for Prime contracts.
In other words, you can liquidate an interest component for a contract on prepayment, only if you have selected this check box and also the ‘Prime Loan’ check box for a product in the ‘Loan Syndication – Borrower Product Preferences’ screen.
If this check box is selected, Oracle FLEXCUBE allows you to define only a bullet interest schedule. Otherwise, you can define a frequency-based schedule.
Note
- Prime contracts are Normal or Bearing type.
- Swing line contracts are not applicable for Prime contracts.
- You cannot amend the participant ratio for back valued contracts beyond the last prepayment date if the ‘Liqd Interest on Prepayment’ is checked.
- You can amend the ‘Liqd Interest on Prepayment’ check box, if required, before the first payment for the drawdown contract.
- System allows partial liquidation of interest only for Prime drawdown contracts. This enables you to make partial payment of the interest and fee components.
- Skim is not applicable for prime drawdown contracts.
- At the tranche level, system does not support auto repayment schedule for prime loans. Hence, for prime contracts, the ‘Auto Repayment Schedule’ check box in the Tranche Contract Online screen should be deselected.
- Liquidation of interest is not allowed if the option ‘Partial Prepayment Allowed’ has been selected.
FpML Type
Select this check box to indicate that the FpML type is required for the DrawDown contract.
If you have selected this box, the system does the following:
- Generate the FpML messages for the primary entity provided all the required maintenances and validations are available and satisfied. However, for non-primary entities, it generates the messages based on the media order maintained in the ‘Customer Entity Maintenance’ screen.
- Generate the message with the next priority media maintained in the ‘Customer Entity Maintenance’ screen if any FpML maintenance is not available for the message or participant does not have ‘Send FpML’ chosen at the entity level.
- Generate the message irrespective of the media order maintained in the ‘Customer Entity Maintenance’ screen in case if all FpML maintenance is available and ‘Send FpML’ is chosen at the entity level
If you have not selected this check box and the ‘Media Priority’ option is selected at the product level, then ‘Media Priority’ tab is enabled.
For more information, refer the section ‘Specifying Media for Message Generation’ in this chapter.
Partial Prepayment Allowed
Select this check box to indicate that for drawdown products, partial prepayment is allowed.
Note
Partial prepayment is allowed only for drawdown products where,
- ‘Sighting Funds Applicable’ option has not been selected
- Schedule Type is ‘Normal’
- ‘Lender of Records’ option has been selected
LC Type
This specification defaults from the product. You may change it at the contract level, if required. The available types are:
- Standby LC
- Commercial LC
Note
You can select the type of LC only if the ‘LC Drawdown’ option is checked for the drawdown.
If you check the ‘LC Drawdown’ option for the product, the same defaults to all drawdowns and you cannot amend it at the drawdown level.
LC Issuer
If the drawdown is an LC type of drawdown, you have to select the issuer of the LC as mandatory information. The option list displays the names of participants you have identified as issuers of LC. This is done at the tranche level.
The LC Issuance Fees is paid to the participant who is identified as the issuer of LC. This fee is computed on the outstanding amount of all the LC drawdowns for the selected issuer.
For more details on this, refer the heading titled ‘Identifying participants as issuers of LC’ in this chapter.
Int/Fee Distribution
System displays the method in which the interest and fee components are distributed among the participants when an assignment is executed before the liquidation date. The distribution type is classified into - ’Lender of Actuals’ type and ’Lender of Record’ type.
This is defaulted from the tranche level.
SSI Pickup At
This option defaults from the tranche. You can opt for a different value for the drawdown, if required. This indicates the basis for picking up the SSI (Standard Settlement Instructions) Mnemonic for the drawdown.
The available options are:
- Currency: If you select this option, the system allows you to select the SSI Mnemonic for each allowable currency for each participant in the ‘Participant Ratio Details’ screen. The SSI Mnemonic selected is applicable to all the components for the drawdown participant.
- Component: This option allows you to select the SSI Mnemonic for each component defined for each participant of the drawdown. This is done in the ‘Participant Ratio Details’ screen.
For more details on this screen, refer the heading ‘Specifying drawdown participant details’ in this chapter.
Billing Notice Days
This defaults from the drawdown product. You can change default value, if required.
This indicates the number of working days before the repayment due date when a billing notice should be generated, to be sent to a customer as a reminder of the payment.
PIK Rollover with capitalization
Select this check box to indicate that the PIK rollover with capitalization is allowed for the contract. You can amend this value after the Rollover is removed\reversed. You cannot amend the value if the interest component linked to Tranche PIK margin component is having non- zero rate.
Interest Payment Propagation
Select the interest payment for the drawdown from the below two options:
- Cash
- Normal
Cash payment can be processed as part of manual payment, split rollover and consolidated rollover processing. The field value for the child contract gets defaulted from parent contract during split rollover processing. During consol rollover processing, the value gets defaulted to child contract from the driver contract.
You cannot book drawdown booking with ‘Interest Payment Propagation’ as ‘Cash’ if below mentioned existing flags are checked for drawdown contract
- Partial Prepayment Allowed
- Liquidate Interest on Prepayment
You cannot book drawdown under lead tranche with ‘Interest Payment Propagation’ as ‘Cash’.
After the drawdown is authorized, amendment of interest payment propagation is allowed under the below validations:
- If cash interest payment is processed in partial or full for a drawdown with Interest Payment Propagation as ‘Cash’ and if the payment is active, then amendment from ‘Cash’ to ‘Normal’ is not allowed and system provides an appropriate error message. Amendment from ‘Cash’ to ‘Normal’ is allowed upon reversal of all active cash payments.
- You cannot amend from ‘Normal’ to ‘Cash’ if ‘Partial Prepayment Allowed’ is selected at contract level; if interest payment exists on drawdown then, the system does not allow to deselect the flag 'Liqd int on prepayment’.
- You can amend from 'Normal' to 'Cash' to allow user to deselect the flag 'Liqd interest on prepayment' even if an active interest payment exists. If the flag is selected then amendment from ‘Normal’ to ‘Cash’ does not allowed.
- If user performs amendment from ‘Normal’ to ‘Cash’ and then capture split rollover instruction with cash interest payment as part of same CAMD then user is not allowed to change back the value from ‘Cash’ to ‘Normal’ during the amendment.
For the drawdowns under lead tranches, the value is ‘Normal’ always. All the existing lead and non lead tranches, the ‘Interest Payment Propagation’ gets updated as ‘Normal’.
Named Agent
System defaults the value of the named agent maintained in the tranche contract online screen, while booking a new drawdown, in this field.
System also displays the name of the named agent adjacent to the Named Agent field.
Agreement/Administrator/Internal Remarks
These details gets default from the tranche contract and may be changed at the drawdown level.
6.2.2 Capturing Details in the ‘Contract’ Tab
You can capture the other contract details in the ‘Contract’ tab of the screen.
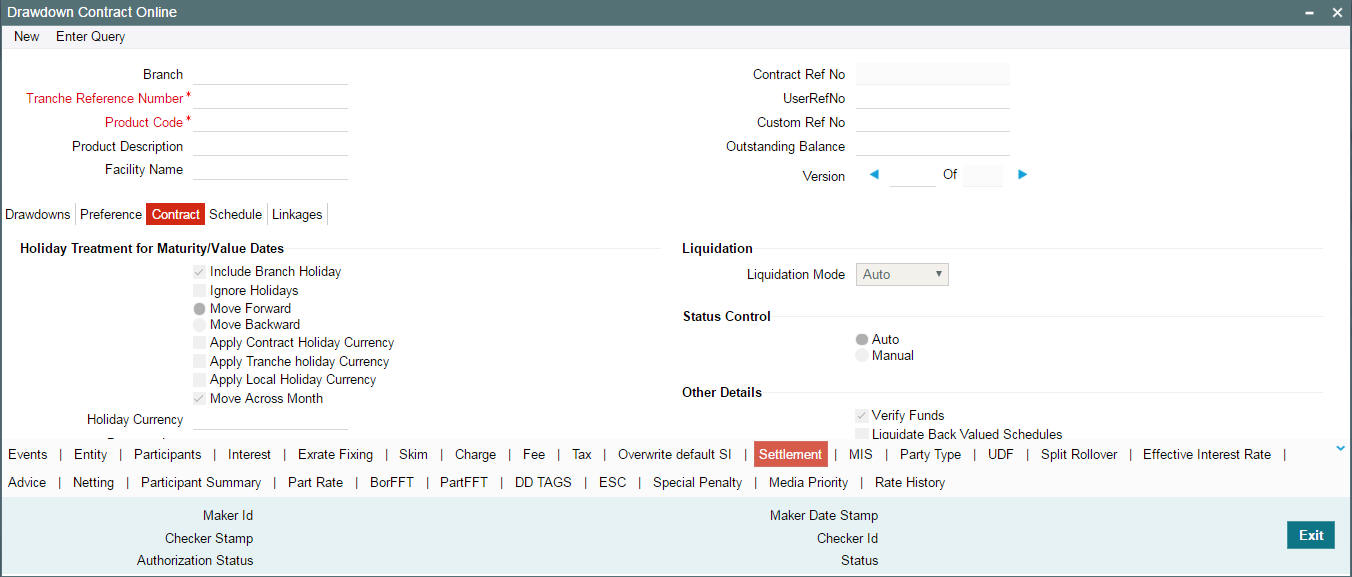
The following contract details applicable for drawdowns are explained below:
Liquidation
Mode of liquidation of interest and fee components associated with the drawdown defaults from the drawdown product.
At the drawdown level, you can change the mode to any one of the following methods:
- Auto: The system automatically liquidates the schedule during EOD on the schedule due date of the component.
- Manual: In this mode, you have to liquidate the components manually through the ‘Contract Payment’ screen. Fee components should be liquidated through the ‘Fee Liquidation’ screen.
For more details on ‘Contract Payment’ screen, refer the heading ‘Processing Repayments Manually’ in the ‘Processing Repayments’ chapter of this User Manual.
For more details on ‘Fee Liquidation’ screen, refer the heading ‘Liquidating Fee Components’ in the ‘Processing Charges and Fees’ chapter of this User Manual.
- Component: If you choose this option as the mode of liquidation, the system automatically liquidates the components as per the order you maintain in the ‘Component Liquidation Order’ screen at the product level. The order is maintained as part of specifying product preferences.
- Semi-Auto: If you choose this option, the message that should get generated during liquidation (Event: LIQD) will be kept on hold. The messages are available in the ‘Outgoing Message Browser’ with status ‘Hold’. You need to use the ‘Events for Forward Processing’ screen to release the messages.
For more details on this screen, refer the heading ‘Forward processing of events’ in this chapter.
Status Control
The statuses - for example, Active, Past Due Obligation, Non-Accrual Basis, and Write-Off , and so on. defined for the product in the ‘Status Maintenance’ screen is applicable for the drawdown. You have to indicate the mode of status change for a drawdown.
The options are:
- Auto – If you select this option, system automatically moves the drawdown from one status to the other based on the criteria maintained for status change (in the ‘Status Maintenance’ screen).
- Manual - If you select this option, user intervention is required to move the drawdown from one status to the other.
For details on the ‘Status Maintenance’ screen, refer the heading titled ‘Maintaining status rules for a syndication product’ in the ‘Reference Information for Loan Syndication’ chapter of this User Manual.
Limit Line
When you are entering a borrower drawdown, specify the credit line under which exposure would be tracked, if required. The credit lines selected for the drawdown customer (borrower) is displayed in the option list provided.
Amortization Type
You need to specify the amortization applicable to the drawdown only if the schedule type is ‘Amortized’. The following options are available:
- Reducing Balance: The reducing balance method is used for calculating interest on the reduced principal/outstanding balance for each repayment schedule. The principal repayment would be the difference between the equated monthly installment and the interest, for each schedule.
- Rule of 78: This method is used to determine how much of each monthly payment is paid towards interest and how much is paid towards the principal component. First, you will compute the total interest on the original principal amount. Then, you will divide this interest amount equally into n parts, where n is the number of schedules and divide the loan principal amount also into n equal parts, so that each equal installment is basically a sum of the two. Subsequently, you will apply the rule of 78 to calculate how much of the EMI goes towards interest and principal.
Examples:
Case 1: Reducing balance
Assume that you have disbursed a drawdown with the following details:
- Principal – 10,000 USD
- Interest Rate – 10%
- Interest Calculation Method – Actual/360
- Start Date - 12/1/2000
- End Date - 11/30/2001
- Days in the year – 364
Based on the reducing balance method, the interest, principal and the EMI is as follows:
Sl. No |
Interest |
Principal |
EMI |
Outstanding Bal |
1 |
86.11 |
$793.05 |
$879.16 |
$9,206.95 |
2 |
79.28 |
$799.88 |
$879.16 |
$8,407.07 |
3 |
65.39 |
$813.77 |
$879.16 |
$7,593.30 |
4 |
65.39 |
$813.77 |
$879.16 |
$6,779.53 |
5 |
56.50 |
$822.66 |
$879.16 |
$5,956.88 |
6 |
51.30 |
$827.86 |
$879.16 |
$5,129.02 |
7 |
42.74 |
$836.42 |
$879.16 |
$4,292.60 |
8 |
36.96 |
$842.20 |
$879.16 |
$3,450.40 |
9 |
29.71 |
$849.45 |
$879.16 |
$2,600.95 |
10 |
21.67 |
$857.49 |
$879.16 |
$1,743.46 |
11 |
15.01 |
$864.15 |
$879.16 |
$879.31 |
12 |
6.11 |
$873.05 |
$879.16 |
$6.26 |
The interest for the first schedule is computed on the loan principal (10,000) for the first month (31 days) using the following formula:
(10000 * 10 * 31) / (100*360)
Interest for the subsequent schedules are computed on the outstanding principal for each schedule.
Case 2: Rule of 78
Consider the drawdown details mentioned in case 1.
Total interest on the loan = (10000 * 10 * 364) / (100*360) = 1011.11
Interest for each schedule = 1011.11/12 = 84.26
Principal for each schedule = 10000/12 = 833.33
EMI = 833.33 + 84.26 = 917.59
First month’s interest = 12/78 times $1011.11 = 155.56
(78 is the sum of integers from 1 to 12)
Therefore, principal for the first month = 917.59 – 155.56 = 762.03. The interest, principal, and EMI due for each schedule is as follows:
Sl. No |
Interest |
Principal |
EMI |
1 |
155.56 |
762.03 |
917.59 |
2 |
142.59 |
775.00 |
917.59 |
3 |
129.63 |
787.96 |
917.59 |
4 |
116.67 |
800.92 |
917.59 |
5 |
103.70 |
813.89 |
917.59 |
6 |
90.74 |
826.85 |
917.59 |
7 |
77.78 |
839.81 |
917.59 |
8 |
64.81 |
852.78 |
917.59 |
9 |
51.85 |
865.74 |
917.59 |
10 |
38.89 |
878.70 |
917.59 |
11 |
25.93 |
891.66 |
917.59 |
12 |
12.96 |
904.63 |
917.59 |
Total |
1011.11 |
9999.97 |
11011.08 |
User Defined Status
If you have not checked the ‘Schedule Level’ status processing for the drawdown product (as part of product preferences), you have to specify the drawdown status here. For a new drawdown, the default status is ‘NORM’ (Normal). You cannot change the status of any of the schedules in this case. You can select from a list of user-defined statuses maintained for the drawdown product (in the ‘Status Maintenance’ screen).
If you have defined schedule-level status processing for the drawdown product, you cannot change the status of the contract in this field. You can change the status of any of the schedules, as required, and the status of the contract is determined as the worst status among the individual statuses of the schedules.
6.2.2.1 Specifying Holiday Treatment for Maturity/Value Date of the Drawdown
In this section of the screen, you can specify the holiday treatment preferences for value date and maturity date falling due on holidays defined for the branch. The holiday treatment details maintained for the drawdown product defaults to the drawdown. You can change your preferences for the drawdown.
For more details on the options available, refer the heading ‘Specifying Additional Preferences for Loan Syndication’ in the ‘Defining Products for Loan Syndication’ chapter of this User Manual.
6.2.2.2 Viewing the Agency Type
The agency type of the transaction (Lead or participation) is defaulted from LB Tranche Contract Online and you are not allowed to change it during Drawdown contract booking or Amendment.
- Lead - Your bank is the lead agent for the syndication transaction.
- Participation - Your bank is one of participant in the syndication transaction.
6.2.2.3 Specifying ‘Other’ Details
Following details have to be captured in the ‘Other Details’ section of the screen:
Verify Funds
When the system debits the borrower’s repayment account for liquidation (repayment), you can specify that the availability of funds for liquidation of the various components of the drawdown has to be ascertained before liquidation is done.
Check this option if you want the availability of funds to be checked before automatic liquidation is done. By default, this option is selected.
Liquidate Back Valued Schedules
If you have specified, while defining the product, that for a back-dated tranche or drawdown loan contract (which has an initiation date which falls before today’s date), with schedules prior to today’s date, the schedules have to be liquidated when the drawdown is initiated, the same will apply to the drawdown you are processing. However, through this field, you can choose not to liquidate back valued schedules by leaving this field blank.
6.2.2.4 Specifying Loan Statement Details
The following loan statement details may be maintained:
Statement Type
You can specify if a loan statement needs to be generated for the drawdown. If loan statements are to be generated, you can specify the type of statement you want to generate. The options are:
- Summary
- Detailed
If you do not want to generate loan statement, select the ‘None’ option.
Cycle/On
If loan statements have to be generated for the drawdown, you have to indicate the frequency of statement generation. You can set the frequency to any one of the following options:
- Annual
- Semi-Annual
- Quarterly
- Monthly
- Fortnightly
- Weekly
- Daily
Based on the frequency that you specify, you can also indicate the month/weekday for the generation of the statement. Thus, if you have set the loan statement generation frequency to Annual, Semi-Annual, or Quarterly, you have to indicate the month in which the first statement is to be generated.
Similarly, if you have indicated that statement generation is to be on a fortnightly or weekly basis, you should specify the day of the week on which the statement is to be generated. For instance, if you indicate that a weekly generation should be done on Thursday, the statement is generated every week on Thursdays.
When the frequency is set to monthly, then by default, the statement is generated on the last day of every month. You can also select a different day from the drop-down menu.
6.2.2.5 Specifying Rollover Details
The rollover applicability is explained below:
Rollover (Yes/No)
While setting up the drawdown product, if you specified that drawdowns involving the product should be automatically rolled-over, then all drawdowns involving the product is rolled-over on their respective maturity dates. This feature is called auto rollover. If rollover is specified for the product, the same is applicable for the drawdowns.
If you do not want to rollover the drawdown, you can select the ‘No’ option. However, if rollover is not allowed for the product, you cannot opt for rollover at the drawdown level.
Note
This option is set to ‘No’ and is disabled if the option ‘Partial Prepayment Allowed’ has been selected.
Count
If rollover is applicable for the drawdown, the system displays the rollover count in this field. For a drawdown that has been rolled-over, this count indicates the number of times it has been rolled-over.
6.2.2.6 Specifying the Rounding Details
The drawdown contract inherits the currency-wise rounding rules defined for interest components, in the interest class associated with the drawdown product (as defined in the ‘Interest Class Definition’ screen).
Int Period Basis
This field indicates how the system must consider the tenor basis upon which interest is computed over a schedule or interest period. You can select the required option from the drop down list.
- Include Frm Dt: For all schedules, the period considered for interest calculation would include the start date and exclude the end date. Therefore, the drawdown value date is considered for interest calculation while the maturity date is excluded.
- Include To Dt: In this case, the period considered for interest calculation excludes the drawdown start date and include the end date.
- Include Frm & To Dt: The period considered for interest calculation includes both the value date and the maturity date.
- Exclude Frm & To Dt: The period considered for interest calculation excludes both the value date and the maturity date.
Rounding Rule
Indicate the currency rounding rule that must be applied to round off interest amounts in the selected currency, for the main interest component. The following options are available in the drop down list:
- Truncate
- Up
- Down
- Round Near
Decimals
This indicates the number of digits after the decimal place, to which interest amount in the specified currency, is to be truncated. This specification can only be made for the rounding option ‘Truncate’. If you do not specify a value here, the system uses the number of decimals defined for the drawdown currency (in the ‘Currency Definition’ screen).
The number of decimals specified in this field cannot exceed the number of allowed decimal places defined for the specified currency (in the ‘Currency Definition’ screen).
Units
This field indicates the lowest possible measure in which interest amounts can be considered in the specified drawdown currency. This value cannot be less than the rounding unit for the specified currency (as maintained in the ‘Currency Definition’ screen). If not specified, the system picks up the rounding unit maintained for the drawdown currency.The following details default to screen and you cannot change them:
- Settlement details for the borrower – Settlement (Cr/Dr) Branch, Account and Currency.
- Payment Method: Bearing, Discounted or True Discounted as defined for the drawdown product.
- Schedule Type: Normal, Capitalized or Amortized, as defined for the drawdown product.
- Reporting Currency details: The equivalent of the drawdown amount in the reporting currency and the outstanding amount gets updated as and when repayments are made.
For more details on the ‘Currency Definition’ screen, refer the ‘Currency Maintenance’ chapter of the CS (Core Services) User Manual.
6.2.2.7 Specifying Revaluation Preferences
If Reval Reqd is ‘Yes’ for the drawdown product, the same defaults to the drawdown processed with the product. You can, however, change the preferences for a specific drawdown. But, if ‘Reval Reqd’ is ‘No’ for the product, you cannot change it to ‘Yes’ at the drawdown level and revaluation will not be applicable for such drawdowns. The following preferences become mandatory if revaluation is applicable:
Exchange Rate Code
This indicates the code for the exchange rate that must be used to convert the drawdown amount from the drawdown currency to its equivalent in the tranche currency. The option list will display the rates codes maintained for the currency pair (tranche and drawdown currencies) involved in the conversion. During revaluation, system picks up the exchange rate maintained for the selected rate code and rate type corresponding to the currency pair.
Exchange Rate Type
This refers to the type of exchange rate that must be used to convert the drawdown amount from the drawdown currency to the tranche currency. The available options are:
- Buy
- Mid
- Sell
Frequency
This is the frequency or periodicity at which automatic revaluation should be performed. The options available are:
- Daily
- Monthly
- Half-Yearly
- Quarterly
- Yearly
Start Month and Start Day
For the frequency selected, you must also specify the month and the date according to which the system commences the revaluation process.
6.2.2.8 Viewing Revaluation Schedules
If Reval Reqd is ‘Yes’, Oracle FLEXCUBE creates the revaluation schedules based on the Frequency, Start Month and Start Day you specify as part of the revaluation preferences for the drawdown. The system also takes into account the holiday preferences in the ‘Holiday Treatment for Schedule’ section of the ‘SCHEDULE’ tab to arrive at the schedule dates.
The following ‘Contract Details’ are displayed in this screen:
- Product Code
- Contract Reference Number
- User Reference Number
- Customer
The following ‘Revaluation Schedules’ details are displayed in the Contract tab for each schedule:
- Schedule Date: This is the date on which revaluation occurs. For instance, if you have a drawdown initiated on 1-Dec-06 with the Revaluation Frequency as ‘Monthly’ and Start Day as 15. The revaluation schedules would be 15-Dec-06, 15-Jan-07, and so on.
- Rate Code and Rate Type: These correspond to the Exchange Rate Code and Exchange Rate Type respectively that is used to convert the amount in the drawdown currency to its equivalent in the tranche currency.
- Status: This indicates the status of the revaluation process as on
the revaluation schedule date and can display any one of the following
values for a schedule:
- Processed: Indicates a successful revaluation process
- Skipped: Indicates a skip in the process as a result of the revaluation date falling before the current rate fixing end date. Also applicable if the revaluation schedule is in the past for back valued drawdowns.
- Failed: Indicates a failure in applying revaluation due to reasons such as non-availability of the rate or if the new rate results in lack or insufficient availability of funds.
- Unprocessed: Applicable for all future schedules
- Applied Date: Indicates the date on which the revaluation was successfully applied. For instance, say that revaluation fails on 15-Jan-07 as a result of the drawdown amount exceeding the tranche available amount, after conversion with the new rate. On 16-Jan-07, during BOD batch, Oracle FLEXCUBE will try to perform a reval using the rate available on 16-Jan-07. If revaluation succeeds, the Applied Date would be 16-Jan-07.
- Applied Rate: This is the rate that was applied for revaluation i.e. the rate using which the amount in the drawdown currency was converted to its equivalent in the tranche currency.
- Remarks: Displays the remarks such as reasons for success, failure, and so on.
Note
- Auto revaluation is initiated on the schedule dates as part of automatic batch processes run during the EOD operations at your branch. The BOD batch process takes up only the failed schedules and will not include the schedules due on that date.
- If you change the maturity date of the drawdown through a VAMI (Value Dated Amendment Initiation), the system repopulates the revaluation schedules in accordance with the new maturity date.
For more details on revaluation, refer the heading titled ‘Processing revaluation of drawdowns’ in this chapter.
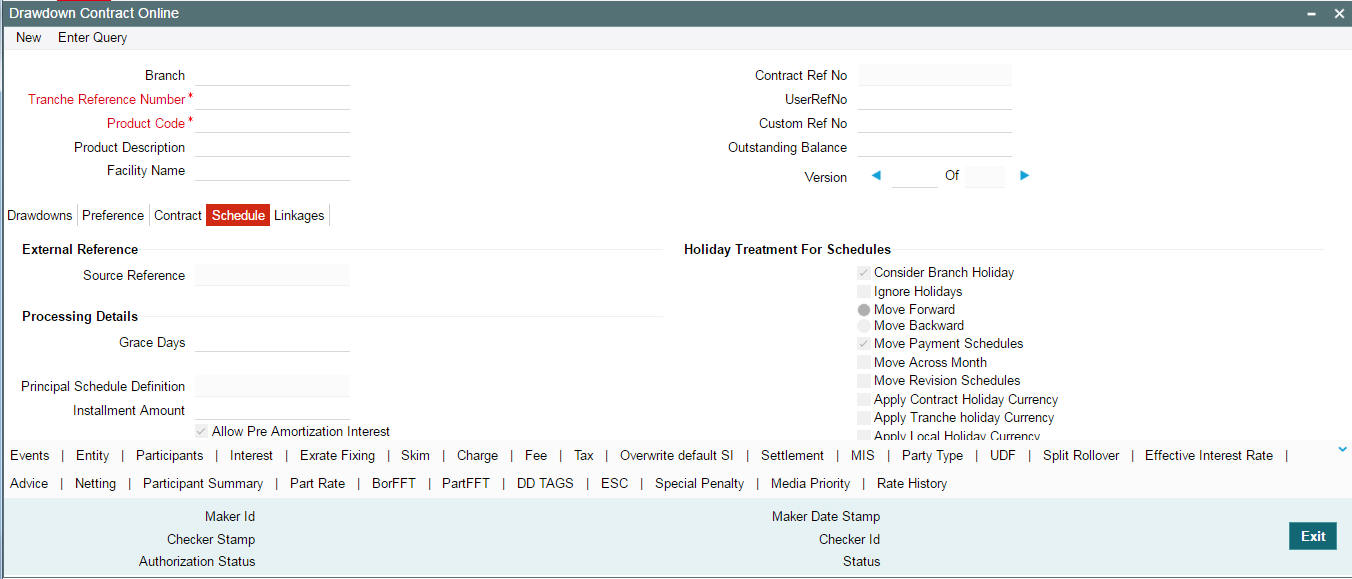
6.2.3 Capturing Details in the Schedule tab
You can capture the details pertaining to the drawdown schedule in the ‘SCEHDULE’ tab.
The information available in this screen is discussed below:
6.2.3.1 Specifying Holiday Treatment for Schedules
The holiday treatment you specified for the DD product defaults to the drawdown. However, you can change the details, if required.
Note
The system redefines the future schedule dates for Principal, Fees, and Interest components based on the changes made.
For details on the available options, refer the heading ‘Specifying Additional Preferences for Loan Syndication’ in the ‘Defining Products for Loan Syndication’ chapter of this User Manual.
6.2.3.2 Processing Rules
Grace Days
For drawdown contract, system defaults the value maintained for ‘Grace Days’ at the borrower drawdown product level. However, you can edit the default value of grace days during contract input or contract amendment. During contract amendment, the amended value is applicable only to future calculations of late payment charges. While saving the drawdown, system displays the following override message:
‘Grace Days for drawdown is defaulted from the tranche contract, do you wish to continue?’
You can accept the override message by clicking the ‘Ok’ button to continue with the save process. In this case, system defaults the value for grace days from linked borrower tranche contract. If you reject the override, then system defaults the value of ‘Grace Days’ from the drawdown product.
6.2.3.3 Specifying Repayment Schedule Details
The repayment schedule definition for the drawdown is based on the repayment processing rule specified at the tranche level. The available rules are:
- FIFO (First In First Out)
- Pro-rata
- LIFO (Last In First Out)
For more information on the above rules, refer the heading ‘Specifying processing rules for the tranche’ in this chapter.
Further, it also depends on the ‘Auto Repay Schedule’ option defined for the tranche (in the ‘Schedule’ tab of the ‘LB Tranche Contract Online’ screen).
- If this option is checked, the rule specified at the tranche level is applied for defining the repayment schedules for the drawdowns processed under the tranche. In this case the ‘Principal Schedule Definition’ is marked as ‘AUTO’ (in the ‘Schedule Details’ section of the ‘Schedule’ tab) and you cannot change it. However, you can amend the schedules, if required. If amendments are made, auto scheduling will not happen for further drawdowns.
- If the option is not checked, the schedules defined for the DD product is applied for drawdowns under the tranche. For such drawdowns, the ‘Principal Schedule Definition’ is marked as ‘MANUAL’ (in the ‘Schedule Details’ section of the ‘Schedule’ tab) and you cannot change it. In this case also, you can amend the schedules, if required. However, if you make amendments, auto scheduling does not happen for further drawdowns.
Note
The drawdown repayment schedules are determined by the reduction schedules only for drawdowns with the following attributes which are defined as part of drawdown product preferences.
- Payment Type - Bearing
- Schedule Type – Normal
The repayment schedule details include the following:
Type
In the ‘Schedule Details’ section of the screen, you can define the following types of schedules:
- P: Repayment schedules
- R: Interest rate revision schedules (for interest components of type ‘Floating’ and ‘Periodic’)
- F: Interest rate revision schedules (for interest components of type ‘Fixed’)
Component
In this field, you have to specify the component for which the schedule is being defined. All components - the principal and other components, depending upon your association with the drawdown product will be available in the form of an option list. You have to define schedules for each of them.
When defining repayment schedules for specific loans, the amount of repayment needs to be specified only for the principal. The interest, commission and fee amounts are calculated by the system, automatically, depending on the repayment date and amount of the principal.
Note
For amortized schedules, you cannot define schedules for the principal. The component is displayed as ‘AMORTISE’. You should specify the frequency of amortization.
Start Date
This is the date on which the first repayment or rate revision becomes due for the schedule being defined. Subsequent dates will be calculated based on this date and the frequency you specify in the next field. Any repayment or rate revision schedule date falling on a holiday is handled as per the holiday treatment specifications you define.
This date should be the same or later than the Value Date and same or earlier than the Maturity Date of the drawdown.
No.
Based on the frequency and the unit of frequency, you have to specify the number of schedules for the component. For instance, if you want the schedules to fall due once a month for 12 months, then you need to specify the following details:
- Frequency: Monthly
- Unit: 1
- No: 12
Frequency
This indicates the frequency/interval at which the schedules fall due. The available frequencies are:
- Daily
- Weekly
- Monthly
- Quarterly
- Half-yearly
- Yearly
- Bullet: One bullet schedule is automatically defined for each component based on the drawdown available amount.
Note
You can specify only bullet schedule for PIK interest component. PIK margin maintained at the ‘Margin Maintenance’ screen is automatically picked up for the PIK margin component.
Unit
Unit of frequency identifies the number of occurrences within a frequency, for example, . Unit ‘2’ and Frequency ‘Monthly’ means bimonthly frequency that is, the schedule occurs once in 2 months. Similarly, if you want a payment every 15 days you have to specify the frequency as ‘Daily’ and enter the units as ‘15’.
Amount
When defining repayment schedules, the amount of repayment needs to be specified only for the principal. This is the amount by which the available amount under the drawdown is reduced as per the frequency.
The system calculates the interest and fee amounts automatically, depending on the repayment date and amount of the principal. However, for drawdowns with special interest, you also have to provide the interest amount. Similarly, if a fee or a charge has been defined as an amount, you also have to specify the amount.
Note
- If you specify amortized schedules, the system automatically does the amortization according to the frequency that you have defined.
- You can define as well as redefine Back Value dated Interest Schedule while amending the schedule for the Drawdown contract.
- You can specify Back Value dated Interest Schedule only for unliquidated Interest Schedules.
- You are allowed to change the Interest schedule beyond the last interest liquidated schedule.
- For Prime drawdowns, you will not be allowed to define a new or redefine an existing interest schedule beyond the last Interest/Principal prepayment date.
6.2.3.4 Specifying the Amortize Details
You can specify the following details related to amortize contracts
Installment Amount
Specify the installment amount for amortized contracts. This option is available only for the contract using the product which has the ‘Allow user input installment’ flag is checked.
The system performs the following validations to this field:
- Amount should be greater than zero and less than the contract amount.
- The computed Interest amount of any of the amortize schedule should not exceed the Installment amount.
- Bullet schedule have non-zero principal schedule based on the user input installment amount during new contract booking. This is not validated during contract amendment.
Installment amount captured is same for all schedules and it may differ if:
- EMI computation function for amortized loan is modified to pass the upfront EMI you entered.
- Main interest component amount of each installment is computed based on the principal balance.
Principal is derived as Principal = user input installment– Interest component. Allow
Pre-Amortization Interest
Select this check box to indicate that the system should calculate the pre-amortization interest.
- If ‘Allow pre-amortization interest’ flag is checked
at the contract level:
- Main Interest component has to be maintained at the product default schedules.
- Schedule default for standalone Main interest component is blocked.
- Defaulted Amortize schedules are deleted.
- Main interest component schedule is allowed to maintain as the first schedule before the amortize schedules. Multiple schedules are not allowed for this component.
- Only one schedule for main interest component is allowed before first amortize schedule. Components other than main interest component is not allowed to define before amortize schedules.
- Redefinition of schedules is allowed. Overlapping of pre-EMI interest and Amortise schedules are not allowed and amortise schedules is not allowed on or before the pre-EMI interest schedule.
- On redefinition of schedules, pre-EMI interest schedule date is considered as the amortization computation start date.
- Redefinition of pre-EMI interest schedules is allowed on Contract Amendment provided there is no Paid Amortization schedule that exists in the contract.
- For userinput installment amortization contracts, Interest and Principal Breakup of the Amortization schedules will undergo a change. However the Amortization amount will be intact.
- In case of System derived amortization, the redefinition of Pre-EMI Interest schedule will change the amortization amount
- If this flag is not selected at the contract level, main interest component or any other component schedules are not allowed to maintain before the Amortise schedule.
- This flag is applicable for both User Installment and System derived Amortization contracts.
- On copying of contracts this flag value is not copied and it is defaulted as unchecked.
6.2.3.5 Viewing Drawdown Payment Schedule Details
Based on the payment schedules captured for the components, Oracle FLEXCUBE computes the schedules and the amount payable for each schedule in the ‘Payment Schedule Details’ screen.
Click ‘Payment Details’ button from the ‘Schedule’ tab
6.2.3.6 Viewing Drawdown Revision Schedule Details
To view the rate revision schedules, click the ‘Revision Schedule’ button. The ‘Revision Schedule
Details’ screen appears.
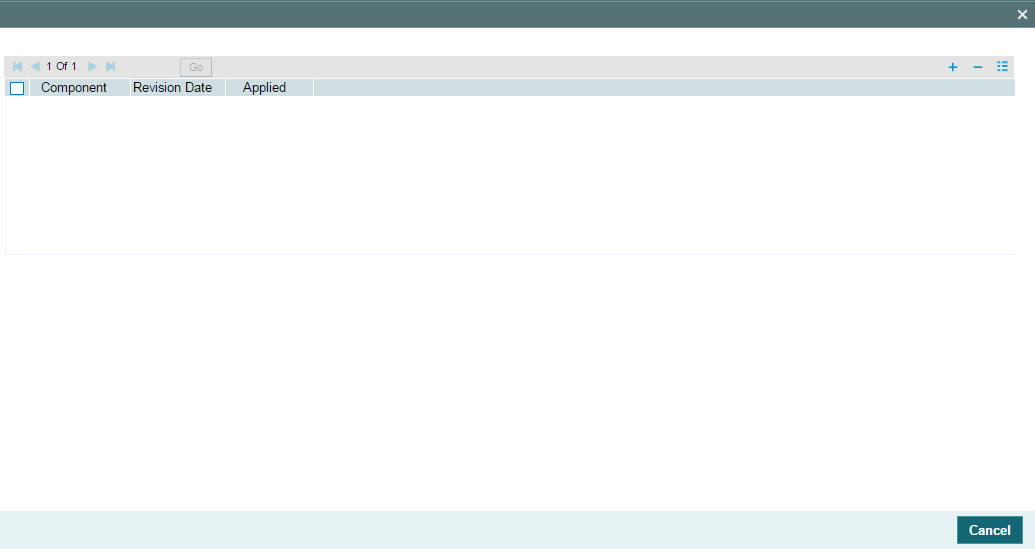
The following details are displayed in this screen:
- The name of the interest component that has undergone a revision
- The revision date
- Whether the revision is applied
6.2.3.7 Viewing Rate History Details
You can view the Interest rate and margin rate history for each drawdown in the ‘Rates History’ screen. This screen holds the history of interest rate and margin changes that have happened for the drawdown. Click ‘Rate History’ tab to invoke this screen.
In this screen,
you have to select the interest component to view the corresponding interest
and margin details. To view the margin rates for the components, click
the ‘Margin History.
6.2.3.8 Viewing Linkage Details for the Drawdown
In the ‘Linkage Details’ section of the screen, you can view the details of the tranche under which the drawdown is processed. The following details are displayed here:
- The linkage type is ‘C’. This indicates that a commitment contract or tranche is associated with the drawdown
- The reference number of the tranche to which the drawdown is linked
- The tranche currency
- Amount available under the tranche (after deducting the new drawdown amount)
- Exchange rate applied on the drawdown. This is required if the drawdown currency is different from the tranche currency
- The amount linked to the tranche. The drawdown amount is displayed here
- The total linked and unlinked amount under the tranche
6.2.3.9 Schedule Adjustments on Interest Rate Revision
In the Instance of Rate change, differential amount will be adjusted against the Bullet schedule without modifying the existing Installment constant amount. On ‘REVN’ or ‘VAMI’ either increase or decrease in the rate increases or decreases the bullet schedule amount without affecting EMI or Tenor. As a result, the EMI of the bullet schedule can be less or more than the other schedules.
The main interest component amount of each installment is re-computed in usual way based on the principal balance and the new rate. The prevailing EMI (EMI present in the current schedule of the transaction – System doesnot consider EMIs of previous schedules) will be kept constant.
The iteration of reducing Principal balance with above Principal component of EMI continues until the bullet schedule is reached. The last EMI have the remaining Principal amount and the interest as the EMI.
In case of user input installment amortise schedule type contracts, On Rate revision or Margin Rate Fixing, if the sum of Interest and Special Component’s amount exceeds the existing Amortization amount, exception is logged for those contracts in batch.
6.2.3.10 Schedule Adjustments on Prepayment
The following schedule adjustments are performed for prepayment:
- Original installment amount is retained on prepayment. Outstanding schedules for principal component gets reduced starting with bullet schedule (LIFO process) and interest amount gets re-computed accordingly.
- If the pre-payment amount is enough to cover the bullet and prior schedules, then amount due for these schedules become zero without changing the maturity date.
Note
‘Liqd int on prepaid principal’ flag is not applicable for any kind of payment of amortization contracts. Payment value date should fall on a schedule date of the Interest (AMORTISE component in case of Amortise schedule type Drawdowns) to do full prepayment of the contract.
6.2.4 Capturing Details in the ‘Split Rollover’ Tab
You can rollover a drawdown only if you have checked the ‘Allow Rollover’ option for the drawdown product used to process the drawdown. If this option is not selected, the following message is displayed when you attempt to visit the ‘ROLLOVER’ tab:
Rollover not allowed
For details on rollover and information on the ‘ROLLOVER’ tab, refer the ‘Rolling-over a drawdown’ chapter of this User Manual.
6.2.5 Specifying Drawdown Entity Details
You can view the borrower entity details in the ‘Borrower Entities’ screen. These details default from the tranche associated with the drawdown. Click the ‘Entity’ tab to invoke this screen.

You can modify only the following parameters:
SSI Counterparty
By default, the drawdown borrower is displayed here. You can change the counterparty if the borrower requests to process the settlements through another account. The option list displays the names of all the customers maintained in Oracle FLEXCUBE.
SSI Mnemonic
SSI Mnemonics are maintained in the ‘Settlement Instructions’ screen for a Counterparty, Module, Currency, Product and Branch combination. The same is available for the counterparty/borrower of the drawdown. The Mnemonic selected here obtains the settlement details for the borrower of the contract and the same defaults to the ‘Settlement Message Details’ screen.
If you do not select the SSI Mnemonic, system defaults the SSI Mnemonic for the counterparty and contract currency when you exit the screen.
Note
Note the following:
- If you do not specify the Branch as ‘ALL’ for local currency contracts and participant transfers in the ‘Settlement Instruction Maintenance’ screen, the System displays the following error message.
Select the appropriate ssi mnemonic applicable for the selected currency
- If you do not specify the Branch as ‘Transaction’ for foreign currency contracts and participant transfers in the ‘Settlement Instruction Maintenance’ screen, the System displays the above mentioned error message.
6.2.6 Specifying Drawdown Participants
You must also identify the participants who contribute to the amount being disbursed under the drawdown. A borrower drawdown contract inherits the participant details defined for the borrower tranche under which it is entered. You can make changes to the defaulted participant details when you enter a borrower drawdown. To view the details in the ‘Participant Ratio Details’ screen, you have to click the ‘Participants’ tab.
Based on the drawdown amount, the system computes the contribution of each participant towards the drawdown as per the ‘Asset Ratio’ maintained for the tranche.
You can change the default participant details in this screen. Upon change of participants, the system automatically convert a ‘Cascade Participation’ type of tranche to a ‘Non Cascade Participation’ type. The ‘CASC’ event is triggered to indicate the change in the attribute and the ‘Cascade Participation’ option for the underlying tranche (in the ‘CONTRACT’ tab of the ‘LS Tranche Contract Online’ screen) is deselected. If changing the participant details is possible, you can specify the following details for each participant, for the drawdown schedule:
- The name of the participant
- The ID of the participant
- Contribution of the participant to the drawdown schedule for the tranche contract, known as the asset ratio or asset amount. You can specify the participant contributions either as an amount or a percentage. If specified as amounts, the sum of all contributions must not be greater than the tranche borrower commitment contract amount. If a percentage is specified, the sum of percentages for all participants must not exceed one hundred percent. Asset sharing ratio of participants is possible only if their contribution does not exceed the availability amount.
For example, let us assume a tranche amount of USD 10 million. The Asset Sharing Ratio (ASR) for various participants can be calculated as follows:
Participant |
Asset amount in USD |
ASR in % |
CITIBANK |
2,000,000 |
20 |
BARCLAYS |
2,000,000 |
20 |
NATWEST |
3,000,000 |
30 |
HSBC |
3,000,000 |
30 |
At the drawdown level, you can choose to change the asset sharing ratio of the participants in the following manner, if required.
Let us assume that the first drawdown amount is USD 4 million. The Asset Sharing Ratio (ASR) for this amount is as follows:
Participant |
Asset amount in USD |
ASR in % |
CITIBANK |
1,200,000 |
30 |
BARCLAYS |
400,000 |
10 |
NATWEST |
1,600,000 |
40 |
HSBC |
800,000 |
20 |
When you change the ASR for a drawdown under the tranche, the ASR at the tranche level will remain the same. However, at the time of a second drawdown, the ASR at the drawdown level displays the availability ratio instead of the tranche asset sharing ratio.
Note
The original asset sharing ratio is displayed only at the Tranche level.
The availability ratio after the first drawdown is as follows:
Participant |
Asset amount in USD |
ASR in % |
Availability amount |
Availability ratio in % |
CITIBANK |
2,000,000 |
20 |
800,000 |
13.33 |
BARCLAYS |
2,000,000 |
20 |
1,600,000 |
26.67 |
NATWEST |
3,000,000 |
30 |
1,400,000 |
23.33 |
HSBC |
3,000,000 |
30 |
2,200,000 |
36.67 |
The availability amount is computed on the following basis:

The availability amount could vary for revolving and non-revolving tranche.
For revolving tranche contracts, the available amount will be calculated as follows:

For non-revolving tranche contracts, you can compute the available amount in the following manner:

You can change the asset sharing ratio for participants on a non proportionate basis using the ‘Contract Payment’ screen.
For more information on this, refer the section ‘Processing Repayments Manually’ in the ‘Processing Repayments’ chapter of this User Manual.
- If the components levied on the contract are in different currencies, you have the option of selecting a Settlement Sequence Number for each currency. The system uses this number to obtain the settlement details for the participant.
- Whether the arranger bank is also a participant in the syndication (self participant)
- Interest, charge and ad-hoc fee components levied on the contract, the receivables from which are due to the participant (you can only specify those components marked for propagation to participants in the product preferences of the borrower tranche product used by the contract)
- Proportion of income from the interest, charge and ad-hoc fee components, which is due to the participant, will be defaulted from the tranche contract. If, for the product, you have checked the box ‘Cascade Participation’ in the ‘Additional Preferences for LS’ screen, you will not be able to change the income sharing ratio for fee components. You will not be allowed to change the income sharing ratio of interest components whether or not you have checked the box ‘Cascade Participation’.
- Entities for the participant, to whom notices and advices related
to the contract, are sent. A primary entity must be designated. The messages
to all entities other than the primary entity contains the text ‘COPY-AVOID
DUPLICATION’ on them. This text is present in the following notices
- Drawdown notices to banks
- Renewal notices to banks
- Rate fix notices to banks
For details on fields available in this screen, refer the heading ‘Maintaining participant details for the tranche’ in this chapter.
In addition to the above, you can do the following through this screen:
- Upload the participant details through the ‘Upload From File’ option
- Download the participant details through the ‘Download From File’ option
- Specify entity details for each participant
For details on the above procedures, refer the following headings in this chapter:
- Uploading participant details
- Downloading participant details
- Maintaining entity details for a facility participant
6.2.7 Viewing Participant Margin Details
You can view margin details maintained for participants of the drawdown contract, using the ‘Participant Rate Summary’ screen. To view this screen, you have to click the ‘Part Rate’ tab.
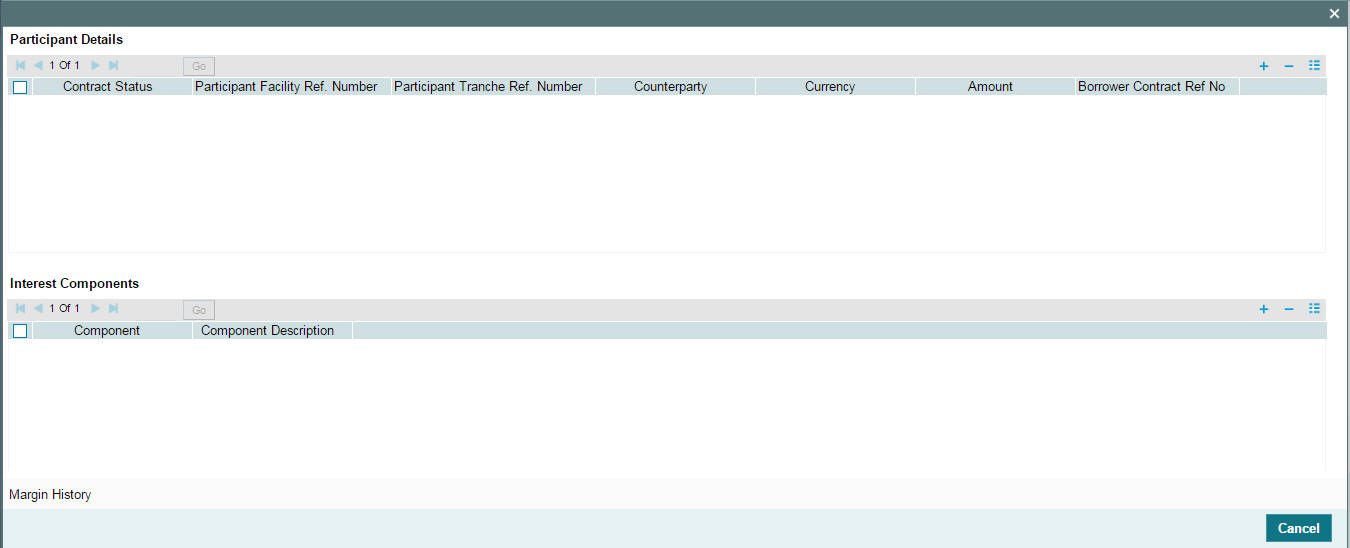
Here you can view the following details.
Participant Details
The system displays the following participant details:
- Participant Drawdown Ref no
- Participant Facility Ref no
- Participant Tranche Ref no
- Customer
- Ccy
- Amount
- Borrower Contract Ref no
Interest Components
The system displays the following component details.
- Component
- Component Description
Interest Details
The system displays the following interest details.
- Value Date
- Rate Type
- Rate Code
- Borrow/Lend
- Base Rate
- Spread
- Margin
- Adjustment Rate
- Final Rate
Margin Details
The system displays the following margin details.
- Margin Component
- Margin Rate
- Margin Basis
6.2.7.1 Viewing Margin History
You can view margin details of all participants including the margin history by clicking the ‘Margin History’ button on the ‘Participant Rate Summary’ screen.
The system displays the following details.
Participant Details
The system displays the following participant details:
- Participant Drawdown Ref no
- Participant Facility Ref no
- Participant Tranche Ref no
- Customer
- Ccy
- Amount
- Borrower Contract Ref no
Margin History Interest Component
The system displays the following component details.
- Component
- Component Description
Margin Details
The system displays the following margin details.
- Margin Component
- Margin Rate
- Margin Basis
Margin Rates
The system displays the following margin rate details.
- Value Date
- Margin Rate
- Final Rate
The margin rate maintained for the individual participant is considered while calculating the interest due on the participant side, during contract booking. This is applicable for current dated/back dated/forward dated drawdown bookings.
6.2.8 Fixing Exchange Rate for Drawdown Currency
You will need to fix the exchange rate for drawdowns only if the drawdown currency is different from the tranche currency. The exchange rate fixing days refers to the number of business days before the value date of the drawdown or the new rate fix period. Exchange rate fixing for the new drawdown or the new rate fix period is done on this day.
To fix the exchange rate for the drawdown currency, click ‘Exrrate Fixing’ tab. The ‘Exchange Rate Fixing’ screen is displayed, as shown below:
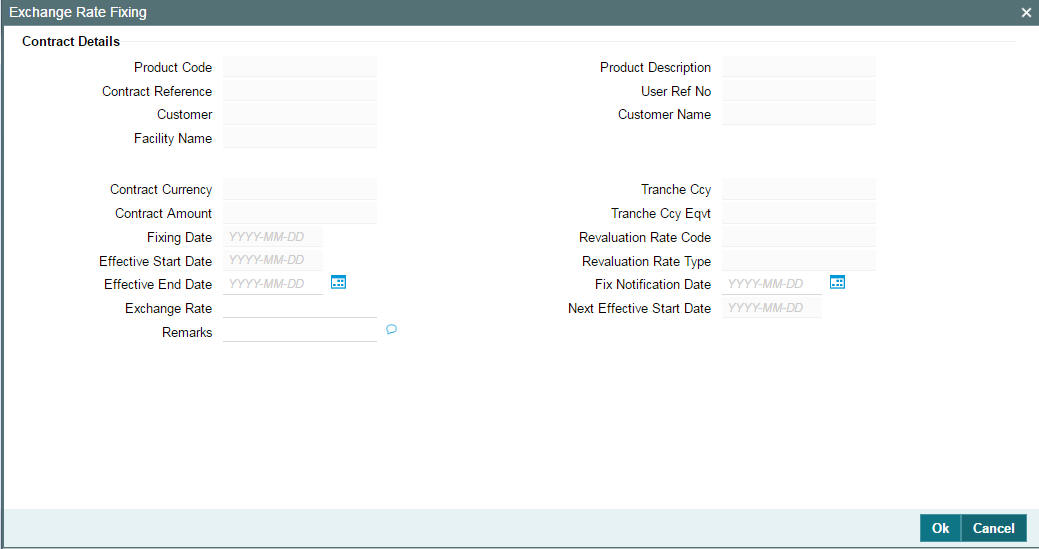
The system arrives at the exchange rate fixing date for the drawdown currency based on the exchange rate fixing days maintained at the tranche level and the holiday validation currencies specified for the drawdown currency.
For more details, refer the heading ‘Specifying currency details for the tranche’ in this chapter.
You can specify the following details in this screen:
Effective End Date
You have to specify an end date for the new rate to be effective in the system. The start date will be equal to the drawdown date. You have to capture the date in ‘DD-MMM-YYYY’ format.
Exchange Rate
The default exchange rate is displayed here. The system picks up this rate from the ‘Currency Rates Maintenance’ screen. You can change the rate, if required. You can enter upto 15 decimal points.
Remarks
You can also capture additional information, if required. This is used only for information purposes.
Note
It is not mandatory for you to fix the exchange rate before you fix the interest rate.
6.2.8.1 Saving the New Exchange Rate
Click ‘Ok’ button to save and exit the screen. When you save the drawdown, the system triggers the ‘EXFX’ event with the exchange rate fixing notice. For future dated drawdowns, you need to fix the exchange rate before the value date of the drawdown.
Subsequently, you have to manually fix the exchange rate for the drawdowns. You have to fix the rate for the next period before the end of the current period. However, if you do not do the rate fixing for the subsequent periods, Oracle FLEXCUBE applies the latest fixing rate for the rest of the period.
Note
- It is mandatory to fix the exchange rate before you initiate a cross currency drawdown in Oracle FLEXCUBE.
- If you do not fix the exchange rate when booking a new drawdown, system applies the default exchange rate for converting the drawdown amount to the tranche amount to validate the tranche availability. When the exchange rate fixing happens, Oracle FLEXCUBE revalidates the tranche available amount and raise the exceptions, if any.
- You also have the option to fix the exchange rate after booking a drawdown.
For more information, refer the heading ‘Fixing Exchange Rate after drawdown booking’ in this chapter.
6.2.9 Specifying Drawdown Interest Details
You can view the interest and margin components, if applicable to the drawdown, in the ‘ICCF Details’ screen. These details default from the tranche under which the drawdown is being processed. Click ‘Interest’ tab to invoke this screen.
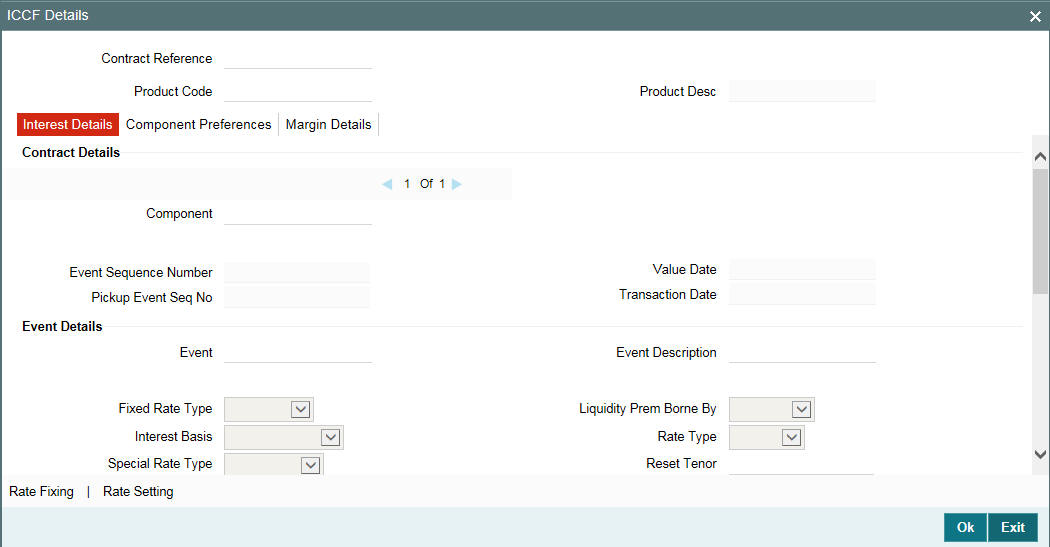
6.2.9.1 Amending Interest Basis
The interest basis defaults from the product level. However, you can change the default value anytime during the lifecycle of the contract except for contracts with interest capitalization type of renewal instructions. When you change the day basis, the system re-computes the schedule interest amount from the start date of the component. The amendment becomes applicable from the value date of the contract. Note that the system considers the margin rates maintained for each participant while re-computing the interest.
The interest for each currency is calculated using the interest basis, which you select:
- 30 Euro / 360
- 30 US / 360
- Actual / 360
- 30 Euro / 365
- 30 US / 365
- Actual / 365
- 30 Euro / Actual
- 30 US / Actual
- Actual / Actual
- 30(Euro)/365.25
- 30(US)/365.25
- Actual/365.25
- Working Days/252
- Working Days/360
Note the following:
- If the interest distribution type is defined as ‘Lender of Actual’ (in the ‘LS Tranche Contract Online’ screen) and if there are any liquidated repayment schedules, the system updates the payable/receivable of the respective liquidated payment schedule as a result of change in interest basis.
- You cannot amend the Interest Basis for ‘Lender of Record’ type of distribution if there are liquidated schedules for the same component.
You can use the navigation buttons -
to view the interest components associated with the drawdown.
Amortization Constant Component
The default value from the product gets defaulted here. The check box is selected if this is an amortization constant component. You cannot change it in the contract level.
Compensatory Component
The corresponding compensatory component is displayed from the product for the main interest component.
Note
- The system considers the Final Rate of the Main interest component to be the Rate for the compensatory component.
- It considers the unfunded amount to be the basis amount for compensatory interest component for the borrower and investors for their respective unfunded period.
- In case of borrower, the basis amount is the total unfunded amount
for the borrower. (Unfunded amount = Total outstanding – Funded
amount)
- Here, funded amount is the amount received by the Borrower
- In case of Recall by bank for the fronted amount for an investor, the fronted amount is considered as unfunded from the date of recall till the actual funding made by the corresponding investor.
- In case of participant, the basis amount is the unfunded amount for
an investor (Unfunded amount = Total outstanding – Funded amount).
- Here, funded amount is the amount actually funded by the investor. The fronted amount (if any) is not considered as funded until it is actually funded by the investor.
- There is no propagation for the compensatory component. the system calculates it separately on the borrower and investor side.
- In case bank is fronting for an investor, bank receives the interest for the fronting period.
- During interest calculation and accrual processing, the system arrives all in rate as zero if all in rate is negative. All in rate gets displayed as zero in the existing all in rate field in the screen.
- The system does not accrue with interest amount in negative. If the interest was accrued with positive interest rate and later all in rate is changed to zero due to negative rates then, the interest does not get accrued from the interest amendment date.
- If the interest rate amendment is done effective back dated then the system recalculates the accrual by taking all in rate as zero from the amendment date along with the back dated interest amendment process.
6.2.9.2 Specifying Billing Preferences
The billing preferences maintained at the product level defaults to the contracts. You can amend these preferences at the contract level only if you have specified the same at the product level.
Billing Notice Required
Select this check box to indicate that you would like to send a billing notice for the interest component.
No of Days
Specify the number of days prior to the billing date that the billing notice needs to be sent.
Note
You can not amend these values if the Billing Notice Required option is deselected at the product level.
For details on the above screen, refer the heading ‘Specifying Interest Details for a Contract’ in the ‘Processing Interest’ chapter of the Interest User Manual.
6.2.9.3 Fixing Interest Rate for the Drawdown
Just as you fix the exchange rate for the drawdown currency, you can also fix the interest rate for a predefined period. The Interest rate fixing days refers to the number of business days before the value date of the drawdown or the new rate fix period. Interest rate fixing for the new drawdown or the new rate fix period is done on this day.
Note
- You can fix interest rates ONLY if you have checked the ‘Rate
Fixing Required’ option for the interest component at the drawdown
product level (in the ‘Interest Definition’ screen). Further,
rate fixing is applicable for an interest component with the following
attributes:
- Rate Type: Fixed
- Fixed Rate type: User input
- If the UDF ‘RATE-VARIANCE’ is maintained as a non-zero value for a tranche contract to which the drawdown is linked, dual authorization is required for rate changes for fixed rate contracts.
For more details regarding dual authorization, refer the heading titled ‘Authorizing Overrides’ in the chapter titled ‘Loan Syndication Contracts - Part 1’ of this User Manual.
The system arrives at the Interest rate fixing date for the drawdown currency based on the Interest rate fixing days maintained at the tranche level and the holiday validation currencies specified for the drawdown currency.
For more details, refer the heading ‘Specifying currency details for the tranche’ in this chapter.
To fix the interest rate for the drawdown currency, click the ‘Rate Fixing’ tab in the ‘ICCF Details’ screen and invoke the ‘Rate Fixing Details’ screen, as shown below:
Note
Note
Rate Fixing button gets enabled in ‘ICCF Details’ screen only if rate fixing is selected at the product level.
You can specify the following details in the ‘Rate Fixing Details’ screen:
Rate Code
You have to specify the floating rate code based on which you can specify the interest rate fixing tenor and the default fixing rate.
Tenor Value
You can specify the rate fixing period by specifying a ‘Tenor Value’ or the ‘Rate Effective End Date’. If you are specifying a tenor, you can select a value from the option list which displays the tenor values associated with the rate code you select. This is based on your maintenance in the ‘Floating Rate Code Definition’ screen. Upon choosing a value, the following details are also displayed:
- Tenor Unit
- Next Rate Fixing Date
- Next Notification Date
- Next Effective Start Date
- Rate Effective End Date
- Rate
Rate Effective End Date
If you do not want to specify a ‘Tenor Value’, you have the option to capture the end date of the rate fixing period. This date should not be less than or equal to the ‘Rate Effective Start Date’. The system displays the following after you specify the end date:
- Next Rate Fixing Date
- Next Notification Date
- Next Effective Start Date
- Rate
Rate
The system defaults the interest rate based on the rate code and the tenor value/effective end date you specify for the drawdown. You can change the default rate, if required.
If the base rate is changed or new rate is added or the floating rate codes are changed, the system recalculates the interest. Note that it considers the margin rates maintained for the participants while recalculating the interest due for the participants.
For more details on negative rate processing, refer the title ‘Maintaining Loans Parameters Details’ in the chapter ‘Bank Parameters’ in Core Services User Manual.
Remarks
You can also capture additional information, if required. This will be used only for information purposes.
Click the ‘Ok’ button to save and exit the screen.
Note
- You have to fix the tenor and rate for the next tenor before the end of the current rate fix period. In case you fail to fix the rate for the next period, system applies zero interest rate for the rest of the period until rate fixing happens.
- Interest Rate fixing occurs on the Interest Rate Fixing date after considering the holiday preferences and the number of Interest Rate fixing days from the start of the new fixing period.
- For the first time, you can fix the interest rate as part of drawdown booking. Subsequent rate fixing should be performed through the ‘LS Interest Rate Fixing’ screen.
6.2.10 Capturing the Value date
On click of unlock button you are allowed to capture the value date by altering the rate effective start date.
Note
The following actions should be performed automatically on click of ‘OK’ button in the ‘value date’ field.
- The IRAM event is registered individually for each amendment
- After save, you are allowed to view the interest rate for both the periods, to verify the interest rate.
- You have to manually authorize both the IRAM events individually.
- If there is no value date (end date) captured or you can click the cancel button in the value date screen. The End date is disabled and you are allowed to amend only the interest rate
- If user fixes interest rate for the new period from ‘Interest Rate Fixing’ Screen, IRFX event is registered.
For more information on bidding refer ‘Bidding Contract’ section in ‘Interest’ manual in ‘Modularity’ module.
For details on the ‘LB Interest Rate Fixing’ screen, refer the heading ‘Fixing Interest Rate after drawdown booking’ in this chapter.
6.2.10.1 Rate Setting
To set the rate setting rules for the borrowers drawdown, click the ‘Rate Setting’ in the ‘ICCF Details’ screen and invoke the ‘Rate setting’ screen, as shown below:
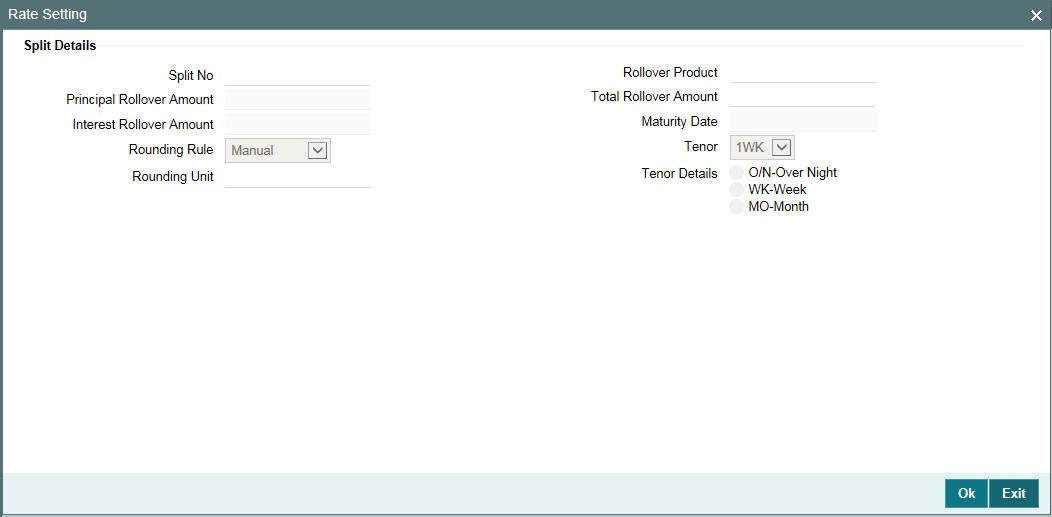
Specify the following details.
Contract Details
Product code
The system displays the product code.
Contract Ref number
The system displays the contract ref number.
User ref number
The system displays the user ref number.
Customer
The system displays the customer name.
Facility name
The system displays the facility name.
Split Details
Split number
The system displays the split number.
Principal roll amount
The system displays the principal roll amount.
Interest roll Amount
The system displays the Interest roll amount.
Roll Product
The system displays the roll product.
Total roll amount
The system displays the total roll amount.
Maturity date
The system displays the maturity date.
Interest rate rounding rules
Rounding rule
Select the rounding rule from the adjoining drop down list. Select one of the options listed below:
- Down
- Upto
- No rounding
- Manual
Rounding Unit
The rounding unit enables only if the you have selected the ‘rounding rule’ as ‘Down’ and ‘Upto’ .
Interest rate period
Select one of the interest rate periods from the options given.
Once all the Rate setting rules are maintained and when you come out of ‘Rate Setting Rule screen’ by clicking OK button (Green tick), the following override messages are displayed
- If the Interest Rate Rounding Rule is ‘Manual’, then the message ‘Rounding Rule is manual. Auto Rate Fixing will not be done’ is displayed
- If Interest Rate Rounding Rule is not ‘Manual’, then the message ‘Rounding Rule is maintained. Auto Rate Fixing will be done and rate will be defaulted’ is displayed. This message appears only for the future dated events / contracts
- You are allowed to change the Rounding Rule by clicking ‘Cancel’ button in the override message
6.2.11 Specifying Drawdown SKIM Details
The SKIM details captured for the tranche gets propagated to the
drawdown contract. You are allowed to amend the details at the drawdown
level. To view and amend the details, if needed, click the ’Skim’ tab. The ‘SKIM Details
– Drawdown’ screen is displayed.
The details of the payer and receiver of Skim and the Skim rate gets defaulted to the respective participant contracts for processing. The accounting entries are also passed in the corresponding participant contracts.
Note
If SKIM details are not maintained for the tranche, you cannot define them afresh at the drawdown level. Atleast one combination of Skim should be defined for the tranche.
For details on the fields in this screen, refer the heading ‘Defining SKIM details for tranche participants’ in this chapter.
For details on the accounting entries defined for the Skim components, refer the heading ‘Maintaining Skim components for participants’ in the ‘Defining Products for Loan Syndication’ chapter of this User Manual.
Note
- You cannot introduce a SKIM during a rate fix period
- The Payer and Receiver combination should be unique. However, the same payer can pay SKIM to multiple payees
- SKIM is paid or received along with the interest schedule. So the accounting for skim transactions occurs along with the interest receipt or payment.
- SKIM is not settled when partial payment of an interest schedule happens. It is settled only after full interest payment is received.
- The SKIM amount being paid or received is considered for the purpose of participant netting
- The advices to participants contain the SKIM amount separately
- The SKIM receiver can also be an external entity (one who is not a participant). For handling such a case, you need to capture the entity as a participant with 0% asset sharing ratio.
You have the option to amend the Skim details for a drawdown through the ‘Skim Amendment’ screen.
For more information on this screen, refer the heading titled ‘Amending drawdown SKIM details’ in this chapter.
6.2.12 Viewing Drawdown Charge Details
The charge components associated with the drawdown product is applied
to the drawdown. You can view the charge details in the ‘Contract
Charge Details’ screen. Click the
‘Charge’ tab to invoke this screen.
For more details on this screen, refer the heading ‘Modifying charge details for the tranche’ in this chapter.
6.2.13 Defining Drawdown Fee Schedules
The fee components associated with the drawdown product is applied
on all drawdowns processed under it. You can view the fee component schedule
details in the ‘Fee Components’ screen. Click the ‘Fee’ tab in the ‘Drawdown
Contract Online’ screen to access it.
For details on the fields in this screen, refer the heading ‘Defining tranche fee schedules’ in this chapter.
6.2.14 Viewing Drawdown Tax Details
You can collect withholding tax on the fee/interest collected by the participants of a drawdown. However, tax is not applied on the fee collected from the participants. The tax details, if applicable for the participant product (linked to the drawdown through the facility product) is applied on the drawdown. To view the details, click the ‘Tax’.
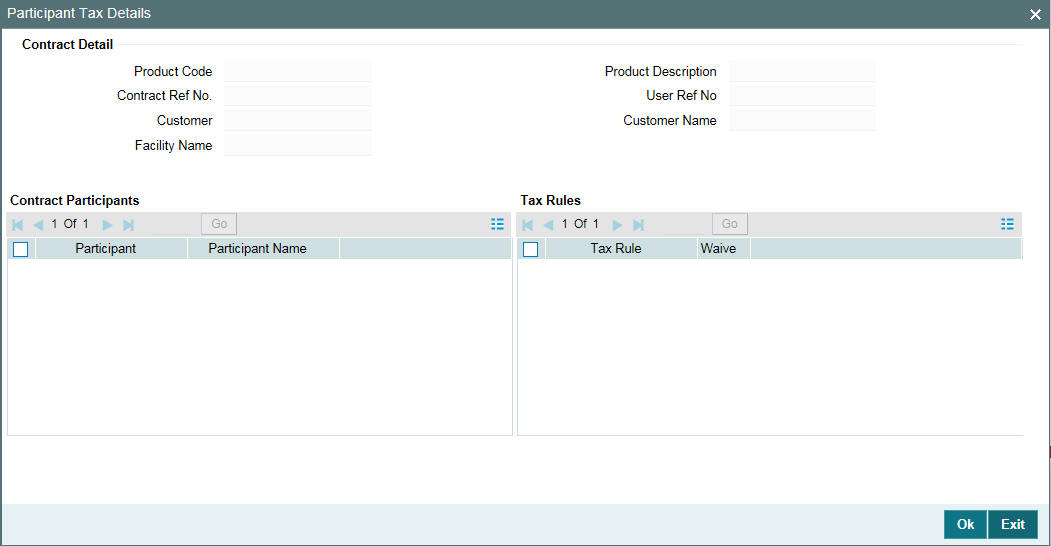
This screen displays the tax rules for each participant based on which withholding tax is computed on the fee or interest components. Tax rules associated with the drawdown product defaults to the drawdown. You can waive the subsequent tax to be applied for a participant and tax rule combination.
The system passes the entries for tax based on the event you specify in the ‘Product Tax Linkage’ screen. Typically, tax on fee is calculated upon liquidation of the fee (event ‘FLIQ’ will be associated with the rule) and tax on interest is computed on interest liquidation (event ‘LIQD’ is associated with the rule).
For details on associating tax with a product, refer the heading titled ‘Specifying tax details for a participant product’ in the ‘Defining Products for Loan Syndication’ chapter of this User Manual.
For more information on the Tax sub-system of Oracle FLEXCUBE, refer the Tax User Manual.
6.2.15 Defining Overwrite Settlement Instructions for the Drawdown
You can maintain settlement instructions for various components such as fees, charges, tax, principal, interest, and so on, using the ‘Overwrite Settlement Instruction Details’ screen. Using this screen, you can post liquidation entries into an Internal GL account instead of the customer account at the time of rollover. Click ‘Overwrite default SI’ in the ‘Drawdown Contract Online’ screen to invoke the following:
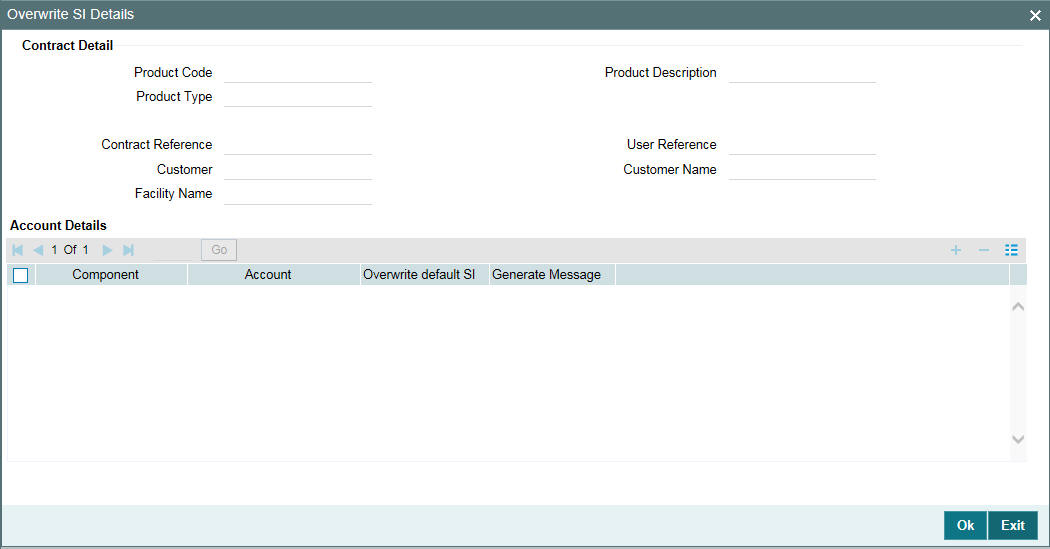
Enter the details as specified below:
Component
This screen displays the all the components displayed in the Settlement Message Details screen.
Internal GL
Specify the Internal GL accounts into which you want to post the liquidation entries for the components.
Overwrite Default Settlement Instruction
Select the ‘Overwrite default settlement instruction’ check box to confirm that the liquidation entries should be posted into the Internal GL account. System posts the entries to the Internal GLs only if you check this box. Otherwise, system posts the entries as per the settlement instructions specified for the component of the contract.
Note
- If you check the ‘Overwrite default settlement instruction’ box for a component, system overwrites the settlement instructions of both the borrower and the participants.
- You can maintain the Internal GL account anytime during the life cycle of the contract.
6.2.15.1 Authorizing Overrides for Drawdown
You need to perform dual authorization, if you have selected the Overwrite SI option for any of the following events:
- Amending Tranche/Drawdown Contract
- Value Dated Amendments
- Fee Liquidation
- Liquidation of Principal/Interest
For more details, refer to the section ‘Authorizing the overrides for tranche’ in the same chapter.
6.2.16 Viewing Settlement Instructions for the Drawdown
You can view the settlement instructions for the drawdown in the ‘Settlement’
screen. Click the ‘Settlement’
tab to view the details.
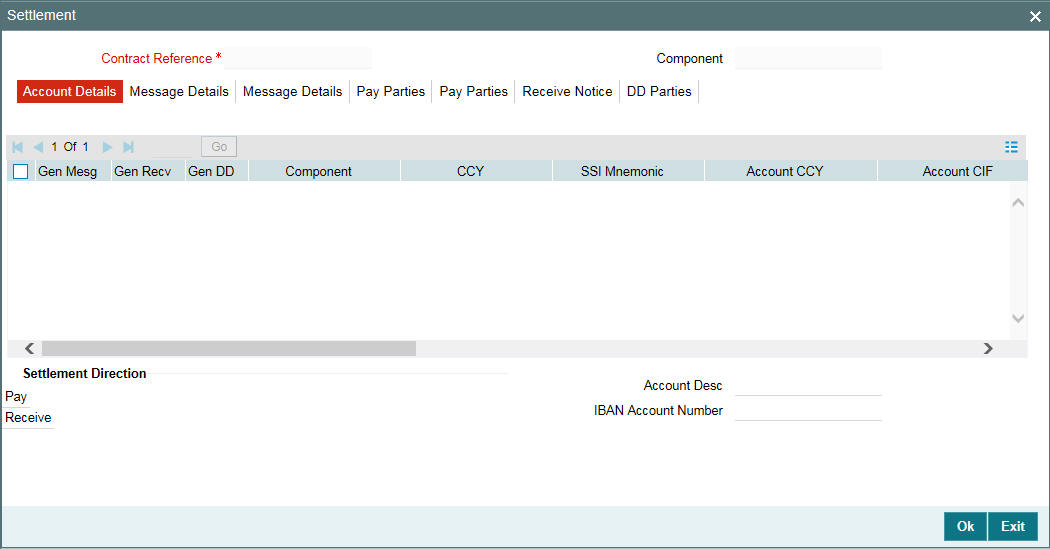
The system obtains the settlement account for each drawdown component based on the SSI Mnemonic selected for the component.
If the ‘Chinese Characters in Payment’ box is checked in the ‘Loan syndication- Branch Parameters’ screen, then only you can enter the Chinese characters in the field 57, 59, and 70 for foreign currency and local currency settlement instructions / accounts and there are no validations in the system. You need to operationally control it.
You are allowed to enter the information in Chinese or English or a combination of both in this field. If it is a combination, then the system considers it as Chinese and allow up to 35 characters.
Note
This is applicable only for ASPAC region.
For more details about the ‘Settlement Message Details’ screen, refer the Settlements User Manual.
6.2.17 Viewing MIS Details for the Drawdown
If you have maintained MIS details for the DD (drawdown) product,
the same will default to the drawdown. To view the details, click the
’MIS’ tab.
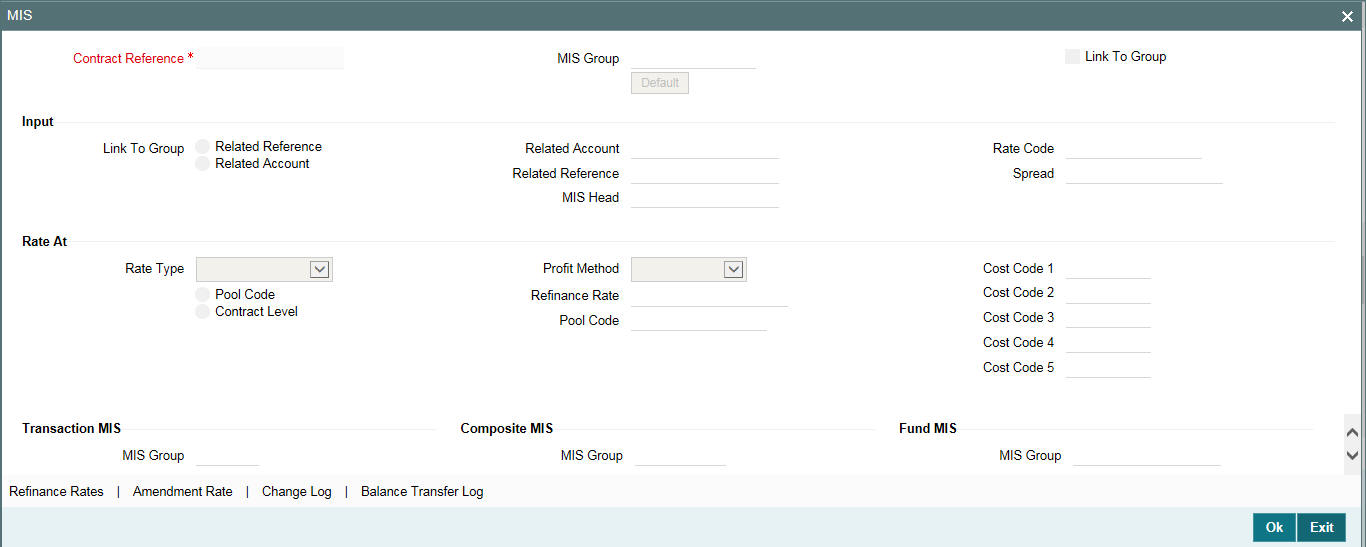
For details on the ‘Transaction MIS Details’ screen, refer the MIS User Manual.
6.2.18 Specifying Parties for the Drawdown
You can also specify different entity or party types that would be applicable for the borrower drawdown as well as the applicable parties belonging to the selected party type. This is done in the ‘Party Details’ screen. Click ‘Party Type’ in the ‘DrawDown Contract Online’ screen. The party types associated with the drawdown product defaults to the drawdown. You can change the defaulted values, if required.
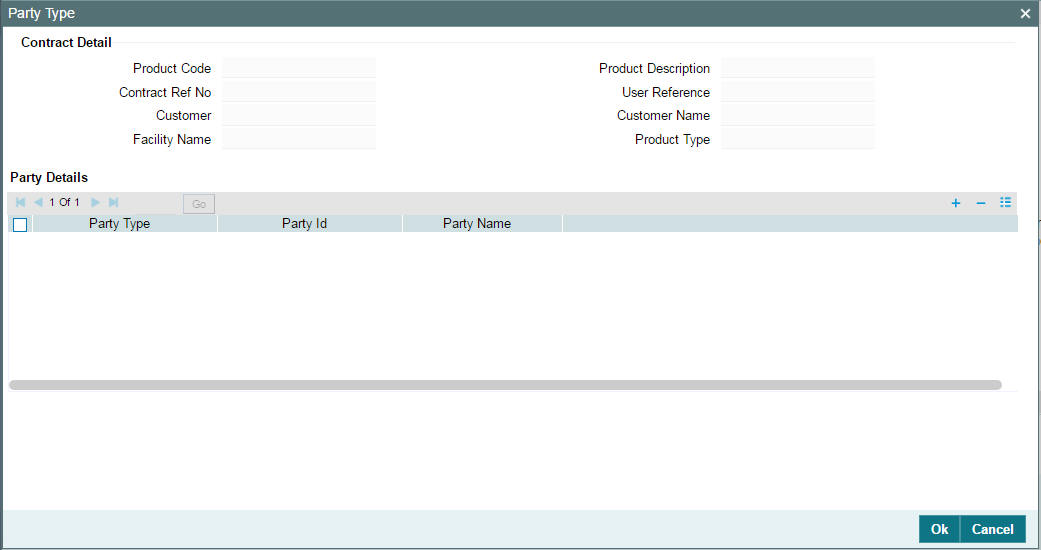
For more details on the above screen, refer the heading ‘Specifying parties for the facility’ in this chapter.
6.2.19 Specifying UDF Values for the Drawdown
The UDFs defined for the drawdown product is applied for the drawdowns processed under it. You can view the UDFs, if applicable, in the ‘User Defined Fields’ screen. Click the ‘UDF’ tab to invoke this screen.

For more details on the above screen, refer the UDF (User Defined Fields) User Manual.
If the UDF ‘RATE-VARIANCE’ is maintained as a non-zero value for a tranche contract to which the drawdown is linked, dual authorization is required for some select operations.
For details on operations that require dual authorization, refer the section ‘Authorizing Overrides’ in the chapter titled ‘Loan Syndication Contracts - Part 1’ of this User Manual.
The UDF ‘PAYOFF-FEE’ attached to drawdown products is used to determine the flat fee amount. The value maintained for this UDF for the tranche contract is inherited to all linked drawdown contracts. If required, you can change the value at drawdown level. If the defaulted UDF value is overwritten at the drawdown level, then the tranche and drawdown UDF values are different. In this case, the subsequent UDF changes at the tranche contract level is not propagated to the drawdown.
6.2.20 Viewing Drawdown Advices
The advices associated with the drawdown product (in the ‘Product Event Accounting Entries & Advices’ screen) is applicable for the drawdown. Click the ‘Advice’ tab to invoke the ‘Advices’ screen.
For more details on this screen, refer the heading ‘Modifying tranche advice details’ in this chapter.
After capturing the drawdown details, you have to save the same and have it authorized by your supervisor.
After you save the drawdown, you can view the following details of the contract:
- Diary Events for the contract
- Netting Cash Flow Summary
- Messages generated for the tranche
- Participant Summary details
- Events
- AER
- EI
This section explains only those details that are unique to a drawdown. For details on the other options (Diary Events, Netting Cash Flow Summary, Message Preview, Participant Summary, Events), refer the following sections in this chapter:
- Viewing tranche diary events
- Viewing netting cash flow summary
- Viewing messages for the tranche
- Viewing tranche participant summary details
- Viewing events for the tranche
6.2.21 Viewing EI for the Drawdown
You can view the effective interest (EI) rates applied on the drawdown through the Effective Interest Rate details screen. Click the ‘Effective Interest Rate’ to invoke this screen.
In this screen you can view the ‘Effective Interest Rate’ and the ‘Start Date’ from which interest rate is effective in the system.
6.2.22 Maintaining Escrow Account Details
You can link escrow accounts to a contract using the ‘Escrow Account Maintenance’ screen. Click the ‘ESC’ tab in the ‘Drawdown Contract Online’ screen to access this screen.
You can specify the following details in this screen:
Account Number
Select the account number of the customer from the adjoining option list.
Account Desc
System displays the description of the account number.
Escrow Type
System displays the Escrow type.
Escrow Balance in LCY
System displays the available escrow balance in local currency.
Note
- You can select the escrow account from the option list, which lists all customer and GL accounts where Escrow Type UDF has been specified. Account Number is assumed to be unique across branches.
- System validates if the escrow account is a customer account (that is,. Escrow Type UDF =’ECS3’). Such accounts can only be linked to a single loan contract. However, if the escrow account is a GL account, then it can be linked to multiple loan contracts.
- You can delink a previously linked escrow account using the contract amendment option. When you click Delete button, system validates that there is no balance in the account for this contract.
- When you perform contract liquidation or a reversal, system validates that there are no balances in linked escrow accounts.
- Rollover can be processed only if the balance in all the linked escrow accounts for the contract is zero. Thus during rollover, balances in the escrow account is not automatically transferred to the new contract.
- If escrow balances exist for the contract, then during rollover instruction input, system alerts the user.
- Rollover instructions can be captured even if escrow balances exist, however before rollover is processed you must ensure that all such balances are nullified. Rollover fails for a contract if the escrow balances have not been nullified.
- If a contract is marked for auto rollover, and if there is pending balance in any of the linked escrow accounts, then the rollover of the contract will fail.
- Escrow maintenances are not be copied to the rolled-over contracts from the parent contract. However you can amend the rolled-over contract and capture the Escrow accounts to be linked.
- When you launch the sub-screen from the contract main screen, system fetches the EOD balance for the Contract Reference Number and Escrow Account combination for each linked Escrow Account. All entries posted during the day up to the time of the query are considered. Thus the balance displayed in ‘Escrow Balance’ field for each Escrow Account is the current balance in real time for the contract.
- Impounding escrow components for tax and insurance are collected as per the payment schedule using the manual payment screen and liquidated into the escrow account mapped at the product level. Such Escrow accounts must be separately linked to the contract using ‘Escrow Account Maintenance’ screen so that the balance of such escrow accounts are displayed at contract level along with other Escrow balances.
- Back date adjustment entries are considered only after linking escrow account at contract.
Example
- 01-Jan-2005: Adjustment entries are posted for contract (No Escrow Accounts)
- 02-Jan-2005: Attached Escrow accounts for which adjustment entries are posted on 01-Jan-2005, these entries are not considered.
- 01-Jan-2005: Adjustment entries are posted with value date 01-Jan-2005 then this entries are considered.
6.2.22.1 Amortization for Escrow Components
If the Escrow component is part of amortization constant amount, then while redefining the following validations are performed:
- Schedule total amount(sum amount of PRINCIPAL, Main Interest Component and other additional amount constant interest components on a schedule due date) cannot exceed the instalment amount after escrow interest amount change
- If EMI amount is exceeded for any of the schedules as part of the change in interest amount, VAMI fails. In this case, you have to adjust other parameters (interest rate, instalment amount, interest amount, no. of schedules) involved in the EMI constant, to keep the schedule amount equal to the EMI amount without violating any other validations
- The above validations are not done for escrow components, if they are not checked as Amortization constant component
Note
Escrow component can be amended only through schedules details tab and not through CAMD or VAMI. You cannot amend escrow interest amounts through contract amendment for Amortization schedule type contracts, if Escrow components are part of the amortization constant.
6.2.23 Specifying the Special Penalty Components
You can select components to which late payment charges are applicable for both commitment and loan contracts using the ‘Special Penalty Components’ screen. To invoke this screen, click the ‘Special Penalty’ tab in ‘Drawdown Contract Online’ screen.
Specify the following details:
Component
System defaults the components selected for late payment charge application at the product level.
Apply Special Penalty
Select this check box to indicate that system should apply special charges to the penalty component.
6.2.23.1 Processing the Late Payment Charges
System identifies the loan contracts where grace period has expired and tracks due date, amount paid and amount settled for each component of the loan. If late payment charge component has been defined for a loan contract, that is,. if the ‘Special Penalty Component’ is selected for a component in a contract, then system does the following:
- System identifies the late payment charge basis components (components for which late payment charges are applicable) from the loan contract details.
- Since late payment charges are applicable for partially paid overdue schedules also, system validates if there is any outstanding amount due on the current date for components selected for late payment charges.
- If there is any outstanding amount, then system calculates the total outstanding amount on all components in this schedule and stores the value in the amount tag ‘SCH_AMT_OS’. This forms the basis of calculating the late payment charge.
- System then calculates the late payment charge by multiplying the value of ‘SCH_AMT_OS’ with Fixed Rate or Flat Amount, based on the setup.
- Each late payment charge schedule is separately stored with the due date same as the original schedule due date.
- The calculation date (schedule date + grace days) of each late payment charge calculated is also stored for information and reporting purpose.
- System does not pass any accrual entries for the special penalty component.
6.2.24 Specifying Media for Message Generation
You can specify the media for the message generation in ‘Media
for Message Generation’ screen. You can invoke this screen by clicking
‘Media Priority; tab. This button
is enabled only if the ‘FpML Type’ option is unchecked and
the ‘Media Priority’ option is checked at the product level.
The system displays the following details:
- Product Code
- Contract Reference Number
- Customer
- Facility Name
- Event Seq No
You can specify the following details:
Media for All Investors
Select this check box to indicate that the media is applicable for all the investors.
Media
Specify the individual participants and media for primary entity of each participant if the ‘Media for All Investors’ option is not selected. The adjoining option list displays all valid media maintained in the system. You can select the appropriate one.
You are allowed to select any media for primary entity of individual participant only if that media is maintained for primary entity of individual participant in the ‘Customer Entity Maintenance’ screen and also message type corresponding to the media is maintained for the event at the product level.
If there are multiple events to be registered in a single transaction from the same screen, the system validates such that message type corresponding to the media is maintained at least for one event at the product level.
In case, if the selected media is not available for any messages attached for some event, then the message for that event is generated based on the priority maintained in the ‘Customer Entity Maintenance’ screen.
During the drawdown booking, if the ‘Media for all investors’ is selected as ‘FPML’ , then the message generation corresponding to the events will be as follows:
Events |
Message generation |
DNOT |
FPML message will be generated |
IRFX |
Since there is no message attached with media FPML for IRFX event system checks the priority of Entity1 of participant and message is sent through media ‘FAX’.
If there is no media order maintained for Entity1, then system will generate the message using customer entity maintenance. |
6.2.25 Amortize schedule type DD Contracts
You need to do the following set ups at the contract level for amortization schedule type contracts.
The ‘Liqd Interest on Prepayment’ flag is unchecked and disabled at the contract online screen. You are not allowed to perform any changes here. Partial payments is not allowed for agency amortization type of contracts and Partial payment allowed flag is unchecked and disabled for Amortization schedule type contracts. In CONTRACT tab, field ‘Amortization Type’ can be selected as ‘Reducing Balancing’ or ‘Rule 78’. The default value is ‘Reducing Balance’ and Schedule type is displayed as ‘AMORTISE’.
Contract schedules parameters like component, start date, number, frequency, units and other fields are defaulted. Amount is automatically derived by the system and is disabled. Based on these parameters, installment amount of each payment schedule is derived.
Contract schedule frequency redefinition to frequency values other than Monthly and Bullet are not allowed for all the components. System derives amortize amount based on the Principal and tenure of the contract using the EMI computation function.
Principal portion of the payment is derived using the formula Principal = Amortize amount– Interest component amount. System supports reducing balance amortization. And, amortization is not applicable for Sighting Funds applicable contracts.
6.2.26 Viewing Drawdown Summary
You can view the drawdown details using the ‘Drawdown Summary’ screen. You can invoke the ‘‘Borrower Drawdown Summary’ screen by typing ‘LBSDDONL’ in the field at the top right corner of the Application tool bar and clicking the adjoining arrow button.
You can view the following fields:
- Authorisation Status
- Contract Status
- DD Type
- Drawdown Reference Number
- Tranche Reference Number
- Facility Reference Number
- Facility Name
- External CUSIP
- CUSIP Number
- External Reference Number
- Short Name
- Customer
- Amount
- Value Date
- Maturity Date
- Product
- Currency
- Branch
- Drawdown User Reference Number
6.2.27 Fixing Exchange Rate After Drawdown Booking
You can perform a case independent search only if the parameter, ‘CASE_SENSITIVITY’ in cstb_param, is set to ‘Y’.
If you do not fix the exchange rate during drawdown booking (the event ‘EXFX’ is not fired for such drawdowns) you have the option to fix the same after the booking event. This is applicable if the drawdown currency is different from the tranche currency. You can invoke the ‘Exchange Rate Fixing’ screen by typing ‘LBDEXRFX’ in the field at the top right corner of the Application tool bar and clicking the adjoining arrow button.
All subsequent exchange rate fixing after the drawdown booking is done through the above screen. Through this screen, you can fix the exchange rate for the current period (before the effective start date) as well as specify a rate for a new period. These options are discussed below.
6.2.27.1 Using the ‘Unlock’ option to fix the exchange rate before the start date
You can use the unlock option to fix the exchange rate before the effective start date of the exchange rate fixing period. If you attempt to fix the exchange rate after the effective start date, the following message will be displayed:
Exchange rate already fixed
To amend the exchange rate for the current fix period (i.e. before the effective start date), do the following:
- Select the drawdown for which you want to fix the exchange rate. You can use the navigation button provided in the toolbar of the screen to select the drawdown. Alternatively, you can also use the F7 and F8 keys to fetch the required drawdown. The system will display the ‘Fixing Date’ based on the exchange rate fixing days maintained for the drawdown currency at the tranche level. The ‘Fix Notification Date’ will be one day prior to the ‘Fixing Date’ for such drawdowns (for which exchange rate fixing is done before the effective start date).
- Unlock the selected drawdown. To do this, Select Unlock option from the menu.
- Specify the effective end date for the period. This date should not be greater than the drawdown maturity date and earlier than the ‘Effective Start Date’. When you specify the end date, system will accordingly display the ‘Next Effective Start Date’ (Effective End Date + 1).
- Change the default exchange rate, if required. This rate is picked up from the ‘Currency Rates Maintenance’ screen. You may also capture any remarks, if required.
- Select Save from the menu to save the changes. The system will display a confirmation message if the save operation is successful.
Note
- If you have defined revaluation schedules for a period, you cannot fix the exchange rate for that period
- In case of future dated drawdowns, exchange rate should be fixed before the value date of the drawdown
- If you fix the exchange rate for a contract wherein the advices ‘BORR_EXFX_ADV’ or ‘PART_EXFX_ADV’ are suppressed for the EXFX event, then the system displays the following override when you save:
‘Advice for event EXFX is suppressed for the product, Do you want to continue?’
- Similarly, If you fix the exchange rate for a contract wherein the advices ‘BORR_ROEX_ADV’ or ‘PART_ROEX_ADV’ are suppressed for the ROEX event, then the system will display the following override:
Advice for event ROEX is suppressed for product, Do you want to continue?
- Similarly, If you fix the exchange rate for a contract wherein the advices ‘BORR_CREX_ADV’ or ‘PART_CREX_ADV’ are suppressed for the CREX event, then the system displays the following override:
Advice for event CREX is suppressed for product, Do you want to continue?
6.2.27.2 Using the ‘New’ option to fix the exchange rate after the effective start date
You can use the ‘New’ option to fix the exchange rate for the next period. Follow the steps given below to fix the exchange rate using this option:
- Select New from the menu
- Select the reference number of the drawdown for which you want to fix the exchange rate for the next period. The option list will display the reference numbers of drawdowns with effective start date earlier than the current system date. This indicates that you are fixing the exchange rate for the next period. By default, the effective end date of the previous period+1 will become the effective start date of the new period. The system displays the ‘Fixing Date’ for the next period based on the exchange rate fixing days maintained for the drawdown currency at the tranche level.
- Change the effective start date, if required. By default, the system displays the current date. You can change it to date in the future such that the date is not beyond the drawdown maturity date. However, if the end date of the previous exchange rate fixing period is greater than the system date, the effective start date of the current period should be greater than the previous period end date.
- Specify the effective end date for the period. This date should not be greater than the drawdown maturity date but may be equal to the effective start date.
- Change the default exchange rate, if required. This rate is picked up from the ‘Currency Rates Maintenance’ screen. You may also capture any remarks, if required.
- Select Save from the menu to save the changes. Since you are fixing the exchange rate before the actual fixing date, the system will display an override message indicating the date and time when the actual fixing should have taken place, before saving the details. A confirmation message is displayed if the save operation is successful.
6.2.28 Fixing Interest Rate after Drawdown Booking
For the first time, you can fix the interest rate as part of drawdown booking through the ‘Rate Fixing Details’ screen. Subsequent rate fixing should be performed through the ‘LS Interest Rate Fixing’ screen. You can invoke the ‘Interest Rate Fixing’ screen by typing ‘LBCRPLIF’ in the field at the top right corner of the Application tool bar and clicking the adjoining arrow button.
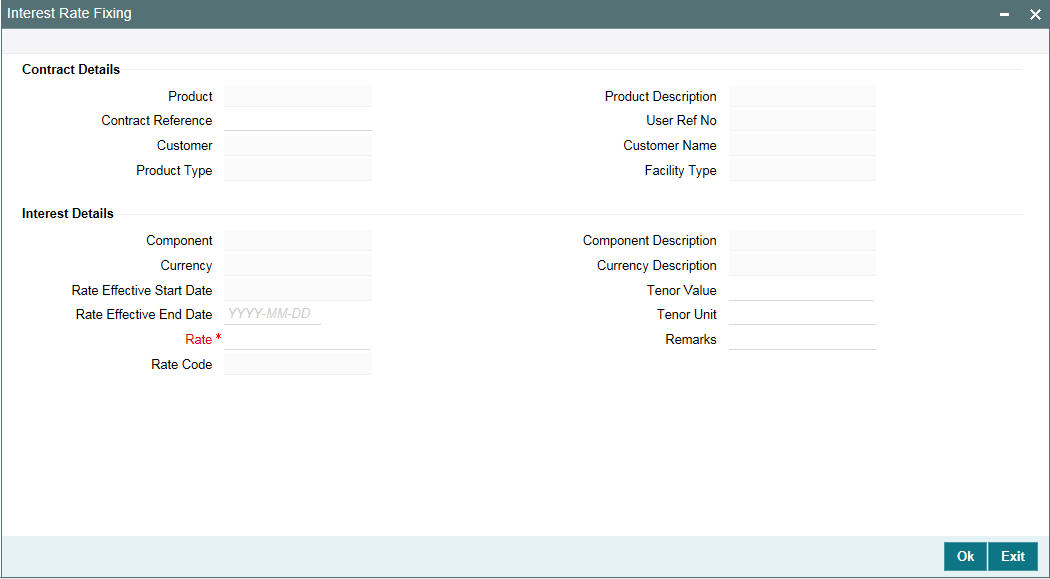
You can view the agent reference number in this screen.
For interest rate fixing also you have the ‘Unlock’ (to fix the interest rate before the effective start date) and ‘New’ (to fix the interest rate after the effective start date) option. For more details on negative rate processing, refer the title ‘Maintaining Loans Parameters Details’ in the chapter ‘Bank Parameters’ in Core Services User Manual. For details on the two options, refer the heading ‘Fixing exchange rate after drawdown booking’ in this chapter.
For more information on the editable fields in the above screen, refer the heading ‘Fixing interest rate for the drawdown’ in this chapter.
You can specify the media for the message generation in ‘Media
for Message Generation’ screen. You can invoke this screen by clicking
‘Media’ tab. This tab is
enabled only if the ‘FpML Type’ option is deselected at the
contract level and the ‘Media Priority’ option is checked
at the product level.
If this tab is enabled, then the system displays an override message saying to view the ‘Media for Message Generation’ screen. If not, the system handoffs the message as per the details maintained in the ‘Customer Entity Maintenance’ screen.
For more information on the ‘Media for Message Generation’ screen, refer the heading ‘Specifying Media for Message Generation’ in this chapter.
6.3 Amending Drawdown SKIM Details
You can amend the Skim details maintained for a drawdown in the ‘Skim Amendment’ screen.
For details on maintaining SKIM for a tranche, refer the section titled ‘Defining SKIM details for tranche participants’ in this chapter.
You can invoke the ‘Amending Drawdown SKIM Details’ screen by typing ‘LBDSKMAM’ in the field at the top right corner of the Application tool bar and clicking the adjoining arrow button.
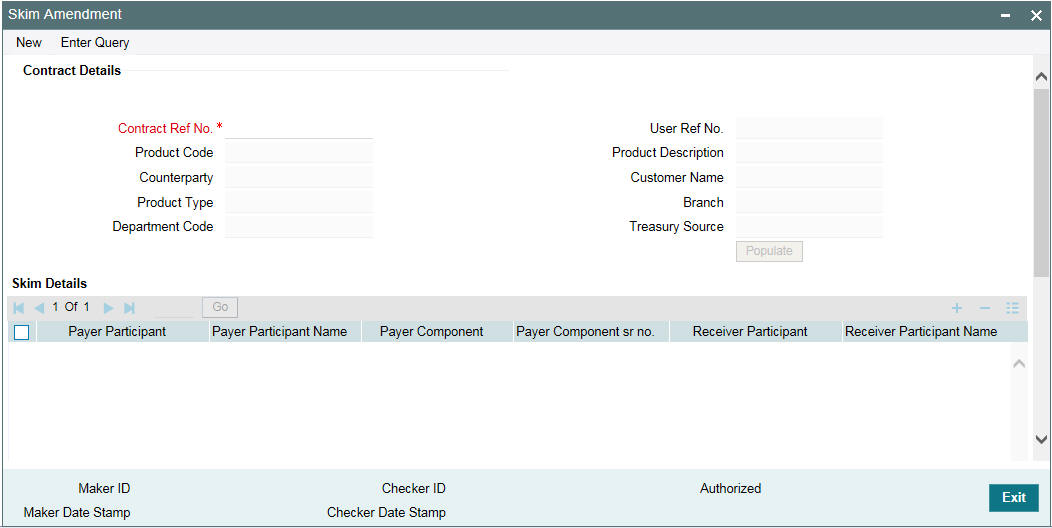
You can use the ‘New’ option for amending the Skim details for an authorized drawdown. The ‘Unlock’ option is available only if the drawdown is unauthorized.
Note
During amendment:
- You cannot remove an existing combination of payer and receiver maintained for the drawdown. However, you can change the value date and skim rate for the combination.
- You can add a new combination and delete only a new combination added as part of Skim amendment
When you ‘Unlock’ or select the ‘New’ option, as the case may be, do the following as part of amendment:
- Add a new combination of Payer and Receiver Participants. The option list displays the participants selected for the drawdown. When you select a ‘Payer Participant’ or ‘Receiver Participant’, the corresponding name and component are also displayed. The system displays the number of times you select the participant for a combination. However, you cannot repeat a combination of Payer and Receiver
- Specify the value date when the amendment should be applied to the drawdown. This date should not be earlier that the drawdown value date or later than the drawdown maturity date.
- Specify the Skim rate for the combinations maintained for the drawdown
- The details get updated to the drawdown upon save of the amendment. You can view the same in the ‘Skim Details – Drawdown’ sub-screen invoked from the ‘Drawdown Contract Online’ screen. The drawdown status is ‘Unauthorized’ after an amendment. The same gets updated to ‘Authorized’ only after the amendment is authorized.
For more details on the ‘Skim Details – Drawdown’ sub-screen, refer the heading titled ‘Specifying drawdown SKIM details’ in this chapter.
In the ‘Value Date Wise Skim History’ section of the ‘Skim Amendment’ screen, you can view the history of modifications/amendments made till date for a payer and receiver combination. The following details are displayed here:
- Payer Participant and Receiver Participant
- Value Date
- Skim Rate
- Event Sequence Number: Indicates the number of modifications done till date
In the ‘Skim Rate History For:’ section of the screen, you view the latest values associated for a payer and receiver combination, prior to the amendment. If only a single amendment is processed for the drawdown, both the history sections will display the same details.
Following points are noteworthy here with reference to interest rate changes:
- The interest receivable from a borrower on the schedule date can be more than the amount actually liquidated due to the interest rate increase. In such a case, the excess interest is receivable from the borrower and payable to the participants based on the participant sharing ratio for the associated business event (REVN).
- The interest receivable from borrower on the schedule date can be less than the amount actually liquidated due to the interest rate decrease. In such case, the excess interest is made payable to the borrower and made receivable from the participants based on the participant sharing ratio for the associated business event (REVN).
In addition, the margin value can change due to changes in the tranche outstanding because of a back value dated drawdown. If the amount due from a borrower changes due to a back value dated drawdown, the amount receivable from the participants also change and this change is shared by the participants based on the participant sharing ratio for the associated business event (MRFX).
The following points are noteworthy with respect to payable/ receivable tracking:
- The payable/receivable tracking is done only for normal/bearing interest type of contracts. It is not applicable for prime and competitive bidding contracts.
- Payable/Receivable tracking is not applicable for liquidated and rolled over contracts
- The parent contract life cycle remains unaffected by the receivable and payable tracking. This means that the parent contract can move to the liquidated status on its maturity date, subject to all schedule payments, even though receivables/payables might be outstanding for the same.
- If the payable/receivable settlement is done after maturity date of the liquidated parent, the system fires the payable/receivable event (PRLQ) at the parent contract even after liquidation.
- If a parent contract is reversed before maturity, all receivables/payables get auto reversed by the system.
Note
You can reverse a payment of a payable/receivable by clicking the ‘Reverse’ option . This option is enabled only if you access the above screen directly from the Application Browser (to do this, you need to choose LS Operations and doubleclick on the Payment option under Receivable Payable).
6.3.1 Processing Contracts For Secondary Loan Trading
If you have selected the ‘Payment Browser’ preference as part of the preferences for the branch for secondary loan trading (in the ‘Secondary Loan Trading – Branch Parameters’ screen), then the system processes the payments meant for trading through the ‘Payment Browser’ screen. The payments that are processed through this browser are:
- Buy Trade payments
- Pay/Rec liquidation (applicable only for Lender of Record type of Trades)
- Fees on Trade ‘Sells’ for unfunded commitment.
- Rebooked trades due to reversal and rebooking of trades after settlement
- Transfer fees payable to Agents and Counterparties (where the transfer fee currency is different from the settlement currency)
- Buy Trade payments, Pay/Rec liquidation, fees on Trade Sells and transfer fees for agents and counterparties settled as part of EOD
6.4 Processing Future Value Dated Payments
Oracle FLEXCUBE allows future dated liquidation of Prime drawdown contracts if ‘Liquidate Interest on Prepayment’ option is selected for the drawdown contract in the ‘Drawdown Contract Online’ screen.
In this case, the interest computation is done for the prepaying principal and is computed till the value date of the future dated payment. On the value date of the payment, system recalculates the interest on the prepaid principal and compares the calculated interest amount with the interest amount that was calculated earlier by the system, while capturing the instructions for future dated payment. If there is a mismatch in the interest amount, system logs an exception and aborts the payment process.
You cannot do future dated payments for contracts which are instructed for a rollover or renewal. In such a case, you need to remove or reverse the rollover/re-price instruction on the contract in order to process a future dated payment. On the contrary, if you are reversing a future dated payment of a contract after instructing it for a rollover or re-pricing, then there will not be any change in the rollover/re-price amount. On the value date of the rollover /re-price, system will rollover/re-price the captured rollover\re-price amount. System liquidates the remaining future dated payment reversal amount based on the Liquidate Interest /Liquidate Principal options selected in the ‘Rollover’ tab of the ‘Drawdown Contract Online’ screen.
Note
- System does not allow you to reverse FDLIQD event if there is an underlying re-price which is over due for the drawdown contract due to FDLIQD reversal. To proceed with FDLIQD reversal you need to reverse the re-price instruction on the contract.
- System allows only one active future dated payment at any point of time.
6.5 Processing Revaluation of Drawdowns
When you initiate a new drawdown, Oracle FLEXCUBE checks whether revaluation is applicable for the drawdown. If selected, it arrives at the revaluation schedule dates based on the following:
- Value Date
- Revaluation Frequency
- Start Month
- Start Day
- Holiday Treatment for Schedules
Even if revaluation schedules have been defined with the ‘Start Date’ as the Value Date, you have to manually fix the exchange rate at the time of booking the contract.
For more details, refer the heading ‘Fixing exchange rate for drawdown currency’ in this chapter.
During EOD batch, system checks if there is a revaluation schedule for any drawdown. If revaluation is due, system further checks if the rate is already fixed for the current date (Manual Exchange Rate Fixing). If it is already fixed, system skips the revaluation process and considers only the next revaluation date for subsequent revaluations.
However, if you have fixed the exchange rate on the value date as part of contract initiation, and revaluation schedules have been defined with the Start Date equal to the Value Date, system again does a revaluation as part of EOD batch on the Value Date. The rate derived for the Rate Code and Rate Type combination at the time of running the batch, is used for revaluation. System uses this rate to convert the amount in the drawdown currency into its equivalent in the tranche currency.
Note
- If you do not fix the exchange rate for the current date when revaluation is due, system fetches the exchange rate for the Rate Code and Rate Type combination maintained as part of revaluation preferences. It automatically triggers the exchange fixing event (EXFX) with the rate fixing start date as the current application/system date and the end date as the next revaluation schedule date minus one.
- If revaluation fails due to the non availability of the rate or if the new rate is resulting in a negative availability, system logs the exception and proceeds with the batch process. During the next day’s batch process, system checks for revaluations with ‘Failed’ status. If available, it attempts for the revaluation event. Upon successful revaluation, it updates the status of the failed schedules as ‘Processed’ with the Applied Date equal to the revaluation date. However, once the current application date becomes equal to the next revaluation schedule date, system does not consider the lapsed revaluation schedule as part of the EOD Batch.
- The system selects the contracts for revaluation in the order of their Contract Reference Number. So, if there is more than one drawdown linked to a tranche, system revaluates the earliest drawdown first. In such cases, you may have a scenario where the first drawdown was revalued successfully but subsequent drawdowns could not be revalued as a result of the utilization exceeding the tranche available amount.
Once auto revaluation commences, you cannot do a manual rate fixing till the end date of that schedule.
6.6 Allowing Back Valued Activities on a Drawdown Beyond the Trade Date
Oracle FLEXCUBE allows you to perform the following back valued activities on a drawdown, beyond the last trade date, for both revolving and non-revolving tranches:
- Back value dated drawdown initiation
- Back value dated drawdown amendment
- Back value dated drawdown liquidation
Note
- You can perform back valued activities beyond the trade date only for drawdowns under pro-rata tranches.
- System does not allow back value dated drawdown initiation and liquidation, beyond the trade date, for drawdowns under Non-prorate tranches and of ‘Lender of Record’ type of distribution.
- System does not liquidate any of the back dated schedules as part of initiating a back value dated drawdown.
- System allows you to perform back value dated amendment of drawdowns
in any of the following instances:
- On the value date of another value dated amendment
- Beyond the value date of another value dated amendment
- Beyond the last payment value date
System performs the following activities as part of any back value dated activity on a drawdown, beyond the trade date:
- When a drawdown is initiated beyond the last trade date, system triggers a Participant Ratio Amendment (PRAM) event for each of the PRAM event at the tranche level, so that the new drawdown have all the ratio changes that have happened in the tranches since the value date of the drawdown.
- In case of back value dated liquidation/amendment beyond the last trade/payment date, for a drawdown under a non-revolving tranche, the ratio for the subsequent PRAMs changes. System triggers PRCH event at tranche level to indicate that the ratio has changed at the tranche level due to the back valued drawdown activity. System updates the future principal schedules of the drawdown participants based on the latest asset ratio.
- For back value dated amendment beyond the last payment date of drawdowns having distribution type as ‘Lender of Actuals’, system updates the payable/receivable of the respective liquidated payment schedule.
6.7 Amending Global Amount for a Contract
You can specify the Global Tranche or Global Drawdown amounts in the ‘Tranche Online’ and ‘Drawdown Online’ screens respectively during contract booking. Any amendment to the Global Tranche or Global Drawdown amounts is done in the ‘Global Amount Amendment’ screen.
Using the ‘Global Amount Amendment’ screen, you can amend all non-lead Tranches; however, you can only amend those non-lead Drawdowns where the Cascade Participation is set to ‘No’.
You can invoke the ‘Global Amount Update’ screen by typing ‘LBDGLAMT’ in the field at the top right corner of the Application tool bar and clicking the adjoining arrow button.

To amend the Global Tranche or Drawdown amounts, do the following:
- Contract Ref No – specify the contract reference number of the Tranche or Drawdown whose Global Amount you want to amend
- Amendment Date – the system defaults the current system date as the Amendment Date. You cannot modify this date.
- Current Global Amount – the system defaults the current Tranche or Drawdown Global Amount
- New Global Amount – specify the new Tranche or Drawdown Global Amount
The system automatically updates the Global Amount for non-lead Tranches or Drawdowns in the following scenarios:
- For any payments on non-lead drawdowns associated with non-revolver tranches, the global amount is updated based on the percentage of the drawdown payment amount and the tranche amount. The tranche amount includes the tranche availability and drawdowns outstanding.
- For any change in principal, as a result of Value-Dated Amendment on the non-lead Drawdown, for both, revolver and non-revolver tranches, the global amount is updated.
- No other events automatically update the Global amount for a Tranche or Drawdown.
The latest Global Amount for tranche as on the date of handoff is used for handoff of the Commitment Reduction to the Loans QT system.
6.7.1 Global Amount for Tranche
Note
The following for the global amount for tranche:
- Global Tranche Amount is available for input only for non-lead tranches
- Global Tranche Amount is specified in Tranche currency
- Global Tranche Amount in Tranche Online will be available for input during new tranche booking only and it will not be amendable during Tranche amendments
6.7.2 Global Amount for Drawdown
Note
The following for the global amount for drawdown:
- Global Drawdown Amount is always specified in Drawdown currency
- Global Drawdown Amount is available for input only for non-lead drawdowns and if the corresponding Tranche has ‘Cascade Participation’ set to ‘No’
- Global Drawdown Amount is computed and populated during new drawdown booking based on the Tranche Amount, Global Tranche Amount and Drawdown Amounts.
- Global Drawdown Amount is computed as (Global Tranche Amount / Tranche Amount) * Drawdown Amount
- The Tranche Amount is computed as (Tranche Available + Drawdowns Outstanding)
- Global Drawdown Amount is not amendable while drawdown booking if the underlying Tranche has ‘Cascade Participation’ as ‘Yes’
- Global Drawdown Amount can be amended while drawdown booking to over-ride the computed amount, only if the underlying Tranche has ‘Cascade Participation’ set to ‘No’
- Global Drawdown Amount is validated to ensure that the Global Drawdown Amount is not greater than the Global Tranche Amount during new Drawdown booking
- Global Drawdown Amount in Drawdown Online is not available for update during drawdown amendments
- The GAMD event fires on the Drawdown contract when you amend the global amount from the Global Amount Amendment/Update screen.
- If global amount for drawdowns for which the corresponding tranche has the ‘Cascade Participation’ box unchecked in the ‘Global Amount Update screen’, then system updates the outstanding amount and allocation amount in the 'Tranche Repayment Schedules' screen for the respective drawdown by applying the ratio between the old drawdown outstanding amount and old global drawdown amount on the new drawdown outstanding amount.
6.8 Processing Participant Contracts
When you ‘BOOK’ a borrower tranche, the system creates the related participant contracts. It picks up the participant tranche product linked to the borrower tranche product (in the ‘Loans Syndication – Facility Product Preferences’ screen) and the participant details maintained for the borrower tranche contract to create the corresponding participant tranche.
In the same manner, it picks up the participant drawdown product to create the participant drawdowns. The contract uses the participant details maintained for the borrower tranche contract.
The processing of participant contracts depends on the ‘Participant Process’ mode, whether ‘Job’ or ‘Online’, set for your branch. You have to specify this as part of defining parameters for your branch in the ‘Branch Parameters – Detail’(OLDBRMNT) screen.
6.8.1 Processing in the ‘Online’ Mode
If the ‘Participant Process’ mode is set to ‘Online’ for your branch, the system automatically processes the related participant contracts, as mentioned above. In the ‘Online’ mode, you can save and authorize the borrower side contracts (facility, tranche or drawdowns) ONLY if the corresponding participant side contracts are processed successfully. You can view the status of the participant contracts in the audit trail section at the bottom of the respective borrower contract. For successfully saved borrower contracts, the ‘Participant Processing Status’ is displayed as ‘Processed’.
You can also view the details of borrower and participant contracts processed in Oracle FLEXCUBE in the ‘JOB PROCESS STATUS’ screen.
For more details on the above screen, refer the heading ‘Viewing borrower/ participant contract processing status’ in this chapter.
6.8.2 Processing in the ‘Job’ Mode
If the ‘Participant Process’ mode is set to ‘Job’ for your branch, you have to initiate a Background Job which picks up the participant contracts created in the system for further processing.
You have to initiate the Background Process as part of BOD programs run for the branch. The initiation is done through the ‘Participants Propagation’ (LBSPPROP)screen.
The ‘Job Status’
is ‘Job’. When you click the ‘Start
Job’ button, the Background Job gets initiated in Oracle FLEXCUBE.
In the ‘Job’ mode, after you save the borrower side contract,
you can proceed with the next contract while the system processes the
participant side contracts in the background. However, you can authorize
the borrower side contracts only if the corresponding participant side
contracts are processed successfully.
For successfully saved borrower contracts, the ‘Participant Processing Status’ (in the audit trail section at the bottom of the respective borrower contract) displays any one of the following statuses:
- Work in Progress
- Unprocessed
The status gets updated when the Background Job processes the participant contracts. After processing, the status reads ‘Processed’ or ‘Failed’, as the case may be.
Before executing the EOD operations for the branch, you have to stop the Background Job. This is mandatory. To stop the process, you have to click the ‘Stop Job’ button in the ‘Participants Jobs’ screen.
You can also view the details of borrower and participant contracts processed in Oracle FLEXCUBE in the ‘JOB PROCESS STATUS’ screen.
For more details on the above screen, refer the heading ‘Viewing borrower/ participant contract processing status’ in this chapter.
6.9 Viewing Participant Contracts
To recall, when the BOOK event for borrower facility, tranche or drawdown is triggered, the system creates the related participant facility, tranche or drawdowns You can view the participant contracts initiated by the system in the ‘Loans Syndication – Participant Contract Online’. You can also view the position identifier description in case the participant is self participant.The features of this screen are discussed in the following sections.
6.9.1 A description of the ‘Loans Syndication – Participant Contract Online’
You can invoke the 'Participant Contract Input’ screen by typing ‘LPDCOMNT’ in the field at the top right corner of the Application tool bar and clicking the adjoining arrow button.

In the above screen, you can view the following details about the contract:
- Code of the product being used
- System generated reference number for the participant contract is displayed here
- User reference number, which is defaulted to the contract reference number. You can change it if necessary, and specify the appropriate user reference number
- Custom reference number
- Outstanding balance on the participant contract reporting currency
- System generated reference number for the borrower facility contract, under which the participant contract was created.
- System generated reference number for the borrower tranche contract, under which the participant contract was created
- If it is a participant drawdown contract, the serial number of the drawdown under the tranche
- Customer of the contract
- Contract currency
- Contract amount in contract currency and reporting currency
- Contract booking date, value date and maturity date
- For participant tranche or drawdown contracts, whether collection from the participant must be initiated automatically (auto collection).
- Whether the amount repaid by the borrower must be disbursed automatically (auto disbursement)
- Remarks
In addition, a vertical toolbar is also provided in the screen. These buttons are used to invoke other sub-systems required for processing a participant contract. These buttons have been described briefly below:
Button |
Description |
Entity |
Click this tab to view the entities defined for the participants, defaulted from the participant details in the parent borrower tranche or drawdown. |
Settlements |
Click this tab to view the settlement details for the participant, defaulted from the SSI Mnemonic selected for the participant in the borrower tranche. |
MIS |
Click this tab to view the MIS details for the contract, defaulted from the participant details in the parent borrower tranche or drawdown. |
UDF |
Click this tab to view the User Defined Fields (UDFs) for the contract, defaulted from the participant details in the parent borrower tranche or drawdown. |
Tax |
Click this tab to view the ‘Participant Tax Details’ screen. |
Payment Schedule |
Click this tab to view the payment schedule details. |
Rate History |
Click this tab to view the participant margin rate history. |
Diary |
Click this tab to view the diary events defined for the participant contract, defaulted from the parent borrower tranche or drawdown. |
Events |
Click this tab to invoke the ‘Event Log Details’ screen. Here, you can view the accounting entries for each event and the overrides encountered, if any. |
LS |
Click this tab to view the syndication details |
6.10 Modifying Participant Details
You can amend the participant details, if required. To do this, you have to first select the contract that needs to be amended. After selecting the contract, select Unlock from the menu to unlock the contract for making the amendment.
You cannot amend the following details:
Contract Reference Numbers
When the participant contracts are initiated, the system generates reference numbers (Contract Reference Number and User Reference Number) for them in the same manner as for normal borrower contracts.
For the purpose of tracking a borrower tranche, the reference numbers of the resultant participant tranche contracts are linked to the reference number of the parent borrower tranche.
For the purpose of tracking a borrower drawdown, the reference numbers of the resultant participant drawdown deposit contracts are linked to the reference number of the parent borrower drawdown, as well as to its’ parent borrower tranche.
Product and contract details
As mentioned earlier, in the product preferences for a borrower facility product, you specify the corresponding participant facility product that is to be used for the related participant facility contract created by the system. This is the product that would be used for the creation of the participant facility contract, along with the participant details specified in the borrower facility contract.
Similarly, in the product preferences for a borrower tranche or drawdown product, you specify the corresponding participant tranche or drawdown product that is to be used for the related participant tranche or drawdown created by the system. This is the product that would be used for the creation of the participant tranche or drawdown, along with the participant details specified in the borrower tranche.
In the ‘Contract Details’ section of the screen, you can specify the following details:
Auto Collection
You have to check this option to indicate that collection from the participant must be initiated automatically. The specification made in the preferences for the participant tranche or drawdown product used by the participant contract is displayed here. You can change it, if required.
Auto Disbursement
This option indicates whether the amount repaid by the borrower must be disbursed automatically. The specification made in the preferences for the participant facility, tranche or drawdown product used by the participant contract is displayed here. You can change it, if required.
Remarks
The remarks specified for the parent borrower facility, tranche or drawdown, under which the participant contract is created, will default here. You can modify these remarks appropriately, if required.
6.10.1 Viewing Participant Entity Details
You can view the participant entity details in the ‘Participant Entities’ screen. These details are defaulted from the participant details maintained for borrower facility/tranche/drawdown associated with the participant facility/ tranche/drawdown. Click the ‘Entity’ tab to invoke this screen.
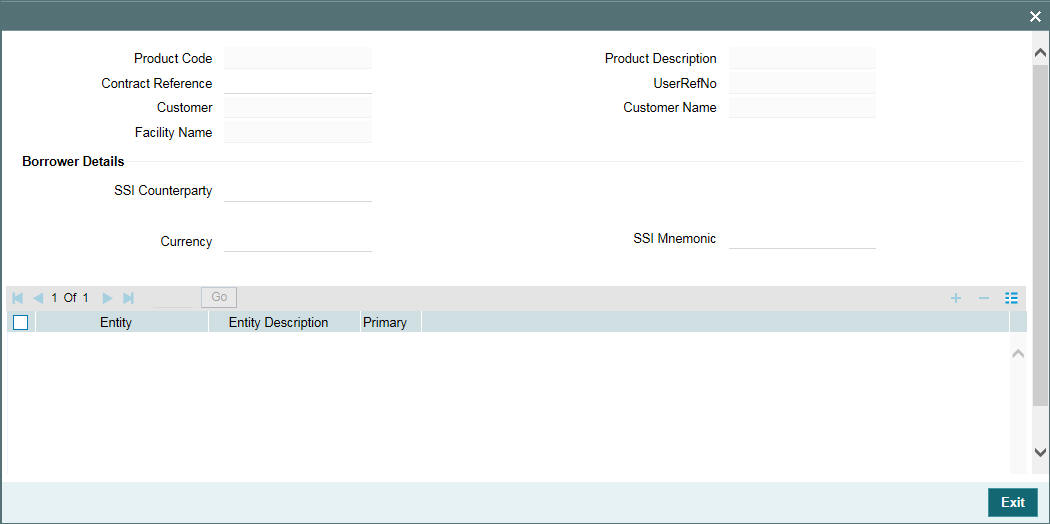
You can add or delete entities and also assign a different primary entity for the participant, if required. You can view the position identifier description in case the participant is self participant.
For more details on the options available in this screen, refer the heading ‘Specifying drawdown entity details’ in this chapter.
6.10.2 Viewing Settlement Instructions for the Participant
You can view the settlement instructions for the contract in the ‘Settlement Message Details’ screen. Click the ‘Settlements’ tab to view the details. The details are defaulted based on the SSI Mnemonic selected for the participant in the borrower tranche/drawdown.
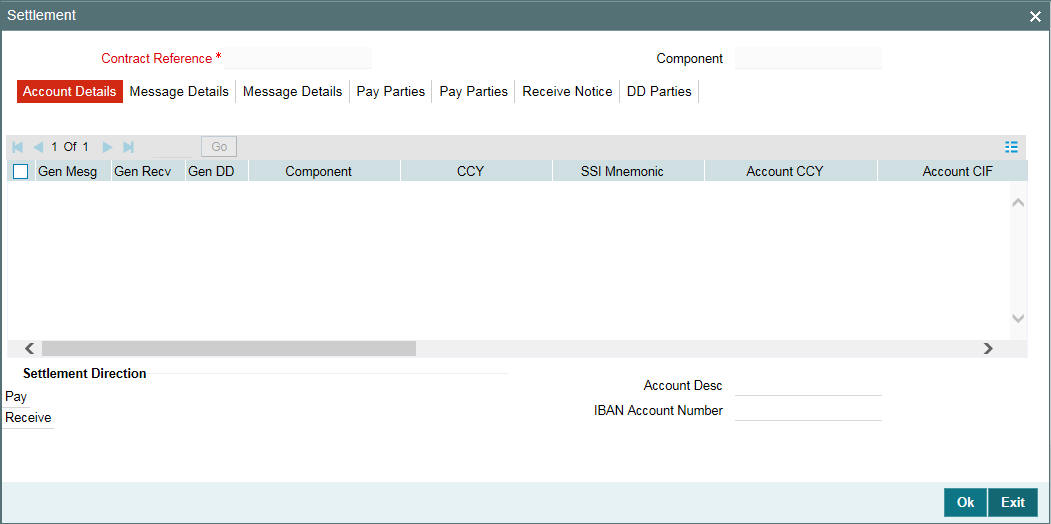
For more details about the ‘Settlement Message Details’ screen, refer the Settlements User Manual.
6.10.3 Viewing Participant MIS Details
If you have maintained MIS details for the participant tranche/drawdown product, the same will default to the participant tranche/drawdown. To view the details, click the ‘MIS’ tab.
For details on the ‘Transaction MIS Details’ screen, refer the MIS User Manual.
6.10.4 Viewing UDF Values for the Participant Contract
The UDFs defined for the participant product is applied for contracts processed under it. You can view the UDFs and its values, if applicable, in the ‘User Defined Fields’ screen. Click the ’UDF’ to invoke this screen.
For more details on the above screen, refer the UDF (User Defined Fields) User Manual.
6.10.5 Viewing Participant Tax Details
You can collect withholding tax from participants on the interest and fee components. If you have associated tax rules with the participant tranche/drawdown product, the same is become applicable to the contract. You can view the tax details for the contract in the ‘Tax Details’ screen.
Click the ‘Tax’ tab to invoke the screen.
The following details are displayed in this screen:
- Tax Rules associated with the product
- Value date for tax computation
- Tax Currency
- Tax Amount
- Position identifier description in case the participant is self participant
For details on maintaining tax rules and schemes, refer the Tax User Manual.
6.10.6 Viewing participant payment schedules
Based on the payment schedules captured for the components due to the participants (Interest, Fee, Skim, and so on), Oracle FLEXCUBE computes the schedules and the amount payable for each schedule in the ‘Payment Schedule Details’ screen. You can view the position identifier description in case the participant is self participant.
To view the details, click the ’Payment Schedule’.
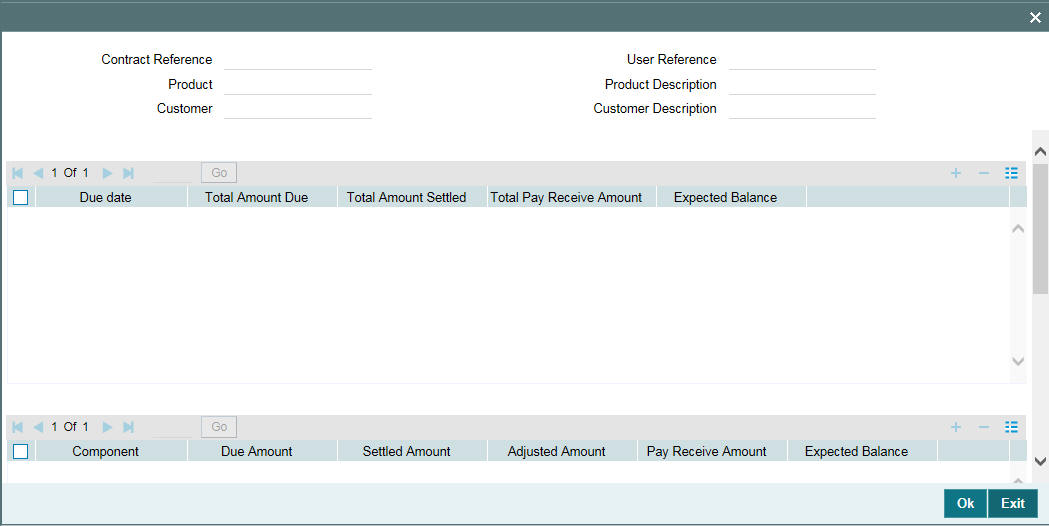
6.10.7 Viewing Rates History
To view the margin rate history, click the ‘Rate History’ tab. The ‘Rates History’ screen is displayed, as shown below:
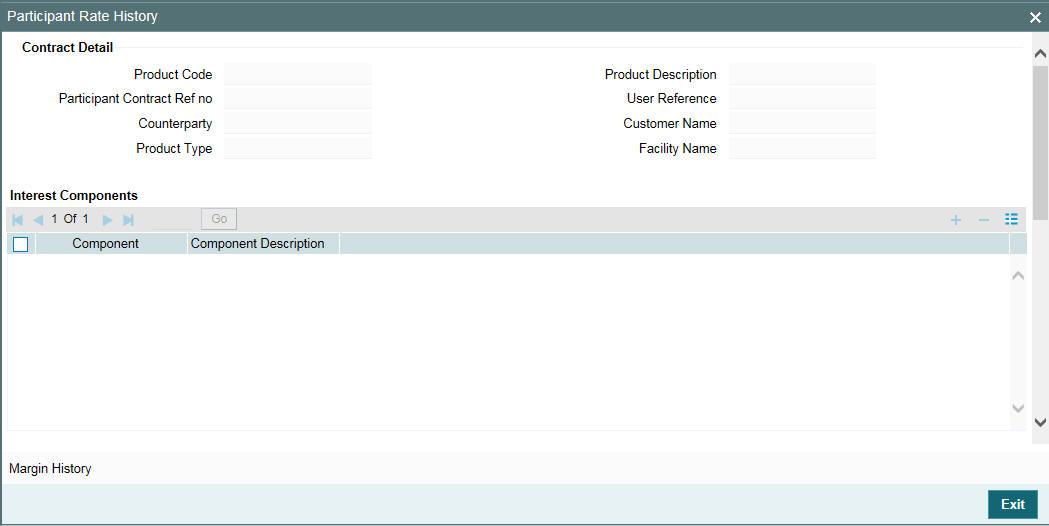
The following details are displayed on this screen.
- Interest component name and description
- Value Date
- Rate Type
- Rate Code
- Rate Code Usage
- Borrow/Lend
- Base Rate
- Spread
- Margin
- Adjustment Rate
- Final Rate
- Margin Component
- Margin Rate
- Margin Basis
6.10.7.1 Viewing Margin History
You can view the participant’s margin details that are applicable for the contract, by clicking the ‘Margin History’. The ‘Rates History’ screen is displayed, as shown below:

The system displays the following details.
Margin History Interest Component
The system displays the following component details.
- Component
- Component Description
Margin Details
The system displays the following margin details.
- Margin Component
- Margin Rate
- Margin Basis
Margin Rates
The system displays the following margin rate details.
- Value Date
- Margin Rate
- Final Rate
6.10.8 Viewing the Syndication Details
To view the details of the syndication, click the ’LS’ tab. The ‘Syndication Details’ screen
is displayed, as shown below:
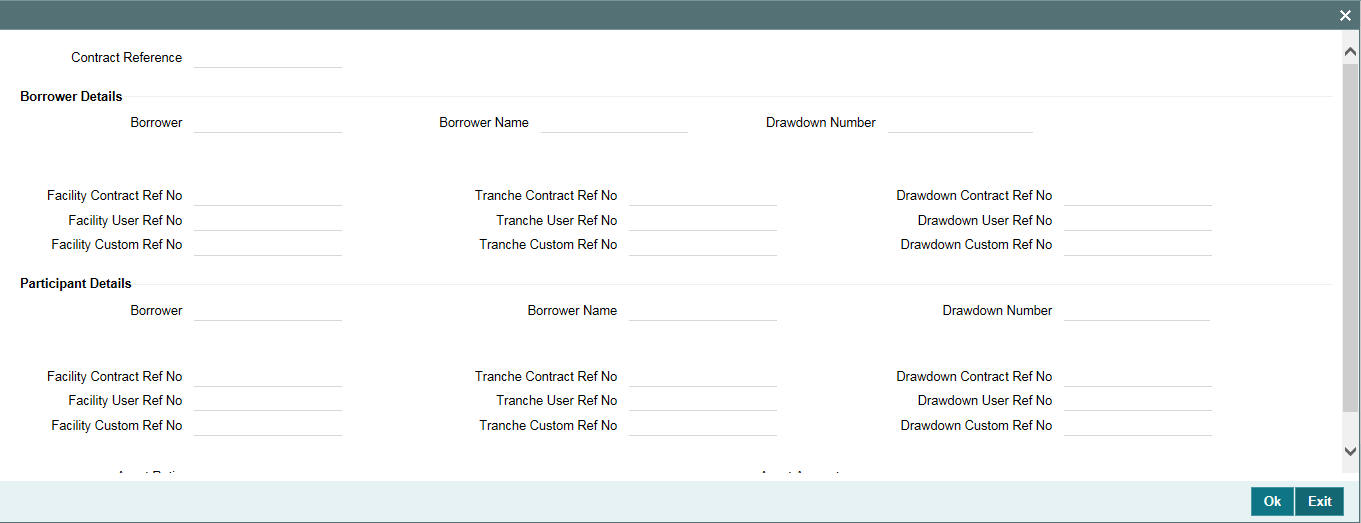
In this screen, you can view the reference numbers of contracts created both for the borrower and the participant involved in the syndication.
After you save the contract, you can view the following details of the contract:
- Events
6.10.9 Viewing Events for the Participant Contract
You can view the events triggered during the contract life cycle in the ‘Event Log Details’ screen. To invoke this screen, click the ‘Events’ tab. The events defined for the participant tranche/drawdown/facility product will be triggered for the contract.
For details on the above screen, refer the heading ‘Viewing events for the facility’ in this chapter.
6.11 Participant Position Summary
You can view the participant position summary in the Participant Position Summary screen.
You can invoke the ‘Participant Position Summary’ screen by typing ‘LBSPTPSN’ in the field at the top right corner of the Application tool bar and clicking the adjoining arrow button.
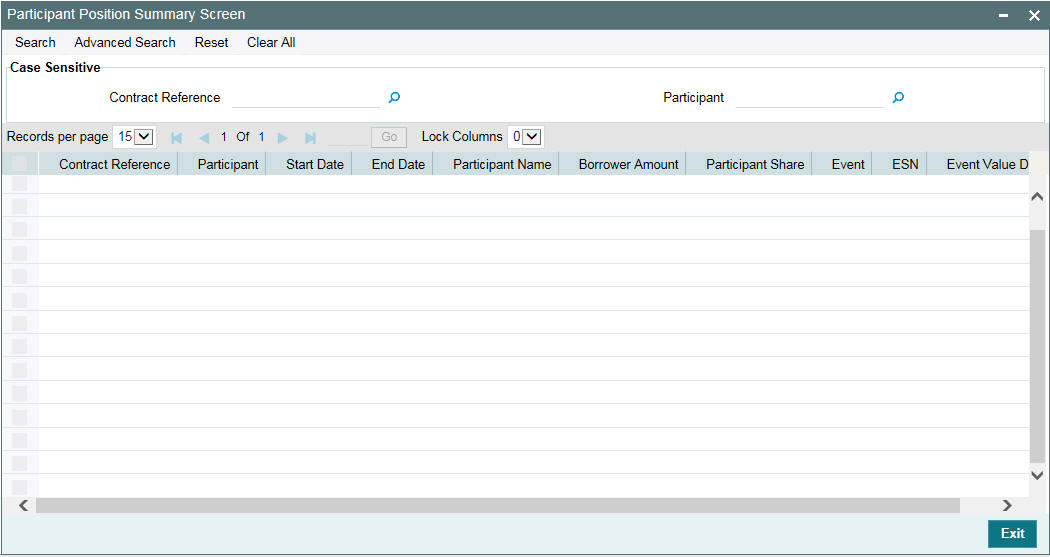
You can view the position details of the participants, for different dates, using this screen. To view details, query using any of the following fields in the Participant Position summary screen:
- Tranche or Drawdown Reference Number
- Participant Id
The following fields are displayed in this screen
- Contract Reference Number
- Participant Id
- Start Date
- End Date
- Partcipant Name
- Borrower Amount
- Participant Share Amount
- Event which resulted in the current position for the corresponding start and end dates
- ESN
- Event Value Date
You can use this screen to query the details for self-participants and also for external participants.
6.12 Transferring Participant Assets
If you want to make changes in the asset ratio of participants for a borrower tranche or drawdown, use the ‘Participant Transfer Details’ screen. You can invoke the ‘Participant Transfer Details’ screen by typing ‘LBDPTFR’ in the field at the top right corner of the Application tool bar and clicking the adjoining arrow button.
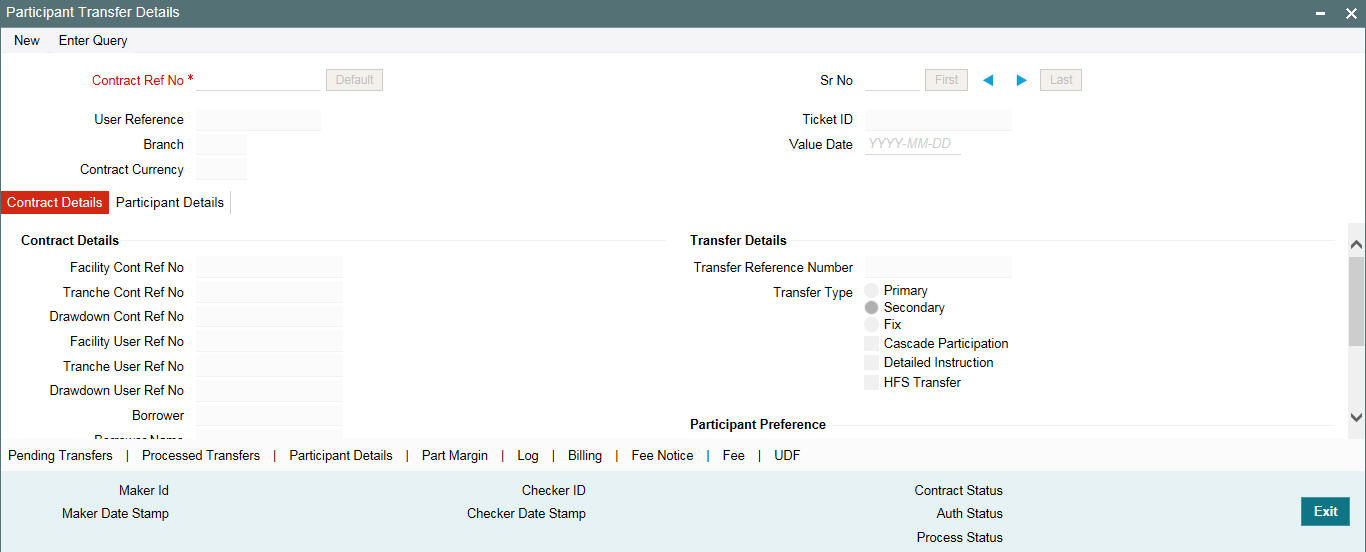
The specification for ‘Cascade Participation’ (whether checked or not) defaults from the contract . When you execute a participant transfer at the tranche level and the ‘Cascade Participation’ option is selected for the tranche, the impact of the transfer automatically affects all the drawdowns under the tranche. However, if the option is not selected, you are required to update the underlying drawdowns manually. In this case, only new drawdowns, processed subsequent to the transfer will reflect the changes.
When you specify the transfer percentage for a transfer instruction, the system arrives at the transfer amount based on the existing actual balance as on the value date of the instruction. In this case, it does not consider the impact of the unauthorized PRAM instructions. You cannot authorize a transfer instruction if there are other unauthorized events like CAMD, LIQD, and so on under the tranche/drawdown.
You can perform participant transfers between the booking date and value date of drawdowns under ‘Non- Cascade Participation’ type of tranches. In this case, the value date of the transfer instruction is equal to the value date of the forward dated drawdown. In this screen, you can amend the participant details for a borrower drawdown only if the ‘Cascade Participation’ option has not been set for the underlying tranche. If this option is not selected, you cannot choose the contract reference number of such contracts in this screen, and amendment is not possible.
In case of participant amendments involving PIK components, only the Principal amount should be considered for transfer and the calculated PIK margin should be apportioned among the participants based on the resultant ratio. If you amend the participant details for a borrower tranche that uses a product for which the ‘Cascade Participation’ option has been selected, the changes are applied to all active drawdowns under the tranche. The ‘Cascade Participation’ option is available as part of additional preferences for a borrower product.
In case Sighting Funds is applicable for the contract, then the system does not allow transfer between investors who have pending funding for any of the underlying drawdowns. In addition, the system does not allow participant transfer beyond the latest actual receipt date for any of the underlying drawdowns for the investors involved in the transfer. However, future dated Participant Transfer is allowed on sighting funds enabled tranches only if ‘Part Transfer for FD VAMB/INIT on SF DD’ check box is selected in the ‘Loans Parameters’ screen, and the existing participants in that tranche involved in the participant transfer must be funded till the application date.
For details on participant transfer for sighting funds enabled tranches, refer section ‘Participation Transfer for Sighting Funds’ in this User Manual.
You can differentiate primary transfer and secondary transfer for a participant transfer by selecting the option provided here. In case of Primary Transfer, Transfer fee screen gets disabled in the Participant Ratio Amendment screen and in the Draft Transfer. Transfer Fee Billing screen gets incorporated in the Draft Transfer, however the fee billings or ledger entries will be processed only upon the confirmation of Draft Transfer.
The ledger entries and the corresponding Payment messages are applicable only for the Primary transfers if it is selected for the applicability of ledger entries and the payment messages.
The system triggers the ‘PRAM’ event to propagate the change.
Oracle FLEXCUBE allows you to change the participation ratio at tranche/DD level beyond the liquidation of schedules when there is transfer of shares between participants. If you do any changes to back valued Participant Ratio beyond the last liquidation/schedule date, it results in the change of the scheduled amounts for the affected participants. You need to track the Payables and Receivables for the difference between the old and new amounts for those participants.
Note
Ledger entries posting as part of PRAM/PAMI events is applicable only for Pro-Rata Tranches.
You can use the ‘Participant Transfer Details’ screen for the following purposes:
- To transfer assets from an existing participant to another
- To add new participants within the Tranche/Drawdown contract
Addition of new participant is allowed from a facility and is available for the tranches and drawdowns processed under it. When you invoke the screen, the following contract details are available:
- Contract Reference Number
- User Reference Number
- Ticket Id (Only if the VAMI is initiated from the trading activity)
- Value Date
- Contract Reference Number and User Reference Number of the corresponding Facility and Tranche contracts
- Branch
- Department Code
- Borrower Code and Borrower Name
- Drawdown No (applicable if the contract is a drawdown)
When you perform a back value participant transfer and when tranches for which ‘Cascade Participation’ is selected, the following happens:
- You can move the changed participation to all the drawdowns under the tranche
- You can handle the receivable/payable through receivable/payable screen if there is any change in the past fee/interest/principal schedules of the Tranche/ Drawdown due to Back Valued Participants Ratio Amendment. You can track receivable/payable with PRAM. You will be able to settle the normal payment cycle when there are any changes made to the unpaid (Overdue) schedules.
When you perform a back value participant transfer and when tranche contracts for which ‘Cascade Participation’ is not selected following happens:
- You can manually move the changed participation to all the drawdowns under the tranche
- For the tranches without the cascade participation, the Oracle FLEXCUBE
will not allow the Back valued Participants Ratio Amendment on or beyond
any of the conditions mentioned below:
- Latest Non-Prorata payment date
- Last schedule/liquidation date of bidding contract
You can perform future dated participant transfers for pro-rata tranches. You can specify a future date as the value date for the transfer.
The following table lists out the events associated with future dated participant transfer.
Event |
Description |
PAMB |
Future dated PRAM instruction booking |
PAMI |
Future dated PRAM instruction Initiation (will happen on value date) |
PAMA |
Modification of future dated PRAM instruction |
PAMC |
cancellation of future dated PRAM instruction |
If any back/current dated activity is performed on a tranche and underlying drawdowns before the value date of the future dated Participant Transfer instruction, the system rebuilds the asset ratio for the future dated transfer.
The following events result in a change in the asset ratio of FD PRAM:
- Current/back/forward dated (value date less than the value date of FD PRAM) tranche amendment (VAMI) for principal increase or decrease
- Current/back/forward dated (value date less than the value date of FD PRAM) repayments/prepayments (LIQD) at drawdown contracts under a non-revolving tranche
- Current/back value dated participant transfers (PRAM) at the tranche contract
- Current/Back/Forward dated (value date less than the value date of FD PRAM) partial renewals (ROLL) under a non-revolving tranche
The following events are impacted by future dated Participant Transfers:
- Forward dated tranche amendment for principal increase or decrease, where the value date is greater than FD PRAM value date
- Forward dated renewals under a non-revolving tranche, where the value date is greater than FD PRAM value date
- Forward dated prepayments/repayments under a non-revolving tranche, where the value date is greater than FD PRAM value date
If the future dated Participant Transfer instruction is unauthorized you are allowed to perform activities like LIQD, VAMI, and PRAM. If an unauthorized FDPRAM exists along with other unauthorized current/back dated PRAM instructions, authorizationis allowed for the earliest instruction based on the value date.
Note
- Only one active, unprocessed FD PRAM instruction can exist for a contract at a time, but there can be more than one current dated or back dated PRAMs co-existing with the FDPRAM.
- If a P+I rollover instruction is present, you cannot capture future dated Participant Transfer instructions.
- Interest capitalization is not allowed if an unprocessed FD PRAM instruction exists (‘Lender of Actuals’ method of interest distribution)
- When any current/back/forward dated activity is performed after capturing the FD PRAM instructions, tranche balances are checked to ensure that FD PRAM does not result in negative transfer.
- Participant transfer can be done between participants only if they have the same margin rates. If they have different margin rates, you will have to amend the margin rates to make them the same for the affected participants as on the PRAM effective date. Then you can initiate the transfer.
6.13 Processing Sighting Fund Rollover/Reprice
Future dated participant transfer is allowed on sighting funds enabled tranche when any of the following future dated events exist for Drawdowns under the tranche:
- Uninitiated drawdown with value date in future - BOOK
- Future dated principal increase – VAMB
- Rollover Child Processing
- Split rollover
- Future dated drawdown (BOOK) created as part of Future dated Split Rollover Instructions
- Future dated Principal Increase (VAMB) on Parent contract for Split Rollover with principal increase
- Consolidated rollover
- Future dated drawdown (BOOK) created as part of Consolidated Rollover Instruction
- Future dated Principal Increase (VAMB) on Driver contract of Consolidated Rollover with principal increase
- Consol + Split rollover
- Future dated drawdown (BOOK) created as part of Future dated Consol + Split Rollover Instructions
- Future dated Principal Increase (VAMB) on Driver contract during Consolidated + Split Rollover with principal increase
- Reprice processing
- Partial Split Processing
- Future dated drawdown (BOOK) created as part of Future dated Split Reprice Instructions
- Future dated Principal Increase (VAMB) on Parent contract for Split Reprice with principal increase
- Merge Processing
- Future dated Principal Increase (MRGB) on parent contract
6.13.1 Participant Transfer for Sighting Funds
In the ‘Payment Processing Browser’ screen, the following details are updated for participant transfer with existing participants during participant transfer authorization based on the latest ratio for future-dated events:
- Pro-rata share amount of participants in Event-wise Fronting Details tab
- Unfunded amount in Investor-wise Funding Details tab
For participant transfer with new participants, system adds the new participants to the existing list of participants in the ‘Payment Processing Browser’ screen. The fronting value is defaulted as follows:
- Fronting – If the investor fronting captured in the Borrower Details sub-screen is ‘Fronting All’ and the funding status is ‘Fronted’.
- No Fronting – If the investor fronting captured in the Borrower Details sub-screen is not ‘Fronting All’ and the funding status is ‘Unfunded’.
For more details, refer section ‘Processing the Release of Payment Messages’ in this User Manual.
6.13.2 Transferring assets between existing participants
To transfer assets from one participant to another, you have to select the reference number of the contract for which you want to initiate the asset transfer amongst the participants.
- Enter the Contract Reference Number. You can either enter or select from the option list.
- Click ‘Default’ button.The system defaults the contract details.
- Click ‘Transfer Details’ tab
You can either click ‘Add Row or ‘Delete Row’ to add or delete participants. The ‘Participant Selection’ screen is displayed.
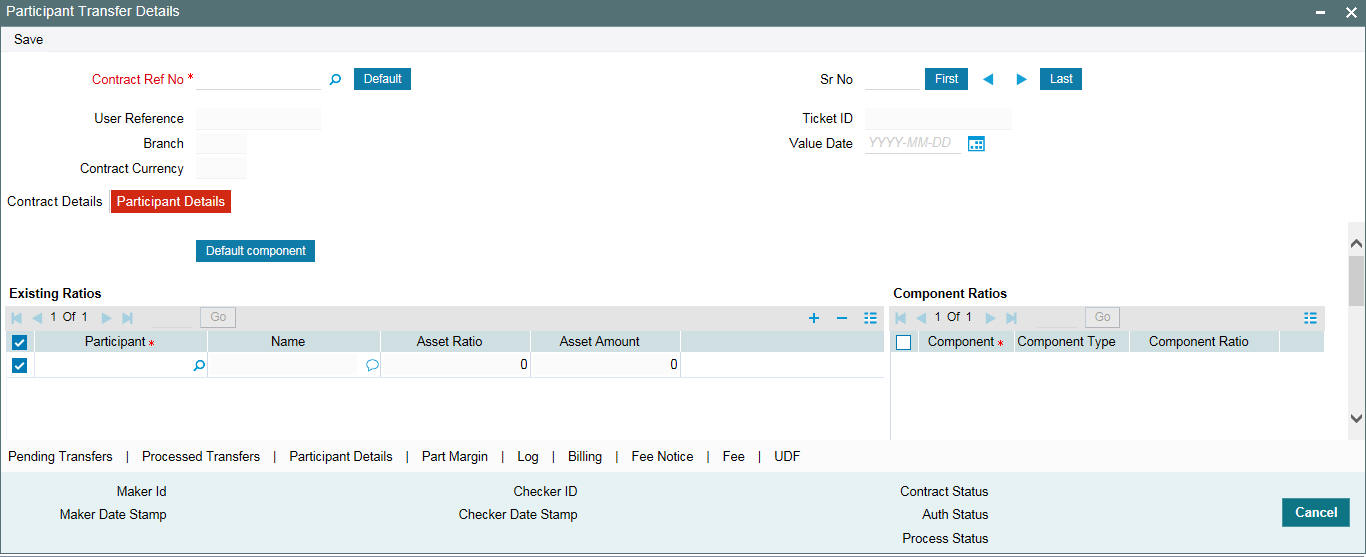
In this screen, you can view the existing participants of the contract.
The ‘Participant Transfer Details’ screen displays the following details:
- Full name of the Participants involved in the transfer
- Asset Sharing Ratio and Current Asset Amount for each participant
- Fee, Charge and Interest (along with the respective components) for each participant, if applicable
- The SSI Mnemonics for each participant
- System displays the entity details of all the participants new or existing for checker’s verification.
You have the option to capture a consolidated type of transfer instruction or a detailed instruction for each participant. By default, the system takes you to the ‘Consolidated’ tab of the ‘Participant Transfer Details’ screen.
The system ensures the following when you capture the transfer instructions:
- You select a participant as a transferor only once
- You can select a participant as a transferee multiple times but under different transferors
- You can select a participant as a transferor as well as a transferee for a different transferor
- The transfer ratio is applied on the eligibility amount of the transferor as on the value date of the transfer to arrive at the transfer amount. The impact of current transfer instruction will not be considered.
- Only one one-one relationship exists between a transferor and transferee. For instance, if Participant 1 is the transferor and Participant 2 is the transferee, you cannot have a combination where Participant 2 is the transferor and Participant 1 is the transferee.
6.13.2.1 Capturing Consolidated Transfer Instructions
Select the name of the participants between whom you want to asset transfer in the ‘Consolidated’ tab of the ‘Participant Transfer Details’ screen. For a given value date, you can capture the net amount transferred to and from each participant.
For the participant who is the transferor, specify the amount with a negative sign (to indicate that the transfer is ‘From’ the participant).
Note
The sum of the transfer amount across all participants should be zero.
While maintaining the consolidated transfer instruction, you cannot visit the ‘Detailed’ section of the screen. The system displays the following error message:
Transfer Instruction Type is consolidated. Cannot enter detailed transfer instructions.
Click ‘Save’ to save the transfer details.
6.13.2.2 Capturing Detailed Transfer Instructions
To capture individual participant transfer details, check the ‘Detailed ’ section.
Click Participant Details tab and check the Detailed section
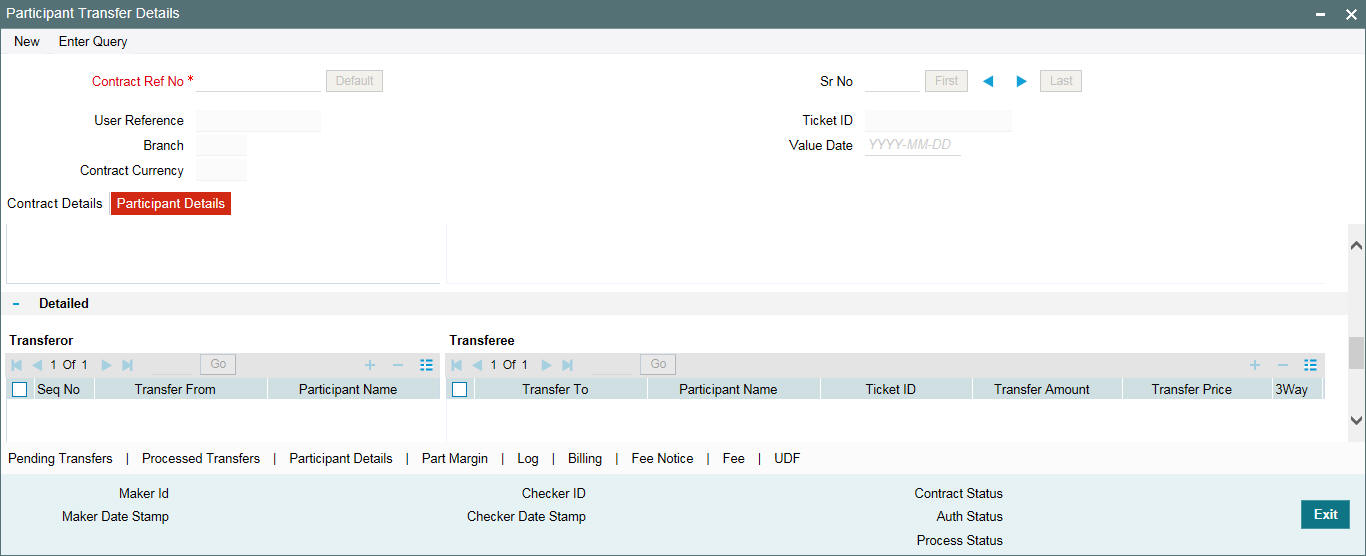
To transfer assets between participants, you have to select the participants from the ‘Participant Selection’ screen and then specify the following for each:
Transferor/Transfer From
You have to select the participant from whom the asset should be transferred. Upon selection of the participant, the name is displayed in the adjacent text box. The system also assigns a sequence number ‘1’ to the first transferor and this number automatically increments by 1 for every subsequent addition of a transferor.
Transferee/Transfer To
You have to select the participant who is receiving the transfer amount. Click ‘Add Row’ button to enable the selection of a transferee. Select a participant from this list.
You may delete a participant(s) if you do you want to include it as a transferee(s). To delete, click ‘Delete Row’ button. However, atleast one transferee is mandatory for a transferor.
Transfer Amount
If you specify the transfer amount, the system computes and display the transfer ratio.
Send Message
Select this check box to indicate if the fax messages have been generated for this participant with the details of the transfer.
For consolidated type billing instruction, you have to define the transfere fee amount against each participant. Transfer Fee amount defined at the Tranche Level is applicable only for the Detailed Transfer Instruction type and not for the Consolidated Transfer Instruction type.
Accounting Entries and messages for the Transfer Fee Billing goes with the Participant Tranche contract Reference number. Accounting Entries and messages for the ledger Entries goes with the Participant Drawdown contract Reference number.
Payment message generation at the tranche level for Transfer fee Billing goes with the settlement days defined for the Transfer fee Settlement currency.
Note
- At the tranche level, the system considers the available amount as on that day to validate the transfer amount for tranches of ‘Non Cascade Participation’ type. In the case of tranches of ‘Cascade Participation’ type, system considers the available amount + outstanding amount for validating the transfer amount.
- At the drawdown level, the system considers the outstanding amount for validating the transfer amount.
Click ‘Add Row’ button to select the next transferor from the option list provided.
After specifying the changes, click ‘Save’ button to confirm the transfer details. The system arrives at the net of the transferor/transferee amount for each participant and you can view it in the ‘Consolidated’ tab of the screen.
On save of Participant Transfer of a contract, if funding is pending (Fund sighted is No) for any participants involved in transfer, the system provides an override message as shown below.
‘Funding from Participant(s) is pending. Do you want to continue?’
The following details the updated:
- Asset ratio for the participants
- Outstanding amount for the participants
- New asset amount for the transferor
6.13.2.3 Capturing Transfer Fee Details
You, as the lead agency, have the option to collect transfer fee for the asset transfer between participants. The fee can be charged to both the transferor and the transferee.
You can collect fee from participants only if fee components are associated with the participant product involved in the contract. In addition, the fee components should be defined with the following attributes:
- Fee Collection Mode: Advance
- Stop Association: Unchecked
For details on defining product level fee components, refer the heading ‘Specifying fee components with the product’ in the ‘Defining Products for Loan Syndication’ chapter of this User Manual.
You can capture the fee details in the ‘Transfer Fee Details’ screen. Click ‘Fee’ tab to invoke this screen.
![]()
You can capture the following transfer fee details in this screen:
Component
The applicable fee components defined for the participant product is available in the option list. You can select one of them to collect the transfer fee. After you select the component, the following details are displayed:
- Participants involved in the transfer (both code and name)
- Fee component associated with each component
- Component Status – The first time the status is ‘Active’. May change to ‘Reversed’ or ‘Liquidated’, as the case may be.
Fee Amount
Specify the amount to be collected as fee. The fee is expressed in the contract currency. This is collected as one time fee and hence requires no schedule definition.
Click ‘Ok’ button to save and exit the screen.
You can use the navigation buttons - in the screen to view the PRAM instructions under a tranche/drawdown.
There is an accounting entry set up at the Participant Drawdown Product for PAMI/PRAM Event to facilitate the ledger entries in case of Primary transfers for the Participant transfer amount captured at the Tranche contract level.
Transferee side accounting entries for PRAM/PAMI Event that would be passed
DR/CR |
Accounting role |
Amount tag |
DR |
Customer |
Principal_INCR |
CR |
Syndication pool |
Principal_INCR |
Transferor side accounting entries for PRAM/PAMI Event that would be passed
DR/CR |
Accounting role |
Amount tag |
CR |
Customer |
Principal_DECR |
DR |
Syndication pool |
Principal_DECR |
Note
Ledger entries at the Drawdown level get posted only for the Primary Syndication transfers and not for the Secondary Transfers.
6.13.2.4 Operations Allowed on Tranches/Drawdowns with Unauthorized Prams
You can perform the following operations on a tranche/drawdown even if there are multiple unauthorized PRAMs under it:
- PRAM (Participant Ratio Amendment)
- VAMI (Value Dated Amendment Initiation)
- LIQD (Liquidation)
- CAMD (Contract Amendment)
- Initiation of new drawdowns
Saving a tranche/drawdown with multiple PRAMs
The system maintains a sequence in which the transactions (PRAMs) are booked.
Authorizing multiple PRAMs under a tranche/drawdown
Oracle FLEXCUBE authorizes a transaction only if the earlier PRAMs are authorized.
During authorization of the Participant Ratio Amendment, Oracle FLEXCUBE revalidates the tranche availability and if the same is not sufficient to process the transfer, the authorization fails. The system displays an error message to indicate the same.
The PRAM event is triggered only upon successful authorization of the transaction.
Note
- After you authorize the amendment/transfer, the system amends the corresponding facility, tranche or drawdown and it also applies the ratio changes to the relevant participant. The ‘PRAM’ event is triggered for the contract for which you have amended the participant details. For modifications to existing participants, the relevant participant contract is also amended. For new participants, the relevant participant contract is created.
- During authorization, the system throws the following message. In order to authorize the assignment activity, you have to authorize the overrides in the ‘Details of overrides requiring dual authorization’.
‘Contract Authorization possible only after authorizing the overrides’
While authorizing the Participant Transfer an override message is thrown if the flag indicating the Transfer is Participant Transfer.
Do you want to post Accounting entry?
If select yes, a payment to the Transferor’s Standard Settlement appears on the Forward Processor for the full amount of the Transfer. If No is selected payment ledger entry is not posted. The payment message is sent to Forward processing broswser, if the liquidation mode is Semi Auto.
6.13.2.5 Viewing the Participant Details After the Transfer
You can view the new asset sharing ratio and new income sharing ratio for the participants involved in the contract in the ‘Participant Ratio Details’ screen. Click the ‘Participation Details’ tab from Participant Transfer Details screen (LBDPTFR).
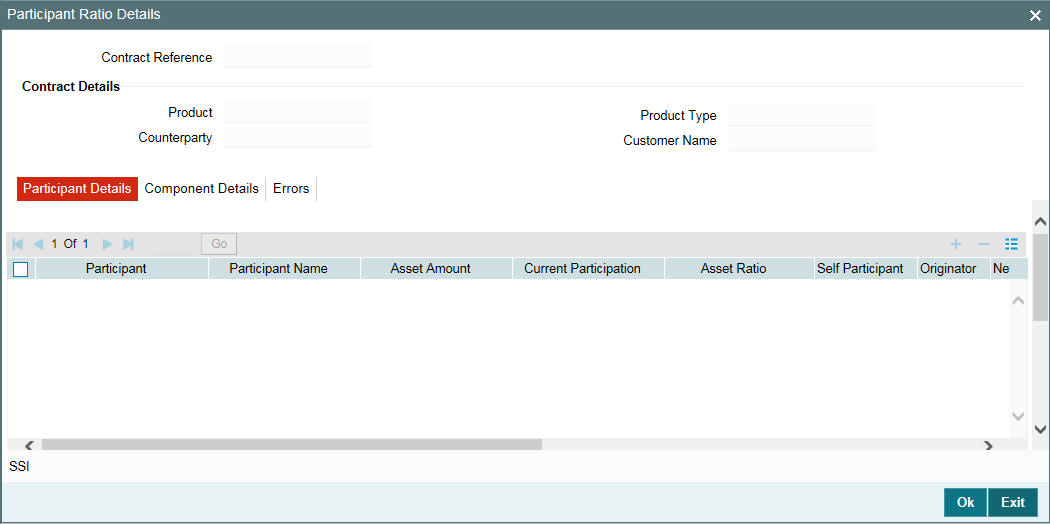
Payment message generation at the drawdown level for the Ledger entries goes with the Settlement days defined for the respective drawdown currencies. You can view the unique transfer referernce number in the ‘Participant Transfer Details’ screen which is preceded with the Branch code, Product code, and PTFR sequence number.
Note
- Any change in the Asset Share Ratio (ASR) or Income Share Ratio (ISR) at the tranche level as a result of asset transfer will be applied to the new drawdowns entered under the tranche. Similarly, any change to ASR or ISR at the drawdown level will be applied to the subsequent repayment done after the transfer.
- You can view the position identifier description in case the participant is self participant.
6.13.2.6 Adding a New Participant
To add a new participant
- Enter the Contract Reference Number. You can either enter or select from the option list.
- Click ‘Default’ button.The system defaults the contract details.
- Click ‘Transfer Details’ tab
- Click the
‘Add Row’ from the ‘Existing Ratios’ section and click ‘Default Components’.
You can define the following:
- Netting Preference
- SSI Mnemonic which the system uses to obtain the settlement details for the participant.
- Entities for the participant, to whom notices and advices related to the contract, will be sent. A primary entity must be designated.
The ‘Participant Transfer Details’ screen looks as shown below:
![]()
After capturing the necessary details, save and authorize the record. You can then select the tranche processed under the facility (to which new participants have been added) and transfer the assets appropriately between the existing and new participants.
6.13.2.7 Viewing Details of Processed Transfers
You can view all ‘Detailed’ authorized transfer instructions in the ‘Processed Transfer Details’ screen. To invoke this screen, click ‘Processed Transfer’ tab.
![]()
In this screen, you can view the following details of a transfer transaction:
- The value date of the transfer
- The customer code associated with the transferor
- The name of the transferor
- The customer code associated with the transferee
- The name of the transferee
- The amount transferred
- The transfer ratio
You can also view the net amount transferred from/to each participant (for ‘Consolidated’ transfer instructions) in the ‘Processed Transfers - Consolidated’ screen. To invoke this screen, click ‘Console Transfer History’ button.
The ‘Transfer Amount’ with a negative sign indicates that the transfer is ‘From’ the participant. If the transfer is ‘To’ the participant, the amount will be shown with a positive sign.
6.13.2.8 Viewing Details of Pending Transfers
You also have the facility to view details of all pending transfer instructions in the ‘Pending Transfer’ screen. To invoke this screen, you have to click ‘Pending Transfer’ tab in the ‘Participant Transfer Details’ screen.
![]()
For each pending transfer, you can also view the net amount transferred from/to each participant in the ‘Pending Transfers - Consolidated’ screen. To invoke this screen, click ‘Console Transfer History’ button.
![]()
6.13.3 Viewing Participant Margin Details
You can view margin details maintained for participants of the drawdown contract, using the ‘Participant Margin Maintenance’ screen. To view this screen, you have to click the ’Part Margin’ tab.
All details captured in the ‘Margin Maintenance’ screen are defaulted here.
For a given effective date and currency, you can view the margin maintained for the borrowers and participants.
To add a new participant, click ‘Add Row’ and click ‘Default Components’.
The system displays all participants linked to the tranche. You can specify the margin rate applicable for the required participants from the required effective date.
Note that you can maintain margin rates for participants only for margin components of the main interest components of the Tranche’s Drawdown products.
Place your cursor on a participant and click the  button to delete that participant.
Click ‘Ok’ button to save
the details and exit the screen.
The system will ensure that the total margin rate of all the participants is the same as the borrower margin rate for the effective date for which margin rate is captured/ amended. It will also check the rates for each participant, margin component, currency, effective date and amount slab combination. You should have computed the required margin rates prior to capturing or amending the margin rate using this screen. If the validation for margin rates fails, the system will display an error message and will abort the transaction. You will have to correct the margin rates and then proceed.
If base rate is negative or borrower margin rate is negative then system will not allow user to maintain participant margin. If user has captured positive margin rate for borrower and participant then system will not allow user to amend the margin rate from positive to negative.
The system displays the below error:
Borrower margin is lesser than 0, hence participant margin cannot be captured.
6.13.4 Generating Third Party Faxes
Oracle FLEXCUBE enables you to send faxes to all the participants on Participant transfer (Assignment) Processing with the following details:
- Transfer Date
- Trade Commitment Amount
- Original Balance
- Ending Balance
After the Participant Transfer is authorized, an override message gets generated for regeneration of Pending Advices. Regeneration of pending advices/notices is for the existing participants with event based notices, event based rate fixing advices and event based payment notices. You can view the list of existing affected participants and advices for the existing affected participants with Pending Status in the ‘Participant Transfer Advice Regeneration’ screen.
You can invoke the ‘Participant Transfer Advice Regeneration’ screen by typing ‘LBDPTADV’ in the field at the top right corner of the Application tool bar and clicking the adjoining arrow button.
You can view the following details here:
- Investor details
- Advices details
Generate
The generate box is selected for all the investors and the events for regeneration. However, you can unselect if want it otherwise.
After the generation of selective advices, the status gets updated to ‘Regenerated’ from pending.
Note
Regeneration of Free format is possible only when billing date is in future. The contracts which got the cascade participation are applicable for regeneration. Advices are also regenerated for new participants added as part of participant transfer. The system identifies the events for which advices have to be regenerated based on the advice events whose value dates are greater than the system date. Event value date should be greater than or equal to assignment date for the events other than NOTC and for NOTC it should be greater than the assignment date.
6.14 Remitting Withheld Tax
Oracle FLEXCUBE enables you to remit the withheld tax amount that was not remitted for a period, to the Central Bank. The tax administrators will review the tax withholdings of all participants at regular intervals. They will select the tax withholdings that need to be sent to the internal Treasury Tax Loan (TTL).
Tax is remitted to the Central Bank using the ‘Tax Remittance’ screen. You can invoke the ‘Tax Remittance’ screen by typing ‘LBDTARMT’ in the field at the top right corner of the Application tool bar and clicking the adjoining arrow button.
Enter the following details:
Remittance Ref No
For any remittance, you need to click ’New’ from menu. System generates a unique 16 digit reference number and populate the same here. For example, the format of the reference number will be as follows - CT4ZTRM043660065 where;
- CT4 is the Branch Code
- ZTRM – fixed format for tax liquidation
- 04 – Year
- 366 – Julian Date
- 0065 – Sequence No.
You can query the remittance made in the past using the remittance reference number.
Tax Payable GL
The tax remitted amount will be credited into this GL account. The option list will display all internal GLs of the branch.
Start Date
Select the date from when you want to remit the tax withholdings. The drop-down list will display all the withholding tax have been booked from this date.
End Date
Select the date till when you want to remit the tax withholdings. The drop-down list displays all the withholding tax have been booked till this date.
Transaction Code
The transaction code you specify here will be used to pass liquidation entries. The option list displays all transaction codes maintained in the ‘Transaction Code Maintenance’ screen.
For more details on transaction codes, refer the chapter ‘Transaction Code Maintenance’ in the Core Services (CS) User Manual.
MIS Group
Select the MIS Group from the list of values. The accounting entries are posted with MIS details associated with the MIS group.
Currency
This is the currency in which the tax that has been withheld needs to be remitted.
Note
System does not post accounting entries or fire events after remitting tax for any LS contract.
Once you enter the above details, click the ‘Populate’ button to view details under ‘Contracts for Remittance’. Here, system will display all the withheld tax entries for the specified period in the currency you have selected.
If you change the Start Date, End Date or Currency, you will need
to click the ‘Populate’ button
to update the details displayed under ‘Contracts for Remittance’.
Contract Ref No.
The reference number of the facility, tranche and drawdown contracts against which the tax was withheld is displayed here.
System displays the tax currency and the total tax amount that was withheld against the participants of the contract. Click ‘Events’ to view the ‘Event Log Details’ screen.
For more details on the ‘Event Log Details’ screen, refer the section titled ‘Viewing events for the facility’ in the ‘Loan Syndication Contracts’ chapter of this User Manual.
You can execute the following operations in the ‘Tax Remittance’ screen:
- Create
- Authorize
- Delete
- Query
Note
- You cannot reverse a remittance
- If the total amount for the specified period and currency is negative, system will not allow tax remittance for that transaction.
6.15 Refunding Withheld Tax
Oracle FLEXCUBE enables you to refund the withheld tax amount when there is fluctuation in the interest rate, or change in the tax status. The tax administrators review the previous tax withholdings of all participants and select those withholdings that need to be refunded. System will calculate and refund the total amount to the participants through wire transfer.
Tax is refunded to the participants using the ‘Tax Refund’ screen. You can invoke the ‘Tax Refund’ screen by typing ‘LBDTXREF’ in the field at the top right corner of the Application tool bar and clicking the adjoining arrow button.
In the above screen, system displays all the withheld tax components. The following details will be displayed:
Borrower Ref No.
Specify the reference number of the borrower contract for which you want to refund the tax.
Participant
From the option list select the participant for whom you want to refund the tax.
Participant Ref No.
System displays the reference number of the participant.
Tax Rule
System displays the tax rule associated with the contract.
Component
System displays the component against which the tax rule is associated.
Ccy
This is the currency in which the Tax that has been withheld which needs to be remitted.
Refund Amount
This is the sum of all the Refund Amount specified under ‘Schedule Details’.
System will display the schedule details of the components:
Tax Rule
This is defaulted from the Tax Rule under ‘Component Details’.
Tax Due Date
System displays the due date of the component with which the tax rule is associated.
Tax Collection Date
This is the date on which the component was liquidated.
Amount
This is the maximum tax amount that can be considered for the refund for a Tax rule, Due Date and collection date combinations for the given participant of an LS contract. System calculates this amount considering the impact of the past refunds and the remittances.
Refund Amount
You can specify the amount you wish to refund to the participant. You can choose to refund the tax withholdings in partial or full. The amount in the Amount field is defaulted here. You can, however, change the amount. If you specify zero, it indicates that you do not want to refund any amount.
Click ‘Settlements’ tab in the ‘Tax Refund’ screen to invoke the ‘Settlement ’ screen. This screen displays the customer’s account where the refund amount is credited.
Click ‘Events’ tab to invoke the ‘Event ’ screen. This screen displays the accounting entries posted with TXRF (Tax Refund) and TXRV (Reversal of refund) events.
Click ‘Media Priority’
button to invoke the ‘Media for Message Generation’ screen.
You can specify the media for the message generation in this screen.
This buttonis enabled only if the ‘FpML Type’ option is unchecked
at the contract level and the ‘Media Priority’ option is
selected at the product level.
If this button is enabled, then the system displays an override message saying to view the ‘Media for Message Generation’ screen. If not, the system handoffs the message as per the details maintained in the ‘Customer Entity Maintenance’ screen.
For more information on ‘Settlement Message Details’ screen, refer the Settlements User Manual.
For more details on the ‘Event Log Details’ screen, refer the section titled ‘Viewing events for the facility’ in the ‘Loan Syndication Contracts’ chapter of this User Manual.
For more information on the ‘Media for Message Generation’ screen, refer the section ‘Specifying Media for Message Generation’ of this chapter.
You can execute the following operations in the ‘Tax Refund’ screen:
- Create
- Reverse
- Authorize
- Delete
Note
- You can refund the amount even after a contract is liquidated
- You can refund the amount only for components that have not been remitted.
- You can reverse the refund, if required
- System will not refund the amount if the underlying contract for which refund is being made is not authorized
- You cannot execute a transaction if the refund is unauthorized
6.15.0.1 Forward Processing for Investor Tax Refund Payments
The payments generated or handed off to the investors as tax refunds can be sent for Sanction Check avoiding maker/checker process. You can view the payments and their sanction screening ACK code.
If the option, ‘Forward Processing Required’ in Loans Parameter screen is selected, the system populates the payments details to the forward processing browser, and the full message is sent to Sanction Check system immediately.
If the status from sanction check system is ‘-1’ (Complete) and the INIT/Liquidation mode is selected as ‘Auto’, the tax refund payment from Forward Processing browser is released. And if the INIT/Liquidation mode selected at the contract level is ‘Semi-Auto’, then you have to manually confirm the release of payment message.
Note
Sanction check functionality is applicable only for the new payment messages.
6.15.0.2 Viewing separate fee liquidation entries in Forward Processing Browser
The system supports fee payment messages in modules LB, OL and SLT where the messages are released from ‘Forward Processing browser’. Firstly, the system populates the ADHOC Fee and derived fee payments into Forward Processing browser if the ‘forward processing required’ flag is checked and if fee liquidation mode at the product level is set to the following criteria’s:
- ‘Semi-Auto’ / ‘Auto’ / ‘Manual’ for ADHOC Fee
- ‘Semi-Auto’ / ‘Auto’ for derived Fee
You will be able to release the message if the liquidation mode is ‘Semi-Auto’ and ‘Auto’ for derived Fee in LB module. For Adhoc Fee component in LB and OL modules, the system will release the messages based on the sanction check without user intervention
Therefore, in a contract if more than one fee liquidation is performed, on the same value date and for the same currency, ‘Forward processing browser’ contains entries even when multiple fee liquidation are performed for the same reference, Counterparty, value date and currency.
6.16 Processing Back Valued Interest and Fee for Payables and Receivables
Oracle FLEXCUBE recalculates the interest/fee for the paid/liquidated schedule and tracks the payables and receivables for the difference in the interest/fee amounts as a result of:
- At the drawdown level,
- Back value dated interest rate revisions (REVN) beyond the last liquidation/schedule date which results in receivable/payable from the borrower to the participants.
- Back value dated margin (MRFX) changes due to the new back valued drawdowns beyond the last liquidation/schedule date which results in receivable/payable from the borrower to the participants.
- Backdated amendment (VAMI) beyond the last liquidation/schedule date which results in receivable from the borrower and payable to the participants.
- Backdated participant transfer (PRAM) beyond the last liquidation/schedule date which results in receivable/payable among the participants due to the new asset sharing ratio.
- Back valued (before the maturity date of the parent of the rolled over contract) change in the interest rate/spread/margin for a liquidated component of a rolled over contract.
- Change in Interest Rate/Spread (VAMI) prior to the last PRAM date.
Note
The recalculation of interest due to change in interest rate happens across all drawdowns which use the modified interest rate code.
- At the tranche level,
- Backdated Participant Ratio Amendment (PRAM) beyond the last liquidation/schedule date of system calculated fee which results in receivable/payable among the participants due to the new asset sharing ratio.
- Backdated amendment (VAMI) beyond the last liquidation/schedule date of system calculated fee which results in receivable/payable from the borrower to the participants.
Note
- Any difference between the revised schedule amount and the amount already settled for a borrower and the participants due to the above mentioned scenarios for a fully paid schedule only, are tracked by Oracle FLEXCUBE as a receivable/payable amount. Partially settled/unsettled past schedules are tracked through the normal payment cycle.
- The payables and receivables are tracked for each of the associated events that is,. interest rate revision (REVN) and margin rate changes (MRFX).
- Appropriate advices are sent to the participants and the borrower for rate revision, margin revision and participant transfer events giving details for the amount due, the amount received and the receivable or payable amount.
- Whenever a parent drawdown is reversed before the maturity date, all the generated receivables/payables are also be reversed for the same.
- The payable/receivable tracking is done only for normal/bearing interest type of contracts
- The payable/receivable tracking is not applicable for competitive bidding contracts.
- The parent contract life cycle remains unaffected by the receivable and payable tracking. This means that the parent contract can move to the liquidated status on its maturity date, subject to all schedule payments, even though receivables/payables might be outstanding for the same.
- If the payable/receivable settlement is done after maturity date of the liquidated parent, the system fires the payable/receivable event (PRLQ) at the parent contract even after liquidation.
- If a parent contract is reversed before maturity, the system auto reverses all receivables/payables also.
- If you have defined the interest distribution type for the Tranche as ‘Lender of Record’’, the back valued changes like Interest Rate Revision (REVN), Margin Rate Revision (MRFX) and Participant Ratio Amendment (PRAM), that result in payables and receivables, will not be allowed beyond the last liquidated schedule. The system propagates the income (Interest/Fee) amongst the participants based on the latest ratio available on the value date of liquidation.
To recall, it is through the ‘Floating Rate Code Definition’ screen that you maintain the interest rates, which are updated daily as and when they change.
Refer to the chapter titled ‘Maintaining Floating Rates’ in the Core Services (CS) User Manual for relevant information.
6.16.1 Viewing the Receivables/Payables for a Contract
In Oracle FLEXCUBE, you have the ‘Payment–Receivable Details’ screen through which you can view the receivable/payable amounts for a drawdown. You can invoke the ‘Payable-Receivable Details’ screen by typing ‘LBDPRDET’ in the field at the top right corner of the Application tool bar and clicking the adjoining arrow button.
For a drawdown/tranche, this screen displays the receivable/payable amounts for each component and the associated event. Based on the last event which has occurred in the life cycle of the contract, the corresponding event sequence number gets defaulted in the ‘Event Seq No’ field. Once the payable and the receivable amounts are settled across all the components for a particular contract, the system updates the ‘Settled Status’ field to ‘Settled’.
All the components for a contract are displayed in the ‘Component Details’ section.
For each component of the drawdown/tranche, the system displays the following details:
- The party name
- The party type (borrower or participant)
- The applicable currency
- The amount due
- The amount settled (if settlement has not happened, zero is displayed here)
- The tax amount: This amount gets calculated upfront if tax is applicable for each of the participants (at the tranche/drawdown level).
- The settlement status: The status can be any one of the following:
- Settled
- Unsettled
- Partial
- Whether the amount is a payable or a receivable
- Whether tax is to be applied or not. This gets updated on the basis of your selection at the time of payment (in the ‘Payable-Receivable Payment’ screen).
Note
If the tax rules are tagged to the components and if the tax is applicable, the system also passes the necessary accounting entries for tax.
You can use the navigation buttons - provided in the toolbar to scroll through the tranches and drawdowns.
6.16.2 Processing Settlement of Receivables/Payables for a Contract
You can process settlement of a payable/receivable amount in the ‘Payable – Receivable Payment’ screen. Click the ‘Payment’ button to access this screen. This screen shows the amounts payable and receivable for the contract chosen in the ‘Payable – Receivable Details’ screen.
The following details are displayed in this screen:
- The Reference Number of the contract
- The event code and the date of occurrence of the event
- The event sequence number
- The date the payment was done and the payment status
Note
You also have the provision to invoke the ‘Payable-Receivable Payment’ screen directly from the Application Browser. To do so, choose LS Operations and double-click on the Payment option under the Payable Receivable sub-menu. In this case, you need to select the tranche/drawdown from the option list provided. In addition, you need to select the relevant event from the ‘Event Code’ option list provided. The corresponding event sequence number gets defaulted in the ‘Event Seq No’ field here.
To view the components due for the selected contract, click “Populate’ button. The following details are displayed:
- The Payment Status for the due component (s)
- The components due
- The borrower due details
- The participant due details
Liqd Reqd
By default, this option is checked for all the participants. However, you can choose to liquidate the payable/receivable amount for selective participants only. To do so, you need to check this option against the appropriate participant (s) and uncheck the same for the others.
Note
The receivables from any party (participant or borrower) should be liquidated in a single instance. For instance, if the amount receivable from a borrower is USD 6000, the same has to be settled entirely including the settlement of individual participant share. Likewise, the amount receivable from participants can be settled individually or with other participants. However, you are not allowed to do a partial liquidation within the individual participant amount.
Apply Tax
Tax is calculated upfront based on whether tax is applicable for the contract. However, at the time of payment, you can check this option to apply tax on the receivable/payable amount. To waive tax, uncheck this option. Your selection here is updated in the ‘Payable-Receivable Details’ screen.
Click button to move between the ‘Component Details’ and ‘Participant Due Details’ sections of the screen.
After capturing the amounts to be settled against the components,
click ‘Save’ to save the payment. Click ‘Exit’ button to exit the screen
and return to the ‘Payable-Receivable Details’ screen. The
‘Amount Settled’ field in this screen is updated accordingly.
Note
You can reverse a payment of a payable/receivable by clicking the ‘Reverse’ from the menu. This option is enabled only if you access the above screen directly from the Application Browser (to do this, you need to choose LS Operations and double click on the Payment option under Receivable Payable.
6.17 Viewing Borrower/Participant Contract Processing Status
You can view the processing status of both borrower and the resultant participant contracts in the ‘JOB PROCESS STATUS’ screen. You can invoke the ‘Participant Exception Log’ screen by typing ‘LBDBPCNT’ in the field at the top right corner of the Application tool bar and clicking the adjoining arrow button.
This screen displays all the borrower side contracts (facility, tranche and drawdowns) and the corresponding participant contracts for each borrower side contract.
The following details are displayed for a borrower contracts:
- Borrower Reference Number
- User Reference Number
- Counterparty Code and Counterparty Name
- Transaction Process Status (Processed or Failed)
The following details are displayed for a participant contract:
- Participant Reference Number
- Counterparty Code and Counterparty Name
- Transaction Process Status (Processed or Failed)
- Error Message, if any
In addition, the ‘Borrower Contract Process Summary’ section of the screen displays the following details:
- Total borrower contracts processed in Oracle FLEXCUBE
- Number of unprocessed contracts
- Number of contract with status ‘Work in Progress’
- Number of contracts that failed
For each borrower contract, the above details are displayed for the corresponding participant contracts, in the ‘Participant Contract Process Summary’ section of the screen. You can double-click on any contract to view the contract details in the respective contract online screen.
Note
The system displays the processed contracts in ‘Green’ while the contracts that fail are displayed in ‘Red’.
6.17.1 Reinitiating the Job Process
You have the option to reinitiate the ‘Background Job’ on an adhoc basis. This option is available only if the ‘Participant Process’ mode is set to ‘Job’. You have to specify this as part of defining parameters for your branch in the ‘Branch Parameters – Detail View’ screen.
For more details on maintaining branch parameters, refer the heading ‘Creating branches and maintaining branch level parameters’ in the ‘Branch Parameters’ chapter of the Core Services (CS) User Manual.
You can also use the reinitiate Background Job to process the failed
contracts after making the necessary corrections. To re-execute the job,
you have to click on the ‘Re-Run’
button in the ‘JOB PROCESS STATUS’ screen. The contracts
may be processed successfully.
You cannot use the reinitiate option if the ‘Participant Process’ mode is set to ‘Online’ for the branch.
6.18 Maintaining Special Penalty Component Waiver Details
You can waive late payment charge schedule(s) for a component using ‘LS Special Penalty Component Waiver’ screen. You can invoke the ‘Special Penalty Waiver’ screen by typing ‘LBDPNWVR’ in the field at the top right corner of the Application tool bar and clicking the adjoining arrow button.
Specify the following details:
Contract Ref No
Specify the reference number of the contract for which the late payment charge schedules should be waived.
System displays the following details based on the specified contract reference number:
- Module Code
- CCY
- Department Code
- Product Code
- Counterparty
- Facility Name
- CUSIP/ISIN
- External CUSIP
- Treasury Source
Penalty Comp
Select the penalty component from the adjoining option list. This list displays all the late payment charge schedules for the contract which are not fully paid of waived.
Due Date
System displays the due date for the penalty component selected. However, you can edit the due date.
System displays the following details based on the selected penalty component:
- Grace Days
- Penalty Calc Date
- Penalty Amount Due
- Penalty Amt Settled
- Basis Amount Due
- Basis Amount Settled
Remarks
Specify a brief description regarding the waiver for late payment charges for a schedule.
Waive
Select this check to indicate that the late payment charge schedule should be waived for a component. You can save the waiver operation only if the ‘Waive’ box is checked for all schedules.
You can waive a partially paid late payment charge schedule. In this case, the unpaid amount is treated as waived and the already paid amount is treated as settled. No further dues are tracked for this schedule.
Before allowing the waiver of each schedule, system checks that all preceding schedules have been paid or waived. If there are any unpaid schedules preceding this schedule, then system displays the following override message:
‘Prior schedules are unpaid for this component. Please pay/waive all such schedules before proceeding’
On waiving a late payment charge, the previously calculated charges are no longer be due.
The accounting entries are posted against the event ‘SPWV’ (Special Penalty Waiver). If multiple schedules are waived as part of the same waiver operation, then system triggers a single ‘SPWV’ event with separate accounting entries for each schedule. The accounting entries are posted for information and tracking purposes only.
6.18.1 Reversing the Waiver of Late Payment Charges
You can reverse the waiver of late payment charges by selecting the original waiver record using the ‘Special Penalty Component Waiver Reversal’ screen. You can invoke this screen by clicking the ‘Reversal’ button in the ‘LS Special Penalty Component Waiver’ screen.
If multiple schedules are waived as part of the original waiver operation, then system allows you to select any or all of such waived schedules for waiver reversal and deselect the ‘Waive’ box. Reversal can be done only if the ‘Waive’ box is unchecked for at least one schedule.
System allows you to undo the waiver operation only if the basis component for the late payment schedule is unpaid/partially paid. If basis component for the late payment charge schedule is fully paid, then you cannot undo the waiver operation.
On waiver reversal, system re-computes late payment charges using values of basis component, grace days and late payment charge fixed rate/flat amount as on the current date. Calculation date is the original schedule due date.
Waiver reversal accounting entries are posted against the event ‘RSPW’ (Reversal of special penalty waiver). If waiver reversal of multiple schedules is performed simultaneously, then system triggers a single RSPW event with separate accounting entries for each schedule. The accounting entries are posted for information and tracking purposes only.
Accrual entries are not passed and late payment charges are booked to P&L only upon liquidation.
Note
At the loan product level, system validates to check that event ‘SPWV’ is mandatorily maintained for a component for which ‘Special Penalty Component’ is checked. System also validates to check that no accounting entries are maintained for the event ‘RSPW’ at the loan product level. System automatically associates the reversal event ‘RSPW’ for such products.
6.19 Viewing the Waiver Details of Special Penalty Components
You can view current status of all unpaid late payment charge components for a contract using ‘LS Special Penalty Component Waiver Summary’ screen. To invoke this screen, select LS Operations in the Application Browser. Thereafter, select Special Penalty Waiver and then click Summary under it.
In this screen, you can view the following details:
- Contract Ref No
- ESN
- Event
- Auth Stat
- Penalty Component
- Penalty Due Date
- Penalty Calc Date
- Penalty Amt Due
- Penalty Amt Settled
- Waive Stat
- Basis Amount Due
- Grace Days
- Basis Amount Settled
- Remarks
6.20 Netting Cash Flows for a Tranche
You can maintain netting preferences for borrowers and participants of a tranche in the ‘Borrower Details’ sub-screen and the ‘Participant Ratio Details’ sub-screen of the ‘LS Tranche Contract Online’ screen.
For a borrower, you can choose one of the following as the netting preference (in the ‘Borrower Details’ sub-screen of the ‘LB Tranche Contract Online’ screen):
- All Components
- None
- Principal Only
Similarly, for a participant, the following options are available for netting (in the ‘Participant Ratio Details’ sub-screen of the ‘LB Tranche Contract Online’ screen):
- All Components
- None
You can view the borrower and participant side contracts for a tranche, for which netting is applicable, in the ‘Loans Syndication Netting Cash Flow Summary’ screen.
Netting takes place only if the following parameters for a cash flow are same:
- Tranche contract
- Customer (Borrower/Participant)
- Value Date
- Currency
6.20.1 Viewing the Contracts for Netting
In this screen, you can specify the following to view:
- The Borrower Tranche Reference Number for which you wan to view the borrower and participant side contracts. The option list displays the borrower tranches for which netting preferences have been set (the option ‘Net Across DD’ is checked).
6.20.2 Netting the Components
To net the components for a contract, select the contract from the summary screen and double-click on it. The ‘Cash Flow Netting Details’ (LBDNETCF) screen is displayed, as shown below:
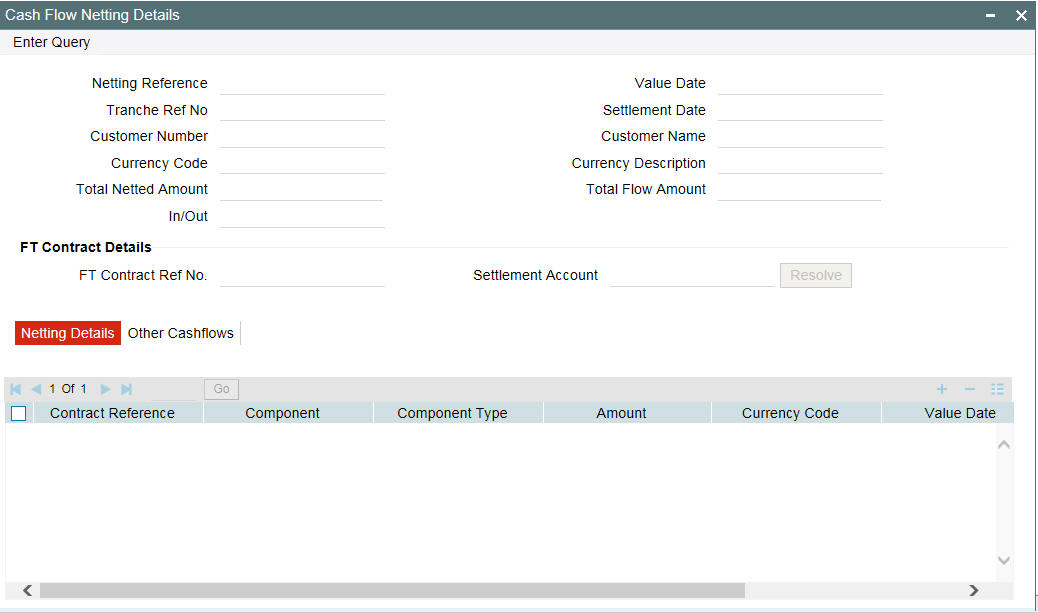
You can view the following details in the ‘Netting Details’ tab of this screen:
- Transaction Reference Number
- Name of the component and the component type
- Amount and currency
- Value Date
- Cash Flow: In or Out
- Netted: If the ‘Netting Preference’ is selected as ‘All Components’ (specified in the ‘Borrower Details’ sub-screen of the ‘LS Tranche Contract Online’ screen), all the components appears in the netting queue. However, you have to confirm the netting manually. If you set the ‘Netting Preference’ to ‘Principal Only’, then only the principal component is automatically confirmed for netting. You can check or uncheck the required contracts.
The ‘Other Cashflows’ tab of the screen displays all contracts till date which need to be netted.
You can check the ‘Netted’ option for these contracts if you want to net them along with the current contracts.
After selecting the contracts for netting (in the ‘Netting Details’
tab of the screen), you have to click the
‘Resolve’ button to continue. If pending cashflows are present
in the ‘Other Cashflows’ tab, system will display a message
to indicate the same. The system will display a message to seek confirmation
to resolve the selected contracts. Select ‘OK’ in the message
window to continue.
If netting is successful, system will update the ‘FT Contract Details’ section of the screen with the following details:
- Reference number of the FT contract that gets created as a result of netting
- Settlement Account used for netting
6.20.2.1 Viewing the Messages
After successfully resolving the netted contracts, you can view the messages in the message details in the ‘Settlement Message Details’ screen.
6.20.2.2 Viewing the Events
You can also view the events triggered for the contracts after netting the contracts. Click the ‘Events’ from LB Tranche Contract Online screen to view the same.
6.21 Free Format Messages for Loan Syndication Contracts
You can enable the system to generate free format messages with respect to loan syndication contracts, by using either of the following options:
- Selecting a template containing pre-defined contract tags for the message
- Specifying free format text, choosing from pre-defined tags defined for the loan syndication module.
You can generate free format for multiple participants or borrowers.
6.21.1 Generating Free Format Messages for Multiple Participants
You can invoke the ‘Free format message’ screen by typing ‘OLDFFMSG’ in the field at the top right corner of the Application tool bar and clicking the adjoining arrow button.
Thereafter, select ‘New’ from the menu. The Free Format Message screen is displayed without any details. Alternatively, you can also select invoke this screen by clicking the ‘PartFFT in the ‘Contract Diary Event’ screen.
When you click on the ‘New’ button, system automatically generates a unique ‘FFMT Reference No’ for the free format message.
6.21.1.1 Specifying Message Details
You have to specify the following in the ‘Message Details’ section of the screen:
Contract Ref No
Select the reference number of the loan syndication contract (facility/tranche/borrower) in respect of which you want to generate free format messages. Upon selection of the contract, system displays the counterparty code and name of the customer involved in the contract. The system also displays the names of participants involved in the contract.
Hold
You have the option to place the free format message on hold. To do this, check this option.
If you have indicated that messages should be generated on-line the free format message is displayed in the ‘Outgoing Message Browser’ once it is saved. You can generate it from the browser. If you indicate that the message should be put on hold, you first have to release the message before you generate it from the ‘Outgoing Message Browser’.
Receiver
You have to select the recipient of the message. The available options are:
- NONE: You may select this option to indicate there are no recipients for the free format message
- ENTITY: If you select this option, the system displays the entities defined for each participant in the ‘Entity Details for Participant’ section of the screen.
- ENTITY TYPE: If you select this option, you can select the entity type to which the message should be sent
Entity Type
If you select the receiver as ‘ENTITY TYPE’, you have to select the type here. The entity types defined for the participants are displayed in the option list. You can select the required type from this list.
The message is sent to only those entities of the selected entity type linked to participant at the facility level.
6.21.1.2 Selecting the Participant(S) for Sending the Message
When you select a syndication contract, the associated participants gets displayed in the ‘Participant Details’ section of the screen. Here, you can select the participant(s) to whom you would like to send the free format message. To indicate you want to send a message to a participant, check ‘Send Message’ against the required participant(s).
By default all the participants are marked for sending the message. However, it is mandatory to capture the message that has to be sent in the ‘Message’ section at the bottom of the screen.
6.21.1.3 Specifying Entity Details
If you specify the ‘Receiver’ as ‘ENTITY’, the entities linked to each participant are displayed in the ‘Entity Details for Participant’ section of the screen. You can indicate the following for the entities:
Media
Indicate the media through which the free format message should be transmitted. The media through which you can channel a free format message depends on the media types that you have maintained for your branch in the ‘Media Maintenance’ screen. You can choose a media code from the option list that is available. For each customer, you can maintain a default media in the ‘Customer Address Maintenance’ screen. The default media is applicable for all the entities under that participant. Hence, you can send the message through different media for each participant simultaneously.
A participant entity for which ‘Send FPML’ option has been selected in ‘Customer Entity Details’ screen, will have the media defaulted as ‘FPML’.
Depending on the media selected, you can capture the message details in the ‘SWIFT’, ‘MAIL’ , ‘TELEX’ and ‘FpML’ tab of the screen.
Primary
By default, one of the entities are designated as the primary entity based on the specification for the participant. You can designate a different entity as the primary entity to receive the message.
Send Message
To instruct the system to send the free format message to the selected primary entity, you have to check the ‘Send Message’ option against the primary entity. However, if the participant of the entity is not marked for sending the message (the ‘Send Message’ option against the participant should be checked), you cannot send a message to the entity.
In this case, system displays the following message:
Since participant is not marked for sending the message, cannot mark entity/entity type for sending the message.
6.21.1.4 Selecting the Type of Free Format Message
You have to indicate the type of free format message that has to be sent to the receiver. The available options are:
- Normal
- Custom
- Pro-Rata
6.21.1.5 Capturing the Free Format Message
You can enter the free format message to be sent to the recipient in the ‘Message’ section of the screen. You have the option of using one of the templates that you have maintained in the ‘Message Format Template Maintenance’ screen. To do this, right-click on the screen. The following two choices appear:
Select the option ‘Template Code’.
You can select the template you would like to use. Upon selection of the template, the message is displayed in the box. You can amend the message that gets defaulted from the template. The code of the selected template is displayed in the ‘Template Code’ field.
Note
Although you are allowed to make changes to the message defaulted form the template, these changes does not affect the template itself. You can make changes to a template through the ‘Message Format Template Maintenance’ screen alone.
6.21.1.6 Capturing Details for FpML Messages
You can capture the details of messages in FpML format in the ‘FpML’ tab. For FpML messages, you need to select the message template in the ‘MAIL’ tab inititally. The FPML template to which the MAIL template is mapped gets automatically updated in the ‘FpML’ tab. This value also gets displayed in ‘FpML Template’ field.
Note
If a participant has only ‘FpML’ messages enabled, then you won’t be able to select the message template using ‘MAIL’ tab. In such cases you need to select the FpML template in ‘FpML’ tab.
6.21.1.7 Specifying ‘Custom’ Message Details
The following options are available only if the ‘Message Type’ is ‘Custom’:
Related Event
You have to select the event for which the message should be generated. The events at the product level are displayed in the option list provided. Select an event from this list. When you select the event code, the description is displayed alongside.
6.21.1.8 Selecting Message Tags for the Message
If the Message Type is ‘Custom’, you can include free format message tags for the message, right-click on the ‘Message’ section of the screen.
When you select the ‘TAGS’ button, a list of pre-defined loan syndication module tags will be displayed as shown below:
From this list, you can select the required tags one by one, to be included in the message.
6.21.1.9 Specifying Participant Tag Details
You can specify the message tag details for participants only if the following criteria are met:
- Message Type is ‘Custom’
- Free format message is captured in the ‘Message’ section of the screen
- Free format message tags are included in the message
You can specify the tag details in the ‘Participant TAG Details’ screen. Click the ‘Tags’ button to invoke this screen.

You can enter the values for the tags that you have already selected from the TAG List screen.
Note
Only those Tag IDs that you have defined for the Message Type ‘Custom’ in the ‘Free Format Message Tags’ screen is available for use.
If the ‘Message Type’ is ‘Custom, the screen appear, as shown below:
For a ‘Custom’ Message Type, you also have the following option:
6.21.1.10 Viewing the Message Details
After capturing the required message details, you can preview the message. To do this, click the ‘Message Preview’ button.
This screen displays the following details:
- The contract reference numbers of the participant contracts
- Auth status of the message - always be unauthorized at this point of time
- Drawdown Number
- FFMT Reference Number
- Template Code
- Related Event
- Customer
- Entity
- Event Sequence Number (ESN)
Through this screen, you also view the actual format of the message
that would be generated. To do this, click the ‘View Message’ button .
Note
In the free format messages for the primary entity, first line of the message will display the borrower/participant name and the second line displays the entity name. In the case of free format messages for non-primary entity, the first line of the message displays ‘Copy - Avoid Duplication’. The second line displays the borrower/participant name and the third line will display the entity name. These positions are fixed and you are allowed to change them.
6.21.1.11 Generating the Message
To generate the ‘Custom’ message, click the ‘Generate’ button in the ‘Free Format Messages – Multiple Participants’ screen.
You can modify the advice details, if required. Click the ‘Ok’ button to generate the message.
After you opt to generate the message, you have the option to cancel the generation of the message. To do this, you have to click the ‘Undo Generate’ button in the ‘Free Format Messages – Multiple Participants’ screen.
Note
For entities having the media as ‘FPML’, FpML notices also get generated in addition to the MAIL notices.
While generating the free format messages for participant, If the ‘FpML Type’ option is checked for borrower tranche / drawdown then the system will do the following:
- Generate only FpML messages for the entity for which media is selected as ‘FpML’ in ‘Free Format Message Generation’ screen, provided all required maintenances and validations are available and satisfied.
- Generate the message with FpML media for that entity only and all other messages with different media, incase If for an entity, record with multiple medias are available including FpML in ‘Free Format Message Generation’screen
- Generate the message with the next priority media maintained for the ‘Customer Entity Maintenance’ screen incase If any FpML maintenance is not available for the message or participant does not have ‘Send FpML’ chosen at the entity level
If the ‘FpML Type’ is not checked, then for free format message, the system does not check the media priority setup.
6.21.1.12 Specifying ‘ProRata’ Message Details
If you select the ‘Message Type’ as ‘ProRata’, you have to specify the pro-rata tag values. To do this, click the ‘Prorata Tag Values’ button in the ‘Free Format Messages – Multiple Participants’ screen. However, you can enter the tag values only if the message is specified in the ‘Message’ section of the screen. If not maintained, the system displays an override to indicate the same.
You can use a template to capture the message format. Refer the heading ‘Capturing the free format message’ in this chapter for details on the same.
6.21.1.13 Selecting Pro-Rata Tags for the Message
When you right-click on the ‘Message’ section of the screen. When you select the ‘TAGS’ option, a list of pre-defined loan syndication module tags will be displayed as shown below:
You can select the required tags one by one, to be included in the message. After selecting the tags, you have to specify the values for the same.
Note
Only those Tag IDs that you have defined for the Message Type ‘ProRata’ in the Free Format Message Tags screen is available for use.
6.21.1.14 Specifying Pro-rata Tag Values
You can specify the tag values in the ‘ProRata TAG Values’ screen. To invoke this screen, click the ‘Prorata Tag Values’ button.
Specify the following details in the screen:
- A description for the tags selected
- The currency and the amount
The system automatically computes the breakup details of the components for the participants based on the amount you enter and the asset sharing ratio. The following details are displayed in the ‘Participant Details’ section of the screen:
- Participant Code and Participant Name
- Asset Sharing Ratio and Amount
Click the ![]() button to move from one
section of the screen to the other.
button to move from one
section of the screen to the other.
6.21.2 Generating Free Format Messages for Multiple Borrowers
You can enable the system to generate a normal advice, as well as custom messages to borrowers through the ‘Free Format – Multiple Borrowers’ screen. You can invoke the ‘Free Format Messages - Multiple Borrowers’ screen by typing ‘OLDFFMBR’ in the field at the top right corner of the Application tool bar and clicking the adjoining arrow button.
The details to be captured for ‘Normal’ and ‘Custom’ message types are as explained under ‘Generating Free Format Messages for multiple participants’, the only difference being that you will be capturing the details for ‘Borrowers’ this time. In addition, you have to select the following:
Module
You have to select the module for which the free format message details are being captured. The available options are:
- OL
- LB
- FC
Select ‘LS’ (Loans Syndication) option here to indicate that the messages are being maintained for loan syndication contracts. When a free format message specification is authorized, the pre-defined event for free format messages (ZFFT) is triggered for the contract. The pre-defined tags available for the Loan Syndication module are:
- ‘_SYNREFNO_’: This tag denotes the facility reference number
- ‘_TRREFNO_’: This tag denotes the tranche reference number, and is available only for drawdown contracts.
- ‘_CREFNO_’: This tag denotes the contract reference number
- ‘_CAMT_’: This tag denotes the contract amount
- ‘_CCCY_’: This tag denotes the contract currency
- ‘_CDATE_’: This tag represents the contract value date
- ‘_DRDWNNO_’: This tag represents the sequence number of the drawdown. This tag is available only for drawdown contracts
- ‘_BRREFNO_': This tag denotes the borrower contract reference number
- ‘_MONTHTAG_’: This tag indicates the month for which the interest amount is being credited
- ‘_ACNOTAG_’: This tag indicates the interest amount being credited
6.21.2.1 Specifying Billing Date
You can specify the billing date in the ‘Billing Date’ screen. You can invoke this screen by clicking the ’Billing/Schedule Date’ in the ‘Free Format Messages – Multiple Borrowers’ screen.
Specify the following details:
Billing Date
Specify the date on which the free format message needs to be generated.
Cash Interest Amount
Specify the cash interest amount. If cash interest amount is not zero, then it is mandatory to input cash interest amount at participant level.
6.21.3 Specifying Payment Breakup for Participants
Click ‘Part Int share’ button to invoke the screen, ‘Payment Breakup for Participants’(LBDPYMNT) with details of all the participants under the drawdown and outstanding interest (Cash Interest) for each participant under the field ‘Amount Due’.

Refer the section, ‘Specifying Payment Breakup for Participants’ in the Repay Chapter
for more details.
Amount Paid
Specify the individual participant share amount for the interest being paid.
Existing participant free format advices having interest payment details can include cash interest payment that is captured by user during free format message generation (for interest liquidation and principal + interest liquidation).
Rollover notification advices that are generated systematically during rollover booking, can include cash interest payment that is captured by user during rollover booking (for interest liquidation and principal + interest liquidation).
Specify the proper cash amount for borrower and participant during free format message generation and payment should be processed for the same amount which is operationally controlled by user.
Property Code
Select the property code during Payment Notice message generation from the adjoining option list. This list displays only those property codes that are linked to the loan/drawdown selected.
This option list is enabled only if the value of 'Property Selection Required' UDF is 'Yes'. Otherwise, this option list is disabled.
The following UDFs in the 'Message Format Template Maintenance' screen are used for message generation based on the predefined parameters by the user:
UDF |
Values |
Property Selection Required |
Yes/No |
Notice Type |
Payoff/Payment/Null |
If the value of 'Property Selection Required' UDF is 'Yes', then system does the following:
- The 'Property Code' option list is enabled in the 'Free Format Messages - Multiple Borrowers' screen and property related details are shown in the notice.
- If the loan/drawdown is linked to the property and you do not select the 'Property Code' in the 'Free Format Messages - Multiple Borrowers' screen, then system displays an appropriate error message.
- If the loan/drawdown is not linked to any property, then system does not allow message generation and gives an appropriate error message.
If the value of 'Property Selection Required' UDF is 'No', then system does the following:
- The 'Property Code' option list is disabled during message generation and system shows all the properties linked to the loan/drawdown in the notice.
- If the loan/drawdown is not linked to any property, system does not allow message generation and gives an appropriate error message.
The event 'PNTC' is used as a related event to generate the Payment Notice and Payoff Notice for loans and drawdowns. The event 'ZFMG' (Free Format Messaging) is triggered at the contract level for processing free format messages.
The following points on Payment Notice are noteworthy:
- Payment Notice is a free format message generated manually, prior to the component due date. You should maintain a template for Payment Notice using 'Message Format Template Maintenance' screen.
- If only one property detail is required in the message, then you should maintain the value of 'Property Selection Required' UDF as ‘Yes’. During message generation, you should select the property code that needs to be displayed in the message.
- For Payment Notice, you should maintain the value of 'Notice Type' UDF as 'Payment' in the ‘Message Format Template Maintenance’ screen. On selecting the Payment Notice free format template, you can define values for user input fields.
- On clicking the 'Message Preview' or ‘Generate’ button, you can define the property code linked to the loan, date on which the free format message needs to be generated in the 'Billing Date' screen.
- Only current dated and backdated dated payment notice generation is allowed.
- Based on the value defined for the UDF ‘Escrow Type’ at the interest class level, the escrow impounding components are identified.
Escrow Type |
Component |
ESC1 |
Tax escrow component |
ESC2 |
Insurance escrow component |
ESC3 |
Other escrow components |
- If there are multiple escrow components with same ‘Escrow Type’, then the balance of each component is added to arrive at the escrow balance.
While generating free format messages for borrower or participant drawdown contracts, if the UDF value for ‘COMPONENT-TYPE’ at interest class level is ‘SERVICER-FEE’ for payment or rollover notices, then system does the following:
- System displays the servicer fee (interest component) details along with main interest component in the notices
- The total interest due for borrower message is the sum of main interest due and servicer fee amount due
- Total interest due for participant message is the actual main interest due excluding servicer fee amount due
6.22 Processing the Release of Payment Messages
On the booking date of the contract, Oracle FLEXCUBE queues up payments due for the value date and then you can release payment messages based on approvals and /or funds received in the system using ‘Payment Processing Browser’ screen.
You can invoke the ‘Payment Processing Browser’ screen by typing ‘LBDMTPRC’ in the field at the top right corner of the Application tool bar and clicking the adjoining arrow button.
You can specify the following fields in this screen:
Contract Reference Number
Specify the borrower contract reference number to capture the fronting/funding details for the disbursement/payment activities of the contract.
The system displays the event wise borrower details for the disbursement and payment events in the Borrower Details frame of this screen.
Borrower Fronting
Select the fronting for the borrower, in case of payment activities, from the following options.
- Fronting
- No fronting
Investor Fronting
Select the fronting for the investor, in case of disbursement activities, from the following options.
- Fronting All
- No fronting
- Fronting Partial
Actual Receipt Date
The date on which the borrower is funding for the payment is displayed in this field; however, you can choose to modify this date.
Note
- You can change the fronting options before the value date of the event.
- If bank is fronting or if the fund is sighted without bank fronting, the current application date is defaulted to the Payment sent date.
Funds Sighted
Select ‘Yes’ if the fund is sighted for the borrower repayment; otherwise, select ‘No’.
The following fields are displayed in this screen.
Borrower Details
- Contract Reference Number - Borrower contract ref number
- Counterparty - Borrower ID
- Counterparty Name - Borrower Name
- Classification - Borrower Classification
- Value Date - Value date of the event
- Amount - Event Amount
- Currency - Contract Currency
- Transaction Event - Event code (BOOK/VAMB/LIQD)
- Payment Date - Date on which the payment is made to the investors (in case of actual funding by the borrower or fronting by bank for the payment)
- Funds Sighted - Indicates if the fund is sighted for the borrower payments, ‘Yes’ for Fronting All, ‘No’ for No Fronting and ‘NA’ for Partial Fronting
Eventwise Fronting Details
You can capture the investor fronting details for each event in this frame.
Default Investor Fronting
Select any of the following options to indicate the type of participant fronting.
- Fronting
- No Fronting
- Seek Approval
Fronting
Select the fronting for the investor, for the disbursement event, from the following options.
- Fronting All
- No fronting
- Seek Approval
Note the following:
- You can change the fronting options before the value date of the
event.
- Seek approval can be changed to Fronting or No Fronting Options before the value date of the disbursement event.
- Seek approval can be changed only to No Fronting Option on or after the value date of the disbursement event.
- By default, Seek approval is considered as No fronting.
- If there is a mismatch between the fronting option specified in the browser and the ORR maintained at the customer level for the respective investor, the system throws an override while saving the respective Payment browser activity
- For the investors who are funding, payment date is defaulted from the Investor wise Funding Details tab and is not allowed to change. This date is used for the interest computation for the borrowers.
- For the fronted investors, the payment date is updated internally as the application date on the payment date and interest is calculated accordingly.
Actual Receipt Date
The actual receipt date is defaulted from Investor wise Funding Details Tab for each Investor; however, you can modify this date. The system uses this date for the interest computation for the investors
Recall Date
In case of Recall for the fronted portion, specify the recall date for Fronted investors for the respective disbursement events.
Note
- You can specify the recall date for the latest disbursement event only, the system updates the same recall date for all the previous disbursements. It validates if the Recall date is greater than or equal to the latest disbursement event value Date.
- Recall Date is used in Interest Calculation for the borrower and investor. For the borrower, the total recall amount is treated as unfunded from the recall date. For the investor, the amount is treated as unfunded from the value date of the contract itself.
The following fields are displayed in this frame:
- Contract Reference Number - Participant contract reference number
- Counterparty - Participant ID
- Counter Party Name - Participant Name
- Classification - Participant Classification
- ‘Pro Rata Share - Pro Rata share of the investor for an event
- Payment Sent - Indicate if the payment message is sent to the investors in case of payments
- Payment Date - Date on which the payment is made to the borrower (in case of actual funding by the participant or fronting by bank for the disbursement)
- Funding Status - Indicates the funding status of the investor (funded, unfunded or fronted)
Investorwise Funding Details
Funds Sighted
Select ‘Yes’ to Indicate if the fund is sighted for the Investor for the disbursements.
Payment Date
Specify the date on which the amount is disbursed to the borrower.
Actual Receipt Date
Specify the date on which the investor is funding the amount.
The following fields are displayed in this screen:
- Contract Reference Number - Participant contract reference number
- Counterparty - Participant ID
- Counter Party name - Participant Name
- Unfunded Amount - Total unfunded amount across the disbursement events for the investor
- Fronting - This will be defaulted from the fronting option chosen for the latest disbursement event for the investor in the ‘Event wise Fronting Details’ tab
- Funding Amount - Total unfunded amount across the disbursement events for the investor will be defaulted here as the investor is expected to fund the complete amount at a time
Click ‘Funding History’ to display the funding history for the chosen investor in the ‘Funding History’ screen.

The following fields are displayed in this screen:
- Contract Reference Number
- Participant
- Funding date
- Actual Receipt Date
- Funding Amount
- Total Funding Amount
The Payment Processing browser is populated during the participant transfer authorization of future-dated events. This is based on the following conditions:
- Participant Transfer with existing participant(s) - following details
are updated based on the latest ratio
- Pro-rata share amount of participants in Event-wise Fronting Details tab
- Unfunded amount in Investor-wise Funding Details tab
- Participant Transfer with new participant(s) - the new participant(s)
are added to the existing list of participants in the screen. All the
other relevant details for the new participant is populated. Fronting
value for such participants will be defaulted as
- ‘Fronting’ - If Investor Fronting captured at Borrower details is ‘Fronting All’ and funding_status is populated as ‘Fronted’
- ‘No Fronting’ – If Investor Fronting captured at Borrower details is not ‘Fronting All’ and funding_status is populated as ‘UnFunded’
- Payment processing browser will be populated with the new child contracts
which are created as part of renewal of Drawdowns during Batch or Online,
as per the current functionality
- Existing funded investors are populated as ‘Funded’ with the latest amount and new investors are treated as Unfunded
- User has to capture the funding details for such investors from the Payment Processing browser
Click ‘Borrower Payment History’ to display the borrower payment details for the chosen borrower contract for the past disbursement events based on investor funding.
The following fields are displayed in this screen:
Borrower Details
- Contract Reference Number
- Counterparty
- Payment Date
- Funding Amount
Participant Details
- Contract Reference Number
- Participant
- Payment Date
- Funding Amount
- Fronting
- Total Funding Amount
6.22.1 Processing Disbursement
On authorization of disbursement events, the system defaults the Payment Processing Browser with the following values:
- Contract Reference Number is defaulted with the Borrower Contract Reference Number
- In Borrower Details frame, Contract Ref No, Customer name, Counterparty number, Classification, disbursement Value Date, disbursement Amount, disbursement CCY, and Transaction Event (BOOK/VAMB) fields are defaulted.
- In Event wise Fronting Details Tab, Contract Ref No, Counterparty Number, Customer Name, Classification, Pro rata Share fields are defaulted.
- In Investor wise Funding Details Tab, Participant Details frame are defaulted with Contract Ref No, Counterparty, Counterparty Name and Unfunded Amount(Pro Rata Share is defaulted as Unfunded Amount during INIT).
You have to capture the Fronting Details of Borrower and Participants before proceeding with any other activity. You can query for the borrower contract and unlock it to capture the Fronting and Funding details.
6.22.1.1 Capturing the Fronting Values
Investor Fronting field in borrower details has the options, Fronting All, Fronting Partial and No Fronting for Disbursement Events. Borrower fronting flag is not applicable for disbursement events. Payment date, funds sighted flag and actual receipt date in Borrower details is not applicable for Borrower disbursements
6.22.1.2 Capturing Event wise Fronting Details
Default Investor fronting flag is enabled only if investor fronting is selected as ‘Fronting partial’ in the borrower details. It have the three options, Fronting, Seek Approval and No Fronting
Fronting flag is enabled for Disbursement events and it will have the three options, Fronting, Seek Approval and No Fronting.
- At Borrower details, if investor fronting flag is selected as Fronting All, then Participant Fronting is set as Fronting and you are not allowed to modify it.
- At Borrower details, if investor fronting flag is selected as No Fronting, then Participant Fronting is set as No Fronting and you are not allowed to modify it.
- At Borrower details, if investor fronting flag is selected as Fronting Partial, then Participant Fronting is defaulted based on the default fronting option maintained for the investors and you are allowed to modify it.
- Participant Fronting can have any of the three options, Fronting, Seek Approval, and No Fronting and you are allowed to modify it till Value date of the event.
- On or after Value date, Seek Approval can be changed only to No Fronting.
- By default, Seek Approval is considered as No Fronting.
If the investor is funding for the disbursement, then the payment date is defaulted from Investor wise Funding Details tab and you are not allowed to modify it.
Actual Receipt Date is defaulted from Investor wise Funding Details Tab for each Investor and you are allowed to modify it. It is not populated until the Fund is sighted for the respective investor.
For the fronted investors, the current application date is defaulted to the payment date on the date of such borrower payments and you are not allowed to modify it.
6.22.1.3 Capturing Investor wise Funding Details
The system updates the Unfunded Amount for each investor after each Disbursement or Repayment. All the fields in Participant Details frame are display fields.
On receiving the funds from an investor, you have to update the Funds Sighted field to Yes for that investor. The current application date is defaulted to the payment date and actual receipt date and you are allowed to modify these dates. The complete unfunded amount is defaulted as the funding amount.
For the fronted investors, it is assumed that the investor has funded and the system populates the funding details internally and the unfunded amount is decreased accordingly. Actual receipt date is updated with the current application date. This update happens at the time of saving the instruction for the current dated or back dated disbursement events. For the future dated disbursement events, this defaulting happens as part of the Beginning Of Day Batch processing.
The system does not allow Partial funding if the funding is due across many disbursement events. The complete amount should be funded when the Fund is sighted for an investor.
Example:
In case the investor has not funded few of the last disbursements, he cannot fund for only the first VAMI while second VAMI is already in place.
If there are multiple investors funding as part of the current activity, then payment date should be the same for all the investors. However, actual receipt date can be different for each investor.
Payment Date/Actual Receipt Date cannot be beyond the latest disbursement event value date. In case if the funding is due across multiple disbursement events for any investors, such investors are expected to fund all the pending disbursements together on or after the latest disbursement event date. (Future dated disbursements are not considered here). Payment date/Actual Receipt date cannot be in the future.
If there are multiple investors funding on the same date for a contract, you should capture the funding details across all investors in a single activity to facilitate the combined payment message to the borrower. However, system allows the user to capture the funding details for various investors on different time period in a day. In such cases, separate payment messages are generated for each distinct funding activity.
Payment date is defaulted to the Payment date in the Event Wise Fronting Details tab and you are not allowed to modify it.
Actual Receipt Date is defaulted to the Actual Receipt date in the Event wise Fronting Details Tab and you are allowed to modify it during subsequent activities.
On saving the fronting details and/or funding details, the system triggers the event ‘SFNT’. If funding details are captured as part of the current instructions, the screen, ‘Payment Details’ is displayed. It shows the funded and fronted amount captured for the current activity.
This screen displays the investor funding details, bank Fronting amounts (If applicable) and also the total amount to be paid to the borrower.
In case of any funding by an investor for whom bank has fronted, the amount is not paid to the borrower; instead it is settled with the bank Sighting Fund GL specified as per the branch parameter setup. Upon confirmation and its authorization in the Payment Processing browser, system populates the new payment infrastructure (if funding details captured for any of the investors).
The event ‘BPMT’ processes the disbursement accounting entries and sends payment messages to the borrower on receiving the fund from the investor(s). This event is triggered on the borrower and affected investor contracts.
It also generates the Payment message for the borrower contract for the funded amount (funded by the investors or Fronted by bank).
In case of backdated and current dated disbursements, the accounting entries and payment messages match with the current application date. In case of future dated disbursements, the accounting entries and payment messages match with the event value date.
The system processes the future dated disbursements (INIT/VAMI) for which the fronting details are captured in advance.
When the funding is done by the Fronted investors, BPMT is triggered for the funded amount, but Payment Message is not generated for the amount which is funded against bank fronted amount.
You can view the borrower payment details by clicking the ‘Borrower Payment History’ button in the Investor Funding Details Tab in the Payment Processing Browser.
You can view the funding details for each investor by clicking ‘Funding History’ in the Investor
Funding Details Tab in the Payment Processing Browser.
6.22.1.4 Opting for Recall
In case of Recall for the fronted portion, specify the recall date for Fronted investors for the respective disbursement events.
You can specify the recall date for the latest disbursement event only, the system updates the same recall date for all the previous disbursements. It validates if the Recall date is greater than or equal to the latest disbursement event value Date.
Recall Date is used in Interest Calculation for the borrower and investor. For the borrower, the total recall amount is treated as unfunded from the recall date. For the investor, the amount is treated as unfunded from the value date of the contract itself.
6.22.2 Processing Repayment (LIQD, MRLQ, SPTI, ROLL, FLIQ)
On authorization of repayment events, Payment Processing Browser is populated with the following values.
- Contract Ref No is defaulted to the Borrower Contract Ref No
- In borrower Details frame, Contract Ref No, Customer name, Counterparty number, Classification, Value Date, Amount, CCY, and Transaction Event (Transaction Event as LIQD, MRLQ, SPTI, ROLL, FLIQ) fields are defaulted.
- In Event wise Fronting Details Tab, Contract Ref No, Counterparty Number, Customer Name, Classification, Pro rata Share (Principal + Actual Interest Liquidated) fields are defaulted.
- In Investor wise Funding Details Tab, Participant Details frame is defaulted to Contract Ref No, Counterparty, Counterparty Name and Unfunded Amount(Unfunded Amount gets updated based on previous Funding and Fronting Details).
You have to specify the Fronting Details of Borrower before proceeding with any other activity. You can query for the contract and unlock it to capture the Fronting and Sighting Fund details for the Repayment Event.
6.22.2.1 Borrower Details
Borrower Fronting has the options, Fronting and No Fronting for Repayment Events: Investor fronting is not applicable for repayment events. On receiving the funds from the borrower, you have to update the Funds Sighted field to Yes. The current application date is defaulted to the actual receipt date and you are allowed to modify it.
If bank is fronting or fund is sighted from the borrower, then the current application date is defaulted to the payment date.
You can only view the Investor wise Funding Details tab for Repayment Events since there is no investor funding for the payment events.
6.22.2.2 Payment Process
On saving the fronting details and funding details, system triggers the event ‘SFNT’. On confirmation and its authorization in the Payment Processing browser, system populates the payment infrastructure (if fund is sighted from borrower or if Fronting Option is chosen).
The event ‘PPMT’ processes the payment accounting entries and sends payment messages to the investors. On capturing the details for the repayment event, this event is triggered on the borrower and all investor contracts, if fund is sighted from the borrower or fronting is set to Yes.
The event ‘PPMT generates the Payment message for the Participant contract for the liquidated amount (Pro rata Share of the amount repaid by the Borrower).
In case the investor has not funded at the time of borrower repayment, the payment is not made to such investors and the net unfunded amount is reduced to the extent of expected payment amount for such investors as per their pro rate share.
In case of bank fronting the borrower payment, bank sighting fund GL is debited for the borrower amount and paid to the investors.
Fronting options at the borrower level only governs the payment to the investors and fronting option at the investor level does not have any significance for the borrower payments.
When the borrower payment is funded or fronted, the payment is made to all the investors (if they have fully funded).
In case of backdated and current dated payments, the accounting entries and payment messages match the current application date.
In case of bank fronting the borrower payment, upon fund sighted from the borrower, PPMT is triggered for the funded amount, but payment message is not generated for the amount already fronted by bank.
Multiple payments cannot be funded together. In case of multiple payments being funded on the same date, you have to capture each funding as a separate instruction.
Note
You can view the events, BPMT and PPMT and the corresponding accounting entries and the payment messages through the Events sub screen in the Drawdown/Tranche Contract Online screen.
If fronting details have not been captured for the previous disbursement/repayment event, then the following will not be allowed:
- Capture of new payment instruction
- Capture of new disbursement instruction (VAMI)
- Capture of new participant transfer instruction
- Capture of new rollover/reprice instruction (In case of consol rollover/merge reprice, the fronting details should have been captured for all the contracts involved).
If Overwrite Settlement Instructions is yes at the time of BPMT/PPMT event triggering, accounting entries for BPMT/PPMT events are not passed to Customer Accounts; instead they are passed to the internal GLs mentioned in the Overwrite SI screen for the respective components.
In case if the borrower payment is made in multiple splits (based on number of investors funding), it has multiple BPMT events on different time frames. While triggering each of the BPMT events, the Overwrite SI is checked and accounting entries are passed accordingly.
The payable receivable processing is not be handled for sighting funds.
Sighting Fund Process (PPMT) is applicable for the Fee payments at the Tranche contract level. However, the fee computation remains the same.
6.23 Settlement Instruction Maintenance Information
You can maintain settlement instructions in the Settlement Instruction Maintenance screen.
You can invoke the ‘Settlement Instructions Maintenance’ screen by typing ‘LBDINSTR’ in the field at the top right corner of the Application tool bar and clicking the adjoining arrow button.
6.24 Viewing Syndication Contracts
At any point during the tenor (or life cycle) of a syndication contract, you can view its status. You can view the tranche contracts as well as the drawdown contracts, for the borrower and the participants. Summary screens are available listing the currently active contracts entered at each level. These screens can be invoked from the respective contract input screens or from the Application Browser.
6.24.1 Viewing the Automatic Rate Set Browser
You can invoke the ‘Auto Rate Set Browser’ screen by typing ‘LBDRSBRW’ in the field at the top right corner of the Application tool bar and clicking the adjoining arrow button.
The system automatically process the rate set events for the following events on authorizing the following operations:
- IRAM event for Future dated Drawdown Booking
- ROIX for Future Dated Split Rollover Processing
- CRIX for Future Dated Consol Rollover Processing
- SPIX Future Dated Split Re-Price Processing
While authorizing the future dated transactions, the Rate set browser gets populated with future dated event details with processing status as ‘Unprocessed’.On the Rate Fixing Date, the Rate set event gets processed and the processing status is updated as ‘Processed’/’Failed’ based on the event processing.
If the Rate Set Event is successfully processed, then
- The Rate is fixed successfully for the drawdown interest components and following details are updated
- The Processing status is updated as ‘Processed’
- the event sequence number of the processed rate set event is populated
- The Interest Rate is automatically fixed when the rate set event is processed
The IRAM/ROIX/CRIX/SPIX event is auto authorized if the flag Auto auth Rate fixing events is checked.
The IRAM/ROIX/CRIX/SPIX event is not authorized if the flag Auto auth Rate fixing events is not checked. User have to manually authorize the event
If the Rate Set Event processing is failed, then
- The Rate Set Browser is updated with Process status as Failed
- You have to manually reprocess the failed event
- The Rate Set Browser have an option to reprocess the failed events in bulk or one event at a time
The Re-processed event have maker/checker id as below
If Auto Auth Rate Fixing event is Yes, then the User id of who is reprocessing the event is displayed as Maker/Checker ids
If Auto Auth Rate Fixing event is No, then the User id of who is reprocessing the event is displayed as Maker id. Checker will be the approver id
For example,
The USER1 books future dated drawdown and USER2 approves it. On authorization of the future dated drawdown, rate set browser is populated with below details:
- Drawdown ref no
- Main interest component
- Rate Fixing Date
- Process status as Unprocessed
- Maker/checker details as blank
If the Rate fixing event is processed automatically on the rate fixing date, below details are updated for the drawdown ref no. and for the main interest combination
- Interest rate
- Event Sequence number
- Event (IRAM)
- Interest Rate
- Process status as Processed
- Maker/Checker as ‘USER1’. (Maker of Base event).
The IRAM gets authorized when the flag ‘Auto auth Rate fixing events’ is checked. Else IRAM gets unauthorized and checker id is blank in this case.
In the above example, the USER1 is allowed to delete the unauthorized IRAM event from Interest Rate Fixing Screen when the flag ‘Auto auth Rate fixing events’ is not checked.
Note that on click of ‘Select All’ checkbox. all the unprocessed or Failed records are selected and user is allowed to reprocess all the selected records
You are not allowed to amend the fields in the browser, except the check box to select the event for reprocessing
All the processed records are removed from the browser to history data store. This is a daily activity which is done as part of End of Day process
6.24.2 Automatic Rate Set Process
Auto rate setting process fixes the Base Rate of Drawdown Main Interest component having Rate Fixing Required as Yes for the contract in Agency module of the types:
- DD
- Consolidated rollover
- Split rollover
- Split re price
- Current dated
- Back dated
- Future dated
This is defining the appropriate rate rule through rate setting screen for the above said contracts.
DrawDown Contract Online (LBDDDONL)
If the rates are not available for rate fixing date, then the insertion of Contract Reference Number, Processing Status, Rate Fixing Date Actual, Date, Rate Code, and Rate Fixing Date Used (OLSRATLG) happens in the rate log table. You can either save the contract with 0 rate or with previous rate based on the loan parameters maintained in the ‘Interest Limits Detail’ screen (OLDINTLM).
After saving the contract, if the rates are maintained for the actual rate fixing date in the Floating Rate Maintenance screen (CFDFLTRI), you can run the rate fixing job from ‘Job Processing’ screen (LBSJOBRN). Thereafter, the rate is picked for the actual rate fixing date. and REVN event is fired at the contract level.
Consolidated Rollover (LBDCOROL)
In ‘Consol Rollover Input’ screen, the ‘Rate Fixing Required’ check box and ‘Rate Fixing Days’ are available in ‘Normal’ and ‘Split’ tabs.
‘Rate Fixing Required’ check box is defaulted from the ‘Loan Syndication - Product Definition’ screen (LBDPRMNT) and ‘Rate Fixing Days’ is defaulted from ‘Interest Limits Detail’ screen.
Split Rollover (LBCSPROL)
In Split Rollover screen, the ‘Rate Fixing Days’ is defaulted from the ‘Interest Limits Detail’ screen.
Split Reprice (LBDREPRS)
In ‘Re-price Transaction - Spilt Details’ screen, ‘Rate Fixing Required’ check box is defaulted from Product screen (LBDPRMNT) and ‘Rate Fixing Days’ is defaulted from ‘Interest Limits Detail’ screen.
6.24.2.1 Automatic rate set for Future Dated Transactions
The future dated events, found in the system for the Rate set events pending to be processed. The Job automatically initiates online process on the Rate Fixing Date as soon as the LIBOR Daily rate maintenance is available for the day. The Jobs are automatically started based on the ‘Auto rate set Job start time’ for all the branches. While processing Rate Set Events automatically, the Job skip the contract and proceed with next contract in the below scenarios:
- Valid Rate Setting Rules not maintained by user
- Rate Code or Rate Effective End Date is not maintained by user
- If Rate Fixing is already done by user manually
- If the contract is not authorized
- If the contract is not in uninitiated status for the new Drawdown
The Rate Set event Processing Date and Value Date should pick the rate from Daily LIBOR Rate, this is always be same which is Interest Rate Fixing Date.
For future dated transactions, Auto Rate Set event is not processed on the rate fixing date, if rate fixing is not done / rate setting rule screen is not visited while capturing the future dated transactions. In addition, User have to visit Rate Setting Rule screen before visiting Rate Fixing screen while capturing the future dated transactions
If Future dated rate setting events pending to be processed on the same day for multiple Drawdown under a tranche and if the flag ‘Auto Auth Rate fixing Required’ is deselected then
- The system processes the first Drawdown and keep the event unauthorized
- Subsequent events of other Drawdowns will be marked as failed with the exception as ‘Drawdown 1 under the tranche is unauthorized’
You have to manually re-process the failed events individually
6.24.2.2 Automatic rate set for Future Dated Transactions
In system a job processes automatic rate fixing on the Rate Fixing Date and IRAM event is registered for this process. The Base rate is picked up from Daily LIBOR Rate for the Rate fixing date for Drawdown currency and for Interest Rate Period and Rate Code. The System picks the IRFX message template and generates the advice for the IRAM event. If the Rate is input as 0 during future dated Drawdown booking, then the IRFX event is registered but IRFX advice is not generated. The IRAM is processed online once the Job starts processing and also when the rate maintenance available for the Rate fixing date.
If the flag ‘Auto Auth Rate Fixing Events’ is ‘Yes’ at loans parameters screen, then the RAM is auto-authorized with maker/checker as SYSTEM
If the flag ‘Auto Auth Rate Fixing Events’ is ‘No’, then the IRAM is not authorized. The Maker Id for IRAM event is the user id of BOOK event. you are allowed to authorize this event in the existing Interest Rate Amendment Screen.
The Uninitiated Rolled over child contracts will not be considered for automatic rate setting as the you have already captured the Rate Setting Rules during Rollover booking and processing of ROLL event will initiate the Rolled over child contract. You have to manually amend the interest rate through Interest Rate Amendment screen (IRAM), if further amendments required for the Drawdown interest components.
The Job fails the IRAM event if rate maintenance is not available for the day and the appropriate exception is logged saying rate maintenance is not available.
- If Rate Fixing Date falls on holiday for any future dated events, then the event is processed on the next working day. Value date is still be the Rate fixing date to pick up the LIBOR rate
- If the rate sent from PMC is 0 or NULL, then the system does not process the Automatic rate setting
6.24.2.3 Automatic Rate Set Process for Future Dated Split Rollover
The system processes the ROIX on the Rate Fixing Date. The Interest rate is not picked from Daily LIBOR Rate for the Rate fixing date for Drawdown currency, Interest Rate Period and Rate Code. The ROIX get processed online once the Job starts processing and also when the rate maintenance available for the Rate fixing date.
If the flag ‘Auto Auth Rate Fixing Events’ is ‘Yes’ at loans parameters screen, then the ROIX is auto-authorized with maker/checker as SYSTEM. If the flag ‘Auto Auth Rate Fixing Events’ is ‘No’, then ROIX is not authorized. Maker Id for ROIX event is SYSTEM. You are allowed to authorize this event from Drawdown Contract Online Screen
You have to manually amend the interest rate through Interest Rate Amendment screen (IRAM), if further amendments required for the Drawdown interest components. The Job fails the ROIX event if rate maintenance is not available for the day and an Appropriate exception will be logged saying rate maintenance is not available.
6.24.2.4 Automatic Rate Set Process for Future Dated Consol Rollover
The Interest Rate will not be defaulted from Daily LIBOR rate while booking future dated Rollover. The system processes CRIX on the Rate Fixing Date. The Interest rate is picked up from Daily LIBOR Rate for the Rate fixing date for Drawdown currency and Interest Rate Period and for Rate Code. The CRIX is processed online once the Job starts processing and also when the rate maintenance available for the Rate fixing date.
If the flag ‘Auto Auth Rate Fixing Events’ is ‘Yes’ at loans parameters screen, then CRIX is auto-authorized with maker/checker as SYSTEM. If the flag ‘Auto Auth Rate Fixing Events’ is ‘No’, then CRIX is not authorized. Maker Id for CRIX event is SYSTEM. User is allowed to authorize this event from Consolidation Rollover Screen. You have to manually amend the interest rate through Interest Rate Amendment screen (IRAM), if further amendments required for the Rolled over Drawdown interest components. In case of Consol and Split rollover, Rate setting rules should be maintained for each split instruction individually. The Job fails the CRIX event if rate maintenance is not available for the day and an appropriate exception is logged saying rate maintenance is not available.