2. Reviewing Limits
2.1 Introduction
Limit refers to credit limit which is the maximum amount of credit that a financial institution offers to its customer. These credit limits are determined based on the information provided by the customer in the application.
A limit is reviewed under following circumstances:
- periodical review
- if an existing customer’s facility is about to expire
- if freezing or termination of any limit is breached
- if there is an increase or decrease of limit amount
- if there is an addition of collateral or covenant to a facility
In the first section, the chapter briefs on the stages involved. The next section talks about the steps involved in detail.
2.2 Stages in Limits Review
The limit review process involves various stages to perform different tasks. At every stage, the users (with requisite rights) need to fetch the relevant transactions from their task lists and act upon them. Appropriate web services are called in at certain stages to complete the transaction.
Stages |
Mandatory/Optional/Exceptional |
Description |
Initiation |
Mandatory |
Limit review process can be initiated in three ways. -- Directly launching the initiation screen through BPEL (ORDLRWIN) and BPMN (ORDLMRIN) models. -- By an automated alert system available in ELCM upon which the limits for review will be made available in Limits Review screen or the user can visit ‘Tasks’ tab and click the Limit Review Process under Origination. -- You can also process a limit review through OBIEE. During the initiation stage, you can upload the related documents received from customers and external information agents. At this stage system also allows you to revalue the collateral details submitted. |
External Credit Rating |
Optional |
During the initial stage you can initiate external credit rating to get the credit rating of the customer through external agencies. |
Credit Review and Decision |
Mandatory |
The credit officer reviews the limit performance of the customer like their linked accounts, collaterals, customer characteristics, utilization trends, credit rating migration, exposure analysis, external credit rating and so on. Based on this review the officer decides whether to initiate further steps of limits review process. At this stage of decision the officer can update the remarks with statuses like Status Quo, Renew, Freeze, Terminate, Additional Information, Additional Collateral and Limit Revision. |
Approval |
Mandatory |
At this stage the approver reviews the decision taken by the credit user and provides his/her decision. The approver can either approve the decision or send back the task. |
Pending with Customer |
Optional |
This stage is applicable only when the approver decision is Additional Information, Additional Collaterals, Limit Freeze and Termination. Here the customer response is captured with justification to re-consider the approvers decision. |
Manual Retry |
Exceptional |
During the facility hand-off to ELCM after approval, if a technical or business error occurs then you can manually retry the process again. |
2.3 Process Flow Diagram
The process flow diagram given below illustrates the activities carried out during various stages of a collateral creation.
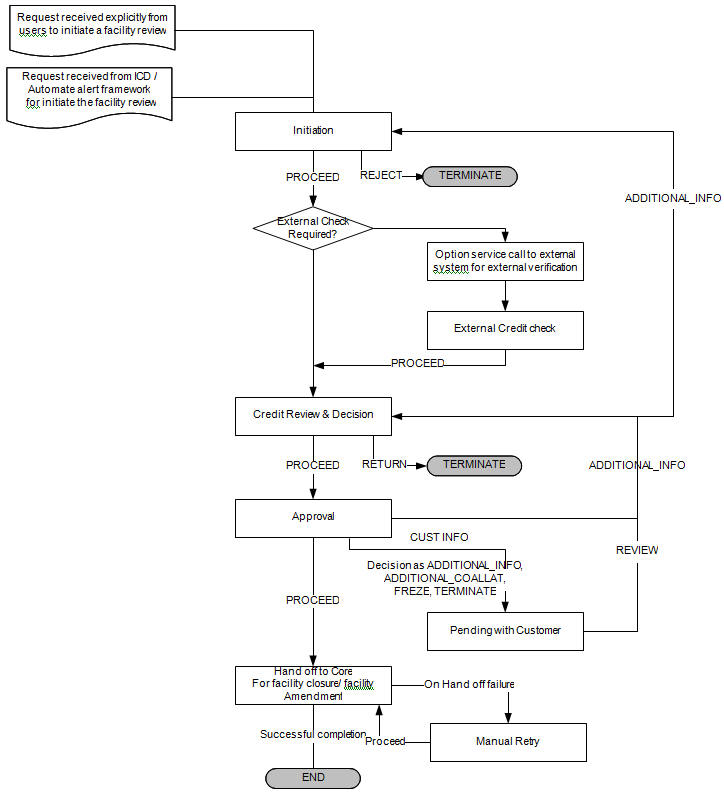
2.4 Process Matrix
Limit review can be processed through BPEL and BPMN business models. The process matrix given below lists out the different stages, function IDs, condition to move to next stage, target stage and remarks for each condition.
Sl.No. |
Source Stage |
Function ID |
Outcome |
Target Stage |
Remarks |
1 |
Initiation |
ORDLRWIN/ORDLMRIN |
PROCEED |
Credit Review and Decision/External Rating |
If the outcome is PROCEED and the task is saved, then the system validates mandatory fields and proceeds to next stage. |
|
|
|
REJECTED |
Termination |
If the outcome is REJECTED, the task goes to termination stage. |
2 |
External Rating |
ORDLMREC |
PROCEED |
Credit Review and Decision |
If the external rating is fetched by an interface then the system automatically moves to Credit Review and Decision stage. If the external rating is manually entered then the user should select the outcome as ‘PROCEED’ and save the task to move to the next stage. |
3 |
Credit Review and Decision |
ORDLMRCR |
PROCEED Decision= Renewal |
Approval |
If the outcome of this stage is PROCEED and the decision is ‘Renewal’, then the task is moved to next stage after validating the ‘Next Renewal Date’. |
|
|
|
PROCEED Decision= Status Quo |
Approval |
If the outcome of this stage is PROCEED and the decision is ‘Status Quo’, then the task is moved to next stage once all the mandatory fields are specified in the screen. |
|
|
|
PROCEED Decision= Freeze |
Approval |
If the outcome of this stage is PROCEED and the decision is ‘Freeze’, then the task will be moved to next stage once all the mandatory fields are specified in the screen. |
|
|
|
PROCEED Decision= Terminate |
Approval |
If the outcome of this stage is PROCEED and the decision is ‘Terminate’, then the task is moved to next stage once all the mandatory fields are specified in the screen. |
|
|
|
PROCEED Decision= Additional Info. |
Approval |
If the outcome of this stage is PROCEED and the decision is ‘Additional Info’, then the task is moved to next stage once all the mandatory fields are specified in the screen. |
|
|
|
PROCEED Decision= Additional Collateral |
Approval |
If the outcome of this stage is PROCEED and the decision is ‘Additional Collateral’, then the task is moved to next stage once all the mandatory fields are specified in the screen. |
|
|
|
PROCEED Decision= Revision |
Approval |
If the outcome of this stage is PROCEED and the decision is ‘Revision’, then the task is moved to next stage once all the mandatory fields are specified in the screen. |
|
|
|
RETURN |
Termination of Task |
If the outcome of the stage is RETURN and the task is saved, then the task is moved to termination stage. |
|
|
|
ADDITIONAL INFO |
Initiation |
If the outcome of the stage is ADDITIONAL INFO and the task is saved, then the task is moved to initiation stage. |
|
|
|
REJECTED |
Termination of task |
If the outcome of the stage is REJECTED and the task is saved, then the task is moved to termination stage. |
4 |
Approval |
ORDLMRAP |
ADDITIONAL INFO |
Credit Review and Decision |
If the outcome of the stage is ADDITIONAL INFO, the system moves the task back to Credit Review be moved to termination stage. |
|
|
|
PROCEED Decision = Freeze |
Hand off to ELCM |
If the outcome of the stage is PROCEED and the decision is ‘Freeze’, then the task is saved and moved to ‘Hand off to ELCM’ stage. |
|
|
|
PROCEED Decision = Terminate |
Hand off to ELCM |
If the outcome of the stage is PROCEED and the decision is ‘Terminate’, then the task is saved and moved to ‘Hand off to ELCM’ stage. |
|
|
|
CUST_INFO Decision = Freeze |
Pending with Customer |
If the outcome of the stage is CUST_INFO and the decision is ‘Freeze’, then the task is saved and moved to ‘Pending with Customer’ stage. |
|
|
|
CUST_INFO Decision = Terminate |
Pending with Customer |
If the outcome of the stage is CUST_INFO and the decision is ‘Terminate’, then the task is saved and moved to ‘Pending with Customer’ stage. |
|
|
|
PROCEED Decision = Additional Info |
Pending with Customer |
If the outcome of the stage is PROCEED and the decision is ‘Additional Info’, then the task is saved and moved to ‘Pending with Customer’ stage. |
|
|
|
PROCEED Decision = Additional Collateral |
Pending with Customer |
If the outcome of the stage is PROCEED and the decision is ‘Additional Collateral’, then the task is saved and moved to ‘Pending with Customer’ stage. |
|
|
|
PROCEED Decision = Status Quo |
Handoff to ELCM |
If the outcome of the stage is PROCEED and the decision is ‘Status Quo’, then the task is saved and moved to ‘Handoff to ELCM’ stage. |
|
|
|
PROCEED Decision = Renewal |
Handoff to ELCM |
If the outcome of the stage is PROCEED and the decision is ‘Renewal’, then the task is saved and moved to ‘Handoff to ELCM’ stage. |
|
|
|
PROCEED Decision = Revision |
Handoff to ELCM |
If the outcome of the stage is PROCEED and the decision is ‘Revision’, then the task is saved and moved to ‘Handoff to ELCM’ stage. |
5 |
Pending with Customer |
ORDLMRPC |
REVIEW |
Credit Review and Decision |
Based on the customer response, submission of additional docs and additional collaterals, the outcome of this stage is selected as REVIEW and the task will be moved to Credit Review and Decision stage |
6 |
Handoff to ELCM |
|
|
|
At this stage the system will handoff the limit details including the changes to be made to ELCM system. |
|
|
ORDLMRMR |
Exceptions like unavailability of ELCM services or error while handing off the details |
Handoff Retry |
For any exceptions the task will be moved to Handoff Retry stage. |
7 |
Handoff Retry |
|
PROCEED |
DB Handoff |
The system invokes DB adapter calls to handoff limit details to ELCM. |
To acquire the next stage, you need to go to the ‘Task’ menu and select ‘Assigned’ under ‘Standard’ option.
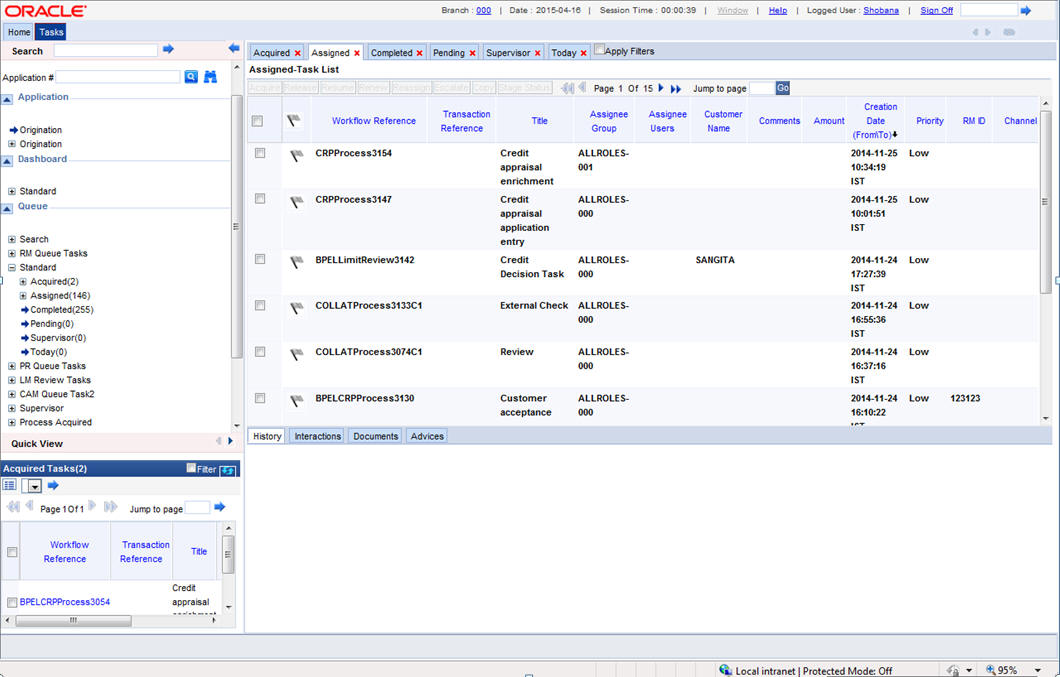
All tasks that have been successfully completed are listed in the right side of the screen. Select the check box against your ‘Workflow Ref No’ and click ‘Acquire’ button at the top of the screen to acquire the next stage of the task.
The system displays the message as ‘Acquire Successful’ on successful acquisition of the task.
Click ‘Ok’ to proceed to the next stage. To select the acquired task for the next stage, select ‘Acquired’ under ‘Standard’ option in the ‘Task’ menu. All the tasks that have been successfully acquired are displayed in the right side of the screen. Search for your workflow reference number and click the ‘Workflow Ref No’ to open the required screen.
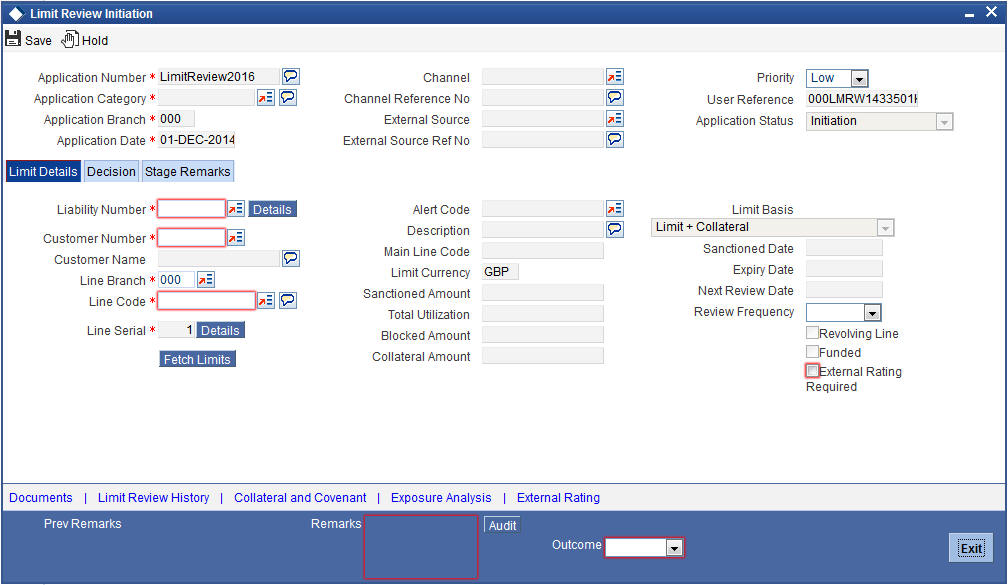
2.5 Processing Limit Review
If you have the required access rights, you can enter details for a new customer in the ‘Limit Review Initiation’ screen.
In BPEL business model, you can invoke the initiation screen by typing ‘ORDLRWIN’ in the field at the top right corner of the Application tool bar and clicking the adjoining arrow button. To invoke initiation screen through BPMN model, type ‘ORDLMRIN’ in the field at the top right corner of the Application tool bar and click the adjoining arrow button. Apart from the initiation stage screen, rest of the stages remains same for both BPEL and BPMN.
You can review, revaluate, decide and approve the credit limit of a customer using Limit Review screen.
Application Number
The system displays the application number.
Application Category
Select the application category from the adjoining option list.
Application Branch
The system displays the application branch.
Application Date
The system displays application date.
Channel
Select the channel from the adjoining option list.
Channel Reference No.
The system displays the channel reference number.
External Source
Select the external source from the adjoining option list.
External Source Reference No
The system displays the external source reference number.
Priority
Select the priority from the adjoining drop-down list. The options available are:
- Low
- Medium
- High
User Reference
The system displays the user reference number.
Application Status
The status of the application is displayed here.
2.5.1 Limit Details Tab
Liability Number
Select the liability number from the adjoining option list.
Customer Number
Select the customer number from the adjoining option list.
Customer Name
The system displays the name of the customer.
Line Branch
Select the line branch from the adjoining option list.
Line Code
Select the line code from the adjoining option list.
Line Serial
The system displays the line serial number.
Click ‘Fetch Limits’ to fetch the limit details.
Alert Code
Select the alert code from the adjoining option list.
Description
The system displays the alert description.
Main Line Code
The system displays the main line code.
Limit Currency
The currency of the limit is displayed here.
Sanctioned Amount
The system displays the sanctioned limit amount.
Total Utilization
The system displays the total utilization limit.
Blocked Amount
The system displays the total blocked amount for the limit.
Collateral Amount
The system displays the collateral amount.
Limit Basis
The system displays the limit basis.
Sanctioned Date
The system displays the date when limit was sanctioned.
Expiry Date
The system displays the limit expiry date.
Next Review Date
The system displays the next review date of the limit.
Review Frequency
Select the limit review frequency from the adjoining drop-down list. The options available are:
- Monthly
- Quarterly
- Half Yearly
- Yearly
Revolving Line
Select this check box to indicate that the limit is a revolving line.
Funded
Select this check box to indicate that the limit is funded.
External Rating Required
Select this check box if external review is required as part of limit review process.
2.5.2 Decision Tab
Click ‘Decision’ tab to provide the officers decision on the limit review.
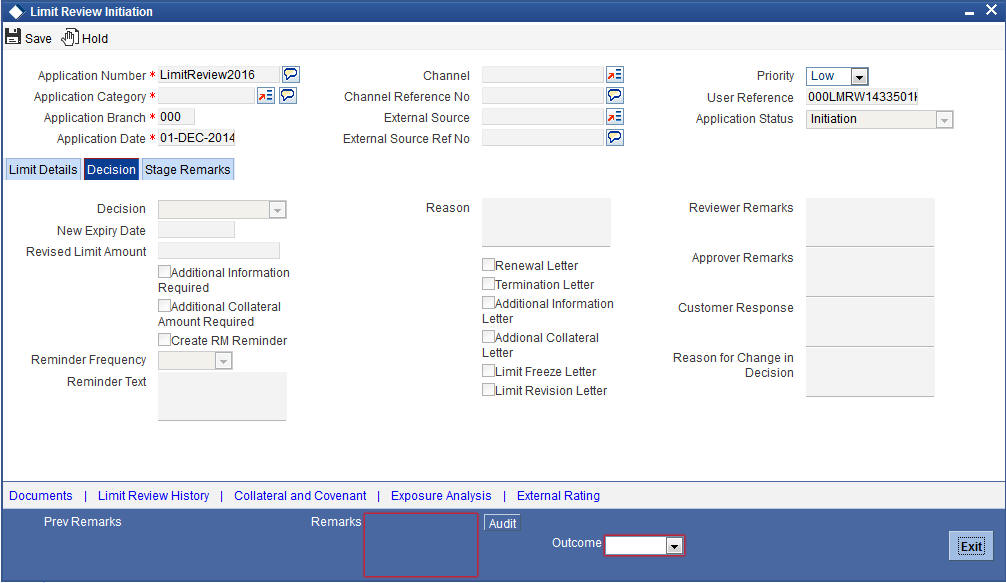
Decision
Select the decision from the adjoining drop-down list. The options available are:
- Status Quo - This option is selected as the decision if the credit user is satisfied with the limit performance and there are no changes proposed to existing limit arrangements.
- Renew - Select this option to renew the limit if the same is nearing expiry.
- Freeze - Select this option if there are any issues with the limit performance. Once this option is chosen, the system blocks the entire limit.
- Terminate - Select this option to cancel he limit facility. You can terminate a limit if there are an covenant breach, irregularities like frequent excess utilization, irregular payments so on.
- Additional Information - Select this option if you require additional information.
- Additional Collateral - Select this option if you require an additional collateral. Additional collateral can be opted when there is a possibility of existing collateral erosion. The financial institution thus requires an additional collateral for security.
- Limit Revision - Select this option if you want to revise the limit.
Reason
Specify the reason for the decision.
New Expiry Date
Specify the new expiry date for the limit. New Expiry date is mandatory if Renew option is selected.
Revised Limit Amount
Specify the revised limit amount.
Additional Information Required
Select this check box if additional information is required.
Additional Collateral Amount Required
Select this check box if additional collateral amount is required.
Create RM Reminder
Select this check box to create reminder for RM of the customer
Reminder Frequency
Select the reminder frequency from the adjoining option list.
Reminder Text
Specify the reminder text.
Renewal Letter
Select this check box to generate renewal letter.
Termination Letter
Select this check box to generate termination letter.
Additional Information Letter
Select this check box to generate the letter asking for additional information.
Additional Collateral Letter
Select this check box to generate letter requesting additional collateral.
Limit Freeze Letter
Select this check box to generate limit freeze letter.
Limit Revision Letter
Select this check box to generate limit revision letter
Reviewer Remarks
Specify the remarks of the reviewer.
Approver Remarks
Specify the remarks of the approver.
Customer Response
Specify the response of the customer.
Reason for Change in Decision
Specify the reason for change in decision.
2.5.3 Stage Remarks
Click ‘Stage Remarks’ to specify previous remarks and stage remarks.

Click ‘Remarks History’ to view the remarks which were updated in the past.
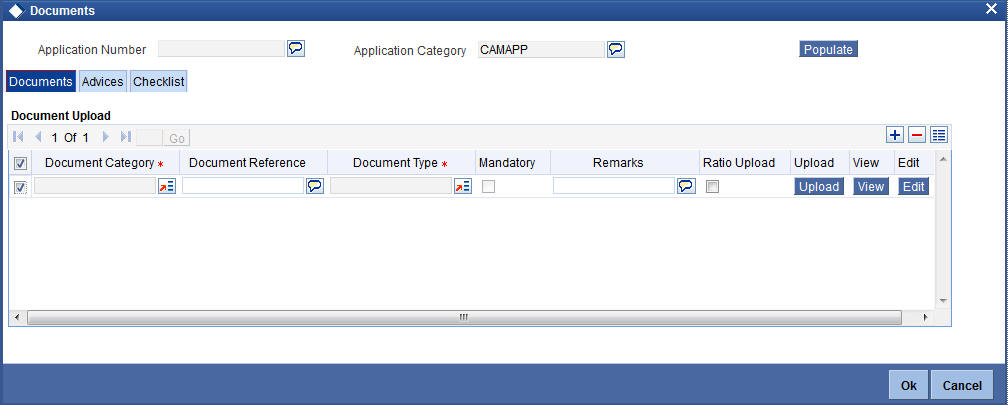
2.5.4 Maintaining Document Details
You can upload and view the documents related to customer and facility through the ‘Documents’ screen. Click ‘Documents’ button from ‘Limit Review Initiation’ screen to invoke the following screen.
Application Number
The system displays the application number.
Application Category
The system displays the application category.
Documents
Document Category
Select the document category from the adjoining option list.
Document Reference
Specify the document reference number.
Document Type
Select the type of document.The adjoining option list displays all the document types maintained in the system. Select the appropriate one.
Mandatory
Select this check box to indicate whether the document is mandatory.
Remarks
Specify remarks, if any.
Ratio Upload
Select this check box if you require ratio upload.
Upload
Click ‘Upload’ button to open the ‘Document Upload’ sub-screen. The ‘Document Upload’ sub-screen is displayed below:

In the ‘Document Upload’ sub-screen, specify the corresponding document path and click the ‘Submit’ button. Once the document is uploaded through the upload button, the system displays the document reference number.
View
Click ‘View’ to view the document uploaded.
Advices
Click ‘Advices’ tab in Documents screen to view advice details.
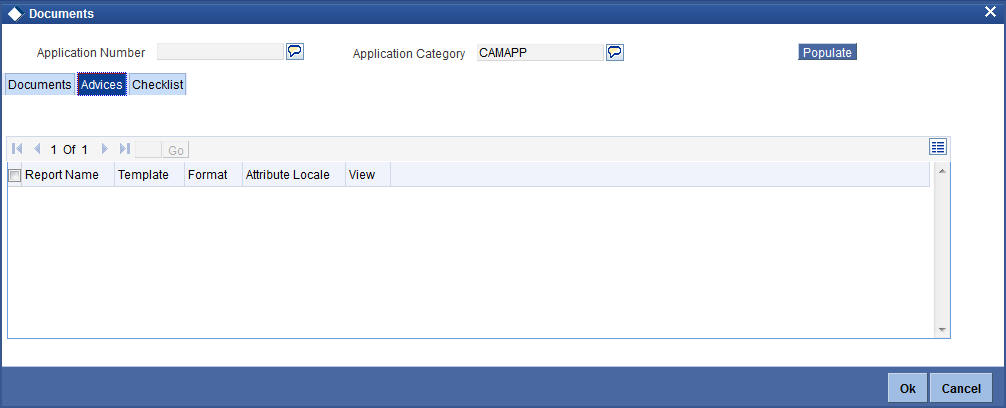
Report Name
The system displays the report name.
Template
The system displays the template.
View
Click ‘View’ to view the document.
Checklist
Click ‘Checklist’ tab in Documents screen to view checklist details.
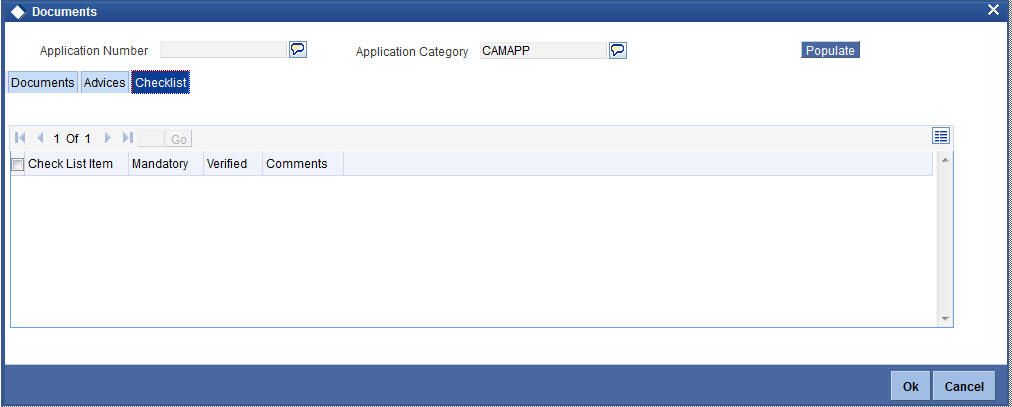
Checklist Item
The system displays the checklist details.
Mandatory
This field is updated based on the maintenances in Documents sub screen.
Verified
Select this check box to indicate whether the documents are verified.
Comments
Specify comments, if any.
2.5.5 External Rating
Click ‘External Rating’ to view external credit rating agency’s rating details.
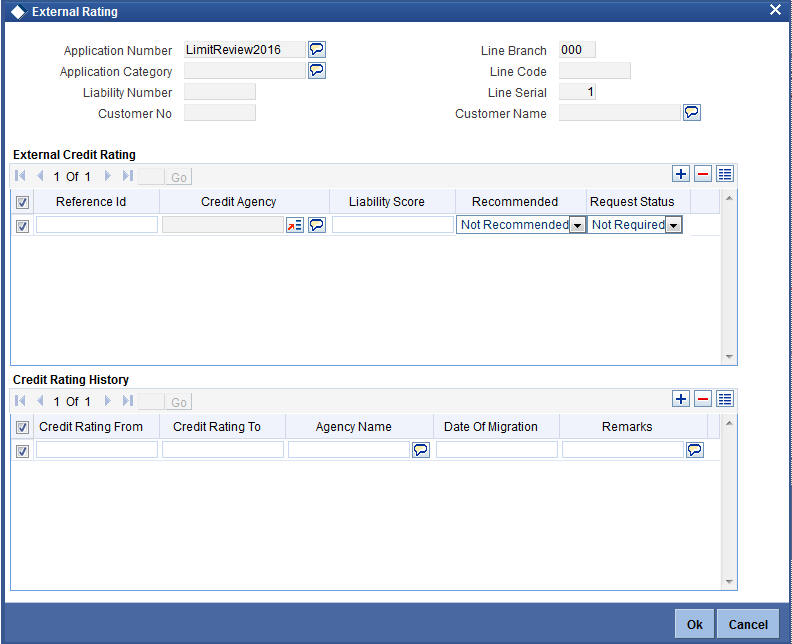
The system displays the following details based on the maintenances in ‘Facilities Maintenances’ (GEDFACLT) screen.
External Credit Rating
- Reference ID
- Credit Agency
- Liability Score
- Recommended
- Request Status
Credit Rating History
- Credit Rating From
- Credit Rating To
- Agency Name
- Date of Migration
- Remarks
2.5.6 Viewing Limit Review History
Click ‘Limit Review History’ to know about the history of previous limit review process. These details helps the credit manager to assess when and why limit review was triggered in the past.
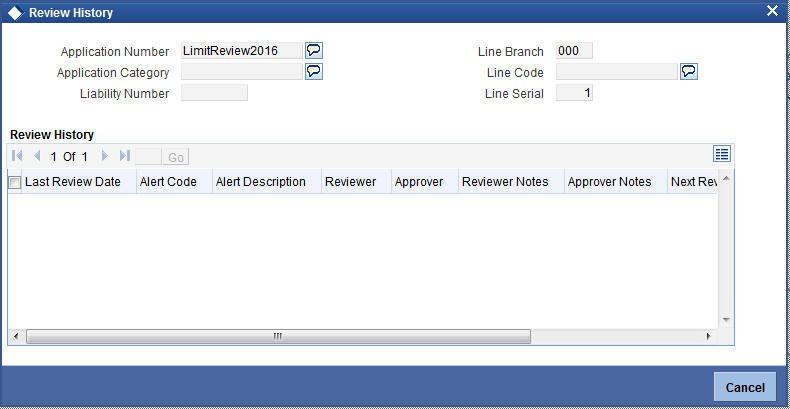
You can view the following details in this screen:
- Application Number
- Application Category
- Liability Number
- Line Branch
- Line Code
- Line Serial
- Review History
- Last Review Date
- Alert Code
- Alert Description
- Reviewer
- Approver
- Reviewer Notes
- Approver Notes
- Next Review Date
- Review Decision
2.5.7 Collateral and Covenant Details
Click ‘Collateral and Covenant’ to view collateral and covenant details that are linked to the limit.
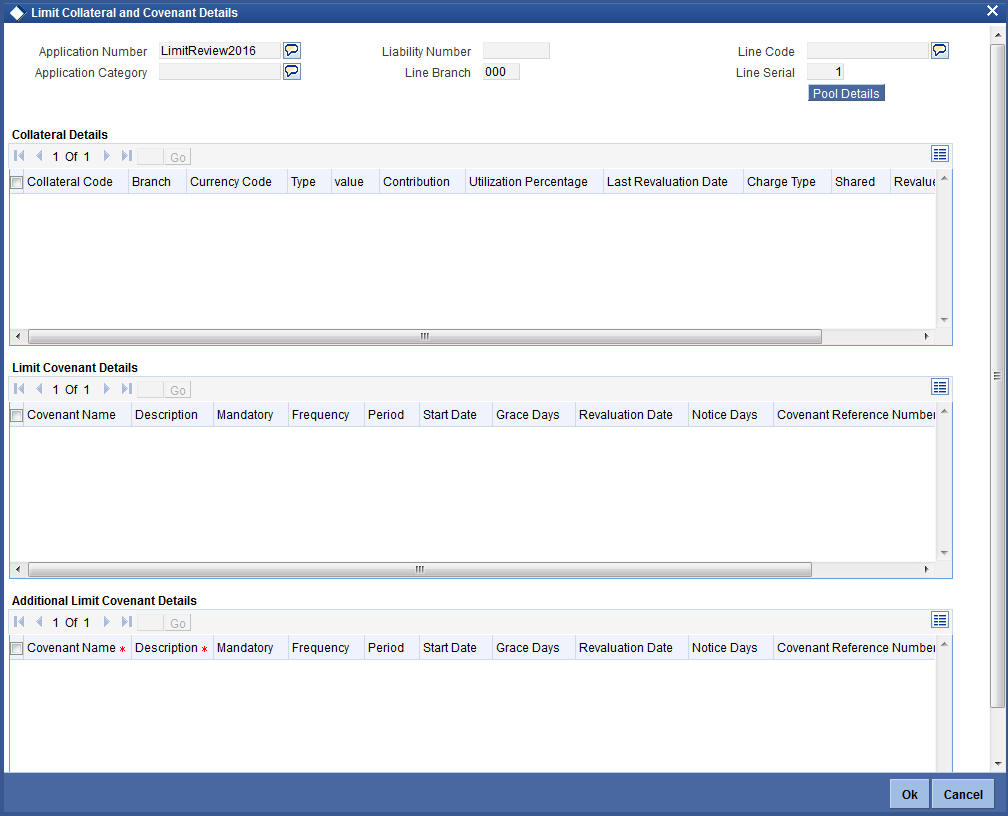
The system displays the following details based on the maintenances in ‘Facilities Maintenances’ (GEDFACLT) screen:
Collateral Detail
- Collateral Code
- Branch
- Currency Code
- Type
- Value
- Contribution
- Utilization Percentage
- Last Revaluation Date
- Charge Type
- Shared
- Revalue
- Details
Limit Covenant Details
- Covenant Name
- Description
- Mandatory
- Frequency
- Period
- Start Date
- Grace Days
- Revaluation Date
- Notice Days
- Covenant Reference Number
- Remarks
The system also displays additional covenant details, if any.
2.5.8 Exposure Analysis
Click ‘Exposure Analysis’ to view various types of exposure related to the limit.
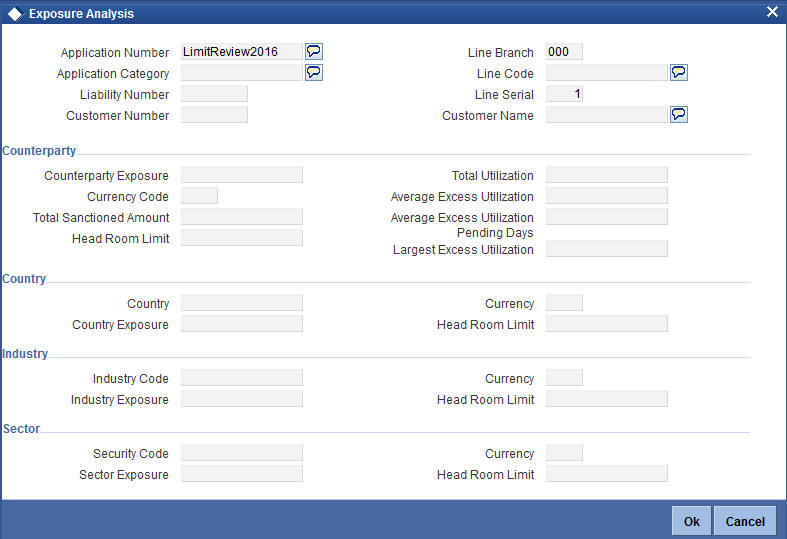
The system displays the following details based on the maintenances in details based on the maintenances in ‘Facilities Maintenances’ (GEDFACLT) screen:
Counterparty Details
- Counterparty Exposure
- Currency Code
- Total Sanctioned Amount
- Head Room Limit
- Total Utilization
- Average Excess Utilization
- Average Excess Utilization Pending Days
- Largest Excess Utilization
Country
- Country
- Country Exposure
- Currency
- Head Room Limit
Industry
- Industry Code
- Industry Exposure
- Currency
- Head Room Limit
Sector
- Security Code
- Sector Exposure
- Currency
- Head Room Limit
2.6 Processing the Limit Review through OBIEE
The limit review can be processed through OBIEE from ‘Credit Desktop’ screen. You can access all the credit details from this screen. You can invoke this screen by typing ‘GEDSKTOP’ in the field at the top right corner of the Application tool bar and clicking the adjoining arrow button.
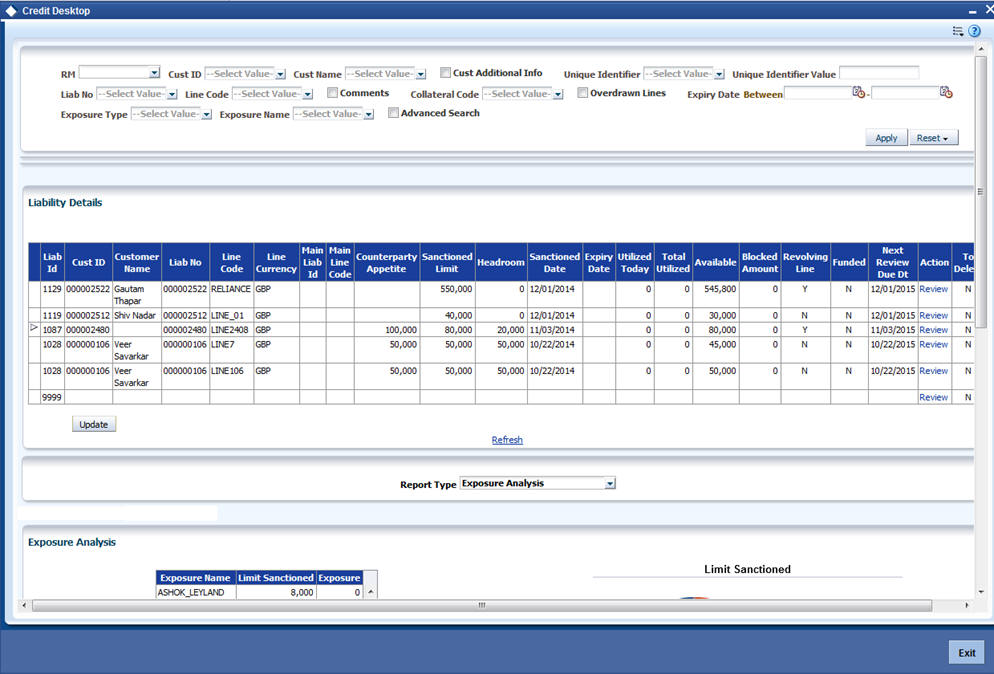
Users belonging to the user role RM_ROLE (Relationship Manager) can perform this activity. The system displays the login ID of the user linked to the RM role in the ‘Relationship Manager’ field. All the records linked with this relationship manager are defaulted in this screen.
In the header section you can filter your search based on the following criteria:
- RM
- Cust ID
- Cust Name
- Cust Additional Info
- Unique Identifier
- Unique Identifier value
- Liab No
- Line Code
- Comments
- Collateral Code
- Overdrawn Lines
- Expiry Date Between
- Exposure Type
- Exposure Name
- Advanced Search
When you click ‘Apply’ button the records matching the specified search criteria are displayed.
- Liability ID
- Cust ID
- Customer Name
- Liab No
- Line Code
- Line Currency
- Main Liab ID
- Main Line Code
- Counterparty Appetite
- Sanctioned Limit
- Headroom
- Sanctioned Date
- Expiry Date
- Utilized Today
- Total Utilized
- Available
- Blocked Amount
- Revolving Line
- Secured
- Committed
- Funded
- Next Review Due Date
- Action
- Exceptions/Warnings
Click ‘Review’ under Action to review the limit associated with each liability ID. The system displays the following screen on invoking the review action:

Alert Desc
Specify the alert description to execute the action.
The system executes the review only if the limit review is incomplete or if the limit is newly initiated. The system suspends the limit review if the review request raised by OBIEE is based on the duplicate details.
Select the ‘Report Type’ as ‘Limit and Collateral Details’ to default the limit and collateral details of selected line or liability ID.
For more information on ‘Credit Desktop’, refer ‘Credit Desktop’ chapter in ‘Enterprise Limits and Collateral Management’ user manual.
2.7 Processing the Limit Review through ELCM
You can trigger a limit review through an automated alert mechanism. The system provides limit review alerts on the dashboard. You can invoke this screen by typing ‘ITSALEDB’ in the field at the top right corner of the Application tool bar and clicking the adjoining arrow button.
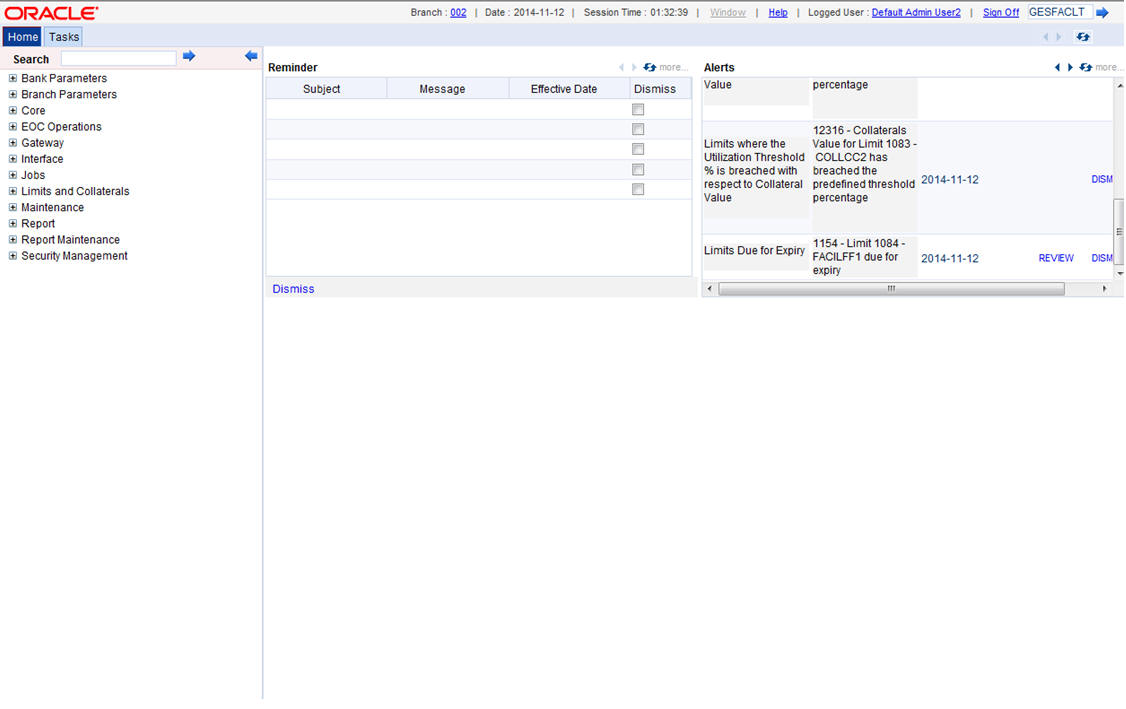
A mandatory alert is generated in the ‘Alerts’ section of the dashboard based on the review rule maintained in ELCM. The alerts displayed on the dashboard can be either dismissed or reviewed. Click ‘Review’ to initiate the review task from ‘Limit Review Initiation’ screen. The system displays the details of the limit to be reviewed from ‘Collateral Maintenance’ and ‘Facilities Maintenance’ screen.
Refer section ‘Processing Limit Review’ for details on limit review work flow.
For more information on limit review rules and alerts refer sections ‘Maintaining Rule Criteria Code’ and ‘Defining Alerts’ in Enterprise Limits and Collateral Management user manual.