Webpshere Security
The AdminConsole security in version 1.0 will be a FORM authentication and authorization using container based security model. The following document outline the security model configuration with Wesphere 9.0.0.x
Wesphere Server provides a standard security model for securing web-application deployed in Wesphere.
To enable application security with HTTP Basic Authentication on WebSphere 9 , we have to perform the following steps:
- Enable Application Security in WebSphere Admin Console
- Define role and protected resources in your web application’s web.xml
- Define user and role mapping in application.xml and ibm-application-bnd.xml.
- Add application user to user repository.
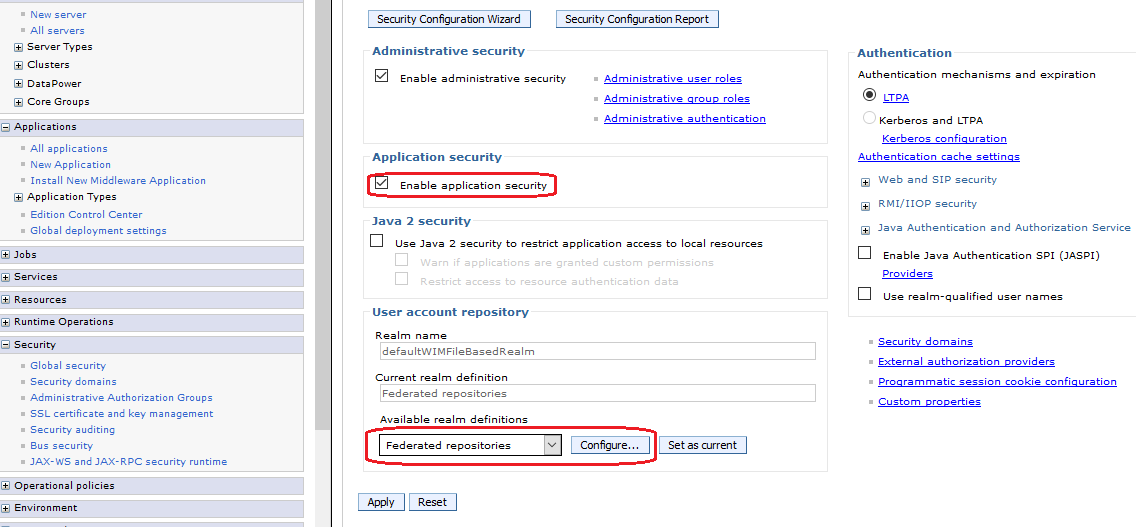
To use a file based user realm you have to configure “Federated repositories” under “User account repository”. If you create a new server profile from scratch, this should be the default setting. If you have to use an existing server profile ensure that “Federated repositories” are configured in the following way:
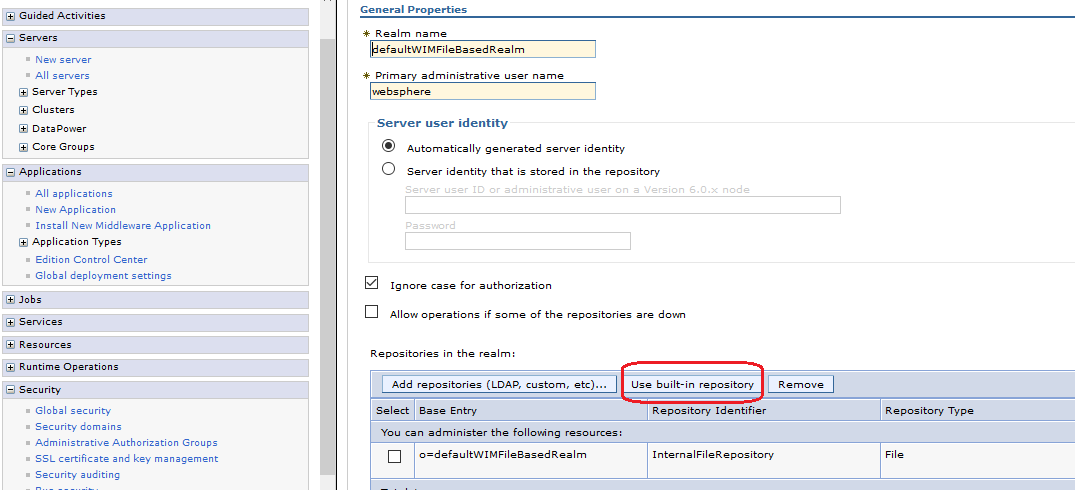
Define role and protected resources in your web application’s web.xml
You have to define protected web resources and roles which are allowed to access these resources. A web resource is a relative URL inside your application combined with the HTTP access method (GET, PUT, HEAD, TRACE, POST, DELETE).
<!-- Defined Security Roles -->
<login-config>
<auth-method>FORM</auth-method>
<realm-name>default</realm-name>
<form-login-config>
<form-login-page>/login.html</form-login-page>
<form-error-page>/login-failed.html</form-error-page>
</form-login-config>
</login-config>
<security-role>
<role-name>AC_ADMIN</role-name>
</security-role>
<security-role>
<role-name>AC_CYCLE</role-name>
</security-role>
<security-constraint>
<web-resource-collection>
<web-resource-name>Secured</web-resource-name>
<url-pattern>/index.html</url-pattern>
<url-pattern>/js/modules/viewmodels/*</url-pattern>
<url-pattern>/service/*</url-pattern>
</web-resource-collection>
<auth-constraint>
<role-name>*</role-name>
</auth-constraint>
<user-data-constraint>
<transport-guarantee>NONE</transport-guarantee>
</user-data-constraint>
</security-constraint>
Define user and role mapping
We already did define a role “AC_ADMIN” in your web application. But this is only a logical role inside your application which we have to map to a real world role. There are two ways to achieve this:
- Define mapping in your application with application.xml and ibm-application-bnd.xml
- Define mapping in WebSphere with admin console
For phase 1 , we are going with "Mapping in WebSphere with admin console".
You have to choose “Applications”/”Application Types”/”WebSphere enterprise applications” and select your application from the table. Now choose “Security role to user/group mapping”:
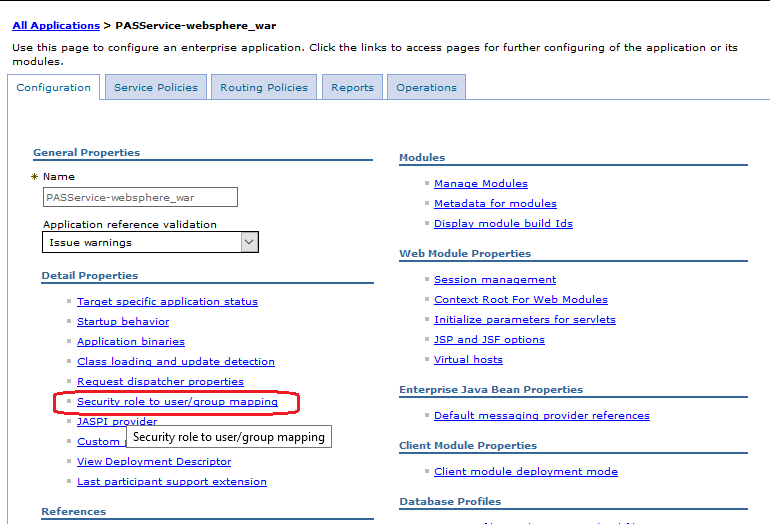
On the next page you can define the mapping as you already know it from before:
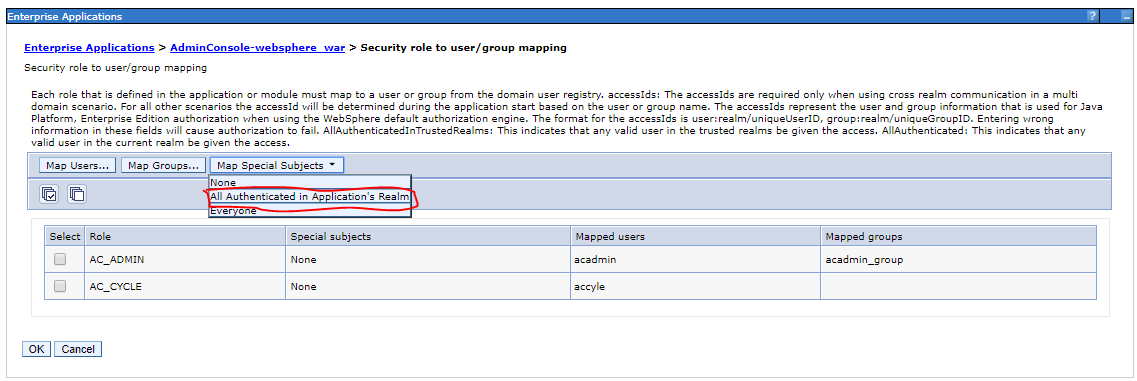

Add application user to user repository
In the last step you should define now at least one user in your file based user repository for testing. Select “Users and Groups”/”Manager Users” in the Admin Console:
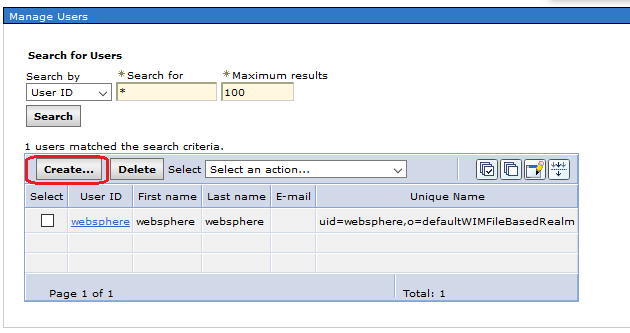
Manage Users in Admin Console
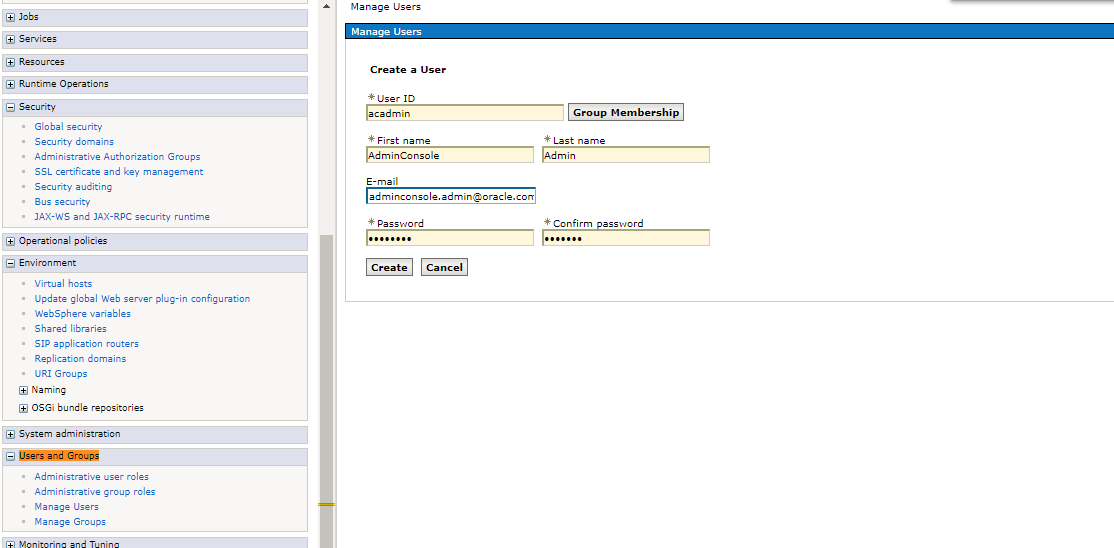
Choose “Create” and enter a new application user for example “acadmin”
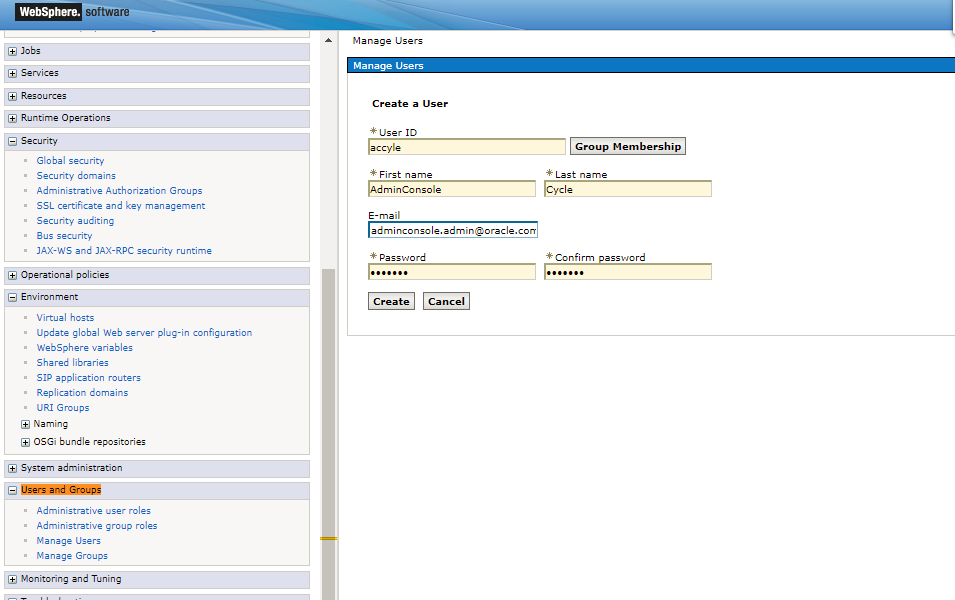
Similarly for other user accyle
Saved

Hint: You will also be able to access your application with the admin user from the admin console.
Map user to Roles in admin console
- Go to Enterprise Applications > [your Application name] > Security role to user/group mapping
- Select the role (in your special case role monitor)
- After that click to Map Users...
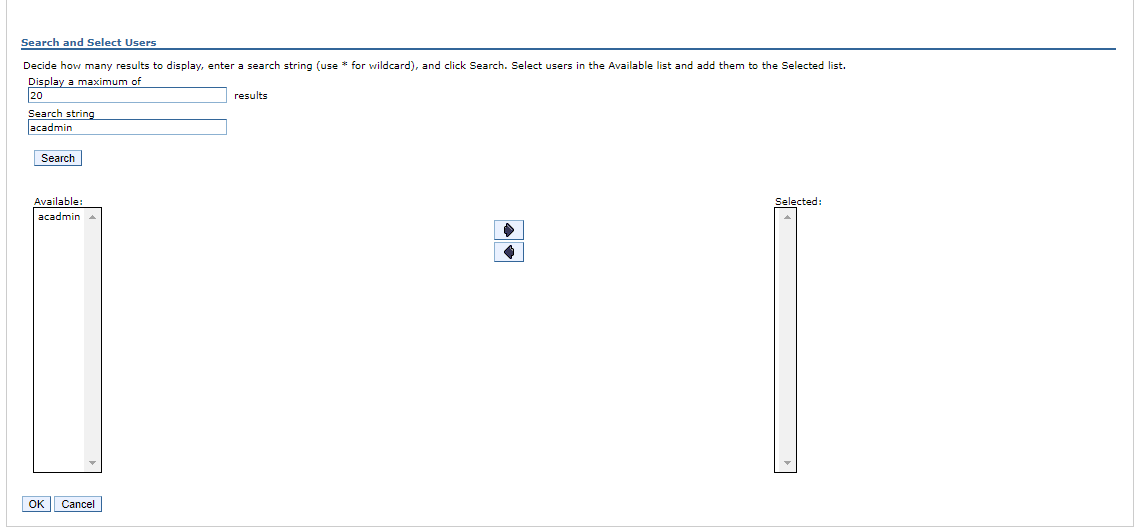
- In the search string field, type in the user name and click to the search button
- Select the user that try to access the application and click to ok
- In the Security role to user/ group mapping configuration window, check, if the user was added to the Mapped users.
In case if we want to group the managed users, Click on 'IBM_Administration_Service'.
Click on 'Security role to user/group mapping'.
Select all the roles. Click the "Map Groups" button, click search.
Select "acadmin_group" from the available list and click the left-to-right arrow.
Click the "OK" button and click the "Save" button.
![Go to Enterprise Applications > [your Application name] > Security role to user/group mapping Go to Enterprise Applications > [your Application name] > Security role to user/group mapping](../Resources/Images/image2018-5-30_11-27-34.png)

Verify deployed application.
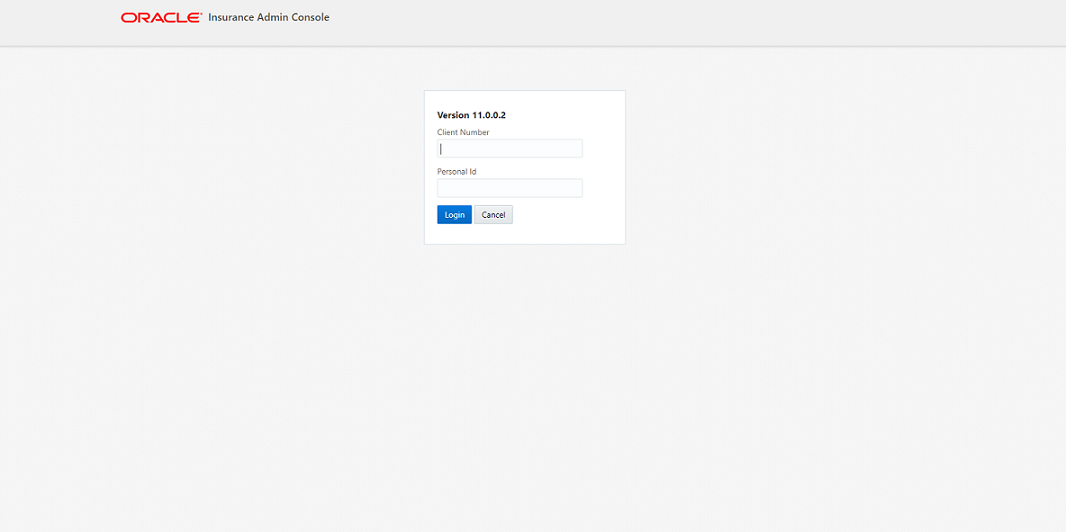
Open http://localhost:port/AdminConsole/login.html) in the browser, Admin Console should be opened.
