Plan Copy Wizard
The OIPA Plan Copy Wizard steps through the process of copying a plan from one IVS environment to another. The Plan Copy utility can only be used in development environments. When a plan is copied, no valuation settings will be changed or transformed.
To open the Plan Copy Wizard, click Tools | Plan Copy.
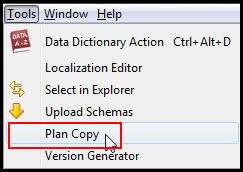
Plan Copy Option on Tools Menu
Steps to Copy a Plan
- Click Tools | Plan Copy on the Main menu. This will open the OIPA Plan Copy Wizard.
- Click the name of the target environment. On clicking the name of the Target Environment, the user will be prompted to enter the Target Environment's Database credentials. Enter the credentials and click Ok.
- Click Next. Only IVS environments that have been set up by the user and share the same IVS as the source environment are listed in this section. By default, the source environment is whatever environment the user is logged into when Plan Copy is invoked.
- Define the source properties.
- Source Environment: This is the environment the user is logged into when Plan Copy is invoked. This is not a selectable field.
- Company: Select the company that contains the plan or Product that is being copied.
- Product: Select the Product that is being copied. This option will be disabled unless Products are enabled.
- Plan: Select the plan that is being copied.
Important If a user wants to copy a plan that is part of a Product in the source environment, but the Product doesn't exist in the target environment, then a two step process must be followed. First, create the new Product in the target environment. This can be accomplished by using the Plan Copy utility to copy the Product to the Target environment. Then, copy the plan to the newly created Product in the target environment. This will ensure that the Product and plan match in the source and target environments. A plan that exists in one Product in the source may be copied into a different Product in the target. - Define the target environment properties.
- Target Env: This is the environment that was selected in step one of the wizard. This is not a selectable field.
- New Plan Name: The name of the plan that is being copied will appear here but can be edited if a plan with the same name doesn’t exist in the target. If the a plan with the same name exists in the target, then this field will be a blank field.
- Effective Date: Select the date when this plan is available.
- Expiration Date: Select the date when this plan is no longer available.
- Determine if GUIDs should be preserved. If selected, the Plan Name field will populate with the existing plan name and the field will become disabled. The GUIDs for all copied rules (PlanGUIDs, BusinessRuleGUIDs, TransactionGUIDs, SegmentNameGUIDs) will also be preserved. If the target environment selected is the same as the source environment (the one the user is logged into), then Preserve GUIDs will be unchecked and disabled.
- Determine if all rules in the plan should be copied. If this checkbox is selected, then the wizard will skip to the Release Management section. If this checkbox is not selected, then the wizard will step through adding business rules, transactions, segments, funds and additional plan data.
- Click Next to advance to the next screen of the utility.
- Select any business rules that should be copied in the new plan and click Next. If Copy All Rules was selected on the first screen of the wizard, then this step will not be available.
- Select any transactions that should be copied in the new plan and click Next. If Copy All Rules was selected on the first screen of the wizard, then this step will not be available.
- Select any segments that should be copied in the new plan and click Next. If Copy All Rules was selected on the first screen of the wizard, then this step will not be available.
- Select any plan funds that should be copied in the new plan and click Next. If Copy All Rules was selected on the first screen of the wizard, then this step will not be available.A child or benefit fund cannot be copied unless the parent fund is also selected. If a parent fund has multiple child or benefit funds, then any combination of the child or benefit funds can be selected, leaving some unchecked if needed.
- Select the plan model definitions that should be included in the copied plan then click Next. If Copy All Rules was selected on the first screen of the wizard, then this step will not be available.
- Select the plan program definitions that should be included in the copied plan then click Next. If Copy All Rules was selected on the first screen of the wizard, then this step will not be available.
- Select the segment program definitions that should be included in the copied plan then click Next. If Copy All Rules was selected on the first screen of the wizard, then this step will not be available.
- Click the box next to any additional plan data that should be included such as plan allocations, plan withholding and plan and segment state approvals.
- Select any comment templates that should be included in the copied plan, then click Next. If Copy AllRules was selected on the first screen of the wizard, then this step will not be available.
- Select any activity filters that should be included in the copied plan, then click Next. If Copy AllRules was selected on the first screen of the wizard, then this step will not be available.
- Select the requirements that should be included in the copied plan, then click Next. If Copy All Rules was selected on the first screen of the wizard, then this step will not be available. If any of the selected requirements have rules attached, the attached rules will need to be selected from the Choose Business Rules screen.
- Click Add to Configuration Package if the plan should be added to a configuration package for release management. Release Management must be enabled in the target environment to use this feature.
- Review the new plan. The top portion contains the plan set-up information and the bottom portion contains a navigation tree that displays the contents of the plan. If changes need to be made, you must move back to the screen where the original information was entered to make the changes.
- Click Finish to complete the copy. The new plan should appear in the navigation tree of the environment where it was copied.
| Important | A check will need to verify if the global rule exists in the target environment so a duplicate is not added. |
| Important | MarketMaker information will be automatically copied if at the Plan level a MarketMakerGUID exists. The MarketMakerGUID must not be null in AsPlan where the PlanGUID is equal to the Source PlanGUID. |
Ifa plan is copied into the same environment as the source, log out and back into the environment to see the copied plan.

Copied Plan in Navigation Tree