| Oracle® Communications IDIH Log Viewer Release 8.2.1 E93209 |
|

 Previous |
 Next |
To create or modify a query for use in filtering log records, click Filter. The Query Dialog window opens.
Figure 2-4 Log Viewer Query Dialog
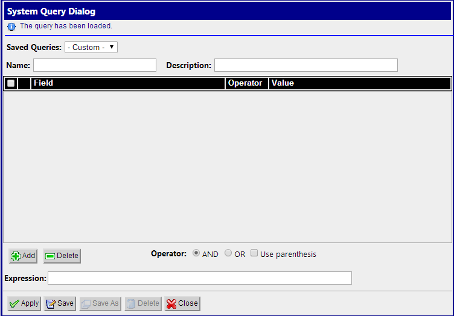
Click Add to create fields for a new query. The query can be deleted by clicking Delete.
When adding a condition, the corresponding label is added into the Expression field. It is added to the end of the expression with the selected Operator (AND or OR). Similarly, when the condition is removed from the query, the corresponding label is automatically removed from the expression and the expression is adjusted. When Use Bracket is selected, then the whole expression is closed in brackets before adding the new condition.
The query is validated before it is saved or executed. Several things are verified:
Whenever any error occurs, the user is notified either in the Message Panel at the top of the Dialog box or next to the GUI element which caused the error (a condition or expression box).
Note:
For filtering on source and destination node fields, provide either the IP address or select the node name from the list. Selecting the node name means filtering on the list of IP addresses assigned to the selected node. If the same IP Address is being reused across the nodes, filtered data would display other nodes as well.The Displayed Fields are selected separately per dictionary. If there is more than one dictionary, then fields in the query result are merged together based on the field name. All fields with the same name are displayed in the same column.
Click Save to save a query for later use. The query appears in the Query List panel.
Click Save As to open a prompt asking for a new name. Confirms the name. A new query is created and saved for later use. The query appears in the Query List panel.
Now the query is ready for execution. Execute the query by clicking Apply.
