4. Processing an MM Deal
A ‘product’ is a specific service that you offer your customers.
For example, amongst other financial services, you may offer an ‘overnight borrowing’ facility to your customers. By defining the overnight borrowing facility as a product − with certain attributes − you can categorize all overnight borrowings, which share the attributes, defined for the product.
The other advantage of defining a product is that you can define certain general attributes for a product that will default to all contracts (placements or borrowings) involving it.
Note
When you enter into a deal with a customer, you enter into a ‘contract’. Contracts are customer specific.
Deals (contracts) inherit the attributes of the product by default. This means you will not have to define these general attributes each time you input a deal involving the product. These general attributes, however, can be changed at the time of processing a deal.
Besides, these general attributes which a deal inherits from a product - and which can be changed for it − there are the specific attributes which you have to define for the deal:
- The counterparty (customer) details
- The deal amount
- The deal currency
- The repayment account for the deal, and so on
This chapter contains the following sections:
- “Capturing Deal Details” on page 1
- “Financial Details that can be Changed” on page 20
- “Viewing the Other Details of a Deal” on page 20
- “Viewing the Other Details of a Deal” on page 20
- “Advices for Deal Initiation” on page 21
- “Viewing Event Details” on page 21
- “Viewing Accounting Entries for Deal Initiation” on page 22
- “Viewing the Different Versions of a Deal” on page 23
- “Initiating a Future Value Dated Deal” on page 23
- Section 4.11, "MM Affirmation Input"
- Section 4.12, "Authorizing a Contract"
- Section 4.13, "Multilevel Authorization of a Contract"
- “Authorizing a Contract” on page 35
- “Multilevel Authorization of a Contract” on page 35
- “Authorizing Bulk MM contracts” on page 36
- “Reassigning a Contract to Another User” on page 39
- “Amending Money Market Transactions” on page 39
4.1 Capturing Deal Details
This section contains the following topics:
- Section 4.1.1, "Features of the Contract Details screen"
- Section 4.1.2, "Entering Deal Details"
- Section 4.1.3, "Schedules Tab"
- Section 4.1.4, "Rollover Tab"
- Section 4.1.5, "Preferences Tab"
- Section 4.1.6, "Modifying a Placement or a Borrowing"
- Section 4.1.7, "Viewing Money Market Contract Details"
You can invoke the Contract Details screen from the Application Browser by typing ‘MMDTRONL’ in the field at the top right corner of the Application tool bar and clicking the adjoining arrow button.
Once in the Contract Details screen, you will see four other sections, each representing a screen:
Section |
Screen |
Preferences |
Contract Preferences screen |
Schedules |
Contract Schedule Definition screen |
Rollover |
Contract Rollover screen |
4.1.1 Features of the Contract Details screen
Every product that is created in your bank is endowed with certain general attributes. A deal that you enter into acquires the general attributes defined for the product it involves. To recall, a product is endowed with the following general attributes:
- The product code, description, slogan, start and end date for the product and remarks
- The frequency of interest accrual
- The tenor limits for the product
- The liquidation mode: manual or automatic
- Whether a deal involving the product can be rolled over into a new deal if it is not liquidated on its maturity date
- Whether the accrued interest of earlier placement(s) should be considered as part of the “utilized amount” while tracking credit utilization for a customer
- Whether tax has to be applied
- Whether brokerage has to be applied
- The exchange rate variance (for a special customer, you can choose to apply a rate that is greater than the standard exchange rate defined for the currency. You can impose some restrictions on the special rate by way of specifying a variance). Whether a penalty is to be imposed if there is an advance repayment
- Whether interest schedule amounts have to be recomputed in case of an advance payment
- Whether a deal involving a product can be booked to be initiated on a date in the future
- Whether for a backdated deal that has schedules prior to today’s date, the schedules have to be liquidated when the deal is initiated. A back dated deal is one, which has an initiation date, which falls before the date on which it is booked.
- The payment type for main interest - bearing, discounted or true discounted
- The values to be rekeyed, by the authorizer of a contract, at the time of authorization
- The liquidation order of various components in case of auto liquidation
- Repayment schedules
- Aging analysis details such as the movement of deals from one status to another; the mode of status change - whether forward and reverse movements should be automatic or manual; reversal or stoppage of accruals upon change of status; the transfer gl upon status change; the messages to be generated; and the transfer days for interim schedules and maturity schedules
- Specifying rollover details like updating credit limit utilization on rollover (for a placement), tax on rollover, rolling over with interest or without, deduction of tax on rollover
- Details of interest, charge and fee
- Other tax details like the component being taxed, the type of tax and the event (booking, liquidation, etc.) Upon which it is applied
- The accounting roles and the general ledgers for accounting purposes when an event (initiation, liquidation, etc.) Takes place, and the advices or messages to be generated
- The customer categories and customers who can be counterparty to a deal involving the product
- The branch and currency restrictions
At the time of saving a money market contract, the system will pass a certain information about the money market contract to the FATCA accounts and obligations maintenance for the customer. This is done if the beneficiary account’s customer has a reportable FATCA classification and if the money market product used to book the contract is present in the FATCA Products, account class and Instruments maintenance.
If the MM contract is closed or liquidated completely, then the corresponding row in FATCA accounts and obligations maintenance will be archived. If you delete the MM contract before authorization, then you should also delete the corresponding entry in FATCA accounts and obligations maintenance.
A deal that you enter into acquires the details specified for the product. However, you also need to enter information that is specific to the contract. You can enter details specific to a contract in the Contract Details screen. You can invoke the ‘Money Market Contract Input’ screen by typing ‘MMDTRONL’ in the field at the top right corner of the Application tool bar and clicking the adjoining arrow button
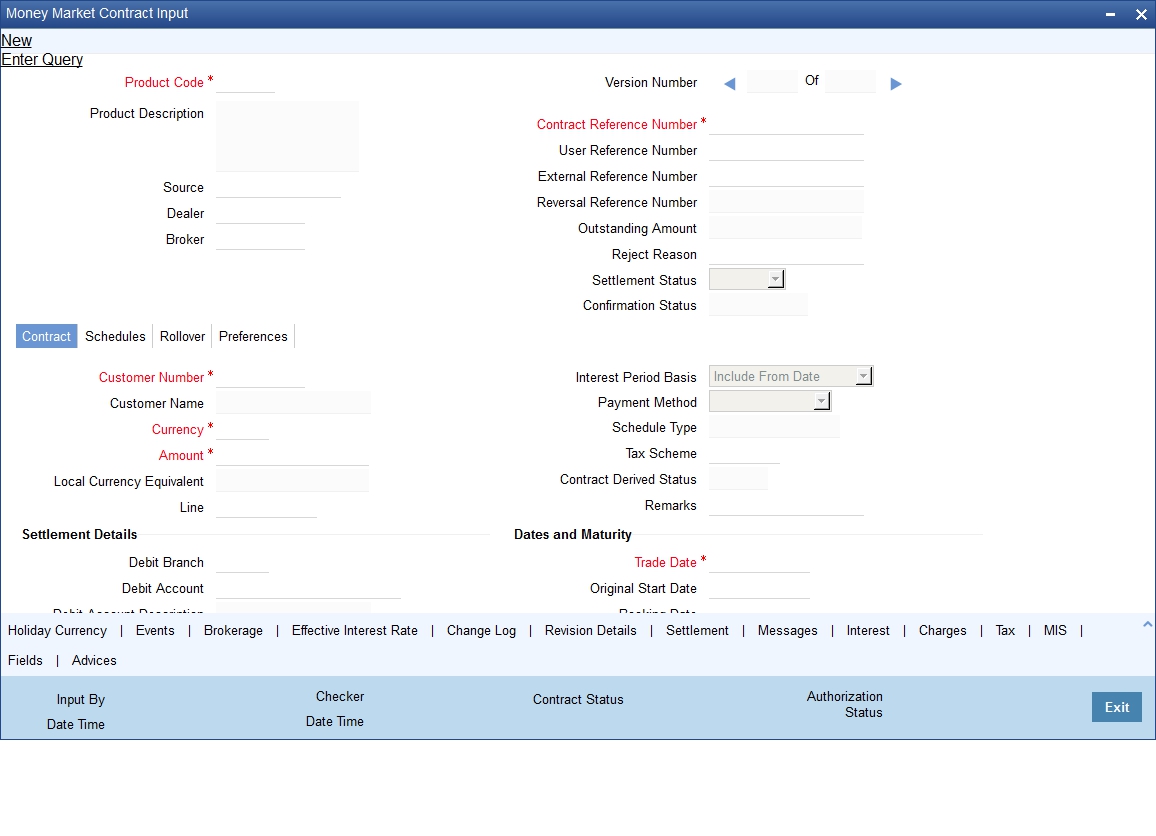
You need to enter the following information:
- The base number of the counterparty (customer)
- The currency of the contract
- The principal amount (for a deal with True Discounted interest, you should enter the nominal)
- The credit line under which the placement has to be tracked
- The tenor related details for the deal
- The code of the broker involved
- The dealer involved
- The default settlement account
- The maturity details
- The related reference number, if any
- The interest details
- Whether the deal can be rolled over
- The status of the placement if it is to be changed manually
The following details are displayed. They cannot be changed:
- Product type
- Default tax scheme
- Schedule payment method
- Interest type Rollover count
This section contains the following details:
- “Entering Deal Details” on page 5
- “Schedules Tab” on page 14
- “Rollover Tab” on page 15
- “Preferences Tab” on page 15
- “Modifying a Placement or a Borrowing” on page 18
4.1.2 Entering Deal Details
Enter values into all the mandatory fields and save the deal details.
Product Code
Every deal that you enter into would involve a specific service that you offer (which you have defined as a product). When processing a deal that you enter into, you should specify the product that it involves.
All the attributes of the product that you specify will apply to the deal. However, you can change some of these attributes while entering the details of the contract. When you specify the product, the product type - placement or borrowing - will be displayed.
Source
You have to indicate the source from which contracts have to be uploaded.
If this value is left null, then you will not be able to amend the contract. Amendment for the contract can be uploaded only through the same source as that used for creation.
Contract Reference number
The Contract Reference Number identifies the deal. It is automatically generated by the system for each deal. It is a combination of the branch code, the product code, the date on which the deal is booked (in Julian format) and a running serial number for the booking date.
The Reference Number consists of a three-digit branch code, a four-character product code, a five-digit Julian Date and a four-digit serial number.
The Julian Date has the following format:
“YYDDD”
Here, YY stands for the last two digits of the year and DDD for the number of day(s) that has/have elapsed in the year.
For example, 31 January 1998 translates into the Julian Date: 98031. Similarly, 5 February 1998 becomes 98036 in the Julian format. Here, 036 is arrived at by adding the number of days elapsed in January with those that elapsed in February (31+5=36).
User Reference Number
You can enter any reference number for a deal that you enter into. The deal will be identified through this number in addition to the Contract Reference Number generated by the system. No two deals can have the same User Reference Number. By default, the Contract Reference Number generated by the system will be taken as the User Reference Number. You can use this number, besides the deal Reference Number, to retrieve information relating to a deal.
External Reference
If the transaction is being uploaded from an external source, you can specify the identification for the transaction in the external source, as the external reference number. You cannot amend this value post contact save.
In a scenario where your customer is tracking a deal in her system, she would probably assign it a unique reference number. If she offers the number for reference purposes, it can be recorded in this screen. This reference number will be printed on the advices sent to the customer to enable her to identify, and track, the deal with ease.
Reversal Reference Number
The reference number of the contract that is being reversed and rebooked is displayed here. To enable amendment of MM Contract details Oracle FLEXCUBE will reverse the old contract and rebook a new contract with the old user reference number and external reference number. The old contract is reversed and a new contract is booked with Reversed FCC ref as the parent contract.
For further details on reversing and rebooking of a contract, refer the section titled 'Reversing and Rebooking a Contract' of this user manual.
Outstanding Amount
The system displays the total amount due as of the value date.
Settlement Status
The system displays the settlement account status. If the fund in settlement account are found insufficient after verification, then the settlement status is displayed as ‘Pending’.
Confirmation Status
The system displays the status of MM contract confirmation on confirming the MM deal manually or automatically. Confirmation Status can be Confirmed, Unconfirmed or Waived. If a completely matched deal is unconfirmed manually from ‘Manual Matching’ screen, then the confirmation message will be changed to ‘Unconfirmed’.
Contract Tab
The contract details like the customer, currency, amount etc are maintained as Contract Details. The Contract Details are entered in the ‘Contract’ tab.
Customer Number
When entering the details of a deal, you should specify the customer (counterparty) involved in the deal. The category of customers (or the customers themselves) that can be counterparty to a deal is defined for the product. Specify the code of an authorized customer who falls into a category allowed for the product.
Customer Name
The system displays the name of the specified customer ID based on the details maintained at ‘Customer Maintenance’ level.
Currency
When processing a deal, you should specify the currency of the deal. You can select any currency that is allowed for the product, which the deal involves. Amendment to this field will be considered a financial amendment.
Amount
If a product has bearing or discounted type of interest, you should enter the principal of the deal in this screen. For a deal involving a true discounted product, you should enter the face value (nominal) of the deal. You can enter “T” or “M” to indicate thousands or millions, respectively. For example, 10T means 10,000 and 10M means 10 million. Amendment to this field will be considered a financial amendment.
Note that the amount, which you enter, would be taken to be in the currency that you specify as the deal currency.
On saving the transaction after entering all the required details in the system, the system validates the value of the contract amount against the following:
- Product transaction limit
- User Input limit
If the transaction currency and the limit currency are different, then the system converts the amount financed to limit currency and checks if the same is in excess of the product transaction limit and user input limit. If this holds true, the system indicates the same with below override/error messages:
- Number of levels required for authorizing the transaction
- Transaction amount is in excess of the input limit of the user
Local Currency Amount
If the deal amount is in foreign currency, the system displays the equivalent local currency amount.
Line
By default, you will view the placement credit line defined for the customer. You can change over to another authorized credit line if you want to track the placement under a different line.
During an upload, the credit lines for the given Counterparty, Product, Branch, Currency combination are fetched by the system. If there is only one credit line available, the system will display it here. If there are multiple lines found, the field will be left blank.
Interest Period Basis
You need to indicate how the system must consider the tenor basis upon which interest is computed over a schedule or interest period, in respect of the contract.
You can choose any of the following options:
- Including the From Date - For all schedules, the period considered for interest calculation would include the start date and exclude the end date. Therefore, the value date of the deal is considered for interest calculation and the maturity date is excluded.
- Including the To Date - For all schedules, the period considered for interest calculation would exclude the start date and include the end date. Therefore, the value date of the deal is excluded, but the maturity date is included for interest calculation.
- Including both From and To Dates - The period considered for interest
calculation would include both the value date and the maturity date.
This would mean:
- For the first schedule, it would include the Value Date as well as the end date.Interest would be calculated for the Value Date.
- For all other schedules, it would include the end date. Interest would be calculated for the Maturity Date. This option would work similar to the Include To Date option - that is, interest would be calculated for the period between the start date (excluding the start date) and the end date (including the end date) of the schedule.
- Excluding both From and To Dates - The period considered for interest
calculation would exclude both the value date and the maturity date.
This would mean:
- For the first schedule, it would exclude both the Value Date as well as the end date of the schedule. No interest would be calculated for the Value Date.
- For all other schedules, it would exclude the end date. No interest would be calculated for the Maturity Date. This option would work similar to the Include From Date option - that is interest would be calculated for the period between the start date (including the start date) and the end date (excluding the end date) of the schedule.
Payment Method
The payment method defined for the main interest for the product (whether bearing, discounted or true discounted) applies to the contract as well. The method defined for the product is displayed here.
- Bearing: Interest is liquidated on schedule payment date(s).
- Discounted: In this interest payment method, the interest is deducted at the time of initiating the deal.
- True discounted: In this interest payment method, the interest is calculated on the principal of the deal and not on the nominal. All the same, like the discounted method, here too, it is deducted from the principal at the time of initiation of the deal.
Schedule Type
If you have defined repayment schedules for a product, they will be applied to a deal involving the product, automatically. However, you can change the schedules while processing a deal under the product.
When a deal for which the repayment schedules were changed is rolled over, the new deal can have the repayment schedules defined for the product, or the schedules for the deal.
Tax Scheme
The tax scheme, which has been specified for the product, will be displayed in this screen. The tax scheme cannot be changed at the time of deal processing.
Contract Derived Status
The "status" of a placement is indicative of the status of repayments on it. If you have specified automatic status movement for the placement, it will be moved automatically to the status, as per your definition. However, if you indicated that the status change will be made manually on the placement, you can change the status manually in this screen. Even if you have defined a placement with automatic status movement, you can still change the status manually before the automatic status change is due.
There is yet another scenario, where you have defined a placement with automatic status movement forward, but manual status movement in the reverse direction. That is, when the conditions for a placement being in a particular status no longer exist, if you have specified manual reverse movement, then you will have to manually move the placement to the appropriate status.
A placement on which the latest repayment has been made will be in the Active status. If a payment is outstanding on a placement, its status can be changed, based on your requirements of reporting placements with outstanding payments. The different status codes applicable for a placement are defined for a product and it applies to the placement, by default. However, you can change the status for the contract through this screen.
When you are capturing placement details, the system allots the status of "Active" by default. You may change it to any of the status codes as per your requirement. While doing manual status changes, ensure that you change the status in the order they are defined. For example, the status codes are defined as follows, in that order:
- Active
- Past Due
- Non-accrual
- Write-off
You cannot change the status of a placement from Active to Non-accrual, by passing Past Due. If the requirement is that the placement has to be put in the Non-accrual status from the Active status, you should first change the status to Past Due, store and authorize this status change and then change it to the Non-accrual status. If a status change has been defined with a change in the GL, the entries will be passed for the GL movement.
Remarks
You can enter information describing the deal that you are processing. This will be available when you retrieve information on the deal. However, this information will not be printed on any advice printed for the customer's benefit. This information will be displayed whenever you retrieve information on the deal either as a display or in print.
Settlement Details
Debit Branch
When selecting the settlement details of a deal, you should specify the debit account Branch.
Debit Account
Specify the account to be debited for the money market deal.
Debit Account Description
The system displays the description of the specified debit account number based on the details maintained at 'Customer Account Maintenance' level.
Credit Branch
When selecting the settlement details of a deal, you should specify the credit account branch.
Credit Account
Specify the account to be credited for the money market deal.
Credit Account Description
The system displays the description of the specified credit account number based on the details maintained at 'Customer Account Maintenance' level.
Liquidation
When setting up a product you specify the mode of liquidation, whether automatic or manual, for the different components of a deal. By default, all deals involving the product will inherit this definition. However, you can change the mode of liquidation, from automatic to manual, or vice versa, while processing a deal.
Verify Funds Before Auto Liquidation
The system defaults the product preferences for ‘Verify Funds Before Auto Liquidation’ during MM contract booking. However you can modify it.
During auto liquidation if ‘Verify Funds Before Auto Liquidation’ is checked at contract level, the system checks the available balance in the settlement account.
The available balance is calculated as available balance in the account + available limits + overdraft limits of the account. This validation is not applicable during manual liquidation.
If settlement account available balance is less than amount due, then the system will update contract settlement status as 'Pending' and park it in Contract Exceptions data store.
If there is sufficient balance in the settlement account, the system will proceed with auto liquidation.
Rollover Allowed
While setting up a product, if you specified that deals involving the product should be automatically rolled over, all deals involving the product will be rolled over on their respective Maturity Dates, if they are not liquidated. This feature is called "auto" rollover. If auto rollover is specified for the product the deal involves, it will be indicated on this screen.
However, if you do not want the deal (whose details are being captured) to be rolled over, you can disallow rollover for the deal. If rollover has been disallowed for a product, you cannot rollover deals involving the product.
Note
For rollover to be applicable for the deal, it has to be defined for the product.
Dates and Maturity Trade Date
This is the date on which the deal is agreed with the counterparty. trade date cannot be modified once authorized.
The system will display error messages under the following conditions:
- Trade date is greater than current system date
- Trade date is holiday as per the deal currency
- Trade date is blank
- Trade date is later than the value date
- Trade date is earlier than the product start date
Original Start Date
For a deal that has been rolled over, this is the date on which the deal was originally initiated. If a deal has been rolled over more than once, this will be the date on which the first deal was initiated.
If you are entering a deal that has already been initiated, you should enter the date on which the deal began. In this case, the date will be for information purposes only and for all accounting purposes the Value Date will be considered as the date on which the deal was initiated.
Booking Date
The date on which the deal details are entered would be displayed in this screen. This defaults to the system date (today’s date). This date is for information purposes only. The accounting entries are passed as of the Value Date of the deal (initiation date of the deal). Amendment to this field will be considered a financial amendment.
Value Date
This is the date on which a deal takes effect. The accounting entries for the initiation of the deal will be passed as of this date. The tenor of the deal will begin from this date and all calculations for interest and all the other components based on tenor will be made from this date onwards.
The system defaults to today’s date. You can enter a Value Date of your choice here. The date that you enter can be any one of the following:
- Today’s date
- A date in the past
- A date in the future (you can enter a date in the future only if Future Dating has been allowed for the product).
The Value Date should not be earlier than the Start Date or later than the End Date defined for the product involved in the deal. In case of a child rolled over contract, this value will be the same as the maturity date of the parent contract.
If the liquidation date for any component falls before today’s date, the liquidation entries (as defined by you for the product) will be passed if you have so specified for the product. If the Maturity Date of a deal is earlier than today, maturity entries will also be passed.
Once the deal details have been stored and authorized, this date can be amended only if the deposit has bearing type of interest and NO schedule has been liquidated. Modification to this field will be considered as a financial amendment.
An override will be sought if the Value Date falls on a holiday, in the country of the deal currency.
User Maturity Date
If you want to change the maturity date of the deal, enter the new maturity date here.
Maturity Date
If the Maturity Type is fixed (that is, the Maturity Date of the deal is known when the deal is initiated) specify the Maturity Date. This date should be later than the Start Date of the product. If the product has a Default Tenor, this date will be defaulted based on the tenor and the From Date of the contract. If you change this date, you should give an override when you save the deal.
For a deal with Call or Notice type of maturity, the Maturity Date is not entered at the time of deal booking. You can get this date updated through value dated amendment. This date should be later than the Start Date of the product.
If the product has a Default Tenor, this date will be defaulted based on the tenor and the From Date of the contract. If you have specified auto liquidation for the deal, liquidation will be done automatically on that date. If manual liquidation has been specified, you will have to manually liquidate the deal through the Manual Liquidation function.
For a deal with Fixed Maturity Type, this date can either be extended or brought backward through the Value Dated Changes function, once the deal has been initiated.
Notice Days
For a contract maturing at notice, you should enter the notice period (in days). This is for information purposes only. When the notice to repay is issued to the counterparty, you should indicate the Maturity Date of the deal using value dated amendment screen.
Intra Day Deal Date
For intra-day deals, the system populates the intra-day deal date in this field. The intra-day deal date is populated as value date +1.You can only enter intra-day deals using a product meant for intra-day deals (as set in the Product Preferences).
Tenor
If the product has a Default Tenor, this tenor will be defaulted based on the tenor. On overriding this maturity date will get adjusted.
Reporting Details
Reporting Currency
Select the reporting currency from the option list.
Reporting Amount
The system displays the amount.
Outstanding Balance
The system displays the total amount due as of the value date.
Settlement Instruction Pickup
Settlement Sequence Number
Choose a settlement instruction by specifying a settlement sequence number. You can skip this field if any default settlement instruction is already specified.
Note
At the time of specifying settlement instructions, it is now possible to choose from multiple instructions that are maintained for the same branch, customer, currency, module and product combinations. You can choose any settlement instruction from a list of values. The list of values displays the Settlement Sequence Number and Settlement Instruction Description.
Settlement Instruction Description
Specifies the description of the selected settlement instruction.
4.1.2.1 Interest Rates/Amounts
Rate Type
The rate type applicable for the selected product will be displayed. It can be one of the following:
- Fixed: a fixed interest rate
- Floating rate: an interest rate that changes periodically or automatically as per your specifications in the Floating Rate Table
- Special: an amount instead of a rate.
You cannot modify the displayed value.
Rate Code
For Floating Rate, the rate code will be displayed. You cannot modify it.
Rate
The Rate applicable for the selected product will be displayed. You cannot modify it.
Max Rate & Minimum Rate
The maximum and minimum rate allowed for the selected product will be displayed. You cannot modify it.
Customer Margin
The margin specified at customer level will be displayed here. You cannot modify it.
Interest Amount
The interest amount for the selected product will be displayed. You cannot modify it.
Interest Margin/Spread
Margin
Margin provided at the product level will be defaulted here. You cannot modify it.
Spread
The spread value for the selected product will be displayed as specified in the product level. You cannot modify it.
Minimum Spread & Maximum Spread
The maximum and minimum spread that can be applied for the selected product will be displayed. You cannot modify it.
Note
This Spread should be greater than or equal to the Minimum Spread and less than or equal to the Maximum Spread defined for the product involved in the deal. If the spread you apply happens to be greater than the Maximum Spread, then the Maximum Spread will be applied on the rate. On the other hand, if it is less than the Minimum Spread defined for the product, the Minimum Spread will be picked up. For a floating rate, the spread will be applied over the market rate applicable for the day.
Negative Interest Rates
Negative fixed rates or resolved rates will be allowed in MM contract or amendment only if negative interest is allowed for the main interest component. You can maintain the contract interest rate (negative or positive) against main interest component only.
If the effective interest rate is negative, then it will be internally assigned to negative interest component and you have to set up accrual and liquidation entries for the negative interest component.
Special interest amount and negative interest amount will not be allowed in Interest Amount and Acquired Amount fields of ICCF screen respectively.
If negative interest is not allowed for a product and if the effective rate becomes negative during batch rate revision, then the rate revision is skipped for the contract and exception will be logged.
4.1.3 Schedules Tab
The contract inherits the schedule details from the associated product. However, you can change at the contract level. Click ‘Schedule’ to view/modify the details.
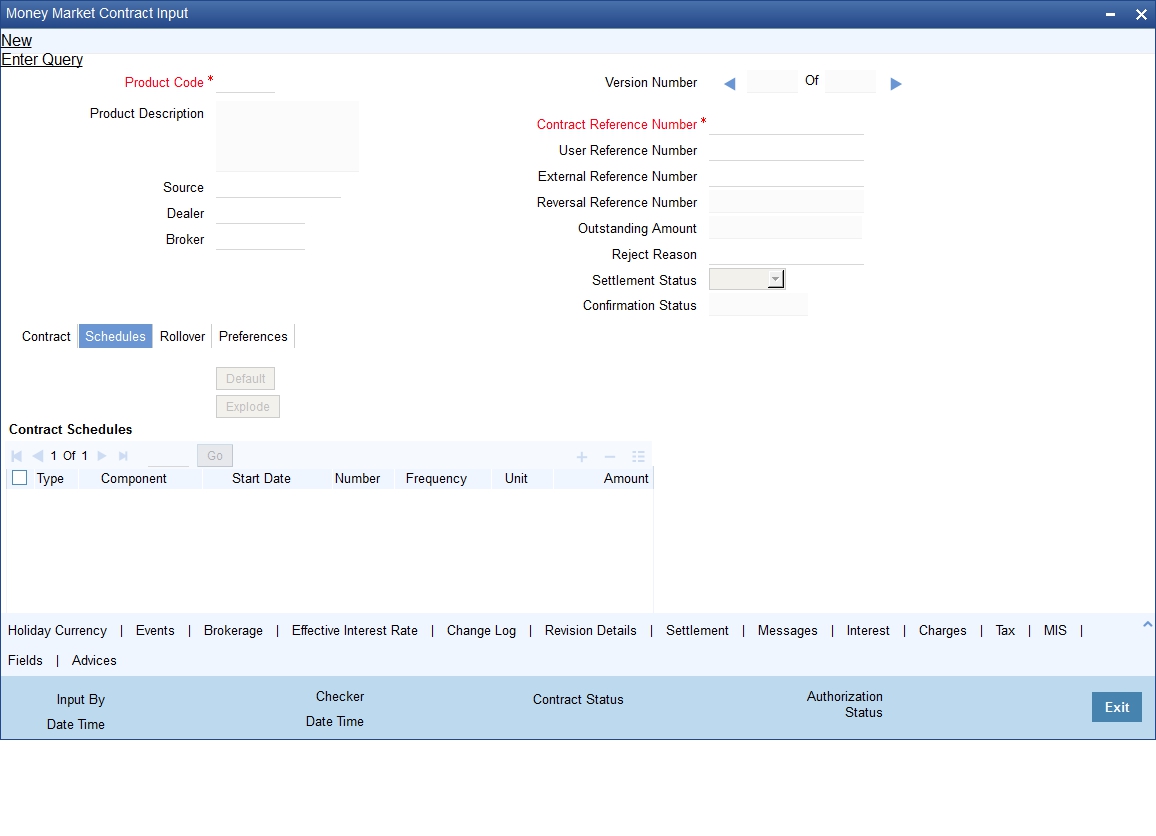
Click ‘Explode’ button in this screen to invoke ‘Payment Schedule Details’ screen. This screen provides the payment schedule break-up. You can view the following details:
Schedule Summary
- Due Date
- Pay Receive
- Currency
- Total Amount Due
- Total Amount Settled
- Total Amount Adjusted
- Subsidy Amount
Schedule Details
- Component
- Pay Receive
- Amount Due
- Amount Settled
- Adjusted Amount
- Subsidy Amount
- Back Value Adjusted Amount
Amount Settled
- Input Date
- Value Date
- Amount Settled
- LCY Equivalent Settled
Refer to the chapter the ‘Processing Repayment’ in this User Manual for details.
4.1.4 Rollover Tab
The rollover details are maintained at the product level. You can however modify them at the time of entering a deal. Click ‘Rollover’ to view/change the rollover details.
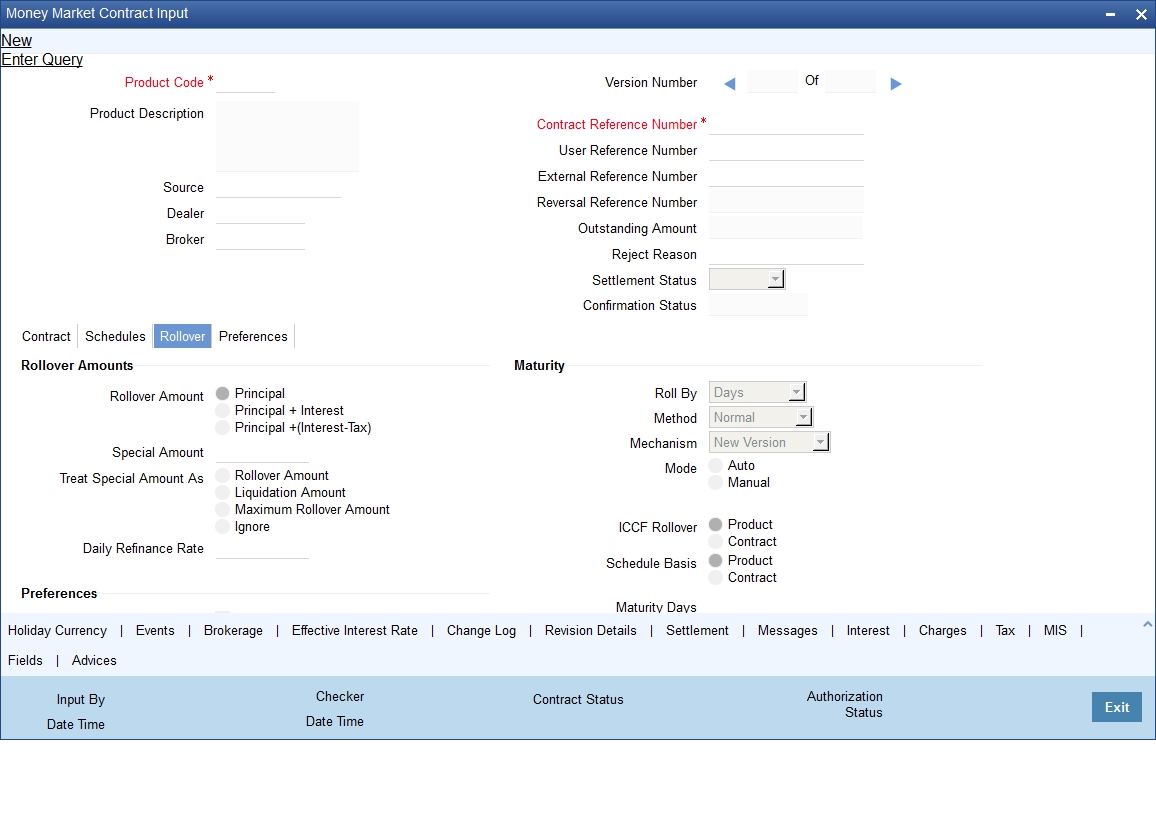
The process of rolling over of contracts is explained in detail in the ‘Rolling Over a Deal’ chapter.
4.1.5 Preferences Tab
Preferences are options. For instance, for a product, you have the option of:
- Making liquidation automatic or manual
- Allowing or disallowing rollover
- Applying tax or waiving it
- Applying prepayment penalty or waiving it etc
Click ‘Preferences’ to view the preferences.
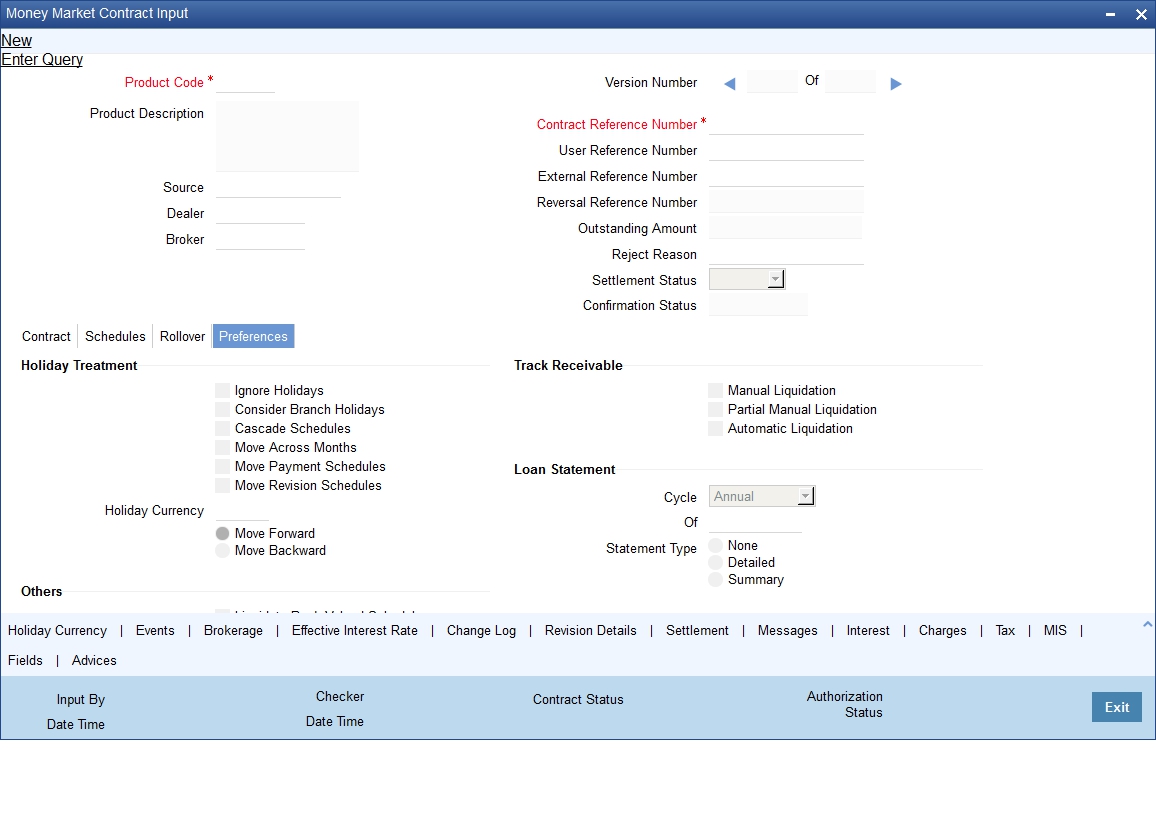
The contract inherits preferences from the associated product.
Refer to the chapter ‘Defining the attributes of a Money Market Product’ for detailed explanations on the preferences.
The preferences that are available at the time of entering the contract details are explained below:
Holiday Treatment
Ignoring Holidays
If you check this box the schedule dates will be calculated ignoring the holiday. The automatic processing of the schedule that falls due on a holiday, however, will be determined by your holiday specifications for the product. If you indicated, for example, that the processing should be done till the day before the next working day, the schedule will be liquidated during the end-of-day run of the Automatic Contract Update function. If you specified, though, that processing should be done only till the System Date, then the schedule falling on the holiday will be processed during the beginning-of-day run of the Automatic Contract Update function on the next working day.
Consider Branch Holidays
Check this box for the system to consider branch holidays for holiday treatment.
Cascading schedules
If you check this box then if one schedule is moved backward or forward in view of a holiday, the other schedules will be accordingly shifted. If you do not want to cascade schedules, then, only the schedule, which falls on a holiday, will be shifted as specified and the others will remain as they were.
Move Across Months
If you check this box, then if you move a schedule falling due on a holiday either forward or backward to the next or previous working day and it crosses over into a different month, then system moves the schedule date. If not, the schedule date will be kept in the same month, on the last or first working day of the month, depending on whether the schedule is over the month-end or the beginning of the month.
Holiday Currency
You can specify the currency for which the holiday table should be checked before drawing the payment schedules related to the deal. In case a schedule falls on a holiday and you have specified that the schedule be moved forward or backward, the movement happens according to the holidays in this country. By default, the currency to be checked is the deal currency. If a currency other than this is specified, the holiday table will be checked for both the currencies.
Others
Liquidate Back Valued Schedules
If you have specified, while defining the product, that a back-dated deal with repayment schedules prior to today's date, the schedules will be liquidated when the deal is initiated, the same will apply to the deal you are entering. However, through this, you can choose not to liquidate back valued schedules.
Payment on Confirmation
Check this box to send the payment messages during the confirmation status ‘Confirmed’ or ‘Waived’.
Payment message will be send on contract confirmation and not during contract booking.
External Interface Details
External Reference Number
Indicate whether the system must accept external reference numbers or a user-entered reference number, for contracts entered at the branch. If you choose this option for a contract, the system will not generate the custom reference number for this deal, but will either accept an external custom reference number or a user-entered custom reference number.
Parent Ref No
Specify the contract reference number of the parent MM contract to which this child contract needs to be linked. This field is applicable only if the contract you are capturing is a child contract created as a result of the parent contract’s rollover. In this case, the following details will be same as the parent contract:
- Product Code
- Counterparty
- Currency
Track Receivables
Manual Liquidation
Select this option to track receivables during manual liquidation. In case of manual payments, the system will display an override if sufficient funds are not available in the settlement account. If you say ‘Yes’ to the override, the system will mark the fund as a receivable amount.
Partial Manual Liquidation
During manual liquidation, if sufficient funds are not available in the settlement account of the contract, you can opt to do a partial payment. In this case, the deal will be liquidated to the extent of the amount available in the account. The balance due will be tracked as a receivable amount. During EOD processing of the contracts, based on the availability of funds, the deal will be liquidated. This process will continue till the deal is recovered fully. The deal will be in the active status till full liquidation happens. If you do not choose to do a partial payment, then the entire amount that is being manually paid will be tracked as a receivable against the settlement account.
Automatic Liquidation
Select this option if you want to track receivables during automatic liquidation.
SGEN Required
You need to indicate whether the SGEN has to be issued for the deal. You need to opt for ‘Settlement Required’ option if you check this box. If not checked, the payment message will not be generated for the contract.
4.1.6 Modifying a Placement or a Borrowing
There are two types of modifications that you can make on a contract:
- Those that affect the financial details of the contract.
- Those that do not affect the financial details of the contract
(“Financial details” include the accounting entries that have already been passed or the advices that have already been generated).
For example, the changes made to the User Reference Number, Auto Rollover and Auto Liquidation flags, do not result in changes to the accounting entries that have been passed.
However, the inputs to some fields that contain financial information can be changed only under specific circumstances. This is done through the Value Dated Changes function. For example, the changes in the interest rate, increase in the principal etc., can be made only through the Value Dated Changes function.
A deal on which the previous activity has been saved but not been authorized, can be modified. For example, you have captured the details of a deal. The details have been saved but not yet authorized when you realize that some of the details have been wrongly entered. You can unlock the contract make the modifications and Save it. The uploaded contracts can be amended by any valid user – the contract maker or others.
Note
Any type of change, however, has to be authorized, before it takes effect.
4.1.7 Viewing Money Market Contract Details
You can view the MM contract details maintained in the ‘Money Market Contract Details’ screen using the ‘Money Market Contract Summary’ screen. You can invoke this screen by typing ‘MMSTRONL’ in the field at the top right corner of the Application tool bar and clicking on the adjoining arrow button.

In the above screen, you can base your queries on any or all of the following parameters and fetch records:
Recommended Fields
- Reference No - Specify the reference number. Alternatively, you can select the reference number from the option list. The list displays all valid reference numbers maintained in the system. You have to specify a minimum of 6 characters in this field.
Optional Fields
- Authorization Status
- Status
- User Reference
- Product
- Customer
- Currency
- Booking Date
- Maturity Date
- Related Reference
- Account Branch
- Module
- Settlement Status
- Parent Contratct Reference
Select any or all of the above parameters for a query and click ‘Search’ button. The following records meeting the selected criteria are displayed.
- Authorization Status
- Status
- Reference No
- User Reference
- Product
- Customer
- Currency
- Amount
- Booking Date
- Trade Date
- Value Date
- Maturity Date
- Related Reference
- Account Branch
- Module
- Status
- Payment Method
- Rate Code
- Rate
- Spread
- Profit/Amount
- Product Description
- Outstanding Principal
- Related Reference
- Settlement Status
4.2 Financial Details that can be Changed
Inputs to the following fields can be changed through the contract processing function:
- Takedown Account if the placement has not yet been initiated and Customer Account if a borrowing has not been initiated
- Maturity Account if the deal is yet to mature
- Interest Payment Account if the entire interest on the deal has not yet been liquidated. The new account will be used for future interest payments.
- Contract End Date for a notice or call type of deal
- Tax details if tax has not yet been liquidated
Note
The changes listed do not trigger any accounting entries or the generation of any advices.
4.3 Viewing the Other Details of a Deal
Using the buttons that are displayed in the ‘Contract Online’ screens you can view the following details of a deal:
- The settlement details
- The tax details
- The advices that you can suppress or prioritize
- The MIS details
- The ICCF details
- The events for the deal
- The accounting entries for the deal
- The brokerage details
4.4 Advices for Deal Initiation
The advices that have to be generated for any event are specified for the product involved in the deal and are generated after the product is authorized at product level. For example, you may have specified the following advices for the product:
- When a deal is initiated, an advice, addressed to the customer
- If any components (like discounted interest, tax on principal etc.) Are liquidated on takedown, an advice for each of them
- While processing the deal initiation, you can do the following:
- Suppress the generation of any of these advices
- Specify the priority of generation
In the Advices screen you can make these changes.
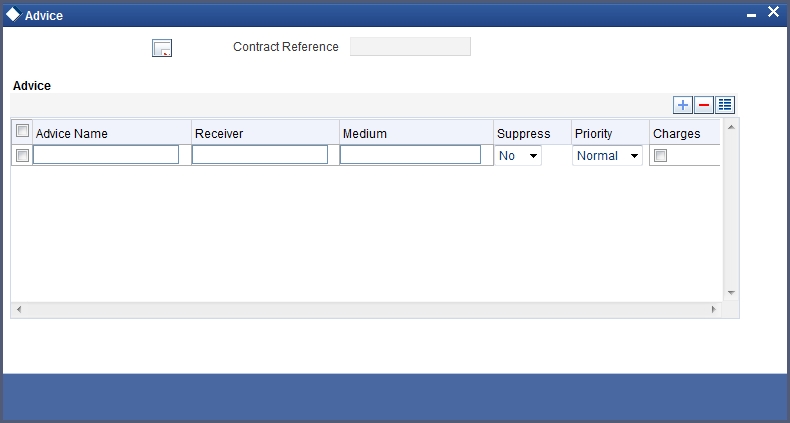
Suppress
By default, all the advices that have been defined for a product will be generated for a deal. However, you can suppress the generation of an advice for a deal by specifying so in this screen.
Priority
Priority applies to payment messages that have to be sent over S.W.I.F.T. By default, such advices will be sent on a Normal priority. You can change it to Urgent.
4.5 Viewing Event Details
You can view all the events that have take place on a Money Market deal through the View Events screen. You can access this screen by clicking on the view events button in any of the Contract On-line screens. All the events that have taken place on the deal so far will be listed in this screen according to the sequence in which they have taken place. The Date on which the event took place will also be displayed.
For example, this list contains events like Booking, Initiation, Interest Accrual, etc.
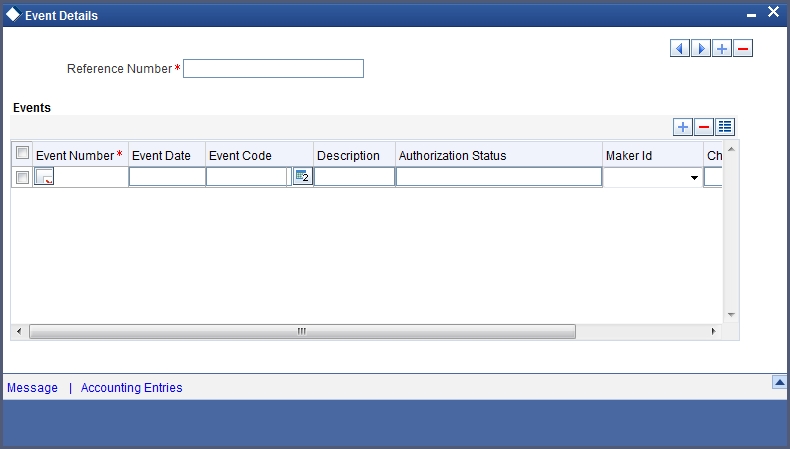
4.6 Viewing Accounting Entries for Deal Initiation
To view the accounting entries passed for a specific event, select the event and click ‘Accounting Entries’ button on the ‘Event Details’ screen. The accounting entries and overrides for that event will be displayed.

4.7 Viewing the Different Versions of a Deal
When a deal is input, it is assigned a version number of 1. From then on, each amendment of the deal results in its next version. When you come to the Detailed View Screen for a deal, the latest version will be displayed.
To see the previous version, click previous icon from a previous version, clicking next icon displays the next version.
4.8 Initiating a Future Value Dated Deal
A “future-dated” deal is one that has a Value Date that is later than the date on which it is booked. The Automatic Contract Update function will initiate the deal on the Value Date of the deal.
A future Value Date falling on a holiday will be initiated either on the previous working day or the next, depending on your definition for automatic processing at your branch.
All the initiation related entries specified for the product involved in the deal will be passed automatically. If currency conversions are involved, the conversion rates as of the date on which the deal is initiated will be picked up from the Currency Table. To recall, the rates that are applicable for a deal are defined for the product involved in the deal.
If there is a rate revision applicable for the future dated deal on the day it is initiated (that is, on the future Value Date), the rate revision will also be applied on the deal. This rate revision could either be due a Floating Rate change or a Value Dated Change.
4.8.1 Initiating Future Dated MM deals Manually
In a situation where the Initiation event for an MM deal has not been triggered during the BOD processes, you can choose to trigger it manually using the Reopen option in the Toolbar or from the Actions Menu. A typical instance when the system does not trigger the initiation event is due to insufficient funds.
You can manually trigger the Initiation event for all uninitiated MM deals with value date less than or equal to the system date.
Note
If your user profile has been granted the Auto-Auth privilege, such a deal gets authorized automatically after initiation. Otherwise it has to be authorized by a different user from the MM contract online screen.
4.9 MM Confirmation Rule Maintenance
This section contains the following topics:
- Section 4.9.1, "Invoking MM Confirmation Rule Maintenance Screen"
- Section 4.9.2, "Viewing MM Confirmation Rule Maintenance Details"
- Section 4.9.3, "Processing MM Confirmation Message Intraday Batch"
4.9.1 Invoking MM Confirmation Rule Maintenance Screen
You can maintain confirmation rules for MM deals in ‘MM Confirmation Rule Maintenance’ screen. The auto matching of confirmation messages will be based on these confirmation rules maintained in this screen. To invoke this screen type ‘MMDCNFMT’ in the field at the top right corner of the Application tool bar and click the adjoining arrow button.
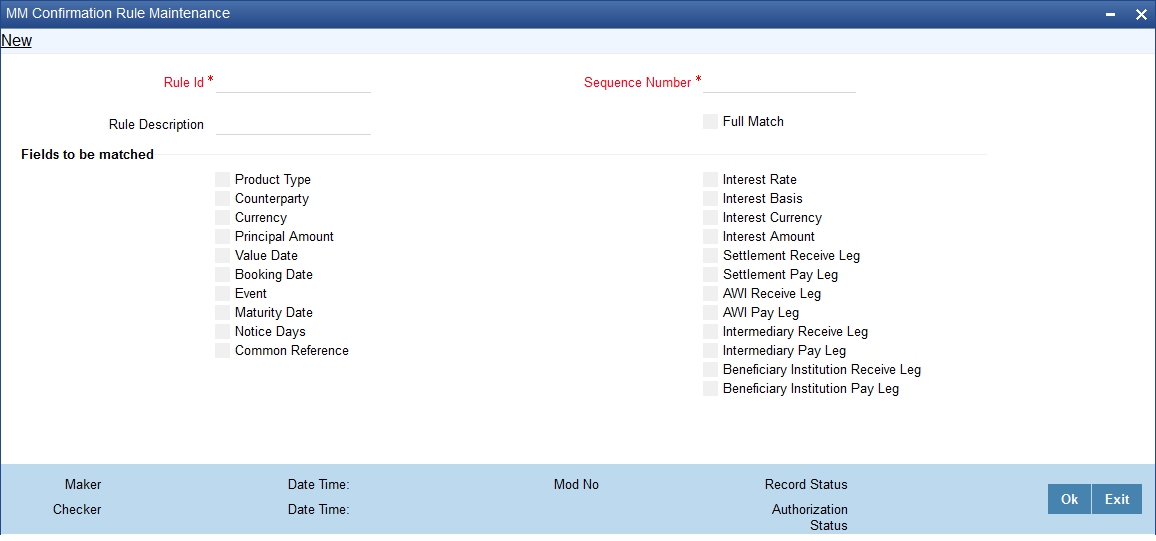
You can maintain the following details in this screen:
Rule ID
Specify a unique rule ID for the rule.
Rule Description
Specify a brief description of the rule ID.
Sequence Number
Specify the sequence number for the rule. If there are multiple rules, then auto matching of the messages will be processed based on the sequence number in an ascending order.
Full Match
Check this box to indicate that the confirmation rule maintained is a full match rule.
You have to check the following fields if the rule should be maintained as full match:
- Counteryparty
- Currency
- Principal Amount
- Value Date
- Product Type
Note
You can maintain more than one rule as full match.
Fields to be Matched
You can enable the following fields to match the details of an incoming SWIFT confirmation message MT320/ MT330 with an existing deal in Oracle FLEXCUBE.
- Product Type
- Counterparty
- Currency
- Principal Amount
- Value Date
- Booking Date
- Event
- Maturity Date
- Notice Days
- Common Reference
- Interest Rate
- Interest Basis
- Interest Currency
- Interest Amount
- Settlement Receive Leg
- Settlement Pay Leg
- AWI Receive Leg
- AWI Pay Leg
- Intermediary Receive Leg
- Intermediary Pay Leg
- Beneficiary Institution Receive Leg
- Beneficiary Institution Pay Leg
If the Full Match Rule is satisfied with a single deal, then the message will be marked as ‘Completely Matched’ and the deal will be marked as confirmed.
If multiple contracts are matched then the message is marked as ‘Partially Matched’.
4.9.2 Viewing MM Confirmation Rule Maintenance Details
You can view MM confirmation rule details in ‘MM Confirmation Rule Maintenance Summary’ screen. You can invoke this screen by typing ‘MMSCNFMT’ in the field at the top right corner of the Application tool bar and clicking the adjoining arrow button.
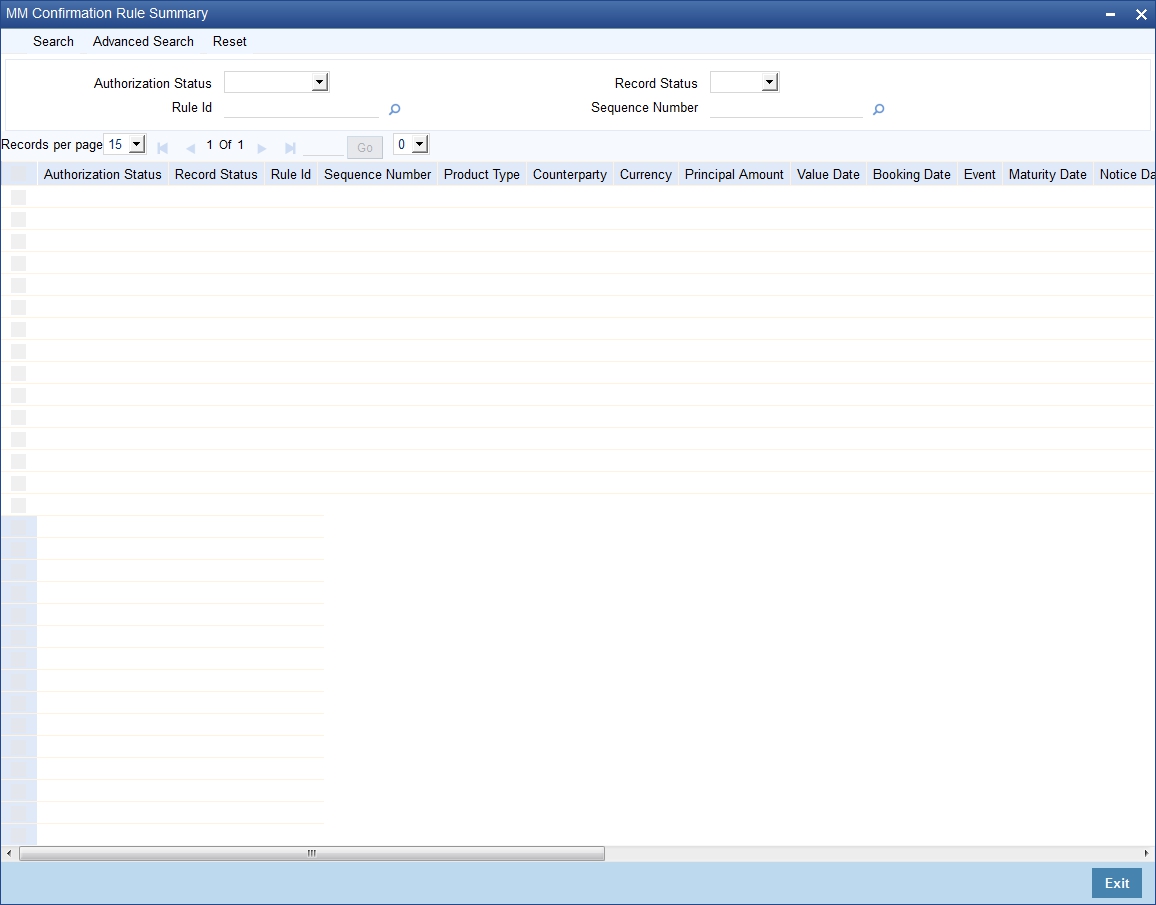
In the above screen, you can base your queries on any or all of the following parameters and fetch records:
- Authorization Status
- Rule ID
- Record Status
- Sequence Number
Select any or all of the above parameters for a query and click ‘Search’ button. The following records are displayed.:
- Authorization Status
- Rule ID
- Record Status
- Sequence Number
- Product Type
- Counterparty
- Currency
- Principal Amount
- Value Date
- Booking Date
- Event
- Maturity Date
- Notice Days
- Interest Rate
- Interest Basis
- Interest Currency
- Interest Amount
- Settlement Receive Leg
- Settlement Pay Leg
- AWI Receive Leg
- AWI Pay Leg
4.9.3 Processing MM Confirmation Message Intraday Batch
An intraday batch MMCNFRM is run to auto match MM Confirmation Messages. The messages MM320 and MM330 are parsed and uploaded into an internal upload table to confirm the format of the messages. On confirming the format, the incoming message browser updates the message as ‘Processed’. The auto confirmation batch will use the data in the incoming message and processes the matching based on Confirmation Rule maintained.
While processing auto match, if the details of an incoming message are matched with a single existing deal in the system based on a Full Match rule, then confirmation will be marked for the deal by triggering CONF event. If multiple contracts are matched with a single message while processing a Full Match Rule, then the message will be marked as Partially Matched. You can manually match the ‘Partially Matched’ deals from the ‘Manual Matching’ screen. While doing an auto matching system will match an incoming message with details of latest outgoing confirmation message details of a contract.
The following fields of MM deals are matched against the message field values:
MT 320/330 MM Confirmation Message field |
MM Contract field |
17R |
Product type |
82A |
Counterparty BIC |
30T |
Trade Date |
22A |
Events |
30V |
Value Date |
32B |
Currency |
32B |
Principal Amount |
30P(MT320) |
Maturity Date (For Fixed maturity contracts) |
38A(MT330) |
Notice Days for Notice Contracts |
37G |
Interest Rate |
14D |
Interest Basis |
34E |
Interest Amount Currency |
34E |
Interest Amount |
57a Settlement for Bought Leg |
Settlement for Sold Leg |
57a Settlement for Sold Leg |
Settlement for Bought Leg |
57a Account With Institution for Bought Leg |
Account With Institution for Sold Leg |
57a Account With Institution for Sold Leg |
Account With Institution for Bought Leg |
58a Beneficiary Institution Sold Leg |
Branch BIC |
22C |
Common Reference |
56A Intermediary Bought Leg |
Intermediary Sold Leg |
56A Intermediary Sold Leg |
Intermediary Bought Leg |
The list of contracts against a message, in case of full and partial matches, can be viewed from the ‘Manual Matching of Confirmation Messages’ screen.
4.10 MM Confirmation Message Matching
This section contains the following topics:
- Section 4.10.1, "Invoking MM Confirmation Message Matching Screen"
- Section 4.10.2, "View Match Details Button"
- Section 4.10.3, "Contract Button"
- Section 4.10.4, "View Message Button"
- Section 4.10.5, "Viewing MM Confirmation Message Matching Details"
- Section 4.10.6, "Processing Manual Match of the Messages"
4.10.1 Invoking MM Confirmation Message Matching Screen
All the partially matched and unmatched SWIFT confirmation messages can be fetched in ‘Confirmation Message Matching’ screen. You can link an unconfirmed MM deal with a confirmation message which is not yet matched and initiate the confirmation process in this screen. You can invoke this screen by typing ‘MMDMATCH’ in the field at the top right corner of the Application tool bar and clicking the adjoining arrow button.
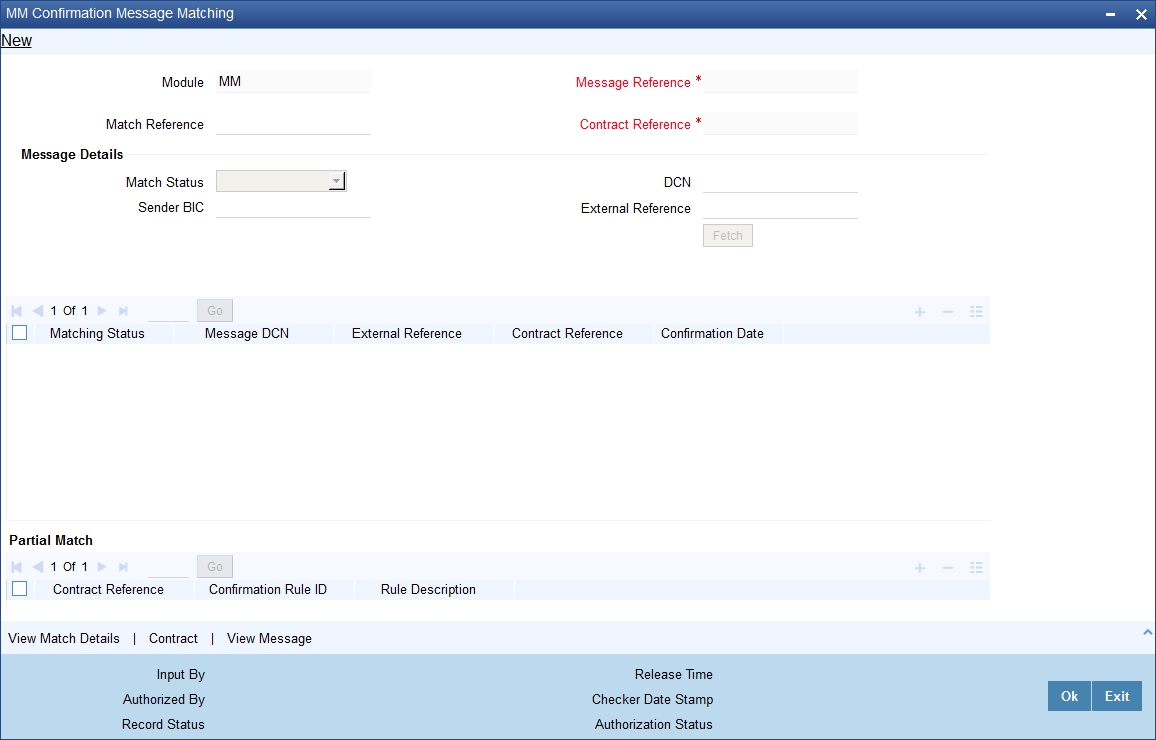
You can specify the following in this screen:
Module
The system displays the name of the module.
Message Reference
Specify the message reference number. The system displays the Message DCN as the message reference number based on the message details maintained.
Match Reference
The system displays the match reference number.
Contract Reference
Specify the contract reference number. The system displays the MM contract number based on the contract chosen from contract details screen.
Message Details
You can fetch all the message details based on the following message detail criteria selected:
Match Status
Select the match status from the drop-down list. Following are the options available:
- Null - To fetch both partially matched and unmatched records
- Partially Matched - To fetch partially matched records
- Unmatched - To fetch unmatched records
DCN
Specify the message DCN. Alternatively, you can select the ‘DCN’ from the option list.
Sender BIC
The system displays the sender BIC.
External Reference
Specify the external reference number. Alternatively, you can select the external reference number from the option list.
Matching Status
The system displays the matching status of the message.
Message DCN
The system displays the message DCN.
External Reference
The system displays the external reference number.
Contract Reference
Specify the contract reference number. Alternatively, you can select the contract reference number from the option list.
Confirmation Date
The system displays the confirmation date.
If a message is selected from the message detail block, then the message DCN will be defaulted in the ‘Message Reference’ field.
Partial Match
You can view the following partially matched message details:
Contract Reference
The system displays the contract reference number of the partially matched messages.
Confirmation Rule ID
The system displays the confirmation rule ID.
Rule Description
The system displays the description maintained for the rule.
If a partially matched message is selected in the partial match block, then the corresponding contract reference number will get defaulted in the ‘Contract Reference’ field.
The manual match of the messages will be done based on the Message Reference and Contract Reference displayed in this screen.
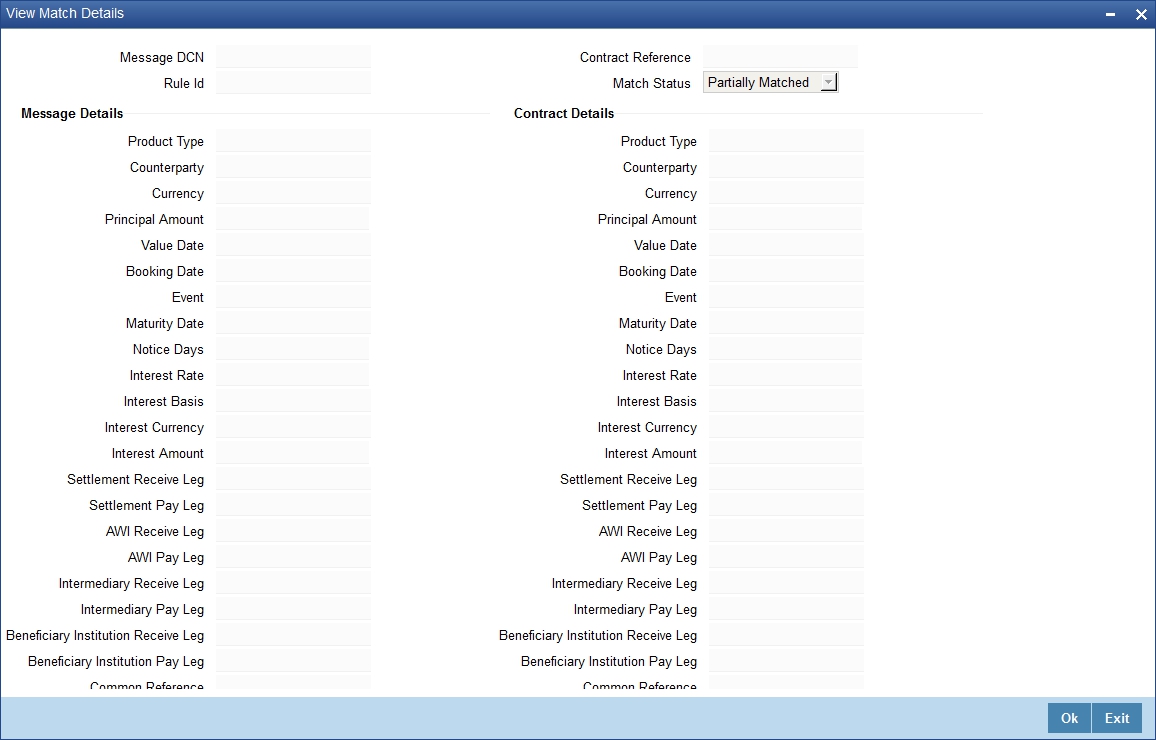
4.10.2 View Match Details Button
Click ‘View Match Details’ button in MM Confirmation Message Matching screen to view message match details based on the message and contract reference numbers.
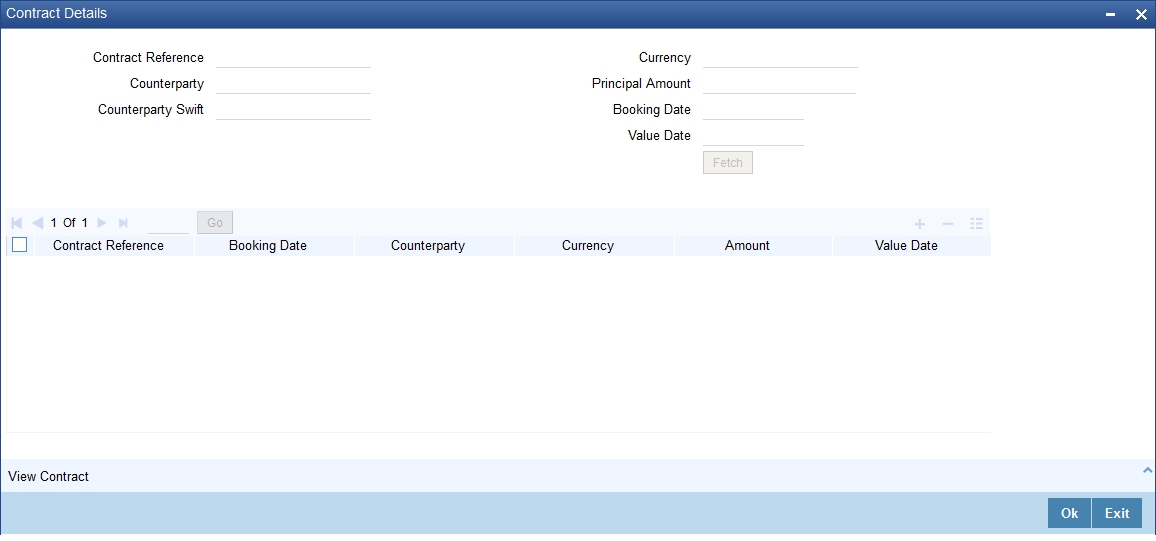
4.10.3 Contract Button
Click ‘Contract’ button in MM Confirmation Message Matching screen to view the contract details.
4.10.4 View Message Button
Click ‘View Message’ button to view the details of a selected message.
4.10.5 Viewing MM Confirmation Message Matching Details
You can view MM confirmation message matching details in ‘Confirmation Message Matching Summary’ screen. You can invoke this screen by typing ‘ MMSMATCH’ in the field at the top right corner of the Application tool bar and clicking the adjoining arrow button.
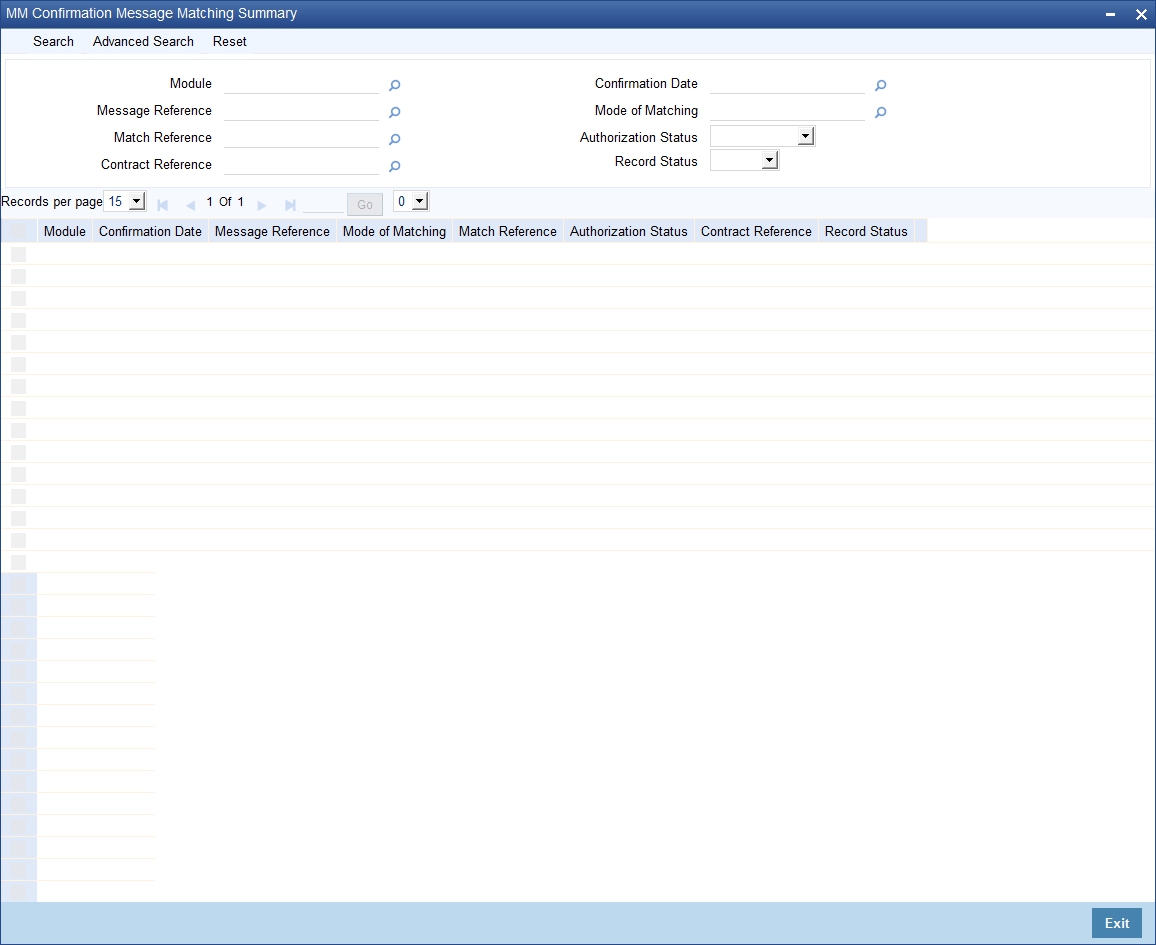
In the above screen, you can base your queries on any or all of the following parameters and fetch records:
- Module
- Message Reference
- Match Reference
- Contract Reference
- Confirmation Date
- Mode of Matching
- Authorization Status
- Record Status
Select any or all of the above parameters for a query and click ‘Search’ button. The following records are displayed.:
- Module
- Confirmation Date
- Message Reference
- Mode of Matching
- Match Reference
- Authorization Status
- Contract Reference
- Record Status
4.10.6 Processing Manual Match of the Messages
For manual match of the messages, the system fetches all the partially matched and unmatched messages based on the criteria selected in manual matching screen. You can match the partially matched record from the message details screen with a selected partially matched message. The manually matched records will be updated as Active and ‘Match in Progress’. You cannot fetch this message record for another manual matching process. Once the manually matched deals are authorized, the message will be marked as ‘Completely Matched’ and for the related MM contract CONF even is triggered.
If there are any partially matched details that are not considered for matching the message , you can fetch the unconfirmed deal records in the Contract Detail sub screen.
4.10.6.1 Un-matching Matched Messages
You can un-match a matched record from MM Confirmation Message Matching Summary screen. To unauthorize and close a completely matched record, select the matched record and click Close button in the detailed screen. The system then triggers unconfirm event UCNF for the related MM contract. You cannot reopen or process the closed match records, but you can fetch the unmatched messages to initiate a new manual match process.
4.11 MM Affirmation Input
This section contains the following topic:
4.11.1 Invoking MM Affirmation Input Screen
You can affirm or un-affirm, waive or un-waive a deal from ‘MM Affirmation Input’ screen. You can invoke this screen by typing ‘ MMDAFFRM’ in the field at the top right corner of the Application tool bar and clicking the adjoining arrow button.
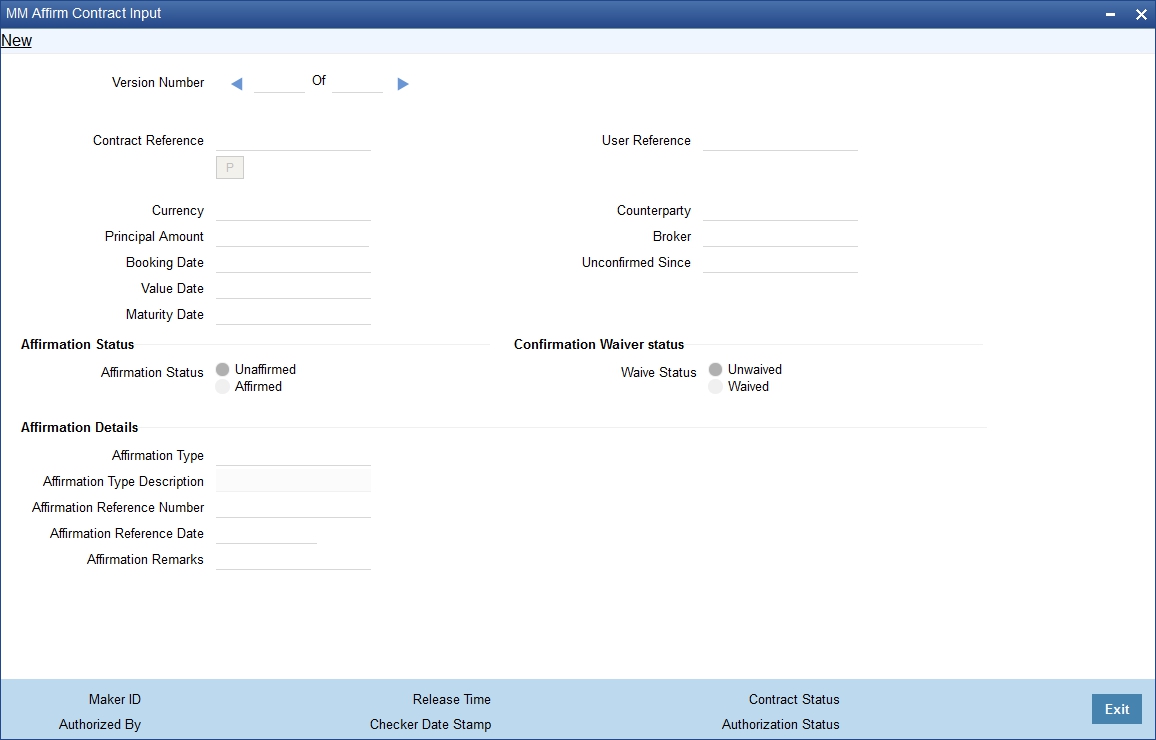
You can maintain only one MM contract record in ‘MM Affirmation Input’ screen.The system displays the following fields in this screen:
- Contract Reference Number
- Currency
- Principal Amount
- Booking Date
- Value Date
- Maturity Date
- Counterparty
- User Reference
- Broker
- Unconfirmed Since
Affirmation Status
Select the affirmation status of the MM deal. The options available are as follows:
- Unaffirmed - If the status of the MM deal is not affirmed.
- Affirmed - If the status of the MM deal is affirmed.
If the affirmation status is changed from unaffirmed to affirmed and the affirmation type or affirmation reference number is not specified then the system displays an error message.
Confirmation Waiver Status
Select the MM deal confirmation waiver status. The options available are as follows:
- Unwaived - If the MM deal is not waived off.
- Waived - If MM deal is waived off.
You can modify either ‘Affirmation Status’ or ‘Confirmation Waiver Status’ at a time.
Affirmation Details
Affirmation Type
Specify the affirmation type. Alternatively, you can select the affirmation type from the option list.
Affirmation Type Description
Give a brief description on the affirmation type.
Affirmation Reference Number
Specify the affirmation reference number.
Affirmation Reference Date
Select the affirmation reference date from the adjoining calendar.
Remarks
Specify remarks, if any.
4.12 Authorizing a Contract
You have to save a contract after entering all the required details in the system. Click Save icon on the Toolbar or choose ‘Save’ from the Actions menu to save an account. The system updates this as an unauthorized contract. To authorize an account, click ‘Authorize’ icon on the Application toolbar.
Note
You cannot authorise a contract from the ‘Money Market Contract Input’ screen in the following cases:
- the contract has multilevel of authorization pending, the same will be done using the ‘Multilevel Authorization Detailed’ screen
- the level of authorization is greater than or equal to ‘N’
- the ‘Nth’ or the final level of the users authorisation limit is less than the difference between amount financed and sum of the limits of all the users involved in authorizing a transaction, this case holds good when the ‘Cumulative’ field is checked in the ‘Product Transaction Limits Maintenance’ screen
- the transaction amount is greater than the authoriser’s authorisation limit if the ‘Cumulative’ field is unchecked in the ‘Product Transaction Limits Maintenance’ screen
4.13 Multilevel Authorization of a Contract
High value contracts may require multilevel of authorization. The levels of authorizations are defined in the ‘Product Transaction Limits’ screen. You can use the ‘Multilevel Authorization Detailed’ screen for authoring a contract n-1 times. However, final authorization can take place only in the contract screen.
For more details, refer the ‘Multilevel Authorization of Contract’ section in the ‘Procedures’ User Manual.
4.14 Authorizing Bulk MM contracts
Money market deals must be authorized in the respective Contract Online screens. This method of authorizing the deals can be quite cumbersome, especially if the volume of transactions is large. In view of that, Oracle FLEXCUBE allows bulk authorization of all unauthorized money market deals from the ‘Unauthorized Contracts’ screen. Invoke this screen from the Application Browser.
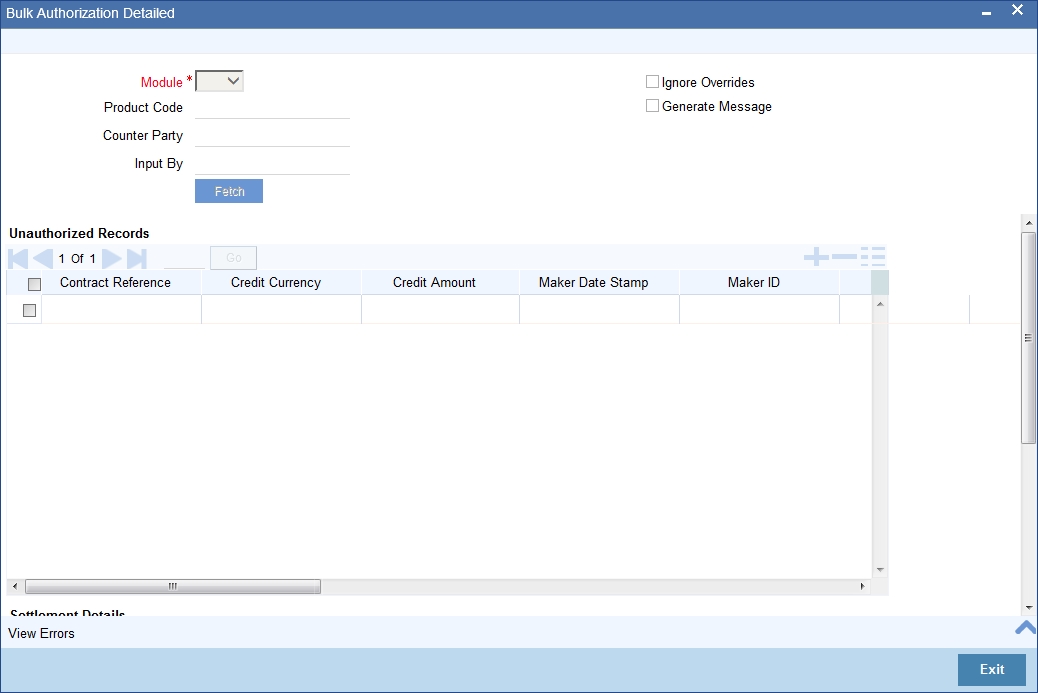
In the ‘Unauthorized Contracts’ screen, you can indicate the following parameters:
- The module (MM or FX) whose deals or contracts have to be authorized.
- On selection of the module, all unauthorized deals or contracts pertaining to that module will be displayed in the grid.
- Whether the system should ignore the overrides generated at the time of authorization.
- If the overrides of the deals are not authorized, system displays an error message. Check against ‘Ignore Overrides’ to ignore the overrides associated with the contracts.
For example, if the maturity date of a contract is 30th December 2001 and is a holiday for your bank, system will display an override:
“30-DEC-2001 is a holiday”.
However, you can opt to ignore such overrides by checking against ‘Ignore Overrides’.
- Whether the messages associated with authorization should be generated.
On authorization of a contract, the messages associated with the deal will be generated. To generate the messages, check against ‘Generate Messages’.
This section contains the following sections:
- “Authorizing the Deals” on page 37
- “Viewing the Errors” on page 37
- “Viewing the Settlement Details” on page 38
- “Viewing the Details of the Deal” on page 38
4.14.1 Authorizing the Deals
You can either opt to authorize all the deal that are displayed or choose only certain contracts for authorization.
- To authorize only specific deals, check against the boxes positioned before each deal reference number.
- If all the deals that are displayed have to be authorized, check against the box positioned before ‘Contract Ref No’.
After selecting the deals, click ‘Authorize’ to authorize the deals.
4.14.2 Viewing the Errors
If the system encounters any errors during the authorization of a particular deal, it will record the error and move on to the next contract.
Among the deals selected for authorization, there may be certain deals, which are created by the user who is authorizing. As the maker and checker cannot be same, system will record an error, as it cannot authorize the deal.
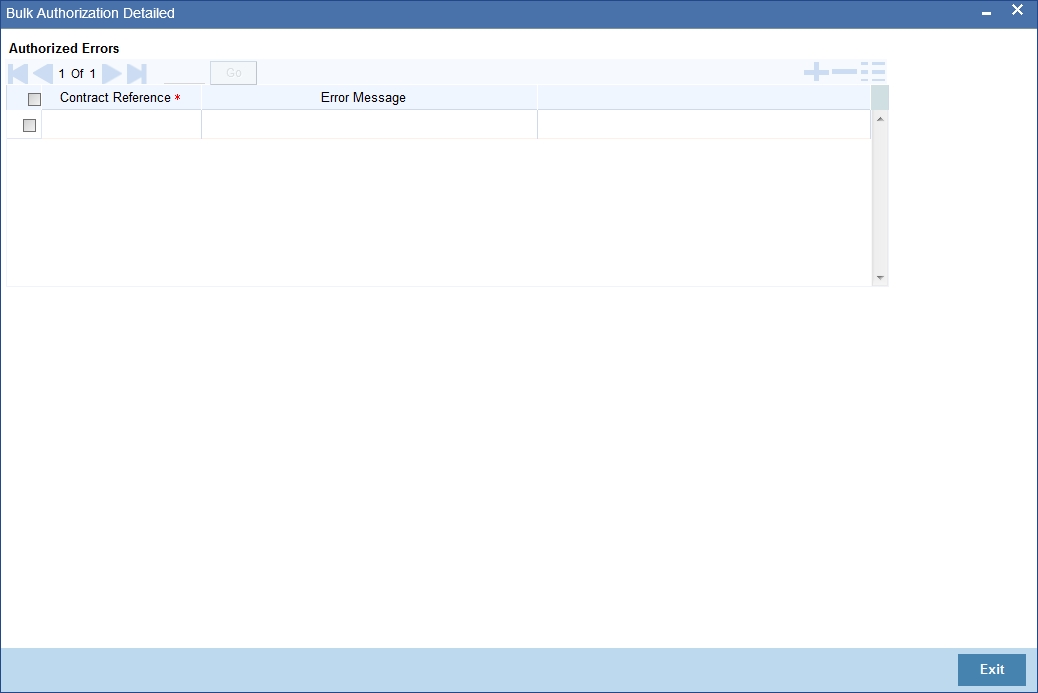
Click ‘View Error’ to view the details of the errors recorded. In this screen, system will display the reference number of the deals, which could not be authorized and the reason for the failure of deal authorization.
4.14.3 Viewing the Settlement Details
The settlement account details of each deal will be displayed in the ‘Settlement Instructions’ screen. Click on the contract for which you want to view the settlement details and it will be displayed in the ‘Settlement Instructions’ section. For each amount tag, the following settlement details are displayed:
- Settlement account
- Currency of the settlement account
- Settlement account branch
- Payable or Receivable
- Ordering Institution
- Ordering Customer
- Beneficiary Institution
- Ultimate Beneficiary
Note
The settlement details for the latest event of the deal will be displayed.

4.14.4 Viewing the Details of the Deal
The details of the unauthorized deals can be viewed by double clicking on the deal reference number in this screen.
In case of money market deals, the screen that is displayed on double clicking a deal depends on the stage of the deal that is unauthorized.
- If booking, initiation or deal amendment is not authorized, the Contract Online screen is displayed
- If a payment of a deal is unauthorized, the Payment screen is displayed
- If a value-dated amendment is unauthorized, the Value Dated Amendment screen is displayed.
4.15 Reassigning a Contract to Another User
Normally, an unauthorized contract can be deleted only by the user who has created it. If a contract has to be deleted and the user who has created it is not around to do it, then you may reassign the contract to another user. The newly assigned user can delete the contract. Typically, this situation may arise during End of Day operations when an unauthorized contract has to be deleted and the user who created it has left the office for the day. You can reassign a contract only if you have sufficient access rights to do it.
You can reassign a contract through the 'Reassign User Prior to Authorization' screen. You can invoke this screen by typing 'MMDCONRE' in the field at the top right corner of the Application tool bar and clicking the adjoining arrow button. The screen is displayed below.
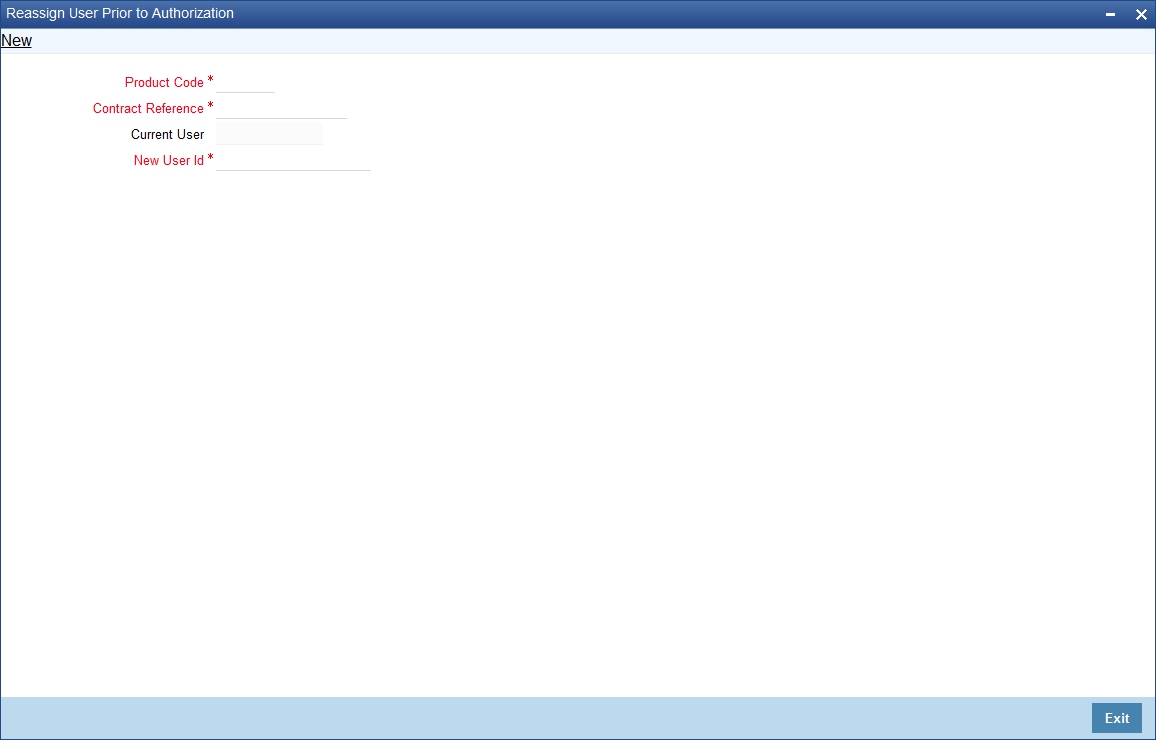
Specify the following details:
Product Code
Specify the product code associated with the contract that you want to reassign to a different user. Select the product code from the adjoining option list.
Contract Reference Number
Specify the reference number of the contract that you need to reassign. Select the appropriate one from the adjoining option list.
Current User
The user ID of the person who has created the contract is displayed in this field.
New User Id
Specify the user ID of the person to whom you need to reassign the contract.
Click 'Ok' button to save the details you entered. The system will reassign the contract to the new user. Click 'Exit' button if you do not want to save the details.
4.16 Amending Money Market Transactions
Once a MM contract is authorized, changes to this can be done through the ‘Money Market Value Dated Changes Input’ screen. You can invoke this screen by typing ‘MMDVAMIN’ in the field at the top right corner of the Application tool bar and clicking on the adjoining arrow button.
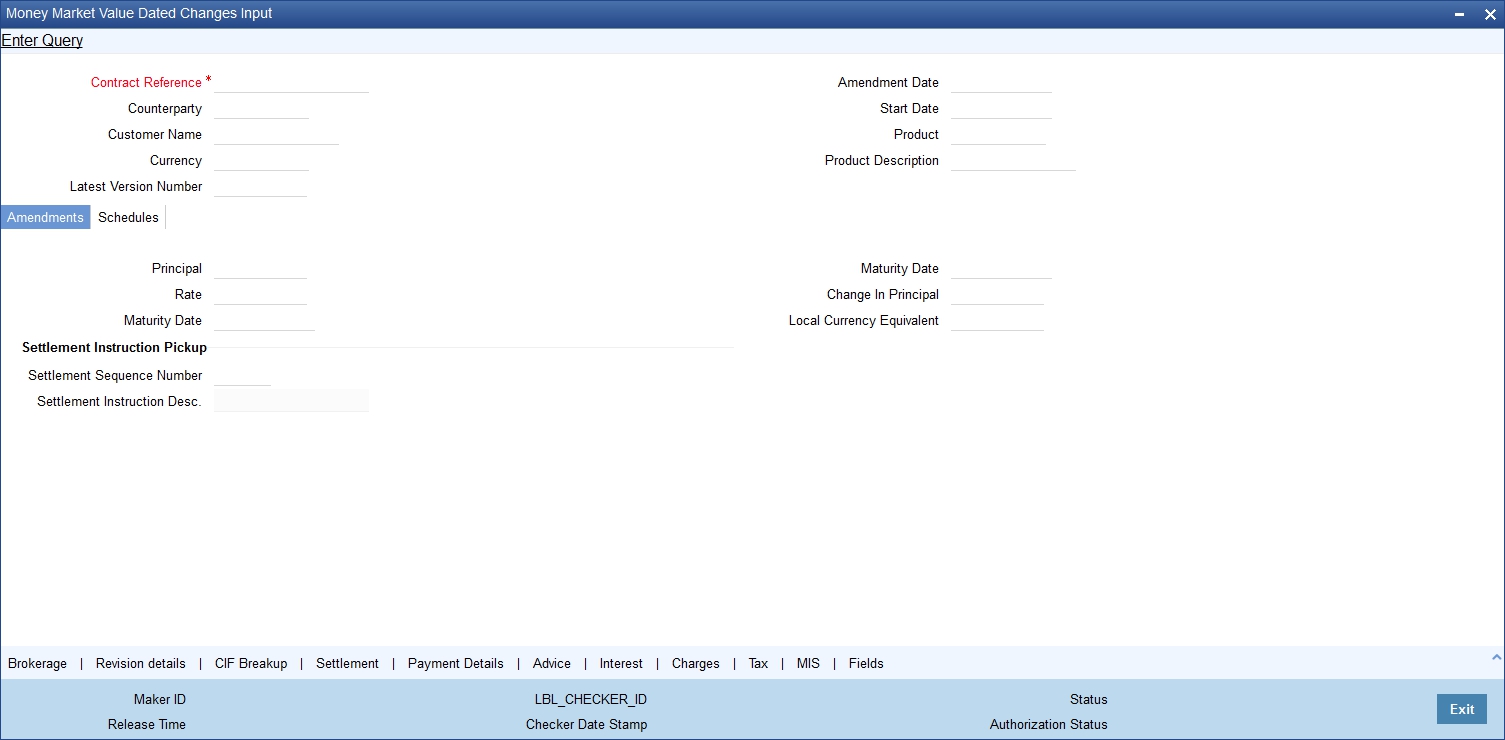
For more details on the field explanation of each tab, refer section ‘Features of the Contract Details screen’ section of this User Manual.
4.16.1 Authorizing Money Market Contracts
You cannot authorise a contract from the ‘Money Market Contract Input’ screen in the following cases:
- the contract has multilevel of authorization pending, the same will be done using the ‘Multilevel Authorization Detailed’ screen
- the level of authorization is greater than or equal to ‘N’
- the ‘Nth’ or the final level of the users authorization limit is less than the difference between amount financed and sum of the limits of all the users involved in authorizing a transaction, this case holds good when the ‘Cumulative’ field is checked in the ‘Product Transaction Limits Maintenance’ screen
- the transaction amount is greater than the authorizer’s authorization limit if the ‘Cumulative’ field is unchecked in the ‘Product Transaction Limits Maintenance’ screen.
- Re-key is not done. Re-key is mandatory for Payment input authorization)
4.17 MM Settlement Exception
This section contains the following topics:
4.17.1 Processing MM Settlement Exception
You can view and process MM placement deals for which the settlement status is pending. If the fund in the settlement account is less than the due amount, then the system updates the contract settlement status as pending. These pending transactions can be viewed and processed through ‘MM Settlement Exception Processing’ screen. You can invoke this screen by typing ‘MMDEXCEP’ in the field at the top right corner of the Application tool bar and clicking on the adjoining arrow button. You are allowed to Create, Save, Authorize, Delete and Enter Query in this screen.
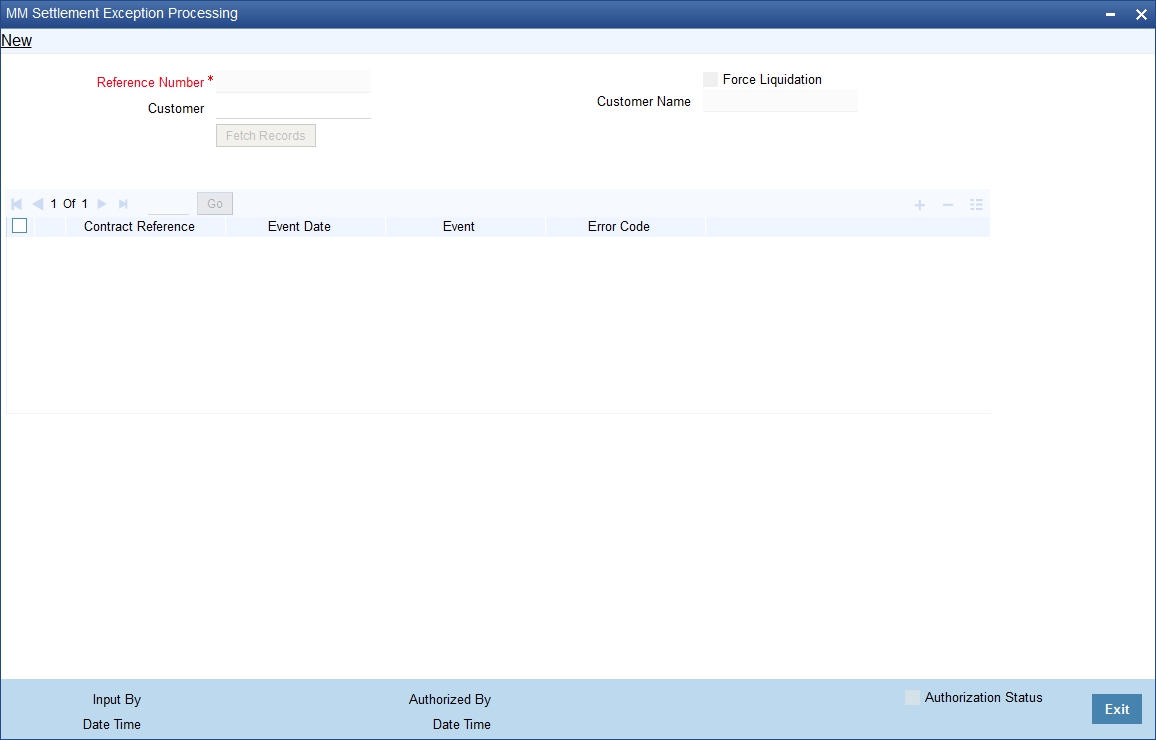
In this screen you can query all MM deals pending for settlement.
Reference Number
The system displays the reference number.
Customer
Specify the customer number. Alternatively, you can select the customer number from the option list. The list displays all valid customer numbers.
Force Liquidate
Check this box if the customer account should be force debited.
Click ‘Fetch Records’. The system displays the following information:
- Contract Reference
- Event Date
- Event
- Error Code