6. Maintaining Passbook
You can maintain all the details needed for the issuance of passbook at the Bank parameter and account class level. The details maintained at the Bank parameter and account class level will be used for computing and issuing all on the account.
This chapter contains the following sections:
- Section 6.1, "New Passbook Issue Details"
- Section 6.2, "Changing Passbook Status"
- Section 6.3, "Passbook Update"
- Section 6.4, "Passbook Reprint"
- Section 6.6, "Passbook Issued Report"
6.1 New Passbook Issue Details
This section contains the following topics:
6.1.1 Invoking New Passbook Issue Screen
You can invoke the ‘New Passbook Issue’ web branch screen by typing ‘7030’ in the field at the top right corner of the Application tool bar and clicking on the adjoining arrow button.
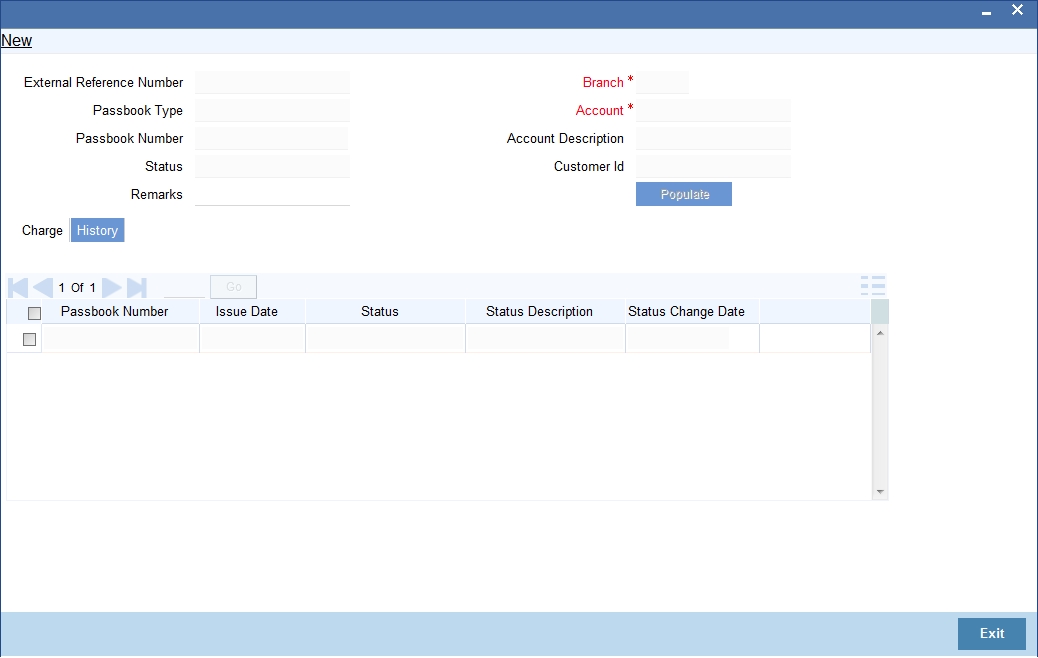
Account Details
Account
Specify account details. Alternatively, you can select account number from the option list. The list displays all the valid account number maintained in the system.
Account Description
The system displays the description for the selected account.
Branch
Specify the branch code. Alternatively, you can select branch code from the option list. The list displays all the valid branch code maintained in the system.
Customer ID
The system displays the customer ID for the selected account number.
Passbook Details
Passbook Type
If inventory tracking is allowed at bank level then you will be asked to enter the passbook type. The list of values for passbook type selection will be the list of valid stock catalog codes with instrument type as ‘Passbooks’.
Passbook Number
If inventory tracking is allowed at bank level then system will retrieve the next available instrument number based on the passbook type. The retrieved passbook number will be displayed to the user only after the passbook issue is saved.
Note
Passbook issuance is allowed despite the value selected for inventory tracking in bank parameter level.
Status Movement
The system displays the status as ‘active’ or ‘Reissue & Active’.
Charge Account Details
Charge Account
The system will default the account number from the ‘Account Number’ field. You can amend this value.Specify the charge account, Alternatively, you can select charge account number from the option list. The list displays all the valid charge account number maintained in the system.
On selecting different account values, the system will default Charge Account Branch, Charge Account Description, Charge Customer ID automatically.
Charge Account Description
The system displays the description for the selected charge account number.
Charge Account Branch
The system displays the branch code.
Charge Customer ID
The system displays the charge customer ID for the selected charge account number.
Additional Details
Remarks
Enter a short remark about the passbook issue.
External Reference Number
The system generates and displays the reference number.
Click ‘Populate’ button to view charge and history details of the passbook
The system displays the details of all the passbooks issued for the selected account. The following details are displayed:
- Passbook Number
- Issue Date
- Status
- Status Description
- Status Change Date
Passbook details are displayed in descending order based on the date of pass book issuance.
6.1.2 Charge Button
Clicking Charge button, the following window is displayed. In ‘Charge Details’ window, you can capture details of charges associated with the issuance of a new passbook.
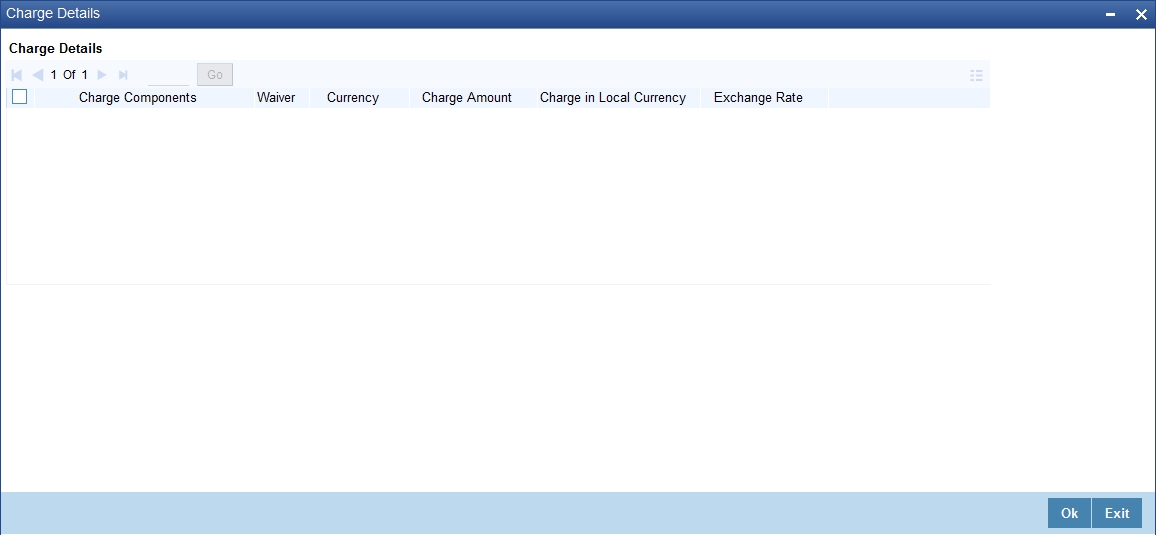
Charge Component
The system displays a short charge description.
Waiver
Check this box if you want to waive charges associated with issuance of new passbook.
Charge Amount
The system computes and displays the charge amount associated with the issuance of passbook. However you can edit it.
Currency
The system displays the currency used. It need not be same as account currency.
Charge in Local Currency
The system displays the charge amount in local currency on successful Issuance of passbook. You cannot modify it.
Exchange Rate
The system displays the applicable exchange rate if the currency used is different from the local currency during SAVE operation. Based on the exchange rate maintained for the cross currency, charge will be calculated and deducted from the customer account. You cannot modify the value.
Account Entries
On saving the operation, the charge amount is liquidated. The below given table indicates the accounting entries for the same.
Dr/Cr Indicator |
Accounting Role |
Amount Tag |
DR |
Customer account |
CHG_AMT |
CR |
Charge GL mapped |
CHG_AMT |
6.2 Changing Passbook Status
This section contains the following topic:
6.2.1 Invoking Changing Passbook Status Screen
You can invoke the ‘Passbook Status Change’ screen by typing ‘7031’ in the field at the top right corner of the Application tool bar and clicking on the adjoining arrow button.
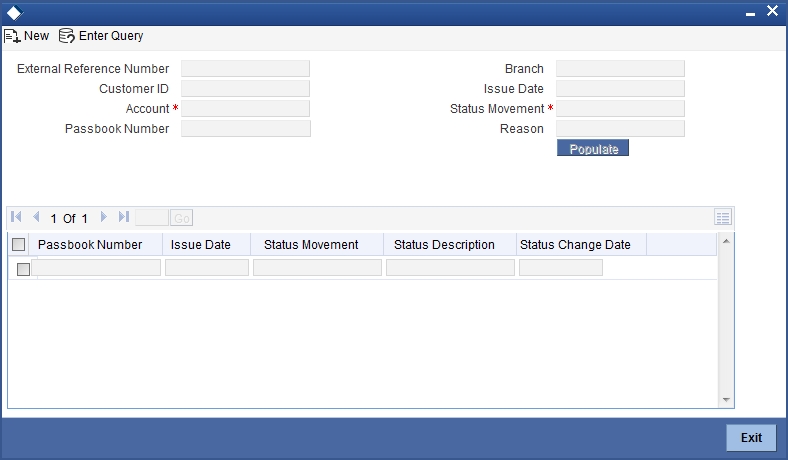
External Reference Number
System generates and displays the reference number.
Customer ID
The system displays the Customer ID based on the selected account.
Account Number
Select the account number for which the status has to be modified.
Passbook Number
The system displays the latest passbook number issued for the selected account.
Branch Code
The system displays the branch code based on the account selected.
Issue Date
The system displays the date of issue of the passbook.
Status
You can select the status from the adjoining option list. The system defaults the current status of the passbook from account number
Reason
Enter the reason for applying a new passbook.
The History tab gets populated on clicking Populate button.
Refer the section ‘Maintaining Passbook Details’ in the chapter titled ‘Maintaining Passbook’ in this User Manual for details about the ‘Passbook Status Change Screen
Note
On closing the account, the passbook status is automatically changed as Account Closed and no further status changes can be made on the same account.
Modifying the status of the passbook will not impact the Account status of the corresponding account.
Printing is allowed only for the open accounts and at least once authorised accounts with passbook facility.
6.3 Passbook Update
This section contains the following topic:
6.3.1 Invoking Passbook Update Screen
You can invoke ‘Passbook Update’ screen by typing ‘7010’ in the field at the top right corner of the Application tool bar and clicking on the adjoining arrow button.
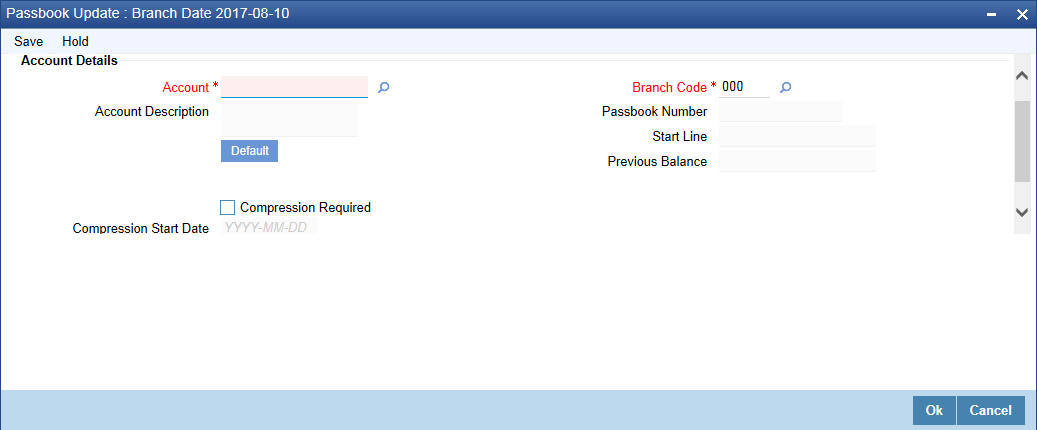
You can specify the following details:
Account Details
Account
Specify the account number. Alternatively, you can select account number from the option list. The list displays all the valid account number maintained in the system.
Account Description
The system displays the description for the selected account number.
Branch Code
The system displays the branch code.
Passbook Number
The system displays the passbook number.
Start Line
Specify the start line of the passbook to enter the transaction details.
Previous Balance
The system displays the previous balance in the passbook.
Compression Required
Check this box to modify the defaulted values related to transaction compression.
If this field is checked in ‘Preferences’ button of ‘Account Class Maintenance’ screen, and if the count of unprinted transactions is more than the value maintained in field ‘Limit for Unprinted Transactions’ at Account Class level, then the transaction compression is applicable for the passbook printing and system will auto default values in following fields of passbook update screen :
Compression Start Date
The system displays the compression start date.
Compression End Date
Select the compression end date from the adjoining calendar.
If ‘Compression Required’ field is checked and compression period is specified, the system will aggregate the debit and credit amount separately for the transactions during the compression period and print a single line on passbook along with the closing balance as of the compression end date.
After printing, all the transactions are either printed individually or consolidated will be marked as ‘Printed’ in system. The date printed on the passbook for the compressed entry will be the end date of compression period.
Transaction code maintained for transaction compression at account class level will be printed for compressed entry. All transactions which are printed as part of compressed entry will be tracked under the same line number. For instance, if compressed entry is printed on line number 8 on passbook and there are total 10 transactions which are compressed, system will track all 10 transactions under line number 8.
If Passbook Compression Preferences are not maintained and you try to compress the transaction, the system will display an appropriate error message.
Each time, when transaction compression is done while printing of passbook, the system will generate a unique Compression Reference Number as per the following logic:
- Compression Ref. Number. will be 14 character long
- First 3 characters will be the branch code from which compression is done
- Next 5 characters will be the date in Julian format.
- Last 6 characters will be the running sequence number.
Clicking ‘Default’ button, the system will populate the values in Start Line, Previous Balance, Compression Required, Compression Start Date and Compression End Date.
6.4 Passbook Reprint
This section contains the following topic:
6.4.1 Invoking Passbook Reprint Screen
You can invoke the ‘Passbook Reprint’ screen by typing ‘7011’ in the field at the top right corner of the Application tool bar and clicking on the adjoining arrow button.
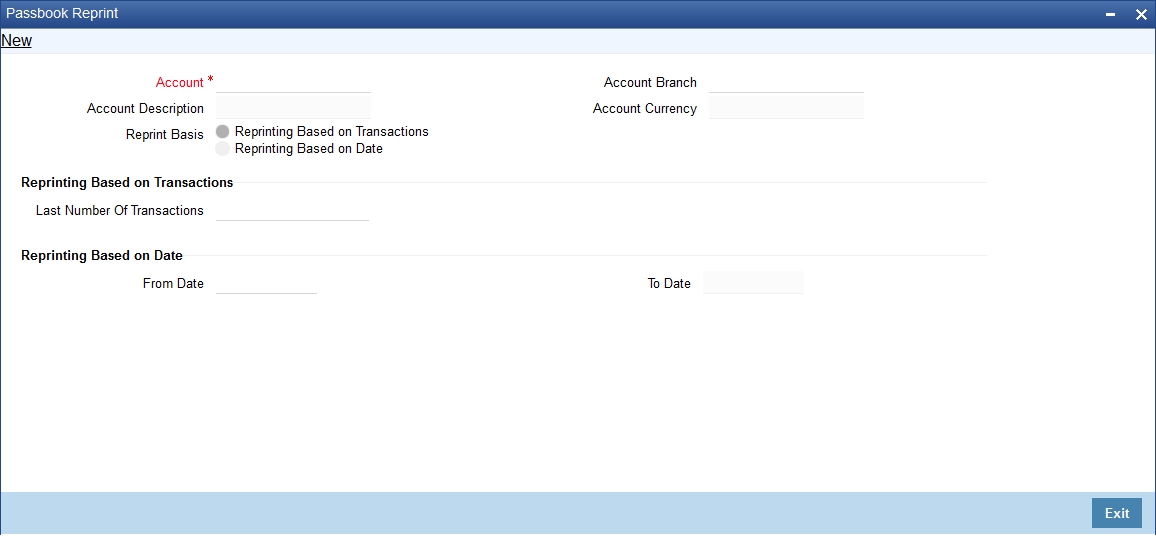
You can specify the following details:
Account
Specify the account number for which passbook needs to be re-printed. Alternatively, you can also select the account number from the option list. The list displays all the valid account numbers maintained in the system.
Account Description
The system displays the description for the selected account number.
Account Branch
The system displays the branch code.
Account Currency
The system displays the currency details for the selected account number.
Reprint Basis
Select the reprinting basis. The options are as follows:
- Reprinting Based on Transactions
- Reprinting Based on Date
Reprinting Based on Transactions
Last Number of Transaction
Specify the last number of transactions to be re printed.
This field is enabled only if you have selected ‘Reprinting Based on Transactions’ in ‘Reprint Basis’ field.
System will mark the last x number of printed transactions as unprinted. For instance, if you input 10 number of transactions to be reprinted, the system will mark latest 10 printed transactions as unprinted.
Reprinting Based on Date
From Date
Specify the start date of date range for which passbook needs to be re-printed.
The system will mark the transactions unprinted for the entered period. If there is no transaction during that period, The system will display an appropriate information message.
From date cannot be a future date, it cannot be less than the account opening date
To Date
The system displays the end date of date range for which passbook needs to be re-printed.
The system will default the current system date in this field.
This field is enabled only if you have selected ‘Reprinting Based on Date’ in ‘Reprint Basis’ field.
After saving, you can print the transactions including the transactions which are marked unprinted using reprint option. using ‘Passbook Update (7010)’ screen. In this ‘Passbook Update’ screen, the system will automatically start printing the transactions which are marked as unprinted using the reprinting option.
6.5 Passbook Reports
This section contains the following topic:
6.5.1 Invoking Passbook Reports
You can invoke the ‘Passbook details’ screen by typing ‘CARPASBK’ in the field at the top right corner of the Application tool bar and clicking on the adjoining arrow button.
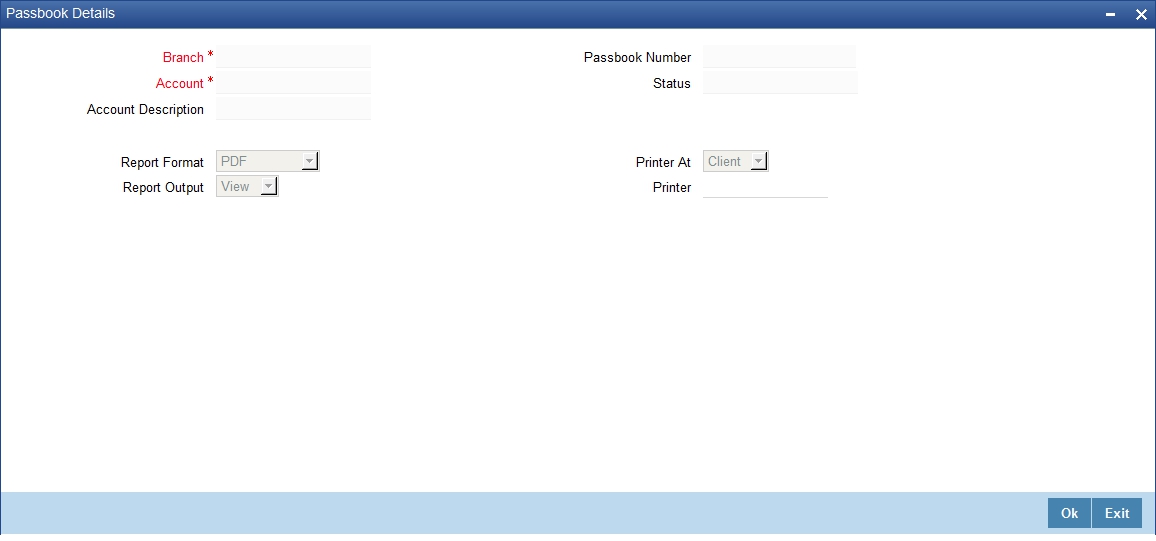
Branch Code
- The system defaults the branch code as current branch code.
Account
- Select the account from the adjoining option list .It displays all active account numbers for which at least one passbook has been issued.
- Based on the selected account following details get displayed:
- Account Description
- Passbook Number
- Status
- To create report the following report related parameters need to be selected:
- Report Format
- Report Output
- PrinterAt
- Printer
Click Ok to generate the passbook report based on the given parameters.
6.6 Passbook Issued Report
This section contains the following topics:
6.6.1 Invoking Passbook Issued Report Screen
You can generate passbook Issued Report to show date wise details of passbooks issued to various accounts.You can invoke the ‘Passbook Issued Report’ screen by typing ‘CARPBISU’ in the field at the top right corner of the Application tool bar and clicking on the adjoining arrow button.
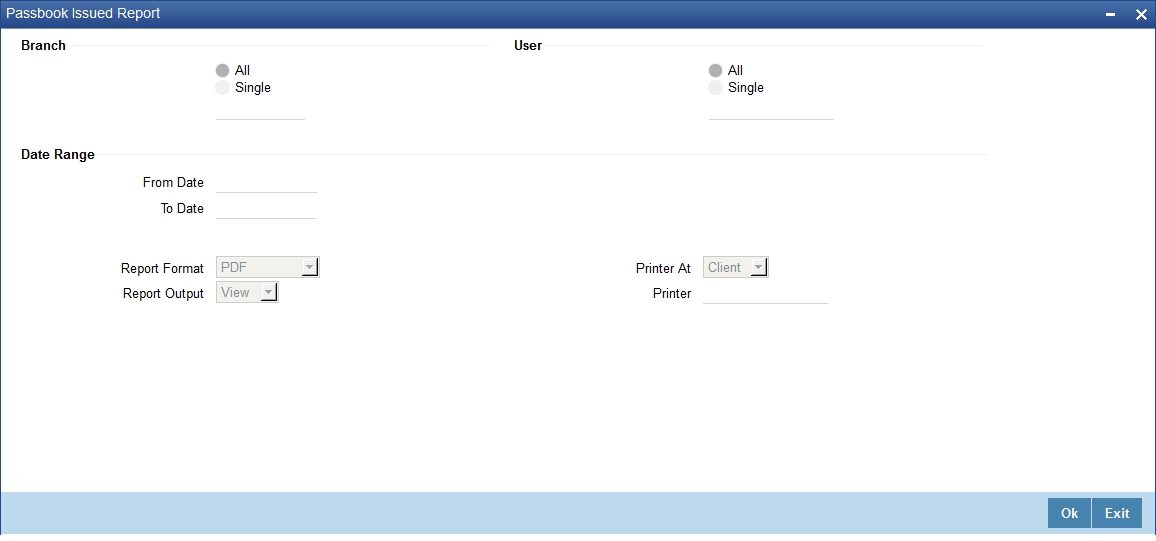
You can specify the following details:
Branch
Select if single or all branch details needs to be generated. The list displays the following options:
- All
- Single
After selecting the required option, specify the branch code. Alternatively, you can select branch code from the option list. The list displays all valid branch code maintained in the system.
User
Select if single or all user details needs to be generated. The list displays the following options:
- All
- Single
After selecting the required option, specify the user details. Alternatively, you can select user code from the option list. The list displays all valid user code maintained in the system.
Date Range
From Date
Select the date from which the reports need to be generated from the adjoining calendar.
To Date
Select the date till which the reports need to be generated from the adjoining calendar.
Report Format
Select the format in which you need to generate the report from the drop-down list. The list displays the following values:
- HTML – Select to generate report in HTML format.
- RTF – Select to generate report in RTF format.
- PDF – Select to generate report in PDF format.
- EXCEL – Select to generate report in EXCEL format.
Report Output
Select the output in which you need to generate the report from the drop-down list. The list displays the following values:
- Print – Select to print the report.
- View – Select to view the report.
- Spool – Select to spool the report to a specified folder so that you can print it later.
Printer At
Select location where you wish to print the report from the drop-down list. The list displays the following values:
- Client – Select if you need to print at the client location.
- Server – Select if you need to print at the server location
Printer
Select printer using which you wish to print the report from the option list.
6.6.2 Contents of the Report
The parameters specified while generating the report are printed at the beginning of the report. Other content displayed in ‘Passbook Issued Report’ is as follows:
Header
The Header carries the title of the report, information on the branch code, the date and time, the branch date, the user id, the module name and the page number of the report.
Body of the Report
The following details are displayed as body of the generated report:
Sl. No |
Field Name |
Information |
1 |
Issue Branch |
Branch Code From which passbook is issued |
2 |
Date of Issue |
Date on which Passbook is issued |
3 |
Account Branch |
Account branch of the account to which passbook is issued |
4 |
Account Number |
Account No. for which passbook is issued |
5 |
Account Description |
Account Description |
6 |
Passbook Type |
Type of Passbook |
7 |
Passbook Number |
Passbook Number |
8 |
Passbook Status |
Status of Passbook (e.g. Active, Re-issue & Active) |
9 |
Maker Id |
User id who issued the passbook |
10 |
Checker Id |
Authorizer who authorized the issue of passbook |