7. Cash Transactions
7.1 Introduction
Teller transactions in the Savings module can be classified into four types:
- Cash transactions
- Instrument transactions
- Term Deposits transactions
- General Ledger transactions
This chapter details all the cash-based transactions that can be performed through this module. You can perform the following types of cash-based transactions:
- Cash deposit and withdrawal
- Closing out an Account with Withdrawal
- Denomination exchange in the same currency
- Bill payments – by cash and against account
- Funds transfer request and stop payment
- Foreign exchange sale and purchase – for walk-in customer
- Telegraphic transfer (TT)
- TT issue – against account, against GL and for walk-in customer
- TT liquidation – against GL, against account and for walk-in customer
- TT inquiry
- Transaction Reversal
- Rental Payments for Safe Deposit Box
This chapter contains the following sections:
- Section 7.2, "Deposit Cash"
- Section 7.3, "Withdraw Cash"
- Section 7.4, "Domestic Cash Transfer"
- Section 7.5, "International Cash Transfer"
- Section 7.7, "Advance By Cash"
- Section 7.6, "Close out Withdrawal by Cash"
- Section 7.8, "Exchanging Denominations "
- Section 7.9, "Pay Bill by Cash"
- Section 7.10, "Pay a Bill against Account"
- Section 7.11, "Pay a Bill by Clearing Cheque"
- Section 7.12, "Pay a Bill by In-house Cheque"
- Section 7.13, "Request for Funds Transfer"
- Section 7.14, "Making a Stop Payment"
- Section 7.15, "Sell Foreign Exchange to a Walk-in Customer"
- Section 7.16, "Purchase Foreign Exchange from a Walk-in Customer "
- Section 7.17, "Purchase FX against Account"
- Section 7.18, "Issue TT against Account "
- Section 7.19, "Issue a TT against GL "
- Section 7.20, "Issue a TT to a Walk-in Customer "
- Section 7.21, "Issuing Multiple TT against Account"
- Section 7.22, "Issuing Multiple TT for Walk In"
- Section 7.23, "Maintaining TT Test Keys"
- Section 7.24, "Inward TT Registration"
- Section 7.25, "Liquidate a TT against GL "
- Section 7.26, "Liquidate a TT against Account"
- Section 7.27, "Liquidate a TT for a Walk-in Customer"
- Section 7.28, "Inquiring on a TT Transaction"
- Section 7.29, "Transaction Reversal"
- Section 7.30, "Disbursing Loan Manually By Cash"
- Section 7.31, "Repaying Loan Manually By Cash"
- Section 7.32, "Safe Deposit Box Rentals"
- Section 7.33, "Viewing Availability of Denomination in Till"
- Section 7.34, "Querying Till Vault Position"
- Section 7.35, "Sell Foreign Currency against CASA Account"
7.2 Deposit Cash
This section contains the following topics:
- Section 7.2.1, "Depositing Cash "
- Section 7.2.2, "Specifying Denomination Details"
- Section 7.2.3, "Specifying Charge Details"
- Section 7.2.4, "Specifying MIS Details"
- Section 7.2.5, "Specifying UDF Details"
- Section 7.2.6, "Specifying Project Details"
- Section 7.2.7, "Authorization Stage"
- Section 7.2.8, "Viewing errors and overrides"
- Section 7.2.9, "Cash Deposit in Two Step Processing"
7.2.1 Depositing Cash
You can capture a cash deposit transaction through the ‘Cash Deposit’ screen. You can invoke this screen by typing ‘1401’ in the field at the top right corner of the Application tool bar and clicking on the adjoining arrow button.
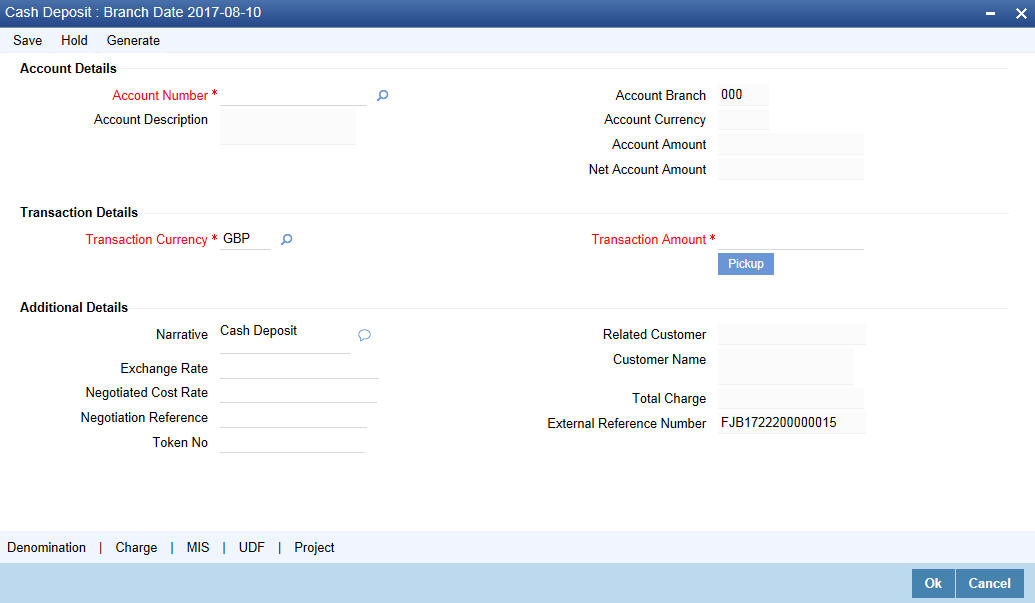
The cash deposit can be done in single step or two step process. The single step process is the single screen approach. For the single step cash deposit, the teller accepts the cash and accounting entries are passed in a single step. In two step process, the teller just collects the information and posts the transaction where no accounting entries are passed. The cashier accepts the cash and then the accounting entries are passed in the second step.
You can also specify Virtual Accounts in this screen. These virtual accounts can be used as a routing account to credit the underlying physical account.
If a virtual account number is specified in this screen, then the F10, F11, and F12 keys will not display any value, however the following error messages will be displayed for each of these keys:
- F10: Customer Image not maintained for this Customer/Account in branch 214
- F11: Customer Account Balance cannot be accessed for this Customer/ Account.
- F12: Customer Signature not maintained for this Customer/Account in branch 214
Click the OK button and you will be able to proceed further with the transaction.
Here the teller can capture the following details:
Account Number
Physical Account Number:
Specify the customer account number into which the cash needs to be deposited. You can also select an account number from the list displayed by clicking on the adjoining option list.
Note
In case of multiple accounts with the same account number, the system will display a list of corresponding account branches to select.
To view the joint holder’s details of an account and the mode of operation maintained at the account level, place the cursor on the Account Number field and press Ctrl+J. The system displays the ‘Joint Holder’ screen.
For more information on the ‘Joint Holder’ screen refer to the section ‘Joint Holder Maintenance’ in the Core User Manual.
Virtual Account Number
You can also specify a virtual account number in this field. The physical account number is identified based on the Virtual Account Number and Account Currency combination. If there is no physical account available for the combination, then the default physical account number is selected. The account currency changes as per the default physical account number.
Account Branch
The system displays the logged-in branch. If you specify another account number and tab out of the Account Number field, the system displays the corresponding account branch.
Account Description
The system displays the description of the account number chosen.
Transaction Currency
The system displays the local currency. If you specify another account number and tab out of
the Account Number field, the system displays the currency associated with the specified account.
Account Amount
The system displays the transaction amount in terms of account currency.
Total Charge
The system computes the charges applicable for the transaction and displays it here.
Net Account Amount
The system displays the net amount to be credited to the account (in the account currency) after calculating the applicable charges. This amount depends on the charge method – whether inclusive or exclusive.
Related Customer
The system displays the related customer.
Customer Name
The system displays the customer name.
Account Currency
The system displays the currency associated with the account.
For a Virtual Account, the transaction currency is defaulted as the account currency. The physical account number is identified based on the account currency and virtual account number combination. If physical account number is available then the transaction currency remains the same.
If the physical account number is not available, then the default physical account number is selected and the transaction currency changes as per the default physical account number. The account currency changes according to the default physical account number.
Transaction Amount
Specify the amount that should be credited to an account in terms of transaction currency. If the account to be credited is a Trust account, this amount should be within the cash deposit limit defined for the credited account class.
Pickup
Click on pickup to default the data into the Denominations, Charges, MIS, UDF and Project details. It is mandatory to click on ‘Pickup’ button before save.
Exchange Rate
The system displays the exchange rate used to convert the transaction currency into account currency. If the transaction currency is the same as the account currency, the system will display the exchange rate as ‘1’.
Negotiated Cost Rate
Specify the negotiated cost rate that should be used for foreign currency transactions between the treasury and the branch. You need to specify the rate only when the currencies involved in the transaction are different. Otherwise, it will be a normal transaction.
Negotiation Reference
Specify the unique reference number that should be used for negotiation of cost rate, in foreign currency transaction. If you have specified the negotiated cost rate, then you need to specify the negotiated reference number also.
Note
Oracle FLEXCUBE books the online revaluation entries based on the difference in exchange rate between the negotiated cost rate and transaction rate.
Token Number
Specify the token number.
Narrative
The system displays ‘Cash Deposit’. You can modify it, if required.
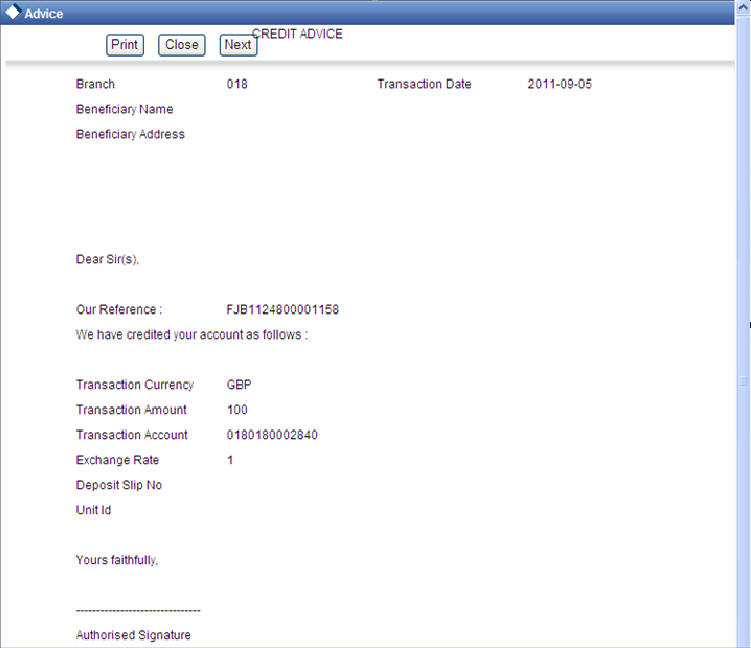
The system generates the advice on click of ‘OK’ button or save after providing all the details.
External Reference Number
The system generates a unique number based on the branch-specific sequence number generation logic and displays it here. The Host system identifies a branch transaction with the external reference number.
Note
You can generate a transaction slip by clicking on ‘Generate’ button after providing account number, transaction amount and clicking on pickup button. It is produced to the customer to sign and confirm the transaction.
Note
When Duplicate Advice Tracker field is checked and you click the EXIT button on the advice generation screen, the system displays a message “Print Successful?”. Click OK button to confirm the successful printing. Every subsequent print of the advices will be considered as duplicate advice. For more information on Duplicate Advice Tracker refer to section “Messaging Branch Parameters Maintenance” in the Core User Manual
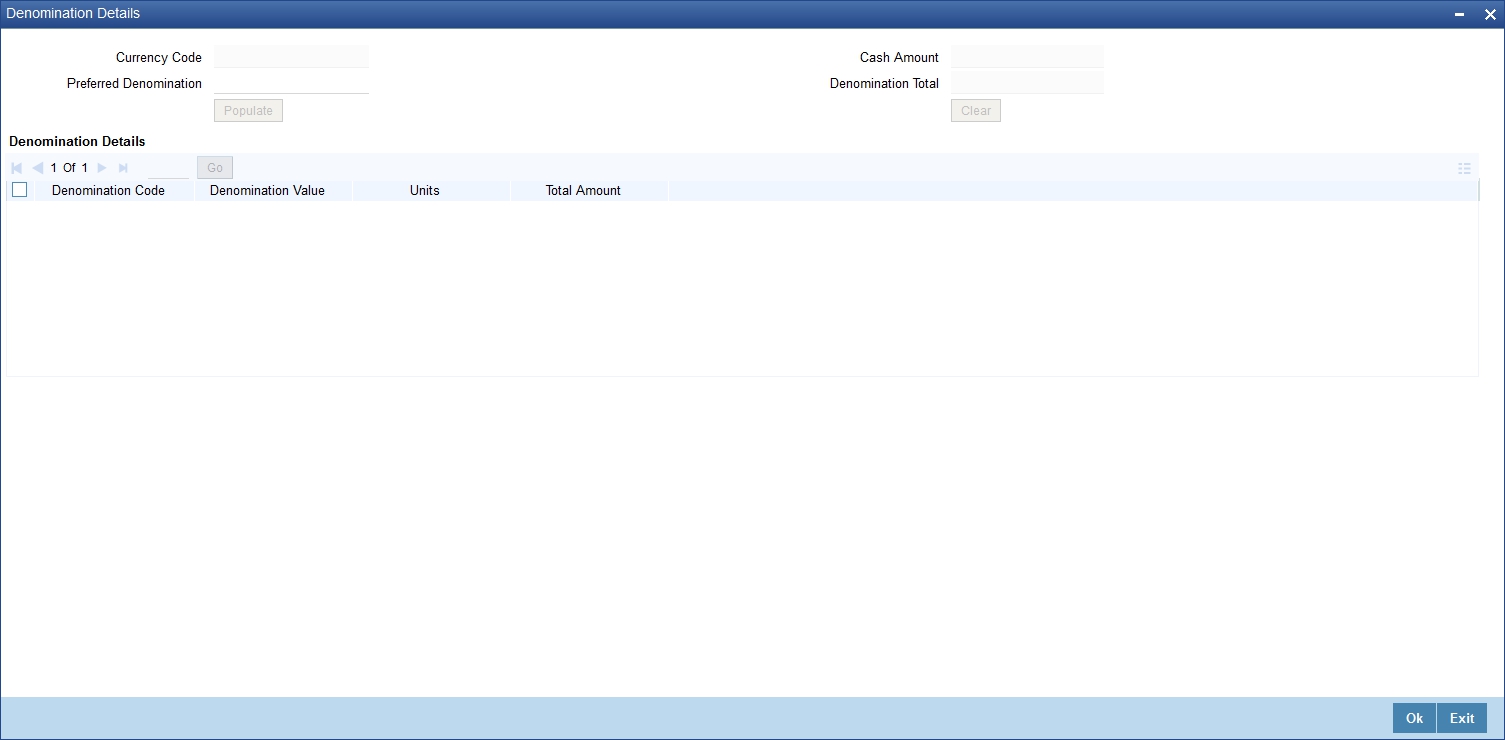
7.2.2 Specifying Denomination Details
In this block, you can capture details of the currency denominations involved in the transaction through the following fields:
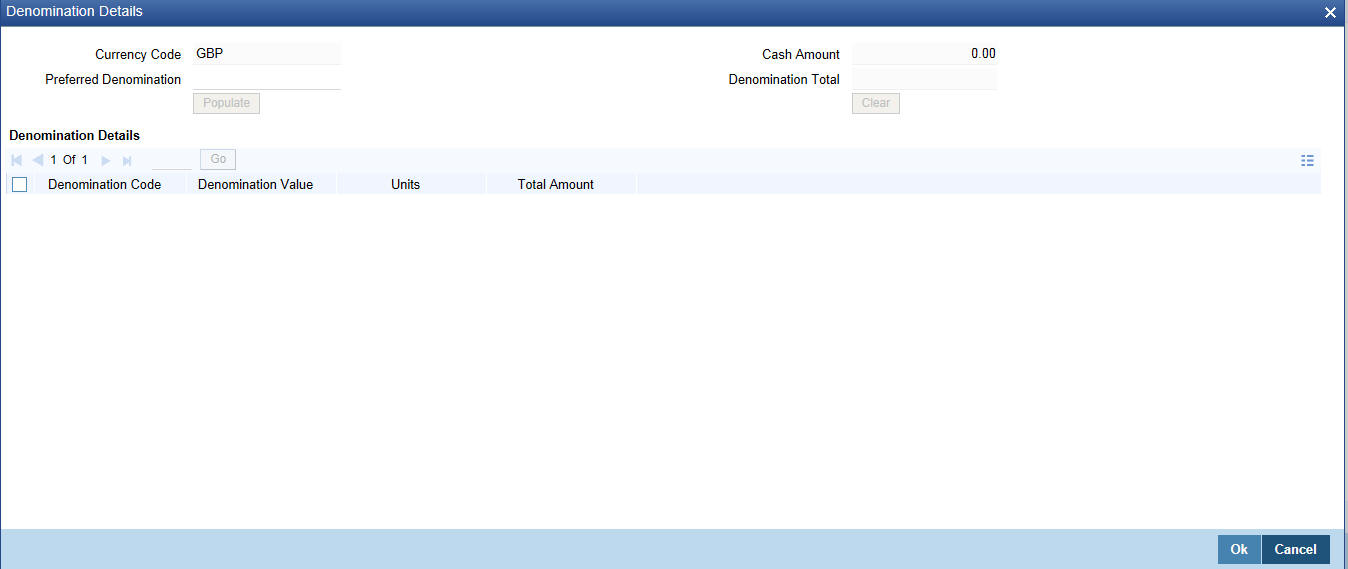
Currency Code
The system displays the currency of the account.
Cash Amount
The system displays the amount for which the denominations have to be captured.
Preferred Denomination
Specify the preferred denomination.
Denomination Total
The system displays the total denomination.
Denomination Details
Denomination Code
For every currency, the various denominations are assigned separate denomination codes. These codes are displayed here.
Denomination Value
The system computes the face value of the denomination and displays it. For instance if the denomination code represents a USD 100, the value will be displayed as ‘100’.
Units
Indicate the number of units of the specified denomination. By default, till contents are incremented for inflow transactions like cash deposit. To reverse this default behaviour, you can specify units in negative.
Total Amount
The system computes the denomination value by multiplying the denomination value with the number of units. For instance, if the denomination code represents a USD 100 and the number of units is 10, the denomination amount will be ‘1000’.
Click ‘OK’ to validate the denominations with the cash amount. If you click on ‘Cancel’ then the data specified will not be available.
7.2.3 Specifying Charge Details
This block allows you to capture charge related details. Click on ‘Charges’ button to invoke the following screen.

Here you can capture the following details:
Charge Component
The system defaults the charge components applicable to the transaction.
Waiver
You can waive a certain charge for the customer by checking this box against the charge component.
Currency
The system displays the currency in which the charge has to be deducted.
Charge Amount
The system displays the charge amount to be deducted for the corresponding charge component. You can edit the amount.
Charge in Local Currency
In case the transaction currency is different from the local currency, the system will compute the local currency equivalent of the charge and display it here.
Exchange Rate
The exchange rate used for the currency conversion is displayed here. If the charge currency is the same as the transaction currency, the system will display ‘1’ as the exchange rate.
7.2.3.1 Recalculating charges
You can modify the charges by clicking on the charges button. You can edit the charge amount and Click “OK” button. The system displays the new charges in the main screen against ‘Total Charge’, which subsequently updates the changes in ‘Net Account Amount’ too.
7.2.4 Specifying MIS Details
This block allows you to capture details pertaining to MIS. Click on the ‘MIS’ button to invoke the following screen:
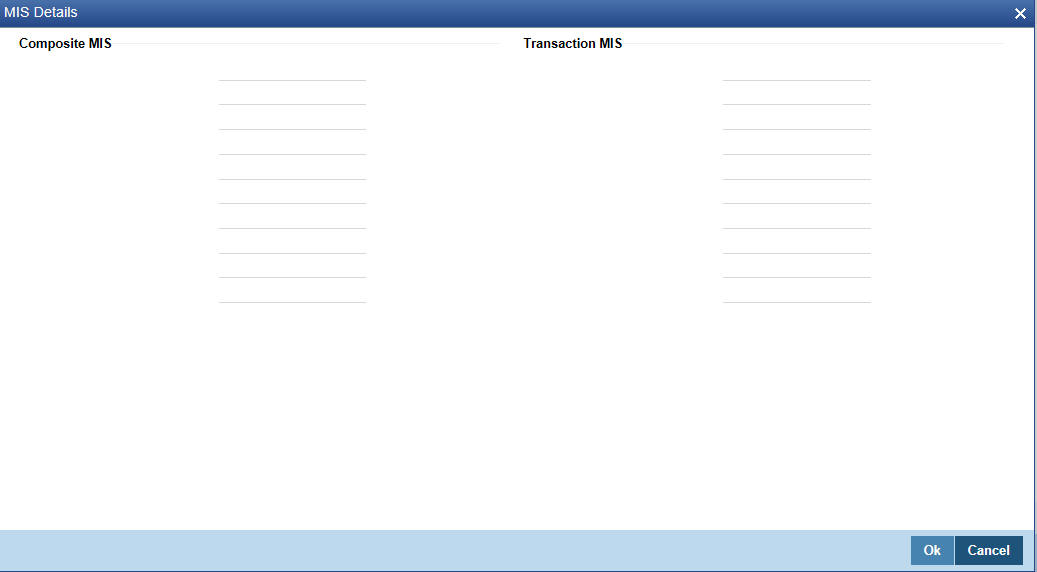
This block allows you to capture details pertaining to MIS. Click on the ‘MIS’ tab to capture the following details:
Transaction MIS
Specify the transaction MIS code.
Composite MIS
Specify the composite MIS code.
Refer the ‘MIS’ User Manual of Oracle FLEXCUBE Host, for further details about MIS.
7.2.5 Specifying UDF Details
You can capture the UDF details under ‘UDF’ button.
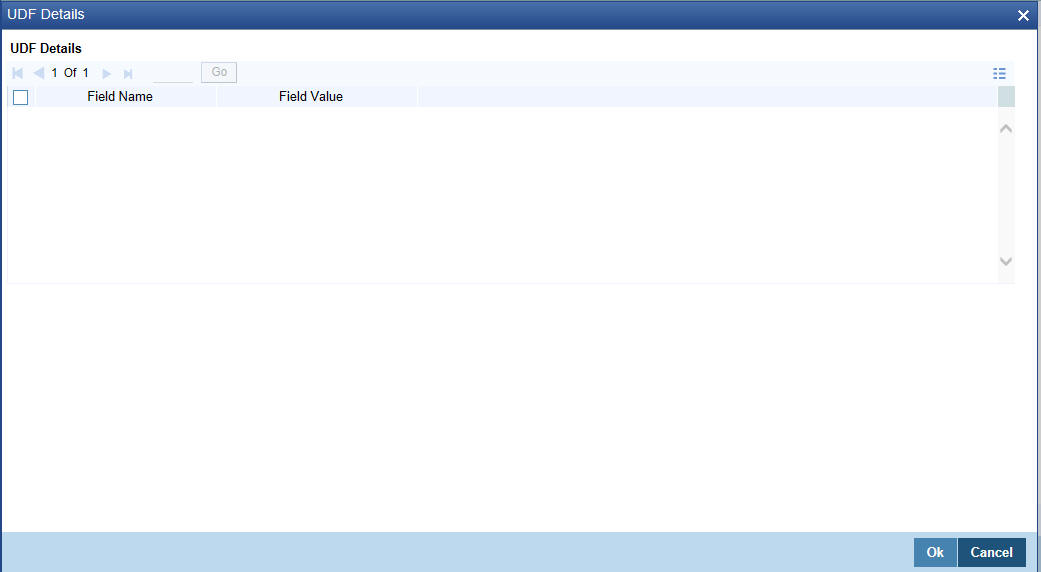
Field Name
The system displays the various User-Defined Fields (UDFs) that you have maintained for the product in the Host.
Field Value
Specify the value for the each UDF that is displayed.
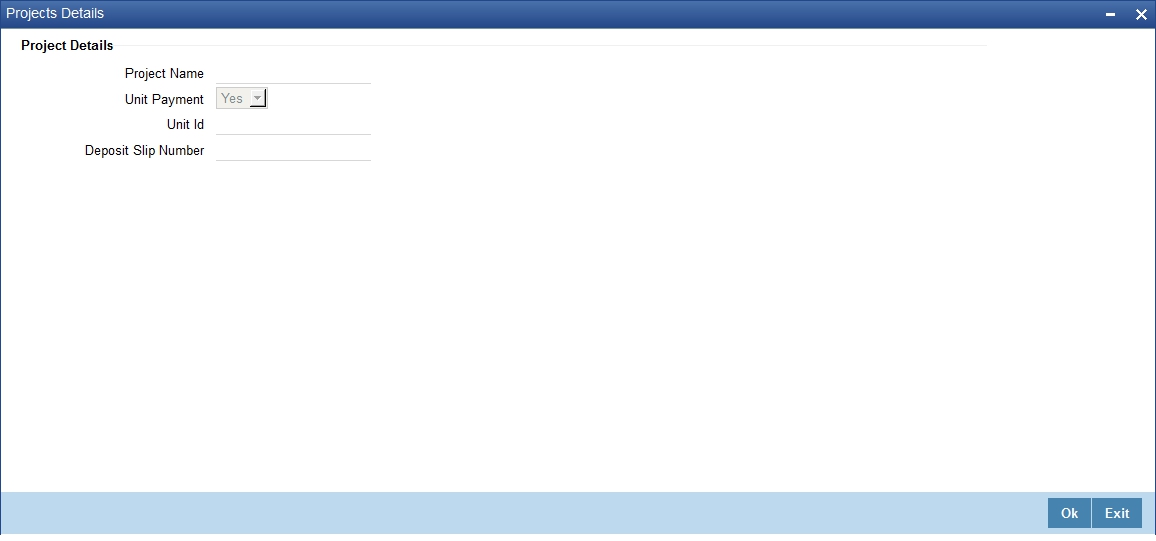
7.2.6 Specifying Project Details
You can capture project details under ‘Project Details’ button. Note that this button will be applicable only if the cash is being deposited in a Trust account.
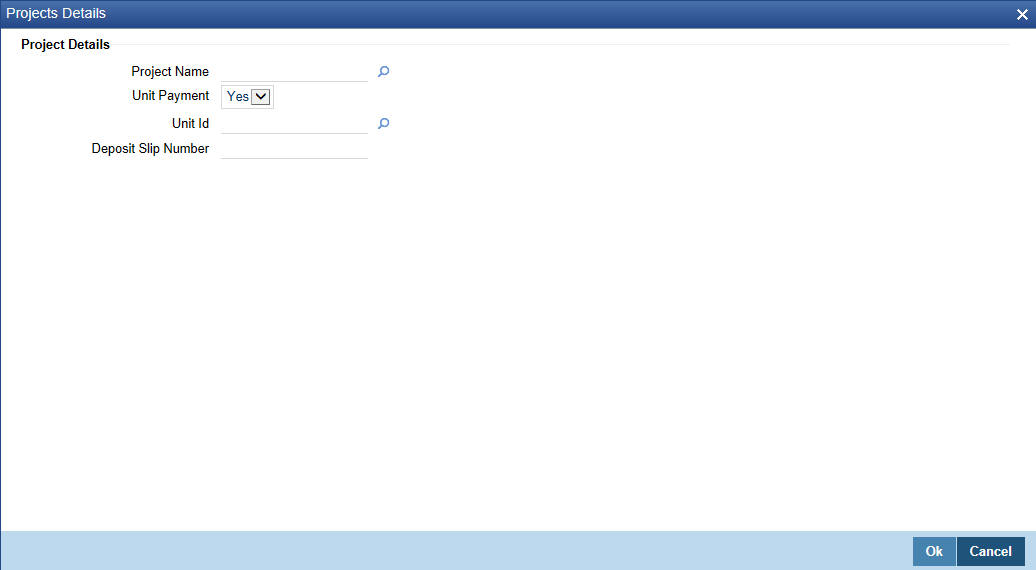
Specify the following details:
Project Name
Specify the developer project name for which payment is being made. The adjoining option list displays all valid projects maintained in the system. You can select the appropriate one. Input to this field is mandatory.
Unit Payment
Indicate whether the transaction is a unit payment or not by choosing the appropriate value from the adjoining drop-down list. The following values are available:
- Yes
- No
Unit ID
Specify the unit ID of the project. This field will be enabled only if you have selected ‘Yes’ against ‘Unit Payment’. The adjoining option list displays all unit IDs along with the unit holder names corresponding to the project name chosen. You can select the appropriate one.
Deposit Slip Number
Specify the deposit slip number for the payment.
Click save icon to save the transaction. On saving, the system checks whether the account to be credited is a Trust account or not. If it is a Trust account, the system will check whether the deposit amount is within the deposit limit maintained for the transaction currency at the account class level. If the currency-wise limit has not been maintained, it will verify the deposit amount against the deposit limit maintained for the account class. If the deposit amount exceeds the limit, it will display an error message.
Note
- You have to click on ‘Pickup’ button after specifying account number and transaction amount. If you save the transaction without clicking on ‘Pickup’, then the system displays an error message as “Please click on pickup before save”.
- After clicking on ‘Pickup’ button, if you modify the transaction account, transaction currency, transaction amount or exchange rate then you will have to click on ‘Pickup’ again.
- You can click on the OK button after specifying the data in the denomination, charge, MIS, UDF, and project details button for the data to persist. If you close the screen or click on 'Cancel' button after specifying the data, then the data will not persist.
The supervisor can view the transactions pending authorization in his or her task list as shown below. You can view this list by choosing the ‘Workflow’ option in the application.

The person needs to click on the ‘Assigned’ option to view all transactions assigned to you.
In case of auto assign, the transaction will get assigned to all the eligible authorizers as per the assignment criteria maintained at your branch. All these eligible supervisors will be able to view these transactions in their ‘Pending Tasks’ lists. The first authorizer to fetch the transaction from his or her task list will lock the same and then can either approve or reject it. This process is similar to the remote authorization flow described earlier. You can view the tasks that are approved by other supervisors in the ‘Approved’ lists and also you can view the history of authorization in the ‘Auth-History’ lists.
Irrespective of the supervisor’s action (approve or reject), the transaction will be re-assigned to the maker.
You can fetch and see the response from your task list.
7.2.7 Authorization Stage
If the workflow for the transaction is configured as a ‘Dual-control’, the transaction will have to be authorized by a supervisor before it gets saved as an unauthorized transaction (for manual assign) or as an authorized transaction (for auto-assign) in the Host. In case of manual assign, the system prompts you to get the transaction authorized at your branch. Branch authorization can happen in either of the following ways based on the transaction configuration in the workflow:
- Local
- Remote
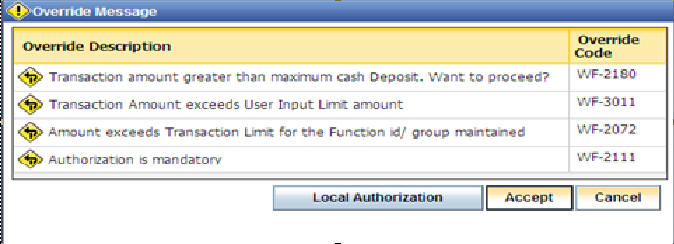
When overrides are raised by the system and have to be approved, the teller will have the option to choose between remote and local authorization. By default remote authorization will be selected. If the teller wants local authorization then the choice has to be made explicitly.
7.2.7.1 Local Authorization
In case of local authorization, the authorizer can allow or cancel the transaction. The following screen is used for local authorization:
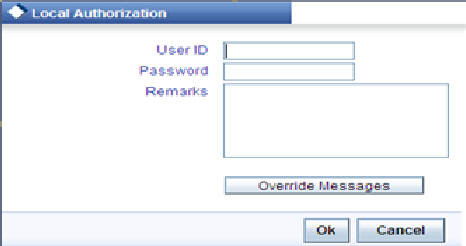
The authorizer can only view the transaction details here. He or she will have to enter the following details:
User Id
Specify the user ID of the authorizer.
Password
Specify the password with which he or she can either authorize or reject the transaction.
Remarks
The authorizer can specify some remarks pertaining to the transaction.
Click ‘OK’ button to authorize the transaction. On successful validation of the User ID and password, the transaction will proceed to the next stage as per workflow. The validations for User ID will be same as in Remote Auth. The user credential validation includes ‘Holiday Maintenance’ check also. However, if you click ‘Cancel’ button, the transaction will move to unassigned queue.
You can view the override messages by clicking ‘Override Messages’.
Note
Local Authorization option is not available when user authentication is via Single Sign On (SSO).
7.2.7.2 Remote Authorization
In case of remote authorization, you need to assign the transaction to an authorizer through the following screen:
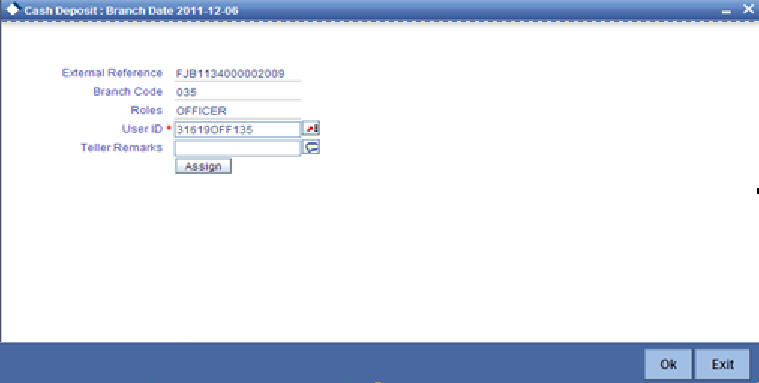
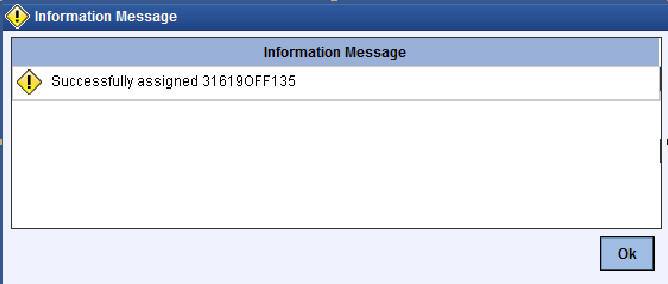
This screen is automatically prompted if the transaction workflow is configured as ‘Remote Authorization’. This assignment can happen either to a particular role or a particular person. In the screen shown above, it is to a particular person. The system displays the message “Successfully Assigned to <USER ID>” on successful assignment.
The supervisor can view the transactions pending his authorization in his or her ‘Assigned Txn’ list. In case of auto assign, the transaction will get assigned to all the eligible authorizers as per the assignment criteria maintained at your branch. All these eligible supervisors will be able to view these transactions in their ‘Pending Tasks’ lists. The first authorizer to fetch the transaction from his or her task list will lock the same and then can either approve or reject it. This process is similar to the remote authorization flow described earlier. You can also view the remarks entered by the teller for that transaction.
Irrespective of the supervisor’s action (approve or reject), the transaction will be re-assigned to the maker. The following screen will be displayed to the supervisor:
You can fetch and see the response from your task list. If the supervisor has approved, you can fetch the transaction from your task list and click save icon to save the transaction for submitting it. Post this, the system will post accounting entries for the transaction and update balances. In case of rejection, the transaction will move to failed queue of the Maker.
7.2.8 Viewing errors and overrides
You can view overrides for the transaction by clicking on the ‘Override Messages’ link on the ‘Remote Authorization’ screen. You need to click on ‘OK’ to close the ‘Overrides’ window and then take appropriate action on the main screen.
7.2.8.1 Submission stage
Submission of the transaction for saving in the Host can happen in two ways:
- Single-step save – wherein the transaction is saves as ‘Auto-authorized’ in the Host.
- Two-step save – wherein the transaction is first saved as ‘Unauthorized’ in the Host and then authorized locally or remotely (as described under ‘Authorization stage’).
After the transaction is successfully saved and the tills are successfully updated, the message “Transaction completed successfully” is displayed.
7.2.9 Cash Deposit in Two Step Processing
During two step processing, the two step role needs to be defined at workflow level.
Role of Teller
The customer approaches the teller for cash deposit. The teller collects the details from the customer and maintains the details like transaction account and transaction amount, specifies the denomination details and checks the charges if anything needs to be modified or waived.The teller then saves the transaction. The accounting entries are not passed at this stage. The teller can choose to open or not open a till at this stage.
Role of a Cashier
The cashier picks the transaction from the pending queue which is saved by the teller. The customer is then called by referring to the token number available in the transaction. The cashier/vault collects the cash from the customer and checks whether the denominations matches with the entry in the system and then saves the record. The cashier’s till gets updated and accounting entries are passed.
The cashier role is performed by CHDP.
Accounting Entry:
Dr/Cr and Account |
Amount |
Dr Cash GL |
Transaction Amount |
Cr Customer A/c |
Transaction amount less the Charges |
Cr Income GL |
Charges |
Dr Income GL |
Tax payable on Charge collected |
Cr Tax payable GL |
Tax payable on Charge collected |
NSF is not applicable when the Charge debit account maintained under the charges tab is a GL.
Note
- You cannot delete the records in 1401 if the first step is completed by the teller.
- Once the teller completes the transaction, it will be in the completed queue and the same record will be available in the pending queue of the cashier. The transaction can be reversed either by teller or cashier.
- If the teller picks the transaction for reversal from the completed queue, then the number of pending records for the cashier will be reduced by one and the number of records in reversal queue gets added up by one for the teller.
- If the cashier picks the transaction for reversal, then the completed queue of the teller gets reduced by one and adds the reversal queue of cashier by one.
- If a token is in use, i.e. one step has been completed by the teller and awaiting for cashier to process, then if same token number is specified, the system displays an error message.
- You cannot amend a transaction after authorization for cash deposit with two step processing. Cash Deposit in two step processing does accounting in second step only. So validations during accounting cannot be achieved.
7.3 Withdraw Cash
This section contains the following topics:
- Section 7.3.1, "Withdrawing Cash"
- Section 7.3.2, "Specifying Denomination Details"
- Section 7.3.3, "Specifying charge details"
- Section 7.3.4, "Specifying MIS details"
- Section 7.3.5, "Specifying UDF Details"
- Section 7.3.6, "Specifying Project Details"
- Section 7.3.7, "Cash Withdrawal in Two Step Processing"
7.3.1 Withdrawing Cash
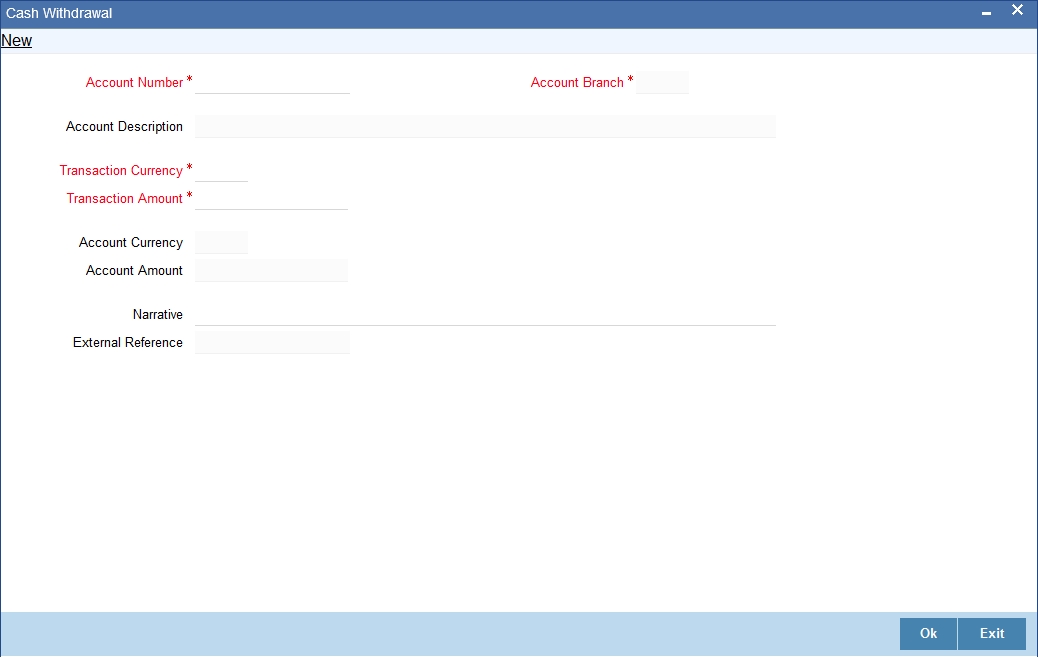
You can capture a cash withdrawal transaction through the ‘Cash Withdrawal’ screen. You can invoke this screen by typing ‘1001’ in the field at the top right corner of the Application tool bar and clicking on the adjoining arrow button.
Note
When you press the ‘Tab’ key, you can move from one field to another based on the order of field alignment. The cash withdrawal can be done in single step or two step process. The single step process is the single screen approach. For the single step cash withdrawal, the teller disburses the cash and accounting entries are passed in a single step. In two step process, the teller just collects the information and posts the transaction. In the first step accounting entries will be passed where the customer accounts will get debited. The cashier accepts the cash and then the accounting entries are passed in the second step. In two step process accounting entries will be passed in steps 1 and 2.
Here the teller can capture the following details:
Account Number
Specify the customer account number into which the cash needs to be deposited. Upon keying the account number, the system will default the Account Number, Account Branch and Account Currency for the corresponding account.
Note
In case of multiple accounts with the same account number, the system will pop-up a list of account numbers with account branch to select.
Account Branch
The system displays the logged-in branch. If you specify another account number and tab out of the Account Number field, the system displays the corresponding account branch.
Account Description
The system displays the description of the account number chosen.
Transaction Currency
The system displays the local currency. If you specify another account number and tab out of the Account Number field, the system displays the currency associated with the specified account.
Account Currency
The system displays the currency of the account.
Transaction Amount
Specify the amount that should be debited from account in terms of transaction currency. If the account to be debited is a Trust account, this amount should be within the cash withdrawal limit defined for the debited account class.
Pickup
Click on pickup to default the data into the Denominations, Charges, MIS, UDF and Project details. It is mandatory to click on ‘Pickup’ button before save.
Account Amount
The system displays the transaction amount in terms of account currency.
Total Charge
The system computes the charges applicable for the transaction and displays it here.
Net Account Amount
The system displays the net amount to be debited from the account (in the account currency) after calculating the applicable charges. This amount depends on the charge method – whether inclusive or exclusive.
Related Customer
The system defaults the related customer.
Customer Name
The system defaults the customer name.
Exchange Rate
The system displays the exchange rate used to convert the transaction currency into account currency. If the transaction currency is the same as the account currency, the system will display the exchange rate as ‘1’.
Negotiated Cost Rate
Specify the negotiated cost rate that should be used for foreign currency transactions between the treasury and the branch. You need to specify the rate only when the currencies involved in the transaction are different. Otherwise, it will be a normal transaction.
Negotiation Reference Number
Specify the unique reference number that should be used for negotiation of cost rate, in foreign currency transaction. If you have specified the negotiated cost rate, then you need to specify the negotiated reference number also.
Note
Oracle FLEXCUBE books then online revaluation entries based on the difference in exchange rate between the negotiated cost rate and transaction rate.
Token No
Specify the token number.
Narrative
The system displays ‘Cash Withdrawal’. You can modify it, if required.
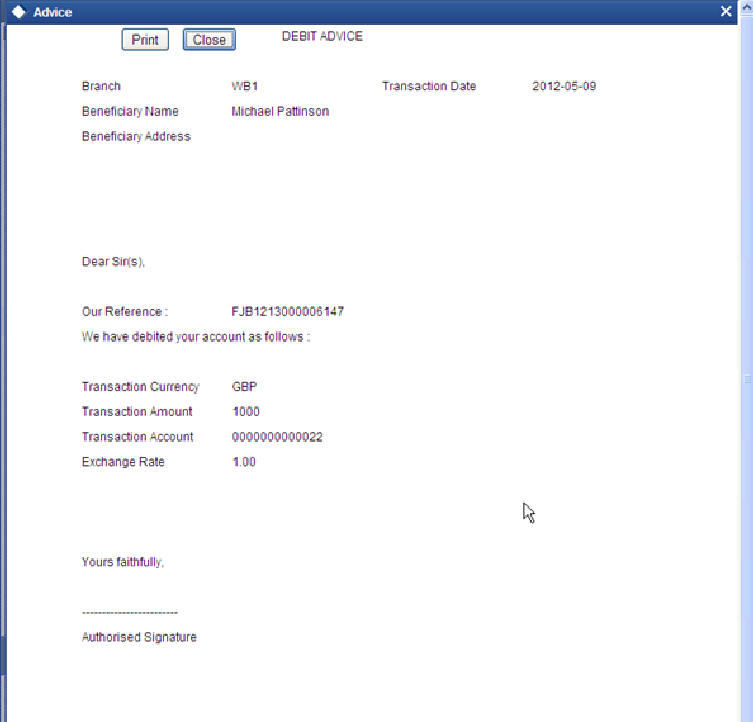
Click OK button or save after providing all details to generate advice with token number.
External Reference Number
The system generates a unique number based on the branch specific sequence number generation logic and displays it here. The Host system identifies a branch transaction with the external reference number.
Account Amount
You can generate a transaction slip by clicking on ‘Generate’ button after providing account number, transaction amount and clicking on pickup button. It is produced to the customer to sign and confirm the transaction.
7.3.2 Specifying Denomination Details
In this block, you can capture details of the currency denominations involved in the transaction.
Preferred Denomination
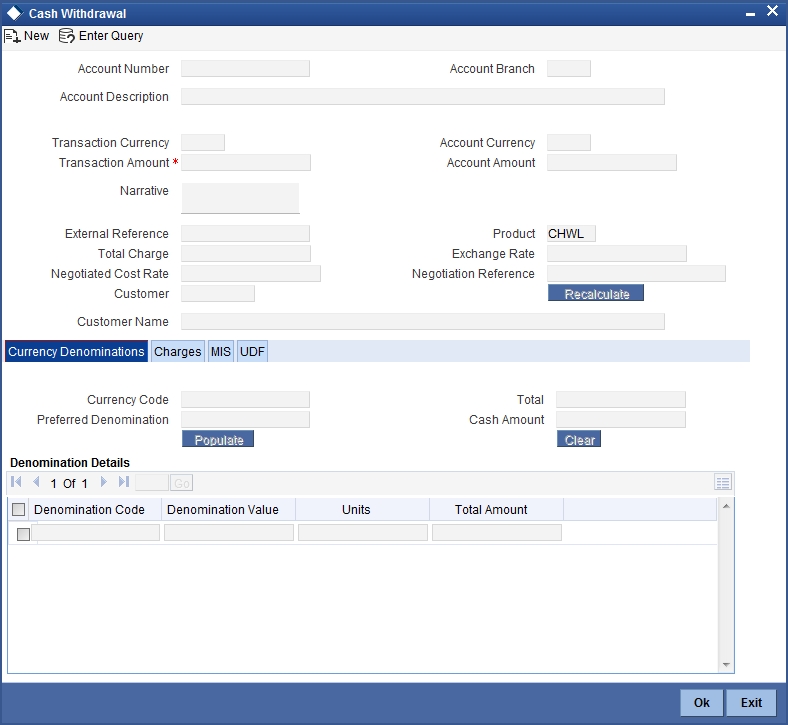
Specify the denomination code that should be preferred. The system processes the transactions with the preferred denominations. If the transaction amount is less than the preferred denomination, the system will use the low valued denomination than the preferred denomination based on the defaulting rule.
If the preferred denomination is not captured, the system will consider the highest available denomination as the preferred denomination.
If the denomination is not available, the system will display ‘Denomination not available’ message.
Click ‘Populate’ button to display the units of currency denomination based on the defaulting rule.
Note
- According to defaulting rule, the system will calculate the total amount in terms of minimum number of currencies. It means that the system divides the total amount into the bigger denominations first. Then the remaining amount into next biggest denomination and so on.
- For the preferred denomination, the ‘Unit’ field will be disabled.
Refer the section titled ‘Specifying denomination details’ under ‘Depositing Cash’ for further details.
7.3.3 Specifying charge details
This block allows you to capture charge related details. You need to click on the ‘Charges’ button to invoke the following screen.
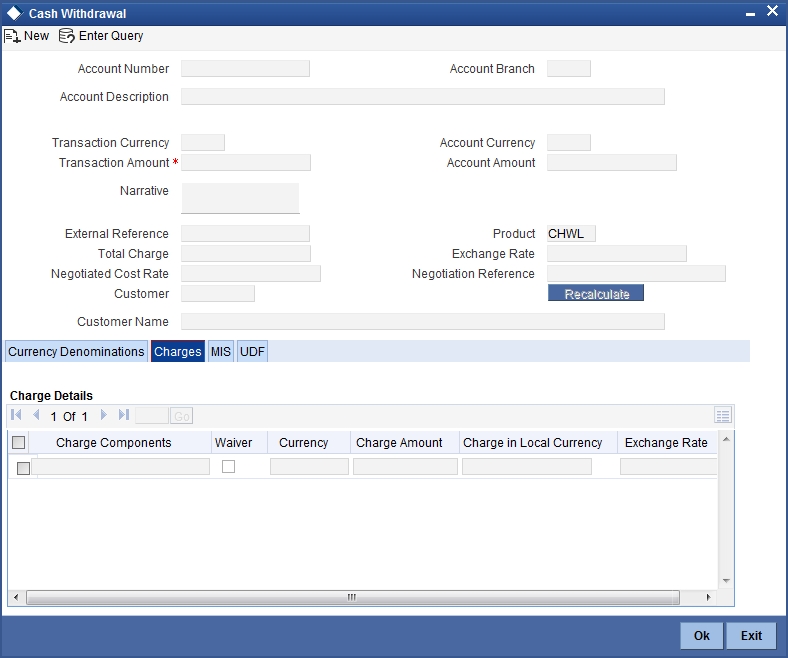
Refer the section titled ‘Specifying charge details’ under ‘Depositing Cash’ for further details.
7.3.4 Specifying MIS details
This block allows you to capture details pertaining to MIS. Click on the ‘MIS’ button to invoke the following screen:
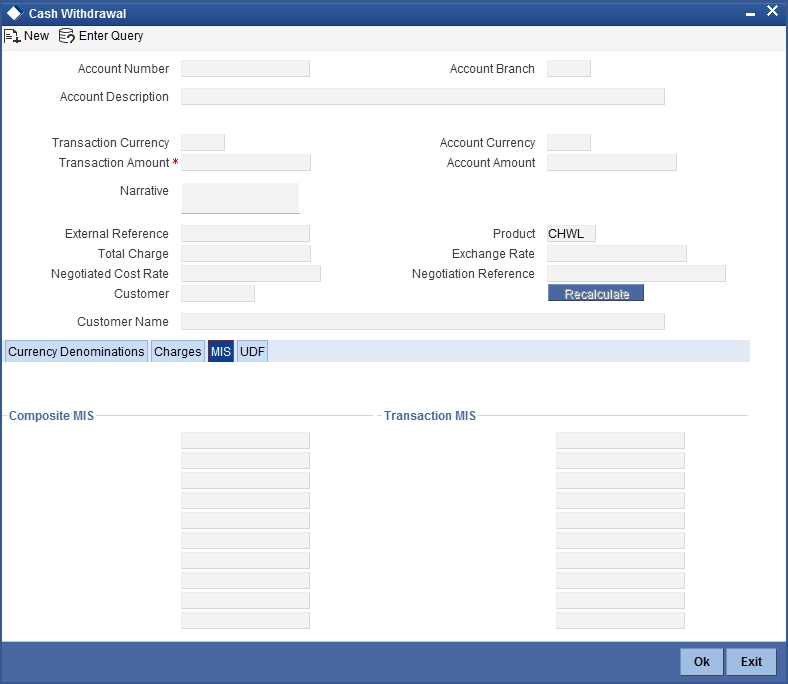
Refer the section titled ‘Specifying MIS details’ under ‘Depositing Cash’ for further details.
7.3.5 Specifying UDF Details
You can capture the UDF details under ‘UDF’ button.
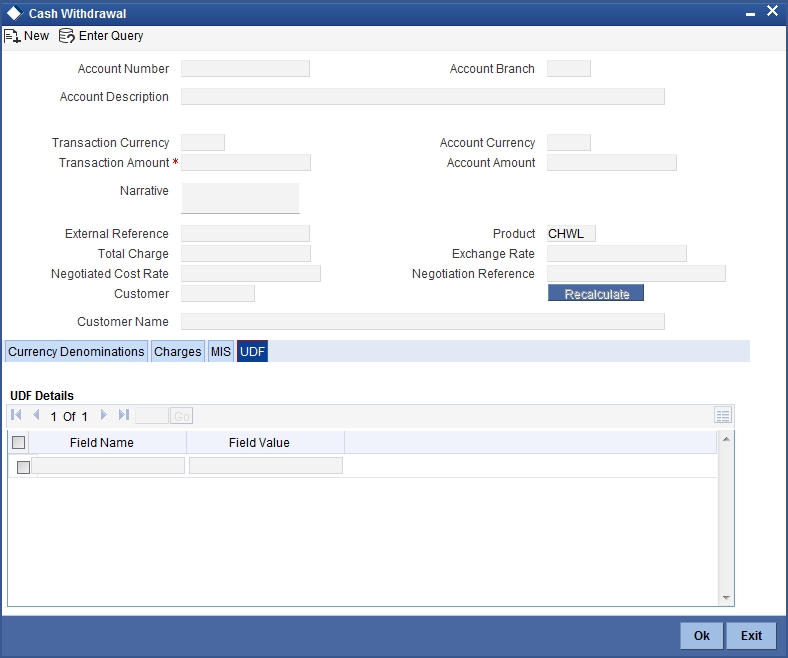
Refer the section titled ‘Specifying the UDF details’ under ‘Depositing Cash’ for further details.
7.3.6 Specifying Project Details
You can capture project details under ‘Project Details’ button. Note that this button will be applicable only if the cash is being deposited in a Trust account.
Specify the following details:
Project Name
Specify the developer project name for which payment is being made. The adjoining option list displays all valid projects maintained in the system. You can select the appropriate one. Input to this field is mandatory.
Unit Payment
Indicate whether the transaction is a unit payment or not by choosing the appropriate value from the adjoining drop-down list. The following values are available:
- Yes
- No
Unit ID
Specify the unit ID of the project. This field will be enabled only if you have selected ‘Yes’ against ‘Unit Payment’. The adjoining option list displays all unit IDs along with the unit holder names corresponding to the project name chosen. You can select the appropriate one.
Deposit Slip Number
Specify the deposit slip number for the payment.
Click save icon button to go to the next stage. The authorization process is similar to cash deposit.
Note
- You have to click on ‘Pickup’ button after specifying account number and transaction amount. If you save the transaction without clicking on ‘Pickup’, then the system displays an error message as “Please click on pickup before save”.
- After clicking on ‘Pickup’ button, if you modify the transaction account, transaction currency, transaction amount or exchange rate then you will have to click on ‘Pickup’ again.
- You can click on the OK button after specifying the data in the denomination, charge, MIS, UDF, and project details button for the data to persist. If you close the screen or click on 'Cancel' button after specifying the data, then the data will not persist.
7.3.7 Cash Withdrawal in Two Step Processing
During two step processing, the two step role needs to be defined at workflow level.
Role of Teller
The customer approaches the teller for cash withdrawal. The teller collects the details from the customer and maintains the details like transaction account and transaction amount, and clicks on ‘Pickup’ button and generates the advice by clicking ‘Generate’ button. It is not mandatory for the teller to specify the denomination as cash is handed over to customer by the cashier. The system validates the total denomination amount with cash amount and does not update the till of the teller irrespective of till being open or closed. The accounting entries are passed at this stage. It is not mandatory for the teller to open the till at step 1.
The teller role is performed by CHWL.
Accounting Entry:
Dr/Cr and Account |
Amount |
Dr Customer A/C |
Txn amount + Charges |
Cr Misc-credit GL |
Txn amount |
Cr Intermediary GL |
Charges |
Role of Cashier
The cashier picks the transaction from the pending queue which is saved by the teller. The customer is then called by referring to the token number available in the transaction. The cashier checks whether the denomination button has got the values by confirming with the customer. If the data persist in the button, the cashier will cross check with the physical denominations in hand. If respective denomination is not available then the cashier will make required changes in the denominations and click ‘OK’ and save the transaction. If the data is not available in the denominations tab, then the cashier should update the denomination details and save the record. The cashier’s till gets updated and accounting entries are passed.
The cashier role is performed by CHW2.
Accounting Entry:
Dr/Cr and Account |
Amount |
Dr Misc-Credit GL |
Txn amount |
Cr Cash GL |
Txn amount |
Dr Intermediary GL |
Charges |
Cr Income GL |
Charges |
Dr Income GL |
Tax payable on Charge |
Cr Tax payable GL |
Tax payable on Charge |
NSF is not applicable when the Charge debit account maintained under the charges tab is a GL.
Note
- You cannot delete the records in 1001 if the first step is completed by the teller.
- Once the teller completes the transaction, it will be in the completed queue and the same record will be available in the pending queue of the cashier. The transaction can be reversed either by teller or cashier.
- If the teller picks the transaction for reversal from the completed queue, then the number of pending records for the cashier will be reduced by one and the number of records in reversal queue gets added up by one for the teller.
- If the cashier picks the transaction for reversal, then the completed queue of the teller gets reduced by one and adds the reversal queue of cashier by one.
- If a token is in use, i.e. one step has been completed by the teller and awaiting for cashier to process, then if same token number is specified, the system displays an error message
By default the cash deposit and cash withdrawal will follow the single screen approach.
Refer the section titled ‘Specifying denomination details’ under ‘Depositing Cash’ for further details.
Refer the corresponding section under ‘Depositing Cash’ for further details.
7.4 Domestic Cash Transfer
This section contains the following topics:
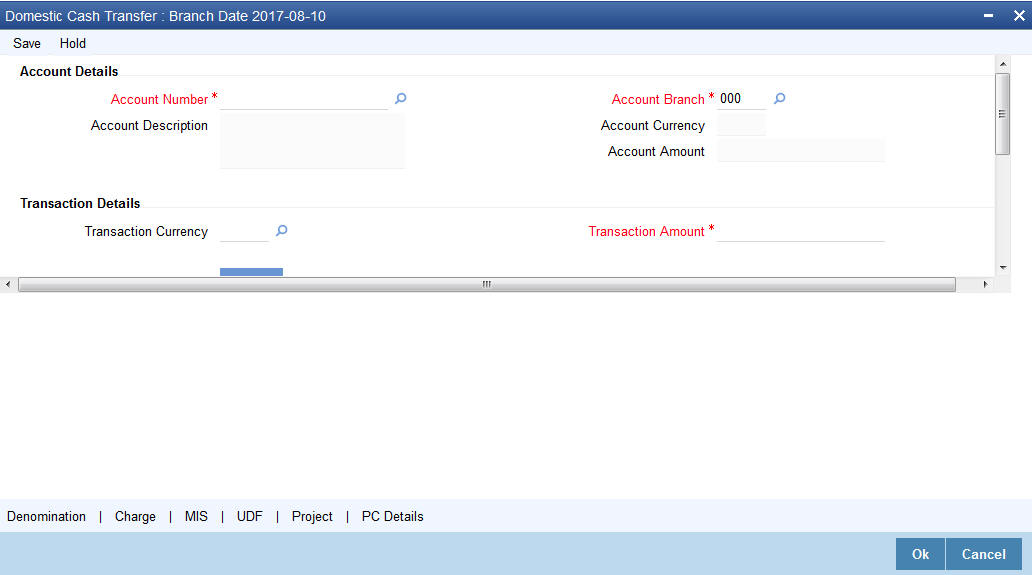
7.4.1 Transferring Cash Domestically
You can capture a domestic cash transfer transaction through the ‘Domestic Cash Transfer’ screen. You can invoke this screen by typing ‘1405’ in the field at the top right corner of the Application tool bar and clicking on the adjoining arrow button.
7.4.2 Specifying PC Details
You can capture the PC details under ‘PC Details’ tab.
Counterparty Name
Specify the name of the counterparty.
Counterparty Address 1
Specify the address 1 of the counterparty.
Counterparty Address 2
Specify the address 2 of the counterparty.
Counterparty Address 3
Specify the address 3 of the counterparty.
Counterparty Bank Code
Specify the counterparty bank code.
Counterparty Account Number
Specify the external counter party account number.
Counterparty Account Type
Select the counterparty account type from the drop-down list. Following are the options available in the drop-down list: 10 - Savings Bank
- 11 - Current Account
- 12 - Overdraft
- 13 - Cash Credit
- 14 - Loan Account
- 40 - NRE
- 50 - Cash
- 51 - Credit Card
Sender To Receiver Information 1
Specify the sender to receiver information 1.
Sender To Receiver Information 2
Specify the sender to receiver information 2.
Sender To Receiver Information 3
Specify the sender to receiver information 3.
Clearing Network
Specify the clearing network details.
Customer Name
Specify the customer name.
If transaction account has not been entered then you need to enter the walk-in customer name otherwise the system will default the customer name of the transaction account.
Customer Address 1
Specify the customer address 1.
If transaction account has not been entered then you need to enter the address 1 of the walk-in customer otherwise the system will default the customer address.
Customer Address 2
Specify the customer address 2.
If transaction account has not been entered then you need to enter the address 2 of the walk-in customer otherwise the system will default the customer address.
Customer Address 3
Specify the customer address 3.
If transaction account has not been entered then you need to enter the address 3 of the walk-in customer otherwise the system will default the customer address.
Communication Mode
Select the mode of communication to the customer to intimate about the beneficiary account credit. Following are the options available:
- Mobile
Mobile Number/Email ID
Specify the mobile number or the e-mail ID based on the communication mode selected.
If transaction account has been entered then system will default the corresponding customer’s mobile number or e-mail ID.
In the single stage flow, if there is an transaction level override or error during approval then the transaction will be moved to the pending queue. Without save action being initiated, the transaction will not be in pending queue.
On clicking Pickup button, the system populates the values in all the callforms of the screen and clicking pickup button is mandatory if you make any changes to the Transaction amount and exchange rate after first pickup.
Once you click ‘Pickup’ button once, then on amendment of xrate, amount, charge, pickup will be mandatory before save. On pick up, the fields that are currently enabled in the enrich stage will alone be retained as enabled fields.
On authorization of this transaction, the system will automatically create the outgoing payment transaction in PC module for the amount of (Transaction amount – Total Charges). After this process, any operations on branch transaction or outgoing payment transaction will be handled independently.
Refer the section titled ‘Depositing Cash’ for further details.
7.5 International Cash Transfer
This section contains the following topics:
- Section 7.5.1, "Transferring Cash Internationally"
- Section 7.5.2, "Denomination Button"
- Section 7.5.3, "Charge Button"
- Section 7.5.4, "MIS Button"
- Section 7.5.5, "UDF Button"
- Section 7.5.6, "FT Details Button"
7.5.1 Transferring Cash Internationally
Oracle FLEXCUBE facilitates international funds transfer by cash. A Walk in customer or an account holder of the Bank can perform the transfer by remitting cash in foreign currency.You can process International Cash Transfer for an account holder or for a walk-in customer, if the Product Code is defaulted as ‘CXTR’ and the FT Transaction check box is selected in the RT Product Preference (DEDRTPRM) screen.
You can process international cash transfer through the ‘International Cash Transfer’ screen. You can invoke this screen by typing ‘1406’ in the field at the top right corner of the Application tool bar and clicking on the adjoining arrow button.
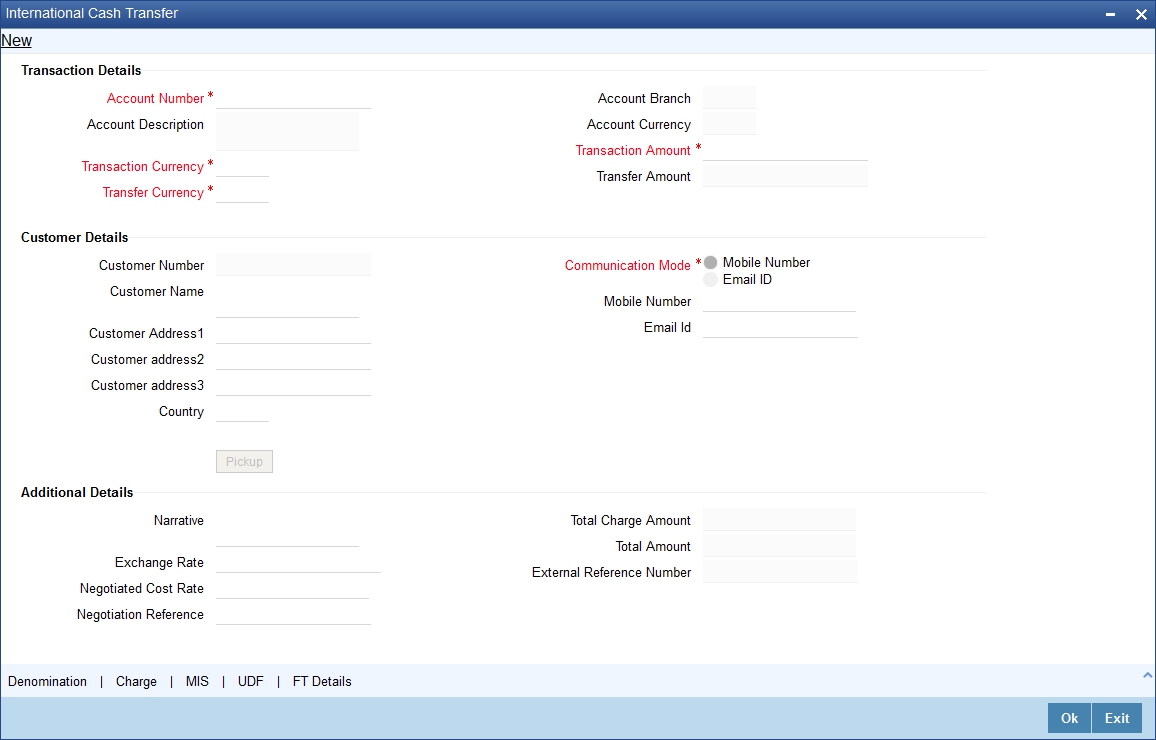
You can specify the following details:
Transaction Details
Account Number
Specify the account number for the transaction. Alternatively, you can select the account from the option list. The list displays all valid accounts maintained in the system. In case of walk-in customer, this field is left blank.
Account Description
The system displays the description of the account number.
Account Branch
The system displays the branch of the main account of the transaction.
Account Currency
The system displays the currency of the account.
Transaction Currency
Specify the currency of the transaction. Alternatively, you can select the transaction currency from the option list. The list displays all the currencies maintained in the system.
Transfer Currency
Specify the transfer currency in which the amount has to be transferred. Alternatively, you can select the transfer currency from the option list. The list displays all the currencies maintained in the system.
If the customer wants the deposited FCY cash to be transferred in another currency to the Beneficiary account, you need to specify the transfer currency for FT transaction in the ‘Transfer currency’ field. The system converts the transaction amount into the transfer currency and credits it to the beneficiary account using the specified exchange rate.
Transaction Amount
Specify the transaction amount.
Transfer Amount
The system displays the transfer amount based on the transfer currency selected and the derived exchange rate.
Customer Details
Customer Number
The system displays the customer Id. If the customer number is a walk-in customer, the walk-in customer number maintained at the branch parameter level is defaulted.
Customer Name
The system displays the customer name. If the customer number is a walk-in customer, specify the customer name.
Note
If the customer is a Walk-in Customer, you can specify the customer name in the Customer Name field.
Customer Address1
Specify the first line of the customer address.
Customer Address2
Specify the second line of the customer address.
Customer Address3
Specify the third line of the customer address.
Country
Specify the country code of the ordering customer. Alternatively, you can select the country code from the option list. The list displays all the country codes maintained in the system.
Communication Mode
Select the mode of communication for the funds transfer. The options are as follows:
- Mobile Number
- Email ID
Mobile Number
Specify the mobile number of the customer. If you select the mode of communication as ‘Mobile Number’, it is mandatory to specify the mobile number of the customer.
Email ID
Specify the email Id of the customer. If you select the mode of communication as ‘Email ID’, it is mandatory to specify the email Id of the customer.
Additional Details
Narrative
Specify any remarks pertaining to the transaction.
Exchange Rate
The system displays the exchange rate, if the transaction currency and transfer currency are different. This exchange rate used to convert the transaction currency into transfer currency and derive the transfer amount.
Negotiated Cost Rate
Specify the negotiated cost rate that should be used for foreign currency transactions between the treasury and the branch. You should specify the rate only when the currencies involved in the transaction are different. Else, it will be a normal transaction.
Negotiated Reference
Specify the unique reference number that should be used for negotiation of cost rate, in foreign currency transaction. If you have specified the negotiated cost rate, then it is mandatory to specify the negotiated reference number.
Note
Oracle FLEXCUBE books an online revaluation entries based on the difference in exchange rate between the negotiated cost rate and transaction rate.
Total Charge Amount
The system displays the total charge amount of the transaction in the transaction currency.
Total Amount
The system displays the total amount of the transaction. In case of walk-in customer, the total amount would be the total transaction amount with the applicable charges.
If the customer is a walk-in customer, the system displays the charges as the total amount. If the customer is an Account Holder, the system displays the transaction amount as the total amount.
External Reference Number
The system displays the external reference number maintained in the system.
Click ‘Pickup’ button to populate the data such as total Amount, total charge amount in transaction currency, customer number, customer name, and address details. In case of walk-in customer, you need to enter the customer name, address, country code and communication mode. It is mandatory to click ‘Pickup’ button to populate the data in the Denomination, Charge, MIS, UDF and FT Details screens.
After clicking ‘Pickup’ button, if you modify the Transaction Amount, Transaction Amount Currency or Account then it is mandatory to click ‘Pickup’ button before saving the transaction.
7.5.2 Denomination Button
You can specify the denomination details for the international cash transfer in the ‘Denomination Details’ screen. Click the ‘Denomination’ button to invoke the screen.
For more information on denomination details, refer to the section ‘Specifying Denomination Details’ in chapter ‘Depositing Cash’ in this User Manual.
7.5.3 Charge Button
You can capture charge related details in ‘Charge Details’ screen. Click the ‘Charge’ button to invoke the screen.
For more information on charge details, refer to the section ‘Specifying Charge Details’ in chapter ‘Depositing Cash’ in this User Manual.
7.5.4 MIS Button
You can capture MIS details in the ‘MIS Details’ screen. Click the ‘MIS’ button to invoke the screen.
For more information on MIS details, refer to the section ‘Specifying the MIS details’ in chapter ‘Depositing Cash’ in this User Manual.
7.5.5 UDF Button
You can capture UDF details in the ‘UDF details’ screen. Click the ‘UDF’ button to invoke the screen.
For more information on UDF details, refer to the section ‘Specifying the UDF details’ in chapter ‘Depositing Cash’ in this User Manual.
7.5.6 FT Details Button
You can capture Funds Transfer details in the ‘FT Details’ screen. Click the ‘FT Details’ button to invoke the screen.
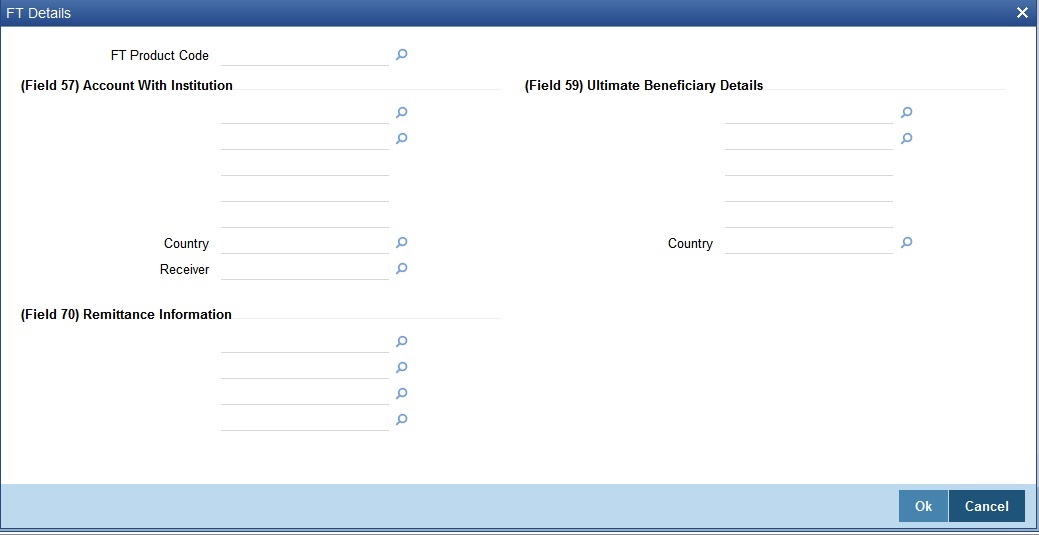
You can specify the following details here:
FT Product
Specify the FT product code. The system allows only outgoing FT product codes to be specified. Alternatively, you can select the product code from the option list. The list displays all product codes maintained in the system.
(Field 57) Account with Institution
Specify the account with institution details. Alternatively, you can select the account from the option list. The list displays all accounts with institution details maintained in the system.
Country
Specify the country code. Alternatively, you can select the country code from the option list. The list displays all the country codes maintained in the system.
Receiver
Specify the receiver BIC code. Alternatively, you can select the code from the option list. The list displays all the receiver BIC codes maintained in the system.
(Field 70) Remittance Information
Specify the remittance information. Alternatively, you can select the remittance details from the option list. The list displays the remittance details maintained in the system.
(Field 59) Ultimate Beneficiary
Specify the ultimate beneficiary details. Alternatively, you can select the beneficiary from the option list. The list displays all the beneficiary maintained in the system.
7.6 Close out Withdrawal by Cash
This section contains the following topics:
- Section 7.6.1, "Closing out Withdrawal by Cash"
- Section 7.6.2, "Specifying Charge Details"
- Section 7.6.3, "Specifying the MIS Details"
- Section 7.6.4, "Specifying the UDF details"
7.6.1 Closing out Withdrawal by Cash
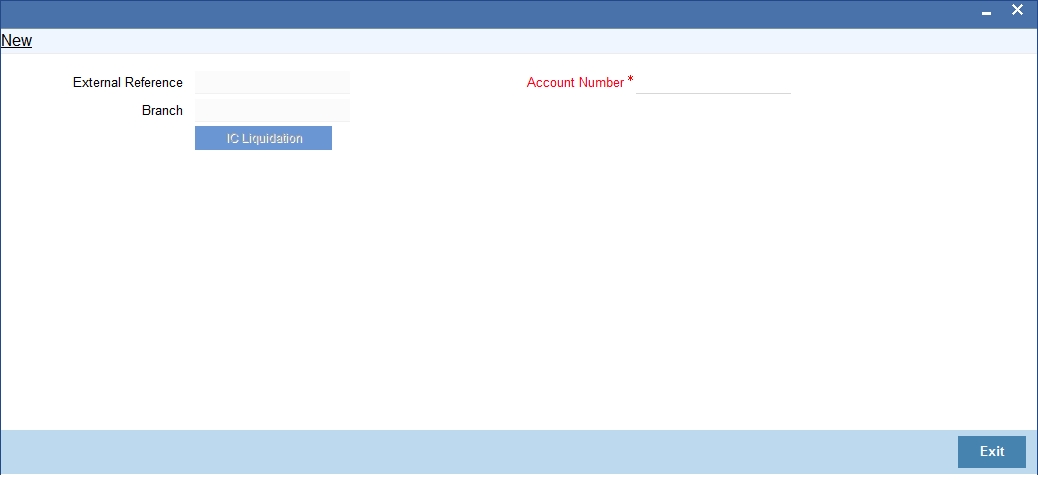
You can capture a close out withdrawal transaction through the ‘Close Out Withdrawal by Cash’ screen. You can invoke this screen by typing ‘1301’ in the field at the top right corner of the Application tool bar and clicking on the adjoining arrow button.
Here you can capture the following details:
Account Number
Specify the account number that needs to be closed. The adjoining option list displays all the accounts maintained in the Host. You can select the appropriate account number.
To view the joint holder’s details of an account and the mode of operation maintained at the account level, place the cursor on the Account Number field and press Ctrl+J. The system displays the ‘Joint Holder’ screen.
For more information on the ‘Joint Holder’ screen refer to the section ‘Joint Holder Maintenance’ in the Core User Manual.
Account Branch
The current logged-in branch code is displayed here. However, you can modify it. Specify the branch where the customer account which needs to be closed resides.
Account Description
The system displays a brief description on the selected account.
Account Currency
The system displays the account currency here.
Account Amount
The system displays the available amount in the account.
Customer ID
The system displays the customer ID based on the account specified.
Narrative
The system defaults ‘Close Out Withdrawal by Cash’ here. However you can modify this.
External Reference
The system generates a unique number based on the branch-specific sequence number generation logic and displays it here. The Host system identifies a branch transaction with the external reference number.
In the single stage flow, if there is an transaction level override or error during approval then the transaction will be moved to the pending queue. Without save action being initiated, the transaction will not be in pending queue.
On clicking Pickup button, the system populates the values in all the callforms of the screen and clicking pickup button is mandatory if you make any changes to the Transaction amount and exchange rate after first pickup.
Once you click ‘Pickup’ button once, then on amendment of xrate, amount, charge, pickup will be mandatory before save. On pick up, the fields that are currently enabled in the enrich stage will alone be retained as enabled fields.
Note
The Close out Withdrawal of Account transactions are processed without any change till the ‘Branch Available’ status is marked as ‘Yes’. If the branch available status is ‘No’ or branch date is ahead of host date, the transactions are not allowed.
Clicking ‘Pickup’ button, the system defaults the following details:
Account Title
The system displays a brief title for the chosen account.
Customer ID
The system displays the customer ID based on the account specified.
Account Currency
The system displays the account currency here.
Account Amount
The system displays the net cash to be disbursed to the customer after deducting the applicable charges.
Note
A transaction slip is generated at the time of input stage completion and is produced to the customer to sign and confirm the transaction.
Enrichment stage - 2
The system displays the following screen on clicking the ‘Proceed’ button.
In addition to the data defaulted from the previous stage, you can capture the following information here:
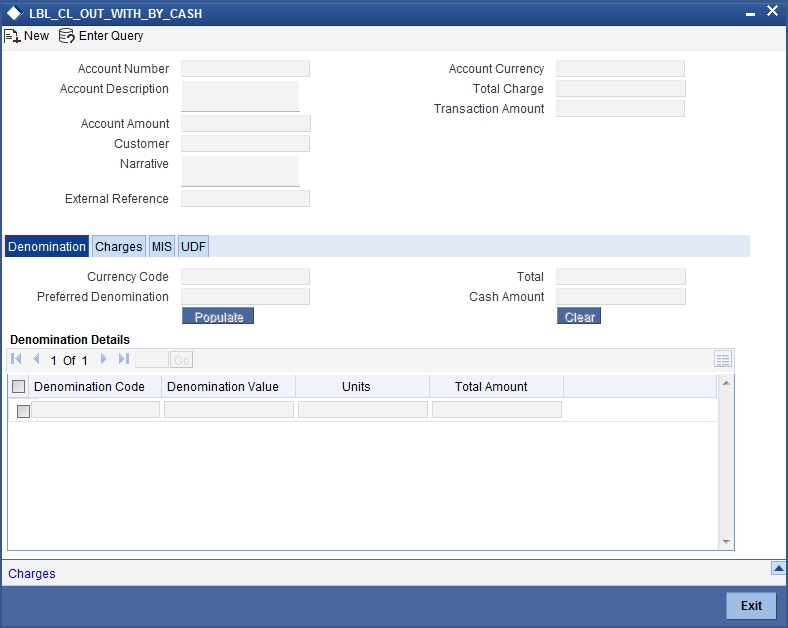
7.6.1.1 Specifying Denomination Details
This block, you can capture details of the currency denominations involved in the transaction.
Refer the section titled ‘Specifying denomination details’ under ‘Depositing Cash’ for further details.
7.6.2 Specifying Charge Details
This block allows you to capture charge related details. Click on the ‘Charges’ tab and invoke the following screen.
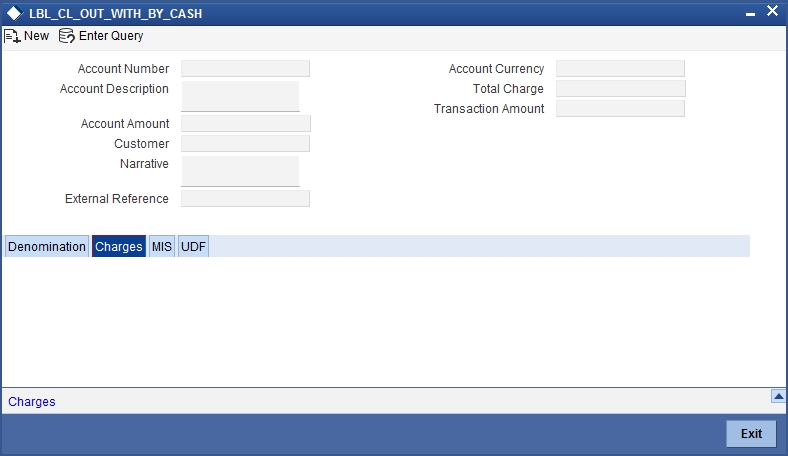
Refer the section titled ‘Specifying charge details’ under ‘Depositing Cash’ for further details.
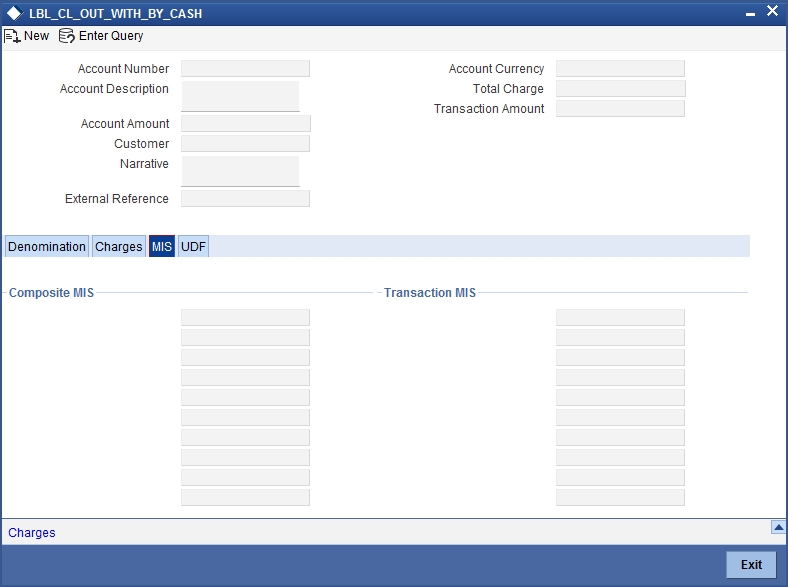
7.6.3 Specifying the MIS Details
This block allows you to capture details pertaining to MIS. Click on the ‘MIS’ tab to invoke the following screen:
7.6.4 Specifying the UDF details
You can capture these details in the ‘UDF’ tab of the screen.
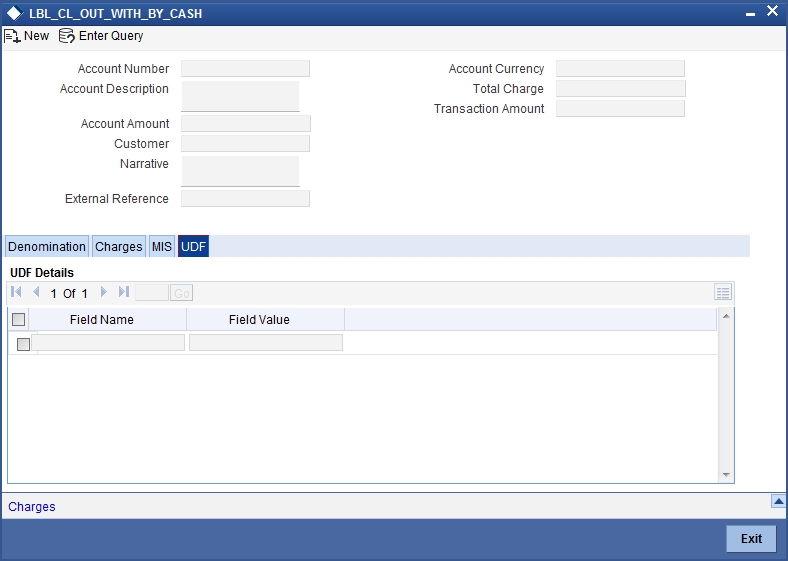
Specify the following details.
Field Description
The system will display all the User-Defined Fields (UDF) maintained for the product.
Field Value
Specify the value for the required UDFs.
Click save icon to save the transaction. The authorization process is similar to cash deposit.
Refer the corresponding section under ‘Depositing Cash’ for further details.
7.7 Advance By Cash
This section contains the following topics:
- Section 7.7.1, "Disbursing Cash Advance"
- Section 7.7.2, "Specifying Denomination Details"
- Section 7.7.3, "Specifying Charge details"
- Section 7.7.4, "Specifying the MIS details"
- Section 7.7.5, "Specifying the UDF details"
7.7.1 Disbursing Cash Advance
You can release cash advances through the ‘Advance By Cash’ screen. When a credit card customer submits a request for advance by cash, you can disburse the cash advances that are maintained in the external system where cash withdrawal from GL is allowed. You can also perform reversal of transaction in this screen.You can invoke this screen by typing ‘1461’ in the field at the top right corner of the Application tool bar and clicking on the adjoining arrow button.

Product type in the Retail Product Parameter Definition screen ‘DEDRTPRM’ should be ‘EC’-External Cash Advance. ARC setup should be done to track denominations and the credit account should be CASH GL. in IFDATMMN an ARC maintenance is created, where the charge type will be percentage and basis will be transaction amount
Contract Details
Advance Reference Number
Specify the advance reference number. For example if the Nature of Advance is Loan the loan account number should be specified and if the Nature of Advance is credit card then the Credit Card number should be specified.
Transaction currency
Specify the currency in which cash advance transaction is initiated. Alternatively you can select the transaction currency code from the option list. The list displays all valid transaction currency maintained in the system.
Transaction Amount
Specify the transaction amount that needs to be sanctioned.
Tenor
You can specify the tenor of the advance in Days/Months/Years
Days
Specify the tenor of advance in days. The range of value that you can specify is “0-30”. If you specify a value beyond permissible range, the system will display an error message.
If you specify the tenor value of date in decimal, then the system displays an error message “Invalid Tenor Value”.
Months
Specify the tenor of advance in months. The range of value that you can specify is “0-11”. If you specify a value beyond permissible range, the system will display an error message
If you specify the tenor value of month in decimal, then the system displays an error message “Invalid Tenor Value”.
Years
Specify the tenor of advance in years.
If you specify the tenor value of year in decimal, then the system displays an error message “Invalid Tenor Value”.
Document Details
Document Category
Specify the category of the document that is uploaded. Alternatively you can select the category of the document from the option list. The list displays all valid document categories maintained in the system.
Document Type
Specify the type of document submitted by the customer. Alternatively you can select the type of document from the option list. The list displays all valid document types maintained for a document category.
Document Number
Specify the document reference number submitted by the customer.
Beneficiary Name
Specify the beneficiary name.
Sanction Reference Number
Specify the approval number obtained from the third party.
When a transaction is reversed and initiated again with the same Sanction Reference Number and application number combination, then the system displays an configurable override message “Sanction Reference Number should be unique”.
Additional Details
Narrative
Specify the remarks about the transaction.
Total Charge
Specify the total charge applicable.
Total Transaction Amount
The system displays the total transaction amount inclusive of all applicable charges.
External Reference Number
The system displays a unique number generated based on the branch specific sequence number generation logic. The Host system identifies a branch transaction with the External reference number.
The following transactions will be performed in this screen:
- Cash Advance (If netting is not present)
- Debit Offset GL
- Credit cash GL
- Charge portion
- Debit GL
- Credit. income GL
You can capture the following details in this screen:
7.7.2 Specifying Denomination Details
You can capture denomination related details in this screen. Click ‘Denomination’ button to invoke this screen.
For more information on denomination details screen, refer to the section ‘Specifying denomination details’ in the chapter ‘Depositing Cash’ in this User Manual.
7.7.3 Specifying Charge details
You can capture charge related details in this screen. Click ‘Charge’ button to invoke this screen.
For more information on charge details screen, refer to the section ‘Specifying charge details’ in the chapter ‘Depositing Cash’ in this User Manual.
7.7.4 Specifying the MIS details
You can capture details pertaining to MIS. Click on the ‘MIS’ button to invoke the screen.
For more information on MIS details screen, refer to the section ‘Specifying the MIS details’ in the chapter ‘Depositing Cash’ in this User Manual.
7.7.5 Specifying the UDF details
You can capture the UDF details in the ‘UDF details’ screen. Click ‘UDF’ button to invoke this screen.
For more information on UDF screen, refer to the section ‘Specifying the UDF details’ in the chapter ‘Depositing Cash’ in this User Manual.
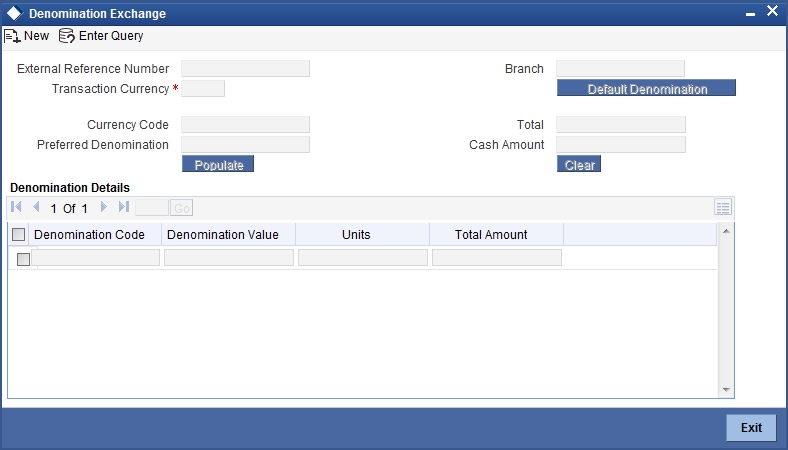
7.8 Exchanging Denominations
A customer may approach your bank to exchange currency denomination. That person may or may not be an actual bank customer (with a valid CIF or customer account). He or she may give you two notes of USD 50 each and ask for 10 notes of USD 10 each. This transaction involves only denomination exchange from your till. The total value in the till will remain the same. Hence there won’t be any accounting entries for this exchange. However, the denomination count in the till will change and hence it needs to be updated. You can capture such a transaction through the ‘Denomination Exchange’ screen. You can invoke this screen by typing ‘DENM’ in the field at the top right corner of the Application tool bar and clicking on the adjoining arrow button.
Here you can capture the following details:
External Reference Number
The system generates a unique number based on the branch-specific sequence number generation logic and displays it here. The Host system identifies a branch transaction with the external reference number.
Branch Code
The system displays the current logged-in branch code.
Transaction Currency
Specify the currency in which your customer wishes to exchange denominations. The adjoining option list displays all the currency codes maintained in the system. Choose the appropriate one.
7.8.1 Specifying Denomination Details
This block allows you to capture exact details of the denominations being exchanged.
Currency Code
Specify the currency in which the transaction is being performed. You can select the appropriate code from the adjoining option list.
Denomination Code
Specify the denomination of the currency used in the transaction. For every currency, the various denominations are assigned separate denomination codes. These codes are displayed in the adjoining option list. Choose the appropriate one.
Value
The system computes the face value of the denomination and displays it. For instance if the denomination code represents a USD 100, the value will be displayed as ‘100’.
Units
Indicate the number of units of the specified denomination.
By default, a positive value is considered to be an inflow unit. To reverse this default behaviour and to enter the units for denominations going out, you can specify a negative value. The summation of the total amount should be zero.
If the total value is not zero, the system will display an error message.
Total Amount
The system computes the denomination value by multiplying the denomination value with the number of units. For instance, if the denomination code represents a USD 100 and the number of units is 10, the denomination amount will be ‘1000’.
Click save icon to save the transaction. The authorization process is similar to cash deposit.
Refer the corresponding section under ‘Depositing Cash’ for further details.
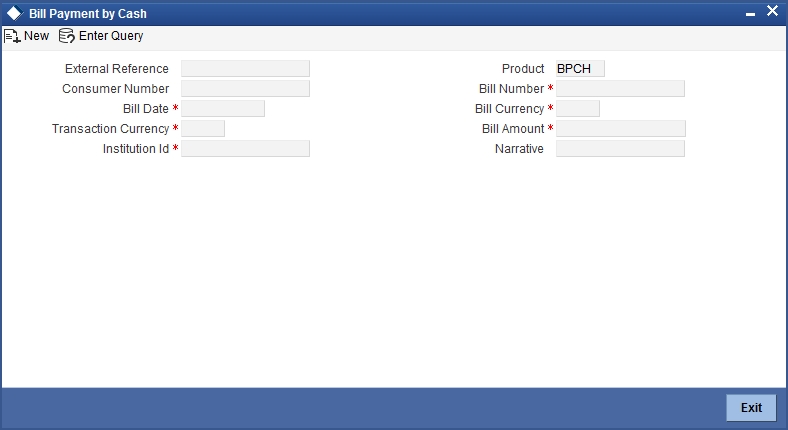
7.9 Pay Bill by Cash
This section contains the following topics:
- Section 7.9.1, "Paying a Bill by Cash"
- Section 7.9.2, "Specifying denomination details"
- Section 7.9.3, "Specifying Charge Details"
7.9.1 Paying a Bill by Cash
This module allows you to undertake cash transactions for payments of all the utility bills. To enter into such transactions, you need to invoke the ‘Bill Payment by Cash’ screen. You can invoke this screen by typing ‘1025’ in the field at the top right corner of the Application tool bar and clicking on the adjoining arrow button.
Here you can capture the following details:
External Reference Number
The system generates a unique number based on the branch-specific sequence number generation logic and displays it here.
Product Code
The system displays the code of the retail teller product maintained in the system that will be used for processing the transaction.
Consumer Number
Specify the consumer number for the transaction.
Bill Number
Specify the bill number here.
Bill Date
Specify the date on which the bill has been issued. The adjoining button when clicked invokes a calendar in which you need to double-click on the appropriate date. The chosen date will then be seen in the ‘YYYYMMDD’ format.
Bill Currency
Specify the currency in which the bill should be paid. You can select the appropriate code from the adjoining option list that displays all the currency codes maintained in the system.
Transaction Currency
Specify the currency in which the payment is being made by your customer. You can select the appropriate code from the adjoining option list that displays all the currency codes maintained in the system.
Institution Id
Specify the unique ID corresponding to the institution towards which the bill payment is being made. You can select the appropriate code from the adjoining option list that displays all the institution codes maintained in the system.
Bill Amount
Specify the amount that should be paid towards the bill.
Narrative
You may enter remarks about the transaction here. This is a free format text field.
In the single stage flow, if there is an transaction level override or error during approval then the transaction will be moved to the pending queue. Without save action being initiated, the transaction will not be in pending queue.
On clicking Pickup button, the system populates the values in all the callforms of the screen and clicking pickup button is mandatory if you make any changes to the Transaction amount and exchange rate after first pickup.
Once you click ‘Pickup’ button once, then on amendment of xrate, amount, charge, pickup will be mandatory before save. On pick up, the fields that are currently enabled in the enrich stage will alone be retained as enabled fields.
Clicking ‘Pickup’ button, the system defaults the following details:
Exchange Rate
The system displays the exchange rate used to convert the bill amount in the bill currency to transaction currency. If the transaction currency is the same as the bill currency, the system will display the exchange rate as ‘1’.
Charges
The system computes the charges applicable for the transaction and displays it here.
Total Amount
The system displays the total amount inclusive of the bill amount and the charges.
Note
A transaction slip is generated at the time of input stage completion and is produced to the customer to sign and confirm the transaction.
Negotiated Cost Rate
Specify the negotiated cost rate that should be used for foreign currency transactions between the treasury and the branch. You need to specify the rate only when the currencies involved in the transaction are different. Otherwise, it will be a normal transaction.
Negotiation Reference Number
Specify the unique reference number that should be used for negotiation of cost rate, in foreign currency transaction. If you have specified the negotiated cost rate, then you need to specify the negotiated reference number also.
Note
Oracle FLEXCUBE books then online revaluation entries based on the difference in exchange rate between the negotiated cost rate and transaction rate.
7.9.2 Specifying denomination details
In this block, you can capture details of the currency denominations involved in the transaction.
Refer the section titled ‘Specifying denomination details’ under ‘Depositing Cash’ for further details.
7.9.3 Specifying Charge Details
This block allows you to capture charge related details. Refer the section titled ‘Specifying charge details’ under ‘Depositing Cash’ for further details.
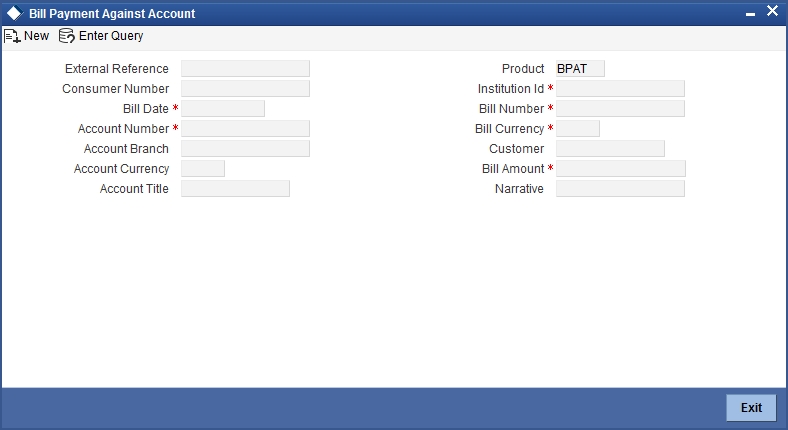
7.10 Pay a Bill against Account
This section contains the following topics:
- Section 7.10.1, "Paying a Bill against Account"
- Section 7.10.2, "Specifying charge details"
- Section 7.10.3, "Specifying the MIS details"
- Section 7.10.4, "Specifying the UDF details"
7.10.1 Paying a Bill against Account
You can capture a bill payment transaction against account through the ‘Bill Payment (Against Account)’ screen. You can invoke this screen by typing ‘1075’ in the field at the top right corner of the Application tool bar and clicking on the adjoining arrow button.
Here you can capture the following details:
External Reference Number
The system generates a unique number based on the branch-specific sequence number generation logic and displays it here. The Host system identifies a branch transaction with the external reference number.
Product Code
The system displays the code of the retail teller product maintained in the system that will be used for processing the transaction.
Bill Number
Specify the bill number here.
Consumer Number
Specify the consumer number for the transaction.
Bill Date
Specify the date on which the bill has been issued. The adjoining button when clicked invokes a calendar in which you need to double-click on the appropriate date. The chosen date will then be seen in the ‘YYYYMMDD’ format.
Institution Id
Specify the unique ID corresponding to the institution towards which the bill payment is being made. You can select the appropriate code from the adjoining option list that displays all the institution codes maintained in the system.
Bill Currency
Specify the currency in which the bill should be paid. You can select the appropriate code from the adjoining option list that displays all the currency codes maintained in the system.
Bill Amount
Specify the amount that should be paid towards the bill.
Account Number
Specify the account number of the customer against which the bill should be paid. You can select the appropriate number from the adjoining option list that displays all the accounts maintained in the system.
To view the joint holder’s details of an account and the mode of operation maintained at the account level, place the cursor on the Account Number field and press Ctrl+J. The system displays the ‘Joint Holder’ screen.
For more information on the ‘Joint Holder’ screen refer to the section ‘Joint Holder Maintenance’ in the Core User Manual.
Account Branch
The branch where the chosen account resides is displayed here.
Narrative
You may enter remarks about the transaction here. This is a free format text field.
In the single stage flow, if there is an transaction level override or error during approval then the transaction will be moved to the pending queue. Without save action being initiated, the transaction will not be in pending queue.
On clicking Pickup button, the system populates the values in all the callforms of the screen and clicking pickup button is mandatory if you make any changes to the Transaction amount and exchange rate after first pickup.
Once you click ‘Pickup’ button once, then on amendment of xrate, amount, charge, pickup will be mandatory before save. On pick up, the fields that are currently enabled in the enrich stage will alone be retained as enabled fields.
Clicking ‘Pickup’ button, the system defaults the following details:
Account Currency
The system displays the currency in which the chosen account is maintained.
Customer ID
The system displays the customer ID based on the account specified.
Account Title
The system displays a brief title for the chosen account.
Exchange Rate
The system displays the exchange rate used to convert the bill amount in bill currency to transaction amount in transaction currency. If the transaction currency is the same as the bill currency, the system will display the exchange rate as ‘1’.
Total Charge
The system computes the charges applicable for the transaction and displays it here.
Total Amount
The system displays the total amount inclusive of the bill amount and the charges.
Negotiated Cost Rate
Specify the negotiated cost rate that should be used for foreign currency transactions between the treasury and the branch. You need to specify the rate only when the currencies involved in the transaction are different. Otherwise, it will be a normal transaction.
Negotiation Reference Number
Specify the unique reference number that should be used for negotiation of cost rate, in foreign currency transaction. If you have specified the negotiated cost rate, then you need to specify the negotiated reference number also.
Note
Oracle FLEXCUBE books then online revaluation entries based on the difference in exchange rate between the negotiated cost rate and transaction rate.
7.10.2 Specifying charge details
This block allows you to capture charge related details.
Refer the section titled ‘Specifying charge details’ under ‘Depositing Cash’ for further details.
7.10.3 Specifying the MIS details
This block allows you to capture details pertaining to MIS. Click on the ‘MIS’ tab to invoke the following screen:
Refer the section titled ‘Specifying the MIS details’ under ‘Depositing Cash’ for further details.
7.10.4 Specifying the UDF details
You can capture these details in the ‘UDF’ tab of the screen.
Field Description
The system will display all the User-Defined Fields (UDF) maintained for the product.
Field Value
Specify the value for the required UDFs.
Click save icon to save the transaction. The authorization process is similar to cash deposit.
Refer the corresponding section under ‘Depositing Cash’ for further details.
7.11 Pay a Bill by Clearing Cheque
This section contains the following topics:
- Section 7.11.1, "Paying a bill by clearing cheque"
- Section 7.11.2, "Specifying the MIS details"
- Section 7.11.3, "Specifying the Field details"
7.11.1 Paying a bill by clearing cheque
You can undertake other bank cheque transactions for the payment of all the utility bills through ‘Bill Payment By Clearing Cheque’ screen. You can invoke this screen by typing ‘1045’ in the field at the top right corner of the application tool bar and clicking on the adjoining arrow button.
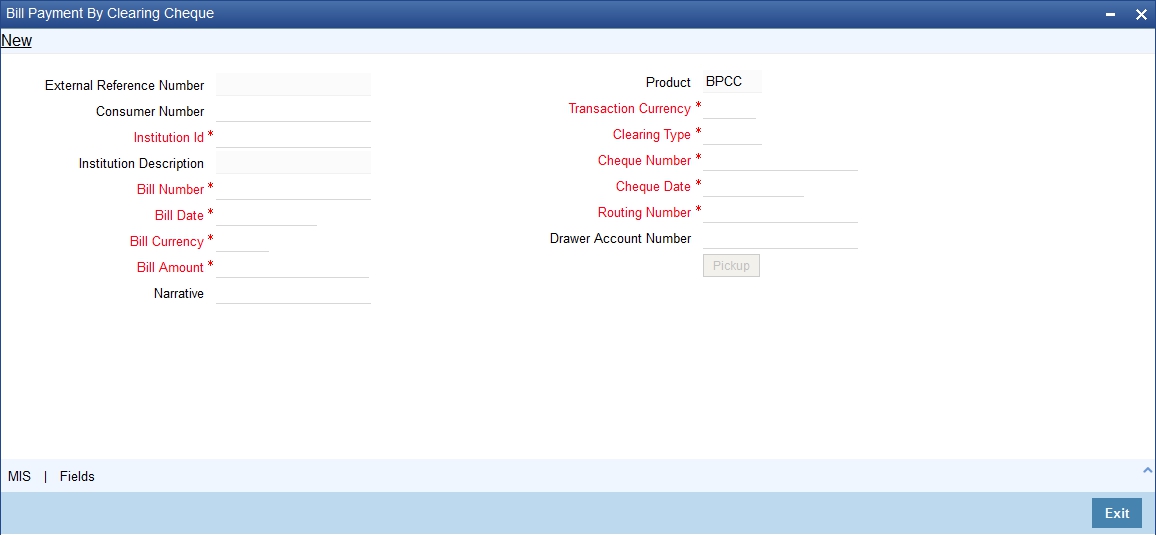
You can capture the following details:
External Reference Number
The system displays the external reference number.The system generates a unique number based on the branch-specific sequence number generation logic and displays it here.
Consumer Number
Specify the consumer number for the transaction.
Institution Id
Specify the unique Id corresponding to the institution towards which bill payment is being made. Alternatively, you can select the institution id from the option list. The list displays all institution code maintained in the system.
Institution description
The system displays the description of the biller institution.
Bill Number
Specify the bill number.
Bill Date
Select the date on which the bill has been issued from the adjoining calendar.
Bill currency
Specify the currency in which the bill should be paid. Alternatively, you can select the currency from the option list. The list displays all bill currency maintained in the system.
Bill Amount
Specify the bill amount.
Narrative
Specify any remarks pertaining to the transaction.
Product
The system displays the utility payment product. The Product ‘BPCC’ will be defaulted for the transaction pertaining to the bill payment for clearing cheques.
Transaction Currency
Specify the currency in which the payment is made by the customer. Alternatively, you can select the transaction currency from the option list. The list displays all transaction currency maintained in the system
Clearing Type
Select the clearing type. Alternatively, you can select the type of clearing from the option list. The list displays all clearing products maintained in the system.
Cheque Number
Specify the cheque number provided by the customer. Alternatively you can select the cheque number from the option list. The list displays all the cheque numbers of the customer maintained in the system.
Cheque Date
Select the date on which cheque has been issued from the adjoining calendar.
If the cheque is issued before three months, the system displays an error message “Cheque is a stale one”.
Routing Number
Specify the routing number. Alternatively you can select the routing number from the option list. The list displays all routing number maintained in the system.
Drawer Account Number
Specify the drawer account number.
Pickup Button
Click on pickup to default the data into the MIS and fields details. It is mandatory to click on ‘Pickup’ button before save.
7.11.2 Specifying the MIS details
You can capture details pertaining to MIS. Click on the ‘MIS’ button to invoke this screen.
For more information on MIS details screen, refer to the section ‘Specifying the MIS details’ in the chapter ‘Depositing Cash’ in this User Manual.
7.11.3 Specifying the Field details
You can capture the UDF details in the ‘UDF details’ screen. Click ‘Fields’ button to invoke this screen.
For more information on UDF screen refer to the section ‘Specifying the UDF details’ in the chapter ‘Depositing Cash’ in this User Manual.
7.12 Pay a Bill by In-house Cheque
This section contains the following topics:
- Section 7.12.1, "Paying a bill by in-house cheque"
- Section 7.12.2, "Specifying Charge details"
- Section 7.12.3, "Specifying the MIS details"
- Section 7.12.4, "Specifying the Field details"
7.12.1 Paying a bill by in-house cheque
You can pay all the utility bills using same bank cheque. You can maintain these transactions, in the ‘Bill Payment By In-house Cheque’ screen. You can invoke this screen by typing ‘1035’ in the field at the top right corner of the application tool bar and clicking on the adjoining arrow button
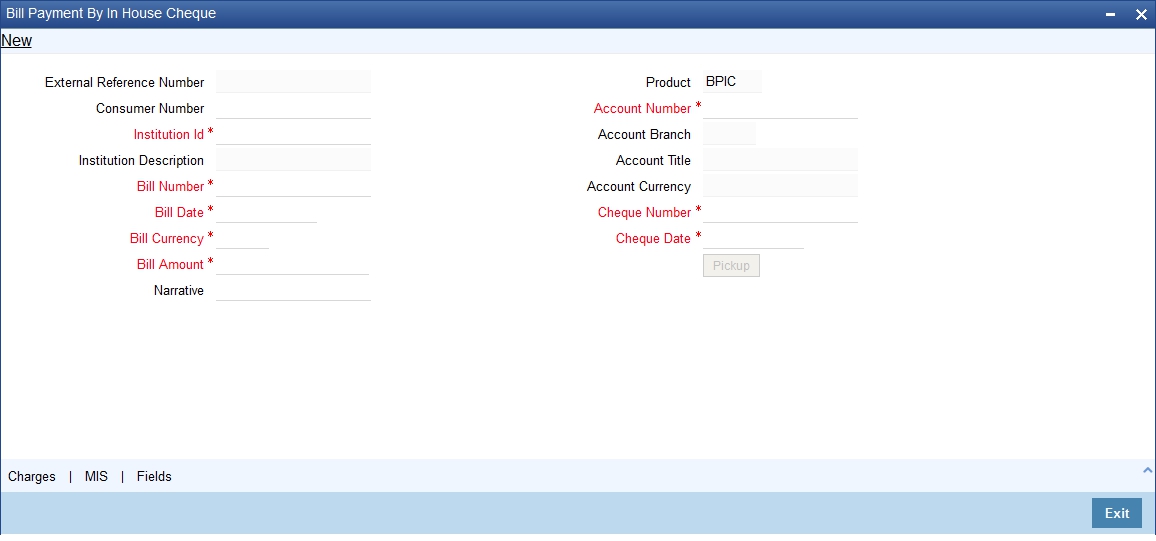
You can capture the following details:
External Reference Number
The system displays the external reference number.The system generates a unique number based on the branch-specific sequence number generation logic and displays it here.
Consumer Number
Specify the consumer number for the transaction.
Institution Id
Specify the unique Id corresponding to the institution towards which bill payment is being made. Alternatively, you can select the institution id from the option list. The list displays all institution code maintained in the system.
Institution description
The system displays the description of the biller institution.
Bill Number
Specify the bill number.
Bill Date
Select the date on which the bill has been issued from the adjoining calendar.
Bill currency
Specify the currency in which the bill should be paid. Alternatively, you can select the currency from the option list. The list displays all bill currency maintained in the system.
Bill Amount
Specify the bill amount.
Narrative
Specify any remarks pertaining to the transaction.
Product
The system displays the utility payment product. The Product ‘BPIC’ will be defaulted for the transaction pertaining to the bill payment for in-house cheques.
Account Number
Specify the account number of the customer against which the bill should be paid. Alternatively, you can select the account number from the option list. The list displays all the accounts maintained in the system
Account Branch
The system displays the branch where the chosen account resides.
Account Title
The system displays a brief title for the chosen account.
Account Currency
The system displays the currency in which the account is maintained.
Cheque Number
Specify the cheque number provided by the customer. Alternatively you can select the cheque number from the option list. The list displays all the cheque numbers of the customer maintained in the system.
If the cheque is cancelled, the system displays an error message “Selected cheque is cancelled”.
If the cheque has stop payment, the system displays an error message “There is a stop payment on the selected cheque”
Cheque Date
Select the date on which cheque has been issued from the adjoining calendar.
If the cheque is issued before three months, the system displays an error message “Cheque is a stale one”.
Pickup Button
Click on the Pickup button to default the data into the Charges, MIS and Fields details. It is mandatory to click on ‘Pickup’ button before save.
7.12.2 Specifying Charge details
You can capture charge related details in this screen. Click ‘Charge’ button to invoke this screen.
For more information on charge details screen, refer to the section ‘Specifying charge details’ in the chapter ‘Depositing Cash’ in this User Manual.
7.12.3 Specifying the MIS details
You can capture details pertaining to MIS. Click on the ‘MIS’ button to invoke the screen
For more information on MIS details screen, refer to the section ‘Specifying the MIS details’ in the chapter ‘Depositing Cash’ in this User Manual.
7.12.4 Specifying the Field details
You can capture the UDF details in the ‘UDF details’ screen. Click ‘Fields’ button to invoke this screen.
For more information on UDF screen refer to the section ‘Specifying the UDF details’ in the chapter ‘Depositing Cash’ in this User Manual.
7.13 Request for Funds Transfer
This section contains the following topics:
- Section 7.13.1, "Requesting for Funds Transfer"
- Section 7.13.2, "Specifying charge details"
- Section 7.13.3, "Specifying MIS details"
- Section 7.13.4, "Specifying UDF Details"
- Section 7.13.5, "Specifying Project Details"
7.13.1 Requesting for Funds Transfer
You can transfer funds in a particular currency from one account to another using the ‘Account to Account Transfer’ screen. The funding account and the beneficiary account can be in different currencies and can belong to different branches.
You can invoke this screen by typing ‘1006’ in the field at the top right corner of the Application tool bar and clicking on the adjoining arrow button.
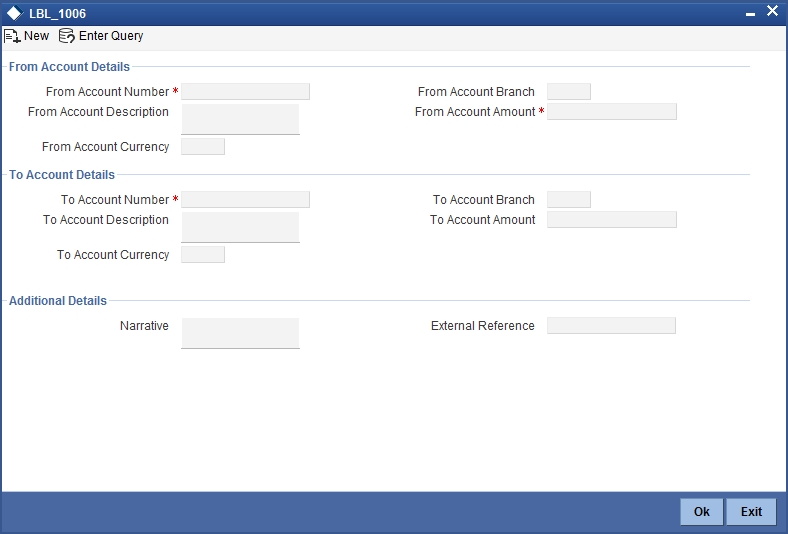
You can also specify Virtual Accounts in this screen. These virtual accounts can be used as a routing account to credit the underlying physical account.
If a virtual account number is specified in this screen, then the F10, F11, and F12 keys will not display any value, however the following error messages will be displayed for each of these keys:
- F10: Customer Image not maintained for this Customer/Account in branch 214
- F11: Customer Account Balance cannot be accessed for this Customer/ Account.
- F12: Customer Signature not maintained for this Customer/Account in branch 214
Click the OK button and you will be able to proceed further with the transaction.
Here you can capture the following details:
From Account Details
From Account Number
Specify the account that should be debited for the funds transfer. After specifying the account number, the system will display the From Account Branch and From Account Currency.
Note
In case of multiple accounts with the same account number, the system will display a list of account numbers with associated account branches. Choose the appropriate one.
To view the joint holder’s details of an account and the mode of operation maintained at the account level, place the cursor on the From Account Number field and press Ctrl+J. The system displays the ‘Joint Holder’ screen.
For more information on the ‘Joint Holder’ screen refer to the section ‘Joint Holder Maintenance’ in the Core User Manual.
From Account Branch
The system displays the logged-in branch. If you specify another account number and tab out of the Account Number field, the system displays the corresponding account branch.
From Account Description
The system displays the description of the account number chosen.
From Account Currency
The system displays the local currency. If you specify another account number and tab out of the Account Number field, the system displays the currency associated with the account.
From Account Amount
Specify the transferrable amount in the currency associated with the From Account.
To Account Details
To Account Number
Physical Account
Specify the account that should be credited for the funds transfer. After specifying the account number, the system will display the To Account Branch and To Account Currency. In case of multiple accounts with the same account number, the system will display a list of account numbers with associated account branches. Choose the appropriate one.
To view the joint holder’s details of an account and the mode of operation maintained at the account level, place the cursor on the To Account Number field and press Ctrl+J. The system displays the ‘Joint Holder’ screen.
For more information on the ‘Joint Holder’ screen refer to the section ‘Joint Holder Maintenance’ in the Core User Manual.
To Account Branch
The system displays the logged-in branch. If you specify another account number and tab out of the Account Number field, the system displays the corresponding account branch.
To Account Description
The system displays the description of the account number chosen.
For Virtual Accounts, the virtual account name is displayed in this field.
To Account Currency
The system displays the local currency. If you specify another account number and tab out of the Account Number field, the system displays the currency associated with the account.
For a Virtual Account, the ‘From Account’ currency is defaulted as the account currency.
The physical account number is identified based on the account currency and virtual account number combination. If the physical account number is available, then the account currency remains the same.
If the physical account number is not available, then the default physical account number
is selected and the account currency changes as per the default physical account number.
To Account Amount
To Account Number is a read-only field displaying the transferrable amount in the currency associated with the To Account.
Click ‘Pickup’ button. The system validates if all the mandatory details are specified. This button will be disabled after the first click.
On clicking Pickup button, the system populates the values in all the callforms of the screen and clicking pickup button is mandatory if you make any changes to the Transaction amount and exchange rate after first pickup.
Once you click ‘Pickup’ button once, then on amendment of xrate, amount, charge, pickup will be mandatory before save. On pick up, the fields that are currently enabled in the enrich stage will alone be retained as enabled fields.
Additional Details
Narrative
The system displays ‘Funds Transfer from <From Account Number> to <To Account Number>’. Once you specify the ‘From Account Number’ and ‘To Account Number’, the system replaces the account numbers respectively.
If virtual account number is entered in the ‘To Account Number’ field, then that virtual account number will be displayed in the Narrative field.
Click the OK button to go to the next stage.
External Reference
The system generates a unique number based on the branch-specific sequence number generation logic. The Host system identifies a branch transaction with the external reference number.
If there is a transaction level override or error during approval then the transaction will be moved to the pending queue. Without save action being initiated, the transaction will not be in pending queue.
On clicking ‘Pickup’ button, the system defaults the following details:
From Account Currency
The currency in which the ‘From Account’ is maintained is displayed.
Customer ID
The system displays the customer ID based on the account specified.
Exchange Rate
The system displays the exchange rate used to convert the from account currency into to account currency. If the from account currency is the same as the to account currency, the system will display the exchange rate as ‘1’.
Total Charge
The system computes the charges applicable for the transaction and displays it here.
To Amount
Specify the amount that should be credited to the account.
Negotiated Cost Rate
Specify the negotiated cost rate that should be used for foreign currency transactions between the treasury and the branch. You need to specify the rate only when the currencies involved in the transaction are different. Otherwise, it will be a normal transaction.
Negotiation Reference Number
Specify the unique reference number that should be used for negotiation of cost rate, in foreign currency transaction. If you have specified the negotiated cost rate, then you need to specify the negotiated reference number also.
Note
Oracle FLEXCUBE books then online revaluation entries based on the difference in exchange rate between the negotiated cost rate and transaction rate.
7.13.2 Specifying charge details
This block allows you to capture charge related details.
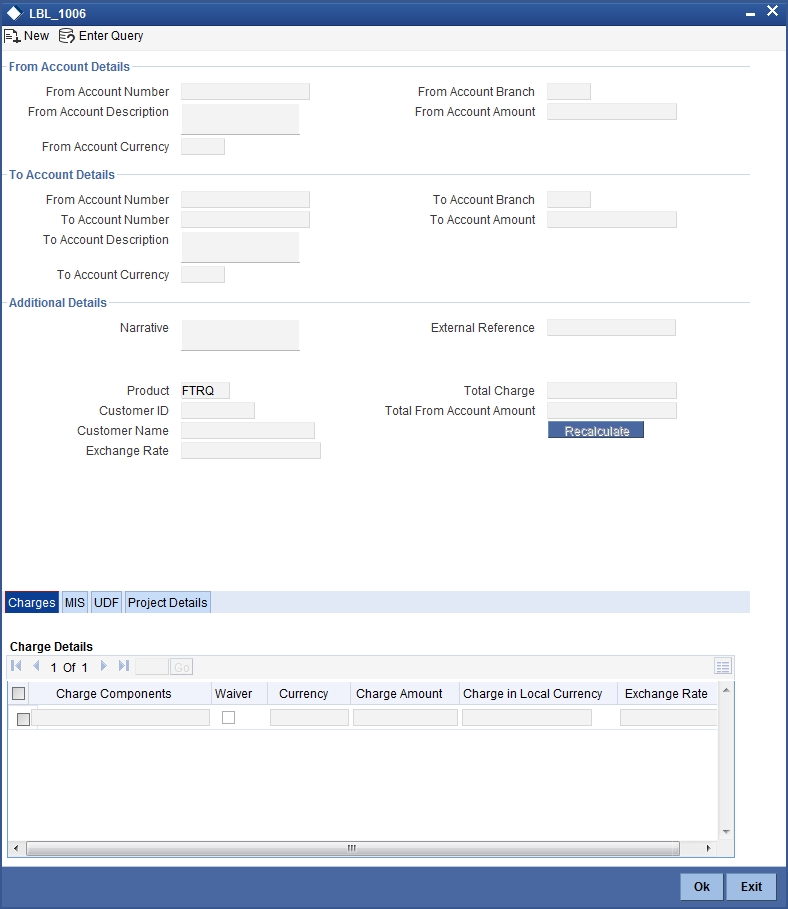
Refer the section titled ‘Specifying charge details’ under ‘Depositing Cash’ for further details.
7.13.3 Specifying MIS details
This block allows you to capture details pertaining to MIS. Click on the ‘MIS’ tab to invoke the following screen:
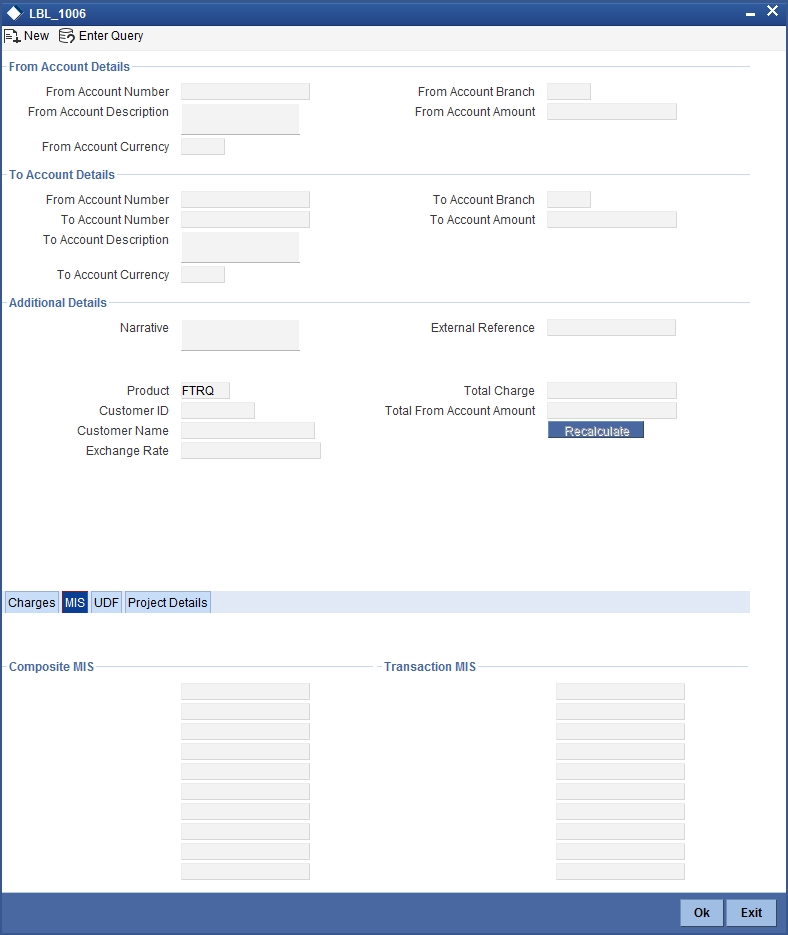
Refer the section titled ‘Specifying MIS details’ under ‘Depositing Cash’ for further details.
7.13.4 Specifying UDF Details
You can capture the UDF details under ‘UDF’ tab.
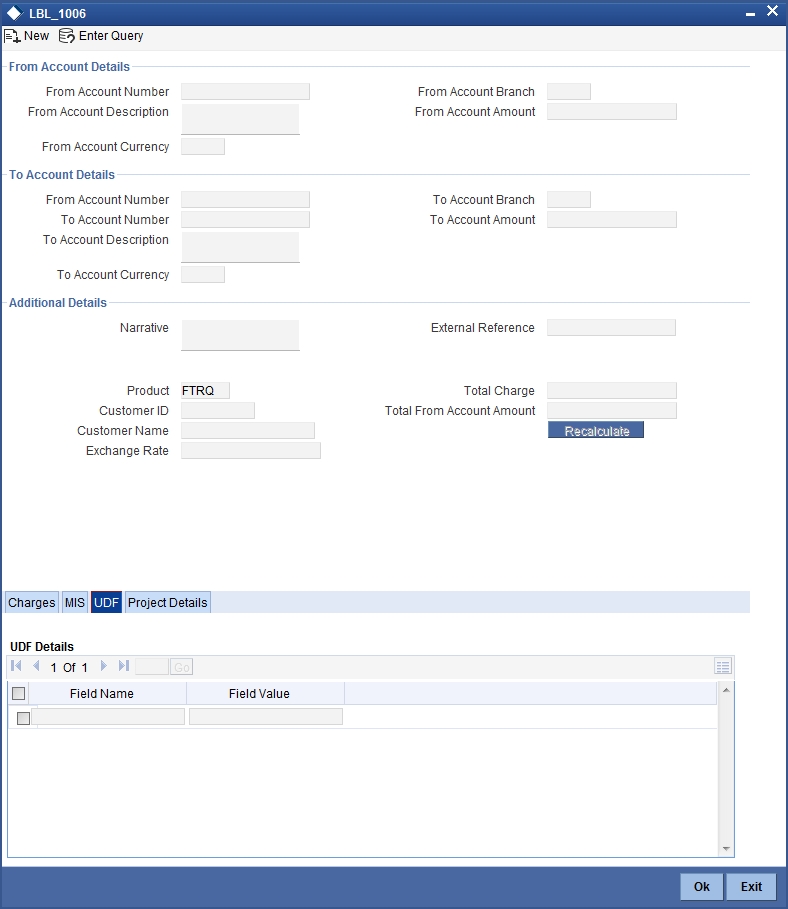
Refer the section titled ‘Specifying the UDF details’ under ‘Depositing Cash’ for further details.
7.13.5 Specifying Project Details
You can capture project details under ‘Project Details’ tab. Note that this tab will be applicable only if the funds are being transferred to a Trust account.
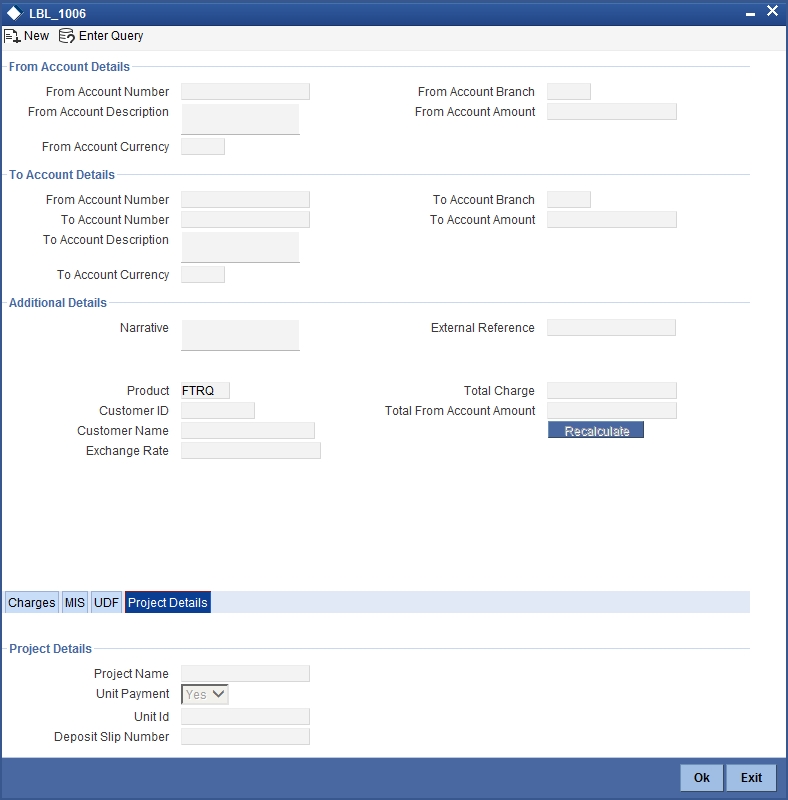
Specify the following details:
Project Name
Specify the developer project name for which payment is being made. The adjoining option list displays all valid projects maintained in the system. You can select the appropriate one. Input to this field is mandatory.
Unit Payment
Indicate whether the transaction is a unit payment or not by choosing the appropriate value from the adjoining drop-down list. The following values are available:
- Yes
- No
Unit ID
Specify the unit ID of the project. This field will be enabled only if you have selected ‘Yes’ against ‘Unit Payment’. The adjoining option list displays all unit IDs along with the unit holder names corresponding to the project name chosen. You can select the appropriate one.
Deposit Slip Number
Specify the deposit slip number for the payment.
Click save icon to save the transaction. On saving, the system checks whether the accounts mentioned in the ‘from’ and ‘to’ leg of the transaction belong to the same netting group or not. If they belong to the same netting group, the entries will not be posted. Instead the transaction will be logged for the netting batch. On authorisation, the transaction will be made available for the netting batch if logged for netting batch. The rest of the authorization process is similar to that of cash deposit.
Refer the corresponding section under ‘Depositing Cash’ for further details.
7.14 Making a Stop Payment
Based on a customer’s request, you can stop a cheque drawn on an account maintained in your bank. You can capture such a transaction through the ‘Stop Payment’ screen. You can invoke this screen by typing ‘1056’ in the field at the top right corner of the Application tool bar and clicking on the adjoining arrow button.

Here you can capture the following details:
External Reference Number
The system generates and displays a reference number for the transaction as soon as the screen is invoked.
Branch
The system displays the branch code where the chosen account resides.
Account Number
Specify the account on which the stop payment needs to be imposed. You can select the appropriate number from the adjoining option list that displays all the accounts maintained in the system.
To view the joint holder’s details of an account and the mode of operation maintained at the account level, place the cursor on the Account Number field and press Ctrl+J. The system displays the ‘Joint Holder’ screen.
For more information on the ‘Joint Holder’ screen refer to the section ‘Joint Holder Maintenance’ in the Core User Manual.
Stop Payment Type
Specify whether the stop payment is on the amount of a cheque or a cheque drawn on an account. The drop-down list displays the following values:
- Amount
- Cheque
Select the appropriate one.
Start Cheque Number
In case of a stop payment on a cheque, you need to specify the cheque number of the first leaf.
End Cheque Number
In case of a stop payment on a cheque, you need to specify the cheque number of the last leaf.
Note
The above two fields are applicable in cases wherein the customer has lost a cheque book. So in order to prevent misuse, you can capture the cheque numbers of the lost cheque book and impose a stop payment on all cheques in that book.
Effective Date
Specify the date from which you wish to impose the stop payment. The adjoining button when clicked invokes a calendar in which you need to double-click on the appropriate date. The chosen date will then be seen in the ‘YYYYMMDD’ format.
Expiry Date
Specify the date until which the stop payment needs to be active. The adjoining button when clicked invokes a calendar in which you need to double-click on the appropriate date. The chosen date will then be seen in the ‘YYYYMMDD’ format.
Amount
Specify the amount based on which you wish to impose a stop payment. This field is applicable only if the ‘Stop Payment Type’ is specified as ‘Amount’.
Narrative
You may enter remarks about the transaction here. This is a free format text field.
In the single stage flow, if there is an transaction level override or error during approval then the transaction will be moved to the pending queue. Without save action being initiated, the transaction will not be in pending queue.
On clicking Pickup button, the system populates the values in all the callforms of the screen and clicking pickup button is mandatory if you make any changes to the Transaction amount and exchange rate after first pickup.
Once you click ‘Pickup’ button once, then on amendment of xrate, amount, charge, pickup will be mandatory before save. On pick up, the fields that are currently enabled in the enrich stage will alone be retained as enabled fields.
Clicking ‘Pickup’ button, the system defaults the following details:
Account Title
The system displays a brief title for the chosen account.
Account Currency
The system displays the currency in which the account is maintained.
Click save icon to save the transaction. The authorization process is similar to cash deposit.
7.14.1 Specifying Charge Details
You can specify charge details under the ‘Charge Details’ tab. You can specify the following details here:
Charge Components
Specify the charge component name.
Waiver
Check this box to indicate that charge is waivered.
Charge Amount
The system displays the computed charge amount.
Currency
The system displays the charge currency.
Charge in Local Currency
Specify the charge in local currency.
Exchange Rate
The system displays the exchange rate if the transaction currency and account currency are different.
Refer the corresponding section under ‘Depositing Cash’ for further details.
7.15 Sell Foreign Exchange to a Walk-in Customer
This section contains the following topics:
- Section 7.15.1, "Selling Foreign Exchange to a Walk-in Customer"
- Section 7.15.2, "Specifying denomination details"
- Section 7.15.3, "Specifying charge details"
- Section 7.15.4, "Specifying the MIS details"
- Section 7.15.5, "Specifying UDF Details"
7.15.1 Selling Foreign Exchange to a Walk-in Customer
You can sell a foreign currency to a walk-in customer in return for the equivalent amount in another currency. To achieve this you need to invoke the ‘FX Sale (Walk-in)’ screen by typing ‘8203’ in the field at the top right corner of the Application tool bar and clicking on the adjoining arrow button.
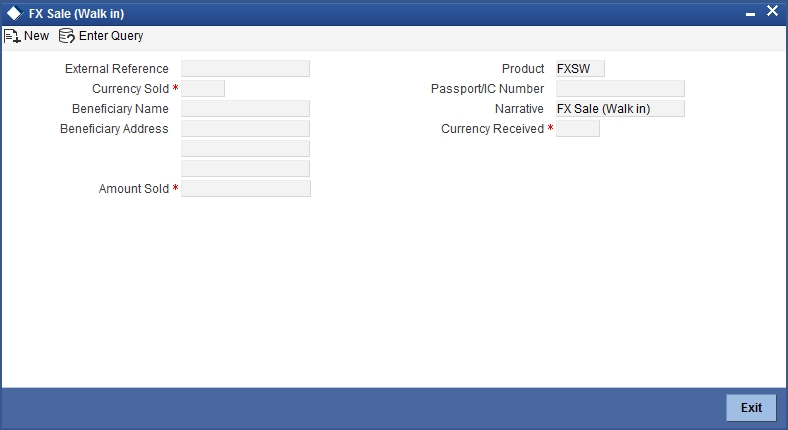
Here you can capture the following details:
Product
The system displays the code of the retail teller product maintained in the system that will be used for processing the transaction.
External Reference Number
The system generates a unique number based on the branch-specific sequence number generation logic and displays it here. The Host system identifies a branch transaction with the external reference number.
Currency Sold
Specify the currency that you are selling to the customer. You can select the appropriate code from the adjoining option list that displays all the currency codes maintained in the system.
Amount Sold
Specify the amount that is being sold in the sold currency.
Currency Received
Specify the currency that you have received from the customer in return for the currency sold. You can select the appropriate code from the adjoining option list that displays all the currency codes maintained in the system.
Customer ID
Specify the customer ID. Alternatively, you can select customer ID from the option list. The list displays all valid customer ID maintained in the system.
Narrative
Here, you can enter your remarks pertaining to the transaction.
Beneficiary Name
Here, you can capture the beneficiary customer’s name.
Passport/IC No
Here, you can enter the passport or other unique identification number of the beneficiary.
Beneficiary Address
Here, you can capture the address of the beneficiary customer.
Denomination Variance Applicable
This Check box will have the value Y by default only if you have set the required parameter to ‘Yes’ in ‘FBTB_PARAMS’.
By default, the system displays the status of the check-box as checked. However, you can modify this based on the transaction requirements.
If this box is checked, then based on the denominations of the currency, the system will apply the respective variance to the rate of exchange. The variance is applied based on the variance maintained for the currency pair involved in the transaction.
If you check this box, it is mandatory to specify the denominations in ‘FX Denominations’ sub-screen.
On clicking the Pickup button, the following details are defaulted:In addition to the details defaulted from the previous stage, you can view the following details:
Currency Received Rate
The system displays the exchange rate to be used for the foreign exchange sale.
Negotiated Rate
Specify the negotiated rate to compute profit or loss of this transaction.
Negotiated Reference
Specify the negotiated reference details.
Charges
The system displays the charge to be levied on the customer for the transaction.
Amount Received
Based on the exchange rate and amount bought, the system computes and displays the amount that needs to be received from the customer in the received currency.
Net Amount
The system displays the net amount.
If you have manually changed the exchange rate, then you can recalculate the net amount by clicking ‘Recalculate’ button.
If you have checked the check-box ‘Denomination Variance Applicable’, then the system will apply the variance for each denomination and calculate the net amount.
7.15.2 Specifying denomination details
In the ‘Denomination’ screen, you can capture details of the currency denominations involved in the transaction. You can invoke this screen by clicking the ‘Denomination’ button.
In the ‘FX Denomination’ screen, you can capture details of the foreign currency denominations involved in the transaction. If you have checked the check-box ‘Denomination Variance Applicable’, then you must capture the ‘FX denomination details’ before Pickup stage. You can invoke this screen by clicking the ‘FX Denomination’ button.
Refer the section titled ‘Specifying denomination details’ under ‘Depositing Cash’ for further details.
7.15.3 Specifying charge details
This screen allows you to capture charge related details. You need to click on the ‘Charges’ screen to invoke the screen.
Refer the section titled ‘Specifying charge details’ under ‘Depositing Cash’ for further details.
7.15.4 Specifying the MIS details
This screen allows you to capture details pertaining to MIS. Click on the ‘MIS’ screen to invoke the following screen:
Refer the section titled ‘Specifying MIS details’ under ‘Depositing Cash’ for further details.
7.15.5 Specifying UDF Details
You can capture the UDF details under ‘UDF’ button.
Refer the section titled ‘Specifying the UDF details’ under ‘Depositing Cash’ for further details.
Click save icon to save the transaction. The authorization process is similar to cash deposit.
Refer the corresponding section under ‘Depositing Cash’ for further details.
7.16 Purchase Foreign Exchange from a Walk-in Customer
This section contains the following topics:
- Section 7.16.1, "Purchasing Foreign Exchange from a Walk-in Customer"
- Section 7.16.2, "Specifying Denomination Details"
- Section 7.16.3, "Specifying charge details"
- Section 7.16.4, "Specifying MIS details"
- Section 7.16.5, "Specifying UDF Details"
7.16.1 Purchasing Foreign Exchange from a Walk-in Customer
You can buy a foreign currency from a walk-in customer in return for the equivalent amount in another currency. To achieve this you need to invoke the ‘FX Purchase (Walk-in)’ screen by typing ‘8004’ in the field at the top right corner of the Application tool bar and clicking on the adjoining arrow button.
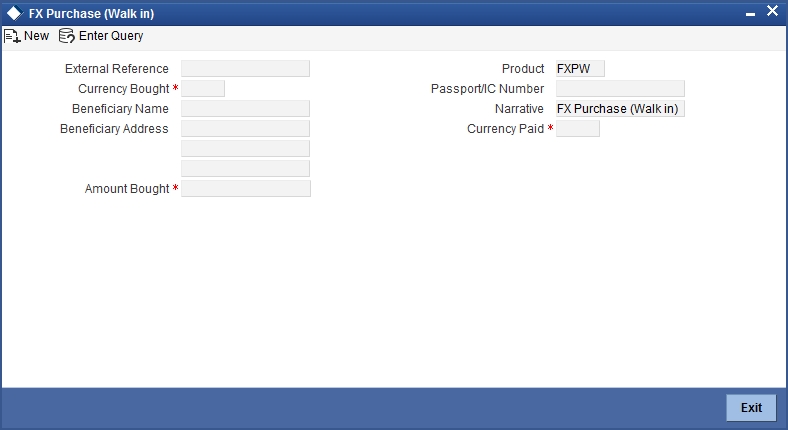
Here you can capture the following details:
Product
The system displays the code of the retail teller product maintained in the system that will be used for processing the transaction.
External Reference Number
The system generates a unique number based on the branch-specific sequence number generation logic and displays it here. The Host system identifies a branch transaction with the external reference number.
Currency Bought
Specify the currency that you have received from the customer. You can select the appropriate code from the adjoining option list that displays all the currency codes maintained in the system.
Amount Bought
Specify the amount that is being purchased in the bought currency.
Currency Paid
Specify the currency that you are paying the customer in return for the currency bought. You can select the appropriate code from the adjoining option list that displays all the currency codes maintained in the system.
Narrative
Here, you can enter your remarks pertaining to the transaction.
Beneficiary Name
Here, you can capture the beneficiary customer’s name.
Passport/IC No
Here, you can enter the passport or other identification number of the beneficiary.
Beneficiary Address
Here, you can capture the address of the beneficiary customer.
Denomination Variance Applicable
This Check box will have the value Y by default only if you have set the required parameter to ‘Yes’ in ‘FBTB_PARAMS’.
By default, the system displays the status of the check-box as checked. However, you can modify this based on the transaction requirements.
If this box is checked, then based on the denominations of the currency, the system will apply the respective variance to the rate of exchange. The variance is applied based on the variance maintained for the currency pair involved in the transaction.
If you check this box, it is mandatory to specify the denominations in ‘FX Denominations’ sub-screen.
On clicking the ‘Pickup’ button the following details will be displayed:
Transaction Currency Rate
The system displays the exchange rate to be used for the foreign exchange purchase.
Negotiated Rate
Specify the negotiated rate to compute profit or loss of this transaction.
You can book profit or loss for each retail FX transaction based on the negotiated rate and transaction rate.
The formula for computing Profit/Loss is as follows:
Direct Method (Stronger currency to Weaker currency) = Negotiated Cost Rate – Transaction Rate) * Transaction Amount
Indirect method (Weaker currency to Stronger currency) = (1/Negotiated Cost Rate – 1/Transaction Rate) * Transaction Amount
If both the currencies of transaction are Foreign currency, then revaluation will be as follows:
Revaluation method = Amount * (Transaction Rate–Negotiated Cost Rate) * Revaluation MID Rate of CCY2
At the time of booking, the profit or loss generated by the transaction will be booked as part of REVL. This profit or loss will be booked under separate GLs as per ARC maintenance.
If Negotiated rate and transaction rate are same there will not be any accounting entry for profit or loss.
Negotiated Reference
Specify the negotiated reference details.
For the negotiated transactions, the negotiation reference number and negotiated rate will be provided by the treasury which needs to be manually captured during transaction input.
Charges
The system displays the charge to be levied on the customer for the transaction.
Amount Paid
Based on the exchange rate and amount bought, the system computes and displays the amount that needs to be paid to the customer in the paid currency.
7.16.2 Specifying Denomination Details
In the’Denomination’ screen, you can capture details of the currency denominations involved in the transaction. You can invoke this screen by clicking the ‘Denomination’ button.
In the ‘FX Denomination’ screen, you can capture details of the foreign currency denominations involved in the transaction. If you have checked the check-box ‘Denomination Variance Applicable’, then you must capture the ‘FX denomination details’ before Pickup stage. You can invoke this screen by clicking the ‘FX Denomination’ button.
Refer the section titled ‘Specifying denomination details’ under ‘Depositing Cash’ for further details.
7.16.3 Specifying charge details
This screen allows you to capture charge related details. You need to click on the ‘Charges’ button to invoke the screen.Refer the section titled ‘Specifying charge details’ under ‘Depositing Cash’ for further details.
7.16.4 Specifying MIS details
This screen allows you to capture details pertaining to MIS. Click on the ‘MIS’ screen to invoke the screen:
Refer the section titled ‘Specifying MIS details’ under ‘Depositing Cash’ for further details.
7.16.5 Specifying UDF Details
You can capture the UDF details under ‘UDF’ screen. Refer the section titled ‘Specifying the UDF details’ under ‘Depositing Cash’ for further details.
Click save icon to save the transaction. The authorization process is similar to cash deposit.
Refer the corresponding section under ‘Depositing Cash’ for further details.
7.17 Purchase FX against Account
This section contains the following topics:
- Section 7.17.1, "Purchasing FX against Account"
- Section 7.17.2, "Denomination Details Tab"
- Section 7.17.3, "Charges Tab"
- Section 7.17.4, "MIS Tab"
- Section 7.17.5, "UDF Tab"
7.17.1 Purchasing FX against Account
Oracle FLEXCUBE facilitates purchase of foreign currency from the branch using CASA account. While purchasing, you can maintain denomination details for the foreign currency amount. On completion of the transaction successfully, the system generates an advice for the same.
You can generate the details from the purchase of foreign currency by crediting CASA account using ‘FX Purchase against Account’ screen. You can invoke ‘FX Purchase against Account’ screen by typing ‘8207’ in the field at the top right corner of the Application tool bar and clicking on the adjoining arrow button.
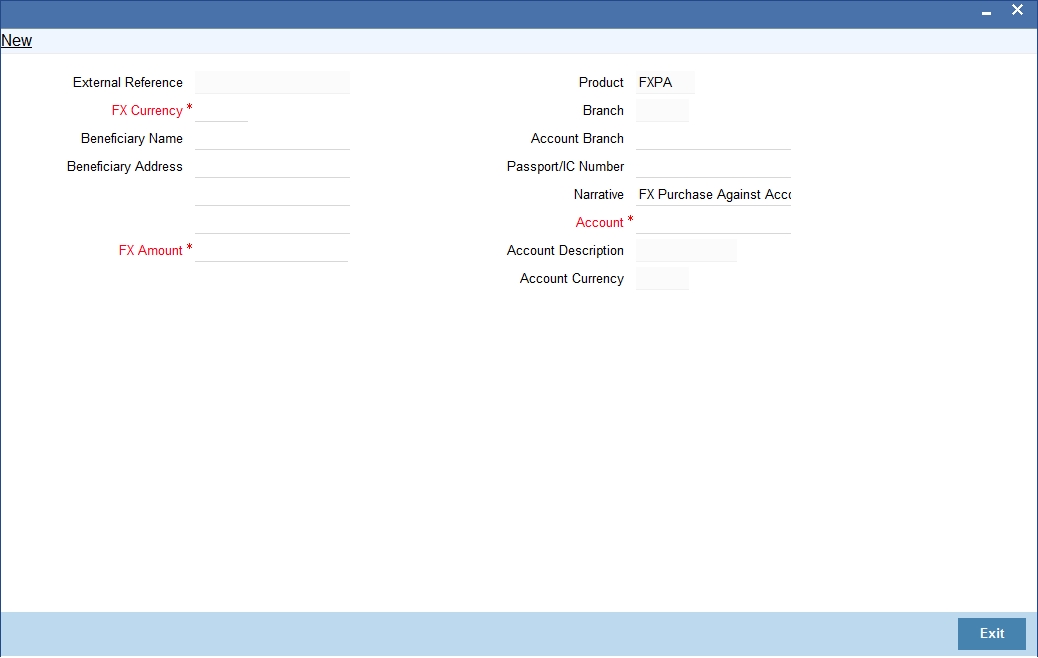
You can also specify Virtual Accounts in this screen. These virtual accounts can be used as a routing account to credit the underlying physical account.
You can maintain the following parameters here:
External Reference Number
The system generates a unique number based on the branch-specific sequence number generation logic and displays it here. The Host system identifies a branch transaction with the external reference number.
FX Currency
Specify a valid currency purchased by the customer from the adjoining option list. The option list displays list of foreign currencies maintained by the bank.
Beneficiary Name
Specify the name of the beneficiary customer.
Beneficiary Address
Specify the address of the beneficiary customer which should appear in the advice.
FX Amount
Specify the amount of the foreign currency purchased by the customer.
Product
The system displays the code of the retail teller product maintained in the system that will be used for processing the transaction.
Branch Code
The system displays the branch code of the current branch here.
Account Branch
The system displays the branch code of the branch to which the specified customer account belongs.
Passport/IC Number
Specify the passport or unique identification number of the beneficiary.
Narrative
Specify additional remarks pertaining to the transaction, if any. If virtual account number is entered in the account number field, then that virtual account number will be displayed in the Narrative field.
Account
Physical Account
Specify a valid CASA account to be debited for the FX sale from the adjoining option list. The option list displays the customer accounts maintained in the system.
Virtual Account
You can also specify a virtual account number in this field. The physical account number is identified based on the Virtual Account Number and Account Currency combination. If there is no physical account available for the combination, then the default physical account number is selected. The account currency changes as per the default physical account number.
To view the joint holder’s details of an account and the mode of operation maintained at the account level, place the cursor on the Accounts Number field and press Ctrl+J. The system displays the ‘Joint Holder’ screen.
For more information on the ‘Joint Holder’ screen refer to the section ‘Joint Holder Maintenance’ in the Core User Manual.
Account Description
Specify the description of the specified customer account. For a virtual account, the virtual account name is displayed here.
Account Currency
Currency of the specified customer account is defaulted here.
For a Virtual Account, the FX currency is defaulted as the account currency.
The physical account number is identified based on the account currency and virtual account number combination. If physical account number is available then the account currency remains the same.
If the physical account number is not available, then the default physical account number is selected and the account currency changes as per the default physical account number.
Denomination Variance Applicable
This Check box will have the value Y by default only if you have set the required parameter to ‘Yes’ in ‘FBTB_PARAMS’.
By default, the system displays the status of the check-box as checked. However, you can modify this based on the transaction requirements.
If this box is checked, then based on the denominations of the currency, the system will apply the respective variance to the rate of exchange. The variance is applied based on the variance maintained for the currency pair involved in the transaction.
If you check this box, it is mandatory to specify the denominations in ‘Denominations’ sub-screen.
On clicking the Pickup button, the following fields will be defaulted:
In addition to the parameters defaulted from the previous stage, you can maintain the following:
Currency Rate
The current exchange rate of the currency is defaulted here.
Negotiated Rate
Specify the negotiated rate to compute profit or loss of this transaction.
Negotiated Reference
Specify the negotiated reference details.
Charges
The charge amount in account currency, if any, associated with the retail teller product FXSP is defaulted here.
Amount
The actual amount equivalent to the foreign currency which is credited to the customer account is defaulted here.
Net Amount
Sum of the actual amount credited and the charges in account currency is defaulted here.
If you have checked the check-box ‘Denomination Variance Applicable’, then the system will apply the variance for each denomination and calculate the net amount.
Recalculate
Click the ‘Recalculate’ button to recalculate the amount after modifications to values, if any.
7.17.2 Denomination Details Tab
In the ‘Denomination’ screen, you can capture details of the currency denominations involved in the transaction. You can invoke this screen by clicking the ‘Denomination’ button. If you have checked the check-box ‘Denomination Variance Applicable’, then you must capture the ‘FX denomination details’ before Pickup stage in the Denomination screen.
Refer the section titled ‘Specifying Denomination Details’ under ‘Depositing Cash’ for further details.
7.17.3 Charges Tab
You can maintain the charge related details of the transaction. Click on the ‘Charges’ button to invoke the screen.
Refer the section titled ‘Specifying Charge Details’ under ‘Depositing Cash’ for further details.
7.17.4 MIS Tab
You can maintain the MIS related details of the transaction. Click on the ‘MIS’ button to invoke the screen:.
Refer the section titled ‘Specifying MIS Details’ under ‘Depositing Cash’ for further details.
7.17.5 UDF Tab
You can capture the UDF related details of the transaction. Click on the ‘UDF’ button to invoke the screen.
Refer the section titled ‘Specifying the UDF details’ under ‘Depositing Cash’ for further details.
Click ‘Save’ to save the transaction. The authorization process is similar to cash deposit.
Refer ‘Authorization Stage’ section under ‘Depositing Cash’ for further details.
7.18 Issue TT against Account
This section contains the following topics:
- Section 7.18.1, "Issuing a TT against Account"
- Section 7.18.2, "Specifying denomination details"
- Section 7.18.3, "Specifying charge details"
- Section 7.18.4, "Specifying MIS Details"
- Section 7.18.5, "Specifying the UDF details"
7.18.1 Issuing a TT against Account
You can issue a Telegraphic Transfer drawn on your branch against an account through the ‘TT Issue Against Account’ screen. You can invoke this screen by typing ‘8318’ in the field at the top right corner of the Application tool bar and clicking on the adjoining arrow button.
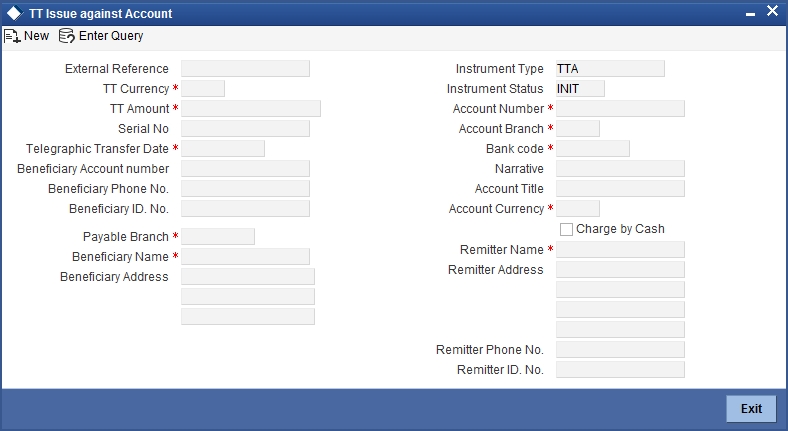
When you invoke the screen, the External Reference Number is displayed.
You need to specify the following details:
Bank Code
Specify the clearing bank code for the transaction.
TT Currency
Specify the TT currency or select a currency for the TT from the list of values.
Account Currency
Specify the currency of the account or select the account currency from the list of values.
Remitter Name
Specify the name of the remitter.
Remitter Address
Specify the address of the remitter
Remitter Phone Number
Specify the phone number of the remitter.
Remitter ID Number
Specify a unique identification value of the remitter.
Beneficiary A/C number
Specify the account number to which the proceeds have to be credited.
Beneficiary ID Number
Specify the beneficiary ID number.
Beneficiary Phone Number
Specify the phone number of the beneficiary.
Charge by Cash
Check this box “Charge by Cash” to select the charge mode, that is by cash or from account.
Note
For the TT where Charge by “Cash” is selected, then all the TT transactions are treated as cash transactions.
Payable Branch
Specify the branch where the transfer amount should be paid out.
Account Number
Specify the account number of the customer or select an account number from the list of values.
To view the joint holder’s details of an account and the mode of operation maintained at the account level, place the cursor on the Account number field and press Ctrl+J. The system displays the ‘Joint Holder’ screen.
For more information on the ‘Joint Holder’ screen refer to the section ‘Joint Holder Maintenance’ in the Core User Manual.
TT Amount
Specify the transfer amount.
Telegraphic Transfer Date
The date on which the instrument is issued is displayed here.
Serial Number
Specify the serial number printed on the TT.
Narrative
Here, you can enter remarks pertaining to the transaction.
Beneficiary Name
Specify the name of the beneficiary of the TT.
Beneficiary Address
Specify the address of the beneficiary.
In the single stage flow, if there is an transaction level override or error during approval then the transaction will be moved to the pending queue. Without save action being initiated, the transaction will not be in pending queue.
On clicking Pickup button, the system populates the values in all the callforms of the screen and clicking pickup button is mandatory if you make any changes to the Transaction amount and exchange rate after first pickup.
Once you click ‘Pickup’ button once, then on amendment of xrate, amount, charge, pickup will be mandatory before save. On pick up, the fields that are currently enabled in the enrich stage will alone be retained as enabled fields.
Clicking ‘Pickup’ button, the system defaults the following details:
Transaction Currency Rate
The system displays the exchange to be used for the transaction in case the transaction currency is different from the transfer currency.
Charges
The system computes the charges applicable to the transaction and displays the amount here.
Generated Test Key
The generated test key is system populated. This field is system populated at Enrich stage.
7.18.2 Specifying denomination details
In this block, you can capture details of the currency denominations involved in the transaction. These details need to be mandatorily updated if ‘Charge by Cash’ is selected.

Refer the section titled ‘Specifying denomination details’ under ‘Depositing Cash’ in this manual for further details.
7.18.3 Specifying charge details
Click on the ‘Charges’ tab to capture charge related details.
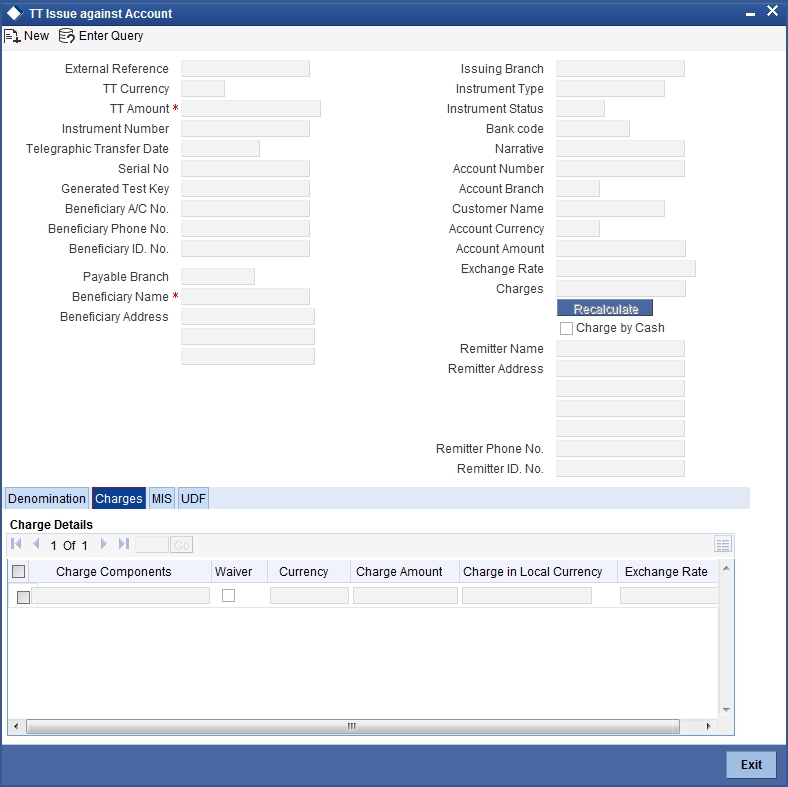
Refer the section titled ‘Specifying the charge details’ under ‘Depositing Cash’ for further details in this manual.
7.18.4 Specifying MIS Details
Click on the MIS tab to capture details pertaining to MIS.
Refer the section titled ‘Specifying MIS details’ under ‘Depositing Cash’ for further details in this Manual.
7.18.5 Specifying the UDF details
You can capture these details in the ‘UDF’ tab of the screen.
Refer the section titled ‘Specifying UDF details’ under ‘Depositing Cash’ for further details in this manual.
Click save icon to save the transaction. The authorization process is similar to cash deposit.
Refer the corresponding section under ‘Depositing Cash’ for further details.
7.19 Issue a TT against GL
This section contains the following topics:
- Section 7.19.1, "Issuing a TT against GL"
- Section 7.19.2, "Specifying Charge Details"
- Section 7.19.3, "Specifying MIS Details"
- Section 7.19.4, "Specifying the UDF details"
7.19.1 Issuing a TT against GL
You can issue a Telegraphic Transfer against a GL account for your customer through the ‘TT Issue against GL’ screen. You can also invoke this screen by typing ‘8317’ in the field at the top right corner of the Application tool bar and clicking on the adjoining arrow button.
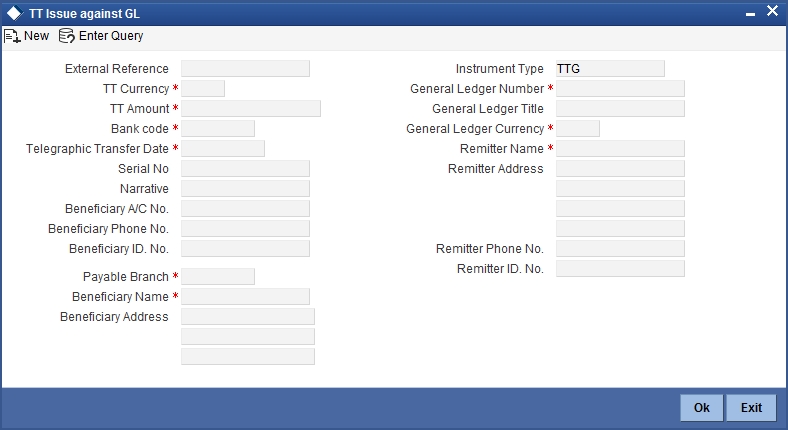
On invoking this screen, the External Reference Number and the Instrument Type of the transaction are displayed.
You need to specify the following details:
Bank Code
Specify the bank code or select a bank code from the list of values.
TT Currency
Specify the TT currency or select a currency for the TT from the list of values.
Payable Branch
Specify the branch where the transfer amount should be paid out.
General Ledger Number
Specify the account number of the GL against which a TT is issued.
General Ledger Currency
Specify the GL currency in this field.
Telegraphic Transfer Date
The date on which the instrument is issued is displayed here.
General Ledger Title
The system displays a brief title for the chosen account.
TT Amount
Specify the transfer amount.
Serial Number
Specify the Serial number printed on the TT.
Remitter Name
Specify the name of the remitter.
Remitter Address
Specify the address of the remitter
Remitter Phone Number
Specify the phone number of the remitter.
Remitter ID Number
Specify the remitter ID number.
Beneficiary A/C number
Specify the account number to which the proceeds have to be credited.
Beneficiary Phone Number
Specify the phone number of the beneficiary.
Narrative
Specify description/remarks for the transaction. This is not mandatory.
Beneficiary Name
Specify the name of the beneficiary.
Beneficiary Address
Specify the address of the beneficiary.
In the single stage flow, if there is an transaction level override or error during approval then the transaction will be moved to the pending queue. Without save action being initiated, the transaction will not be in pending queue.
On clicking Pickup button, the system populates the values in all the callforms of the screen and clicking pickup button is mandatory if you make any changes to the Transaction amount and exchange rate after first pickup.
Once you click ‘Pickup’ button once, then on amendment of xrate, amount, charge, pickup will be mandatory before save. On pick up, the fields that are currently enabled in the enrich stage will alone be retained as enabled fields.
Clicking ‘Pickup’ button, the system defaults the following details:
Txn Ccy Rate
The system displays the transaction currency.
Charges
The system computes the charges applicable for the transaction and displays it here.
TT Amount
The system displays the TT amount.
Total Amount
The system displays the total amount of the transaction.
Generated Test Key
The generated test key is system populated. This field is system populated at Enrich stage.
7.19.2 Specifying Charge Details
This block allows you to capture charge related details.
Refer the section titled ‘Specifying the charge details’ under ‘Capturing a Cash Deposit’ in this manual for further details.
7.19.3 Specifying MIS Details
This block allows you to capture details pertaining to MIS.
Refer the section titled ‘Specifying MIS details’ under ‘Capturing a Cash Deposit’ in this manual for further details.
7.19.4 Specifying the UDF details
You can capture these details in the ‘UDF’ tab of the screen.
Refer the section titled ‘Specifying UDF details’ under ‘Depositing Cash’ for further details in this manual.
Click save icon to save the transaction. The authorization process is similar to cash deposit.
Refer the corresponding section under ‘Depositing Cash’ for further details.
7.20 Issue a TT to a Walk-in Customer
This section contains the following topics:
- Section 7.20.1, "Issuing a TT to a Walk-in Customer"
- Section 7.20.2, "Specifying denomination details"
- Section 7.20.3, "Specifying charge details"
- Section 7.20.4, "Specifying MIS Details"
- Section 7.20.5, "Specifying the UDF details"
7.20.1 Issuing a TT to a Walk-in Customer
You can issue a Telegraphic Transfer to any walk-in customer through the ‘TT Issue (Walk-In)’ screen. You can invoke this screen by typing ‘8316’ in the field at the top right corner of the Application tool bar and clicking on the adjoining arrow button.
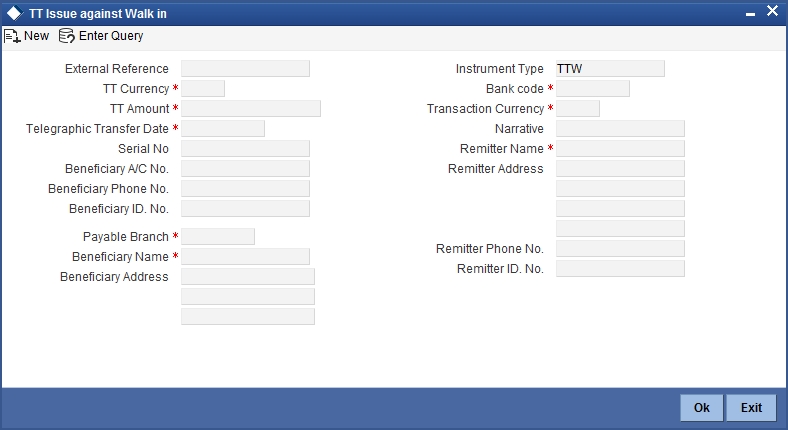
When you invoke the screen, the External Reference Number and instrument type of the transaction are displayed.
You need to specify the following details:
Bank Code
Specify the clearing bank code for the transaction.
TT Currency
Specify the currency in which the TT is being issued.
Payable Branch
Specify the branch where the TT amount should be paid out.
Transaction Currency
Specify the currency in which the customer is making the payment.
TT Amount
Specify the amount for which the TT needs to be drawn in the transfer currency.
Telegraphic Transfer Date
The date on which the instrument has been issued is displayed here.
Remitter Name
Specify the name of the remitter.
Remitter Address
Specify the address of the remitter
Remitter Phone Number
Specify the phone number of the remitter.
Remitter ID Number
Specify the remitter ID number.
Beneficiary A/C number
Specify the account number to which the proceeds have to be credited.
Beneficiary Phone Number
Specify the phone number of the beneficiary.
Beneficiary ID Number
Specify the beneficiary Identification number.
Narrative
Here, you can enter remarks pertaining to the transaction.
Beneficiary Name
Specify the name of the beneficiary in whose favor the telegraphic transfer is done.
Beneficiary Address
Specify the address of the beneficiary in whose favor the telegraphic transfer is done.
In the single stage flow, if there is an transaction level override or error during approval then the transaction will be moved to the pending queue. Without save action being initiated, the transaction will not be in pending queue.
On clicking Pickup button, the system populates the values in all the callforms of the screen and clicking pickup button is mandatory if you make any changes to the Transaction amount and exchange rate after first pickup.
Once you click ‘Pickup’ button once, then on amendment of xrate, amount, charge, pickup will be mandatory before save. On pick up, the fields that are currently enabled in the enrich stage will alone be retained as enabled fields.
Clicking ‘Pickup’ button, the system defaults the following details:
Transaction Currency Rate
The system displays the exchange to be used for the transaction in case the transaction currency is different from the transfer currency.
Charges
The system computes the charges applicable to the transaction and displays the amount here.
Total Amount
The system computes the total amount to be paid by the walk-in customer by adding the charge amount to the TT amount.
Generated Test Key
The generated test key is system populated. This field is system populated at Enrich stage.
7.20.2 Specifying denomination details
In this block, you can capture details of the currency denominations involved in the transaction.
Refer the section titled ‘Specifying denomination details’ under ‘Depositing Cash’ in this manual for further details.
7.20.3 Specifying charge details
Click on the ‘Charges’ tab to capture charge related details.
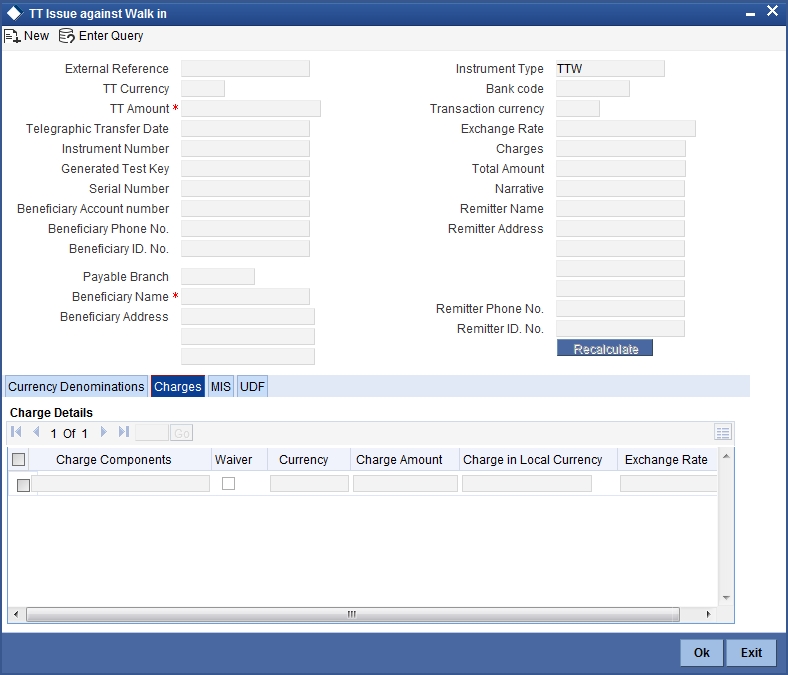
Refer the section titled ‘Specifying the charge details’ under ‘Depositing Cash’ in this manual for further details.
7.20.4 Specifying MIS Details
Click on the MIS tab to capture details pertaining to MIS.
Refer the section titled ‘Specifying MIS details’ under ‘Depositing Cash’ in this manual for further details.
7.20.5 Specifying the UDF details
You can capture these details in the ‘UDF’ tab of the screen.
Refer the section titled ‘Specifying UDF details’ under ‘Depositing Cash’ for further details in this manual.
Click save icon to save the transaction. The authorization process is similar to cash deposit.
Refer the corresponding section under ‘Depositing Cash’ for further details.
7.21 Issuing Multiple TT against Account
Issuance of multiple TT against a customer account with multiple beneficiaries respectively from single transactions is performed through this screen. The beneficiaries can be in different banks. The charge for this TT would be the sum of individual charges for each of the beneficiary banks. The charge can be collected either in cash or debited to the customer account. You can invoke the ‘Multiple TT Issue against Account’ screen, by typing ‘8324’in the field at the top right corner of the Application tool bar and clicking on the adjoining arrow button.

When you invoke this screen, the External Reference Number, Instrument Type and Instrument Status is defaulted.
Specify the following details in this screen:
TT Currency
Specify the TT currency or select a currency for the TT from the list of values.
Total Transfer Amount
The value in this field is defaulted. The sum total of the multiple TT amount is displayed in this field.
Telegraphic Transfer Date
Specify the telegraphic transfer date.
Remitter Account Number
Specify the account number of the customer or select an account number from the adjoining option list.
To view the joint holder’s details of an account and the mode of operation maintained at the account level, place the cursor on the Remitter Account Number field and press Ctrl+J. The system displays the ‘Joint Holder’ screen.
For more information on the ‘Joint Holder’ screen refer to the section ‘Joint Holder Maintenance’ in the Core User Manual.
Remitter Name
Specify the name of the remitter.
Remitter Address
Specify the address of the remitter
Remitter Phone Number
Specify the phone number of the remitter.
Remitter ID Number
Specify the remitter ID number.
Charge by Cash
Check the box “Charge by Cash” to select the charge mode that is by cash or from account.
Payable Bank Code
Specify the clearing bank code for the transaction.
Payable Bank
The name of the payable bank is displayed here.
Payable Branch
Specify the branch where the transfer amount should be paid out.
Serial Number
Specify the serial number.
TT Amount
Specify the transfer amount.
TT Instrument Number
The instrument number of the generated child TT’s is system populated.
Narrative
Specify remarks pertaining to the transaction.
Beneficiary Name
Specify the name of the beneficiary of the TT.
Beneficiary Address
Specify the address of the beneficiary.
Beneficiary Phone Number
Specify the phone number of the beneficiary.
Beneficiary A/C number
Specify the account number to which the proceeds have to be credited.
Beneficiary ID Number
Specify the beneficiary Identification number.
TT Transaction Number
The system displays the Telegraphic Transfer transaction number in this field.
On clicking the ‘Enrich’ button, the following fields are defaulted:
Test Key
This field stores the test key generated at Enrich Stage.
TT Total Charge Amount
The value in this field is defaulted. The Total Charge will be equal to sum of all the Charges as computed and returned by the ARC of Individual Child TTs in the Enrichment Stage.
Total Transfer Amount
The value in this field is defaulted. The sum total of the multiple TT amount is displayed in this field.
Charge Amount 1 to 5
These fields are defaulted by the system. It computes all 5 charges (if applicable) for each individual child TT from their respective ARC and populates the same in the fields Charge 1,Charge 2, Charge 3, Charge 4, and Charge 5.
Charge Currency 1 to 5
The currency in which charge has to be deducted is displayed in these fields.
TT Transaction Number
The Telegraphic Transfer transaction number is defaulted in this field.
7.21.1 Specifying Denomination Details
In this block, you can capture details of the currency denominations for the charge, if the Charge by Cash is Y.
Refer the section titled ‘Specifying denomination details’ under ‘Depositing Cash’ in this manual for further details.
7.22 Issuing Multiple TT for Walk In
Issuance of Multiple TT against a walk-in customer with multiple beneficiaries from a single transaction is possible through this facility. You can invoke the ‘Multiple TT Issue against Walk in’ screen, by typing ‘8323’ in the field at the top right corner of the Application tool bar and clicking on the adjoining arrow button.
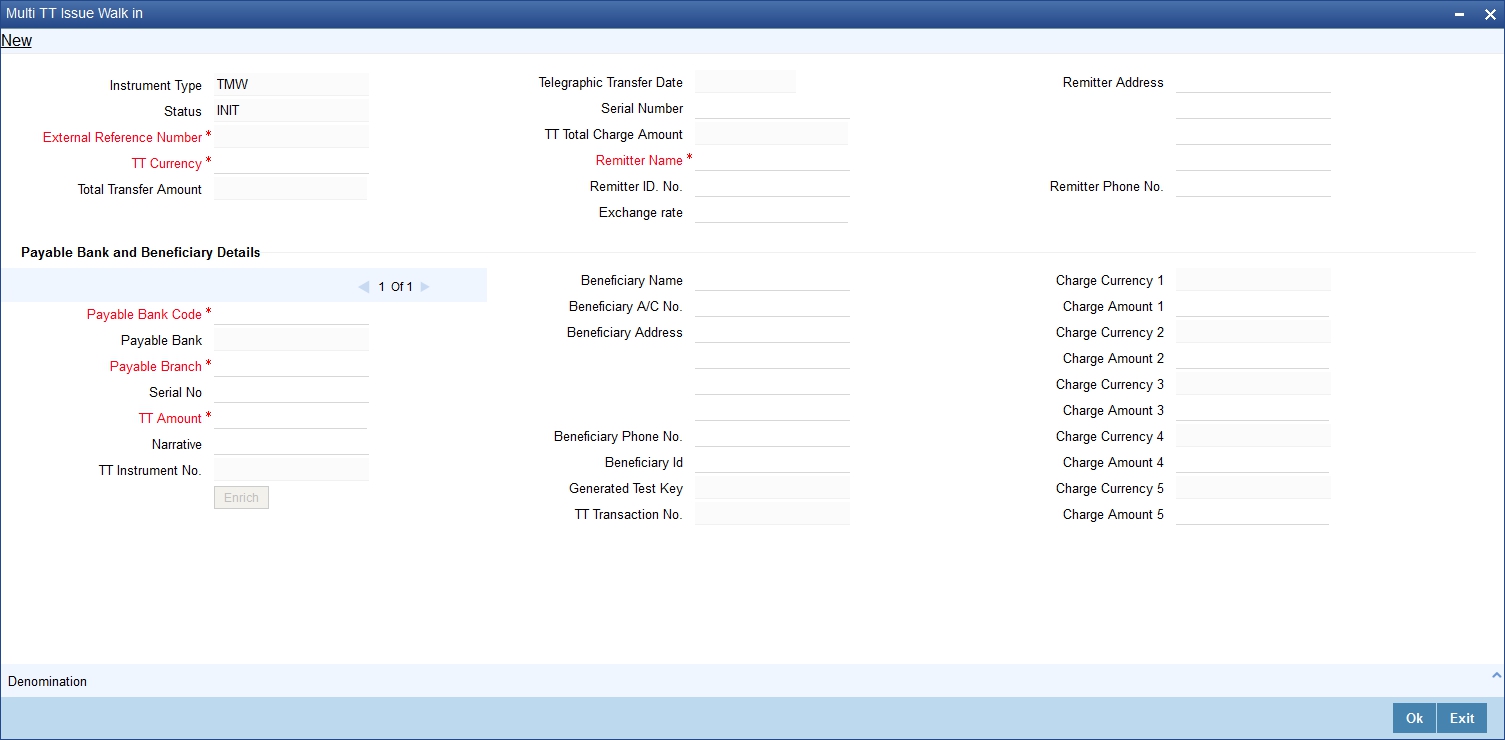
When you invoke this screen, the External Reference Number, Instrument Type and Instrument Status is defaulted.
TT Currency
Specify the TT currency or select a currency for the TT from the adjoining option list.
Telegraphic Transfer Date
Select the telegraphic transfer date in this field.
Remitter Name
Specify the name of the remitter.
Remitter Address
Specify the address of the remitter
Remitter Phone Number
Specify the phone number of the remitter.
Remitter ID Number
Specify the remitter ID number.
Payable Bank Code
Specify the clearing bank code for the transaction.
Beneficiary A/C number
Specify the account number to which the proceeds have to be credited.
Payable Bank
The name of the payable bank is displayed here.
Payable Branch
Specify the branch where the transfer amount should be paid out.
Serial Number
Specify the serial number.
TT Amount
Specify the transfer amount.
TT Instrument Number
The system generates the instrument number of the generated child TT’s.
Narrative
Here, you can enter remarks pertaining to the transaction.
Beneficiary Name
Specify the name of the beneficiary of the TT.
Beneficiary Address
Specify the address of the beneficiary.
Beneficiary Phone Number
Specify the phone number of the beneficiary.
Beneficiary ID Number
Specify the beneficiary Identification number.
On clicking the ‘Enrich’ button, the system populates the following details.
TT Total Charge Amount
This field is auto populated. The Total Charge will be equal to sum of all the Charges as computed and returned by the ARC of Individual Child TTs in the Enrich Stage.
Test Keys
This field stores the test key generated. This field is defaulted at Enrich state.
Total Transfer Amount
The value in this field is defaulted. The sum total of the multiple TT amount is displayed in this field.
TT Transaction Number
The system displays the telegraphic transfer transaction number in the field.
Charge Amount 1 to 5
These fields are defaulted by the system. It computes all 5 charges (if applicable) for each individual child TT from their respective ARC and populates the same in the fields Charge 1, Charge 2, Charge 3, Charge 4, and Charge 5.
Charge Currency 1 to 5
The currency in which the charges need to be deducted is defaulted in these fields.
7.22.1 Specifying denomination details
In this block, you can capture details of the currency denominations involved in the transaction.
Refer the section titled ‘Specifying denomination details’ under ‘Depositing Cash’ in this manual for further details.
7.23 Maintaining TT Test Keys
With this facility a unique Test Key is generated for Individual TT remittance when the funds are being remitted to another bank. It is also beneficial for validating funds remitted from external banks payable at the branches of Home Bank. The generated Test Key is a part of the outgoing TT message. The test key generation is based on the following parameters:
- The remitter bank and branch.
- The beneficiary branch and bank
- The amount of remittance
- The date of remittance
- The Fax number used to send the remittance message
- A serial number
You can invoke the ‘TT Test Key Maintenance screen by typing ‘STDTTKEY’ in the field at the top right corner of the Application tool bar and clicking on the adjoining arrow button.
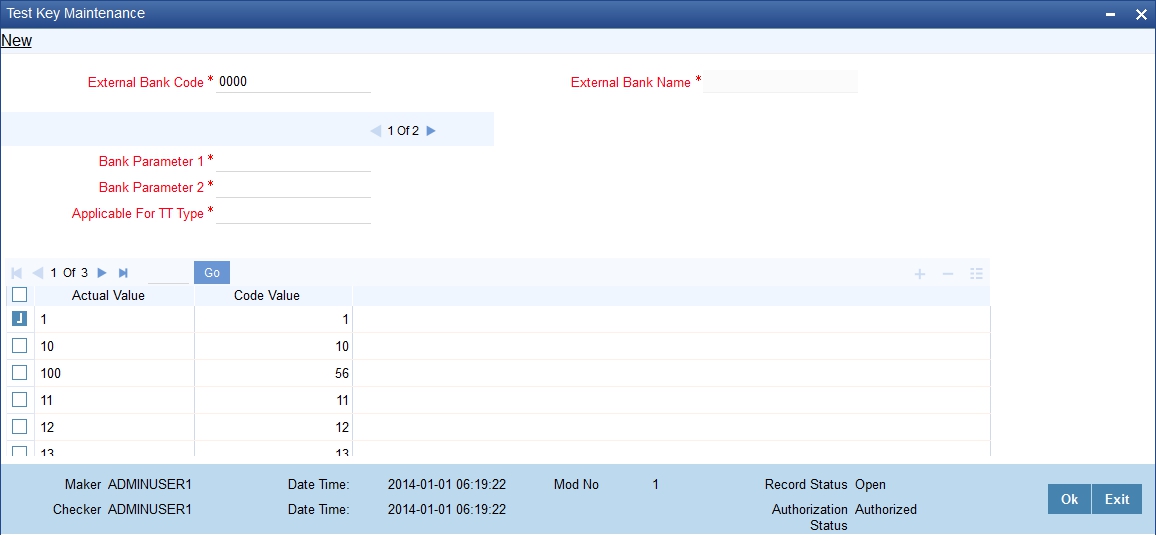
Specify the following details in this field:
External Bank Code
Select the external bank code from the adjoining option list. The option list displays all the bank codes as maintained in the ‘Clearing Bank Code Maintenance’.
External Bank Name
This field is defaulted as per your selection in the external bank code field.
Bank Parameter 1
Select the bank parameter from the drop down list. The available parameters are as follows:
- Date
- Month
- Year
- Currency
- Amount
- Amount Range
- Home Bank Branch.
- Corresponding Bank Branch.
- Serial No.
Bank Parameter 2
Based on your selection in the Bank Parameter 1 field, select the appropriate value from the drop down list. The list of values displayed are as follows:
- All: this value indicates that all the parameters in Parameter 1 are applicable for the selection except amount.
- If Date is selected as Parameter 1, then the list of values will
display the following parameters:
- SUN
- MON
- TUE
- WED
- THUR
- FRI
- SAT
- If Amount is selected as Parameter 1, then the list of values displayed
are:
- MOD 100
- MOD10
Applicable for TT type
Select the appropriate value from the drop down list. The list of values displayed are as follows:
- Both TT Type
- Inward TT
- Outward TT
Actuals
Specify the actual value in this field.
Code Value
Specify the code value in this field.
7.24 Inward TT Registration
This section contains the following topics:
- Section 7.24.1, "Defining Inward TT Registration"
- Section 7.24.2, "Specifying Charge details"
- Section 7.24.3, "Specifying MIS Details"
- Section 7.24.4, "Specifying the UDF details"
7.24.1 Defining Inward TT Registration
With this facility an inward remittance, that is, remittance from a external bank, is processed in the following manner:
- Remittance for credit to a customer account: The beneficiary customer has a customer account with the bank. The remittance on processing is credited to the customer account.
- Remittance is for collection by cash: The beneficiary customer collects the remitted amount in cash.
Any charges, if applicable, is calculated and collected from the customer. The charges are calculated based on the remitting bank and branch, beneficiary branch, amount, and so on. The charges can be collected either in cash or debited to a customer account. At the time of processing this inward remittance, the test key sent by the remitting bank is also validated
You can invoke this screen by typing ‘8322’ in the field at the top right corner of the Application tool bar and clicking on the adjoining arrow button.
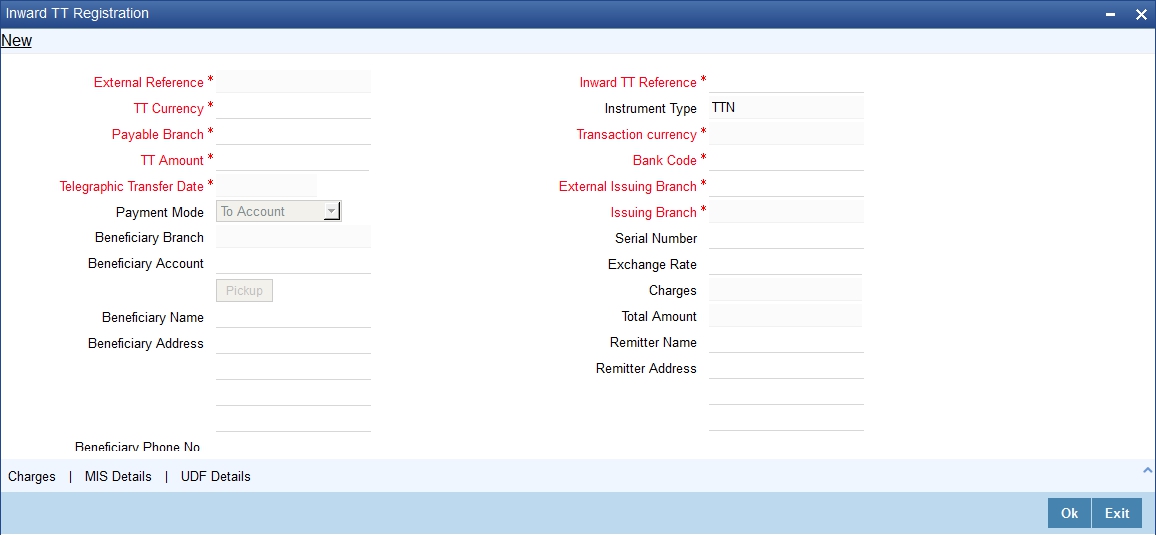
When you invoke the screen, the External Reference Number and Instrument type of the transaction are displayed.
You need to specify the following details:
TT Currency
Specify the currency in which the customer is receiving the payment.
TT Amount
Specify the amount that the customer is receiving.
Telegraphic Transfer Date
Specify the Telegraphic Transfer Date.
Payable Branch
Specify the branch where the TT amount is paid out.
Payment Mode
Select the appropriate option from the drop down list to indicate whether the TT is Payable by Immediate Liquidation to Account or Payable by Deferred Liquidation.
Beneficiary Account
Select the beneficiary account number from the adjoining option list.
To view the joint holder’s details of an account and the mode of operation maintained at the account level, place the cursor on the Beneficiary A/C field and press Ctrl+J. The system displays the ‘Joint Holder’ screen.
For more information on the ‘Joint Holder’ screen refer to the section ‘Joint Holder Maintenance’ in the Core User Manual.
Beneficiary Branch
The beneficiary’s home branch is displayed in this field on the selection of the beneficiary account.
Beneficiary Name
Specify the name of the beneficiary in whose favor the telegraphic transfer is done.
Beneficiary Address
Specify the address of the beneficiary in whose favor the telegraphic transfer is done.
Beneficiary Phone Number
Specify the phone number of the beneficiary.
Beneficiary ID Number
Specify the beneficiary Identification number.
Narrative
Specify remarks pertaining to the transaction.
Instrument Number
The system displays the instrument number.
Inward TT Reference
Specify the Reference No. of the Inward Inter Bank TT.
Transaction Currency
Specify the currency in which the payment is being made by your customer.
Bank Code
Specify the clearing bank code for the transaction.
Issuing Branch
Select the branch of the external bank where the TT has been issued. Only the branches of the External Bank for which the Bank Code is selected, is listed
Serial Number
Specify the serial number printed on the TT
Remitter Name
Specify the name of the remitter.
Remitter Address
Specify the address of the remitter
Remitter Phone Number
Specify the phone number of the remitter.
Remitter ID Number
Specify the remitter ID number.
Input Test Key
Specify the Test Key sent by External Bank on the fax message of the TT
Pick Up
Click this button to retrieve details and compute charges if applicable. The following details are computed by the system:
Exchange Rate
Specify the rate of exchange.
Charges
The system displays the exchange to be used for the transaction in case the transaction
currency is different from the transfer currency.
Total Amount
The system computes the total amount to be paid by the walk-in customer by adding the charge amount to the TT amount.
7.24.2 Specifying Charge details
Click on the ‘Charges’ button to capture charge related details.
Refer the section titled ‘Specifying the charge details’ under ‘Depositing Cash’ in this manual for further details.
7.24.3 Specifying MIS Details
Click on the MIS button to capture details pertaining to MIS.
Refer the section titled ‘Specifying MIS details’ under ‘Depositing Cash’ in this manual for further details.
7.24.4 Specifying the UDF details
You can capture these details in the ‘UDF’ button of the screen.
Refer the section titled ‘Specifying UDF details’ under ‘Depositing Cash’ for further details in this manual.
7.25 Liquidate a TT against GL
This section contains the following topics:
- Section 7.25.1, "Liquidating a TT against GL"
- Section 7.25.2, "Specifying charge details"
- Section 7.25.3, "Specifying MIS details"
- Section 7.25.4, "Specifying the UDF details"
7.25.1 Liquidating a TT against GL
You can liquidate a telegraphic transfer drawn on your branch against a GL through the ‘TT Liquidation Against GL’ screen. You can invoke this screen by typing ‘8320’ in the field at the top right corner of the Application tool bar and clicking on the adjoining arrow button.
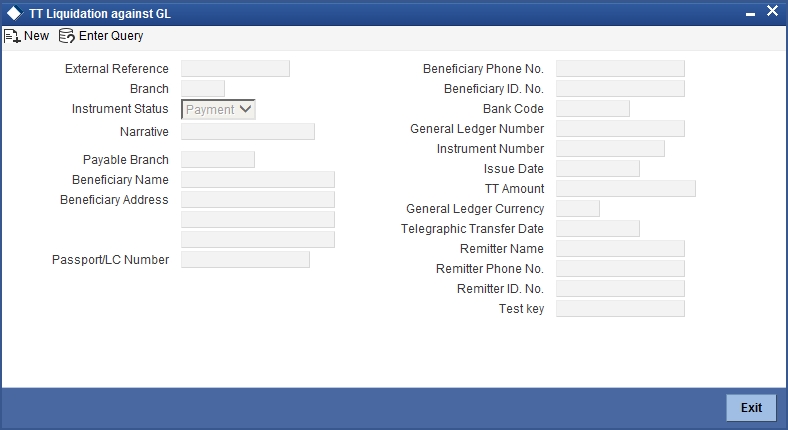
On invoking this screen, the External Reference Number of the transaction is displayed. Select the branch code in the ‘Issuing Branch’ field and the instrument number of the TT to be liquidated in the ‘Instrument Number’ field.
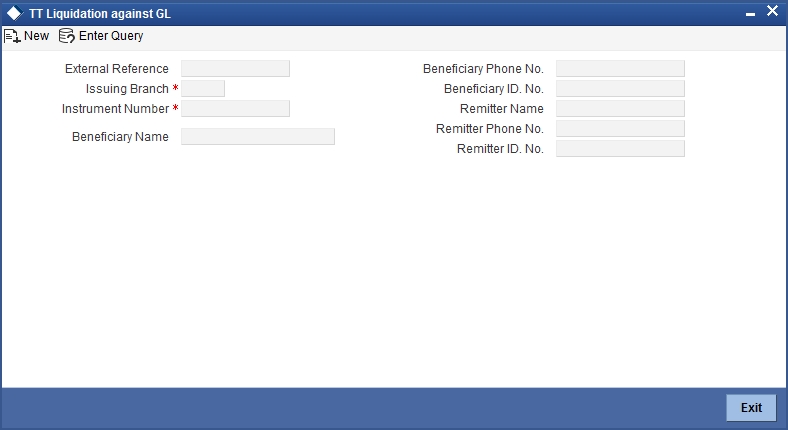
The following details will be auto populated:
Remitter Name
The name of the remitter is defaulted in this field.
Remitter Phone Number
The phone number of the remitter is defaulted in this field.
Remitter ID Number
The remitter ID number is defaulted in this field.
Test Key
The Test Key sent by External Bank on the fax message of the TT is defaulted in this field.
Beneficiary Name
The name of the beneficiary in whose favour the telegraphic transfer is done is defaulted in this field.
Beneficiary Phone Number
The phone number of the beneficiary is defaulted in this field.
Beneficiary ID Number
The beneficiary Identification number is defaulted in this field.
Bank Code
The bank code of the clearing bank is displayed here.
Payable Branch
The system displays the current branch code (where the transaction is being captured).
Instrument Status
This indicates the mode of liquidation of the TT transaction. You can select the mode of liquidation to any of the values available in the adjoining drop-down list:
- Payment
- Refund
- Cancel
GL Currency
The GL currency is defaulted to the instrument currency. However you can change it. The adjoining option list displays all the currency codes maintained in the system. Choose the appropriate one.
GL Number
The GL into which the amount should be liquidated is displayed here.
TT Currency
Displays the currency in which the instrument was issued.
TT Status
The system displays the last event that has been triggered for the transaction. This corresponds to the status of the instrument.
Telegraphic Transfer Date
The system displays the date on which the TT was issued.
Beneficiary Address
The address of the beneficiary of the transaction is displayed here.
Passport/IC No
The passport number or a unique identification number of the customer is displayed here.
Narrative
The remarks associated with the transaction are displayed here.
In the single stage flow, if there is an transaction level override or error during approval then the transaction will be moved to the pending queue. Without save action being initiated, the transaction will not be in pending queue.
On clicking Pickup button, the system populates the values in all the callforms of the screen and clicking pickup button is mandatory if you make any changes to the Transaction amount and exchange rate after first pickup.
Once you click ‘Pickup’ button once, then on amendment of xrate, amount, charge, pickup will be mandatory before save. On pick up, the fields that are currently enabled in the enrich stage will alone be retained as enabled fields.
The Charges, UDF, and MIS tabs will be displayed at this stage.
7.25.2 Specifying charge details
This block allows you to capture charge related details.
Refer the section titled ‘Specifying the charge details’ under ‘Depositing Cash’ in this manual.
7.25.3 Specifying MIS details
This block allows you to capture details pertaining to MIS.
Refer the section titled ‘Specifying the MIS details’ under ‘Depositing Cash’ in this manual.
7.25.4 Specifying the UDF details
You can capture these details in the ‘UDF’ tab of the screen.
Refer the section titled ‘Specifying UDF details’ under ‘Depositing Cash’ for further details in this manual.
Click save icon to save the transaction. The authorization process is similar to cash deposit.
Note
MIS and UDF should have same set of values for the Instrument Issuance and Liquidation products, even if the products are different for issuance and liquidation.Else, the system displays an error message during liquidation as ‘UDF not maintained’.
Refer the corresponding section under ‘Depositing Cash’ for further details.
7.26 Liquidate a TT against Account
This section contains the following topics:
- Section 7.26.1, "Liquidating a TT against Account"
- Section 7.26.2, "Specifying charge details"
- Section 7.26.3, "Specifying MIS details"
- Section 7.26.4, "Specifying the UDF details"
7.26.1 Liquidating a TT against Account
You can liquidate a TT against an account through the ‘TT Liquidation Against Account’ screen. You can invoke this screen by typing ‘8321’ in the field at the top right corner of the Application tool bar and clicking on the adjoining arrow button.

On invoking this screen, the External Reference Number of the transaction is displayed. Select the branch code in the ‘Issuing Branch’ field and the instrument number of the TT to be liquidated in the ‘Instrument Number’ field.

The following fields will be auto populated:
Remitter Name
The name of the remitter is defaulted.
Remitter Phone Number
The phone number of the remitter is defaulted
Remitter ID Number
The remitter ID number is defaulted.
Test Key
The Test Key sent by External Bank on the fax message of the TT is defaulted.
Beneficiary Name
The name of the beneficiary in whose favor the telegraphic transfer is done is defaulted.
Beneficiary Phone Number
The phone number of the beneficiary is defaulted.
Beneficiary ID Number
The beneficiary Identification number is defaulted.
Bank Code
The clearing bank code is displayed here.
Payable Branch
The branch where the TT has to be liquidated is displayed here.
Instrument Status
Specify the liquidation mode. You can choose any of the following values available in the drop-down list:
- Payment
- Refund
- Cancel
TT Status
The system displays the last event that has been triggered for the transaction. This corresponds to the status of the instrument.
Account Currency
The currency of the chosen account is displayed here.
TT Currency
Specify the TT currency or select a currency for the TT from the list of values.
TT Amount
The system displays the TT amount.
Telegraphic Transfer Date
The system displays the date on which the TT was issued.
Account Number
Specify the account into which the TT should be liquidated.
To view the joint holder’s details of an account and the mode of operation maintained at the account level, place the cursor on the Account Number field and press Ctrl+J. The system displays the ‘Joint Holder’ screen.
For more information on the ‘Joint Holder’ screen refer to the section ‘Joint Holder Maintenance’ in the Core User Manual.
Transaction Branch
The branch to which the account belongs is displayed here.
Beneficiary Address
The address of the beneficiary of the transaction is displayed here.
You can enter remarks for the transaction.
In the single stage flow, if there is an transaction level override or error during approval then the transaction will be moved to the pending queue. Without save action being initiated, the transaction will not be in pending queue.
On clicking Pickup button, the system populates the values in all the callforms of the screen and clicking pickup button is mandatory if you make any changes to the Transaction amount and exchange rate after first pickup.
Once you click ‘Pickup’ button once, then on amendment of xrate, amount, charge, pickup will be mandatory before save. On pick up, the fields that are currently enabled in the enrich stage will alone be retained as enabled fields.
7.26.2 Specifying charge details
The Charges, MIS and UDF tabs will be displayed at this stage. This block allows you to capture charge related details.
Refer the section titled ‘Specifying the charge details’ under ‘Depositing Cash’ in this manual..
Click save icon to save the transaction. The authorization process is similar to cash deposit.
Refer the corresponding section under ‘Depositing Cash’ for further details.
7.26.3 Specifying MIS details
This block allows you to capture details pertaining to MIS.
Refer the section titled ‘Specifying the MIS details’ under ‘Depositing Cash’ in this manual.
7.26.4 Specifying the UDF details
You can capture these details in the ‘UDF’ tab of the screen.
Refer the section titled ‘Specifying UDF details’ under ‘Depositing Cash’ for further details in this manual.
Click save icon to save the transaction. The authorization process is similar to cash deposit.
Refer the corresponding section under ‘Depositing Cash’ for further details.
7.27 Liquidate a TT for a Walk-in Customer
This section contains the following topics:
- Section 7.27.1, "Liquidating a TT for a Walk-in Customer"
- Section 7.27.2, "Specifying Denomination Details"
- Section 7.27.3, "Specifying charge details"
- Section 7.27.4, "Specifying MIS details"
- Section 7.27.5, "Specifying the UDF details"
7.27.1 Liquidating a TT for a Walk-in Customer
You can liquidate a Telegraphic Transfer for a walk-in customer and give the customer an equivalent amount in cash. In order to capture such a transaction, invoke the ‘TT Liquidation (Walk-In)’ screen. You can invoke this screen by typing ‘8319’ in the field at the top right corner of the Application tool bar and clicking on the adjoining arrow button.
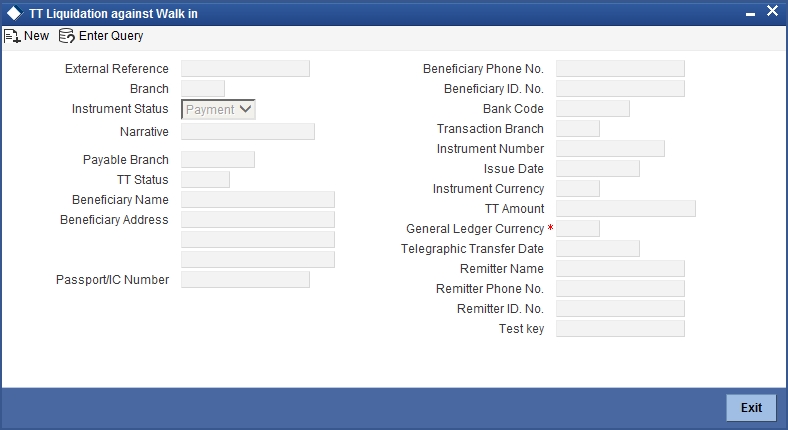
On invoking this screen, the External Reference Number of the transaction is displayed. Select the branch code in the ‘Issuing Branch’ field and the instrument number of the TT to be liquidated in the ‘Instrument Number’ field.
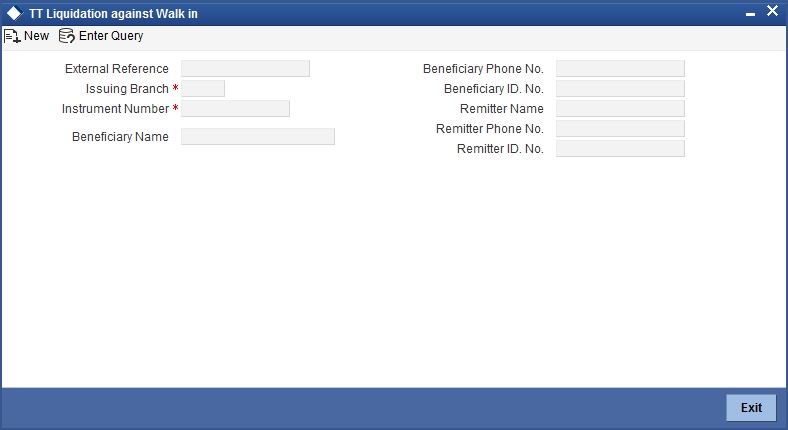
The following details will be auto populated:
Remitter Name
The name of the remitter is defaulted.
Remitter Phone Number
The phone number of the remitter is defaulted.
Remitter ID Number
The remitter ID number is defaulted.
Test Key
The Test Key sent by External Bank on the fax message of the TT is defaulted.
Beneficiary Name
The name of the beneficiary in whose favor the telegraphic transfer is done, is defaulted.
Beneficiary Address
The address of the beneficiary is displayed her.
Beneficiary Phone Number
The phone number of the beneficiary is defaulted.
Beneficiary ID Number
The beneficiary Identification number is defaulted.
Instrument Status
The system displays the liquidation mode of the TT. However, you can change it.
The adjoining drop-down list displays the following values:
- Payment
- Refund
- Cancel
Bank Code
The clearing bank code is displayed here.
Instrument Currency
The system displays the currency in which the TT has been issued.
TT Instrument Amount
The amount for which the cheque amount has been issued is displayed here.
Telegraphic Transfer Date
The system displays the date on which the TT was issued.
Payable Branch
The branch where the transfer amount is being paid out (current branch) is displayed here.
TT Status
The status of the transaction is displayed here.
Passport/IC Number
The passport number or a unique identification number of the customer is displayed here.
GL Currency
The GL currency is defaulted to the instrument currency. However you can change it. The adjoining option list displays all the currency codes maintained in the system. Choose the appropriate one.
Narrative
Here, you can enter remarks pertaining to the transaction.
Note
The Inter Bank Outward TT Issuance will not be available for the Payment in the Liquidation Process. The Inter Bank Outward TT will be available for only Refund and Cancel event at the Refund at the Issuing and Payable branch respectively, under the TT Liquidation Process.
In the single stage flow, if there is an transaction level override or error during approval then the transaction will be moved to the pending queue. Without save action being initiated, the transaction will not be in pending queue.
On clicking Pickup button, the system populates the values in all the callforms of the screen and clicking pickup button is mandatory if you make any changes to the Transaction amount and exchange rate after first pickup.
Once you click ‘Pickup’ button once, then on amendment of xrate, amount, charge, pickup will be mandatory before save. On pick up, the fields that are currently enabled in the enrich stage will alone be retained as enabled fields.
The Denomination, Charges, MIS and UDF tabs are displayed at this stage.
Click save icon to save the transaction. The authorization process is similar to cash deposit.
7.27.2 Specifying Denomination Details
In this block, you can capture details of the currency denominations involved in the transaction. Refer the section titled ‘Specifying denomination details’ under ‘Depositing Cash’ for further details.
7.27.3 Specifying charge details
This block allows you to capture charge related details.
Refer the section titled ‘Specifying the charge details’ under ‘Depositing Cash’ in this manual..
Click save icon to save the transaction. The authorization process is similar to cash deposit.
Refer the corresponding section under ‘Depositing Cash’ for further details.
7.27.4 Specifying MIS details
This block allows you to capture details pertaining to MIS.
Refer the section titled ‘Specifying the MIS details’ under ‘Depositing Cash’ in this manual.
7.27.5 Specifying the UDF details
You can capture these details in the ‘UDF’ tab of the screen.
Refer the section titled ‘Specifying UDF details’ under ‘Depositing Cash’ for further details in this manual.
Click save icon to save the transaction. The authorization process is similar to cash deposit.
Refer the corresponding section under ‘Depositing Cash’ for further details.
7.28 Inquiring on a TT Transaction
You can query a Telegraphic Transfer transaction for a specified branch and Instrument Number. This can be done by using the ‘TT Inquiry’ screen. You can invoke this screen by typing ‘7795’ in the field at the top right corner of the Application tool bar and clicking on the adjoining arrow button.
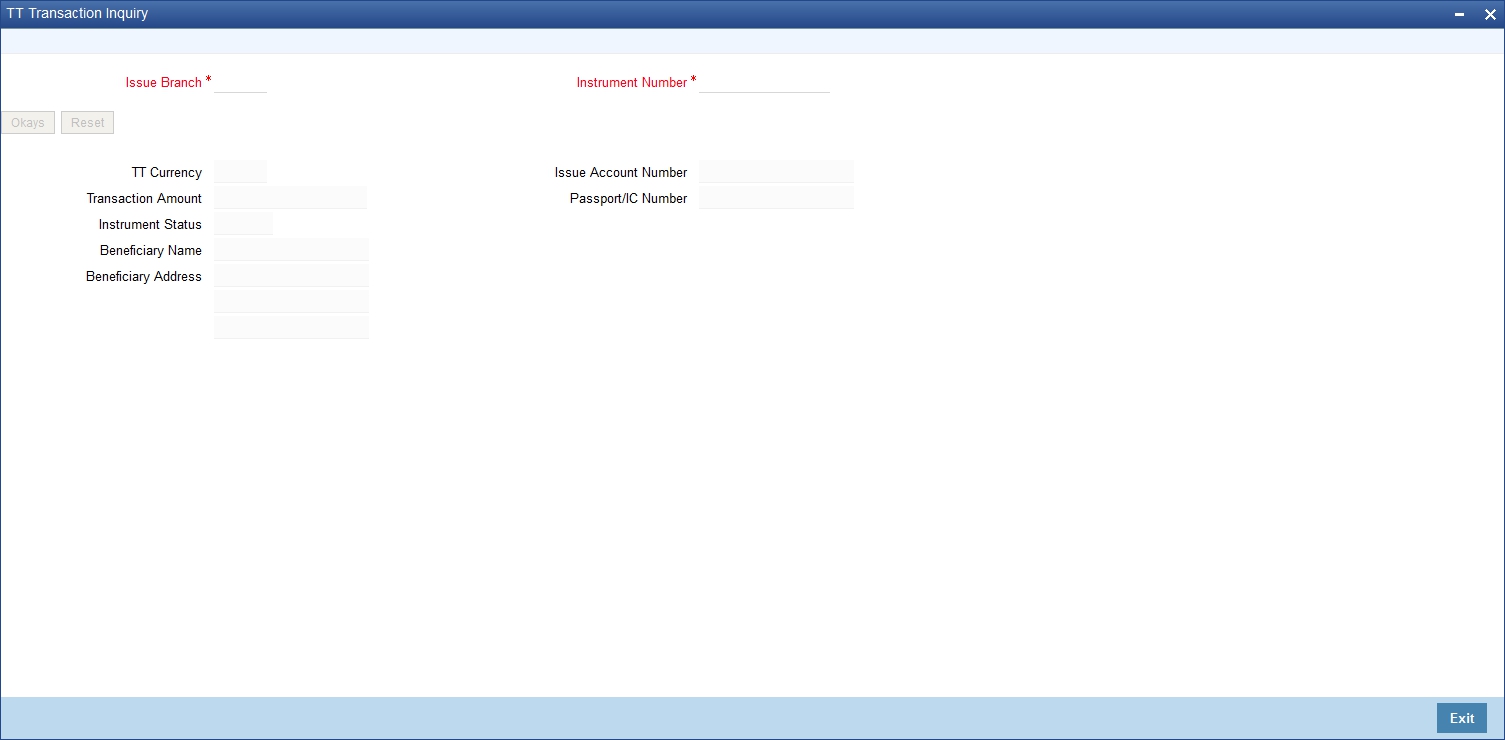
Specify the following details:
Instrument Number
Specify an instrument number of the TT transaction that needs to be queried.
Issue Branch
Specify a branch for which you wish to query the TT transaction. Or select a branch from the list of values.
After you specify the above details, click ‘Ok’ button.
The system will display the following details based on the instrument number:
- Transaction Amount
- TT Currency
- Instrument Status
- Issue Mode
- Issue Account Number
- Beneficiary Name
- Passport/IC Number
- Beneficiary Address
Clicking ‘Query’ button, the system validates if all the mandatory details are specified. This button will be disabled after the first click.
7.29 Transaction Reversal
You can reverse financial transactions that have been initiated by you. The transactions that have been completed successfully are available in the ‘Completed’ list.
![]()
You can select the transaction that needs to be reversed by clicking on it.
Here you will be able to view all the transaction details. Click save icon to reverse the transaction. The accounting entries will be reversed (i.e. negative amounts will be posted into the accounts). This will update the till balance for the currencies, wherever applicable. The system will display the message “Transaction Completed Successfully”.
7.30 Disbursing Loan Manually By Cash
You can manually disburse loan amount by cash using the ‘Loan Disbursement by Cash’ screen. You can invoke this screen by typing ‘5001’ in the field at the top right corner of the Application tool bar and clicking on the adjoining arrow button. The screen is displayed below:
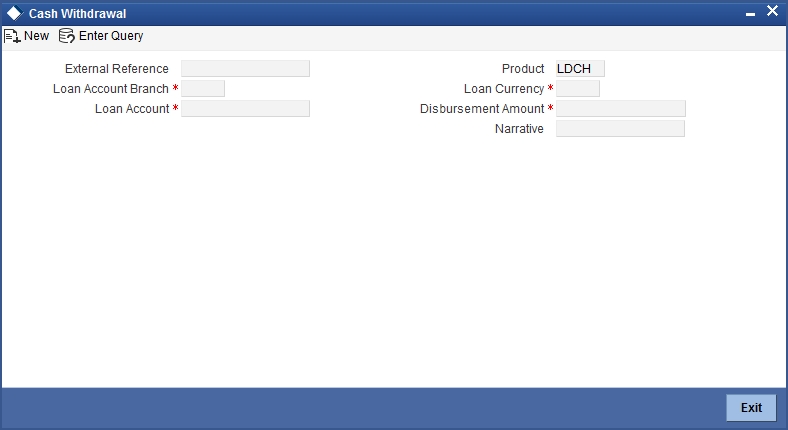
Specify the following details:
External Reference Number
The system displays a unique number.
Product
The retail teller product code ‘LDCH’ is displayed in this field.
Loan Account Branch
Specify the loan account branch from which the amount is to be disbursed. You can also select the appropriate branch from the adjacent option list. The list displays all the branches maintained in the system.
Loan Account
Specify the loan account number from which the amount is to be disbursed. You can also select the appropriate account number from the adjacent option list. The list displays all the valid loan accounts maintained in the system.
Disbursement Currency
Specify the currency of the disbursement amount. You can also select the appropriate currency from the adjacent option list. The list displays all the currencies maintained in the system. The denomination tracking will be against this currency.
Disbursement Amount
Specify the disbursement amount.
Narrative
Specify any remarks for the transaction.
After specifying the above details, click ‘Save’ button. The following screen along with the loan details is displayed:
The details specified in the first screen are displayed here. However, you can capture the following details:
Disbursement Amount
The disbursement amount mentioned in the first screen is displayed here. However, you can modify the same. Specify the disbursement amount and click ‘Recalculate’ button to calculate the total cash being disbursed.
Total Cash Disbursed
The total cash disbursed, after deducting the charges is displayed.
Exchange Rate
Specify the rate of exchange.
Loan Account Title
You can specify any title or remarks for the loan account.
Narrative
Specify any remarks for the transaction.
Currency Denominations
You can specify denomination details if you have checked the ‘Denomination Tracking Required’ option in the ‘Function Workflow Definition Detail’ screen.
Units
Specify the number of units for each denomination.
Total Amount
The total amount for each denomination is displayed.
In the single stage flow, if there is an transaction level override or error during approval then the transaction will be moved to the pending queue. Without save action being initiated, the transaction will not be in pending queue.
On clicking Pickup button, the system populates the values in all the callforms of the screen and clicking pickup button is mandatory if you make any changes to the Transaction amount and exchange rate after first pickup.
Once you click ‘Pickup’ button once, then on amendment of xrate, amount, charge, pickup will be mandatory before save. On pick up, the fields that are currently enabled in the enrich stage will alone be retained as enabled fields.
On saving the transaction, it will move to the enrichment stage for further processing.
Note
The total amount of all the denominations must be equal to the total cash being disbursed.
- You cannot reverse these transactions from Savings module
- Manual disbursement through Savings module can be done only for manual disbursement loan accounts
7.31 Repaying Loan Manually By Cash
You can manually repay retail loan amount by cash using the ‘Repayment towards Loan’ screen. You can invoke this screen by typing ‘5401’ in the field at the top right corner of the Application tool bar and clicking on the adjoining arrow button. The screen is displayed below:
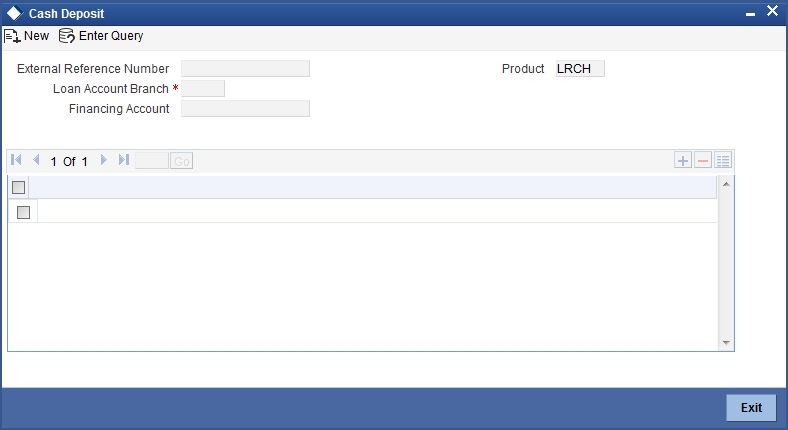
Here, you query the loan details by specifying the following:
Loan Account Branch
Specify the branch of the loan account for which the amount is to be repaid.
Loan Account Number
Specify the loan account number for which the amount is to be repaid.
Click ‘Save’ button. The total amount financed, disbursed, the total outstanding amount for each component and currency is displayed in the following screen:

Specify the following in this screen:
Loan Account Branch
Specify the branch of the loan account for which the amount is to be repaid.
Loan Account Number
Specify the loan account number for which the amount is to be repaid.
Repayment Currency
Specify the currency of repayment amount. You can also select the appropriate currency from the adjacent option list. The list displays all the valid currencies maintained in the system. The denomination tracking will be against this currency.
Repayment Amount
Specify the amount to be repaid.
Narrative
Specify any remarks for the transaction.
In the single stage flow, if there is an transaction level override or error during approval then the transaction will be moved to the pending queue. Without save action being initiated, the transaction will not be in pending queue.
On clicking Pickup button, the system populates the values in all the callforms of the screen and clicking pickup button is mandatory if you make any changes to the Transaction amount and exchange rate after first pickup.
Once you click ‘Pickup’ button once, then on amendment of xrate, amount, charge, pickup will be mandatory before save. On pick up, the fields that are currently enabled in the enrich stage will alone be retained as enabled fields.
Repayment Amount
The amount mentioned in the input screen is displayed here. However, you can modify the same. Specify the amount to be repaid and click ‘Recalculate’ button to calculate the total cash being amount.
Total Cash Amount
The total amount to be paid after including all the charges is displayed here.
Exchange Rate
Specify the rate of exchange.
Loan Account Title
You can specify any title or remarks for the loan account.
Narrative
Specify any remarks for the transaction.
Note
A transaction slip is generated at the time of input stage completion and is produced to the customer to sign and confirm the transaction.
Currency Denominations
You can specify denomination details if you have checked the ‘Denomination Tracking Required’ option in the ‘Function Workflow Definition Detail’ screen.
Units
Specify the number of units for each denomination.
Total Amount
The total amount for each denomination is displayed.
On saving the transaction, it will move to the enrichment stage for further processing.
Note
- The total amount of all the denominations must be equal to the total cash amount being paid.
- You cannot reverse these transactions from Savings module.
7.32 Safe Deposit Box Rentals
This section contains the following topics:
7.32.1 Processing Safe Deposit Box Rentals
Your customer can pay rental for the safe deposit box either by cash or from the account. The cash payment is processed through the ‘Safe Deposit Rental By Cash’ screen as detailed below:
7.32.2 Input Stage
You can invoke the ‘Safe Deposit Rental By Cash’ screen by typing ‘3401’ in the field at the top right corner of the Application tool bar and clicking on the adjoining arrow button. The following screen is displayed:
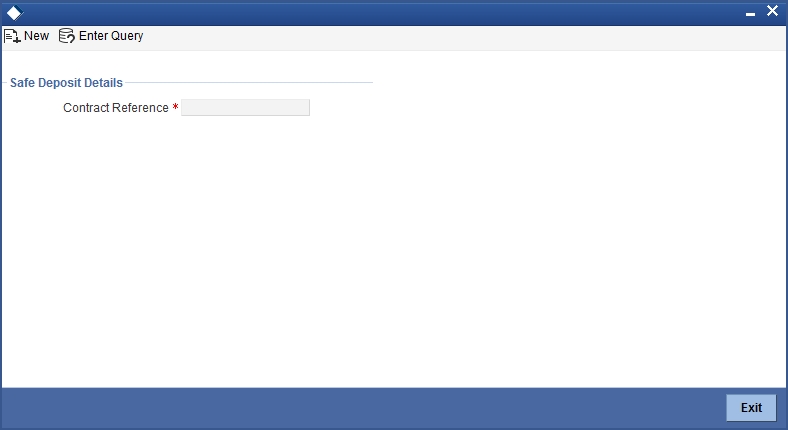
In this screen, select the Contract Reference Number of the transaction from the option list.
In the single stage flow, if there is an transaction level override or error during approval then the transaction will be moved to the pending queue. Without save action being initiated, the transaction will not be in pending queue.
On clicking Pickup button, the system populates the values in all the callforms of the screen and clicking pickup button is mandatory if you make any changes to the Transaction amount and exchange rate after first pickup.
Once you click ‘Pickup’ button once, then on amendment of xrate, amount, charge, pickup will be mandatory before save. On pick up, the fields that are currently enabled in the enrich stage will alone be retained as enabled fields.
Clicking ‘Pickup’ button, the system defaults the following details:
- External Reference Number
- Product
- Contract Reference Number
- Value Date
- Due Date
- Next Due Date
- Payment Currency
- Payment Amount
You can enter the following details:
Narrative
Enter additional information for the transaction.
Settlement Account
The system will display the account selected at the contract level. You can modify this, if required.
Settlement Branch
The system will display the branch selected at the contract level. You can modify this, if required.
Settlement Currency
The system will display the currency selected at the contract level. You can modify this, if required.
You can save the transaction by clicking the save icon.
In this screen, you can enter the details pertaining to denomination, MIS and UDF:
7.32.2.1 Denomination Details
Enter the following detail:
Preferred Denomination
Specify the denomination in which the cash should be paid.
After entering the denomination click ‘Populate’. The system will default the units for the denomination specified. You can modify the denomination and units if required.
If you do not enter any preferred denomination after clicking ‘Populate’, the system will default the denomination code and other details to the extent of the transaction amount. If you wish to modify these details, you may do so by clicking ‘Clear’, specifying the preferred currency and then clicking the ‘Populate’ button.
Refer the corresponding section under ‘Depositing Cash’ for details on MIS and UDF
Refer the chapter ‘Operations’ in the Deposit Locker User Manual for details on payment through account.
Click the save icon. The following screen is displayed:
7.33 Viewing Availability of Denomination in Till
You can view the count of denomination units available in Till in the ‘Denomination Count for Transaction Currency’ screen. You can invoke this screen using the key combination ‘Ctrl+T’ only if the main screen contains ‘Denomination’ tab and the code of the currency is specified in the main screen. For enabling ‘Ctrl+T’ key combination for this feature, check ‘Display Denomination Details’ at the system level.

Here you can view the following details:
- Denomination Code – The denomination ID as specified in Currency definition.
- Denomination Value – The absolute value of the denomination code.
- Units Available – The count of denominations in the system.
7.34 Querying Till Vault Position
You can view the cash position for all the currencies in the Till for the current day and view the vault position including denomination, at any given point of timein the ‘Till Vault Position Query’ screen. You can invoke this screen by typing ‘TVQR’ in the field at the top right corner of the Application tool bar and clicking the adjoining arrow.
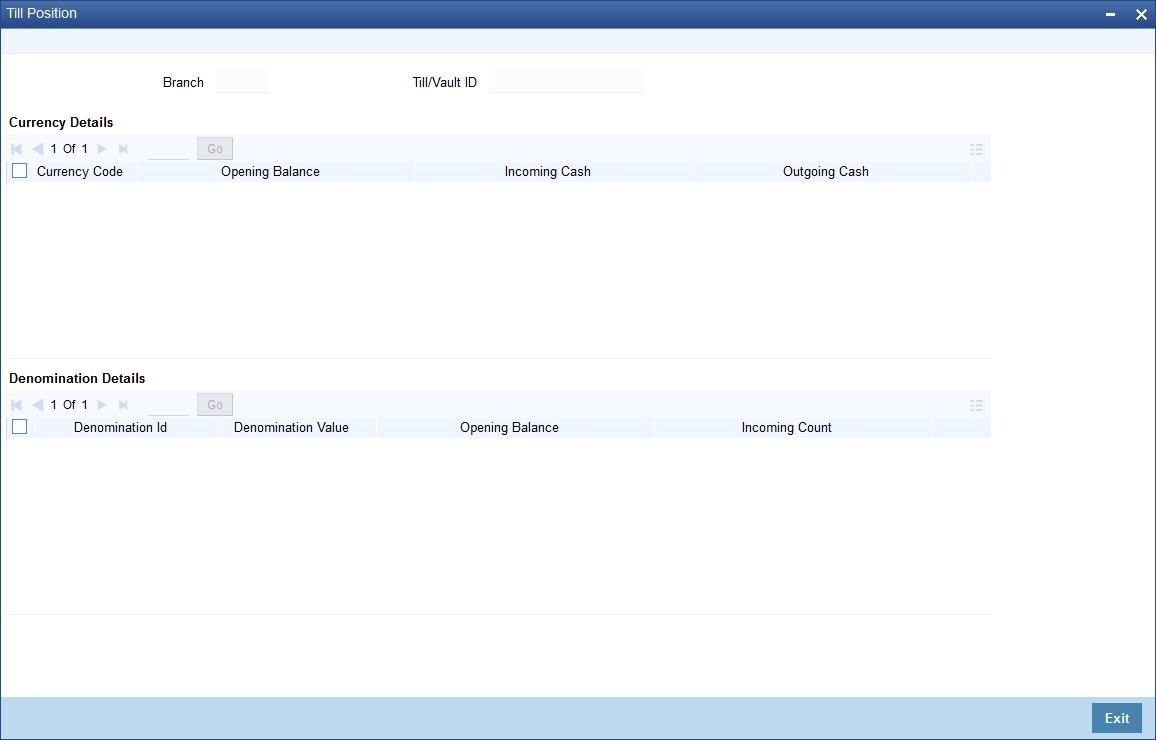
Here you can view the following details:
Branch Code
The system displays the current branch code.
Till/Vault ID
The system displays the identification of the currently logged in user.
Currency Details
Currency Code
The system displays the code of the currency available in the Till.
Opening Balance
The system displays the opening balance in the Till for the day.
Incoming Cash
The system displays the incoming cash in the Till for the day.
Outgoing Cash
The system displays the outgoing cash in the Till for the day.
Total Cash
The system displays the total cash currently available in the Till.
Check one of the Till details record to view the following currency details:
Denomination Details
Denomination ID
The system displays the denomination code for the currency in the selected till details record.
Denomination Value
The system displays the value of the corresponding denomination ID.
Opening Balance
The system displays the opening balance in the till for the day in terms of denominations.
Incoming Cash
The system displays the incoming cash in the Till for the day in terms of denominations.
Outgoing Cash
The system displays the outgoing cash in the Till for the day in terms of denominations.
Total Cash
The system displays the total cash currently available in the Till for the day in terms of denominations.
7.35 Sell Foreign Currency against CASA Account
This section contains the following topics:
- Section 7.35.1, "Sale of Foreign Currency against CASA Account"
- Section 7.35.2, "Specifying Denomination Details"
- Section 7.35.3, "Specifying Charge Details"
- Section 7.35.4, "Specifying MIS details"
- Section 7.35.5, "Specifying UDF Details"
7.35.1 Sale of Foreign Currency against CASA Account
You can sell foreign currency from the branch through the CASA account. You can do this by debiting corresponding account currency from CASA account. You can capture this foreign currency sale transaction through the ‘FX Sale against Account’ screen. You can invoke this screen by typing ‘8206’ in the field at the top right corner of the Application tool bar and clicking on the adjoining arrow button.

Here you can capture the following details:
External reference
This is the unique transaction number generated by the system for each transaction. The host system identifies a branch transaction with the external reference number.
Fx Currency
Specify the foreign currency sold by the bank to the customer from the adjoining option list.
Fx Amount
Specify the total value of the foreign currency sold to the customer.
Beneficiary name
Specify the name of the beneficiary which will be reflected in the advice.
Beneficiary address
Specify the address of the beneficiary.
Product
The system defaults the retail teller product code. The product code for this transaction would be FXSA.
Account
Specify the CASA account to be debited for the foreign currency sale from the adjoining option list.
To view the joint holder’s details of an account and the mode of operation maintained at the account level, place the cursor on the Accounts field and press Ctrl+J. The system displays the ‘Joint Holder’ screen.
For more information on the ‘Joint Holder’ screen refer to the section ‘Joint Holder Maintenance’ in the Core User Manual.
Account description
The description of the customer account gets defaulted based on the selected account number.
Account branch
The account opening branch detail gets defaulted based on the selected account number.
Account currency
The system displays the currency in which the account is maintained.
Negotiated Rate
Specify the negotiated rate to compute profit or loss of this transaction.
Negotiated Reference
Specify the negotiated reference details.
Passport/IC no
Specify either the passport number or the unique identification number of the customer.
Narrative
You can input additional remarks for the transaction, if there are any.
Denomination Variance Applicable
This Check box will have the value Y by default only if you have set the required parameter to ‘Yes’ in ‘FBTB_PARAMS.
By default, the system displays the status of the check-box as checked. However, you can modify this based on the transaction requirements.
If this box is checked, then based on the denominations of the currency, the system will apply the respective variance to the rate of exchange. The variance is applied based on the variance maintained for the currency pair involved in the transaction.
If you check this box, it is mandatory to specify the denominations in ‘Denominations’ sub-screen.
On clicking the pickup button, the following details will be defaulted:
Charges
The system displays the charge amount associated with the retail teller product FXSA in account currency.
Amount Received
The system displays the amount received from the customer account in exchange of the foreign currency amount sold.
Net Amount
It is the sum of actual account currency amount and the charges incurred.
If you have manually changed the exchange rate, then you can recalculate the net amount by clicking ‘Recalculate’ button.
If you have checked the check-box ‘Denomination Variance Applicable’, then the system will apply the variance for each denomination and calculate the net amount.
Currency Received Rate
Specify the current exchange rate of the currency.
7.35.2 Specifying Denomination Details
In the ‘Denomination’ screen, you can capture details of the currency denominations involved in the transaction. You can invoke this screen by clicking the ‘Denomination’ button. If you have checked the check-box ‘Denomination Variance Applicable’, then you must capture the ‘FX denomination details’ before Pickup stage in the Denomination screen.
Refer the section titled ‘Specifying denomination details’ under ‘Depositing Cash’ for further details.
7.35.3 Specifying Charge Details
This screen allows you to capture charge related details. You need to click on the ‘Charges’ button to invoke the screen.
Refer the section titled ‘Specifying charge details’ under ‘Depositing Cash’ for further details.
7.35.3.1 Recalculating Charges
You can modify any of the charges for any of the components. In case of modification, you need to click ‘Recalculate’ button. The system will compute the new charge amount and display the same. In case you modify the charge details and don’t click on this button, the system will trigger the charge recalculation internally, when you click the save button.
7.35.4 Specifying MIS details
This screen allows you to capture details pertaining to MIS. Click on the ‘MIS’ button to invoke the following screen:
Refer the section titled ‘Specifying MIS details’ under ‘Depositing Cash’ for further details.
7.35.5 Specifying UDF Details
You can capture the UDF details under ‘UDF’ button.
Refer the section titled ‘Specifying the UDF details’ under ‘Depositing Cash’ for further details.
Click save icon to save the transaction. The authorization process is similar to cash deposit.
Refer the corresponding section under ‘Depositing Cash’ for further details.
Note
ARC Maintenance will be done for the FXSA product with the required accounting entries.
For details on the ARC maintenance, refer the section on ARC Maintenance screen in Utility Payments user manual.