8. Instrument Transactions
As you may recall, the Savings module allows you to perform different types of transactions. This chapter details the various instrument-based transactions that can be performed through this module. You can perform the following types of instrument-based transactions:
- Cheque transactions
- Cheque deposit and withdrawal
- Cheque deposit to GL
- Cheque book request
- In-house cheque deposit
- Cheque return
- Traveller’s Cheque (TC) transactions
- TC sale and purchase - against account and for walk-in customer
- TC sale against GL
- Demand Draft (DD) transactions
- DD sale against account
- DD liquidation – against GL, against account and for walk-in customer
- DD issue – to walk-in customer and against GL
- DD inquiry
- DD reprint
- Banker’s Cheque (BC) transaction
- BC sale – against account and against clearing
- BC issue – against GL and for walk-in customer
- BC liquidation – against account and against GL
- BC inquiry
- BC reprint
This chapter contains the following sections:
- Section 8.1, "Withdraw Cash against a Cheque"
- Section 8.3, "Deposit a Cheque into a GL"
- Section 8.4, "Deposit an In-house Cheque "
- Section 8.5, "Tracking a Cheque Return"
- Section 8.6, "Bulk Cheque Return"
- Section 8.7, "Querying Cheque Status"
- Section 8.9, "Issue a TC against an Account"
- Section 8.10, "Issue a TC against a GL"
- Section 8.11, "Issue a TC to a Walk-in Customer"
- Section 8.12, "Purchase a TC against an Account"
- Section 8.13, "Purchase a TC from a Walk-in Customer"
- Section 8.14, "Issue a DD Issue against an Account"
- Section 8.15, "Issue DD against Cheque"
- Section 8.16, "Liquidating a DD against a GL"
- Section 8.17, "Liquidate a DD against an Account"
- Section 8.18, "Liquidate a DD for a Walk-in Customer"
- Section 8.19, "Issue a DD to a Walk-in Customer"
- Section 8.20, "Issue a DD against a GL"
- Section 8.21, "Inquiring on a DD Transaction"
- Section 8.22, "Re-validate DD Instrument"
- Section 8.23, "Reprint/ Reissue of DD"
- Section 8.24, "Duplicate DD Instrument"
- Section 8.25, "Issue a BC against an Account"
- Section 8.26, "Issue BC against Cheque"
- Section 8.27, "Close Account by BC"
- Section 8.28, "Close Account"
- Section 8.29, "Issue a BC against a GL"
- Section 8.30, "Issue a BC to a walk-in customer"
- Section 8.31, "Liquidate a BC against an account"
- Section 8.32, "Liquidate a BC against a GL"
- Section 8.33, "Liquidate a BC for a walk-in customer"
- Section 8.34, "Inquiring on a BC Transaction"
- Section 8.35, "Re-validate BC Instrument"
- Section 8.36, "Reprint / Reissue Banker’s Cheque"
- Section 8.37, "Duplicate BC Instrument"
- Section 8.38, "Reversing BC/DD Liquidation"
8.1 Withdraw Cash against a Cheque
This section contains the following topics:
- Section 8.1.1, "Withdrawing Cash against a Cheque"
- Section 8.1.2, "Specifying Denomination Details"
- Section 8.1.3, "Specifying Charge Details"
- Section 8.1.4, "Specifying MIS Details"
- Section 8.1.5, "Specifying UDF details"
8.1.1 Withdrawing Cash against a Cheque
Your customer can withdraw money from his/her account by issuing a cheque on the account. You can capture such a transaction through the ‘Cheque Withdrawal’ screen. You can invoke this screen by typing ‘1013’ in the field at the top right corner of the Application tool bar and clicking the adjoining arrow button.
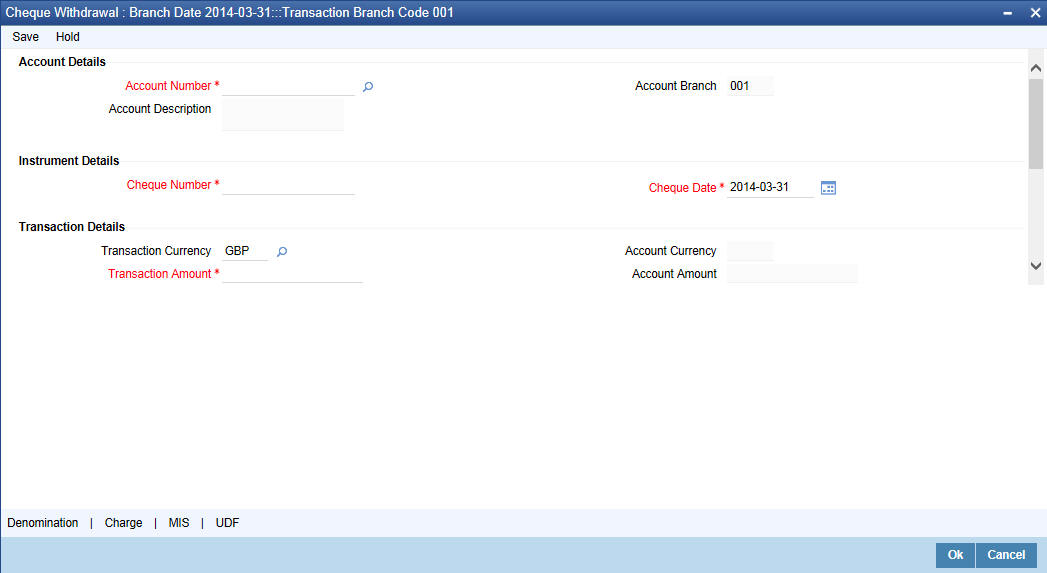
Here you can capture the following details:
Account Number
Specify the customer account into which the cash needs to be deposited.
Note
In case of multiple accounts with the same account number, the system will display a list of account numbers with account branches to select.
To view the joint holder’s details of an account and the mode of operation maintained at the account level, place the cursor on the Account Number field and press Ctrl+J. The system displays the ‘Joint Holder’ screen.
For more information on the ‘Joint Holder’ screen refer to the section ‘Joint Holder Maintenance’ in the Core User Manual.
Account Branch
The system displays the logged-in branch. If you specify another account number and tab out of the Account Number field, the system displays the corresponding account branch.
Account Description
Enter a brief description on the account.
Cheque Number
Specify the MICR number displayed on the cheque leaf.
Cheque Date
Specify the date displayed on the cheque leaf.
Transaction Currency
The system displays the local currency. If you specify another account number and tab out of the Account Number field, the system displays the currency associated with the account.
Transaction Amount
Specify the amount that should be debited from another account in terms of transaction currency. If the account to be debited is a Trust account, this amount should be within the cash withdrawal limit defined for the debited account class.
Account Currency
The system displays the logged-in currency. If you specify another account number and tab out of the Account Number field, the system displays the currency associated with the account.
Account Amount
The system displays the transaction amount. You cannot modify it..
Narrative
The system displays ‘Cheque Withdrawal’. You can modify it, if required.
In the single stage flow, if there is an transaction level override or error during approval then the transaction will be moved to the pending queue. Without save action being initiated, the transaction will not be in pending queue.
On clicking Pickup button, the system populates the values in all the callforms of the screen and clicking pickup button is mandatory if you make any changes to the Transaction amount and exchange rate after first pickup.
Once you click ‘Pickup’ button once, then on amendment of xrate, amount, charge, pickup will be mandatory before save.
External Reference Number
The system generates and displays a unique number based on the branch-specific sequence number generation logic. The Host system identifies a branch transaction with the external reference number.
Clicking ‘Pickup’ button, the system defaults the following details:
Account Description
The system displays a brief title for the chosen account.
Account Currency
The system displays the currency of the customer account.
Exchange Rate
The system displays the exchange rate used to convert the transaction currency into account currency. If the transaction currency is the same as the account currency, the system will display the exchange rate as ‘1’.
Total Charge
The system calculates the charges applicable to the transaction and displays the amount here.
Account Amount
The system displays the amount to be debited from the account (in the account currency) after calculating the applicable charges. The system adds the charge amount from the transaction amount and displays the net value.
Customer ID
The system displays the customer ID based on the account that is specified.
Negotiated Cost Rate
Specify the negotiated cost rate that should be used for foreign currency transactions between the treasury and the branch. You need to specify the rate only when the currencies involved in the transaction are different. Otherwise, it will be a normal transaction.
Negotiation Reference Number
Specify the reference number that should be used for negotiation of cost rate, in foreign currency transaction. If you have specified the negotiated cost rate, you need to specify the negotiated reference number also.
Note
Oracle FLEXCUBE books the online revaluation entries based on the difference in exchange rate between the negotiated cost rate and transaction rate.
Reject Code
Specify the Reject Code. The adjoining option list displays the list of all the reject codes maintained in the system. You can choose the appropriate one.
Note
If you reject a cheque without giving the reject code then that cheque can be reused. However, if you enter the reject code then the cheque will be rejected.
8.1.2 Specifying Denomination Details
In this block, you can capture details of the currency denominations involved in the transaction through the following fields:
Currency Code
The system displays the currency of the account.
Denomination Code
The system defaults the denomination code as maintained in the ‘Denomination Maintenance’ screen.. For every currency, the various denominations are assigned separate denomination codes..
Denomination Value
The system computes the face value of the denomination and displays it. For instance if the denomination code represents a USD 100, the value will be displayed as ‘100’.
Units
Indicate the number of units of the specified denomination. By default, till contents are decremented for outflow transactions like cash withdrawal. To reverse this default behavior, you can specify units in negative.
Total Amount
The system computes the denomination value by multiplying the denomination value with the number of units. For instance, if the denomination code represents a USD 100 and the number of units is 10, the denomination amount will be ‘1000’.
8.1.3 Specifying Charge Details
This block allows you to capture charge related details. Click on the ‘Charges’ tab and invoke the following screen.

Here you can capture the following details:
Charge Component
The system displays the charge component that is levied on the transaction.
Waiver
This option is unchecked by default, thereby indicating that the charge needs to be levied. However, you can check this option to waive the charge. If you check this option, you will have to click the ‘Recalculate’ button to re-compute the net amount to be credited to the account.
Charge Currency
The system displays the currency in which the charge has to be levied.
Charge Amount
The system displays the charge amount in the charge currency. However you can change it. You will then have to recalculate the charge and net transaction amount.
Charge in LCY
In case the transaction currency is different from the local currency, the system will compute the local currency equivalent of the charge and display it here.
Exchange Rate
The exchange rate used for the currency conversion is displayed here. If the charge currency is the same as the transaction currency, the system will display ‘1’ as the exchange rate.
Charge Currency
The system displays the currency in which the charge has to be levied.
8.1.4 Specifying MIS Details
This block allows you to capture details pertaining to MIS. Click on the ‘MIS’ tab to invoke the following screen:
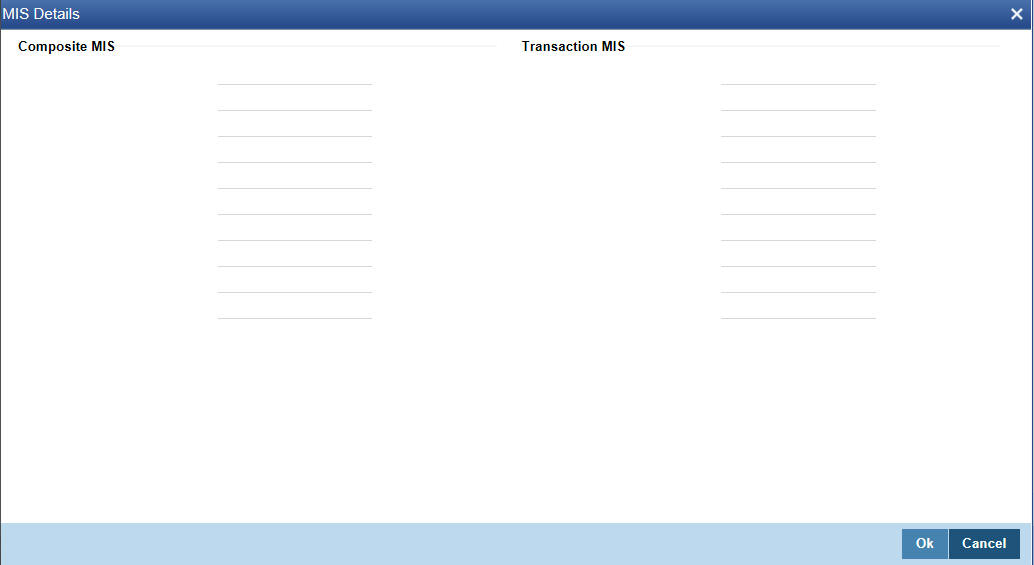
You can capture the following details here:
This block allows you to capture details pertaining to MIS. Click on the ‘MIS’ tab to capture the following details:
Transaction MIS
Specify the transaction MIS. The adjoining option list displays a list of transaction MIS codes maintained in the system. You can choose the appropriate one.
Composite MIS
Specify the composite MIS. The adjoining option list displays a list of composite MIS codes maintained in the system. You can choose the appropriate one.
8.1.5 Specifying UDF details
You can capture these details in the ‘UDF’ tab of the screen.
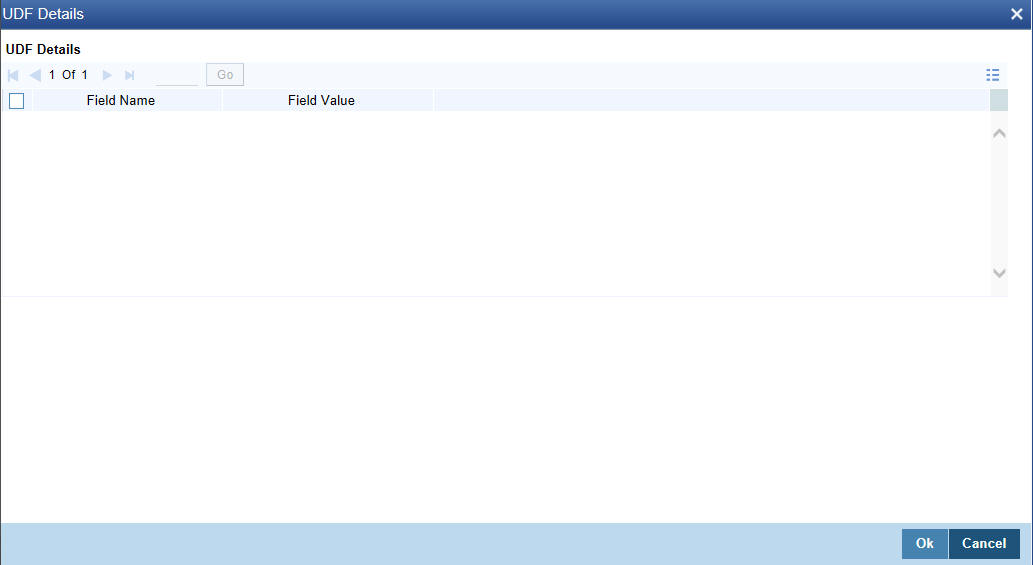
UDF Name
The system displays the various User-Defined Fields (UDFs) that you have maintained for the product in the Host.
UDF Value
Specify the value for the each UDF that is displayed.
Note
The MIS-related fields displayed here are based on the MIS configuration done at the Host.
Refer the ‘MIS’ User Manual of Oracle FLEXCUBE Host, for further details about MIS.
Click save icon to save the transaction.
The system displays overrides on a separate window. You can either accept or reject the overrides and proceed with saving the transaction. If you click ‘Reject’ button, the screen will remain in the enrichment stage for you to make changes to charge elements. Then if you click ‘Save’, the system will initiate reversal of the transaction without reversing the charges.
The authorization process is similar to that of cash deposit.
Note
Depending on the ‘Display Type’ selected for customer / account in ‘Instruction Maintenance’ screen, the instruction will be displayed the time of saving the input stage and authorizing the transaction.
For more details about viewing customer / account instructions, refer the section titled ‘Viewing Customer / Account Instructions on ‘F6’ Key-Press’ and Viewing Customer / Account Instruction Details in Override Screen’ in this user manual.
Refer the corresponding section under ‘Depositing Cash’ in the chapter ‘Cash Transactions’ of this User Manual for further details.
Refer the chapters titled ‘Transaction Workflow’ and ‘Common Operations’ in this User Manual for details on the dual-control operations and the authorization process respectively.
8.2 Depositing a Cheque
The In-house cheques will deposit using the existing Outward Clearing Data Entry screens if Customer float days are greater than zero for the product or if sufficient funds are not available during cheque deposited from existing LOCH screen. If the in-house cheques are initiated using Outward Clearing Data Entry screen, the system will follow the regular life cycle of inward clearing contract creation and return handling like other normal clearing cheques.
You can deposit a cheque into your customer’s account through the ‘Cheque Deposit’ screen. You can invoke this screen by typing ‘6501’ in the field at the top right corner of the Application tool bar and clicking the adjoining arrow button.
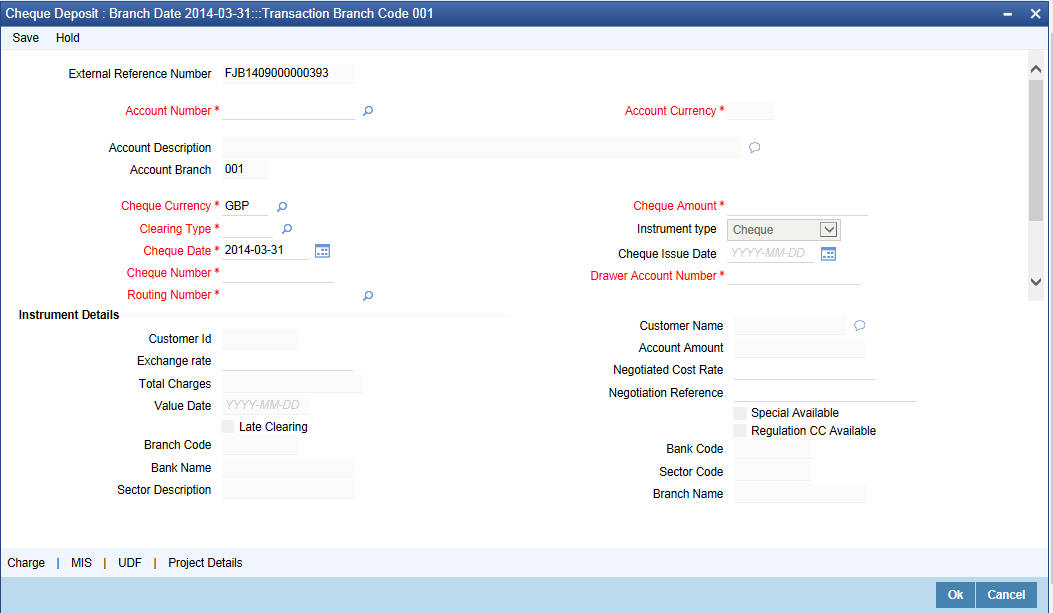
Here you can capture the following details:
External Reference
The system generates a unique number based on the branch-specific sequence number generation logic and displays it here. The Host system identifies a branch transaction with the external reference number.
Account Number
Specify the customer account number into which the cash needs to be deposited.
Note
In case of multiple accounts with the same account number, the system will display a list of account numbers with account branches to select.
To view the joint holder’s details of an account and the mode of operation maintained at the account level, place the cursor on the Account Number field and press Ctrl+J. The system displays the ‘Joint Holder’ screen.
For more information on the ‘Joint Holder’ screen refer to the section ‘Joint Holder Maintenance’ in the Core User Manual.
Account Currency
The system displays the currency associated with the account.
Account Description
The system displays the description of the account number chosen.
Account Branch
The system displays the logged-in branch. If you specify another account number and tab out of the Account Number field, the system displays the corresponding account branch.
Cheque Currency
The system displays the local currency. If you specify another account number and tab out of the Account Number field, the system displays the currency associated with the account.
Cheque Amount
Specify the amount that needs to be deposited to the account; in terms of local currency.
Clearing Type
Specify the product that is maintained in the system for the transaction. The adjoining drop-down list displays the outward and inward clearing products. For example:
- CLEARING OF CHEQUE-LOOC
- CLEARING OF CHEQUE-NAOC
Cheque Issue Date
To specify the issue date of the cheque, click on the adjoining calendar icon and select the appropriate date.
Note
If the difference between the ‘Cheque issue date’ and the ‘Cheque Date’ is greater than the ‘Cheque Stale Days’ maintained at the ‘Branch Parameters Maintenance’ screen, an error message will be displayed stating that the cheque is a stale one. However, a stale cheque validation would not be done if the field ‘Cheque Stale days’ is not maintained at the ‘Branch Parameters Maintenance’ screen.
Cheque Number
Specify the MICR number displayed on the cheque.
Drawer Account Number
Specify the account number on which the cheque is drawn.
Routing Number
Specify the routing number for cheque clearance. .The adjoining option list displays all routing numbers along with the Branch codes and Bank Codes. You can select the appropriate one.
Narrative
The system defaults the narrative as 'Cheque Deposit - Cheque no - Cheque Number – Drawer A/c Number - Account Number'. Once you specify the ‘Cheque Number’ and ‘Drawer Account Number’, the system replaces the field values respectively on tabbing out from the field.
Clicking ‘Pickup’ button, the system displays the following details:
Instrument Details
Customer ID
The system displays the customer ID based on the account specified.
Exchange Rate
The system displays the exchange rate used to convert the transaction currency into account currency. If the transaction currency is the same as the account currency, the system will display the exchange rate as ‘1’.
Account Amount
The system displays the cheque amount in terms of account currency.
Total Charges
The system calculates the charges applicable to the transaction and displays the amount here.
Negotiated Cost Rate
Specify the negotiated cost rate that should be used for foreign currency transactions between the treasury and the branch. You need to specify the rate only when the currencies involved in the transaction are different. Otherwise, it will be a normal transaction.
Negotiation Reference Number
Specify the reference number that should be used for negotiation of cost rate, in foreign currency transaction. If you have specified the negotiated cost rate, then you need to specify the negotiated reference number also.
Late Clearing
The system indicates whether the cheque has been cleared on the same day or is marked for late clearing.
Regulation CC Available
Check this box to indicate that the ‘Reg CC’ facility is available for the transaction.
Special Available
Check this box to indicate that the ‘special availability’ facility is available for the transaction.
Bank Code
The system displays the clearing bank code based on the routing number.
Bank Name
The system displays the name of the clearing bank based on the routing number.
Branch Code
The system displays the branch code of the clearing bank, based on the routing number.
Branch Name
The system displays the branch in the clearing bank, based on the routing number.
Sector Code
The system displays the sector code of the clearing bank, based on the routing number.
Sector Description
The system displays the description of the sector.
Note
Oracle FLEXCUBE books the online revaluation entries based on the difference in exchange rate between the negotiated cost rate and transaction rate.
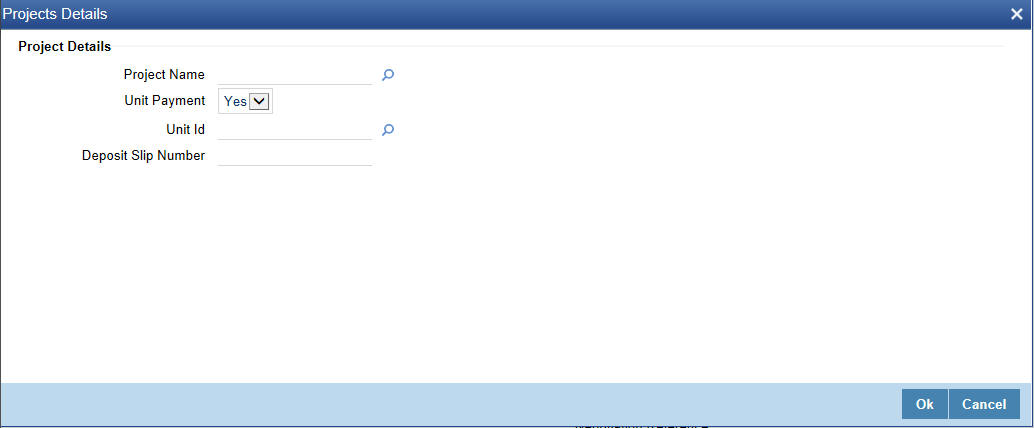
8.2.1 Specifying Project Details
You can capture project details under ‘Project Details’ tab. Note that this tab will be applicable only if the cheque is being deposited into a Trust account.
Specify the following details:
Project Name
Specify the developer project name for which payment is being made. The adjoining option list displays all valid projects maintained in the system. You can select the appropriate one. Input to this field is mandatory.
Unit Payment
Indicate whether the transaction is a unit payment or not by choosing the appropriate value from the adjoining drop-down list. The following values are available:
- Yes
- No
Unit ID
Specify the unit ID of the project.The adjoining option list displays all unit IDs along with the unit holder names corresponding to the project name chosen. You can select the appropriate one.
If you specify the Project Name, the system will display the Unit Ids in the list of values here.
Deposit Slip Number
Specify the deposit slip number for the payment.
Click save icon to go to the next stage.
Refer the sections titled ‘Authorization stage’ and ‘Submission stage’ under ‘Withdrawing Cash against a Cheque’ for details on the authorization and submission.
8.2.2 Specifying Charge Details
Charges Details sub screen allows you to capture charge related details for the transaction. Refer the section titled ‘Specifying charge details’ under ‘Withdrawing Cash against a Cheque’ for further details.
8.2.3 Specifying MIS Details
MIS Details sub-screen allows you to capture details pertaining to MIS. Click on the ‘MIS’ tab to invoke the MIS Details screen.
Refer the section titled ‘Specifying the MIS details’ under ‘Withdrawing Cash against a Cheque’ for further details.
8.2.4 Specifying UDF Details
You can capture the UDF details under ‘UDF’ tab. Click the tab button ‘UDF’. The system displays the following details:
Click to save the transaction.
The approver can fetch this transaction for his/her task list and authorize it. The authorization process is similar to that of cash deposit.
Note
Depending on the ‘Display Type’ selected for customer / account in ‘Instruction Maintenance’ screen, the instruction will be displayed at the time of saving the input stage and authorizing the transaction.
Refer the corresponding section under ‘Depositing Cash’ in the chapter ‘Cash Transactions’ of this User Manual for further details.
Refer the chapters titled ‘Transaction Workflow’ and ‘Common Operations’ in this User Manual for details on the authorization process.
8.3 Deposit a Cheque into a GL
This section contains the following topics:
- Section 8.3.1, "Depositing a Cheque into a GL"
- Section 8.3.2, "Specifying Charge Details"
- Section 8.3.3, "Specifying MIS Details"
- Section 8.3.4, "Specifying UDF Details"
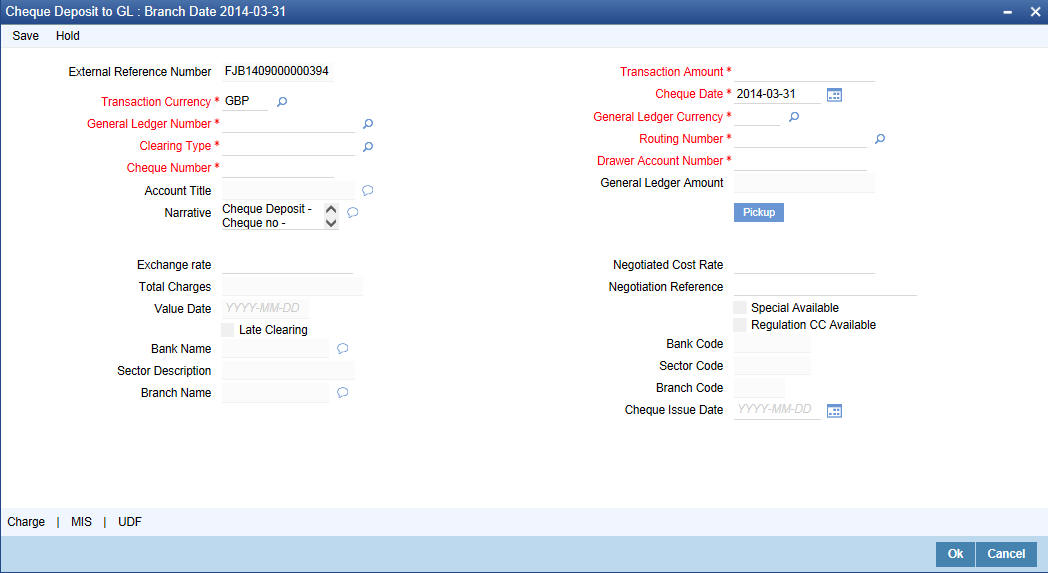
8.3.1 Depositing a Cheque into a GL
Your customer can deposit a cheque into a GL. You can capture this transaction through the ‘Cheque Deposit to GL’ screen. You can invoke this screen by typing ‘6520’ in the field at the top right corner of the Application tool bar and clicking on the adjoining arrow button.
Here you can capture the following details:
External Reference Number
The system generates a unique number based on the branch-specific sequence number generation logic and displays it here. The Host system identifies a branch transaction with the external reference number.
Transaction Amount
Specify the amount that needs to be deposited into the GL.
Transaction Currency
The system defaults the account currency as the transaction currency. However, you can modify it. The adjoining option list displays all the currency codes maintained in the system. You can select the appropriate one.
Cheque Date
The system defaults the system date as the cheque date. However, you can edit it from the adjoining calendar.The chosen date will then be seen in the ‘YYYYMMDD’ format.
General Ledger Number
Specify the GL into which the cheque is being deposited. The adjoining option list displays all the GL codes maintained in the system. You can select the appropriate one.
General Ledger Currency
Specify the currency of the GL into which the customer is depositing a cheque. The adjoining option list displays all the currency codes maintained in the system. You can select the appropriate one.
Clearing Type
Specify the product that is maintained in the system for the transaction. The adjoining drop-down list displays the outward and inward clearing products. For example:
- CLEARING OF CHEQUE-LOOC
- CLEARING OF CHEQUE-NAOC
Select the appropriate one.
Routing Number
Specify the routing number for cheque clearance.
Cheque Number
Specify the MICR number displayed on the cheque.
Drawer Account Number
Specify the account on which the cheque is drawn.
General Ledger Amount
The system adds the charges to the transaction amount and displays the total amount that will be credited to the GL.
Account Title
On specifying the account number, the corresponding account title (description) is displayed.
Narrative
The system defaults the narrative as 'Cheque Return - Cheque no - Cheque Number - Reject Reason'. Once you specify the 'Cheque Number' and 'Reject Reason', the system replaces the field values respectively on tabbing out from the field.
On clicking Pickup button, the system populates the values in all the callforms of the screen and clicking pickup button is mandatory if you make any changes to the Transaction amount and exchange rate after first pickup.
Exchange Rate
The system displays the exchange rate used to convert the transaction currency into GL currency. If the transaction currency is the same as the GL currency, the system will display the exchange rate as ‘1’.
Negotiated Cost Rate
Specify the negotiated cost rate that should be used for foreign currency transactions between the treasury and the branch. You need to specify the rate only when the currencies involved in the transaction are different. Otherwise, it will be a normal transaction.
Total Charges
The system displays the service charges applicable to the transaction.
Negotiation Reference Number
Specify the reference number that should be used for negotiation of cost rate, in foreign currency transaction. If you have specified the negotiated cost rate, then you need to specify the negotiated reference number also.
Note
Oracle FLEXCUBE books the online revaluation entries based on the difference in exchange rate between the negotiated cost rate and transaction rate.
Regulation CC Available
Check this box to indicate that the ‘Reg CC’ facility is available for the transaction.
Special Available
Check this box to indicate that the ‘special availability’ facility is available for the transaction.
Late Clearing
The system indicates whether the cheque has been cleared on the same day or is marked for late clearing.
Refer the section titled ‘Specifying instrument details’ and ‘Capturing instrument details’ under ‘Depositing a Cheque’ for further details about maintaining instrument details for this transaction.
Bank Name
The system displays the name of the clearing bank based on the routing number.
Branch Name
The system displays the branch in the clearing bank, based on the routing number.
Sector Code
The system displays the sector code of the clearing bank, based on the routing number.
8.3.2 Specifying Charge Details
Charge Details sub-screen allows you to capture charge related details for the transaction. Click on the ‘Charge Details’ tab to view the Charge Detailsscreen.Refer the section titled ‘Specifying charge details’ under ‘Withdrawing Cash against a Cheque’ for further details.
8.3.3 Specifying MIS Details
This block allows you to capture details pertaining to MIS. Click on the ‘MIS’ tab to invoke the MIS Details screen.Refer the section titled ‘Specifying the MIS details’ under ‘Withdrawing Cash against a Cheque’ for further details.
Click save icon to save the transaction.
The approver can fetch this transaction for his/her task list and authorize it. The authorization process is similar to that of cash deposit.
8.3.4 Specifying UDF Details
You can capture the UDF details under ‘UDF’ tab. Click the tab button ‘UDF’. The system displays the following details:
Refer the corresponding section under ‘Depositing Cash’ in the chapter ‘Cash Transactions’ of this User Manual for further details.
Refer the chapters titled ‘Transaction Workflow’ and ‘Common Operations’ in this User Manual for details on the authorization process.
8.4 Deposit an In-house Cheque
This section contains the following topics:
- Section 8.4.1, "Depositing an In-house Cheque"
- Section 8.4.2, "Specifying Charge Details"
- Section 8.4.3, "Specifying MIS Details"
- Section 8.4.4, "Specifying UDF Details"
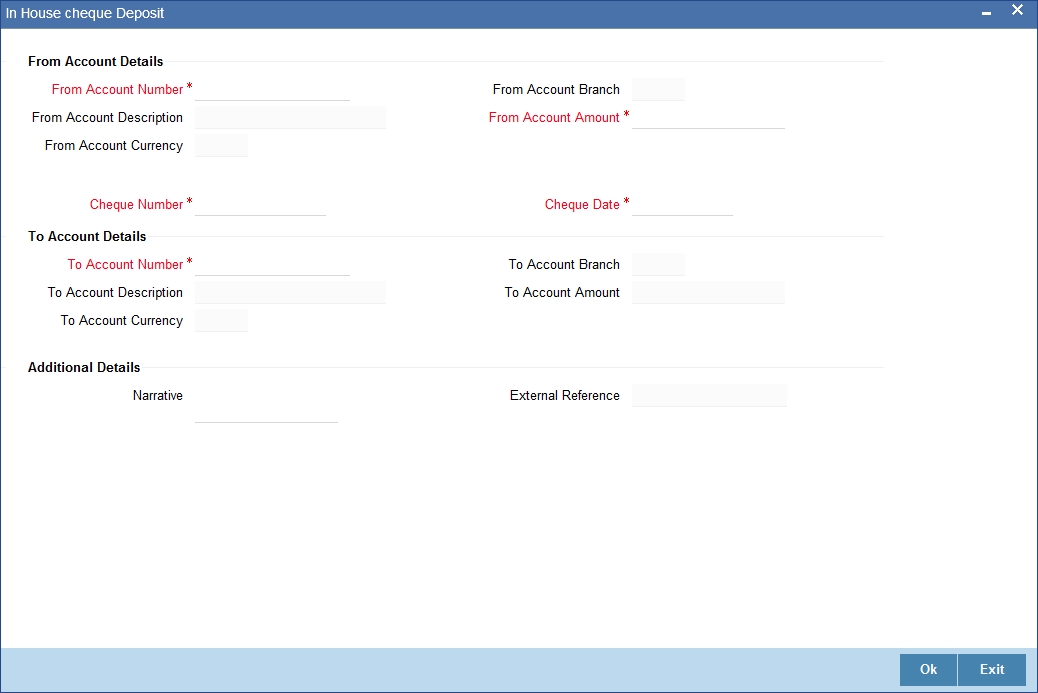
8.4.1 Depositing an In-house Cheque
You can capture deposit transactions for cheques issued by your bank to your customers through the ‘In House Cheque Deposit’ screen. You can invoke this screen by typing ‘LOCH’ in the field at the top right corner of the Application tool bar and clicking on the adjoining arrow button.
Here you can capture the following details:
From Account Details
From Account Number
Specify the drawer account number. The adjoining option list displays all the accounts maintained in the logged-in branch. You can choose the appropriate one.
To view the joint holder’s details of an account and the mode of operation maintained at the account level, place the cursor on the From Account Number field and press Ctrl+J. The system displays the ‘Joint Holder’ screen.
For more information on the ‘Joint Holder’ screen refer to the section ‘Joint Holder Maintenance’ in the Core User Manual.
From Account Branch
The system displays the current logged in branch. This means that you will be able to specify an account that resides in the current branch only.
From Account Description
The system displays the description of the account number chosen.
From Account Currency
The system displays the currency of the drawer account.
From Account Amount
Specify the transferrable amount in the currency associated with the From Account.
Cheque Number
Specify the cheque number.
Cheque Date
Specify the cheque date from the adjoining calendar.
External Reference Number
The system generates a unique number based on the branch-specific sequence number generation logic and displays it here. The Host system identifies a branch transaction with the external reference number.
Product
The system displays the code of the retail teller product that will be used in the Host for processing the transaction.
To Account Number
Specify the beneficiary account that needs to be credited with the cheque amount. The adjoining option list displays all the accounts maintained across different branches in the Host. You can choose the appropriate one. However, the option list will display the values only on specifying the ‘to account branch’ field.
If you have already specified the branch codes for the beneficiary account in the ‘To Account Branch’ field, the option list will display only those accounts that belong to the chosen branch.
To Account Branch
Specify the branch where the beneficiary account resides. The adjoining option list displays all the branch codes maintained in the system. You can choose the appropriate one.
To Account Currency
The system displays the currency of the beneficiary account.
Amount
Specify the amount for which the cheque has been drawn.
Narrative
Here, you can enter remarks for the transaction.
Cheque Number
Specify the number on the cheque that has been drawn.
Cheque Date
The system defaults the cheque date. However, you can modify it by clicking the adjoining button and selecting from the calendar.
Cheque Issue Date
Specify the issue date of the cheque. You can click on the adjoining calendar icon and select the appropriate date.
Note
If the difference between the ‘Cheque issue date’ and the ‘Cheque Date’ is greater than the ‘Cheque Stale Days’ maintained at the ‘Branch Parameters Maintenance’ screen, an error message stating that the cheque is a stale one will be displayed. However, stale cheque validation would not be done if the field ‘Cheque Stale days’ is not maintained at the ‘Branch Parameters Maintenance’ screen.
In the single stage flow, if there is an transaction level override or error during approval then the transaction will be moved to the pending queue. Without save action being initiated, the transaction will not be in pending queue.
On clicking Pickup button, the system populates the values in all the callforms of the screen and clicking pickup button is mandatory if you make any changes to the Transaction amount and exchange rate after first pickup.
Once you click ‘Pickup’ button once, then on amendment of xrate, amount, charge, pickup will be mandatory before save.
Clicking ‘Pickup’ button, the system defaults the following details:
Customer ID
The system displays the drawer customer’s CIF based on the value in the ‘From Account’ field.
From Amount
The system displays the amount debited from the beneficiary account.
To Amount
The system displays the amount credited to the beneficiary account.
Exchange Rate
The system displays the exchange rate for the transaction if the cheque currency and the transaction currency are not the same.
Reject Code
Specify the Reject Code. The adjoining option list displays the list of all the reject codes maintained in the system. You can choose the appropriate one.
Note
If you reject a cheque without giving the reject code then that cheque can be reused. However, if you enter the reject code then the cheque will be rejected.
8.4.2 Specifying Charge Details
This block allows you to capture charge related details for the transaction.
Refer the section titled ‘Specifying charge details’ under ‘Withdrawing Cash against a Cheque’ for further details.
8.4.3 Specifying MIS Details
This block allows you to capture details pertaining to MIS. Click on the ‘MIS’ tab to invoke the MIS Details screen.Refer the section titled ‘Specifying the MIS details’ under ‘Withdrawing Cash against a Cheque’ for further details.
8.4.4 Specifying UDF Details
You can capture the UDF details under ‘UDF’ tab. Click the tab button ‘UDF’ to view the UDF Details screen. Refer the section titled ‘Specifying the MIS details’ under ‘Withdrawing Cash against a Cheque’ for further details.
Click save icon to save the transaction. On saving, the system checks whether the accounts mentioned in the ‘from’ and ‘to’ leg of the transaction belong to the same netting group or not. If they belong to the same netting group, the entries will not be posted. Instead the transaction will be logged for the netting batch. On authorisation, the transaction will be made available for the netting batch if logged for netting batch.
Refer the section ‘Maintaining Netting Group’ in the chapter ‘Accounts for Inter-Branch Transactions’ in the Core Services User Manual for further details about netting.
The approver can fetch this transaction for his/her task list and authorize it. The authorization process is similar to that of cash deposit.
The system displays overrides on a separate window. You can either accept or reject the overrides and proceed with saving the transaction. If you click ‘Reject’ button, the screen will remain in the enrichment stage for you to make changes to charge elements. Then if you click ‘Save’, the system will initiate reversal of the transaction without reversing the charges.
Refer the corresponding section under ‘Depositing Cash’ in the chapter ‘Cash Transactions’ of this User Manual for further details.
Refer the chapters titled ‘Transaction Workflow’ and ‘Common Operations’ in this User Manual for details on the authorization process
8.5 Tracking a Cheque Return
This section contains the following topics:
8.5.1 Invoking Cheque Return Screen
A cheque transaction may not be successfully completed for want of funds in the drawer account or if the drawer account is invalid. You can cancel a cheque issued on such an account through the ‘Cheque Return’ screen. You can invoke this screen by typing ‘6560’ in the field at the top right corner of the Application tool bar and clicking on the adjoining arrow button.

Here you can capture the following details:
External Reference Number
The system generates a unique number based on the branch-specific sequence number generation logic and displays it here. The Host system identifies a branch transaction with the external reference number.
Transaction Branch
The current logged branch code is displayed here.
Remitter Account
Specify the remitter account number. Alternatively, you can select remitter account number from the option list. The list displays all valid remitter account number maintained in the system.
Instrument Number
Specify the instrument number. Alternatively, you can select instrument number from the option list. The list displays all valid instrument number maintained in the system.
Reject Code
Specify the reject code. Alternatively, you can select reject code from the option list. The list displays all valid reject code maintained in the system.
Reject Reason
The system displays the reason for the selected reject code.
Drawer Account Description
The system displays the description of the specified drawer account number based on the details maintained at ‘Customer Account Maintenance’ level.
Routing No
Once the drawee account number is specified, you can select the routing number from the adjoining option list. Alternately, you can choose a routing number along with the Branch codes and Bank Codes from the adjoining list and view the corresponding cheque number and account number.
Narrative
The system defaults the narrative as 'Cheque Return - Cheque no - Cheque Number - Reject Reason'. Once you specify the 'Cheque Number' and 'Reject Reason', the system replaces the field values respectively on tabbing out from the field.
After specifying the mandatory details, click ‘Query’ button, to display the following values:
- Beneficiary Account
- Account Description
- Cheque Return Amount
- Charge Amount
- Instrument Currency
- Instrument Amount
- Value Date
To view the joint holder’s details of an account and the mode of operation maintained at the account level, place the cursor on the Drawee Accounts Number field and press Ctrl+J. The system displays the ‘Joint Holder’ screen.
For more information on the ‘Joint Holder’ screen refer to the section ‘Joint Holder Maintenance’ in the Core User Manual.
8.5.2 Charge Button
System displays the following details under ‘Charge Details’ section:
- Charge Component
- Charge Currency
- Charge in Local Currency
- Exchange Rate
Waiver
Check this box to waive the charge.
Charge Amount
System displays the calculated charge amount here. You can amend this, if required.
Note
If you reject a cheque without giving the reject code then that cheque can be reused. However, if you enter the reason code then the cheque will be rejected.
In the single stage flow, if there is an transaction level override or error during approval then the transaction will be moved to the pending queue. Without save action being initiated, the transaction will not be in pending queue.
On clicking Pickup button, the system populates the values in all the callforms of the screen and clicking pickup button is mandatory if you make any changes to the Transaction amount and exchange rate after first pickup.
Once you click ‘Pickup’ button once, then on amendment of xrate, amount, charge, pickup will be mandatory before save. On pick up, the fields that are currently enabled in the enrich stage will alone be retained as enabled fields.
Refer the chapters titled ‘Transaction Workflow’ and ‘Common Operations’ in this User Manual for details on the authorization process.
8.6 Bulk Cheque Return
This section contains the following topics:
- Section 8.6.1, "Cheque Return Batch"
- Section 8.6.2, "Maintaining Function Input Details"
- Section 8.6.3, "Triggering Cheque Return Processing Batch"
8.6.1 Cheque Return Batch
You can process the cheque return in bulk using an intraday batch in Oracle FLEXCUBE. For this, you need to first maintain the batch as an intraday batch in the system.
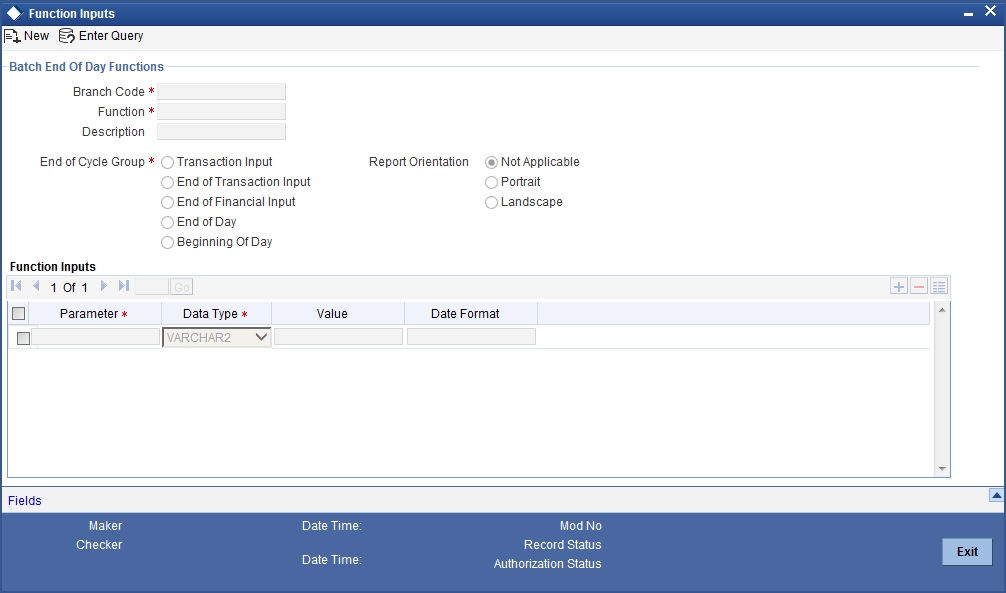
8.6.2 Maintaining Function Input Details
You need to maintain the required batch program in 'Batch EOD Function Input' screen. To invoke this screen, type BADEODFE’ in the field at the top right corner of the Application tool bar and click the adjoining arrow button.
Specify the following details:
Function ID
Specify CGREJECT. This is the function ID for running the intraday batch for cheque return.
End of Cycle Group
Select ‘Transaction input’.
Report Orientation
Select ‘Not Applicable’.
Function Input
You need to map the following parameters.
Parameter |
Data Type |
Value |
ACTION CODE |
VARCHAR2 |
RETURN |
EXTERNAL SYSTEM |
VARCHAR2 |
Name of the external system for which the cheque returns are being uploaded |
FUNCTION ID |
VARCHAR2 |
6560 |
Once you have specified the details, save the maintenance.
For further information on this screen, refer to the section 'Specifying Data Values for EOD Functions' in chapter ‘Automated End of Cycle Operations’ of the Automated End of Day user manual.
8.6.3 Triggering Cheque Return Processing Batch
You can invoke 'Intra Day Batch Start' screen by typing 'BABIDBAT' in the field at the top right corner of the Application tool bar and clicking the adjoining arrow button.
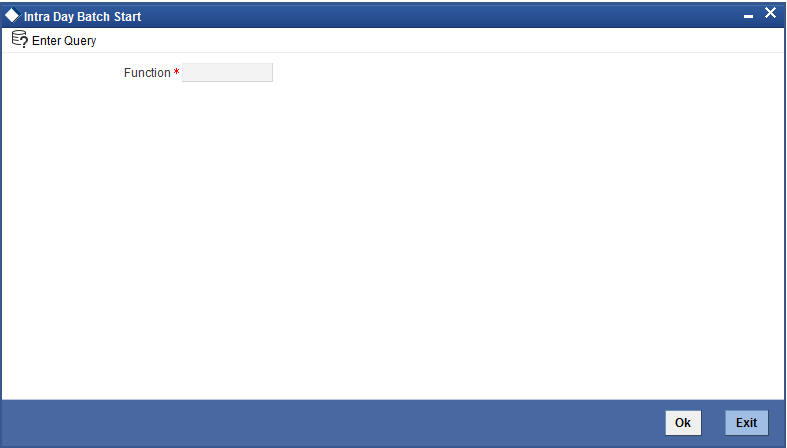
Select the function ID of the batch to be executed. Click 'OK' button. The system triggers the batch process.
The batch will pick up the unprocessed cheque return records and start processing the records one by one.
Before passing the cheque return record to the main processing routine, the system validates the entered data against the data stored in the database. If the entered data does not match with the data stored in the database, the system logs the error and proceeds to the next record.
You can input the charge component and charge amount/waiver for a cheque return. The charge component thus entered must be maintained in the ‘Arc Maintenance’ screen for the charge product mapped to the clearing product of the cheque being returned. The charge product, which should be an RT product, is mapped to the clearing product using the screen ‘Online Charge Product Maintenance’ (STDCHGMN). If it is not maintained, then the system will log appropriate error for the particular cheque return and proceed to the next cheque return record.
If you do not input any charge component for the cheque, then the system will check if any charge component has been maintained in 'Arc Maintenance' screen for the charge product mapped to the clearing product. If it is maintained, then system will pick that charge component and amount and process the record.
8.7 Querying Cheque Status
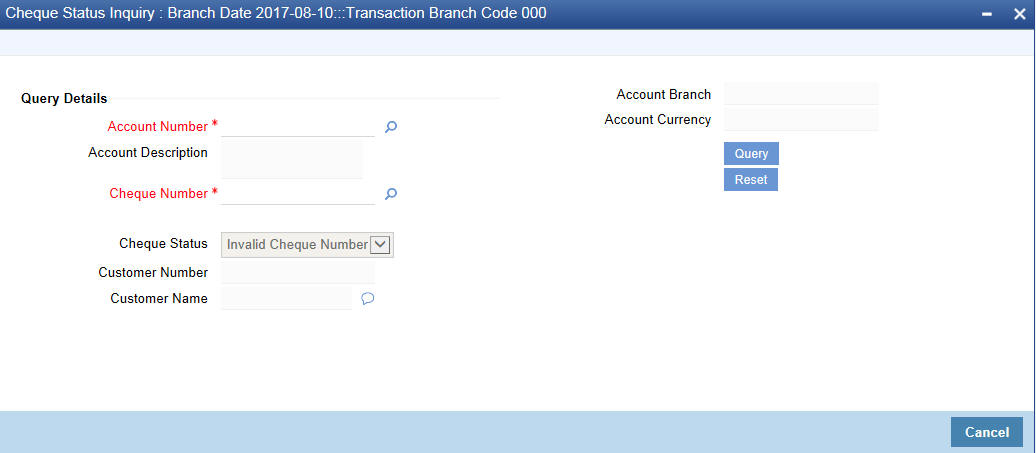
You can query the details of a cheque by specifying the customer’s account number and cheque number in the ‘Cheque Status Inquiry’ screen. You can invoke this screen by typing ‘CQIN’ in the field at the top right corner of the Application tool bar and clicking on the adjoining arrow button.
Here you can capture the following details:
Account Number
Specify the account number. The adjoining option list displays all the valid account numbers maintained in the account branch selected. You can choose the appropriate one.
To view the joint holder’s details of an account and the mode of operation maintained at the account level, place the cursor on the Account Number field and press Ctrl+J. The system displays the ‘Joint Holder’ screen.
For more information on the ‘Joint Holder’ screen refer to the section ‘Joint Holder Maintenance’ in the Core User Manual.
Account Branch
Specify the branch code. The adjoining option list displays all the valid branch codes maintained in the system. You can choose the appropriate one.
Account Description
The system displays a brief description on the account.
Account Currency
The currency of the chosen account is displayed here.
Cheque Number
Specify the cheque number. The adjoining option list displays all the valid cheque numbers maintained in the account number selected. You can choose the appropriate one.Click ‘Reset’ button once you specify the account number and cheque number. The following details will be displayed in the screen:
- Account Title
- Customer Number
- Account Currency
- Cheque Status
Note
Validation will be done to check if the account number specified is a valid number.
8.8 Inward Cheque Return
This section contains the following topic:
8.8.1 Invoking Inward Cheque Return Screen
In case of handling returns for successfully processed Inward clearing transactions, the system will first reverse the entries that got passed as part of Inward clearing transaction and pass the newly introduced reject entries as part of REVR event. You can return successfully processed inward clearing transactions using ‘Inward Cheque Return’ screen. You can invoke this screen by typing ‘6570’ in the field at the top right corner of the Application tool bar and clicking on the adjoining arrow button.
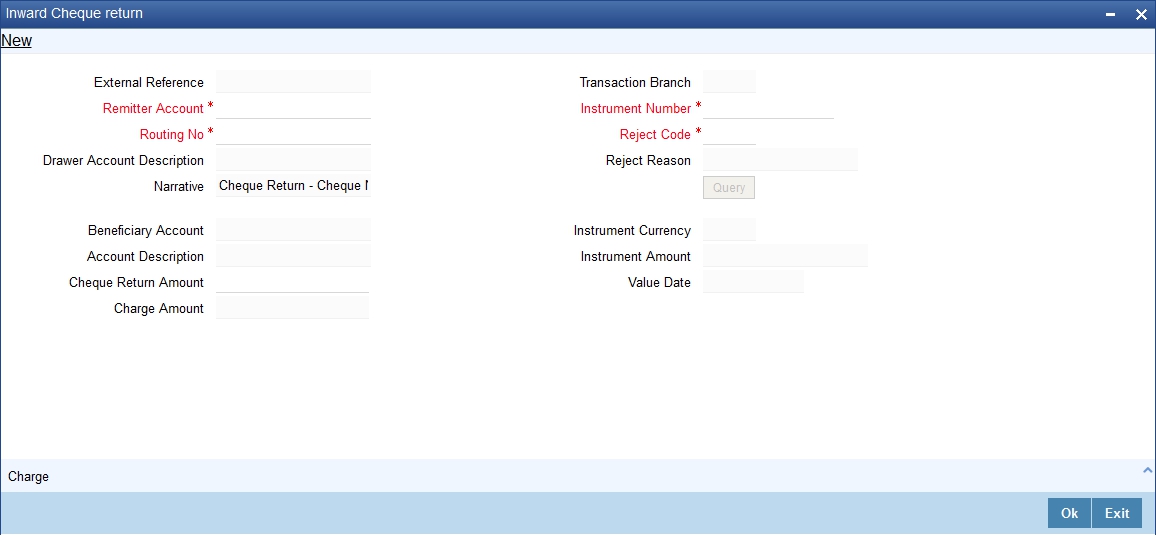
You can specify the following details:
External Reference
The system displays the external reference number based on the branch specific sequence number by which the host identifies the branch transaction.
Remitter Account
Specify the drawer account number, Alternatively, you can select remitter account from the option list. The list displays all valid drawer account number maintained in the system.
Routing No
Specify the routing number. Alternatively, you can select routing number from the option list. The list displays all valid routing number maintained in the system.
Drawer Account Description
The system displays description for the specified remitter account.
Transaction Branch
The system displays the current logged in branch details.
Instrument Number
Specify the cheque number that needs to be tracked to return. Alternatively, you can select instrument number from the option list. The list displays all valid instrument number maintained in the system.
Reject Code
Specify the reject code. Alternatively, you can select reject code from the option list. The list displays all valid reject code maintained in the system.
Reject Reason
Specify the reason for reject.
Narrative
Specify the details about the cheque number and the reject reason for the cheque return.
Beneficiary Account
The system displays the beneficiary details specified for the cheque.
Account Description
The system displays the description of the beneficiary account number.
Cheque Return Amount
The system displays the amount of cheque returned.
Charge Amount
The system displays the charge applicable for the charge return.
Instrument Currency
The system displays the currency of the instrument.
Instrument Amount
The system displays the amount of the instrument.
Value Date
The system displays the value date of the instrument.
8.9 Issue a TC against an Account
This section contains the following topics:
- Section 8.9.1, "Selling a TC against an Account"
- Section 8.9.2, "Specifying TC Denomination Details"
- Section 8.9.3, "Specifying Charge Details"
- Section 8.9.4, "Specifying MIS Details"
- Section 8.9.5, "Specifying UDF Details"
8.9.1 Selling a TC against an Account
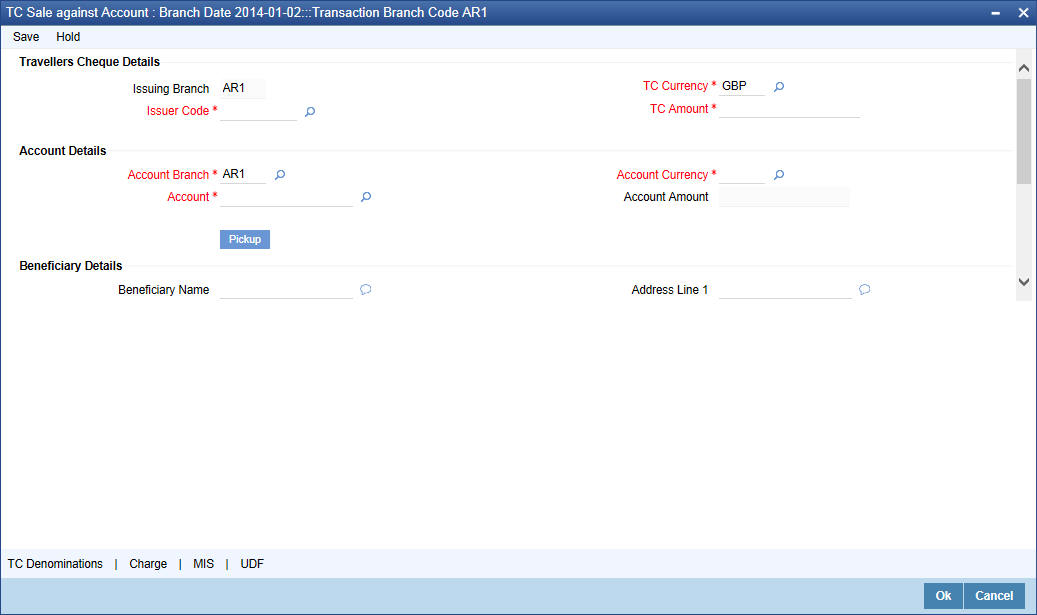
You can issue a Traveller’s Cheque (TC) for your customer against his/her savings account. In order to capture this transaction, you need to invoke the ‘TC Sale (Against A/C’) screen by typing ‘1009’ in the field at the top right corner of the Application tool bar and clicking on the adjoining arrow button.
Here, you can capture the following details:
External Reference Number
The system generates a unique number based on the branch-specific sequence number generation logic and displays it here. The Host system identifies a branch transaction with the external reference number.
Issuing Branch
The current logged – in branch is displayed.
Instrument Type
The instrument type corresponding to a TC issued to customers against their savings account is displayed here.
Instrument Status
The system displays the event that is triggered for the transaction. This corresponds to the status of the instrument.
Issuer Code
Specify the issuer code to validate the TC details for sale from the adjoining option list.
Account Branch
Specify the branch in which the customer account is maintained for issuing the TC from the adjoining option list.
Account
Specify the customer account against which you are issuing the TC. The adjoining option list displays all the accounts maintained in the system. Select the appropriate one.
To view the joint holder’s details of an account and the mode of operation maintained at the account level, place the cursor on the Account field and press Ctrl+J. The system displays the ‘Joint Holder’ screen.
For more information on the ‘Joint Holder’ screen refer to the section ‘Joint Holder Maintenance’ in the Core User Manual.
Account Currency
The account currency of the specified customer account is displayed here.
TC Currency
The transaction currency of the specified customer account is displayed here.
TC Amount
Specify the amount for which the TC is being issued.
Narrative
Here, you can enter remarks about the transaction.
Click the save icon to go to the next stage.
In the single stage flow, if there is an transaction level override or error during approval then the transaction will be moved to the pending queue. Without save action being initiated, the transaction will not be in pending queue.
On clicking Pickup button, the system populates the values in all the callforms of the screen and clicking pickup button is mandatory if you make any changes to the Transaction amount and exchange rate after first pickup.
Once you click ‘Pickup’ button once, then on amendment of xrate, amount, charge, pickup will be mandatory before save. Clicking ‘Pickup’ button, the system defaults the following details:
Related Customer ID
The customer identification number of the payment initiator is displayed here based on the chosen account number.
Customer Name
The customer name pertaining to the related customer ID is displayed here.
Exchange Rate
The system displays the exchange rate used to convert the transaction currency into account currency. If the transaction currency is the same as the account currency, the system will display the exchange rate as ‘1’.
Total Charge
The system computes the charges applicable for the transaction and displays it here.
Beneficiary Name
Specify the beneficiary name.
Beneficiary Address
Specify the beneficiary address.
Account Amount
The system displays the amount to be debited from the account (in the account currency) after calculating the applicable charges. This amount depends on the charge method – whether inclusive or exclusive.
Recalc
Click ‘Recalc’ button to update amount/charge details.
8.9.2 Specifying TC Denomination Details
In this block you can enter the TC denomination details through the following fields:
TC Description
Select the TC denomination from the adjoining option list. The list displays all the TC denominations maintained in the branch system.
TC Denomination
The number of available units in the denomination is displayed.
Currency
The TC Currency is displayed here.
Count
Enter the number of TCs against each denomination in Count.
Series
Select the TC series from the option list.
Start Number
Specify the starting serial number of TC against each denomination and press TAB.
The following details are displayed:
End Number
The system displays ending serial number of TCs against each denomination based on the TC count you have specified.
TC Amount
The system displays the TC amount based on the value of denomination and the number of TCs against that denomination.
System Count
The count of denominations available in the system is displayed.
8.9.3 Specifying Charge Details
This block allows you to capture charge related details. Click on the ‘Charges’ to invoke the Charge Details screen.Refer the section titled ‘Specifying charge details’ under ‘Withdrawing Cash against a Cheque’ for further details.
8.9.4 Specifying MIS Details
This block allows you to capture details pertaining to MIS. Click on the ‘MIS’ tab to invoke the MIS Details screen.
Refer the section titled ‘Specifying MIS details’ under ‘Withdrawing Cash against a Cheque’ for further details.
8.9.5 Specifying UDF Details
This block allows you to capture details pertaining to UDF. Click on the ‘UDF’ tab to invoke the UDF Details screen.
Refer the section titled ‘Specifying the UDF details’ under ‘Withdrawing Cash against a Cheque’ for further details.
Click save icon to save the transaction.
The approver can fetch this transaction for his/her task list and authorize it. The authorization process is similar to that of cash deposit.
Note
Depending on the ‘Display Type’ selected for customer / account in ‘Instruction Maintenance’ screen, the instruction will be displayed at the time of saving the input stage and authorizing the transaction.
For more details about viewing customer / account instructions, refer the section titled ‘Viewing Customer / Account Instructions on ‘F6’ Key-Press’ and Viewing Customer / Account Instruction Details in Override Screen’ in this user manual.
Refer the corresponding section under ‘Depositing Cash’ in the chapter ‘Cash Transactions’ of this User Manual for further details.
Refer the chapters titled ‘Transaction Workflow’ and ‘Common Operations’ in this User Manual for details on the authorization process.
8.10 Issue a TC against a GL
This section contains the following topics:
- Section 8.10.1, "Selling a TC against a GL"
- Section 8.10.2, "Specifying TC Denomination Details"
- Section 8.10.3, "Specifying Charge Details"
- Section 8.10.4, "Specifying MIS Details"
- Section 8.10.5, "Specifying UDF Details"
8.10.1 Selling a TC against a GL
You can issue a Traveller’s Cheque (TC) for your customer against General Ledger account. In order to capture this transaction, you need to invoke the ‘TC Sale (Against GL)’ screen by typing ‘8205’ in the field at the top right corner of the Application tool bar and clicking on the adjoining arrow button.
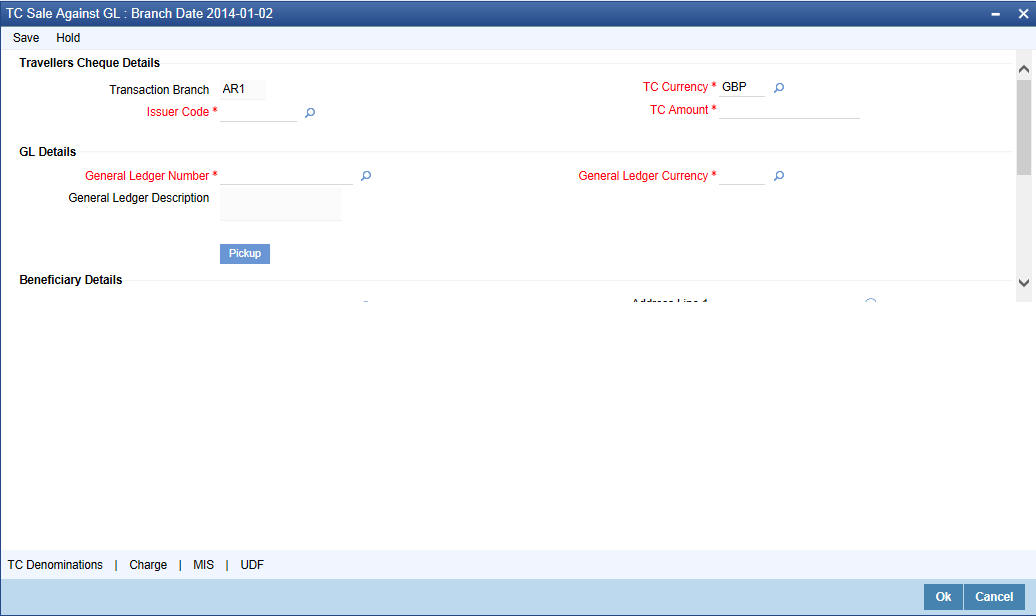
Here, you can capture the following details:
External Reference Number
The system generates a unique number based on the branch-specific sequence number generation logic and displays it here. The Host system identifies a branch transaction with the external reference number.
Issuer Code
Specify the issuer code to validate the TC details for sale from the adjoining option list.
Branch
The current logged – in branch is displayed.
Instrument Type
The instrument type corresponding to a TC issued against GL account is displayed here.
Instrument Status
The system displays the event that is triggered for the transaction. This corresponds to the status of the instrument.
TC Currency
Specify the currency of the TC.
General Ledger Currency
Specify the currency of the GL against which the TC is being issued. The adjoining option list displays all the currency codes maintained in the system. Choose the appropriate one.
TC Amount
Specify the amount for which the TC is being issued.
General Ledger Number
Specify the GL against which you are issuing the TC. The adjoining option list displays all the GL accounts maintained in the system. Select the appropriate one.
GL Description
The system displays the description of the GL account number chosen.
Narrative
Here, you can enter remarks about the transaction.
On clicking Pickup button, the system populates the values in all the callforms of the screen and clicking pickup button is mandatory if you make any changes to the Transaction amount and exchange rate after first pickup.
Once you click ‘Pickup’ button once, then on amendment of xrate, amount, charge, pickup will be mandatory before save. Clicking ‘Pickup’ button, the system defaults the following details:
Customer Number
The customer identification number of the payment initiator is displayed here based on the chosen account number.
Exchange Rate
The system displays the exchange rate used to convert the TC currency into GL account currency. If the TC currency is the same as the account currency, the system will display the exchange rate as ‘1’.
Total Charge
The system computes the charges applicable for the transaction and displays it here.
Total Amount
The system displays the amount to be debited from the account (in the account currency) after calculating the applicable charges. This amount depends on the charge method – whether inclusive or exclusive.
Beneficiary Name
Specify the name of the beneficiary in whose favour the TC is being drawn.
Beneficiary Address
Specify the address of the beneficiary.
Recalc
Click ‘Recalc’ button to update amount/charge details.
8.10.2 Specifying TC Denomination Details
In this block you can enter the TC denomination details.
Refer the section titled ‘Specifying TC Denomination Details’ under ‘Selling a TC against an Account’ for further details.
8.10.3 Specifying Charge Details
This block allows you to capture charge related details. Click on the ‘Charges’ to invoke the Charge Details screen.
Refer the section titled ‘Specifying charge details’ under ‘Withdrawing Cash against a Cheque’ for further details.
8.10.4 Specifying MIS Details
This block allows you to capture details pertaining to MIS. Click on the ‘MIS’ tab to invoke the MIS Details screen.
Refer the section titled ‘Specifying MIS details’ under Withdrawing Cash against a Cheque’’ for further details.
8.10.5 Specifying UDF Details
This block allows you to capture details pertaining to UDF. Click on the ‘UDF’ tab to invoke the UDF Details screen:
Refer the section titled ‘Specifying the UDF details’ under Withdrawing Cash against a Cheque’’ for further details.
Click save icon to save the transaction.
The approver can fetch this transaction for his/her task list and authorize it. The authorization process is similar to that of cash deposit.
Refer the corresponding section under ‘Depositing Cash’ in the chapter ‘Cash Transactions’ of this User Manual for further details.
Refer the chapters titled ‘Transaction Workflow’ and ‘Common Operations’ in this User Manual for details on the authorization process.
8.11 Issue a TC to a Walk-in Customer
This section contains the following topics:
- Section 8.11.1, "Selling a TC to a Walk-in Customer"
- Section 8.11.2, "Specifying TC Denomination Details"
- Section 8.11.3, "Specifying Currency Denomination Details"
- Section 8.11.4, "Specifying Charge Details"
- Section 8.11.5, "Specifying MIS Details"
- Section 8.11.6, "Specifying UDF Details"
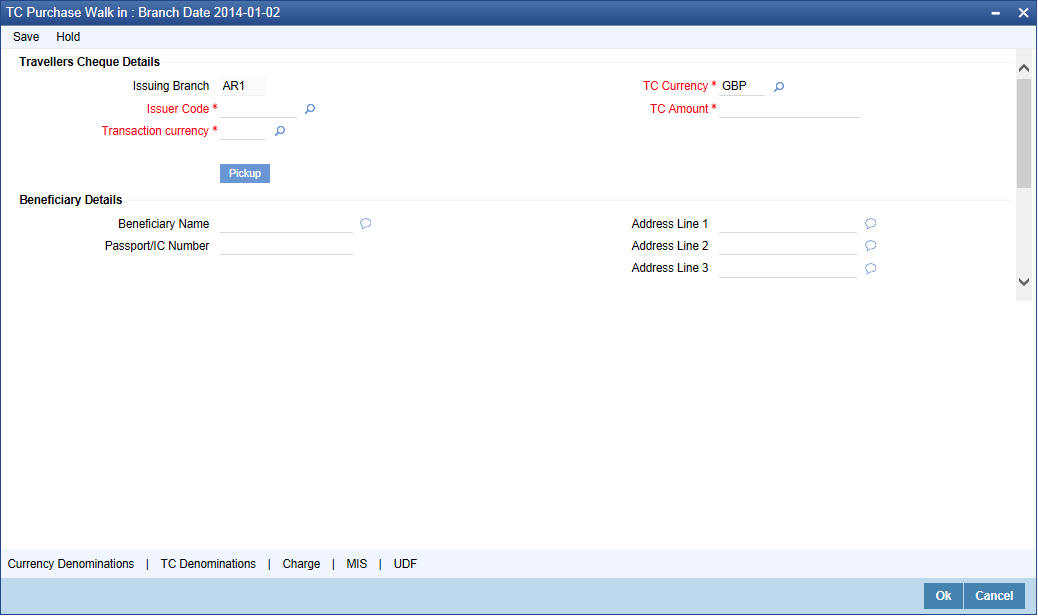
8.11.1 Selling a TC to a Walk-in Customer
You can sell a TC to any walk-in customer through the ‘TC Sale (Walk-In)’ screen. You can invoke this screen by typing ‘8204’ in the field at the top right corner of the Application tool bar and clicking on the adjoining arrow button.

Here, you can capture the following details:
External Reference Number
The system generates a unique number based on the branch-specific sequence number generation logic and displays it here. The Host system identifies a branch transaction with the external reference number.
Branch
The current logged – in branch is displayed.
Issuer Code
Specify the issuer code to validate the TC details for sale from the adjoining option list.
Instrument Type
The instrument type corresponding to a TC issued to walk-in customers is displayed here.
Instrument Status
The system displays the event that is triggered for the transaction. This corresponds to the status of the instrument.
Transaction Date
Enter the date of issue of the TC. This is deemed to be the application date by default, and can be changed if necessary.
TC Currency
Specify the currency in which the TC is being issued.
Account Currency
The system defaults the branch currency as the account currency. However you can change it. The adjoining option list displays all the currency codes maintained in the system. You can select the appropriate code.
TC Amount
Specify the amount for which the TC is being issued.
Narrative
Here, you can enter remarks about the transaction.
In the single stage flow, if there is an transaction level override or error during approval then the transaction will be moved to the pending queue. Without save action being initiated, the transaction will not be in pending queue.
On clicking Pickup button, the system populates the values in all the callforms of the screen and clicking pickup button is mandatory if you make any changes to the Transaction amount and exchange rate after first pickup.
Once you click ‘Pickup’ button once, then on amendment of xrate, amount, charge, pickup will be mandatory before save. On pick up, the fields that are currently enabled in the enrich stage will alone be retained as enabled fields.
Clicking ‘Pickup’ button, the system defaults the following details:
Exchange Rate
The system displays the exchange rate used to convert the TC currency into transaction currency. If the TC currency is the same as the transaction currency, the system will display the exchange rate as ‘1’.
TC Amount in A/C Currency
Specify the TC amount in the TC currency.
Total Charge
The system computes the charges applicable for the transaction and displays it here.
Actual Amount
The system adds the charge amount to the TC amount and displays the total transaction amount.
Recalc
Click ‘Recalc’ button to update amount/charge details.
8.11.2 Specifying TC Denomination Details
Click ‘TC Denominations’ to enter the TC denomination details.
Refer the section titled ‘Specifying TC Denomination Details’ under ‘Selling a TC against an Account’ for further details.
8.11.3 Specifying Currency Denomination Details
Click ‘Currency Denominations’, to capture details of the currency denominations involved in the transaction.
Refer the section titled ‘Specifying denomination details’ under ‘Withdrawing Cash against a Cheque’ for further details.
8.11.4 Specifying Charge Details
This block allows you to capture charge related details. Click on the ‘Charges’ to invoke the Charge Details screen:
Refer the section titled ‘Specifying charge details’ under ‘Withdrawing Cash against a Cheque’ for further details.
8.11.5 Specifying MIS Details
This block allows you to capture details pertaining to MIS. Click on the ‘MIS’ tab to invoke the MIS Details screen.
Refer the section titled ‘Specifying MIS details’ under ‘Withdrawing Cash against a Cheque’ for further details.
8.11.6 Specifying UDF Details
This block allows you to capture details pertaining to UDF. Click on the ‘UDF’ tab to invoke the UDF Details screen. Refer the section titled ‘Specifying the UDF details’ under ‘Withdrawing Cash against a Cheque’ for further details.
Click save icon to save the transaction.
The approver can fetch this transaction for his/her task list and authorize it. The authorization process is similar to that of cash deposit.
Refer the corresponding section under ‘Depositing Cash’ in the chapter ‘Cash Transactions’ of this User Manual for further details.
Refer the chapters titled ‘Transaction Workflow’ and ‘Common Operations’ in this User Manual for details on the authorization process.
8.12 Purchase a TC against an Account
This section contains the following topics:
- Section 8.12.1, "Purchasing a TC against an Account"
- Section 8.12.2, "Specifying TC Denomination Details"
- Section 8.12.3, "Specifying Charge Details"
- Section 8.12.4, "Specifying MIS Details"
- Section 8.12.5, "Specifying UDF Details"
8.12.1 Purchasing a TC against an Account
You can purchase a TC through the ‘TC Purchase (Against A/C)’ screen. You can invoke this screen by typing ‘1409’ in the field at the top right corner of the Application tool bar and clicking on the adjoining arrow button.
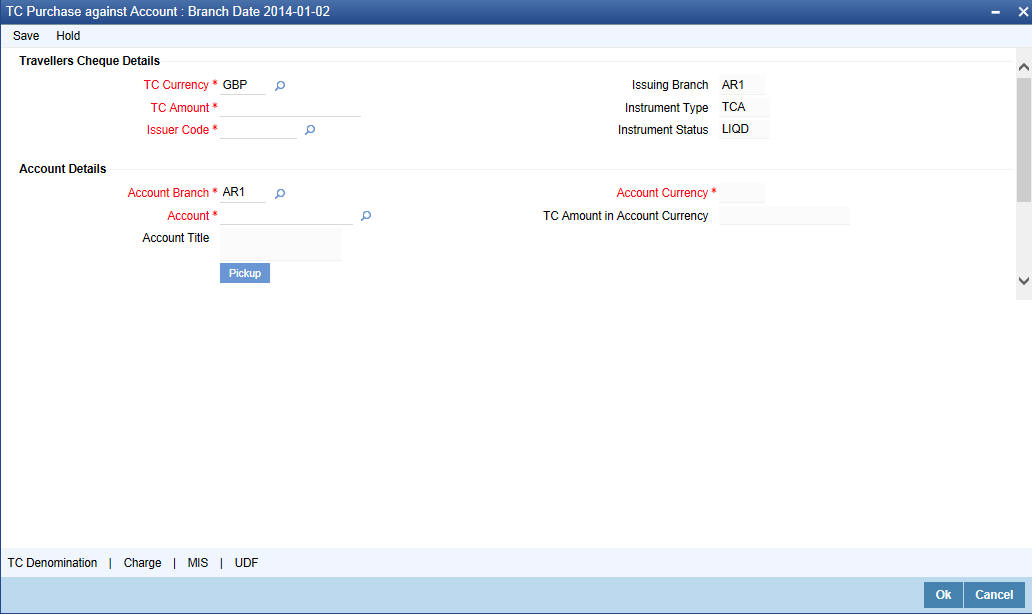
Here, you can capture the following details:
External Reference Number
The system generates a unique number based on the branch-specific sequence number generation logic and displays it here. The Host system identifies a branch transaction with the external reference number.
Issuing Branch
The current logged – in branch is displayed.
Account Number
Specify the customer account against which you are purchasing the TC. The adjoining option list displays all the accounts maintained in the system. Select the appropriate one.
To view the joint holder’s details of an account and the mode of operation maintained at the account level, place the cursor on the Account Number field and press Ctrl+J. The system displays the ‘Joint Holder’ screen.
For more information on the ‘Joint Holder’ screen refer to the section ‘Joint Holder Maintenance’ in the Core User Manual.
Account Branch
Specify the Branch in which the customer account needs to be selected for issuing the TC. The adjoining option list displays all the branches maintained in the system. Select the appropriate one.
TC Currency
Specify the currency of the TC.
TC Amount
Specify the amount as indicated on the TC instrument being purchased.
Issuer Code
Specify the issuer code to validate the TC details for sale from the adjoining option list.
Account Currency
The transaction currency of the chosen customer account is displayed here.
Narrative
Here, you can enter remarks about the transaction.
On clicking Pickup button, the system populates the values in all the callforms of the screen and clicking pickup button is mandatory if you make any changes to the Transaction amount and exchange rate after first pickup.
Once you click ‘Pickup’ button once, then on amendment of xrate, amount, charge, pickup will be mandatory before save. Clicking ‘Pickup’ button, the system defaults the following details:
Related Customer ID
The system displays the customer ID based on the account specified.
Customer Name
Customer name pertaining to the Related customer ID will be defaulted and displayed here.
TC Amount in A/C Currency
Specify the TC amount in the TC currency.
Exchange Rate
The system displays the exchange rate used to convert the TC currency into account currency. If the TC currency is the same as the account currency, the system will display the exchange rate as ‘1’.
Total Charge
The system computes the charges applicable for the transaction and displays it here.
Total Amount
The system deducts the charge amount from the TC amount and displays the total transaction amount.
In case you change the TC amount, you will have to click the ‘Recalc’ button to re-compute the total transaction amount and the total amount.
8.12.2 Specifying TC Denomination Details
In this block you can enter the TC denomination details.
Refer the section titled ‘Specifying TC Denomination Details’ under ‘Selling a TC against an Account’ for further details.
8.12.3 Specifying Charge Details
This block allows you to capture charge related details. Click on the ‘Charges’ to invoke the Charge Details screen. Refer the section titled ‘Specifying charge details’ under ‘Withdrawing Cash against a Cheque’ for further details.
8.12.4 Specifying MIS Details
This block allows you to capture details pertaining to MIS. Click on the ‘MIS’ tab to invoke the MIS Details screen.
Refer the section titled ‘Specifying MIS details’ under ‘Withdrawing Cash against a Cheque’ for further details.
8.12.5 Specifying UDF Details
This block allows you to capture details pertaining to MIS. Click on the ‘MIS’ tab to invoke the UDF Details screen.
Refer the section titled ‘Specifying the UDF details’ under ‘Withdrawing Cash against a Cheque’ for further details.
Click save icon to save the transaction.
The approver can fetch this transaction for his/her task list and authorize it. The authorization process is similar to that of cash deposit.
Note
Depending on the ‘Display Type’ selected for customer / account in ‘Instruction Maintenance’ screen, the instruction will be displayed at the time of saving the input stage and authorizing the transaction.
For more details about viewing customer / account instructions, refer the section titled ‘Viewing Customer / Account Instructions on ‘F6’ Key-Press’ and Viewing Customer / Account Instruction Details in Override Screen’ in this user manual.
Refer the corresponding section under ‘Depositing Cash’ in the chapter ‘Cash Transactions’ of this User Manual for further details.
Refer the chapters titled ‘Transaction Workflow’ and ‘Common Operations’ in this User Manual for details on the authorization process.
8.13 Purchase a TC from a Walk-in Customer
This section contains the following topics:
- Section 8.13.1, "Purchasing a TC from a Walk-in Customer"
- Section 8.13.2, "Specifying TC Denomination Details"
- Section 8.13.3, "Specifying Currency Denomination Details"
- Section 8.13.4, "Specifying Charge Details"
- Section 8.13.5, "Specifying MIS Details"
- Section 8.13.6, "Specifying UDF Details"
8.13.1 Purchasing a TC from a Walk-in Customer
You can liquidate a TC from a walk-in customer and give him/her the equivalent amount in cash. In order to capture such a transaction, invoke the ‘TC Purchase (Walk - In)’ screen. You can invoke this screen by typing ‘8003’ in the field at the top right corner of the Application tool bar and clicking on the adjoining arrow button.
Here, you can capture the following details:
External Reference Number
The system generates a unique number based on the branch-specific sequence number generation logic and displays it here. The Host system identifies a branch transaction with the external reference number.
Issuing Branch
The current logged – in branch is displayed.
Issuer Code
Specify the issuer code to validate the TC details for sale from the adjoining option list.
Instrument Type
The instrument type corresponding to a TC issued against GL account is displayed here.
Instrument Status
The system displays the event that is triggered for the transaction. This corresponds to the status of the instrument.
TC Currency
Specify the currency of the TC.
Account Currency
The system defaults the branch currency as the account currency. However you can change it. The adjoining option list displays all the currency codes maintained in the system. You can select the appropriate code.
TC Amount
Specify as indicated on the TC instrument being purchased.
Narrative
Here, you can enter remarks about the transaction.
Beneficiary Name
Specify the name of the beneficiary of the transaction.
Beneficiary Address
Specify the address of the beneficiary of the transaction.
In the single stage flow, if there is an transaction level override or error during approval then the transaction will be moved to the pending queue. Without save action being initiated, the transaction will not be in pending queue.
On clicking Pickup button, the system populates the values in all the callforms of the screen and clicking pickup button is mandatory if you make any changes to the Transaction amount and exchange rate after first pickup.
Once you click ‘Pickup’ button once, then on amendment of xrate, amount, charge, pickup will be mandatory before save.
Clicking ‘Pickup’ button, the system defaults the following details:
Exchange Rate
The system displays the exchange rate used to convert the TC currency into transaction currency. If the TC currency is the same as the transaction currency, the system will display the exchange rate as ‘1’.
Related Customer ID
System displays the customer ID applicable to walk-in customers.
Total Charge
The system computes the charges applicable for the transaction and displays it here.
Total Amount
The system displays the amount to be debited from the account (in the account currency) after calculating the applicable charges. This amount depends on the charge method – whether inclusive or exclusive.
Beneficiary Name
Specify the beneficiary name.
Beneficiary Address
Specify the beneficiary address.
Passport/IC Number
Specify the customer’s passport number or any other identification number.
In case you change the TC amount, you will have to click the ‘Recalc’ button to re-compute the total transaction amount and the total amount.
8.13.2 Specifying TC Denomination Details
In this block you can enter the TC denomination details.
Refer the section titled ‘Specifying TC Denomination Details’ under ‘Selling a TC against an Account’ for further details.
8.13.3 Specifying Currency Denomination Details
In this block, you can capture details of the currency denominations involved in the transaction.
Refer the section titled ‘Specifying denomination details’ under ‘Withdrawing Cash against a Cheque’ for further details.
8.13.4 Specifying Charge Details
This block allows you to capture charge related details. Click on the ‘Charges’ to invoke the Charge Details screen.
Refer the section titled ‘Specifying charge details’ under ‘Withdrawing Cash against a Cheque’ for further details.
8.13.5 Specifying MIS Details
This block allows you to capture details pertaining to MIS. Click on the ‘MIS’ tab to invoke the MIS Details screen.
Refer the section titled ‘Specifying MIS details’ under ‘Withdrawing Cash against a Cheque’ for further details.
8.13.6 Specifying UDF Details
This block allows you to capture details pertaining to UDF. Click on the ‘UDF’ tab to invoke the UDF Details screen.
Refer the section titled ‘Specifying the UDF details’ under ‘Withdrawing Cash against a Cheque’ for further details.
Click save icon to save the transaction.
The approver can fetch this transaction for his/her task list and authorize it. The authorization process is similar to that of cash deposit.
Refer the corresponding section under ‘Depositing Cash’ in the chapter ‘Cash Transactions’ of this User Manual for further details.
Refer the chapters titled ‘Transaction Workflow’ and ‘Common Operations’ in this User Manual for details on the authorization process.
8.14 Issue a DD Issue against an Account
This section contains the following topics:
- Section 8.14.1, "Selling a DD Issue against an Account"
- Section 8.14.2, "Specifying Charge Details"
- Section 8.14.3, "Specifying MIS Details"
- Section 8.14.4, "Specifying UDF Details"
- Section 8.14.5, "Viewing OFAC Check Response"
8.14.1 Selling a DD Issue against an Account
You can issue a Demand Draft (DD) for your customer against his/her savings account. In order to capture this transaction, you need to invoke the ‘DD Issue Against Account’ screen by typing ‘1014’ in the field at the top right corner of the Application tool bar and clicking on the adjoining arrow button.
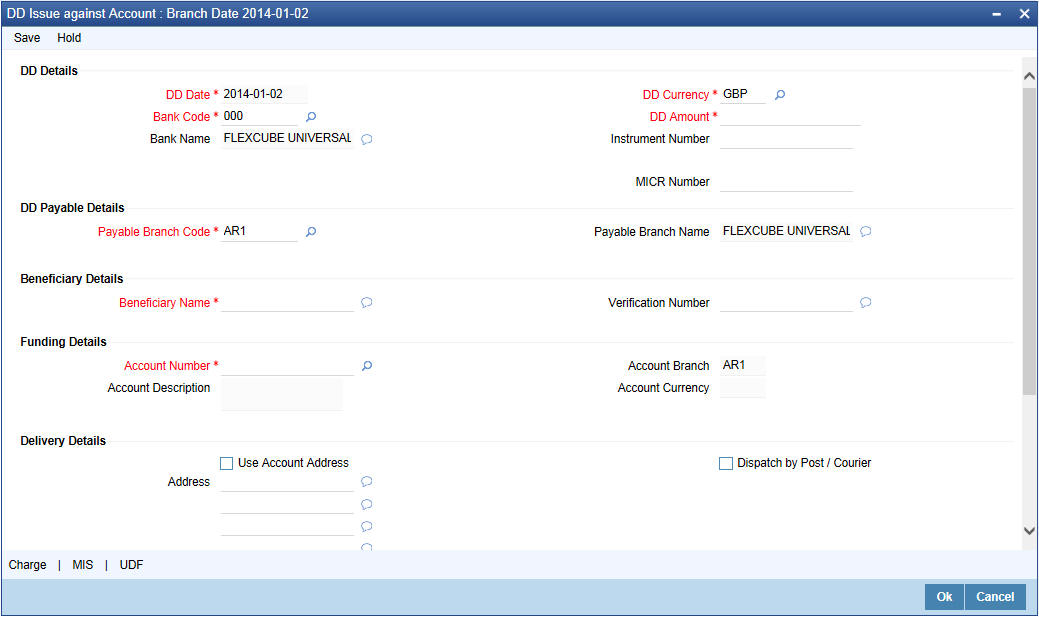
Here you can capture the following details:
DD Details
DD Date
The date of DD issue is displayed here.
Bank Code
Specify the code of the bank that is issuing the DD. The adjoining option list displays all the bank codes maintained in the system. Select the appropriate one.
Bank Name
The system displays the name of the bank.
Payable Branch Code
Specify the branch code at which the DD should be encashed or redeemed. The adjoining option list displays all the branches maintained in the system. Select the appropriate one.
Payable Branch Name
The system displays the name of the branch.
DD Currency
Specify the currency of the DD.
DD Amount
Specify the amount for which the DD is being drawn.
Instrument Number
Specify the instrument number. On save, system validates the instrument number.
If the instrument number is available then the system moves the transaction to the enrich stage.
If the instrument number is not available then the system raises an error message as “Instrument number entered is not valid”
If the instrument number is not specified the system defaults the least instrument number which is available for the branch and the instrument type.
MICR Number
Specify the MICR number of the cheques.
Beneficiary Details
Beneficiary Name
Specify the name of the beneficiary in whose favour the DD is being drawn.
Verification Number
Specify the customer’s verification number.
Funding Details
Account Number
Specify the customer account against which you are issuing the DD. The adjoining option list displays all the accounts maintained in the system. Select the appropriate one.
To view the joint holder’s details of an account and the mode of operation maintained at the account level, place the cursor on the Account Number field and press Ctrl+J. The system displays the ‘Joint Holder’ screen.
For more information on the ‘Joint Holder’ screen refer to the section ‘Joint Holder Maintenance’ in the Core User Manual.
Account Description
The system displays a brief description on the account.
Account Branch
Select the branch code from the adjoining option list.
Account Currency
The currency of the chosen account is displayed here.
Account Amount
The amount to be credited to the account is displayed here.
Delivery Details
Dispatch by Post/Courier
Check this box to dispatch the DD by post or courier.
Use Account Address
Check this box to default the address maintained at the account level.
Address
Specify the address to which the demand draft should be delivered. From the adjoining option list, you can choose the valid account address maintained in the system.
Additional Details
Narrative
The system defaults the ‘DD Issued in favour of <Beneficiary Name> here. However you can modify this.
External Reference
The system generates a unique number based on the branch-specific sequence number generation logic and displays it here. The Host system identifies a branch transaction with the external reference number.
In the single stage flow, if there is an transaction level override or error during approval then the transaction will be moved to the pending queue. Without save action being initiated, the transaction will not be in pending queue.
On clicking Pickup button, the system populates the values in all the callforms of the screen and clicking pickup button is mandatory if you make any changes to the Transaction amount and exchange rate after first pickup.
Once you click ‘Pickup’ button once, then on amendment of xrate, amount, charge, pickup will be mandatory before save.
Clicking ‘Pickup’ button, the system defaults the following details:
Issuing Branch
The branch code of the issuing branch is displayed here.
Instrument Number
The instrument number is displayed here.
Customer Number
The customer number is displayed here.
Account Branch
The code of the branch where the account resides is displayed here.
Customer Name
Specify the name of the customer.
Exchange Rate
The exchange rate is displayed here.
Account Currency
The currency of the chosen account is displayed here.
Account Title
The title of the account is displayed here.
Customer ID
The customer ID is displayed here.
Charges
The total charges applicable are displayed here.
Account Amount
The amount to be credited to the account is displayed here.
MICR Number
Specify the MICR number displayed on the DD being issued.
Charge Amount
Specify the charge amount.
Note
- During the issue process, based on the issue type, the system will use the instrument types (BCW, BCA, BCG, BCC/DDW, DDA, DDG, DDC) for the resolution of the retail product and DAO accounts.
- Instrument number generation will be based on the single instrument type (BC/DD) and issuer code at the inventory level.
- If the system is not using the inventory module, then a new instrument type called ‘BCI’ or ‘DDI’ will be used to generate (issue) the instrument and the sequence number generation will be based on this new type and issuer code.
- This will ensure that the instrument number is unique for the instrument BC or DD and issuer code irrespective of the issue type. i.e., across all types of BC and DD, the instrument number will be unique.
8.14.2 Specifying Charge Details
This block allows you to capture charge related details.
Refer the section titled ‘Specifying charge details’ under ‘Capturing a cash deposit’ for further details.
8.14.3 Specifying MIS Details
This block allows you to capture details pertaining to MIS. Click on the ‘MIS’ tab to invoke the MIS Details screen.
Refer the section titled ‘Specifying the MIS details’ under ‘Capturing a cash deposit’ for further details.
8.14.4 Specifying UDF Details
You can capture UDF details in the ‘UDF’ tab of the screen.
Refer the section titled ‘Specifying the UDF details’ under ‘Capturing a cash deposit’ for further details.
Click save icon to save the transaction.
The approver can fetch this transaction for his/her task list and authorize it. The authorization process is similar to that of cash deposit.
Note
Depending on the ‘Display Type’ selected for customer / account in ‘Instruction Maintenance’ screen, the instruction will be displayed at the time of saving the input stage and authorizing the transaction.
For more details about viewing customer / account instructions, refer the section titled ‘Viewing Customer / Account Instructions on ‘F6’ Key-Press’ and Viewing Customer / Account Instruction Details in Override Screen’ in this user manual.
Refer the corresponding section under ‘Depositing Cash’ in the chapter ‘Cash Transactions’ of this User Manual for further details.
Refer the chapters titled ‘Transaction Workflow’ and ‘Common Operations’ in this User Manual for details on the authorization process.
8.14.5 Viewing OFAC Check Response
OFAC check enables the application to call an external web service to perform black list check for customer and customer accounts and give warnings appropriately while transacting with black listed customers. You can also capture your remarks before overriding the black list warning.
Click ‘OFAC Check’ button in ‘Bills and Collections - Contract Input - Detailed’ screen to view the OFAC check response in the ‘External System Detail’ screen On clicking ‘OFAC Check’ button, system will build the request XML and call the web service. The ‘External System details’ screen displays the response is received from the external system and you will be also allowed to enter your remarks in this screen. The response received will also be sent to Oracle FLEXCUBE Database layer for any further interpretations of the same. This button can be made visible while carrying out the actual customization. Request building response interpretation in the database layer needs to be done as part of customization to enable this.
Here, you can view /capture the following details:
External System Response
The response from the external system regarding the black listed customer is displayed here.
User Remarks
Specify your remarks regarding the black listed customer here.
8.15 Issue DD against Cheque
This section contains the following topics:
- Section 8.15.1, "Issuing DD against Cheque"
- Section 8.15.2, "Specifying Charge Details"
- Section 8.15.3, "Specifying MIS Details"
- Section 8.15.4, "Specifying UDF Details"
8.15.1 Issuing DD against Cheque
You can issue a Demand Draft (DD) for your customer against an in-house cheque drawn on his/her savings account. In order to capture this transaction, you need to invoke the ‘DD Issue Against Cheque’ screen by typing ‘8330’ in the field at the top right corner of the Application tool bar and clicking on the adjoining arrow button.

Here you can capture the following details:
DD Details
DD Date
The date of DD issue is displayed here.
Bank Code
Specify the code of the bank that is issuing the DD. The adjoining option list displays all the bank codes maintained in the system. Select the appropriate one.
Bank Name
The system displays the name of the bank.
Payable Branch Code
Specify the branch code at which the DD should be encashed or redeemed. The adjoining option list displays all the branches maintained in the system. Select the appropriate one.
Payable Branch Name
The system displays the name of the branch.
DD Currency
Specify the currency of the DD.
DD Amount
Specify the amount for which the DD is being drawn.
Instrument Number
Specify the instrument number. On save, system validates the instrument number.
If the instrument number is available then the system moves the transaction to the enrich stage.
If the instrument number is not available then the system raises an error message as "Instrument number entered is not valid"
If the instrument number is not specified the system defaults the least instrument number which is available for the branch and the instrument type.
MICR Number
Specify the MICR number of the cheques.
Beneficiary Details
Beneficiary Name
Specify the name of the beneficiary in whose favour the DD is being drawn.
Verification Number
Specify the customer's verification number.
Funding Details
Account Number
Specify the customer account against which you are issuing the DD. The adjoining option list displays all the accounts maintained in the system. Select the appropriate one.
To view the joint holder’s details of an account and the mode of operation maintained at the account level, place the cursor on the Account Number field and press Ctrl+J. The system displays the ‘Joint Holder’ screen.
For more information on the ‘Joint Holder’ screen refer to the section ‘Joint Holder Maintenance’ in the Core User Manual.
Account Description
The system displays a brief description on the account.
Cheque Number
Specify the number of the cheque being drawn for DD sale.
Account Branch
Select the branch code from the adjoining option list.
Account Currency
The currency of the chosen account is displayed here.
Account Amount
The amount to be credited to the account is displayed here.
Cheque Date
Specify the date of the cheque from the adjoining calendar.
Delivery Details
Dispatch by Post/Courier
Check this box to dispatch the DD by post or courier.
Use Account Address
Check this box to default the address maintained at the account level.
Address
Specify the address to which the demand draft should be delivered. From the adjoining option list, you can choose the valid account address maintained in the system.
Additional Details
Narrative
The system defaults the ‘DD Issued in favour of <Beneficiary Name> here. However you can modify this.
External Reference Number
The system generates a unique number based on the branch-specific sequence number generation logic and displays it here. The Host system identifies a branch transaction with the external reference number.
In the single stage flow, if there is an transaction level override or error during approval then the transaction will be moved to the pending queue. Without save action being initiated, the transaction will not be in pending queue.
On clicking Pickup button, the system populates the values in all the callforms of the screen and clicking pickup button is mandatory if you make any changes to the Transaction amount and exchange rate after first pickup.
Once you click ‘Pickup’ button once, then on amendment of xrate, amount, charge, pickup will be mandatory before save.
Clicking ‘Pickup’ button, the system defaults the following details:
Issuing Branch
The branch code of the issuing branch is displayed here.
Instrument Number
The instrument number is displayed here.
Customer Number
The customer number is displayed here.
Account Branch
The code of the branch where the account resides is displayed here.
Customer Name
Specify the name of the customer.
Exchange Rate
The exchange rate is displayed here.
Account Currency
The currency of the chosen account is displayed here.
Account Title
The title of the account is displayed here.
Customer ID
The customer ID is displayed here.
Charges
The total charges applicable are displayed here.
Account Amount
The amount to be credited to the account is displayed here.
MICR Number
Specify the MICR number displayed on the DD being issued.
Charge Amount
Specify the charge amount.
8.15.2 Specifying Charge Details
This block allows you to capture charge related details.
Refer the section titled ‘Specifying charge details’ under ‘Capturing a cash deposit’ for further details.
8.15.3 Specifying MIS Details
This block allows you to capture details pertaining to MIS. Click on the ‘MIS’ tab to invoke the MIS Details screen.
Refer the section titled ‘Specifying the MIS details’ under ‘Capturing a cash deposit’ for further details.
8.15.4 Specifying UDF Details
You can capture the UDF details in the ‘UDF’ tab of the screen.
Refer the section titled ‘Specifying the UDF details’ under ‘Capturing a cash deposit’ for further details.
Click save icon to save the transaction.
The approver can fetch this transaction for his/her task list and authorize it. The authorization process is similar to that of cash deposit.
Note
Depending on the ‘Display Type’ selected for customer / account in ‘Instruction Maintenance’ screen, the instruction will be displayed at the time of saving the input stage and authorizing the transaction.
For more details about viewing customer / account instructions, refer the section titled ‘Viewing Customer / Account Instructions on ‘F6’ Key-Press’ and Viewing Customer / Account Instruction Details in Override Screen’ in this user manual.
Refer the corresponding section under ‘Depositing Cash’ in the chapter ‘Cash Transactions’ of this User Manual for further details.
Refer the chapters titled ‘Transaction Workflow’ and ‘Common Operations’ in this User Manual for details on the authorization process.
8.16 Liquidating a DD against a GL
You can liquidate a DD drawn on your branch against a GL through the ‘DD Liquidation against GL’ screen. You can invoke this screen by typing ‘8311’ in the field at the top right corner of the Application tool bar and clicking on the adjoining arrow button.
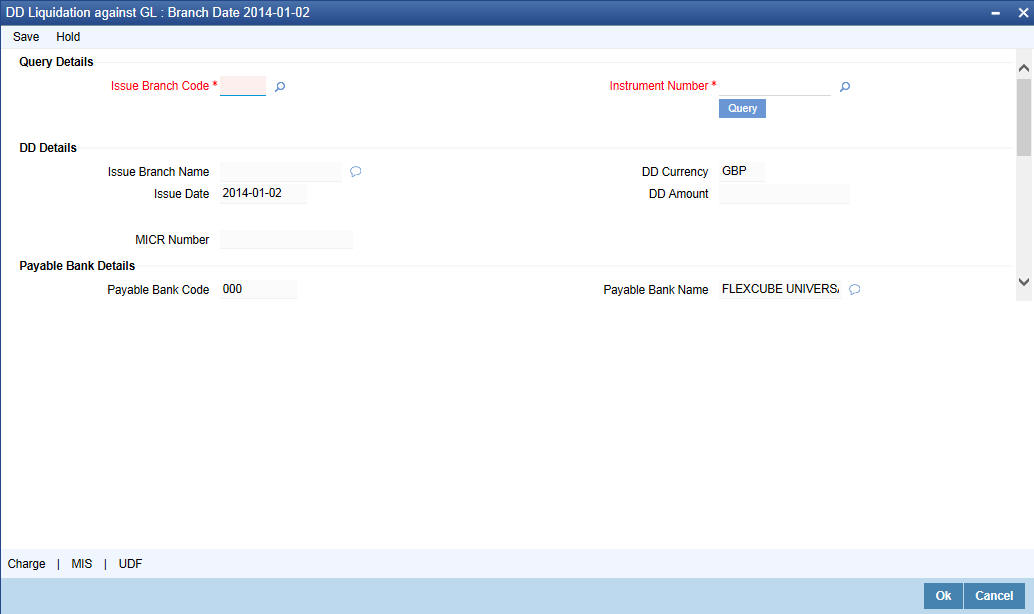
Here you can capture the following details:
Query Details
Issue Branch Code
Select the issue branch code from the adjoining option list.
Instrument Number
Select the instrument number of the DD that should be liquidated form the adjoining option list. This field allows you to capture the issuer code while selecting the instrument number.
DD Details
Issue Branch Name
the system displays the name of the issue branch based on the issue branch code.
Issue Date
The system displays the date of issue of the DD.
DD Currency
The system displays currency of the DD currency captured during 'Issue'.
DD Amount
The system displays the DD amount captured during 'Issue'.
Payable Bank Details
Payable Bank Code
The system displays the name of the payable bank code captured during 'Issue'.
Payable Bank Name
The system displays the name of the bank captured during 'Issue'.
Payable Branch Code
The system displays the name of the payable branch code captured during ‘Issue’.
Payable Branch Name
The system displays the name of the branch captured during 'Issue'.
Beneficiary Details
Beneficiary Name
The system displays the beneficiary in whose favour the DD is being drawn captured during 'Issue'.
Verification Number
The system displays the customer's verification number captured during 'Issue'.
Liquidation Details
Liquidation Mode
Specify the mode of liquidation from the adjoining drop-down list.
GL Number
Specify the general ledger number that should be used to post this transaction. The adjoining option list displays all the general ledgers maintained in the system. Choose the appropriate one.
GL Description
The system displays the description of the specified GL account.
GL Currency
The currency of the chosen GL is displayed here.
GL Amount
The GL amount to be credited to the account is displayed here.
Additional Details
Narrative
The system defaults the ‘DD Liquidation- <Instrument No.> here. However you can modify this.
External Reference Number
The system generates a unique number based on the branch-specific sequence number generation logic and displays it here. The Host system identifies a branch transaction with the external reference number.
The approver can fetch this transaction for his/her task list and authorize it. The authorization process is similar to that of cash deposit. Refer the corresponding section under ‘Depositing Cash’ in the chapter ‘Cash Transactions’ of this User Manual for further details.
Refer the chapters titled ‘Transaction Workflow’ and ‘Common Operations’ in this User Manual for details on the authorization process.
8.17 Liquidate a DD against an Account
This section contains the following topics:
- Section 8.17.1, "Liquidating a DD against an Account"
- Section 8.17.2, "Specifying Charge Details"
- Section 8.17.3, "Specifying MIS Details"
- Section 8.17.4, "Specifying UDF Details"
8.17.1 Liquidating a DD against an Account
You can liquidate a DD drawn on your branch against an account through the ‘DD Liquidation Against Account’ screen. You can invoke this screen by typing ‘8312’ in the field at the top right corner of the Application tool bar and clicking on the adjoining arrow button.
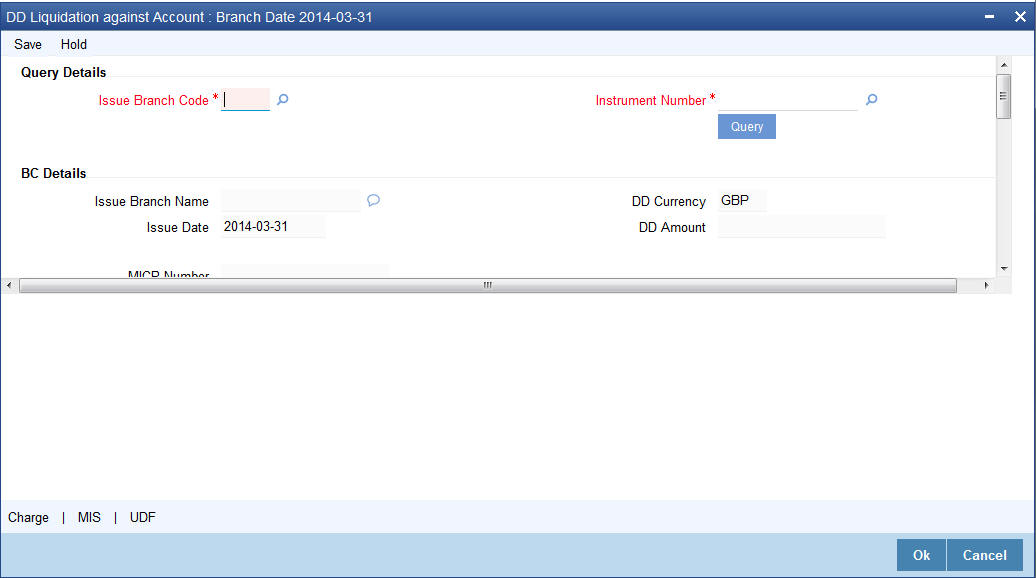
Here you can specify the following details:
DD Details
Issue Branch Code
Select the issue branch code from the adjoining option list.
Instrument Number
Select the instrument number of the DD to be liquidated from the adjoining option list. This field allows you to capture the issuer code while selecting the instrument number.
BC Details
Issue Branch Name
the system displays the name of the issue branch based on the issue branch code.
Issue Date
The system displays the date of issue of the DD.
DD Currency
The system displays currency of the DD currency captured during 'Issue'.
DD Amount
The system displays the DD amount captured during 'Issue'.
Payable Bank Details
Payable Bank Code
The system displays the name of the payable bank code captured during 'Issue'.
Payable Bank Name
The system displays the name of the bank captured during 'Issue'.
Payable Branch Code
The system displays the name of the payable branch code captured during 'Issue'.
Payable Branch Name
The system displays the name of the branch captured during 'Issue'.
MICR Number
The system displays the MICR number of the cheques captured during 'Issue'.
DD Status
The system displays the status of the issued DD.
Beneficiary Details
Beneficiary Name
The system displays the beneficiary in whose favour the DD is being drawn captured during 'Issue'.
Verification Number
The system displays the customer's verification number which was captured during 'Issue'.
Liquidation Details
Liquidation Mode
Specify the mode of liquidation from the adjoining drop-down list.
Account Number
Specify the customer account against which you are issuing the DD. The adjoining option list displays all the accounts maintained in the system. Select the appropriate one.
To view the joint holder’s details of an account and the mode of operation maintained at the account level, place the cursor on the Accounts Number field and press Ctrl+J. The system displays the ‘Joint Holder’ screen.
For more information on the ‘Joint Holder’ screen refer to the section ‘Joint Holder Maintenance’ in the Core User Manual.
Account Description
The system displays a brief description on the account.
Account Branch
Select the branch code from the adjoining option list.
Account Currency
The currency of the chosen account is displayed here.
Account Amount
The amount to be credited to the account is displayed here.
Additional Details
Narrative
The system defaults the ‘DD Liquidation - <Instrument No.> here. However you can modify this.
External Reference Number
The system generates a unique number based on the branch-specific sequence number generation logic and displays it here. The Host system identifies a branch transaction with the external reference number.
In the single stage flow, if there is an transaction level override or error during approval then the transaction will be moved to the pending queue. Without save action being initiated, the transaction will not be in pending queue.
On clicking Pickup button, the system populates the values in all the callforms of the screen and clicking pickup button is mandatory if you make any changes to the Transaction amount and exchange rate after first pickup.
Once you click ‘Pickup’ button once, then on amendment of xrate, amount, charge, pickup will be mandatory before save.
8.17.2 Specifying Charge Details
This block allows you to capture charge related details.
Refer the section titled ‘Specifying charge details’ under ‘Capturing a cash deposit’ for further details.
8.17.3 Specifying MIS Details
This block allows you to capture details pertaining to MIS. Click on the ‘MIS’ tab to invoke the MIS Details screen.
Refer the section titled ‘Specifying the MIS details’ under ‘Capturing a cash deposit’ for further details.
8.17.4 Specifying UDF Details
You can capture these details in the ‘UDF’ tab of the screen.
Refer the section titled ‘Specifying the UDF details’ under ‘Capturing a cash deposit’ for further details.
Click save icon to save the transaction.
The approver can fetch this transaction for his/her task list and authorize it. The authorization process is similar to that of cash deposit.
Note
Depending on the ‘Display Type’ selected for customer / account in ‘Instruction Maintenance’ screen, the instruction will be displayed at the time of saving the input stage and authorizing the transaction.
For more details about viewing customer / account instructions, refer the section titled ‘Viewing Customer / Account Instructions on ‘F6’ Key-Press’ and Viewing Customer / Account Instruction Details in Override Screen’ in this user manual.
Refer the corresponding section under ‘Depositing Cash’ in the chapter ‘Cash Transactions’ of this User Manual for further details.
Refer the chapters titled ‘Transaction Workflow’ and ‘Common Operations’ in this User Manual for details on the authorization process.
8.18 Liquidate a DD for a Walk-in Customer
This section contains the following topics:
- Section 8.18.1, "Liquidating a DD for a Walk-in Customer"
- Section 8.18.2, "Specifying Denomination Details"
- Section 8.18.3, "Specifying Charge Details"
- Section 8.18.4, "Specifying MIS Details"
- Section 8.18.5, "Specifying UDF Details"
8.18.1 Liquidating a DD for a Walk-in Customer
You can liquidate a DD or a walk-in customer and give him/her the equivalent amount in cash. In order to capture such a transaction, invoke the ‘DD Liquidation Walk-In’ screen. You can invoke this screen by typing ‘8310’ in the field at the top right corner of the Application tool bar and clicking on the adjoining arrow button.
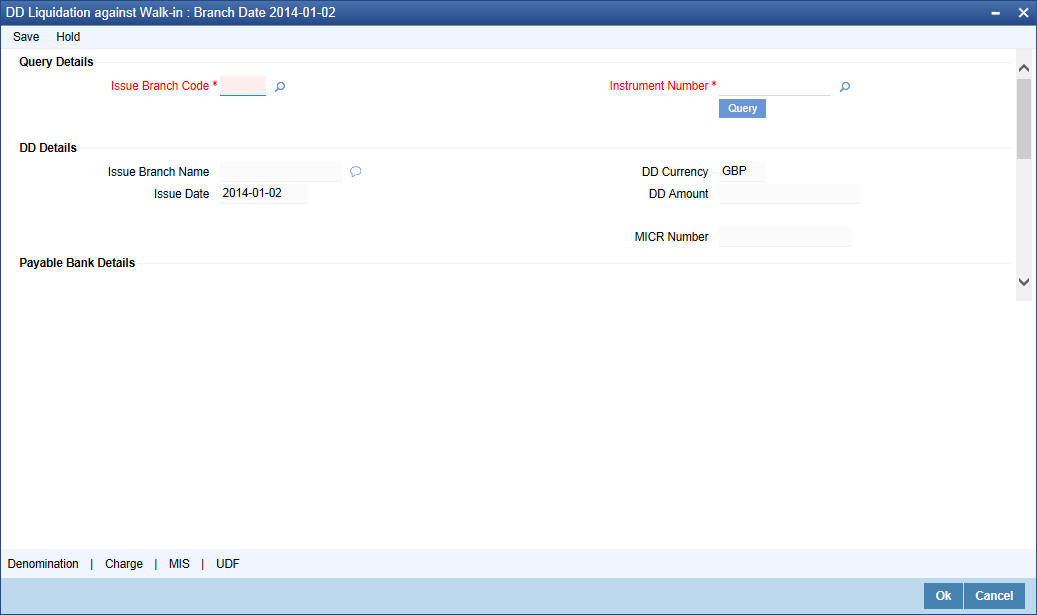
Here you can capture the following details:
DD Details
Instrument Number
Select the instrument number of the DD that needs to be liquidated from the adjoining option list. This field allows you to capture the issuer code while selecting the instrument number.
Issue Branch Code
Select Issue branch code from the adjoining option list.
Issue Branch Name
the system displays the name of the issue branch based on the issue branch code.
Issue Date
The system displays the date of issue of the DD.
DD Currency
The system displays currency of the DD currency captured during 'Issue'.
DD Amount
The system displays the DD amount captured during 'Issue'.
Payable Bank Code
The system displays the name of the payable bank code captured during 'Issue'.
Payable Bank Name
The system displays the name of the bank captured during 'Issue'.
Payable Branch Code
The system displays the name of the payable branch code captured during 'Issue'.
Payable Branch Name
The system displays the name of the branch captured during 'Issue'.
MICR Number
The system displays the MICR number of the cheques captured during 'Issue'.
DD Status
The system displays the status of the issued DD.
Beneficiary Details
Beneficiary Name
The system displays the beneficiary in whose favour the DD is being drawn captured during 'Issue'.
Verification Number
The system displays the customer's verification number captured during 'Issue'.
Liquidation Details
Liquidation Mode
Specify the mode of liquidation from the adjoining drop-down list.
Transaction Currency
Specify the currency in which the customer is making the payment.
Transaction Amount
The system displays the total transaction amount.
Additional Details
Narrative
The system defaults the DD Liquidation - <Instrument No.> here. However you can modify this.
In the single stage flow, if there is an transaction level override or error during approval then the transaction will be moved to the pending queue. Without save action being initiated, the transaction will not be in pending queue.
On clicking Pickup button, the system populates the values in all the callforms of the screen and clicking pickup button is mandatory if you make any changes to the Transaction amount and exchange rate after first pickup.
Once you click ‘Pickup’ button once, then on amendment of xrate, amount, charge, pickup will be mandatory before save. External Reference Number
The system generates a unique number based on the branch-specific sequence number generation logic and displays it here. The Host system identifies a branch transaction with the external reference number.Click save icon to go to the next stage.
You can capture the following information:
Branch
The branch code is displayed here.
Liquidation Type
The liquidation type of the DD is displayed here.
Liquidation Mode
The system displays the liquidation mode of the DD. However, you can change it. The adjoining drop-down list displays the following values:
- Payment
- Refund
- Cancel
Payable Bank
The clearing bank code is displayed here.
Instrument Number
The instrument number is displayed here.
Payable Branch
The branch where the DD amount is being paid out (current branch) is displayed here.
DD Currency
The system displays the currency in which the DD has been issued.
Issue Date
The system displays the date on which the DD has been issued.
Liquidation Date
The system displays the date on which the transaction is being posted.
Drawee Account Number
The account on which the DD has been drawn is displayed here.
DD Amount
The amount for which the DD has been issued is displayed here.
DD Number
The MICR number of the DD is displayed here.
DD Status
The system displays the event that is triggered for the transaction. This corresponds to the status of the instrument.
Transaction Currency
The system defaults the branch currency as the transaction currency. However you can change it. The adjoining option list displays all the currency codes maintained in the Host. You can select the appropriate code.
Narrative
Here, you can enter remarks pertaining to the transaction.
Beneficiary Name
The name of the beneficiary of the transaction is displayed here.
Other Details
Any other information captured for the transaction is displayed here.
Verification Number
The system displays the verification number details captured during issue.
Exchange Rate
The system displays the exchange rate for the transaction if the DD currency and the transaction currency are not the same.
Total Charge
The system computes the charge applicable to the transaction and displays it.
Net Amount
The system derives the net amount payable to the customer after deducting the applicable charges and displays it here.
8.18.2 Specifying Denomination Details
In this block, you can capture details of the currency denominations involved in the transaction.
Refer the section titled ‘Specifying denomination details’ under ‘Capturing a cash deposit’ for further details.
8.18.3 Specifying Charge Details
This block allows you to capture charge related details. You need to click on the ‘Charges’ tab to invoke the Charge Details screen. The system displays the charge applicable to the transaction. You can waive it if required. You then need to click ‘Recalc’ button to re-computed the net amount payable to the customer.
Refer the section titled ‘Specifying charge details’ under ‘Capturing a cash deposit’ for further details.
8.18.4 Specifying MIS Details
This block allows you to capture details pertaining to MIS. Click on the ‘MIS’ tab to invoke the MIS Details screen.
Refer the section titled ‘Specifying MIS details’ under ‘Capturing a cash deposit’ for further details.
8.18.5 Specifying UDF Details
This block allows you to capture details pertaining to UDF. Click on the ‘UDF’ tab to invoke the UDF Details screen.
Click save icon to save the transaction.
The approver can fetch this transaction for his/her task list and authorize it. The authorization process is similar to that of cash deposit.
Refer the corresponding section under ‘Depositing Cash’ in the chapter ‘Cash Transactions’ of this User Manual for further details.
Refer the chapters titled ‘Transaction Workflow’ and ‘Common Operations’ in this User Manual for details on the authorization process.
8.19 Issue a DD to a Walk-in Customer
This section contains the following topics:
- Section 8.19.1, "Issuing a DD to a Walk-in Customer"
- Section 8.19.2, "Specifying Denomination Details"
- Section 8.19.3, "Specifying Charge Details"
- Section 8.19.4, "Specifying MIS Details"
- Section 8.19.5, "Specifying UDF Details"
- Section 8.19.6, "Invoking OFAC Check"
8.19.1 Issuing a DD to a Walk-in Customer
You can issue a DD to any walk-in customer through the ‘DD Issue Walk-In’ screen. You can invoke this screen by typing ‘8305’ in the field at the top right corner of the Application tool bar and clicking on the adjoining arrow button.
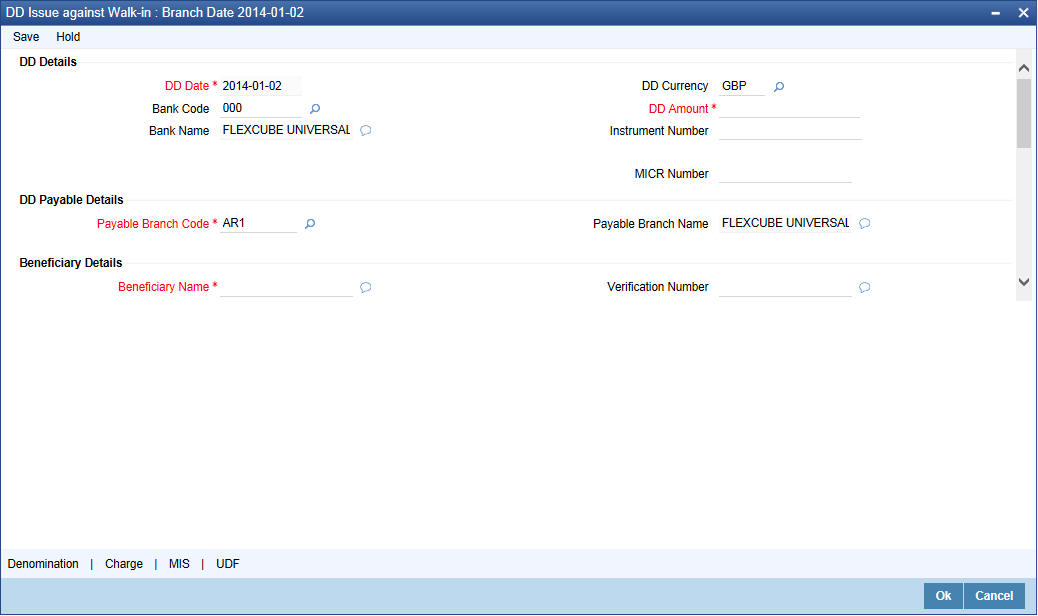
Here you can capture the following details:
DD Details
DD Date
The date of DD issue is displayed here.
Bank Code
Specify the code of the bank that is issuing the DD. The adjoining option list displays all the bank codes maintained in the system. Select the appropriate one.
Bank Name
The system displays the name of the bank.
Payable Branch Code
Specify the branch code at which the DD should be encashed or redeemed. The adjoining option list displays all the branches maintained in the system. Select the appropriate one.
Payable Branch Name
The system displays the name of the branch.
DD Currency
Specify the currency of the DD.
DD Amount
Specify the amount for which the DD is being drawn.
Instrument Number
Specify the instrument number. On save, system validates the instrument number.
If the instrument number is available then the system moves the transaction to the enrich stage.
If the instrument number is not available then the system raises an error message as "Instrument number entered is not valid"
If the instrument number is not specified the system defaults the least instrument number which is available for the branch and the instrument type.
MICR Number
Specify the MICR number of the cheques.
Beneficiary Details
Beneficiary Name
Specify the name of the beneficiary in whose favour the DD is being drawn.
Verification Number
Specify the customer's verification number.
Funding Details
Transaction Currency
Specify the currency in which the customer is making the payment.
Transaction Amount
The system displays the total transaction amount.
Purchaser Details
Purchaser Name
Specify the name of the purchaser.
Verification Number
Specify the purchaser’s verification number.
Delivery Details
Dispatch by Post/Courier
Check this box to dispatch the DD by post or courier.
Address
Specify the address to which the demand draft should be delivered. From the adjoining option list, you can choose the valid account address maintained in the system.
Additional Details
Narrative
The system defaults the ‘DD Issued in favour of <Beneficiary Name> here. However you can modify this.
External Reference Number
The system generates a unique number based on the branch-specific sequence number generation logic and displays it here. The Host system identifies a branch transaction with the external reference number.
In the single stage flow, if there is an transaction level override or error during approval then the transaction will be moved to the pending queue. Without save action being initiated, the transaction will not be in pending queue.
On clicking Pickup button, the system populates the values in all the callforms of the screen and clicking pickup button is mandatory if you make any changes to the Transaction amount and exchange rate after first pickup.
Once you click ‘Pickup’ button once, then on amendment of xrate, amount, charge, pickup will be mandatory before save.
Clicking ‘Pickup’ button, the system defaults the following details:
Transaction Currency Rate
The system displays the exchange to be used for the transaction in case the transaction currency is different from the DD currency.
Charges
The system computes the charges applicable to the transaction and displays the amount here.The mode of charge collection is Cash.
Total Amount
The system computes the total amount to be paid by the walk-in customer by adding the charge amount to the DD amount.
8.19.2 Specifying Denomination Details
In this block, you can capture details of the currency denominations involved in the transaction.
Refer the section titled ‘Specifying denomination details’ under ‘Capturing a cash deposit’ for further details.
8.19.3 Specifying Charge Details
This block allows you to capture charge related details. You need to click on the ‘Charges’ tab to invoke the Charge Details screen.The system displays the charge applicable to the transaction. You can waive it if required. You then need to click ‘Recalc’ button to re-compute the net amount payable to the customer.
Refer the section titled ‘Specifying charge details’ under ‘Capturing a cash deposit’ for further details.
8.19.4 Specifying MIS Details
This block allows you to capture details pertaining to MIS. Click on the ‘MIS’ tab to invoke the MIS Details screen:
Refer the section titled ‘Specifying the MIS details’ under ‘Capturing a cash deposit’ for further details.
8.19.5 Specifying UDF Details
This block allows you to capture details pertaining to UDF. Click on the ‘UDF’ tab to invoke the UDF Details screen.
Refer the section titled ‘Specifying UDF details’ under ‘Capturing a cash deposit’ for further details.
Click save icon to save the transaction.
The approver can fetch this transaction for his/her task list and authorize it. The authorization process is similar to that of cash deposit.
Refer the corresponding section under ‘Depositing Cash’ in the chapter ‘Cash Transactions’ of this User Manual for further details.
Refer the chapters titled ‘Transaction Workflow’ and ‘Common Operations’ in this User Manual for details on the authorization process.
8.19.6 Invoking OFAC Check
OFAC Check enables the application to call an external web service to perform black list check for customer and customer accounts and warn the users appropriately while transacting with black listed customers. This will also allow capturing the user remarks in such scenarios before overriding the black list warning.
To invoke this screen, click ‘OFAC Check’ button in ‘DD Issue Walk-In’ screen.
This button can be made visible while carrying out the actual customization. Request building, response interpretation in the database layer needs to be done as part of customization to enable this feature.
On clicking this button, system will build the request XML and call the web service. Once the response is received from the external system, the user will be allowed to enter his remarks in the screen displayed. The response received will also be sent to Oracle FLEXCUBE Database layer for any further interpretations of the same.
8.20 Issue a DD against a GL
This section contains the following topics:
- Section 8.20.1, "Issuing a DD against a GL"
- Section 8.20.2, "Specifying Charge Details"
- Section 8.20.3, "Specifying MIS Details"
- Section 8.20.4, "Specifying UDF Details"
- Section 8.20.5, "Invoking OFAC Check"
8.20.1 Issuing a DD against a GL
You can issue a DD against a GL account for your customer through the ‘DD Issue against GL’ screen. You can invoke this screen by typing ‘8306’ in the field at the top right corner of the Application tool bar and clicking on the adjoining arrow button.
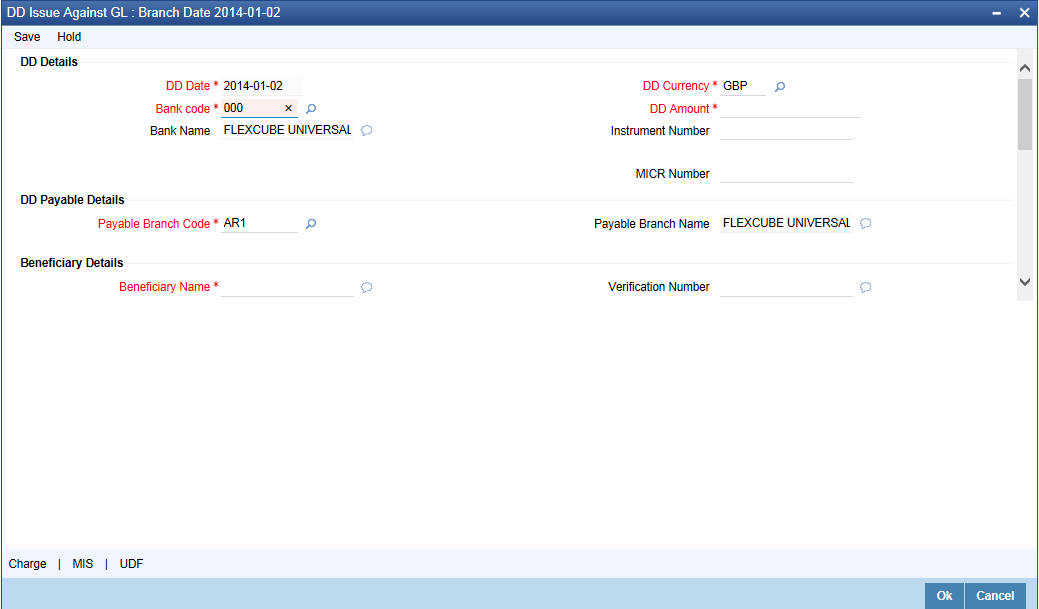
Here you can capture the following details:
DD Details
DD Date
The system displays the date on which the DD is being issued.
Bank Code
Specify the clearing bank code. The adjoining option list displays all the clearing bank codes maintained in the system. Choose the appropriate one.
Bank Name
The system displays the name of the bank.
Payable Branch Code
Specify the branch code at which the DD should be encashed or redeemed. The adjoining option list displays all the branches maintained in the system. Select the appropriate one.
Payable Branch Name
The system displays the name of the branch.
DD Currency
Specify the in which the DD is being issued. The adjoining option list displays all the currency codes maintained in the system. Choose the appropriate one.
DD Amount
Specify the amount for which the DD is being drawn.
Instrument Number
Specify the instrument number. On save, system validates the instrument number.
If the instrument number is available then the system moves the transaction to the enrich stage.
If the instrument number is not available then the system raises an error message “Instrument number entered is not valid”.
If the instrument number is not specified the system defaults the least instrument number which is available for the branch and the instrument type.
MICR Number
Specify the MICR number as displayed on the DD instrument.
Beneficiary Details
Beneficiary Name
Specify the name of the beneficiary in whose favor the DD is being issued.
Verification Number
Specify the customer’s verification number.
Funding Details
GL Number
Specify the GL against which the DD is being issued. The adjoining option list displays all the GL codes maintained in the system. Choose the appropriate one.
GL Description
The system displays the description of the specified GL account.
GL Currency
Specify the currency of the GL against which the DD is being issued. The adjoining option list displays all the currency codes maintained in the system. Choose the appropriate one.
GL Amount
The GL amount is displayed here.
Delivery Details
Dispatch by Post/Courier
Check this box to dispatch the DD by post or courier.
Address
Specify the address to which the demand draft should be delivered. From the adjoining option list, you can choose the valid account address maintained in the system.
Additional Details
Narrative
The system defaults the ‘DD Issued in favour of <Beneficiary Name> here. However you can modify this.
External Reference Number
The system generates a unique number based on the branch-specific sequence number generation logic and displays it here. The Host system identifies a branch transaction with the external reference number.
In the single stage flow, if there is an transaction level override or error during approval then the transaction will be moved to the pending queue. Without save action being initiated, the transaction will not be in pending queue.
On clicking Pickup button, the system populates the values in all the callforms of the screen and clicking pickup button is mandatory if you make any changes to the Transaction amount and exchange rate after first pickup.
Once you click ‘Pickup’ button once, then on amendment of xrate, amount, charge, pickup will be mandatory before save. Clicking ‘Pickup’ button, the system defaults the following details:
Transaction Currency
The system displays the currency of the GL as the currency in which the transaction entries will be posted. However, you can change it by choosing the appropriate currency code from the adjoining option list.
Charges
The system calculates the charges applicable to the transaction and displays the amount here.
In case you change the charge amount or the DD amount, you will have to click ‘Recalc’ button to re-compute the total transaction amount.
Total Amount
The system adds the charge amount to the DD amount and displays the total transaction amount.
Instrument Number
The instrument number is displayed here.
8.20.2 Specifying Charge Details
This block allows you to capture charge related details for the transaction. You can waive it if required. You then need to click ‘Recalc’ button to re-compute the net amount payable to the customer.
Refer the section titled ‘Specifying charge details’ under ‘Capturing a cash deposit’ for further details.
8.20.3 Specifying MIS Details
This block allows you to capture details pertaining to MIS. Click on the ‘MIS’ tab to invoke the MIS Details screen.
Refer the section titled ‘Specifying MIS details’ under ‘Capturing a cash deposit’ for further details.
8.20.4 Specifying UDF Details
This block allows you to capture details pertaining to UDF. Click on the ‘UDF’ tab to invoke the UDF Details screen.
Refer the section titled ‘Specifying UDF details’ under ‘Capturing a cash deposit’ for further details.
Click save icon to save the transaction.
The approver can fetch this transaction for his/her task list and authorize it. The authorization process is similar to that of cash deposit.
Refer the corresponding section under ‘Depositing Cash’ in the chapter ‘Cash Transactions’ of this User Manual for further details.
Refer the chapters titled ‘Transaction Workflow’ and ‘Common Operations’ in this User Manual for details on the authorization process.
8.20.5 Invoking OFAC Check
OFAC Check enables the application to call an external web service to perform black list check for customer and customer accounts and warn the users appropriately while transacting with black listed customers. This will also allow capturing the user remarks in such scenarios before overriding the black list warning.
To invoke this screen, click ‘OFAC Check’ button in ‘DD Issue against GL ’screen.
This button can be made visible while carrying out the actual customization. Request building, response interpretation in the database layer needs to be done as part of customization to enable this feature.
On clicking this button, system will build the request XML and call the web service. Once the response is received from the external system, the user will be allowed to enter his remarks in the screen displayed. The response received will also be sent to Oracle FLEXCUBE Database layer for any further interpretations of the same.
Here, you can view the following details.
External System Response
The response from the external system regarding the black listed customer will be defaulted here.
User Remarks
You can specify your remarks here.
8.21 Inquiring on a DD Transaction
You can query on the details of a DD transaction based on the issue branch and the instrument number of the DD transaction. For a liquidated contract only liquidation details are displayed. You can achieve this through the ‘DD Inquiry’ screen. You can invoke this screen by typing ‘7789’ in the field at the top right corner of the Application tool bar and clicking on the adjoining arrow button.
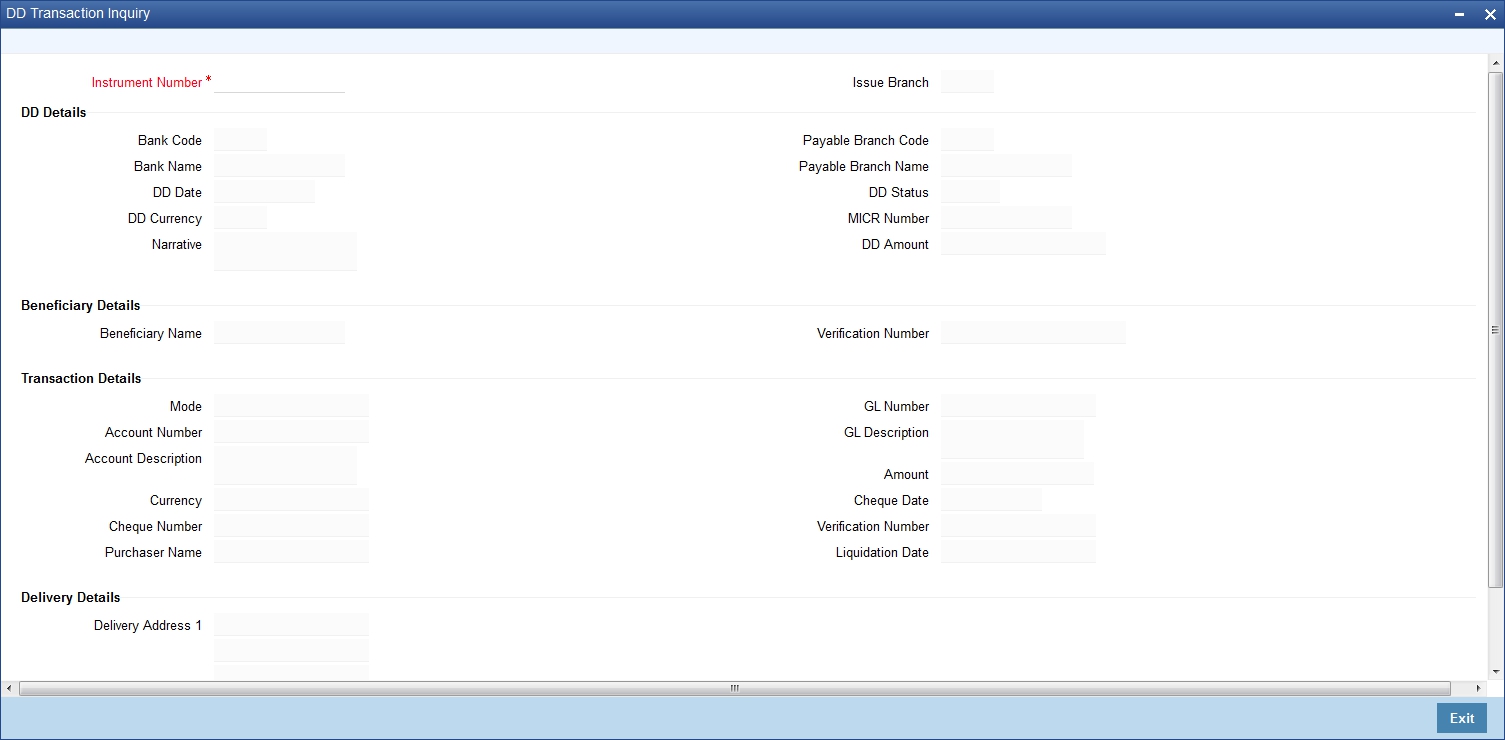
Here you can query on the details of a DD based on the following fields:
Instrument Number
Specify the instrument number from the adjoining option list.
Issue Branch
The system displays the issue branch
DD Details
Bank Code
The system displays the bank code.
Bank Name
The system displays the name of the bank.
DD Date
The date of DD issue is displayed here.
DD Currency
The system displays the DD currency.
DD Status
The system displays the status of the issued DD.
Payable Branch Code
The system displays the payable branch code.
Payable Branch Name
The system displays the name of the branch.
MICR Number
The system displays the MICR number of the cheques.
DD Amount
The system displays the amount for which the DD is being drawn.
Print Status
Check this box to print the instrument.
Note
During loan disbursement, if the issuing branch is selected as a branch other than the transaction branch then the “Print Status’ check box is updated as unchecked during DD creation
Narrative
The system defaults the ‘DD Issued in favour of <Beneficiary Name>’ for liquidated instruments.
The system defaults the ‘DD Liquidation - <Instrument No.>’ for liquidated instruments.
Beneficiary Details
Beneficiary Name
Specify the name of the beneficiary in whose favour the DD is being drawn.
Verification Number
Specify the customer's verification number.
Funding Details
Mode
The system displays the funding mode based on the mode of payment for funding DD.
Account Number
Specify the customer account against which you are issuing the DD. The adjoining option list displays all the accounts maintained in the system. Select the appropriate one.
Account Description
The system displays a brief description on the account.
Currency
The currency of the chosen account is displayed here.
Cheque Number
The system displays the cheque number.
Purchaser Name
Specify the name of the purchaser.
GL Number
Select the account number of the GL against which a BC is issued from the adjoining option list.
GL Description
The system displays a brief description on the general ledger.
Amount
The system displays the amount based on funding.
Cheque Date
The system displays the cheque date,
Verification Number
The system displays the customer verification number.
Liquidation Details
Mode
Specify the mode of liquidation from the adjoining drop-down list.
Account Number
Specify the customer account against which you are issuing the DD. The adjoining option list displays all the accounts maintained in the system. Select the appropriate one.
Account Description
The system displays a brief description on the account.
Currency
The currency of the chosen account is displayed here.
Date
Specify the date of liquidation.
GL Number
Select the account number of the GL against which a BC is issued from the adjoining option list.
GL Description
The system displays a brief description on the general ledger.
Amount
The system displays the amount based on the liquidation
Delivery Details
Address
Specify the address to which the demand draft should be delivered. From the adjoining option list, you can choose the valid account address maintained in the system.
Clicking ‘Query’ button, the system validates if all the mandatory details are specified. This button will be disabled after the first click.
8.22 Re-validate DD Instrument
This section contains the following topics:
8.22.1 Re-validating DD Instrument
You can re-validate the expired DD instrument using ‘Revalidation of DD Instrument’ screen.
System will allow re-validating instrument only if,
- The check box ‘Allow Revalidation’ is checked in the ‘Instrument Product Maintenance’ screen.
- The instruments have not been liquidated, cancelled or refunded.
- Instrument status should be issued (INIT), Reissued (RISU), Duplicate Issue (DISU) or authorized.
To invoke ‘Revalidation of DD Instrument’ screen, type ‘DDRV’ in the field at the top right corner of the Application tool bar and click on the adjoining arrow button.
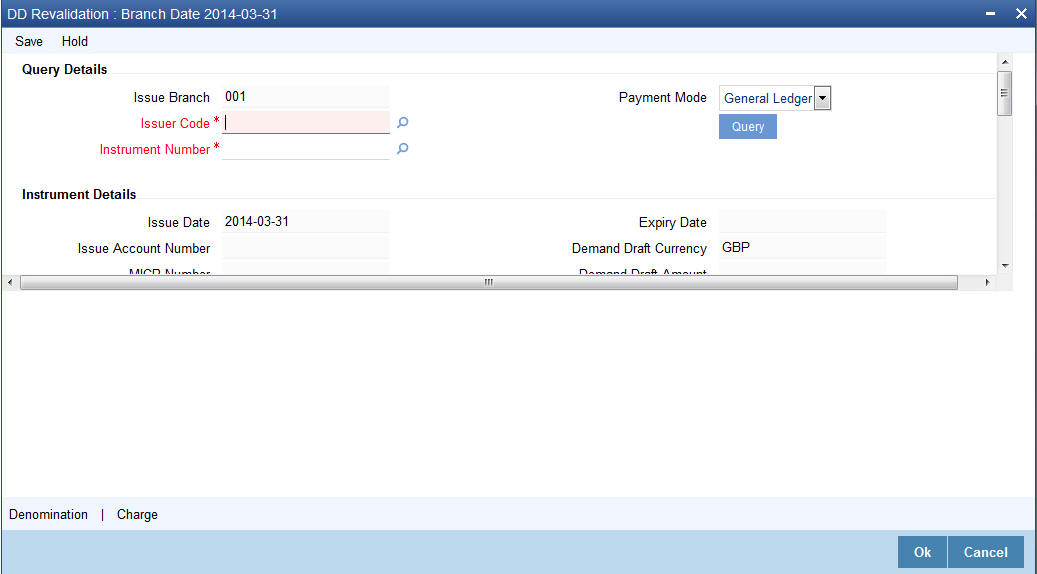
You need to specify following details here:
Issue Branch
The system defaults the current branch as the issue branch.
Issuer Code
Specify the issuer code of the cheque book. Alternatively, you can select the issuer code from the option list. The list displays all valid options maintained in the system.
Instrument Number
Specify the instrument number for the issuance of duplicate DD instrument from the adjoining option list.
Payment Mode
The system will collect charges based on the payment mode selected at the query stage.
System displays the following instrument details in this screen:
- Issue Date
- Issue Account Number
- MICR Number
- Payable Bank
- Branch
- Expiry Date
- Demand Draft Currency
- Demand Draft Amount
- Demand Draft Status
- Revalidation Date
You need to specify the following details:
Revalidation Reason
Specify the reason for the re-validation of DD instrument. The reason specified here will be shown in the revalidated instrument report.
Revalidation Frequency
System defaults re-validation frequency maintained in the ‘Instrument Type Definition’ screen; however, you can override the re-validation frequency in days, months or years.
New Expiry Date
System generates new expiry date for the re-validated instrument calculated as,
‘Old Expiry Date + ‘Revalidation Period’.
Payment Details
You need to specify the following details under ‘Payment Details’ section:
Charge Account
Specify the charge account number from which the charge needs to be collected from the adjoining option list.
Charge Currency
Specify the currency applied for the charge from the adjoining option list.
Beneficiary Details
The system displays the beneficiary details.
Additional Details
Instrument Type
The system displays the instrument type.
External Reference Number
The system displays external reference number.
8.22.1.1 Denomination Details
If you have selected ‘Payment Mode’ as ‘Cash’ at query stage, you need to specify Denomination details.
Total Amount
The system computes the total amount based on the specified denomination details, iIf you have selected ‘Payment Mode’ as ‘Cash’ at query stage.
Refer the section titled ‘Specifying denomination details’ under ‘Withdrawing cash against a Cheque’ in this manual for further details.
8.22.1.2 Specifying Charge Details
This block allows you to capture charge related details.
Refer the section titled ‘Specifying the charge details’ under ‘Withdrawing cash against a Cheque’ in this manual.
8.23 Reprint/ Reissue of DD
This section contains the following topics:
8.23.1 Reprinting / Reissuing of DD
Oracle FLEXCUBE reprints / reissues the DD due to one of the following reasons:
- Stationery got stuck in the printer
- Improper printing
- Instrument is lost by the banker
To invoke ‘DD Reprint / Reissue’ screen, type ‘DDRP’ in the field at the top right corner of the Application tool bar and click on the adjoining arrow button.
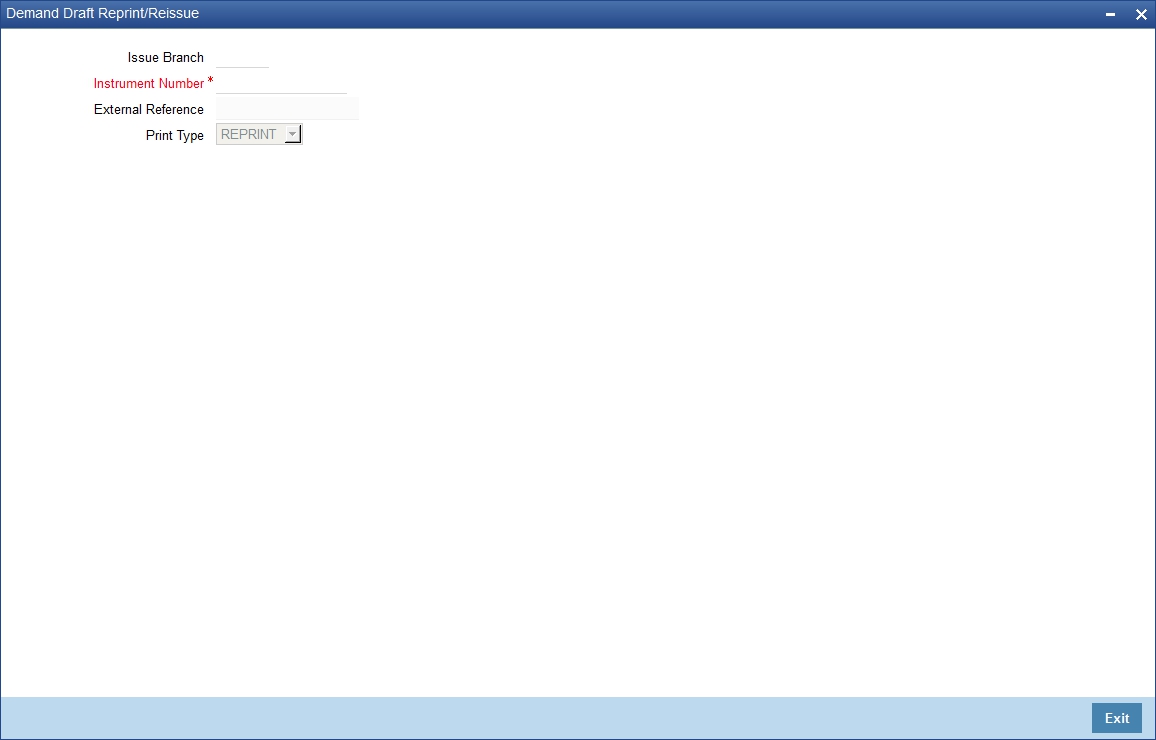
You need to specify the following details on this screen.
Issue Branch
Specify the code that identifies the branch that issued the instrument. The option list displays all valid branch codes maintained in the system. Choose the appropriate one.
Issuer Code
Specify the issuer code of the cheque book. Alternatively, you can select the issuer code from the option list. The list displays all valid options maintained in the system.
Old Instrument Number
Specify the number of the instrument that you wish to reprint. The option list displays all valid instrument numbers issued at the selected branch. Choose the appropriate one.
Print Type
Select print type from the drop-down list. The list displays the following values:
- Reissue - Select this option to reissue the DD instrument
- Reprint - Select this option to reprint the DD instrument.
- First Print - Select this option when the instrument is disbursed at the issuing branch itself. This action updates the ‘Print Status’ check box in ‘Instruments Transaction Query Screen’ as checked.
Note
If you select ‘Print Type’ as Reissue or Reprint and if the ‘Print Status’ check-box in ‘Instruments Transaction Query Screen’ is unchecked then system displays an error message
Old Instrument Details
The system displays the following old instrument details
- Instrument Date
- Issue Account Number
- Account Description
- MICR Number
- Expiry Date
- Demand Draft Currency
- Demand Draft Amount
- Payable Bank
New Instrument Details
New Instrument Number
Specify the new instrument number for the reissuance/reprinting of a new DD instrument.
New MICR Number
Specify the new MICR Number captured for the new Instrument.
Reprint / Reissue Reason
Specify the reason that should be verified during the auditing of DD reprint / Reissue. This is a mandatory field.
Reprint / Reissue Count
The system displays the count of the current reprint / Reissue operation.
Note
In order to keep track on reprints, the system will count the number of times the instrument is printed. These details will be verified by branch official or auditor.
Beneficiary Details
Beneficiary Name
The system displays the beneficiary name.
Address Line 1-3
The system displays the address.
Additional Details
Demand Draft Status
The system displays the demand draft status.
External Reference
The system displays the external reference number.
Click ‘Save’ to retain the incremented reprint / Reissue count and audit details.
8.24 Duplicate DD Instrument
This section contains the following topics:
- Section 8.24.1, "Issuing Duplicate DD Instrument"
- Section 8.24.2, "Viewing Instrument Reprint Summary"
8.24.1 Issuing Duplicate DD Instrument
You can issue the duplicate DD instrument using ‘Duplicate Issue of DD Instrument’ screen. System will allow duplicate issuance of DD instrument only if,
- The check box ‘Allow Duplicate Issuance’ is checked in the ‘Instrument Product Maintenance’ screen.
- The instruments have not been liquidated.
- Instrument status should be issued (INIT), Reissued (RISU).
To invoke ‘Duplicate Issue of DD Instrument’ screen, type ‘DDDI’ in the field at the top right corner of the Application tool bar and click on the adjoining arrow button.
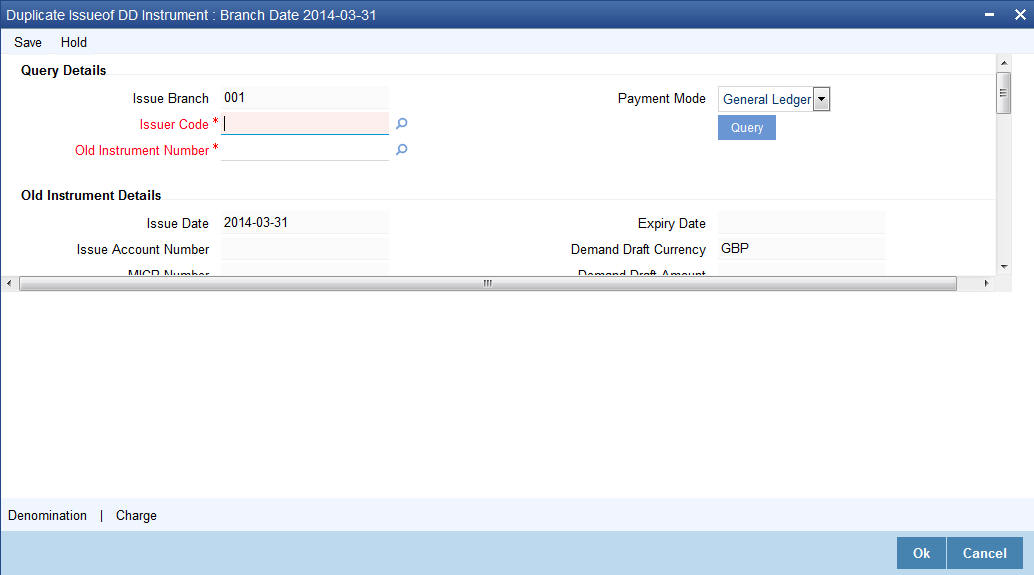
You need to specify following details here:
Issue Branch
Specify the branch where DD has been issued.
Issuer Code
Specify the issuer code of the cheque book. Alternatively, you can select the issuer code from the option list. The list displays all valid options maintained in the system.
Old Instrument Number
Specify the instrument number for the issuance of duplicate DD instrument from the adjoining option list.
Payment Mode
Select the payment mode for the duplicate issuance of the instrument from the drop-down list. System will apply charges only for the duplicate issuance of an instrument. Cancellation charges will be waived.
The system displays the following old instrument details:
- Issue Date
- Issue Account Number
- MICR Number
- Payable Bank
- Branch
- Expiry Date
- Demand Draft Currency
- Demand Draft Amount
- Demand Draft Status
New Instrument Details
New Instrument Number
Select the new instrument number from the adjoining option list.
New MICR Number
Specify the new MICR Number captured for the new Instrument.
Duplicate Issue Reason
Specify the reason for the duplicate issuance of DD instrument.
Duplicate Issue Date
Specify the duplicate issue date.
Payment Details
You need to specify the following details under ‘Payment Details’ section:
Charge Account
Specify the charge account number from which the charge needs to be collected from the adjoining option list.
Charge Currency
Specify the currency applied for the charge from the adjoining option list.
Beneficiary Details
The system displays the beneficiary details.
Additional Details
Instrument Type
The system displays the instrument type.
External Reference Number
The system displays external reference number.
8.24.1.1 Denomination Details
If you have selected ‘Payment Mode’ as ‘Cash’ at query stage, you need to specify Denomination details.
Refer the section titled ‘Specifying denomination details’ under ‘Withdrawing cash against a Cheque’ in this manual for further details.
8.24.1.2 Specifying Charge Details
Charge Details block allows you to capture charge related details. Refer the section titled ‘Specifying the charge details’ under ‘Withdrawing cash against a Cheque’ in this manual.
8.24.2 Viewing Instrument Reprint Summary
You can view the summary of instrument reprint in the ‘Instrument Reprint Summary’ screen. You can invoke this screen by typing ‘ISSRPDET’ in the field at the top right corner of the Application tool bar and clicking on the adjoining arrow button.
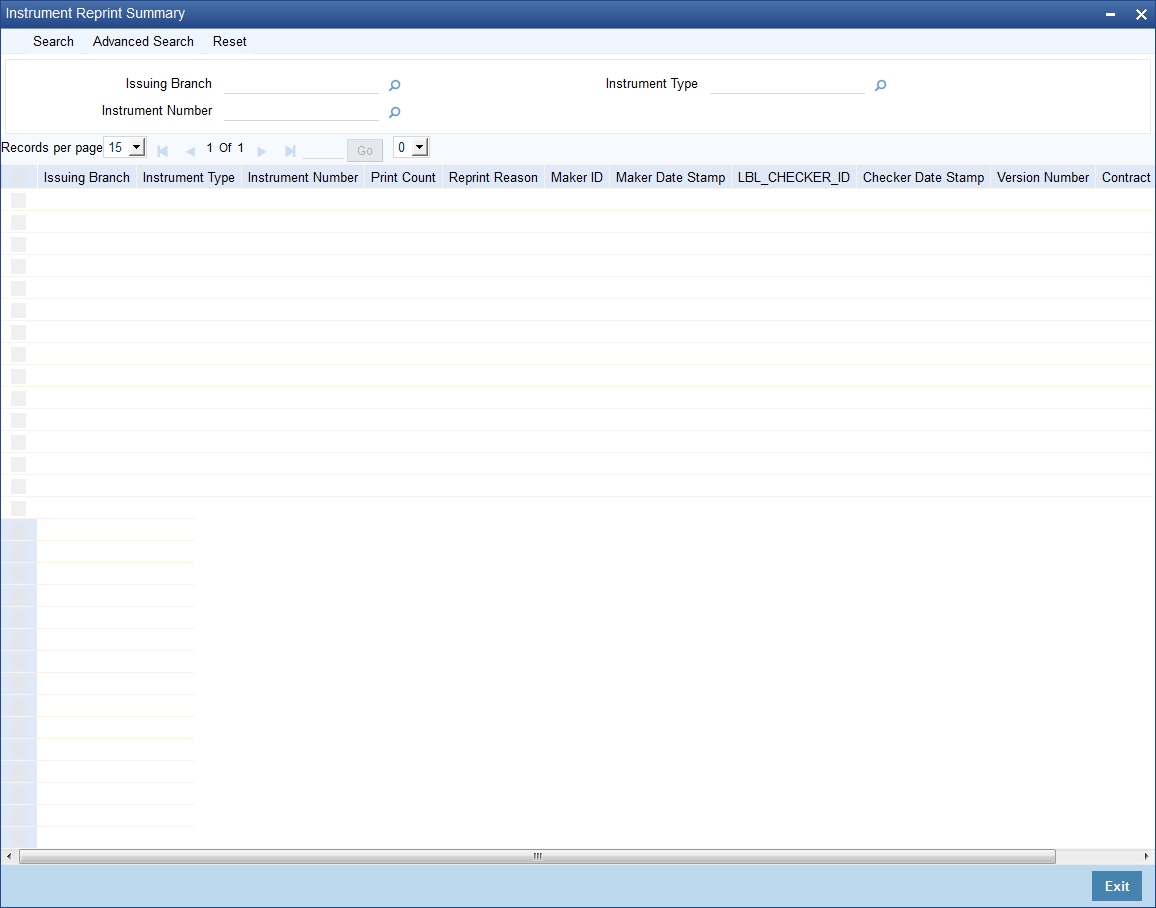
Here you can query the reprint summary details based on the following details:
Issuing Branch
Specify the branch assigned to issue the instrument reprint. The adjoining option list displays all valid branches maintained in the system. You can choose the appropriate one.
Instrument Number
Specify the number of the instrument that should be queried. The adjoining option list displays all valid instrument numbers maintained in the system. You can choose the appropriate one.
Instrument Type
Specify the type of the instrument that should be queried. The adjoining option list displays all valid instrument numbers maintained in the system. You can choose the appropriate one.
Based on the aforementioned queries, the system displays the following fields:
- Issuing Branch
- Instrument Type
- Instrument Number
- Contract Reference Number
- Reprint Count
- Reprint Reason
- Maker ID
- Maker Date
- Checker ID
- Checker Date
8.25 Issue a BC against an Account
This section contains the following topics:
- Section 8.25.1, "Selling a BC against an Account"
- Section 8.25.2, "Specifying Charge Details"
- Section 8.25.3, "Specifying MIS Details"
- Section 8.25.4, "Specifying UDF Details"
- Section 8.25.5, "Invoking OFAC Check"
8.25.1 Selling a BC against an Account
You can sell Bankers cheque (BC) against a customer’s savings account. In order to capture this transaction, you need to invoke the ‘BC Issue Against Account’ screen by typing ‘1010’ in the field at the top right corner of the Application tool bar and clicking on the adjoining arrow button.
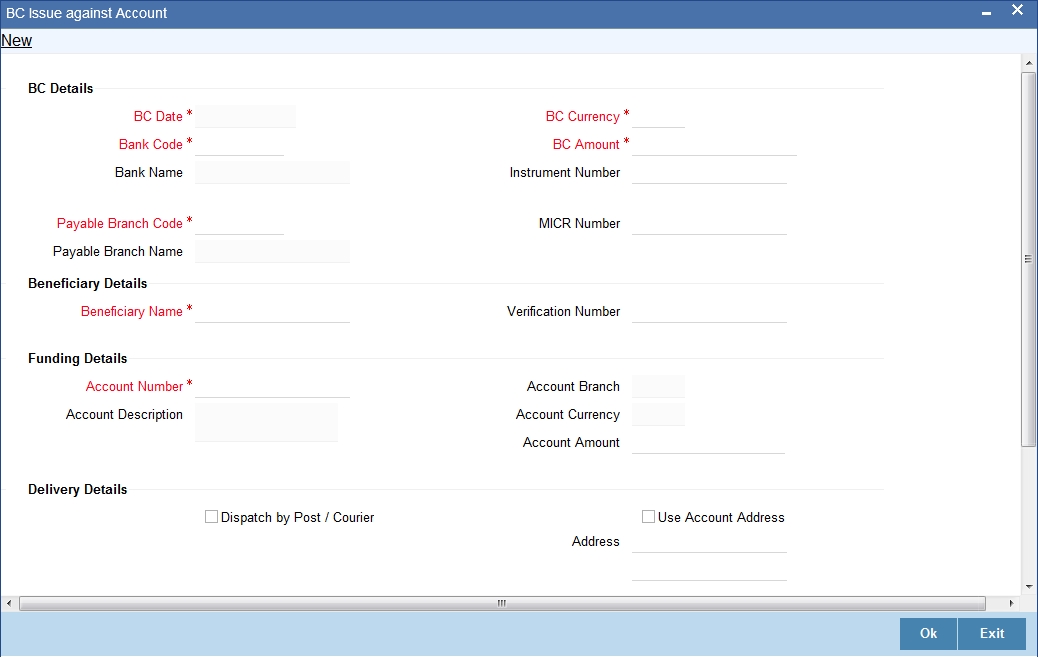
In this screen, you need to specify the following details:
BC Details
BC Date
The system defaults the BC date to the system date.
Bank Code
Specify the bank code that is issuing the BC. The adjoining option list displays all the bank codes maintained in the system.
Bank Name
The system displays the name of the bank based on the bank code selected.
Payable Branch Code
Specify the branch where the BC should be payable. The adjoining option list displays all the branch codes maintained in the system. Choose the appropriate one.
Payable Branch Name
The system defaults the payable branch name based on the payable branch code selected.
BC Currency
The system displays the currency of the banker’s cheque.
BC Amount
Specify the amount for which the BC is being issued.
Instrument Number
Specify the instrument number. On save, system validates the instrument number.
If the instrument number is available then the system moves the transaction to the enrich stage.
If the instrument number is not available then the system raises an error message as “Instrument number entered is not valid”.
If the instrument number is not specified the system defaults the least instrument number which is available for the branch and the instrument type.
MICR Number
Specify the MICR number displayed on the BC being issued.
Beneficiary Details
Beneficiary Name
Specify the name of the beneficiary in whose favor the BC is being issued.
Verification Number
Specify the verification number.
Funding Details
Account Number
Specify the customer account against which you are issuing the BC. The adjoining option list displays all the accounts maintained in the system. Select the appropriate one.
To view the joint holder’s details of an account and the mode of operation maintained at the account level, place the cursor on the Account Number field and press Ctrl+J. The system displays the ‘Joint Holder’ screen.
For more information on the ‘Joint Holder’ screen refer to the section ‘Joint Holder Maintenance’ in the Core User Manual.
Account Description
The system displays a brief description on the account based on the account number selected.
Account Branch
The system displays the account branch based on the account number selected.
Account Currency
The system displays the account currency based on the account number selected.
Account Amount
The system displays the amount in account currency based on the BC amount.
Mode of Charge
Select the mode of charge through which the charges are collected for the BC issuance from the drop-down list. The list displays the following values:
- Cash - If the customer deposits the charge amount by cash for BC issuance, then Cash GL is debited for charges
- Transaction Account - If the customer account or transaction account to be debited for charges. By default, the system selects this option
- Other Account - If the charges to be borne from other customer account.
Charge Account
Specify the charge account number which has to be debited. Alternatively, you can select the charge account from the option list. The list displays all charge accounts maintained in the system. This field is enabled if you select the ‘Other Account’ option in the ‘Mode of Charge’ field. You can validate the total denomination amount in the Denomination screen, if you select the ‘Mode of Charge’ as Cash.
Delivery Details
Dispatch by Post/Courier
Check this box to dispatch the cheque book by post or courier.
If you check ‘Dispatch by Post /Courier’, then the 'Use Account Address' or 'Address' should be mandatory.
Use Account Address
Check this box to default the address maintained at the account level.
Address
Specify the address to which the banker’s cheque should be delivered. From the adjoining option list, you can choose the valid account address maintained in the system. The system displays the address of the customer if the check box ‘Use Account Address’ is checked.
Additional Details
Narrative
The system defaults the ‘BC Issued in favour of <Beneficiary Name>’ here. However you can modify this.
The system updates the beneficiary name based on the name specified in ‘Beneficiary Name’. However you can modify it.
External Reference
The system generates a unique number based on the branch-specific sequence number generation logic and displays it as the ‘External Reference’.
Total Charge Amount
The system displays the total charge amount for the issued BC.
In the single stage flow, if there is an transaction level override or error during approval then the transaction will be moved to the pending queue. Without save action being initiated, the transaction will not be in pending queue.
On clicking Pickup button, the system populates the values in all the callforms of the screen and clicking pickup button is mandatory if you make any changes to the Transaction amount and exchange rate after first pickup.
Once you click ‘Pickup’ button once, then on amendment of xrate, amount, charge, pickup will be mandatory before save.
Clicking ‘Pickup’ button, the system defaults the following details:
Instrument Number
Specify the instrument number.
Customer Id
Specify the customer Id.
Customer Name
Specify the customer name.
Exchange Rate
The exchange rate is displayed here.
Total Charge
System displays the total charge.
Account Title
The system displays a brief title for the chosen account.
Customer ID
The system displays the customer ID based on the account specified.
Charges
The system computes the charges applicable for the transaction and displays it here.
Account Amount
The system displays the amount to be debited from the account (in the account currency) after calculating the applicable charges. This amount depends on the charge method – whether inclusive or exclusive.
Note
- During the issue process, based on the issue type, the system will use the instrument types (BCW, BCA, BCG, BCC/DDW, DDA, DDG, DDC) for the resolution of the retail product and DAO accounts.
- Instrument number generation will be based on the single instrument type (BC/DD) and issuer code at the inventory level.
- If the system is not using the inventory module, then a new instrument type called ‘BCI’ or ‘DDI’ will be used to generate (issue) the instrument and the sequence number generation will be based on this new type and issuer code.
- This will ensure that the instrument number is unique for the instrument BC or DD and issuer code irrespective of the issue type. i.e., across all types of BC and DD, the instrument number will be unique.
8.25.2 Specifying Charge Details
This block allows you to capture charge related details such as the following:
Charge Component
The system defaults the charge components applicable to the transaction.
Waiver
You can waive a certain charge for the customer by checking this box against the charge component.
Charge Amount
The system displays the charge amount to be deducted for the corresponding charge component. You can edit the amount.
Charge in LCY
In case the transaction currency is different from the local currency, the system will compute the local currency equivalent of the charge and display it here.
Exchange Rate
The exchange rate used for the currency conversion is displayed here. If the charge currency is the same as the transaction currency, the system will display ‘1’ as the exchange rate.
8.25.3 Specifying MIS Details
This block allows you to capture details pertaining to MIS. Click on the ‘MIS’ tab to invoke the MIS Details screen.
Cost Center
Select a cost center from the list of values. The MIS code assigned to the cost center related to the account is displayed here.
LOAN_TYPE
Select the type of the loan from the adjoining option list.
LOAN TERM
Select the term of the loan from the adjoining option list.
Contracts in Various Currencies
Select the currency to which the contract belongs.
Account Officer
Select the account officer who is in-charge of executing this transaction.
Standard Industrial Code
Select the industry to which the customer belongs.
8.25.4 Specifying UDF Details
You can capture the UDF details in the ‘UDF’ tab of the screen.Specify the following details.
Field Name
All UDFs specified for the account class is displayed here.
Field Value
The value for each UDF is displayed here. You can alter this value if necessary.
Click save icon to save the transaction.
The approver can fetch this transaction for his/her task list and authorize it. The authorization process is similar to that of cash deposit.
Note
Depending on the ‘Display Type’ selected for customer / account in ‘Instruction Maintenance’ screen, the instruction will be displayed the time of saving the input stage and authorizing the transaction.
For more details about viewing customer / account instructions, refer the section titled ‘Viewing Customer / Account Instructions on ‘F6’ Key-Press’ and Viewing Customer / Account Instruction Details in Override Screen’ in this user manual.
Refer the corresponding section under ‘Depositing Cash’ in the chapter ‘Cash Transactions’ of this User Manual for further details.
8.25.5 Invoking OFAC Check
OFAC Check enables the application to call an external web service to perform black list check for customer and customer accounts and warn the users appropriately while transacting with black listed customers. This will also allow capturing the user remarks in such scenarios before overriding the black list warning.
To invoke this screen, click ‘OFAC Check’ button in ‘Banker’s Cheque Sale (Against Account) ’screen.
This button can be made visible while carrying out the actual customization. Request building, response interpretation in the database layer needs to be done as part of customization to enable this feature.
On clicking this button, system will build the request XML and call the web service. Once the response is received from the external system, the user will be allowed to enter his remarks in the screen displayed. The response received will also be sent to Oracle FLEXCUBE Database layer for any further interpretations of the same.
Here, you can view the following details.
External System Response
The response from the external system regarding the black listed customer will be defaulted here.
User Remarks
You can specify your remarks here.
8.26 Issue BC against Cheque
This section contains the following topics:
- Section 8.26.1, "Selling BC against Cheque"
- Section 8.26.2, "Specifying Charge Details"
- Section 8.26.3, "Specifying MIS Details"
- Section 8.26.4, "Specifying UDF details"
8.26.1 Selling BC against Cheque
You can sell Bankers cheque (BC) against an in-house cheque drawn on customer’s savings account. In order to capture this transaction, you need to invoke the ‘Bankers Cheque Sale Against Account’ screen by typing ‘8335’ in the field at the top right corner of the Application tool bar and clicking on the adjoining arrow button.

In this screen, you need to specify the following details:
BC Details
BC Date
The system defaults the BC date to the system date. However you can change it using the adjoining calendar.
Bank Code
Specify the code of the bank that is issuing the BC. The adjoining option list displays all the bank codes maintained in the system.
Bank Name
The system displays the name of the bank.
Payable Branch Code
Specify the branch where the BC should be payable. The adjoining option list displays all the branch codes maintained in the system. Choose the appropriate one.
Payable Branch Name
The system defaults the payable branch name based on the payable branch code
BC Currency
The system displays the local currency of the banker's cheque.
BC Amount
Specify the amount for which the BC is being issued.
Instrument Number
Specify the instrument number. On save, system validates the instrument number.
If the instrument number is available then the system moves the transaction to the enrich stage.
If the instrument number is not available then the system raises an error message as "Instrument number entered is not valid".
If the instrument number is not specified the system defaults the least instrument number which is available for the branch and the instrument type.
MICR Number
Specify the MICR number displayed on the BC being issued.
Beneficiary Details
Beneficiary Name
Specify the name of the beneficiary in whose favor the BC is being issued.
Verification Number
Specify the verification number.
Funding Details
Account Number
Specify the customer account against which you are issuing the BC. The adjoining option list displays all the accounts maintained in the system. Select the appropriate one.
To view the joint holder’s details of an account and the mode of operation maintained at the account level, place the cursor on the Account number field and press Ctrl+J. The system displays the ‘Joint Holder’ screen.
For more information on the ‘Joint Holder’ screen refer to the section ‘Joint Holder Maintenance’ in the Core User Manual.
Account Description
The system displays a brief description on the account.
Cheque Number
Specify the number of the cheque being drawn for BC sale.
Account Branch
Select the branch code from the adjoining option list.
Account Currency
The currency of the account is displayed here.
Account Amount
The system displays the amount in account currency based on the currency.
Cheque Date
Specify the date of the cheque from the adjoining calendar.
Mode of Charge
Select the mode of charge through which the charges are collected for the BC issuance from the drop-down list. The list displays the following values:
- Cash - If the customer deposits the charge amount by cash for BC issuance, then Cash GL is debited for charges
- Transaction Account - If the customer account or transaction account to be debited for charges. By default, the system selects this option
- Other Account - If the charges to be borne from other customer account
Charge Account
Specify the charge account number which has to be debited. Alternatively, you can select the charge account from the option list. The list displays all charge accounts maintained in the system. This field is enabled if you select the ‘Other Account’ option in the ‘Mode of Charge’ field. You can validate the total denomination amount in the Denomination screen, if you select the ‘Mode of Charge’ as Cash.
Delivery Details
Dispatch by Post/Courier
Check this box to dispatch the BC by post or courier.
Use Account Address
Check this box to default the address maintained at the account level.
Address
Specify the address to which the banker's cheque should be delivered. From the adjoining option list, you can choose the valid account address maintained in the system. The system displays the address of the customer if the check box 'Use Account Address' is checked.
Additional Details
Narrative
The system defaults the ‘BC Issued in favour of <Beneficiary Name> here. However you can modify this.
External Reference
The system generates a unique number based on the branch-specific sequence number generation logic and displays it as the 'External Reference’.
Total Charge Amount
The system displays the total charge amount for the issued BC.
In the single stage flow, if there is an transaction level override or error during approval then the transaction will be moved to the pending queue. Without save action being initiated, the transaction will not be in pending queue.
On clicking Pickup button, the system populates the values in all the callforms of the screen and clicking pickup button is mandatory if you make any changes to the Transaction amount and exchange rate after first pickup.
Once you click ‘Pickup’ button once, then on amendment of xrate, amount, charge, pickup will be mandatory before save. Clicking ‘Pickup’ button, the system defaults the following details:
Instrument Number
The system displays the instrument number.
Customer Id
The system displays the customer Id.
Customer Name
The system displays the customer name based on the customer Id.
Exchange Rate
The exchange rate is displayed here.
Total Charge
System displays the total charge.
Account Title
The system displays a brief title for the chosen account.
Account
The system displays the customer account based on the account specified.
Charges
The system computes the charges applicable for the transaction and displays it here.
Account Amount
The system displays the amount to be debited from the account (in the account currency) after calculating the applicable charges. This amount depends on the charge method – whether inclusive or exclusive.
8.26.2 Specifying Charge Details
This block allows you to capture charge related details such as the following:
Charge Component
The system defaults the charge components applicable to the transaction.
Charge Currency
The system displays the currency in which the charge has to be deducted.
Waiver
You can waive a certain charge for the customer by checking this box against the charge component.
Charge Amount
The system displays the charge amount to be deducted for the corresponding charge component. You can edit the amount.
Charge in LCY
In case the transaction currency is different from the local currency, the system will compute the local currency equivalent of the charge and display it here.
Exchange Rate
The exchange rate used for the currency conversion is displayed here. If the charge currency is the same as the transaction currency, the system will display ‘1’ as the exchange rate.
8.26.3 Specifying MIS Details
This block allows you to capture details pertaining to MIS. Click on the ‘MIS’ tab to invoke the MIS Details screen.
Refer the section titled ‘Specifying MIS details’ under ‘Capturing a cash deposit’ for further details.
8.26.4 Specifying UDF details
You can capture these details in the ‘UDF’ tab of the screen.Specify the following details.
Field Name
All UDFs specified for the account class is displayed here.
Field Value
The value for each UDF is displayed here. You can alter this value if necessary.
Click save icon to save the transaction. The approver can fetch this transaction for his/her task list and authorize it. The authorization process is similar to that of cash deposit.
Note
Depending on the ‘Display Type’ selected for customer / account in ‘Instruction Maintenance’ screen, the instruction will be displayed at the time of saving the input stage and authorizing the transaction.
For more details about viewing customer / account instructions, refer the section titled ‘Viewing Customer / Account Instructions on ‘F6’ Key-Press’ and Viewing Customer / Account Instruction Details in Override Screen’ in this user manual.
Refer the corresponding section under ‘Depositing Cash’ in the chapter ‘Cash Transactions’ of this User Manual for further details.
8.27 Close Account by BC
This section contains the following topics:
- Section 8.27.1, "Close Out Withdrawal by BC"
- Section 8.27.2, "Specifying Charge Details"
- Section 8.27.3, "Specifying MIS Details"
- Section 8.27.4, "Specifying UDF Details"
8.27.1 Close Out Withdrawal by BC
You can close an account and pay the account balance (by issuing a BC) to the customer using the ‘Close out Withdrawal by Bankers Cheque’ screen. You can invoke this screen by typing ‘1300’ in the field at the top right corner of the Application tool bar and clicking on the adjoining arrow button.
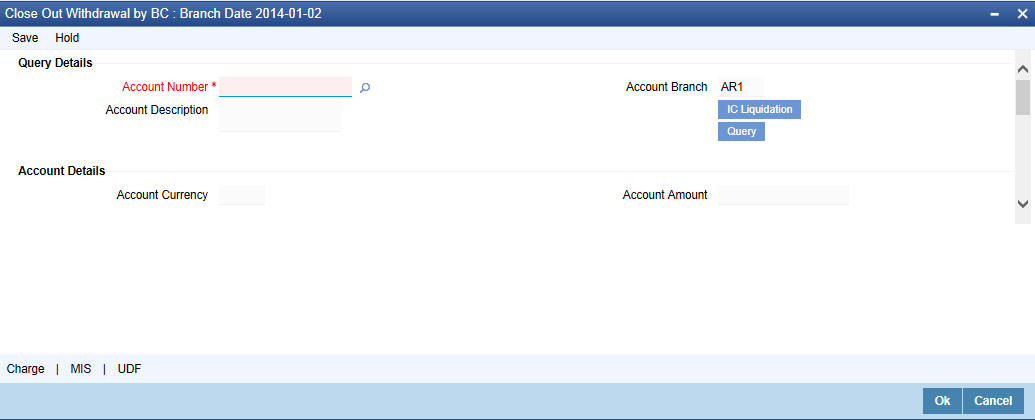
On invoking this screen, the External Reference Number of the transaction, the Account Branch, and Account No are displayed.
Specify an account number or select an account number from the list of values.
Clicking ‘Query’ button, the system validates if all the mandatory details are specified. This button will be disabled after the first click.
Clicking ‘Pickup’ button, the system defaults the following details:
Account Number
Specify the customer account against which you are issuing the BC. The adjoining option list displays all the accounts maintained in the system. Select the appropriate one.
To view the joint holder’s details of an account and the mode of operation maintained at the account level, place the cursor on the Account Number field and press Ctrl+J. The system displays the ‘Joint Holder’ screen.
For more information on the ‘Joint Holder’ screen refer to the section ‘Joint Holder Maintenance’ in the Core User Manual.
Account Description
The system displays a brief description on the account.
Account Branch
Select the branch code from the adjoining option list.
Account Currency
The currency of the account is displayed here.
Account Amount
The system displays the amount in account currency based on the currency.
BC Details
BC Date
The system defaults the BC date to the system date. However you can change it using the adjoining calendar.
Bank Code
Specify the code of the bank that is issuing the BC. The adjoining option list displays all the bank codes maintained in the system.
Bank Name
The system displays the name of the bank.
Payable Branch Code
Specify the branch where the BC should be payable. The adjoining option list displays all the branch codes maintained in the system. Choose the appropriate one.
Payable Branch Name
The system defaults the payable branch name based on the payable branch code
Instrument Number
The system displays the instrument number.
MICR Number
The system displays the MICR number.
Serial Number
The system displays the serial number.
Beneficiary Details
Beneficiary Name
Specify the beneficiary name.
Dispatch by Post/Courier
Check this box to dispatch the bankers cheque by post or courier.
Use Account Address
Check this box to default the address maintained at the account level.
Address
Specify the address to which the banker's cheque should be delivered. From the adjoining option list, you can choose the valid account address maintained in the system. The system displays the address of the customer if the check box 'Use Account Address' is checked.
Additional Details
Narrative
Enter remarks about the transaction.
External Reference
The system generates a unique number based on the branch-specific sequence number generation logic and displays it as the 'External Reference'.
8.27.2 Specifying Charge Details
Charge Details block allows you to capture charge related details.
For more details, refer the section ‘Specifying Charge Details’ under ‘Selling a BC against an Account’ in this manual.
8.27.3 Specifying MIS Details
MIS Details block allows you to capture details pertaining to MIS.For more details, refer the section ‘Specifying MIS Details’ under ‘Selling a BC against an Account’ in this manual.
8.27.4 Specifying UDF Details
You can capture the UDF details in the ‘UDF’ tab of the screen.Refer the section titled ‘Specifying the UDF details’ under ‘Capturing a cash deposit’ for further details.
Click save icon to go to the next stage – Authorization.
In the Authorization stage, you need to assign the transaction to a teller who will authorize or reject the transaction.
Note
- The contract is saved only when there are no overrides or when all overrides have been authorized by a supervisor.
- Once the transaction is successfully authorized the customer’s account balance is set to zero and a BC is issued for the net amount.
For more information on ‘Authorization’ and ‘Submission’, refer the section ‘Withdrawing Cash against a Cheque’ in this manual.
Once a transaction is complete you can reverse this transaction, if required.
Note
Depending on the ‘Display Type’ selected for customer / account in ‘Instruction Maintenance’ screen, the instruction will be displayed at the time of saving the input stage and authorizing the transaction.
For more details about viewing customer / account instructions, refer the section titled ‘Viewing Customer / Account Instructions on ‘F6’ Key-Press’ and Viewing Customer / Account Instruction Details in Override Screen’ in this user manual.
For more information on reversing a transaction, refer the section ‘Transaction Reversal’ in the ‘Cash Transactions’ manual.
8.28 Close Account
This section contains the following topics:
- Section 8.28.1, "Account Close Out Withdrawal"
- Section 8.28.2, "Specifying Charge Details"
- Section 8.28.3, "Specifying MIS Details"
- Section 8.28.4, "Specifying UDF details"
8.28.1 Account Close Out Withdrawal
You can close an account and pay the account balance to the customer using the ‘Account Close out Withdrawal’ screen. You can invoke this screen by typing ‘1320’ in the field at the top right corner of the Application tool bar and clicking on the adjoining arrow button.
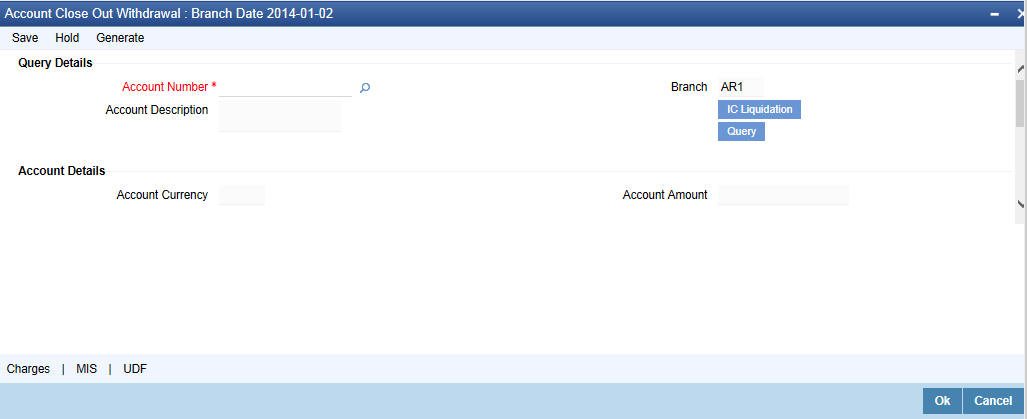
On invoking this screen, the External Reference Number of the transaction, the Account Branch, and Account Number are displayed.
External Reference Number
The system displays the external reference number based on the account number selected.
Account Number
Select the account number from the adjoining option list.
To view the joint holder’s details of an account and the mode of operation maintained at the account level, place the cursor on the Account Number field and press Ctrl+J. The system displays the ‘Joint Holder’ screen.
For more information on the ‘Joint Holder’ screen refer to the section ‘Joint Holder Maintenance’ in the Core User Manual.
Branch
The system displays the branch based on the account number selected.
Account Description
The system displays a brief description on the account.
In the single stage flow, if there is an transaction level override or error during approval then the transaction will be moved to the pending queue. Without save action being initiated, the transaction will not be in pending queue.
On clicking Pickup button, the system populates the values in all the callforms of the screen and clicking pickup button is mandatory if you make any changes to the Transaction amount and exchange rate after first pickup.
Once you click ‘Pickup’ button once, then on amendment of xrate, amount, charge, pickup will be mandatory before save. On pick up, the fields that are currently enabled in the enrich stage will alone be retained as enabled fields.
Clicking ‘Pickup’ button, the system defaults the following details:
External Reference
The system displays the external reference number.
Branch
The system displays the branch code.,
Account Number
Specify the customer account number.
Account Description
The system displays a brief description on the account.
Account Currency
The currency of the account is displayed here.
Account Amount
The system displays the amount in account currency based on the currency.
Offset Branch
Select the offset branch from the adjoining option list.
Offset Account
Specify the offset account that should be used to post this transaction. The adjoining option list displays all the accounts maintained in the system. Choose the appropriate one.
Account Title
The system displays the account title.
Offset Currency
The system displays the offset currency.
The system generates a unique number based on the branch-specific sequence number generation logic and displays it as the 'External Reference'.
8.28.2 Specifying Charge Details
Charge Details block allows you to capture charge related details.
For more details, refer the section ‘Specifying Charge Details’ under ‘Selling a BC against an Account’ in this manual.
8.28.3 Specifying MIS Details
MIS Details block allows you to capture details pertaining to MIS.For more details, refer the section ‘Specifying MIS Details’ under ‘Selling a BC against an Account’ in this manual.
8.28.4 Specifying UDF details
You can capture these details in the ‘UDF’ tab of the screen.Refer the section titled ‘Specifying the UDF details’ under ‘Capturing a cash deposit’ for further details.
Click save icon to go to the next stage – Authorization.
In the Authorization stage, you need to assign the transaction to a teller who will authorize or reject the transaction.
8.29 Issue a BC against a GL
This section contains the following topics:
- Section 8.29.1, "Issuing a BC against a GL"
- Section 8.29.2, "Specifying Charge Details"
- Section 8.29.3, "Specifying MIS Details"
- Section 8.29.4, "Specifying UDF details"
- Section 8.29.5, "Invoking OFAC Check"
8.29.1 Issuing a BC against a GL
You can issue a BC against a GL account for your customer through the ‘BC Issue against GL’ screen. You can invoke this screen by typing ‘8302’ in the field at the top right corner of the Application tool bar and clicking on the adjoining arrow button.
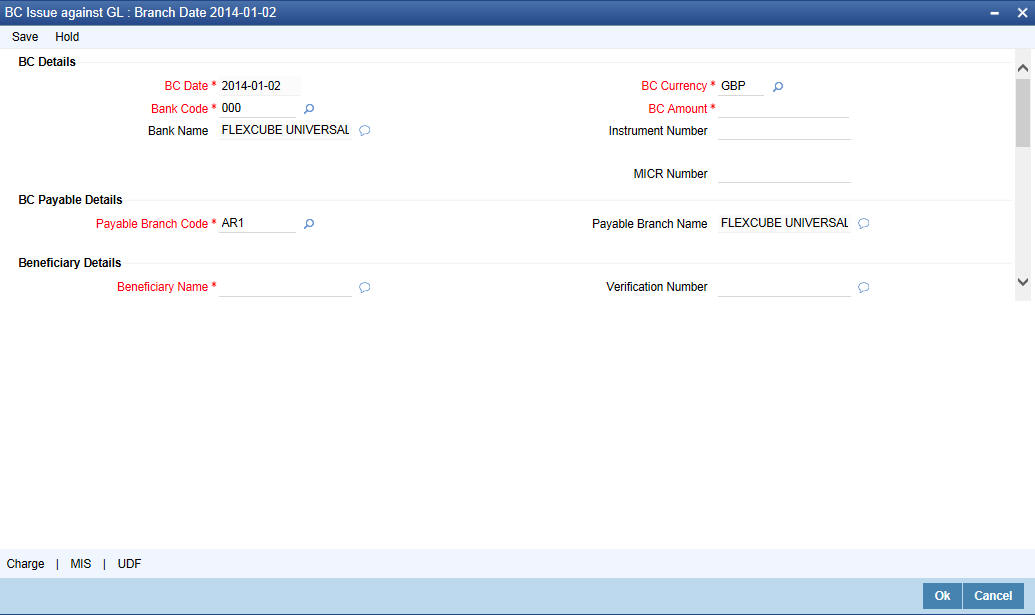
On invoking this screen, the ‘External Reference Number’ and the ‘Banker’s Cheque Date’ are displayed. You need to specify the following details:
BC Details
BC Date
The system defaults the BC date to the system date. However you can change it using the adjoining calendar.
Bank Code
Specify the code of the bank that is issuing the BC. The adjoining option list displays all the bank codes maintained in the system.
Bank Name
The system displays the name of the bank.
Payable Branch Code
Specify the branch where the BC should be payable. The adjoining option list displays all the branch codes maintained in the system. Choose the appropriate one.
Payable Branch Name
The system defaults the payable branch name based on the payable branch code
BC Currency
The system displays the local currency of the banker's cheque. However you can modify it.
BC Amount
Specify the amount for which the BC is being issued.
Instrument Number
Specify the instrument number. On save, system validates the instrument number.
If the instrument number is available then the system moves the transaction to the enrich stage.
If the instrument number is not available then the system raises an error message as ”Instrument number entered is not valid”.
If the instrument number is not specified the system defaults the least instrument number which is available for the branch and the instrument type.
MICR Number
Specify the MICR number displayed on the BC being issued.
Beneficiary Details
Beneficiary Name
Specify the name of the beneficiary in whose favor the BC is being issued.
Verification Number
Specify the verification number.
Funding Details
GL Number
Select the account number of the GL against which a BC is issued from the adjoining option list.
GL Description
The system displays a brief description on the general ledger.
GL Currency
Specify the currency of the GL against which a BC is issued or select a GL currency from the list of values.
GL Amount
The system displays the amount in GL account currency.
Delivery Details
Dispatch by Post/Courier
Check this box to dispatch the BC by post or courier.
Address
Specify the address to which the banker's cheque should be delivered. From the adjoining option list, you can choose the valid account address maintained in the system. The system displays the address of the customer if the check box 'Use Account Address' is checked in the ‘BC Issue Against Account’ screen.
Additional Details
Narrative
The system defaults the ‘BC Issued in favour of <Beneficiary Name> here. However you can modify this.
External Reference
The system displays the external reference number.
In the single stage flow, if there is an transaction level override or error during approval then the transaction will be moved to the pending queue. Without save action being initiated, the transaction will not be in pending queue.
On clicking Pickup button, the system populates the values in all the callforms of the screen and clicking pickup button is mandatory if you make any changes to the Transaction amount and exchange rate after first pickup.
Once you click ‘Pickup’ button once, then on amendment of xrate, amount, charge, pickup will be mandatory before save. On pick up, the fields that are currently enabled in the enrich stage will alone be retained as enabled fields.
Clicking ‘Pickup’ button, the system defaults the following details:
General Ledger Number
Specify the GL number.
General Ledger Currency
Specify the GL currency.
General Ledger Title
The system displays a brief title for the chosen account.
Txn Ccy Rate
The system displays the transaction currency.
Charges
The system computes the charges applicable for the transaction and displays it here.
Total Amount
The system displays the total amount of the transaction.
Instrument Number
The system displays the instrument number.
Customer ID
The system displays the customer ID.
Customer Name
The system displays the customer name based on the customer ID
8.29.2 Specifying Charge Details
This block allows you to capture charge related details.
For more details, refer the section ‘Specifying Charge Details’ under ‘Selling a BC against an Account’ in this manual.
8.29.3 Specifying MIS Details
This block allows you to capture details pertaining to MIS.
For more details, refer the section ‘Specifying MIS Details’ under ‘Selling a BC against an Account’ in this manual.
8.29.4 Specifying UDF details
You can capture these details in the ‘UDF’ tab of the screen.
Refer the section titled ‘Specifying the UDF details’ under ‘Capturing a cash deposit’ for further details.
Click save icon to save the transaction.
The approver can fetch this transaction for his/her task list and authorize it. The authorization process is similar to that of cash deposit.
Refer the corresponding section under ‘Depositing Cash’ in the chapter ‘Cash Transactions’ of this User Manual for further details..
8.29.5 Invoking OFAC Check
OFAC Check enables the application to call an external web service to perform black list check for customer and customer accounts and warn the users appropriately while transacting with black listed customers. This will also allow capturing the user remarks in such scenarios before overriding the black list warning.
To invoke this screen, click ‘OFAC Check’ button in ‘BC Issue Against GL ’screen.
This button can be made visible while carrying out the actual customization. Request building, response interpretation in the database layer needs to be done as part of customization to enable this feature.
On clicking this button, system will build the request XML and call the web service. Once the response is received from the external system, the user will be allowed to enter his remarks in the screen displayed. The response received will also be sent to Oracle FLEXCUBE Database layer for any further interpretations of the same.
Here, you can view the following details.
External System Response
The response from the external system regarding the black listed customer will be defaulted here.
User Remarks
You can specify your remarks here.
8.30 Issue a BC to a walk-in customer
This section contains the following topics:
- Section 8.30.1, "Issuing a BC to a walk-in customer"
- Section 8.30.2, "Invoking OFAC Check"
- Section 8.30.3, "Specifying Denomination Details"
- Section 8.30.4, "Specifying Charge Details"
- Section 8.30.5, "Specifying MIS Details"
- Section 8.30.6, "Specifying UDF details"
8.30.1 Issuing a BC to a walk-in customer
You can issue a BC to any walk-in customer through the ‘BC Issue Walk-In’ screen. You can invoke this screen by typing ‘8301’ in the field at the top right corner of the Application tool bar and clicking on the adjoining arrow button.
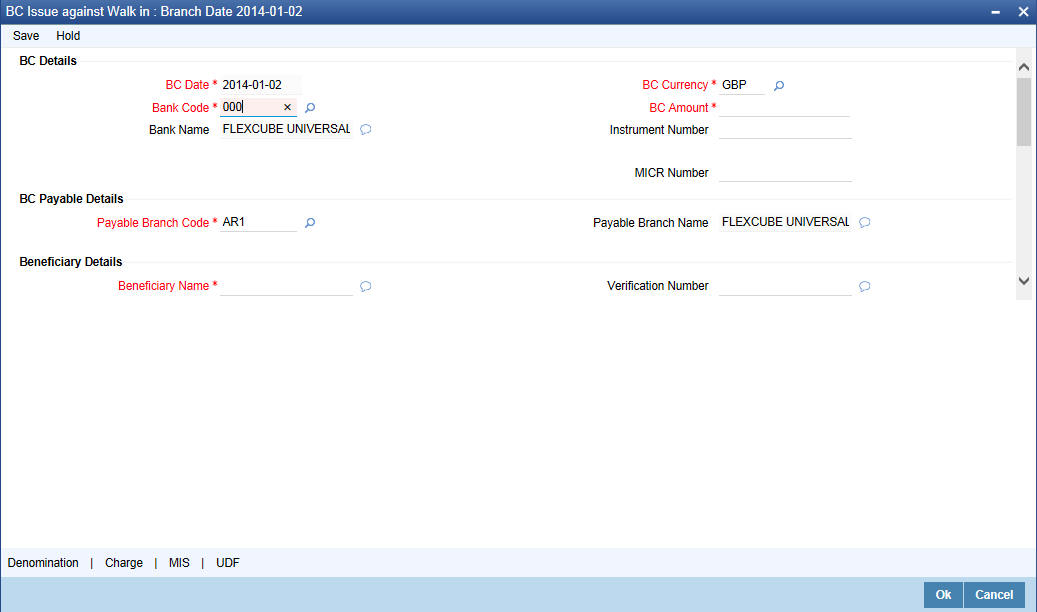
You need to specify the following details:
BC Details
BC Date
The system defaults the BC date to the system date. However you can change it using the adjoining calendar.
Bank Code
Select the clearing bank code for the transaction. The adjoining option list displays all the bank codes maintained in the system.
Bank Name
The system displays the name of the bank.
Payable Branch Code
Specify the branch where the BC should be payable. The adjoining option list displays all the branch codes maintained in the system. Choose the appropriate one.
Payable Branch Name
The system defaults the payable branch name based on the payable branch code
BC Currency
Select the currency in which the BC is being issued from the adjoining option list.
BC Amount
Specify the amount for which the BC needs to be drawn in the cheque currency.
Instrument Number
Specify the instrument number. On save, system validates the instrument number.
If the instrument number is available then the system moves the transaction to the enrich stage.
If the instrument number is not available then the system raises an error message as “Instrument number entered is not valid”.
If the instrument number is not specified the system defaults the least instrument number which is available for the branch and the instrument type.
MICR Number
Specify the MICR number displayed on the BC being issued.
Beneficiary Details
Beneficiary Name
Specify the name of the beneficiary in whose favor the BC is being drawn.
Verification Number
Specify the verification number.
Funding Details
Transaction Currency
The system defaults the transaction currency. However it can be modified.
Transaction Amount
The system displays the total transaction amount based on the currency.
Purchaser Details
Purchaser Name
Specify the name of the purchaser.
Verification Number
Specify the verification number.
Delivery Details
Dispatch by Post/Courier
Check this box to dispatch BC by post or courier.
Address
Specify the address to which the banker’s cheque should be delivered. From the adjoining option list, you can choose the valid account address maintained in the system.
Additional Details
Narrative
The system defaults the ‘BC Issued in favour of <Beneficiary Name> here. However you can modify this.
External Reference
The system generates a unique number based on the branch-specific sequence number generation logic and displays it as the 'External Reference'.
In the single stage flow, if there is an transaction level override or error during approval then the transaction will be moved to the pending queue. Without save action being initiated, the transaction will not be in pending queue.
On clicking Pickup button, the system populates the values in all the callforms of the screen and clicking pickup button is mandatory if you make any changes to the Transaction amount and exchange rate after first pickup.
Once you click ‘Pickup’ button once, then on amendment of xrate, amount, charge, pickup will be mandatory before save.
Clicking ‘Pickup’ button, the system defaults the following details:
Instrument Number
The system displays the instrument number.
Customer Id
The system displays the customer ID.
Customer Name
The system displays the customer name based on the customer ID.
Transaction Currency Rate
The system displays the exchange to e used for the transaction in case the transaction currency is different from the BC currency.
Charges
The system computes the charges applicable to the transaction and displays the amount here.
Total Amount
The system computes the total amount to be paid by the walk-in customer by adding the charge amount to the BC amount.
8.30.2 Invoking OFAC Check
OFAC Check enables the application to call an external web service to perform black list check for customer and customer accounts and warn the users appropriately while transacting with black listed customers. This will also allow capturing the user remarks in such scenarios before overriding the black list warning.
To invoke this screen, click ‘OFAC Check’ button in ‘BC Issue Walk-In’ screen.
This button can be made visible while carrying out the actual customization. Request building, response interpretation in the database layer needs to be done as part of customization to enable this feature.
On clicking this button, system will build the request XML and call the web service. Once the response is received from the external system, the user will be allowed to enter his remarks in the screen displayed. The response received will also be sent to Oracle FLEXCUBE Database layer for any further interpretations of the same.

Here, you can view the following details.
External System Response
The response from the external system regarding the black listed customer will be defaulted here.
User Remarks
You can specify your remarks here.
8.30.3 Specifying Denomination Details
In this block, you can capture details of the currency denominations involved in the transaction.
Refer the section titled ‘Specifying denomination details’ under ‘Capturing a cash deposit’ for further details.
8.30.4 Specifying Charge Details
Click on the Charges tab to capture charge related details.
For more details, refer the section ‘Specifying Charge Details’ under ‘Selling a BC against an Account’ in this manual.
8.30.5 Specifying MIS Details
Click on the MIS tab to capture details pertaining to MIS. Refer the section titled ‘Specifying the MIS details’ under ‘Capturing a cash deposit’ for further details.
8.30.6 Specifying UDF details
You can capture these details in the ‘UDF’ tab of the screenRefer the section titled ‘Specifying the UDF details’ under ‘Capturing a cash deposit’ for further details.
Click save icon to save the transaction.
The approver can fetch this transaction for his/her task list and authorize it. The authorization process is similar to that of cash deposit.
Refer the corresponding section under ‘Depositing Cash’ in the chapter ‘Cash Transactions’ of this User Manual for further details.
Refer the chapters titled ‘Transaction Workflow’ and ‘Common Operations’ in this User Manual for details on the authorization process.
8.31 Liquidate a BC against an account
This section contains the following topics:
- Section 8.31.1, "Liquidating a BC against an account"
- Section 8.31.2, "Specifying Charge Details"
- Section 8.31.3, "Specifying MIS Details"
- Section 8.31.4, "Specifying UDF Details"
8.31.1 Liquidating a BC against an account
You can liquidate a BC against an account through the ‘BC Liquidation Against Account’ screen. You can invoke this screen by typing ‘8309’ in the field at the top right corner of the Application tool bar and clicking on the adjoining arrow button.
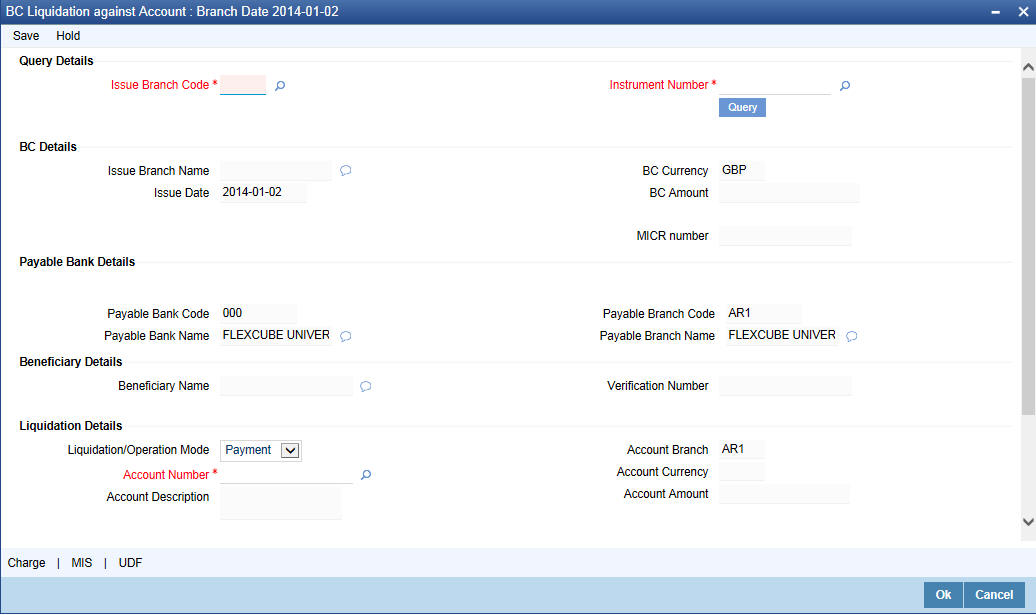
Here you can capture the following details:
BC Details
Issue Branch
Select the issue branch code from the adjoining option list.
Instrument Number
Select the instrument number of the BC that needs to be liquidated from the adjoining option list. This field allows you to capture the issuer code while selecting the instrument number.
External Reference
The system generates a unique number based on the branch-specific sequence number generation logic and displays it here. The Host system identifies a branch transaction with the external reference number.
In the single stage flow, if there is an transaction level override or error during approval then the transaction will be moved to the pending queue. Without save action being initiated, the transaction will not be in pending queue.
On clicking Pickup button, the system populates the values in all the callforms of the screen and clicking pickup button is mandatory if you make any changes to the Transaction amount and exchange rate after first pickup.
Once you click ‘Pickup’ button once, then on amendment of xrate, amount, charge, pickup will be mandatory before save. On pick up, the fields that are currently enabled in the enrich stage will alone be retained as enabled fields.
Clicking ‘Pickup’ button, the system defaults the following details:
Query Details
Issue Branch Code
Select the issue branch code from the adjoining option list.
Instrument Number
Select the instrument number of the BC that needs to be liquidated from the adjoining option list.
Instrument Number
Select the instrument number of the BC that needs to be liquidated from the adjoining option list.
BC Details
Issue Branch Name
The system displays the issue branch name based on the branch code.
Issue Date
The system defaults the Issue date. However you can change it using the adjoining calendar.
BC Currency
The system displays the local currency of the banker’s cheque captured during ‘Issue’..
BC Amount
The system displays the BC amount captured during 'Issue'.
MICR Number
The system displays the MICR number of the cheques captured during 'Issue'.
Payable Bank Details
Payable Bank Code
The system displays the name of the payable bank code captured during 'Issue'.
Payable Bank Name
The system displays the name of the bank captured during 'Issue'.
Payable Branch Code
The system displays the name of the payable branch code captured during 'Issue'.
Payable Branch Name
The system displays the name of the branch captured during 'Issue'.
BC Status
The system displays the status of BC.
Beneficiary Details
Beneficiary Name
The system displays the beneficiary in whose favour the BC is being drawn captured during 'Issue'.
Verification Number
The system displays the customer's verification number captured during 'Issue'.
Liquidation Details
Liquidation/ Operation Mode
Select the mode of liquidation or operation to be performed on the issued BC from the drop-down list. The list displays the following values:
- Payment - To update the instrument status as payment
- Refund - To update the instrument status as refund
- Cancel - To update the instrument status as cancel
- Lost - To update the instrument status as lost
- Reactivate - To reactivate the instrument which was lost
Account Number
Specify the customer account number. The adjoining option list displays all the accounts maintained in the system. Select the appropriate one.
Account Branch
Select the branch code from the adjoining option list.
Account Description
The system displays a brief description on the account.
Account Currency
The currency of the account is displayed here.
Account Amount
The system displays the amount in account currency based on the currency.
Additional Details
Narrative
The system defaults the ‘BC Liquidation - <Instrument No.>’ here. However you can modify this.
External Reference
The system generates a unique number based on the branch-specific sequence number generation logic and displays it here. The Host system identifies a branch transaction with the external reference number.
Note
If the system date is greater than the expiry date, then the system will not allow liquidating the instrument and will display the following error message as “Instrument Validity has expired and needs Revalidation”.
If the check box ‘Allow Revalidation’ is checked in the ‘Instrument Product maintenance’ screen, then you can re-validate the instrument using ‘Revalidation of DD/BC Instrument’ screen. After revalidation, system will allow liquidating the instrument as the expiry date gets extended by the revalidation period.
In addition to the details defaulted from the previous stage, you can capture the following information:
- Txn Amount
- Total Charges
- Total Amount
8.31.2 Specifying Charge Details
Click on the Charges tab to capture charge related details.
For more details, refer the section ‘Specifying Charge Details’ under ‘Selling a BC against an Account’ in this manual.
8.31.3 Specifying MIS Details
Click on the MIS tab to capture details pertaining to MIS.
Refer the section titled ‘Specifying the MIS details’ under ‘Capturing a cash deposit’ for further details.
8.31.4 Specifying UDF Details
You can capture these details in the ‘UDF’ tab of the screen.
Refer the section titled ‘Specifying the UDF details’ under ‘Capturing a cash deposit’ for further details.
Click save icon to save the transaction. The approver can fetch this transaction for his/her task list and authorize it. The authorization process is similar to that of cash deposit.
Note
Depending on the ‘Display Type’ selected for customer / account in ‘Instruction Maintenance’ screen, the instruction will be displayed at the time of saving the input stage and authorizing the transaction.
For more details about viewing customer / account instructions, refer the section titled ‘Viewing Customer / Account Instructions on ‘F6’ Key-Press’ and Viewing Customer / Account Instruction Details in Override Screen’ in this user manual.
Refer the corresponding section under ‘Depositing Cash’ in the chapter ‘Cash Transactions’ of this User Manual for further details.
8.32 Liquidate a BC against a GL
This section contains the following topics:
- Section 8.32.1, "Liquidating a BC against a GL"
- Section 8.32.2, "Specifying Charge Details"
- Section 8.32.3, "Specifying MIS Details"
- Section 8.32.4, "Specifying UDF Details"
8.32.1 Liquidating a BC against a GL
You can liquidate a BC drawn on your branch against a GL through the ‘BC Liquidation Against GL’ screen. You can invoke this screen by typing ‘8308’ in the field at the top right corner of the Application tool bar and clicking on the adjoining arrow button.
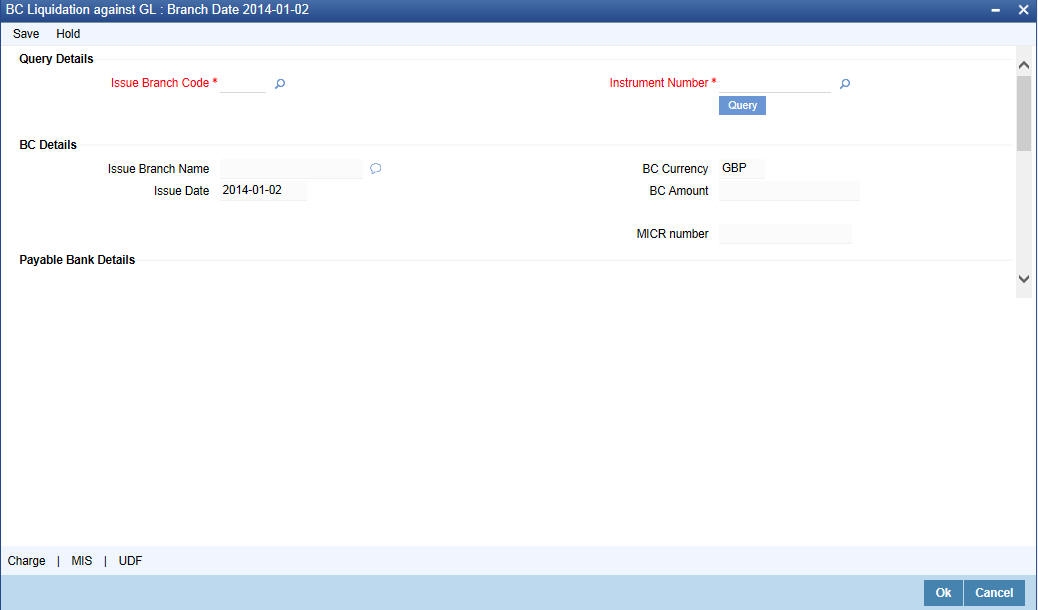
You can capture the following details:
BC Details
Instrument Number
Select the instrument number of the BC that needs to be liquidated from the adjoining option list. This field allows you to capture the issuer code while selecting the instrument number.
Issue Branch Code
Select the issue branch code where the BC is payable from the adjoining option list .
Issue Branch Name
The system displays the issue branch name based on the branch code.
Issue Date
The system defaults the Issue date. However you can change it using the adjoining calendar.
BC Currency
The system displays the local currency of the banker’s cheque captured during ‘Issue’.
BC Amount
The system displays the BC amount captured during 'Issue'.
Payable Bank Code
The system displays the name of the payable bank code captured during 'Issue'.
Payable Bank Name
The system displays the name of the bank captured during 'Issue'.
Payable Branch Code
The system displays the name of the payable branch code captured during 'Issue'.
Payable Branch Name
The system displays the name of the branch captured during 'Issue'.
MICR Number
The system displays the MICR number of the cheques captured during 'Issue'.
BC Status
The system displays the status of BC.
Beneficiary Details
Beneficiary Name
The system displays the beneficiary in whose favour the BC is being drawn captured during 'Issue'.
Verification Number
The system displays the customer's verification number which was captured during 'Issue'.
Liquidation Details
Liquidation/ Operation Mode
Select the mode of liquidation or operation to be performed on the issued BC from the drop-down list. The list displays the following values:
- Payment - To update the instrument status as payment
- Refund - To update the instrument status as refund
- Cancel - To update the instrument status as cancel
- Lost - To update the instrument status as lost
- Reactivate - To reactivate the instrument which was lost
GL Number
Specify the customer account number. The adjoining option list displays all the accounts maintained in the system. Select the appropriate one.
GL Description
The system displays a brief description on the account.
GL Currency
The currency of the account is displayed here.
GL Amount
The system displays the amount in account currency based on the currency.
Additional Details
Narrative
The system defaults the ‘BC Liquidation - <Instrument No.>’ here. However you can modify this.
External Reference
The system generates a unique number based on the branch-specific sequence number generation logic and displays it here. The Host system identifies a branch transaction with the external reference number.
In the single stage flow, if there is an transaction level override or error during approval then the transaction will be moved to the pending queue. Without save action being initiated, the transaction will not be in pending queue.
On clicking Pickup button, the system populates the values in all the callforms of the screen and clicking pickup button is mandatory if you make any changes to the Transaction amount and exchange rate after first pickup.
Once you click ‘Pickup’ button once, then on amendment of xrate, amount, charge, pickup will be mandatory before save. On pick up, the fields that are currently enabled in the enrich stage will alone be retained as enabled fields.
Clicking ‘Pickup’ button, the system defaults the following details:
Clearing Bank Code
The bank code of the clearing bank is displayed here.
Payable Branch
The system displays the current branch code (where the transaction is being captured).
Liquidation Mode
The status of the DD instrument is displayed here as ‘Payment’. However, you can change it to either of the other values available in the adjoining drop-down list viz:
- Refund
- Cancel
- Cheque Number
The MICR number of the DD instrument is displayed here.
Cheque Currency
The DD currency is displayed here. However you can change it. The adjoining option list displays all the currency codes maintained in the system. Choose the appropriate one.
Cheque Status
The system displays the event that is triggered for the transaction. This corresponds to the status of the instrument.
Beneficiary Name
The name of the beneficiary of the transaction is displayed here.
Passport/ IC No
The passport/IC number of the beneficiary of the transaction is displayed here.
Beneficiary Address
The address of the beneficiary of the transaction is displayed here.
Liquidation Date
The system displays the date on which the transaction is posted.
GL Currency
Specify the currency in which the transaction needs to be posted to the GL. The adjoining option list displays all the currency codes maintained in the system. Choose the appropriate one.
GL Account Number
The amount that should be liquidated into the GL is displayed here.
Narrative
The remarks associated with the transaction are displayed here.
Click save icon to go to the next stage.
Note
If the system date is greater than the expiry date, then the system will not allow liquidating the instrument and will display the following error message as “Instrument Validity has expired and needs Revalidation”.
If the check box ‘Allow Revalidation’ is checked in the ‘Instrument Product maintenance’ screen, then you can re-validate the instrument using ‘Revalidation of DD/BC Instrument’ screen. After revalidation, system will allow liquidating the instrument as the expiry date gets extended by the revalidation period.
In addition to the details defaulted from the previous stage, you can capture the following information:
- Txn Amount
- Total Charges
- Total Amount
8.32.2 Specifying Charge Details
Click on the Charges tab to capture charge related details.
For more details, refer the section ‘Specifying Charge Details’ under ‘Selling a BC against an Account’ in this manual.
8.32.3 Specifying MIS Details
Click on the MIS tab to capture details pertaining to MIS.
Refer the section titled ‘Specifying the MIS details’ under ‘Capturing a cash deposit’ for further details.
8.32.4 Specifying UDF Details
You can capture these details in the ‘UDF’ tab of the screen.
Refer the section titled ‘Specifying the UDF details’ under ‘Capturing a cash deposit’ for further details.
Click save icon to save the transaction.
The approver can fetch this transaction for his/her task list and authorize it. The authorization process is similar to that of cash deposit.
Refer the corresponding section under ‘Depositing Cash’ in the chapter ‘Cash Transactions’ of this User Manual for further details.
8.33 Liquidate a BC for a walk-in customer
This section contains the following topics:
- Section 8.33.1, "Liquidating a BC for a walk-in customer"
- Section 8.33.2, "Specifying Denomination Details"
- Section 8.33.3, "Specifying Charge Details"
- Section 8.33.4, "Specifying MIS Details"
- Section 8.33.5, "Specifying UDF details"
8.33.1 Liquidating a BC for a walk-in customer
You can liquidate a DD or a walk-in customer and give the customer an equivalent amount in cash. In order to capture such a transaction, invoke the ‘BC Liquidation Walk-In’ screen. You can invoke this screen by typing ‘8307’ in the field at the top right corner of the Application tool bar and clicking on the adjoining arrow button.

You can capture the following details:
BC Details
Instrument Number
Select the instrument number of the BC that needs to be liquidated from the adjoining option list. This field allows you to capture the issuer code while selecting the instrument number.
Issue Branch Code
Select the issue branch code where the BC is payable from the adjoining option list .
Issue Branch Name
The system displays the issue branch name based on the branch code.
Issue Date
The system defaults the Issue date. However you can change it using the adjoining calendar.
BC Currency
The system displays currency of the BC captured during 'Issue'.
BC Amount
The system displays the BC amount captured during 'Issue'.
Payable Bank Code
The system displays the name of the payable bank code captured during 'Issue'.
Payable Bank Name
The system displays the name of the payable bank code captured during 'Issue'.
Payable Branch Code
The system displays the name of the payable branch code captured during 'Issue'.
Payable Branch Name
The system displays the name of the branch captured during 'Issue'.
MICR Number
The system displays the MICR number of the cheques which was captured during 'Issue'.
BC Status
The system displays the status of BC.
Beneficiary Details
Beneficiary Name
The system displays the beneficiary in whose favour the BC is being drawn captured during 'Issue'..
Verification Number
The system displays the customer's verification number captured during 'Issue'.
Liquidation Details
Liquidation Mode
Select the mode of liquidation from the adjoining drop-down list.
Transaction Currency
The currency of the transaction is displayed here.
Transaction Amount
The system displays the transaction amount based on the currency.
Additional Details
Narrative
The system defaults the ‘BC Liquidation - <Instrument No.>’ here. However you can modify this.
External Reference
The system generates a unique number based on the branch-specific sequence number generation logic and displays it here. The Host system identifies a branch transaction with the external reference number.
In the single stage flow, if there is an transaction level override or error during approval then the transaction will be moved to the pending queue. Without save action being initiated, the transaction will not be in pending queue.
On clicking Pickup button, the system populates the values in all the callforms of the screen and clicking pickup button is mandatory if you make any changes to the Transaction amount and exchange rate after first pickup.
Once you click ‘Pickup’ button once, then on amendment of xrate, amount, charge, pickup will be mandatory before save.
Clicking ‘Pickup’ button, the system defaults the following details:
Liquidation Type
The liquidation type of the BC is displayed here.
Liquidation/ Operation Mode
Select the mode of liquidation or operation to be performed on the issued BC from the drop-down list. The list displays the following values:
- Payment - To update the instrument status as payment
- Refund - To update the instrument status as refund
- Cancel - To update the instrument status as cancel
- Lost - To update the instrument status as lost
- Reactivate - To reactivate the instrument which was lost
Bank Code
The clearing bank code is displayed here.
Payable Branch
The branch where the cheque amount is being paid out (current branch) is displayed here.
Cheque Currency
The system displays the currency in which the BC has been issued.
Issue Date
The system displays the date on which the BC has been issued.
Liquidation Date
The system displays the date on which the transaction is being posted.
Drawee Account Number
The account on which the BC has been drawn is displayed here.
Cheque Amount
The amount for which the cheque amount has been issued is displayed here.
Cheque Number
The MICR number of the cheque is displayed here.
Cheque Status
The system displays the event that is triggered for the transaction. This corresponds to the status of the instrument.
Transaction Currency
The system defaults the branch currency as the transaction currency. However you can change it. The adjoining option list displays all the currency codes maintained in the Host. You can select the appropriate code.
Narrative
Here, you can enter remarks pertaining to the transaction.
Beneficiary Name
The name of the beneficiary of the transaction is displayed here.
Beneficiary Address
The address of the beneficiary of the transaction is displayed here.
Other Details
Any other information captured for the transaction is displayed here.
Passport/IC Number
The passport number or a unique identification number of the customer is displayed here.
Click save icon to go to the next stage.
Note
If the system date is greater than the expiry date, then the system will not allow liquidating the instrument and will display the following error message as “Instrument Validity has expired and needs Revalidation”.
If the check box ‘Allow Revalidation’ is checked in the ‘Instrument Product maintenance’ screen, then you can re-validate the instrument using ‘Revalidation of DD/BC Instrument’ screen. After revalidation, system will allow liquidating the instrument as the expiry date gets extended by the revalidation period.
In addition to the details defaulted from the previous stage, you can capture the following information:
Exchange Rate
The system displays the exchange rate for the transaction if the cheque currency and the transaction currency are not the same.
Total Charge
The system computes the charge applicable to the transaction and displays it.
Net Amount
The system derives the net amount payable to the customer after deducting the applicable charges and displays it here.
8.33.2 Specifying Denomination Details
In this block, you can capture details of the currency denominations involved in the transaction.
Refer the section titled ‘Specifying denomination details’ under ‘Withdrawing cash against a Cheque’ in this manual for further details.
8.33.3 Specifying Charge Details
This block allows you to capture charge related details.
Refer the section titled ‘Specifying the charge details’ under ‘Withdrawing cash against a Cheque’ in this manual.
8.33.4 Specifying MIS Details
This block allows you to capture details pertaining to MIS.
Refer the section titled ‘Specifying the MIS details’ under ‘Withdrawing cash against a Cheque’ in this manual.
8.33.5 Specifying UDF details
You can capture these details in the ‘UDF’ tab of the screen.
Refer the section titled ‘Specifying the UDF details’ under ‘Capturing a cash deposit’ for further details.
Click save icon to save the transaction.
The approver can fetch this transaction for his/her task list and authorize it. The authorization process is similar to that of cash deposit.
Refer the corresponding section under ‘Depositing Cash’ in the chapter ‘Cash Transactions’ of this User Manual for further details.
8.34 Inquiring on a BC Transaction
You can query a BC transaction for a specified branch and Instrument Number. This can be done using the ‘BC Inquiry’ screen. You can invoke this screen by typing ‘7790’ in the field at the top right corner of the Application tool bar and clicking on the adjoining arrow button.
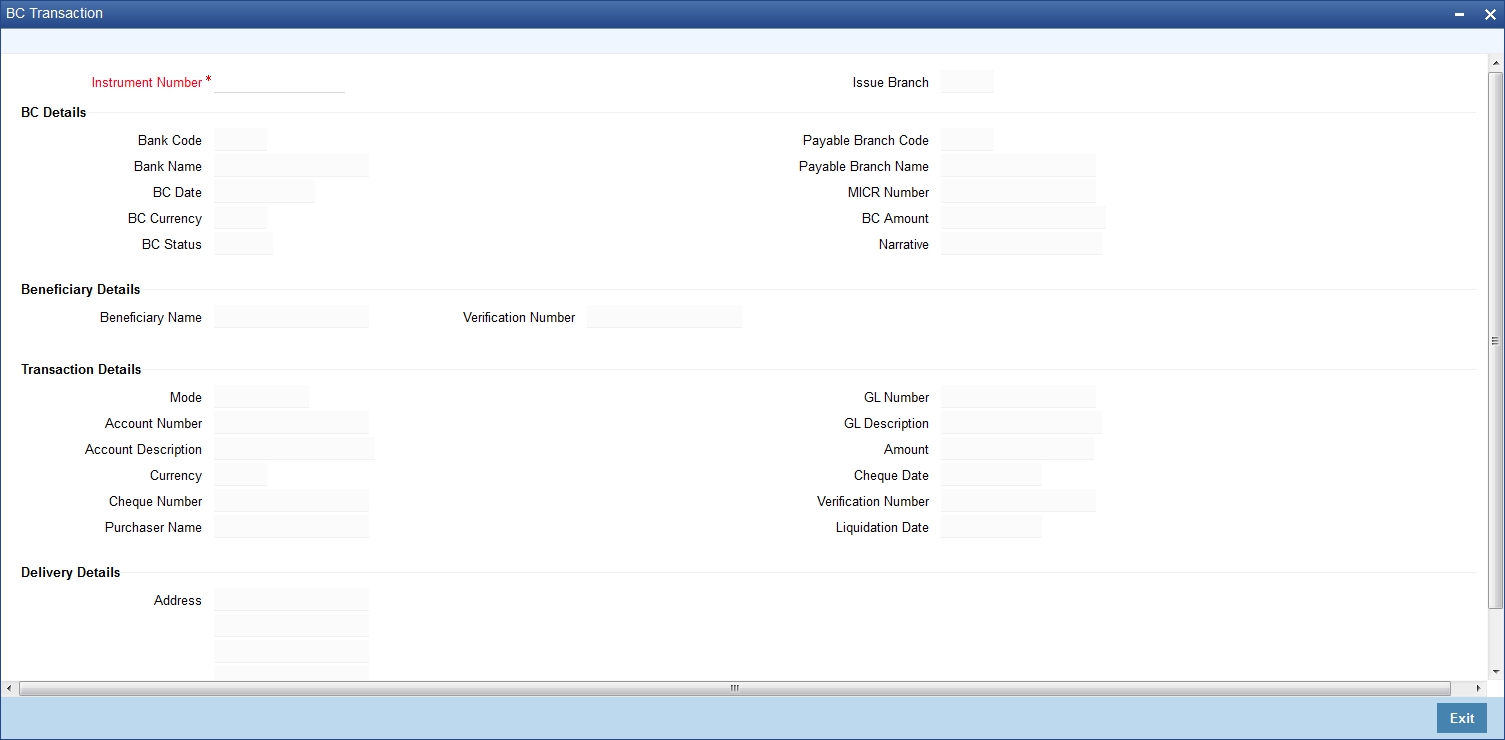
Specify the following details:
Instrument Number
Specify an instrument number of the BC transaction that needs to be queried.The adjoining option list displays all the instrument numbers maintained in the system. Choose the appropriate one.
Payable Branch Name
Issue Branch
Specify a branch for which you wish to query the BC transaction. You can also select a branch from the adjoining option list.
After you specify the above details, click ‘Ok’ button. Based on the specified data, the following details will be displayed:
BC Details
Bank Code
Specify the code of the bank that is issuing the BC. The adjoining option list displays all the bank codes maintained in the system.
Bank Name
The system displays the name of the bank.
BC Date
The system defaults the BC date to the system date. However you can change it using the adjoining calendar.
BC Currency
The system displays the local currency of the banker’s cheque.
BC Status
The system displays the status of BC.
Payable Branch Code
Specify the branch where the BC should be payable. The adjoining option list displays all the branch codes maintained in the system. Choose the appropriate one.
Payable Branch Name
The system defaults the payable branch name based on the payable branch code
MICR Number
Specify the MICR number.
BC Amount
Specify the BC amount.
Narrative
Enter remarks about the transaction.
Print Status
Check this box to print the instrument.
Note
During loan disbursement, if the issuing branch is selected as a branch other than the transaction branch then the “Print Status’ check box is updated as unchecked during BC creation.
Beneficiary Details
Beneficiary Name
Specify the name of the beneficiary in whose favor the BC
Verification Number
Specify the passport/IC Number.
Transaction Details
Mode
The system displays the mode of liquidation based on the mode of payment.
Account Number
The system displays the account number of the customer.
Account Description
The system displays a brief description on account.
Currency
The system displays the currency based on funding.
Cheque Number
The system displays the cheque number.
Purchaser Name
The system displays the purchaser name.
GL Number
The system displays the general ledger number.
GL Description
The system displays a brief description on GL.
Amount
The system displays the amount based on funding.
Cheque Date
The system displays the cheque date.
Verification Number
The system displays the verification number.
Liquidation Date
The system displays the date on which BC is liquidated.
Multi Reference Number
The system displays the consolidated reference number of the BCs issued. This field is applicable only for multiple BCs issued either through BC Multi Issuance screen or using Bulk Upload.
Delivery Details
Address Line 1 to 4
The system displays the address of the customer.
Clicking ‘Query’ button, the system validates if all the mandatory details are specified. This button will be disabled after the first click.
8.35 Re-validate BC Instrument
This section contains the following topics:
8.35.1 Re-validating BC Instrument
You can re-validate the expired BC instrument using ‘Revalidation of BC Instrument’ screen.
System will allow re-validating instrument only if,
- The check box ‘Allow Revalidation’ is checked in the ‘Instrument Product Maintenance’ screen.
- The instruments have not been liquidated, cancelled or refunded.
- Instrument status should be issued (INIT), Reissued (RISU), Duplicate Issue (DISU) or authorized.
To invoke ‘Revalidation of BC Instrument’ screen, type ‘BCRV’ in the field at the top right corner of the Application tool bar and click on the adjoining arrow button.
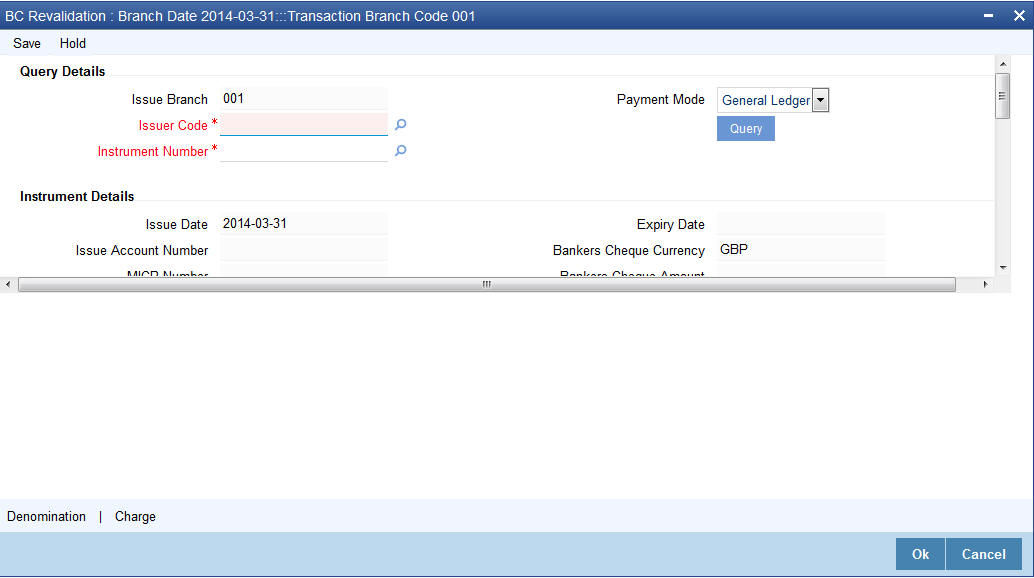
You need to specify following details here:
Issue Branch
Specify the branch where BC has been issued.
Issuer Code
Specify the issuer code of the cheque book. Alternatively, you can select the issuer code from the option list. The list displays all valid options maintained in the system.
Instrument Number
Specify the instrument number for the issuance of duplicate BC instrument from the adjoining option list.
Payment Mode
Select the payment mode for the re-validation of the instrument from the drop-down list. System will apply charges only for the re-validation of an instrument. Cancellation charges will be waived.
Instrument Details
The system displays the following instrument details:
- Issue Date
- Issue Account Number
- MICR Number
- Payable Bank
- Branch
- Expiry Date
- Bankers Cheque Currency
- Bankers Cheque Amount
- Bankers Cheque Status
- Revalidation Date
Revalidation Reason
Specify the reason for the re-validation of BC instrument. The reason specified here will be shown in the revalidated instrument report.
Revalidation Frequency
System defaults re-validation frequency maintained the ‘Instrument Type Definition’ screen; however, you can override the re-validation frequency in days, months or years.
New Expiry Date
System generates new expiry date for the re-validated instrument calculated as,
‘Old Expiry Date + ‘Revalidation Period’.
Payment Details
You need to specify the following details under ‘Payment Details’ section:
Charge Account
Specify the charge account number from which the charge needs to be collected from the adjoining option list.
Charge Currency
Specify the currency applied for the charge from the adjoining option list.
Beneficiary Details
The system displays the beneficiary details.
Additional Details
Instrument Type
The system displays the instrument type.
External Reference Number
The system displays external reference number.
8.35.1.1 Denomination Details
In this block, you can capture details of the currency denominations involved in the transaction.
Refer the section titled ‘Specifying denomination details’ under ‘Withdrawing cash against a Cheque’ in this manual for further details.
8.35.1.2 Specifying Charge Details
This block allows you to capture charge related details. Refer the section titled ‘Specifying the charge details’ under ‘Withdrawing cash against a Cheque’ in this manual.
8.36 Reprint / Reissue Banker’s Cheque
This section contains the following topics:
8.36.1 Reprinting / Reissuing Banker’s Cheque
On various grounds such as improper printing and issue of duplicate instruments, Oracle FLEXCUBE allows you to reprint a banker’s cheque. The system keeps a track of such reprints so that the bank officials or auditors can ascertain the reasons and validity of multiple instrument printing.
To invoke ‘BC Reprint / Reissue’ screen, type ‘BCRP’ in the field at the top right corner of the Application tool bar and click on the adjoining arrow button.
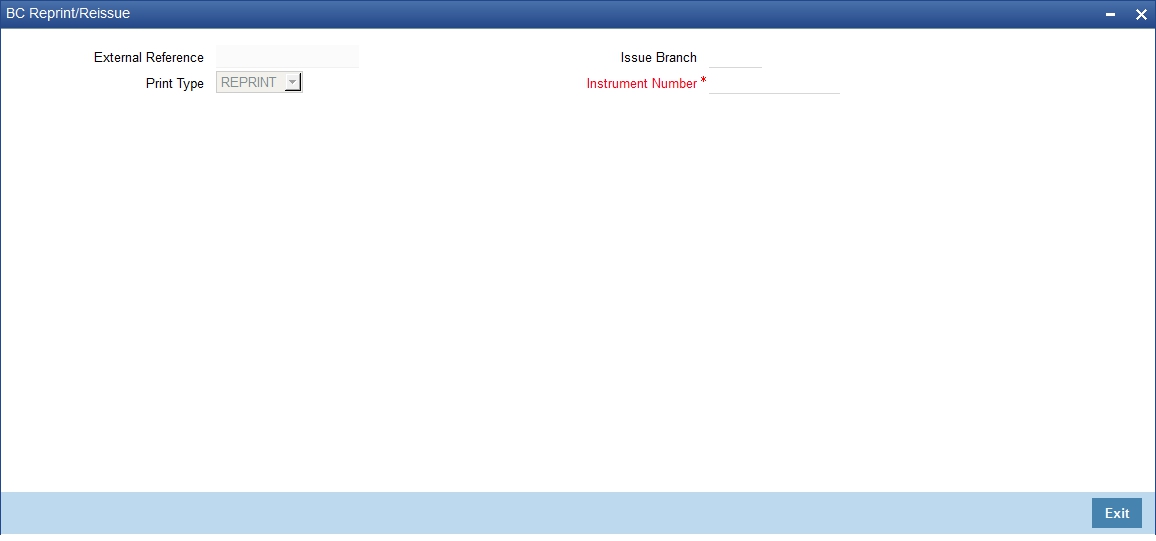
You need to specify the following details on this screen.
Issue Branch
Specify the code that identifies the branch that issued the instrument. The option list displays all valid branch codes maintained in the system. Choose the appropriate one.
Issuer Code
Specify the issuer code of the cheque book. Alternatively, you can select the issuer code from the option list. The list displays all valid options maintained in the system.
Instrument Number
Specify the number of the instrument that you wish to reprint. The option list displays all valid instrument numbers issued at the selected branch. Choose the appropriate one.
Multi BC External Reference No
Select the multi BC external reference number from the option list. The list displays all valid options.
Start Number
Specify the start number.
End Number
Specify the end number.
Print Type
Select the print type from the drop-down list. The list displays the following values:
- Reissue - Select this option to reissue the BC instrument
- Reprint - Select this option to reprint the BC instrument.
- First Print - Select this option when the instrument is disbursed at the issuing branch itself. This action updates the ‘Print Status’ check box in ‘Instruments Transaction Query Screen’ as checked.
Note
If you select ‘Print Type’ as Reissue or Reprint and if the ‘Print Status’ check-box in ‘Instruments Transaction Query Screen’ is unchecked then system displays an error message.
Old Instrument Details
The system displays the following old instrument details:
- Issue Date
- Issue Account Number
- Account Description
- MICR Number
- Expiry Date
- Instrument Currency
- Instrument Amount
- Payable Bank
New Instrument Details
New Instrument Number
Specify the new instrument number.
New MICR Number
Specify the new MICR number.
Reprint/Reissue Reason
Specify the reason for reprint/reissue. During auditing, the official or the auditor will verify the validity of the reason specified here. This information is mandatory.
Reprint/Reissue Count
The system displays the count of the current reprint operation. You cannot modify this.
Beneficiary Details
Beneficiary Name
The system displays the beneficiary name.
Address 1-3
The system displays the address of the beneficiary.
Additional Details
Instrument Status
The system displays the instrument status.
External Reference Number
The system displays the external reference number.
You can view a summary of all reprint operations using ‘Instrument Reprint Summary’ screen. For more information on this, refer to the section ‘Viewing Instrument Reprint Summary’ in this chapter.
You can view a summary of all reprint operations using ‘Instrument Reprint Summary’ screen. For more information on this, refer to the section ‘Viewing Instrument Reprint Summary’ in this chapter.
8.37 Duplicate BC Instrument
This section contains the following topics:
8.37.1 Issuing Duplicate BC Instrument
You can issue the duplicate BC instrument using ‘Duplicate Issue of BC Instrument’ screen.
System will allow duplicate issuance of instrument only if,
- The check box ‘Allow Duplicate Issuance’ is checked in the ‘Instrument Product Maintenance’ screen.
- The instruments have not been liquidated.
- Instrument status should be issued (INIT), Reissued (RISU).
To invoke ‘Duplicate Issue of BC Instrument’ screen, type ‘BCDI’ in the field at the top right corner of the Application tool bar and click on the adjoining arrow button. Following screen is displayed:

You need to specify following details here:
Issue Branch
Specify the branch where BC has been issued.
Issuer Code
Specify the issuer code of the cheque book. Alternatively, you can select the issuer code from the option list. The list displays all valid options maintained in the system.
Old Instrument Number
Specify the instrument number for the issuance of duplicate BC instrument from the adjoining option list.
Payment Mode
Select the payment mode for the duplicate issuance of the instrument from the drop-down list. System will apply charges only for the duplicate issuance of an instrument. Cancellation charges will be waived.
Old Instrument Details
The system displays the following old instrument details:
- Issue Date
- Issue Account Number
- MICR Number
- Payable Bank
- Expiry Date
- Bankers Cheque Currency
- Bankers Cheque Amount
- Bankers Cheque Status
New Instrument Details
New Instrument Number
The system displays the new instrument number.
New MICR Number
Specify the new MICR Number captured for the new Instrument.
Duplicate Issue Reason
Specify the reason for the duplicate issuance of BC instrument.
Duplicate Issue Count
The system displays the duplicate issue count.
8.37.1.1 Denomination Details
In this block, you can capture details of the currency denominations involved in the transaction.
Refer the section titled ‘Specifying denomination details’ under ‘Withdrawing cash against a Cheque’ in this manual for further details.
8.37.1.2 Specifying Charge Details
This block allows you to capture charge related details.Refer the section titled ‘Specifying the charge details’ under ‘Withdrawing cash against a Cheque’ in this manual.
8.38 Reversing BC/DD Liquidation
You can reverse the liquidated BC/DD instruments through the ‘Reversal of BC/DD Liquidation’ screen. You can invoke this screen by typing ‘8304’ in the field at the top right corner of the Application tool bar and clicking on the adjoining arrow button.
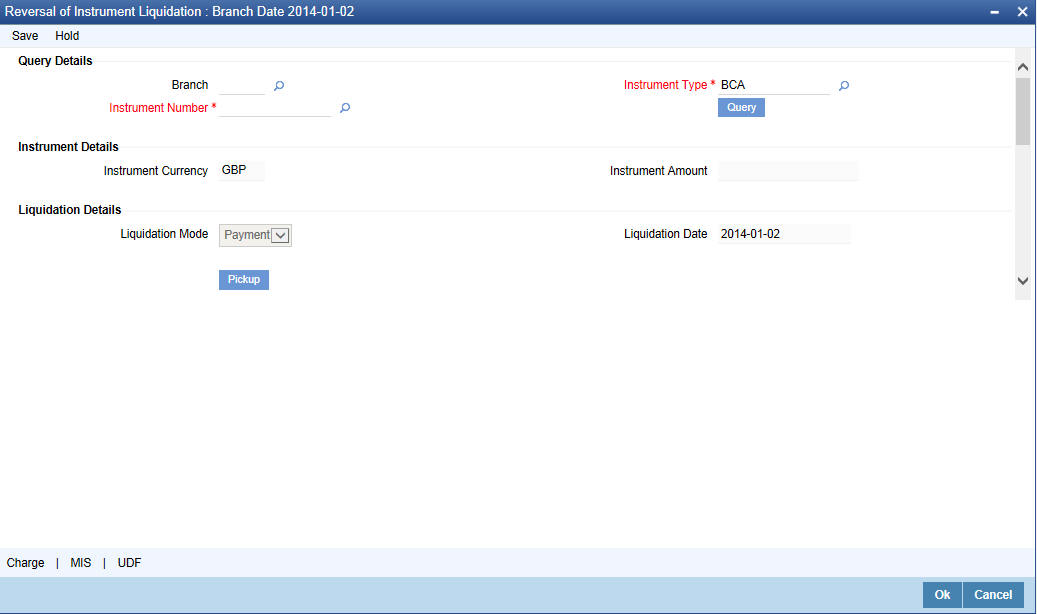
Here you can capture the following details:
External Reference Number
The system generates a unique number based on the branch-specific sequence number generation logic and displays it here. The Host system identifies a branch transaction with the external reference number.
Issue Branch
Specify the branch where the instrument is issued. The adjoining option list displays all the branches that are maintained in the system. You can select the appropriate one.
Instrument Type
Specify the instrument type which is to be reversed. The adjoining option list displays all the DD and BCs based on the branch selected. You can select the appropriate one.
Instrument Number
Specify the instrument number which is to be reversed. The adjoining option list displays the valid instrument numbers based on the instrument type selected. You can select the appropriate one.
In the single stage flow, if there is an transaction level override or error during approval then the transaction will be moved to the pending queue. Without save action being initiated, the transaction will not be in pending queue.
On clicking Pickup button, the system populates the values in all the callforms of the screen and clicking pickup button is mandatory if you make any changes to the Transaction amount and exchange rate after first pickup.
Once you click ‘Pickup’ button once, then on amendment of xrate, amount, charge, pickup will be mandatory before save. On pick up, the fields that are currently enabled in the enrich stage will alone be retained as enabled fields.
8.39 Multi BC Issue
This section contains the following topics:
- Section 8.39.1, "Issuing Multi BC against an Account"
- Section 8.39.5, "Issuing Multi BC against Cheque"
- Section 8.39.9, "Issuing Multi BC against GL"
8.39.1 Issuing Multi BC against an Account
You can issue Multi BC against a customer’s savings account. To capture this transaction, you need to invoke the ‘Multi BC Issue Against Account’ screen by typing ‘8332’ in the field at the top right corner of the Application tool bar and clicking on the adjoining arrow button.
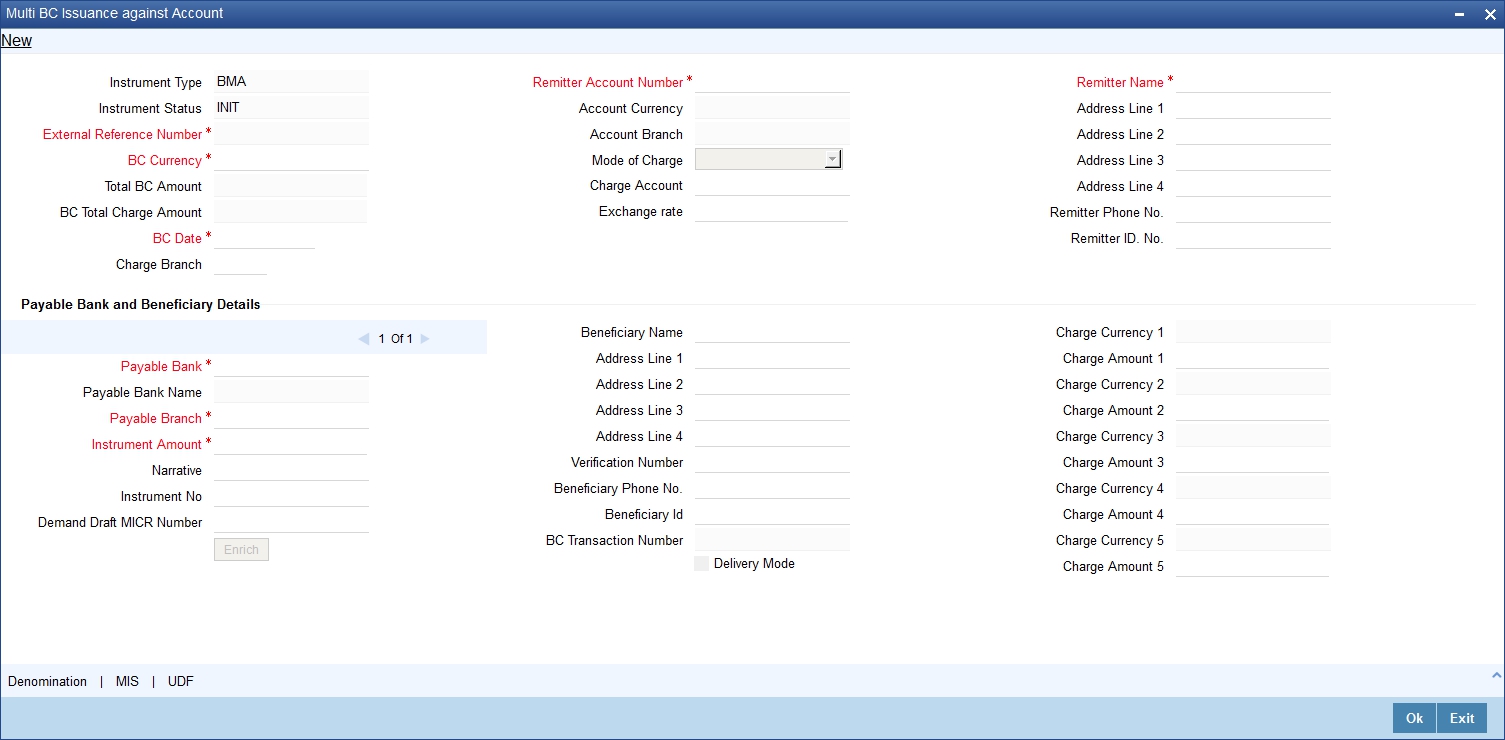
You can specify the following details:
Instrument Type
The system displays the instrument type corresponding to the multi BC issued to customers against their account.
Instrument Status
The system displays the event that is triggered for the transaction. This corresponds to the status of the instrument.
External Reference
The system displays a unique reference number generated based on the branch-specific sequence number generation logic.
BC Currency
The system displays the currency of the banker’s cheque. You can modify it.
Total BC Amount
The system displays the sum total of multiple BC amount.
BC Total Charge Amount
The system displays the total charge amount computed for the issued multiple BC.
BC Date
The system defaults the BC date to the system date. You can modify it.
Remitter Account Number
Specify the account number of the remitter. Alternatively, you can select the account number from the option list. The list displays all valid accounts maintained in the system.
Account Currency
The system displays the account currency based on the account number selected.
Account Branch
The system displays the account branch based on the account number selected.
Mode of Charge
Select the mode of charge through which the charges are collected for the BC issuance from the drop-down list. The list displays the following values:
- Cash - If the customer deposits the charge amount by cash for BC issuance, then Cash GL is debited for charges
- Transaction Account - If the customer account or transaction account to be debited for charges. By default, the system selects this option
- Other Account - If the charges to be borne from other customer account
- Null - If 'Null' option is selected, the system calculates the charges based on the ARC maintenance
Charge Account
Specify the charge account number which has to be debited. Alternatively, you can select the charge account from the option list. The list displays all charge accounts maintained in the system. This field is enabled if you select the ‘Other Account’ option in the ‘Mode of Charge’ field.
Exchange Rate
The system displays the exchange rate used to convert the transaction currency into account currency. If the transaction currency is the same as the account currency, the system will display the exchange rate as ‘1’.
Remitter Name
Specify the name of the remitter.
Remitter Address 1 to 4
Specify the address of the remitter.
Remitter Phone No.
Specify the phone number of the remitter.
Remitter ID No.
Specify a unique identification value of the remitter.
Payable Bank and Beneficiary Details
Click ‘Add’ button to specify the following details.
Payable Bank
Specify the payable bank code that is issuing the BC. Alternatively, you can select the bank code from the option list. The list displays all bank codes maintained in the system.
Payable Bank
The system displays the name of the bank based on the bank code selected.
Payable Branch Code
Specify the payable branch code where the BC is payable. Alternatively, you can select the branch code from the option list. The list displays all the branch codes maintained in the system.
Payable Branch Name
The system displays the payable branch name based on the payable branch code selected.
Instrument Amount
Specify the amount for which the BC is being issued.
Narrative
Specify remarks if any for multi BC issue.
Instrument Number
Specify the instrument number.
On save, system validates the instrument number.
- If the instrument number is available, then the system moves the transaction to the enrich stage.
- If the instrument number is not available, then the system raises an error message as “Instrument number entered is not valid”.
- If the instrument number is not specified, the system defaults the least instrument number which is available for the branch and the instrument type.
Demand Draft MICR Number
Specify the MICR number displayed on the BC being issued.
Beneficiary Details
Beneficiary Name
Specify the name of the beneficiary in whose favour the BC is being issued.
Beneficiary Address 1 to 4
Specify the address of the beneficiary.
Verification Number
Specify the verification number.
Beneficiary Phone No.
Specify the phone number of the beneficiary.
Beneficiary ID
Specify a unique identification value of the beneficiary.
BC Transaction Reference Number
The system displays the BC transaction reference number on click ‘Enrich’ button.
Delivery Mode
Check this box to set the delivery mode.
Charge Currency 1 to 5
The system displays the charge currency of the BC issued.
Charge Amount 1 to 5
The system displays the charge amount of the BC issued.
8.39.2 Denomination Button
You can capture the denomination details by clicking the ‘Denomination’ button.
Currency Code
The system displays the currency of the account.
Cash Amount
The system displays the cash amount.
Preferred Denomination
Specify the preferred denomination.
Denomination Total
The system displays the denomination total.
Denomination Code
The system defaults the denomination code as maintained in the ‘Denomination Maintenance’ screen. For every currency, the various denominations are assigned separate denomination codes.
Denomination Value
The system computes the face value of the denomination and displays it. For instance if the denomination code represents a USD 100, the value will be displayed as ‘100’.
Units
Indicate the number of units of the specified denomination. By default, till contents are decremented for outflow transactions like cash withdrawal. To reverse this default behavior, you can specify units in negative.
Total Amount
The system computes the denomination value by multiplying the denomination value with the number of units. For instance, if the denomination code represents a USD 100 and the number of units is 10, the denomination amount will be ‘1000’.
8.39.3 MIS Button
You can capture the MIS details by clicking the ‘MIS’ button.
For more details, refer section ‘Specifying MIS Details’ under ‘Selling a BC against an Account’ in this manual.
8.39.4 UDF Button
You can capture the UDF details in by clicking the ‘UDF’ button.
For more details, refer section ‘Specifying MIS Details’ under ‘Selling a BC against an Account’ in this manual.
During authorization, the issued BCs are sent for printing. The system generates an advice for the BC Multi Issuance providing the details of the Remitter account, BC Date, Total BC Amount, Total Charge Amount, Charge Debit account along with the details of the individual BC instrument no, individual charges and their corresponding beneficiary details.
8.39.4.1 Uploading Bulk BC Multi Issuance against Customer Account
You can issue bulk Bankers Cheques using an Interface upload for an existing instrument types. This upload facility is applicable only for BC issue against Customer account.
You can receive bulk file from channels like Internet Banking or can be uploaded directly. You can create an interface definition for the input file for Multi BC Issue against customer account and cheque with relevant components as per the file format. Similarly, an interface definition for the output file for Multi BC Issue input file can be created, which shows the processing status of the records, error code and status.
While saving or authorizing of uploaded transactions, the system performs the BC issuance specific validations and create individual BC transactions using an RT product ‘BCSG’. The system derives the debit account from the GL maintained for the product ‘BCSG’.
8.39.5 Issuing Multi BC against Cheque
You can sell Multi Bankers cheque (BC) against an in-house cheque drawn on customer’s savings account. In order to capture this transaction, you need to invoke the ‘Bankers Cheque Sale Against Account’ screen by typing ‘8333’ in the field at the top right corner of the Application tool bar and clicking on the adjoining arrow button.
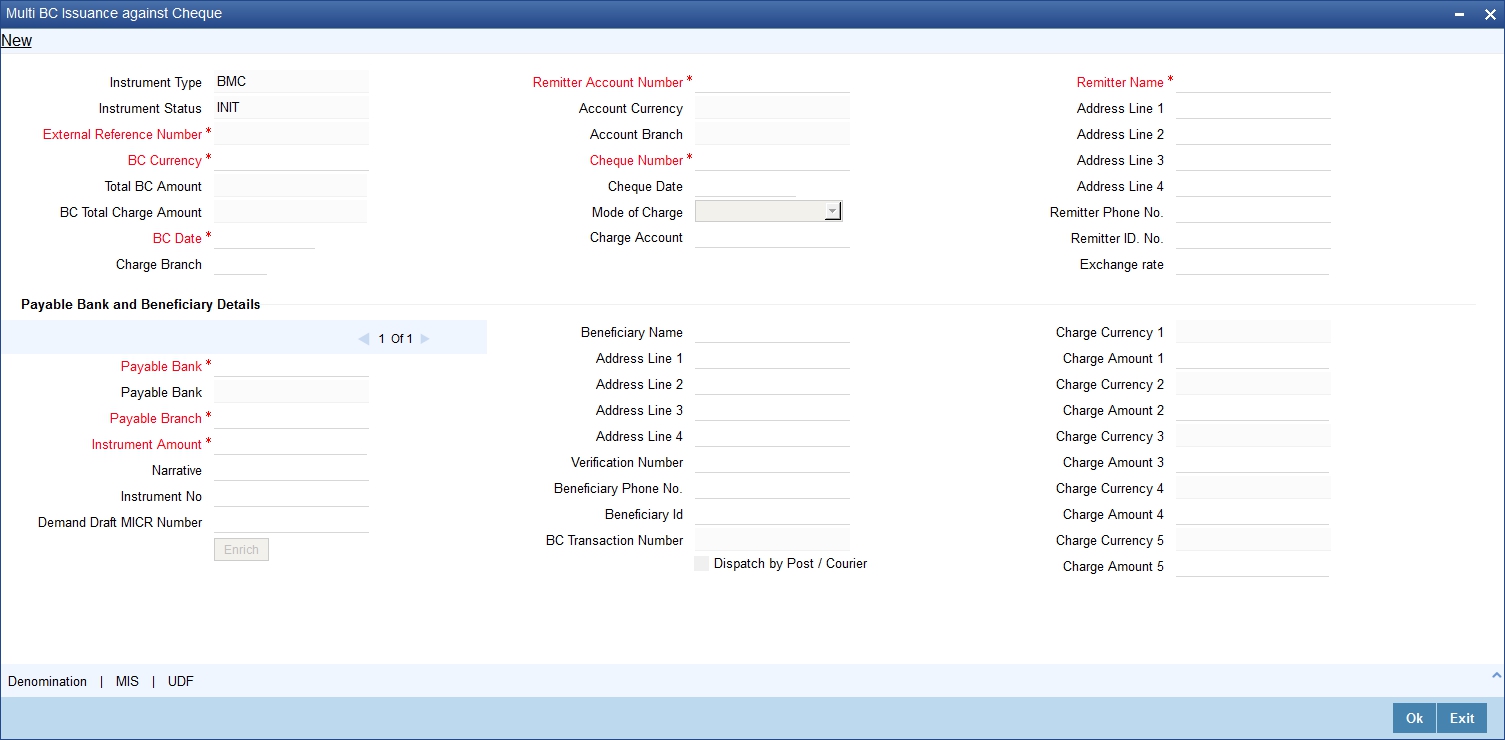
In this screen, you need to specify the following details:
Instrument Type
The system displays the instrument type corresponding to the multi BC issued to customers against their account.
Instrument Status
The system displays the event that is triggered for the transaction. This corresponds to the status of the instrument.
External Reference
The system displays a unique reference number generated based on the branch-specific sequence number generation logic.
BC Currency
The system displays the currency of the banker’s cheque. You can modify it.
Total BC Amount
The system displays the sum total of multiple BC amount.
BC Total Charge Amount
The system displays the total charge amount computed for the issued multiple BC.
BC Date
The system defaults the BC date to the system date. You can modify it.
Remitter Account Number
Specify the account number of the remitter. Alternatively, you can select the account number from the option list. The list displays all valid accounts maintained in the system.
Account Currency
The system displays the account currency based on the account number selected.
Account Branch
The system displays the account branch based on the account number selected.
Cheque Number
Specify the number of the cheque being drawn for BC sale.
Cheque Date
Specify the date of the cheque from the adjoining calendar.
Mode of Charge
Select the mode of charge through which the charges are collected for the BC issuance from the drop-down list. The list displays the following values:
- Cash - If the customer deposits the charge amount by cash for BC issuance, then Cash GL is debited for charges
- Transaction Account - If the customer account or transaction account to be debited for charges. By default, the system selects this option
- Other Account - If the charges to be borne from other customer account
- Null - If 'Null' option is selected, the system calculates the charges based on the ARC maintenance
Charge Account
Specify the charge account number which has to be debited. Alternatively, you can select the charge account from the option list. The list displays all charge accounts maintained in the system. This field is enabled if you select the ‘Other Account’ option in the ‘Mode of Charge’ field.
Remitter Name
Specify the name of the remitter.
Remitter Address 1 to 4
Specify the address of the remitter.
Remitter Phone No.
Specify the phone number of the remitter.
Remitter ID No.
Specify a unique identification value of the remitter.
Exchange Rate
The system displays the exchange rate used to convert the transaction currency into account currency. If the transaction currency is the same as the account currency, the system will display the exchange rate as ‘1’.
Payable Bank and Beneficiary Details
Click ‘Add’ button to specify the following details.
Payable Bank
Specify the payable bank code that is issuing the BC. Alternatively, you can select the bank code from the option list. The list displays all bank codes maintained in the system.
Payable Bank
The system displays the name of the bank based on the bank code selected.
Payable Branch
Specify the payable branch code where the BC is payable. Alternatively, you can select the branch code from the option list. The list displays all the branch codes maintained in the system.
Instrument Amount
Specify the amount for which the BC is being issued.
Narrative
Specify remarks if any for multi BC issue.
Instrument Number
Specify the instrument number.
On save, system validates the instrument number.
- If the instrument number is available, then the system moves the transaction to the enrich stage.
- If the instrument number is not available, then the system raises an error message as “Instrument number entered is not valid”.
- If the instrument number is not specified, the system defaults the least instrument number which is available for the branch and the instrument type.
Demand Draft MICR Number
Specify the MICR number displayed on the BC being issued.
Beneficiary Name
Specify the name of the beneficiary in whose favour the BC is being issued.
Beneficiary Address 1 to 4
Specify the address of the beneficiary.
Verification Number
Specify the verification number.
Beneficiary Phone No.
Specify the phone number of the beneficiary.
Beneficiary ID
Specify a unique identification value of the beneficiary.
BC Transaction Number
The system displays the BC transaction reference number on click ‘Enrich’ button.
Dispatch by Post /Courier
Check this box to dispatch the BC by post or courier.
Charge Currency 1 to 5
The system displays the charge currency of the BC issued.
Charge Amount 1 to 5
The system displays the charge amount of the BC issued.
8.39.6 Denomination Button
You can capture the denomination details by clicking the ‘Denomination’ button.
For more information about denomination details, refer the section ‘Issuing Multi BC against an Account’ in this User Manual.
8.39.7 MIS Button
You can capture details pertaining to MIS.
For more information, refer the section ‘Specifying MIS details’ under ‘Capturing a cash deposit’ for further details.
8.39.8 UDF Button
You can capture details pertaining to UDF.
Specify the following details.
Field Name
The system displays the UDFs specified for the account class.
Field Value
The system displays the value for each UDF. You can modify it.
Click save icon to save the transaction. The approver can fetch this transaction for his/her task list and authorize it. The authorization process is similar to that of cash deposit.
Note
Depending on the ‘Display Type’ selected for customer / account in ‘Instruction Maintenance’ screen, the instruction will be displayed at the time of saving the input stage and
For more information about viewing customer / account instructions, refer the section titled ‘Viewing Customer / Account Instructions on ‘F6’ Key-Press’ and Viewing Customer / Account Instruction Details in Override Screen’ in this user manual.
For more information, refer the corresponding section under ‘Depositing Cash’ in the chapter ‘Cash Transactions’ of this User Manual for further details.
During authorization, the issued BCs are sent for printing. The system generates an advice for the BC Multi Issuance providing the details of the Remitter account, BC Date, Total BC Amount, Total Charge Amount, Charge Debit account along with the details of the individual BC instrument no, individual charges and their corresponding beneficiary details.
8.39.9 Issuing Multi BC against GL
You can issue a Multi BC against a GL account for your customer through the ‘Multi BC Issue against GL’ screen. You can invoke this screen by typing ‘8334’ in the field at the top right corner of the Application tool bar and clicking on the adjoining arrow button.
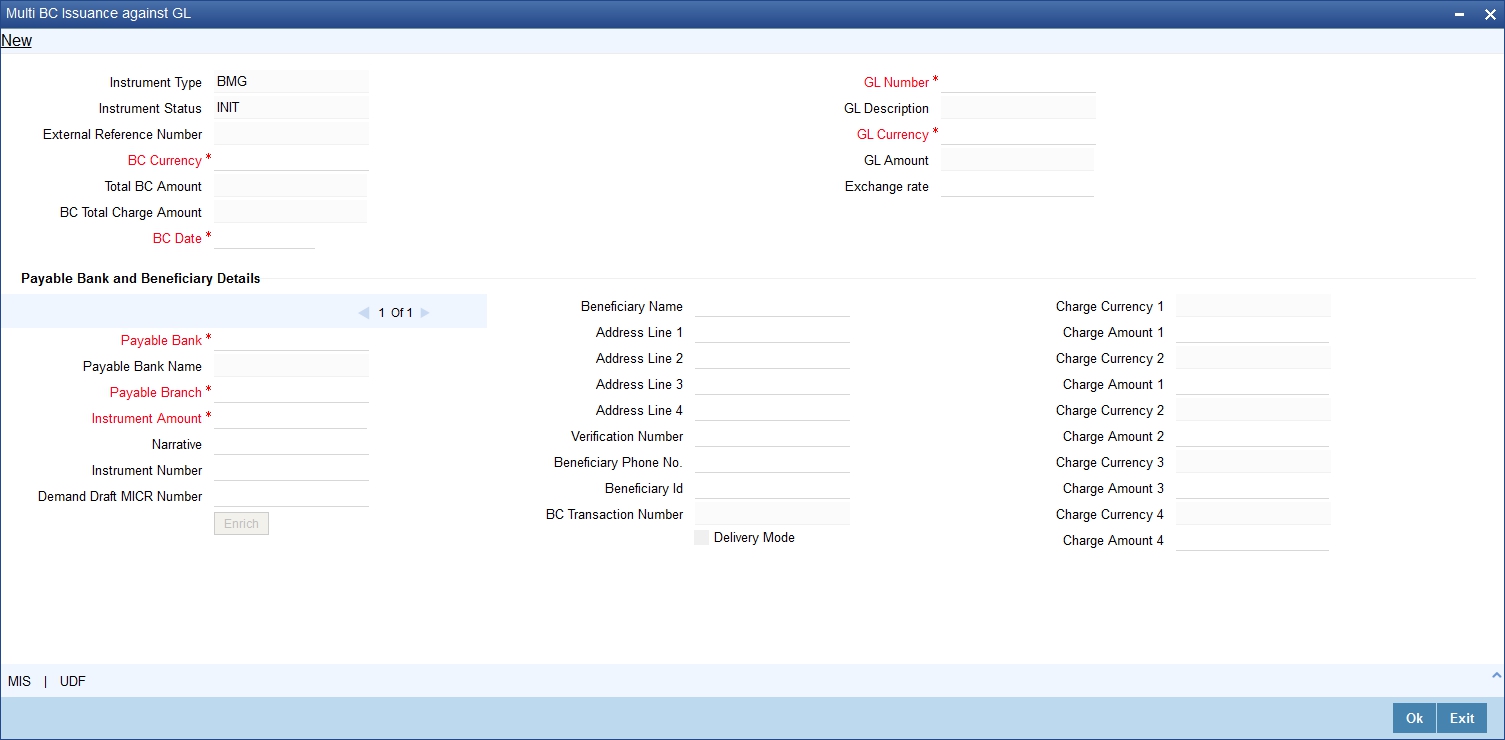
The system displays the ‘External Reference Number’ and the ‘Banker’s Cheque Date’. You need to specify the following details:
Instrument Type
The system displays the instrument type corresponding to the multi BC issued to customers against their account.
Instrument Status
The system displays the event that is triggered for the transaction. This corresponds to the status of the instrument.
External Reference
The system displays a unique reference number generated based on the branch-specific sequence number generation logic.
BC Currency
The system displays the currency of the banker’s cheque. You can modify it.
Total BC Amount
The system displays the sum total of multiple BC amount.
BC Total Charge Amount
The system displays the total charge amount computed for the issued multiple BC.
BC Date
The system defaults the BC date to the system date. You can modify it.
GL Number
Specify the GL number. Alternatively, you can select the account number of the GL against which a BC is issued from the option list. The list displays the GL number maintained in the system.
GL Description
The system displays a brief description on the general ledger.
GL Currency
Specify the currency of the GL against which a BC is issued or select a GL currency from the list of values.
GL Amount
The system displays the amount in GL account currency.
Exchange Rate
The system displays the exchange rate used to convert the transaction currency into account currency. If the transaction currency is the same as the account currency, the system will display the exchange rate as ‘1’.
Payable Bank and Beneficiary Details
Click ‘Add’ button to specify the following details.
Payable Bank
Specify the payable bank code that is issuing the BC. Alternatively, you can select the bank code from the option list. The list displays all bank codes maintained in the system.
Payable Bank
The system displays the name of the bank based on the bank code selected.
Payable Branch
Specify the payable branch code where the BC is payable. Alternatively, you can select the branch code from the option list. The list displays all the branch codes maintained in the system.
Instrument Amount
Specify the amount for which the BC is being issued.
Narrative
Specify remarks if any for multi BC issue.
Instrument Number
Specify the instrument number.
On save, system validates the instrument number.
- If the instrument number is available, then the system moves the transaction to the enrich stage.
- If the instrument number is not available, then the system raises an error message as “Instrument number entered is not valid”.
- If the instrument number is not specified, the system defaults the least instrument number which is available for the branch and the instrument type.
Demand Draft MICR Number
Specify the MICR number displayed on the BC being issued.
Beneficiary Name
Specify the name of the beneficiary in whose favour the BC is being issued.
Beneficiary Address 1 to 4
Specify the address of the beneficiary.
Verification Number
Specify the verification number.
Beneficiary Phone No.
Specify the phone number of the beneficiary.
Beneficiary ID
Specify a unique identification value of the beneficiary.
BC Transaction Number
The system displays the BC transaction reference number on click ‘Enrich’ button.
Delivery Mode
Check this box to dispatch the BC by post or courier.
Charge Currency 1 to 5
The system displays the charge currency of the BC issued.
Charge Amount 1 to 5
The system displays the charge amount of the BC issued.
8.39.10 MIS Button
You can capture details pertaining to MIS.
For more details, refer the section ‘Specifying MIS Details’ under ‘Selling a BC against an Account’ in this manual.
8.39.11 UDF Button
You can capture details pertaining to UDF.
Refer the section titled ‘Specifying the UDF details’ under ‘Capturing a cash deposit’ for further details.
Click save icon to save the transaction.
The approver can fetch this transaction for his/her task list and authorize it. The authorization process is similar to that of cash deposit.
Refer the corresponding section under ‘Depositing Cash’ in the chapter ‘Cash Transactions’ of this User Manual for further details.
During authorization, the issued BCs are sent for printing. The system generates an advice for the BC Multi Issuance providing the details of the Remitter account, BC Date, Total BC Amount, Total Charge Amount, Charge Debit account along with the details of the individual BC instrument no, individual charges and their corresponding beneficiary details.