9. General Ledger Transactions
9.1 Introduction
You can perform General Ledger transactions such as miscellaneous debit and credit transactions against a customer's CASA account and a GL account.
A customer's CASA account can be debited or credited in respect of GL transactions. For example, you can debit a customer's CASA account towards service charge (with the corresponding credit given to the Service Charge GL account). Similarly, you can credit a customer's CASA account towards interest (with the corresponding debit given to the Interest GL account).
Also a GL account can be debited or credited against cash transactions that do not involve a customer's CASA account.
Each of these transactions has been explained in detail in the following sections.
This chapter contains the following sections:
- Section 9.2, "Miscellaneous Customer Debits"
- Section 9.3, "Miscellaneous Customer Credits"
- Section 9.4, "Advance By Transfer"
- Section 9.5, "Miscellaneous Debit to a GL Account"
- Section 9.6, "Miscellaneous Credit to a GL Account"
- Section 9.7, "Fund Transfer in GL Accounts"
9.2 Miscellaneous Customer Debits
This section contains the following topics:
- Section 9.2.1, "Miscellaneous Debits to a Customer’s Account"
- Section 9.2.2, "Specifying the charge details"
- Section 9.2.3, "Specifying the MIS Details"
- Section 9.2.4, "Specifying UDF Details"
9.2.1 Miscellaneous Debits to a Customer’s Account
You can perform miscellaneous debit to a customer account with the corresponding credit to a GL account. Use the ‘Miscellaneous Customer Debit’ screen to carry out this transaction.
You can invoke this screen by typing ‘1008’ in the field at the top right corner of the Application tool bar and clicking on the adjoining arrow button.

The following details can be entered in this screen:
Account Number
Specify the customer account from which the cash needs to be debited.
Based on the account number specified, the system will display the Account Branch, Account Description, Account Currency and GL Currency for the corresponding account. The option list displays all valid account numbers applicable. Choose the appropriate one.To view the joint holder’s details of an account and the mode of operation maintained at the account level, place the cursor on the Account Number field and press Ctrl+J. The system displays the ‘Joint Holder’ screen.
NoteFor more information on the ‘Joint Holder’ screen refer to the section ‘Joint Holder Maintenance’ in the Core User Manual.
In case of multiple accounts with the same account number, the system will display a list of account numbers with account branches to select.
Account Branch
By default, the system displays the logged-in branch. When you specify an account number, the system displays the account branch based on the account number specified.
Account Description
Based on the account number specified, the system displays the description of the account.
GL Branch
The system displays the logged-in branch. However, you can modify it, if required.
GL Account Number
Select the GL account number to which the cash needs to be credited..The option list displays all valid account numbers applicable. Choose the appropriate one.
GL Description
The system displays the description based on the selected GL account number.
Account Currency
Based on the account number specified, the system displays the account currency.
Account Amount
Specify the debited amount in account currency.
GL Currency
Based on the account number specified, the system displays the GL currency. However, you can modify it, if required.
GL Amount
The system displays the account amount in terms of GL currency.
Narrative
The system displays ‘Miscellaneous Customer Debit’.
Reference Number
Specify the reference number for the transaction.
External Reference
This is a system generated sequence number for the transaction.
In the single stage flow, if there is an transaction level override or error during approval then the transaction will be moved to the pending queue. Without save action being initiated, the transaction will not be in pending queue.
On clicking Pickup button, the system populates the values in all the callforms of the screen and clicking pickup button is mandatory if you make any changes to the Transaction amount and exchange rate after first pickup.
Once you click ‘Pickup’ button once, then on amendment of xrate, amount, charge, pickup will be mandatory before save. On pick up, the fields that are currently enabled in the enrich stage will alone be retained as enabled fields.
Enrichment stage
On saving, the system validates and ensures for minimum mandatory data entry. If the data entry is found alright, it will calculate the charge based on the transaction type.
The following details are defaulted from the account and displayed:
- The currency associated with the account
- The account title
- The ID of the account holder
Exchange Rate
The exchange rate used for the currency conversion is displayed here. If the account currency is the same as the transaction currency, the system will display ‘1’ as the exchange rate.
GL Amount
The amount credited to the GL account is displayed here. This amount will be in terms of the GL account currency.
Account Amount
The amount debited from the customer account in account currency is displayed.
Total Charges
The system computes the charges applicable for the transaction and displays it here.
If you modify the amount to be transferred, then click ‘Recalc’ button to recalculate the charge amount.
Negotiated Cost Rate
Specify the negotiated cost rate that should be used for foreign currency transactions between the treasury and the branch. You need to specify the rate only when the currencies involved in the transaction are different. Otherwise, it will be a normal transaction.
Negotiation Reference Number
Specify the unique reference number that should be used for negotiation of cost rate, in foreign currency transaction. If the negotiated cost rate is specified then you should be needed to specify the negotiated reference number.
Note
Oracle FLEXCUBE books then online revaluation entries based on the difference in exchange rate between the negotiated cost rate and transaction rate.
9.2.2 Specifying the charge details
In this block, you can capture the following charge related details:
Charge Component
The system defaults the charge components applicable to the transaction.
Type
The system displays the type of charge that is applicable to the transaction. It could be any one of the following:
- ‘F’ for Flat Rate
- ‘P’ for Percentage
- ‘I’ for Interest
Waiver
You can waive a certain charge for the customer by checking this box against the charge component.
Charge Amount
The system displays the charge amount to be deducted for the corresponding charge component. You can edit the amount.
Charge in LCY
In case the transaction currency is different from the local currency, the system will compute the local currency equivalent of the charge and display it here.
Exchange Rate
The exchange rate used for the currency conversion is displayed here. If the charge currency is the same as the transaction currency, the system will display ‘1’ as the exchange rate.
Charge Currency
The system displays the currency in which the charge has to be deducted.
9.2.3 Specifying the MIS Details
This block allows you to capture details pertaining to MIS. Click on the ‘MIS’ tab to invoke the following screen:
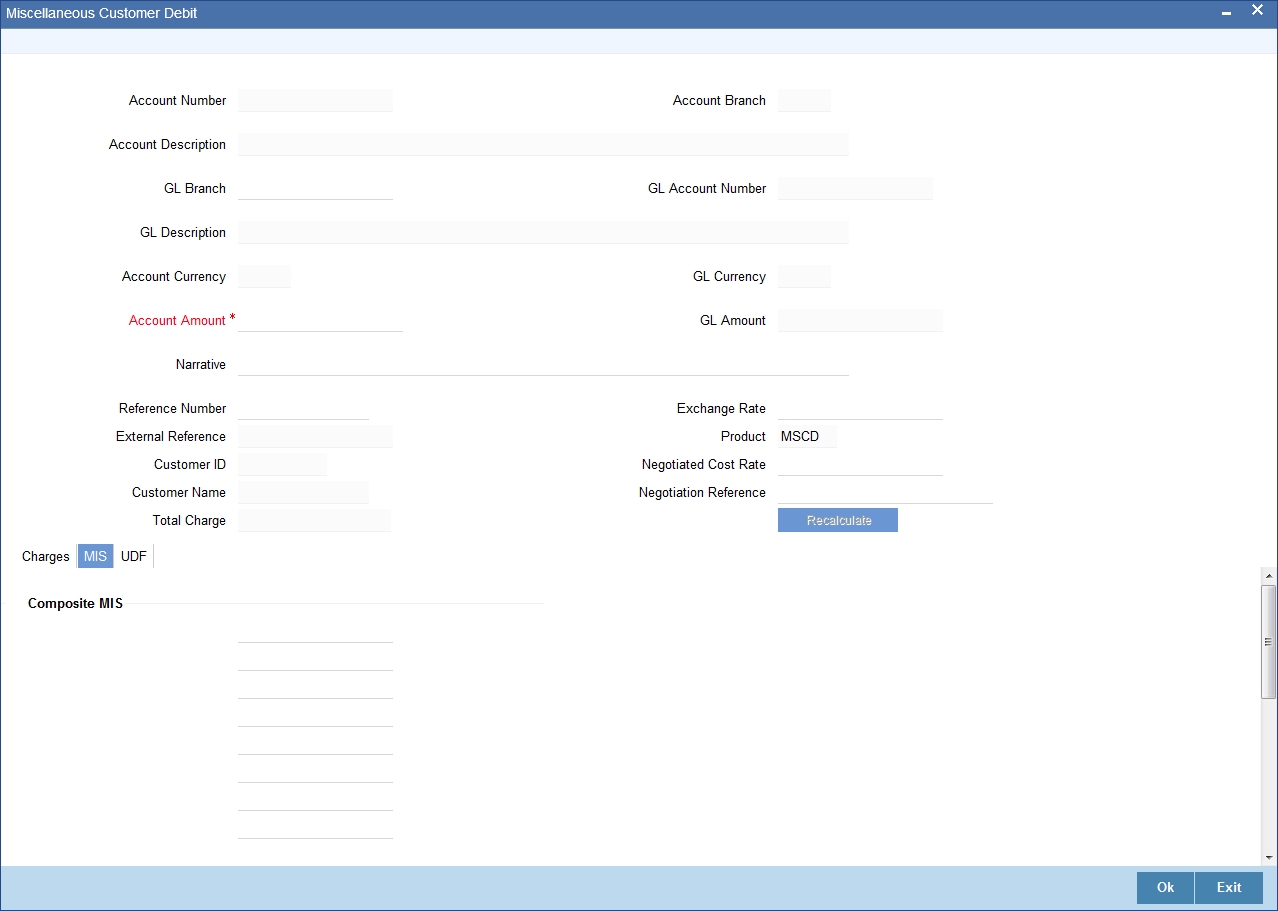
You can capture the following details here:
MIS Class
The system displays all the MIS classes maintained in the Host. You can to select the appropriate MIS code for each of these classes from the adjoining option list and link it to the transaction.
9.2.4 Specifying UDF Details
You can capture the UDF details under ‘UDF’ tab.
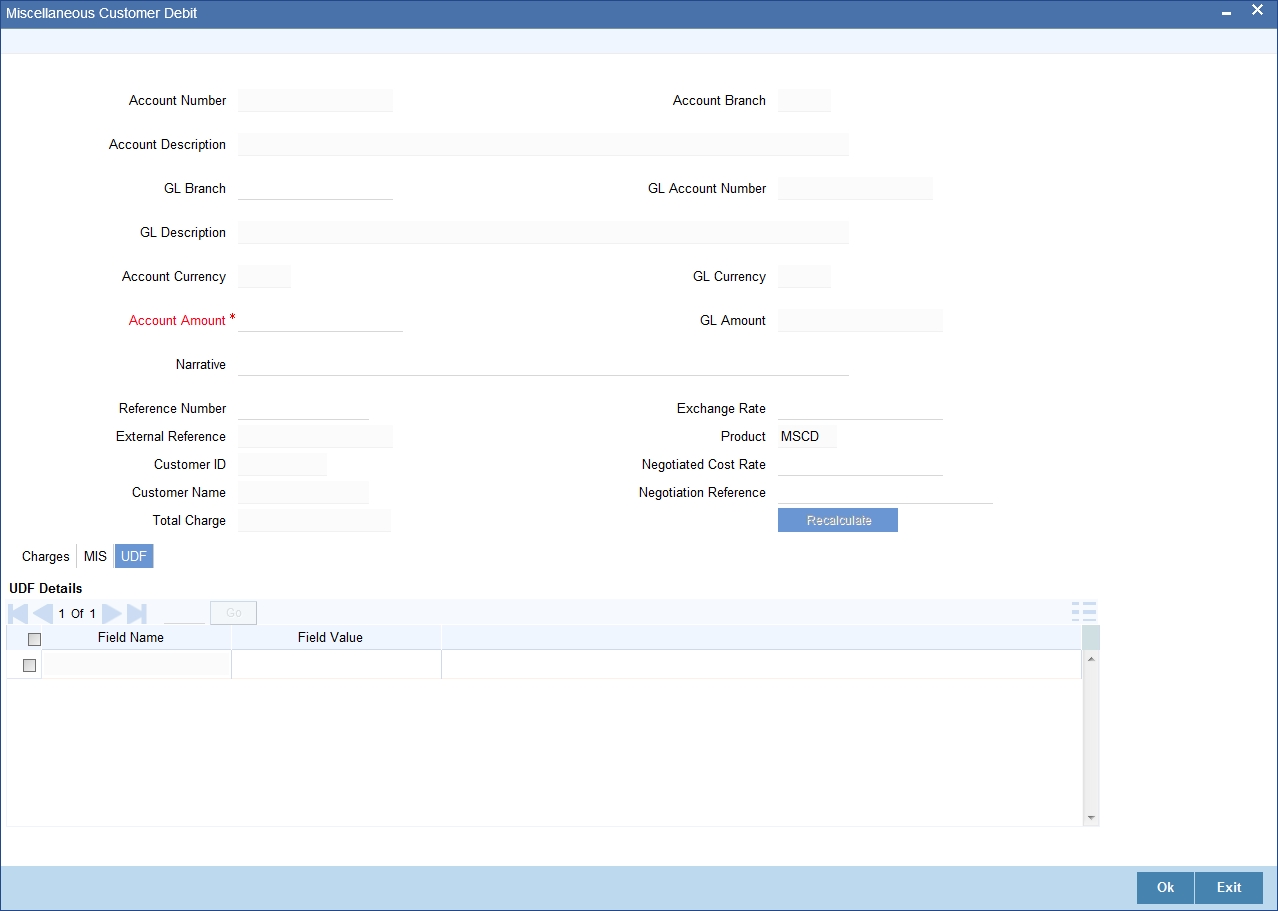
Field Name
The system displays the various User-Defined Fields (UDFs) that you have maintained for the product in the Host.
Field Value
Specify the value for the each UDF that is displayed.
Click save icon to save the transaction. The approver can fetch this transaction for his/her task list and authorize it. The authorization process is similar to that of cash deposit.
Refer the corresponding section under ‘Depositing Cash’ in the chapter ‘Cash Transactions’ of this User Manual for further details.
9.3 Miscellaneous Customer Credits
This section contains the following topics:
- Section 9.3.1, "Miscellaneous Credits to a Customer’s Account"
- Section 9.3.2, "Specifying the charge details"
- Section 9.3.3, "Specifying the MIS details"
- Section 9.3.4, "Specifying UDF Details"
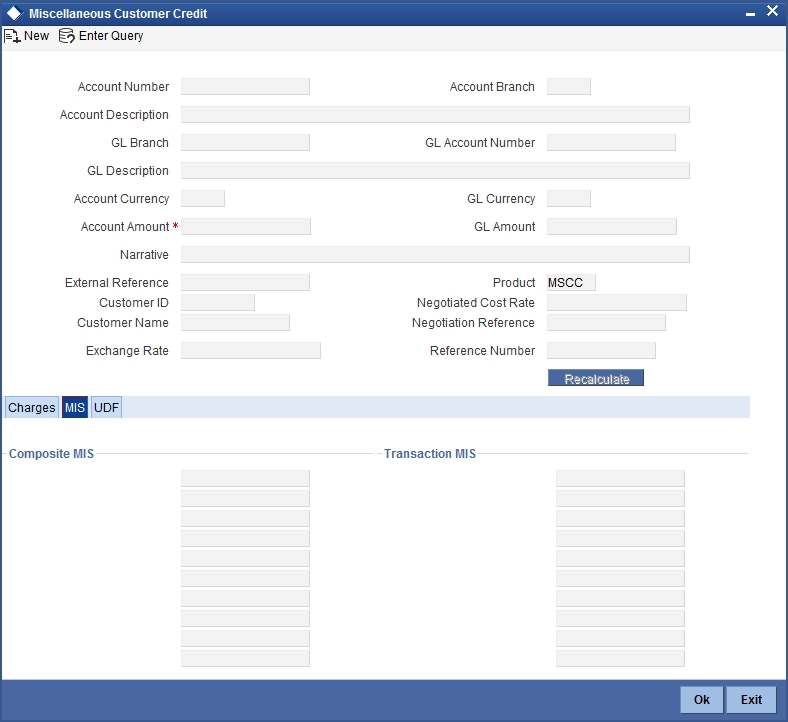
9.3.1 Miscellaneous Credits to a Customer’s Account
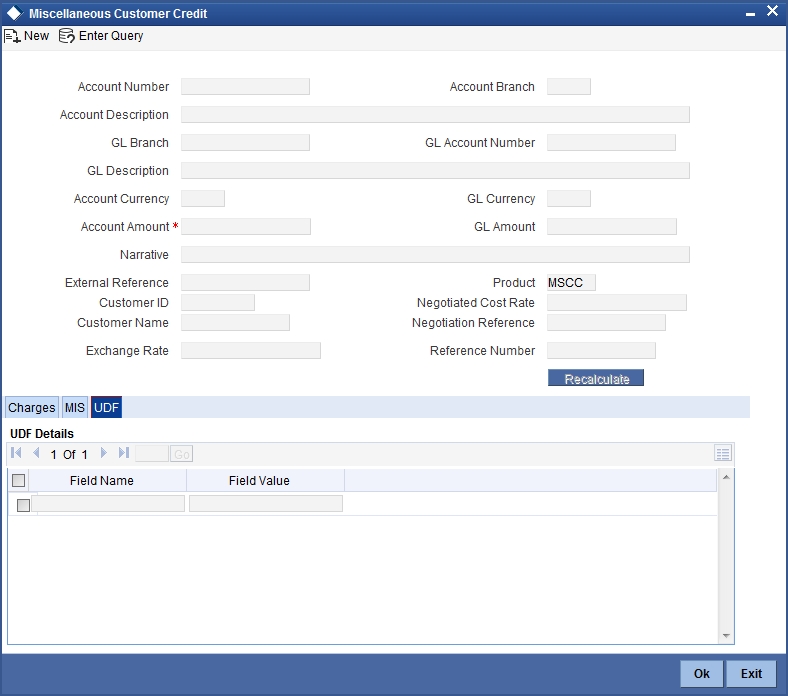
Similarly, you can perform miscellaneous credit to a customer account with the corresponding debit to a GL account. Use the ‘Miscellaneous Customer Credit’ screen to carry out this transaction. You can invoke this screen by typing ‘1408’ in the field at the top right corner of the Application tool bar and clicking on the adjoining arrow button.
You can also specify Virtual Accounts in this screen. These virtual accounts can be used as a routing account to credit the underlying physical account.
If a virtual account number is specified in this screen, then the F10, F11, and F12 keys will not display any value, however the following error messages will be displayed for each of these keys:
- F10: Customer Image not maintained for this Customer/Account in branch 214
- F11: Customer Account Balance cannot be accessed for this Customer/ Account.
- F12: Customer Signature not maintained for this Customer/Account in branch 214
Click the OK button and you will be able to proceed further with the transaction.
The following details can be captured in this screen:
Account Number
Physical Account
Specify the customer account number into which the amount needs to be deposited.
NoteBased on the account number specified, the system will display the Account Branch, Account Description, Account Currency and GL Currency for the corresponding account. The option list displays all valid account numbers applicable. Choose the appropriate one.
In case of multiple accounts with the same account number, the system will display a list of account numbers with account branches to select.
To view the joint holder’s details of an account and the mode of operation maintained at the account level, place the cursor on the Account Number field and press Ctrl+J. The system displays the ‘Joint Holder’ screen.
For more information on the ‘Joint Holder’ screen refer to the section ‘Joint Holder Maintenance’ in the Core User Manual.
Virtual Account
You can also specify a virtual account number in this field. The physical account number is identified based on the Virtual Account Number and Account Currency combination. If there is no physical account available for the combination, then a default physical account number is selected. The account currency changes as per the default physical account number.
Account Branch
By default, the system displays the logged-in branch. When you specify an account number, the system displays the account branch based on the account number specified.
Account Description
Based on the account number specified, the system displays the description of the account. For a virtual account, the virtual account name is specified here.
GL Branch
The system displays the logged-in branch. However, you can modify it, if required.
GL Account Number
Specify the GL account number from which the funds need to be withdrawn.
GL Description
The system displays the description of the corresponding GL account number.
Account Currency
Based on the account number specified, the system displays the account currency.
For a Virtual Account, the GL currency is defaulted as the account currency. The physical account number is identified based on the account currency and virtual account number combination. If physical account number is available, then the account currency remains the same. If the physical account number is not available, then the default physical account number is selected and the account currency changes as per the default physical account number.
Account Amount
Specify the credited amount in terms of account currency.
GL Currency
Based on the account number specified, the system displays the GL currency. However, you can modify it, if required.
GL Amount
The system displays the account amount in terms of GL currency.
Narrative
The system displays ‘Miscellaneous Customer Credit’.
Note
Click the OK button to go to the next stage.
Reference Number
Enter a reference number for the corresponding transaction.
External Reference
This is a system generated sequence number for the transaction.
In the single stage flow, if there is an transaction level override or error during approval then the transaction will be moved to the pending queue. Without save action being initiated, the transaction will not be in pending queue.
On clicking Pickup button, the system populates the values in all the callforms of the screen and clicking of Pickup button is be made mandatory if you makes any changes to the Transaction amount and exchange rate after first pickup.
Once you click ‘Pickup’ button once, then on amendment of xrate, amount, charge, pickup will be mandatory before save. On pick up, the fields that are currently enabled in the enrich stage will alone be retained as enabled fields.
On Click of pickup the following details gets defaulted
- The currency associated with the account
- The account title
- The ID of the account holder
Exchange Rate
The exchange rate used for the currency conversion is displayed here. If the account currency is the same as the transaction currency, the system will display ‘1’ as the exchange rate.
GL Amount
The amount debited from the GL account is displayed here. This amount will be in terms of the GL account currency.
Account Amount
System displays the amount credited to the customer account in terms of the account currency.
Total Charges
The system computes the charges applicable for the transaction and displays it here.
If you modify the amount to be transferred, then click ‘Recalc’ button to recalculate the charge amount.
Negotiated Cost Rate
Specify the negotiated cost rate that should be used for foreign currency transactions between the treasury and the branch. You need to specify the rate only when the currencies involved in the transaction are different. Otherwise, it will be a normal transaction.
Negotiation Reference Number
Specify the unique reference number that should be used for negotiation of cost rate, in foreign currency transaction. If the negotiated cost rate is specified then you should be needed to specify the negotiated reference number.
Note
Oracle FLEXCUBE books then online revaluation entries based on the difference in exchange rate between the negotiated cost rate and transaction rate.
9.3.2 Specifying the charge details
In this block, you can specify the charge related details.
Refer the section titled ‘Specifying the charge details’ under ‘Miscellaneous Debits to a Customer’s Account’ for further details.
9.3.3 Specifying the MIS details
This block allows you to capture details pertaining to MIS. Click on the ‘MIS’ tab to invoke the following screen:
Refer the section titled ‘Specifying the MIS details’ under ‘Miscellaneous Debits to a Customer’s Account’ for further details.
9.3.4 Specifying UDF Details
You can capture the UDF details under ‘UDF’ tab.
Refer the section titled ‘Specifying the UDF details’ under ‘Miscellaneous Debits to a Customer’s Account’ for further details.
Click save icon to save the transaction. The approver can fetch this transaction for his/her task list and authorize it. The authorization process is similar to that of cash deposit.
Refer the corresponding section under ‘Depositing Cash’ in the chapter ‘Cash Transactions’ of this User Manual for further details.
Refer the chapters titled ‘Transaction Workflow’ and ‘Common Operations’ in this User Manual for details on the authorization process.
9.4 Advance By Transfer
- Section 9.4.1, "Disbursing Advance by Account Credit"
- Section 9.4.2, "Specifying the charge details"
- Section 9.4.3, "Specifying the MIS details"
- Section 9.4.4, "Specifying the UDF details"
9.4.1 Disbursing Advance by Account Credit
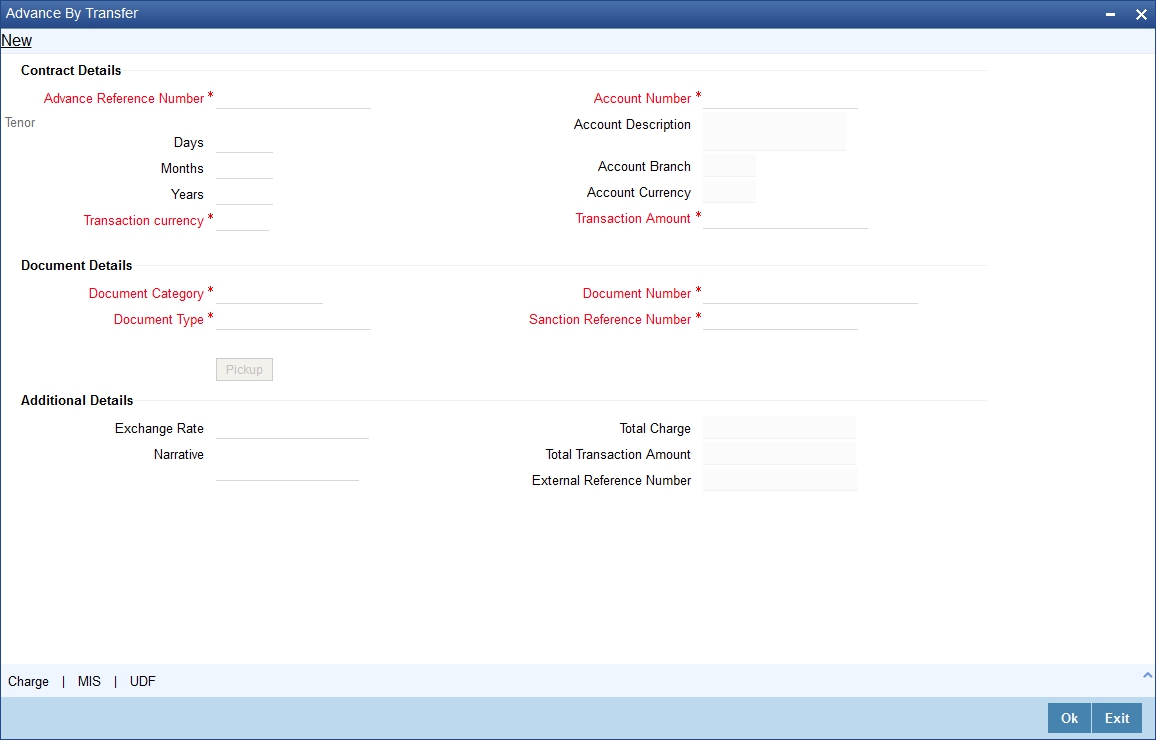
You can release advances by account credit through the ‘Advance By Transfer’ screen. When a customer submits a request for advance by account credit in case of emergency, you can disburse advance that are maintained in the external system where transfer from GL to CASA account is allowed. You can also perform reversal of transaction in this screen.You can invoke this screen by typing ‘1462’ in the field at the top right corner of the Application tool bar and clicking on the adjoining arrow button.
Product type in the ‘Retail Product Parameter Definition’ (DEDRTPRM) screen should be ‘ET’-External Transfer Advance. In IFDATMMN create an ARC maintenance with the product code with Debit Account as Offset account and charge debit account as Offset account. In the Offset account specify the Offset GI that is configured earlier and add a charge code as per requirement.
Contract Details
Advance Reference Number
Specify the advance reference number. For example if the Nature of Advance is Loan then the loan account number should be specified and if the Nature of Advance is credit card then the Credit Card number should be specified.
Account Number
Specify the account number of the customer to which advance has to be credited.
Account Description
The system displays the account description based on the account number specified.
Account Branch
The system displays the account branch based on the account number specified.
Account Currency
The system displays the account currency based on the account number specified.
Transaction currency
Specify the currency in which advance transaction is initiated. Alternatively you can select the transaction currency code from the option list. The list displays all valid transaction currencies maintained in the system.
Transaction Amount
Specify the transaction amount that needs to be sanctioned.
Tenor
You can specify the tenor of the advance in Days/Months/Years
Days
Specify the tenor of advance in days. The range of value that you can specify is “0-30”. If you specify a value beyond permissible range, the system will display an error message.
If you specify the tenor value of date in decimal, then the system displays an error message “Invalid Tenor Value”.
Months
Specify the tenor of advance in months. The range of value that you can specify is “0-11”. If you specify a value beyond permissible range, the system will display an error message.
If you specify the tenor value of month in decimal, then the system displays an error message “Invalid Tenor Value”.
Years
Specify the tenor of advance in years.
If you specify the tenor value of year in decimal, then the system displays an error message “Invalid Tenor Value”.
Document Details
Document Category
Specify the category of the document that is uploaded. Alternatively you can select the category of the document from the option list. The list displays all valid document categories maintained in the system.
Document Type
Specify the type of document submitted by the customer. Alternatively you can select the type of document from the option list. The list displays all valid document types maintained for a document category.
Document Number
Specify the document reference number submitted by the customer.
Beneficiary Name
Specify the beneficiary name.
Sanction Reference Number
Specify the approval number obtained from the third party.
When a transaction is reversed and initiated again with the same Sanction Reference Number and application number combination, then the system displays an configurable override message “Sanction Reference Number should be unique”.
Additional Details
Exchange Rate
The system displays the exchange rate used to convert the transaction currency into GL currency. If the transaction currency is the same as the account currency, the system will display the exchange rate as ‘1’.
Narrative
Specify the remarks about the transaction.
Total Charge
Specify the total charge applicable.
Total Transaction Amount
The system displays the total transaction amount inclusive of all applicable charges.
External Reference Number
The system displays a unique number generated based on the branch specific sequence number generation logic. The Host system identifies a branch transaction with the External reference number.
If the customer requests for advance account credit, then the following accounting entries are passed:
- Principal portion (If netting is not present)
- Debit Offset GL
- Credit CASA
- Charge portion
- Debit Charge GL
- Credit income GL
You can capture the following details in this screen:
9.4.2 Specifying the charge details
You can capture details pertaining to charge. Click on the ‘Charges’ tab to invoke the following screen.
For more information on charge details screen, refer to the section ‘Specifying the Charge details’ in the chapter ‘Miscellaneous Debits to a Customer’s Account’ in this User Manual.
9.4.3 Specifying the MIS details
You can capture details pertaining to MIS. Click on the ‘MIS’ tab to invoke the following screen.
For more information on MIS details screen, refer to the section ‘Specifying the MIS details’ in the chapter ‘Miscellaneous Debits to a Customer’s Account’ in this User Manual.
9.4.4 Specifying the UDF details
You can capture details pertaining to UDF. Click on the ‘UDF’ tab to invoke the following screen.
For more information on UDF details screen, refer to the section ‘Specifying the UDF details’ in the chapter ‘Miscellaneous Debits to a Customer’s Account’ in this User Manual.
9.5 Miscellaneous Debit to a GL Account
This section contains the following topics:
- Section 9.5.1, "Miscellaneous Debit to a General Ledger Account"
- Section 9.5.2, "Specifying the denomination details"
- Section 9.5.3, "Specifying the charge details"
- Section 9.5.4, "Specifying MIS details"
- Section 9.5.5, "Specifying UDF details"
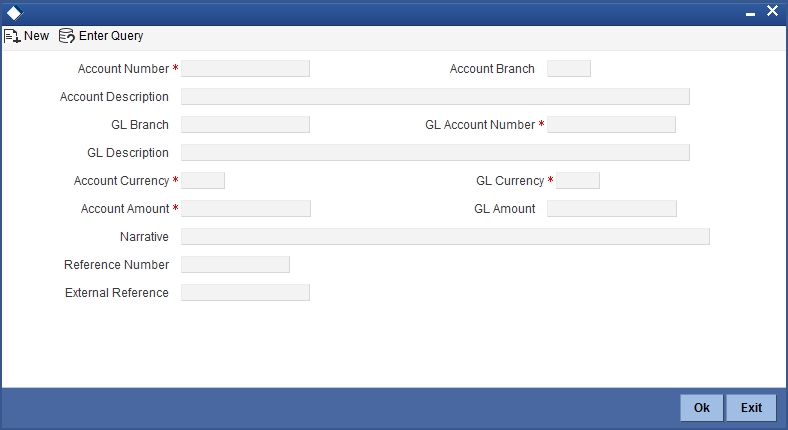
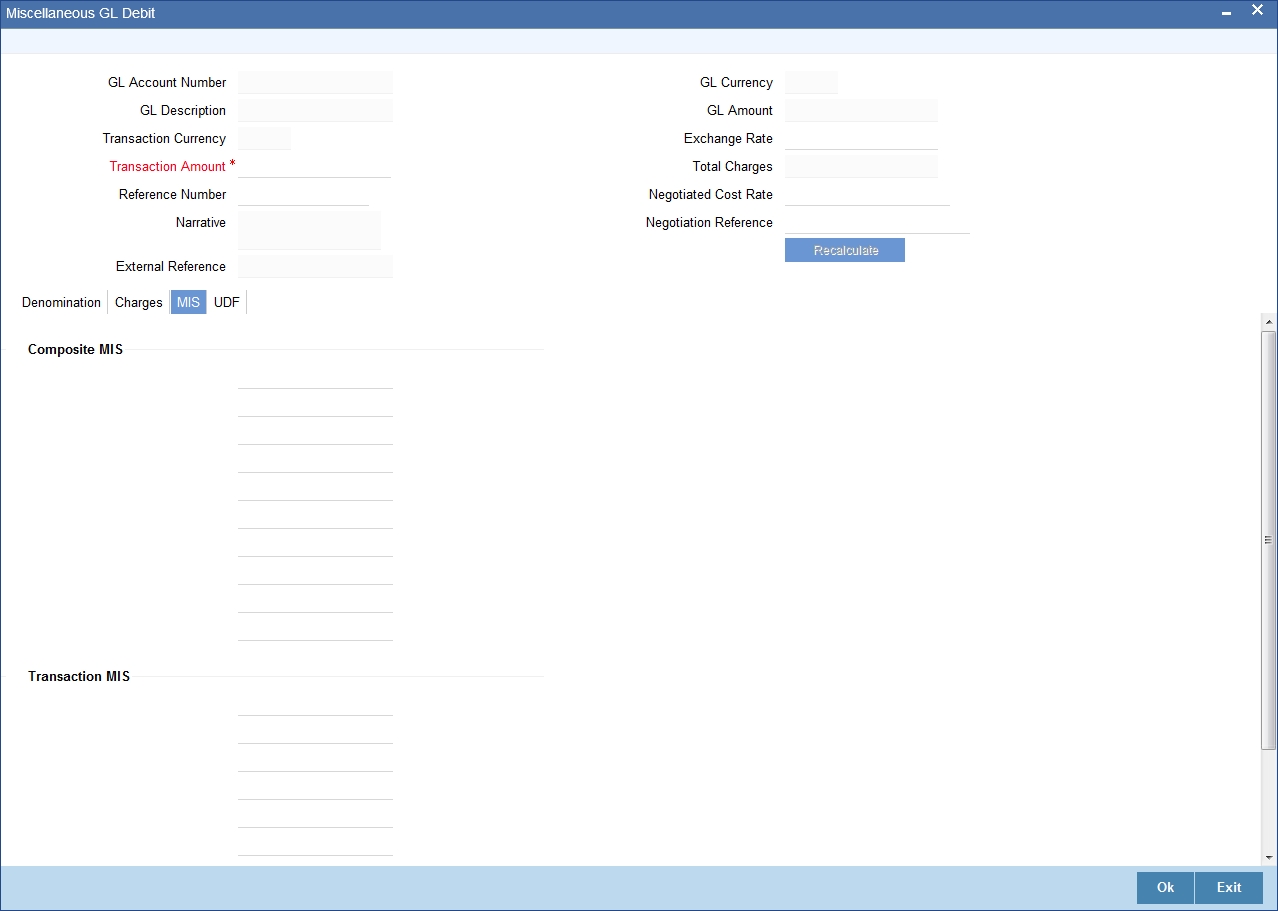
9.5.1 Miscellaneous Debit to a General Ledger Account
You can perform miscellaneous debit to a GL account with the corresponding credit to the cash account. This transaction lets you enter a miscellaneous debit to a General Ledger (GL) account with the corresponding credit to the cash account. Use the ‘Miscellaneous GL Debit’ screen to enter a miscellaneous debit to a GL account. You can invoke this screen by typing ‘1060’ in the field at the top right corner of the Application tool bar and clicking the adjoining arrow button.
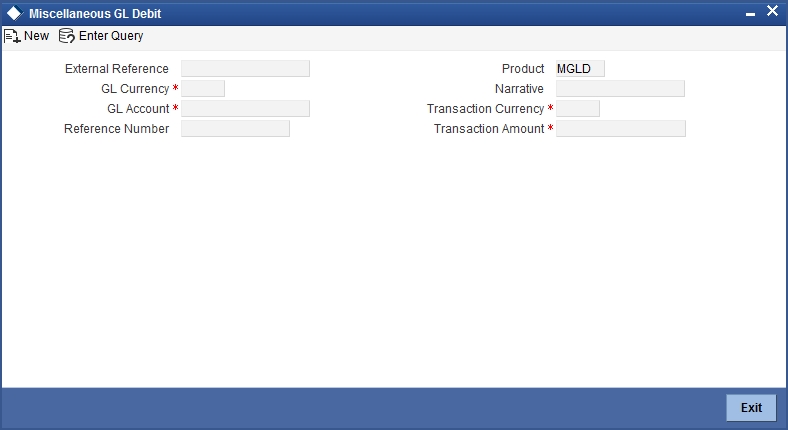
The following details can be captured in this screen:
GL Account Number
Select the GL account number from which the funds are to be transferred to a cash account from the option list.
To view the joint holder’s details of an account and the mode of operation maintained at the account level, place the cursor on the GL Account Number field and press Ctrl+J. The system displays the ‘Joint Holder’ screen.
For more information on the ‘Joint Holder’ screen refer to the section ‘Joint Holder Maintenance’ in the Core User Manual.
GL Currency
Specify the currency of the GL account from which the funds are to be transferred.
GL Description
The system displays the description of the GL account number chosen.
GL Amount
The system displays the amount in GL account currency.
Transaction Currency
Specify the currency in which the cash account is being credited. You can select the appropriate code from the adjoining option list that displays all the currency codes maintained in the system.
Transaction Amount
Specify the amount that should be credited to the cash account in the specified currency.
Reference Number
Enter a reference number for the transaction.
Narrative
You may enter remarks about the transaction here. This is a free format text field.
External Reference
This is a system generated sequence number for the transaction.
In the single stage flow, if there is an transaction level override or error during approval then the transaction will be moved to the pending queue. Without save action being initiated, the transaction will not be in pending queue.
On clicking Pickup button, the system populates the values in all the callforms of the screen and clicking pickup button is mandatory if you make any changes to the Transaction amount and exchange rate after first pickup.
Once you click ‘Pickup’ button once, then on amendment of xrate, amount, charge, pickup will be mandatory before save. On pick up, the fields that are currently enabled in the enrich stage will alone be retained as enabled fields.
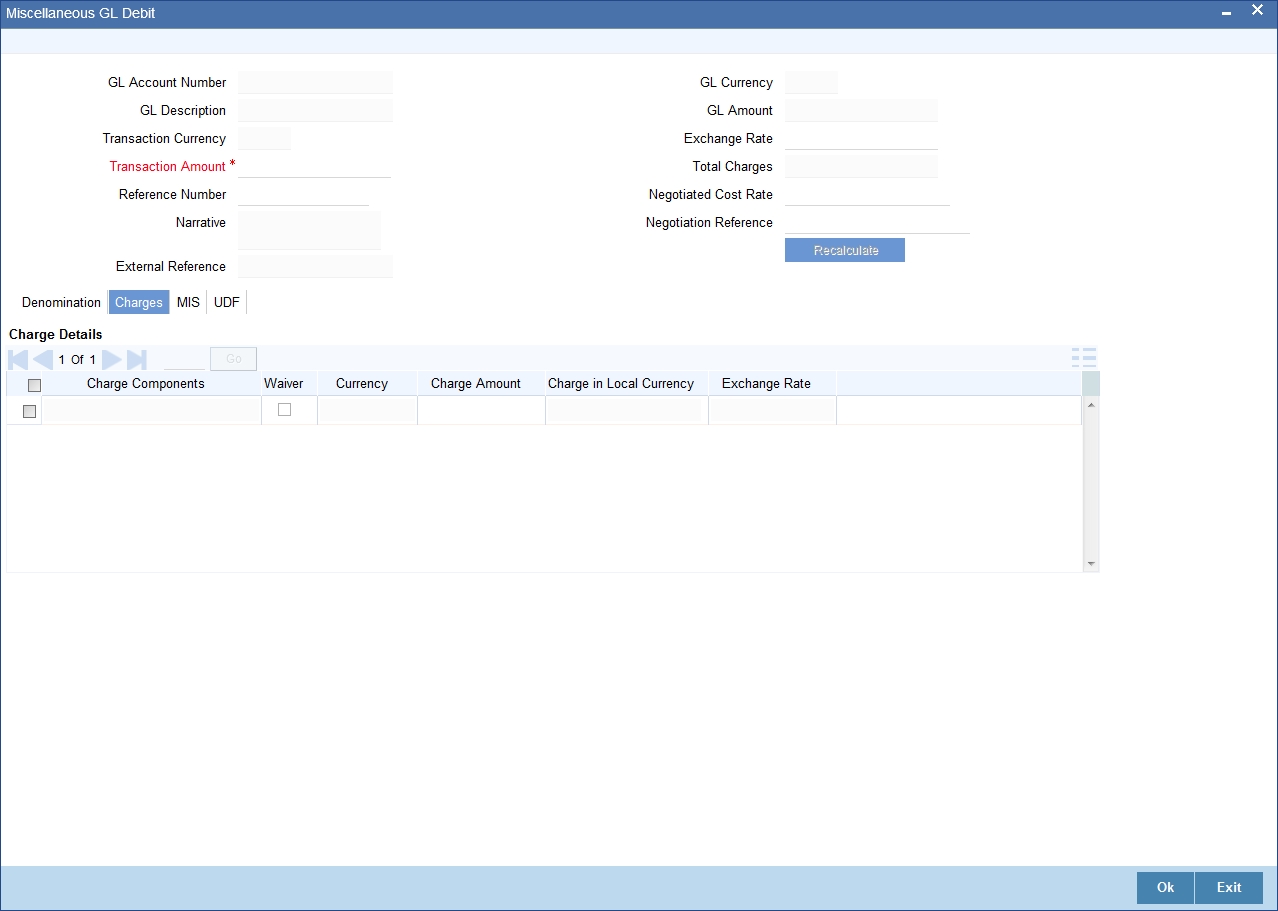
After pickup system populates the below details:
Exchange Rate
The system displays the exchange rate used to convert the transaction currency into GL currency. If the transaction currency is the same as the account currency, the system will display the exchange rate as ‘1’.
SC Charges
The system displays the service charges calculated based on the maintenance in the host.
GL Amount
The system displays the total amount debited from the GL account inclusive of the service charges in the transaction currency.
If you modify the transaction amount, then click ‘Recalc’ button to re-compute the amount to be debited from the GL account.
Negotiated Cost Rate
Specify the negotiated cost rate that should be used for foreign currency transactions between the treasury and the branch. You need to specify the rate only when the currencies involved in the transaction are different. Otherwise, it will be a normal transaction.
Negotiation Reference Number
Specify the unique reference number that should be used for negotiation of cost rate, in foreign currency transaction. If the negotiated cost rate is specified then you should be needed to specify the negotiated reference number.
Note
Oracle FLEXCUBE books then online revaluation entries based on the difference in exchange rate between the negotiated cost rate and transaction rate.
9.5.2 Specifying the denomination details
In this block, you can capture details of the currency denominations involved in the transaction through the following fields:
Currency Code
The system displays the currency of the account.
Denomination Code
Specify the denomination of the currency used in the transaction. For every currency, the various denominations are assigned separate denomination codes. These codes are displayed in the adjoining option list. Choose the appropriate one.
Denomination Value
The system computes the face value of the denomination and displays it. For instance if the denomination code represents a USD 100, the value will be displayed as ‘100’.
Units
Indicate the number of units of the specified denomination. By default, till contents are decremented for outflow transactions like GL debit. To reverse this default behaviour, you can specify units in negative.
Total Amount
The system computes the denomination value by multiplying the denomination value with the number of units. For instance, if the denomination code represents a USD 100 and the number of units is 10, the denomination amount will be ‘1000’.
9.5.3 Specifying the charge details
In this block, you can specify the charge related details. Click on the ‘Charges’ tab to invoke the following screen:
Refer the section titled ‘Specifying the charge details’ under ‘Miscellaneous Debits to a Customer’s Account’ for further details.
9.5.4 Specifying MIS details
This block allows you to capture details pertaining to MIS. Click on the ‘MIS’ tab to invoke the following screen:
Refer the section titled ‘Specifying the MIS details’ under ‘Miscellaneous Debits to a Customer’s Account’ for further details.
9.5.5 Specifying UDF details
This block allows you to capture details pertaining to UDF. Click on the ‘UDF’ tab to invoke the following screen:

Refer the section titled ‘Specifying UDF details’ under ‘Miscellaneous Debits to a Customer’s Account’ for further details.
Click save icon to save the transaction. The approver can fetch this transaction for his/her task list and authorize it. The authorization process is similar to that of cash deposit.
Refer the corresponding section under ‘Depositing Cash’ in the chapter ‘Cash Transactions’ of this User Manual for further details.
Refer the chapters titled ‘Transaction Workflow’ and ‘Common Operations’ in this User Manual for details on the authorization process.
9.6 Miscellaneous Credit to a GL Account
This section contains the following topics:
- Section 9.6.1, "Miscellaneous Credit to a General Ledger Account"
- Section 9.6.2, "Specifying the denomination details"
- Section 9.6.3, "Specifying the charge details"
- Section 9.6.4, "Specifying the MIS details"
- Section 9.6.5, "Specifying UDF Details"
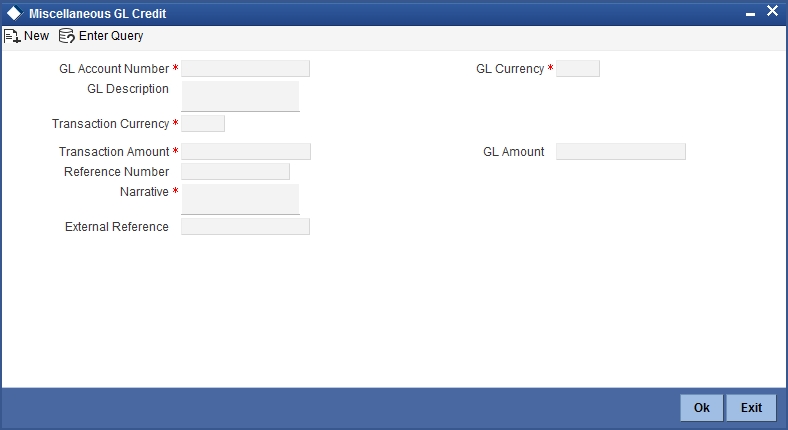
9.6.1 Miscellaneous Credit to a General Ledger Account
You can perform miscellaneous credit to a GL account with the corresponding debit to the cash account. This transaction lets you enter a miscellaneous credit to a General Ledger (GL) account with the corresponding debit to the cash account. Use the ‘Miscellaneous GL Credit’ screen to enter a miscellaneous credit to a GL account. You can invoke this screen by typing ‘1460’ in the field at the top right corner of the Application tool bar and clicking on the adjoining arrow button.
The following details can be captured in this screen:
GL Account Number
Select the GL account number from which the funds are to be transferred to a cash account from the option list.
GL Currency
Specify the currency of the GL account from which the funds are to be transferred.
GL Description
The system displays the description of the GL account number chosen.
GL Amount
The system displays the amount in GL account currency.
Transaction Currency
Specify the currency in which the cash account is being credited. You can select the appropriate code from the adjoining option list that displays all the currency codes maintained in the system.
Transaction Amount
Specify the amount that should be credited to the cash account in the specified currency.
Reference Number
Enter a reference number for the transaction.
Narrative
You may enter remarks about the transaction here. This is a free format text field.
External Reference Number
This is a system generated sequence number for the transaction.
In the single stage flow, if there is an transaction level override or error during approval then the transaction will be moved to the pending queue. Without save action being initiated, the transaction will not be in pending queue.
On clicking Pickup button, the system populates the values in all the callforms of the screen and clicking pickup button is mandatory if you make any changes to the Transaction amount and exchange rate after first pickup.
Once you click ‘Pickup’ button once, then on amendment of xrate, amount, charge, pickup will be mandatory before save. On pick up, the fields that are currently enabled in the enrich stage will alone be retained as enabled fields.
Clicking ‘Pickup’ button, the system defaults the following details:Exchange Rate
The system displays the exchange rate used to convert the transaction currency into GL currency. If the transaction currency is the same as the account currency, the system will display the exchange rate as ‘1’.
SC Charges
The system displays the service charges calculated based on the maintenance in the host.
GL Amount
The system displays the total amount credit to the GL account inclusive of the service charges in the transaction currency.
If you modify the transaction amount, then click ‘Recalc’ button to re-compute the amount to be credited to the GL account.
Negotiated Cost Rate
Specify the negotiated cost rate that should be used for foreign currency transactions between the treasury and the branch. You need to specify the rate only when the currencies involved in the transaction are different. Otherwise, it will be a normal transaction.
Negotiation Reference Number
Specify the unique reference number that should be used for negotiation of cost rate, in foreign currency transaction. If the negotiated cost rate is specified then you should be needed to specify the negotiated reference number.
Note
Oracle FLEXCUBE books then online revaluation entries based on the difference in exchange rate between the negotiated cost rate and transaction rate.
9.6.2 Specifying the denomination details
In this block, you can capture details of the currency denominations involved in the transaction.
Refer the section titled ‘Specifying Denomination Details’ under ‘Miscellaneous Debit to a General Ledger Account’ for further details.
9.6.3 Specifying the charge details
In this block, you can specify the charge related details. Click on the ‘Charges’ tab to invoke the following screen:

Refer the section titled ‘Specifying the charge details’ under ‘Miscellaneous Debits to a Customer’s Account’ for further details.
9.6.4 Specifying the MIS details
This block allows you to capture details pertaining to MIS. Click on the ‘MIS’ tab to invoke the following screen:

Refer the section titled ‘Specifying the MIS details’ under ‘Miscellaneous Debits to a Customer’s Account’ for further details.
9.6.5 Specifying UDF Details
You can capture the UDF details under ‘UDF’ tab.
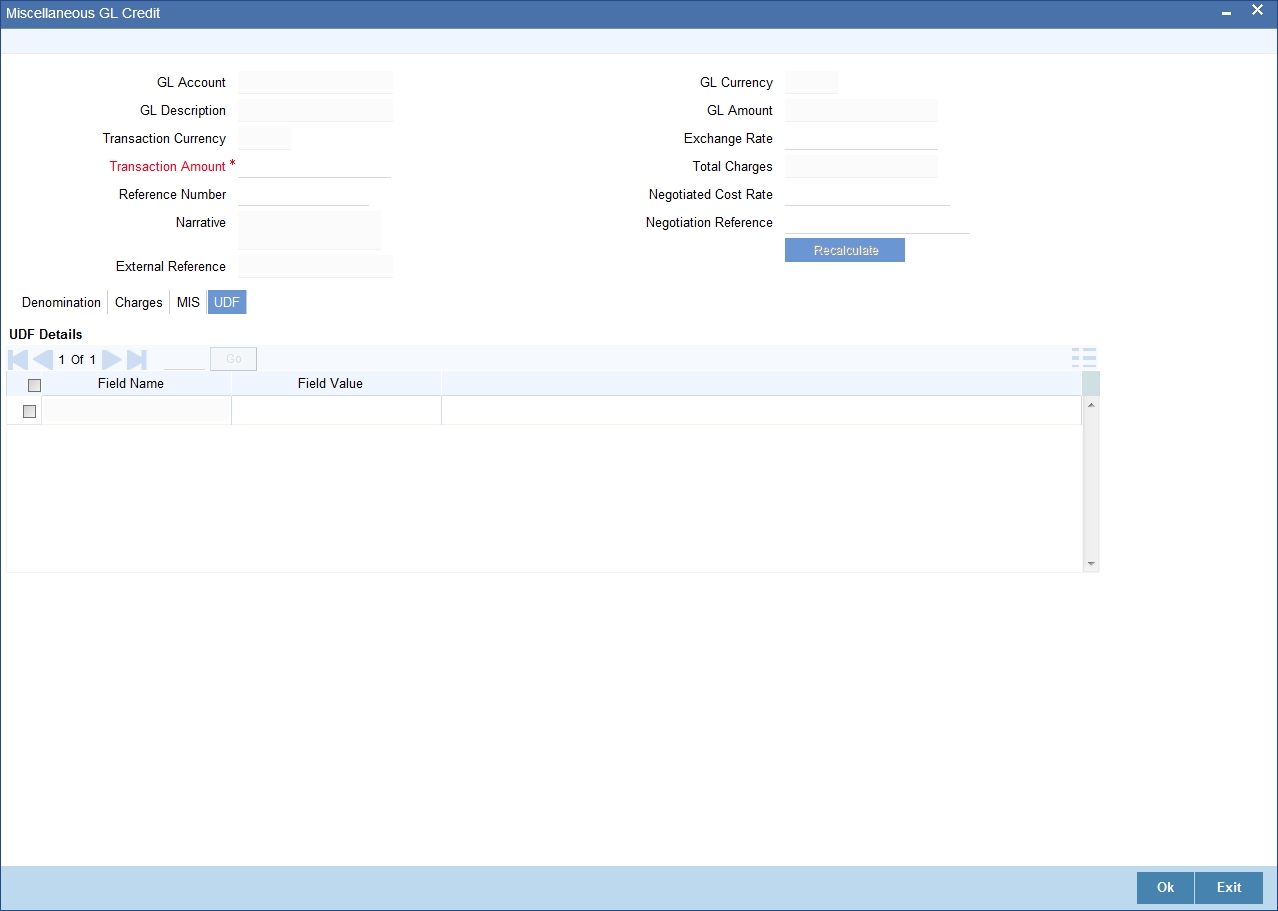
Refer the section titled ‘Specifying the UDF details’ under ‘Miscellaneous Debits to a Customer’s Account’ for further details.
Click save icon to save the transaction. The approver can fetch this transaction for his/her task list and authorize it. The authorization process is similar to that of cash deposit.
Refer the corresponding section under ‘Depositing Cash’ in the chapter ‘Cash Transactions’ of this User Manual for further details.
Refer the chapters titled ‘Transaction Workflow’ and ‘Common Operations’ in this User Manual for details on the authorization process.
9.7 Fund Transfer in GL Accounts
This section contains the following topics:
- Section 9.7.1, "Miscellaneous GL Transfer"
- Section 9.7.2, "Specifying the charge details"
- Section 9.7.3, "Specifying the MIS details"
- Section 9.7.4, "Specifying UDF Details"
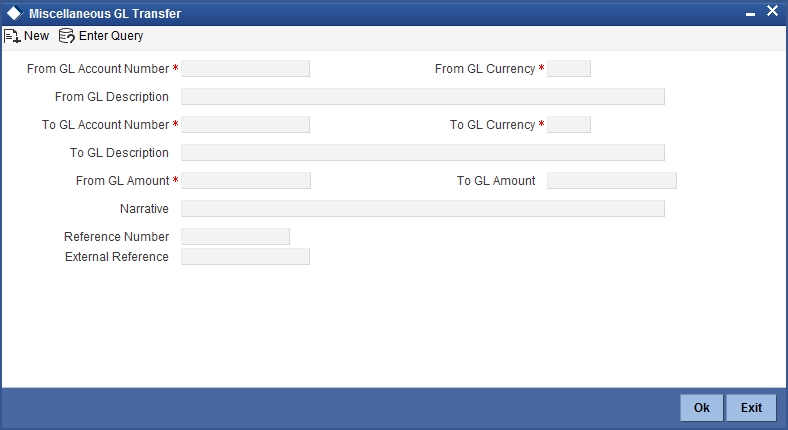
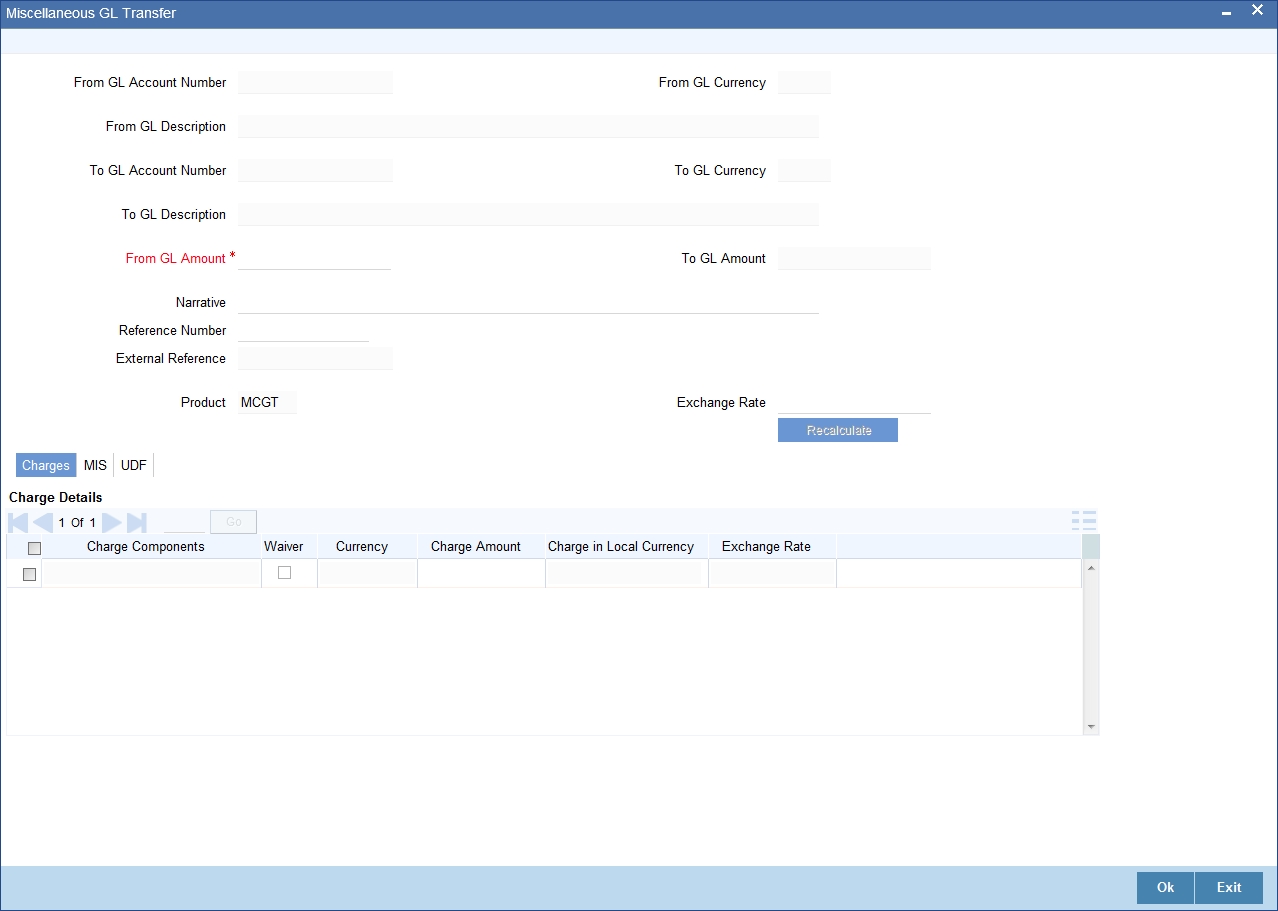
9.7.1 Miscellaneous GL Transfer
You can transfer funds from one GL account to another using Miscellaneous GL. Use the ‘Miscellaneous GL Transfer’ screen to transfer funds. You can invoke this screen by typing ‘1005’ in the field at the top right corner of the Application tool bar and clicking on the adjoining arrow button.
The following details can be captured in this screen:
From GL Account Number
Select the GL account number from which the funds are to be transferred; from the adjacent option list.
From GL Currency
The system displays the local currency. You can modify it, if required.
From GL Description
The system displays the description of the corresponding From GL Account. If the length of the data goes beyond the screen section size, you can view and edit the description in the popup window.
To GL Account Number
Select the GL account number to which the funds are to be transferred; from the adjacent option list.
To GL Currency
The system displays the local currency. You can modify it, if required.
To GL Description
The system displays the description of the corresponding To GL Account. If the length of the data goes beyond the screen section size, you can view and edit the description in the popup window.
From GL Amount
Enter the amount to be transferred.
To GL Amount
The system displays the transferable amount in terms of the To GL Account currency.
Narrative
The system displays ‘Miscellaneous GL Transfer from <From GL Account> to <To GL Account>’. In Narrative field, the system displays the values specified in From GL Account and To GL Account fields.
Click the OK button to go to the next stage.
Reference Number
Enter a reference number for the transaction.
External Reference
This is a system generated transaction sequence number.
In the single stage flow, if there is an transaction level override or error during approval then the transaction will be moved to the pending queue. Without save action being initiated, the transaction will not be in pending queue.
On clicking Pickup button, the system populates the values in all the callforms of the screen and clicking pickup button is mandatory if you make any changes to the Transaction amount and exchange rate after first pickup.
Once you click ‘Pickup’ button once, then on amendment of xrate, amount, charge, pickup will be mandatory before save. On pick up, the fields that are currently enabled in the enrich stage will alone be retained as enabled fields.
9.7.2 Specifying the charge details
In this block, you can specify the charge related details.
Refer the section titled ‘Specifying the charge details’ under ‘Miscellaneous Debits to a Customer’s Account’ for further details.
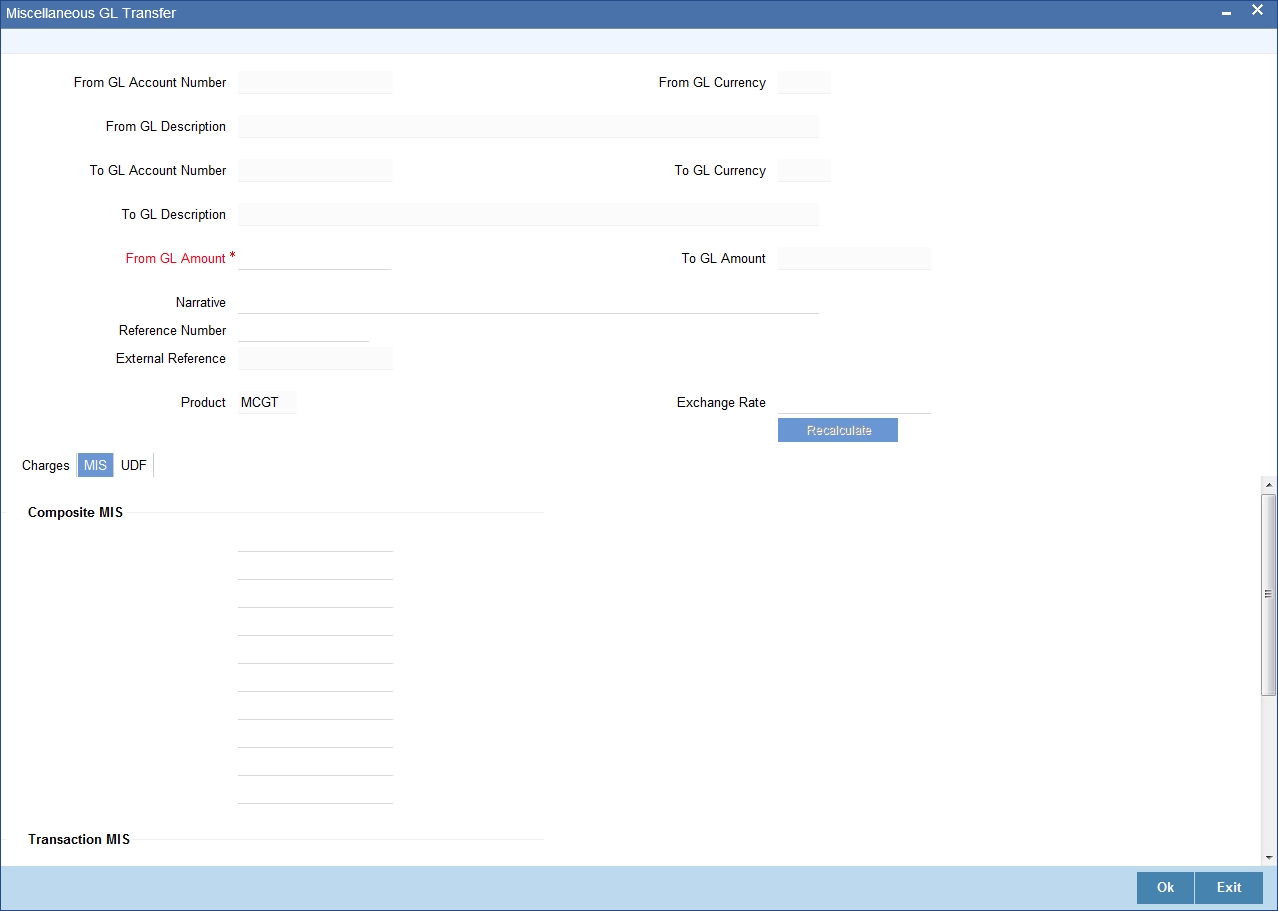
9.7.3 Specifying the MIS details
This block allows you to capture details pertaining to MIS. Click on the ‘MIS’ tab to invoke the following screen:
Click save icon to save the transaction. The approver can fetch this transaction for his/her task list and authorize it. The authorization process is similar to that of cash deposit.
9.7.4 Specifying UDF Details
You can capture the UDF details under ‘UDF’ tab.
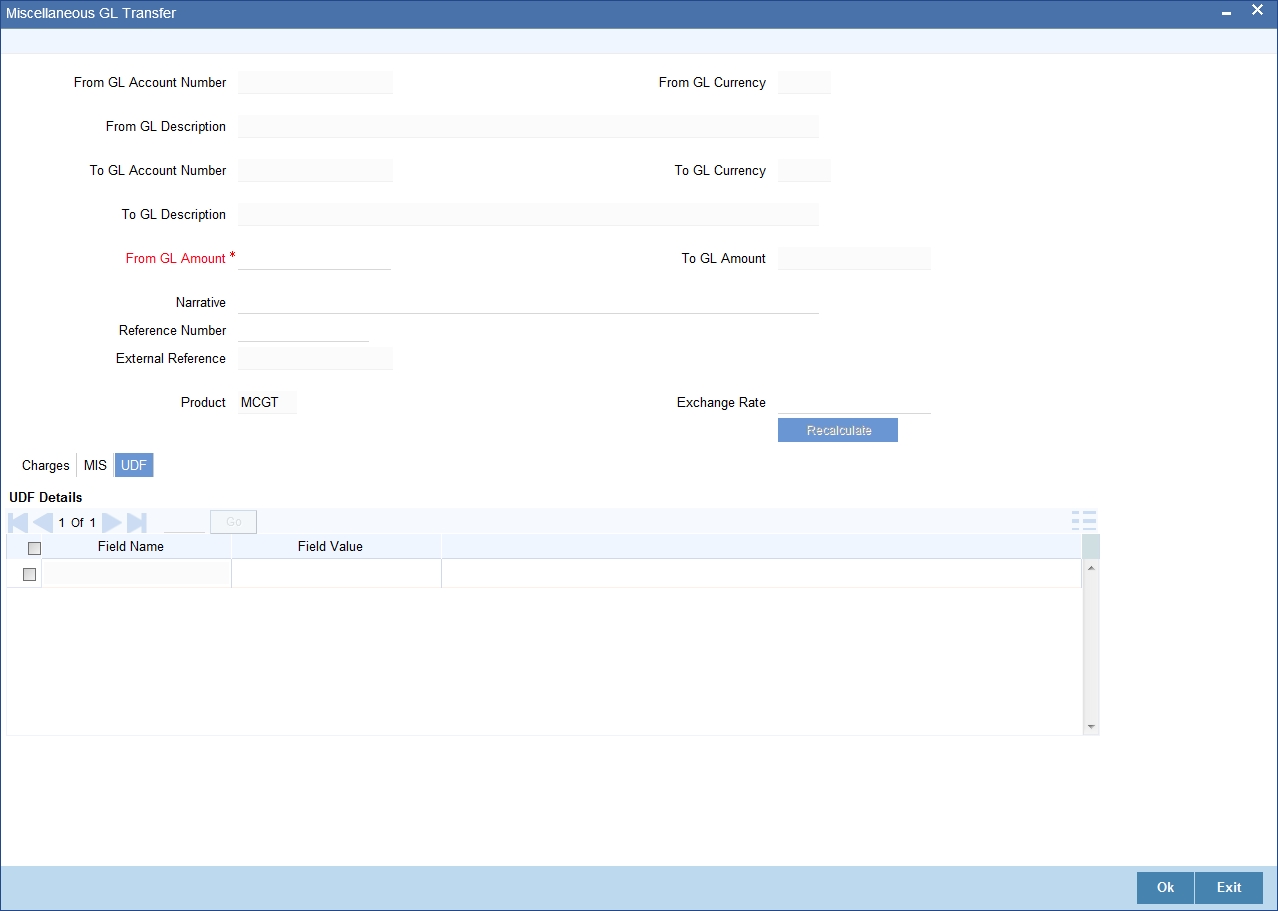
Refer the corresponding section under ‘Depositing Cash’ in the chapter ‘Cash Transactions’ of this User Manual for further details.
Refer the chapters titled ‘Transaction Workflow’ and ‘Common Operations’ in this User Manual for details on the authorization process.