4. TD Account
4.1 Introduction
This chapter contains the following sections:
4.2 Creating a Deposit Account
This section contains the following topics:
- Section 4.2.1, "Creating a Deposit Account"
- Section 4.2.2, "Main Tab"
- Section 4.2.3, "Viewing Amounts and Dates"
- Section 4.2.4, "Nominee Tab"
- Section 4.2.5, "Dual Currency Deposit Tab"
- Section 4.2.6, "Check List Tab"
- Section 4.2.8, "Capturing Additional Details"
4.2.1 Creating a Deposit Account
You can create a term deposit account using the ‘Deposit Account Booking’ screen.To invoke this screen type ‘STDCUSTD’ in the field at the top right corner of the Application tool bar and click the adjoining arrow button. Select the ‘New’ button on the Application toolbar.
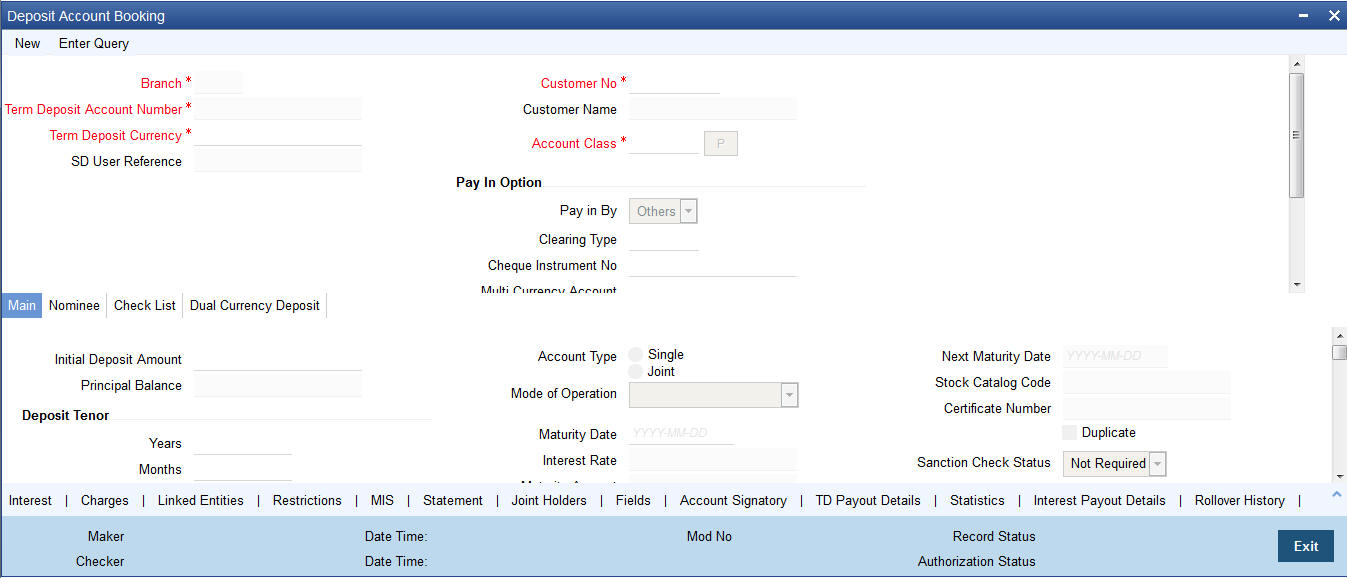
Here you can capture the following details.
Branch Code
The system displays the branch code of the sign on branch. If you have multi branch access rights, the system will display a screen where you can select the branch in which TD should be created.
Customer No.
Specify the customer identification (CIF) for whom you are creating a TD. The adjoining option list displays all valid CIF maintained in the system. You can choose the appropriate one.
Customer Name
The system displays the name of the customer based on the CIF specified.
Term Deposit Account Number
Account numbers can either be generated automatically or you can choose to allocate them manually. If you have enabled auto generation of customer account numbers at the bank parameters level, the system will create a unique reference number to identify the TD account and display it here, on pressing the ‘P’ (populate) button.
In case of manual number allocation, specify a unique account number.
In case of a child TD creation (as part of payout of parent TD), the number will be automatically generated.
To view the joint holder’s details of an account and the mode of operation maintained at the account level, place the cursor on the Term Deposit it Account field and press Ctrl+J. The system displays the ‘Joint Holder’ screen.
For more information on the ‘Joint Holder’ screen refer to the section ‘Joint Holder Maintenance’ in the Core User Manual.
Term Deposit Currency
Specify the currency of the TD. A list of all the currencies maintained in the system is displayed in the available option list. You can select the appropriate one. The TD will be created in the term deposit currency specified here.
SD User Reference
The system displays the SD user reference for the TD. This is the SD user reference number of the TD created out of structured deposit.
Account Class
Specify the account class to which the particular account belongs. You can select the appropriate account class from the option list that displays all ‘deposit’ type of account classes maintained in the system. Account classes that have surpassed their end date (expired) will not be displayed in the option list.
If the start date of the selected account is a future date, then on clicking 'Populate' button, the system will display an error message indicating that the account class was not available yet.
Pay-In Option
Pay-in By
Select the pay-in option from the adjoining drop-down list. This list displays the following values:
- Cheque
- Others
If you want to create TD through cheque, you must specify the pay-in option as ‘Cheque’.
If the pay-in option ‘Cheque’ is selected, you need to pay the total TD amount only by cheque. During account class default, the account opening dates would be updated as expected value date of the cheque transaction based on the float days maintained at ARC maintenance level.
Note
- If the pay-in option once selected from the main tab cannot be changed after account class defaults.
- Pay-in details of the cheque entered in the ‘Main’ tab will be automatically displayed in the ‘Pay-in Details’ multigrid. You cannot modify it. The pay-in option will be read only after the TD account number is populated.
- Pay-in option as cheque is not applicable to discounted TDs.
If the pay-in option ‘Cheque’ is selected, you must specify the following details:
Cheque Instrument No
Specify the cheque instrument number.
Cheque Date
Specify the date of issue of the cheque.
The cheque date cannot be future date.
Cheque date cannot be back dated more than the cheque stale days. But, If the Cheque Stale Days is set to NULL at branch level, then the system allow you to proceed.
Clearing Type
Specify the clearing type for the transaction. The adjoining option list displays a list of the outward clearing products maintained in the system. You can select the appropriate one. The cheque clearing happens based on the clearing product specified.
Drawee Account Number
Specify the drawee account number.
Routing No.
Specify the Routing number.
Note
- If a TD account is opened with payin through cheque, then till float days completion, funds will be in Uncollected stage in TD account.
- TD account cannot be modified nor any operations are allowed till cheque clearance. The system displays an error as 'Account is in tanked status. Operation will not be allowed'
- Cheque can be rejected till the float days. If float days is 0, then cheque can be rejected only on current day.Rejection can be done through 6560, CGDCLGDT, IFDCLGDTor file upload.
- On cheque rejection, the REVR will be fired debiting the uncollected amount online, if cheque consolidation is not done.and RETN will be fired debiting the TD amount online, if cheque consolidation is done. In this case, uncollected will be released online.
- If cheque is rejected, the TD account will be closed in EOD.
- If the cheque float days is 0 & the transaction code availability is X days, then till that X days, funds will be in Uncollected & account will be in tanked status. No operation is allowed till the cheque clearance.
Details maintained in this screen are classified into the following tabs:
Main |
Here you maintain the main attributes of the TD like the account number, customer code, the account class, account currency, type of account - single or joint, account status etc. |
Nominee |
Here you can capture nominee details for the TD. |
Check List |
In this tab, you can maintain the details such as documents required for opening a TD, expected date of submission, expiry date and notification/reminder frequency. You can also upload the documents from this tab. |
Dual Currency Deposit |
In this tab, you can maintain details of a dual currency deposit. |
Note
The Customer Number, Pay in and Payout account numbers should be different The following override message is provided to ensure that different account numbers are entered in these fields:
“Book TD with Single or Joint, Provide the IB, Pay-in and Payout A/C as differ customer”
4.2.2 Main Tab
On invoking the ‘Deposit Account Booking’ screen, this tab is displayed by default. You can specify the following details.
Initial Deposit Amount
The initial deposit amount displays the amount for which TD is created. If you have specified the percentage in the Pay-In options, on clicking the ‘Compute’ button, the system computes the amount. And while saving, the system validates the sum of Pay-In Amounts against the ‘TD Amount’ keyed in.
The system will validate the following:
- The deposit amount should be equal or greater than minimum booking amount maintained at the ‘Deposits Cluster Maintenance’ screen, else the system will display the error message “The deposit amount is less than the minimum booking amount”.
The deposit amount should be a multiple of the booking unit maintained at the ‘Deposits Cluster Maintenance’ screen, else the system will display the error message “The deposit amount must be in multiples of booking unit”.
Principal Balance
Principal balance displays the initial deposit amount in TD on save. If any top-up or redemption has happened on the TD, then the Initial deposit amount plus Top-up less redeemed amount is displayed here. Liquidated interest added to TD account will not be considered. On closure/full redemption, the Principal balance will be made as 0.
Account Type
You have to indicate whether the account is to be opened only by the account holder or whether it can be jointly operated. Select one of the following account types:
- Single - If you select this, you need to capture the details of single account only
- Joint - If you select this, the joint holder details needs to be specified under 'Joint Holder sub-screen.
Mode of Operation
Indicate the mode of operation. Choose one of the following options from the drop-down list:
- Single
- Jointly
- Either-Anyone or Survivor
- Former or Survivor
- Mandate Holder
Next Maturity Date
On selecting the rollover for the TD account, the system defaults the next maturity date based on the rollover tenor option of the deposit. This is updated only for rollover TD's.
The display of next maturity date is based on the Rollover tenor options:
- Account class Tenor: This is the default value of the rollover tenor if the Re-pick up account class tenor on rollover is yes. If account class tenor is selected, the next maturity date will be blank since the account class tenor is subject to change. On rollover, the account class default tenor will be picked and applied to TD. However, this default option can be changed anytime during the life cycle of the TD and a configurable override "Re-pick account class tenor on rollover restrictions exists at account class" will be displayed on save. The rollover tenor in days,months & years will be null and non -amendable.
- Account Tenor: This is the default value of the rollover tenor if the Re-pick up account class tenor on rollover is No. However, this default option can be changed anytime during the life cycle of the TD and a configurable override "Re-pick account class tenor on rollover restrictions exists at account class" will be displayed on save. The rollover tenor in days, months & years will be populated with the original tenor of the TD and will be non-amendable. The next maturity date will be calculated based on the maturity date + account tenor.
Independent tenor : The rollover tenor in days, months & years will be amendable and you are allowed to input if independent tenor is selected. The rollover tenor should be within the min / max tenor specified at account class. The rollover tenor will be validated for not null during save.Interest Rate
Click Compute button to display the interest rate. The system displays the interest rate of the main interest UDE linked to the IC product.
If the interest rate for the main Interest UDE is customized using the 'Interest' sub-screen, the system will display the customized rate here.
Along with the interest rate in the 'Interest' sub-screen, this will be re-populated during liquidation, redemption and rollover, based on the instruction at the product level.
On clicking on ‘Save’ or ‘Compute’, system defaults the next maturity date based on the rollover tenor option of the deposit. This is updated only for rollover TDs.
System calculates the next maturity date based in the current maturity date and the rollover tenor maintained at the account level. System calculates the next maturity date based on the changes to the maturity date due to holiday treatment.
Stock Catalog Code
The system displays the Stock Catalog Code of the TD certificate number. The term deposit certificate has to be maintained as an inventory. On generation of certificate from 'Term Deposit Advice' (ICDBADHC) screen, the stock catalog code will be updated to TD account automatically.
Certificate Number
The system displays the TD certificate number in Main tab. On generation of TD certificate, the certificate number will be updated in the TD account automatically. On duplicate certificate generation/rollover issue, the latest certificate number issued against the TD account will be updated in TD account.
Deposit Tenor
The system calculates the tenor of the deposit account to the difference between Interest start date and Maturity date and displays it. In case of change in maturity date, the system changes the deposit tenor.
Note
System validates that the deposit tenor is within the minimum and maximum tenor allowed for the account class. If this validation fails, then system displays the error message, “Deposit tenor does not fall in the range of minimum and maximum tenor allowed”.
Tenor of TD account cannot be modified during the lifecycle of TD account, It can be done through ICDREDMN- Tenor modification feature only. Tenor can be modified before authorization. You can modify the default tenor during the following:
- Deposit account opening
- Any time before maturity during the life cycle of the deposit
- On rollover of the deposit
On rollover of TD account, different rollover tenor can be specified, which will be considered as Deposit tenor on rollover.
If you specify the tenor, the system computes the maturity date. Once the record is authorized, you cannot amend the tenor.
The deposit tenor is represented in terms of years, months and days. For example, if the deposit tenor is 185 days, it should be represented as 0 years, 6 months and 5 days. You need to specify the values in the appropriate fields.
If the arrived maturity date falls on a holiday, then the system will adjust the maturity date as per the Holiday Treatment Maintenance at Account Class level and update revised tenor.
Years
This indicates the number of years in the deposit tenor.
Months
This indicates the number of months in the deposit tenor.
Days
This indicates the number of days in the deposit tenor.
Maturity Date
The system defaults the maturity date from the default tenor from the account class. However, you can modify this date. On this date the term deposit account gets liquidated.
Interest Rate
The rate of interest.
Maturity Amount
Click Compute button to display the maturity amount. System computes Maturity Amount based on the TD booking amount and the accrued interest till maturity. Maturity amount is based on the capitalized interest (P + I), if the booking account and the interest liquidation account are the same and the interest payout details are not provided.
Note
In case of rollover in a TD account, the system recalculates the interest rate and maturity amount and displays the values accordingly. On partial redemption, the system re-computes and displays the interest rate and maturity amount.
The SDE 'DEPOSIT_AMOUNT' is used for displaying the 'Maturity Amount' on the screen.
Refer the chapter ‘Annexure B - IC Rule Set-up’ in this user manual for details about the formula for calculating interest rate and maturity amount.
Duplicate
If any duplicate certificate is generated for the TD account, this box will be checked automatically on generation of duplicate certificate. By default, this box will be unchecked.
Sanction Check Status
The system displays the status of the sanction check request.
Sanction check will not be sent for Child TD, TD creation from SF and Auto Deposit Creation.
Original Tenor
This indicates the original tenor of the deposit. The system displays the default tenor or the tenor specified for account, which is arrived before the holiday movement. You can view the original tenor in terms of years, months and days. For example, if the deposit tenor is 185 days, it is represented as 0 years, 6 months and 5 days.
This value cannot be modified.It stores the account class tenor/ user modified tenor before holiday adjustment, if any.
Years
This indicates the number of years in the original tenor.
Months
This indicates the number of months in the original tenor.
Days
This indicates the number of days in the original tenor.
Auto Rollover
Check this box to automatically rollover the deposit you are maintaining. If you check this box, then you need to specify the rollover tenor.
Close on Maturity
Check this box to close the account automatically on maturity date.
Move interest to Unclaimed
Check this box to move the interest amount to the unclaimed GL mapped at the IC product in the accounting role ‘INT_UNCLAIMED’ on Grace period End date. If you select this option, then you will have to check the box ‘Move Principal to Unclaimed’.
Note
- If you have selected auto rollover, then this field will not be applicable.
- Funds will be moved to unclaimed GLs only if the maturity options have not been specified. If an account matures and no action is taken (closure or roll-over) within the grace period, then the funds are moved to the unclaimed GLs on the EOD of the last day of the grace period (maturity date + grace days).
Move Principle to Unclaimed
Check this box to move the principal amount to the unclaimed GL mapped at the IC product in the accounting role ‘PRN_UNCLAIMED’ on Grace period End date. If you select this option then only principle amount will be moved to unclaimed and Interest will be settled to TD payout. If You select both ‘Move Interest to Unclaimed’ and ‘Move Principle to Unclaimed’ then TD amount (i.e. P+I will be moved to Unclaimed GL, irrespective to the TD payout Details).
Cascade Month -End Maturity Date
Check this box to cascade the month end maturity date of the deposit. If not selected then, the maturity date will fall in line with the account open date. To cascade to function, tenor should be multiple of months.
This value gets defaulted based on account class.It should by default be checked.
Computed Amount
On clicking the ‘Compute’ after specifying the percentage under the ‘Pay-In Details’ section the system computes the amount of the TD in this field.
On saving the record, the system validates the sum of Pay-In amounts against the ‘TD Amount’ keyed in.
Payin Details
You can specify the following details of the deposit:
Term Deposit Pay In Option:
The TD module allows you to fund a TD using multiple pay-in modes viz:
- Pay in by transfer from GL - In case of pay-in through GL, the offset GL account maintained at 'TD Payin Parameters' (STDTDPAY) screen should be selected.If the offset GL account is not specified, the GL maintained at TD Payin Parameters' (STDTDPAY) will be defaulted and used on save of TD
- Pay in by transfer from Savings Account - In case of pay-in from savings account, it is mandatory to specify the offset account. If it is not specified, the system displays an error on saving the TDaccount. If the pay-in account specified is disallowed for the TD product, then on saving the account, the system displays an error message. The account specified is debited and TD will be created.
- Pay in by Cheque - In case of pay-in by cheque, the TD should be
entirely funded by a single cheque. Multimode, combining multiple cheques
or part payment by cheque and the rest by other modes, is not allowed.
You can also have a combination of the aforesaid modes while funding a single TD. Once the TD account is created, the system considers each of the pay-in options entered in this screen and processes it accordingly.
You can specify the TD funding amount as a percentage or as an absolute value. You can fund a TD by cash too.
However, this option is available for TD creation through the Savings module (TDMM) only.You can
Percentage
Specify the percentage amount that funds the TD by the pay-in mode
Amount
Specify the amount that funds the TD. If you have specified the percentage, then the system computes the amount.
Note:
When Amount and Percentage options are provided, amount takes precedence and percentage is ignored.
Offset Branch
The system populates the branch code of the account from which fund is transferred to TD account.
Offset Account
Specify the account number/ GL from which the fund is transferred to TD account. This field returns the branch code if the account is selected and NULL is returned if GL is selected. If Pay-In mode is GL, then the system displays only GL’s and if the Pay-In mode is Account then only accounts are displayed in the option list.
Offset Currency
The currrency of the TD amount.
Cheque Instrument No
Specify the cheque instrument number.
Clearing Type
Specify the clearing type for the transaction. The adjoining option list displays a list of the clearing types maintained in the system. You can select the appropriate one.
Cheque Date
Specify the date of issue of the cheque.
Drawee Account Number
Specify the drawee account number.
Routing No
Specify the Routing number.
Original FX Rate
The FX rate picked up by the system.
Applied FX Rate
The FX rate entered by the user.
In the followiing scenarios the Applied FX rate should be equal to the Original FX rate:
- If the Deposit Account Currency and the Pay-In/Out Account Currency are same.
- If the Rate Type/Rate code combination is not maintained at the account class for a Pay-In/Out Mode. In this case the sysytem considers the STANDARD Rateas the default and the MID Rate code as the existing rate type.
Offset Amount
The offset amount displayed aftser saving the details.
Payout Details
The TD module allows you to close a TD using multiple pay-out modes viz:
- Pay-out by Bankers Cheque
- Pay-out by transfer to GL
- Pay-out by transfer to own bank Savings Account
- Pay-out by transfer to Other Bank’s Account
- Pay-out resulting in a new child TD
- Pay-out by Demand Draft
You can specify following pay out details of the deposit:
Payout Type
Indicate the method for settlement of the TD on maturity date. The payout instructions are mandatory in case of Close on Maturity, Rollover Principal, Rollover Interest and Special Amount. The payout option can be specified separately for Principal and Interest components. The following payout options are available:
- Bankers Cheque
- Payments
- General Ledger
- Account
- Term Deposit
- Demand Draft
Percentage
Specify the percentage of payout for each payout option specified.
Offset Branch
The system displays the branch code of the account to which fund is transferred from TD account.
Offset Account
Specify the account number/ GL to which the fund is transferred to TD account on liquidation, maturity or rollover. This field will return the branch code if the account is selected and NULL will be returned if GL is selected. If pay-out mode is GL then the system displays only GLs in the option list. If the pay-out mode is Account then the system displays only accounts in the option list.
The offset account should not be specified for payout through Bankers Cheque, Demand Draft, Payments and Term Deposits.
To view the joint holder’s details of an account and the mode of operation maintained at the account level, place the cursor on the Offset Account field and press Ctrl+J. The system displays the ‘Joint Holder’ screen.
For more information on the ‘Joint Holder’ screen refer to the section ‘Joint Holder Maintenance’ in the Core User Manual.
Narrative
Specify the description for the payout.
Payout Component
Select the payout component from the options given below. The options available are:
- Principal
- Interest
Note
You can select separate payout types for principal and interest components respectively. If you select different payout types for the principal and interest, these components will be paid out through the respective modes.
Payout component for interest is not mandatory. If you do not specify it, the interest will be liquidated to the principal payout account.
Payout of interest component through term deposit is not supported. Multiple payout modes with banker's cheque or demand draft are not allowed.
Recurring Deposit
You can maintain the pay-in details for recurring deposits here:
Auto Payment Take Down
Check this box to allow the recurring deposit account to debit the payment account for the payment amount as per the installment frequency. If you check this box, the payment account will be debited automatically for installment collection on the due date. If you do not check this, the payment has to be done manually through 'Recurring Deposit Payment Input' screen.
The system triggers the event 'RDLQ' on installment payment. Payment to account will be successful only if the redemption transaction code is specified at IC branch parameter level.
Move Maturities to Unclaimed
Check this field to move all the funds, on the maturity date, to the unclaimed GL mapped to the accounting role in the IC product.
The system un-checks and disables this box for RD.
Payment Branch
Specify the details for the branch to which the payment account belongs.
Payment Accounts
Specify the payment account; this can be either savings account or the current account from which the installment for the Recurring Deposit is collected as per the installment frequency. If you have not checked the option 'Auto Payment Take Down', the system will not allow you to specify the payment accounts.
To view the joint holder’s details of an account and the mode of operation maintained at the account level, place the cursor on the Payment Accounts field and press Ctrl+J. The system displays the ‘Joint Holder’ screen.
For more information on the ‘Joint Holder’ screen refer to the section ‘Joint Holder Maintenance’ in the Core User Manual.
Installment Amount
Specify the installment amount that has to be collected from the payment account as per the installment frequency. This installment amount should be greater than the minimum installment amount mentioned at the account class.
Recurring Deposit Account
Check this box to indicate recurring deposit account. For recurring deposits, by default this checkbox will be checked.
Payment Date
The system displays the account booking date as the date on which the payment is made for recurring deposit account. You cannot modify it.
This is the date on which the payment will happen. On successful payment of installments, the system changes the payment date to the next due date based on the installment frequency.
Payment Currency
The system displays the account currency of the payment account.
Note
- The system enables the offset account and branch detail fields only if the option to pay is selected as the savings account.
- The Unclaimed Interest and Principal GLs are specified while maintaining an Interest and Charges (IC) Deposit Type product. The Accounting Roles for the GLs are ‘INT_UNCLAIMED’ and ‘PRN_UNCLAIMED’ respectively. When maintaining an IC-Deposit type product, you have to map these Accounting Roles to the appropriate GLs maintained at your bank.
- The system allows you to select ‘Close on Maturity’ box, only when you specify the recurring deposit details. You have to maintain deposit transaction code as ‘DPN’, RD Payment transaction code as ‘RED’ and prepayment transaction code as ‘TRF’ for the recurring payments in the Branch Parameters for the Interest and Charges.
- On booking date, RD installment accounting entries are posted during the IC batch (Post End of Transaction Input stage). From the second installment, entries are posted during every IC BOD batch on the schedule date.
- If an RD installment is overdue due for insufficient funds in the payment account, then the system will collect the overdue installment amount as soon as funds are available, during the IC batch (Post End of Transaction Input stage) on that day. During the same batch the system will also calculate the number of overdue days and apply penalty on that,
- RD penalty amount is calculated at the EOD, but penalty is collected on account liquidation date from the interest booking account.
Installment Frequency
Specify the following details:
Move funds on Overdraft
Check this option to indicate that the system should pass an overdraft in the payment account (i.e. CASA) when the account does not have sufficient funds for making RD installment payment.
Days
Specify the installment frequency in terms of days.
Months
Specify the installment frequency in terms of months.
Years
Specify the installment frequency in terms of years.
The installment frequency needs to be greater than the minimum schedule days and less than the maximum schedule days specified at account class level.
Auto Deposit
A TD can also be automatically created from a savings account if the balance in the savings account exceeds a predefined limit. You can capture the following details of such a TD:
Sweep Type
The system indicates the type of sweep based on which the TD was created. It can be any one of the following:
- -1 - This indicates ‘No sweeps’.
- 1 - This indicates ‘Default from account class’.
- 0 - This indicates that deposit is instructed.
Master Account No
The system displays the account number of the savings account from which this auto deposit was created.
Account Details
Account Description
This is the description of the account. Here you can enter the nature of the TD account. If a customer has two or more accounts under one account class you can specify the purpose of that account.
In case of child TD, the system automatically populates the description on creation of child TD.
Country Code
Specify the country code to define country limits. The adjoining option list displays all valid country codes maintained in the system You can select the appropriate one.
Account Open Date
The date on which the account has to be opened is defaulted based on the account class selected here. You can however change the opening date of account.
In case of pay-in through cheque, the account open date can be a future date considering the expected date of clearing.
Alternate Account Number
The system displays the account number as the alternate account number. However, you can change it.
Clearing Bank Code
The code for the bank serving as clearing house for the account is displayed here.
Address Code
Specify the address code from the adjoining option list.
Address 1
Specify the address of the customer.
Pincode
The customer’s postal code.
Location
An address for a customer account is based on the ‘Location’ and ‘Media’ combination. Location codes maintained through the ‘Account Address Location Type Maintenance’ screen are made available against this field. Select the appropriate one. The address maintained here is always the primary or the default address. Each customer can have several addresses for a particular media. To distinguish between one address of a customer from another for a given media, it is essential for you to specify a unique location for each address.
Media
Select the media to communicate account related details to the customer, such as account maintenance related charges, fees, interest etc. from the option list. You can choose any one of the following:
- FAX
- SWIFT
- TELEX
Option
Indicate your preferences for the following:
Track Receivable
Check this box if you choose to block the subsequent credit that happens to the settlement account (linked to this account class) of a loan contract or retail teller contract, if the system detects insufficient funds in the account, during liquidation. In other words, the system will track the account for receivables (credits). As and when a credit happens, the funds will be allocated to the loan or the retail teller contract for liquidation.
Replicate Customer Signature
Check this box to indicate that customer signature should be replicated to the account.
Goal Account Details
Goal Reference Number
At the branch level, you can specify the goal reference number. If received from channels then the goal reference number will be auto populated.
Target Amount
At the branch level, you can specify the goal amount. If received from channels then the goal amount will be auto populated.
Auto Rollover
Check this box to automatically rollover the deposit you are maintaining. You have to indicate ‘Rollover Type’ on selecting this option. The TD will be rolled over automatically on maturity date during beginning of day operations.
Close on Maturity
Check this box to close the term deposit account on maturity date and transfer the amount as per the TD pay-out details. For a recurring deposit, you need to mandatorily check this box.
For a TD, only one of the options - Close on Maturity, Auto Rollover or Move Interest & Principal to Unclaimed - can be checked.
Move Interest to Unclaimed
Check this box to move the interest amount to the unclaimed GL mapped at the IC product in the accounting roles on grace period end date. If you select this option, you will have to check the box ‘Move Principal to Unclaimed’.
Move Principal to Unclaimed
Check this box to move the principal amount to the unclaimed GL mapped at the IC product in the accounting roles and liquidate the interest amount to the interest booking account on grace period end date.
If you have checked the option 'Move Interest to Unclaimed' it is mandatory to check 'Move Principal to Unclaimed'. If both options are checked, on the maturity date or at the end of grace days, the system will close the TD and move the proceeds to the unclaimed GL maintained at IC product.
If you check the option 'Move Principal to Unclaimed' alone, the system will display an error 'If Move Interest to Unclaimed is checked, Move Principal to Unclaimed should also be checked' if you check both the boxes, payout instruction is not allowed.
Note:
If both principal and interest have to be moved to unclaimed, then interest booking account should be a TD account only. If not, an error message "Booking account should be TD account when move Interest to unclaimed is checked" will be displayed.
Intermediary Details
Intermediary Required
Check this box to link Intermediaries with Term Deposit. If this is checked, the intermediary is allowed to be attached to TD account. If you do not check this, the system displays an error when you attempt linking intermediary to the TD.
Intermediate
Intermediary Code
Specify the intermediary code from the adjoining option list.
Intermediary Description
The system gives a brief description about intermediary code.
Intermediary Ratio
Specify the ratio of individual intermediary contribution against the Term Deposit account. The commission for intermediary will be calculated according to the ratios specified for each intermediary.
Sweeps
In this section you can enable Sweep In and Reverse Sweep In.
Enable Sweep in
Check this box to enable sweep in.
Enable Reverse Sweep in
Check this box to enable reverse sweep in. You can check this box only if the ‘Enable Sweep in’ check box is checked. If the check box is checked without checking ‘Enable Sweep in’, the system disable saving, current account class creation and amendment of the account class.
4.2.3 Viewing Amounts and Dates
You can view all financial details of this account along with the details of the previous debit or credit activities. However, access to all financial information of an account can be restricted for any user. The financial details of an account include the account balance, the uncleared debit and credit balances, the debit and credit turnover and the interest details. The turnover limit details of an account include the current financial period, currency, utilized and unutilized limit balances.
Click ‘Amounts and dates’ button in the ‘Deposit Account Booking’ screen.
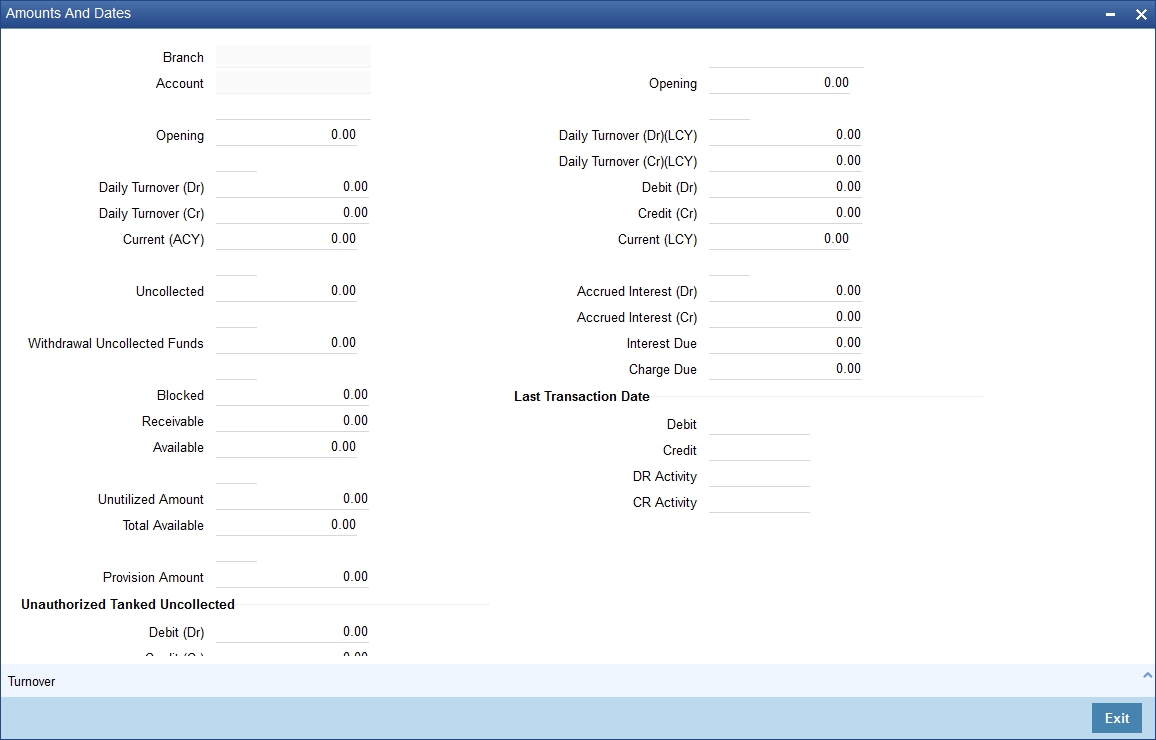
The total available balance displayed by the system includes the initial funding amount and unutilized line amount (in case the customer enjoys an OD limit). You can also view the outstanding debit interest and/or charges due on the account, as on the current date.
You can also view the amount that can be withdrawn against uncollected funds, on the account. The system computes the allowable amount based on the ‘Withdrawable Uncollected Funds Basis’ option specified in the Branch Parameters Preferences screen.
Unposted
When this branch is under EOD processing, the inter-branch transactions that have originated from other branches are tanked. The funds are made available automatically after BOD and till such time they are treated as unposted items.
4.2.3.1 Viewing Turnover Amounts
In the Customer Account - Turnover Amounts screen you can view the total turnover of this customer account from the first date of this month to the current day’s system date. Also, you can view the accumulated interest associated with debit or credit transactions after the last liquidation.
To view the turnovers for the account, click the ‘Turnover’ button.
4.2.4 Nominee Tab
Click ‘Nominee’ tab on the ‘Deposit Account Booking’ screen. The following screen will be displayed.
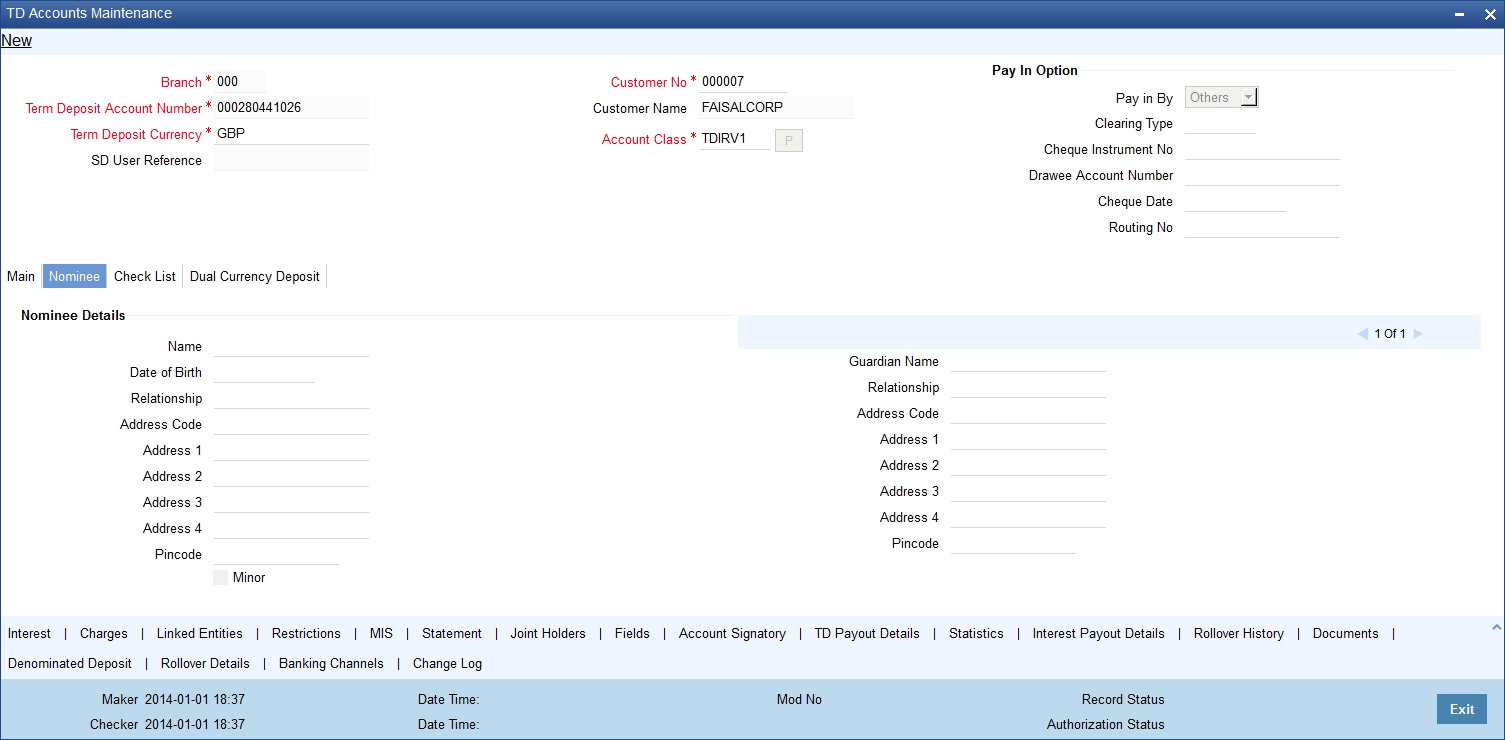
Specify the following details:
Name
Specify the name of the nominee.
Date of Birth
Specify the date of birth of the nominee.
Relationship
Specify the relationship of the nominee with the customer.
Address 1 to 4
Specify the address of domicile of the nominee. You can enter the address in four lines. You can specify a maximum of 105 alphanumeric characters in each line.
Minor
Check this box if the nominee is a minor.
Guardian Name
If the nominee is a minor, specify the name of the guardian.
Relationship
Specify the relationship of the guardian with the minor.
Address 1 to 4
Specify the address of domicile of the guardian. You can enter the address in four lines. You can specify a maximum of 105 alphanumeric characters in each line.
4.2.5 Dual Currency Deposit Tab
Click ‘Dual Currency Deposit’ tab on the ‘Deposit Account Booking’ screen. The following tab will be displayed.

Specify the following details:
Dual Currency Deposit
You can capture the following details for the deposit.
Linked Currency
This option is defaulted from the account class. However you can modify this value.
Currency Option Product
Specify the currency option product from the option list under which the Options Contract has to be created in case of Dual Currency Deposit. The option list displays all the Option Products with Product Type ‘CO.
Note
You need to mandatorily specify this product if the ‘Linked Currency’ is entered. You will be allowed to capture this value here only if the option ‘Dual CCY Deposit’ is checked at the ‘Account Class Maintenance’ screen. You will be allowed to modify this value even after authorization.
On saving the account, system validates the following to ensure that the currency option product selected here has the below features:
- Contract type is Trade
- Option Type is Call
- Deal Type is Buy
- Option Style is Plain Vanilla
- Barrier is not allowed
- Delivery type is Physical
- Expiration Style is American
Option Contract Ref No.
The system displays here the reference number of Options contract that is being created while authorising the dual currency TD account.
Exchange Rate
Specify the exchange rate between TD account currency and the linked currency. Initially, it will be defaulted with the standard exchange rate. However, you are allowed to change the same.
Linked Currency Settlement A/c
Here you can specify the settlement account of the linked currency in case if the settlement has to happen in the linked currency at maturity. The adjoining option list displays all valid accounts maintained in the system. You can select the appropriate one.
Linked Currency GL
You can capture the GL used for posting the settlement entries in the linked currency. The adjoining option list displays all valid GLs maintained in the system. You can select the appropriate one.
Fixing Days
Specify the number of days from TD maturity date before which the exchange rate has to be fixed. This will be defaulted from the ‘Account Class Maintenance’ screen. However you change it. Fixing days cannot be lesser than zero or greater than the tenor of the TD.
Yield Enhancement
Specify the additional yield percentage that the customer receives for agreeing on the currency Option. This is the premium paid to the customer for investing in dual currency deposits.
Inception Fair Value
Specify the market value of the option contract at inception. This will be defaulted in the linked Options contract.
4.2.6 Check List Tab
Click ‘Check List’ tab on the ‘Deposit Account Booking’ screen. The following screen will be displayed.
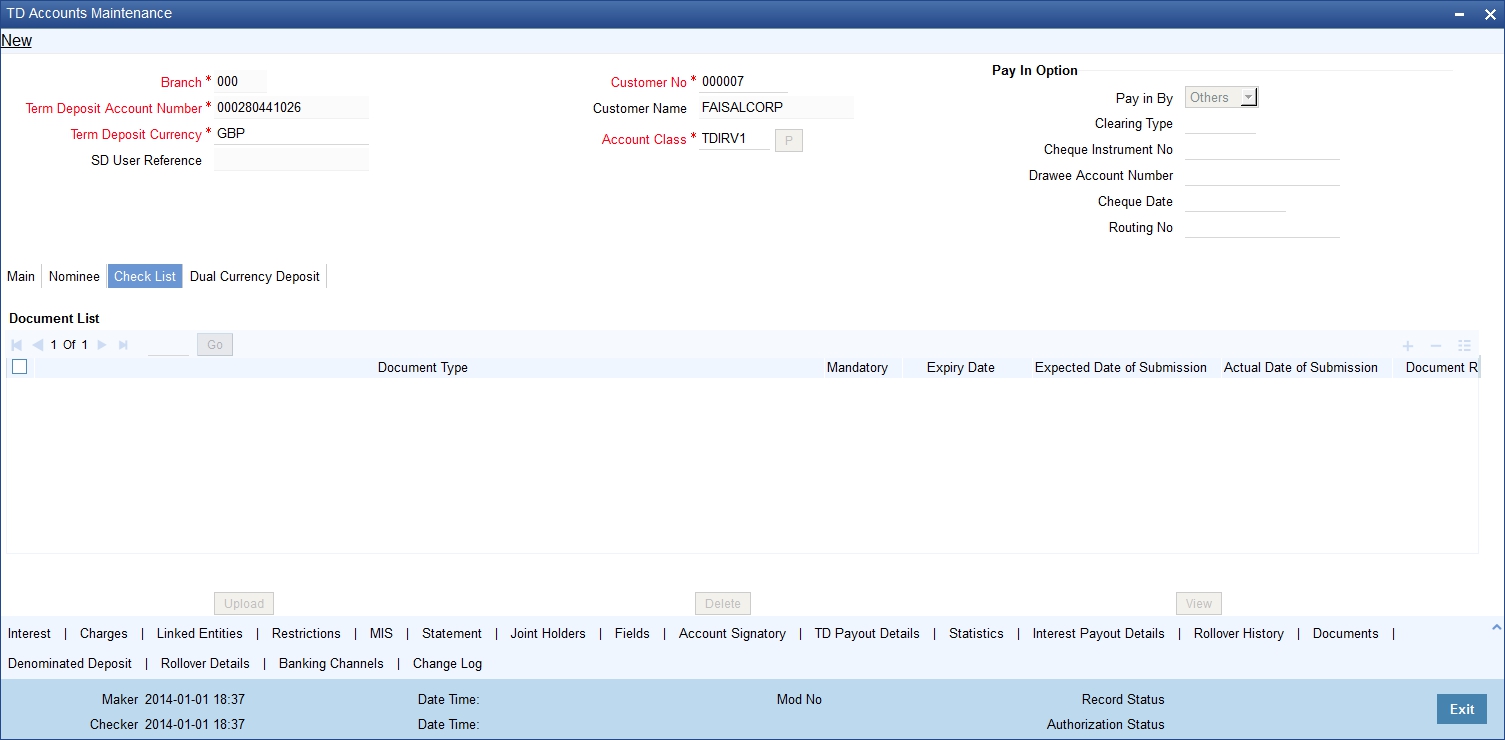
Specify the following details:
Document Type
The system displays the document check list based on the customer type.
Mandatory
Based on the details maintained in the account class for the document type, the system indicates whether it is a mandatory document or not. If this box is checked, the document is mandatory. If it is not checked, it is not mandatory.
Expiry Date
Specify the expiry date of the document provided by the customer.
Note
- Expiry date will always be greater than ‘Expected Date of Submission’ and ‘Actual Submission Date’.
- Expected Date of Submission will always be greater than current date.
Expected Date of Submission
Specify the expected date on which the customer is accepted to submit the required documents. If the documents are not submitted by the customer at the time of opening a TD, you need to specify the expected date of submission. The TD is booked if the documents are available and uploaded. If they are not available, you need to specify the expected date of submission of documents for opening the TD.
Actual Submission Date
System displays the actual date on which customer has submitted the required documents.
Document Reference
Once the document is uploaded, the system defaults the document reference here.
Checked
Check this box to indicate that the received documents are acknowledged.
Note
You cannot save and authorize an account if the mandatory documents are not confirmed as ‘Checked’.
Upload
Click on this button to upload the selected document type.
Delete
Click on this button to delete the selected document.
View
Click on this button to view the selected document.
Notification Details
System defaults notification details from the ‘Account Class Maintenance’ screen.
Send Notification
This check box indicates whether to send notifications or reminders for not submitting the mandatory documents.
Frequency (Notification)
System defaults the frequency of notification to be sent. The frequency can be one of the following:
- Daily
- Weekly
- Monthly
- Quarterly
- Half yearly
- Yearly
Note
Notification will be sent only if
- the check box ‘Send Notification’ is checked in Account Class Maintenance’ screen.
- the account status is active and authorized.
- the mandatory documents are not submitted.
Notifications will be sent based on the frequency specified.
First notification will be sent on the expected date of submission or expiry date
If notification date falls on a holiday then system will send the notification on next working day.
Days (Reminder)
System defaults the number of days left for the expiry or submission due date of the documents for sending the reminder.
System will send the following reminders:
- Reminder prior to the submission due date of the document.
- Reminder prior to the expiry date of the document.
- Overdue notifications after the due date if the document is not submitted based on the frequency.
- Notifications after the expiry date if the document is not submitted after the expiry date.
Note
Reminder will be sent only if,
- the mandatory documents are not submitted.
- the account status is active and authorized.
Reminder will be sent only once.
If reminder date falls on a holiday then system will send the notification on next working day.
Reminder will be sent prior the number of days specified at the account level from expected date of submission or the expiry date.
If there are more than one notifications or reminders of the same message type for which the notification schedule date falls on the same day for the same account, a single notification will be sent which will have the details of all the related documents.
Remarks 1 to 10
Specify the additional information, if required.
4.2.7 Banking Channels Button
The system defaults the common channel information captured at CIF and account class levels during TD account creation.
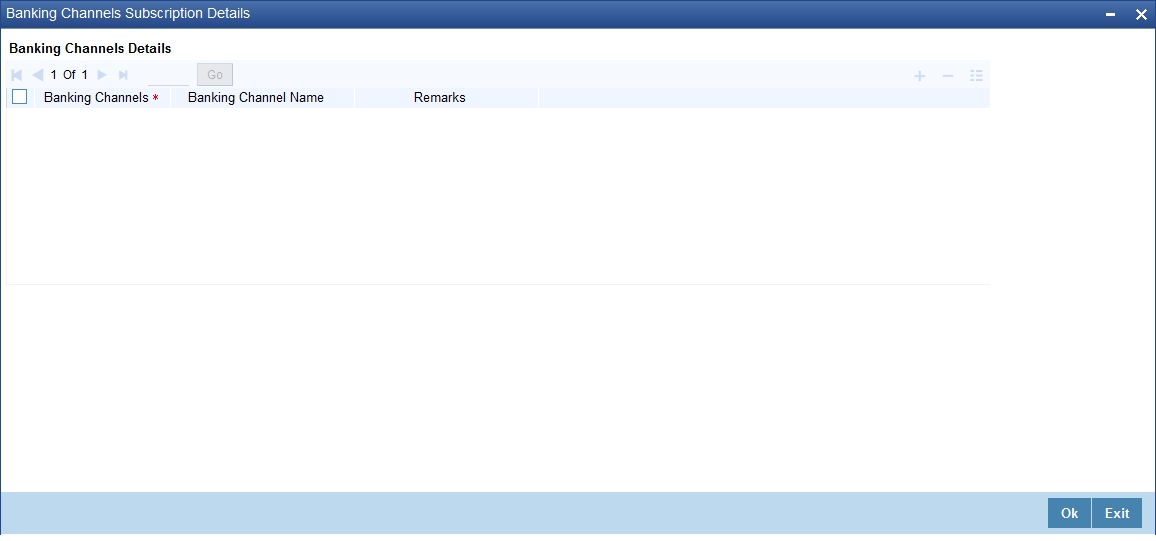
Specify the following details:
Banking Channels
Specify the banking channels code. Alternatively, you can select the list of channels from the option list. The list displays the channels maintained in the system.
Banking Channel Name
The system displays the name of the banking channel.
Remarks
Specify remarks for the banking channel subscription.
Note
- While populating the channels to the Customer Account screen, the system populates only the channels which are allowed in primary CIF and Account Class. The system defaults the remarks maintained at customer level to the account. You can modify it.
- You can delete the channels which need not be allowed at the customer account level, but you cannot add the channels which are disallowed at the customer or account class level. The system will display only those channels which are available in both CIF and account class levels.
- You can add channels which are mapped at both CIF and Account Class levels. You cannot delete a channel at CIF/Account Class level, which is already mapped to accounts (authorized or unauthorized) belonging to the CIF/Account Class. The system checks only for active accounts. You can delete the channels from customer/account class level only if the account is closed. During reopen of the account, the system validates whether the account is modified after reopening.
- When an account is created automatically from Customer Creation screen, the channels maintained at both Customer and Account Class is defaulted to the account. If no maintenance is performed at CIF/account class levels for channels, the system does not populate any channels at account.
- When account class transfer happens during batch, the system deletes the existing channels attached to the account and repopulates from the new Account Class and Customer.
During authorization of the account, the system does not repopulate the channel details. While authorizing primary party change, the system defaults the existing channels which are attached to the account and repopulates from the new Customer and Account Class. You can modify the channel information from the main screen for Customer Account Creation.
During save, the system defaults the channel details from Customer and Account Class of the account. You can modify the details in the Account Creation screen (STDCUSTD).
4.2.8 Capturing Additional Details
You can capture additional details for the account by clicking the following buttons in the ‘Deposit Account Booking’ screen:
Button |
Function |
Interest |
This invokes the ‘IC Special Conditions Maintenance’ screen. |
Charges |
This invokes the ‘Account level charges conditions’ screen. |
Linked Entities |
This invokes the ‘Linked Entities’ screen. |
Restrictions |
This invokes the ‘Products and Transaction Codes Restriction’ screen. |
MIS |
This invokes the ‘Management Information System’ screen. |
Statement |
This invokes the ‘Statement Details’ screen. |
Joint Holders |
This invokes the ‘Linked Entities’ screen |
Fields |
This invokes the ‘User Defined Fields’ screen. |
Account Signatory |
This invokes the ‘Signatory Details’ screen. |
TD Payout Details |
This invokes the ‘Term Deposit Payout Details’ screen. |
Statistics |
This invokes the ‘Account Statistics’ screen |
Interest Payout Details |
This invokes the ‘Interest Pay-out Details’ screen |
Rollover History |
This invokes the ‘Rollover History’ screen. |
Documents |
This invokes the ‘Document Upload’ screen. |
Denominated Deposit |
This invokes the ‘Denominated Deposit’ screen. |
Rollover Details |
This invokes the ‘TD Rollover Details’ screen. |
Banking Channels |
This invokes the ‘Banking Channels Subscription Details’ screen. |
Change Log |
This invokes the ‘Customer Address Change Log’ screen. |
Refer the chapter ‘Capturing Additional Details’ in this User Manual for details about the aforesaid buttons.
At the time of saving of a customer account or TD, the account or TD’s details will be passed on to the FATCA account and obligation maintenance. The details will be passed on if the customer who would be the beneficiary of the interest/proceeds of the account has a reportable FATCA classification and if the account class used to open the account or TD is present in the FATCA Products, Account Class and Instruments Maintenance.
At the time of closure or deletion of an account/ term deposit, if the details of account / term deposit exists in the accounts and obligations maintenance, then the account / term deposit details will be removed from the maintenance and archived.
While saving the transaction, if you had modified the interest rate at TD account level for TD booking or for creating Payout TD, the system displays configurable override messages.
These overrides are displayed during subsequent modifications of the interest rate. You can also configure overrides for Dual Authorization to be displayed at Contract and Maintenance level in the ‘Override Maintenance’ screen.
For more information about configuring overrides, refer to the section ‘Override Maintenance’ in the chapter ‘Configuring Overrides’ in the Core Services User Manual.
4.2.9 Viewing Term Deposit Account Details
You can view the term deposit account details maintained in the ‘Deposit Account Booking’ screen using the ‘Deposit Account Summary’ screen. You can invoke this screen by typing ‘STSCUSTD’ in the field at the top right corner of the Application tool bar and clicking on the adjoining arrow button.
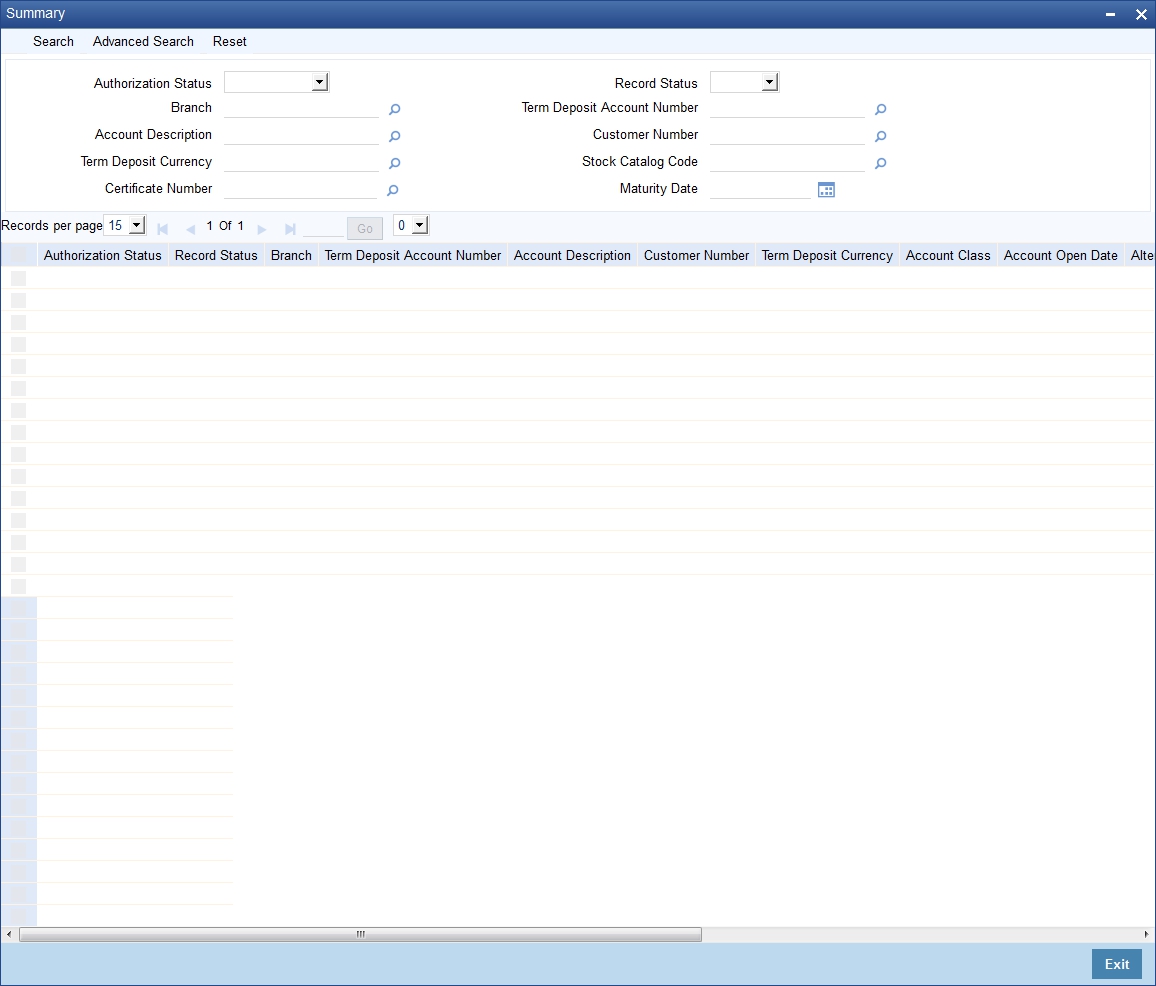
In the above screen, you can base your queries on any or all of the following parameters and fetch records:
- Authorization Status
- Record Status
- Branch
- Term Deposit Account Number
- Customer Number
- Term Deposit Currency
- Stock Catalogue Code
- Certificate Number
- Maturity Date
Select any or all of the above parameters for a query and click ‘Search’ button. The records meeting the selected criteria are displayed.
System will only fetch records for the group code allowed for the user. If a user tries to query customer information which is restricted for him, system displays the error message “No query results found for the specific criteria”.
If you are allowed to query customer information, system displays the following details pertaining to the fetched records:
- Authorization Status
- Record Status
- Branch Code
- Term Deposit Account Number
- Description
- Customer Number
- Term Deposit Currency
- Account Class
- Account Open Date
- Alternate Account Number
- Account Number
- Account Type
- Goal Reference Number
- Maturity Date
4.3 Viewing Recurring Deposit Details
You can view the details of Recurring Deposit using the ‘RD schedule enquiry ‘screen. You can invoke this screen by typing ‘RDDSCHEQ’ in the field at the top right corner of the Application tool bar and click the adjoining arrow button.
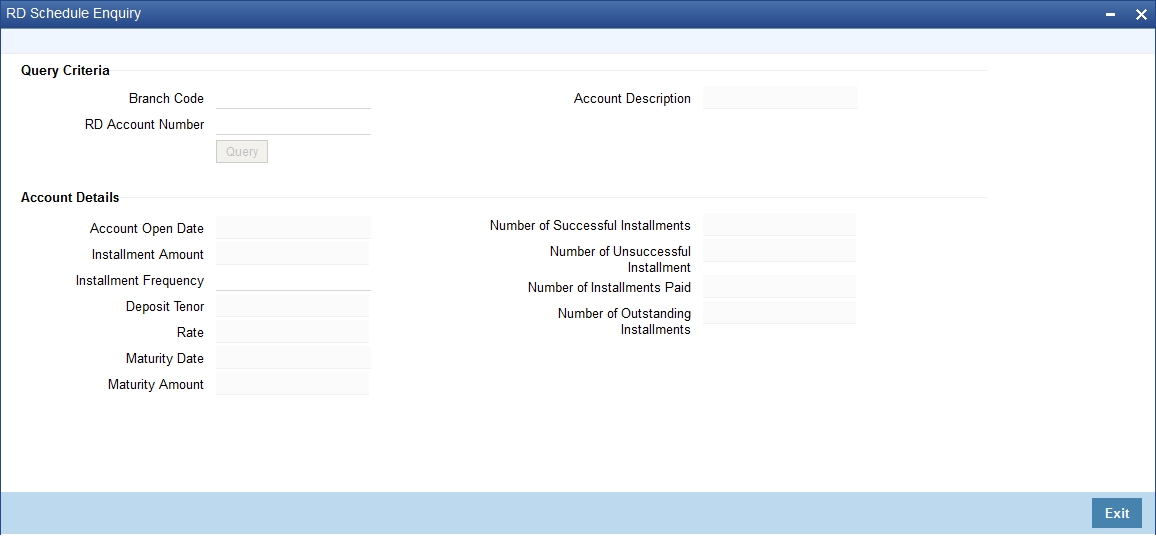
You can query recurring deposit details in this screen based on the following mandatory parameters:
- Branch Code
- RD Account Number
To view the joint holder’s details of an account and the mode of operation maintained at the account level, place the cursor on the RD Account Number field and press Ctrl+J. The system displays the ‘Joint Holder’ screen.
For more information on the ‘Joint Holder’ screen refer to the section ‘Joint Holder Maintenance’ in the Core User Manual.
Note
System displays a description of the Recurring Deposit account once the querying parameter is selected.
Select any of the parameters for a query and click ‘Query’ button. The records meeting the selected criteria are displayed.
System displays the following Recurring Deposit details:
- Account open date
- Installment Amount
- Installment frequency
- Deposit Tenor
- Number of successful installments
- Number of un successful installments
- Number of installments paid
- Number of outstanding installments
- Interest Rate
- Maturity Date
- Maturity amount