3. Long Term Data Store
Long term Data Store (LDS) is the process of moving the old data from FCIS business schema to Long term data store.
LDS can be implemented on FCIS system adhering to data retention policy of region or country. Data retention is storing company’s data for business purpose, or to comply with their country’s rules and regulations. Data retention policy is a set of guidelines stating the details of the data to be stored and also the duration that needs to be maintained.
Long term data store process will help to reduce volume in business schema thereby improving the performance of the system. The information moved to Long term data store will still be available and you can view the same via User Interface.
You can also generate the reports from the Long term data store.
This chapter contains the following sections:
- Section 3.1, "LDS Module Setup Maintenance"
- Section 3.2, "LDS Module Set Up Summary"
- Section 3.3, "Pre Process Check"
- Section 3.4, "LDS Status"
- Section 3.5, "LDS Process"
- Section 3.6, "LDS Process Flow"
3.1 LDS Module Setup Maintenance
This section contains the following topics:
3.1.1 Invoking LDS Module Setup Maintenance Screen
You can invoke the ‘LDS Module Setup Maintenance’ screen by typing ‘SMDLDMOD’ in the field at the top right corner of the Application tool bar and clicking on the adjoining arrow button. Select ‘New’ from the Actions menu in the Application tool bar or click new icon to enter the details.
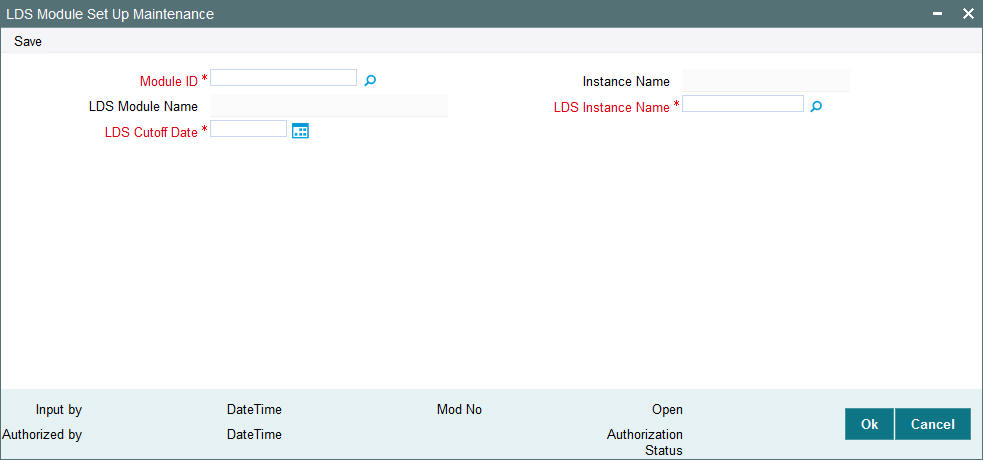
You can specify the following details:
Module ID
Alphanumeric; 30 Characters; Mandatory
Specify the module ID. Alternatively, you can select the module ID from the option list. The list displays all valid module ID and instance name maintained in the system.
Instance Name
Display
The system displays the instance name for the selected module ID.
LDS Module Name
Display
The system displays the LDS module name.
LDS Instance Name
Alphanumeric; 50 Characters; Mandatory
Specify the LDS instance name. Alternatively, you can select the LDS instance name from the option list. The list displays all valid LDS instance name maintained in the system.
LDS Cutoff Date
Date Format; Mandatory
Select the LDS cut-off date from the adjoining calendar.
Note
The LDS Cutoff Date can be product fiscal end date or a date lesser than the fiscal end date. If LEP is not installed, then LDS cut-off date can be a date minimum of 2 years less than the application date.
Click ‘Ok’ and then click ‘Save’ to save the entered records.
Only one active setup can be maintained for an module.
3.2 LDS Module Set Up Summary
This section contains the following topics:
- Section 3.2.1, "Retrieving Record in LDS Module Set Up Summary Screen"
- Section 3.2.2, "Editing LDS Module Set Up Record"
- Section 3.2.3, "Viewing LDS Module Set Up Record"
- Section 3.2.4, "Deleting LDS Module Set Up Record"
- Section 3.2.5, "Authorizing LDS Module Set Up Record"
3.2.1 Retrieving Record in LDS Module Set Up Summary Screen
You can retrieve a previously entered record in the Summary Screen, as follows:
Invoke the ‘LDS Module Set Up Summary’ screen by typing ‘SMSLDMOD’ in the field at the top right corner of the Application tool bar and clicking on the adjoining arrow button.
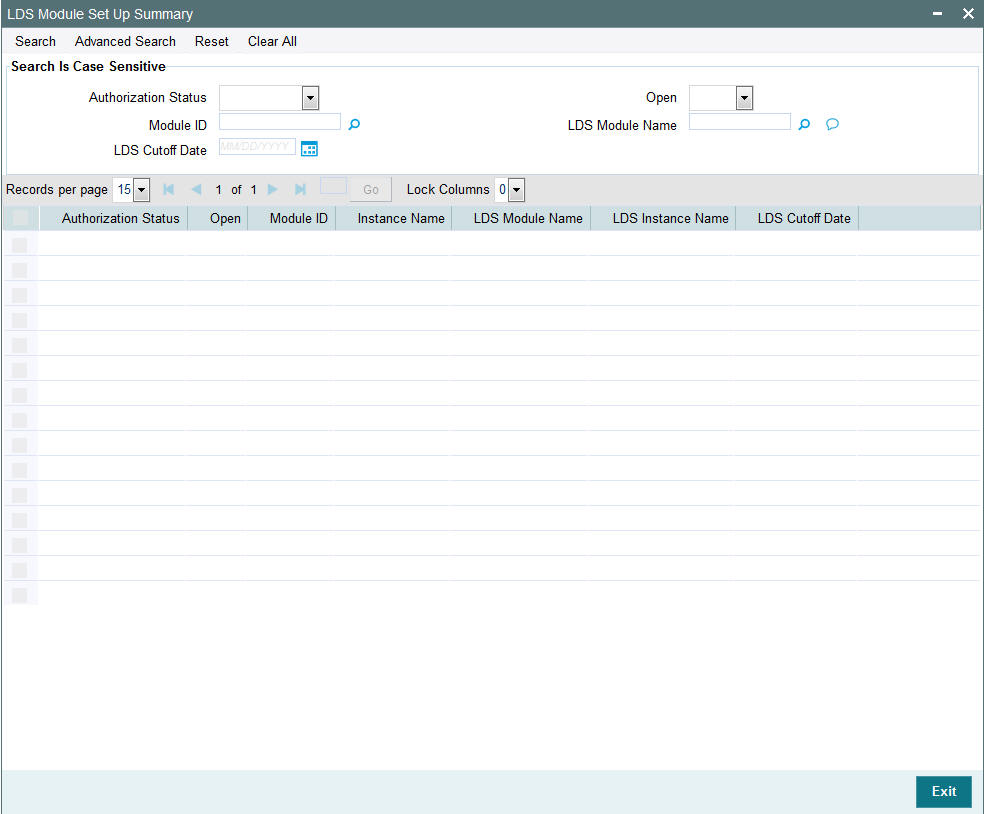
Specify any or all of the following details in the corresponding fields:
- The status of the record in the Authorization Status field. If you choose the ‘Blank Space’ option, then all the records are retrieved.
- The status of the record in the Open field. If you choose the ‘Blank Space’ option, then all records are retrieved.
- Module ID
- LDS Module Name
- LDS Cutoff Date
Click ‘Search’ button to view the records. All the records with the specified details are retrieved and displayed in the lower portion of the screen.
Note
You can also retrieve the individual record detail from the detail screen by querying in the following manner:
- Press F7
- Input the LDS Module Name
- Press F8
You can perform Edit, Delete, Authorize, Close and Reopen operations by selecting the operation from the Action list. You can also search a record by using a combination of % and alphanumeric value.
Example
You can search the record for LDS Module Name by using the combination of % and alphanumeric value as follows:-
- Search by A%: System will fetch all the records whose LDS Module Name starts from Alphabet ‘A’. For example, AGC17, AGVO6, AGC74 etc.
- Search by %7: System will fetch all the records whose LDS Module Name ends by numeric value’ 7’. For example AGC17, GSD267, AGC77 etc.
- Search by %17%:- System will fetch all the records whose LDS Module Name contains the numeric value 17. For example, GSD217, GSD172, AGC17 etc.
3.2.2 Editing LDS Module Set Up Record
You can modify the details of LDS Module Set Up Maintenance that you have already entered into the system, provided it has not subsequently authorized. You can perform this operation as follows:
- Invoke the LDS Module Set Up Summary screen from the Browser.
- Select the status of the record that you want to retrieve for modification in the Authorization Status field. You can only modify records that are unauthorized. Accordingly, choose the unauthorized option.
- Specify any or all of the details in the corresponding fields to retrieve the record that is to be modified.
- Click ‘Search’ button. All unauthorized records with the specified details are retrieved and displayed in the lower portion of the screen.
- Double click the record that you want to modify in the list of displayed records. The LDS Module Set Up Maintenance screen is displayed.
- Select Unlock Operation from the Action list to modify the record. Modify the necessary information.
- Click Save to save your changes. The LDS Module Set Up Maintenance screen is closed and the changes made are reflected in the LDS Module Set Up Summary screen.
3.2.3 Viewing LDS Module Set Up Record
To view a record that you have previously input, you must retrieve the same in the LDS Module Set Up Summary screen as follows:
- Invoke the LDS Module Set Up Summary screen from the Browser.
- Select the status of the record that you want to retrieve for viewing in the Authorization Status field. You can also view all records that are either unauthorized or authorized only, by choosing the Unauthorized/Authorized option.
- Specify any or all of the details of the record in the corresponding fields on the screen and click ‘Search’ button. All records with the specified fields are retrieved and displayed in the lower portion of the screen.
- Double click the record that you want to view in the list of displayed records. The LDS Module Set Up Maintenance screen is displayed in View mode.
3.2.4 Deleting LDS Module Set Up Record
You can delete only unauthorized records in the system. To delete a record that you have previously entered:
- Invoke the LDS Module Set Up Summary screen from the Browser.
- Select the status of the record that you want to retrieve for deletion.
- Specify any or all of the details and click ‘Search’ button. All records with the specified fields are retrieved and displayed in the lower portion of the screen.
- Double click the record that you want to delete in the list of displayed records. The LDS Module Set Up Maintenance Detail screen is displayed.
- Select Delete Operation from the Action list. The system prompts you to confirm the deletion and the record is physically deleted from the system database.
3.2.5 Authorizing LDS Module Set Up Record
An unauthorized LDS Module Set Up must be authorized in the system for it to be processed. To authorize a record:
- Invoke the LDS Module Set Up Summary screen from the Browser.
- Select the status of the record that you want to retrieve for authorization. Typically, choose the unauthorized option.
- Specify any or all of the details and click ‘Search’ button. All records with the specified details that are pending authorization are retrieved and displayed in the lower portion of the screen.
- Double click the record that you wish to authorize. The LDS Module Set Up Maintenance Detail screen is displayed. Select Authorize operation from the Action List.
When a checker authorizes a record, details of validation, if any, that were overridden by the maker of the record during the Save operation are displayed. If any of these overrides results in an error, the checker must reject the record.
3.3 Pre Process Check
This section contains the following topics:
3.3.1 Invoking LDS Pre Process Screen
You can perform pre-process check operation of LDS record using ‘LDS Pre Process’ screen. You can invoke this screen by typing ‘LDPREPRC’ in the field at the top right corner of the Application tool bar and clicking on the adjoining arrow button. The ‘LDS Pre Process’ screen is displayed. Select ‘New’ from the Actions menu in the Application tool bar or click new icon to enter the details.
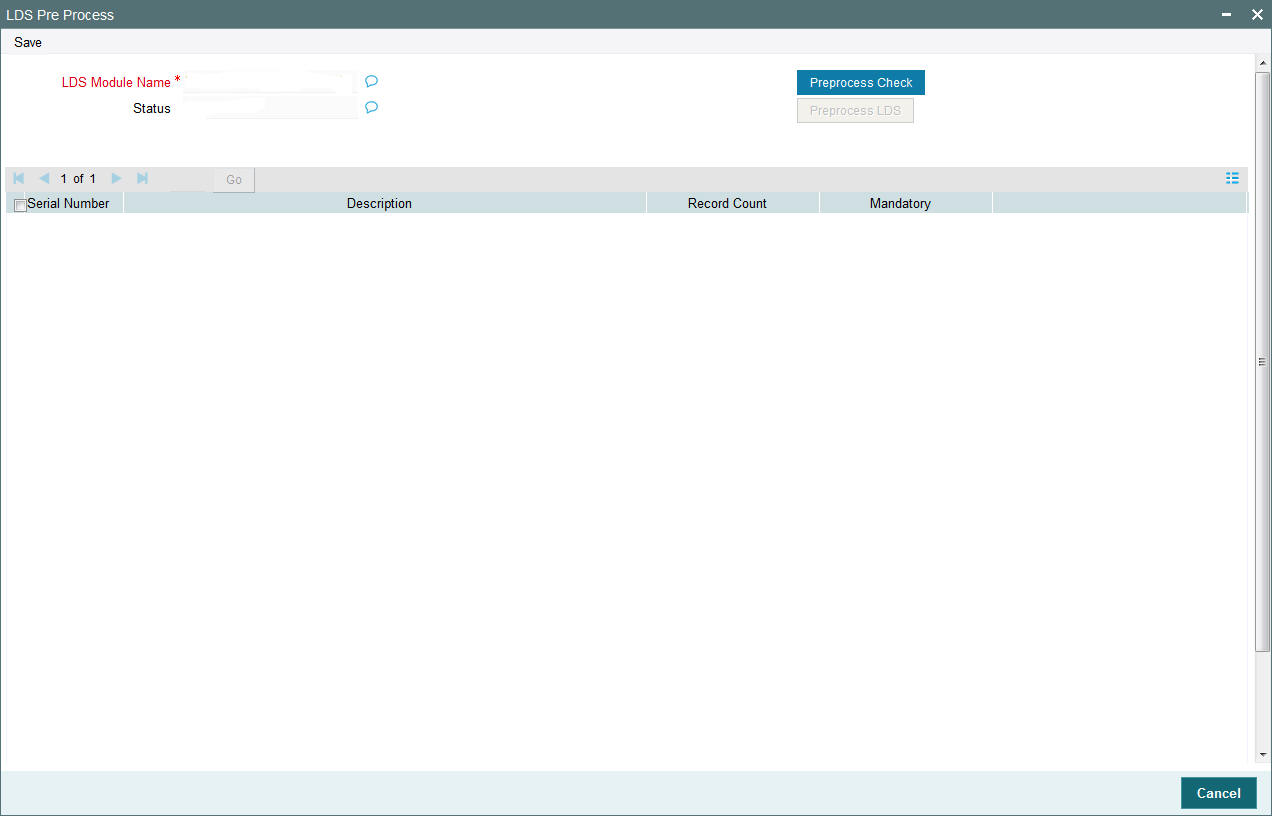
You can specify the following details:
LDS Module Name
Display
The system displays the LDS module name on click of ‘New’ button.
Status
Display
The system displays the status on click of ‘New’ button.
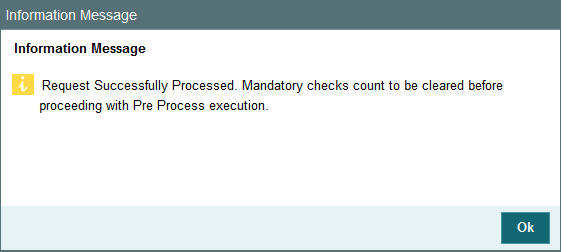
Click ‘Preprocess Check’ button to validate the cut-off date. Click ‘Preprocess Check’ button, the system will execute few check queries and return the count. Once the request is successful, the following confirmation window is displayed.
The following details are displayed:
- Serial Number
- Description
- Record Count
- Mandatory
Once the request is processed successfully, you need to clear the mandatory check count before proceeding with pre-process execution.
Once count is cleared the ‘Preprocess LDS’ button will be enabled. Click ‘Preprocess LDS’ button to initiate pre-process job. The following window is displayed:

You can view the pre-process execution status in ‘LDS Status’ screen.
Note
After pre-process execution if you create new LDS module, then you need to map to the newly created module in SMS.
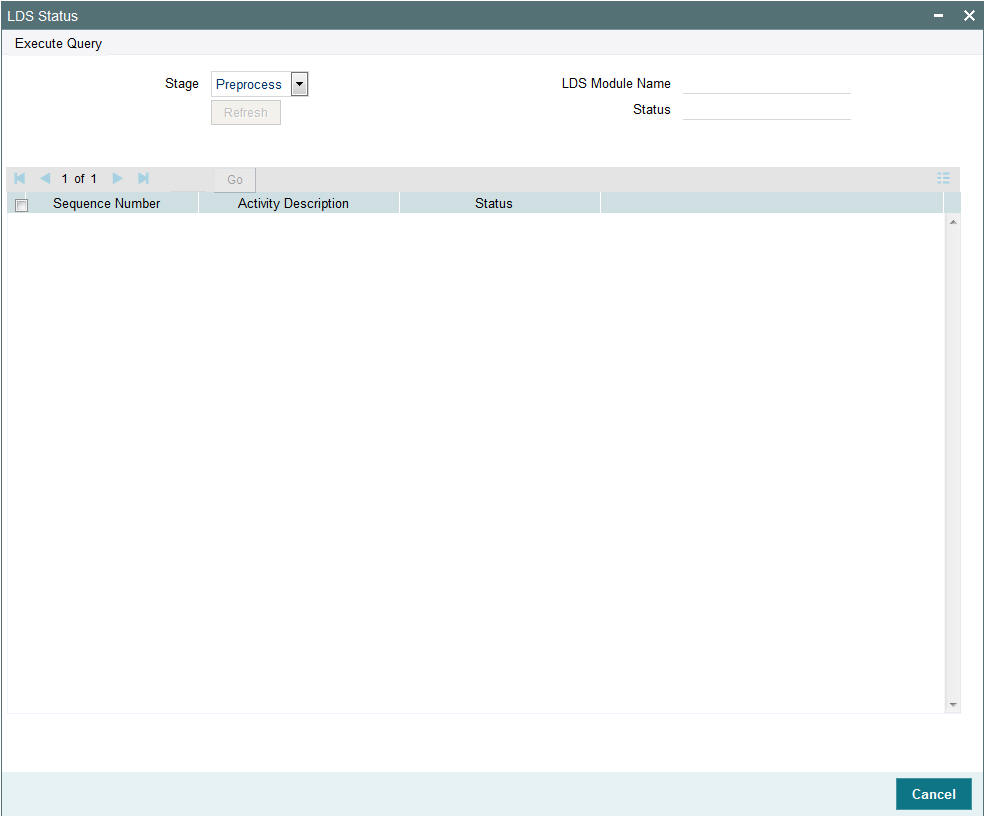
3.4 LDS Status
This section contains the following topics:
3.4.1 Invoking LDS Status Screen
You can view the pre-process execution status in ‘LDS Status’ screen. You can invoke this screen by typing ‘LDDVWSTA’ in the field at the top right corner of the Application tool bar and clicking on the adjoining arrow button. The ‘LDS Pre Process’ screen is displayed. Select ‘New’ from the Actions menu in the Application tool bar or click new icon to enter the details.
You can specify the following details:
Stage
Optional
Select the stage of execution from the drop-down list. The list displays the following values:
- Preprocess
- Postprocess
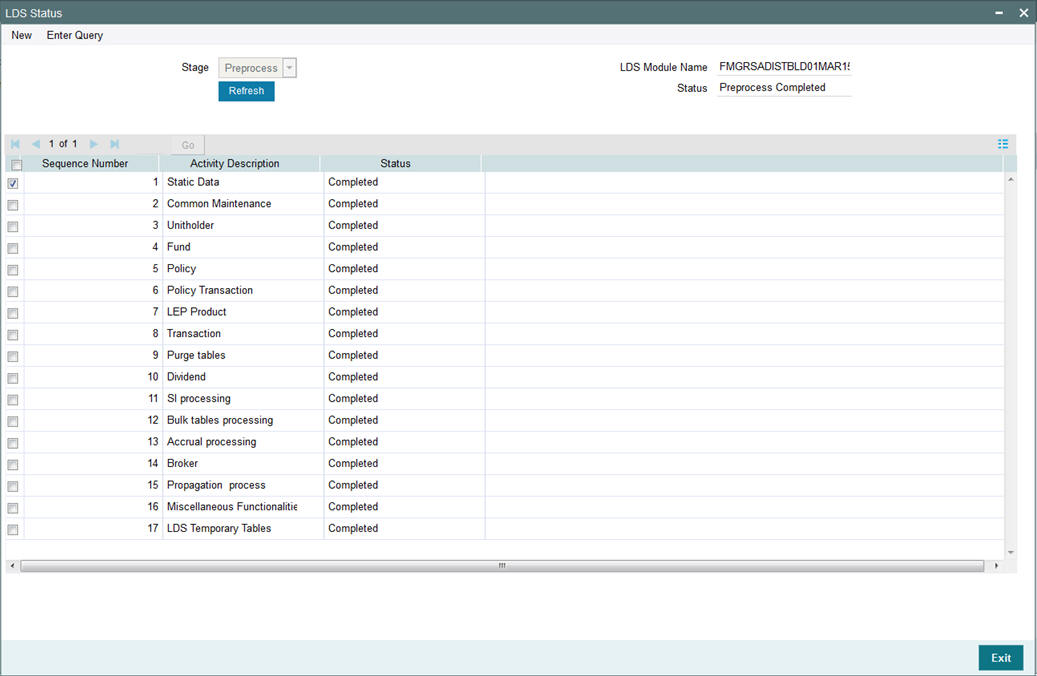
Select ‘Preprocess’ option and then click ‘Execute Query’. The status of each sequence is displayed as follows:
- LDS Module Name
- Status
- Sequence Number
- Activity Description
- Status of individual activity
Click ‘Refresh’ button to refresh the status.
You should verify pre-process data before proceeding with post process.
You can also view the post process status by selecting the stage as ‘Post Process’ option in ‘Stage’ field and clicking ‘Enter Query’. The system displays the status of each activity. Click ‘Refresh’ button to refresh the status.
Select ‘Preprocess’ option and then click ‘Execute Query’. The following window is displayed:
Select ‘Postprocess’ option and then click ‘Execute Query’. The following window is displayed:

3.5 LDS Process
This section contains the following topics:
3.5.1 Invoking LDS Process Screen
You can perform post-process execution operation of LDS record using ‘LDS Process’ screen. You can invoke this screen by typing ‘LDPROCES ’ in the field at the top right corner of the Application tool bar and clicking on the adjoining arrow button. The ‘LDS Process’ screen is displayed. Select ‘New’ from the Actions menu in the Application tool bar or click new icon to enter the details.
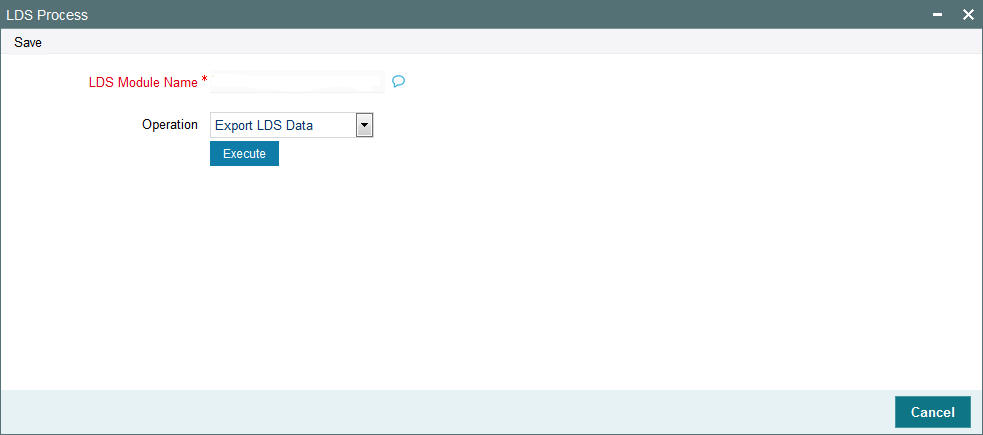
You can specify the following details:
LDS Module Name
Display
The system displays the LDS module name on click of ‘New’ button.
Operation
Optional
Select the operation status from the drop-down list. The list displays the following values in:
- Export LDS Data
- Export Business Data
- Truncate Business Data
- Import Business Data
- Post Process
The system will maintain these values in such a way that the following values are stored in LOB module:
- Export LDS Data
- Export Business Data
- Truncate Business Data
- Import Business Data
- Post Process
The following values are stored in LDS module:
- Import LDS Data
Business Schema
In LOB module, Select ‘Export LDS Data’ option from ‘Operation’ field and click ‘Execute’ button in order to generate a dump with table data that needs to be moved to LDS schema.
In LOB module, Select ‘Export Business Data’ option from ‘Operation’ field and click ‘Execute’ button to generate a dump with table data that needs to be retained in Business schema.
In LOB module, Select ‘Truncate Business Data’ option from ‘Operation’ field and click ‘Execute’ button to truncate the Business schema data.
In LOB module, Select ‘Import Business Data’ option from ‘Operation’ field and click ‘Execute’ button to import the generated dump.
In LOB module, Select ‘Post Process’ option from ‘Operation’ field and click ‘Execute’ button to initiate Post Process execution.
Note
The system stores all the export and import dump in ‘DUMPDIR’ PARAM code. This PARAM code is a logical directory.
LDS Schema
In LDS module, Select ‘Import LDS Data’ option from ‘Operation’ field and click ‘Execute’ button to import the generated dump.
You can view the post process status in LDDVWSTA screen as mentioned above by selecting the stage as ‘Post Process’ and click ‘Enter Query’. The system displays the status of each activity. Click ‘Refresh’ button to refresh the status.
3.6 LDS Process Flow
Following is the process flow for LDS:
Step 1:
- Prepare new LDS environment for LDS processing.
- Create LDS schema equivalent to Business LOB only with Metadata.
- Create Data source in application console for newly maintained LDS schema.
- Maintain corresponding DSN Entries in SMS schema.
Step 2:
Launch SMDLDMOD screen and maintain LDS module record using the newly created instance and cut-off date identified for LDS processing.
Step 3:
Launch LDPREPRC screen, and click ‘Preprocess Check’ button. This provides a list of mandatory checks to be cleared before proceeding with LDS process.
Step 4:
Once the mandatory checks are cleared, click ‘PreProcess LDS’ button to trigger pre-process execution.
Step 5:
Launch LDDVWSTA screen to monitor status of each activity in Preprocess stage.
Step 6:
After preprocess successful execution, the system will create LDS Module and also will identify and store the records to be moved to LDS schema and retained in LOB schema.
Step 7:
Once the preprocess execution is completed successfully and sanity checks are cleared, launch LDPROCES screen and trigger the following:
- Export LDS Data
- Export Business Data
- Truncate Business Data
- Import Business Data
- Post Process
Step 8:
Launch LDDVWSTA screen to monitor status of each activity in Post process stage.
Step 9:
Launch SMDUSRDF screen and create user with view access to LDS module alone.
Step 10:
Login with the newly created user into LDS module. Launch LDPROCES screen and execute 'Import LDS Data'.
Step 11:
Login using newly created user into LDS module to view LDS screen and reports.