2. Back Data Propagation
Back Data Propagation refers to the process of including data that has been left out and correcting data that has been erroneously entered and can be performed for both UT and LEP transactions. This is done by replaying all the transactions for the Unit Holder that have taken place since the date of the propagation transaction and which have an impact on the unit holder balance and client contribution. Based on the correct (or complete) information that is input through the propagation record, the system will re-compute dividends, broker commissions, capital gains tax and its recovery, annuity and periodic fees.
This chapter contains the following sections:
- Section 2.1, "Back Data Processing"
- Section 2.2, "Propagating Back Data for UT"
- Section 2.3, "FCIS UT Back Data Propagation Summary"
- Section 2.4, "UT Transactions Creation"
- Section 2.5, "FCIS UT Propagate Transaction Summary"
- Section 2.6, "Back Data Propagation for LEP"
- Section 2.7, "FCIS LEP Back Data Propagation Summary"
- Section 2.8, "Propagate Transaction Detail"
- Section 2.9, "FCIS LEP Propagate Transaction Summary"
- Section 2.10, "Annuities and Premium Transactions"
- Section 2.11, "FCIS LEP Propagate SI Summary"
- Section 2.12, "Processing Transactions"
- Section 2.13, "First Verification"
- Section 2.14, "Back Data Transactions Authorization"
- Section 2.15, "Running Debugs for Propagation"
- Section 2.16, "Propagation Jobs"
- Section 2.17, "Impact of Propagation"
- Section 2.18, "Back Data Propagation Details"
2.1 Back Data Processing
Propagation of back data is a process wherein the system simulates all the relevant transactions for a Unit Holder from the date of propagation till current date, This is done by simulating the incomplete or incorrect transactions in a separate schema known as the report schema. For the simulation, the transaction details need to be entered in the normal or business schema and then selected for data propagation. The system will then access the latest version of the transaction that is being propagated from the main tables in the business schema and update information accordingly. The updated information will be stored in the tables of the report schema and can be viewed from the business schema.
Propagation can be done for multiple transactions at the same time, for instance if you wish, you can modify a transaction and at the same time select another transaction for deletion. Each time propagation happens, the system will generate a unique reference to identify the process and store it along with the data in the business schema. This reference will be used to retrieve the propagation data for the corresponding transaction from the report data stores after propagation.
The following transactions can be propagated:
- UT Transactions
- IPO
- Subscription
- Redemption
- Normal Switch and Pseudo switch
- Transfer
- SI transactions
- LEP Transactions:
- Policy Initial Investment
- Top up
- Premium
- Annuity
- Policy switches
- Recurring switches
- Surrender
Note
- If the transaction is unavailable in the main tables of the business schema, the system will check for its existence in the archives (of the business schema) and display an error message if the transaction cannot be traced in either of these.
- The propagation will be only a simulation in the report schema. You will not be allowed to correct data or input data missed out in the business schema.
- You cannot perform multiple operations on the same transaction
- If, after a transaction has been entered in the business schema, there is an NAV correction, the system will consider the corrected NAV for propagation
The following details will be stored in the report data stores for the propagated transactions:
- Total confirmed units before propagation
- Total confirmed units after propagation
- Total Provisional units before propagation
- Total Provisional units after propagation
- Net profit
- Net Loss
2.2 Propagating Back Data for UT
This section contains the following topics:
2.2.1 Invoking the FCIS UT Back Data Propagation Detail
You can create a transaction that has not been input for a unit holder, delete existing erroneous data and modify certain details for an existing record in the ‘FCIS UT Back Data Propagation Detail’ screen. You can invoke by typing ‘UTDROPUT' in the field at the top right corner of the Application tool bar and click the adjoining arrow button.

To modify or delete a transaction, you can specify the required operation, the original transaction number and change the details or delete the transaction through the ‘UT Back Data Propagation’ screen. To create a new record however, you are required to enter a new and unique transaction number along with the other details of the transaction in the ‘UT Propagate Transaction Detail’ screen. Subsequently, you need to select the new transaction number in the ‘UT Back Data Propagation’ screen to propagate the new record.
You can enter the following details here:
Basic Information
Propagation Reference Number
Display Only
The system generates a unique number for each propagation process.
Unit Holder ID
Alphanumeric; 12 Characters; Mandatory
Specify the UH for which the propagation is being done, You can use the ‘UH Find’ button to select the required UH.
Unit Holder Name
Display Only
The system displays the name of the selected UH.
Propagation Date
Display Only
The system displays the application date here.
Specifying Transaction Information Details
Operation
Mandatory
Select from the adjoining drop-down list, the kind of propagation operation that is to be done. The options are:
- New
- Modify
- Delete
The data that you are required to enter from here on depends on the type of operation you have selected.
Old Transaction Number
Alphanumeric; 16 Characters; Mandatory only if Operation is ‘Delete’
Specify the transaction number of the transaction that you wish to delete or modify. You can also select the transaction number from the adjoining option list. The list contains the reference numbers of all authorized transactions.
New Transaction Number
Alphanumeric; 16 Characters; Mandatory for New Operation
Specify a new unique transaction number for a transaction that you wish to create. You can also select the transaction number from the adjoining option list. The list contains the reference numbers for all the transactions that were created in the ‘FCIS UT Propagate Transaction Detail’ screen.
Transaction Currency
Alphanumeric; 3 Characters; Mandatory only if Operation is ‘Modify’
Specify the currency in which the new transaction is to be reckoned.
Transaction Mode
Mandatory only if Operation is ‘Modify’
Select, from the adjoining drop-down list, the mode of transacting. The options are:
- Amount
- Percent
- Units
Amount Applied
Numeric; 30 Characters; Mandatory if Transaction Mode is ‘Amount’
If the transaction mode is amount, specify the amount for the transaction.
Percent
Numeric; 5 Characters; Mandatory if Transaction Mode is ‘Percent’
If the transaction mode is percent, specify the percentage.
Units
Numeric; 27 Characters; Mandatory if Transaction Mode is ‘Units’
If the transaction mode is units, specify the number of units for the transaction.
After entering the requisite details, click ‘Save’. The system will propagate the transactions (and commissions) as per the operation specified and generate a detailed report. If any of the following transactions have taken place during the data propagation period, the system will take these into account along with the original data for reiteration:
- Dividend payout or re-investment transaction
- Applicable loads
- Periodic fees
- SI Transactions
2.3 FCIS UT Back Data Propagation Summary
This section contains the following topics:
- Section 2.3.1, "Retrieving Record in FCIS UT Back Data Propagation Summary screen"
- Section 2.3.2, "Viewing an FCIS UT Back Data Propagation Record"
- Section 2.3.3, "Authorizing an FCIS UT Back Data Propagation Record"
2.3.1 Retrieving Record in FCIS UT Back Data Propagation Summary screen
You can retrieve a previously entered record in the Summary Screen, as follows:
- Invoke the ‘FCIS UT Back Data Propagation Summary’ screen
by typing ‘UTSROPUT' in the field at the top right corner of
the Application tool bar and clicking on the adjoining arrow button.
.
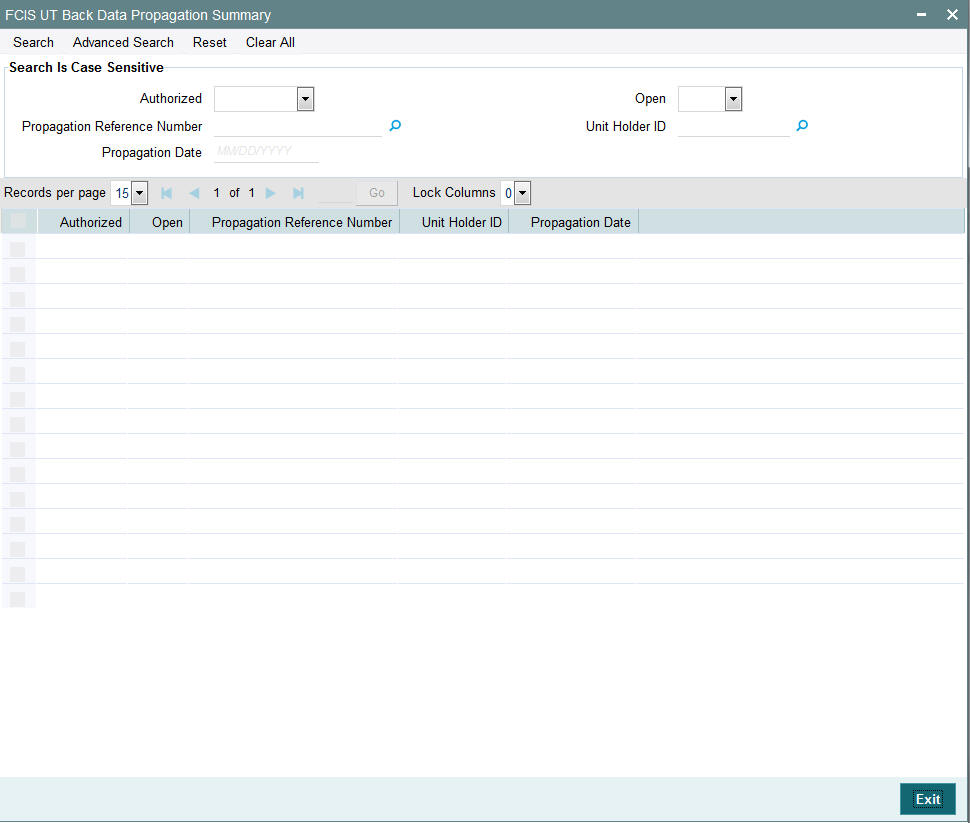
Specify any or all of the following details in the corresponding fields:
- The status of the record in the Authorized field. If you choose the ‘Blank Space’ option, then all the records are retrieved.
- The status of the record in the Open field. If you choose the ‘Blank Space’ option, then all records are retrieved
- Propagation Reference Number
- Unit Holder ID
- Propagation Date
Click ‘Search’ button to view the records. All the records with the specified details are retrieved and displayed in the lower portion of the screen.
You can also retrieve the individual record detail from the detail screen by querying in the following manner:
- Press F7
- Input the Propagation Reference Number
- Press F8
2.3.2 Viewing an FCIS UT Back Data Propagation Record
To view a record that you have previously input, you must retrieve the same in the FCIS UT Back Data Propagation Summary screen as follows:
- Invoke the FCIS UT Back Data Propagation Summary screen from the Browser.
- Select the status of the record that you want to retrieve for viewing in the Authorization Status field. You can also view all records that are either unauthorized or authorized only, by choosing the Unauthorized/ Authorized option.
- Specify any or all of the details of the record in the corresponding fields on the screen.
- Click ‘Search’ button. All records with the specified fields are retrieved and displayed in the lower portion of the screen.
- Double click the record that you want to view in the list of displayed records. The FCIS UT Back Data Propagation screen is displayed in View mode.
2.3.3 Authorizing an FCIS UT Back Data Propagation Record
An unauthorized FCIS UT Back Data Propagation record must be authorized in the system for it to be processed. To authorize a record:
- Invoke the FCIS UT Back Data Propagation Summary screen from the Browser.
- Select the status of the record that you want to retrieve for authorization. Typically, choose the unauthorized option.
- Specify any or all of the details in the corresponding fields on the screen.
- Click ‘Search’ button. All records with the specified details that are pending authorization are retrieved and displayed in the lower portion of the screen.
- Double click the record that you wish to authorize. The FCIS UT Back Data Propagation screen is displayed. Select Authorize operation from the Action List.
2.4 UT Transactions Creation
This section contains the following topics:
- Section 2.4.1, "Creating UT Transactions"
- Section 2.4.2, "Transaction Information Tab"
- Section 2.4.3, "Settlement Details Tab"
- Section 2.4.4, "Intermediary Tab"
- Section 2.4.5, "KYC Details Tab"
2.4.1 Creating UT Transactions
If you wish to create a record that has been missed out, you can do so in the ‘FCIS UT Propagate Transaction Detail’ screen. You can invoke the screen by typing ‘UTDPRTXN' in the field at the top right corner of the Application tool bar and click the adjoining arrow button.

Enter the following details here:
Transaction Type
Transaction Type
Mandatory
Select, from the adjoining drop-down list, the kind of transaction you want to create. The options are:
- IPO
- Subscription
- Redemption
- Switch
- Transfer
Transaction Number
Display Only
The system generates and displays a unique transaction number.
Transaction Sub Type
Alphanumeric; 1 Character; Optional
Specify the sub-type for the transaction.
Client Information
Unit Holder ID
Alphanumeric; 12 Characters; Mandatory
Specify the unit holder for the transaction. You can select the required unit holder ID by clicking the ‘Find UH’ button.
Unit Holder Name
Display Only
The system will display the name of the unit holder selected.
To UnitHolder ID
Alphanumeric; 12 Characters; Optional (Only for Transfer Transactions)
Specify the unit holder to whom the units are being transferred. You can select the required unit holder ID by clicking the ‘Find UH’ button.
To Unit Holder Name
Display Only
The system will display the name of the unit holder selected.
2.4.2 Transaction Information Tab
In this section, you can enter the basic details for the transaction along with the exchange rates to be used.
You can specify the following details:
Transaction Date
Date Format; Mandatory
Select the date format from the adjoining calendar.
Fund ID
Alphanumeric; 6 Characters; Mandatory
Specify the fund ID. Alternatively, you can select fund ID from the option list. The list displays all valid fund ID maintained in the system.
Transaction Currency
Alphanumeric; 6 Characters; Optional
Specify the transaction currency. Alternatively, you can select transaction currency code from the option list. The list displays all valid transaction currency code maintained in the system.
To Fund ID
Alphanumeric; 6 Characters; Optional
Specify the To fund ID. Alternatively, you can select To fund ID from the option list. The list displays all valid To fund ID maintained in the system.
Fund Identification Number
Display
The system displays the fund identification number based on the fund ID selected.
Fund Name
Display
The system displays the fund name for the selected fund ID.
Gross or Net
Optional
Select gross or net from the drop-down list. The list displays the following values:
- Gross
- Net
Transaction Category
Optional
Select the transaction category from the drop-down list. The list displays the following values:
- Legal
- Advised Business
- Execution Only
Communication Mode
Optional
Select the communication mode from the drop-down list. The list displays the following values:
- Direct (In Person)
- Check Writing
- Internet
- Registered Investment Advisor
- Registered Dealer
- Savings Plan
- SWIFT
- Telephone
Transaction Mode
Optional
Select the transaction mode from the drop-down list. The list displays the following values:
- Units
- Amount
- Percent
Units
Numeric; 12 Characters; Optional
Specify the units.
Amount
Numeric; 30 Characters; Optional
Specify the amount.
Percent
Numeric; 2 Characters; Optional
Specify the percent.
Payment Mode
Alphanumeric; 2 Characters; Optional
Specify the payment mode.
Payment Mode Description
The system displays the description for the selected payment mode.
Subscription Fund ID
Alphanumeric; 12 Characters; Optional
Specify the subscription fund ID.
Delivery Option
Optional
Select the delivery option from the drop-down list. The list displays the following values:
- Investment Account
- Clearing Account - Against Payment
- Clearing Account - Free of Payment
- Delivery to Custodian
- Physical Delivery
- PUEV
Click ‘Enrich’ button to enrich the transaction details.
Exchange Rate Details
Source ID
Alphanumeric; 6 Characters; Mandatory
Specify the source ID. Alternatively, you can select source ID from the option list. The list displays all valid source ID maintained in the system.
Amount Applied
Numeric; 30 Characters; Optional
Specify the amount applied.
FX Deal Date
Date Format; Optional
Select FX deal date from the adjoining calendar.
Exchange Rate Applied
Numeric; 21 Characters; Optional
Specify the exchange rate applied.
Override Exchange Rate
Optional
Select if the exchange rate is overridden or not from the drop-down list. The list displays the following values:
- Yes
- No
FX Value Date
Date Format; Optional
Select the FX value date from the adjoining calendar.
Click ‘Calculate’ button to calculate the exchange amount.
2.4.3 Settlement Details Tab
In this section, you can capture the details of settlement and payment made for the transaction in the case of IPO, subscription and redemption transactions. Payment Details link is displayed on selecting any Payment Mode other than ‘Cash’ and ‘Against Payment’. Click the Payment Details link to invoke the Settlement Information screen.
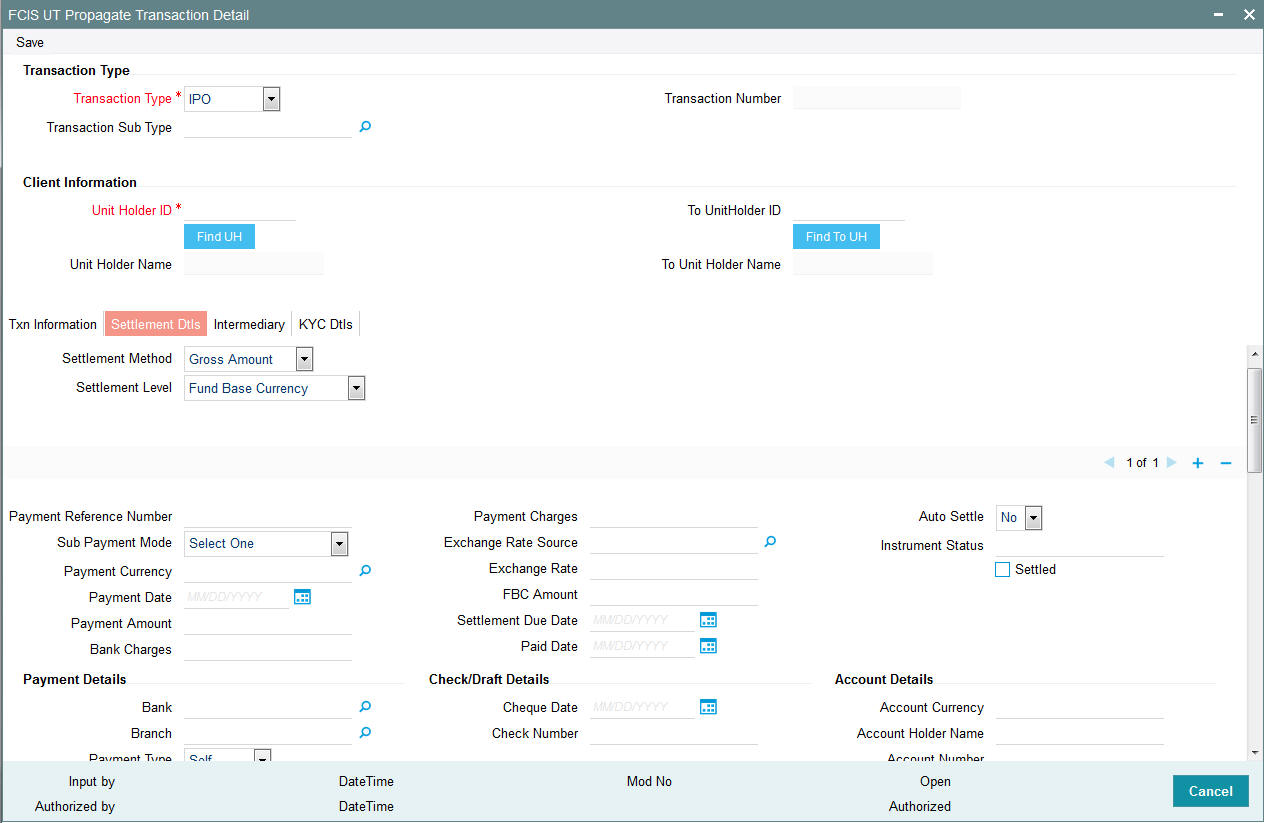
You can specify the following details:
Settlement Method
Optional
Select the settlement method from the drop-down list. The list displays the following values:
- Gross Amount
- Net of Agent Fees
- Net of All Fees
- Net of FM Fees
Settlement Level
Optional
Select the settlement level from the drop-down list. The list displays the following values:
- Fund Base Currency
- Transaction Base Currency
Payment Reference Number
Alphanumeric; 50 Characters; Optional
Specify the payment reference number.
Sub Payment Mode
Optional
Select the sub payment mode from the drop-down list. The list displays the following values:
- Demand Draft
- Pay Order
- Against Payment
- Inkind Payment
- CMA Cheque
- Broker Cheque
- Cashier Cheque
- Foreigner Cheque
- Government Cheque
- Other Institution Cheque
- Local Cheque
- Out of Town Cheque
- Payroll Deduction
- Cheque
- Reserve Bank Cheque
- Debit Card
- Credit Card
- Advice
- CMA Transfer
- Direct Debit
- Money Transfer
- Telegraphic Transfer
- Wire Transfer
- Cash
Payment Currency
Alphanumeric; 3 Characters; Optional
Specify the payment currency. Alternatively, you can select payment currency code from the option list. The list displays all valid payment currency code maintained in the system.
Payment Date
Date Format; Optional
Select the payment date from the adjoining calendar.
Payment Amount
Numeric; 30 Characters; Optional
Specify the payment amount.
Bank Charges
Numeric; 30 Characters; Optional
Specify the bank charges.
Payment Charges
Numeric; 30 Characters; Optional
Specify the payment charges.
Exchange Rate Source
Alphanumeric; 6 Characters; Optional
Specify the exchange rate source. Alternatively, you can select exchange rate source ID from the option list. The list displays all valid exchange rate source maintained in the system.
Exchange Rate
Numeric; 15 Characters; Optional
Specify the exchange rate.
FBC Amount
Numeric; 30 Characters; Optional
Specify the FBC amount.
Settlement Due Date
Date Format; Optional
Select the settlement due date from the adjoining calendar.
Paid Date
Date Format; Optional
Select the paid date from the adjoining calendar.
Auto Settle
Optional
Select if the transaction is auto settled or not from the drop-down list. The list displays the following values:
- Yes
- No
Instrument Status
Alphanumeric; 30 Characters; Optional
Specify the instrument status.
Settled
Optional
Select this box if the transaction is settled.
Payment Details
Bank
Alphanumeric; 12 Characters; Optional
Specify the bank details. Alternatively, you can select bank details from the option list. The list displays all valid bank details maintained in the system.
Branch
Alphanumeric; 12 Characters; Optional
Specify the branch details. Alternatively, you can select branch details from the option list. The list displays all valid branch details maintained in the system.
Payment Type
Optional
Select the payment type from the drop-down list. The list displays the following values:
- Self
- Third Party
- Broker
Broker
Alphanumeric; 12 Characters; Optional
Specify the broker details. Alternatively, you can select broker details from the option list. The list displays all valid broker details maintained in the system.
Check/Draft Details
Cheque Date
Date Format; Optional
Select the cheque date from the adjoining calendar.
Check Number
Alphanumeric; 16 Characters; Optional
Specify the cheque number.
Card Details
Credit Card Ref No
Alphanumeric; 16 Characters; Optional
Specify the credit card reference number.
Card Number
Alphanumeric; 16 Characters; Optional
Specify the card number.
Account Details
Account Currency
Alphanumeric; 3 Characters; Optional
Specify the account currency code.
Account Holder Name
Alphanumeric; 30 Characters; Optional
Specify the account holder name.
Account Number
Alphanumeric; 16 Characters; Optional
Specify the account number
Account Type
Alphanumeric; 1 Character; Optional
Specify the account type.
IBAN
Alphanumeric; 40 Characters; Optional
Specify the IBAN details.
Third Party Details
Third Party Address
Alphanumeric; 255 Characters; Optional
Specify the third party address.
Third Party Reference
Alphanumeric; 255 Characters; Optional
Specify the third party reference.
Third Party US State
Alphanumeric; 1 Character; Optional
Specify the third party US state.
Third Party Zip Code
Alphanumeric; 1 Character; Optional
Specify the third party zip code.
Unit Holder Details
Payment Address Details
Alphanumeric; 255 Characters; Optional
Specify the payment address details.
Inkind Details
Inkind Payment Details
Alphanumeric; 255 Characters; Optional
Specify the inkind payment details.
Fund Bank Details
ISIN Code
Alphanumeric; Optional
Specify the ISIN code.
Fund Base Currency
Alphanumeric; 3 Characters; Optional
Specify fund base currency.
Fund ID
Alphanumeric; 3 Characters; Optional
Specify the fund ID.
Bank
Alphanumeric; 12 Characters; Optional
Specify the bank details.
Branch
Alphanumeric; 12 Characters; Optional
Specify the branch code.
Description
Alphanumeric; 255 Characters; Optional
Specify the branch details.
Account Currency
Alphanumeric; 3 Characters; Optional
Specify the account currency.
Account Number
Alphanumeric; 16 Characters; Optional
Specify the account number.
Account Name
Alphanumeric; 100 Characters; Optional
Specify the account name.
Direct Debit Applicable
Alphanumeric; 1 Characters; Optional
Specify the direct debit applicable.
Close Account
Alphanumeric; 1 Characters; Optional
Specify the close account details.
IBAN
Alphanumeric; 40 Characters; Optional
Specify IBAN details.
Routing Bank Detail
SWIFT Format
Optional
Select SWIFT format from the drop-down list. The list displays the following values:
- MT103
- MT202
Bank Charged
Optional
Select the bank charged from the drop-down list. The list displays the following values:
- Beneficiary
- Remitter
- Share
Beneficiary Details
Beneficiary
Alphanumeric; 35 Characters; Optional
Specify the beneficiary details.
Beneficiary Code
Alphanumeric; 24 Characters; Optional
Specify the beneficiary code.
Beneficiary IBAN
Alphanumeric; 40 Characters; Optional
Specify the beneficiary IBAN code.
Beneficiary Add1
Alphanumeric; 35 Characters; Optional
Specify the beneficiary address details.
Beneficiary Add2
Alphanumeric; 35 Characters; Optional
Specify the beneficiary address details.
Beneficiary Add3
Alphanumeric; 35 Characters; Optional
Specify the beneficiary address details.
Beneficiary BIC Code
Alphanumeric; 24 Characters; Optional
Specify the beneficiary BIC code.
Beneficiary Acct No
Alphanumeric; 24 Characters; Optional
Specify the beneficiary address details.
Beneficiary Info
Alphanumeric; 100 Characters; Optional
Specify the beneficiary information.
Intermediary Details
Intermediary
Alphanumeric; 35 Characters; Optional
Specify the beneficiary details.
Intermediary Code
Alphanumeric; 24 Characters; Optional
Specify the beneficiary code.
Intermediary IBAN
Alphanumeric; 40 Characters; Optional
Specify the beneficiary IBAN code.
Intermediary Add1
Alphanumeric; 35 Characters; Optional
Specify the beneficiary address details.
Intermediary Add2
Alphanumeric; 35 Characters; Optional
Specify the beneficiary address details.
Intermediary Add3
Alphanumeric; 35 Characters; Optional
Specify the beneficiary address details.
Intermediary BIC Code
Alphanumeric; 24 Characters; Optional
Specify the beneficiary BIC code.
Intermediary Acct No
Alphanumeric; 24 Characters; Optional
Specify the beneficiary address details.
Intermediary Info
Alphanumeric; 100 Characters; Optional
Specify the beneficiary information.
Further Credit Details
Further Credit Name
Alphanumeric; 35 Characters; Optional
Specify the further credit name.
Further Credit Acct No
Alphanumeric; 35 Characters; Optional
Specify the further credit account number.
Reference
Reference1
Alphanumeric; 35 Characters; Optional
Specify the reference details.
Reference2
Alphanumeric; 35 Characters; Optional
Specify the reference details.
2.4.4 Intermediary Tab
If a broker has been identified as an intermediary for the transaction, then you must identify the same in this section, along with the commission percentage split for the broker.
If brokers are designated as mandatory for the fund in which the transaction is being put through, then you must specify at least one broker as mandatory information in this section. If brokers are not mandatory for the fund, and you do not specify any broker in this section, then the system reckons the broker as DIRECT and designates the same as the default broker.
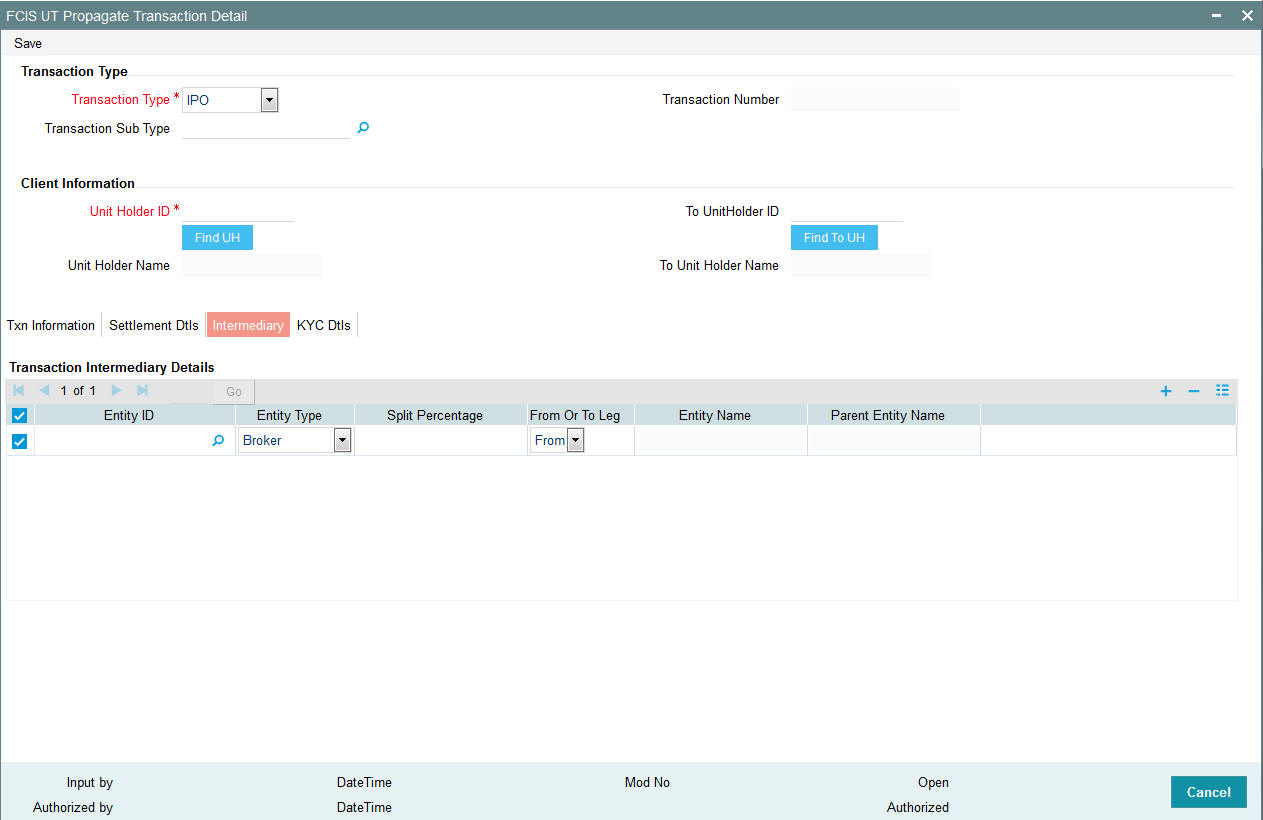
You can specify the following details:
Transaction Intermediary Details
Entity ID
Alphanumeric; 12 Characters; Optional
Specify the entity ID. Alternatively, you can select fund ID from the option list. The list displays all valid fund ID maintained in the system.
Entity Type
Optional
Select the entity type from the drop-down. The list displays the following values:
- Agent
- Agent Branch
- Account Officer
- IFA
- Broker
Split Percentage
Numeric; 5 Characters; Optional
Specify the split percentage.
From Or To Leg
Optional
Select if From or To Leg from the drop-down list. The list displays the following values:
- From
- To
Entity Name
Display
The system displays the entity name for the selected entity ID.
Parent Entity Name
Alphanumeric; 50 Characters; Optional
Specify the parent entity name.
2.4.5 KYC Details Tab
You need to specify the list of required KYC documents for this transaction. System allows you to save the transaction even if the unit holder has not submitted all the required KYC documents. However, you will not be allowed to perform the completion operation on that transaction unless all the required documents have been received from the investor.
This feature will be available only if your installation has requested for it.
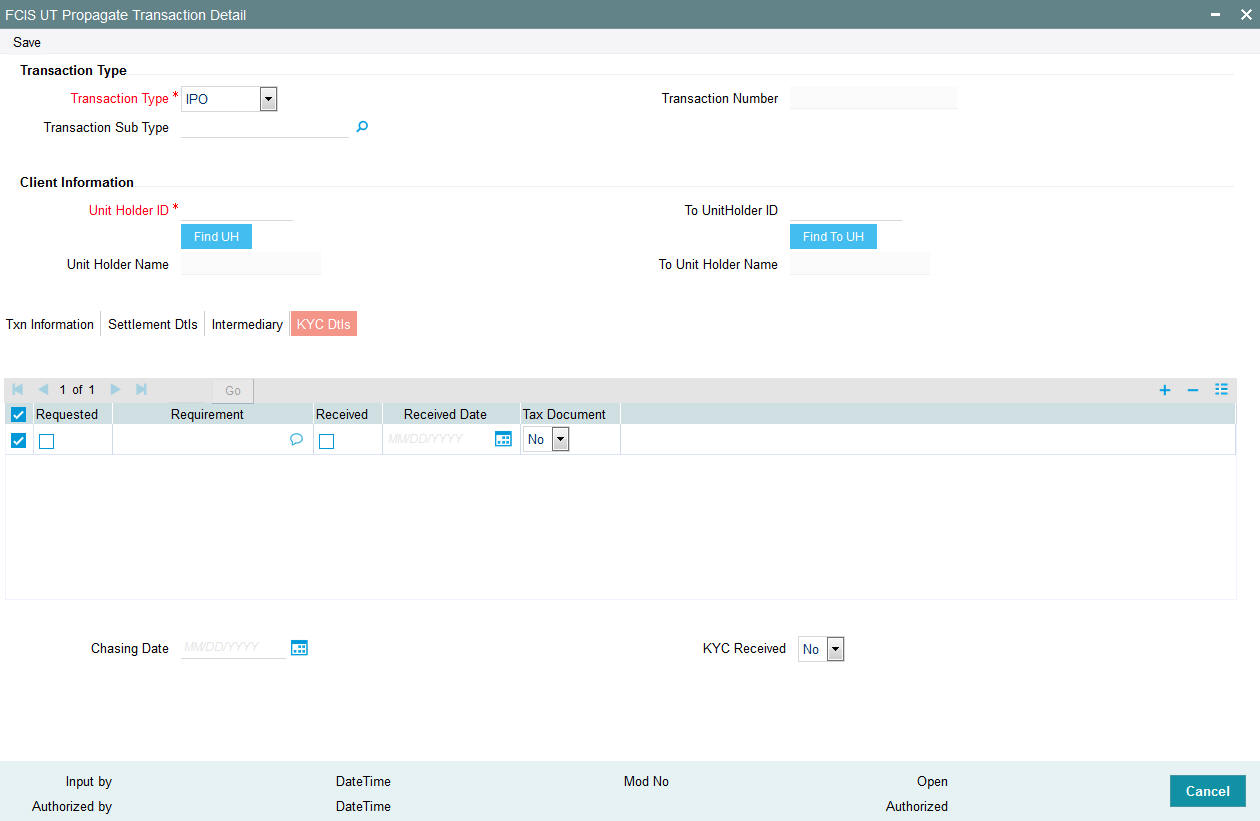
You can specify the following details:
Requested
Optional
Check this box if KYC details are requested.
Requirement
Alphanumeric; 255 Characters; Optional
Specify the required details.
Received
Optional
Check this box if KYC details are received
Received Date
Date Format; Optional
Select the received date from the adjoining option list.
Tax Document
Optional
Select if tax document is required or not from the drop-down list. The list displays the following values:
- Yes
- No
Chasing Date
Date Format; Optional
Select the chasing date from the adjoining option list.
KYC Received
Optional
Select if KYC is received or not from the drop-down list. The list displays the following values:
- Yes
- No
You can also modify details of a newly created record, delete and authorize a record through this screen. Modification, however, will be allowed only if the record has not been selected for data propagation in the ‘UT Back Data Propagation’ screen.
Note
- If you put in a new transaction for transfer, the system will consider this transaction to recalculate the holdings of the Unitholder only. It will not automatically re-compute the unit balances of the unit holder to whom the transfer is being done (the To Unit Holder). Also, it will store the updated information for only the ‘To Unit Holder’ in the report schema tables.
- In case of a switch transaction, it will re-calculate the unit holder balances in both the ‘To Fund’ as well as the ‘From Fund’ and store details of both in the report schema tables.
- If there has been a merger or a split for a fund specified in a propagation transaction, the system will re-calculate the holdings for the propagation period.
2.5 FCIS UT Propagate Transaction Summary
This section contains the following topics:
- Section 2.5.1, "Retrieving Record in FCIS UT Propagate Transaction Summary screen"
- Section 2.5.2, "Editing an FCIS UT Propagate Transaction Record "
- Section 2.5.3, "Viewing an FCIS UT Propagate Transaction Record"
- Section 2.5.4, "Deleting an FCIS UT Propagate Transaction Record"
- Section 2.5.5, "Authorizing an FCIS UT Propagate Transaction Record"
- Section 2.5.6, "Amending an FCIS UT Propagate Transaction Record"
- Section 2.5.7, "Authorizing an Amended FCIS UT Propagate Transaction Record"
2.5.1 Retrieving Record in FCIS UT Propagate Transaction Summary screen
You can retrieve a previously entered record in the Summary Screen, as follows:
Invoke the ‘FCIS UT Propagate Transaction Summary’ screen by typing ‘UTSPRTXN' in the field at the top right corner of the Application tool bar and clicking on the adjoining arrow button. Specify any or all of the following details in the corresponding fields:
- The status of the record in the Authorized field. If you choose the ‘Blank Space’ option, then all the records are retrieved.
- The status of the record in the Open field. If you choose the ‘Blank Space’ option, then all records are retrieved
- Transaction Number
- Transaction Type
- Unit Holder ID
- Fund ID
- Transaction Currency
- Transaction Date
Click ‘Search’ button to view the records. All the records with the specified details are retrieved and displayed in the lower portion of the screen.
You can also retrieve the individual record detail from the detail screen by querying in the following manner:
- Press F7
- Input the Transaction Number
- Press F8
You can perform Edit, Delete, Amend, Authorize operations by selecting the operation from the Action list.

2.5.2 Editing an FCIS UT Propagate Transaction Record
You can modify the details of an FCIS UT Propagate Transaction record that you have already entered into the system, provided it has not been subsequently authorized and if it has not been attached to any propagation. If the transaction has been propagated, then you will not be allowed to modify it.
You can perform this operation as follows:
- Invoke the FCIS UT Propagate Transaction Summary screen from the Browser.
- Select the status of the record that you want to retrieve for modification in the Authorized field. You can only modify records that are unauthorized. Accordingly, choose the unauthorized option.
- Specify any or all of the details in the corresponding fields to retrieve the record that is to be modified.
- Click ‘Search’ button. All unauthorized records with the specified details are retrieved and displayed in the lower portion of the screen.
- Double click the record that you want to modify in the list of displayed records. The FCIS UT Propagate Transaction screen is displayed.
- Select Unlock Operation from the Action list to modify the record. Modify the necessary information.
- Click Save to save your changes. The FCIS UT Propagate Transaction screen is closed and the changes made are reflected in the FCIS UT Propagate Transaction Summary screen.
2.5.3 Viewing an FCIS UT Propagate Transaction Record
To view a record that you have previously input, you must retrieve the same in the FCIS UT Propagate Transaction Summary screen as follows:
- Invoke the FCIS UT Propagate Transaction Summary screen from the Browser.
- Select the status of the record that you want to retrieve for viewing in the Authorization Status field. You can also view all records that are either unauthorized or authorized only, by choosing the Unauthorized/ Authorized option.
- Specify any or all of the details of the record in the corresponding fields on the screen.
- Click ‘Search’ button. All records with the specified fields are retrieved and displayed in the lower portion of the screen.
- Double click the record that you want to view in the list of displayed records. The FCIS UT Propagate Transaction screen is displayed in View mode.
2.5.4 Deleting an FCIS UT Propagate Transaction Record
You can delete only unauthorized records in the system. To delete a record that you have previously entered:
- Invoke the FCIS UT Propagate Transaction Summary screen from the Browser.
- Select the status of the record that you want to retrieve for deletion.
- Specify any or all of the details in the corresponding fields on the screen.
- Click ‘Search’ button. All records with the specified fields are retrieved and displayed in the lower portion of the screen.
- Double click the record that you want to delete in the list of displayed records. The FCIS UT Propagate Transaction screen is displayed.
- Select Delete Operation from the Action list. The system prompts you to confirm the deletion and the record is physically deleted from the system database.
2.5.5 Authorizing an FCIS UT Propagate Transaction Record
An unauthorized FCIS UT Propagate Transaction record must be authorized in the system for it to be processed. To authorize a record:
- Invoke the FCIS UT Propagate Transaction Summary screen from the Browser.
- Select the status of the record that you want to retrieve for authorization. Typically, choose the unauthorized option.
- Specify any or all of the details in the corresponding fields on the screen.
- Click ‘Search’ button. All records with the specified details that are pending authorization are retrieved and displayed in the lower portion of the screen.
- Double click the record that you wish to authorize. The FCIS UT Propagate Transaction screen is displayed. Select Authorize operation from the Action List.
2.5.6 Amending an FCIS UT Propagate Transaction Record
After an FCIS UT Propagate Transaction record is authorized, it can be modified using the Unlock operation from the Action List. To make changes to a record after authorization:
- Invoke the FCIS UT Propagate Transaction Summary screen from the Browser.
- Select the status of the record that you want to retrieve for authorization. You can only amend authorized records.
- Specify any or all of the details in the corresponding fields on the screen.
- Click ‘Search’ button. All records with the specified details that are pending authorization are retrieved and displayed in the lower portion of the screen.
- Double click the record that you wish to authorize. The FCIS UT Propagate Transaction screen is displayed in amendment mode. Select Unlock operation from the Action List to amend the record.
- Amend the necessary information and click on Save to save the changes.
2.5.7 Authorizing an Amended FCIS UT Propagate Transaction Record
An amended FCIS UT Propagate Transaction record must be authorized for the amendment to be made effective in the system. The authorization of amended records can be done only from Fund Manager Module.
The subsequent process of authorization is the same as that for normal records.
2.6 Back Data Propagation for LEP
This section contains the following topics:
2.6.1 Propagating Back Data for LEP
You can create transactions that have not been input for a policy holder, delete existing erroneous data and modify certain details for an existing record in the ‘FCIS LEP Back Data Propagation’ screen. You can invoke by typing ‘LEDROPLE' in the field at the top right corner of the Application tool bar and click the adjoining arrow button.
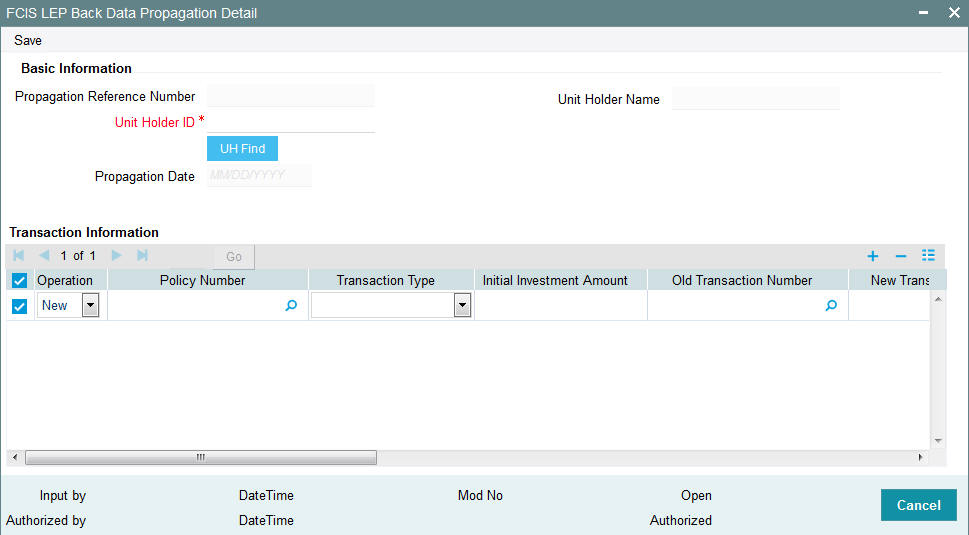
To modify or delete a transaction, you can specify the required operation, the original transaction number and change the details or delete the transaction through the ‘FCIS LEP Back Data Propagation’ screen. To create a new record however, you are required to enter a new and unique transaction number along with the other details of the transaction in the ‘FCIS LEP Propagate Transaction Detail’ screen. Subsequently, you need to select the new transaction number in the ‘FCIS LEP Back Data Propagation’ screen to propagate the new record.
You can enter the following details here:
Basic Information
Propagation Reference Number
Display
The system generates a unique number for each propagation process.
Unit Holder ID
Alphanumeric; 12 Characters; Mandatory
Specify the UH for which the propagation is being done. You can use the ‘UH Find’ button to select the required UH.
Unit Holder Name
Display Only
The system displays the name of the selected UH.
Propagation Date
Display Only
The system displays the application date here.
Transaction Information
Operation
Optional
Select from the adjoining drop-down list, the kind of propagation operation that is to be done. The options are:
- New
- Modify
- Delete
The data that you are required to enter from here on depends on the type of operation you have selected.
Policy Number
Alphanumeric; 16 Characters; Mandatory only if the Operation is Modify
Specify the policy number for which you want to propagate back data. You can also select the policy number from the adjoining option list. The list contains the reference numbers of all authorized policies.
Transaction Type
Optional
Select, from the adjoining drop-down list, the type of transaction to be propagated. The options are:
- Policy Initial Investment
- Topup
- Switch
- Surrender
- Annuity
- Premium
- Recurring Switch
Initial Investment Amount
Numeric; 30 Characters; Mandatory if Transaction Type is ‘Policy Initial Investment’
Enter the initial investment amount for the policy.
Old Transaction Number
Alphanumeric; 16 Characters; Mandatory if Operation is ‘Delete’
Enter the transaction number of the transaction that you wish to delete or modify.
New Transaction Number
Alphanumeric; 16 Characters; Mandatory if Operation is ‘New’
Specify a new unique transaction number for a transaction that you wish to create. You can also select the transaction number from the adjoining option list. The list contains the reference numbers for all the transactions that were created in the ‘FCIS LEP Propagate Transaction Detail’ screen.
Transaction Currency
Alphanumeric; 3 Characters; Mandatory if Operation is ‘Modify’
Specify the currency in which the new transaction is to be reckoned.
Transaction Mode
Mandatory if Operation is ‘Modify’
Select, from the adjoining drop-down list, the mode of transacting. The options are:
- Amount
- Percent
- Units
Amount Applied
Numeric; 30 Characters; Mandatory if Transaction Mode is ‘Amount’
If the transaction mode is amount, specify the amount for the transaction.
Percent
Numeric; 5 Characters; Mandatory if Transaction Mode is ‘Percent’
If the transaction mode is percent, specify the percentage.
Units
Numeric; 27 Characters; Mandatory if Transaction Mode is ‘Units’
If the transaction mode is units, specify the number of units for the transaction.
Transaction Category
Optional
Select the transaction category from the drop-down list. The list displays the folloing values:
- Legacy
- Advised Business
- Execution Only
After entering the requisite details, click ‘Save’. The system will propagate the transactions (and commissions) as per the operation specified and generate a detailed report. If any of the following transactions have taken place during the data propagation period, the system will take these into account along with the original data for reiteration:
- Dividend payout or re-investment transaction
- Annuity, recurring switches, recurring premium or surrender transactions
- Applicable loads
- Annuity Journals
- Periodic fees
- CGT Recovery Transactions
2.7 FCIS LEP Back Data Propagation Summary
This section contains the following topics:
- Section 2.7.1, "Retrieving Record in FCIS LEP Back Data Propagation Summary screen"
- Section 2.7.2, "Viewing an FCIS LEP Back Data Propagation Record"
- Section 2.7.3, "Authorizing an FCIS LEP Back Data Propagation Record"
2.7.1 Retrieving Record in FCIS LEP Back Data Propagation Summary screen
You can retrieve a previously entered record in the Summary Screen, as follows:
Invoke the ‘FCIS LEP Back Data Propagation Summary’ screen by typing ‘LESROPLE' in the field at the top right corner of the Application tool bar and clicking on the adjoining arrow button. Specify any or all of the following details in the corresponding fields:
- The status of the record in the Authorized field. If you choose the ‘Blank Space’ option, then all the records are retrieved.
- The status of the record in the Open field. If you choose the ‘Blank Space’ option, then all records are retrieved
- Propagation Reference Number
- Unit Holder ID
- Propagation Date
Click ‘Search’ button to view the records. All the records with the specified details are retrieved and displayed in the lower portion of the screen.
You can also retrieve the individual record detail from the detail screen by querying in the following manner:
- Press F7
- Input the Propagation Reference Number
- Press F8

2.7.2 Viewing an FCIS LEP Back Data Propagation Record
To view a record that you have previously input, you must retrieve the same in the FCIS LEP Back Data Propagation Summary screen as follows:
- Invoke the FCIS LEP Back Data Propagation Summary screen from the Browser.
- Select the status of the record that you want to retrieve for viewing in the Authorization Status field. You can also view all records that are either unauthorized or authorized only, by choosing the Unauthorized/ Authorized option.
- Specify any or all of the details of the record in the corresponding fields on the screen.
- Click ‘Search’ button. All records with the specified fields are retrieved and displayed in the lower portion of the screen.
- Double click the record that you want to view in the list of displayed records. The FCIS LEP Back Data Propagation screen is displayed in View mode.
2.7.3 Authorizing an FCIS LEP Back Data Propagation Record
An unauthorized FCIS LEP Back Data Propagation record must be authorized in the system for it to be processed. To authorize a record:
- Invoke the FCIS LEP Back Data Propagation Summary screen from the Browser.
- Select the status of the record that you want to retrieve for authorization. Typically, choose the unauthorized option.
- Specify any or all of the details in the corresponding fields on the screen.
- Click ‘Search’ button. All records with the specified details that are pending authorization are retrieved and displayed in the lower portion of the screen.
- Double click the record that you wish to authorize. The FCIS LEP Back Data Propagation screen is displayed. Select Authorize operation from the Action List.
2.8 Propagate Transaction Detail
This section contains the following topics:
- Section 2.8.1, "Invoking LEP Propagate Transaction Detail"
- Section 2.8.2, "Transaction Details Tab"
- Section 2.8.3, "Asset Allocation Tab"
- Section 2.8.4, "Payment Details Tab"
- Section 2.8.5, "Broker Details Tab"
2.8.1 Invoking LEP Propagate Transaction Detail
You can invoke the ‘LEP Propagate Transaction Detail’ screen by typing ‘LEDPRTXN’ in the field at the top right corner of the Application tool bar and clicking on the adjoining arrow button.

You can specify the following details:
Policy Transaction
Policy Number
Alphanumeric; 16 Characters; Mandatory
Specify the policy number. Alternatively, you can select the policy number from the option list. The list displays all valid policy number maintained in the system.
Policy Holder ID
Display
The system displays the policy holder ID for the selected policy number.
Policy Txn Number
Display
The system displays the policy transaction number.
Transaction Type
Mandatory
Select the transaction type from the drop-down list. The list displays the following values:
- Topup
- Surrender
- Switch
2.8.2 Transaction Details Tab
Select ‘Transaction Details’ tab in the ‘LEP Propagate Transaction Detail’ screen to invoke the screen:
Transaction Date
Date Format, Mandatory
Specify the date for the transaction.
Transaction Currency
Alphanumeric; 3 Characters; Mandatory
When different currencies have been used in payment details, then you are required to enter the transaction currency.
Transaction Amount
Numeric, 30 Characters; Mandatory
Specify the investment amount of the transaction.
Txn Type
Alphanumeric; 2 Characters; Optional
Select the Transaction Type. Alternatively, you can select transaction type from the option list. The list displays all valid transaction type maintained in the system.
Phase In To Be Cancelled
Alphanumeric; 16 Characters; Optional
You could choose to cancel all, none or specific IDs of the active Phase-In setup.
Include Interest in Investment
Optional
Select, from the adjoining drop-down list, if the interest earned on the initial investment should be considered along with the initial investment for investment in the policy.
If you select ‘Yes’, the interest amount will be included in the investment and a single transaction will be generated for both. You need to manually add the interest amount calculated in the settlement details to the transaction amount of the particular currency in the asset allocation details.
If you select ‘No’, the interest amount will be generated as a separate UT transaction.
Interest Amount
Numeric; 18 Characters; Optional
Specify the interest amount based on the interest calculation days and interest rate provided.
Transaction Entry Date
Date Format, Mandatory
The Transaction Entry Date signifies the date on which the transaction is entered into the system. By default, the application date is displayed in this field, and it cannot be altered.
Transaction Mode
Mandatory
Select the transaction mode from the drop-down list. The list displays the following values:
- Amount
- Unit
- Percent
Top Up Inclusive
Optional
Select if the transaction is an inclusive top up transaction or not from the drop-down list.The list displays the following values:
- Yes
- No
When a top up is inclusive, the top up amount is considered immediately for the next annuity payment. If it is an exclusive top up, the top up amount is not considered for annuity payments till after the first anniversary date.
PortFolio Switch
Optional
Select if portfolio switch is considered or not from the adjoining drop-down list. The list displays the following values:
- Yes
- No
Portfolio Surrender
Optional
Select if portfolio surrender is considered or not from the adjoining drop-down list. The list displays the following values:
- Yes
- No
Surrender Money Payable
Alphanumeric; 1 Character; Optional
Specify the surrender money payable details.
Refer to the chapter “Maintaining System Parameters” for further information on the System Parameters Maintenance screen.
Transaction Category
Mandatory
Select the transaction category from the adjoining drop-down list. Following are the options available:
- Legal
- Advised Business
- Execution Only
Exchange Rate Details
Amount Applied
Numeric; 30 Characters; Optional
Specify the amount calculated based on the exchange rate specified.
Source ID
Alphanumeric; 6 Characters; Optional
Specify the source from which the exchange rate is obtained or select the source ID from the option list provided.
Exchange Rate Applied
Numeric; 21 Characters; Optional
Specify the exchange rate applied.
Override Exchange Rate
Optional
Select the option to indicate if you wish to override the exchange rate that gets defaulted. Select ‘Yes’ to indicate that you wish to override the exchange rate and ‘No’ to indicate otherwise.
Click ‘Calculate’ button to calculate the amount using the exchange rate specified. The interest amount associated with the policy transaction also gets converted to policy base currency based on the exchange rate specified.
2.8.3 Asset Allocation Tab
Capture the fund-wise pattern of distribution of the investment amount in the Asset Allocation Details section of this tab. If the initial contribution that you enter is in different currencies, you need to mention the currency-wise details here. Click the ‘Asset Allocation’ tab to enter the asset allocation details for the transaction.

Fund ID
Alphanumeric; 6 Characters; Mandatory
All the funds mapped for the selected product are displayed in the option list. Select the required funds.
Fund Name
Display
The system displays the fund name for the selected fund ID.
Fund Base Currency
Display
The system displays the fund base currency details.
Transaction Currency
Alphanumeric; 3 Characters; Optional
Specify the transaction currency for the initial contribution. If many currencies have been mentioned in the settlements, then you are required to enter the amount for individual currencies. You can specify a transaction currency only if the transaction is amount-based.
Transaction Amount
Numeric, 30 Characters; Mandatory
Specify the portion of the transaction amount that is to be invested in each of the selected funds. If different currencies have been mentioned in settlements, then you can specify only the transaction amount.
Exchange Rate Source
Alphanumeric; 6 Characters; Optional
The system will display the exchange source maintained at the default set-up in system parameters. You can change it by selecting the required exchange rate source from the adjoining option list. This will be used by the system to convert the transaction amount in terms of fund base currency.
Override Exchange Rate
Optional
Select ‘Yes’ if you wish to change the exchange rate that is displayed here. If you select ‘Yes’, however, you need to specify the exchange rate to be used for the transaction in the ‘Exchange Rate Applied’ field. Select ‘No’ if you wish to retain the exchange rate that is displayed by the system.
Exchange Rate Applied
Numeric; 21 Characters; Optional
The system will default the exchange rate available for the currency based on the exchange source specified. If you have elected to override the exchange rate, you need to enter the exchange rate to be used here. If exchange rate is not available, then the system will generate the transactions as incomplete ones. Such transactions can be enriched later through the ‘Policy Transaction Enrichment Screen’.
FX Deal Date
Date format; Optional
Specify the FX deal date.
FX Value Date
Date format; Optional
Specify the FX Value date.
WAC
Numeric; 30 Characters; Optional
Enter the Weighted Average Cost.
Ratio
Numeric, 11 Characters; Optional
Specify the portion of the units that are to be invested in each of the selected funds.
The latest investment ratio applicable for the Policy is displayed here when the form is opened. These values can be amended, and you can specify the required percentages.
Auto Clear Provisional Balance
Mandatory
Select if provisional balance should be automatically cleared or not from the drop-down list. The list displays the following values:
- Yes
- No
Auto Clear Reinvestments
Mandatory
Select if reinvestment details should be automatically cleared or not from the drop-down list. The list displays the following values:
- Yes
- No
2.8.4 Payment Details Tab
Capture the details of payments made by the Policy Holder towards processing of the transaction in this tab. Click the ‘Payment Details’ tab to enter the payment details for the transaction.

Payment Details
Payment Mode
Optional
Select the mode through which the payment is made by the Policy holder. This could be any one of the following, as applicable:
- Cash
- Cheque
- Demand Draft
- Money Transfer
Clearing Date
Date Format, Optional
Specify the Clearing Date of the payment.
Payment Type
Mandatory
Select the payment type from the drop-down list. The list displays the following values:
- Self
- Product
- Third Party
- Beneficiary
Bank Code
Alphanumeric; 12 Characters; Optional
Select the Bank code from the option list.
Account Number
Alphanumeric; 16 Characters; Optional
Specify the number of the transfer account.
Check Number
Alphanumeric; 16 Characters; Optional
Enter the cheque number of the cheque /draft number of the demand draft by which the payment is being made.
Identification Number
Alphanumeric; 50 Characters; Mandatory
Specify the identification number.
Address Line 1
Alphanumeric; 255 Characters; Optional
Specify the address of the customer.
Transferee Number
Alphanumeric; 16 Characters; Optional
Specify the transferee number.
Payment Date
Date Format; Mandatory
Specify the date on which the initial investment was done. You can deposit the amount in different currencies and on different dates.
Payment Currency
Alphanumeric; 3 Characters; Optional
Enter the currency in which the initial investment is being done. The initial amount can be deposited in multiple currencies.
Payment Amount
Numeric; 30 Characters; Mandatory
Enter the initial investment amount being paid in the particular currency.
Ratio
Numeric; 5 Characters; Optional
Specify the ratio.
Branch Code
Alphanumeric; 12 Characters; Optional
Select the Branch code from the option list.
Account Type
Alphanumeric; 1 Character; Optional
Select the account type of the transfer account.
Account Currency
Alphanumeric; 3 Characters; Optional
Specify the transaction currency.
Check Date
Date Format, Optional
Enter the cheque date of the cheque /draft number of the demand draft by which the payment is being made.
Contact Name
Alphanumeric; 100 Characters; Optional
Specify the contact name.
Address Line 1
Alphanumeric; 255 Characters; Optional
Specify the address of the customer.
IBAN
Alphanumeric; 40 Characters; Optional
Specify the IBAN (International Bank Account Number) of the account holder.
Exchange Rate Details
Source ID
Alphanumeric; 6 Characters; Optional
Specify the source ID from the adjoining option list.
Exchange Rate Applied
Numeric; 21 Characters; Optional
Specify the exchange rate applied.
Transaction Currency Amount
Numeric; 30 Characters; Optional
Specify the transaction currency amount.
Override Exchange Rate
Optional
Select the exchange rate is overridden or not from the drop-down list. The list displays the following values:
- Yes
- No
FX Deal Date
Date Format; Optional
Select FX deal date from the adjoining calendar.
FX Value Date
Date Format; Optional
Select the FX value date from the adjoining calendar.
If exchange rate details are not available for any settlement when the transaction or policy is entered, the system will not generate a UT transaction. Once all the settlement details have been enriched in the ‘Policy Transaction Exchange Rate Enrichment’ screen and the ‘FCIS Enrich Exchange Rate Detail’ screen, the system will compute the transaction amount and generate the UT transaction. If it is not enriched, then the system will pick the exchange rate during EOD and generate the UT transaction.
Interest Details
When you click the ‘Enrich’ button in the ‘Transaction Detail’ tab, if the investment amount has been deposited prior to the transaction date, the system will calculate and display the interest on the payment amount in the ‘Policy Information’ tab. The interest will be calculated from the date of payment till the transaction date.
When you click ‘Calculate Interest’ button in the ‘Settlement Details’ screen, the system will calculate and display the interest amount in the ‘Interest Amount’ field in the same screen.
Interest Rate
Numeric; 30 Characters; Optional
Enter the rate of interest that is to be used to calculate interest amount for the particular currency. Alternatively, you can maintain the interest rate in the ‘Interest Rate Maintenance’ screen. If you do not maintain an interest rate, the system will take it as null.
Interest Amount
Numeric; 30 Characters; Optional
Specify the interest amount.
Interest Amount in Transaction Currency
Numeric; 30 Characters; Optional
Specify the interest amount in terms of the transaction currency.
Interest Calc. Days
Numeric; 30 Characters; Optional
Specify the number of days for which interest calculation has to be done for a policy top-up based on the payment date and transaction date.
Basis Days
Optional
Select the interest basis days, based on which the interest will be calculated. The options available are:
- 360 days
- 365 days
2.8.5 Broker Details Tab
Click the ‘Broker Details’ tab to enter details of brokers for the transaction.

Broker Code
Alphanumeric; 9 Characters; Mandatory
Specify the Broker Mapped for the Policy from the option list.
Broker Name
Display
Upon selection of the broker code, the system displays the name of the selected broker code.
Split Percentage
Percentage Format, Mandatory if you select any broker in the Intermediary field.
Specify the percentage of the commission that the selected broker is entitled to receive on any transactions put through for the investor.
This percentage must not exceed one hundred percent.
Note
If you specify more than one broker in this section, the split percentages for all brokers, when summed up, must not exceed or fall below one hundred percent.
2.9 FCIS LEP Propagate Transaction Summary
This section contains the following topics:
- Section 2.9.1, "Retrieving Record in FCIS LEP Propagate Transaction Summary screen"
- Section 2.9.2, "Editing an FCIS LEP Propagate Transaction Record "
- Section 2.9.3, "Viewing an FCIS LEP Propagate Transaction Record"
- Section 2.9.4, "Deleting an FCIS LEP Propagate Transaction Record"
- Section 2.9.5, "Authorizing an FCIS LEP Propagate Transaction Record"
- Section 2.9.6, "Amending an FCIS LEP Propagate Transaction Record"
- Section 2.9.7, "Authorizing an Amended FCIS LEP Propagate Transaction Record"
2.9.1 Retrieving Record in FCIS LEP Propagate Transaction Summary screen
You can retrieve a previously entered record in the Summary Screen, as follows:
Invoke the ‘FCIS LEP Propagate Transaction Summary’ screen by typing ‘LESPRTXN’ in the field at the top right corner of the Application tool bar and clicking on the adjoining arrow button.
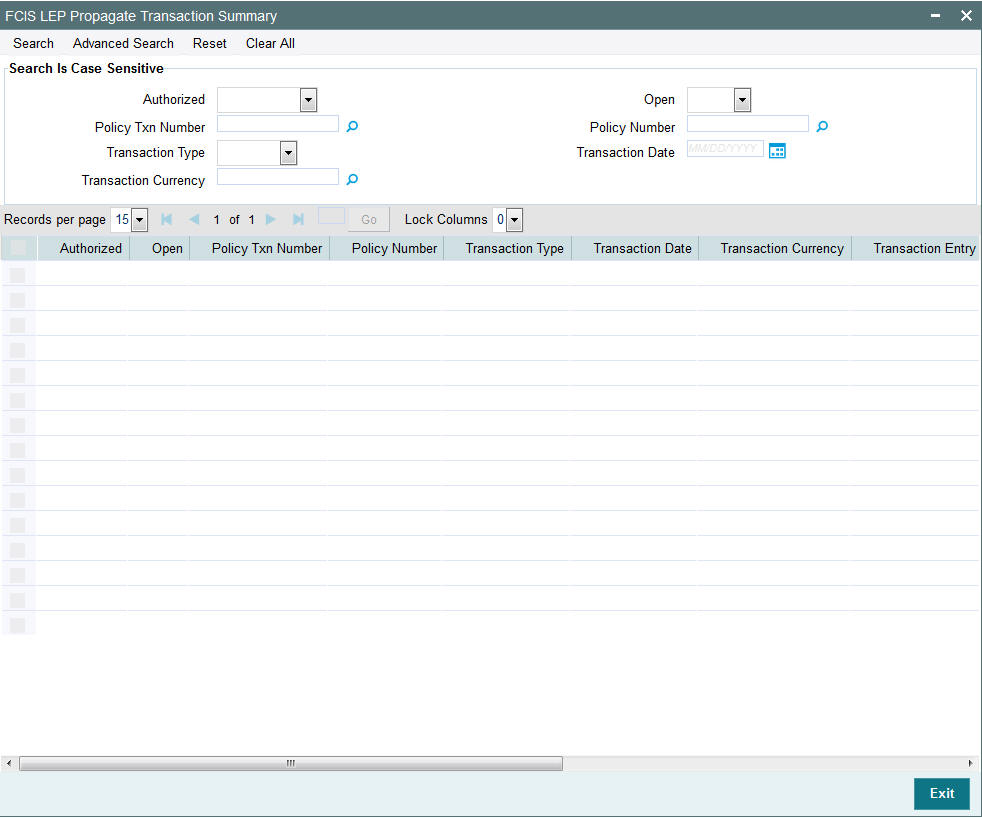
Specify any or all of the following details in the corresponding fields:
- The status of the record in the Authorized field. If you choose the ‘Blank Space’ option, then all the records are retrieved.
- The status of the record in the Open field. If you choose the ‘Blank Space’ option, then all records are retrieved
- Policy Txn Number
- Policy Number
- Transaction Type
- Transaction Date
- Transaction Currency
Click ‘Search’ button to view the records. All the records with the specified details are retrieved and displayed in the lower portion of the screen.
You can also retrieve the individual record detail from the detail screen by querying in the following manner:
- Press F7
- Input the Policy Txn Number
- Press F8
You can perform Edit, Delete, Amend, Authorize operations by selecting the operation from the Action list.
2.9.2 Editing an FCIS LEP Propagate Transaction Record
You can modify the details of an FCIS LEP Propagate Transaction record that you have already entered into the system, provided it has not been subsequently authorized and if it has not been attached to any propagation. If the transaction has been propagated, then you will not be allowed to modify it.
You can perform this operation as follows:
- Invoke the FCIS LEP Propagate Transaction Summary screen from the Browser.
- Select the status of the record that you want to retrieve for modification in the Authorized field. You can only modify records that are unauthorized. Accordingly, choose the unauthorized option.
- Specify any or all of the details in the corresponding fields to retrieve the record that is to be modified.
- Click ‘Search’ button. All unauthorized records with the specified details are retrieved and displayed in the lower portion of the screen.
- Double click the record that you want to modify in the list of displayed records. The FCIS LEP Propagate Transaction screen is displayed.
- Select Unlock Operation from the Action list to modify the record. Modify the necessary information.
- Click Save to save your changes. The FCIS LEP Propagate Transaction screen is closed and the changes made are reflected in the FCIS LEP Propagate Transaction Summary screen.
2.9.3 Viewing an FCIS LEP Propagate Transaction Record
To view a record that you have previously input, you must retrieve the same in the FCIS LEP Propagate Transaction Summary screen as follows:
- Invoke the FCIS LEP Propagate Transaction Summary screen from the Browser.
- Select the status of the record that you want to retrieve for viewing in the Authorization Status field. You can also view all records that are either unauthorized or authorized only, by choosing the Unauthorized/ Authorized option.
- Specify any or all of the details of the record in the corresponding fields on the screen.
- Click ‘Search’ button. All records with the specified fields are retrieved and displayed in the lower portion of the screen.
- Double click the record that you want to view in the list of displayed records. The FCIS LEP Propagate Transaction screen is displayed in View mode.
2.9.4 Deleting an FCIS LEP Propagate Transaction Record
You can delete only unauthorized records in the system. To delete a record that you have previously entered:
- Invoke the FCIS LEP Propagate Transaction Summary screen from the Browser.
- Select the status of the record that you want to retrieve for deletion.
- Specify any or all of the details in the corresponding fields on the screen.
- Click ‘Search’ button. All records with the specified fields are retrieved and displayed in the lower portion of the screen.
- Double click the record that you want to delete in the list of displayed records. The FCIS LEP Propagate Transaction screen is displayed.
- Select Delete Operation from the Action list. The system prompts you to confirm the deletion and the record is physically deleted from the system database.
2.9.5 Authorizing an FCIS LEP Propagate Transaction Record
An unauthorized FCIS LEP Propagate Transaction record must be authorized in the system for it to be processed. To authorize a record:
- Invoke the FCIS LEP Propagate Transaction Summary screen from the Browser.
- Select the status of the record that you want to retrieve for authorization. Typically, choose the unauthorized option.
- Specify any or all of the details in the corresponding fields on the screen.
- Click ‘Search’ button. All records with the specified details that are pending authorization are retrieved and displayed in the lower portion of the screen.
- Double click the record that you wish to authorize. The FCIS LEP Propagate Transaction screen is displayed. Select Authorize operation from the Action List.
2.9.6 Amending an FCIS LEP Propagate Transaction Record
After an FCIS LEP Propagate Transaction record is authorized, it can be modified using the Unlock operation from the Action List. To make changes to a record after authorization:
- Invoke the FCIS LEP Propagate Transaction Summary screen from the Browser.
- Select the status of the record that you want to retrieve for authorization. You can only amend authorized records.
- Specify any or all of the details in the corresponding fields on the screen.
- Click ‘Search’ button. All records with the specified details that are pending authorization are retrieved and displayed in the lower portion of the screen.
- Double click the record that you wish to authorize. The FCIS LEP Propagate Transaction screen is displayed in amendment mode. Select Unlock operation from the Action List to amend the record.
- Amend the necessary information and click on Save to save the changes.
2.9.7 Authorizing an Amended FCIS LEP Propagate Transaction Record
An amended FCIS LEP Propagate Transaction record must be authorized for the amendment to be made effective in the system. The authorization of amended records can be done only from Fund Manager Module.
The subsequent process of authorization is the same as that for normal records.
2.10 Annuities and Premium Transactions
This section contains the following topics:
2.10.1 Creating Annuities and Premium Transactions
Similar to the way policy transactions are entered in the system, annuities and premium related transactions can be entered for propagation in the ‘FCIS LEP Propagate SI Details’. You can invoke this screen by typing ‘LEDPROSI’ in the field at the top right corner of the Application tool bar and click the adjoining arrow button.
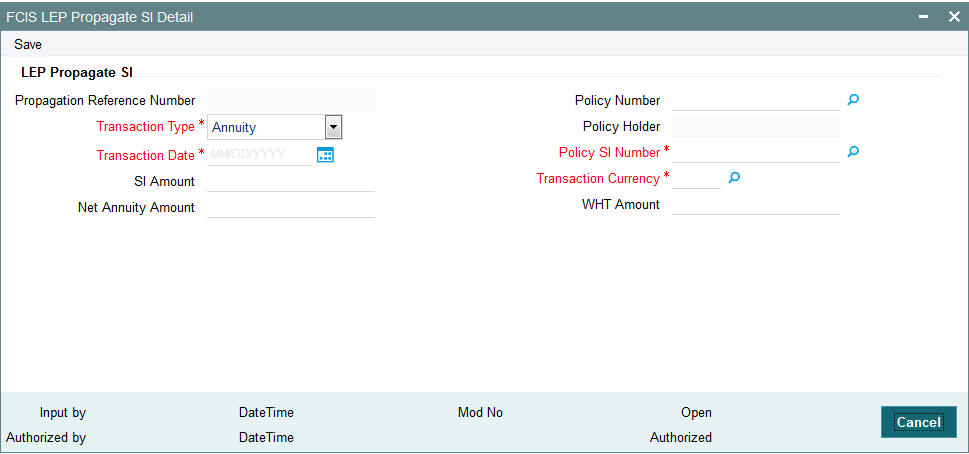
Enter the following details:
LEP Propagate SI
Propagation Reference Number
Display
The system displays the propagation reference number.
Transaction Type
Mandatory
Select, from the adjoining drop-down list, the transaction type. You have the following options:
- Annuity
- Recurring Premium
- Recurring Switch
Transaction Date
Date Format; Mandatory
Select the date of transaction from the adjoining option list.
SI Amount
Numeric; 30 Characters; Optional
This is the value for which the SI will be generated.. You can give either SI amount or Net Annuity amount and WHT amount. If SI amount alone is entered system will compute the WHT amount if applicable. If SI amount is given, Net annuity amount and WHT amount should not be specified.
Net Annuity Amount
Numeric; 15 Characters; Optional
You can enter either SI amount or Net Annuity amount and WHT amount. If Net annuity amount and WHT amount are entered, the system will generate an SI with Net annuity amount and a WHT redemption transaction for the WHT amount.
Policy Number
Alphanumeric; 16 Characters; Optional
Enter the policy number for which SI should be generated.
Policy Holder
Display
The system will display the Unitholder of the policy.
Policy SI Number
Alphanumeric; 16 Characters; Mandatory
You need to choose the policy SI maintenance for which an adhoc SI to be generated
Transaction Currency
Alphanumeric; 3 Characters; Mandatory
Enter the transaction currency for the SI transaction.
WHT Amount
Numeric; 15 Characters; Optional
You can enter either SI amount or Net Annuity amount and WHT amount. If Net annuity amount and WHT amount is entered, the system will generate an SI with Net annuity amount and a WHT redemption transaction for the WHT amount.
2.11 FCIS LEP Propagate SI Summary
This section contains the following topics:
- Section 2.11.1, "Retrieving Record in FCIS LEP Propagate SI Summary screen"
- Section 2.11.2, "Editing an FCIS LEP Propagate SI Record "
- Section 2.11.3, "Viewing an FCIS LEP Propagate SI Record"
- Section 2.11.4, "Deleting an FCIS LEP Propagate SI Record"
- Section 2.11.5, "Authorizing an FCIS LEP Propagate SI Record"
- Section 2.11.6, "Amending an FCIS LEP Propagate SI Record"
- Section 2.11.7, "Authorizing an Amended FCIS LEP Propagate SI Record"
2.11.1 Retrieving Record in FCIS LEP Propagate SI Summary screen
You can retrieve a previously entered record in the Summary Screen, as follows:
Invoke the ‘FCIS LEP Propagate SI Summary’ screen by typing ‘LESPROSI’ in the field at the top right corner of the Application tool bar and clicking on the adjoining arrow button.

Specify any or all of the following details in the corresponding fields:
- The status of the record in the Authorized field. If you choose the ‘Blank Space’ option, then all the records are retrieved.
- The status of the record in the Open field. If you choose the ‘Blank Space’ option, then all records are retrieved
- Propagation Reference Number
- Transaction Type
- Transaction Date
- Policy SI Number
Click ‘Search’ button to view the records. All the records with the specified details are retrieved and displayed in the lower portion of the screen.
You can also retrieve the individual record detail from the detail screen by querying in the following manner:
- Press F7
- Input the Propagation Reference Number
- Press F8
You can perform Edit, Delete, Amend, Authorize operations by selecting the operation from the Action list.
2.11.2 Editing an FCIS LEP Propagate SI Record
You can modify the details of an FCIS LEP Propagate SI record that you have already entered into the system, provided it has not been subsequently authorized. You can perform this operation as follows:
- Invoke the FCIS LEP Propagate SI Summary screen from the Browser.
- Select the status of the record that you want to retrieve for modification in the Authorized field. You can only modify records that are unauthorized. Accordingly, choose the unauthorized option.
- Specify any or all of the details in the corresponding fields to retrieve the record that is to be modified.
- Click ‘Search’ button. All unauthorized records with the specified details are retrieved and displayed in the lower portion of the screen.
- Double click the record that you want to modify in the list of displayed records. The FCIS LEP Propagate SI screen is displayed.
- Select Unlock Operation from the Action list to modify the record. Modify the necessary information.
- Click Save to save your changes. The FCIS LEP Propagate SI screen is closed and the changes made are reflected in the FCIS LEP Propagate SI Summary screen.
2.11.3 Viewing an FCIS LEP Propagate SI Record
To view a record that you have previously input, you must retrieve the same in the FCIS LEP Propagate SI Summary screen as follows:
- Invoke the FCIS LEP Propagate SI Summary screen from the Browser.
- Select the status of the record that you want to retrieve for viewing in the Authorization Status field. You can also view all records that are either unauthorized or authorized only, by choosing the Unauthorized/ Authorized option.
- Specify any or all of the details of the record in the corresponding fields on the screen.
- Click ‘Search’ button. All records with the specified fields are retrieved and displayed in the lower portion of the screen.
- Double click the record that you want to view in the list of displayed records. The FCIS LEP Propagate SI screen is displayed in View mode.
2.11.4 Deleting an FCIS LEP Propagate SI Record
You can delete only unauthorized records in the system. To delete a record that you have previously entered:
- Invoke the FCIS LEP Propagate SI Summary screen from the Browser.
- Select the status of the record that you want to retrieve for deletion.
- Specify any or all of the details in the corresponding fields on the screen.
- Click ‘Search’ button. All records with the specified fields are retrieved and displayed in the lower portion of the screen.
- Double click the record that you want to delete in the list of displayed records. The FCIS LEP Propagate SI screen is displayed.
- Select Delete Operation from the Action list. The system prompts you to confirm the deletion and the record is physically deleted from the system database.
2.11.5 Authorizing an FCIS LEP Propagate SI Record
An unauthorized FCIS LEP Propagate SI record must be authorized in the system for it to be processed. To authorize a record:
- Invoke the FCIS LEP Propagate SI Summary screen from the Browser.
- Select the status of the record that you want to retrieve for authorization. Typically, choose the unauthorized option.
- Specify any or all of the details in the corresponding fields on the screen.
- Click ‘Search’ button. All records with the specified details that are pending authorization are retrieved and displayed in the lower portion of the screen.
- Double click the record that you wish to authorize. The FCIS LEP Propagate SI screen is displayed. Select Authorize operation from the Action List.
2.11.6 Amending an FCIS LEP Propagate SI Record
After an FCIS LEP Propagate SI record is authorized, it can be modified using the Unlock operation from the Action List. To make changes to a record after authorization:
- Invoke the FCIS LEP Propagate SI Summary screen from the Browser.
- Select the status of the record that you want to retrieve for authorization. You can only amend authorized records.
- Specify any or all of the details in the corresponding fields on the screen.
- Click ‘Search’ button. All records with the specified details that are pending authorization are retrieved and displayed in the lower portion of the screen.
- Double click the record that you wish to authorize. The FCIS LEP Propagate SI screen is displayed in amendment mode. Select Unlock operation from the Action List to amend the record.
- Amend the necessary information and click on Save to save the changes.
2.11.7 Authorizing an Amended FCIS LEP Propagate SI Record
An amended FCIS LEP Propagate SI record must be authorized for the amendment to be made effective in the system. The authorization of amended records can be done only from Fund Manager Module.
The subsequent process of authorization is the same as that for normal records.
2.12 Processing Transactions
You can propagate different combinations of transactions and operations in the back data propagation and transaction screens. The workflow for each combination of transaction and operation is detailed in the table below:
Transaction |
Operation |
Scenario |
Workflow |
Policy Initial Investment |
Modify Only initial investment amount modification would be supported. |
Policy captured with wrong initial investment amount. |
In LEP back propagation screen, select the Investor, policy number and input the initial investment amount. Operation would be Modify and transaction type would be “Policy Initial Investment” Click ‘Save’. |
Topup
|
Add |
Top-up transaction was missed. |
In Propagate LEP Transaction screen (Function ID: LEDPRTXN), capture a top-up transaction for the appropriate policy and investor. In LEP back propagation screen, select the Investor, policy number and select operation as ‘New’ and new transaction number should be the newly captured top-up transaction. Transaction type should be ‘Top-up’ here. Click ‘Save’. |
Delete |
Top-up transaction captured in a wrong fund/investor. |
In LEP back propagation screen, select the Investor, policy number and select operation as ‘Delete’ and old transaction number should be the top-up transaction in business schema. Transaction type should be ‘Top-up’ here. Click ‘Save’. |
|
Modify |
Top-up transaction captured in a wrong amount. |
In LEP back propagation screen, select the Investor, policy number and select operation as ‘Modify’ and old transaction number should be the top-up transaction in business schema. Transaction Amount/Transaction Units would be used to input the modified value. Transaction type should be ‘Top-up’ here. Click ‘Save’. |
|
Switch
|
Add |
Missed policy switch transaction |
In Propagate LEP Transaction screen (Function ID: LEDPRTXN), capture a switch transaction for the appropriate policy and investor. In LEP back propagation screen, select the Investor, policy number and select operation as ‘New’ and new transaction number should be the newly captured Switch transaction. Transaction type should be ‘Switch’ here. Click ‘Save’. |
|
Delete |
Switch captured in wrong fund. |
In LEP back propagation screen, select the Investor, policy number and select operation as ‘Delete’ and old transaction number should be the switch transaction which needs to be deleted. Transaction type should be ‘Switch’ here. Click ‘Save’. |
|
Modify |
Say switch transaction was captured with wrong asset allocation details. |
Add row in transaction details grid, select the old transaction number as wrongly specified switch transaction number and operation should be selected as “Delete”. In Propagate LEP Transaction screen (Function ID: LEDPRTXN), capture a switch transaction for the appropriate policy, investor and proper asset allocation. In LEP back propagation screen, select the Investor, policy number and select operation as ‘New’ and new transaction number should be the newly generated Switch transaction. Transaction type should be ‘Switch’ here. Click ‘Save’. |
Surrender
|
Add |
Missed Surrender transaction |
In Propagate LEP Transaction screen (Function ID: LEDPRTXN), capture the surrender transaction for the appropriate policy and investor. In LEP back propagation screen, select the Investor, policy number and select operation as ‘New’ and new transaction number should be the newly captured surrender transaction. Transaction type should be ‘Surrender’ here. Click ‘Save’. |
|
Delete |
Wrongly captured surrender |
In LEP back propagation screen, select the Investor, policy number and select operation as ‘Delete’ and old transaction number should be the surrender transaction in business schema. Transaction type should be ‘Surrender’ here. Click ‘Save’. |
|
Modify |
Surrender transaction captured with wrong amount |
In LEP back propagation screen, select the Investor, policy number and select operation as ‘Modify’ and old transaction number should be the surrender transaction in business schema. Transaction Amount/Transaction Units/Percentage would be used to input the modified value. Transaction type should be ‘Surrender’ here. Click ‘Save’. |
Annuity
|
Add |
Missed Annuity |
In LEP Propagation SI transaction screen (Function ID: LEDPROSI) capture the missed annuity, In LEP back propagation screen, select the Investor, policy number and select operation as ‘New’ and new transaction number should be the newly captured annuity transaction. Transaction type should be ‘Annuity’ here. Click ‘Save’. |
|
Delete |
Wrongly generated Annuity |
In LEP back propagation screen, select the Investor, policy number and select operation as ‘Delete’ and old transaction number should be the Annuity transaction in business schema. Transaction type should be ‘Annuity’ here. Click ‘Save’. |
|
Modify |
Not-revised Annuity |
In LEP Propagation SI transaction screen (Function ID: LEDPROSI) capture the not-revised annuity with proper annuity amount, In LEP back propagation screen, select the Investor, policy number and select operation as ‘New’ and new transaction number should be the newly captured annuity transaction. Transaction type should be ‘Annuity’ here. Add another row in transaction grid, select the Investor, policy number and select operation as ‘Delete’ and old transaction number should be the Annuity transaction in business schema. Transaction type should be ‘Annuity’ here. Click ‘Save’. |
Premium
|
Add |
Missed Premium |
In LEP Propagation SI transaction screen (Function ID: LEDPROSI) capture the missed annuity, In LEP back propagation screen, select the Investor, policy number and select operation as ‘New’ and new transaction number should be the newly captured premium transaction. Transaction type should be ‘Premium’ here. Click ‘Save’. |
|
Delete |
Wrongly generated Premium |
In LEP back propagation screen, select the Investor, policy number and select operation as ‘Delete’ and old transaction number should be the premium transaction in business schema. Transaction type should be ‘Premium’ here. Click ‘Save’. |
|
Modify |
Wrongly generated with wrong value |
In LEP Propagation SI transaction screen (Function ID: LEDPROSI) capture the SI transaction with proper premium amount. In LEP back propagation screen, select the Investor, policy number and select operation as ‘New’ and new transaction number should be the newly captured premium transaction. Transaction type should be ‘Premium’ here. Add another row in transaction grid, select the Investor, policy number and select operation as ‘Delete’ and old transaction number should be the premium transaction in business schema. Transaction type should be ‘Premium’ here. Click ‘Save’. |
Recurring Switch
|
Add |
Missed SI Switch |
In LEP Propagation SI transaction screen (Function ID: LEDPROSI) capture the missed recurring switch. In LEP back propagation screen, select the Investor, policy number and select operation as ‘New’ and new transaction number should be the newly captured switch transaction. Transaction type should be ‘Recurring Switch’ here. Click ‘Save’. |
|
Delete |
Wrongly generated Switch |
In LEP back propagation screen, select the Investor, policy number and select operation as ‘Delete’ and old transaction number should be the recurring switch transaction in business schema. Transaction type should be ‘Recurring Switch’ here. Click ‘Save’. |
|
Modify |
Wrongly generated with wrong value |
In LEP Propagation SI transaction screen (Function ID: LEDPROSI) capture recurring switch transaction In LEP back propagation screen, select the Investor, policy number and select operation as ‘New’ and new transaction number should be the newly captured recurring switch transaction. Transaction type should be ‘Recurring Switch here. Add another row in transaction grid, select the Investor, policy number and select operation as ‘Delete’ and old transaction number should be the recurring switch transaction in business schema. Transaction type should be ‘Recurring Switch’ here. Click ‘Save’. |
2.13 First Verification
This section contains the following topics:
2.13.1 Invoking First Verification Screen
You can enable dual authorization for a screen that requires dual authorization using ‘First Verification’ screen.
The first level authorization can be done from this screen and the second level authorization can be done from the respective function ID screen which is set for dual authorization.
You can invoke the ‘First Verification’ screen by typing ‘CSDVERFY’ in the field at the top right corner of the Application tool bar and clicking on the adjoining arrow button.
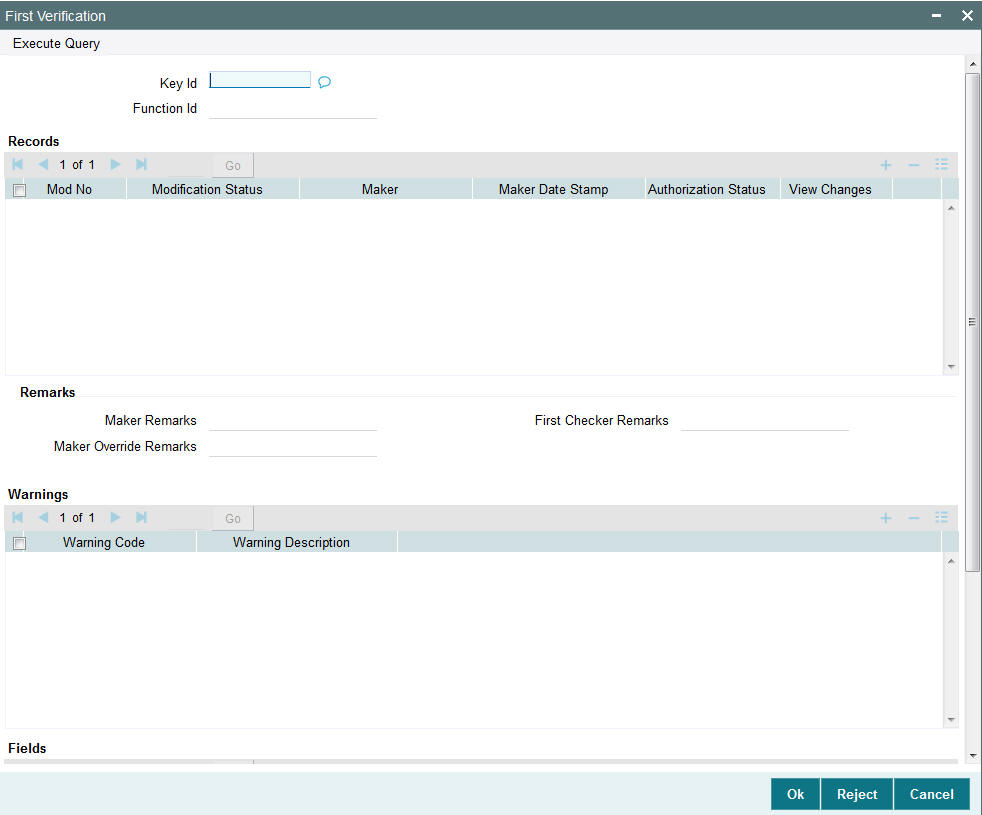
You can specify the following details:
Key ID
Alphanumeric; 2000 Characters; Optional
The system generates the key ID.
If you specify some random key, the system displays an error message.
The system displays the following details on clicking ‘Execute Query’:
- Function ID
Records
- Mod No
- Modification Status
- Maker
- Maker Date Stamp
- Authorization Status
- View Changes
Remarks
- Maker Remarks
- Maker Override Remarks
- First Checker Remarks
Warnings
- Warning Code
- Warning Description
Fields
- Field Name
- Old Value
- New Value
2.14 Back Data Transactions Authorization
This section contains the following topics:
2.14.1 Authorizing Back Data Transactions
The system requires dual authorization for the transactions that have been propagated. The first-time authorization is done from the ‘First Verification’ screen and subsequently from the summary screens for LEP and UT. You can invoke the ‘First Verification’ screen by typing ‘CSSVERFY’ in the field at the top right corner of the Application tool bar and clicking on the adjoining arrow button.
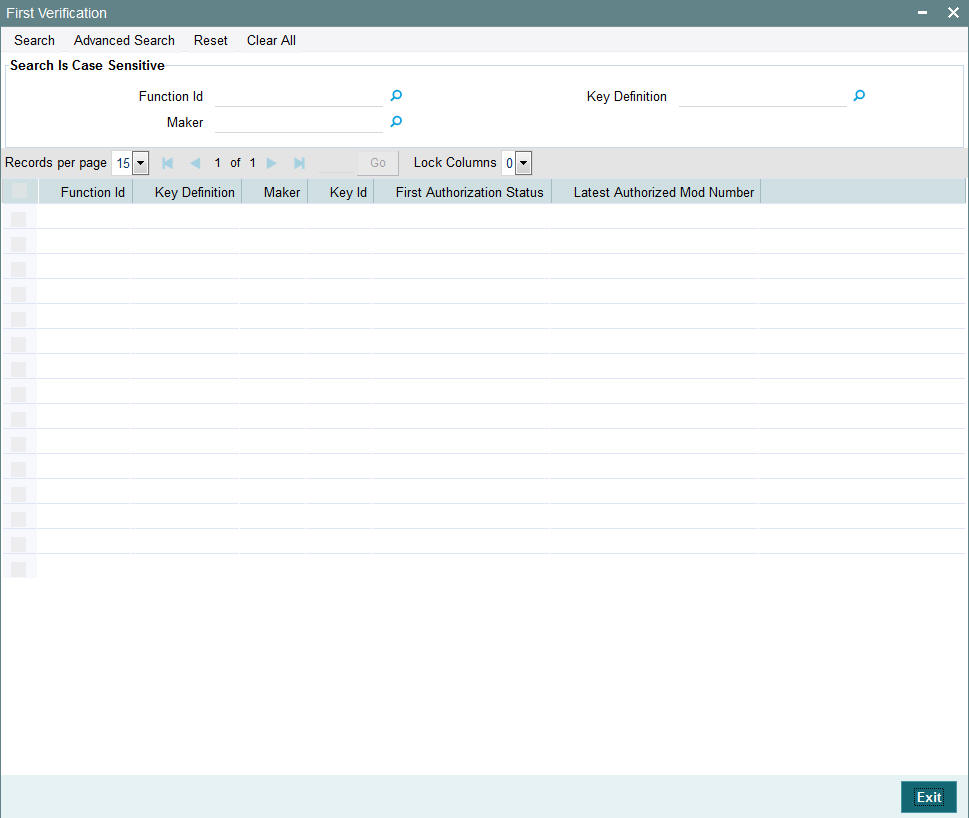
In this screen, you can retrieve records by specifying any of the following parameters and clicking ‘Search’:
Function Id
Alphanumeric; 30 Characters; Optional
Specify the function ID. Alternatively, you can select function ID from the option list. The list displays all valid function ID maintained in the system.
Maker
Alphanumeric; 12 Characters; Optional
Specify the maker ID. Alternatively, you can select maker ID from the option list. The list displays all valid maker ID maintained in the system.
Key Definition
Alphanumeric; 2000 Characters; Optional
Specify the key definition.
The system will retrieve the records matching the parameters specified. If you do not enter any parameter before clicking ‘Search’, the system will display all the unauthorized UT and LEP records. Double-click the required record and click ‘Accept’. The system will perform the first level of authorization and redirect the record to the respective summary screen, from where you can perform the second level of authorization.
2.15 Running Debugs for Propagation
When you run the data propagation process for LEP and UT, you can keep track of the processing using the debug facility. To enable this facility, you need to maintain a parameter 'PROPAGATIONLOG' in the ‘Parameter Setup Detail’ screen which you can invoke by typing UTDPARAM’ in the field at the top right corner of the Application tool bar and clicking on the adjoining arrow button. You are required to maintain the value of this parameter as ‘1’ to have a debug written. To disable the debug, maintain the value as ‘0’.
2.16 Propagation Jobs
This section contains the following topics:
2.16.1 Viewing Propagation Jobs
As part of propagation, you will need to run EOD continuously to update the data from the date of transaction input till the current date. This is done through jobs. You can view the jobs that are being run and terminate the ones that you do not require in the ‘Jobs Monitor Summary’ screen. To invoke this screen, type ‘CSSJMNTR’ in the field at the top right corner of the Application tool bar and click the adjoining arrow button.
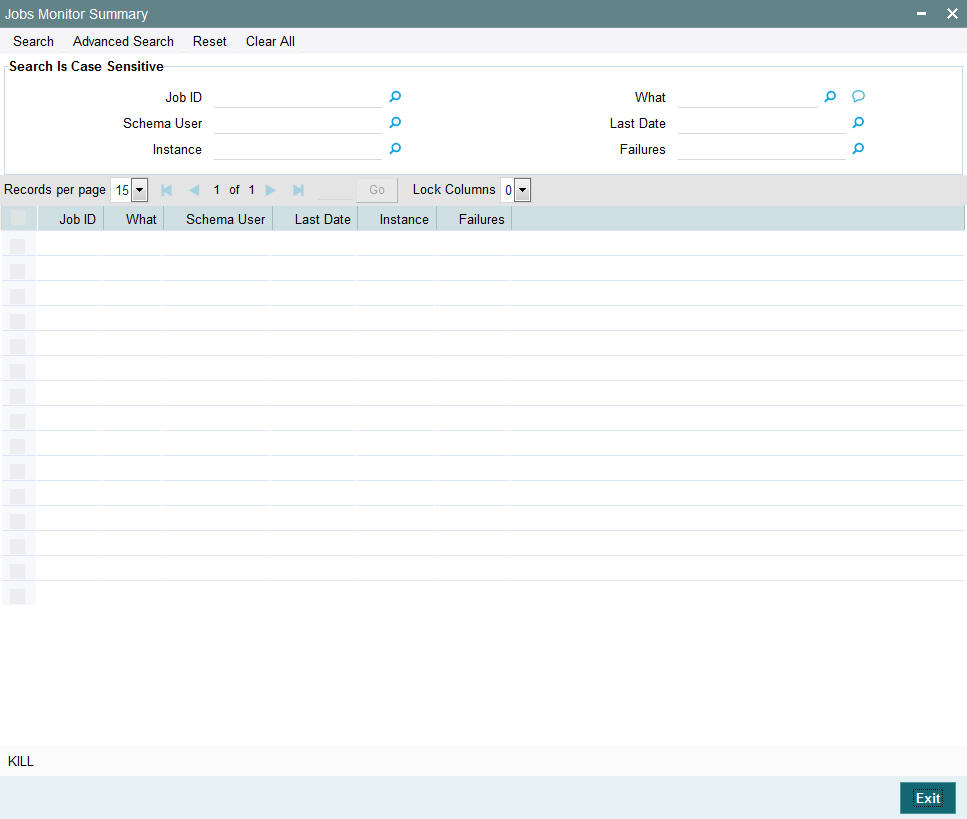
In this screen, you can retrieve records by specifying criteria for the search and clicking the ‘Search’ button. You can query on the following parameters:
- Job ID
- Schema User
- Instance
- What
- Last Date
- Failures
The system will fetch the records that match the criteria. If you do not enter any criterion before clicking ‘Search’, the system will fetch all the job records.
To update the records, click ‘Refresh’. The system will display a job for as long as it is running. If the job has been completed, it will no longer be visible in this screen.
To terminate a job, select the job record and click ‘KILL’. The system will terminate the job.
2.17 Impact of Propagation
There can be an impact on the following processes due to data propagation:
Load Computation
There can be a difference in the load computed after propagation and the original load computation if:
- the load is unit based and there has been an increase (or decrease) in the number of units due to propagation
- the outflow is linked to an inflow and the exit load is based on a period
Dividend Reinvestments
These will differ if transactions have been wrongly entered initially. During propagation, the system will pick up the balance based on the correct information entered and generate the dividend re-investment transactions. This calculation will however be based on the original IDS for the unit holder, that is, the IDS maintained at the time of initial processing.
Ageing (FIFO) Units
If there has been a change in the allocation status of a transaction, the system will consider only the original allocation status of a transaction during data propagation. For instance, if the original allocation status of a transaction is ‘Provisional’ and subsequently the status changes to ‘Confirmed’, while reiterating the transactions, the system will consider the status as ‘Provisional’ and carry out the calculations accordingly.
Linked Transactions Processing
For linked transactions, where an inflow transaction that is linked to an outflow transaction is being modified, the system will check if the outflow transaction is affected due to data propagation. If it is, the outflow transaction will not be generated.
2.18 Back Data Propagation Details
This section contains the following topics:
- Section 2.18.1, "Viewing Back Data Propagation Details"
- Section 2.18.2, "Viewing Investor Fund Balances"
- Section 2.18.3, "Viewing Standing Instruction Details"
- Section 2.18.4, "Viewing Income Distribution Setup Details"
- Section 2.18.5, "Viewing Transaction Summary"
- Section 2.18.6, "Viewing Dividend Distribution Details"
- Section 2.18.7, "Viewing Capital Gains Transactions Tax Details"
- Section 2.18.8, "Viewing Broker Commission Details"
2.18.1 Viewing Back Data Propagation Details
You can view the details that have been propagated using the ‘Back Data Propagation Enquiry’ screen. You can invoke the screen by typing ‘UTDPRQRY' in the field at the top right corner of the Application tool bar and click the adjoining arrow button.
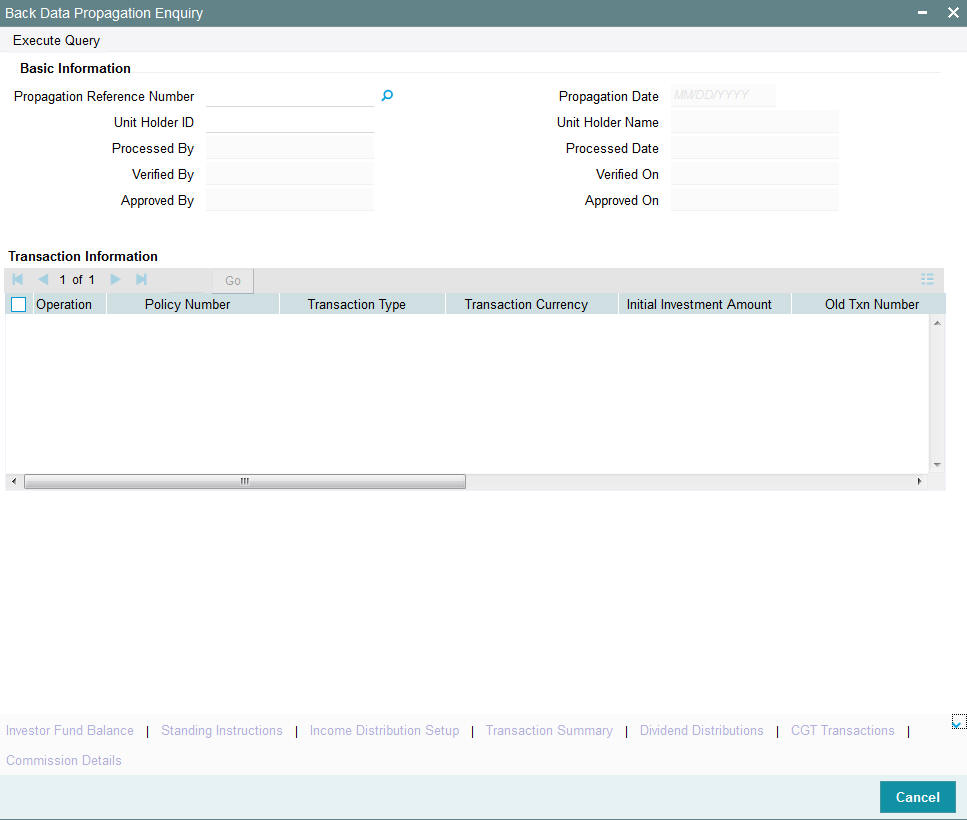
In this screen, press F7, enter the ‘Propagation Reference Number’ and press F8. The system will display the following details for the propagated query:
- Operation
- Policy Number
- Transaction Type
- Transaction Currency
- Initial Investment Amount
- Old Txn Number
- New Txn Number
- Amount Applied
- Units
- Percent
2.18.2 Viewing Investor Fund Balances
Click the ‘Investor Fund Balance’ button in the ‘Back Data Propagation Screen’ to view the fund balances propagated.
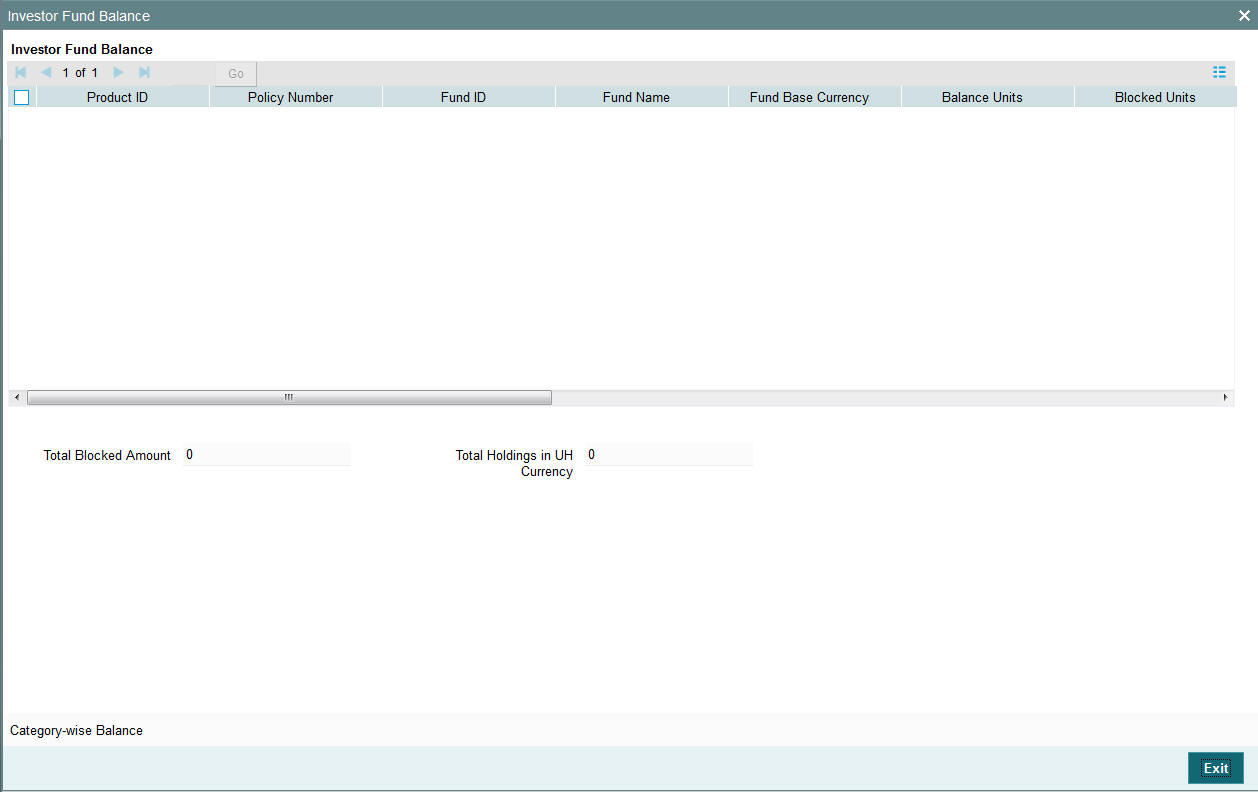
The following details are displayed:
- Product ID
- Policy Number
- Fund ID
- Fund Name
- Fund Base Currency
- Balance Units
- Blocked Units
- Total Blocked Amount
- FBC redeemable
- FBC Holding
- UHBC Redeemable
- Average Cost
- Provisional Units
- UHBC Holding
- Total Blocked Amount
- Total Holdings in UH currency
2.18.3 Viewing Standing Instruction Details
Click the ‘Standing Instructions’ button in the ‘Back Data Propagation Screen’ to view the standing instructions details propagated.
The following details are displayed:
- SI Number
- Unit Holder ID
- Fund ID
- Transaction Type
- Status
- Start Date
- End Date
- Escalation Start Date
- Escalation End Date
- Last Processed Date
- SI Description
2.18.4 Viewing Income Distribution Setup Details
Click the ‘Income Distribution Setup’ button in the ‘Back Data Propagation Screen’ to view details of the income distribution propagated.
The following details are displayed:
- Unit Holder
- Entity Type
- Product ID
- Policy Number
- Fund ID
- Payment Percentage
- Reinvestment Percentage
2.18.5 Viewing Transaction Summary
Click the ‘Transaction Summary’ button in the ‘Back Data Propagation Screen’ to view a summary of the transactions propagated.
The following details are displayed:
- Product ID
- Policy Number
- Fund ID
- Transaction Number
- Transaction Date
- Transaction Type
- Units
- Price
- Book Value
- Running Total
- Status
- Gross Amt in FBC
- Net Amt in FBC
- Broker Commission
- Other Fees
- Transaction Category
- KIID Received?
2.18.6 Viewing Dividend Distribution Details
Click the ‘Dividend Distributions’ button in the ‘Back Data Propagation Screen’ to view the details of dividend propagated.
The following details are displayed:
- Dividend Details
- Fund ID
- Declaration Date
- Payment Date
- Units Held
- Earnings/Lot
- Total
- Tax
- Net Amount
- Payment Details
- Fund ID
- Payment Mode
- Account Number
- Bank
- Branch
- Amount
- Reinvestment Details
- Fund ID
- Reinvestment Fund ID
- Amount
- Unit Price
- Units Allotted
2.18.7 Viewing Capital Gains Transactions Tax Details
Click the ‘CGT Transactions’ button in the ‘Back Data Propagation Screen’ to view the details of capital gains tax.
![]()
The following details are displayed:
- Product ID
- Policy Number
- Fund ID
- Entry Date
- Transaction Number
- Units
- Transaction Date
- Reference Number
- Settled
2.18.8 Viewing Broker Commission Details
Click the ‘Broker Commissions’ button in the ‘Back Data Propagation Screen’ to view the details of commission details for brokers.
The following details are displayed:
- Transaction Number
- Transaction Date
- Broker Code
- Transaction Amount
- Load ID
- Return Value
- Commission without VAT
- VAT
- Commission with VAT