4. Setting up Investor Preferences
After you have created an authorized unit holder account for an investor, you can set up any or all of the following investment preferences for the same, as and when requested.
- Setting up of income distribution options for a combination of funds, policy and products the investor has invested in.
- Specifying the applicability of the Letter of Intent facility, at the investor’s behest.
- Setting up a negotiated deal for the investor.
- Specifying non-tax- limits for exemption eligible investors.
You set up these preferences at the investor’s behest, and these will govern the maintenance of the investor’s account and processing aspects of any transactions requested by the investor.
This chapter contains the following sections:
- Section 4.1, "Income Distribution Setup Screen"
- Section 4.2, "Income Distribution Setup Summary Screen"
- Section 4.3, "Unitholder Deal Maintenance Detail Screen"
- Section 4.4, "Unitholder Deal Summary Screen"
- Section 4.5, "LOI Adjust Proc Screen"
- Section 4.6, "Setting up Letter of Intent Options for Investor"
- Section 4.7, "Unit Holder LOI Setup Summary Screen"
- Section 4.8, "LOI Adjust Proc Screen"
- Section 4.9, "UH Non Tax Limits Detail Screen"
- Section 4.10, "UH Non Tax Limits Summary Screen"
- Section 4.11, "Unit Holder IRRF Preference Detail Screen"
- Section 4.12, "Unit Holder IRRF Preference Summary Screen"
- Section 4.13, "Unit Holder NPI Preference Detail Screen"
- Section 4.14, "Unit Holder NPI Preference Summary Screen"
- Section 4.15, "Fund UH Category Minimum Holding Period Details Screen"
- Section 4.16, "Fund UH Category Minimum Holding Period Summary Screen"
- Section 4.17, "UH Status Change Detail Screen"
- Section 4.18, "Unit Holder Status Change Summary Screen"
- Section 4.19, "Auth Rep Maintenance Detail Screen"
- Section 4.20, "Auth Rep Maintenance Summary"
- Section 4.21, "NotePad of Entities Detail Screen"
- Section 4.22, "NotePad of Entities Summary Screen"
- Section 4.23, "Agency Branch Account Officer Maintenance Detail"
- Section 4.24, "Agency Branch Account Officer Maintenance Summary"
- Section 4.25, "Account Officer IFA Maintenance Detail"
- Section 4.26, "Account Officer IFA Maintenance Summary"
- Section 4.27, "Agent Price Basis Detail"
- Section 4.28, "Agent Price Basis Summary"
- Section 4.29, "AMC Agent SLA Maintenance Summary"
- Section 4.30, "Tax Credit"
4.1 Income Distribution Setup Screen
This section contains the following topics:
- Section 4.1.1, "Maintaining Investor Distribution Setup Details"
- Section 4.1.2, "Invoking Income Distribution Setup Screen"
- Section 4.1.3, "Payment Details Tab"
- Section 4.1.4, "Reinvestment Details Tab"
- Section 4.1.5, "Routing Details Tab"
4.1.1 Maintaining Investor Distribution Setup Details
When investors put their capital into any funds of the AMC, they derive earnings out of any dividend declared by the fund at any juncture.
Also, an intermediary (such as a broker) designated for a fund derives commission earnings from the transactions in the fund.
Investors may wish to choose the manner in which they could use the dividend income. Similarly, brokers could wish to choose the manner in which they could use their commission earnings.
They could wish to:
- Receive the entire earnings, dividend or commission, as payment, either entirely through checks or account transfer, or a combination of both.
- Not receive the earnings by way of payment, but invest the earnings back into the funds of the AMC. This is known as reinvestment. The earnings could be reinvested either back into the same fund, or different funds. Also, the reinvestment could be made into any other investor’s account too.
- Receive a portion of the earnings by way of payment, and reinvest the remaining portion.
The option chosen by the investor to use dividend or commission earnings, as the case may be, is known as the Income Distribution Setup option or the IDS option for the investor or broker.
Income distribution options can be set up for both; UT transactions and Policy transactions. You can capture this option for any investor or broker for a combination of fund, policy and product in the Oracle FLEXCUBE Investor Servicing system.
4.1.2 Invoking Income Distribution Setup Screen
You can setup the income distribution setup option for an investor using ‘Income Distribution Setup Detail’ screen. You can invoke the ‘Income Distribution Setup Detail’ screen by typing ‘UTDUHIDS’ in the field at the top right corner of the Application tool bar and clicking on the adjoining arrow button. Select 'New' from the Actions menu in the Application tool bar or click new icon to enter the details of the Income Distribution Setup screen.
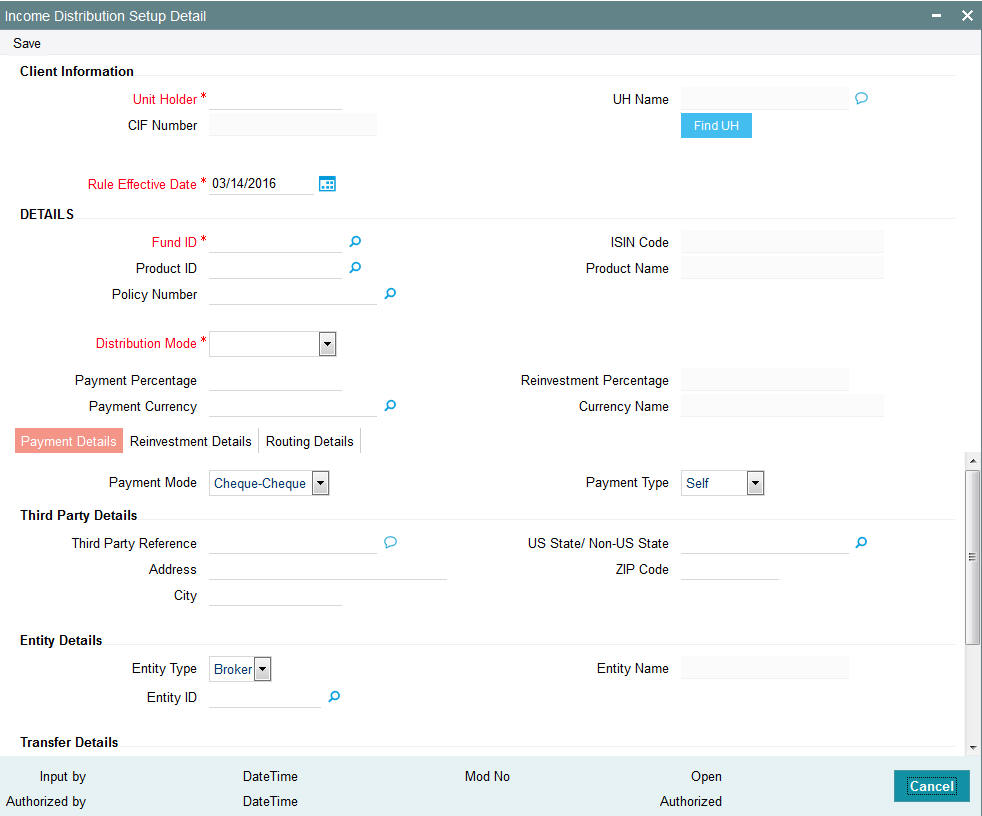
In this screen, you set up the IDS option by:
- Specifying the investor for whom the option is being set up, by indicating the CIF account associated with the unit holder, or the unit holder ID.
Note
Income distribution options are only set up at a unit holder account level, and not at a CIF account level.
- Specifying the fund for which the option is applicable, in the Fund ID field. You can also specify the ISIN Code for the fund. For LEP transactions, you can specify a combination of fund, policy and product, for which the option is applicable. The option you will set up will be applied only for dividend earnings on the fund/combination of fund, product and policy you select here.
- Specifying the mode of distribution, in the Distribution Mode field.
- Specifying the percentages that represent the portions of dividend earnings to be paid and reinvested, as desired by the investor, in the Payment Percentage and Reinvestment Percentage fields.
- Specifying the payment details for the paid portion, in the Payment Details section, and the reinvestment details, for the reinvestment portion, in the Reinvestment Details section.
- Saving your changes.
Client Information
In this section, select the ID of the unit holder for whom you are creating an income distribution setup record.
Unit Holder
Alphanumeric; 12 Characters; Mandatory
From the list, select the CIF unit holder for whom you are creating an income distribution setup record.
CIF Number
Display
The system displays the number of the CIF Account under which the unit CIF Number is displayed when you select/ locate a Unit Holder by clicking ‘Find UH’ button.
UH Name
Display
The system displays name of the unit holder.
Click ‘Find UH’ button to query for unit holder details.
Rule Effective Date
Date Format; Mandatory
Select rule effective date from the adjoining calendar.
Details
In this section, you can indicate the fund, policy and product, the income earnings from which will be distributed according to the IDS options you are creating for the selected unit holder.
Various combinations at which the Unitholder IDS options can be set up, in order of preference are:
- Product + Policy + Fund level
- Product + Fund level
In case of LEP transactions, if the UH IDS is not available, the dividend earnings will be reinvested into the default reinvestment fund maintained for the product in the Product Maintenance Details screen. However, if the reinvestment fund is not defined, then the dividend is reinvested into the source fund itself.
You can also indicate the manner in which the income must be distributed.
Fund ID
Alphanumeric; 6 Characters; Mandatory
Select the ID of the fund from which the selected investor derives income, which will be distributed according to the IDS options you are creating in this screen.
If the selected investor receives income from many funds, then you must create the IDS options for the income from each fund in this screen as applicable, if so requested by the investor.
When you specify the ID of the fund, the ISIN Code of the fund is displayed in the ISIN Code field.
ISIN Code
Display
ISIN Code will be displayed for the selected Fund ID.
Product ID
Alphanumeric; 10 Characters; Optional
Select the ID of product from which the investor derives income, which will be distributed according to the IDS options you are creating in this screen.
This field is not applicable if you are setting up IDS options for UT transactions.
Product Name
Display
The system displays the name of the product for the selected product ID.
Policy Number
Alphanumeric; 16 Characters; Optional
Select the policy from which the investor derives income, which will be distributed according to the IDS options you are creating in this screen.
This field is not applicable if you are setting up IDS options for UT transactions.
Distribution Mode
Mandatory
From the list, indicate the manner in which the selected investor prefers to avail of income earned in the selected fund. This could be any of the following:
- Full Payment: Choose this option to indicate that the investor prefers to receive the entire income derived from an income distribution cycle in the selected fund as a payment.
Further, the investor can choose to avail of payment either in the form of a check, or an account transfer.
- Full Reinvestment: Choose this option to indicate that the investor prefers to reinvest the entire income derived from an income distribution cycle in the selected fund into another fund.
In such a case, the fund into which the earned income is reinvested must belong to the same fund family as the fund from which the income was earned.
Further, the investor can choose to have the income reinvested either in the investor’s own unit holder account or the account of another investor. In the latter case, the investor in whose account the reinvestment is proposed (i.e., the Reinvestment Unit Holder) must belong to the same AMC as the source investor.
- Both: Choose this option to indicate that the investor prefers to have the income derived from an entire income distribution cycle in the selected fund divided into two portions, receive one portion as payment, and reinvest the remaining portion.
Note
- In some funds in which reinvestment is not allowed, according to the Corporate Action profile for the fund, the investor cannot choose to have income earnings reinvested. In such cases, this field is validated with the “Full Payment” option displayed as a non-editable default option. Also, the Payment Percentage field is locked with a default, non-editable value of one hundred percent displayed, and the Reinvestment Percentage field is locked with a default, non-editable value of zero percent displayed.
- If you have chosen the distribution mode in this field as ‘Full Reinvestment” or “Both”, and the reinvestment fund has a restriction on the nationality of the investor as maintained in the Fund Residency Restriction list, then reinvestment is not allowed at all.
For some funds, the option of allowing the investor to decide the income distribution mode is restricted. The default distribution mode specified in the fund rules is considered for such funds, and an investor cannot decide the same at account level by making a specification in this field.
Payment Percentage
Numeric; 5 Characters; Optional (Mandatory if distribution mode is either Both or Full Payment)
Specify the percentage of income earned that the investor prefers to receive by way of payment.
- If the distribution mode chosen is Both, specify a percentage that is below one hundred percent.
- If the distribution mode chosen is Full Payment, this field contains one hundred percent as a default value. If so, you cannot specify any other value.
- If the distribution mode chosen is Full Reinvestment, and the reinvestment is disallowed for the selected fund, this field contains one hundred percent as a default value. If so, you cannot change it.
Reinvestment Percentage
Display
The system displays the percentage of income earned that the investor prefers to reinvest into another fund.
- If the distribution mode chosen is Both, the system displays a percentage that is below one hundred percent.
- If the distribution mode chosen is Full Reinvestment, this field contains one hundred percent as a default value. If so, you cannot specify any other value.
- If the distribution mode chosen is Full Reinvestment, and the reinvestment is disallowed for the selected fund, this field contains zero as a default value. If so, you cannot change it.
Payment Currency
Alphanumeric; 3 Characters; Optional
Select the currency in which the unit holder wishes the payment to be made. All currencies maintained in the system are available for selection.
In case Payment mode is transfer then the system looks for a bank account in the opted payment currency for the unit holder. If such an account does not exist, you can choose (in Transfer Details section) any multi-currency account maintained for the unit holder subject to the following conditions:
- The Distribution mode is ‘Full Payment/ Both’
- Mode of Payment is ‘Transfer’
- Payment Type is ‘Self’
Also the fund should have a bank account in this currency. In the event of failure of any one of the two criteria an error will be displayed.
Note
The default value here would be the unit holder base currency.
Currency Name
Display
The system displays the name of the currency for the selected payment currency.
4.1.3 Payment Details Tab
In this section, you can define the option in which the investor can receive income earnings in the form of payment. The investor can receive the payment income either in the form of checks or through account transfers.
If you have chosen either Both or Full Payment as the distribution mode, you must specify all information in this section.
Click ‘Payment Details’ tab to enter the details.
Payment Mode
Optional
From the drop-down list, select the mode in which the investor prefers to receive the paid portion of the income earned – either in the form of a check or an account transfer. The list displays the following values:
- Cheque-Cheque
- Transfer-Transfer
Payment Type
Optional
From the drop-down list, indicate whether the check payment instrument must be addressed to the investor (self) or a third party. The list displays the following values:
- Self
- Third Party
- Entity
You can also indicate that the payment check must be addressed to a broker, by selecting the Entity option. If you choose this option, you must indicate the broker to which the payment must be made.
From the list, indicate whether the account transfer payment must be made to one of the investor’s preferred bank accounts (self) or to the bank account of a third party. You can also indicate that the transfer payment must be made to the bank account of a designated broker, by selecting the Entity option in this field
If you select the Self option in this field, all the preferred bank accounts specified for the investor in the unit holder account are listed in the Select Bank Account field. The default designated account is displayed in the bank account fields, and will be reckoned as the account to which the transfer payment must be made. You can choose any of these preferred bank accounts, as requested by the investor.
If you select the Third Party option in this field, then you must specify the bank account details of the third party account to which the transfer must be made, in the bank account fields in this section.
If you select the Entity option, specify the broker into whose bank account the transfer payment must be made, in the Broker field.
Third Party Details
Note
The payment of income to a third party (i.e. a bank account that is not the investor account or a check that is not in favor of the investor) can be made only if such an installation level option is available.
Third Party Reference
Alphanumeric; 255 Characters; Mandatory for ‘Third Party’ payment
Specify the name or reference of the third party for which the check instrument must be made out.
Address
Alphanumeric; 255 Characters; Mandatory for ‘Third Party’ payment
Specify the address of the third party for which the check instrument must be made out.
City
Alphanumeric; 20 Characters; Mandatory for ‘Third Party’ payment
Select the city of residence of the third party for which the check instrument must be made out.
US State/Non-US State
Alphanumeric; 20 Characters; Mandatory for ‘Third Party’ payment
Select the state of residence of the third party for which the check instrument must be made out, if the state is a US state.
Zip Code
Alphanumeric; 20 Characters; Mandatory for ‘Third Party’ payment
Specify the zip code of the city of residence of the third party for which the check instrument must be made out.
Entity Details
Entity Type
Optional
Select the entity type from the drop-down list. The list displays the following values:
- Broker
Entity ID
Alphanumeric; 12 Characters; Optional
If you have indicated that the payment (check or transfer) is to be made to a broker, specify the broker in this field. The name of the selected broker is displayed in the Entity Name field.
Entity Name
Display
The entity name will be displayed for the Entity Type selected.
Transfer Details
Bank
Alphanumeric; 12 Characters; Mandatory for Self payment type
Select the bank account to which the transfer payment of the income must be made.
The details of the account you select are displayed in the bank account details fields.
You must select a bank account for which the currency is a valid fund bank account currency so that the income payment transfer can be affected.
If the payment type is ‘Self’, the bank account associated with the investor is defaulted from the unit holder level.
If you have chosen ‘Third Party’ as the payment type, select the name of the bank in which the transfer account is present, from the drop down list.
Branch
Alphanumeric; 12 Characters; Mandatory for Third Party transfer payment
If the payment type is ‘Self’, the branch associated with the investor account is defaulted from the unit holder level.
If you have chosen ‘Third Party’ as the payment type, Specify the branch name of the bank in which the transfer account is present.
A/c Type
Alphanumeric; 1 Character; Mandatory for Third Party transfer payment
Select the account type (Fixed, Savings or Current) of the transfer account.
A/c No
Alphanumeric; 16 Characters; Mandatory for Third Party transfer payment
Specify the number of the transfer account.
A/c Ccy
Alphanumeric; 3 Characters; Mandatory for Third Party transfer payment
Specify the currency of the transfer account
The currency specified here must be a valid fund bank account currency.
A/c Holder Name
Alphanumeric; 100 Characters; Mandatory for Third Party transfer payment
Specify the name of the holder of the third party account.
IBAN
Alphanumeric; 40 Characters; Optional
Specify the IBAN (International Bank Account Number) of the account holder.
4.1.4 Reinvestment Details Tab
Click ‘Reinvestment Details’ tab to enter the details.
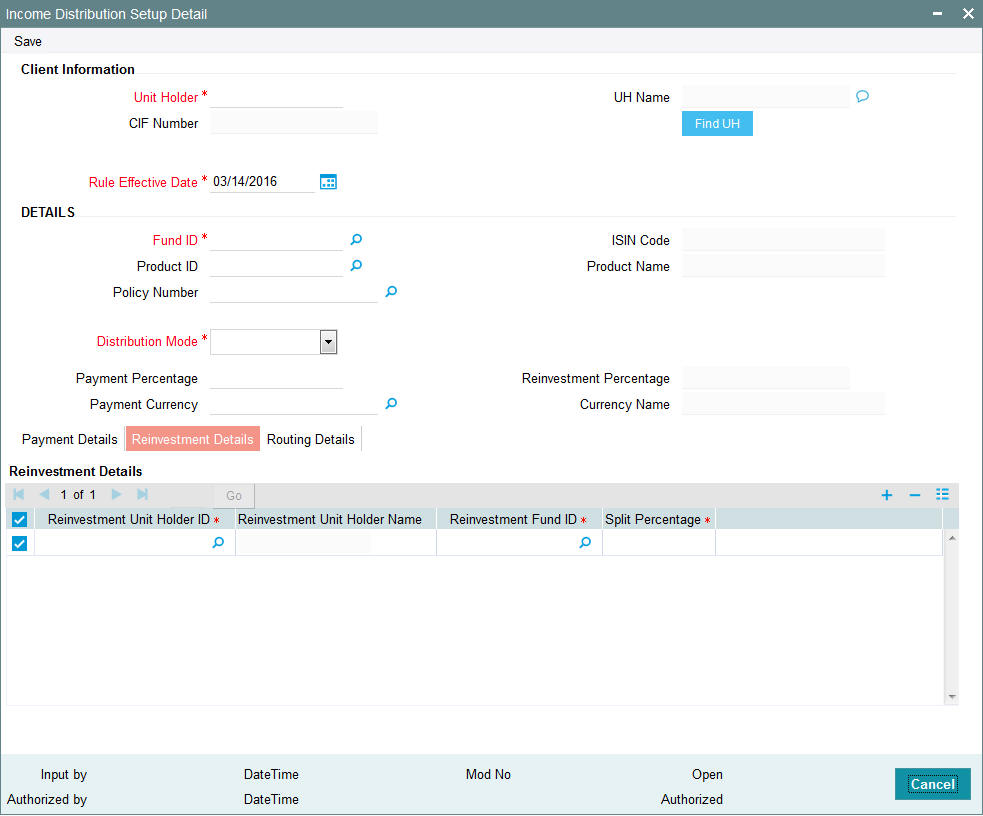
Reinvestment Unit Holder ID
Alphanumeric; 12 Characters; Mandatory
Specify the ID of the unit holder in whose account the income is to be reinvested. When you select the ID of the reinvestment unit holder, the name of the unit holder is displayed in the Reinvestment Unit Holder Name field.
Reinvestment Unit Holder Name
Display
The system displays the reinvestment unit holder name for the selected reinvestment unit holder ID.
Reinvestment Fund ID
Alphanumeric; 6 Characters; Mandatory
Select the ID of the fund in which the income is to be reinvested. The fund that you select here should be part of the same fund family as the fund from which the income was derived.
Split Percentage
Numeric; 5 Characters; Mandatory
Specify the percentage of the derived income that is to be reinvested in the specified reinvestment unit holder's account, in the specified reinvestment fund. You can make any number of such entries, specifying a percentage for each combination. The sum total of all split percentages for all reinvestment unit holder – reinvestment fund ID combinations you have specified must be equal to one hundred percent.
In this section, you can define the option in which the investor can reinvest income earnings from the selected fund. The investor can reinvest earned income in any of the following ways:
- Reinvest either in the investor’s own unit holder account, or another investor’s account. In the latter case, the investor in whose account the reinvestment is proposed (that is, the Reinvestment Unit Holder) must belong to the same AMC as the source investor.
- Reinvest the income in any other fund. If the investor desires to do this, the reinvestment fund must belong to the same fund family as the fund from which the income is derived.
- Reinvest the income in as many target fund/unit holder combinations, subject to the constraints expressed above. This is again subject to the consideration that the sum of the percentages of reinvestment in all these combinations must be equal to 100.
Note
Reinvestment is only allowed into or out of a fund if so designated in the Corporate Actions profile for the fund and corporate action type.
If you have chosen either Both or Full Reinvestment as the distribution mode, you must specify all information in this section mandatory.
4.1.5 Routing Details Tab
FCIS provides the option to capture the bank routing details. At the time of transaction input, the routing details specified here are picked up for the combination of fund, transaction type and transaction currency. You can specify the routing details by clicking on 'Routing Details'.
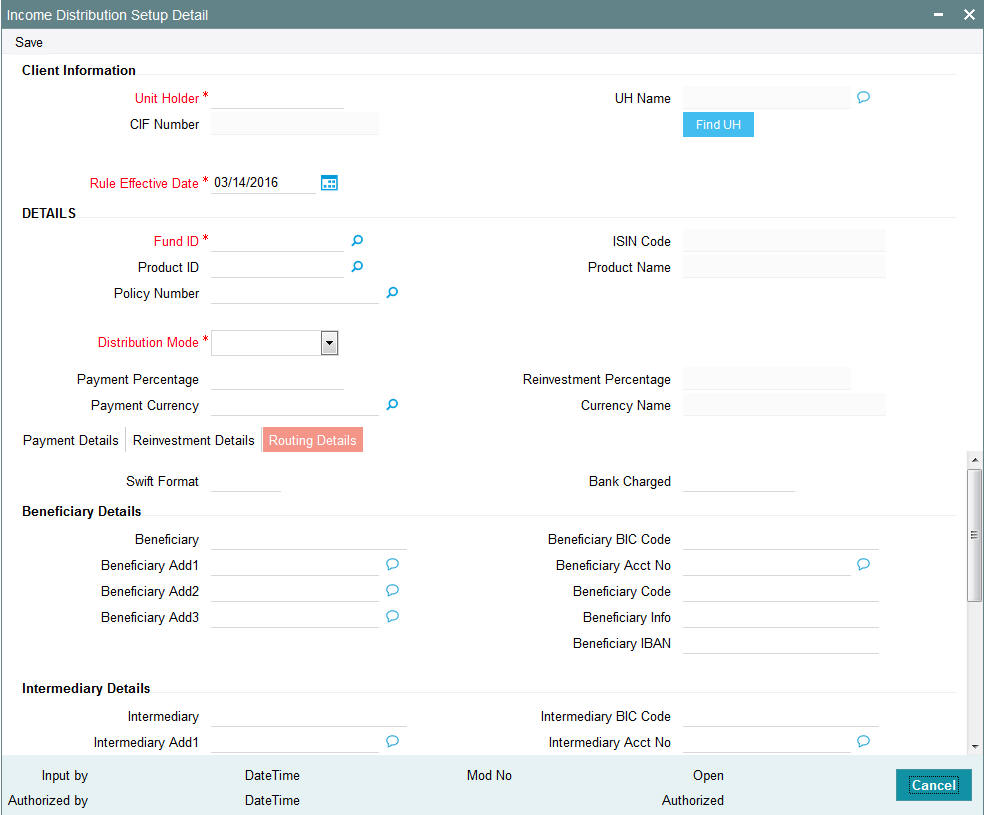
You need to maintain the following details:
Swift Format
Optional
At the time of transaction input, the routing details specified here are picked up for the combination of fund, transaction type and transaction currency. The drop-down list displays the following values:
- MT103
- MT202
Bank Charged
Optional
Indicate whether the bank charges must be levied upon the beneficiary, the remitter or must be shared between the two. The drop-down list displays the following values:
- Shared
- Remit
- Beneficiary
Beneficiary Details
Beneficiary
Alphanumeric; 35 Characters; Optional
Specify the beneficiary name.
Beneficiary Add 1, 2, 3
Alphanumeric; 105 Characters; Optional
Specify the beneficiary address. There are three lines available for the same.
Beneficiary BIC Code
Alphanumeric; 24 Characters; Optional
Specify the BIC code of the beneficiary.
Beneficiary Acct No
Alphanumeric; 34 Characters; Optional
Specify the account number of the beneficiary.
Beneficiary Code
Alphanumeric; 24 Characters; Optional
Specify the code of the beneficiary.
Beneficiary Info
Alphanumeric; 100 Characters; Optional
Enter more information about the beneficiary.
Beneficiary IBAN
Alphanumeric; 40 Characters; Optional
Specify beneficiary IBAN details.
Intermediary Details
Intermediary
Alphanumeric; 35 Characters; Optional
Specify the intermediary detail.
Intermediary Add 1, 2, 3
Alphanumeric; 105 Characters; Optional
Specify the intermediary address. There are three lines available for the same
Intermediary BIC Code
Alphanumeric; 24 Characters; Optional
Specify the BIC code of the Intermediary.
Intermediary Acct No
Alphanumeric; 34 Characters; Optional
Specify the account number of the Intermediary.
Intermediary Code
Alphanumeric; 24 Characters; Optional
Specify the code of the Intermediary.
Intermediary Info
Alphanumeric; 100 Characters; Optional
Enter more information about the Intermediary.
Intermediary IBAN
Alphanumeric; 40 Characters; Optional
Specify intermediary IBAN details.
Further Credit Details
Further Credit Name
Alphanumeric; 35 Characters; Optional
Specify further credit name.
Further Credit Acct No
Alphanumeric; 35 Characters; Optional
Specify further credit account number.
Reference
Reference1
Alphanumeric; 35 Characters; Optional
Specify the reference details.
Reference2
Alphanumeric; 35 Characters; Optional
Specify the reference details.
Save all the details to proceed or click cancel button to cancel the operation.
4.2 Income Distribution Setup Summary Screen
This section contains the following topics:
- Section 4.2.1, "Retrieving Income Distribution Setup Record"
- Section 4.2.2, "Editing Income Distribution Setup Record"
- Section 4.2.3, "Viewing Income Distribution Setup Record"
- Section 4.2.4, "Deleting Income Distribution Setup Record"
- Section 4.2.5, "Authorizing Income Distribution Setup"
- Section 4.2.6, "Amending Income Distribution Setup"
- Section 4.2.7, "Authorizing Amended Income Distribution Setup Details"
4.2.1 Retrieving Income Distribution Setup Record
After you set up the IDS options for an investor in the UH IDS Setup Detail screen, you can perform any of the operations before the record is authorized:
- Edit the specified options in the setup. At this stage, you can alter any of the details, other than the fund and the unit holder ID.
- Delete the setup.
To perform either operation, use the ‘Income Distribution Setup Summary’ screen. You can invoke this screen by typing ‘UTSUHIDS/ UTSFHIDS’ in the field at the top right corner of the Application tool bar and clicking on the adjoining arrow button.
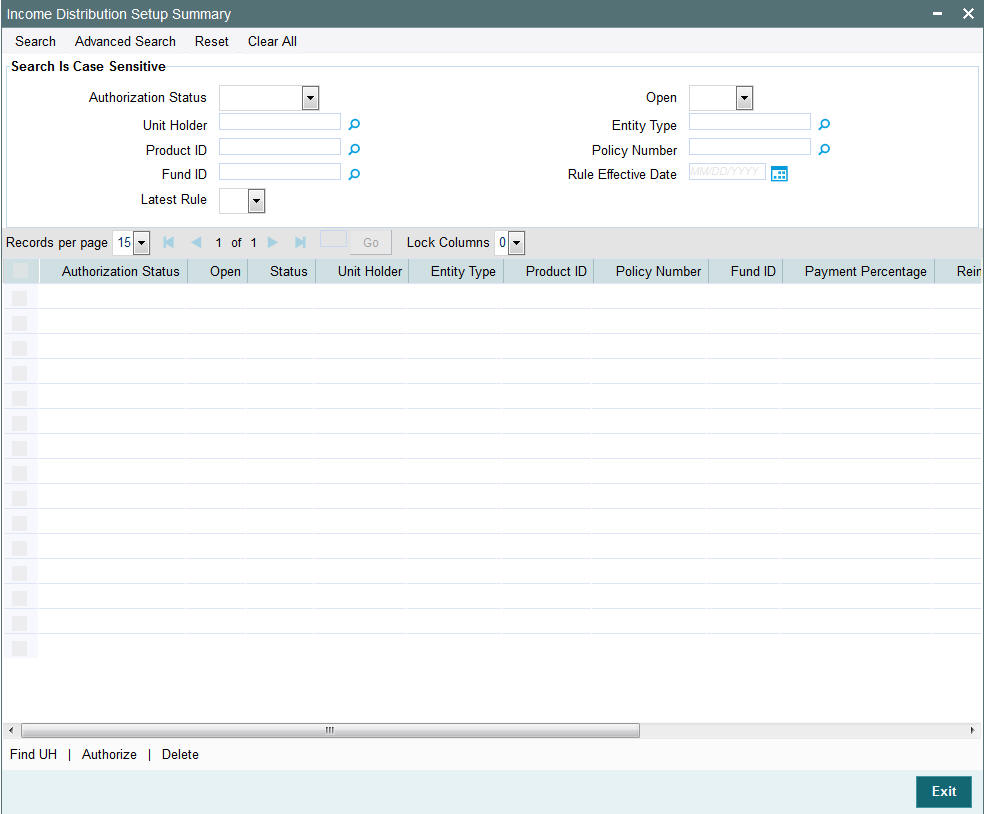
You can retrieve a previously entered record in the Income Distribution Setup Summary screen, as follows:
- Specify any or all of the following details in the Income Distribution Setup Summary screen:
- The status of the transaction in the Authorization Status field. If you choose the “Blank Space” option, then all the transactions that involve the specified unit holder are retrieved.
- The status of the record in the Open field. If you choose the “Blank Space” option, then all the records that involve the specified unit holder are retrieved.
- Unit Holder
- Entity Type
- Product ID
- Policy Number
- Fund ID
- Rule Effective Date
- Latest Rule
Click ‘Search’ button to view the records. All records with the specified details are retrieved and displayed in the lower portion of the screen.
You can also retrieve the individual record detail from the detail screen by doing query in the following manner:
- Press F7
- Input the Product ID
- Press F8
You can perform Edit, Delete, Amend, Authorize, Reverse, Confirm operation by selecting from the Action list.
You can also search the record by using combination of % and alphanumeric value.
Example
You can search the record for Product ID by using the combination of % and alphanumeric value as follows:
- Search by A%: System will fetch all the records whose Product ID starts from Alphabet ‘A’. For Example: AGC17, AGVO6, AGC74 and so forth.
- Search by %7: System will fetch all the records whose Product ID ends by numeric value’ 7’. For Example: AGC17, GSD267, AGC77 and so forth.
- Search by %17%: System will fetch all the records whose Product ID contains the numeric value 17. For Example: GSD217, GSD172, AGC17 and so forth.
4.2.2 Editing Income Distribution Setup Record
You can modify the details of Income Distribution Setup parameters that you have already entered into the system, provided it has not been subsequently authorized. You can perform this operation as follows:
- Invoke the Income Distribution Setup Summary screen from the Browser.
- Select the status of the record that you want to retrieve for modification in the Authorized field. You can only modify records that are unauthorized. Accordingly, choose the Unauthorized option.
- Specify any or all of the details in the corresponding fields to retrieve the record that is to be modified. All unauthorized records with the specified details are retrieved and displayed in the lower portion of the screen.
- Double click the record that you want to modify in the list of displayed record. The Income Distribution Setup Detail screen is displayed.
- Select Unlock Operation from Action list to modify the record. Modify the necessary information.
- Click Save to save your changes. The Income Distribution Setup Detail screen is closed and the changes made are reflected in the Income Distribution Setup Summary screen.
4.2.3 Viewing Income Distribution Setup Record
To view a record that you have previously entered, you must retrieve the same in the Income Distribution Setup Summary screen, as follows:
- Invoke the Income Distribution Setup Summary Screen from the Browser.
- Select the status of the transaction that you want to retrieve for viewing in the Authorized field. You can also view all records that are either unauthorized or authorized only, by choosing the Unauthorized/ Authorized option.
- Specify any or all of the details of the transaction in the corresponding fields on the screen, and click ‘Search’ button. All records with the specified details are retrieved and displayed in the lower portion of the screen.
- Double click the record that you want to view in the list of displayed records. The Income Distribution Setup Detail screen is displayed in View mode.
4.2.4 Deleting Income Distribution Setup Record
You can delete only unauthorized records in the system. To delete a record that you have previously entered:
- Invoke the Income Distribution Setup Summary screen from the Browser.
- Select the status of the record that you want to retrieve for deletion.
- Specify any or all of the details and click ‘Search’ button. All records with the specified details are retrieved and displayed in the lower portion of the screen.
- Double click the record that you want to delete. The Income Distribution Setup Detail screen is displayed.
- Select Delete operation from the Action list. The system prompts you to confirm the deletion, and the record is deleted physically from the system database.
4.2.5 Authorizing Income Distribution Setup
An unauthorized Income Distribution Setup must be authorized in the system for it to be processed. To authorize a record:
- Invoke the Income Distribution Setup Summary screen from the Browser.
- Select the status of the record that you want to retrieve for authorization. Typically, choose the Unauthorized option.
- Specify any or all of the details of the record in the corresponding fields on the screen. Click ‘Search’ button. All transactions with the specified details that are pending authorization are retrieved and displayed in the lower portion of the screen.
- Double click the transaction that you wish to authorize. The Income Distribution Setup Detail screen is displayed. Select Authorize operation from Action.
When the checker authorizes a record, details of validations, if any, that were overridden by the maker of the transaction during the Save operation, are displayed. If any of these overrides results in an error, the checker must reject the transaction.
4.2.6 Amending Income Distribution Setup
After an Income Distribution Setup is authorized, it can be modified using the Unlock operation from Action list. To make changes to a transaction after authorization:
- Invoke the Income Distribution Setup Summary screen from the Browser.
- Select the status of the transaction that you wish to retrieve for amendment. You can only amend only authorized records.
- Specify any or all of the details of the Income Distribution Setup in the screen. All records with the specified details are retrieved and displayed in the lower portion of the screen.
- Double click the record that you want to amend. The Income Distribution Setup Detail screen is displayed in Amendment mode. Click the Unlock operation from the Action list to amend the record.
- Amend the necessary information. Click the Save button to save the changes.
When you retrieve an IDS setup record for the purpose of amendment in this screen, it is displayed in the Income Distribution Setup Detail screen, in Amend mode. All the non-editable field values are displayed as labels, while the editable fields are enabled for data entry changes.
Note
When you make changes to any authorized record in the system database through the amendment operation, the record with the amended information is saved as an unauthorized record in the system. For your amendment changes to be effective, the amended record must be subsequently authorized. When it is authorized, it is saved in the system database as an authorized record with the amendment information, and is effective.
4.2.7 Authorizing Amended Income Distribution Setup Details
An amended Income Distribution Setup record must be authorized for the amendment to be made effective in the system. The authorization of amended records can only be done from Agency branch Module.
The process of authorization is subsequently the same as that for normal records.
4.3 Unitholder Deal Maintenance Detail Screen
This section contains the following topics:
- Section 4.3.1, "Setting Up Deal for Investor"
- Section 4.3.2, "Invoking Unitholder Deal Maintenance Detail Screen"
4.3.1 Setting Up Deal for Investor
When you map a charge (or load) to a fund, or a load group, the loads are applied to transactions requested by all investors that transact in the fund or load group subject to the evaluated criteria of the loads matching the unit holder and the transaction.
In some cases, the AMC may wish to offer a special, unique load option to be applied on all transactions involving a specific CIF Account or unit holder. This could also be at the request of the investor. This special load option would override the existing load option mapped to the fund or load group. Such a load option is called a ‘deal’ for an investor.
The deal consists of specifying a new return value for any or all of the loads mapped to the fund or load group. You specify the new return value against an existing return value that is based on a percentage or a fixed amount for the load.
You can set up a deal:
- For a specific unit holder under a CIF customer account.
- For all unit holders under a CIF account.
- For a single, non-CIF unit holder.
- To be applicable to all transactions of the selected unit holder/ CIF unit holder in a specific fund.
- To be applicable to all transactions of the selected unit holder/ CIF unit holder in any or all of the funds under a specific load group.
- To be applicable on a specific load that has been mapped to a fund or load group.
The usage of a negotiated deal is different from an over-the-counter load override. Negotiated deals are generally done for special customers with pre-defined business agreements that are exceptional to the normal business rules.
To set up a deal for an investor, you use the ‘Unitholder Deal Maintenance Detail’ screen. You can invoke this screen by typing ‘UTDUHDEL’ in the field at the top right corner of the Application tool bar and clicking on the adjoining arrow button.
In the UH Deal Setup Detail screen, set up the deal as follows:
- Select the investor (or CIF Account) for whom the deal is being setup, in the CIF Number or the Unit Holder ID field.
- Select the level at which the deal is to be applied.
- To set a deal as applicable to all unit holders under a CIF, check the Apply at CIF Level check box.
- To set a deal as applicable at either a load level, fund/product level or load group level, choose the desired option in the Apply At field.
- Specify the period, during which the deal is applicable, by indicating the start and end dates, in the Start Date and End Date fields.
- If the deal is applicable for a fund, select the desired fund in the Fund field, and the ISIN Code of the fund, in the ISIN Code field.
- If the deal is applicable for a load group, select the desired load group in the Load Group field.
- If the deal is applicable for a specific load that is mapped to the selected fund or load group, select the desired load in the Load field.
- In the Load Details section, specify the overridden return value that is to be deemed applicable for the required slab, in the Override To field.
- Save your changes.
4.3.2 Invoking Unitholder Deal Maintenance Detail Screen
Invoke the ‘Unitholder Deal Maintenance Detail’ screen by typing ‘UTDUHDEL’ in the field at the top right corner of the Application tool bar and clicking on the adjoining arrow button.
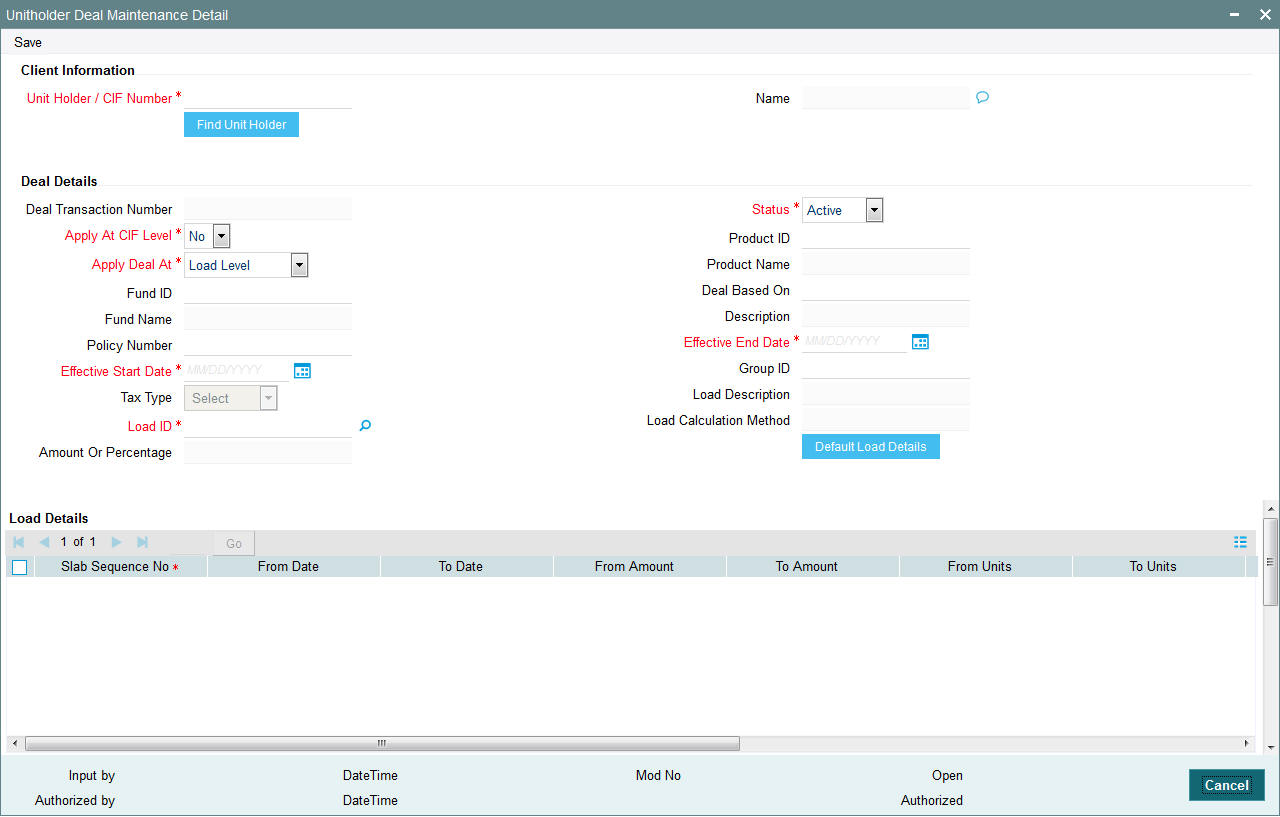
Select 'New' from the Actions menu in the Application tool bar or click new icon to enter the details of the ‘Unitholder Deal Maintenance’ screen.
Client Information
In this section, select the ID of the unit holder for whom you are specifying deal options.
You can create deals for both authorized and unauthorized unit holders/CIF. If a deal is created for an unauthorized unit holder, the unit holder/CIF record must be authorized before the deal authorization process is put through. Else, the unit holder deal cannot be authorized.
Unit Holder/ CIF Number
Alphanumeric; 12 Characters; Mandatory
From the list, select the unit holder or CIF account number for whom you are creating the deal options.
When you specify the CIF Number, the name of the corresponding CIF Account is retrieved from the database and displayed alongside the field.
Name
Display
The system displays the name of the ID of the non-CIF unit holder for whom you are setting up the deal in this screen.
You can search unit holder or CIF number by clicking ‘Find Unit Holder’ button.
Deal Details
In this section, specify the level at which the deal must be applied for the selected unit holder.
Deal Transaction Number
Display
The system displays the deal transaction number of the deal while saving.
Status
Mandatory
By default, the status of all newly created deals in this screen is Active. However, you can select the status from the drop-down list. The list displays the following values:
- Active
- Cancelled
Apply at CIF Level
Mandatory
Select ‘Yes’ to indicate that the deal options you are setting up must be applicable to all unit holder accounts under the selected CIF customer account.
Note
When the deal is applied at CIF level, a similar set up is not possible at unit holder account level for the same fund / group and load, and vice versa.
Apply Deal At
Mandatory
From the list, select and indicate whether the deal must be applied on a single load (Load Level), a particular load for a fund (Fund Level), all funds in a load group (Load Group Level) or a Product (Product Level). The options in the drop-down list are as follows:
- Load Level
- Load Group Level
- Fund Level
- Product Level
Note
If you select the option ‘Product Level’ or ‘Fund Level’, the fields ‘Fund’ and ‘ISIN Code’ will be displayed. These two fields are explained below.
Product ID
Alphanumeric; 10 Characters; Optional
Specify the Product for which the deal is to be applied.
Product Name
Display
The system displays the name of the product for the selected product ID.
Fund ID
Alphanumeric; 6 Characters; Optional if ‘Product Level’, Mandatory if ‘Fund Level’
This field will be displayed only if you have selected the option ‘Product Level’ or ‘Fund Level’ against the field ‘Apply At’.
If you have selected the option ‘Product Level’, you can set up a deal for the investor at the Product level. You have the option of specifying a particular fund to which the ‘Load’ that you select applies. If you do not select a fund, the load that you select will be applicable to all funds mapped to the Product.
If you have selected the option ‘Fund Level’, from the list, select the fund for which the deal would apply, for the selected unit holder.
Fund Name
Display
The system displays the name of the fund for the selected fund ID.
Deal Based On
Alphanumeric; 1 Character; Optional
Select the deal based on from the following options maintained:
- Inclusion Percentage, then the calculation of taxes are as follows:
- Basis Annual Tax = Gross Annualized Amount * Load Return Value
- Annual Tax = Apply the Product With Holding Tax slab basis load on Basis Annual Tax
- Flat Rate Percentage, then the annual tax is calculated as:
- Annual Tax = Policy Annuity Value * Load Return Value
- Flat Rate Amount, then the annual tax is calculated as:
- Basis Amount = Load Return Value * 12 and
- Effective Rate = Basis Amount * 100 / Gross Annualized Amount
- Annual Tax = (Gross Annualized Amount * Effective Rate ) / 100
Note
An option "All" is also available to map a load across all the Products for a Policy Holder. If 'All' is selected then the Funds cannot be selected.
Description
Display
The system displays the description for the selected deal based on details.
Policy Number
Alphanumeric; 16 Characters; Optional
Specify the Policy for which the deal is to be applied.
Effective Start Date
Date Format, Mandatory
Enter the date from which the deal is to be effective
Specify the date on and following which, the deal options must be applied for transactions for the selected unit holder, in the manner indicated in this record.
Effective End Date
Date Format, Mandatory
Enter the date to which the deal is to be effective.
Specify the last date on which, the deal options must be applied for transactions for the selected unit holder, in the manner indicated in this record.
Tax Type
Optional
You will be able to select the tax type only if you have selected ‘Apply At’ as ‘Product Level’.
The investor will be charged for tax and the tax rate will be calculated based on the method of tax calculation you specify. Following are the options available in the adjoining drop-down list:
- Directives
- Instructions
- Aggregation
Directives
Tax Directives is the tax rate provided by the SARS to the investors. The investors, in turn will instruct the tax that has to be deducted. Accordingly, the system will deduct the tax rate specified by the investor instead of the tax slab that is maintained in the ‘Withholding Tax Setup’ screen.
Refer to the chapter ‘Maintaining Reference Information’ for details on maintaining tax slabs.
Based on the tax directive submitted by the investor at the UH level, the UH deal for the tax load will be maintained.
Instructions
Tax Instructions is the tax rate suggested by the investors to deduct the tax. However, the system will compare the suggested tax rate with that of the tax slabs maintained. If the value of the suggested tax rate is lower than the maintained tax slab, the system can apply the higher value of the tax rate.
Note
The tax directive or the tax instruction is at the policy level and not at the UH level.
Aggregation
This is allowed only if ‘Tax Aggregation’ is allowed at product level. If Product ID is selected as ‘All’ in UH deal then the system will look at those products where ‘Tax Aggregation’ is checked for the product.
If tax directive is maintained in UH-Deal then tax instruction or tax aggregation will not be allowed to maintain for the same deal effective period. Tax instruction and tax directive are mutually exclusive.
When a tax directive is maintained in UH-Deal then existing tax instruction or tax aggregation (for the same UH/product/policy/deal effective period), if any, will be marked as cancelled. You cannot maintain multiple directives/instructions/aggregation for the same deal effective period.
When directive is maintained in UH deal, the system will directly use this value to compute WHT. When tax instruction or aggregated value is maintained then system will project WHT based on Tax-instruction and aggregation, higher of these will be used for WHT deduction.
Internally, the system will track whether slab or directive or instruction or Aggregation was applied for each annuity.
When deal is based on flat rate amount, then it needs to apply directly to the Annuity irrespective of the frequency. The return value would be tax amount payable per annuity frequency and not the annualized value.
If both Tax Aggregation and Instructions are maintained then the system will take the rate with higher tax outgo.
In Product maintenance if ‘Annuity Tax Computation basis’ is ‘Policy’, then rebate also will be at Policy level.
In case of any UH deal (Directive/Aggregation/Instruction) rebate will not be given. It will be applied only on Default slab.
If Unit Holder has multiple policies under one product and the deal based on is selected as Flat rate percentage and UH Deal Tax Type is Directive then the annuity tax must be calculated at each Policy gross annualized annuity amount level.
For instance, If POL1 and POL2 are two policies under a UH, with 3000 and 2000 as respective annuities and assuming 10% is the flat rate deal maintained at the UH deal level, then the system should charge an annuity tax of 300 and 200 respectively each month.
When Annuity Tax Computation Basis at product Level is ‘Policy Holder’ and the UH Deal Tax type is ‘Directive’ (deal based on is selected as Flat Rate), the system calculates the annual tax on each policy’s gross annualized annuity amount, if UH has many policies under the same product.
Multiple deals for same deal type/ UH/Product/policy combination will not be supported.
Note
Unit Holder can have multiple policies under one product and if the UH Deal Tax type is directive (deal based on is selected as Flat Rate), the system will compute annuity tax on each policy’s gross annualized annuity amount.
Group ID
Alphanumeric; 16 Characters; Optional
From the list, select the load for which you want to specify the new return value as required for the deal. For all transactions for the selected unit holder in the selected fund, that occur between the deal start and end dates, for which the selected load is applicable, the deal will be applied.
Load ID
Numeric, 5 Characters; Mandatory if the deal is to be applied for all funds in a load group (Load Group Level)
From the list, select the load group for which the deal would apply, for the selected unit holder. For all transactions for the selected unit holder in any fund belonging to this load group, that occur between the deal start and end dates, the deal will be applied on the selected load.
Load Description
Display
The system displays the description for the selected load ID.
Load Calculation Method
Display
The system displays the Load method that is used for calculating the Load when you choose the load ID.
Amount or Percentage
Display
This field is defaulted depending on whether the Load ID selected is an amount based load or a percentage based load.
Load Details
In this section, you can specify the altered return value for the selected load that is applicable as required for the deal.
The Load details that are maintained gets defaulted in this tab, when the button ‘Default Load Details’ is clicked. For each load that you select in the Load field in the Deal Details section, the following details are displayed in this section, in display mode:
- Slab Sequence No, if any and their applicable boundaries.
- From Date
- To Date
- From Amount
- To Amount
- From Units
- To Units
- From Period
- To Period
- Return Value: The original Return Value for the load.
- Override To
Derived Load Details
- Load ID
- Description
- Load Percentage: Amount or Percentage (this is the basis on which the return value for the selected load is derived)
- Override To
In the Override To field, specify the new return value applicable for the load, as required for the deal, and click ‘Exit’ button.
4.4 Unitholder Deal Summary Screen
This section contains the following topics:
- Section 4.4.1, "Retrieving Deals for Investors"
- Section 4.4.2, "Editing Deals for Investors "
- Section 4.4.3, "Viewing Deals for Investors "
- Section 4.4.4, "Deleting Deals for Investors "
- Section 4.4.5, "Authorizing Deals for Investors"
- Section 4.4.6, "Amending Deals for Investors"
- Section 4.4.7, "Authorizing Amended Deals for Investors"
4.4.1 Retrieving Deals for Investors
After you set up the Deal options for an investor in the UH Deal Setup Detail screen, you can perform any of the following operations before the record is authorized:
- Edit the specified options in the setup. At this stage, you can alter any of the details.
- Delete the setup.
To perform either operation, use the ‘Unitholder Deal Summary’ screen. You can invoke this screen by typing ‘UTSUHDEL’ in the field at the top right corner of the Application tool bar and clicking on the adjoining arrow button.

You can retrieve a previously entered record in the Unitholder Deal Summary screen, as follows:
- Specify any or all of the following details in the Unitholder Deal Summary screen:
- The status of the record in the Authorization Status field. If you choose the “Blank Space” option, then all the records that involve the specified unit holder are retrieved.
- The status of the record in the Open field. If you choose the “Blank Space” option, then all the records that involve the specified unit holder are retrieved.
- Unit Holder/ CIF Number
- Apply At CIF Level
- Apply Deal At
- Load ID
- Effective Start Date
- Effective End Date
Click ‘Search’ button to view the records. All records with the specified details are retrieved and displayed in the lower portion of the screen.
Note
You can also retrieve the individual transaction detail from the detail screen by doing query in the following manner:
- Press F7
- Input the Load ID
- Press F8
You can perform Edit, Delete, Amend, Authorize, Reverse, Confirm operation by selecting from the Action list.
You can also search the record by using combination of % and alphanumeric value.
Example
You can search the record for Load ID by using the combination of % and alphanumeric value as follows:
- Search by A%: System will fetch all the records whose Load ID starts
from Alphabet ‘A’.
For example: AGC17, AGVO6, AGC74 and so forth. - Search by %7: System will fetch all the records whose Load ID ends by numeric value’ 7’. For Example: AGC17, GSD267, AGC77 and so forth.
- Search by %17%: System will fetch all the records whose Load ID contains the numeric value 17. For Example: GSD217, GSD172, AGC17 and so forth.
4.4.2 Editing Deals for Investors
You can modify the details of Unitholder Deal parameters that you have already entered into the system, provided it has not been subsequently authorized. You can perform this operation as follows:
- Invoke the Unitholder Deal Summary screen from the Browser.
- Select the status of the record that you want to retrieve for modification in the Authorized field. You can only modify records that are unauthorized. Accordingly, choose the Unauthorized option.
- Specify any or all of the details in the corresponding fields to retrieve the record that is to be modified. All unauthorized records with the specified details are retrieved and displayed in the lower portion of the screen.
- Double click the record that you want to modify in the list of displayed records. The Unitholder Deal Detail screen is displayed.
- Select Unlock Operation from Action list to modify the record. Modify the necessary information.
- Click Save to save your changes. The Unitholder Deal Detail screen is closed and the changes made are reflected in the Unitholder Deal Summary screen.
4.4.3 Viewing Deals for Investors
To view a record that you have previously entered, you must retrieve the same in the Unitholder Deal Summary screen, as follows:
- Invoke the Unitholder Deal Summary Screen from the Browser.
- Select the status of the transaction that you want to retrieve for viewing in the Authorized field. You can also view all records that are either unauthorized or authorized only, by choosing the Unauthorized/ Authorized option.
- Specify any or all of the details of the transaction in the corresponding fields on the screen, and click ‘Search’ button. All records with the specified details are retrieved and displayed in the lower portion of the screen.
- Double click the record that you want to view in the list of displayed records. The Unitholder Deal Detail screen is displayed in View mode.
4.4.4 Deleting Deals for Investors
You can delete only unauthorized records in the system. To delete a record that you have previously entered:
- Invoke the Unitholder Deal Summary screen from the Browser.
- Select the status of the record that you want to retrieve for deletion.
- Specify any or all of the details and click ‘Search’ button. All records with the specified details are retrieved and displayed in the lower portion of the screen.
- Double click the record that you want to delete. The Unitholder Deal Detail screen is displayed.
- Select Delete operation from the Action list. The system prompts you to confirm the deletion, and the record is deleted physically from the system database.
4.4.5 Authorizing Deals for Investors
An unauthorized Unitholder Deal records must be authorized in the system for it to be processed. To authorize a record:
- Invoke the Unitholder Deal Summary screen from the Browser.
- Select the status of the record that you want to retrieve for authorization. Typically, choose the Unauthorized option.
- Specify any or all of the details of the record in the corresponding fields on the screen. Click ‘Search’ button. All transactions with the specified details that are pending authorization are retrieved and displayed in the lower portion of the screen.
- Double click the transaction that you wish to authorize. The Unitholder Deal Detail screen is displayed. Select Authorize operation from Action.
When the checker authorizes a transaction, details of validations, if any, that were overridden by the maker of the transaction during the Save operation, are displayed. If any of these overrides results in an error, the checker must reject the transaction.
4.4.6 Amending Deals for Investors
After an Unitholder Deal record is authorized, it can be modified using the Unlock operation from Action list. To make changes to a record after authorization:
- Invoke the Unitholder Deal Summary screen from the Browser.
- Select the status of the record that you wish to retrieve for amendment. You can only amend only authorized records.
- Specify any or all of the details of the Unitholder Deal in the screen. All records with the specified details are retrieved and displayed in the lower portion of the screen.
- Double click the record that you want to amend. The Unitholder Deal Detail screen is displayed in Amendment mode. Click the Unlock operation from the Action list to amend the record.
- Amend the necessary information. Click the Save button to save the changes.
4.4.7 Authorizing Amended Deals for Investors
An amended Unitholder Deal record must be authorized for the amendment to be made effective in the system. The authorization of amended records can only be done from Fund Manager Module and Agency branch Module.
The process of authorization is subsequently the same as that for normal transactions.
When you retrieve a deal record for the purpose of amendment in this screen, it is displayed in the UH Deal Setup Detail screen, in Amend mode. All the non-editable field values are displayed as labels, while the editable fields are enabled for data entry changes.
Note
When you make changes to any authorized record in the system database through the amendment operation, the record with the amended information is saved as an unauthorized record in the system. For your amendment changes to be effective, the amended record must be subsequently authorized. When it is authorized, it is saved in the system database as an authorized record with the amendment information, and is effective.
You can cancel an existing negotiated deal by changing the status to cancel. When you authorize this change, the deal set up is nullified.
4.5 LOI Adjust Proc Screen
This section contains the following topics:
4.5.1 Defining Letters of Intent
An investor may promise to invest a certain volume of capital in the funds of the AMC within a certain period. Sometimes, the AMC offers the investor a reduced commission or charge for such investment. Such indemnification from the investor is known as a Letter of Intent.
Any investor that chooses to invest using a Letter of Intent is known as an LOI investor in the system.
Example
An investor, Mrs. Frances Smith, promises to bring in investment worth 500000 USD to the Terry Wynan Growth Fund floated by your AMC, within the space of 3 months dating from 5th May 2003. She indemnifies this through a Letter of Intent. On 5th May 2003, she makes her first investment of 100000 USD.
This means that by the 4th of August, 2003, Mrs. Smith promises to invest the remaining indemnified amount (i.e., 500000 USD – 100000 USD = 400000 USD) in the said fund. She could do so in one transaction worth 400000 USD, or a series of transactions cumulatively worth 400000 USD.
Let us suppose the following charge option for the Terry Wynan Growth Fund, as defined by your AMC for normal investment:
Slab |
From Amount |
To Amount |
Charge percentage per transaction |
1 |
0 |
100000 |
5 |
2 |
100000 |
200000 |
4 |
3 |
200000 |
300000 |
3 |
4 |
300000 |
400000 |
2 |
5 |
400000 |
500000 |
1 |
Let us suppose that Mrs. Smith fulfills her Letter of Intent investment in the pattern specified below after 5th May 2003.
Transaction Reference Number |
Transaction Date |
Transaction Amount |
LOIREF1 |
05-05-2003 |
100000 |
LOIREF2 |
20-05-2003 |
100000 |
LOIREF3 |
05-06-2003 |
100000 |
LOIREF4 |
20-06-2003 |
100000 |
LOIREF5 |
05-07-2003 |
100000 |
For the transaction LOIREF1, the charge percentage actually applied would be as follows:
Slab for LOIREF1, as a normal transaction: Slab 1
Charge Percentage for normal investment transaction, as per charge setup: 5%
LOI Amount: 500000 USD
Slab for LOI Amount: Slab 5.
Charge Percentage actually applied for LOIREF1: 1% of transaction amount = 1% of 100000 USD.
Similarly, the applicable charge percentages for each of the LOI fulfillment transactions are derived, and they are displayed below:
Transaction Reference Number |
Transaction Date |
Transaction Amount |
Charge actually applied |
LOIREF1 |
05-05-2003 |
100000 |
1% |
LOIREF2 |
20-05-2003 |
100000 |
1% |
LOIREF3 |
05-06-2003 |
100000 |
1% |
LOIREF4 |
20-06-2003 |
100000 |
1% |
LOIREF5 |
05-07-2003 |
100000 |
1% |
Each investment made by Mrs. Smith after 5th May 2003 into the fund, will reduce the Letter of Intent amount remaining to be fulfilled. The amount remaining to be fulfilled is known as the ‘used up’ amount.
With the last investment on 5th July 2003, the Letter of Intent amount is fulfilled, or is said to be ‘used up’.
An investor that has opted to invest through a Letter of Intent can reduce the used up Letter of Intent amount within the defined period, by any of the following transactions:
- IPO or subscription transactions
- Standing instructions that result in subscription, switch or redemption transactions.
- Switch transactions
- Redemption transactions
- Transactions resulting from reinvestment of income.
4.5.2 Non-fulfilling of Letter of Intent
If an investor does not bring in the investment amount promised in a letter of intent, before the expiry of the letter of intent, it constitutes non-fulfilment, and the AMC can recover the applicable commission that would have been due without the letter of intent.
The system monitors the fulfilment of letters of intent. The following facilities are available in the system:
Prior Warning Report
On the date that marks the beginning of the start of the lead time period for the load group, a prior warning report is generated by the system during the Beginning of Day (BOD) process. This report contains information about those letters of intent that have not been fulfilled as on that date.
For instance, if the letter of intent expires on 15th June 2002 and the lead-time specified for the load group is 10 days, a BOD process is executed on 5th June 2002 to ascertain whether the investor has satisfied the letter of intent amount agreed upon. This verification is performed for all letters of intent.
The report identifies and displays the following information for each letter of intent for any investor which is unfulfilled as on the date that marks the beginning of the lead time period:
- LOI Number
- LOI start date
- LOI end date (expiry date)
- LOI amount
- Amount fulfilled or used up as on the current date
- Amount remaining unfulfilled as on the current date. This is computed as the difference between the LOI amount and the Amount Used Up as on the current date
- The Load Group to which the fund belongs, for which the LOI has been set up for the investor
- The lead time period specified for the load group
Post-Adjustment Report
In the event of non-fulfilment of a letter of intent, you can obtain a report (known as the post adjustment report) that displays the actual commission that would have been due on any transactions entered into by the investor, had the letter of intent not been applied.
4.6 Setting up Letter of Intent Options for Investor
This section contains the following topics:
4.6.1 Invoking Unit Holder LOI Setup Detail Screen
In Oracle FLEXCUBE Investor Servicing, you can set up any or all of the following options for investors who choose to invest through a Letter of Intent, at the investor’s behest:
- The period during which the Letter of Intent will be fulfilled
- The amount indemnified in the Letter of Intent
- The load group in which the investor seeks to invest, through a Letter of Intent.
- The applicability of standing instruction transactions as a means of fulfilling Letters of Intent (i.e., reducing the LOI used up amount).
- The applicability of transactions put through earlier than the Letter of Intent period start date, as a means of reducing the Letter of Intent used up amount. Any period earlier than the start date is known as a prior period.
- The duration of a prior period, if applicable.
- For an LOI investor, you can designate any transaction requested by the investor as an LOI transaction, at the investor’s request. By so doing, the transaction will be taken into account to reduce the used up Letter of Intent amount.
Note
For an investor, you can only set up one Letter of Intent options record for a load group.
To set up the options requested by the investor for a Letter of Intent, use the ‘Unit Holder LOI Setup Detail’ screen. You can invoke this screen by typing ‘UTDUHLOI’ in the field at the top right corner of the Application tool bar and clicking on the adjoining arrow button.
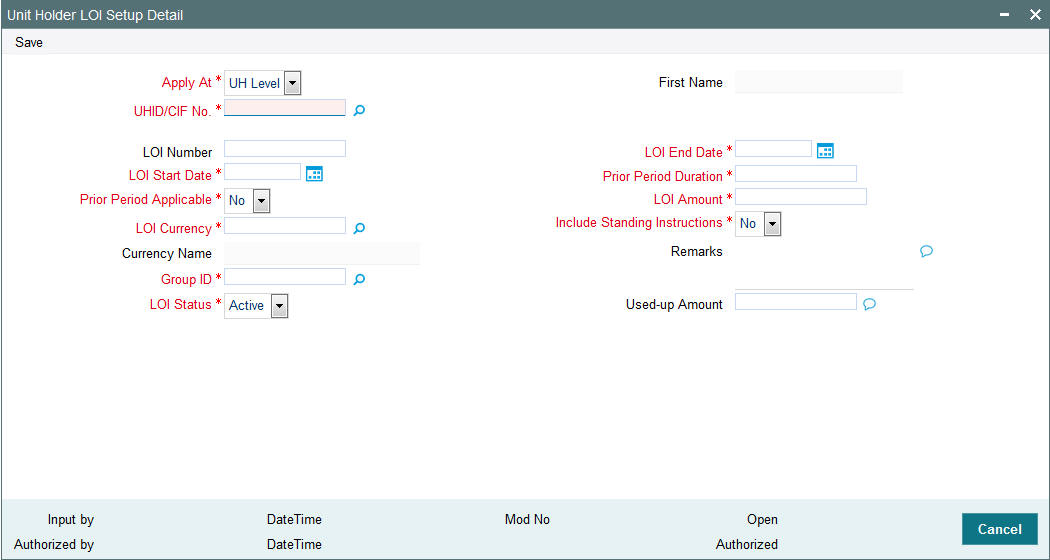
In the UH LOI Detail screen, you must specify all the following details to set up the Letter of Intent option for an investor:
Apply At
Mandatory
Select the applicability of the Letter of Intent setup to all unit holders under a CIF Account from the drop-down list. The list displays the following values:
- UH Level
- CIF Level
First Name
Display
The system displays the first name of the unit holder.
UHID/CIF No.
Alphanumeric; 12 Characters; Mandatory
From the list, select the CIF unit holder for whom you are creating the Letter of Intent options.
When you specify the CIF Number, the name of the corresponding CIF Account is retrieved from the database and displayed alongside the field.
All the unit holder accounts under the CIF Account that you have selected are listed in the option list in the Unit Holders for CIF field.
LOI Number
Alphanumeric; 12 Characters; Optional
Specify the LOI number.
LOI End Date
Date Format; Mandatory
Indicate the latest date by which the investor would fulfill the amount indemnified in the Letter of Intent.
LOI Start Date
Date Format; Mandatory
Indicate the date on which the period of the Letter of Intent commences. Following this date, the investor will have to fulfill the Letter of Intent.
If a prior period is applicable, then the duration of the prior period is reckoned from the date you specify here.
Prior Period Applicable
Mandatory
Select if prior period is applicable or not from the drop-down list. The list displays the following values:
- Yes
- No
Prior Period Duration
Numeric; 3 Characters; Mandatory
Specify the duration of the prior period (in days), to be reckoned from the Letter of Intent period start date.
If a prior period is specified, the used up amount on an LOI must be updated during authorization, based on the transactions that have been allocated before the LOI start date, within the prior period.
LOI Currency
Alphanumeric; 3 Characters; Mandatory
Specify the LOI currency in which the Letter of Intent amount will be deemed.
Currency Name
Display
The system displays the name of the currency for the selected LOI currency code.
LOI Amount
Numeric; 18 Characters; Mandatory
Specify the LOI amount.
Include Standing Instructions
Mandatory
Select the applicability of standing instruction transactions as a means of reducing the Letter of Intent used up amount from the drop-down list. The list displays the following values:
- Yes
- No
Group ID
Alphanumeric; 6 Characters; Mandatory
Specify the load group in which the investor seeks to invest, through the Letter of Intent.
LOI Status
Mandatory
Select the LOI status from the drop-down list. The list displays the following values:
- Active
- Cancel
Remarks
Alphanumeric; 255 Characters; Optional
Specify remarks, if any.
Used-up Amount
Numeric; 30 Characters; Optional
On any given date after the LOI Start Date, specify the amount that reflects the portion of the Letter of Intent amount that the investor has already fulfilled as on that date.
When you are creating the Letter of Intent options for the investor for the first time, this field contains a ‘zero’ value.
After making your specifications, save your changes by clicking the Save button. This setup must be authorized for it to be effective.
4.7 Unit Holder LOI Setup Summary Screen
This section contains the following topics:
- Section 4.7.1, "Retrieving LOI Setup Options for Investor"
- Section 4.7.2, "Editing LOI Setup Options for Investor"
- Section 4.7.3, "Viewing LOI Setup Options for Investor"
- Section 4.7.4, "Deleting LOI Setup Options for Investor"
- Section 4.7.5, "Authorizing LOI Setup Options for Investor"
- Section 4.7.6, "Amending LOI Setup Options for Investor"
- Section 4.7.7, "Authorizing Amended LOI Setup Options for Investor"
4.7.1 Retrieving LOI Setup Options for Investor
After you set up the Letter of Intent options for an investor in the UH LOI Setup Detail screen, you can perform any of the following operations before the record is authorized:
- Edit the specified options in the setup. At this stage, you can alter any of the details.
- Delete the setup.
To perform either operation, use the ‘Unit Holder LOI Setup Summary’ screen. You can invoke this screen by typing ‘UTSUHLOI/ UTSUHLOA’ in the field at the top right corner of the Application tool bar and clicking on the adjoining arrow button.
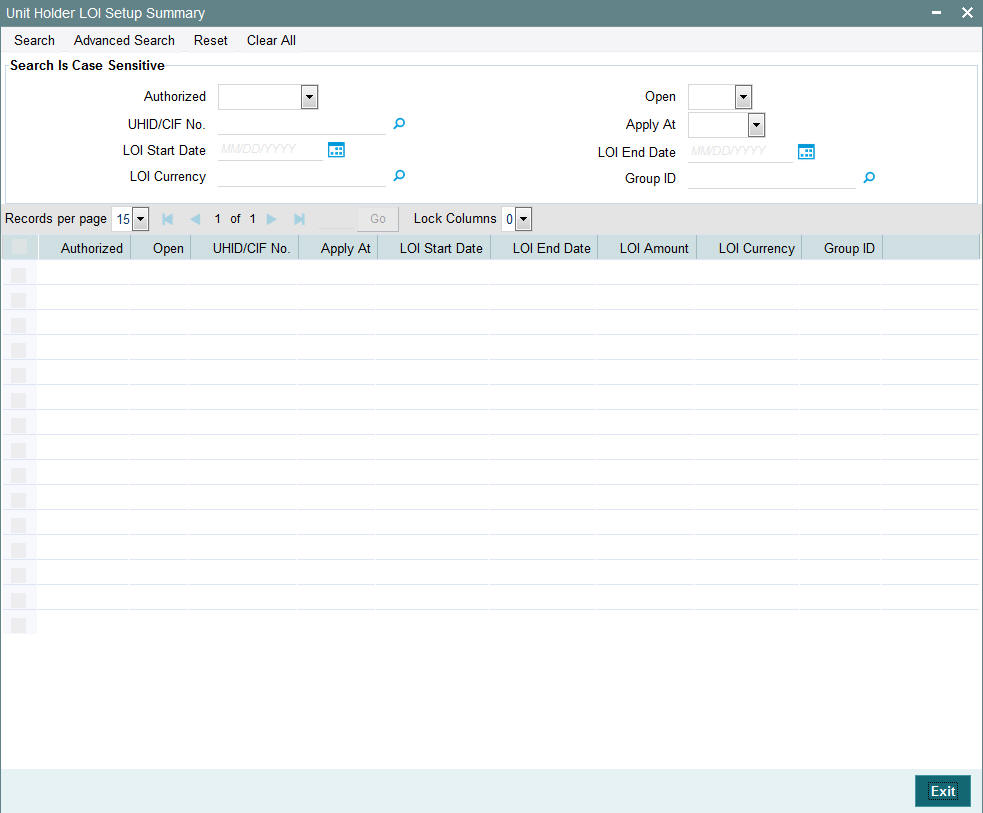
You can retrieve a previously entered record in the UH LOI Summary screen, as follows:
- Specify any or all of the following details in the UH LOI Summary screen:
- The status of the transaction in the Authorized field. If you choose the “Blank Space” option, then all the records that involve the specified unit holder are retrieved.
- The status of the record in the Open field. If you choose the “Blank Space” option, then all the records that involve the specified unit holder are retrieved.
- Unit Holder / CIF Number
- Apply At
- LOI Start Date
- LOI End Date
- LOI Currency
- The Group ID
Click ‘Search’ button to view the records. All records with the specified details are retrieved and displayed in the lower portion of the screen.
You can also retrieve the individual transaction detail from the detail screen by doing query in the following manner:
- Press F7
- Input the Group ID
- Press F8
You can perform Edit, Delete, Amend, Authorize, Reverse, Confirm operation by selecting from the Action list.
You can also search the record by using combination of % and alphanumeric value.
Example
You can search the record for Group ID by using the combination of % and alphanumeric value as follows:
- Search by A%: System will fetch all the records whose Group ID starts from Alphabet ‘A’. For example: AGC17, AGVO6, AGC74 and so forth.
- Search by %7: System will fetch all the records whose Group ID ends by numeric value’ 7’. For example: AGC17, GSD267, AGC77 and so forth.
- Search by %17%:- System will fetch all the records whose Group ID contains the numeric value. For example: GSD217, GSD172, AGC17 and so forth.
4.7.2 Editing LOI Setup Options for Investor
You can modify the details of UH LOI parameters that you have already entered into the system, provided it has not been subsequently authorized. You can perform this operation as follows:
- Invoke the UH LOI Summary screen from the Browser.
- Select the status of the record that you want to retrieve for modification in the Authorized field. You can only modify records that are unauthorized. Accordingly, choose the Unauthorized option.
- Specify any or all of the details in the corresponding fields to retrieve the record that is to be modified. All unauthorized records with the specified details are retrieved and displayed in the lower portion of the screen.
- Double click the record that you want to modify in the list of displayed records. The UH LOI Detail screen is displayed.
- Select Unlock Operation from Action list to modify the record. Modify the necessary information.
- Click Save to save your changes. The UH LOI Detail screen is closed and the changes made are reflected in the UH LOI Summary screen.
4.7.3 Viewing LOI Setup Options for Investor
To view a record that you have previously entered, you must retrieve the same in the UH LOI Summary screen, as follows:
- Invoke the UH LOI Summary Screen from the Browser.
- Select the status of the record that you want to retrieve for viewing in the Authorized field. You can also view all records that are either unauthorized or authorized only, by choosing the Unauthorized / Authorized option.
- Specify any or all of the details of the record in the corresponding fields on the screen, and click ‘Search’ button. All records with the specified details are retrieved and displayed in the lower portion of the screen.
- Double click the record that you want to view in the list of displayed records. The UH LOI Detail screen is displayed in View mode.
4.7.4 Deleting LOI Setup Options for Investor
You can delete only unauthorized records in the system. To delete a record that you have previously entered:
- Invoke the UH LOI Summary screen from the Browser.
- Select the status of the record that you want to retrieve for deletion.
- Specify any or all of the details and click ‘Search’ button. All records with the specified details are retrieved and displayed in the lower portion of the screen.
- Double click the record that you want to delete. The UH LOI Detail screen is displayed.
- Select Delete operation from the Action list. The system prompts you to confirm the deletion, and the record is deleted physically from the system database.
4.7.5 Authorizing LOI Setup Options for Investor
An unauthorized UH LOI record must be authorized in the system for it to be processed. To authorize a record:
- Invoke the UH LOI Summary screen from the Browser.
- Select the status of the record that you want to retrieve for authorization. Typically, choose the Unauthorized option.
- Specify any or all of the details of the record in the corresponding fields on the screen. Click ‘Search’ button. All record with the specified details that are pending authorization are retrieved and displayed in the lower portion of the screen.
- Double click the transaction that you wish to authorize. The UH LOI Detail screen is displayed. Select Authorize operation from Action.
When the checker authorizes a transaction, details of validations, if any, that were overridden by the maker of the transaction during the Save operation, are displayed. If any of these overrides results in an error, the checker must reject the transaction.
4.7.6 Amending LOI Setup Options for Investor
After an UH LOI record is authorized, it can be modified using the Unlock operation from Action list. To make changes to a transaction after authorization:
- Invoke the UH LOI Summary screen from the Browser.
- Select the status of the transaction that you wish to retrieve for amendment. You can only amend only authorized records.
- Specify any or all of the details of the UH LOI in the screen. All records with the specified details are retrieved and displayed in the lower portion of the screen.
- Double click the record that you want to amend. The UH LOI Detail screen is displayed in Amendment mode. Click the Unlock operation from the Action list to amend the record.
- Amend the necessary information. Click the Save button to save the changes.
When you retrieve an LOI record for the purpose of amendment in this screen, it is displayed in the UH LOI Detail screen, in Amend mode. All the non-editable field values are displayed as labels, while the editable fields are enabled for data entry changes.
Note
When you make changes to any authorized record in the system database through the amendment operation, the record with the amended information is saved as an unauthorized record in the system. For your amendment changes to be effective, the amended record must be subsequently authorized. When it is authorized, it is saved in the system database as an authorized record with the amendment information, and is effective.
The Effect of Amending Letter of Intent Options
You can amend an LOI setup record for an investor even after the LOI amount fulfilment has begun. During the amendment, if you change the LOI amount, then the charges applicable as well as the used up LOI amount are reckoned from the new, amended LOI amount.
The Effect of Amending a Letter of Intent Fulfilment Transaction
If you amend the amount involved in an LOI transaction for an investor, then the used up LOI amount is computed using the amended transaction amount.
Note
Once a transaction for an LOI investor is designated as an LOI transaction and subsequently authorized, it cannot be re-designated as a non-LOI transaction during amendment.
Cancelling the Letter of Intent Options during Amendment
When you amend the Letter of Intent options for an investor, you can ‘cancel’ the applicability of the options by choosing the Cancel option in the LOI Status field, and saving your changes. If you do so, then the Letter of Intent is invalid and will not be validated for during subsequent transactions for the investor.
4.7.7 Authorizing Amended LOI Setup Options for Investor
An amended UH LOI record must be authorized for the amendment to be made effective in the system. The authorization of amended records can only be done from Agency branch Module.
The process of authorization is subsequently the same as that for normal transactions.
4.8 LOI Adjust Proc Screen
This section contains the following topics:
4.8.1 Invoking LOI Adjust Proc Screen
To obtain such a report, you must trigger the computation and storing of the actual commission data, from the system database. You can use the ‘LoI Adjust Proc’ screen for this. You can invoke this screen by typing ‘UTDLOIPR’ in the field at the top right corner of the Application tool bar and clicking on the adjoining arrow button. The ‘LoI Adjust Proc’ screen is displayed.
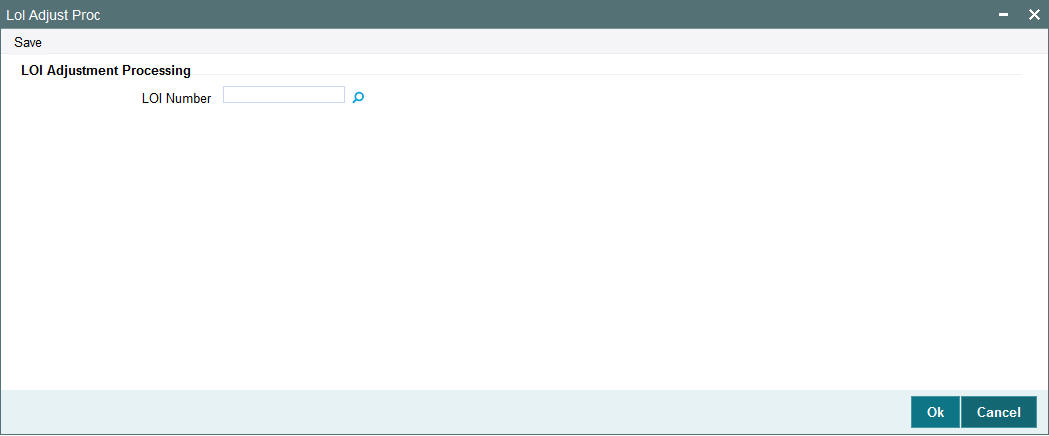
LOI Number
Alphanumeric; 25 Characters; Optional
Specify the LOI number of the corresponding letter of intent, on the next business date after the expiry date of the letter of intent.
Alternatively, if you do not specify the number, you can trigger the computation of commission data for all such letters of intent that are unfulfilled, after the expiry date.
After you have triggered the computation of commission data, in the LOI Adjustment Processing screen, you can use the LOI Non-Fulfilment menu item in the Batch menu to obtain the actual report.
This report contains details of the actual commission due on each of the transactions without considering the letter of intent. This amount must be recovered from the unit holder by the AMC.
The following details are displayed in the report for each letter of intent for any investor which is unfulfilled as on the next business date after the expiry date:
- LOI Number
- Letter of intent amount agreed (LOI amount).
- Letter of intent amount fulfilled (used up amount).
- ID of the load group to which the fund belongs, for which the LOI was set up for the investor.
- The funds in the load group.
- Transaction number, for each transaction designated as an LOI transaction.
- Commission collected for the transaction.
- Actual commission that should have been collected had there been no letter of intent.
- The loss borne by the AMC, which is computed as the difference between the commission collected and commission that should have been collected had there been no LOI.
The commission for each of the LOI transactions entered into during the LOI period is recomputed as if there had been no letter of intent. For each transaction, the actual commission collected and the commission that should have been collected without the LOI is displayed. The sum of the commissions will be subtracted from the actual commission collected and the difference is reported through the report.
LOI investors have the option of designating any single transaction they enter into, as a Letter of Intent transaction. If so designated, the transaction amount in such transactions will reduce the Letter of Intent used up amount.
4.9 UH Non Tax Limits Detail Screen
This section contains the following topics:
- Section 4.9.1, "Setting Up Non-Tax Limits for Eligible Investors"
- Section 4.9.2, "Processing of Non-Tax Limits for Investors"
- Section 4.9.3, "Invoking UH Non Tax Limits Detail Screen"
4.9.1 Setting Up Non-Tax Limits for Eligible Investors
In some cases, investors can avail of tax exemption on their holdings in funds, up to certain prescribed limits, based on their eligibility for these exemptions. The limits would apply to holdings in both accumulated and non-accumulated funds. Whenever the prescribed limits are exceeded, the excess holdings would be subject to taxation.
Example
Let us suppose that an investor, Mr. Robert Brown, is eligible for exemption on tax to a limit of 100000 USD, on all his holdings in the AMC, in the following pattern:
Limit in accumulated funds : 20000 USD
Limit in non-accumulated funds : : 80000 USD
Mr. Brown is eligible up to the following limits in the following accumulated funds:
Carey Bugle Memorial Fund : 10000 USD
Eastern Capital Income Fund : 10000 USD
This would mean that if his investment holdings in any of these funds exceed these prescribed limits, the spillover holdings would attract taxation.
In Oracle FLEXCUBE Investor Servicing, you can maintain any such limits for eligible investors. By maintaining these limits and validating them whenever a transaction request is received from such an eligible investor, you can maintain the investor’s taxable and non-taxable holdings separately.
To set up the limits in this screen,
- Select the unit holder for whom you want to set up the non-tax limits, in the Client Information section.
- Specify the total tax-exemption limit applicable for the investor, in all funds both accumulative and non-accumulative, in the Total Sanctioned Limit field.
- Specify the identification document for the non-tax limits that are being set up.
- If the eligibility document for the non-tax limits option has been received, select the Maruyu Eligibility Status option in the Change Information Status field, and specify the date on which the document was received, in the Document Received Date field. Typically, the Document Received Date is defaulted to the application date.
- Specify the break up of the total limit that would be applicable, in accumulated and non-accumulated funds.
- In the Non-Taxable Limits for Non-Accumulated Funds section, indicate the limit for such funds.
- In the Non-Taxable Limits for Accumulated Funds section, select each of the funds for which the limit must be applicable in the Fund field, and specify the limit for each in the Allowed Limit field.
- Save your specifications.
4.9.2 Processing of Non-Tax Limits for Investors
If you have set up tax-exemption limits for eligible investors, the system maintains the taxable and non-taxable holdings of such investors separately.
In Oracle FLEXCUBE Investor Servicing, you can give investors the option of designating each transaction request to be validated against the non-tax limits, if any, set up for them. This means that even in the event of the limits not being used up, the investors can indicate that the proceeds of a transaction be classified as taxable, or non-taxable.
If, on an investor’s request, you classify the transaction as a non-taxable one, then the transaction amount is validated against the investor’s remaining limit for tax exemption.
When in the course of a transaction designated as non-taxable the limits are exceeded, the spillover proceeds are maintained in the system as taxable holdings for the investor.
The non-tax limits maintained for an investor are also reduced when dividend earned in accumulated funds is reinvested.
For more information on how you can configure funds to maintain taxable and non-taxable holdings for investors, refer the chapter “Setting up Fund Rules” in Fund Manager User Manual.
For more information on how to designate a transaction as taxable or non-taxable for eligible investors, refer the chapter “Processing Transaction Requests”.
4.9.3 Invoking UH Non Tax Limits Detail Screen
To set up the prescribed limits for taxable holdings for an eligible investor, you can use the ‘UH Non Tax Limits Detail’ screen. You can invoke this screen by typing ‘UTDUHNTX/ UTDURATX’ in the field at the top right corner of the Application tool bar and clicking on the adjoining arrow button.
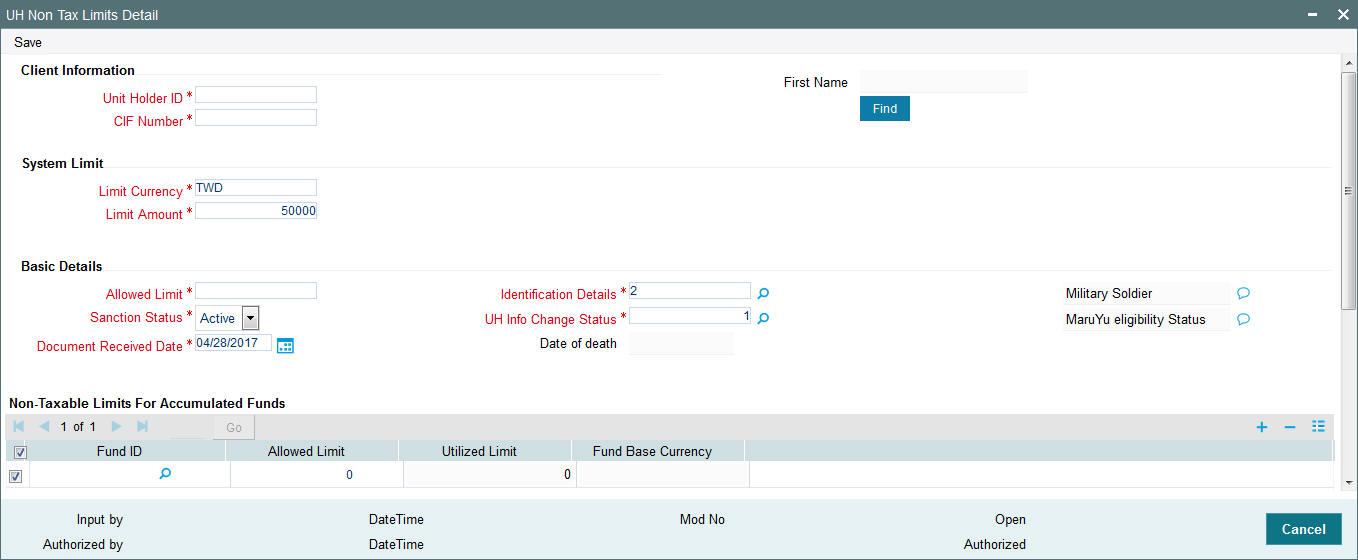
Select 'New' from the Actions menu in the Application tool bar or click new icon to enter the details of the UH Non-Tax Limits screen.
Client Information
In this section, select the ID of the unit holder for whom you are specifying non-tax limit options.
Unit Holder ID
Alphanumeric; 12 Characters; Mandatory
Enter the CIF unit holder ID for whom you are creating the non-tax limit options.
First Name
Display
Specify the ID of the non-CIF unit holder for whom you are setting up the non-tax limit options in this screen. The name of the unit holder that you select is displayed alongside the field.
CIF Number
Alphanumeric; 12 Characters; Mandatory for setting up non-tax limit options for a unit holder under a CIF Account
Select or specify the number of the CIF Account under which the unit holder for whom you are creating the non-tax limit options is found.
When you specify the CIF Number, the name of the corresponding CIF Account is retrieved from the database and displayed alongside the field.
All the unit holder accounts under the CIF Account that you have selected are listed in the drop down list in the Unit Holders for CIF field.
You can query unit holder ID and CIF number by clicking ‘Find’ button.
System Limit
Limit Currency
Alphanumeric; 3 Characters; Mandatory
This is parameterized at the system level. However, you can amend this value.
Limit Amount
Numeric; 22 Characters; Mandatory
This is parameterized at the system level. However, you can amend this value.
Basic Details
In this section, you can indicate the total sanctioned limit across all funds for the investor.
Allowed Limit
Numeric; 28 Characters; Mandatory
Specify the total non-tax limit that is applicable for investments in the selected accumulated fund, for the investor. This amount must not be higher than the total sanctioned limit across all funds, which you specified in the Basic Details section in this screen.
The sum of the allowed limits for each accumulated fund must not exceed that portion of the total sanctioned limit available for accumulated funds.
Identification Details
Alphanumeric; 3 Characters; Mandatory
Select the type of identification document that is being provided for the non-tax limits option being set up for the unit holder. The system displays the description in the adjacent field.
The identification could be provided as any of the following documents:
- Nominee Document
- Handicap Document
- Death Certificate
Sanction Status
Mandatory
At any given date after you set up the non-tax limits for an investor in this screen, select the sanction status from the drop-down list. The list displays the following values:
- Active
- Cancel
When you are creating the non-tax limit options for the investor for the first time, the ‘Active’ option is displayed in this field.
If you have cancelled the non-tax limit through an amendment, the ‘Cancel’ option is displayed in this field. In this state, the limit is no longer valid and will not be validated for during any transactions of the investor.
You cannot alter the status displayed in this field at any juncture.
UH Info Change Status
Numeric; 1 Character; Mandatory
Specify the UH info change status. The system displays the description in the adjacent field.
The Maruyu Eligibility Status option is mandatory while setting up a new non-tax record.
While setting up a new non-tax limits record in this screen, you must select the Maruyu Eligibility Status option and specify the date on which the eligibility status document was received, as mandatory information. This date is typically defaulted to the application date.The system displays the description in the adjacent field.
While specifying any changes to the non-tax limits record during an amendment in this screen, you can select the type of change document that has been received, from the list. The following options are available:
- Change Limit Status: Select this option to indicate that the non-tax limit has been legally revised, and the document for the change has been received. The changed limit must also be specified in the Sanctioned Limit field.
Note
When a transfer transaction is entered for a unit holder with a non-tax limits record, the limit tracking for the amount is done based on the Average Cost and not the Transaction Base Price. Therefore, there could be a residual value for the non-taxable holdings, even if the actual number of units has come down to zero.
Only transfer by units (All Units) and percentage (by 100%) transactions may be entered for unit holders with non-tax limits records. Transfer transactions by amount cannot be entered for such unit holders in the case of change in status.
- Stop Using Status: Select this option to indicate that the non-tax limit has been withdrawn or stopped for the investor and the corresponding document to this effect this has been received. The available limit must be set to zero, in the Sanctioned Limit field. Authorization of this status change will result in an automatic transfer of non-taxable holdings to taxable holdings, for the concerned unit holder.
- Loss of Eligibility Status: Select this option to indicate that the investor has been legally made ineligible to avail of the non-tax limit, and the corresponding document to this effect has been received. The available limit must be set to zero, in the Sanctioned Limit field. Authorization of this status change will result in an automatic transfer of non-taxable holdings to taxable holdings, for the concerned unit holder.
- Death Status: Select this option to indicate that the non-tax limit has been withdrawn or stopped for the investor, due to death of the investor and the corresponding document to this effect this has been received. The available limit must be set to zero, in the Sanctioned Limit field.
When an information change has been effected to the unit holder account for which the non-tax limits are being set up, the system prompts you to confirm the change for the non-tax limit investor, and to confirm the receipt of the supporting document. Based on this, it also updates the option in this field as Change Information Status option, and defaults the Document Received Date as the application date of the change.
Document Received Date
Date Format; Mandatory
Specify the date on which the following documents are received:
- For a new non-tax limits record, the Maruyu Eligibility Status.
- For a non-tax limit amendment, the Change Limit Status, Stop Using Status, Loss of Eligibility Status or Death Status.
By default, the application date is reckoned as the date on which the corresponding document is received.
You must specify this date as mandatory information for either a new non-tax limits record or during amendment.
Date of Death
Date Format, Mandatory if the Death Status option is chosen in the Change Information Status field.
During amendment, if you are entering the change information as Death Status in the Change Information Field, specify the date of death in this field.
Non-Taxable Limits for Accumulated Funds
In this section, you specify the portion of the total non-taxable limit that is applicable for investments in accumulated funds, for the unit holder. You can define individual limits for individual funds.
Fund ID
Alphanumeric; 6 Characters; Optional
Select the fund for which you want to indicate a non-taxable limit for the investor.
Allowed Limit
Numeric; 28 Characters; Optional
Specify the total non-tax limit that is applicable for investments across all non-accumulated funds, for the investor. This amount must not be higher than the total sanctioned limit across all funds that you specified in the previous section in this screen.
Utilized Limit
Display
At any given date after you have created the non-taxable limit for a unit holder, the value displayed in this field reflects the portion of the limit defined for the selected accumulated fund that has been used up, as on the date, in investments in the fund. You cannot change this value at any juncture.
Fund Base Currency
Display
The value displayed in this field reflects the portion of the limit, in fund base currency, defined for the selected accumulated fund that has been used up, as on the date of viewing, in investments in the fund. You cannot change this value at any juncture.
Non-Taxable Limits for Non-Accumulated Funds
In this section, you specify the portion of the total non-taxable limit that is applicable for investments in non-accumulated funds, for the unit holder.
NonAcc Allowed Limit
Numeric; 22 Characters; Mandatory
Specify the non accumulated allowed limit.
Utilized Amount
Display Only
At any given date after you have created the non-taxable limit for a unit holder, the value displayed in this field reflects the portion of the limit defined for non-accumulated funds that have been used up, as on the date, in investments in non-accumulated funds. You cannot change this value at any juncture.
4.10 UH Non Tax Limits Summary Screen
This section contains the following topics:
- Section 4.10.1, "Retrieving Non-Tax Limits for Investor"
- Section 4.10.2, "Editing Non-Tax Limits for Investor"
- Section 4.10.3, "Viewing Non-Tax Limits for Investor"
- Section 4.10.4, "Deleting Non-Tax Limits for Investor"
- Section 4.10.5, "Authorizing Non-Tax Limits for Investor"
- Section 4.10.6, "Amending Non-Tax Limits for Investor"
- Section 4.10.7, "Authorizing Amended Non-Tax Limits for Investor"
4.10.1 Retrieving Non-Tax Limits for Investor
After you set up the tax-exemption limits for an investor in the ‘UH Non Tax Limits Setup Detail’ screen, you can perform any of the following operations before the record is authorized:
- Edit the specified limits in the setup.
- Delete the setup.
To perform either operation, use the ‘UH Non Tax Limits Summary’ screen. You can invoke this screen by typing ‘UTSUHNTX/ UTSURATX’ in the field at the top right corner of the Application tool bar and clicking on the adjoining arrow button.
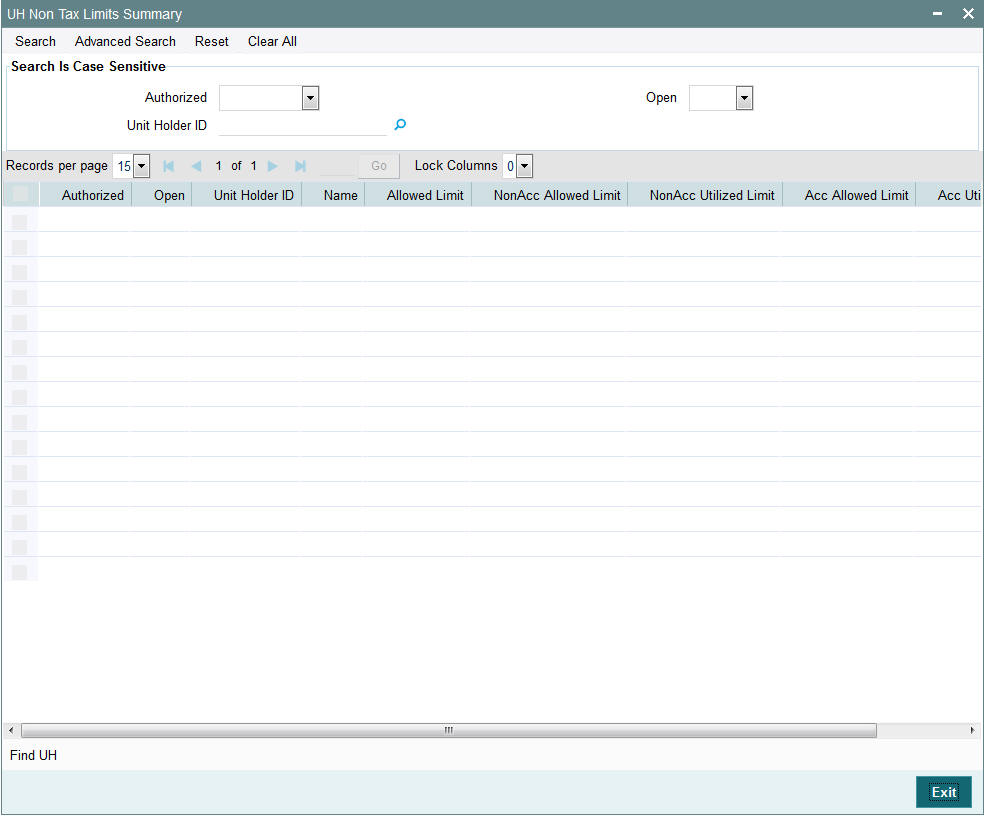
You can retrieve a previously entered record in the UH Non-Tax Limits Summary screen, as follows:
- Specify any or all of the following details in the UH Non-Tax Limits Summary screen:
- The status of the transaction in the Authorized field. If you choose the “Blank Space” option, then all the transactions that involve the specified unit holder are retrieved.
- The status of the Transaction in the Open field. If you choose the ‘Blank Space’ option, then all the records that involve the specified unit holder are retrieved.
- Unit Holder ID
Click ‘Search’ button to view the records. All records with the specified details are retrieved and displayed in the lower portion of the screen.
Note
You can also retrieve the individual transaction detail from the detail screen by doing query in the following manner:
- Press F7
- Input the Unit Holder ID
- Press F8
You can perform Edit, Delete, Amend, Authorize, Reverse, Confirm operation by selecting from the Action list.
You can also search the record by using combination of % and alphanumeric value.
Example
You can search the record for Unit Holder ID by using the combination of % and alphanumeric value as follows:
- Search by A%: System will fetch all the records whose Unit Holder ID starts from Alphabet ‘A’. For example: AGC17, AGVO6, AGC74 and so forth.
- Search by %7: System will fetch all the records whose Unit Holder ID ends by numeric value’ 7’. For example: AGC17, GSD267, AGC77 and so forth.
- Search by %17%: System will fetch all the records whose Unit Holder ID contains the numeric value 17. For example: GSD217, GSD172, AGC17 and so forth.
4.10.2 Editing Non-Tax Limits for Investor
You can modify the details of UH Non-Tax Limits parameters that you have already entered into the system, provided it has not been subsequently authorized. You can perform this operation as follows:
- Invoke the UH Non-Tax Limits Summary screen from the Browser.
- Select the status of the record that you want to retrieve for modification in the Authorized field. You can only modify records that are unauthorized. Accordingly, choose the Unauthorized option.
- Specify any or all of the details in the corresponding fields to retrieve the record that is to be modified. All unauthorized records with the specified details are retrieved and displayed in the lower portion of the screen.
- Double click the record that you want to modify in the list of displayed transactions. The UH Non-Tax Limits Detail screen is displayed.
- Select Unlock Operation from Action list to modify the record. Modify the necessary information.
- Click Save to save your changes. The UH Non-Tax Limits Detail screen is closed and the changes made are reflected in the UH Non-Tax Limits Summary screen.
4.10.3 Viewing Non-Tax Limits for Investor
To view a record that you have previously entered, you must retrieve the same in the UH Non-Tax Limits Summary screen, as follows:
- Invoke the UH Non-Tax Limits Summary Screen from the Browser.
- Select the status of the records that you want to retrieve for viewing in the Authorization Status field. You can also view all records that are either unauthorized or authorized only, by choosing the Unauthorized/ Authorized option.
- Specify any or all of the details of the records in the corresponding fields on the screen, and click ‘Search’ button. All records with the specified details are retrieved and displayed in the lower portion of the screen.
- Double click the record that you want to view in the list of displayed records. The UH Non-Tax Limits Detail screen is displayed in View mode.
4.10.4 Deleting Non-Tax Limits for Investor
You can delete only unauthorized records in the system. To delete a record that you have previously entered:
- Invoke the UH Non-Tax Limits Summary screen from the Browser.
- Select the status of the record that you want to retrieve for deletion.
- Specify any or all of the details and click ‘Search’ button. All records with the specified details are retrieved and displayed in the lower portion of the screen.
- Double click the record that you want to delete. The UH Non-Tax Limits Detail screen is displayed.
- Select Delete operation from the Action list. The system prompts you to confirm the deletion, and the record is deleted physically from the system database.
4.10.5 Authorizing Non-Tax Limits for Investor
An unauthorized UH Non-Tax Limits record must be authorized in the system for it to be processed. To authorize a record:
- Invoke the UH Non-Tax Limits Summary screen from the Browser.
- Select the status of the record that you want to retrieve for authorization. Typically, choose the Unauthorized option.
- Specify any or all of the details of the record in the corresponding fields on the screen. Click ‘Search’ button. All record with the specified details that are pending authorization are retrieved and displayed in the lower portion of the screen.
- Double click the transaction that you wish to authorize. UH Non-Tax Limits Detail screen is displayed. Select Authorize operation from Action.
When the checker authorizes a transaction, details of validations, if any, that were overridden by the maker of the transaction during the Save operation, are displayed. If any of these overrides results in an error, the checker must reject the transaction.
4.10.6 Amending Non-Tax Limits for Investor
After a UH Non-Tax Limits record is authorized, it can be modified using the Unlock operation from Action list. To make changes to a record after authorization:
- Invoke the UH Non-Tax Limits Summary screen from the Browser.
- Select the status of the transaction that you wish to retrieve for amendment. You can only amend only authorized records.
- Specify any or all of the details of the UH Non-Tax Limits in the screen. All records with the specified details are retrieved and displayed in the lower portion of the screen.
- Double click the record that you want to amend. The UH Non-Tax Limits Detail screen is displayed in Amendment mode. Click the Unlock operation from the Action list to amend the record.
- Amend the necessary information. Click the Save button to save the changes.
When you retrieve a non-tax limits record for the purpose of amendment in this screen, it is displayed in the UH Non-Tax Limits Setup Detail screen, in Amend mode. All the non-editable field values are displayed as labels, while the editable fields are enabled for data entry changes.
Note
When you make changes to any authorized record in the system database through the amendment operation, the record with the amended information is saved as an unauthorized record in the system. For your amendment changes to be effective, the amended record must be subsequently authorized. When it is authorized, it is saved in the system database as an authorized record with the amendment information, and is effective.
If you change the non-tax limits at any level during amendment, the altered value must not fall below the utilized portion of the limits, as on the date of amendment. At any level, the utilized portion of the limits as on the date of viewing or amendment, are displayed in the Utilized Limit (or Amount) field on the screen.
Change of Information for a Non-Tax Limit Record through Amendment
Changes to the non-tax limit record will be necessary in the following situations:
- The unit holder’s non-tax limit has changed.
- The unit holder has been made legally ineligible for the non-tax limit, or the eligibility has been legally stopped or withdrawn.
- The death of the unit holder.
During amendment, you can specify the change that has been made, in the Change Information Status field. You must also specify the date on which the supporting documents for the change were received, in the Document Received Date field.
If the unit holder has been made legally ineligible to avail the non-tax limit, or the eligibility has been legally stopped, you must specify the non-tax limit to zero, in the Total Sanctioned Limit field.
4.10.7 Authorizing Amended Non-Tax Limits for Investor
When an amendment is made to a non-tax limits record for a unit holder, it must be authorized for the information change to take effect in the system and for the resultant processes to be initiated.
When an amendment resulting from the unit holder’s non-tax limit being brought down to zero (i.e., the unit holder has been made legally ineligible or the eligibility has been stopped or withdrawn) is being authorized, the system displays a message stating that the non-taxable holdings of the unit holder will be converted to taxable holdings.
If the authorization is confirmed, the system triggers transactions that will convert the non-taxable units to taxable units. If any provisional holdings are present, the system forces the user to either confirm or reject the same. Redemptions will go through the normal taxation.
The Inheritance Process (Return of Death Status)
In the event of the death of the unit holder for whom a non-tax limit is in operation, you must specify the death, date of death and the receipt of the death certificate in the non-tax limits record, through an amendment. The date of death must be specified as mandatory information.
In the event of death of a unit holder with a non-tax limits record, you must manually enter redemption transactions or transfer transactions, before you specify the return of death status in the non-tax limits record. By this process, the non-taxable units held by the deceased unit holder are either redeemed, or transferred to the account of the legal heir, through a normal transfer transaction. If transferred, the system checks for the non-tax limit eligibility of the transferee unit holder. If the resulting transfer transaction exceeds the non-tax limit specified for the transferee unit holder, the spillover balance is added to the transferee’s taxable holdings.
Redemptions will go through the normal taxation.
4.11 Unit Holder IRRF Preference Detail Screen
This section contains the following topics:
- Section 4.11.1, "Setting up IRRF Preferences for a Unit Holder"
- Section 4.11.2, "Invoking Unit Holder IRRF Preference Detail Screen"
4.11.1 Setting up IRRF Preferences for a Unit Holder
IRRF is equivalent of the income tax, and is paid as the percentage of the profit made post the application of IOF which is a tax paid for the profit made by the Unitholder, if a Unitholder redeems the funds within a stipulated time. Unit Holder IRRF preferences are applicable only for pension funds.
IRRF is usually paid on the last working day of May and November. Apart from paying IRRF on these fixed dates, IRRF is also paid during redemption. Any advance IRRF paid by the customer are adjusted while calculating the IRRF during redemption.
You can opt for optional IRRF load only within the stipulated number of days as specified in PARAMS maintenance. If the IRRF preferences have not been setup from the date of first subscription for a given combination of unit holder and fund within the stipulated number of days, default IRRF will be considered. Whenever judicial blocking or redemption occurs before the preferences have been setup in the system, default IRRF load will be considered for IRRF calculation and you will not be allowed to maintain the preferences then on.
Note
This feature is only available if your installation has requested for it.
4.11.2 Invoking Unit Holder IRRF Preference Detail Screen
To set up unit holder preferences for the IRRF component, use the ‘Unit Holder IRRF Preference Detail’ screen. You can invoke this screen by typing ‘UTDUHIOF’ in the field at the top right corner of the Application tool bar and clicking on the adjoining arrow button.
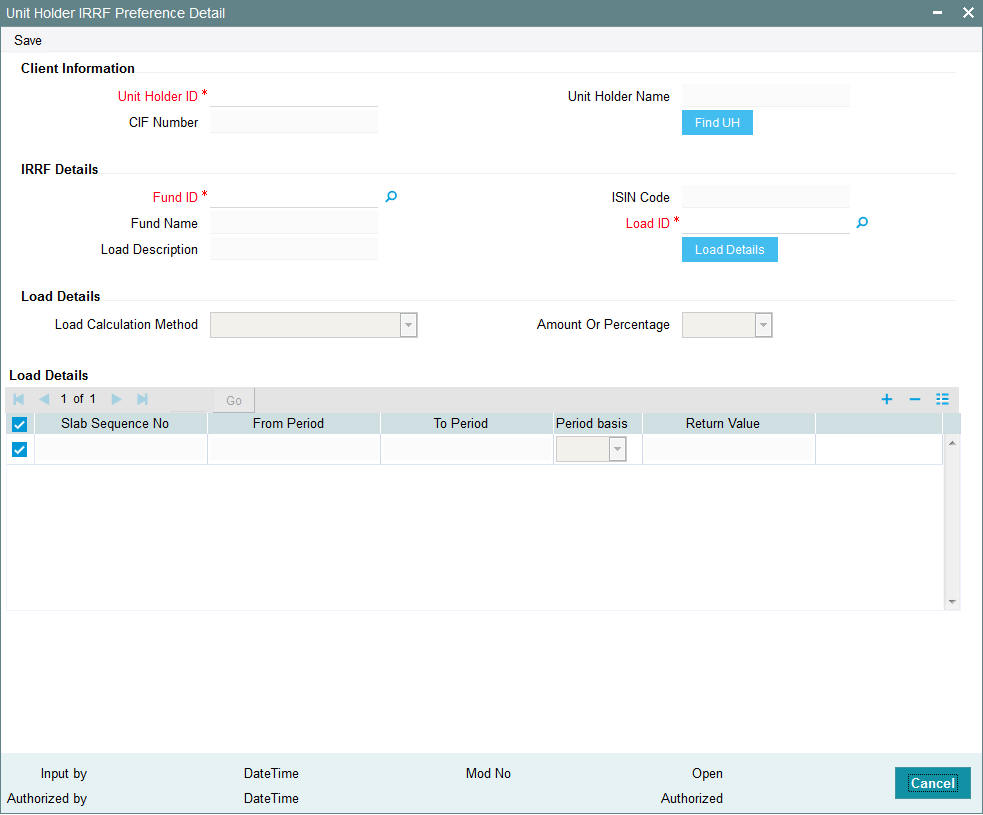
Select 'New' from the Actions menu in the Application tool bar or click new icon to enter the details of the Unit Holder IRRF Preference screen.
Client Information
Unit Holder ID
Alphanumeric; 12 Characters; Mandatory
Specify the ID of the unit holder ID for whom IRRF details are being maintained.
Unitholder Name
Display
The name of the unit holder is defaulted here once the unit holder Id is provided.
CIF Number
Display
The system displays the CIF number of the customer for the selected unit holder ID.
You can query unit holder ID by clicking ‘Find UH’ button.
IRRF Details Section
Fund ID
Alphanumeric; 6 Characters; Mandatory
Specify the fund ID. All the pension funds with a valid fund ID maintained through the General Operating Rules screen for IOF / IRRF Ageing based funds are displayed in the option list.
Fund Name
Display
The system displays the name of the fund for the selected fund ID.
ISIN Code
Display
The system displays the ISIN Code of the selected fund.
Load ID
Numeric; 5 Characters; Mandatory
Select the IRRF Load id from the option list which displays all the IRRF Loads which mapped to the fund.
Load Description
Display
On selection of the Fund ID Code, the system automatically displays the description of the fund.
On Selection of the IRRF Load the Load Details Section is displayed.
Note
You are allowed to opt for optional IRRF load only within the stipulated number of days as specified in PARAMS maintenance.
Load Details
Click ‘Load Details’ button to view the following details.
Load Calculation Method
Display
The system displays the load maintained.
This is same as one available in Load section in FMG and it defaults from the load maintained.
Amount Or Percentage
Display
The system displays the amount or percentage value.
This is same as one available in Load section in FMG and it defaults from the load maintained.
The Load Details Section displays the following
- Slab Sequence No
- From Period
- To Period
- Period Basis
- Return Value
Note
You cannot amend the unit holder IRRF preferences once it is maintained in the system.
4.12 Unit Holder IRRF Preference Summary Screen
This section contains the following topics:
- Section 4.12.1, "Retrieving IRRF Preferences for Investors"
- Section 4.12.2, "Editing IRRF Preferences for Investors"
- Section 4.12.3, "Viewing IRRF Preferences for Investors"
- Section 4.12.4, "Deleting IRRF Preferences for Investors"
- Section 4.12.5, "Authorizing IRRF Preferences for Investors"
- Section 4.12.6, "Amending IRRF Preferences for Investors"
- Section 4.12.7, "Authorizing Amended IRRF Preferences for Investors"
4.12.1 Retrieving IRRF Preferences for Investors
After you setup Unit Holder IRRF Preference for an investor, in the ‘IRRF Unit Holder Preferences’ screen, you can perform any of the following operations before the record is authorized:
- Edit the preferences.
- Delete the record.
To perform either of the operation, use the ‘Unit Holder IRRF Preference Summary’ screen. You can invoke this screen by typing ‘UTSUHIOF’ in the field at the top right corner of the Application tool bar and clicking on the adjoining arrow button.
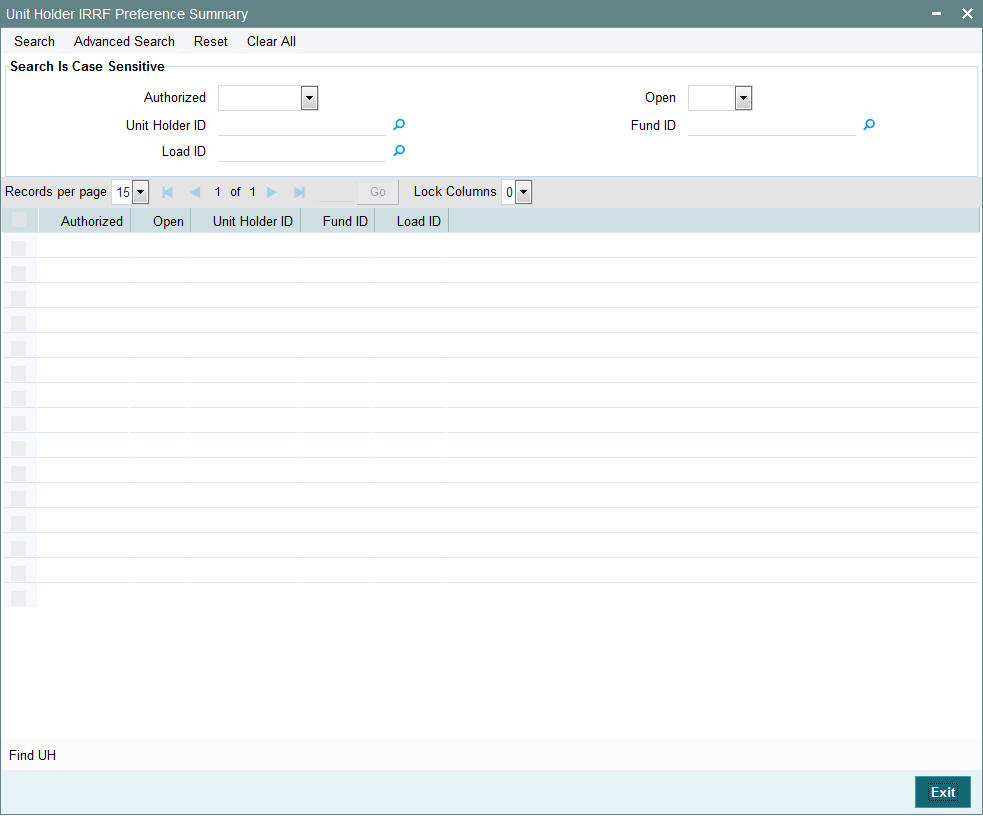
You can retrieve a previously entered record in the ‘Unit Holder IRRF Preference Summary’ screen, as follows:
- Specify any or all of the following details in the Unit Holder IRRF Preference Summary screen:
- The status of the Unit Holder IRRF Preference in the Authorized field. If you choose the “Blank Space” option, then all the Unit Holder IRRF Preference that involves the specified unit holder are retrieved.
- The status of the Unit Holder IRRF Preference in the Open field. If you choose the “Blank Space” option, then all the Unit Holder IRRF Preference that involves the specified unit holder are retrieved.
- The Unit Holder ID
- The Fund ID
- The Load ID
Click ‘Search’ button to view the records. All records with the specified details are retrieved and displayed in the lower portion of the screen.
Note
You can also retrieve the individual Unit Holder IRRF Preference detail from the detail screen by doing query in the following manner:
- Press F7
- Input the Unit Holder ID
- Press F8
You can perform Edit, Delete, Amend, Authorize, Reverse, Confirm operation by selecting from the Action list.
You can also search the record by using combination of % and alphanumeric value.
Example
You can search the record for Unit Holder ID by using the combination of % and alphanumeric value as follows:
- Search by A%: System will fetch all the records whose Unit Holder ID starts from Alphabet ‘A’. For Example: AGC17, AGVO6, AGC74 and so forth.
- Search by %7: System will fetch all the records whose Unit Holder ID ends by numeric value’ 7’. For Example: AGC17, GSD267, AGC77 and so forth.
- Search by %17%: System will fetch all the records whose Unit Holder ID contains the numeric value 17. For Example: GSD217, GSD172, AGC17 and so forth.
4.12.2 Editing IRRF Preferences for Investors
You can modify the details of Unit Holder IRRF Preference parameters that you have already entered into the system, provided it has not been subsequently authorized. You can perform this operation as follows:
- Invoke the Unit Holder IRRF Preference Summary screen from the Browser.
- Select the status of the record that you want to retrieve for modification in the Authorized field. You can only modify records that are unauthorized. Accordingly, choose the Unauthorized option.
- Specify any or all of the details in the corresponding fields to retrieve the record that is to be modified. All unauthorized records with the specified details are retrieved and displayed in the lower portion of the screen.
- Double click the record that you want to modify in the list of displayed record. The Unit Holder IRRF Preference Detail screen is displayed.
- Select Unlock Operation from Action list to modify the record. Modify the necessary information.
- Click Save to save your changes. Unit Holder IRRF Preference Detail screen is closed and the changes made are reflected in the Unit Holder IRRF Preference Summary screen.
4.12.3 Viewing IRRF Preferences for Investors
To view a record that you have previously entered, you must retrieve the same in the Unit Holder IRRF Preference Summary screen, as follows:
- Invoke the Unit Holder IRRF Preference Summary Screen from the Browser.
- Select the status of the Unit Holder IRRF Preference that you want to retrieve for viewing in the Authorized field. You can also view all records that are either unauthorized or authorized only, by choosing the Unauthorized/ Authorized option.
- Specify any or all of the details of the record in the corresponding fields on the screen, and click ‘Search’ button. All records with the specified details are retrieved and displayed in the lower portion of the screen.
- Double click the record that you want to view in the list of displayed records. The Unit Holder IRRF Preference Detail screen is displayed in View mode.
4.12.4 Deleting IRRF Preferences for Investors
You can delete only unauthorized records in the system. To delete a record that you have previously entered:
- Invoke the Unit Holder IRRF Preference Summary screen from the Browser.
- Select the status of the record that you want to retrieve for deletion.
- Specify any or all of the details and click ‘Search’ button. All record with the specified details are retrieved and displayed in the lower portion of the screen.
- Double click the record that you want to delete. The Unit Holder IRRF Preference Detail screen is displayed.
- Select Delete operation from the Action list. The system prompts you to confirm the deletion, and the record is deleted physically from the system database.
4.12.5 Authorizing IRRF Preferences for Investors
An unauthorized Unit Holder IRRF Preference record must be authorized in the system for it to be processed. To authorize a record:
- Invoke the Unit Holder IRRF Preference Summary screen from the Browser.
- Select the status of the record that you want to retrieve for authorization. Typically, choose the Unauthorized option.
- Specify any or all of the details of the record in the corresponding fields on the screen. Click ‘Search’ button. All records with the specified details that are pending authorization are retrieved and displayed in the lower portion of the screen.
- Double click the transaction that you wish to authorize. Unit Holder IRRF Preference Detail screen is displayed. Select Authorize operation from Action.
When the checker authorizes a Unit Holder IRRF Preference, details of validations, if any, that were overridden by the maker of the transaction during the Save operation, are displayed. If any of these overrides results in an error, the checker must reject the Unit Holder IRRF Preference.
4.12.6 Amending IRRF Preferences for Investors
After an Unit Holder IRRF Preference record is authorized, it can be modified using the Unlock operation from Action list. To make changes to a transaction after authorization:
- Invoke the Unit Holder IRRF Preference Summary screen from the Browser.
- Select the status of the Unit Holder IRRF Preference that you wish to retrieve for amendment. You can only amend only authorized records.
- Specify any or all of the details of the Unit Holder IRRF Preference in the screen. All records with the specified details are retrieved and displayed in the lower portion of the screen.
- Double click the record that you want to amend. The Unit Holder IRRF Preference Detail screen is displayed in Amendment mode. Click the Unlock operation from the Action list to amend the record.
- Amend the necessary information. Click the Save button to save the changes.
4.12.7 Authorizing Amended IRRF Preferences for Investors
An amended Unit Holder IRRF Preference record must be authorized for the amendment to be made effective in the system. The authorization of amended records can only be done from Fund Manager Module and Agency branch Module.
The process of authorization is subsequently the same as that for normal Unit Holder IRRF Preference.
4.13 Unit Holder NPI Preference Detail Screen
This section contains the following topics:
4.13.1 Invoking Unit Holder NPI Preference Detail Screen
As per Shariah principle of ‘cleansing’ the fund of ‘impure’ income the earnings derived out of any dividend exceeding a certain benchmark cannot be reinvested. This portion of the earnings is classified as Non Permissible Income (NPI). The investor can either choose to receive the NPI component as income or pay the same to a trust.
To set up a Unit Holder NPI payment preference use the ‘Unit Holder NPI Preference Detail’ screen. You can invoke this screen by typing ‘UTDUHNPI’ in the field at the top right corner of the Application tool bar and clicking on the adjoining arrow button.
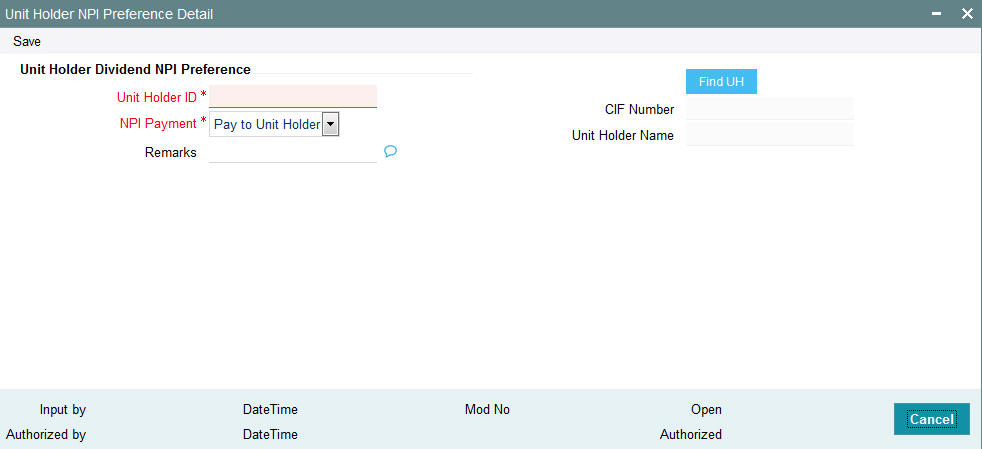
Select 'New' from the Actions menu in the Application tool bar or click new icon to enter the details of the Unit Holder NPI Preference screen.
Unit Holder Dividend NPI Preference
Unit Holder ID
Alphanumeric; 12 Characters; Mandatory
Specify the ID of the unit holder for whom you are maintaining the NPI preferences in this screen. You can also query for unit holder ID by clicking ‘Find UH’ button.
CIF Number
Display
The system displays the CIF number.
Unit Holder Name
Display
The system displays the name of CIF unit holder for the selected unit holder ID.
NPI Payment
Mandatory
If the investor opts to receive the NPI component as income, then select ‘Pay to Unit Holder’ from drop-down list.
Remarks
Alphanumeric; 255 Characters; Optional
You can enter any applicable narrative or descriptive text here.
4.14 Unit Holder NPI Preference Summary Screen
This section contains the following topics:
- Section 4.14.1, "Retrieving NPI Payment Preferences for Investors"
- Section 4.14.2, "Editing NPI Payment Preferences for Investors"
- Section 4.14.3, "Viewing NPI Payment Preferences for Investors"
- Section 4.14.4, "Deleting NPI Payment Preferences for Investors"
- Section 4.14.5, "Authorizing NPI Payment Preferences for Investors"
- Section 4.14.6, "Amending NPI Payment Preferences for Investors"
- Section 4.14.7, "Authorizing Amended NPI Payment Preferences for Investors"
4.14.1 Retrieving NPI Payment Preferences for Investors
After you setup the NPI preferences for an investor, in the NPI UnitHolder Preferences screen, you can perform any of the following operations before the record is authorized:
- Edit the preferences
- Delete the record
To perform either of the operation, use the ‘Unit Holder NPI Preference Summary’ screen. You can invoke this screen by typing ‘UTSUHNPI’ in the field at the top right corner of the Application tool bar and clicking on the adjoining arrow button.
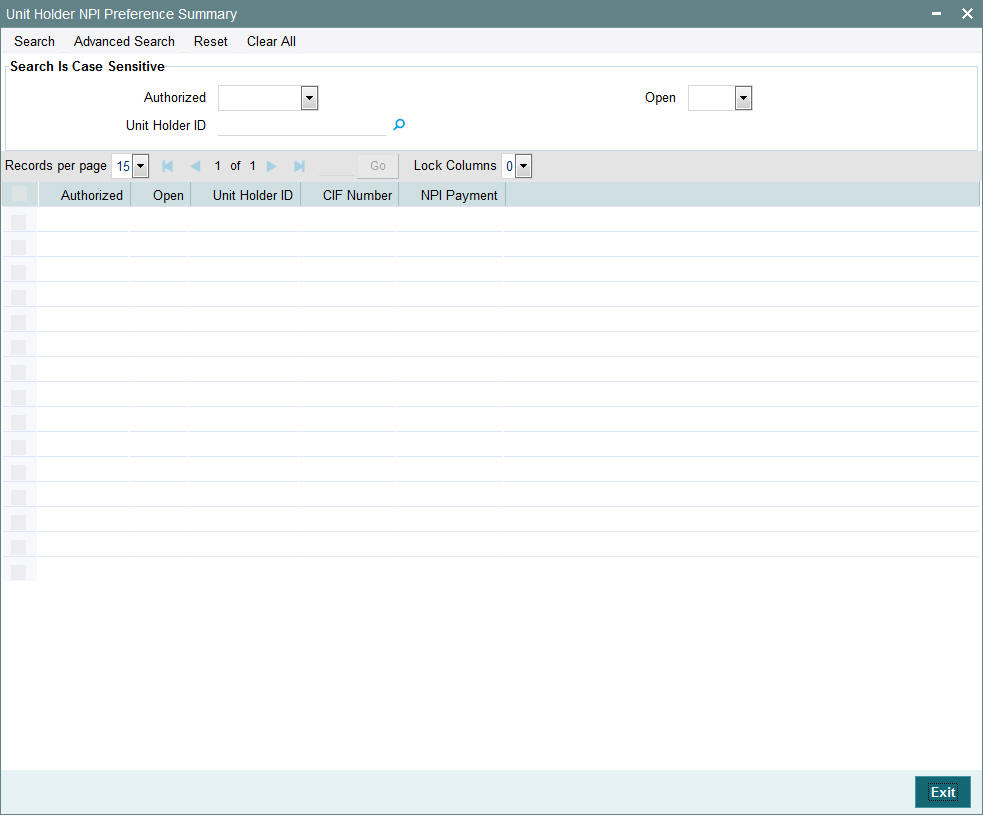
You can retrieve a previously entered record in the UH NPI Preference Summary screen, as follows:
- Specify any or all of the following details in the UH NPI Preference Summary screen:
- The status of the transaction in the Authorized field. If you choose the “Blank Space” option, then all the record that involves the specified unit holder are retrieved.
- The status of the Transaction in the Open field. If you choose the “Blank Space” option, then all the transactions that involve the specified unit holder are retrieved.
- The Unit Holder ID
Click ‘Search’ button to view the records. All records with the specified details are retrieved and displayed in the lower portion of the screen.
Note
You can also retrieve the individual record detail from the detail screen by doing query in the following manner:
- Press F7
- Input the Unit Holder ID
- Press F8
You can perform Edit, Delete, Amend, Authorize, Reverse, Confirm operation by selecting from the Action list.
You can also search the record by using combination of % and alphanumeric value.
Example
You can search the record for Unit Holder ID by using the combination of % and alphanumeric value as follows:
- Search by A%: System will fetch all the records whose Unit Holder ID starts from Alphabet ‘A’. For example: AGC17, AGVO6, AGC74 and so forth.
- Search by %7: System will fetch all the records whose Unit Holder ID ends by numeric value’ 7’. For Example: AGC17, GSD267, AGC77 and so forth.
- Search by %17%:- System will fetch all the records whose Unit Holder ID contains the numeric value 17. For Example: GSD217, GSD172, AGC17 and so forth.
4.14.2 Editing NPI Payment Preferences for Investors
You can modify the details of UH NPI Preference parameters that you have already entered into the system, provided it has not been subsequently authorized. You can perform this operation as follows:
- Invoke the UH NPI Preference Summary screen from the Browser.
- Select the status of the record that you want to retrieve for modification in the Authorization Status field. You can only modify records that are unauthorized. Accordingly, choose the Unauthorized option.
- Specify any or all of the details in the corresponding fields to retrieve the record that is to be modified. All unauthorized records with the specified details are retrieved and displayed in the lower portion of the screen.
- Double click the record that you want to modify in the list of displayed transactions. The UH NPI Preference Detail screen is displayed.
- Select Unlock Operation from Action list to modify the record. Modify the necessary information.
- Click Save to save your changes. The UH NPI Preference Detail screen is closed and the changes made are reflected in the UH NPI Preference Summary screen.
4.14.3 Viewing NPI Payment Preferences for Investors
To view a record that you have previously entered, you must retrieve the same in the UH NPI Preference Summary screen, as follows:
- Invoke the UH NPI Preference Summary Screen from the Browser.
- Select the status of the transaction that you want to retrieve for viewing in the Authorization Status field. You can also view all records that are either unauthorized or authorized only, by choosing the Unauthorized / Authorized option.
- Specify any or all of the details of the record in the corresponding fields on the screen, and click ‘Search’ button. All records with the specified details are retrieved and displayed in the lower portion of the screen.
- Double click the record that you want to view in the list of displayed records. The UH NPI Preference Detail screen is displayed in View mode.
4.14.4 Deleting NPI Payment Preferences for Investors
You can delete only unauthorized records in the system. To delete a record that you have previously entered:
- Invoke the UH NPI Preference Summary screen from the Browser.
- Select the status of the record that you want to retrieve for deletion.
- Specify any or all of the details and click ‘Search’ button. All records with the specified details are retrieved and displayed in the lower portion of the screen.
- Double click the record that you want to delete. The In UH NPI Preference Detail screen is displayed.
- Select Delete operation from the Action list. The system prompts you to confirm the deletion, and the record is deleted physically from the system database.
4.14.5 Authorizing NPI Payment Preferences for Investors
An unauthorized UH NPI Preference record must be authorized in the system for it to be processed. To authorize a record:
- Invoke the UH NPI Preference Summary screen from the Browser.
- Select the status of the record that you want to retrieve for authorization. Typically, choose the Unauthorized option.
- Specify any or all of the details of the record in the corresponding fields on the screen. Click ‘Search’ button. All transactions with the specified details that are pending authorization are retrieved and displayed in the lower portion of the screen.
- Double click the transaction that you wish to authorize. The UH NPI Preference Detail screen is displayed. Select Authorize operation from Action.
When the checker authorizes a transaction, details of validations, if any, that were overridden by the maker of the transaction during the Save operation, are displayed. If any of these overrides results in an error, the checker must reject the transaction.
4.14.6 Amending NPI Payment Preferences for Investors
After an UH NPI Preference record is authorized, it can be modified using the Unlock operation from Action list. To make changes to a transaction after authorization:
- Invoke the UH NPI Preference Summary screen from the Browser.
- Select the status of the transaction that you wish to retrieve for amendment. You can only amend only authorized records.
- Specify any or all of the details of the UH NPI Preference in the screen. All records with the specified details are retrieved and displayed in the lower portion of the screen.
- Double click the record that you want to amend. The UH NPI Preference Detail screen is displayed in Amendment mode. Click the Unlock operation from the Action list to amend the record.
- Amend the necessary information. Click the Save button to save the changes.
When you retrieve an NPI payment preferences record for the purpose of amendment in this screen, it is displayed in the NPI UnitHolder Preferences screen, in Amend mode. All the non-editable field values are displayed as labels, while the editable fields are enabled for data entry changes.
Note
When you make changes to any authorized record in the system database through the amendment operation, the record with the amended information is saved as an unauthorized record in the system. For your amendment changes to be effective, the amended record must be subsequently authorized. When it is authorized, it is saved in the system database as an authorized record with the amendment information, and is effective.
4.14.7 Authorizing Amended NPI Payment Preferences for Investors
An amended UH NPI Preference record must be authorized for the amendment to be made effective in the system. The authorization of amended records can only be done from Fund Manager Module and Agency branch Module.
The process of authorization is subsequently the same as that for normal transactions.
4.15 Fund UH Category Minimum Holding Period Details Screen
This section contains the following topic:
4.15.1 Invoking Fund UH Category Minimum Holding Period Details Screen
You can capture the minimum holding period at Fund/ UH category/Transaction Type level using ‘Fund UH Category Minimum Holding Period Detail’ screen.
You can invoke this screen by typing ‘UTDMINHL’ in the field at the top right corner of the Application tool bar and click the adjoining arrow. The screen is displayed below:
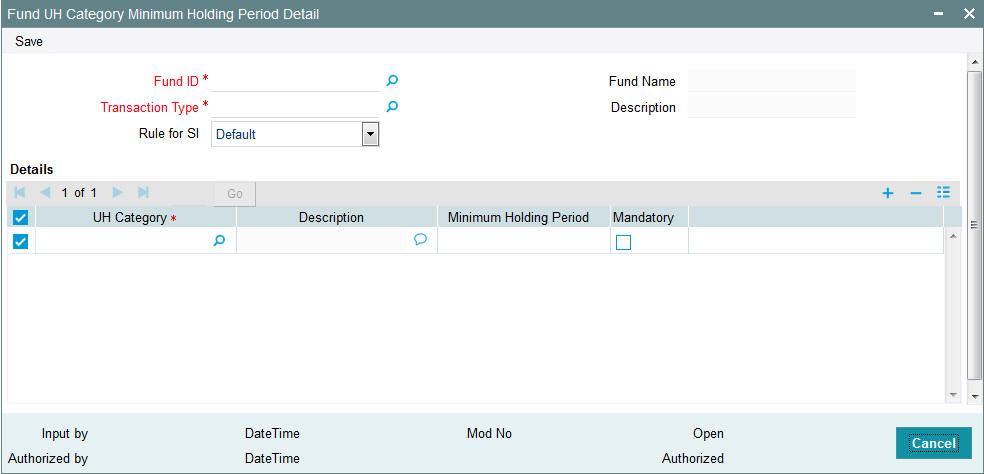
In this screen you can maintain the following details:
Fund ID
Alphanumeric; 6 Characters; Mandatory
Specify the fund of the unit holder. You can also select the fund from the option list provided. The list consists of valid and authorized funds maintained in the system.
Fund Name
Display
Based on the ID selected, the name of the fund is displayed.
Transaction Type
Alphanumeric; 2 Characters; Mandatory
Specify the type of the transaction. You can also select the transaction type from the option list provided.
Description
Display
The description of the transaction type is displayed.
Rule for SI
Optional
Select any of the following option from the drop-down list:
- First SI Transaction Date – On selecting this option, the system validates the minimum holding period by considering the SI first generation date i.e. the transaction date of the first transaction generated by the SI, which has not been reversed
- Default – On selecting this option, the minimum holding period will be validated considering last inflow date of transaction and current transaction date
Details
UH Category
Alphanumeric; 2 Characters; Mandatory
Specify the category of the unit holder. You can also select the UH category from the option list provided. The list consists of valid and authorized UH Categories maintained in the system.
Description
Display
The description of the selected category is displayed.
Minimum Holding Period
Numeric; 5 Characters; Optional
Indicate the number of days required for minimum holding.
Mandatory
Optional
Check this option to indicate that the minimum holding period for fund/UH category wise is mandatory. If this option is checked, then on violating minimum holding period, the system displays an error message and the transaction will not be saved.
Click on Cancel to cancel the operation. Click on the save icon to save the details and you will be shown the following message:
The system displays the confirmation message as “Record Successfully Saved”.
Click Ok and in the main screen click Exit button to exit.
The system displays the error message as “Failed to Save the Record”.
If this option is unchecked, then on violating minimum holding period, an overriding message is triggered. However, you can save the transaction by overriding the message.
On saving the redemption/switch/transfer transaction, the system checks if any of the allotted inflow transaction (like subscription, switch in, transfer in) has been captured within the minimum holding period (based on the difference of the transaction date).If it exists, then a overriding message ‘There are some inflow transactions with in the Minimum Holding Period’ is displayed along with any other warnings, if applicable.
Note
Checking minimum holding period maintained at the UH Category level is independent of checking minimum holding period at fund level.
Example
Case 1: Inflow involves transactions like subscriptions, switch-in, SI etc
Current Redemption Transaction Date : 10-May-2008
Minimum Holding Period at Fund/UH Category : 30
Last inflow transaction date for this Fund : 18-Apr-2008
No. of Days elapsed from date of last inflow transaction (10/May/08 -18/Apr/08): 22
Since the difference between last inflow date of the transaction and the current transaction date is less than Minimum Holding period, the system triggers a warning message ‘There are some inflow transactions with in the Minimum Holding Period’. This transaction is saved only if the warning is accepted.
If the number of days elapsed from the date of last inflow transaction to current redemption transaction date is more than the minimum holding period defined at Fund/UH Category for redemption transaction type, the system will save the transaction without the above warning message.
Case 2: Inflow is only because of SI transaction
Rule for SI set up in new maintenance : First SI Transaction Date
The First SI subscription date for this fund : 10-Apr-2008
Current Normal Redemption transaction date : 05-May-2008
Minimum Holding Period for the Fund/UH Cat. : 30
Whether any inflow transactions other than SI : No
No. of Days elapsed from the first SI subscription transaction date (05/May/08 -10/Apr/08) : 25
Since the difference between last inflow date of the transaction and the current transaction date is less than Minimum Holding period, the system triggers a warning message ‘There are some inflow transactions with in the Minimum Holding Period’. This transaction is saved only if the warning is accepted.
If the outflow is because of the SI redemption transaction, the system will save the transaction without any warning.
If there were some other inflow transactions other than SI with in this period, then system will consider Last inflow transaction date instead of the first SI subscription transaction date for arriving at the no. of days elapsed.
4.16 Fund UH Category Minimum Holding Period Summary Screen
This section contains the following topics:
- Section 4.16.1, "Retrieving/Viewing minimum holding period at Fund/UH category/transaction level"
- Section 4.16.2, "Editing Minimum Holding period at Fund/UH Category/Transaction Level"
- Section 4.16.3, "Deleting Minimum Holding Period at Fund/UH Category/Transaction Level"
- Section 4.16.3, "Deleting Minimum Holding Period at Fund/UH Category/Transaction Level"
- Section 4.16.4, "Authorizing Minimum Holding Period at Fund/UH Category/Transaction Level"
- Section 4.16.5, "Amending Minimum Holding Period at Fund/UH Category/Transaction Level"
4.16.1 Retrieving/Viewing minimum holding period at Fund/UH category/transaction level
The minimum holding period defined at the fund/UH category/ transaction type level must be authorized by another user. You can use the ‘Fund UH Category Minimum Holding Period Summary’ screen to perform the following operations:
- Retrieve
- Edit
- Delete
- Authorize
- Amend
You can invoke this screen by typing ‘UTSMINHL’ in the field at the top right corner of the Application tool bar and click the adjoining arrow. The screen is displayed below:
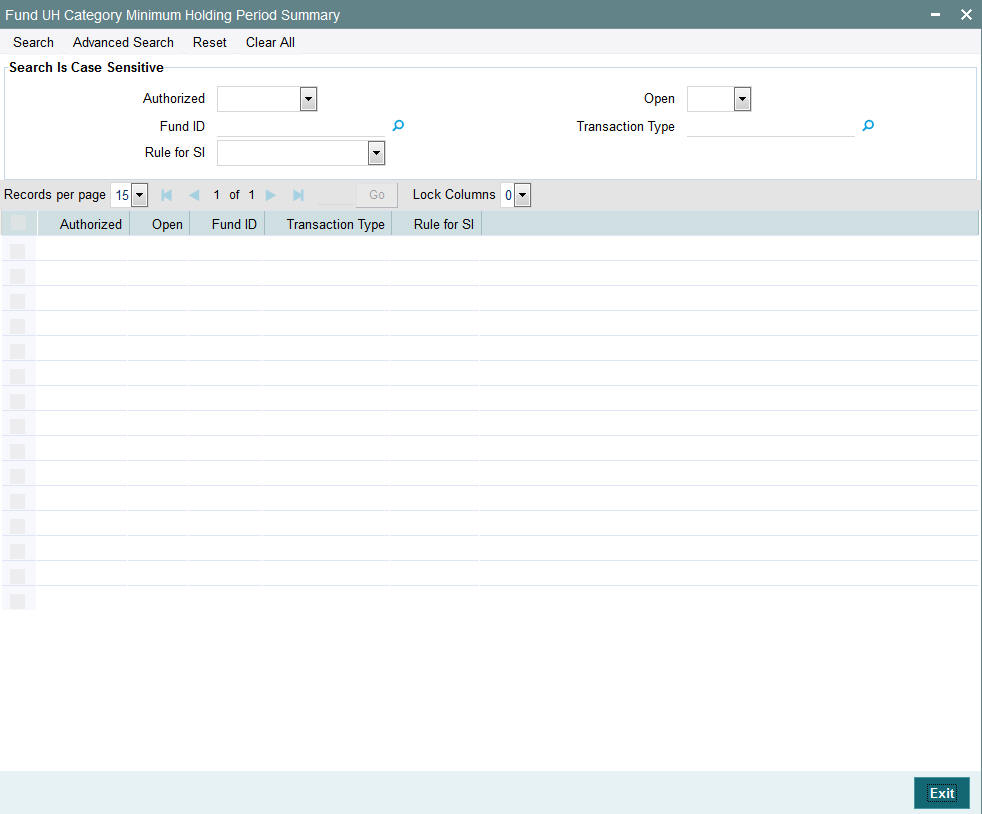
You can retrieve/view the UH minimum holding period record as follows:
- Invoke the ‘Fund UH Category Minimum Holding Period Summary’ screen from the Browser.
- Specify any or all of the following details in the screen:
- The status of the transaction in the ‘Authorized’ field. If you choose the blank space, then both the authorized and the unauthorized status records will be retrieved for the specified criteria.
- The status of the records in the ‘Open’ field. If you choose the blank space, then all the records are retrieved.
- The fund ID in the ‘Fund ID’ field. If you choose the blank space, then all the records are retrieved.
- The type of transaction in the ‘Transaction Type’ field. If you choose the blank space, then all the records are retrieved.
- The rule for standing instruction in the ‘Rule for SI’ field.
- Click ‘Search’ button to view the records. All records with the specified details are retrieved and displayed in the lower portion of the screen.
- Double click the record that you want to view in the list of displayed records. The ‘Fund UH Category Minimum Holding Period Detail’ screen is displayed in the view mode.
4.16.2 Editing Minimum Holding period at Fund/UH Category/Transaction Level
You can modify the details that you have already entered into the system, provided it has not been subsequently authorized. You can perform this operation as follows:
- Invoke the ‘Fund UH Category Minimum Holding Period Summary’ screen from the Browser.
- Specify any or all of the following details in the screen:
- The status of the transaction in the ‘Authorized’ field. If you choose the blank space, then both the authorized and the unauthorized status records will be retrieved for the specified criteria.
- The status of the records in the ‘Open’ field. If you choose the blank space, then all the records are retrieved.
- The fund ID in the ‘Fund ID’ field. If you choose the blank space, then all the records are retrieved.
- The type of transaction in the ‘Transaction Type’ field. If you choose the blank space, then all the records are retrieved.
- The rule for standing instruction in the ‘Rule for SI’ field.
- Click ‘Search’ button to view the records. All records with the specified details are retrieved and displayed in the lower portion of the screen.
- Double click the record that you want to modify in the list of displayed records. The ‘Fund UH Category Minimum Holding Period Detail’ screen is displayed.
- Select Unlock operation from the Action list to modify the record. Modify the necessary information.
- Click Save to save your changes. The ‘Fund UH Category Minimum Holding Period Detail’ screen is closed and the changes made are reflected in the ‘Fund UH Category Minimum Holding Period Summary’ screen.
4.16.3 Deleting Minimum Holding Period at Fund/UH Category/Transaction Level
You can delete only unauthorized records in the system. To delete a record that you have previously entered:
- Invoke the ‘Fund UH Category Minimum Holding Period Summary’ screen from the Browser.
- Specify any or all of the following details in the screen:
- The status of the transaction in the ‘Authorized’ field. If you choose the blank space, then both the authorized and the unauthorized status records will be retrieved for the specified criteria.
- The status of the records in the ‘Open’ field. If you choose the blank space, then all the records are retrieved.
- The fund ID in the ‘Fund ID’ field. If you choose the blank space, then all the records are retrieved.
- The type of transaction in the ‘Transaction Type’ field. If you choose the blank space, then all the records are retrieved.
- The rule for standing instruction in the ‘Rule for SI’ field.
- Click ‘Search’ button to view the records. All records with the specified details are retrieved and displayed in the lower portion of the screen.
- Double click the record that you want to delete. The ‘Fund UH Category Minimum Holding Period Detail’ screen is displayed.
- Select Delete operation from the Action list. The system prompts you to confirm the deletion, and the record is deleted physically from the system database.
Note
The maker of the record can only delete the unauthorized record.
4.16.4 Authorizing Minimum Holding Period at Fund/UH Category/Transaction Level
Apart from the maker, someone else must authorize an unauthorized broker deal in the system for it to be processed. To authorize a record:
- Invoke the ‘Fund UH Category Minimum Holding Period Summary’ screen from the Browser.
- ‘The status of the transaction in the ‘Authorized’ field. Choose the ‘Unauthorized’ status.
- Click ‘Search’ button to view the records. All the records with the specified details that are pending authorization are retrieved and displayed in the lower portion of the screen.
- Select the Authorization operation from the Action list to authorize the selected record.
4.16.5 Amending Minimum Holding Period at Fund/UH Category/Transaction Level
After a UH minimum holding period is authorized, it can be modified using the Unlock operation from Action list. To make changes to a record after authorization:
- Invoke the ‘Fund UH Category Minimum Holding Period Summary’ screen from the Browser.
- Select the status of the transaction that you wish to retrieve for amendment. You can only amend only authorized records.
- Click ‘Search’ button to view the records. All records with the specified details are retrieved and displayed in the lower portion of the screen.
- Double click the record that you want to amend. The ‘Fund UH Category Minimum Holding Period Detail’ screen is displayed in the amendment mode. Click the Unlock operation from the Action list to amend the record.
- Amend the necessary information. Click the Save button to save the changes.
4.17 UH Status Change Detail Screen
This section contains the following topics:
- Section 4.17.1, "Closing an Unit Holder Account"
- Section 4.17.2, "Invoking UH Status Change Detail Screen"
4.17.1 Closing an Unit Holder Account
The investor may wish at any juncture, to close operations with the AMC. At such a time, the account maintained for the investor in the system database must be closed. To close a unit holder account, use the ‘Unitholder Status Change Detail’ screen. You can invoke this screen by typing ‘UTDACCLS’ in the field at the top right corner of the Application tool bar and clicking on the adjoining arrow button.
Specify the following information in this screen:
- The ID of the unit holder whose account you want to close
- The reason for closure or any description / narrative regarding the same, in the Closure Remarks field.
In the event of an account closure request, the holdings of the investor in all funds transacted in must be brought down to zero. Therefore, when you close a unit holder account in the system, the following events take place:
- If the unit holder has entered into transactions, then the status of account is marked as Pending Closure.
- Subsequently, in this state, this account is still valid in the system, but it cannot be edited or amended (as the case may be), or used to enter into any further transactions. If the unit holder avails the check writing facility, any checks that have been issued through check-writing facility are marked invalid.
- After the transactions are allocated, and the holdings of the unit holder in all the funds that have been transacted in are brought down to zero, the status of the account is marked as Closed, and the account is then no longer valid in the system.
You can close any unit holder account, except in the following circumstances:
- The account is an unauthorized account in any way. The account closure facility applies only to authorized accounts. There must not be any details (whether new or amended) pending authorization.
- The agency branch from which the closure request is being made is not the one where the account was created. An account can be closed only in the branch where it was opened.
4.17.2 Invoking UH Status Change Detail Screen
Invoke the ‘UH Status Change Detail’ screen by typing ‘UTDACCLS’ in the field at the top right corner of the Application tool bar and clicking on the adjoining arrow button.
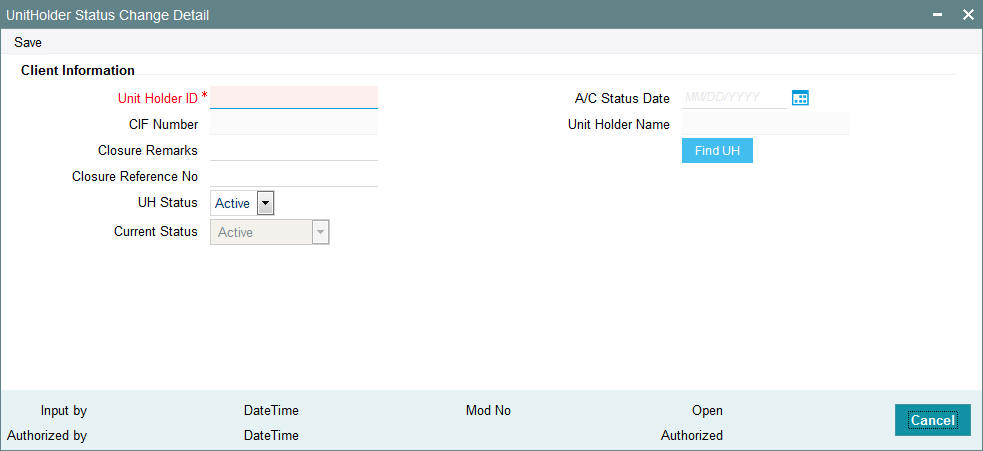
Select 'New' from the Actions menu in the Application tool bar or click new icon to enter the details in the screen.
Client Information
Unit Holder ID
Alphanumeric; 12 Characters; Mandatory
Specify the ID of the non-CIF unit holder whose account you are closing. The name of the unit holder that you select is displayed alongside the field.
CIF Number
Display
The system displays the CIF number for the selected unit holder ID.
Unit Holder Name
Display
The system displays the name of CIF unit holder for the selected unit holder ID.
You can query for unit holder ID by clicking ‘Find UH’ button.
A/C Status Date
Date Format; Optional
Select the account status date on which the account closure request is entered from the adjoining calendar.
Closure Remarks
Alphanumeric; 70 Characters; Optional
Specify the reason for closing the account.
Closure Reference No
Alphanumeric; 12 Characters; Optional
Specify the reference number of the unit holder account that you are closing.
UH Status
Optional
Specify the status for the unit holder whose account is being processed. The statuses are:
- Active
- Closed
To close an account select ‘Closed’; to re-open a closed account select ‘Active’.
Current Status
Display
The system will display the current status of the unit holder account. You can re-open a closed account only if the current status of the account is ‘Pending for Closure’.
4.18 Unit Holder Status Change Summary Screen
This section contains the following topics:
- Section 4.18.1, "Retrieving Status Change"
- Section 4.18.2, "Editing Status Change"
- Section 4.18.3, "Viewing Status Change"
- Section 4.18.4, "Deleting Status Change"
- Section 4.18.5, "Authorizing Status Change"
- Section 4.18.6, "Amending Status Change"
- Section 4.18.7, "Authorizing Amended Status Change"
4.18.1 Retrieving Status Change
After you setup the NPI preferences for an investor, in the NPI UnitHolder Preferences screen, you can perform any of the following operations before the record is authorized:
- Edit the preferences
- Delete the record
To authorize the closure of an investor account, use the ‘Unitholder Status Change Summary’ screen. You can invoke this screen by typing ‘UTSACCLS’ in the field at the top right corner of the Application tool bar and clicking on the adjoining arrow button.
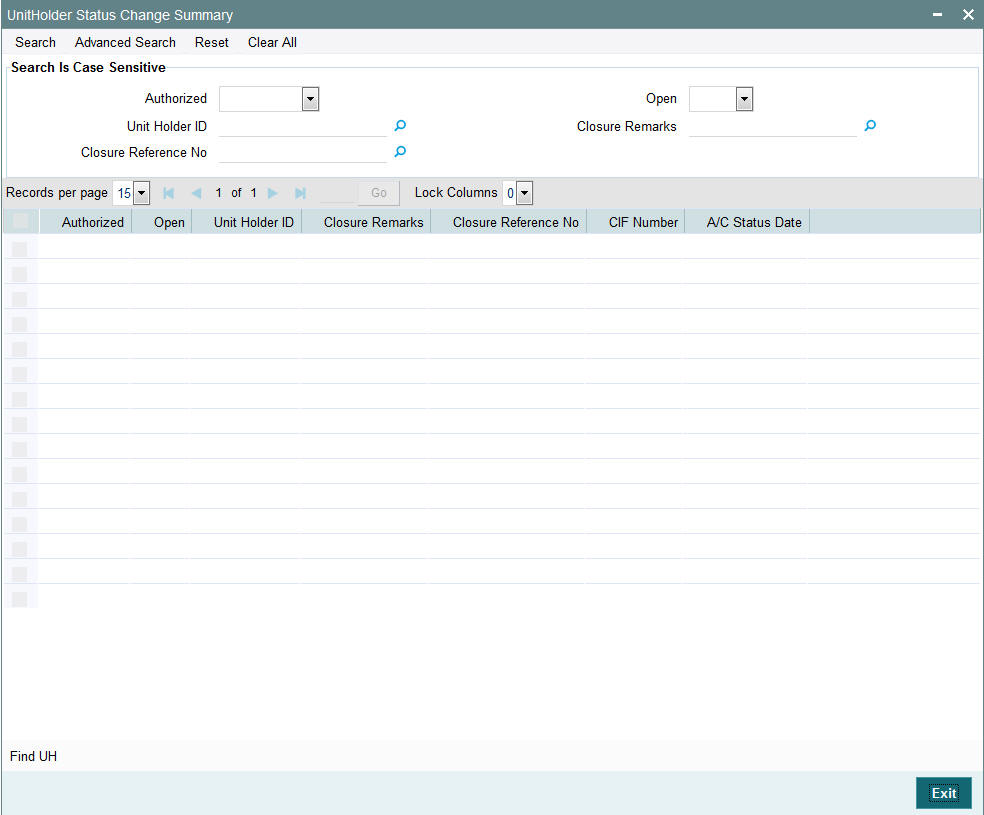
You can retrieve a previously entered record in the UnitHolder Status Change Summary screen, as follows:
- Specify any or all of the following details in the UnitHolder Status Change Summary screen:
- The status of the transaction in the Authorized field. If you choose the “Blank Space” option, then all the transactions that involve the specified unit holder are retrieved.
- The status of the Transaction in the Open field. If you choose the “Blank Space” option, then all the transactions that involve the specified unit holder are retrieved.
- Unit Holder ID
- Closure Remarks
- Closure Reference No
Click ‘Search’ button to view the records. All records with the specified details are retrieved and displayed in the lower portion of the screen.
Note
You can also retrieve the individual record detail from the detail screen by doing query in the following manner:
- Press F7
- Input the Unit Holder ID
- Press F8
You can perform Edit, Delete, Amend, Authorize, Reverse, Confirm operation by selecting from the Action list.
You can also search the record by using combination of % and alphanumeric value.
Example
You can search the record for Unit Holder ID by using the combination of % and alphanumeric value as follows:
- Search by A%: System will fetch all the records whose Unit Holder ID starts from Alphabet ‘A’. For example: AGC17, AGVO6, AGC74 and so forth.
- Search by %7: System will fetch all the records whose Unit Holder ID ends by numeric value’ 7’. For example: AGC17, GSD267, AGC77 and so forth.
- Search by %17%: System will fetch all the records whose Unit Holder ID contains the numeric value 17. For Example: GSD217, GSD172, AGC17 and so forth.
4.18.2 Editing Status Change
You can modify the details of Unit Holder Status Change parameters that you have already entered into the system, provided it has not been subsequently authorized. You can perform this operation as follows:
- Invoke the UnitHolder Status Change Summary screen from the Browser.
- Select the status of the record that you want to retrieve for modification in the Authorization Status field. You can only modify records that are unauthorized. Accordingly, choose the Unauthorized option.
- Specify any or all of the details in the corresponding fields to retrieve the record that is to be modified. All unauthorized records with the specified details are retrieved and displayed in the lower portion of the screen.
- Double click the record that you want to modify in the list of displayed records. The UnitHolder Status Change Detail screen is displayed.
- For editing, click the ‘Unlock Action’ at the upper left end of the required row in the result list. The selected closure record is displayed in edit mode in the ‘UH A/c Closure Detail’ screen. All editable value fields are enabled for modification, and the values for all non-editable fields appear as labels. Make your changes and Save the record.
- Click Save to save your changes. The UnitHolder Status Change Detail screen is closed and the changes made are reflected in the UnitHolder Status Change Summary screen.
4.18.3 Viewing Status Change
To view a record that you have previously entered, you must retrieve the same in the Unit Holder Status Change Summary screen, as follows:
- Invoke the Unit Holder Status Change Summary Screen from the Browser.
- Select the status of the record that you want to retrieve for viewing in the Authorization Status field. You can also view all records that are either unauthorized or authorized only, by choosing the Unauthorized / Authorized option.
- Specify any or all of the details of the record in the corresponding fields on the screen, and click ‘Search’ button. All records with the specified details are retrieved and displayed in the lower portion of the screen.
- Double click the record that you want to view in the list of displayed records. The Unit Holder Status Change Detail screen is displayed in View mode.
4.18.4 Deleting Status Change
You can delete only unauthorized records in the system. To delete a record that you have previously entered:
- Invoke the Unit Holder Status Change Summary screen from the Browser.
- Select the status of the record that you want to retrieve for deletion.
- Specify any or all of the details and click ‘Search’ button. All records with the specified details are retrieved and displayed in the lower portion of the screen.
- Double click the record that you want to delete. The Unit Holder Status Change Detail screen is displayed.
- Select Delete operation from the Action list. The system prompts you to confirm the deletion, and the record is deleted physically from the system database.
4.18.5 Authorizing Status Change
An unauthorized Unit Holder Status Change record must be authorized in the system for it to be processed. To authorize a record:
- Invoke the Unit Holder Status Change Summary screen from the Browser.
- Select the status of the record that you want to retrieve for authorization. Typically, choose the Unauthorized option.
- Specify any or all of the details of the record in the corresponding fields on the screen. Click ‘Search’ button. All transactions with the specified details that are pending authorization are retrieved and displayed in the lower portion of the screen.
- Double click the transaction that you wish to authorize. The Unit Holder Status Change Detail screen is displayed. Select Authorize operation from Action.
When the checker authorizes a transaction, details of validations, if any, that were overridden by the maker of the transaction during the Save operation, are displayed. If any of these overrides results in an error, the checker must reject the transaction.
4.18.6 Amending Status Change
After a Unit holder Status Change record is authorized, it can be modified using the Unlock operation from Action list. To make changes to a record after authorization:
- Invoke the Unit Holder Status Change Summary screen from the Browser.
- Select the status of the record that you wish to retrieve for amendment. You can only amend only authorized records.
- Specify any or all of the details of the Unit Holder Status Change in the screen. All records with the specified details are retrieved and displayed in the lower portion of the screen.
- Double click the record that you want to amend. The Unit Holder Status Change Detail screen is displayed in Amendment mode. Click the Unlock operation from the Action list to amend the record.
- Amend the necessary information. Click the Save button to save the changes.
4.18.7 Authorizing Amended Status Change
An amended Unit Holder Status Change record must be authorized for the amendment to be made effective in the system. The authorization of amended records can only be done from Fund Manager Module and Agency branch Module.
The process of authorization is subsequently the same as that for normal transactions.
4.19 Auth Rep Maintenance Detail Screen
This section contains the following topic:
4.19.1 Invoking Auth Rep Maintenance Detail Screen
To set up a new authorized representative in the system and associate this representative with the unit holder, you can use the ‘Auth Rep Maintenance Detail’ screen. You can invoke this screen by typing ‘UTDATREP’ in the field at the top right corner of the Application tool bar and clicking on the adjoining arrow button. The ‘Auth Rep Maintenance Detail’ screen opens.
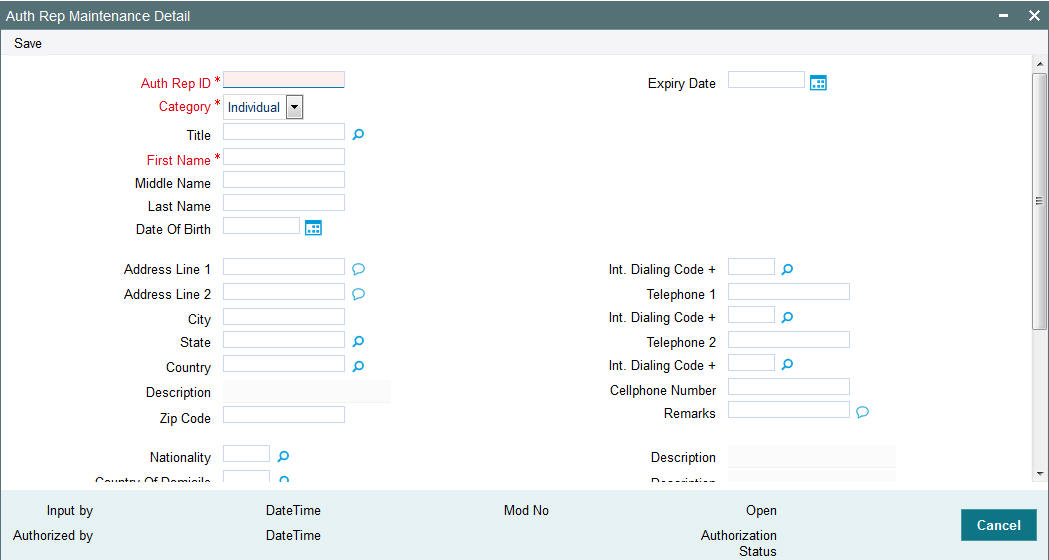
Select 'New' from the Actions menu in the Application tool bar or click new icon to enter the details of the Auth Rep Maintenance screen.
Auth Rep ID
Alphanumeric; 12 Characters; Mandatory
Indicate a unique ID for the authorized representative.
Expiry Date
Date Format; Optional
Specify an expiry date for the unit holder authorizing representative being defined. An error message is displayed on saving the transaction if the expiry date is less than the transaction date.
Category
Mandatory
Select the category from the drop-down list. The list displays the following values:
- Individual
- Corporate
Title
Alphanumeric; 15 Characters; Optional
Select the applicable title for the name of the authorized representative from the list provided. If you do not find the option you are looking for in the list, specify the same.
First Name
Alphanumeric; 105 Characters; Mandatory
Specify the first name of the authorized representative.
Middle Name
Alphanumeric; 105 Characters; Optional
Specify the middle name of the authorized representative.
Last Name
Alphanumeric; 105 Characters; Optional
Specify the last name of the authorized representative.
Date of Birth
Date Format; Optional
Select the date of birth of the guardian from the adjoining calendar.
The system will attach this detail to the unit holder account while creating a minor unit holder account.
Address Line 1 and 2
Alphanumeric; 255 Characters; Optional
Specify the address of the authorized representative.
City
Alphanumeric; 80 Characters; Optional
Specify the name of the city of residence of the authorized representative.
State
Alphanumeric; 20 Characters; Optional
If the specified city of residence is located in a state outside of the United States of America, specify the name of the state here.
Country
Alphanumeric; 3 Characters; Optional
Select the country code for address from the adjoining option list.
Description
Display
The system displays the description for the selected country code.
Zip Code
Alphanumeric; 10 Characters; Optional
Specify the zip code of the specified city of residence of the authorized representative.
Int. Dialing Code +
Alphanumeric; 10 Characters; Optional
Specify the international dialling code.
Telephone 1
Alphanumeric; 15 Characters; Optional
Specify the telephone number.
Int. Dialing Code +
Alphanumeric; 10 Characters; Optional
Specify the international dialling code.
Telephone 2
Alphanumeric; 15 Characters; Optional
Specify the alternative telephone number
Int. Dialing Code +
Alphanumeric; 10 Characters; Optional
Specify the international dialling code.
Cellphone Number
Alphanumeric; 16 Characters; Optional
Specify the cellphone number.
Remarks
Alphanumeric; 255 Characters; Optional
Specify remarks, if any.
Nationality
Alphanumeric; 3 Characters; Optional
Select the nationality from the adjoining option list.
Description
Display
The system displays the description for the selected nationality.
Country of Domicile
Alphanumeric; 3 Characters; Optional
Select the country of domicile from the adjoining option list.
Description
Display
The system displays the description for the selected
Country of Birth
Alphanumeric; 3 Characters; Optional
Select the country of birth from the adjoining option list.
Description
Display
The system displays the description for the selected country of birth.
US Indicia Available
Display
The system defaults US Indicia Available as Yes or No depending on the following:
- The nationality is US
- The country of birth is US
- The country of domicile is US
- The country of address is US
- The country code of the telephone number is 01
FATCA Status
Display
The system displays the FATCA Status based on the FATCA maintenance.
FATCA Classification
Display
The system displays the FATCA classification type.
Description
Display
The system displays the FATCA classification description.
Click ‘Show Image’ button to upload the necessary documents. Click ‘Browse’ button to browse the required documents and then click on ‘Upload’ button. The documents will be uploaded.
4.20 Auth Rep Maintenance Summary
This section contains the following topics:
- Section 4.20.1, "Retrieving a Record in Auth Rep Maintenance Summary Screen"
- Section 4.20.2, "Editing Auth Rep Maintenance Record"
- Section 4.20.3, "Viewing Auth Rep Maintenance Record "
- Section 4.20.4, "Deleting Auth Rep Maintenance Record"
- Section 4.20.5, "Authorizing Auth Rep Maintenance Record "
- Section 4.20.6, "Amending Auth Rep Maintenance Record "
- Section 4.20.7, "Authorizing Auth Rep Maintenance Record "
4.20.1 Retrieving a Record in Auth Rep Maintenance Summary Screen
You can retrieve a previously entered record in the Summary Screen, as follows:
Invoke the ‘Auth Rep Maintenance Summary’ screen by typing ‘UTSATREP’ in the field at the top right corner of the Application tool bar and clicking on the adjoining arrow button and specify any or all of the following details in the corresponding details.

- The status of the record in the Authorization Status field. If you choose the ‘Blank Space’ option, then all the records are retrieved.
- The status of the record in the Open field. If you choose the ‘Blank Space’ option, then all records are retrieved
- Auth Rep ID
Click ‘Search’ button to view the records. All the records with the specified details are retrieved and displayed in the lower portion of the screen.
Note
You can also retrieve the individual record detail from the detail screen by querying in the following manner:
- Press F7
- Input the Auth Rep ID
- Press F8
You can perform Edit, Delete, Amend, Authorize, Reverse, Confirm operations by selecting the operation from the Action list. You can also search a record by using a combination of % and alphanumeric value
4.20.2 Editing Auth Rep Maintenance Record
You can modify the details of Auth Rep Maintenance record that you have already entered into the system, provided it has not subsequently authorized. You can perform this operation as follows:
- Invoke the Auth Rep Maintenance Summary screen from the Browser.
- Select the status of the record that you want to retrieve for modification in the Authorization Status field. You can only modify records that are unauthorized. Accordingly, choose the Unauthorized option.
- Specify any or all of the details in the corresponding fields to retrieve the record that is to be modified.
- Click ‘Search’ button. All unauthorized records with the specified details are retrieved and displayed in the lower portion of the screen.
- Double click the record that you want to modify in the list of displayed records. The Auth Rep Maintenance Detail screen is displayed.
- Select Unlock Operation from the Action list to modify the record. Modify the necessary information.
Click Save to save your changes. The Auth Rep Maintenance Detail screen is closed and the changes made are reflected in the Auth Rep Maintenance Summary screen.
4.20.3 Viewing Auth Rep Maintenance Record
To view a record that you have previously input, you must retrieve the same in the Auth Rep Maintenance Summary screen as follows:
- Invoke the Auth Rep Maintenance Summary screen from the Browser.
- Select the status of the record that you want to retrieve for viewing in the Authorization Status field. You can also view all records that are either unauthorized or authorized only, by choosing the unauthorized / Authorized option.
- Specify any or all of the details of the record in the corresponding fields on the screen.
- Click ‘Search’ button. All records with the specified fields are retrieved and displayed in the lower portion of the screen.
- Double click the record that you want to view in the list of displayed records. The Auth Rep Maintenance Detail screen is displayed in View mode.
4.20.4 Deleting Auth Rep Maintenance Record
You can delete only unauthorized records in the system. To delete a record that you have previously entered:
- Invoke the Auth Rep Maintenance Summary screen from the Browser.
- Select the status of the record that you want to retrieve for deletion.
- Specify any or all of the details in the corresponding fields on the screen.
- Click ‘Search’ button. All records with the specified fields are retrieved and displayed in the lower portion of the screen.
- Double click the record that you want to delete in the list of displayed records. The Auth Rep Maintenance Detail screen is displayed.
- Select Delete Operation from the Action list. The system prompts you to confirm the deletion and the record is physically deleted from the system database.
4.20.5 Authorizing Auth Rep Maintenance Record
- An unauthorized Auth Rep Maintenance record must be authorized in the system for it to be processed. To authorize a record:
- Invoke the Auth Rep Maintenance Summary screen from the Browser.
- Select the status of the record that you want to retrieve for authorization. Typically, choose the unauthorized option.
- Specify any or all of the details in the corresponding fields on the screen.
- Click ‘Search’ button. All records with the specified details that are pending authorization are retrieved and displayed in the lower portion of the screen.
- Double click the record that you wish to authorize. The Auth Rep Maintenance Detail screen is displayed. Select Authorize operation from the Action List.
When a checker authorizes a record, details of validation, if any, that were overridden by the maker of the record during the Save operation are displayed. If any of these overrides results in an error, the checker must reject the record.
4.20.6 Amending Auth Rep Maintenance Record
After a Auth Rep Maintenance record is authorized, it can be modified using the Unlock operation from the Action List. To make changes to a record after authorization:
- Invoke the Auth Rep Maintenance Summary screen from the Browser.
- Select the status of the record that you want to retrieve for authorization. You can only amend authorized records.
- Specify any or all of the details in the corresponding fields on the screen.
- Click ‘Search’ button. All records with the specified details that are pending authorization are retrieved and displayed in the lower portion of the screen.
- Double click the record that you wish to authorize. The Auth Rep Maintenance Detail screen is displayed in amendment mode. Select Unlock operation from the Action List to amend the record.
- Amend the necessary information and click on Save to save the changes
4.20.7 Authorizing Auth Rep Maintenance Record
An amended Auth Rep Maintenance record must be authorized for the amendment to be made effective in the system. The authorization of amended records can be done only from Fund Manager Module and Agency Branch module.
The subsequent process of authorization is the same as that for normal transactions.
4.21 NotePad of Entities Detail Screen
This section contains the following topic:
Section 4.21.1, "Invoking NotePad of Entities Detail Screen"
4.21.1 Invoking NotePad of Entities Detail Screen
You can use the Entity NotePad facility to maintain information about any entity in the system which would be of relevance to the other entities either at the time of transaction input or in general.
You can invoke the ‘NotePad Of Entities Detail’ screen by typing ‘UTDNTPDE’ in the field at the top right corner of the Application tool bar and clicking on the adjoining arrow button.
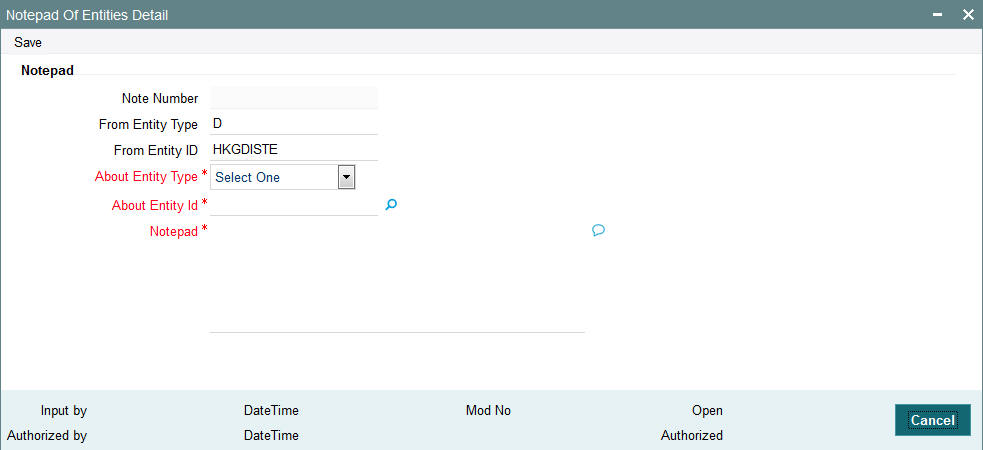
You can specify the following details:
Note Number
Display
The system displays the unique Number for the note.
From Entity Type
Display
The system displays the Entity Type who is creating this information in the form of note pad. This information is taken from the Login Details..
From Entity ID
Display
The system displays the Entity ID of the entity that is creating this information. This information is taken from the Login details.
About Entity Type
Mandatory
Select the entity about which the information is being entered from the drop-down list. The lisy displays the following values:
- Agent Name
- Broker
- AMC
- Agency Branch
- Registrar
- Trustee
- Unit Holder
- Distribution List Type
About Entity ID
Alphanumeric; 12 Characters; Mandatory
Specify Entity about whom the Notepad is being created.
Notepad
Alphanumeric; 255 Characters; Mandatory
Specify a memo text into which information about the entity is keyed in.
4.22 NotePad of Entities Summary Screen
This section contains the following topics:
- Section 4.22.1, "Retrieving Entity NotePad Information"
- Section 4.22.2, "Editing Entity NotePad Information"
- Section 4.22.3, "Viewing Entity NotePad Information"
- Section 4.22.4, "Deleting Entity NotePad Information"
- Section 4.22.5, "Authorizing Entity NotePad Information"
- Section 4.22.6, "Amending Entity NotePad Information"
- Section 4.22.7, "Authorizing Amended Entity NotePad Information"
4.22.1 Retrieving Entity NotePad Information
After you setup the NotePad entity, in the Notepad of Entities screen, you can perform any of the following operations before the record is authorized:
- Edit the preferences.
- Delete the record.
To authorize the NotePad entity, use the ‘NotePad Of Entities Summary’ screen. You can invoke this screen by typing ‘UTSNTPDE’ in the field at the top right corner of the Application tool bar and clicking on the adjoining arrow button.

You can retrieve a previously entered record in the NotePad of Entities Summary screen, as follows:
- Specify any or all of the following details in the NotePad of Entities Summary screen:
- The status of the record in the Authorized field. If you choose the “Blank Space” option, then all the record that involves the specified unit holder are retrieved.
- The status of the NotePad in the Open field. If you choose the “Blank Space” option, then all the records that involve the specified unit holder are retrieved.
- The Note Number
- The About Entity ID
- The About Entity Type
Click ‘Search’ button to view the records. All records with the specified details are retrieved and displayed in the lower portion of the screen.
You can also retrieve the individual NotePad detail from the detail screen by doing query in the following manner:
- Press F7
- Input the Note Number
- Press F8
You can perform Edit, Delete, Amend, Authorize, Reverse, Confirm operation by selecting from the Action list.
You can also search the record by using combination of % and alphanumeric value.
For example,
You can search the record for Note Number by using the combination of % and alphanumeric value as follows:
- Search by A%: System will fetch all the records whose Note Number starts from Alphabet ‘A’. For Example: AGC17, AGVO6, AGC74 and so forth.
- Search by %7: System will fetch all the records whose Note Number ends by numeric value’ 7’. For Example: AGC17, GSD267, AGC77 and so forth.
- Search by %17%: System will fetch all the records whose Note Number contains the numeric value 17. For Example: GSD217, GSD172, AGC17 and so forth.
4.22.2 Editing Entity NotePad Information
You can modify the details of NotePad of Entities parameters that you have already entered into the system, provided it has not been subsequently authorized. You can perform this operation as follows:
- Invoke the NotePad of Entities Summary screen from the Browser.
- Select the status of the record that you want to retrieve for modification in the Authorization Status field. You can only modify records that are unauthorized. Accordingly, choose the Unauthorized option.
- Specify any or all of the details in the corresponding fields to retrieve the record that is to be modified. All unauthorized records with the specified details are retrieved and displayed in the lower portion of the screen.
- Double click the record that you want to modify in the list of displayed records. The NotePad of Entities Detail screen is displayed.
- Select Unlock Operation from Action list to modify the record. Modify the necessary information.
- Click Save to save your changes. NotePad of Entities Detail screen is closed and the changes made are reflected in the NotePad of Entities Summary screen.
4.22.3 Viewing Entity NotePad Information
To view a record that you have previously entered, you must retrieve the same in the NotePad of Entities Summary screen, as follows:
- Invoke the NotePad of Entities Summary Screen from the Browser.
- Select the status of the NotePad that you want to retrieve for viewing in the Authorization Status field. You can also view all records that are either unauthorized or authorized only, by choosing the Unauthorized / Authorized option.
- Specify any or all of the details of the NotePad in the corresponding fields on the screen, and click ‘Search’ button. All records with the specified details are retrieved and displayed in the lower portion of the screen.
- Double click the record that you want to view in the list of displayed records. The NotePad of Entities Detail screen is displayed in View mode.
4.22.4 Deleting Entity NotePad Information
You can delete only unauthorized records in the system. To delete a record that you have previously entered:
- Invoke the NotePad of Entities Summary screen from the Browser.
- Select the status of the record that you want to retrieve for deletion.
- Specify any or all of the details and click ‘Search’ button. All records with the specified details are retrieved and displayed in the lower portion of the screen.
- Double click the record that you want to delete. The NotePad of Entities Detail screen is displayed.
- Select Delete operation from the Action list. The system prompts you to confirm the deletion, and the record is deleted physically from the system database.
4.22.5 Authorizing Entity NotePad Information
An unauthorized NotePad of Entities record must be authorized in the system for it to be processed. To authorize a record:
- Invoke the NotePad of Entities Summary screen from the Browser.
- Select the status of the record that you want to retrieve for authorization. Typically, choose the Unauthorized option.
- Specify any or all of the details of the record in the corresponding fields on the screen. Click ‘Search’ button. All records with the specified details that are pending authorization are retrieved and displayed in the lower portion of the screen.
- Double click the NotePad that you wish to authorize. The NotePad of Entities Detail screen is displayed. Select Authorize operation from Action.
When the checker authorizes a NotePad, details of validations, if any, that were overridden by the maker of the NotePad during the Save operation, are displayed. If any of these overrides results in an error, the checker must reject the NotePad.
4.22.6 Amending Entity NotePad Information
After a NotePad of Entities record is authorized, it can be modified using the Unlock operation from Action list. To make changes to a NotePad after authorization:
- Invoke the NotePad of Entities Summary screen from the Browser.
- Select the status of the NotePad that you wish to retrieve for amendment. You can only amend only authorized records.
- Specify any or all of the details of the NotePad of Entities in the screen. All records with the specified details are retrieved and displayed in the lower portion of the screen.
- Double click the record that you want to amend. The NotePad of Entities Detail screen is displayed in Amendment mode. Click the Unlock operation from the Action list to amend the record.
- Amend the necessary information. Click the Save button to save the changes.
4.22.7 Authorizing Amended Entity NotePad Information
An amended NotePad of Entities record must be authorized for the amendment to be made effective in the system. The authorization of amended records can only be done from Fund Manager Module and Agency branch Module.
The process of authorization is subsequently the same as that for normal transactions.
4.23 Agency Branch Account Officer Maintenance Detail
This section contains the following topics:
4.23.1 Invoking Agency Branch Account Officer Maintenance Detail Screen
You can map the Agency branch and Account officer to the respective agent code, from this screen. You can invoke ‘Agency Branch Account Officer Maintenance Detail’ screen by typing ‘UTDAGTAO’ in the field at the top right corner of the Application tool bar and clicking on the adjoining arrow button.
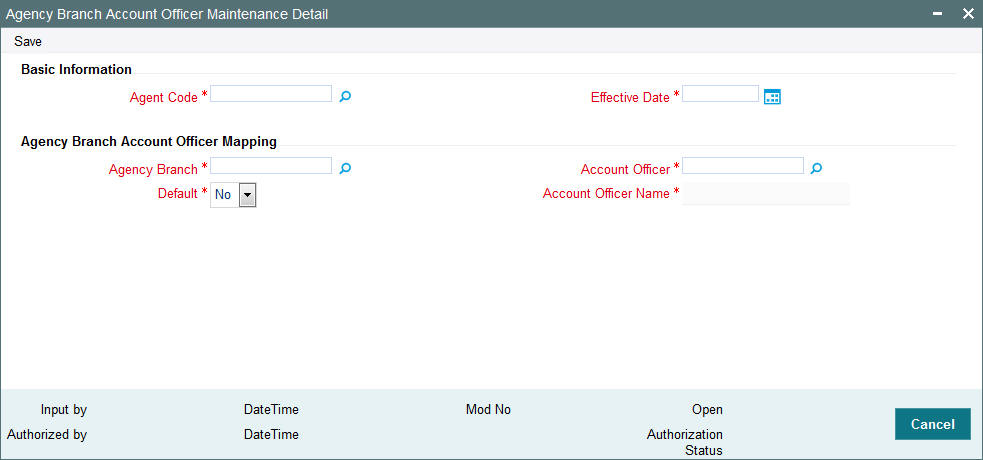
You can specify the following details:
Basic Information
Agent Code
Alphanumeric; 12 Characters; Mandatory
Specify the agent code. Alternatively, you can select agent code from the option list. The list displays all valid agent code maintained in the system.
Effective Date
Date Format; Mandatory
Select the effective date from the adjoining calendar.
Agency Branch Account Officer Mapping
Agency Branch
Alphanumeric; 12 Characters; Mandatory
Specify the agent branch. Alternatively, you can select agent branch from the option list. The list displays all valid agent branch maintained in the system.
Account Officer
Alphanumeric; 12 Characters; Mandatory
Specify the account officer details. Alternatively, you can select account officer details from the option list. The list displays all valid account officer details maintained in the system.
Default
Mandatory
Select ‘Yes’ from drop-down list to select default
Account Officer Name
Display
The system displays the name of the selected account officer.
4.24 Agency Branch Account Officer Maintenance Summary
This section contains the following topics:
- Section 4.24.1, "Retrieving a Record in Agency Branch Account Officer Maintenance Summary Screen"
- Section 4.24.2, "Editing Agency Branch Account Officer Maintenance Record"
- Section 4.24.3, "Viewing Agency Branch Account Officer Maintenance Record"
- Section 4.24.4, "Deleting Agency Branch Account Officer Maintenance Record"
- Section 4.24.5, "Authorizing Agency Branch Account Officer Maintenance Record"
- Section 4.24.6, "Amending Agency Branch Account Officer Maintenance Record"
- Section 4.24.7, "Authorizing Amended Agency Branch Account Officer Maintenance Record"
4.24.1 Retrieving a Record in Agency Branch Account Officer Maintenance Summary Screen
You can retrieve a previously entered record in the Summary Screen, as follows:
Invoke the ‘Agency Branch Account Officer Maintenance Summary’ screen by typing ‘UTSAGTAO’ in the field at the top right corner of the Application tool bar. Click on the adjoining arrow button and specify any or all of the following details in the corresponding details.
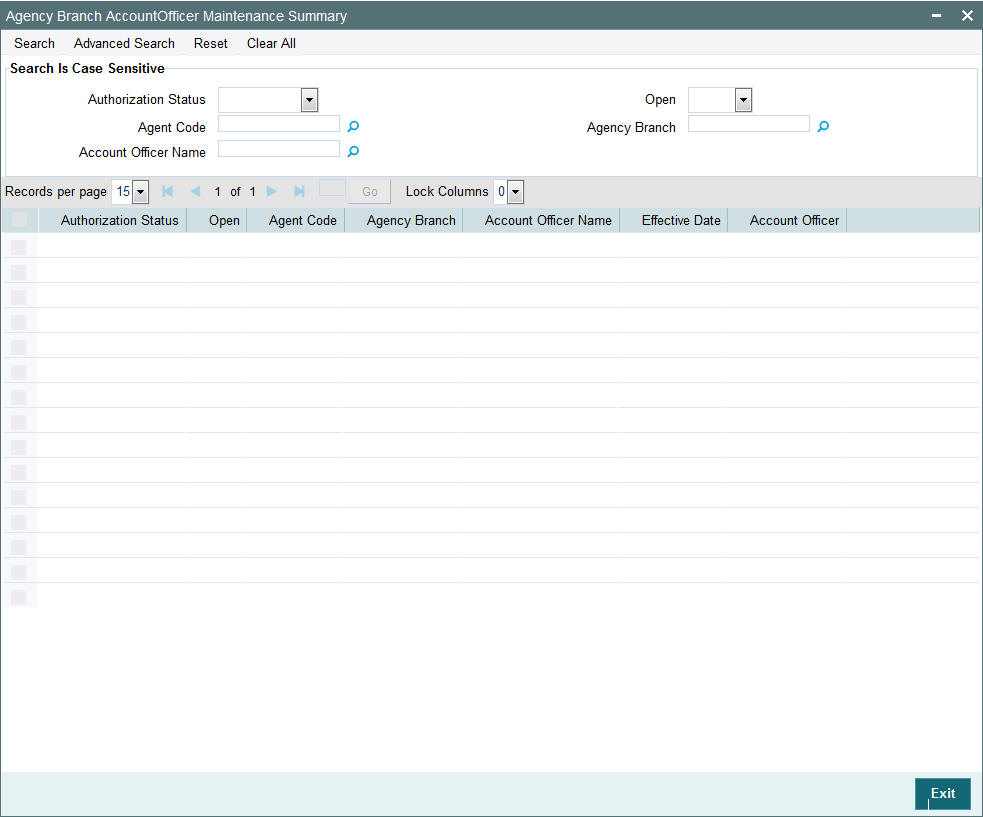
- The status of the record in the Authorization Status field. If you choose the ‘Blank Space’ option, then all the records are retrieved.
- The status of the record in the Open field. If you choose the ‘Blank Space’ option, then all records are retrieved
- Agent Code
- Account Officer Name
- Agency Branch
Click ‘Search’ button to view the records. All the records with the specified details are retrieved and displayed in the lower portion of the screen.
Note
You can also retrieve the individual record detail from the detail screen by querying in the following manner:
- Press F7
- Input the Agent Code
- Press F8
You can perform Edit, Delete, Amend, Authorize, Reverse, Confirm operations by selecting the operation from the Action list. You can also search a record by using a combination of % and alphanumeric value
4.24.2 Editing Agency Branch Account Officer Maintenance Record
You can modify the details of Agency Branch Account Officer Maintenance record that you have already entered into the system, provided it has not subsequently authorized. You can perform this operation as follows:
- Invoke the Agency Branch Account Officer Maintenance Summary screen from the Browser.
- Select the status of the record that you want to retrieve for modification in the Authorization Status field. You can only modify records that are unauthorized. Accordingly, choose the Unauthorized option.
- Specify any or all of the details in the corresponding fields to retrieve the record that is to be modified.
- Click ‘Search’ button. All unauthorized records with the specified details are retrieved and displayed in the lower portion of the screen.
- Double click the record that you want to modify in the list of displayed records. The Agency Branch Account Officer Maintenance Detail screen is displayed.
- Select Unlock Operation from the Action list to modify the record. Modify the necessary information.
Click Save to save your changes. The Agency Branch Account Officer Maintenance Detail screen is closed and the changes made are reflected in the Agency Branch Account Officer Maintenance Summary screen.
4.24.3 Viewing Agency Branch Account Officer Maintenance Record
To view a record that you have previously input, you must retrieve the same in the Agency Branch Account Officer Maintenance Summary screen as follows:
- Invoke the Agency Branch Account Officer Maintenance Summary screen from the Browser.
- Select the status of the record that you want to retrieve for viewing in the Authorization Status field. You can also view all records that are either unauthorized or authorized only, by choosing the unauthorized / Authorized option.
- Specify any or all of the details of the record in the corresponding fields on the screen.
- Click ‘Search’ button. All records with the specified fields are retrieved and displayed in the lower portion of the screen.
- Double click the record that you want to view in the list of displayed records. The Agency Branch Account Officer Maintenance Detail screen is displayed in View mode.
4.24.4 Deleting Agency Branch Account Officer Maintenance Record
You can delete only unauthorized records in the system. To delete a record that you have previously entered:
- Invoke the Agency Branch Account Officer Maintenance Summary screen from the Browser.
- Select the status of the record that you want to retrieve for deletion.
- Specify any or all of the details in the corresponding fields on the screen.
- Click ‘Search’ button. All records with the specified fields are retrieved and displayed in the lower portion of the screen.
- Double click the record that you want to delete in the list of displayed records. The Agency Branch Account Officer Maintenance Detail screen is displayed.
- Select Delete Operation from the Action list. The system prompts you to confirm the deletion and the record is physically deleted from the system database.
4.24.5 Authorizing Agency Branch Account Officer Maintenance Record
- An unauthorized Agency Branch Account Officer Maintenance record must be authorized in the system for it to be processed. To authorize a record:
- Invoke the Agency Branch Account Officer Maintenance Summary screen from the Browser.
- Select the status of the record that you want to retrieve for authorization. Typically, choose the unauthorized option.
- Specify any or all of the details in the corresponding fields on the screen.
- Click ‘Search’ button. All records with the specified details that are pending authorization are retrieved and displayed in the lower portion of the screen.
- Double click the record that you wish to authorize. The Agency Branch Account Officer Maintenance Detail screen is displayed. Select Authorize operation from the Action List.
When a checker authorizes a record, details of validation, if any, that were overridden by the maker of the record during the Save operation are displayed. If any of these overrides results in an error, the checker must reject the record.
4.24.6 Amending Agency Branch Account Officer Maintenance Record
After a Agency Branch Account Officer Maintenance record is authorized, it can be modified using the Unlock operation from the Action List. To make changes to a record after authorization:
- Invoke the Agency Branch Account Officer Maintenance Summary screen from the Browser.
- Select the status of the record that you want to retrieve for authorization. You can only amend authorized records.
- Specify any or all of the details in the corresponding fields on the screen.
- Click ‘Search’ button. All records with the specified details that are pending authorization are retrieved and displayed in the lower portion of the screen.
- Double click the record that you wish to authorize. The Agency Branch Account Officer Maintenance screen is displayed in amendment mode. Select Unlock operation from the Action List to amend the record.
- Amend the necessary information and click on Save to save the changes
4.24.7 Authorizing Amended Agency Branch Account Officer Maintenance Record
An amended Agency Branch Account Officer Maintenance record must be authorized for the amendment to be made effective in the system. The authorization of amended records can be done only from Fund Manager Module and Agency Branch module.
The subsequent process of authorization is the same as that for normal transactions.
4.25 Account Officer IFA Maintenance Detail
This section contains the following topics:
4.25.1 Invoking Account Officer IFA Maintenance Detail Screen
You can map the Account Officer and the IFA using ‘Account Officer IFA Maintenance Detail’ screen. You can invoke ‘Account Officer IFA Maintenance Detail’ screen by typing ‘UTDAOIFA’ in the field at the top right corner of the Application tool bar and clicking on the adjoining arrow button.
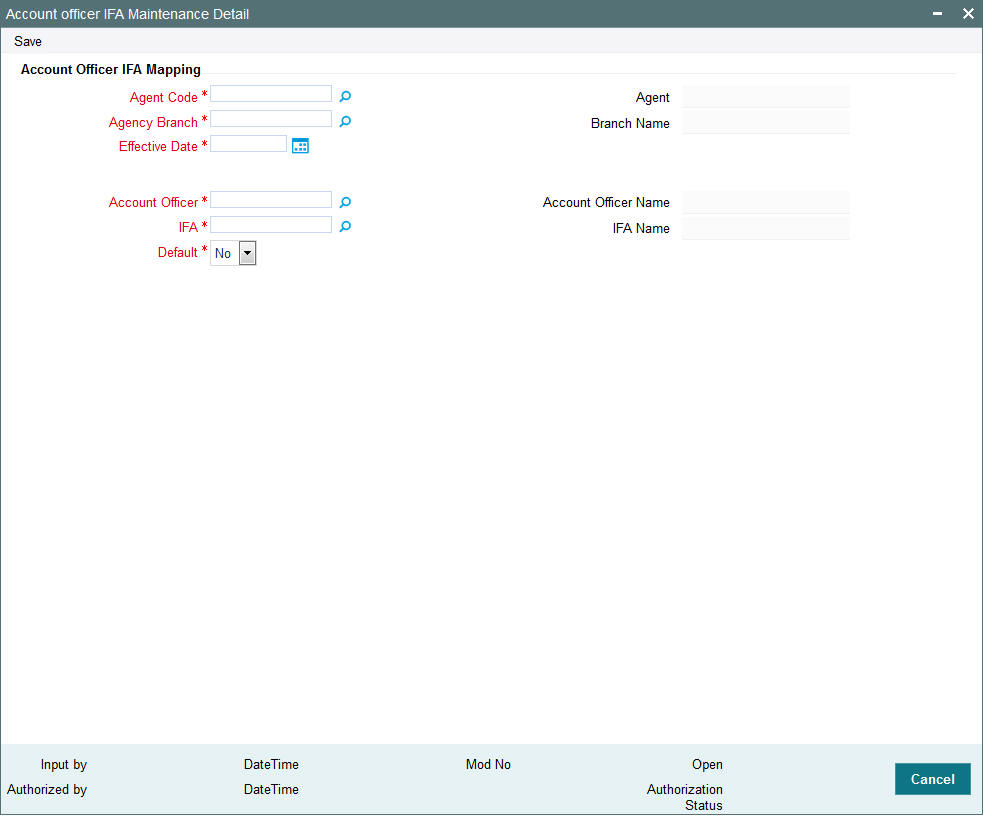
You can specify the following details:
Account Officer IFA Mapping
Agent Code
Alphanumeric; 12 Characters; Mandatory
Specify the agent code. Alternatively, you can select agent code from the option list. The list displays all valid agent code maintained in the system.
Agent
Display
The system displays the description of the selected agent code.
Agency Branch
Alphanumeric; 12 Characters; Mandatory
Specify the agency branch code. Alternatively, you can select agency branch code from the option list. The list displays all valid agency branch code maintained in the system.
Branch Name
Display
The system displays the name of the selected agency branch code.
Effective Date
Date Format; Mandatory
Select the effective date from the adjoining calendar.
Account Officer
Alphanumeric; 12 Characters; Mandatory
Specify the account officer. Alternatively, you can select account officer from the option list. The list displays all valid account officer maintained in the system.
Account Officer Name
Display
The system displays the name of the selected account officer ID.
IFA
Alphanumeric; 12 Characters; Mandatory
Specify the IFA code. Alternatively, you can select IFA code from the option list. The list displays all valid IFA code maintained in the system.
IFA Name
Display
The system displays the name of the selected IFA code.
Default
Mandatory
Select the default status from the drop-down list. The list displays the following values:
- Yes
- No
4.26 Account Officer IFA Maintenance Summary
This section contains the following topics:
- Section 4.26.1, "Retrieving a Record in Account Officer IFA Maintenance Summary Screen"
- Section 4.26.2, "Editing Account Officer IFA Maintenance Record"
- Section 4.26.3, "Viewing Account Officer IFA Maintenance Record"
- Section 4.26.4, "Deleting Account Officer IFA Maintenance Record"
- Section 4.26.5, "Authorizing Account Officer IFA Maintenance Record"
- Section 4.26.6, "Amending Account Officer IFA Maintenance Record"
- Section 4.26.7, "Authorizing Amended Account Officer IFA Maintenance Record"
4.26.1 Retrieving a Record in Account Officer IFA Maintenance Summary Screen
You can retrieve a previously entered record in the Summary screen, as follows:
Invoke the ‘Account Officer IFA Maintenance Summary’ screen by typing ‘UTSAOIFA’ in the field at the top right corner of the Application tool bar and clicking on the adjoining arrow button and specify any or all of the following details in the corresponding details.
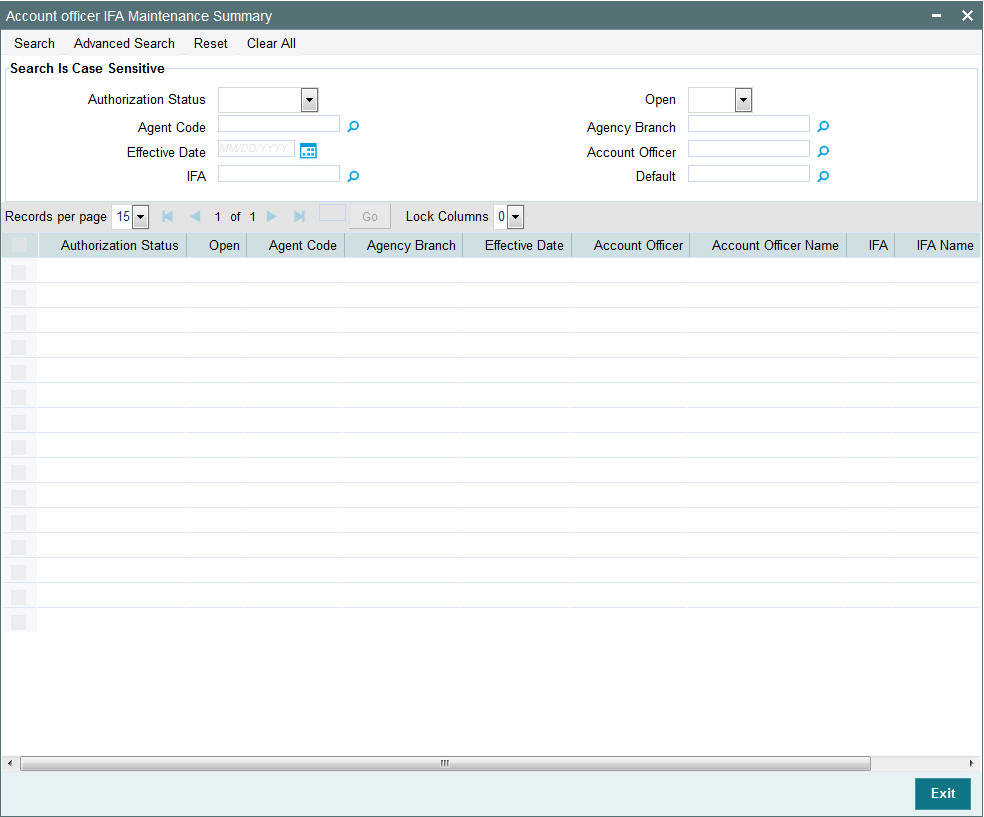
- The status of the record in the Authorization Status field. If you choose the ‘Blank Space’ option, then all the records are retrieved.
- The status of the record in the Open field. If you choose the ‘Blank Space’ option, then all records are retrieved
- Agent Code
- Effective Date
- IFA
- Agency Branch
- Account Officer
- Default
Click ‘Search’ button to view the records. All the records with the specified details are retrieved and displayed in the lower portion of the screen.
Note
You can also retrieve the individual record detail from the detail screen by querying in the following manner:
- Press F7
- Input the Agent Code
- Press F8
You can perform Edit, Delete, Amend, Authorize, operations by selecting the operation from the Action list. You can also search a record by using a combination of % and alphanumeric value
4.26.2 Editing Account Officer IFA Maintenance Record
You can modify the details of Account Officer IFA Maintenance record that you have already entered into the system, provided it has not subsequently authorized. You can perform this operation as follows:
- Invoke the Account Officer IFA Maintenance Summary screen from the Browser.
- Select the status of the record that you want to retrieve for modification in the Authorization Status field. You can only modify records that are unauthorized. Accordingly, choose the Unauthorized option.
- Specify any or all of the details in the corresponding fields to retrieve the record that is to be modified.
- Click ‘Search’ button. All unauthorized records with the specified details are retrieved and displayed in the lower portion of the screen.
- Double click the record that you want to modify in the list of displayed records. The Account Officer IFA Maintenance Detail screen is displayed.
- Select Unlock Operation from the Action list to modify the record. Modify the necessary information.
Click Save to save your changes. The Account Officer IFA Maintenance Detail screen is closed and the changes made are reflected in the Account Officer IFA Maintenance Summary screen.
4.26.3 Viewing Account Officer IFA Maintenance Record
To view a record that you have previously input, you must retrieve the same in the Account Officer IFA Maintenance Summary screen as follows:
- Invoke the Account Officer IFA Maintenance Summary screen from the Browser.
- Select the status of the record that you want to retrieve for viewing in the Authorization Status field. You can also view all records that are either unauthorized or authorized only, by choosing the unauthorized / Authorized option.
- Specify any or all of the details of the record in the corresponding fields on the screen.
- Click ‘Search’ button. All records with the specified fields are retrieved and displayed in the lower portion of the screen.
- Double click the record that you want to view in the list of displayed records. The Account Officer IFA Maintenance Detail screen is displayed in View mode.
4.26.4 Deleting Account Officer IFA Maintenance Record
You can delete only unauthorized records in the system. To delete a record that you have previously entered:
- Invoke the Account Officer IFA Maintenance Summary screen from the Browser.
- Select the status of the record that you want to retrieve for deletion.
- Specify any or all of the details in the corresponding fields on the screen.
- Click ‘Search’ button. All records with the specified fields are retrieved and displayed in the lower portion of the screen.
- Double click the record that you want to delete in the list of displayed records. The Account Officer IFA Maintenance Detail screen is displayed.
- Select Delete Operation from the Action list. The system prompts you to confirm the deletion and the record is physically deleted from the system database.
4.26.5 Authorizing Account Officer IFA Maintenance Record
- An unauthorized Account Officer IFA Maintenance record must be authorized in the system for it to be processed. To authorize a record:
- Invoke the Account Officer IFA Maintenance Summary screen from the Browser.
- Select the status of the record that you want to retrieve for authorization. Typically, choose the unauthorized option.
- Specify any or all of the details in the corresponding fields on the screen.
- Click ‘Search’ button. All records with the specified details that are pending authorization are retrieved and displayed in the lower portion of the screen.
- Double click the record that you wish to authorize. The Account Officer IFA Maintenance Detail screen is displayed. Select Authorize operation from the Action List.
When a checker authorizes a record, details of validation, if any, that were overridden by the maker of the record during the Save operation are displayed. If any of these overrides results in an error, the checker must reject the record.
4.26.6 Amending Account Officer IFA Maintenance Record
After a Account Officer IFA Maintenance record is authorized, it can be modified using the Unlock operation from the Action List. To make changes to a record after authorization:
- Invoke the Account Officer IFA Maintenance Summary screen from the Browser.
- Select the status of the record that you want to retrieve for authorization. You can only amend authorized records.
- Specify any or all of the details in the corresponding fields on the screen.
- Click ‘Search’ button. All records with the specified details that are pending authorization are retrieved and displayed in the lower portion of the screen.
- Double click the record that you wish to authorize. The Account Officer IFA Maintenance Detail screen is displayed in amendment mode. Select Unlock operation from the Action List to amend the record.
- Amend the necessary information and click on Save to save the changes
4.26.7 Authorizing Amended Account Officer IFA Maintenance Record
An amended Account Officer IFA Maintenance record must be authorized for the amendment to be made effective in the system. The authorization of amended records can be done only from Fund Manager Module and Agency Branch module.
The subsequent process of authorization is the same as that for normal transactions.
4.27 Agent Price Basis Detail
This section contains the following topics:
4.27.1 Invoking Agent Price Basis Detail Screen
You can maintain component details in the ‘Agent Price Basis Detail’ screen for the required fund, transaction type, agent code and account type combination for Formula based funds.
You can invoke ‘Agent Price Basis Detail’ screen by typing ‘UTDAGTPR’ in the field at the top right corner of the Application tool bar and clicking on the adjoining arrow button. Select ‘New’ from the Actions menu in the Application tool bar or click new icon to enter the details.
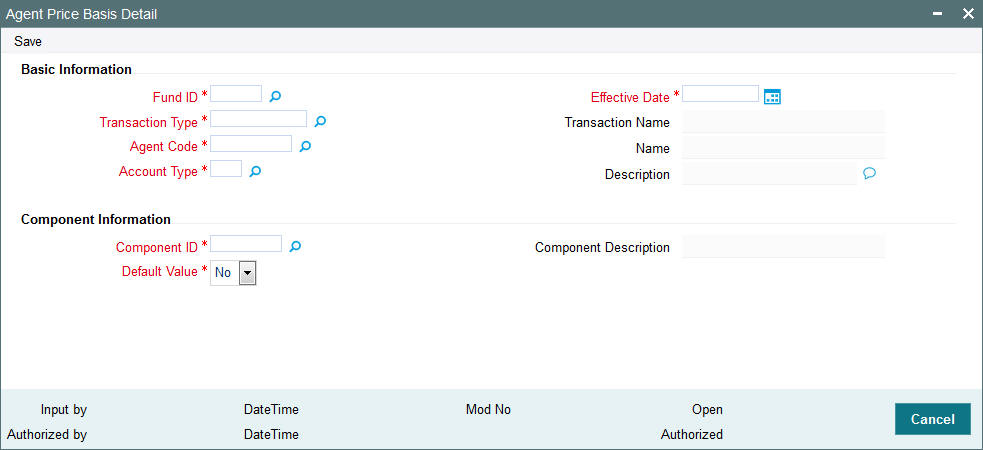
You can specify the following details:
Basic Information
Fund ID
Alphanumeric; 6 Character; Mandatory
Specify the fund code for which you want to maintain the price basis. Alternatively you can select fund ID from the option list. The list displays all valid fund ID maintained in the system.
Effective Date
Date Format; Mandatory
Select the Effective date for which you want to maintain the price basis from the adjoining calendar.
Transaction Type
Alphanumeric; 15 Character; Mandatory
Specify the transaction type for which you want to maintain the price basis. Alternatively you can select transaction type from the option list. The list displays all valid transaction type maintained in the system.
Transaction Name
Display
The system displays the name of the selected transaction type.
Agent Code
Alphanumeric; 12 Character; Mandatory
Specify the agent code for which you want to maintain the price basis. Alternatively you can select agent code from the option list. The list displays all valid agent code maintained in the system.
Name
Display
The system displays the name of the selected agent code.
Account Type
Alphanumeric; 2 Character; Mandatory
Specify the Account type for which you want to maintain the price basis. Alternatively you can select account type from the option list. The list displays all valid account type maintained in the system.
Description
Display
The system displays the description of the selected account type.
Component Information
Component ID
Alphanumeric; 10 Character; Mandatory
Specify the component ID for which you want to maintain the price basis. Alternatively you can select component ID from the option list. The list displays all valid component ID maintained in the system.
Component Description
Display
The system displays the description of the selected component ID.
Default Value
Mandatory
Select the default value from the drop-down list. The list displays the following values:
- Yes
- No
4.28 Agent Price Basis Summary
This section contains the following topics:
- Section 4.28.1, "Retrieving a Record in Agent Price Basis Summary Screen"
- Section 4.28.2, "Editing Agent Price Basis Record"
- Section 4.28.3, "Viewing Agent Price Basis Record"
- Section 4.28.4, "Deleting Agent Price Basis Record"
- Section 4.28.5, "Authorizing Agent Price Basis Record"
- Section 4.28.6, "Amending Agent Price Basis Record"
- Section 4.28.7, "Authorizing Amended Agent Price Basis Record"
4.28.1 Retrieving a Record in Agent Price Basis Summary Screen
You can retrieve a previously entered record in the Summary Screen, as follows:
Invoke the ‘Agent Price Basis Summary’ screen by typing ‘UTSAGTPR’ in the field at the top right corner of the Application tool bar. Click on the adjoining arrow button and specify any or all of the following details in the corresponding details.
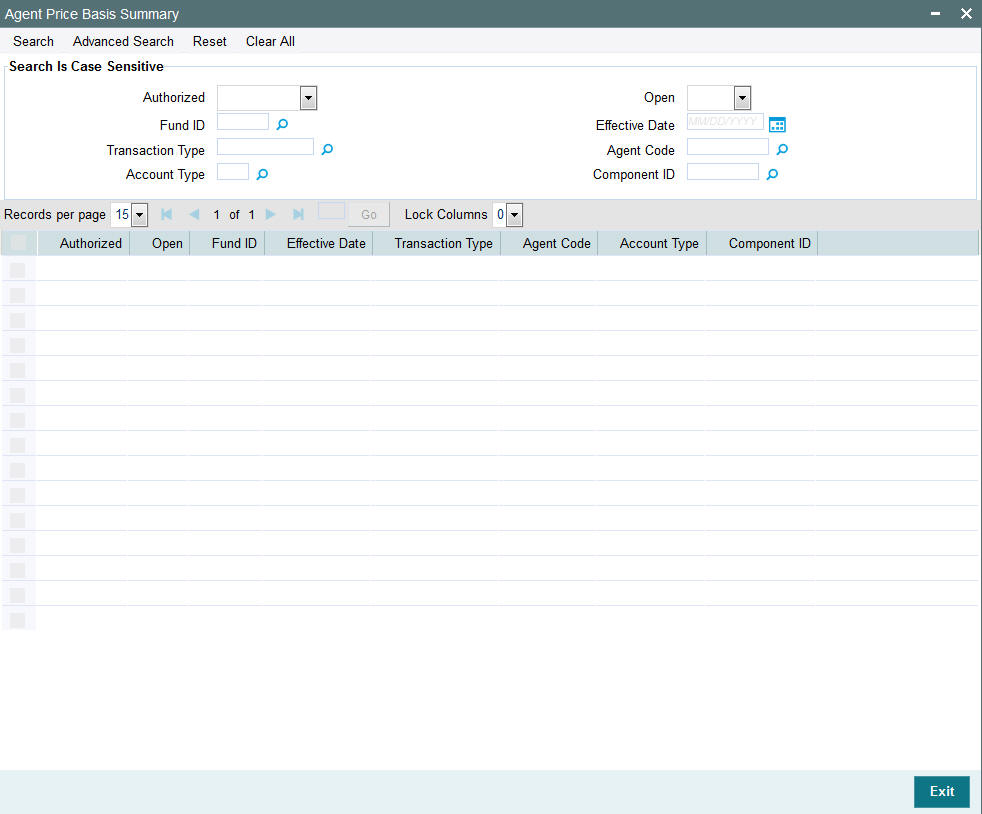
- The status of the record in the Authorized field. If you choose the ‘Blank Space’ option, then all the records are retrieved.
- The status of the record in the Open field. If you choose the ‘Blank Space’ option, then all records are retrieved
- Fund ID
- Transaction Type
- Account Type
- Effective Date
- Agent Code
- Component ID
Click ‘Search’ button to view the records. All the records with the specified details are retrieved and displayed in the lower portion of the screen.
Note
You can also retrieve the individual record detail from the detail screen by querying in the following manner:
- Press F7
- Input the Fund ID
- Press F8
You can perform Edit, Delete, Amend, Authorize, Reverse, Confirm operations by selecting the operation from the Action list. You can also search a record by using a combination of % and alphanumeric value
4.28.2 Editing Agent Price Basis Record
You can modify the details of Agent Price Basis record that you have already entered into the system, provided it has not subsequently authorized. You can perform this operation as follows:
- Invoke the Agent Price Basis Summary screen from the Browser.
- Select the status of the record that you want to retrieve for modification in the Authorized field. You can only modify records that are unauthorized. Accordingly, choose the Unauthorized option.
- Specify any or all of the details in the corresponding fields to retrieve the record that is to be modified.
- Click ‘Search’ button. All unauthorized records with the specified details are retrieved and displayed in the lower portion of the screen.
- Double click the record that you want to modify in the list of displayed records. The Agent Price Basis Detail screen is displayed.
- Select Unlock Operation from the Action list to modify the record. Modify the necessary information.
Click Save to save your changes. The Agent Price Basis Detail screen is closed and the changes made are reflected in the Agent Price Basis Summary screen.
4.28.3 Viewing Agent Price Basis Record
To view a record that you have previously input, you must retrieve the same in the Agent Price Basis Summary screen as follows:
- Invoke the Agent Price Basis Summary screen from the Browser.
- Select the status of the record that you want to retrieve for viewing in the Authorized field. You can also view all records that are either unauthorized or authorized only, by choosing the unauthorized / Authorized option.
- Specify any or all of the details of the record in the corresponding fields on the screen.
- Click ‘Search’ button. All records with the specified fields are retrieved and displayed in the lower portion of the screen.
- Double click the record that you want to view in the list of displayed records. The Agent Price Basis Detail screen is displayed in View mode.
4.28.4 Deleting Agent Price Basis Record
You can delete only unauthorized records in the system. To delete a record that you have previously entered:
- Invoke the Agent Price Basis Summary screen from the Browser.
- Select the status of the record that you want to retrieve for deletion.
- Specify any or all of the details in the corresponding fields on the screen.
- Click ‘Search’ button. All records with the specified fields are retrieved and displayed in the lower portion of the screen.
- Double click the record that you want to delete in the list of displayed records. The Agent Price Basis Detail screen is displayed.
- Select Delete Operation from the Action list. The system prompts you to confirm the deletion and the record is physically deleted from the system database.
4.28.5 Authorizing Agent Price Basis Record
- An unauthorized Agent Price Basis record must be authorized in the system for it to be processed. To authorize a record:
- Invoke the Agent Price Basis Summary screen from the Browser.
- Select the status of the record that you want to retrieve for authorization. Typically, choose the unauthorized option.
- Specify any or all of the details in the corresponding fields on the screen.
- Click ‘Search’ button. All records with the specified details that are pending authorization are retrieved and displayed in the lower portion of the screen.
- Double click the record that you wish to authorize. The Agent Price Basis Detail screen is displayed. Select Authorize operation from the Action List.
When a checker authorizes a record, details of validation, if any, that were overridden by the maker of the record during the Save operation are displayed. If any of these overrides results in an error, the checker must reject the record.
4.28.6 Amending Agent Price Basis Record
After a Agent Price Basis record is authorized, it can be modified using the Unlock operation from the Action List. To make changes to a record after authorization:
- Invoke the Agent Price Basis Summary screen from the Browser.
- Select the status of the record that you want to retrieve for authorization. You can only amend authorized records.
- Specify any or all of the details in the corresponding fields on the screen.
- Click ‘Search’ button. All records with the specified details that are pending authorization are retrieved and displayed in the lower portion of the screen.
- Double click the record that you wish to authorize. The Agent Price Basis Detail screen is displayed in amendment mode. Select Unlock operation from the Action List to amend the record.
- Amend the necessary information and click on Save to save the changes
4.28.7 Authorizing Amended Agent Price Basis Record
An amended Agent Price Basis record must be authorized for the amendment to be made effective in the system. The authorization of amended records can be done only from Fund Manager Module and Agency Branch module.
The subsequent process of authorization is the same as that for normal transactions.
4.29 AMC Agent SLA Maintenance Summary
This section contains the following topics:
4.29.1 Invoking AMC Agent SLA Maintenance Summary Screen
You can set the distribution hierarchy for the agent in a AMC using ‘AMC Agent SLA Maintenance Detail’ screen. You can invoke this screen by typing ‘UTDAMCSL’ in the field at the top right corner of the Application tool bar and clicking on the adjoining arrow button.
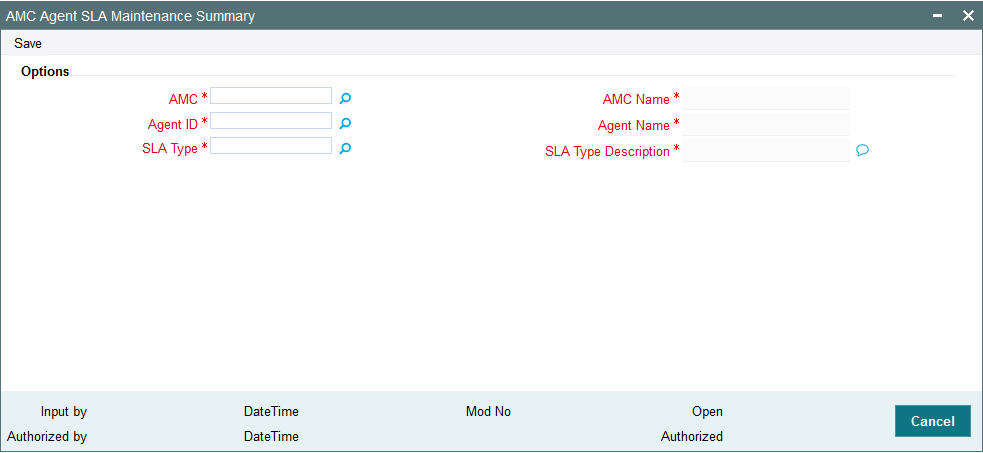
You can specify the following details:
AMC
Alphanumeric; 12 Characters; Mandatory
Specify the AMC ID for which the Agent hierarchy needs to be mapped. Alternatively, you can select AMC ID from the option list. The list displays all valid AMC ID maintained in the system.
AMC Name
Display
The system displays the AMC name of the selected AMC ID.
Agent ID
Alphanumeric; 12 Characters; Mandatory
Specify the Agent ID that needs to be mapped with the AMC. Alternatively, you can select Agent ID from the option list. The list displays all valid Agent ID maintained in the system.
Agent Name
Display
The system displays the agent name of the selected agent ID.
SLA Type
Numeric; 22 Characters; Mandatory
Specify the SLA type. Alternatively, you can select SLA type from the option list. The list displays all valid SLA type maintained in the system.
SLA Type Description
Display
The system displays the description for the selected SLA type.
4.30 Tax Credit
This section contains the following topics:
4.30.1 Invoking Tax Credit Screen
You can maintain tax credit details using ‘Tax Credit’ screen. You can invoke this screen by typing ‘UTDTAXCR’ in the field at the top right corner of the Application tool bar and clicking on the adjoining arrow.
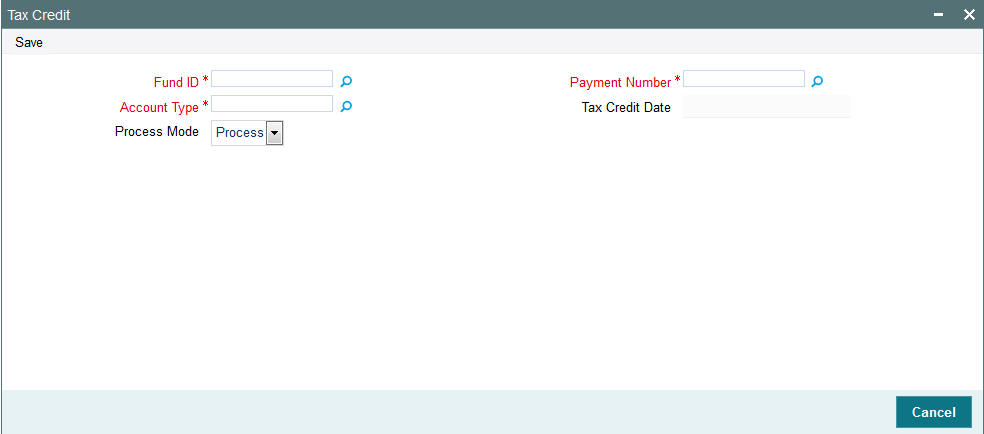
You can specify the following details:
Fund ID
Alphanumeric; 6 Characters; Optional
Specify the fund ID. Alternatively, you can select fund ID from the option list. The list displays all valid fund ID maintained in the system.
Account Type
Alphanumeric; 1 Character; Optional
Specify the account type. Alternatively, you can select account type from the option list. The list displays all valid account type maintained in the system.
Process Mode
Optional
Select the mode of processing from the drop-down list. The list displays the following values:
- Process
- Reverse
Payment Number
Alphanumeric; 1 Character; Optional
Specify the payment number. Alternatively, you can select payment number from the option list. The list displays all valid payment number maintained in the system.
Tax Credit Date
Display
The system displays the tax credited date.