2. Setting up Fund Hierarchies
After you have set up reference data that you will use to operate your funds, you must define the funds in the system, and set up the rules that each fund will be governed by. These rules will be automatically applied by the system whenever you enter a transaction into the system that has been requested by an investor into the fund.
A fund is, typically, a money pool that is accumulated through the contributions of persons who are interested in investing their capital in this manner, with a view to obtaining either steady incomes with periodic returns or steady appreciation of the capital. These interested persons are typically called investors or unit holders.
The fund gives the investors an acknowledgment of their stake in the money pool by issuing units to them, and invests their contributions into the securities market. The returns earned by the fund on this investment is distributed to the investors either in the form of dividends when a dividend is declared by the fund administrators, or in the form of capital appreciation when the investors sell their holdings back to the fund.
Funds can be of various types depending upon their processing guidelines, their expected returns for the investor, pricing guidelines, and so on. Therefore, funds will differ widely in any or all of these characteristics.
Funds differ widely in any or all of the following:
- Operational guidelines
- Investment offer patterns
- The structure of the fees and other loads that are charged or the incentives that are given.
- Pricing policies: The price of the fund on a given business day is known as the NAV (Net Asset Value) for the fund. It is a measure of the net worth of a single asset (or unit) in the fund. It is also the rate that is available to the investors at which they may buy into the fund or sell out of the fund, at any given time.
The fund price is a reflection of the value of the assets in the fund, and so it is rarely constant. Depending upon the frequency at which the fund administrators declare this price, funds may be, accordingly, either pre-priced or post-priced.
- Certificate guidelines: Some funds give investors certificates representing their holdings in the money pool. Such funds are known as scrip-based, certificate-based or simply, certificate funds. Some funds only give the investors an acknowledgment of their holdings, in terms of the number of units held and their prevalent value. Such funds are termed scrip-less funds.
Funds could also be grouped together based on common investment options, either as fund families or as umbrella funds.
Sometimes, asset managers create a tree-structure of associated funds, which may be similar in their investment options. Investors are allowed to invest in any level of the tree-structure. Such fund structures are called umbrella funds.
This chapter includes the following sections:
- Section 2.1, "Setting up Fund "
- Section 2.2, "Fund Hierarchy Setup"
- Section 2.3, "Fund Family Summary Screen"
- Section 2.4, "Share Class Definition"
- Section 2.5, "Share Class Definition Summary Screen"
- Section 2.6, "Sub Fund to Share Class"
- Section 2.7, "Sub Fund Share Class Summary Screen"
- Section 2.8, "Fund Sub Account Mapping Detail"
- Section 2.9, "Fund Sub Account Mapping Summary"
- Section 2.10, "Fund Conversion Restriction"
- Section 2.11, "Fund Restriction Details Summary"
- Section 2.12, "Share Class Ad-Hoc Conversion"
- Section 2.13, "Share Class Adhoc Conversion Summary"
- Section 2.14, "Share Class Bulk Conversion"
- Section 2.15, "Share Class Bulk Conversion Summary"
- Section 2.16, "Conversion Factor"
- Section 2.17, "Conversion Factor Summary"
2.1 Setting up Fund
In Oracle FLEXCUBE Investor Servicing, you set up a fund in the system as follows:
- First, you set up any necessary fund hierarchies, either fund families or umbrella funds.
- You set up the different guidelines according to which any investment in the funds will be processed.
- Have another user authorize the fund.
2.2 Fund Hierarchy Setup
This section contains the following topics:
2.2.1 Setting up Fund Hierarchy
The system provides the facility of maintaining and processing umbrella funds as well as non-umbrella type of fund families. Therefore, a hierarchy of funds may be set up with fund rule profiles at each level except the lowest level.
Before you actually set up a fund in the system, you must first set up the kind of hierarchy that you require. You can do so by setting up the following:
Fund Families
First, you set up the lowest levels in the fund hierarchy. The fund families created here may be designated either as umbrella funds or non-umbrella funds. For an umbrella fund, you must maintain at least three levels.
Creation of the hierarchy for an umbrella fund is facilitated by this fund rule. Each umbrella fund has one sub-fund associated with it and each sub-fund has at least one share class associated with it. This makes up a complete hierarchy.
Share Class Definition
You can define the share classes that will be the last level in the hierarchy of funds. Each share class will thus be uniquely identified in the system.
Setting up Sub-funds and Share Classes
Sub-funds and share classes may be setup, and the share classes may be mapped to the sub-funds. A rudimentary profile consisting of a system-generated Fund ID, Fund Name and Fund Short Name will be maintained for share class funds.
2.2.2 Invoking Fund Families Screen
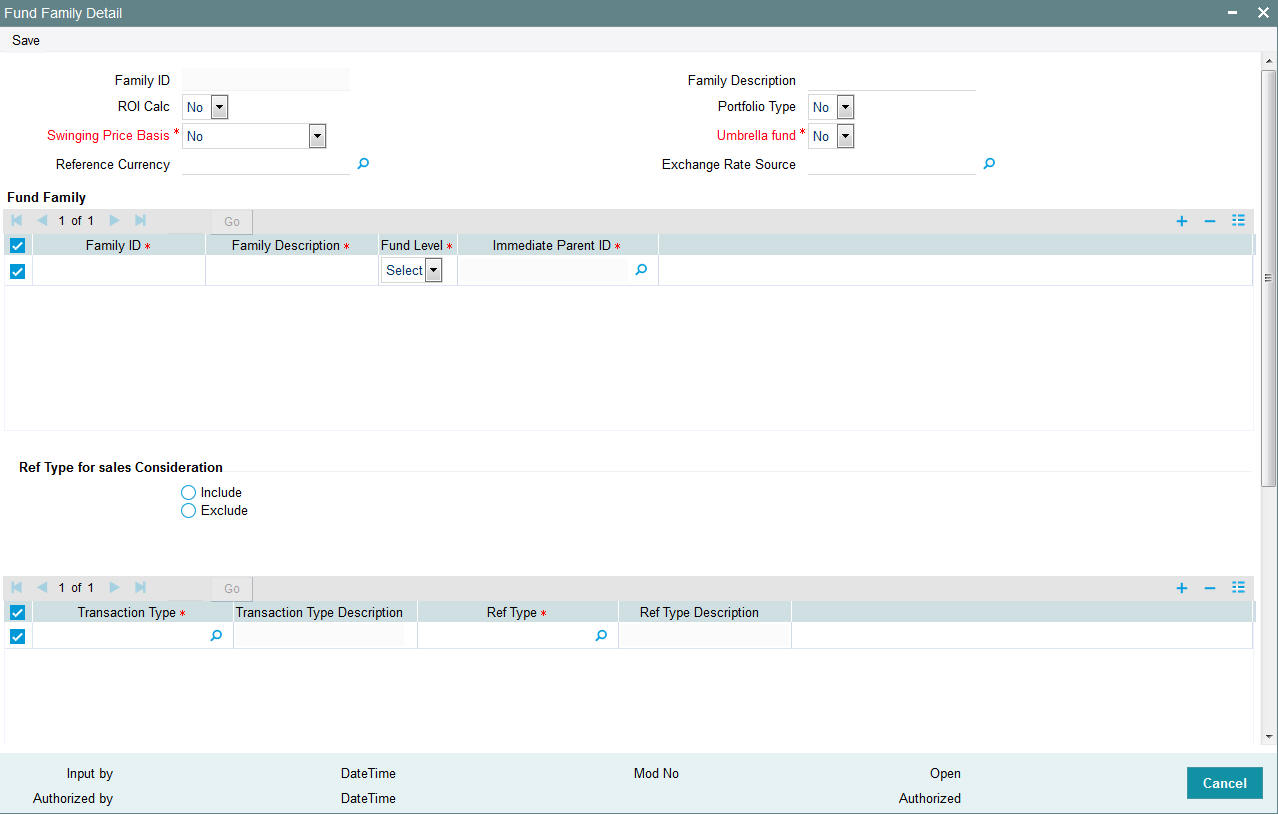
You can use the ‘Fund Family Detail’ screen to maintain fund families and umbrella fund hierarchies. The lower levels of the fund hierarchy, for both Umbrella and non-umbrella funds may be set up in this screen.
You can invoke this screen by typing ‘UTDFNDFM’ in the field at the top right corner of the Application tool bar and clicking on the adjoining arrow button.
Select ‘New’ from the Actions menu in the Application tool bar or click new icon to enter the details of a new fund family.
In the system, switching transactions that involve switching of a unit holder’s units from one fund to another are dependent on the fund family setup for non-umbrella funds and the fund hierarchy for umbrella funds.
You can specify the following fields:
Family ID
Display
The system displays a unique Identification for the fund family.
ROI Calc
Optional
If ROI calculation is applicable for the family which is being set up, select Yes from the drop-down list. Else select ‘No’.
Swinging Price Basis
Mandatory
This field displays whether the swinging price is applicable for the fund family or not. The available options are:
- No
- Swinging Price
- Semi Swinging
This field is applicable if swinging price is applicable for fund families.
Reference Currency
Alphanumeric; 3 Characters; Optional
Specify the reference currency. This field is applicable only when the swinging price basis is selected as ‘Swinging Price’ or ‘Semi Swinging’. The mid currency exchange rate is used for currency conversion.
Family Description
Alphanumeric; 100 Characters; Optional
Enter a brief description of the fund family that is being set up.
Portfolio Type
Optional
If the family being set up is to have a portfolio type, select Yes from drop-down list.
Umbrella Fund
Mandatory
If the family being set up is to be an umbrella fund, select Yes from the drop-down list. If a fund is designated as an umbrella fund, the hierarchy must be maintained up to level 3, i.e., fund families, umbrella funds and sub-funds.
Exchange Rate Source
Alphanumeric; 20 Characters; Optional
This field displays the Exchange Rate Source. This field is applicable only when the swinging price basis is selected as ‘Swinging Price’ or ‘Semi Swinging’.
Fund Family
Family ID
Alphanumeric; 6 Characters; Mandatory
Enter a unique Identification for the fund family. This value should not be a valid Family ID already existing in the system.
Family Description
Alphanumeric; 100 Characters; Optional
Enter a brief description of the fund family that is being set up.
Fund Level
Mandatory
Select the fund level from the drop-down list. The list displays the following values:
- One
- Two
- Three
Immediate Parent ID
Alphanumeric; 6 Characters; Mandatory
Select the Immediate parent ID from the option list. The option list contains list of all existing fund families. Select a valid entry for the relevant Fund Family ID.
Ref Types for sales Consideration
Mandatory only if Swinging Price Basis is not ‘No’
Select Include or Exclude to indicate whether reference type needs to be used for net sales computation or not.
Transaction Type
Alphanumeric; 2 Characters; Mandatory
Select the transaction type to be mapped for sales consideration computation from the option list. The following values are listed in the option list:
- 01
- 02
- 03
- 04
- 54
Transaction Type Description
Display
The description of the selected transaction type is displayed in this field.
Reference Type
Alphanumeric; 2 Characters; Mandatory
Specify the reference type which is used for sales consideration computation.
Ref Type Description
Display
The description of the selected reference type is displayed in this field.
Transaction Type for Swinging Price Consideration
Transaction Type
Alphanumeric; 2 Characters; Mandatory
Specify the transaction type for which the swinging price is to be applied
Transaction Description
Display
The system displays a description of the selected transaction.
2.3 Fund Family Summary Screen
This section contains the following topics:
- Section 2.3.1, "Retrieving Record in Fund Family Summary Screen"
- Section 2.3.2, "Editing Fund Family Record"
- Section 2.3.3, "Viewing Fund Family Record"
- Section 2.3.4, "Deleting Fund Family Record"
- Section 2.3.5, "Authorizing Fund Family Record"
- Section 2.3.6, "Amending Fund Family Record"
- Section 2.3.7, "Authorizing Amended Fund Family Record"
- Section 2.3.8, "Copying Attributes"
2.3.1 Retrieving Record in Fund Family Summary Screen
You can retrieve a previously entered record in the Summary Screen, as follows:
Invoke the ‘Fund Family Summary’ screen by typing ‘UTSFNDFM’ in the field at the top right corner of the Application tool bar and clicking on the adjoining arrow button.
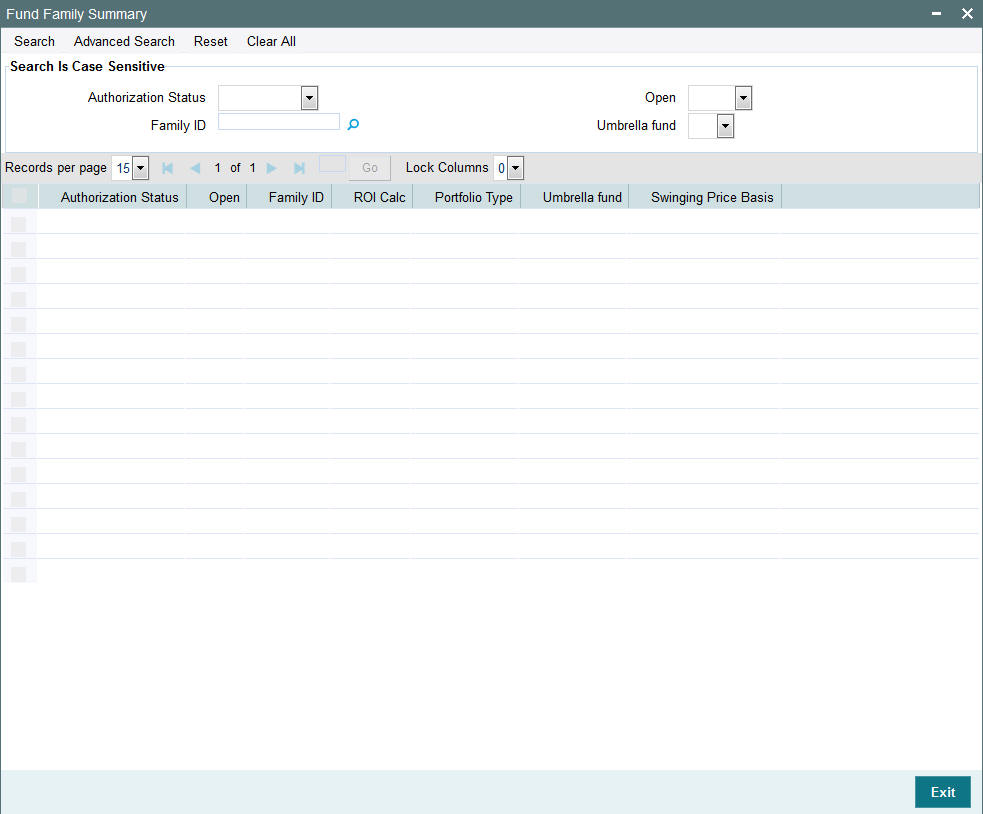
Specify any or all of the following details in the corresponding fields:
- The status of the record in the Authorization Status field. If you choose the ‘Blank Space’ option, then all the records are retrieved.
- The status of the record in the Open field. If you choose the ‘Blank Space’ option, then all records are retrieved
- Family ID
- Umbrella Fund
Click ‘Search’ button to view the records. All the records with the specified details are retrieved and displayed in the lower portion of the screen.
Note
You can also retrieve the individual record detail from the detail screen by querying in the following manner:
- Press F7
- Input the Family ID
- Press F8
You can perform Edit, Delete, Amend, Authorize, Reverse, Confirm operations by selecting the operation from the Action list. You can also search a record by using a combination of % and alphanumeric value.
Example
You can search the record for Family ID by using the combination of % and alphanumeric value as follows:-
- Search by A%: The system will fetch all the records whose Family ID starts from Alphabet ‘A’. For example, AGC17, AGVO6, AGC74 and so forth.
- Search by %7: The system will fetch all the records whose Family ID ends by numeric value’ 7’. For example, AGC17, GSD267, AGC77 and so forth.
- Search by %17%: The system will fetch all the records whose Family ID contains the numeric value 17. For example, GSD217, GSD172, AGC17 and so forth.
2.3.2 Editing Fund Family Record
You can modify the details of a Fund Family record that you have already entered into the system, provided it has not subsequently authorized. You can perform this operation as follows:
- Invoke the Fund Family Summary screen from the Browser.
- Select the status of the record that you want to retrieve for modification in the Authorization Status field. You can only modify records that are unauthorized. Accordingly, choose the ‘Unauthorized’ option.
- Specify any or all of the details in the corresponding fields to retrieve the record that is to be modified.
- Click ‘Search’ button. All unauthorized records with the specified details are retrieved and displayed in the lower portion of the screen.
- Double click the record that you want to modify in the list of displayed records. The Fund Family Detail screen is displayed.
- Select Unlock Operation from the Action list to modify the record. Modify the necessary information.
- Click Save to save your changes. The Fund Family Detail screen is closed and the changes made are reflected in the Fund Family Summary screen.
Only maker can edit his unauthorized records.
2.3.3 Viewing Fund Family Record
To view a record that you have previously input, you must retrieve the same in the Fund Family Summary screen as follows:
- Invoke the Fund Family Summary screen from the Browser.
- Select the status of the record that you want to retrieve for viewing in the Authorization Status field. You can also view all records that are either unauthorized or authorized only, by choosing the Unauthorized/ Authorized option.
- Specify any or all of the details of the record in the corresponding fields on the screen.
- Click ‘Search’ button. All records with the specified fields are retrieved and displayed in the lower portion of the screen.
- Double click the record that you want to view in the list of displayed records. The Fund Family Detail screen is displayed in View mode.
2.3.4 Deleting Fund Family Record
You can delete only unauthorized records in the system. To delete a record that you have previously entered:
- Invoke the Fund Family Summary screen from the Browser.
- Select the status of the record that you want to retrieve for deletion.
- Specify any or all of the details in the corresponding fields on the screen.
- Click ‘Search’ button. All records with the specified fields are retrieved and displayed in the lower portion of the screen.
- Double click the record that you want to delete in the list of displayed records. The Fund Family Detail screen is displayed.
- Select Delete Operation from the Action list. The system prompts you to confirm the deletion and the record is physically deleted from the system database.
2.3.5 Authorizing Fund Family Record
An unauthorized Fund Family record must be authorized in the system for it to be processed. To authorize a record:
- Invoke the Fund Family Summary screen from the Browser.
- Select the status of the record that you want to retrieve for authorization. Typically, choose the unauthorized option.
- Specify any or all of the details in the corresponding fields on the screen.
- Click ‘Search’ button. All records with the specified details that are pending authorization are retrieved and displayed in the lower portion of the screen.
- Double click the record that you wish to authorize. The Fund Family Detail screen is displayed. Select Authorize operation from the Action List.
When a checker authorizes a transaction, details of validation, if any, that were overridden by the maker of the transaction during the Save operation are displayed. If any of these overrides results in an error, the checker must reject the transaction.
2.3.6 Amending Fund Family Record
After a Fund Family record is authorized, it can be modified using the Unlock operation from the Action List. To make changes to a record after authorization:
- Invoke the Fund Family Summary screen from the Browser.
- Select the status of the record that you want to retrieve for authorization. You can only amend authorized records.
- Specify any or all of the details in the corresponding fields on the screen.
- Click ‘Search’ button. All records with the specified details that are pending authorization are retrieved and displayed in the lower portion of the screen.
- Double click the record that you wish to authorize. The Fund Family Detail screen is displayed in amendment mode. Select Unlock operation from the Action List to amend the record.
- Amend the necessary information and click on Save to save the changes.
2.3.7 Authorizing Amended Fund Family Record
An amended Fund Family record must be authorized for the amendment to be made effective in the system. The authorization of amended records can be done only from Fund Manager Module.
The subsequent process of authorization is the same as that for normal transactions.
2.3.8 Copying Attributes
If you want to create a new Fund Family with the same attributes of an existing one, you can copy the attributes of an existing Fund Family to a new one.
To copy the attributes:
- Retrieve the record whose attributes the new Fund Family should inherit. You can retrieve the record through the Summary screen or through the F7-F8 operation explained in the previous sections of this chapter.
- Click on Copy
- Indicate the ID for the new Fund Family. You can, however, change the details of the new maintenance.
2.4 Share Class Definition
This section contains the following topics:
2.4.1 Invoking Share Classes Screen
The share classes are the last or lowest level in the umbrella fund hierarchy. Each share class is uniquely identified in this screen with a unique ID. You can maintain any number of share class types as are necessary.
To maintain share classes, use the ‘Share Class Definition Detail’ screen. You can invoke this screen by typing ‘UTDSCDEF’ in the field at the top right corner of the Application tool bar and clicking on the adjoining arrow button. Select ‘New’ from the Actions menu in the Application tool bar or click new icon to enter the details of the share class.
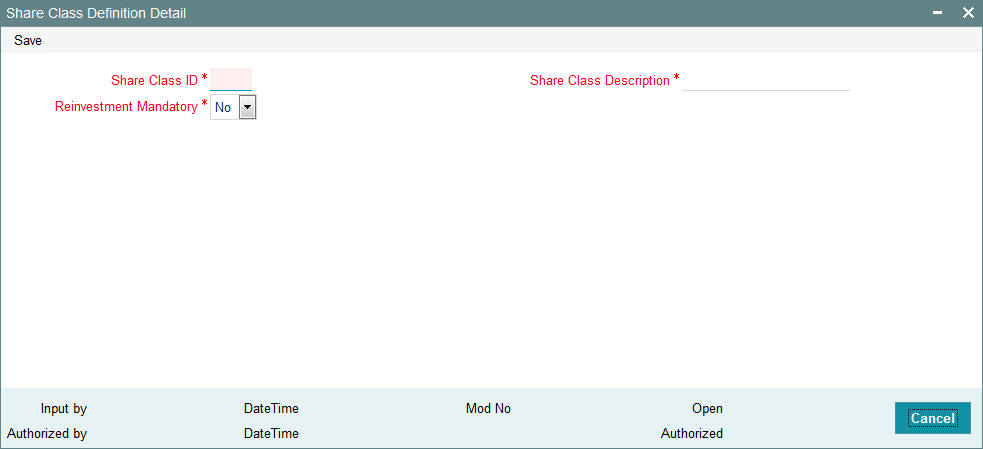
You can specify the following fields:
Share Class ID
Alphanumeric; 2 Characters; Mandatory
Specify a unique ID that will identify the share class in the system.
Share Class Description
Alphanumeric; 20 Characters; Mandatory
Specify a unique description for the share class.
Reinvestment Mandatory
Mandatory
Select ‘Yes’ from the drop-down list if reinvestment is to be mandatory for this share class. If you select ‘Yes’, and reinvestment is mandatory for this share class, reinvestment is the only option that will be available when a Corporate Actions profile is set up for this share class fund.
2.5 Share Class Definition Summary Screen
This section contains the following topics:
- Section 2.5.1, "Retrieving Record in Share Class Definition Summary Screen"
- Section 2.5.2, "Editing Share Class Definition Record"
- Section 2.5.3, "Viewing Share Class Definition Record"
- Section 2.5.4, "Deleting Share Class Definition Record"
- Section 2.5.5, "Authorizing Share Class Definition Record"
- Section 2.5.6, "Amending Share Class Definition Record"
- Section 2.5.7, "Authorizing Amended Share Class Definition Record"
- Section 2.5.8, "Copying Attributes"
2.5.1 Retrieving Record in Share Class Definition Summary Screen
You can retrieve a previously entered record in the Summary Screen, as follows:
Invoke the ‘Share Class Definition Summary’ screen by typing ‘UTSSCDEF’ in the field at the top right corner of the Application tool bar and clicking on the adjoining arrow button..

Specify any or all of the following details in the corresponding fields:
- The status of the record in the Authorized field. If you choose the ‘Blank Space’ option, then all the records are retrieved.
- The status of the record in the Open field. If you choose the ‘Blank Space’ option, then all records are retrieved
- Share Class ID
Click ‘Search’ button to view the records. All the records with the specified details are retrieved and displayed in the lower portion of the screen.
Note
You can also retrieve the individual record detail from the detail screen by querying in the following manner:
- Press F7
- Input the Share Class ID
- Press F8
You can perform Edit, Delete, Amend, Authorize, Reverse, Confirm operations by selecting the operation from the Action list. You can also search a record by using a combination of % and alphanumeric value.
Example
You can search the record for Share Class ID by using the combination of % and alphanumeric value as follows:-
- Search by A%: The system will fetch all the records whose Share Class ID starts from Alphabet ‘A’. For example, AGC17, AGVO6, AGC74 and so forth.
- Search by %7: The system will fetch all the records whose Share Class ID ends by numeric value’ 7’. For example, AGC17, GSD267, AGC77 and so forth.
- Search by %17%: The system will fetch all the records whose Share Class ID contains the numeric value 17. For example, GSD217, GSD172, AGC17 and so forth.
2.5.2 Editing Share Class Definition Record
You can modify the details of a Share Class Definition record that you have already entered into the system, provided it has not subsequently authorized. You can perform this operation as follows:
- Invoke the Share Class Definition Summary screen from the Browser.
- Select the status of the record that you want to retrieve for modification in the Authorization Status field. You can only modify records that are unauthorized. Accordingly, choose the ‘Unauthorized’ option.
- Specify any or all of the details in the corresponding fields to retrieve the record that is to be modified.
- Click ‘Search’ button. All unauthorized records with the specified details are retrieved and displayed in the lower portion of the screen.
- Double click the record that you want to modify in the list of displayed records. The Share Class Definition Detail screen is displayed.
- Select Unlock Operation from the Action list to modify the record. Modify the necessary information.
- Click Save to save your changes. The Share Class Definition Detail screen is closed and the changes made are reflected in the Share Class Definition Summary screen.
2.5.3 Viewing Share Class Definition Record
To view a record that you have previously input, you must retrieve the same in the Share Class Definition Summary screen as follows:
- Invoke the Share Class Definition Summary screen from the Browser.
- Select the status of the record that you want to retrieve for viewing in the Authorization Status field. You can also view all records that are either unauthorized or authorized only, by choosing the Unauthorized/ Authorized option.
- Specify any or all of the details of the record in the corresponding fields on the screen.
- Click ‘Search’ button. All records with the specified fields are retrieved and displayed in the lower portion of the screen.
- Double click the record that you want to view in the list of displayed records. The Share Class Definition Detail screen is displayed in View mode.
2.5.4 Deleting Share Class Definition Record
You can delete only unauthorized records in the system. To delete a record that you have previously entered:
- Invoke the Share Class Definition Summary screen from the Browser.
- Select the status of the record that you want to retrieve for deletion.
- Specify any or all of the details in the corresponding fields on the screen.
- Click ‘Search’ button. All records with the specified fields are retrieved and displayed in the lower portion of the screen.
- Double click the record that you want to delete in the list of displayed records. . The Share Class Definition Detail screen is displayed.
- Select Delete Operation from the Action list. The system prompts you to confirm the deletion and the record is physically deleted from the system database.
2.5.5 Authorizing Share Class Definition Record
An unauthorized Share Class Definition record must be authorized in the system for it to be processed. To authorize a record:
- Invoke the Share Class Definition Summary screen from the Browser.
- Select the status of the record that you want to retrieve for authorization. Typically, choose the unauthorized option.
- Specify any or all of the details in the corresponding fields on the screen.
- Click ‘Search’ button. All records with the specified details that are pending authorization are retrieved and displayed in the lower portion of the screen.
- Double click the record that you wish to authorize. The Share Class Definition screen is displayed. Select Authorize operation from the Action List.
When a checker authorizes a transaction, details of validation, if any, that were overridden by the maker of the transaction during the Save operation are displayed. If any of these overrides results in an error, the checker must reject the transaction.
2.5.6 Amending Share Class Definition Record
After a Share Class Definition record is authorized, it can be modified using the Unlock operation from the Action List. To make changes to a record after authorization:
- Invoke the Share Class Definition Summary screen from the Browser.
- Select the status of the record that you want to retrieve for authorization. You can only amend authorized records.
- Specify any or all of the details in the corresponding fields on the screen.
- Click ‘Search’ button. All records with the specified details that are pending authorization are retrieved and displayed in the lower portion of the screen.
- Double click the record that you wish to authorize. The Share Class Definition screen is displayed in amendment mode. Select Unlock operation from the Action List to amend the record.
- Amend the necessary information and click on Save to save the changes.
2.5.7 Authorizing Amended Share Class Definition Record
An amended Share Class Definition record must be authorized for the amendment to be made effective in the system. The authorization of amended records can be done only from Fund Manager Module.
The subsequent process of authorization is the same as that for normal transactions.
2.5.8 Copying Attributes
If you want to create a new Share Class Definition with the same attributes of an existing one, you can copy the attributes of an existing Share Class Definition to a new one.
To copy the attributes:
- Retrieve the record whose attributes the new Share Class Definition should inherit. You can retrieve the record through the Summary screen or through the F7-F8 operation explained in the previous sections of this chapter.
- Click on Copy
- Indicate the ID for the new Share Class Definition. You can, however, change the details of the new maintenance.
2.6 Sub Fund to Share Class
This section contains the following topics:
2.6.1 Invoking Sub Fund Share Class Detail Screen
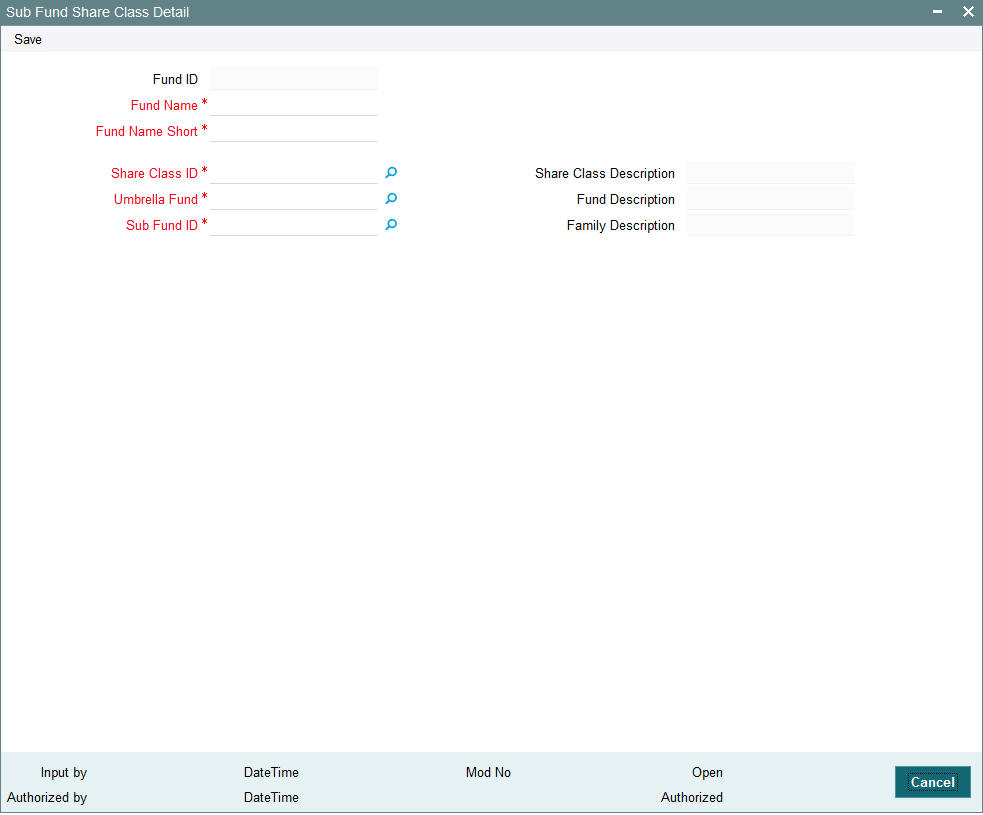
All sub-funds that come under any umbrella fund may be mapped to a share class in the system. A share class fund is set up for each of these mapping relationships, with a unique six-character system-generated Fund ID. This mapping will complete the fund hierarchy for an umbrella fund.
You can perform this mapping in the ‘Sub Fund Share Class Detail’ screen.
You can invoke this screen by typing ‘UTDSUBFN’ in the field at the top right corner of the Application tool bar and clicking on the adjoining arrow button.
Select ‘New’ from the Actions menu in the Application tool bar or click new icon to enter the details of the Mapping.
Before you actually map a sub-fund to a share class, the following information must be already set up in the system:
- The umbrella funds, up to sub-fund level, must already be set up in the Fund Family Maintenance, i.e., the fund family, umbrella fund and sub-fund.
- The share classes must be defined in the Share Class Definition maintenance.
You can specify the following fields:
Fund ID
Display
After the umbrella fund, sub-fund and share class have been selected for mapping, the share class fund ID is generated by the system. The generation logic is as follows:
The Fund ID will be a unique six-character ID. The first two characters will be the ID of the umbrella fund that is the immediate parent of the chosen sub-fund, the next two characters will be the ID of the fund family of the sub-fund that is selected, and the last two characters are the ID of the share class that has been mapped to the sub-fund. For example, if P1 is the ID of the umbrella fund, P2 is the ID of the sub-fund and AC is the ID of the share class, the share class fund generated will have a six-character ID, P1P2AC.
Fund Name
Alphanumeric; 60 Characters; Mandatory
Specify the name of the share class fund that has been created.
Fund Name Short
Alphanumeric; 15 Characters; Mandatory
Specify the short name of the share class fund that has been created.
Share Class ID
Alphanumeric; 2 Characters; Mandatory
Select the share class that must be mapped to the selected sub-fund, from the options in the list. This list will contain all share classes that have been defined in the system in the Share Class Definition maintenance.
Share Class Description
Display
The system displays the description for the selected share class ID.
Umbrella Fund
Alphanumeric; 6 Characters; Mandatory
Select the umbrella fund that incorporates the sub-funds for which a share class mapping must be done, from the options in the list. All the sub-funds that are set up with the selected umbrella fund as parent will be populated in the Sub-Fund list in the lower portion of the screen.
Fund Description
Display
The system displays the description of fund.
Sub-Fund ID
Alphanumeric; 6 Characters; Mandatory
Select the umbrella fund that incorporates the sub-funds for which a share class mapping must be done, from the options in the list.
Family Description
Display
The system displays the family description.
2.7 Sub Fund Share Class Summary Screen
This section contains the following topics:
- Section 2.7.1, "Retrieving Record in Sub Fund Share Class Summary Screen"
- Section 2.7.2, "Editing Sub Fund Share Class Record"
- Section 2.7.3, "Viewing Sub Fund Share Class Record"
- Section 2.7.4, "Deleting Sub-fund Share Class Record"
- Section 2.7.5, "Authorizing Sub Fund Share Class Record"
- Section 2.7.6, "Amending Sub Fund Share Class Maintenance"
- Section 2.7.7, "Authorizing Amended Sub Fund Share Class Record"
2.7.1 Retrieving Record in Sub Fund Share Class Summary Screen
You can retrieve a previously entered record in the Summary Screen, as follows:
Invoke the ‘Sub Fund Share Class Summary’ screen by typing ‘UTSSUBFN’ in the field at the top right corner of the Application tool bar and clicking on the adjoining arrow button.
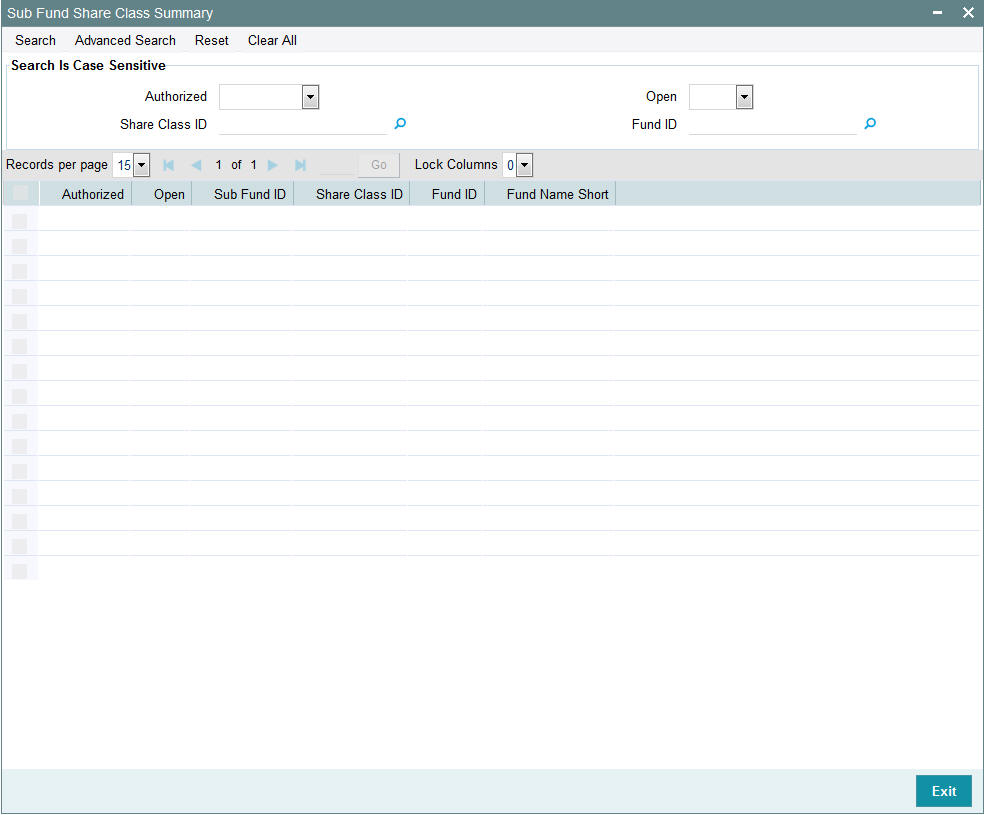
Specify any or all of the following details in the corresponding fields:
- The status of the record in the Authorized field. If you choose the ‘Blank Space’ option, then all the records are retrieved.
- The status of the record in the Open field. If you choose the ‘Blank Space’ option, then all records are retrieved
- Share Class ID
- Fund ID
Click ‘Search’ button to view the records. All the records with the specified details are retrieved and displayed in the lower portion of the screen.
You can also retrieve the individual record detail from the detail screen by querying in the following manner:
- Press F7
- Input the Share Class ID
- Press F8
You can perform Edit, Delete, Amend, Authorize, Reverse, Confirm operations by selecting the operation from the Action list. You can also search a record by using a combination of % and alphanumeric value.
Example
You can search the record for Share Class ID by using the combination of % and alphanumeric value as follows:
- Search by A%: The system will fetch all the records whose Share Class ID starts from Alphabet ‘A’. For example, AGC17, AGVO6, AGC74 and so forth.
- Search by %7: The system will fetch all the records whose Share Class ID ends by numeric value’ 7’. For example, AGC17, GSD267, AGC77 and so forth.
- Search by %17%: The system will fetch all the records whose Share Class ID contains the numeric value 17. For example, GSD217, GSD172, AGC17 and so forth.
2.7.2 Editing Sub Fund Share Class Record
You can modify the details of a Sub Fund Share Class Summary that you have already entered into the system, provided it has not subsequently authorized.
You can perform this operation as follows:
- Invoke the Sub Fund Share Class Summary screen from the Browser.
- Select the status of the record that you want to retrieve for modification in the Authorization Status field. You can only modify records that are unauthorized. Accordingly, choose the unauthorized option.
- Specify any or all of the details in the corresponding fields to retrieve the record that is to be modified.
- Click ‘Search’ button. All unauthorized records with the specified details are retrieved and displayed in the lower portion of the screen.
- Double click the record that you want to modify in the list of displayed records. The Sub Fund Share Class Detail screen is displayed.
- Select Unlock Operation from the Action list to modify the record. Modify the necessary information.
- Click Save to save your changes. The Sub Fund Share Class Detail screen is closed and the changes made are reflected in the Sub Fund Share Class Summary screen.
2.7.3 Viewing Sub Fund Share Class Record
To view a record that you have previously input, you must retrieve the same in the Sub Fund Share Class Summary screen as follows:
- Invoke the Sub Fund Share Class Summary screen from the Browser.
- Select the status of the record that you want to retrieve for viewing in the Authorization Status field. You can also view all records that are either unauthorized or authorized only, by choosing the Unauthorized/ Authorized option.
- Specify any or all of the details of the record in the corresponding fields on the screen.
- Click ‘Search’ button. All records with the specified fields are retrieved and displayed in the lower portion of the screen.
- Double click the record that you want to view in the list of displayed records. The Sub-fund Share Class Maintenance Detail screen is displayed in View mode.
2.7.4 Deleting Sub-fund Share Class Record
You can delete only unauthorized records in the system. To delete a record that you have previously entered:
- Invoke the Sub Fund Share Class Summary screen from the Browser.
- Select the status of the record that you want to retrieve for deletion.
- Specify any or all of the details in the corresponding fields on the screen.
- Click ‘Search’ button. All records with the specified fields are retrieved and displayed in the lower portion of the screen.
- Double click the record that you want to delete in the list of displayed records. The Sub Fund Share Class Detail screen is displayed.
- Select Delete Operation from the Action list. The system prompts you to confirm the deletion and the record is physically deleted from the system database.
2.7.5 Authorizing Sub Fund Share Class Record
An unauthorized Sub Fund Share Class record must be authorized in the system for it to be processed. To authorize a record:
- Invoke the Sub Fund Share Class Summary screen from the Browser.
- Select the status of the record that you want to retrieve for authorization. Typically, choose the unauthorized option.
- Specify any or all of the details in the corresponding fields on the screen.
- Click ‘Search’ button. All records with the specified details that are pending authorization are retrieved and displayed in the lower portion of the screen.
- Double click the record that you wish to authorize. The Sub Fund Share Class screen is displayed. Select Authorize operation from the Action List.
When a checker authorizes a transaction, details of validation, if any, that were overridden by the maker of the transaction during the Save operation are displayed. If any of these overrides results in an error, the checker must reject the transaction.
2.7.6 Amending Sub Fund Share Class Maintenance
After a Sub Fund Share Class record is authorized, it can be modified using the Unlock operation from the Action List. To make changes to a record after authorization:
- Invoke the Sub Fund Share Class Summary screen from the Browser.
- Select the status of the record that you want to retrieve for authorization. You can only amend authorized records.
- Specify any or all of the details in the corresponding fields on the screen.
- Click ‘Search’ button. All records with the specified details that are pending authorization are retrieved and displayed in the lower portion of the screen.
- Double click the record that you wish to authorize. The Sub Fund Share Class screen is displayed in amendment mode. Select Unlock operation from the Action List to amend the record.
- Amend the necessary information and click on Save to save the changes.
2.7.7 Authorizing Amended Sub Fund Share Class Record
An amended Sub Fund Share Class record must be authorized for the amendment to be made effective in the system. The authorization of amended records can be done only from Fund Manager Module and Agency Branch module.
The subsequent process of authorization is the same as that for normal transactions.
2.8 Fund Sub Account Mapping Detail
This section contains the following topics:
2.8.1 Invoking Fund Sub Account Mapping Detail Screen
You can map fund sub account using ‘Fund Sub Account Mapping Detail’ screen. You can invoke this screen by typing ‘UTDFSAMS’ in the field at the top right corner of the Application tool bar and clicking on the adjoining arrow button.

You can specify the following details:
Fund ID
Alphanumeric; 6 Characters; Mandatory
Specify the fund ID for which the funds are to be restricted for usage. Alternatively, you can select fund ID from the option list. The list displays all valid fund IDs maintained in the system.
Fund Name
Display
The system displays the name of the selected fund ID.
Fund Identification Number
Display
The system displays the fund identification number of the selected fund ID.
Sub Account
Alphanumeric; 6 Characters; Mandatory
Specify the sub account details.
2.9 Fund Sub Account Mapping Summary
This section contains the following topics:
- Section 2.9.1, "Retrieving Fund Sub Account Mapping Record in Summary Screen"
- Section 2.9.2, "Editing Fund Sub Account Mapping Record"
- Section 2.9.3, "Viewing Fund Sub Account Mapping Record"
- Section 2.9.4, "Deleting a Fund Sub Account Mapping Record"
- Section 2.9.5, "Authorizing Fund Sub Account Mapping Record"
- Section 2.9.6, "Amending Fund Sub Account Mapping Record"
- Section 2.9.7, "Authorizing Amended Fund Sub Account Mapping Record"
2.9.1 Retrieving Fund Sub Account Mapping Record in Summary Screen
You can retrieve a previously entered entity in the Summary screen, as follows.
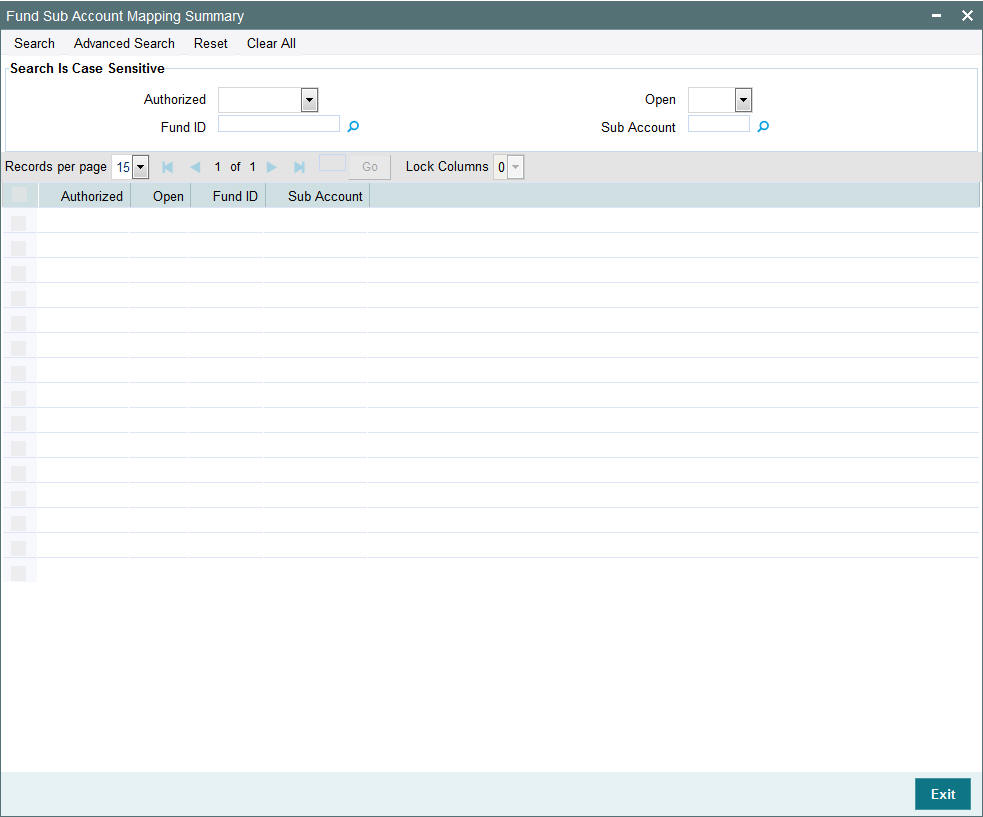
You can invoke the ‘Fund Sub Account Mapping Summary’ screen by typing ‘UTSFSAMS’ in the field at the top right corner of the Application tool bar and clicking on the adjoining arrow button and specify any or all of the following details in the corresponding details.
- Invoke the Fund Sub Account Mapping Summary screen and specify the
following:
- The status of the record in the Authorized field. If you choose the “Blank Space” option, then all the records are retrieved.
- The status of the record in the Open field. If you choose the “Blank Space” option, then all the records are retrieved.
- Fund ID
- Sub Account
- After you have specified the required details, click ‘Search’ button. All records with the specified details are retrieved and displayed in the lower portion of the screen.
Note
You can also retrieve an individual record from the Detail screen by doing query in the following manner:
- Press F7
- Input any parameter in the screen.
- Press F8
You can perform Edit, Delete, Amend, Authorize, operation by selecting from the Action list.
You can also search the record by using combination of % and alphanumeric value.
For example, you can search the record for Fund ID by using the combination of % and alphanumeric value as follows:-
- Search by A%: The system will fetch all the records whose Fund ID starts from Alphabet ‘A’. For example, AA.
- Search by %7: The system will fetch all the records whose Fund ID Type ends by numeric value’ 7’. For example, -S7.
- Search by %17%: The system will fetch all the records whose Fund ID contains the numeric value 17. For example, - 17.
2.9.2 Editing Fund Sub Account Mapping Record
You can modify the Fund Sub Account Mapping record that you have already entered into the system, provided it has not been subsequently authorized. You can perform this operation as follows:
- Invoke the Fund Sub Account Mapping Summary screen from the Browser.
- Select the status of the records that you want to retrieve for modification in the Authorized field. You can only modify records that are unauthorized. Accordingly, choose the Unauthorized option from the drop-down list.
- Click ‘Search’ button. All unauthorized Fund Sub Account Mapping records with the specified details are retrieved and displayed in the lower portion of the screen.
- Double click the record that you want to modify. The Fund Sub Account Mapping Detail screen is displayed.
- Select Unlock Operation from Action list to modify the record. Modify the necessary information.
- Click Save to save the changes. The Fund Sub Account Mapping record Detail screen is closed and the changes made are reflected in the Fund Sub Account Mapping Summary screen.
2.9.3 Viewing Fund Sub Account Mapping Record
To view a Fund Sub Account Mapping record that you have previously entered:
- Invoke the Fund Sub Account Mapping Summary Screen from the Browser.
- Select the status of the Fund Sub Account Mapping record that you want to retrieve for viewing in the Authorized field. You can also view all records that are either unauthorized or authorized only, by choosing the Unauthorized / Authorized option.
- Click ‘Search’ button. All records with the specified details are retrieved and displayed in the lower portion of the screen.
- Double click the record that you want to view. The Fund Sub Account Mapping Detail screen is opened in view mode.
2.9.4 Deleting a Fund Sub Account Mapping Record
You can delete only unauthorized Fund Sub Account Mapping record in the system. To delete a switch privileges setup list:
- Invoke the Fund Sub Account Mapping Summary screen from the Browser.
- Select the status of the record that you want to retrieve for deletion.
- Click ‘Search’ button. All records with the specified details are retrieved and displayed in the lower portion of the screen.
- Double click the record that you want to delete. The Fund Sub Account Mapping Detail screen is displayed.
- Select Delete operation from the Action list. The system prompts you to confirm the deletion, and the record is deleted physically from the system database.
2.9.5 Authorizing Fund Sub Account Mapping Record
An unauthorized Fund Sub Account Mapping record must be authorized in the system for it to come into effect. To authorize:
- Invoke the Fund Sub Account Mapping Summary screen from the Browser.
- Select the status of the records that you want to retrieve for authorization. Typically, choose the Unauthorized option from the drop-down list.
- Click ‘Search’ button. All records with the specified details that are pending authorization are retrieved and displayed in the lower portion of the screen.
- Double click the record that you wish to authorize. The Fund Sub Account Mapping Detail screen is displayed. Select Authorize operation from Action.
When the checker authorizes an entity, details of validations, if any, that were overridden by the maker of the transaction during the Save operation, are displayed. If any of these overrides results in an error, the checker must reject the entity.
2.9.6 Amending Fund Sub Account Mapping Record
After a Fund Sub Account Mapping record is authorized, it can be modified using the Unlock operation from Action list. To make changes to a Fund Sub Account Mapping record after authorization, you must invoke the Unlock operation which is termed as Amend Operation.
- Invoke the Fund Sub Account Mapping Summary screen from the Browser.
- Select the status of the record that you wish to retrieve for amendment. You can only amend records of entities that are authorized.
- Click ‘Search’ button. All records with the specified details are retrieved and displayed in the lower portion of the screen.
- Double click the record that you want to amend. The Fund Sub Account Mapping Detail screen is displayed in Amendment mode.
- Click the Unlock operation from the Action list to amend the setup.
- Amend the necessary information. Click the Save button to save the changes.
2.9.7 Authorizing Amended Fund Sub Account Mapping Record
An amended Fund Sub Account Mapping record must be authorized for the amendment to be made effective in the system. The process of authorization is subsequently the same as that for normal transactions.
2.10 Fund Conversion Restriction
This section contains the following topics:
2.10.1 Invoking Fund Conversion Restriction Screen
You can restrict fund conversion details within the same fund family and AMC using ‘Fund Conversion Restrict Details’ screen.
You can invoke this screen by typing ‘UTDFNCVR’ in the field at the top right corner of the Application tool bar and clicking on the adjoining arrow button.

You can specify the following details.
Fund ID
Alphanumeric; 6 Characters; Mandatory
Specify the valid From Fund ID for which the restriction is enabled.
From Fund Name
Display
The system displays the name of the fund for the selected fund ID.
ISIN Code
Display
The system displays the fund ISIN code.
Effective Date
Date Format; Mandatory
Specify the date from which the restriction is effective.
Restrictive List
Mandatory
Select the restrictive list from the adjoining drop-down list. Following are the options available:
- Exclude
- Include
If you select ‘Include’, then the list of restrictive funds will be enabled for the fund. If you select ‘Exclude’, then the restrictive list will not be enabled for restriction and the fund will be open for restricting any fund which is not in the restrictive list.
Limit Restrictive List To
Mandatory
Select the restrictive list that is limited to from the adjoining option list. Following are the options available:
- No Restriction
- Fund Family
- AMC
If you select ‘No Restriction’, then restriction will happen based on the value selected in Restrictive List field. However, if you select ‘Fund Family’ then system will do a validation that it will show only the list of funds for restriction which are of same fund family. If you select ‘AMC’, then the system will do the validation that it will show the list of funds for restriction which are of same AMC.
To Fund ID
Alphanumeric; 6 Characters; Mandatory
Specify the To fund ID selected for restriction.
To Fund Name
Display
The system displays the name of the fund selected for restriction.
ISIN Code
Display
The system displays the ISIN code.
2.11 Fund Restriction Details Summary
This section contains the following topics:
- Section 2.11.1, "Retrieving Fund Restriction Details"
- Section 2.11.2, "Editing Fund Restriction Details"
- Section 2.11.3, "Viewing Fund Restriction Details"
- Section 2.11.4, "Deleting Fund Restriction Details"
- Section 2.11.5, "Authorizing Fund Restriction Details"
- Section 2.11.6, "Amending Fund Restriction Details"
2.11.1 Retrieving Fund Restriction Details
You can retrieve previously entered Fund Restriction Details as follows:
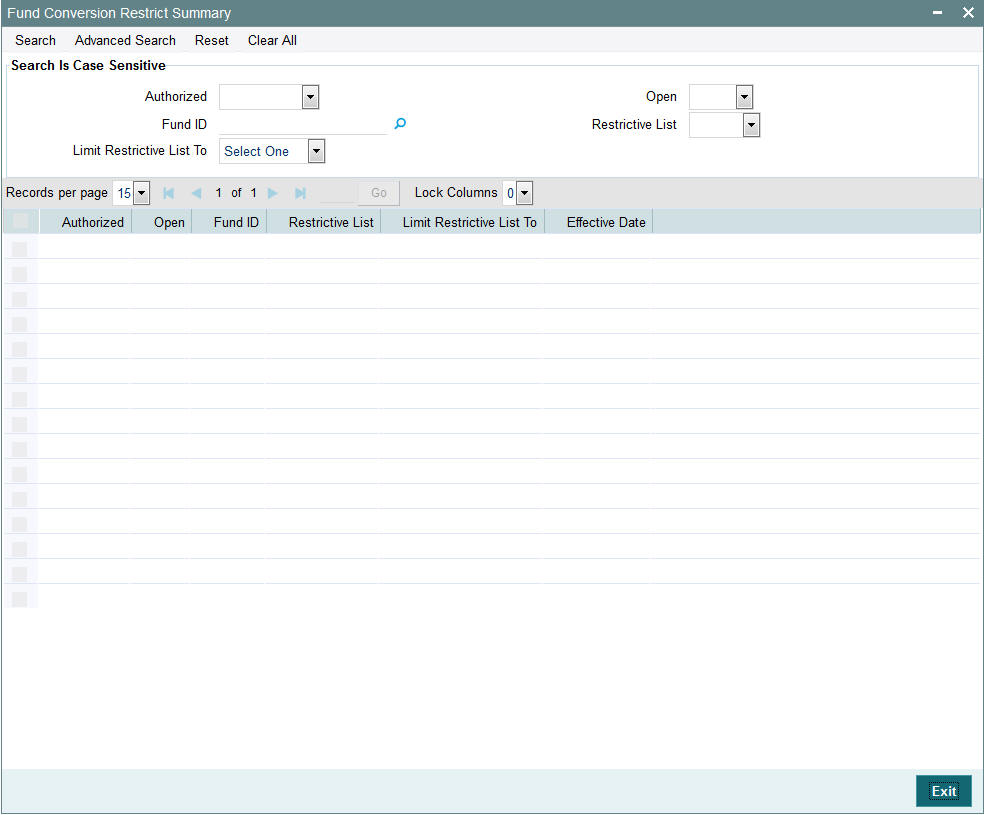
- Invoke the ‘Fund Conversion Restrict Summary’ screen
from the Browser. To invoke this screen, type ‘UTSFNCVR’ in the field at the top right corner
of the Application tool bar.
- Specify any or all of the following details in the screen:
- The status of the transaction in the ‘Authorized’ field. If you choose the blank space, then both the authorized and the unauthorized status records will be retrieved for the specified criteria.
- The status of the records in the ‘Open’ field. If you choose the blank space, then all the records are retrieved.
- Fund ID
- Restrictive List
- Limit Restrictive List To.
- If you choose the blank space, then all the records are retrieved.
Click ‘Search’ button to view the records. All the records with the specified details are retrieved and displayed in the lower portion of the screen.
Note
You can also retrieve the individual record detail from the detail screen by querying in the following manner:
- Press F7
- Input Fund ID
- Press F8
You can perform Edit, Delete, Amend, Authorize, Reverse, Confirm operations by selecting the operation from the Action list. You can also search a record by using a combination of % and alphanumeric value.
Example
You can search the record for Account Type by using the combination of % and alphanumeric value as follows:
- Search by A%: The system will fetch all the records whose Account Type starts from Alphabet ‘A’. For example, AGC17, AGVO6, AGC74 and so forth.
- Search by %7: The system will fetch all the records whose Account Type ends by numeric value’ 7’. For example, AGC17, GSD267, AGC77 and so forth.
- Search by %17%: The system will fetch all the records whose Account Type contains the numeric value 17. For example, GSD217, GSD172, AGC17 and so forth.
2.11.2 Editing Fund Restriction Details
You can modify the Fund Restriction Details that you have already entered into the system, provided it has not been subsequently authorized. You can perform this operation as follows:
- Invoke the ‘Fund Conversion Restrict Summary’ screen from the Browser.
- Select the status of the record that you want to retrieve for modification in the Authorized field. You can only modify records that are unauthorized. Accordingly, choose the unauthorized option.
- Specify any or all of the details in the corresponding fields to retrieve the record that is to be modified.
- Click ‘Search’ button. All unauthorized records with the specified details are retrieved and displayed in the lower portion of the screen.
- Double click the record that you want to modify in the list of displayed records. The ‘Fund Conversion Restrict Detail’ screen is displayed.
- Select Unlock Operation from the Action list to modify the record. Modify the necessary information.
- Click Save to save your changes. The ‘Fund Conversion Restrict Summary’ screen is closed and the changes made are reflected in the ‘Fund Conversion Restrict Summary’ screen.
2.11.3 Viewing Fund Restriction Details
To view a record that you have previously input, you must retrieve the same in the ‘Fund Conversion Restrict Summary’ screen as follows:
- Invoke the ‘Fund Conversion Restrict Summary’ screen from the Browser.
- Select the status of the record that you want to retrieve for viewing in the Authorization Status field. You can also view all records that are either unauthorized or authorized only, by choosing the Unauthorized/ Authorized option.
- Specify any or all of the details of the record in the corresponding fields on the screen.
- Click ‘Search’ button. All records with the specified fields are retrieved and displayed in the lower portion of the screen.
- Double click the record that you want to view in the list of displayed records. The ‘Fund Conversion Restrict Detail’ screen is displayed in View mode.
2.11.4 Deleting Fund Restriction Details
You can delete only unauthorized records in the system. To delete a record that you have previously entered:
- Invoke the ‘Fund Conversion Restrict Summary’ screen from the Browser.
- Select the status of the record that you want to retrieve for deletion.
- Specify any or all of the details in the corresponding fields on the screen.
- Click ‘Search’ button. All records with the specified fields are retrieved and displayed in the lower portion of the screen.
- Double click the record that you want to delete in the list of displayed records. The ‘Fund Conversion Restrict Detail’ screen is displayed.
- Select Delete Operation from the Action list. The system prompts you to confirm the deletion and the record is physically deleted from the system database.
2.11.5 Authorizing Fund Restriction Details
An unauthorized fund restriction record must be authorized in the system for it to be processed. To authorize a record:
- Invoke the ‘Fund Conversion Restrict Summary’ screen from the Browser.
- Select the status of the record that you want to retrieve for authorization. Typically, choose the unauthorized option.
- Specify any or all of the details in the corresponding fields on the screen.
- Click ‘Search’ button. All records with the specified details that are pending authorization are retrieved and displayed in the lower portion of the screen.
- Double click the record that you wish to authorize. The ‘Fund Conversion Restrict Summary’ screen is displayed. Select Authorize operation from the Action List.
When a checker authorizes a transaction, details of validation, if any, that were overridden by the maker of the transaction during the Save operation are displayed. If any of these overrides results in an error, the checker must reject the transaction.
2.11.6 Amending Fund Restriction Details
After a fund restriction record is authorized, it can be modified using the Unlock operation from the Action List. To make changes to a record after authorization:
- Invoke the ‘Fund Conversion Restrict Summary’ screen from the Browser.
- Select the status of the record that you want to retrieve for authorization. You can only amend authorized records.
- Specify any or all of the details in the corresponding fields on the screen.
- Click ‘Search’ button. All records with the specified details that are pending authorization are retrieved and displayed in the lower portion of the screen.
- Double click the record that you wish to authorize. The ‘Fund Conversion Restrict Detail’ screen is displayed in amendment mode. Select Unlock operation from the Action List to amend the record.
Amend the necessary information and click on Save to save the changes.
2.12 Share Class Ad-Hoc Conversion
This section contains the following topics:
2.12.1 Invoking Share Class Conversion Screen
You can specify the unit holder ID and enter one or more funds details in the details sections for the units to be converted. On selecting the fund, the system will default the current confirmed holdings of the customer in the fund. You can change this value, if required.
During allocation of the conversion transactions, the system will use the Switch-In price for allocation and conversion factor for converting units into To Fund. There will be no settlement for conversion transactions.
During the allocation of conversion transaction, the system will calculate the linked transactions G1/G2 split, and convert it to new G1/G2 split using the conversion factor.
You can maintain Share Class Ad-hoc Conversion details using ‘Share Class Conversion -Ad hoc- Detail’ screen. You can invoke this screen by typing ‘UTDSCADH’ in the field at the top right corner of the Application tool bar and clicking on the adjoining arrow button.
Select ‘New’ from the Actions menu in the Application tool bar or click new icon to enter the details of the Mapping.
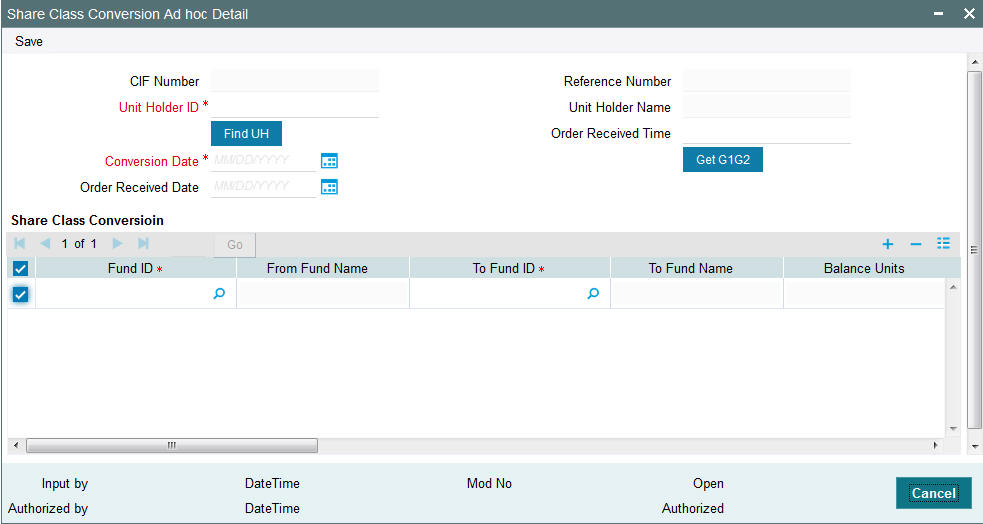
You can specify the following details:
CIF Number
Display
The system displays the CIF number in this field.
Reference Number
Display
The system displays the reference number.
Unit Holder ID
Alphanumeric; 12 Characters; Mandatory
Specify the unit holder ID. You can also select the valid UH ID by clicking ‘Find UH’ button.
Unit Holder Name
Display
The system displays the unit holder name.
Conversion Date
Date Format; Mandatory
Specify the conversion date.
Order Received Date
Date Format; Optional
Specify the order received date.
Order Received Time
Time Format; Optional
Specify the order received time.
You can click the ‘GetG1G2’ button to view the G1 and G2 details of the unit holder.
Share Class Conversion
Fund ID
Alphanumeric; 6 Characters; Mandatory
Specify the From Fund ID details.
From Fund Name
Display
The system displays the From Fund Name for the selected Fund ID.
To Fund ID
Alphanumeric; 6 Characters; Mandatory
Specify the To Fund ID details.
During transaction, if any ‘To’ fund is not maintained at the fund level of ‘From Fund’ then the system will display the following error saying ‘To Fund is not specified for conversion’.
To Fund Name
Display
The system displays the ‘To Fund Name’ for the selected To Fund ID.
Balance Units
Display
The system displays the total unit balance.
Provisional Unit Balance
Display
The system displays the total provisional unit balance details.
Blocked Unit Balance
Display
The system displays the total blocked unit balance.
Conversion Units
Numeric; 27 Characters; Mandatory
Specify the conversion units.
G1 Unit
Display
The system displays the G1 Unit balance.
G2 Unit
Display
The system displays the G2 Unit balance.
G1/G2 balance of From Fund will be moved proportionately based on the conversion factor and To fund.
Converted G1 Units
Display
The system displays the Converted G1 Units.
Converted G2 Units
Display
The system displays the Converted G2 Units.
Conversion Factor (1:2)
Display
The system displays the valid conversion factor.
Transaction Category
Optional
Select the appropriate transaction category from the following values of the drop-down list:
- Advised Business
- Legacy
- Execution Only
Upon authorization of the entry, the system will internally create one conversion transaction for each unit holder and fund combination and generate authorized unit based conversion switch transactions.
If any SI/IDS are maintained in the system against unit holder accounts, then you need to manually update or disable the SI as well as IDS details. The system will not carry forward the SI, Deal or IDS details of ‘From Fund’ to ‘To Fund’.
On authorization of the transaction, the system will generate conversion transactions. For Ad hoc conversion, the system will perform different modes of operation such as Add, Edit, Delete, and Reverse.
All ad hoc conversion transaction will be captured and authorized without the conversion factor but only will be unitized once conversion factor is available.
Upon authorization of share class conversion transaction, underlying Conversion switch transactions will be generated. The system will generate authorized unit based conversion switch transactions.
If any SI/ IDS are maintained in the system against unit holder accounts, you need to manually update or disable the SI as well as IDS details. The system will not carry forward the SI, Deal or IDS details of From Fund to To Fund.
If for a UH, both Ad hoc and Bulk conversion is entered then only transaction will be considered for conversion, whichever is authorized first (Ad hoc/Bulk).
The system will do a duplicate transaction check for a combination of transaction date, unitholder ID, from fund and to fund combination and if a similar transaction exists then the system will display a message as ‘Similar transaction exists for the Unit holder. Do you wish to continue?’
2.13 Share Class Adhoc Conversion Summary
This section contains the following topics:
- Section 2.13.1, "Retrieving Share Class Adhoc Conversion Details"
- Section 2.13.2, "Editing Share Class Adhoc Conversion Details"
- Section 2.13.3, "Viewing Share Class Adhoc Conversion Details"
- Section 2.13.4, "Deleting Share Class Adhoc Conversion Details"
- Section 2.13.5, "Authorizing Share Class Adhoc Conversion Details"
- Section 2.13.6, "Amending Share Class Adhoc Conversion Details"
2.13.1 Retrieving Share Class Adhoc Conversion Details
You can retrieve a previously entered Share Class Conversion Adhoc Details as follows:
Invoke the ‘Share Class Conversion - Adhoc - Summary’ screen from the Browser.To invoke this screen, type ‘UTSSCADH’ in the field at the top right corner of the Application tool bar. .
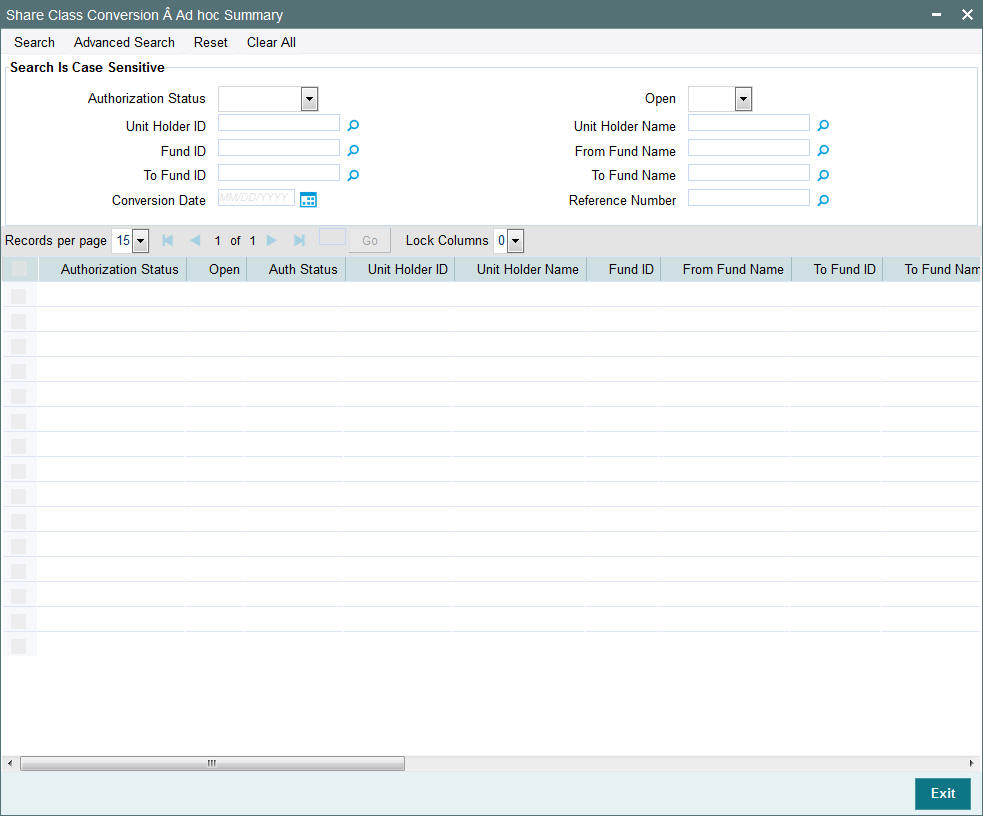
- Specify any or all of the following details in the screen:
- The status of the transaction in the ‘Authorization Status’ field. If you choose the blank space, then both the authorized and the unauthorized status records will be retrieved for the specified criteria.
- The status of the records in the ‘Open’ field. If you choose the blank space, then all the records are retrieved.
- Unit Holder ID
- Fund ID
- To Fund ID
- Conversion Date
- Unit Holder Name
- From Fund Name
- To Fund Name
- Reference Number
- If you choose the blank space, then all the records are retrieved.
- Click ‘Search’ button to view the records. All records with the specified details are retrieved and displayed in the lower portion of the screen.
You can perform Edit, Delete, Amend, and Authorize operation by selecting from the Action list.
2.13.2 Editing Share Class Adhoc Conversion Details
You can modify the Share Class Conversion - Adhoc details that you have already entered into the system, provided it has not been subsequently authorized. You can perform this operation as follows:
- Invoke the ‘Share Class Conversion - Adhoc - Summary’ screen from the Browser.
- Specify any or all of the following details in the screen:
- The status of the transaction in the ‘Authorization Status’ field. If you choose the blank space, then both the authorized and the unauthorized status records will be retrieved for the specified criteria.
- The status of the records in the ‘Open’ field. If you choose the blank space, then all the records are retrieved.
- The Unit Holder ID in the ‘Unit Holder ID’ field. If you choose the blank space, then all the records are retrieved.
- The From Fund ID in the ‘Fund ID’ field. If you choose the blank space, then all the records are retrieved.
- Click ‘Search’ button to view the records. All records with the specified details are retrieved and displayed in the lower portion of the screen.
- Double-click the record that you want to modify in the list of displayed records. The ‘Share Class Conversion - Adhoc - Detail’ screen is displayed.
- Select Unlock operation from the Action list to modify the record. Modify the necessary information.
- Click Save to save your changes. The ‘Share Class Conversion - Adhoc -Detail’ screen is closed and the changes made are reflected in the ‘Share Class Conversion - Adhoc - Summary’ screen.
2.13.3 Viewing Share Class Adhoc Conversion Details
To view a record that you have previously entered, you must retrieve the same in the ‘Share Class Conversion - Adhoc - Summary’ screen, as follows:
- Invoke the ‘Share Class Conversion - Adhoc - Summary’ screen from the Browser.
- Specify any or all of the following details in the screen:
- The status of the transaction in the ‘Authorization Status’ field. If you choose the blank space, then both the authorized and the unauthorized status records will be retrieved for the specified criteria.
- The status of the records in the ‘Open’ field. If you choose the blank space, then all the records are retrieved.
- The Unit Holder ID in the ‘Unit Holder ID’ field. If you choose the blank space, then all the records are retrieved.
- The From Fund ID in the ‘Fund ID’ field. If you choose the blank space, then all the records are retrieved.
- Click ‘Search’ button to view the records. All records with the specified details are retrieved and displayed in the lower portion of the screen.
- Double click the record that you want to view in the list of displayed records. The ‘Share Class Conversion - Adhoc - Detail’ screen is displayed in the view mode.
2.13.4 Deleting Share Class Adhoc Conversion Details
You can delete only unauthorized records in the system. To delete a record that you have previously entered:
- Invoke the ‘Share Class Conversion - Adhoc - Summary’ screen from the Browser.
- Specify any or all of the following details in the screen:
- The status of the transaction in the ‘Authorization Status’ field. If you choose the blank space, then both the authorized and the unauthorized status records will be retrieved for the specified criteria.
- The status of the records in the ‘Open’ field. If you choose the blank space, then all the records are retrieved.
- The Unit Holder ID in the ‘Unit Holder ID’ field. If you choose the blank space, then all the records are retrieved.
- The From Fund ID in the ‘Fund ID’ field. If you choose the blank space, then all the records are retrieved.
- Click ‘Search’ button to view the records. All records with the specified details are retrieved and displayed in the lower portion of the screen.
- Double click the record that you want to delete. The ‘Share Class Conversion - Adhoc -Detail’ screen is displayed.
- Select Delete operation from the Action list. The system prompts you to confirm the deletion, and the record is deleted physically from the system database.
Note
The maker of the record can only delete the unauthorized record.
2.13.5 Authorizing Share Class Adhoc Conversion Details
Apart from the maker, someone else must authorize an unauthorized global order record deal in the system for it to be processed. To authorize a record:
- Invoke the ‘Share Class Conversion - Adhoc - Summary’ screen from the Browser.
- ‘The status of the transaction in the ‘Authorization Status’ field. Choose the ‘Unauthorized’ status.
- Click ‘Search’ button to view the records. All the records with the specified details that are pending authorization are retrieved and displayed in the lower portion of the screen.
- Select the Authorization operation from the Action list to authorize the selected record.
2.13.6 Amending Share Class Adhoc Conversion Details
After a global order record is authorized, it can be modified using the Unlock operation from Action list. To make changes to a record after authorization:
- Invoke the ‘Share Class Conversion - Adhoc - Summary’ screen from the Browser.
- Select the status of the transaction that you wish to retrieve for amendment. You can amend only authorized records.
- Click ‘Search’ button to view the records. All records with the specified details are retrieved and displayed in the lower portion of the screen.
- Double-click the record that you want to amend. The ‘Share Class Conversion - Adhoc - Detail’ screen is displayed in the amendment mode. Click the Unlock operation from the Action list to amend the record.
Amend the necessary information available in the ‘Share Class Conversion’ grid. You can add or delete rows in this grid. Click the Save button to save the changes.
2.14 Share Class Bulk Conversion
This section contains the following topic:
2.14.1 Invoking Share Class Bulk Conversion
You can specify the fund ID and all the unit holders in the fund will be considered by default for conversion. You can also specify the unit holders to be included or excluded from the conversion. If ‘no list’ is maintained, then all unit holders will be included, if include list is maintained, only specified unit holders will be included and if exclude list is maintained specified unit holders will be excluded.
Upon authorization of the entry, the system will internally create one conversion transaction for each unit holder and fund combination. A separate reftype (SB) under Switch transaction type will be used for Bulk conversion transactions.
You can maintain Share Class Bulk Conversion details using ‘Share Class Conversion - Bulk’ screen. You can invoke this screen by typing ‘UTDSCBLK’ in the field at the top right corner of the Application tool bar and clicking on the adjoining arrow button.
Select ‘New’ from the Actions menu in the Application tool bar or click new icon to enter the details of the Mapping.
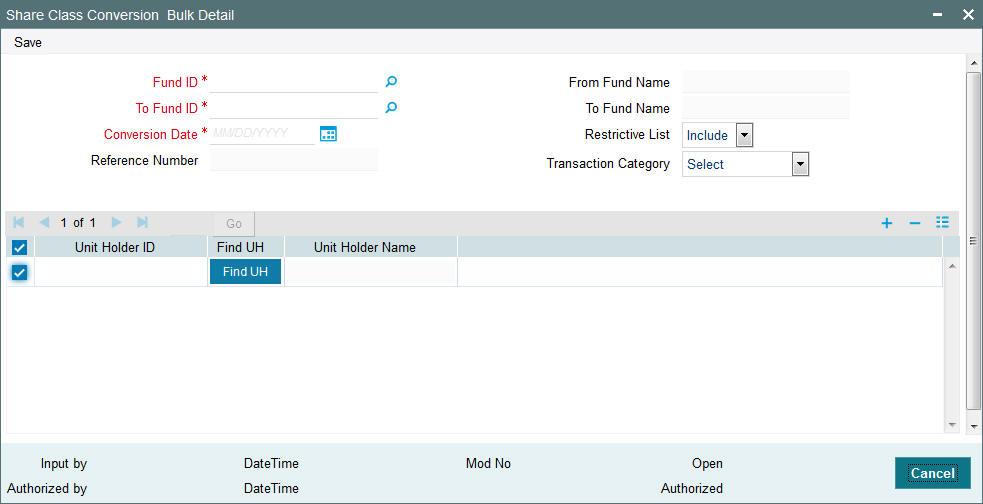
You can specify the following fields:
From Fund ID
Alphanumeric; 6 Characters; Mandatory
Specify the From Fund ID. You can also select the ‘From Fund ID’ from the adjoining option list.
From Fund Name
Display
The system displays the From Fund Name details for the selected ‘From Fund ID’.
To Fund ID
Alphanumeric; 6 Characters; Mandatory
Specify the ‘To Fund ID’. You can also select the ‘To Fund ID’ from the adjoining option list.
During transaction, if any ‘To fund’ is not maintained at the fund level of ‘From Fund’ then the system will display the following error message as ‘To Fund is not specified for conversion.
To Fund Name
Display
The system displays the ‘To Fund Name’ details for the selected ‘To Fund ID’.
Conversion Date
Date Format; Mandatory
Specify the conversion date.
Reference Number
Display
The system displays the conversion reference number.
Restrictive List
Optional
Select the appropriate value from the drop down list to include or exclude the list of unit holders for conversion:
- Include
- Exclude
Transaction Category
Optional
Select the transaction category from the following list of drop down values:
- Advised Business
- Execution Only
- Legacy
Share Class Conversion
Unit Holder ID
Alphanumeric; 12 Characters; Optional
Specify the unit holder ID. You can query for unit holder ID by clicking ‘Find UH’ button.
Unit Holder Name
Display
The system displays the unit holder name.
On authorization of the transaction, the system will do conversion for Bulk transactions. All the bulk conversion transaction can be captured and authorized without the conversion factor but only will be unitized once the conversion factor is available. While conversion, if a rounding difference of units occurs, then this will be handled manually.
The system will move the G1/G2 balance of ‘From Fund’ proportionately based on conversion factor to To fund.
If any SI/IDS are maintained in the system against unit holder accounts, you need to manually update or disable the SI as well as IDS details. The system will not carry forward the SI, Deal or IDS details of From Fund to To Fund. If for a UH, both Ad hoc and Bulk conversion is entered then only one transaction will be considered for conversion, whichever is authorized first (Ad hoc/Bulk).
If a bulk conversion is entered for the fund, the system will not allow any inflow transactions but outflow transactions will be allowed. However, system generated transactions will be allowed for inflow transactions.
The system will do a duplicate transaction check for a combination of transaction date, unit holder ID, from fund and to fund combination and if a similar transactions exists, then the system will display the message as ‘Similar transaction exists for the Unit holder. Do you wish to continue?’.
2.15 Share Class Bulk Conversion Summary
This section contains the following topics:
- Section 2.15.1, "Retrieving Share Class Bulk Conversion Details"
- Section 2.15.2, "Editing Share Class Bulk Conversion Details"
- Section 2.15.3, "Viewing Share Class Bulk Conversion Details"
- Section 2.15.4, "Deleting Share Class Bulk Conversion Details"
- Section 2.15.5, "Authorizing Share Class Bulk Conversion Details"
- Section 2.15.6, "Amending Share Class Bulk Conversion Details"
2.15.1 Retrieving Share Class Bulk Conversion Details
You can retrieve a previously entered Share Class Conversion Bulk Details as follows:
Invoke the ‘Share Class Conversion - Bulk - Summary’ screen from the Browser. To invoke this screen, type ‘UTSSCBLK’ in the field at the top right corner of the Application tool bar..
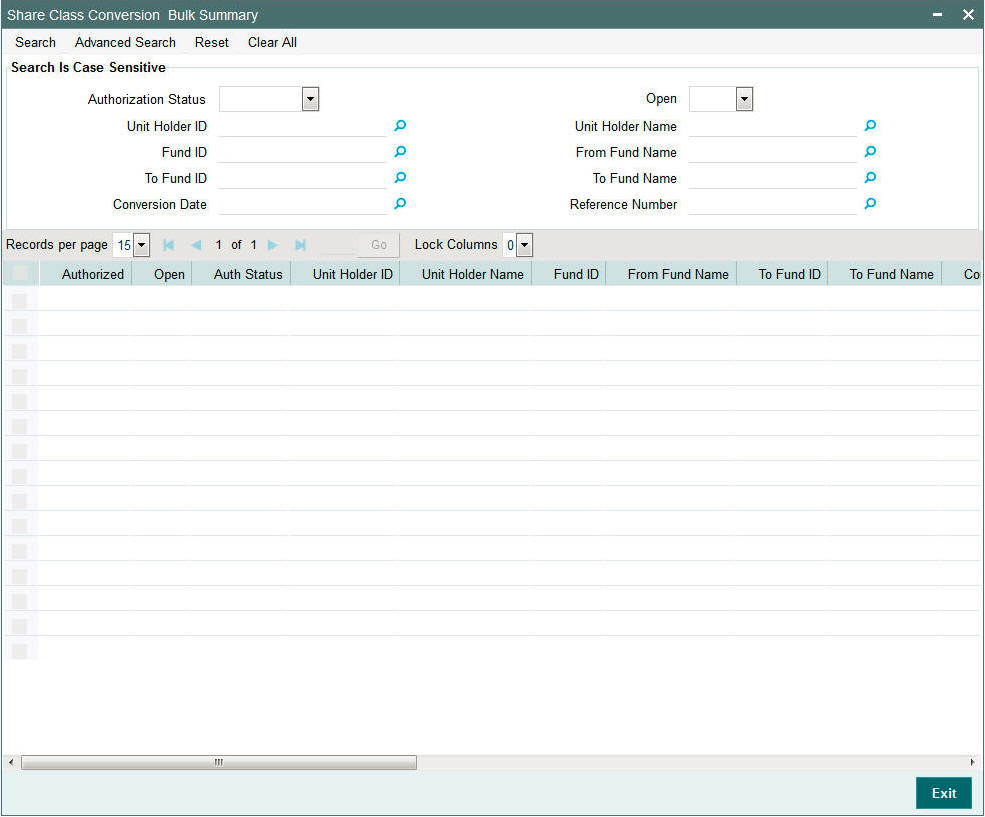
- Specify any or all of the following details in the screen:
- The status of the transaction in the ‘Authorization Status’ field. If you choose the blank space, then both the authorized and the unauthorized status records will be retrieved for the specified criteria.
- The status of the records in the ‘Open’ field. If you choose the blank space, then all the records are retrieved.
- Unit Holder ID
- From Fund ID
- To Fund ID
- Conversion Date
- UH Name
- From Fund Name
- To Fund Name
- Reference Number
- If you choose the blank space, then all the records are retrieved.
- Click ‘Search’ button to view the records. All records with the specified details are retrieved and displayed in the lower portion of the screen.
You can perform Edit, Delete, Amend and Authorize operation by selecting from the Action list.
2.15.2 Editing Share Class Bulk Conversion Details
You can modify the Share Class Conversion - Bulk details that you have already entered into the system, provided it has not been subsequently authorized. You can perform this operation as follows:
- Invoke the ‘Share Class Conversion - Bulk - Summary’ screen from the Browser.
- Specify any or all of the following details in the screen:
- The status of the transaction in the ‘Authorization Status’ field. If you choose the blank space, then both the authorized and the unauthorized status records will be retrieved for the specified criteria.
- The status of the records in the ‘Record Status’ field. If you choose the blank space, then all the records are retrieved.
- The From Fund ID in the ‘From Fund ID’ field. If you choose the blank space, then all the records are retrieved.
- The To Holder ID in the ‘Unit Holder ID’ field. If you choose the blank space, then all the records are retrieved.
- Click ‘Search’ button to view the records. All records with the specified details are retrieved and displayed in the lower portion of the screen.
- Double-click the record that you want to modify in the list of displayed records. The ‘Share Class Conversion - Bulk - Detail’ screen is displayed.
- Select Unlock operation from the Action list to modify the record. Modify the necessary information.
- Click Save to save your changes. The ‘Share Class Conversion - Bulk -Detail’ screen is closed and the changes made are reflected in the ‘Share Class Conversion - Bulk - Summary’ screen.
2.15.3 Viewing Share Class Bulk Conversion Details
To view a record that you have previously entered, you must retrieve the same in the ‘Share Class Conversion - Bulk - Summary’ screen, as follows:
- Invoke the ‘Share Class Conversion - Bulk - Summary’ screen from the Browser.
- Specify any or all of the following details in the screen:
- The status of the transaction in the ‘Authorization Status’ field. If you choose the blank space, then both the authorized and the unauthorized status records will be retrieved for the specified criteria.
- The status of the records in the ‘Record Status’ field. If you choose the blank space, then all the records are retrieved.
- The From Fund ID in the ‘From Fund ID’ field. If you choose the blank space, then all the records are retrieved.
- The To Holder ID in the ‘Unit Holder ID’ field. If you choose the blank space, then all the records are retrieved.
- Click ‘Search’ button to view the records. All records with the specified details are retrieved and displayed in the lower portion of the screen.
- Double click the record that you want to view in the list of displayed records. The ‘Share Class Conversion - Bulk - Detail’ screen is displayed in the view mode.
2.15.4 Deleting Share Class Bulk Conversion Details
You can delete only unauthorized records in the system. To delete a record that you have previously entered:
- Invoke the ‘Share Class Conversion - Bulk - Summary’ screen from the Browser.
- Specify any or all of the following details in the screen:
- The status of the transaction in the ‘Authorization Status’ field. If you choose the blank space, then both the authorized and the unauthorized status records will be retrieved for the specified criteria.
- The status of the records in the ‘Record Status’ field. If you choose the blank space, then all the records are retrieved.
- The From Fund ID in the ‘From Fund ID’ field. If you choose the blank space, then all the records are retrieved.
- The To Holder ID in the ‘Unit Holder ID’ field. If you choose the blank space, then all the records are retrieved.
- Click ‘Search’ button to view the records. All records with the specified details are retrieved and displayed in the lower portion of the screen.
- Double-click the record that you want to delete. The ‘Share Class Conversion - Adhoc -Detail’ screen is displayed.
- Select Delete operation from the Action list. The system prompts you to confirm the deletion, and the record is deleted physically from the system database.
Note
The maker of the record can only delete the unauthorized record.
2.15.5 Authorizing Share Class Bulk Conversion Details
Apart from the maker, someone else must authorize an unauthorized global order record deal in the system for it to be processed. To authorize a record:
- Invoke the ‘Share Class Conversion - Bulk - Summary’ screen from the Browser.
- ‘The status of the transaction in the ‘Authorization Status’ field. Choose the ‘Unauthorized’ status.
- Click ‘Search’ button to view the records. All the records with the specified details that are pending authorization are retrieved and displayed in the lower portion of the screen.
- Select the Authorization operation from the Action list to authorize the selected record.
2.15.6 Amending Share Class Bulk Conversion Details
After a global order record is authorized, it can be modified using the Unlock operation from Action list. To make changes to a record after authorization:
- Invoke the ‘Share Class Conversion - Bulk - Summary’ screen from the Browser.
- Select the status of the transaction that you wish to retrieve for amendment. You can only amend authorized records.
- Click ‘Search’ button to view the records. All records with the specified details are retrieved and displayed in the lower portion of the screen.
- Double-click the record that you want to amend. The ‘Share Class Conversion - Bulk - Detail’ screen is displayed in the amendment mode. Click the Unlock operation from the Action list to amend the record.
Amend the necessary information. Click the ‘Save’ button to save the changes.
2.16 Conversion Factor
This section contains the following topic:
2.16.1 Invoking Conversion Factor Screen
You can specify conversion factor for the fund using ‘Conversion Factor Detail’ screen. You can invoke this screen by typing ‘UTDCONVF’ in the field at the top right corner of the Application tool bar and clicking on the adjoining arrow button.
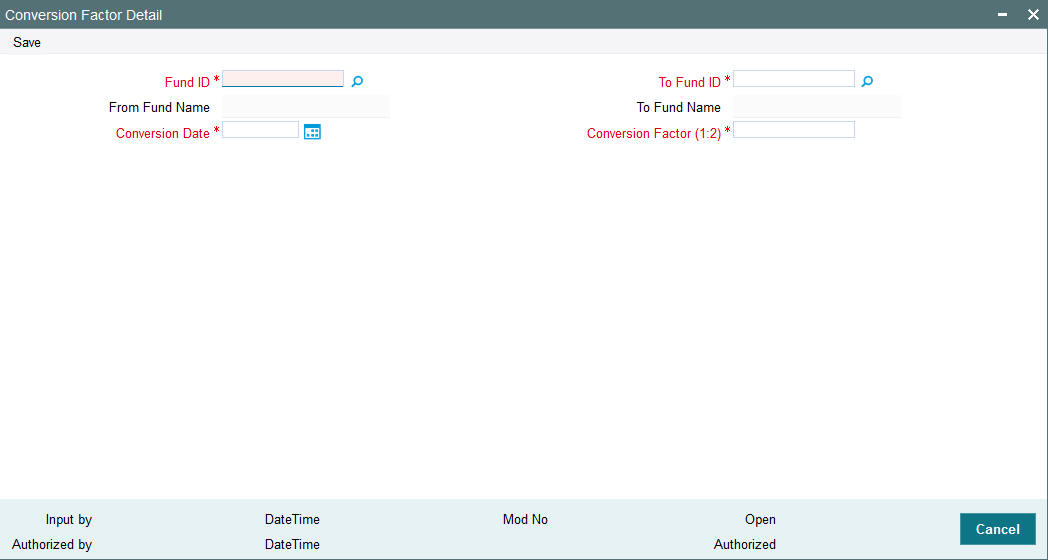
You can specify the following details.
Fund ID
Alphanumeric; 6 Characters; Mandatory
Specify Fund ID details. This adjoining option list displays all valid ‘From Fund ID’ maintained in the system. You can choose the appropriate one.
From Fund Name
Display
The system displays the ‘From Fund Name’ for the selected ‘From Fund ID’.
To Fund ID
Alphanumeric; 6 Characters; Mandatory
Specify ‘To Fund ID’ details. This adjoining option list displays all valid ‘To Fund ID’ maintained in the system. You can choose the appropriate one.
To Fund Name
Display
The system displays the ‘To Fund Name’ for the selected ‘To Fund ID’.
Conversion Date
Date Format; Mandatory
Specify the conversion date.
Conversion Factor (1:2)
Numeric; 10 Characters; Optional
Specify the conversion factor.
2.17 Conversion Factor Summary
This section contains the following topics:
- Section 2.17.1, "Querying Conversion Factor Details"
- Section 2.17.2, "Deleting Conversion Factor Details"
- Section 2.17.3, "Authorizing Conversion Factor Details"
- Section 2.17.4, "Amending Conversion Factor Details"
2.17.1 Querying Conversion Factor Details
You can query previously entered conversion factor details as follows:
- Invoke the ‘Conversion Factor Summary’ screen from the
Browser. To invoke this screen, type ‘UTSCONVF’ in the field at the top right corner
of the Application tool bar
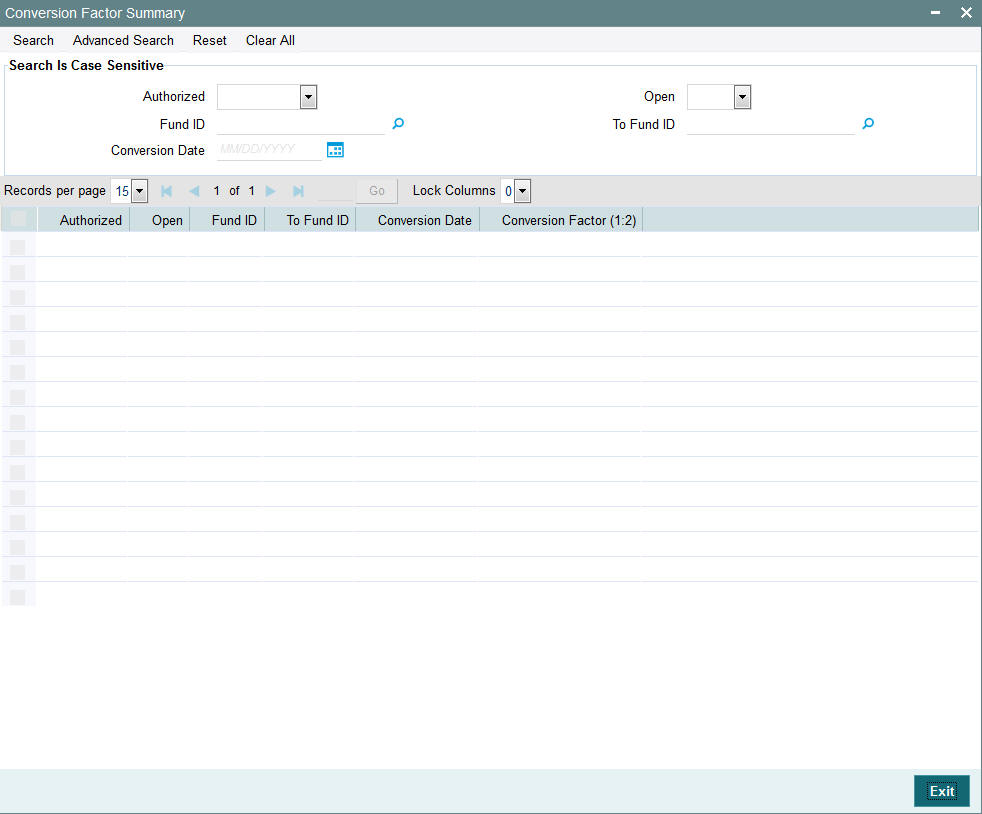
- Specify any or all of the following details in the screen:
- The status of the transaction in the ‘Authorized’ field. If you choose the blank space, then both the authorized and the unauthorized status records will be retrieved for the specified criteria.
- The status of the records in the ‘Open’ field. If you choose the blank space, then all the records are retrieved.
- Fund ID
- To Fund ID
- Conversion Date
- If you choose the blank space, then all the records are retrieved.
Click ‘Search’ button to view the records. All the records with the specified details are queried and displayed in the lower portion of the screen.
Note
You can also query the individual record detail from the detail screen as follows:
- Press F7
- Input the Fund ID
- Press F8
You can perform New, Copy, Delete, Query, Amend, and Authorize operations by selecting the operation from the Action list. You can also search a record by using a combination of % and alphanumeric value.
Example
You can search the record for ‘Fund ID’ by using the combination of % and alphanumeric value as follows:
- Search by A%: The system will fetch all the records whose Fund ID starts from Alphabet ‘A’. For example, AGC17, AGVO6, AGC74 and so forth.
- Search by %7: The system will fetch all the records whose Fund ID ends by numeric value’ 7’. For example, AGC17, GSD267, AGC77 and so forth.
- Search by %17%: The system will fetch all the records whose Fund ID contains the numeric value 17. For example, GSD217, GSD172, AGC17 and so forth.
2.17.2 Deleting Conversion Factor Details
You can delete only unauthorized records in the system. To delete a record that you have previously entered:
- Invoke the ‘Conversion Factor Summary’ screen from the Browser.
- Select the status of the record that you want to retrieve for deletion.
- Specify any or all of the details in the corresponding fields on the screen.
- Click ‘Search’ button. All records with the specified fields are retrieved and displayed in the lower portion of the screen.
- Double click the record that you want to delete in the list of displayed records. The ‘Conversion Factor Detail’ screen is displayed.
- Select Delete Operation from the Action list. The system prompts you to confirm the deletion and the record is physically deleted from the system database.
2.17.3 Authorizing Conversion Factor Details
An unauthorized conversion factor record must be authorized in the system for it to be processed. To authorize a record:
- Invoke the ‘Conversion Factor Summary’ screen from the Browser.
- Select the status of the record that you want to retrieve for authorization. Typically, choose the unauthorized option.
- Specify any or all of the details in the corresponding fields on the screen.
- Click ‘Search’ button. All records with the specified details that are pending authorization are retrieved and displayed in the lower portion of the screen.
- Double-click the record that you wish to authorize. The ‘Conversion Factor Summary’ screen is displayed. Select Authorize operation from the Action List.
When a checker authorizes transaction details for validation, if any, that were overridden by the maker of the transaction during the Save operation are displayed. If any of these overrides results in an error, the checker must reject the transaction.
2.17.4 Amending Conversion Factor Details
After a conversion factor record is authorized, it can be modified using the Unlock operation from the Action List. To make changes to a record after authorization:
- Invoke the ‘Conversion Factor Summary’ screen from the Browser.
- Select the status of the record that you want to retrieve for authorization. You can only amend authorized records.
- Specify any or all of the details in the corresponding fields on the screen.
- Click ‘Search’ button. All records with the specified details that are pending authorization are retrieved and displayed in the lower portion of the screen.
- Double-click the record that you wish to authorize. The ‘Conversion Factor Detail’ screen is displayed in amendment mode. Select Unlock operation from the Action List to amend the record.
Amend the necessary information and click on ‘Save’ to save the changes.