4. Other Fund Activities
This chapter contains the following sections:
- Section 4.1, "Entities with Funds Association"
- Section 4.2, "Fund Entity Mapping Summary Screen"
- Section 4.3, "Agency Branch Backdating Setup"
- Section 4.4, "Fund Agency Backdating Limit Summary Screen"
- Section 4.5, "Restrictions for Switch Transactions"
- Section 4.6, "Fund Switch Restrict Summary Screen"
- Section 4.7, "Pseudo Switch Lag Maintenance"
- Section 4.8, "Pseudo Switch Lag Summary"
- Section 4.9, "Fund Price"
- Section 4.10, "Fund Price Maintenance Summary Screen"
- Section 4.11, "Fund Preference Maintenance"
- Section 4.12, "Fund Preference Summary Screen"
- Section 4.13, "Short Trade Counter Details Screen"
- Section 4.14, "Investor Fund Risk Rating Mapping"
- Section 4.15, "Investor Fund Risk Mapping Summary"
- Section 4.16, "Adhoc Prices"
- Section 4.17, "Adhoc Price Dates Maintenance Summary Screen"
- Section 4.18, "Pricing Preference Indication"
- Section 4.19, "Price Date Change Summary Screen"
- Section 4.20, "Non Availability of Fund Price"
- Section 4.21, "Fund Price Holiday Maintenance Summary Screen"
- Section 4.22, "Fund CPMF Preferences"
- Section 4.23, "Fund CPMF Summary Screen"
- Section 4.24, "Fund Account Set Up"
- Section 4.25, "Fund Account Summary Screen"
- Section 4.26, "Funds to Products Mapping"
- Section 4.27, "Wrap Fund Maintenance"
- Section 4.28, "Wrap Fund Summary Screen"
- Section 4.29, "Access Restrictions"
- Section 4.30, "FBC Access Restriction Summary Screen"
- Section 4.31, "Corporate Actions for Fund"
- Section 4.32, "Corporate Actions Summary Screen"
- Section 4.33, "Corporate Actions Processing"
- Section 4.34, "Bank Reconciliation"
- Section 4.35, "Bank Reconciliation Summary Screen"
- Section 4.36, "Performance Fee for Hedge Funds"
- Section 4.37, "Override Trade Cycles Date For Funds"
- Section 4.38, "Override Trade Cycle Date Summary Screen"
- Section 4.39, "Price Rounding Detail"
- Section 4.40, "Unit Price Rounding Summary"
4.1 Entities with Funds Association
This section contains the following topics:
- Section 4.1.1, "Associating Entities with Funds"
- Section 4.1.2, "Invoking Fund Entity Mapping Detail Screen"
4.1.1 Associating Entities with Funds
This screen can be used to associate entities with a fund. You can maintain either a list of ‘restricted’ entities, or an ‘allowed’ list.
If you maintain a restrictive list as ‘Yes’, only the entities that you maintain in the list in the Fund Entity Maintenance screen for a fund are restricted from transacting in the selected fund. If you maintain a restrictive list as ‘No’, only the entities that you maintain in the list in the Fund Entity Maintenance screen are allowed to transact in the selected fund. If you maintain neither a restrictive nor an allowed list, all entities of a type are allowed to transact in the fund.
Agents
In the case of agents, mapping can be carried out for only those Agents and their branches as have been created using the Agent and Agency Branch screens. Only those agents and their branches that have been mapped to a fund as part of an ‘allowed’ list will be able to accept transactions related to that particular fund. Agents and their branches maintained as a ‘restrictive’ list will not be able to accept transactions for the fund.
Distributor agents can also be mapped to the fund. This would be required in a scenario where the Distributor markets certain funds of the AMC, or in cases where a service agent performs back office processing for an AMC as well as a Distributor.
Customer Categories
Your AMC may wish to restrict investment in a fund based on investor categories, allowing only investors of certain categories to invest. Also, your AMC may wish to restrict or allow use of a fund to certain unit holders. You can maintain lists of such allowed / restricted investor categories (or unit holders) in the Fund Entity Maintenance screen in the Fund Manager component of the system.
At the transaction entry or upload (including adjustment transactions), standing instructions entry or upload, or income distribution setup, the unit holders in a restricted list or belonging to the restricted categories cannot be specified. For an allowed list, at the transaction entry or upload (including adjustment transactions), standing instructions entry or upload, or income distribution setup, the unit holders in the allowed list or belonging to the allowed categories can be specified.
If you maintain neither a restrictive nor an allowed list, all customers are allowed to transact in the fund.
CIFs
You might need to restrict certain CIFs from a restricted category from transacting in a fund. You can maintain such restrictions in the Fund Entity Maintenance screen.
You can disallow CIFs belonging to a restricted category (a restrictive list); or, you might require maintaining a list of CIFs that are allowed to transact in a fund (a positive list).
The system checks the CIF number specified for any transaction that is entered in the Transaction Detail screens as well as in the Standing Instructions Detail screen, to see if any restrictions have been maintained that would entail disallowing the specified CIF from transacting into the fund. The restrictions, if any, applicable at the following levels, would be enforced:
- Unit Holder Account
- CIF
- Investor Category
Check Vendors
Using this screen, you can also associate a check vendor that is maintained as an entity in the system, with those funds for which the vendor is designated to print check books that are requested by investors availing the check writing facility.
4.1.2 Invoking Fund Entity Mapping Detail Screen
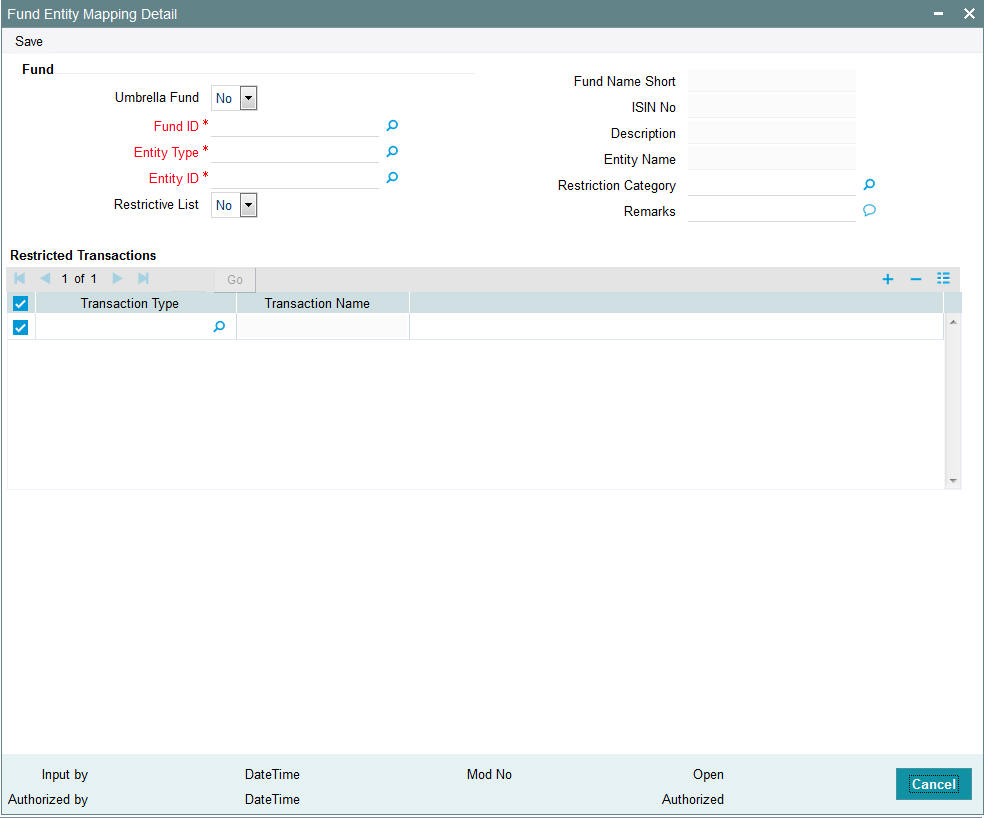
To map entities to a fund, use the ‘Fund Entity Mapping Detail’ screen. You can invoke this screen by typing ‘UTDFNENT’ in the field at the top right corner of the Application tool bar and clicking on the adjoining arrow button. The ‘Fund Entity Mapping Detail’ screen is displayed.
Select ‘New’ from the Actions menu in the Application tool bar or click new icon to enter the details of the fund and entity that you wish to map.
You can only map entities to a fund for which the latest rule is effective, and all fund rules have been authorized.
When you enter a fund entity mapping in this screen, you can save it by selecting the save option from the action menu.
You can specify the following fields in this screen:
Fund
Umbrella Fund
Optional
Select ‘Yes’ from the drop-down list if the fund for which you wish to maintain the fund entity association is an umbrella fund.
Fund ID
Alphanumeric; 6 Characters; Mandatory
Select the fund for which you want to map entities, from the options provided. If you specify the fund, the ISIN Code of the selected fund is displayed in the ISIN Code field. You can also map all the funds to an entity by selecting ‘All’ option from the option list.
If you have selected the ‘All’ option, then any new fund created in the system will be automatically mapped to this entity. You will not be able to map individual fund to this entity. Similarly, if individual fund is mapped to an entity, then the system will not allow you to map all the funds to the same entity.
Fund Name Short
Display
The system displays the description for the selected fund ID.
ISIN Code
Display
The system displays the ISIN Code for the selected fund ID.
Entity Type
Alphanumeric; 2 Characters; Mandatory
You can use this field to indicate the type of entity that is to be associated with the selected fund. You can associate any of the following entities:
- Agent
- Investor
- Individual Investor Categories
- Corporate Investor Categories
- Check Vendor
- Clearing Agent
- CIF Number
- Broker
- ISA Manager
If you are maintaining a restrictive / positive list of CIFs that you wish to disallow / allow to transact into the specified fund, you must select the CIF Number option in this field.
If you select the CIF Number option, you can also specify the appropriate restriction category and any remarks, in the Restriction Category and Remarks fields.
Description
Display
The system displays the description for the selected entity type.
Entity ID
Alphanumeric; 12 Characters; Mandatory
Select the code of the entity that is to be allowed to operate this fund, from the options provided. It could be an agent, or a check vendor who is designated to print check books that are requested by investors availing the check writing facility; it could also be a unit holder, individual or corporate investor category, or a clearing agent.
Entity Name
Display
The system displays the name of the selected entity ID.
Restrictive List
Optional
Use this field to indicate whether you are maintaining a list of ‘allowed’ entity associations for the fund, or a ‘restrictive’ one. Select ‘Yes’ from the drop-down list to indicate a restricted list; leave it unchecked to indicate an allowed list.
If you maintain a ‘restrictive list’, only the entities that you specify are restricted from transacting in the selected fund. If you maintain an ‘allowed’ list, only the entities that you specify are allowed to transact in the selected fund.
Based on the installation setup, the system validates Broker fund mapping in one the following ways:
- If any broker or brokerage is mapped to a fund and the restrictive list value is selected as ‘No’, then only those brokers and the sub-brokers are allowed to transact in the fund. If any broker or brokerage is mapped to a fund and the restricted list is listed as ‘Yes’, then all the brokers apart from the disallowed list are allowed to in the fund, unless you map the sub-brokers of the disallowed brokers to a particular fund.
- If any broker or brokerage is mapped to a fund and the restrictive list value is selected as ‘No’, then only those brokers are allowed to transact in the fund, the sub-brokers are not allowed to transact in the mapped fund. If any broker or brokerage is mapped to a fund and the restricted list is listed as ‘Yes’, then all the brokers apart from the disallowed list are allowed to transact in the fund, even the sub-brokers of disallowed parent broker are allowed.
Restriction Category
Alphanumeric; 2 Characters; Optional
If you are maintaining a restrictive / positive list of CIFs that you wish to disallow / allow to transact into the specified fund, you can select the appropriate restriction category in this field.
Remarks
Alphanumeric; 255 Characters; Optional
If you are maintaining a restrictive / positive list of CIFs that you wish to disallow / allow to transact into the specified fund, you can specify any appropriate remarks in this field.
Restricted Transactions
Transaction Type
Alphanumeric; 2 Characters; Optional
Specify the transaction type. Alternatively, you can select transaction type from the option list. The list displays all valid transaction type maintained in the system.
Transaction Name
Display
The system displays the description for the selected transaction type.
4.2 Fund Entity Mapping Summary Screen
This section contains the following topics:
- Section 4.2.1, "Retrieving Record in Fund Entity Mapping Summary Screen"
- Section 4.2.2, "Editing Fund Entity Mapping"
- Section 4.2.3, "Viewing Fund Entity Mapping "
- Section 4.2.4, "Deleting Fund Entity Mapping "
- Section 4.2.5, "Authorizing Fund Entity Mapping "
- Section 4.2.6, "Amending Fund Entity Mapping "
- Section 4.2.7, "Authorizing Amended Fund Entity Mapping "
- Section 4.2.8, "Copying Attributes"
4.2.1 Retrieving Record in Fund Entity Mapping Summary Screen
You can retrieve a previously entered record in the Summary Screen, as follows:
- Invoke the ‘Fund Entity Mapping Summary’ screen by typing
‘UTSFNENT’ in the field at the top right corner
of the Application tool bar and clicking on the adjoining arrow button.

Specify any or all of the following details in the corresponding fields:
- The status of the record in the Authorized field. If you choose the ‘Blank Space’ option, then all the records are retrieved.
- The status of the record in the Open field. If you choose the ‘Blank Space’ option, then all records are retrieved
- Fund ID
- Entity Type
- Entity ID
- Custom Values Setup
Click ‘Search’ button to view the records. All the records with the specified details are retrieved and displayed in the lower portion of the screen.
Note
You can also retrieve the individual record detail from the detail screen by querying in the following manner:
- Press F7
- Input the Fund ID
- Press F8
You can perform Edit, Delete, Amend, Authorize, Reverse, Confirm operations by selecting the operation from the Action list. You can also search a record by using a combination of % and alphanumeric value.
Example
You can search the record for Fund ID by using the combination of % and alphanumeric value as follows:-
- Search by A%: The system will fetch all the records whose Fund ID starts from Alphabet ‘A’. For example, AGC17, AGVO6, AGC74 and so forth.
- Search by %7: The system will fetch all the records whose Fund ID ends by numeric value’ 7’ For example, AGC17, GSD267, AGC77and so forth.
- Search by %17%: The system will fetch all the records whose Fund ID contains the numeric value 17. For example, GSD217, GSD172, AGC17 and so forth.
4.2.2 Editing Fund Entity Mapping
You can modify the details of Fund Entity Mapping that you have already entered into the system, provided it has not subsequently authorized. You can perform this operation as follows:
- Invoke the Fund Entity Summary screen from the Browser.
- Select the status of the record that you want to retrieve for modification in the Authorized field. You can only modify records that are unauthorized. Accordingly, choose the unauthorized option.
- Specify any or all of the details in the corresponding fields to retrieve the record that is to be modified.
- Click ‘Search’ button. All unauthorized records with the specified details are retrieved and displayed in the lower portion of the screen.
- Double click the record that you want to modify in the list of displayed records. The Fund Entity Mapping Detail screen is displayed.
- Select Unlock Operation from the Action list to modify the record. Modify the necessary information.
- Click Save to save your changes. The Fund Entity Mapping Detail screen is closed and the changes made are reflected in the Fund Entity Summary screen.
4.2.3 Viewing Fund Entity Mapping
To view a record that you have previously input, you must retrieve the same in the Fund Entity Mapping Summary screen as follows:
- Invoke the Fund Entity Mapping Summary screen from the Browser.
- Select the status of the record that you want to retrieve for viewing in the Authorization Status field. You can also view all records that are either unauthorized or authorized only, by choosing the Unauthorized/ Authorized option.
- Specify any or all of the details of the record in the corresponding fields on the screen.
- Click ‘Search’ button. All records with the specified fields are retrieved and displayed in the lower portion of the screen.
- Double click the record that you want to view in the list of displayed records. The Fund Entity Mapping Detail screen is displayed in View mode.
4.2.4 Deleting Fund Entity Mapping
You can delete only unauthorized records in the system. To delete a record that you have previously entered:
- Invoke the Fund Entity Mapping Summary screen from the Browser.
- Select the status of the record that you want to retrieve for deletion.
- Specify any or all of the details in the corresponding fields on the screen.
- Click ‘Search’ button. All records with the specified fields are retrieved and displayed in the lower portion of the screen.
- Double click the record that you want to delete in the list of displayed records. The Fund Entity Mapping Detail screen is displayed.
- Select Delete Operation from the Action list. The system prompts you to confirm the deletion and the record is physically deleted from the system database.
4.2.5 Authorizing Fund Entity Mapping
An unauthorized Fund Entity Mapping must be authorized in the system for it to be processed. To authorize a record:
- Invoke the Fund Entity Mapping Summary screen from the Browser.
- Select the status of the record that you want to retrieve for authorization. Typically, choose the unauthorized option.
- Specify any or all of the details in the corresponding fields on the screen.
- Click ‘Search’ button. All records with the specified details that are pending authorization are retrieved and displayed in the lower portion of the screen.
- Double click the record that you wish to authorize. The Fund Entity Mapping Detail screen is displayed. Select Authorize operation from the Action List.
When a checker authorizes a transaction, details of validation, if any, that were overridden by the maker of the transaction during the Save operation are displayed. If any of these overrides results in an error, the checker must reject the transaction.
4.2.6 Amending Fund Entity Mapping
After a Fund Entity Mapping is authorized, it can be modified using the Unlock operation from the Action List. To make changes to a record after authorization:
- Invoke the Fund Entity Mapping Summary screen from the Browser.
- Select the status of the record that you want to retrieve for authorization. You can only amend authorized records.
- Specify any or all of the details in the corresponding fields on the screen.
- Click ‘Search’ button. All records with the specified details that are pending authorization are retrieved and displayed in the lower portion of the screen.
- Double click the record that you wish to authorize. The Fund Entity Mapping Detail screen is displayed in amendment mode. Select Unlock operation from the Action List to amend the record.
- Amend the necessary information and click on Save to save the changes.
4.2.7 Authorizing Amended Fund Entity Mapping
An amended Fund Entity Mapping maintenance must be authorized for the amendment to be made effective in the system. The authorization of amended records can be done only from Fund Manager Module and Agency Branch module.
The subsequent process of authorization is the same as that for normal transactions.
4.2.8 Copying Attributes
If you want to create a new Fund Entity Mapping with the same attributes of an existing maintenance, you can copy the attributes of an existing Fund Entity mapping to a new one.
To copy the attributes:
- Retrieve the record whose attributes the new Fund Entity mapping should inherit. You can retrieve the record through the Summary screen or through the F7-F8 operation explained in the previous sections of this chapter.
- Click on Copy.
- Indicate the ID for the new Fund Entity mapping. You can, however, change the details of the new maintenance.
4.3 Agency Branch Backdating Setup
This section contains the following topics:
4.3.1 Invoking the Agency Branch Backdating Limit Setup Screen
This fund rule facilitates the maintenance of the back dating limits for a particular transaction type for an agency branch in a fund. The backdating limit applicable for every transaction type can also be specified in the Transaction Processing Rules profile for the fund, but if it is necessary to handle exceptions for a few agency branches for specific transaction types, the same can be maintained here. The information entered here will then supersede the information in the Transaction Processing Rules profile for the fund, and for that agency branch.
To set up the backdating options for a transaction type for a fund, use the ‘Fund Agency BackDating Limit Setup Detail’ screen. You can invoke this screen by typing ‘UTDFALMT’ in the field at the top right corner of the Application tool bar and clicking on the adjoining arrow button.
Select ‘New’ from the Actions menu in the Application tool bar or click new icon to enter the details of the backdating limits that you wish to maintain.

Before you set up an Agency Branch Backdating limits profile record for a fund, it is desirable to ensure that the following information is already setup in the system:
- The fund already has an existing, unauthorized Fund Demographics profile record.
- The fund already has an existing, unauthorized Shares Characteristics profile record.
- The fund already has an existing, unauthorized Transaction Processing Rules profile record for the concerned transaction type.
You can specify the following fields in this screen:
Fund ID
Alphanumeric; 6 Characters; Mandatory
The Fund ID is a unique identification for each Fund as defined in Fund Demographics. Choose the fund from the list for which the Agency Branch backdating is being set up.
ISIN Code
Alphanumeric; 12 Characters; Optional
Select the ISIN Code of the fund for which you want to set up agency branch backdating, from the options provided. If you specify the ISIN Code of a fund, the ID of the fund is displayed in the Fund field and vice versa.
Fund Name Short
Display
The system displays the description for the selected fund ID.
Agency Details
Agent Code
Alphanumeric; 12 Characters; Mandatory
Enter the code of the agent who is allowed to operate this fund and for whom backdating is to be done.
Agency Branch Code
Alphanumeric; 12 Characters; Mandatory
Enter the branch code of the specified Agent for whom backdating is to be done.
Transaction Type
Alphanumeric; 2 Characters; Mandatory
Enter the Transaction Type for which backdating is to be done.
Backdating Period
Numeric; 22 Characters; Mandatory
Enter the number of days allowed in Backdating for that Agency Branch for the transaction type specified above.
4.4 Fund Agency Backdating Limit Summary Screen
The section contains the following topics:
- Section 4.4.1, "Retrieving Record in Fund Agency Backdating Limit Summary Screen"
- Section 4.4.2, "Editing Fund Agency Backdating Limit"
- Section 4.4.3, "Viewing Fund Agency Backdating Limit"
- Section 4.4.4, "Deleting Fund Agency Backdating Limit"
- Section 4.4.5, "Authorizing Fund Agency Backdating Limit"
- Section 4.4.6, "Amending Fund Agency Backdating Limit"
- Section 4.4.7, "Authorizing Amended Fund Agency Backdating Limit"
- Section 4.4.8, "Copying Attributes"
4.4.1 Retrieving Record in Fund Agency Backdating Limit Summary Screen
You can retrieve a previously entered record in the Summary Screen, as follows:
Invoke the summary screen and specify any or all of the following details in the corresponding fields:
- You can invoke the Fund Agency BackDating Limit Setup Summary’
screen by typing ‘UTSFALMT’ in the field at the top right corner
of the Application tool bar and clicking on the adjoining arrow button..
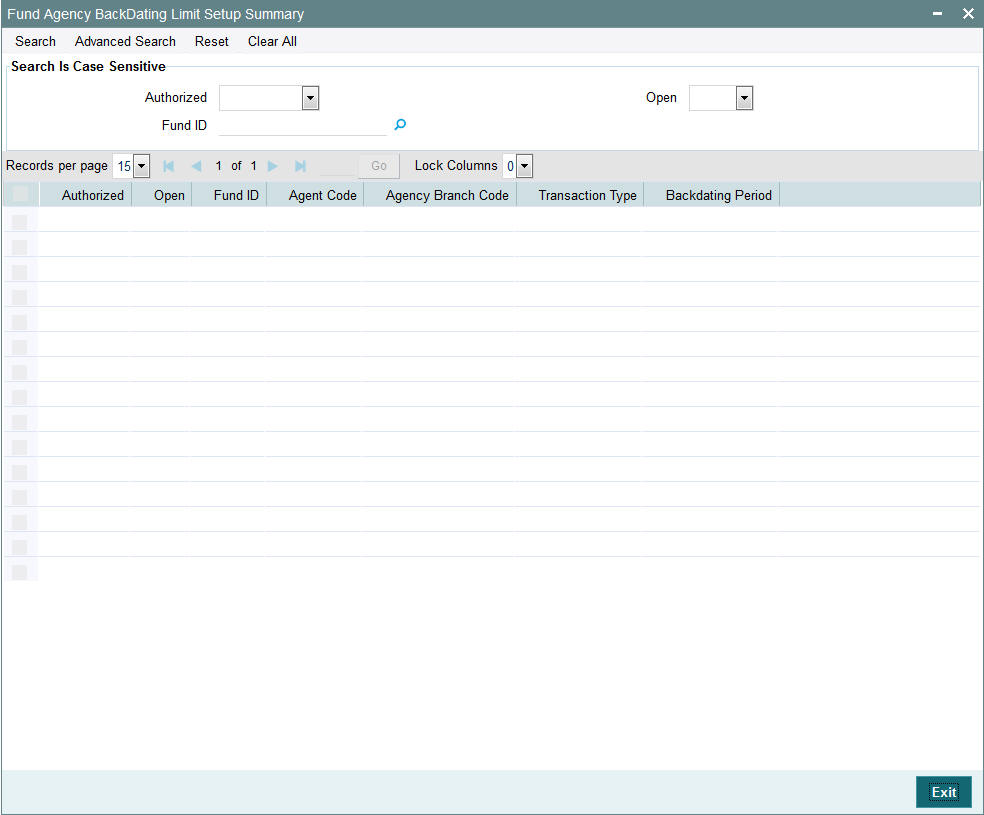
- The status of the record in the Authorized field. If you choose the ‘Blank Space’ option, then all the records are retrieved.
- The status of the record in the Open field. If you choose the ‘Blank Space’ option, then all records are retrieved
- Fund ID
Click ‘Search’ button to view the records. All the records with the specified details are retrieved and displayed in the lower portion of the screen.
Note
You can also retrieve the individual record detail from the detail screen by querying in the following manner:
- Press F7
- Input the Fund ID
- Press F8
You can perform Edit, Delete, Amend, Authorize, Reverse, Confirm operations by selecting the operation from the Action list. You can also search a record by using a combination of % and alphanumeric value.
Example
You can search the record for Fund ID by using the combination of % and alphanumeric value as follows:-
- Search by A%: The system will fetch all the records whose Fund ID starts from Alphabet ‘A’. For example, AGC17, AGVO6, AGC74 and so forth.
- Search by %7: The system will fetch all the records whose Fund ID ends by numeric value’ 7’. For example, AGC17, GSD267, AGC77 and so forth.
- Search by %17%: The system will fetch all the records whose Fund ID contains the numeric value 17. For example, GSD217, GSD172, AGC17 and so forth.
4.4.2 Editing Fund Agency Backdating Limit
You can modify the details of Fund Agency Backdating Limit that you have already entered into the system, provided it has not subsequently authorized. You can perform this operation as follows:
- Invoke the Fund Agency Backdating Limit Summary screen from the Browser.
- Select the status of the record that you want to retrieve for modification in the Authorization Status field. You can only modify records that are unauthorized. Accordingly, choose the unauthorized option.
- Specify any or all of the details in the corresponding fields to retrieve the record that is to be modified.
- Click ‘Search’ button. All unauthorized records with the specified details are retrieved and displayed in the lower portion of the screen.
- Double click the record that you want to modify in the list of displayed records. The Fund Agency Backdating Limit Detail screen is displayed.
- Select Unlock Operation from the Action list to modify the record. Modify the necessary information.
- Click Save to save your changes. The Fund Agency Backdating Limit Detail screen is closed and the changes made are reflected in the Fund Agency Backdating Limit Summary screen.
4.4.3 Viewing Fund Agency Backdating Limit
To view a record that you have previously input, you must retrieve the same in the Fund Agency Backdating Limit Summary screen as follows:
- Invoke the Fund Agency Backdating Limit Summary screen from the Browser.
- Select the status of the record that you want to retrieve for viewing in the Authorization Status field. You can also view all records that are either unauthorized or authorized only, by choosing the Unauthorized/ Authorized option.
- Specify any or all of the details of the record in the corresponding fields on the screen.
- Click ‘Search’ button. All records with the specified fields are retrieved and displayed in the lower portion of the screen.
- Double click the record that you want to view in the list of displayed records. The Fund Agency Backdating Limit Detail screen is displayed in View mode.
4.4.4 Deleting Fund Agency Backdating Limit
You can delete only unauthorized records in the system. To delete a record that you have previously entered:
- Invoke the Fund Agency Backdating Limit Summary screen from the Browser.
- Select the status of the record that you want to retrieve for deletion.
- Specify any or all of the details in the corresponding fields on the screen.
- Click ‘Search’ button. All records with the specified fields are retrieved and displayed in the lower portion of the screen.
- Double click the record that you want to delete in the list of displayed records. The Fund Agency Backdating Limit Detail screen is displayed.
- Select Delete Operation from the Action list. The system prompts you to confirm the deletion and the record is physically deleted from the system database.
4.4.5 Authorizing Fund Agency Backdating Limit
An unauthorized Fund Agency Backdating Limit must be authorized in the system for it to be processed. To authorize a record:
- Invoke the Fund Agency Backdating Limit Summary screen from the Browser.
- Select the status of the record that you want to retrieve for authorization. Typically, choose the unauthorized option.
- Specify any or all of the details in the corresponding fields on the screen.
- Click ‘Search’ button. All records with the specified details that are pending authorization are retrieved and displayed in the lower portion of the screen.
- Double click the record that you wish to authorize. The Fund Agency Backdating Limit Detail screen is displayed. Select Authorize operation from the Action List.
When a checker authorizes a transaction, details of validation, if any, that were overridden by the maker of the transaction during the Save operation are displayed. If any of these overrides results in an error, the checker must reject the transaction.
4.4.6 Amending Fund Agency Backdating Limit
After a Fund Agency Backdating Limit is authorized, it can be modified using the Unlock operation from the Action List. To make changes to a record after authorization:
- Invoke the Fund Agency Backdating Limit Summary screen from the Browser.
- Select the status of the record that you want to retrieve for authorization. You can only amend authorized records.
- Specify any or all of the details in the corresponding fields on the screen.
- Click ‘Search’ button. All records with the specified details that are pending authorization are retrieved and displayed in the lower portion of the screen.
- Double click the record that you wish to authorize. The Fund Agency Backdating Limit Detail screen is displayed in amendment mode. Select Unlock operation from the Action List to amend the record.
- Amend the necessary information and click on Save to save the changes.
4.4.7 Authorizing Amended Fund Agency Backdating Limit
An amended Fund Agency Backdating Limit must be authorized for the amendment to be made effective in the system. The authorization of amended records can be done only from Fund Manager Module and Agency Branch module.
The subsequent process of authorization is the same as that for normal transactions.
4.4.8 Copying Attributes
If you want to create a new Fund Agency Backdating Limit with the same attributes of an existing one, you can copy the attributes of an existing Fund Agency Backdating Limit to a new one.
To copy the attributes:
- Retrieve the record whose attributes the new Fund Agency Backdating Limit should inherit. You can retrieve the record through the Summary screen or through the F7-F8 operation explained in the previous sections of this chapter.
- Click on Copy
- Indicate the ID for the new Fund Agency Backdating Limit. You can, however, change the details of the new maintenance.
4.5 Restrictions for Switch Transactions
This section contains the following topics:
4.5.1 Invoking the Fund Switch Restrict Detail Screen
Switch transactions are governed by the switching policy indicated for the AMC. Accordingly, switch transactions could either be allowed between funds within the AMC, or between funds within the same fund family.
In the case of Distributors, no switching logic might be indicated.
For a fund, you might require to disallow switch transactions into a few selected funds (a restrictive list); or, you might require maintaining a list of funds into which switch transactions are allowed (a positive list).
Typically, a restrictive list could be required if the switching logic indicated for the AMC entails no restrictions on switch transactions.
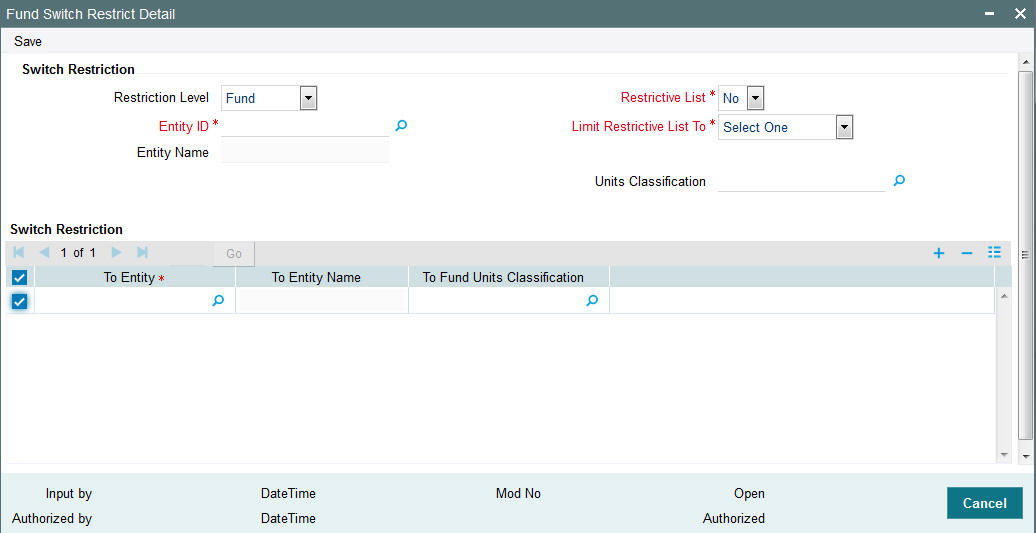
You can maintain such restrictive or positive lists for a fund in the ‘Fund Switch Restrict Detail’ screen. You can invoke this screen by typing ‘UTDFNSWR’ in the field at the top right corner of the Application tool bar and clicking on the adjoining arrow button.
Select ‘New’ from the Actions menu in the Application tool bar or click new icon to enter the details of the lists on switch transactions.
Before you maintain switch restrictions in the Fund Switch Restrictions screen, you must ensure that:
- The switching logic for the AMC has been maintained, in the Single Entity Maintenance.
- Authorized fund rules have been maintained for the requisite funds.
Maintenance of switch restrictions is not a fund rule, and can be done after the fund rules have been maintained.
Note
For a fund, you cannot maintain both a positive as well as a restrictive list.
You can specify the following fields in this screen:
Switch Restriction
Restriction Level
Optional
Select the restriction level from the drop-down list. The list displays the following values:
- Fund
- Fund Family
- Legal Entity
- Fund Type
Entity ID
Alphanumeric; 12 Characters; Mandatory
Specify the entity ID. Alternatively, you can select the entity ID form the option list. The list displays all valid entity ID maintained in the system.
Entity Name
Display
The system displays the entity name for the selected entity ID.
Restrictive List
Mandatory
For a fund, you might require to disallow switch transactions into a few selected funds (a restrictive list); or, you might require maintaining a list of funds into which switch transactions are allowed (a positive list)
You can indicate that you are maintaining a restrictive list, by choosing ‘Yes’ from the drop-down list. To indicate that the list is a positive list, choose ‘No’ from the drop-down list.
If you indicate a restrictive list, switch transactions into any of the selected funds in the list will not be allowed. If you indicate a positive list, switch transactions are allowed only into any of the selected funds in the list. For a fund, only a restrictive list OR a positive list can be maintained, not both.
Limit Restrictive List To
Mandatory
If you have indicated a restrictive list, you can indicate the range of funds for which the restrictive list applies from the drop-down list. The list displays the following values:
- No Restriction
- Fund Family
- AMC
- Legal Entity
- Units Classification
Indicating the range of funds in this field is dependant on the switching logic applicable for the AMC (also in the case of Distributors), as given below:
- If the restrictions are being maintained for a Distributor, and no
restrictions have been indicated for switch transactions, you can indicate
whether the restricted list would be applicable for switch transactions
involving:
- All funds (select ‘No Restrictions’ in this field)
- Funds within the same AMC
- Funds within the same fund family
- Legal Entity
- Units Classification
- If the switching logic for the AMC is ‘Switch Within Funds of AMC’, the ‘Within AMC’ option is selected in this field and cannot be changed. The restrictive list will only be applicable for funds within the AMC.
- If the switching logic for the AMC is ‘Switch Within Funds of Fund Family’, the ‘Within Fund Family’ option is selected in this field and cannot be changed. The restrictive list will only be applicable for funds within the same fund family.
This field is not applicable for positive lists; the switching logic of the AMC is defaulted here and cannot be changed.
Units Classification
Alphanumeric; 1 Character; Optional
Specify the units classification details. Alternatively, you can select units classification code from the option list. The list displays all valid unit classification code maintained in the system.
Units Classification Description
Alphanumeric; 60 Characters; Optional
Specify the units classification description.
Switch Restriction
To Entity
Alphanumeric; 12 Characters; Mandatory
Select the To Entity ID into which switch transactions from the selected ‘from fund’ are disallowed (if you are maintaining a restrictive list) or allowed (if you are maintaining a positive list). When the restrictive / positive list is applied, the fund you select here is considered the ‘To Fund’.
To select the fund, you can either indicate the Fund ID or the ISIN Code of the fund. When you select the fund, the short name of the fund is also displayed.
The funds available for selection in this field depend on the option selected in the Limit Restricted Funds To field:
- If the ‘No Restriction’ option has been chosen, all valid funds in the system are available for selection in this field.
- If ‘Within AMC’ has been chosen, all funds belonging to the AMC of the ‘from fund’ are available for selection
- If ‘Within Fund Family’ has been chosen, all funds belonging to the fund family of the ‘from fund’ are available for selection
To Entity Name
Display
The system displays the To Entity name for the selected To Entity ID.
To Fund Units Classification
Alphanumeric; 1 Character; Optional
Specify the To funds units classification details. Alternatively, you can select To funds units classification from the option list. The list displays all valid To fund units classification code maintained in the system.
Units Classification Description
Alphanumeric; 60 Characters; Optional
Specify the units classification description.
How Restricted / Positive Lists Work
The following example illustrates how restricted lists for switch transactions would be applied.
Example
For the Royal Trust AMC, no restrictions for switch transactions have been indicated in the switching logic (the Switching Logic in the Entity Maintenance is ‘No Restrictions’). The following funds are maintained:
Fund |
AMC |
Fund Family |
Fund 1 |
Royal Trust AMC |
Growth Funds |
Fund 2 |
Carling Finance AMC |
Equity Funds |
Fund 3 |
Elton Trueblood AMC |
Equity Funds |
Fund 4 |
Carling Finance AMC |
Growth Funds |
Fund 5 |
Carling Finance AMC |
Equity Funds |
The switch restriction lists are maintained as follows:
Fund |
Restrictive / Positive List |
Limit Restricted List To |
Restricted / Allowed Funds |
Fund 1 |
Restrictive |
No Restrictions |
Fund 2 (Restricted) |
Fund 2 |
Restrictive |
Within AMC |
Fund 4 (Restricted) |
Fund 3 |
Restrictive |
Within Fund Family |
Fund 5 (Restricted) |
Fund 4 |
Positive |
No Restrictions |
Fund 1 (Allowed) |
The lists would apply as follows:
From Fund |
To Funds Allowed |
To Funds Disallowed |
Fund 1 |
All funds except Fund 2 |
Fund 2 |
Fund 2 |
Fund 5 |
Fund 4 |
Fund 3 |
Fund 2 |
Fund 5 |
Fund 4 |
Fund 1 |
All funds except Fund 1 |
4.6 Fund Switch Restrict Summary Screen
This section contains the following sections:
- Section 4.6.1, "Retrieving Record in Fund Switch Restrict Summary Screen"
- Section 4.6.2, "Editing Fund Switch Restrict Record"
- Section 4.6.3, "Viewing Fund Switch Restrict Record"
- Section 4.6.4, "Deleting Fund Switch Restrict Record"
- Section 4.6.5, "Authorizing Fund Switch Restrict Record"
- Section 4.6.6, "Amending Fund Switch Restrict Record"
- Section 4.6.7, "Authorizing Amended Fund Switch Restrict Record"
- Section 4.6.8, "Copying Attributes"
4.6.1 Retrieving Record in Fund Switch Restrict Summary Screen
You can retrieve a previously entered record in the Summary Screen, as follows:
Invoke the summary screen and specify any or all of the following details in the corresponding fields:
- You can invoke this screen by typing ‘UTSFNSWR’ in the field at the top right corner
of the Application tool bar and clicking on the adjoining arrow button.
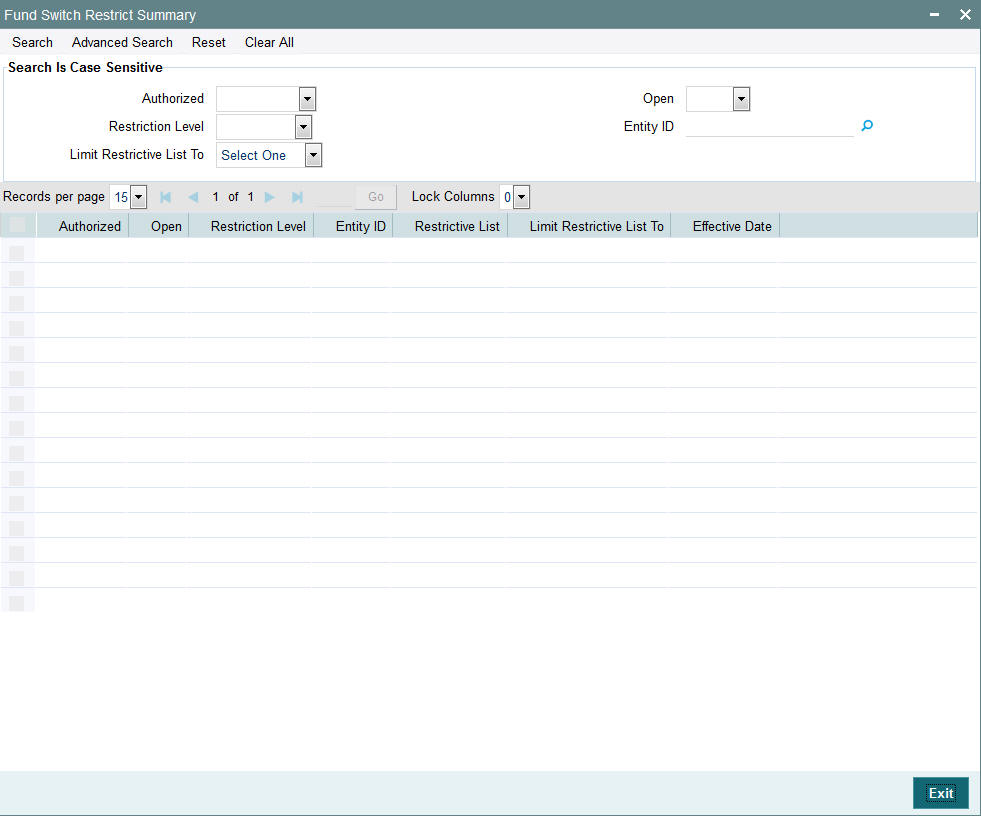
- The status of the record in the Authorized field. If you choose the ‘Blank Space’ option, then all the records are retrieved.
- The status of the record in the Open field. If you choose the ‘Blank Space’ option, then all records are retrieved
- Restriction Level
- Entity ID
- Limit Restrictive List To
Click ‘Search’ button to view the records. All the records with the specified details are retrieved and displayed in the lower portion of the screen.
Note
You can also retrieve the individual record detail from the detail screen by querying in the following manner:
- Press F7
- Input the Entity ID
- Press F8
You can perform Edit, Delete, Amend, Authorize, Reverse, Confirm operations by selecting the operation from the Action list. You can also search a record by using a combination of % and alphanumeric value.
Example
You can search the record for Fund ID by using the combination of % and alphanumeric value as follows:-
- Search by A%: The system will fetch all the records whose Entity ID starts from Alphabet ‘A’. For example, AGC17, AGVO6, AGC74 and so forth.
- Search by %7: The system will fetch all the records whose Entity ID ends by numeric value’ 7’. For example, AGC17, GSD267, AGC77 and so forth.
- Search by %17%: The system will fetch all the records whose Entity ID contains the numeric value 17. For example, GSD217, GSD172, AGC17 and so forth.
4.6.2 Editing Fund Switch Restrict Record
You can modify the details of a Fund Switch Restrict record that you have already entered into the system, provided it has not subsequently authorized. You can perform this operation as follows:
- Invoke the Fund Switch Restrict Summary screen from the Browser.
- Select the status of the record that you want to retrieve for modification in the Authorization Status field. You can only modify records that are unauthorized. Accordingly, choose the unauthorized option.
- Specify any or all of the details in the corresponding fields to retrieve the record that is to be modified.
- Click ‘Search’ button. All unauthorized records with the specified details are retrieved and displayed in the lower portion of the screen.
- Double click the record that you want to modify in the list of displayed records. The Fund Switch Restrict Detail screen is displayed.
- Select Unlock Operation from the Action list to modify the record. Modify the necessary information.
- Click Save to save your changes. The Fund Switch Restrict Detail screen is closed and the changes made are reflected in the Fund Switch Restrict Summary screen.
4.6.3 Viewing Fund Switch Restrict Record
To view a record that you have previously input, you must retrieve the same in the Fund Switch Restrict Summary screen as follows:
- Invoke the Fund Switch Restrict Summary screen from the Browser.
- Select the status of the record that you want to retrieve for viewing in the Authorized field. You can also view all records that are either unauthorized or authorized only, by choosing the Unauthorized/ Authorized option.
- Specify any or all of the details of the record in the corresponding fields on the screen.
- Click ‘Search’ button. All records with the specified fields are retrieved and displayed in the lower portion of the screen.
- Double click the record that you want to view in the list of displayed records. The Fund Switch Restrict Detail screen is displayed in View mode.
4.6.4 Deleting Fund Switch Restrict Record
You can delete only unauthorized records in the system. To delete a record that you have previously entered:
- Invoke the Fund Switch Restrict Summary screen from the Browser.
- Select the status of the record that you want to retrieve for deletion.
- Specify any or all of the details in the corresponding fields on the screen.
- Click ‘Search’ button. All records with the specified fields are retrieved and displayed in the lower portion of the screen.
- Double click the record that you want to delete in the list of displayed records. . The Fund Switch Restrict Detail screen is displayed.
- Select Delete Operation from the Action list. The system prompts you to confirm the deletion and the record is physically deleted from the system database.
4.6.5 Authorizing Fund Switch Restrict Record
- An unauthorized Fund Switch Restrict record must be authorized in the system for it to be processed. To authorize a record:
- Invoke the Fund Switch Restrict Summary screen from the Browser.
- Select the status of the record that you want to retrieve for authorization. Typically, choose the unauthorized option.
- Specify any or all of the details in the corresponding fields on the screen.
- Click ‘Search’ button. All records with the specified details that are pending authorization are retrieved and displayed in the lower portion of the screen.
- Double click the record that you wish to authorize. The Fund Switch Restrict Detail screen is displayed. Select Authorize operation from the Action List.
When a checker authorizes a transaction, details of validation, if any, that were overridden by the maker of the transaction during the Save operation are displayed. If any of these overrides results in an error, the checker must reject the transaction.
4.6.6 Amending Fund Switch Restrict Record
After a Fund Switch Restrict record is authorized, it can be modified using the Unlock operation from the Action List. To make changes to a record after authorization:
- Invoke the Fund Switch Restrict Summary screen from the Browser.
- Select the status of the record that you want to retrieve for authorization. You can only amend authorized records.
- Specify any or all of the details in the corresponding fields on the screen.
- Click ‘Search’ button. All records with the specified details that are pending authorization are retrieved and displayed in the lower portion of the screen.
- Double click the record that you wish to authorize. The Fund Switch Restrict Detail screen is displayed in amendment mode. Select Unlock operation from the Action List to amend the record.
- Amend the necessary information and click on Save to save the changes.
4.6.7 Authorizing Amended Fund Switch Restrict Record
An amended Fund Switch Restrict record must be authorized for the amendment to be made effective in the system. The authorization of amended records can be done only from Fund Manager Module and Agency Branch module.
The subsequent process of authorization is the same as that for normal transactions.
4.6.8 Copying Attributes
If you want to create a new Fund Switch Restrict record with the same attributes of an existing maintenance, you can copy the attributes of an existing Fund Switch Restrict record to a new one.
To copy the attributes:
- Retrieve the record whose attributes the new Fund Switch Restrict record should inherit. You can retrieve the record through the Summary screen or through the F7-F8 operation explained in the previous sections of this chapter.
- Click on Copy.
- Indicate the ID for the new Fund Switch Restrict maintenance. You can, however, change the details of the new maintenance.
4.7 Pseudo Switch Lag Maintenance
This section contains the following topics:
- Section 4.7.1, "Maintaining Pseudo Switch Lag Maintenance"
- Section 4.7.2, "Invoking Pseudo Switch Lag Maintenance Screen"
4.7.1 Maintaining Pseudo Switch Lag Maintenance
You can maintain the lag for the combination of two funds or for two Fund Families. You can derive Pseudo switch date based on cut off time. fund cut off time, then the system will derive the transaction date of Switch Out fund based on Switch Out fund cut off time and the transaction date of Switch In fund based on Switch In fund cut off time.
The transaction date will be derived based on the application received date and time recorded at the transaction level.
For Non Daily pricing frequency funds, in case when derived transaction date falls on a holiday and trade is received before cut-off time then the system will arrive previous or next working day of current transaction cut-off day cycle depending on holiday rule is prior or after. If trade is received after cut-off time then the system should arrive previous or next working day of next cycle transaction cut-off day depending on holiday rule is prior or after.
If the Pseudo switch lag is maintained for the funds and between the families of those funds then the system will give precedence to the Fund. If there is no pseudo switch lag maintenance for the fund then the system will consider the lag maintained for the fund family.
Based on the maintenance at AMC level, the to fund/fund family can be within the AMC or across AMC
Settlement of Pseudo Switch In leg Transaction will be automatic when Switch Out leg is settled manually either through ‘Switch Screen’ or via ‘Confirm Redemption Screen’.
If Switch Out leg transaction is settled using ‘Switch’ screen, then the system will automatically initiate the settlement process for subscription (Switch In Leg) transaction.
If Switch Out leg transaction is settled using ‘Confirm Redemption’ screen, then the system will automatically initiate the settlement process for subscription (Switch In Leg) transaction.
If you try to manually settle the Switch IN leg transaction, then the system will display an error message as ‘The Switch IN leg Transaction cannot be settled manually since Auto Switch In Settlement is turned ON’.
Also the system will allow settlement of Switch OUT only when Switch out leg is allotted. If you try settlement before the allocation, then the system will display an error message as ‘Settlement of Switch OUT cannot be allowed before allocation’.
If ‘Auto Settle Switch Transactions’ field is checked, then only the system will perform the above validations.
You can use ‘Pseudo Switch Lag Maintenance’ screen to maintain the lag maintenance at Fund or Fund Family level. As per the maintenance, the transaction date of switch in transaction will be derived in the respective calendar maintained. The system derives Price date and settlement date based on the fund level lag maintenances. If in Pseudo switch lag maintenance, switch lag option is selected as Settlement Date and Switch Lag as 2, then the system will derive pseudo switch in leg transaction date as (out leg Settlement Date) + 2.
Example for Pseudo switch-in transaction date derivation
Example 1
The system will use Pseudo Switch Lag Maintenance screen for the following setup for switch in transaction date derivation logic (Assumption is No fund holiday for the month November):
Fund Preference Switch-in Generation Level |
Switch Out Fund |
Switch In Fund |
Switch Lag Option |
Switch Lag |
Calendar Basis |
Settlement |
FundA |
FundB |
Settlement Date |
2 |
Actual |
FundB |
FundC |
Price Date |
2 |
Actual |
|
FundD |
FundA |
Transaction Date |
3 |
System |
With the above maintenance, pseudo switch in transaction date will be as follows:
Switch Out Fund ID |
Switch In Fund ID |
Switch Out Txn Date |
Switch Out Price Date |
Switch Out Settlement Date |
Switch In Txn Date |
Switch in Generation on |
FundA |
FundB |
7-Nov-16 |
8-Nov-16 |
9-Nov-16 |
11-Nov-16 |
9-Nov-16 |
FundB |
FundC |
7-Nov-16 |
8-Nov-16 |
9-Nov-16 |
10-Nov-16 |
9-Nov-16 |
FundD |
FundA |
7-Nov-16 |
8-Nov-16 |
8-Nov-16 |
10-Nov-16 |
8-Nov-16 |
Example 2
The following examples cover the following cases:
- Switch-out transaction with payment lag and price lag
- Switch-in transaction date derived based on switch-out price date/Settlement date
Fund Level setup
Fund ID |
Transaction Date |
Price Lag |
Payment Lag |
Fund A |
T |
T+1 |
T+5 |
Fund B1 |
T |
T+1 |
T+5 |
Fund B2 |
T |
T+1 |
T+5 |
Fund C |
T |
T+1 |
T+5 |
In Fund Preference Level, Switch-in Generation Level = Allotment
Pseudo Switch Lag Maintenance
Switch Out Fund |
Switch In Fund |
Switch Lag Option |
Switch Lag |
Calendar Basis |
Fund A |
Fund B1 |
Price Date |
0 |
Fund Calendar |
Fund A |
Fund B2 |
Price Date |
0 |
Fund Calendar |
Fund A |
Fund C |
Settlement Date |
0 |
Fund Calendar |
Pseudo Switch in Transaction attributes as follows:
From Fund |
To Fund |
Transaction |
Transaction Date |
Price Date |
Settlement Date |
Fund Holiday |
Fund A |
Fund B1 |
PS-Out |
30-Oct |
31-Oct |
4-Nov |
|
PS-In |
31-Oct |
1-Nov |
5-Nov |
|
||
Fund A |
Fund B2 |
PS-Out |
30-Oct |
31-Oct |
4-Nov |
|
PS-In |
31-Oct |
2-Nov |
6-Nov |
1-Nov |
||
Fund A |
Fund C |
PS-Out |
30-Oct |
31-Oct |
4-Nov |
|
PS-In |
4-Nov |
5-Nov |
9-Nov |
|
4.7.2 Invoking Pseudo Switch Lag Maintenance Screen
You can maintain the lag for the combination of two funds or for two Fund Families using ‘Pseudo Switch Lag Maintenance’ screen. You can invoke this screen by typing ‘UTDSWLAG’ in the field at the top right corner of the Application tool bar and clicking on the adjoining arrow button.
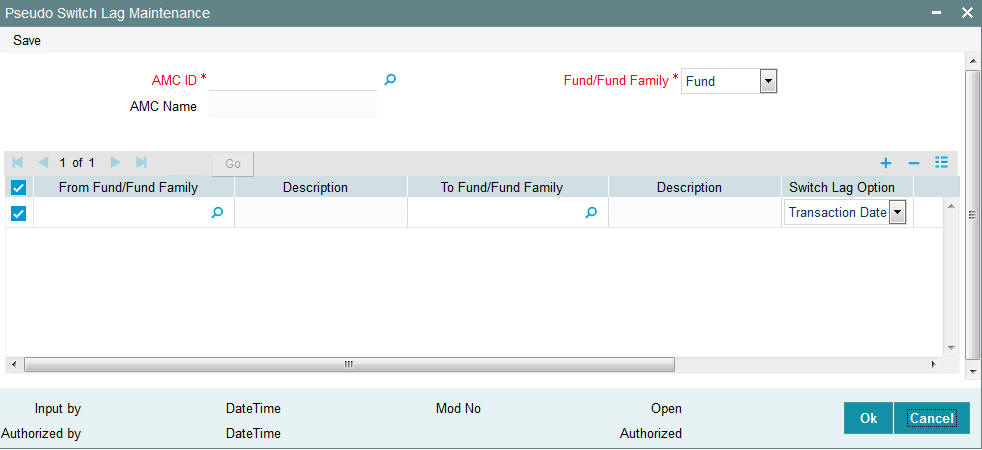
You can specify the following details:
AMC ID
Alphanumeric; 12 Characters; Mandatory
Specify the AMC ID. Alternatively, you can select the AMC ID from the option list. The list displays all valid AMC ID maintained in the system.
AMC Name
Display
The system displays the description for the selected AMC ID.
Fund/Fund Family
Mandatory
Select the fund or fund family from the drop-down list. The list displays the following values:
- Fund
- Fund Family
From Fund/Fund Family
Alphanumeric; 6 Characters; Optional
Specify the from fund or fund family details. Alternatively, you can select the from fund or fund family details from the option list. The list displays all valid from fund or fund family details maintained in the system.
Description
Display
The system displays the description for the selected from fund or fund family.
To Fund/Fund Family
Alphanumeric; 6 Characters; Optional
Specify the To fund or fund family details. Alternatively, you can select the To fund or fund family details from the option list. The list displays all valid To fund or fund family details maintained in the system.
Description
Display
The system displays the description for the selected To fund or fund family.
Switch Lag Option
Optional
Select the switch lag option from the drop-down list. The list displays the following values:
- Transaction Date
- Settlement Date
- Price Date
- Dealing Date
Switch Lag
Alphanumeric; 2 Characters; Optional
Specify the switch lag details.
Calendar Basis
Optional
Select the calendar basis from the drop-down list. The list displays the following value
- Actual Calendar
- System Calendar
- AMC Calendar
- Fund Calendar
During Transaction Upload Process, the Switch Transaction date will be calculated as follows:
- If the maintenance is done for the Fund/ Fund family for From and To leg, then it should arrive the transaction date for To leg according to the maintenance irrespective of UPLOADCUTOFFTIME being on or off
- If there is no pseudo switch lag maintenance and PSINCUTTIME and UPLOADCUTOFFTIME is off, then the default trade date is taken which is based on the Out settlement date. The To Price Date is arrived based on the to transaction date
- If there is no pseudo switch lag maintenance and PSINCUTTIME is ON and UPLOADCUTOFFTIME is off then the IN leg trade date will be derived depending on whether the transaction has been created before or after switch in fund cut off time and in leg transaction date will be derived accordingly and The To Price Date is arrived based on the to transaction date
- If there is no pseudo switch lag maintenance and PSINCUTTIME is ON and UPLOADCUTOFFTIME is ON, then the IN leg trade date will be derived depending on cut off time mentioned in upload file is before or after switch in fund cut off time and in leg transaction date will be derived accordingly and The To Price Date is arrived based on the to transaction date.
4.8 Pseudo Switch Lag Summary
This section contains the following topics:
- Section 4.8.1, "Retrieving Pseudo Switch Lag Record"
- Section 4.8.2, "Viewing Pseudo Switch Lag Record"
- Section 4.8.3, "Editing Pseudo Switch Lag Record"
- Section 4.8.4, "Deleting Pseudo Switch Lag Record"
- Section 4.8.5, "Authorizing Pseudo Switch Lag Record"
- Section 4.8.6, "Amending Pseudo Switch Lag Record"
4.8.1 Retrieving Pseudo Switch Lag Record
You can view pseudo switch lag details using ‘Pseudo Switch Lag Summary’ screen. To invoke this screen, type ‘UTSSWLAG’ in the field at the top right corner of the Application tool bar and clicking on the adjoining arrow button.
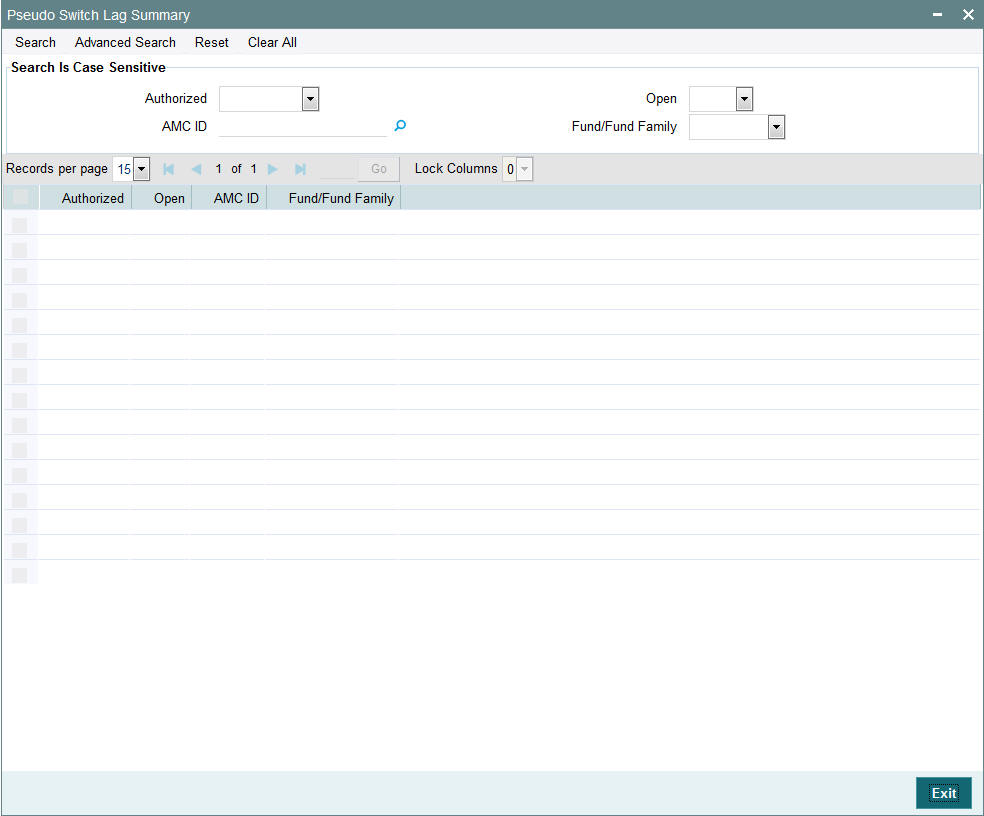
You can retrieve previously entered Pseudo Switch Lag as follows:
- Invoke the ‘Pseudo Switch Lag Summary’ screen from the Browser.
- Specify any or all of the following details in the screen:
- The status of the transaction in the ‘Authorized’ field. If you choose the blank space, then both the authorized and the unauthorized status records will be retrieved for the specified criteria.
- The status of the records in the ‘Open’ field. If you choose the blank space, then all the records are retrieved.
- AMC ID
- Fund or Fund Family
- Click ‘Search’ button to view the records. All records with the specified details are retrieved and displayed in the lower portion of the screen.
4.8.2 Viewing Pseudo Switch Lag Record
To view a record that you have previously entered, you must retrieve the same in the ‘Global Order Maintenance Summary’ screen, as follows:
- Invoke the ‘Pseudo Switch Lag Summary’ screen from the Browser.
- Specify any or all of the following details in the screen:
- The status of the transaction in the ‘Authorized’ field. If you choose the blank space, then both the authorized and the unauthorized status records will be retrieved for the specified criteria.
- The status of the records in the ‘Open’ field. If you choose the blank space, then all the records are retrieved.
- The AMC ID in the ‘AMC ID’ field. If you choose the blank space, then all the records are retrieved.
- The Fund/Fund Family
- Click ‘Search’ button to view the records. All records with the specified details are retrieved and displayed in the lower portion of the screen.
- Double click the record that you want to view in the list of displayed records. The ‘Pseudo Switch Lag Detail’ screen is displayed in the view mode.
4.8.3 Editing Pseudo Switch Lag Record
You can modify the Pseudo Switch Lag that you have already entered into the system, provided it has not been subsequently authorized. You can perform this operation as follows:
- Invoke the ‘Pseudo Switch Lag Summary’ screen from the Browser.
- Specify any or all of the following details in the screen:
- The status of the transaction in the ‘Authorized’ field. If you choose the blank space, then both the authorized and the unauthorized status records will be retrieved for the specified criteria.
- The status of the records in the ‘Open’ field. If you choose the blank space, then all the records are retrieved.
- The AMC ID in the ‘AMC ID’ field. If you choose the blank space, then all the records are retrieved.
- The Fund/Fund Family
- Click ‘Search’ button to view the records. All records with the specified details are retrieved and displayed in the lower portion of the screen.
- Double-click the record that you want to edit in the list of displayed records. The ‘Pseudo Switch Lag Detail’ screen is displayed.
- Select Unlock operation from the Action list to edit the record. Edit the necessary information.
- Click Save to save your changes. The ‘Pseudo Switch Lag Detail’ screen is closed and the changes made are reflected in the ‘Pseudo Switch Lag Summary’ screen.
4.8.4 Deleting Pseudo Switch Lag Record
You can delete only unauthorized records in the system. To delete a record that you have previously entered:
- Invoke the ‘Pseudo Switch Lag Summary’ screen from the Browser.
- Specify any or all of the following details in the screen:
- The status of the transaction in the ‘Authorized’ field. If you choose the blank space, then both the authorized and the unauthorized status records will be retrieved for the specified criteria.
- The status of the records in the ‘Open’ field. If you choose the blank space, then all the records are retrieved.
- The AMC ID in the ‘AMC ID’ field. If you choose the blank space, then all the records are retrieved.
- The Fund/Fund Family
- Click ‘Search’ button to view the records. All records with the specified details are retrieved and displayed in the lower portion of the screen.
- Double-click the record that you want to delete. The ‘Pseudo Switch Lag Detail’ screen is displayed.
- Select Delete operation from the Action list. The system prompts you to confirm the deletion, and the record is deleted physically from the system database.
Note
The maker of the record can only delete the unauthorized record.
4.8.5 Authorizing Pseudo Switch Lag Record
Apart from the maker, someone else must authorize an unauthorized Pseudo Switch Lag deal in the system for it to be processed. To authorize a record:
- Invoke the ‘Pseudo Switch Lag Summary’ screen from the Browser.
- ‘The status of the transaction in the ‘Authorized’ field. Choose the ‘Unauthorized’ status.
- Click ‘Search’ button to view the records. All the records with the specified details that are pending authorization are retrieved and displayed in the lower portion of the screen.
- Select the Authorization operation from the Action list to authorize the selected record.
4.8.6 Amending Pseudo Switch Lag Record
After a Pseudo Switch Lag record is authorized, it can be modified using the Unlock operation from Action list. To make changes to a record after authorization:
- Invoke the ‘Pseudo Switch Lag Summary’ screen from the Browser.
- Select the status of the transaction that you wish to retrieve for amendment. You can only amend only authorized records.
- Click ‘Search’ button to view the records. All records with the specified details are retrieved and displayed in the lower portion of the screen.
- Double click the record that you want to amend. The ‘Pseudo Switch Lag Detail’ screen is displayed in the amendment mode. Click the Unlock operation from the Action list to amend the record.
4.9 Fund Price
This section contains the following topics:
- Section 4.9.1, "Invoking the Fund Price Maintenance Screen"
- Section 4.9.2, "Fund Base Currency Details Tab"
- Section 4.9.3, "Additional Information Tab"
- Section 4.9.4, "Fund Price Currency Details Button"
4.9.1 Invoking the Fund Price Maintenance Screen
The Real NAV for the fund for a specific date must be declared, according to the frequency specified for this declaration.
To set up the fund prices, use the ‘Fund Price Detail’ screen. You can invoke this screen by typing ‘UTDFPRIC’ in the field at the top right corner of the Application tool bar and clicking on the adjoining arrow button. The ‘Fund Price Detail’ screen is displayed.
Select ‘New’ from the Actions menu in the Application tool bar or click new icon to enter the details of the new fund price.

After you have set up and authorized a fund, you may enter the Fund Price on the Next Price Declare Date that you have specified in the General Operating Rules. Subsequently, you can enter the Fund Price according to the price declare frequency that you have specified in the General Operating Rules for the fund.
You can specify the following fields in this screen:
Fund ID
Alphanumeric; 6 Characters; Mandatory
Select the fund for which the price is being set, from the options provided.
Effective Date
Date Format; Mandatory
Specify the effective date.The price entered in this screen is effective from the system date.
Fund Base Currency
Display
When the fund is selected, the Fund Base Currency for the selected fund is picked up from the Fund Demographics profile and displayed here.
ISIN Code
Display
The system displays the ISIN Code of the selected fund ID
NAV Computation
You need to select the option based on which the Fund Price is to be calculated. The following options are available for calculation of Fund Price:
Net Asset Value
Optional
If you choose this option, you must specify the Real NAV per unit, and the system will compute the fund price per transaction, based on whether the fund is formula-based.
Total Assets
Optional
If you choose this option, you must specify the Total Assets, and based on the outstanding units, the system computes the net asset value.
Formula Builder
Optional
If you choose this option, you must specify values for all the user input fields, and the system computes the Net Asset Value.
Real NAV/Lot
Numeric; 22 Characters; Mandatory
Enter the Real NAV per Unit for the period when the price is being set.
This is applicable only if NAV is selected in the Total assets/ NAV / Formula Builder option. If Total Assets is selected, then this is calculated by the system.
If entered, the system validates this value against the fluctuation limits set for the selected transaction type, in the selected fund, in the Transaction Processing Rules. If the limit is exceeded, an override is sought while saving the price.
Floor Price
Numeric; 22 Characters; Mandatory
Enter the Floor Price for the fund. The floor price is to indicate the lowest price that the fund can offer. Based on the loads, if the net transaction price happens to be lower than this floor price then, the floor price would be considered as net transaction price. This will typically be in case of a redemption or a switch transaction.
FI Outstanding Units
Display
The system displays the number of Foreign Investors’ Outstanding Units for the fund that is also calculated by the system. The units displayed prior to allocation are of the previous period and post-allocation, the Foreign Investors’ units will form the balance for the effective day.
The Foreign Investors Outstanding Units should always be below the figure of one hundred trillion, at any point of time.
Outstanding Units
Display
This displays the number of Total Outstanding Units for the fund that is calculated by the system. The units displayed prior to allocation are of the previous period. Post-allocation, the outstanding units will become the balances for the effective day.
The Total Outstanding Units should never exceed or be equal to the figure of ten thousand trillion, at any point of time.
Reflect in Trading
Optional
Select ‘Yes’ option from drop-down option if you wish to make this fund price applicable for an investor who maintains a trading account under this fund.
Swinging Price Basis
Display
The system displays whether mid/offer/bid price is applied for the fund.
Swinging Price
Numeric; 30 Characters; Optional
Specify the swinging price which is applied for allocating transactions.
The Swinging Price Basis and Swinging Price fields are populated on running the Mini EOD for swinging price computation, only if the fund is swinging or semi swinging price basis fund. For non swinging/non semi swinging fund these fields will be blank.
NAV Lot
Numeric; 22 Characters; Optional
Enter the NAV lot amount.
Total Net Assets
Display
The system displays the Total Net Asset Value or Fund Corpus for the fund. This is applicable only if Total Assets is selected in the Total Assets / NAV / Formula Builder option. If NAV is selected then this is calculated by the system.
This should never exceed or be equal to the figure of ten thousand trillion, at any point of time.
No. Of Unit Holders
Display
This displays the Total Number of unit holders holding a balance in the fund. This number will be the actual number for any given effective date. This is also calculated by the system.
Declared NAV/Lot
Numeric; 22 Characters; Mandatory
Specify the declared NAV per lot.
Ceiling Price
Numeric; 22 Characters; Mandatory
Enter the Ceiling Price for the fund. The Ceiling price is to indicate the highest price that the fund can offer. Based on the loads, if the net transaction price happens to be greater than the Ceiling Price then, the Ceiling Price would be considered as the net transaction price. This will typically be in case of a subscription or IPO transaction.
The Floor Price should be less than the Fund Price and the Ceiling Price should be greater than the Fund Price i.e., Fund Price should be between Floor Price and the Ceiling Price.
Amend Transactions
Optional
This option allows you to reverse and recreate transactions affected by amending the Fund Price or merely updating the price. Only after you select this option, the transactions included during authorization of the Fund Price are affected.
The system will not reverse and recreate the transactions if any underlying child transaction has been created from the old transaction.
The details specified below are displayed if the related fund is a ‘Hedge Fund’.
High Water Mark (HWM)
Numeric; 22 Characters; Optional
Specify the high water mark, as per the price date.
Hurdle Rate
Numeric; 22 Characters; Optional
Specify the hurdle rate as per the price date.
HWM + Hurdle
Numeric; 22 Characters; Optional
Specify the sum of High Water Mark (HWM) and the hurdle rate, rounded based on the price rounding method.
After specifying the necessary details, clicking ‘Ok’ button.
4.9.2 Fund Base Currency Details Tab
You can maintain fund base currency details by clicking ‘Fund Base Currency Details’ tab in ‘Fund Price Detail’ screen.
After specifying the mandatory details, click ‘Ok’ button. The system displays the following details:
Transaction Details
- Effective Date
- Transaction Type
- Base Price
- Base Price Constant
- Allocation Vs. Register Capital
Fund Price Components
- Component Description
- Component Value
Click ‘Compute’ button to process the request.
4.9.3 Additional Information Tab

Additional Information Details
Label Code
Display
The system displays the label of the additional information field.
Field Value
Display
The system displays the value in this field.
Based on the entity add info mapping, all mapped additional information is displayed here.
4.9.4 Fund Price Currency Details Button
You can maintain fund price currency details by clicking ‘Fund Price Currency Button’ tab in ‘Fund Price Detail’ screen. You can capture the various price details for Fund Price Currency’s for various transaction types and component details for a COE fund in this screen..

The system will validate if the price is maintained for the fund in fund price currencies. if not the system will display an error message as ‘Prices for all currencies are not maintained. Do you wish to continue?’
During the pre EOD, the system will check if price in FPC have been maintained for the day. If the price in currency of expression is not found, then the transaction entered in currency of expression will not be allotted.
The Units will be allocated using respective currency of expression or fund price if the transaction is done in currency of expression. If the transaction is done in fund base currency then the allocation will take place by taking the fund price captured in fund base currency. If the transaction is done in a currency which is other than FBC or currency of expression then the allocation of units will be done using exchange rate of FBC.
For project allocation, the system will take the latest available price and show the project allocation. For menu allocation if the price is not available then system will not allocate the transactions.
NAV Correction for fund price currencies
The system will be impacted for NAV corrections for fund price currencies. In case the NAV is corrected for fund price currency, for instance, if GBP and the amend transaction is set to Yes, then all the transactions will be corrected with the new NAV price for the fund price currency (GBP). In case the amend transaction is set to No, the system will not correct the new price at transaction level.
For more details on field explanation, please refer ‘Fund Price Currencies Button’ section in Fund Rule’ screen in this User Manual.
4.10 Fund Price Maintenance Summary Screen
This section contains the following topics:
- Section 4.10.1, "Retrieving Record in the Fund Price Maintenance Summary Screen"
- Section 4.10.2, "Editing Fund Price Record"
- Section 4.10.3, "Viewing Fund Price Record "
- Section 4.10.4, "Deleting Fund Price Record"
- Section 4.10.5, "Authorizing Fund Price Record"
- Section 4.10.6, "Amending Fund Price Record "
- Section 4.10.7, "Authorizing Amended Fund Price Record"
- Section 4.10.8, "Copying Attributes"
4.10.1 Retrieving Record in the Fund Price Maintenance Summary Screen
You can retrieve a previously entered record in the Summary Screen, as follows:
- Invoke the ‘Fund Price Summary’ screen by typing ‘UTSFPRIC’ in the field at the top right corner
of the Application tool bar and clicking on the adjoining arrow button.
.

Specify any or all of the following details in the corresponding fields:
- The status of the record in the Authorization Status field. If you choose the ‘Blank Space’ option, then all the records are retrieved.
- The status of the record in the Open field. If you choose the ‘Blank Space’ option, then all records are retrieved
- Fund ID
- Effective Date
- Declared NAV/Lot
Click ‘Search’ button to view the records. All the records with the specified details are retrieved and displayed in the lower portion of the screen.
Note
You can also retrieve the individual record detail from the detail screen by querying in the following manner:
- Press F7
- Input the Fund ID
- Press F8
You can perform Edit, Delete, Amend, Authorize, Reverse, Confirm operations by selecting the operation from the Action list. You can also search a record by using a combination of % and alphanumeric value.
Example
You can search the record for Fund ID by using the combination of % and alphanumeric value as follows:-
- Search by A%: The system will fetch all the records whose Fund ID starts from Alphabet ‘A’. For example, AGC17, AGVO6, AGC74 and so forth.
- Search by %7: The system will fetch all the records whose Fund ID ends by numeric value’ 7’. For example, AGC17, GSD267, AGC77 and so forth.
- Search by %17%: The system will fetch all the records whose Fund ID contains the numeric value 17. For example, GSD217, GSD172, AGC17 and so forth.
4.10.2 Editing Fund Price Record
You can modify the details of Fund Price record that you have already entered into the system, provided it has not subsequently authorized. You can perform this operation as follows:
- Invoke the Fund Price Summary screen from the Browser.
- Select the status of the record that you want to retrieve for modification in the Authorized field. You can only modify records that are unauthorized. Accordingly, choose the unauthorized option.
- Specify any or all of the details in the corresponding fields to retrieve the record that is to be modified.
- Click ‘Search’ button. All unauthorized records with the specified details are retrieved and displayed in the lower portion of the screen.
- Double click the record that you want to modify in the list of displayed records. The Fund Price Detail screen is displayed.
- Select Unlock Operation from the Action list to modify the record. Modify the necessary information.
- Click Save to save your changes. The Fund Price Detail screen is closed and the changes made are reflected in the Fund Price Summary screen.
4.10.3 Viewing Fund Price Record
To view a record that you have previously input, you must retrieve the same in the Fund Price Summary screen as follows:
- Invoke the Fund Price Summary screen from the Browser.
- Select the status of the record that you want to retrieve for viewing in the Authorization Status field. You can also view all records that are either unauthorized or authorized only, by choosing the Unauthorized/ Authorized option.
- Specify any or all of the details of the record in the corresponding fields on the screen.
- Click ‘Search’ button. All records with the specified fields are retrieved and displayed in the lower portion of the screen.
- Double click the record that you want to view in the list of displayed records. The Fund Price Detail screen is displayed in View mode.
4.10.4 Deleting Fund Price Record
You can delete only unauthorized records in the system. To delete a record that you have previously entered:
- Invoke the Fund Price Summary screen from the Browser.
- Select the status of the record that you want to retrieve for deletion.
- Specify any or all of the details in the corresponding fields on the screen.
- Click ‘Search’ button. All records with the specified fields are retrieved and displayed in the lower portion of the screen.
- Double click the record that you want to delete in the list of displayed records. The Fund Price Detail screen is displayed.
- Select Delete Operation from the Action list. The system prompts you to confirm the deletion and the record is physically deleted from the system database.
4.10.5 Authorizing Fund Price Record
An unauthorized Fund Price record must be authorized in the system for it to be processed. To authorize a record:
- Invoke the Fund Price Summary screen from the Browser.
- Select the status of the record that you want to retrieve for authorization. Typically, choose the unauthorized option.
- Specify any or all of the details in the corresponding fields on the screen.
- Click ‘Search’ button. All records with the specified details that are pending authorization are retrieved and displayed in the lower portion of the screen.
- Double click the record that you wish to authorize. The Fund Price Detail screen is displayed. Select Authorize operation from the Action List.
When a checker authorizes a transaction, details of validation, if any, that were overridden by the maker of the transaction during the Save operation are displayed. If any of these overrides results in an error, the checker must reject the transaction.
4.10.6 Amending Fund Price Record
After a Fund Price record is authorized, it can be modified using the Unlock operation from the Action List. To make changes to a record after authorization:
- Invoke the Fund Price record Summary screen from the Browser.
- Select the status of the record that you want to retrieve for authorization. You can only amend authorized records.
- Specify any or all of the details in the corresponding fields on the screen.
- Click ‘Search’ button. All records with the specified details that are pending authorization are retrieved and displayed in the lower portion of the screen.
- Double click the record that you wish to authorize. The Fund Price Detail screen is displayed in amendment mode. Select Unlock operation from the Action List to amend the record.
- Amend the necessary information and click on Save to save the changes.
4.10.7 Authorizing Amended Fund Price Record
An amended Fund Price record must be authorized for the amendment to be made effective in the system. The authorization of amended records can be done only from Fund Manager Module and Agency Branch module.
The subsequent process of authorization is the same as that for normal transactions.
4.10.8 Copying Attributes
If you want to create a new Fund Price record with the same attributes of an existing maintenance, you can copy the attributes of an existing Fund Price record to a new one.
To copy the attributes:
- Retrieve the record whose attributes the new Fund Price record should inherit. You can retrieve the record through the Summary screen or through the F7-F8 operation explained in the previous sections of this chapter.
- Click on Copy
- Indicate the ID for the new Fund Price record. You can, however, change the details of the new maintenance.
4.11 Fund Preference Maintenance
This section contains the following topics:
- Section 4.11.1, "Invoking Fund Preference Maintenance Screen"
- Section 4.11.2, "Short Trade Applicable Transaction Tab"
- Section 4.11.3, "Aging Order Sequence Tab"
- Section 4.11.4, "Special Discount Disallowed Transactions Tab"
- Section 4.11.5, "Special Discount Applicable Load Entities Tab"
4.11.1 Invoking Fund Preference Maintenance Screen
You can maintain fund preferences using ‘Fund Preference Maintenance’ screen. For multi switch transactions, based on the maintenance the system will generate pseudo switch-In transactions at allotment or settlement of PS-Out leg.
You can invoke ‘Fund Preference Maintenance’ screen by typing ‘UTDFPMNT’ in the field at the top right corner of the Application tool bar and click the adjoining arrow.
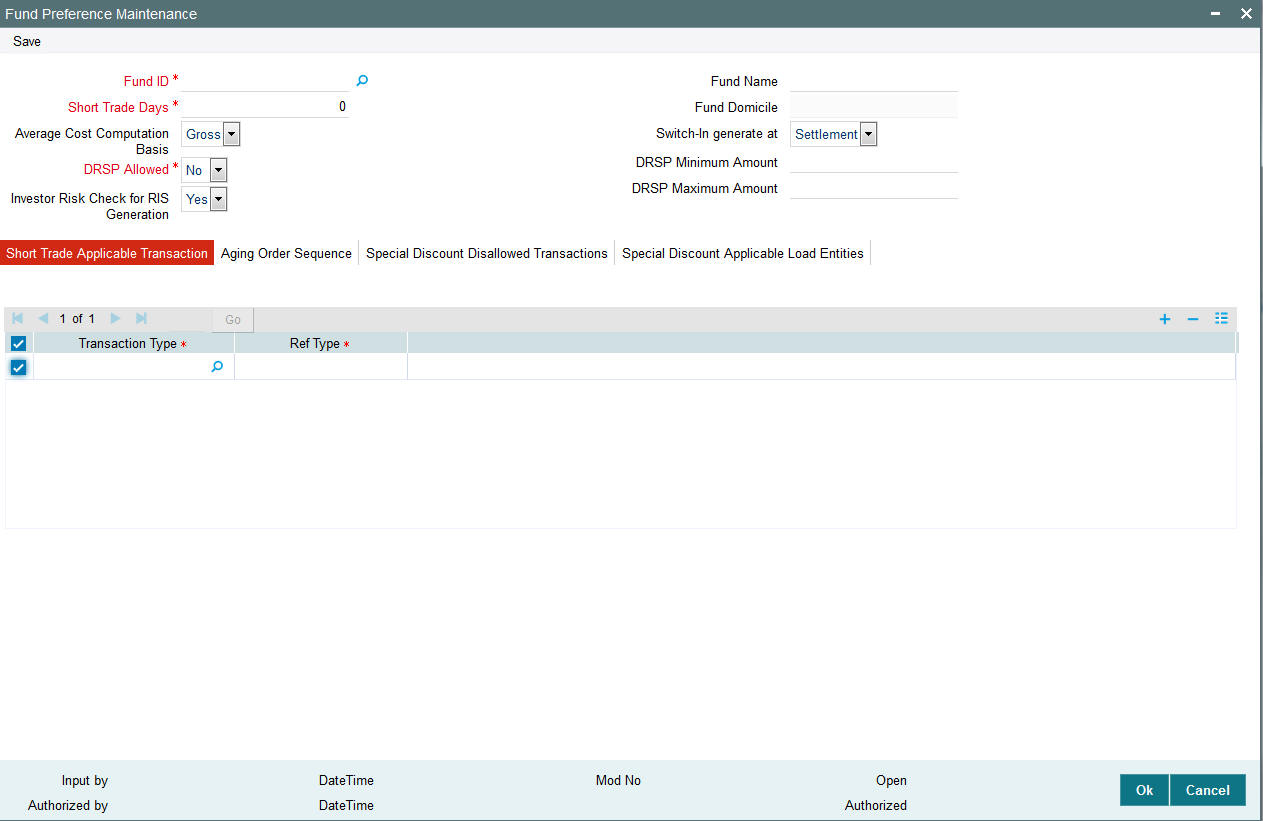
You can invoke the following details:
Fund ID
Alphanumeric; 6 Characters; Mandatory
Specify the fund ID for which the preference needs to be captured. Alternatively, you can select fund ID from the option list. The list displays all valid fund ID maintained in the system.
The system will validate the fund ID for the unique record.
Fund Name
Display
The system displays the name of the fund for the selected fund ID.
Fund Domicile
Display
The system defaults the fund domicile based on the fund ID selected.
Short Trade Days
Numeric; 22 Characters; Mandatory
Specify the short trade days.
Average Cost Computation Basis
Optional
Select the average cost computation basis from the drop-down list. The list displays the following values:
- Net - If you select this option, the system will use net amount in average cost computation.
- Gross - If you select this option, the system will use gross amount in average cost computation.
By default, Net option will be selected.
For off-shore fund, the system will not consider the values selected in this field for average cost computation. For off-shore fund, it is always Gross Amount.
DRSP Allowed
Mandatory
Select if DRSP is allowed for a fund or not from the drop-down list. The list displays the following values:
- Yes
- No
Investor Risk Check for RIS Generation
Optional
Select if investor risk is checked for RIS generation from the drop-down list. The list displays the following values:
- Yes
- No
Switch-In generate at
Optional
Select the pseudo switch-in transaction generate at option from the drop-down list. The list displays the following values:
- Settlement
- Allotment
DRSP Minimum Amount
Numeric; 18 Characters; Optional
Specify the DRSP minimum amount required for a DRSP transaction.
DRSP Maximum Amount
Numeric; 18 Characters; Optional
Special the DRSP maximum amount allowed for a DRSP transaction.
4.11.2 Short Trade Applicable Transaction Tab
You can maintain transaction details applicable for short trade using ‘Short Trade Applicable Transaction’ tab in ‘Fund Preference Maintenance’ screen.
You can specify the following details:
Transaction Type
Alphanumeric; 2 Characters; Mandatory
Specify the transaction type. Alternatively, you can select transaction type from option list. The list display all valid transaction type maintained in the system.
Ref Type
Alphanumeric; 3 Characters; Mandatory
Specify the reference type. Alternatively, you can select reference type from option list. The list display all valid reference type maintained in the system.
The maintained Transaction type and Ref type alone will be applicable for short trade load. You need to map only the applicable inflow transaction type.
4.11.3 Aging Order Sequence Tab
You can maintain aging order sequence details applicable for short trade using ‘Aging Order Sequence’ tab in ‘Fund Preference Maintenance’ screen.
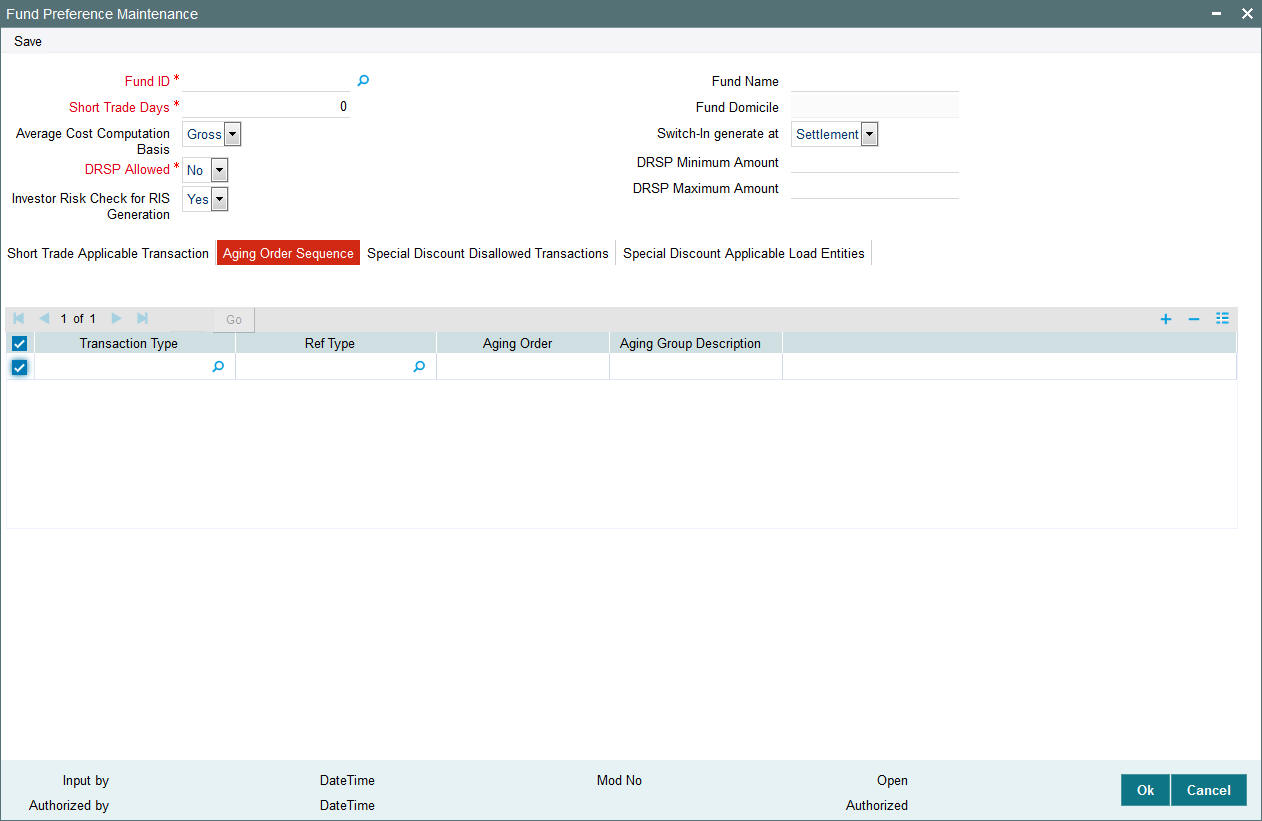
You can specify the following details:
Transaction Type
Alphanumeric; 2 Characters; Optional
Specify the transaction type. Alternatively, you can select transaction type from option list. The list display all valid transaction type maintained in the system.
Ref Type
Alphanumeric; 3 Characters; Optional
Specify the reference type. Alternatively, you can select reference type from option list. The list display all valid reference type maintained in the system.
Ageing Order
Numeric; 22 Characters; Optional
Specify the ageing order.
Ageing Group Description
Alphanumeric; 20 Characters; Optional
Specify the description for the selected ageing order.
Aging Sequence in Fund Preference Maintenance is mandatory only for the Funds for which Aging Logic is maintained as USERMNTFIFO.
If you try to maintain aging sequence for funds with Aging Logic different than USERMNTFIFO, the system will display an error message.
Fund Preference maintenance is applicable for all rule effective dates for that fund.
The system will perform a mandatory pre-EOD check to validate the availability of authorized active fund preference record for all the funds.
4.11.4 Special Discount Disallowed Transactions Tab
You can disallow special discounts for transactions applicable for short trade using ‘Special Discount Disallowed Transactions’ tab in ‘Fund Preference Maintenance’ screen.
![]()
Transaction Type
Alphanumeric; 3 Characters; Optional
Specify the transaction type for which the special discount is to be disallowed. Alternatively, you can select transaction type from option list. The list display all valid transaction type maintained in the system.
Ref Type
Display
The system displays the reference type for which the special discount is to be disallowed.
Note
If you have not maintained Special Discount Disallowed Transaction, then the system will apply the special discount for all the transaction type.
4.11.5 Special Discount Applicable Load Entities Tab
You can maintain special discounts for load entities based on From entity type and To entity type using ‘Special Discount Applicable Load Entities’ tab in ‘Fund Preference Maintenance’ screen.

You can specify the following details:
From Entity Type
Alphanumeric; 3 Characters; Optionals
Specify the From entity type details for which the special discounts to be applied. Alternatively, you can also select From Entity Type from the option list. The list displays all valid entity types maintained in the system.
From Entity Type Description
Display
The system displays description for the selected From entity type.
To Entity Type
Alphanumeric; 3 Characters; Optionals
Specify the To entity type details for which the special discounts to be applied. Alternatively, you can also select To Entity Type from the option list. The list displays all valid entity types maintained in the system.
To Entity Type Description
Display
The system displays description for the selected To entity type.
From entity and To entity values are to be valid values as in the system.
If Special Discount Applicable Load Entities are not maintained, then the system will apply special discounts for all loads.
4.11.5.1 Calculating Average Cost
All fund will use Net/ Gross amount of the transaction. Net amount or Gross amount will be set at fund level in ‘Fund Preference Maintenance’ screen.
Off- shore fund will use weighted average method to calculate average cost and use Net/Gross amount of the transaction.
Only the current unit holder units holding will be shown.
On-Shore Average Cost (Transaction Cost Level)
The system will calculate the average cost for on-shore fund based on Net/ Gross amount.
For showing the unit holder’s Unit Holding Statement, units will be mainly classified into two group as follows:
- Subscription – All Inflow transaction (including Reinvestment Transaction) excluding RSP and DRSP
- RSP – RSP and DRSP
Total cost of subscription is calculated as follows:
- Cost of all inflow transactions excluding Regular saving Plan (RSP/ DRSP).
- Current cost will be arrived by sum of net/ gross amount of inflow transactions minus all the linked out flow units * NAV (Unit Price of the allotted units).
Total cost of RSP is calculated as follows:
- Cost of all Regular saving plan RSP / DRSP.
- Current cost will be arrived by sum of net/Gross amount of RSP / DRSP transactions minus all the linked out flow units * NAV (Unit Price of the allotted units).
where,
NAV is linked inflow transactions unit price at the time of allocation.
Total number of subscription units is the current unit balance of all inflow transactions units excluding Regular Saving Plan (RSP).
Total number of RSP units is the current unit balance of all Regular Saving Plans.
The system will calculate the average cost per unit as follows:
((Total cost of subscription) + (Total cost of RSP))
((Total no. of subscription units) + (Total no. of RSP units))
In case of Transfer Gross/ Net Amount, the system will consider the cost of the transfer-in units based on the preference of the Transfer out Leg.
In case of transfer, you need to use Base Cost to enter NAV for the change of beneficiary.
- In this case cost of the Transfer In will be Transfer in Units multiplied by NAV, as entered in Base cost
- For any out flow transaction linking this transfer, cost will be arrived by linked units multiplied by the Base Cost.
For 100% transfer, you should capture 2 transactions one for each FEL and CDSC. For Fund Merger, the system will generate 2 Normal switch transactions one each for FEL and CDSC.
For Fund Merger cost of the switch-in fund units will be the units that got switched In multiplied by the NAV as of that date.
Off-Shore Average Cost (Weighted Average Cost)
Calculation of average cost for off-shore fund will be based on Net/ Gross amount. The system will calculate the average cost based on the weighted average method.
For showing the unit holder’s unit holding statement units will be mainly classified into two group as follows:
- Subscription – All Inflow transaction (including Reinvestment Transaction) excluding RSP and DRSP
- RSP – RSP and DRSP
Total cost of subscription is calculated as total sum of Gross amount of all inflow transactions excluding Regular Saving Plan (RSP).
Total cost of RSP is calculated as total sum of Gross amount of all inflow transaction of Systematic Investments.
Total Units is the sum all inflow units corresponding to Subscription or RSP
Average cost of subscription is calculated as (Total cost of subscription)/ (Total sum of Inflow units for subscription)
Average cost of RSP is calculated as (Total cost of RSP)/ (Total sum of Inflow units for RSP).
In case of Transfer without Base Cost entered, the system will consider the Gross/ Net Amount based on preference of the Transfer out Leg as cost of the Transfer In units.
The system uses Base Cost in Transfer screen to capture NAV (the cost of transferee refers to the market value stated on the tax certificate).
In case of Transfer or Fund Merger, the system will classify all Transfer In units or Switch In units as Subscription units irrespective of the out units are from Subscription or RSP.
The system will calculate the capital gain or loss for all the Outflow transactions during allocation for offshore funds only.
The client country flag ‘PLCOMPUTE’ should be enabled to compute capital gain/ loss based on below unit classifications
- Pre 2009 – Lump sum
- Pre 2009 – RSP/DRSP
- Post 2009 - Lump sum
- Post 2009 - RSP/DRSP
Linked Inflow Units * (OutFlow Transaction NAV – Average Cost of that Linked Inflow Lot)
This will be happening during allocation.
4.11.5.2 Aging Logic
Aging sequence is common for all investor account type including Nominee account type.
Aging Sequence in Fund Preference Maintenance is mandatory only for the Funds for which Aging Logic is maintained as USERMNTFIFO.
If you try to maintain aging sequence for funds with Aging Logic different than USERMNTFIFO, the system will display an error message.
In USERMNTFIFO Aging Policy, link transactions are aged out based on the following values:
- Inflow Units Type (FEL/ CDSC)
- Transaction Currency
- Transaction Type
- Reftype
- Transaction Date
- Transaction Number
The aging order will have 5 bits namely,
- Input unit type
- Transaction Currency
- Transaction Date
- Short Trade bit
- Aging Order
For On-shore fund the system will use the following logic to derive the 5 bit Aging order:
- Input Unit Type: It will be set to 1 or 2 based on the out flow transactions
unit type. For FEL based out flow, all Transactions with FEL unit type
will be marked as 1 and 2 for CDSC.
- For CDSC based out flow transaction, the system marks all transaction with CDSC unit type as 1 and 2 FEL.
- In case of outflow transaction, the system does not specify the unit type than FEL and CDSC will be given assigned same value 1.
- Transaction date: All transaction will be marked as 1
- Transaction Currency: All transaction will be marked as 1
- Short Trade bit will be set to 1 if the transaction date is more than short trade period. It will be set to 2 if the transaction date is within short trade period.
- Aging Order: The system populates the aging order as per the Aging maintenance done for on-shore fund.
Example
Txn Type |
Ref Type |
5 Bit value |
2 |
2 |
1 |
2 |
PS |
1 |
2 |
RE |
1 |
2 |
41 |
3 |
2 |
F1 |
2 |
2 |
F2 |
2 |
For Off-shore fund, the system will use the following logic to derive the 5 bit aging order:
- Input Unit Type: The system will set all transaction to 1
- Transaction Currency: The system will set this based on the Outflow
Transaction currency. Outflow transaction currency is same as inflow
transaction currency, it be set to 1 else set to 2.
- For Block Transaction this bit will be set to 1 for all transactions irrespective of Transaction currency.
- Transaction date: The system will mark the transaction date less
than or equal to 31-DEC-2009 as 1. The system will set transaction date
greater than 31-DEC-2009 to 2.
Param Code
Param Description
Max Length (Param Value)
Maintainable
Param Value
TXNCUTTOFFDATE
Off Shore Transaction cutoff date
12
Yes
31-Dec-09
The system will set short trade bit to 1, if the transaction date is more than short trade period. It will be set to 2 if the transaction date is within short trade period.
Example:
Txn Type |
Ref Type |
4 Bit value |
ALL |
ALL |
1 |
2 |
41 |
2 |
This aging new bit Aging Order will be used in the order clause alone with Transaction date and Transaction Number.
For On-shore fund
- The system will capture all the out flow transaction with FEL or CDSC units type.
- If the units type is not been specified system will default it to NULL. All transactions FEL and CDSC will be redeemed as per the logic maintained in Aging Sequence Maintenance (UTDAGSEQ). In case of block transaction no unit’s type will be specified.
- Based on the unit type, the system will process the specified Aging of units.
- For an outflow transaction if the unit type is FEL then all the linked transaction with Unit Type FEL will be aged out first as per the Aging logic maintained in Aging Sequence Maintenance (UTDAGSEQ) and vice versa in case of CDSC.
- If unit type is not specified then inflow transaction unit type will not be considered for Aging. It follows the Aging sequence maintained.
For Off-shore Fund
- The system will capture all the out flow transaction with transaction currency.
- Aging will happen based on the transaction currency of the outflow transaction.
- If the outflow transaction currency is Installed Entity Base Currency - TWD then all the inflow transaction with TWD as transaction currency will be aged out first as per the Aging logic maintained in Aging Sequence Maintenance (UTDAGSEQ).
- If the outflow transaction currency is USD or any other currency other than Installed Entity Base Currency TWD then all the inflow transaction with currency other than TWD, Installed Entity Base Currency, as transaction currency will be aged out first as per the Aging logic maintained in Aging Sequence Maintenance (UTDAGSEQ).
In case of block transaction, the transaction Aging will not consider Transaction currency. It will link transaction as per the Aging sequence maintained.
Example of deriving AgingOrder:
Txn Number |
Fund Ccy |
Transaction Date |
Units Type |
Units |
RED02 |
USD |
21-Aug-16 |
FEL |
20 |
On-Shore
Txn Number |
Fund Ccy |
Transaction Date |
Units Type |
TXN TYPE |
REF TYPE |
Units |
AgingOrder (RED02) |
SUB01 |
USD |
12-Aug-08 |
FEL |
2 |
2 |
10 |
11111 1st Bit: 1- out flow for FEL so it is set to 1 2nd and 3rd Bit: 1 since this are not applicable for on-shore fund 4th Bit: Short Trade Bit 5th Bit: 1 for this transaction aging order derived is 1 |
SUB02 |
USD |
12-Aug-08 |
FEL |
2 |
41 |
10 |
11113 1st Bit: 1- out flow for FEL so it is set to 1 2nd and 3rd Bit: 1 since this are not applicable for on-shore fund 4th Bit: Short Trade Bit 5th Bit: for this transaction aging order derived is 3 |
On - shore: Unity type not specified
Transaction Number |
Fund Currency |
Transaction Date |
Units Type |
Units |
RED03 |
USD |
21-Aug-16 |
NULL |
50 |
Txn Number |
Fund Ccy |
Transaction Date |
Units Type |
TXN TYPE |
REF TYPE |
Units |
AgingOrder (RED03) |
SUB01 |
USD |
12-Aug-08 |
FEL |
2 |
2 |
10 |
11111 |
1st Bit: 1- since Out flow is set to NULL |
|||||||
2nd and 3rd Bit: 1 since this are not applicable for on-shore fund |
|||||||
4th Bit: 1 – trade is not within short trade |
|||||||
5th Bit: transaction aging order derived is 1 |
|||||||
SUB21 |
USD |
12-Nov-08 |
CDSC |
2 |
2 |
10 |
11111 |
1st Bit: 1- since Out flow is set to NULL |
|||||||
2nd and 3rd Bit: 1 since this are not applicable for on-shore fund |
|||||||
4th Bit: 1 – trade is not within short trade |
|||||||
5th Bit: transaction aging order derived is 1 |
|||||||
SUB14 |
USD |
20-Aug-16 |
CDSC |
2 |
2 |
10 |
11121 |
1st Bit: 1- since Out flow is set to NULL |
|||||||
2nd and 3rd Bit: 1 since this are not applicable for on-shore fund |
|||||||
4th Bit: 2 – trade is within short trade |
|||||||
5th Bit: transaction aging order derived is 1 |
|||||||
SUB15 |
USD |
20-Aug-16 |
FEL |
2 |
2 |
10 |
11121 |
1st Bit: 1- since Out flow is set to NULL |
|||||||
2nd and 3rd Bit: 1 since this are not applicable for on-shore fund |
|||||||
4th Bit: 2 – trade is within short trade |
|||||||
5th Bit: transaction aging order derived is 1 |
|||||||
SUB96 |
USD |
15-May-16 |
CDSC |
2 |
F1 |
10 |
11112 |
1st Bit: 1- since Out flow is set to NULL |
|||||||
2nd and 3rd Bit: 1 since this are not applicable for on-shore fund |
|||||||
4th Bit: trade is not within short trade |
|||||||
5th Bit: transaction aging order derived is 2 |
Off-Shore Fund Base Currency: USD
Txn Number |
Txn Ccy |
Transaction Date |
Units Type |
Units |
RED01 |
USD |
21-Aug-16 |
CDSC |
50 |
Txn Number |
Txn Ccy |
Transaction Date |
Units Type |
TXN TYPE |
REF TYPE |
Units |
AgingOrder (RED02) |
SUB01 |
TWD |
12-Aug-08 |
CDSC |
2 |
2 |
10 |
11111 |
1st Bit: will be always set 1 |
|||||||
2nd Bit: 2 transaction currency TWD and out flow transaction currency TWD |
|||||||
3rd Bit: 1 transaction date is before 31-Dec-2009 |
|||||||
4th Bit: Short Trade Bit 1 |
|||||||
5th Bit: 1 for this transaction aging order derived is 1 |
|||||||
SUB23 |
TWD |
12-Nov-08 |
CDSC |
2 |
41 |
10 |
11112 |
1st Bit: will be always set 1 |
|||||||
2nd Bit : 2 transaction currency TWD and out flow transaction currency TWD |
|||||||
3rd Bit: 1 transaction date is before 31-Dec-2009 |
|||||||
4th Bit: Short Trade Bit |
|||||||
5th Bit: 2 for this transaction aging order derived is 2 |
|||||||
SUB62 |
USD |
1-Jan-10 |
CDSC |
2 |
2 |
10 |
12211 |
1st Bit: will be always set 1 |
|||||||
2nd Bit: 2 transaction currency USD and out flow transaction currency are TWD |
|||||||
3rd Bit: 2 transaction date is after 31-Dec-2009 |
|||||||
4th Bit: Short Trade Bit 1 |
|||||||
5th Bit: for this transaction aging order derived is 1 |
|||||||
SUB63 |
TWD |
1-Jan-10 |
CDSC |
2 |
2 |
10 |
11211 |
1st Bit: will be always set 1 |
|||||||
2nd Bit: 1 transaction currency TWD and out flow transaction currency are TWD |
|||||||
3rd Bit: 2 transaction date is after 31-Dec-2009 |
|||||||
4th Bit: Short Trade Bit |
|||||||
5th Bit: 1 for this transaction aging order derived is 1 |
|||||||
SUB82 |
USD |
11-Apr-16 |
CDSC |
2 |
41 |
10 |
12212 |
1st Bit: will be always set 1 |
|||||||
2nd Bit: 2 transaction currency USD and out flow transaction currency are TWD |
|||||||
3rd Bit 2 transaction date is after 31-Dec-2009 |
|||||||
4th Bit: Short Trade Bit |
|||||||
5th Bit: 2 for this transaction aging order derived is 2 |
On-shore ageing logic for short trade period is as follows:
- Step 1: First the system will age out all the transactions, which are not marked as Short trade and transactions for which short trade penalty are not applicable, as per the Aging sequence maintained.
- Step 2: If there are remaining units to be redeemed after step 1, the system will link all the transactions which are marked as Short Trade as per the Aging sequence maintained.
- Marking and resetting the Short trade transaction are internal to process.
On-shore ageing logic for short trade Units is as follows:
- The system will age out all the transactions as per the Aging sequence maintained. In this case system will not consider transactions based on Short trade period.
Off-shore ageing logic for short trade is as follows:
- Holdings before specific period as maintained in business:
- Subscription
- RSP
- Holdings after specific period as maintained in business:
- Subscription
- RSP
4.12 Fund Preference Summary Screen
This section contains the following topics:
- Section 4.12.1, "Retrieving a Record in Fund Preference Summary Screen"
- Section 4.12.2, "Editing Fund Preference Record"
- Section 4.12.3, "Viewing Fund Preference Record"
- Section 4.12.4, "Deleting Fund Preference Record"
- Section 4.12.5, "Authorizing Fund Preference Record"
- Section 4.12.6, "Amending Fund Preference Record"
- Section 4.12.7, "Authorizing Amended Fund Preference Record"
4.12.1 Retrieving a Record in Fund Preference Summary Screen
You can retrieve a previously entered record in the Summary Screen, as follows:
Invoke the ‘Fund Preference Summary’ screen by typing ‘UTSFPMNT’ in the field at the top right corner of the Application tool bar and clicking on the adjoining arrow button and specify any or all of the following details in the corresponding details.

- The status of the record in the Authorization Status field. If you choose the ‘Blank Space’ option, then all the records are retrieved.
- The status of the record in the Open field. If you choose the ‘Blank Space’ option, then all records are retrieved
- Fund ID
Click ‘Search’ button to view the records. All the records with the specified details are retrieved and displayed in the lower portion of the screen.
Note
You can also retrieve the individual record detail from the detail screen by querying in the following manner:
- Press F7
- Input Fund ID
- Press F8
You can perform Edit, Delete, Amend, Authorize, Reverse, Confirm operations by selecting the operation from the Action list. You can also search a record by using a combination of % and alphanumeric value
4.12.2 Editing Fund Preference Record
You can modify the details of fund preference record that you have already entered into the system, provided it has not subsequently authorized. You can perform this operation as follows:
- Invoke the Fund Preference Summary screen from the Browser.
- Select the status of the record that you want to retrieve for modification in the Authorization Status field. You can only modify records that are unauthorized. Accordingly, choose the Unauthorized option.
- Specify any or all of the details in the corresponding fields to retrieve the record that is to be modified.
- Click ‘Search’ button. All unauthorized records with the specified details are retrieved and displayed in the lower portion of the screen.
- Double click the record that you want to modify in the list of displayed records. The Fund Preference Detail screen is displayed.
- Select Unlock Operation from the Action list to modify the record. Modify the necessary information.
Click Save to save your changes. The Fund Preference screen is closed and the changes made are reflected in the Fund Preference Summary screen.
4.12.3 Viewing Fund Preference Record
To view a record that you have previously input, you must retrieve the same in the Fund Preference Summary screen as follows:
- Invoke the Fund Preference Summary screen from the Browser.
- Select the status of the record that you want to retrieve for viewing in the Authorization Status field. You can also view all records that are either unauthorized or authorized only, by choosing the unauthorized / Authorized option.
- Specify any or all of the details of the record in the corresponding fields on the screen.
- Click ‘Search’ button. All records with the specified fields are retrieved and displayed in the lower portion of the screen.
- Double click the record that you want to view in the list of displayed records. The Fund Preference Detail screen is displayed in View mode.
4.12.4 Deleting Fund Preference Record
You can delete only unauthorized records in the system. To delete a record that you have previously entered:
- Invoke the Fund Preference Summary screen from the Browser.
- Select the status of the record that you want to retrieve for deletion.
- Specify any or all of the details in the corresponding fields on the screen.
- Click ‘Search’ button. All records with the specified fields are retrieved and displayed in the lower portion of the screen.
- Double click the record that you want to delete in the list of displayed records. The Fund Preference Detail screen is displayed.
- Select Delete Operation from the Action list. The system prompts you to confirm the deletion and the record is physically deleted from the system database.
4.12.5 Authorizing Fund Preference Record
- An unauthorized Fund Preference record must be authorized in the system for it to be processed. To authorize a record:
- Invoke the Fund Preference Summary screen from the Browser.
- Select the status of the record that you want to retrieve for authorization. Typically, choose the unauthorized option.
- Specify any or all of the details in the corresponding fields on the screen.
- Click ‘Search’ button. All records with the specified details that are pending authorization are retrieved and displayed in the lower portion of the screen.
- Double click the record that you wish to authorize. The Fund Preference Detail screen is displayed. Select Authorize operation from the Action List.
When a checker authorizes a record, details of validation, if any, that were overridden by the maker of the record during the Save operation are displayed. If any of these overrides results in an error, the checker must reject the record.
4.12.6 Amending Fund Preference Record
After a Fund Preference record is authorized, it can be modified using the Unlock operation from the Action List. To make changes to a record after authorization:
- Invoke the Fund Preference Summary screen from the Browser.
- Select the status of the record that you want to retrieve for authorization. You can only amend authorized records.
- Specify any or all of the details in the corresponding fields on the screen.
- Click ‘Search’ button. All records with the specified details that are pending authorization are retrieved and displayed in the lower portion of the screen.
- Double click the record that you wish to authorize. The Fund Preference Detail screen is displayed in amendment mode. Select Unlock operation from the Action List to amend the record.
- Amend the necessary information and click on Save to save the changes
4.12.7 Authorizing Amended Fund Preference Record
An amended Fund Preference record must be authorized for the amendment to be made effective in the system. The authorization of amended records can be done only from Fund Manager Module and Agency Branch module.
The subsequent process of authorization is the same as that for normal transactions.
4.13 Short Trade Counter Details Screen
This section contains the following topics:
4.13.1 Invoking Short Trade Counter Details Screen
You can view short trade counter at unit holder fund level using ‘Short Trade Counter Details’ screen. You can invoke this screen by typing ‘UTDSTCNT’ in the field at the top right corner of the Application tool bar and clicking on the adjoining arrow button.

You can specify the following details:
Unit Holder ID
Alphanumeric; 12 Characters; Mandatory
Specify the unit holder ID. Alternatively, you can select unit holder ID from the option list. The list displays all the unit holder ID maintained in the system.
You can also click ‘Find UH’ button to invoke ‘UnitHolder Find Options’ screen. You can search for the unit holder ID from this screen.
Unit Holder Name
Display
The system displays the name of the unit holder for the selected unit holder ID.
From Date
Date Format; Mandatory
Select the From Date from the adjoining calendar.
To Date
Date Format; Mandatory
Select the To Date from the adjoining calendar.
After specifying the necessary details, click ‘Execute Query’ option. the system displays the fund ID, fund name and short trade count for the given criteria.
The system will display the fund with count greater than zero. Also, the system will count only the transaction for which short trade are applicable.
You can query the details of the transaction for which short trade are applicable. Clicking ‘View’ button, the system displays the outflow transaction for which short trade are applicable.

You can specify the following details:
Transaction Number
Display
The system displays the transaction number for which the short trade transactions happened.
Transaction Date
Display
The system displays the transaction date on which the short trade transactions occurred.
Short Trade Applicable
Optional
Select if the short trade is applicable or not from the drop-down list. The list displays the following values:
- Yes
- No
By default, the transaction will be set to ‘Yes’.
If you change the status to ‘No’, the system will not perform any validation.
Once the Short Trade Applicable field is set to No, the system will reset the Short Trade counter while re-querying the given criteria.
Marking the Short Trade Applicable to No, the system will not reverse or recalculate Short trade penalties.
Remarks
Alphanumeric; 255 Characters; Optional
Specify remarks, if any on changing the short trade to Yes or vice versa.
4.13.2 Batch Process
The system will increment the unit holder fund level short trade counter during successful outflow allocation process, when the linked transaction meets any one of the following criteria.
- If the link inflow transaction type is one of the applicable transactions type for penalty and if the linked transaction date plus Short Trade Days, as maintained in Fund Preference Maintenance (UTDFPMNT), is less than or equal to out flow transaction date
- If short trade units specified in the out flow transactions. This case is applicable for Nominee account type unit holder transactions.
- Irrespective of number of short trade transaction linked to an outflow transaction it will be counted as one short trade transaction.
During the reversal of outflow transaction linked to short trade, corresponding unit holder fund counter will be decremented.
4.14 Investor Fund Risk Rating Mapping
This section contains the following topics:
- Section 4.14.1, "Mapping Investor Fund Risk Rating Screen"
- Section 4.14.2, "Invoking Investor Fund Risk Rating Mapping Screen"
4.14.1 Mapping Investor Fund Risk Rating Screen
You can capture investor risk rating to fund risk rating mapping. This mapping will be done at an AMC level. The system will validate transactions wherever applicable based on this mapping to check if an investor can invest into a selected fund or not.
You can configure investor risk rating and fund risk rating in ‘Parameter Setup’ screen where ‘Param Value’ will be numeric ranging from 0-100 with 1 as the lowest risk rating and 100 as the highest risk rating.
If risk rating for an investor is 0 (Not Applicable), the validation for investor fund risk rating will not be applicable. Param Value ‘0’ should not be used for any other risk rating maintenance.
Note
You can configure Fund risk level and investor risk level at param maintenance for FUNDRISKPROFILE and INVRISKPROFILE param codes respectively. The system will validate the fund risk for an investor in ‘Investor Fund Risk Rating Mapping’ screen.
The parameters for investor and fund risk ratings are as follows:
Investor Risk Rating
Param Value |
Description |
0 |
Not Applicable |
10 |
Low (Conservative) |
20 |
Medium (Moderate) |
30 |
High (Aggressive) |
Fund Risk Rating
Param Value |
Description |
10 |
Risk Level 1 |
20 |
Risk Level 2 |
30 |
Risk Level 3 |
40 |
Risk Level 4 |
50 |
Risk Level 5 |
You can add more risk rating levels to Investor Risk Rating and Fund Risk Rating parameter maintenance as required.
Example for Parameter maintenance:
Investor risk rating
Param Value |
Description |
10 |
Low (Conservative) |
20 |
Medium (Moderate) |
30 |
High (Aggressive) |
Fund Risk Rating
Param Value |
Description |
10 |
Risk Level 1 |
20 |
Risk Level 2 |
30 |
Risk Level 3 |
40 |
Risk Level 4 |
50 |
Risk Level 5 |
Mapping is done as follows:
Param Value |
Description |
10 |
Risk Level 1 |
20 |
Risk Level 2 |
30 |
Risk Level 3 |
40 |
Risk Level 4 |
50 |
Risk Level 5 |
4.14.2 Invoking Investor Fund Risk Rating Mapping Screen
You can capture investor risk rating to fund risk rating mapping using ‘Investor Fund Risk Rating Mapping’ screen. You can invoke this screen by typing ‘UTDINFRR’ in the field at the top right corner of the Application tool bar and clicking on the adjoining arrow button.

You can invoke the following values:
Entity Type
Optional
Select the entity type from the drop-down list. the list displays the following values:
- AMC
- Product ID
AMC/ Product ID
Alphanumeric; 12 Characters; Mandatory
Specify the AMC ID for which the mapping is done. Alternatively, you can select AMC ID from the option list. The list displays all valid AMC ID maintained in the system.
Mapping
Investor Risk Rating
Alphanumeric; 16 Characters; Mandatory
Specify the investor risk rating level for which the mapping to be done. Alternatively, you can select the investor risk rating level from the option list. The list displays all valid investor risk rating maintained in the system.
Risk Rating From
Alphanumeric; 16 Characters; Mandatory
Specify the lowest fund risk rating for the selected investor risk rating eligible to invest. Alternatively, you can select the lowest fund risk rating from the option list. The list displays all valid lowest fund risk rating maintained in the system.
Risk Rating To
Alphanumeric; 16 Characters; Mandatory
Specify the highest fund risk rating for the selected investor risk rating eligible to invest. Alternatively, you can select the highest fund risk rating from the option list. The list displays all valid highest fund risk rating maintained in the system.
4.15 Investor Fund Risk Mapping Summary
This section contains the following topics:
- Section 4.15.1, "Retrieving a Record in Investor Fund Risk Mapping Summary Screen"
- Section 4.15.2, "Editing Investor Fund Risk Rating Mapping Record"
- Section 4.15.3, "Viewing Investor Fund Risk Rating Mapping Record "
- Section 4.15.4, "Deleting Investor Fund Risk Rating Mapping Record"
- Section 4.15.5, "Authorizing Investor Fund Risk Rating Mapping Record "
- Section 4.15.6, "Amending Investor Fund Risk Rating Mapping Record "
- Section 4.15.7, "Authorizing Amended Investor Fund Risk Rating Mapping Record "
4.15.1 Retrieving a Record in Investor Fund Risk Mapping Summary Screen
You can retrieve a previously entered record in the Summary Screen, as follows:
You can invoke the ‘Investor Fund Risk Rating Mapping Discount Summary’ screen by typing ‘UTSINFRR’ in the field at the top right corner of the Application tool bar and clicking on the adjoining arrow button and specify any or all of the following details in the corresponding details.

- The status of the record in the Authorization Status field. If you choose the ‘Blank Space’ option, then all the records are retrieved.
- The status of the record in the Open field. If you choose the ‘Blank Space’ option, then all records are retrieved
- AMC/Product ID
- Entity Type
Click ‘Search’ button to view the records. All the records with the specified details are retrieved and displayed in the lower portion of the screen.
Note
You can also retrieve the individual record detail from the detail screen by querying in the following manner:
- Press F7
- Input the AMC/Product ID
- Press F8
You can perform Edit, Delete, Amend, Authorize, Reverse, Confirm operations by selecting the operation from the Action list. You can also search a record by using a combination of % and alphanumeric value.
Note
The status field in the Records pane of the summary screen displays the bulk operation results.
4.15.2 Editing Investor Fund Risk Rating Mapping Record
You can modify the details of investor fund risk rating mapping record that you have already entered into the system, provided it has not subsequently authorized. You can perform this operation as follows:
- Invoke the Investor Fund Risk Rating Mapping Summary screen from the Browser.
- Select the status of the record that you want to retrieve for modification in the Authorization Status field. You can only modify records that are unauthorized. Accordingly, choose the Unauthorized option.
- Specify any or all of the details in the corresponding fields to retrieve the record that is to be modified.
- Click ‘Search’ button. All unauthorized records with the specified details are retrieved and displayed in the lower portion of the screen.
- Double click the record that you want to modify in the list of displayed records. The Investor Fund Risk Rating Mapping Detail screen is displayed.
- Select Unlock Operation from the Action list to modify the record. Modify the necessary information.
Click Save to save your changes. The Investor Fund Risk Rating Mapping Detail screen is closed and the changes made are reflected in the Investor Fund Risk Rating Mapping Summary screen.
4.15.3 Viewing Investor Fund Risk Rating Mapping Record
To view a record that you have previously input, you must retrieve the same in the Investor Fund Risk Rating Mapping Summary screen as follows:
- Invoke the Investor Fund Risk Rating Mapping Summary screen from the Browser.
- Select the status of the record that you want to retrieve for viewing in the Authorization Status field. You can also view all records that are either unauthorized or authorized only, by choosing the unauthorized / Authorized option.
- Specify any or all of the details of the record in the corresponding fields on the screen.
- Click ‘Search’ button. All records with the specified fields are retrieved and displayed in the lower portion of the screen.
- Double click the record that you want to view in the list of displayed records. The Investor Fund Risk Rating Mapping Detail screen is displayed in View mode.
4.15.4 Deleting Investor Fund Risk Rating Mapping Record
You can delete only unauthorized records in the system. To delete a record that you have previously entered:
- Invoke the Investor Fund Risk Rating Mapping Summary screen from the Browser.
- Select the status of the record that you want to retrieve for deletion.
- Specify any or all of the details in the corresponding fields on the screen.
- Click ‘Search’ button. All records with the specified fields are retrieved and displayed in the lower portion of the screen.
- Double click the record that you want to delete in the list of displayed records. The Investor Fund Risk Rating Mapping Detail screen is displayed.
- Select Delete Operation from the Action list. The system prompts you to confirm the deletion and the record is physically deleted from the system database.
4.15.5 Authorizing Investor Fund Risk Rating Mapping Record
- An unauthorized Investor Fund Risk Rating Mapping record must be authorized in the system for it to be processed. To authorize a record:
- Invoke the Investor Fund Risk Rating Mapping Summary screen from the Browser.
- Select the status of the record that you want to retrieve for authorization. Typically, choose the unauthorized option.
- Specify any or all of the details in the corresponding fields on the screen.
- Click ‘Search’ button. All records with the specified details that are pending authorization are retrieved and displayed in the lower portion of the screen.
- Double click the record that you wish to authorize. The Investor Fund Risk Rating Mapping Detail screen is displayed. Select Authorize operation from the Action List.
When a checker authorizes a record, details of validation, if any, that were overridden by the maker of the record during the Save operation are displayed. If any of these overrides results in an error, the checker must reject the record.
4.15.6 Amending Investor Fund Risk Rating Mapping Record
After a Investor Fund Risk Rating Mapping record is authorized, it can be modified using the Unlock operation from the Action List. To make changes to a record after authorization:
- Invoke the Investor Fund Risk Rating Mapping Summary screen from the Browser.
- Select the status of the record that you want to retrieve for authorization. You can only amend authorized records.
- Specify any or all of the details in the corresponding fields on the screen.
- Click ‘Search’ button. All records with the specified details that are pending authorization are retrieved and displayed in the lower portion of the screen.
- Double click the record that you wish to authorize. The Investor Fund Risk Rating Mapping Detail screen is displayed in amendment mode. Select Unlock operation from the Action List to amend the record.
- Amend the necessary information and click on Save to save the changes
4.15.7 Authorizing Amended Investor Fund Risk Rating Mapping Record
An amended Investor Fund Risk Rating Mapping record must be authorized for the amendment to be made effective in the system. The authorization of amended records can be done only from Fund Manager Module and Agency Branch module.
The subsequent process of authorization is the same as that for normal transactions.
4.16 Adhoc Prices
This section contains the following topics:
4.16.1 Invoking Adhoc Price Dates Maintenance Detail Screen
To set up adhoc price dates for any transaction types mapped to a fund, use the ‘Ad Hoc Price Detail’ screen. The system allows you to maintain adhoc price date as any back date provided this back-date is greater than the last fund price date.
Note
You will be allowed to enter adhoc price dates for funds for which you have maintained a specific fund price date. This is irrespective of whether or not you have indicated Forward Pricing is applicable.
You can invoke the ‘Adhoc Price Detail’ screen by typing ‘UTDAHPRM’ in the field at the top right corner of the Application tool bar and clicking on the adjoining arrow button.
Select ‘New’ from the Actions menu in the Application tool bar or click new icon to enter the details of the adhoc price maintenance.
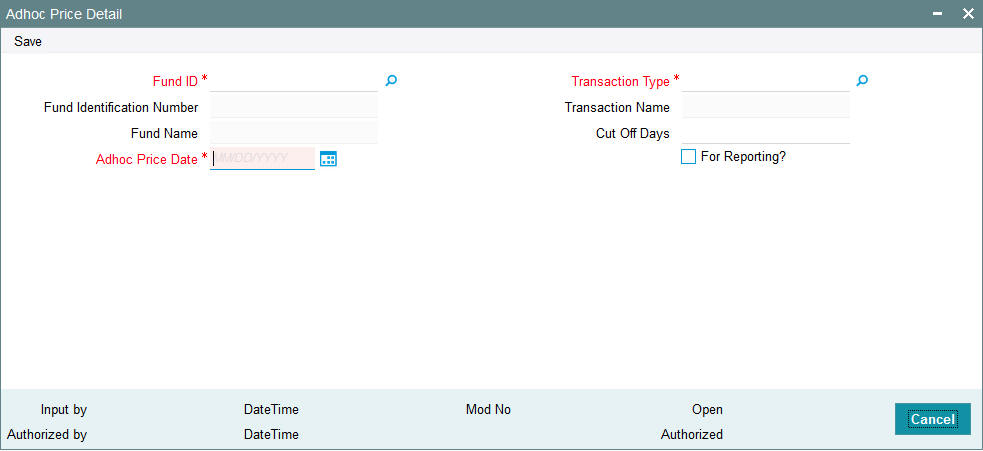
You can specify the following details:
Fund ID
Alphanumeric; 6 Characters; Mandatory
Select the fund id of the fund for which ad-hoc price dates have to be maintained, from the option list provided.
Fund Identification Number
Display
Select the fund identification number of the fund for which ad-hoc price dates have to be maintained, from the option list provided
The Fund Identification Number of the fund you have chosen will be displayed when you choose the Fund ID.
You could, alternatively, choose the Fund Identification Number of the fund and the Fund ID will be displayed.
Fund Name
Display
The system displays the description for the selected fund ID.
Adhoc Price Date
Date Format; Mandatory
Select the adhoc price date from the adjoining calendar.
The date you enter cannot be earlier than Application Date, and the Next Price Date maintained in the General Operating Rules screen.
Transaction Type
Alphanumeric; 2 Characters; Mandatory
Choose the transaction type for which you want to maintain adhoc price dates.
Transaction Name
Display
The system displays the name of the selected transaction type.
Cut Off Days
Numeric; 5 Characters; Optional
Enter the number of days after the price date beyond which the price date is moved to the next specific pricing cycle.
For Reporting?
Optional
Check this box to indicate the date entered is to be used for reporting purposes only. In this case, this date will not be used for the subsequent price date calculation.
Note
- You can check more than one ‘Delete?’ box and then click on the link Delete.
- Click on the link ‘Add’ to add to the transaction types for which you are maintaining the adhoc price date.
- Click ‘Ok’ button to save.
If the new back dated price date is a fund/ fund price holiday, the system will automatically mark this day as a working day during the authorization of the adhoc price. The case will be applicable in a case where the adhoc price is a fund/fund price holiday only and not AMC/system holiday.
Any un-allotted transactions in the system for which price date is greater than the new back-date price date, the system will re-compute the following information for those trades price date, settlement date and dealing date.
Due to this price date change the impact is propagated to dealing date and settlement date in the system.
For the new back dated price date, the system will consider the cut off days if maintained and this will be on calendar as maintained in the fund rules (price date calendar basis)
If multiple back date adhoc prices are maintained, the system will consider the first adhoc price date irrespective of the price sequence maintenance.
For cases where there is auto generation of prices if there is a back dated adhoc price maintenance, then on authorization of the back dated adhoc price date (UTDAHPRM), the system will delete the auto generated prices from the adhoc price date. On authorization of the new price (using UTDFPRIC) for the back dated adhoc price date; the system will re- generate the deleted prices.
4.17 Adhoc Price Dates Maintenance Summary Screen
This section contains the following topics:
- Section 4.17.1, "Retrieving Record in Adhoc Price Dates Maintenance Summary Screen"
- Section 4.17.2, "Editing Adhoc Price Record"
- Section 4.17.3, "Viewing Adhoc Price Record"
- Section 4.17.4, "Deleting Adhoc Price record"
- Section 4.17.5, "Authorizing Adhoc Price Record"
- Section 4.17.6, "Amending Adhoc Price Record"
- Section 4.17.7, "Authorizing Amended Adhoc Price Record"
- Section 4.17.8, "Copying Attributes"
4.17.1 Retrieving Record in Adhoc Price Dates Maintenance Summary Screen
You can retrieve a previously entered record in the Summary Screen, as follows:
Invoke the summary screen and specify any or all of the following details in the corresponding fields:
You can invoke the ‘Ad Hoc Price Summary’ screen by typing ‘UTSAHPRM’ in the field at the top right corner of the Application tool bar and clicking on the adjoining arrow button.

- The status of the record in the Authorized field. If you choose the ‘Blank Space’ option, then all the records are retrieved.
- The status of the record in the Open field. If you choose the ‘Blank Space’ option, then all records are retrieved
- Fund ID
- Fund Identification Number
Click ‘Search’ button to view the records. All the records with the specified details are retrieved and displayed in the lower portion of the screen.
Note
You can also retrieve the individual record detail from the detail screen by querying in the following manner:
- Press F7
- Input the Fund ID
- Press F8
You can perform Edit, Delete, Amend, Authorize, Reverse, Confirm operations by selecting the operation from the Action list. You can also search a record by using a combination of % and alphanumeric value.
Example
You can search the record for Fund ID by using the combination of % and alphanumeric value as follows:-
- Search by A%: The system will fetch all the records whose Fund ID starts from Alphabet ‘A’. For example, AGC17, AGVO6, AGC74 and so forth.
- Search by %7: The system will fetch all the records whose Fund ID ends by numeric value’ 7’. For example, AGC17, GSD267, AGC77 and so forth.
- Search by %17%:The system will fetch all the records whose Fund ID contains the numeric value 17. For example, GSD217, GSD172, AGC17 and so forth.
4.17.2 Editing Adhoc Price Record
You can modify the details of an Adhoc Price record that you have already entered into the system, provided it has not subsequently authorized. You can perform this operation as follows:
- Invoke the Adhoc Price Summary screen from the Browser.
- Select the status of the record that you want to retrieve for modification in the Authorized field. You can only modify records that are unauthorized. Accordingly, choose the unauthorized option.
- Specify any or all of the details in the corresponding fields to retrieve the record that is to be modified.
- Click ‘Search’ button. All unauthorized records with the specified details are retrieved and displayed in the lower portion of the screen.
- Double click the record that you want to modify in the list of displayed records. The Adhoc Price Detail screen is displayed.
- Select Unlock Operation from the Action list to modify the record. Modify the necessary information.
- Click Save to save your changes. The Adhoc Price Detail screen is closed and the changes made are reflected in the Adhoc Price Summary screen.
4.17.3 Viewing Adhoc Price Record
To view a record that you have previously input, you must retrieve the same in the Adhoc Price Summary screen as follows:
- Invoke the Adhoc Price Summary screen from the Browser.
- Select the status of the record that you want to retrieve for viewing in the Authorization Status field. You can also view all records that are either unauthorized or authorized only, by choosing the Unauthorized/ Authorized option.
- Specify any or all of the details of the record in the corresponding fields on the screen.
- Click ‘Search’ button. All records with the specified fields are retrieved and displayed in the lower portion of the screen.
- Double click the record that you want to view in the list of displayed records. The Adhoc Price Detail screen is displayed in View mode.
4.17.4 Deleting Adhoc Price record
You can delete only unauthorized records in the system. To delete a record that you have previously entered:
- Invoke the Adhoc Price Summary screen from the Browser.
- Select the status of the record that you want to retrieve for deletion.
- Specify any or all of the details in the corresponding fields on the screen.
- Click ‘Search’ button. All records with the specified fields are retrieved and displayed in the lower portion of the screen.
- Double click the record that you want to delete in the list of displayed records. The Adhoc Price Detail screen is displayed.
- Select Delete Operation from the Action list. The system prompts you to confirm the deletion and the record is physically deleted from the system database.
4.17.5 Authorizing Adhoc Price Record
An unauthorized Adhoc Price record must be authorized in the system for it to be processed. To authorize a record:
- Invoke the Adhoc Price Summary screen from the Browser.
- Select the status of the record that you want to retrieve for authorization. Typically, choose the unauthorized option.
- Specify any or all of the details in the corresponding fields on the screen.
- Click ‘Search’ button. All records with the specified details that are pending authorization are retrieved and displayed in the lower portion of the screen.
- Double click the record that you wish to authorize. The Adhoc Price Detail screen is displayed. Select Authorize operation from the Action List.
When a checker authorizes a transaction, details of validation, if any, that were overridden by the maker of the transaction during the Save operation are displayed. If any of these overrides results in an error, the checker must reject the transaction.
4.17.6 Amending Adhoc Price Record
After an Adhoc Price record is authorized, it can be modified using the Unlock operation from the Action List. To make changes to a record after authorization:
- Invoke the Adhoc Price Summary screen from the Browser.
- Select the status of the record that you want to retrieve for authorization. You can only amend authorized records.
- Specify any or all of the details in the corresponding fields on the screen.
- Click ‘Search’ button. All records with the specified details that are pending authorization are retrieved and displayed in the lower portion of the screen.
- Double click the record that you wish to authorize. The Adhoc Price Detail screen is displayed in amendment mode. Select Unlock operation from the Action List to amend the record.
- Amend the necessary information and click on Save to save the changes.
4.17.7 Authorizing Amended Adhoc Price Record
An amended Adhoc Price record must be authorized for the amendment to be made effective in the system. The authorization of amended records can be done only from Fund Manager Module and Agency Branch module.
The subsequent process of authorization is the same as that for normal transactions.
4.17.8 Copying Attributes
If you want to create a new Adhoc Price record with the same attributes of an existing one, you can copy the attributes of an existing Adhoc Price record to a new one.
To copy the attributes:
- Retrieve the record whose attributes the new Adhoc Price record should inherit. You can retrieve the record through the Summary screen or through the F7-F8 operation explained in the previous sections of this chapter.
- Click on Copy
- Indicate the ID for the new Adhoc Price record. You can, however, change the details of the new record.
4.18 Pricing Preference Indication
This section contains the following topics:
4.18.1 Invoking Price Date Change Detail Screen
You may search for a record and indicate whether or not the Adhoc price entered for a transaction should be applied, in the ‘Price Date Change Maintenance Detail’ screen.
You can invoke the ‘Price Date Change Maintenance Detail’ screen by typing ‘UTDPRDTC’ in the field at the top right corner of the Application tool bar and clicking on the adjoining arrow button. The ‘Price Date Change Maintenance Detail’ screen is displayed. Select ‘New’ from the Actions menu in the Application tool bar or click new icon to enter the details of the new price date change.
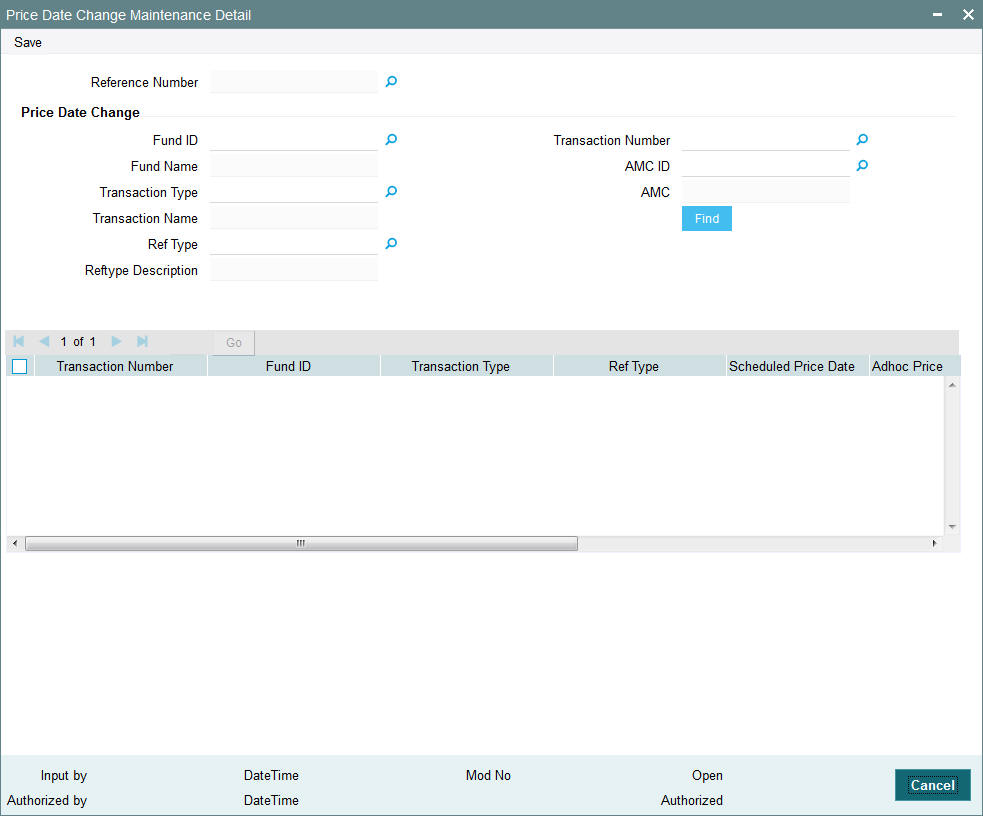
You can search for a record using any of the following criteria:
Reference Number
Display
The system displays the reference number.
Price Date Change
Fund ID
Alphanumeric; 6 Characters; Optional
Specify the fund ID.
Fund Name
Display
The system displays the name of the selected fund ID.
Transaction Number
Alphanumeric; 16 Characters; Optional
Specify the transaction number.
Transaction Type
Alphanumeric; 2 Characters; Optional
Specify the transaction type.
Transaction Name
Display
The system displays the name of the selected transaction type.
Ref Type
Alphanumeric; 2 Characters; Optional
Specify the ref type.
Reftype Description
Display
The system displays the description for the selected ref type.
AMC ID
Alphanumeric; 12 Characters; Optional
Specify the AMC ID.
AMC
Display
The system displays the AMC name.
When you click ‘Find’ button, records satisfying the search criteria that you have entered are displayed.
Note
Only Unallotted transactions will be displayed.
You will be able to view the following details for the records that are displayed:
- Transaction Number
- Fund ID
- Transaction Type
- Ref Type
- Scheduled Price Date
- Adhoc Price Date
- Scheduled Dealing Date
- New Dealing Date
- Use Adhoc Pricing?
You would have indicated the scheduled and adhoc price dates for a transaction. If, for a certain transaction, you would like to indicate the adhoc price should be used and not the scheduled price, check the box ‘Use Adhoc Pricing?’
Click ‘Ok’ button to save any information.
4.19 Price Date Change Summary Screen
This section contains the following topics:
- Section 4.19.1, "Retrieving Record in Price Date Change Summary Screen"
- Section 4.19.2, "Editing Price Date Change Maintenance"
- Section 4.19.3, "Viewing Price Date Change Maintenance "
- Section 4.19.4, "Deleting Price Date Change Maintenance"
- Section 4.19.5, "Authorizing Price Date Change Maintenance"
- Section 4.19.6, "Amending Price Date Change Maintenance"
- Section 4.19.7, "Authorizing Amended Price Date Change Maintenance"
- Section 4.19.8, "Copying Attributes"
4.19.1 Retrieving Record in Price Date Change Summary Screen
You can retrieve a previously entered record in the Summary Screen, as follows:
Invoke the summary screen and specify any or all of the following details in the corresponding fields:
- You can invoke this screen by typing ‘UTSPRDTC’ in the field at the top right corner
of the Application tool bar and clicking on the adjoining arrow button.

- The status of the record in the Authorized field. If you choose the ‘Blank Space’ option, then all the records are retrieved.
- The status of the record in the Open field. If you choose the ‘Blank Space’ option, then all records are retrieved
- Reference Number
Click ‘Search’ button to view the records. All the records with the specified details are retrieved and displayed in the lower portion of the screen.
Note
You can also retrieve the individual record detail from the detail screen by querying in the following manner:
- Press F7
- Input the Reference Number
- Press F8
You can perform Edit, Delete, Amend, Authorize, Reverse, Confirm operations by selecting the operation from the Action list. You can also search a record by using a combination of % and alphanumeric value.
Example
You can search the record for Reference Number by using the combination of % and alphanumeric value as follows:-
- Search by A%: The system will fetch all the records whose Reference Number starts from Alphabet ‘A’. For example, AGC17, AGVO6, AGC74 and so forth.
- Search by %7: The system will fetch all the records whose Reference Number ends by numeric value’ 7’. For example, AGC17, GSD267, AGC77 and so forth.
- Search by %17%: The system will fetch all the records whose Reference Number contains the numeric value 17. For example, GSD217, GSD172, AGC17 and so forth.
You can use the Summary screen for authorizing or deleting in bulk. Select the records and authorize using the ‘Authorize’ button or delete using ‘Delete’ button.
4.19.2 Editing Price Date Change Maintenance
You can modify the details of Price Date Change Maintenance that you have already entered into the system, provided it has not been subsequently authorized. You can perform this operation as follows:
- Invoke the Price Date Change Maintenance Summary screen from the Browser.
- Select the status of the record that you want to retrieve for modification in the Authorized field. You can only modify records that are unauthorized. Accordingly, choose the unauthorized option.
- Specify any or all of the details in the corresponding fields to retrieve the record that is to be modified.
- Click ‘Search’ button. All unauthorized records with the specified details are retrieved and displayed in the lower portion of the screen.
- Double click the record that you want to modify in the list of displayed records. The Price Date Change Maintenance Detail screen is displayed.
- Select Unlock Operation from the Action list to modify the record. Modify the necessary information.
- Click Save to save your changes. The Price Date Change Maintenance Detail screen is closed and the changes made are reflected in the Price Date Change Maintenance Summary screen.
4.19.3 Viewing Price Date Change Maintenance
To view a record that you have previously input, you must retrieve the same in the Price Date Change Maintenance Summary screen as follows:
- Invoke the Price Date Change Maintenance Summary screen from the Browser.
- Select the status of the record that you want to retrieve for viewing in the Authorized field. You can also view all records that are either unauthorized or authorized only, by choosing the Unauthorized/ Authorized option.
- Specify any or all of the details of the record in the corresponding fields on the screen.
- Click ‘Search’ button. All records with the specified fields are retrieved and displayed in the lower portion of the screen.
- Double click the record that you want to view in the list of displayed records. The Price Date Change Maintenance Detail screen is displayed in View mode.
4.19.4 Deleting Price Date Change Maintenance
You can delete only unauthorized records in the system. To delete a record that you have previously entered:
- Invoke the Price Date Change Maintenance Summary screen from the Browser.
- Select the status of the record that you want to retrieve for deletion.
- Specify any or all of the details in the corresponding fields on the screen.
- Click ‘Search’ button. All records with the specified fields are retrieved and displayed in the lower portion of the screen.
- Double click the record that you want to delete in the list of displayed records. The Price Date Change Maintenance Detail screen is displayed.
- Select Delete Operation from the Action list. The system prompts you to confirm the deletion and the record is physically deleted from the system database.
You can also delete in bulk by selecting the records you wish to delete and clicking the Delete All button.
4.19.5 Authorizing Price Date Change Maintenance
An unauthorized Price Date Change Maintenance must be authorized in the system for it to be processed. To authorize a record:
- Invoke the Price Date Change Maintenance Summary screen from the Browser.
- Select the status of the record that you want to retrieve for authorization. Typically, choose the unauthorized option.
- Specify any or all of the details in the corresponding fields on the screen.
- Click ‘Search’ button. All records with the specified details that are pending authorization are retrieved and displayed in the lower portion of the screen.
- Double click the record that you wish to authorize. The Price Date Change Maintenance Detail screen is displayed. Select Authorize operation from the Action List.
You can also authorize in bulk by selecting the records that you wish to authorize and clicking on the Authorize button.
When a checker authorizes a record, details of validation, if any, that were overridden by the maker of the record during the Save operation are displayed. If any of these overrides results in an error, the checker must reject the record.
4.19.6 Amending Price Date Change Maintenance
After a Price Date Change Maintenance is authorized, it can be modified using the Unlock operation from the Action List. To make changes to a record after authorization:
- Invoke the Price Date Change Maintenance Summary screen from the Browser.
- Select the status of the record that you want to retrieve for authorization. You can only amend authorized records.
- Specify any or all of the details in the corresponding fields on the screen.
- Click ‘Search’ button. All records with the specified details that are pending authorization are retrieved and displayed in the lower portion of the screen.
- Double click the record that you wish to authorize. The Price Date Change Maintenance Detail screen is displayed in amendment mode. Select Unlock operation from the Action List to amend the record.
- Amend the necessary information and click on Save to save the changes.
4.19.7 Authorizing Amended Price Date Change Maintenance
An amended Price Date Change Maintenance must be authorized for the amendment to be made effective in the system. The authorization of amended records can be done only from Fund Manager Module and Agency Branch module.
The subsequent process of authorization is the same as that for normal transactions.
4.19.8 Copying Attributes
If you want to create a new Price Date Change Maintenance with the same attributes of an existing maintenance, you can copy the attributes of an existing Price Date Change Maintenance to a new one.
To copy the attributes:
- Retrieve the record whose attributes the new Price Date Change Maintenance should inherit. You can retrieve the record through the Summary screen or through the F7-F8 operation explained in the previous sections of this chapter.
- Click on Copy.
- Indicate the ID for the new Price Date Change Maintenance. You can, however, change the details of the new maintenance.
4.20 Non Availability of Fund Price
This section contains the following topics:
4.20.1 Invoking the Fund Price Holiday Maintenance Detail Screen
You can indicate the non availability of a fund price in the ‘Fund Price Holiday Maintenance Detail’ screen.
You can invoke the ‘Fund Price Holiday Maintenance Detail’ screen by typing ‘UTDFPHOL’ in the field at the top right corner of the Application tool bar and clicking on the adjoining arrow button. The ‘Fund Price Holiday Maintenance Detail’ screen is displayed.
Select ‘New’ from the Actions menu in the Application tool bar or click new icon to enter the details of the holiday maintenance you wish to maintain for a fund price.

Enter the following information in this screen:
Fund ID
Alphanumeric; 6 Characters; Mandatory
Select the ID of the fund for which you want to specify the day on which the price will not be available.
Fund Name Short
Display
The system displays the short fund name for the selected fund ID.
ISIN Code
Alphanumeric; 12 Characters; Mandatory
The Fund ISIN of the fund you have chosen will be displayed. You could, alternatively, choose the ISIN Code and the corresponding Fund ID will be displayed.
Fund Price Holiday
Date Format; Mandatory
Specify the date on which the fund price will not be available.
Note
The system will allow you to capture two prices in a same cycle if the previous cycle price date falls on a holiday and holiday rule is after. This will be applicable for all pricing frequencies. For instance, if Friday is set up as holiday, the price date will follow on the next Working Date, say, Monday if Monday is a working date (even if Monday belongs to next cycle/week).
Bulk upload of fund prices will exclude all funds for which fund price is not available for the day. The price for these funds will be accepted on the next working day and the effective date will be reflected as shown above.
The following batch processes will exclude all funds for which fund price is not available for the day:
- Allocation
- Trading
- Trailer Commission
4.21 Fund Price Holiday Maintenance Summary Screen
This section contains the following topics:
- Section 4.21.1, "Retrieving a Fund Price Holiday Record"
- Section 4.21.2, "Editing a Fund Price Holiday Record "
- Section 4.21.3, "Viewing a Fund Price Holiday Record "
- Section 4.21.4, "Deleting a Fund Price Holiday Record "
- Section 4.21.5, "Authorizing a Fund Price Holiday Record "
- Section 4.21.6, "Amending a Fund Price Holiday Record "
- Section 4.21.7, "Authorizing an Amended Fund Price Record "
4.21.1 Retrieving a Fund Price Holiday Record
You can retrieve a previously entered record in the Summary Screen, as follows:
Invoke the Fund Price Holiday Maintenance Summary screen. Specify any or all of the following details in the corresponding fields:
- You can invoke the ‘Fund Price Holiday Maintenance Summary’
screen by typing ‘UTSFPHOL’ in the field at the top right corner
of the Application tool bar and clicking on the adjoining arrow button..

- The status of the record in the Authorized field. If you choose the ‘Blank Space’ option, then all the records are retrieved.
- The status of the record in the Open field. If you choose the ‘Blank Space’ option, then all records are retrieved
- Fund ID
- ISIN Code
Click 'Search' to view the records. All the records with the specified details are retrieved and displayed in the lower portion of the screen.
You can also retrieve the individual record detail from the detail screen by querying in the following manner:
- Press F7
- Input Fund ID
- Press F8
You can perform Edit, Delete, Amend, Authorize, Reverse, Confirm operations by selecting the operation from the Action list. You can also search a record by using a combination of % and alphanumeric value.
Example
You can search the record for Fund ID by using the combination of % and alphanumeric value as follows:-
- Search by A% :- System will fetch all the records whose Fund ID starts from Alphabet ‘A’. For example, AGC17,AGVO6,AGC74 etc.
- Search by %7 :- System will fetch all the records whose Fund ID ends by numeric value ‘7’. For example, AGC17,GSD267,AGC77 etc.
- Search by %17%:- System will fetch all the records whose Fund ID contains the numeric value ‘17’. For example, GSD217,GSD172, AGC17 etc.
4.21.2 Editing a Fund Price Holiday Record
You can modify the details of Fund Price Holiday record that you have already entered into the system, provided it has not subsequently authorized. You can perform this operation as follows:
- Invoke the Fund Price Holiday Maintenance Summary screen from the Browser.
- Select the status of the record that you want to retrieve for modification in the Authorization Status field. You can only modify records that are unauthorized. Accordingly, choose the unauthorized option.
- Specify any or all of the details in the corresponding fields to retrieve the record that is to be modified.
- Click 'Search'. All unauthorized records with the specified details are retrieved and displayed in the lower portion of the screen.
- Double click the record that you want to modify in the list of displayed records. The Fund Price Holiday Maintenance Detail screen is displayed.
- Select Unlock Operation from the Action list to modify the record. Modify the necessary information.
- Click Save to save your changes. The Fund Price Holiday Maintenance Detail screen is closed and the changes made are reflected in the Fund Price Holiday Maintenance Summary screen.
4.21.3 Viewing a Fund Price Holiday Record
To view a record that you have previously input, you must retrieve the same in the Fund Price Holiday Maintenance Summary screen as follows:
- Invoke the Fund Price Holiday Maintenance Summary screen from the Browser.
- Select the status of the record that you want to retrieve for viewing in the Authorization Status field. You can also view all records that are either unauthorized or authorized only, by choosing the Unauthorized/ Authorized option.
- Specify any or all of the details of the record in the corresponding fields on the screen.
- Click 'Search'. All records with the specified fields are retrieved and displayed in the lower portion of the screen.
- Double click the record that you want to view in the list of displayed records. The Fund Price Holiday Maintenance Detail screen is displayed in View mode.
4.21.4 Deleting a Fund Price Holiday Record
You can delete only unauthorized records in the system. To delete a record that you have previously entered:
- Invoke the Fund Price Holiday Summary screen from the Browser.
- Select the status of the record that you want to retrieve for deletion.
- Specify any or all of the details in the corresponding fields on the screen.
- Click 'Search'. All records with the specified fields are retrieved and displayed in the lower portion of the screen.
- Double click the record that you want to delete in the list of displayed records. The Fund Price Holiday Detail screen is displayed.
- Select Delete Operation from the Action list. The system prompts you to confirm the deletion and the record is physically deleted from the system database.
4.21.5 Authorizing a Fund Price Holiday Record
An unauthorized Fund Price Holiday record must be authorized in the system for it to be processed. To authorize a record:
- Invoke the Fund Price Holiday Summary screen from the Browser.
- Select the status of the record that you want to retrieve for authorization. Typically, choose the unauthorized option.
- Specify any or all of the details in the corresponding fields on the screen.
- Click 'Search'. All records with the specified details that are pending authorization are retrieved and displayed in the lower portion of the screen.
- Double click the record that you wish to authorize. The Fund Price Holiday Maintenance Detail screen is displayed. Select Authorize operation from the Action List.
When a checker authorizes a transaction, details of validation, if any, that were overridden by the maker of the transaction during the Save operation are displayed. If any of these overrides results in an error, the checker must reject the transaction.
4.21.6 Amending a Fund Price Holiday Record
After a Fund Price record is authorized, it can be modified using the Unlock operation from the Action List. To make changes to a record after authorization:
- Invoke the Fund Price Holiday Maintenance Summary screen from the Browser.
- Select the status of the record that you want to retrieve for authorization. You can only amend authorized records.
- Specify any or all of the details in the corresponding fields on the screen.
- Click 'Search'. All records with the specified details that are pending authorization are retrieved and displayed in the lower portion of the screen.
- Double click the record that you wish to authorize. The Fund Price Holiday Maintenance Detail screen is displayed in amendment mode. Select Unlock operation from the Action List to amend the record.
- Amend the necessary information and click on Save to save the changes.
If an incorrect price has been entered in the Fund Price Holiday Maintenance screen, for a particular date, the system allows you to make correction through an amendment operation. Through this, prices entered on any previous working day can be amended, if necessary, to make corrections.
Amendment of a fund price is only possible under the following circumstances:
- The date of amendment must be a fund working day as well as a system / AMC working day.
- The fund for which the price is being amended is a scripless fund.
- The ageing policy (in the General Operating Rules) defined for the fund for which the price is being amended, is not ‘Txn Receipts’ or ‘FIFO Across Products’.
Note
This feature is only available if your installation has specifically requested for it.
4.21.7 Authorizing an Amended Fund Price Record
An amended Fund Price Holiday record must be authorized for the amendment to be made effective in the system. The authorization of amended records can be done only from Fund Manager Module and Agency Branch module.
The subsequent process of authorization is the same as that for normal transactions.
4.22 Fund CPMF Preferences
This section contains the following topics:
4.22.1 Invoking the Fund CPMF Screen
CPMF tax is deducted by the some banks and the money is transferred from current/savings account to the investment account.
For a few selected investment products such as funds or term deposits the bank could decide to return a part of the CPMF Tax that has been deducted as an incentive for having invested. This is referred to as CPMF Bonus.
Invoke the ‘Fund CPMF Detail’ screen by typing ‘UTDFCPMF’ in the field at the top right corner of the Application tool bar and clicking on the adjoining arrow button. The ‘Fund CPMF Detail’ screen is displayed.
Select ‘New’ from the Actions menu in the Application tool bar or click new icon to enter the details of CPMF preferences for the fund.

Fund Details
Fund ID
Alphanumeric; 6 Characters; Mandatory
Select the ID for the fund for which the CPMF rule is applicable.
CPMF Bonus Applicable
Optional
Select ‘Yes’ from the drop-down list if the CPMF bonus is applicable to investment made in this fund.
Lag for CPMF Bonus Credit
Numeric; 4 Characters; Optional
If Lag basis is transaction date or trigger based, lag will not be captured. If Lag basis is user defined, then the 'Lag for CPMF Bonus Credit' will be captured.
IRRF Load for CPMF
Alphanumeric; 5 Characters; Optional
Indicate the IRRF load to be applied to the CPMF bonus, in which case the net amount will be credited to the investor after taking into consideration the tax amount.
CPMF Bonus Type
Optional
Select the type of CPMF Bonus, the options being:
- Defined during Application
- Fixed
If the type selected is fixed then no changes can be made to the bonus at the transaction level.
Load Description
Display
The system displays the description for the selected IRRF Load ID For CPMF.
Default CPMF Bonus Percentage Value
Numeric; 30 Characters; Optional
Specify the default percentage value of the CPMF bonus. In case the CPMF bonus type is fixed, this value will be the value used and it can not be changed.
Minimum Transaction Amount
Numeric; 30 Characters; Optional
Specify the minimum amount that is required to be available for the CPMF bonus to be considered, in case the application amount is less than the amount specified here the bonus will not be calculated.
Note
The minimum transaction amount should be specified in the fund base currency.
Fund Identification Number
Display
The system displays the description for the selected fund ID. However, you can amend this value.
Lag Basis
Optional
Select the lag basis from the drop down provided, the options being;
- Transaction Date: In this case the CPMF bonus will be credited on the transaction date as an EOD activity.
- User Defined: User Defined –In this case lag is specified in Fund CPMF preference which will be defaulted in transaction screen. This can be changed at transaction level.
- Trigger Based: In this case CPMF bonus is credited on the day of uploading basis amount for that transaction.
Credit Bonus on Outflow
Optional
Select ‘Yes’ from drop-down list to ensure that the CPMF credit takes place even if the subscribed units have been redeemed partially or fully.
Applicable Account Types
Account Types
Alphanumeric; 25 Characters; Optional
Select the account types from the list of available account types for which the CPMF bonus will be applicable.
Account Types Description
Display
The system displays the description for the selected available account type.
4.23 Fund CPMF Summary Screen
This section contains the following topics:
- Section 4.23.1, "Retrieving Record in Fund CPMF Summary Screen"
- Section 4.23.2, "Editing Fund CPMF Record"
- Section 4.23.3, "Viewing Fund CPMF Record "
- Section 4.23.4, "Deleting Fund CPMF Record"
- Section 4.23.5, "Authorizing Fund CPMF Record "
- Section 4.23.6, "Amending Fund CPMF Record"
- Section 4.23.7, "Authorizing Amended Fund CPMF Record"
- Section 4.23.8, "Copying Attributes"
4.23.1 Retrieving Record in Fund CPMF Summary Screen
You can retrieve a previously entered record in the Summary Screen, as follows:
Specify any or all of the following details in the corresponding fields:
- Invoke the ‘Fund CPMF Setup Summary’ screen by typing
‘UTSFCPMF’ in the field at the top right corner
of the Application tool bar and clicking on the adjoining arrow button

- The status of the record in the Authorized field. If you choose the ‘Blank Space’ option, then all the records are retrieved.
- The status of the record in the Open field. If you choose the ‘Blank Space’ option, then all records are retrieved
- Fund ID
- CPMF Bonus Applicable
Click ‘Search’ button to view the records. All the records with the specified details are retrieved and displayed in the lower portion of the screen.
Note
You can also retrieve the individual record detail from the detail screen by querying in the following manner:
- Press F7
- Input the Fund ID
- Press F8
You can perform Edit, Delete, Amend, Authorize, Reverse, Confirm operations by selecting the operation from the Action list. You can also search a record by using a combination of % and alphanumeric value.
Example
You can search the record for Fund ID by using the combination of % and alphanumeric value as follows:-
- Search by A%:- The system will fetch all the records whose Fund ID starts from Alphabet ‘A’. For example, AGC17, AGVO6, AGC74 and so forth.
- Search by %7:- The system will fetch all the records whose Fund ID ends by numeric value’ 7’. For example, AGC17, GSD267, AGC77 and so forth.
- Search by %17%:- The system will fetch all the records whose Fund ID contains the numeric value 17. For example, GSD217, GSD172, AGC17 and so forth.
4.23.2 Editing Fund CPMF Record
You can modify the details of Fund CPMF record that you have already entered into the system, provided it has not been subsequently authorized. You can perform this operation as follows:
- Invoke the Fund CPMF Summary screen from the Browser.
- Select the status of the record that you want to retrieve for modification in the Authorized field. You can only modify records that are unauthorized. Accordingly, choose the unauthorized option.
- Specify any or all of the details in the corresponding fields to retrieve the record that is to be modified.
- Click ‘Search’ button. All unauthorized records with the specified details are retrieved and displayed in the lower portion of the screen.
- Double click the record that you want to modify in the list of displayed records. The Fund CPMF Detail screen is displayed.
- Select Unlock Operation from the Action list to modify the record. Modify the necessary information.
- Click Save to save your changes. The Fund CPMF Detail screen is closed and the changes made are reflected in the Fund CPMF Summary screen.
4.23.3 Viewing Fund CPMF Record
To view a record that you have previously input, you must retrieve the same in the Fund CPMF Summary screen as follows:
- Invoke the Fund CPMF Summary screen from the Browser.
- Select the status of the record that you want to retrieve for viewing in the Authorized field. You can also view all records that are either unauthorized or authorized only, by choosing the Unauthorized/ Authorized option.
- Specify any or all of the details of the record in the corresponding fields on the screen.
- Click ‘Search’ button. All records with the specified fields are retrieved and displayed in the lower portion of the screen.
- Double click the record that you want to view in the list of displayed records. The Fund CPMF Detail screen is displayed in View mode.
4.23.4 Deleting Fund CPMF Record
You can delete only unauthorized records in the system. To delete a record that you have previously entered:
- Invoke the Fund CPMF Summary screen from the Browser.
- Select the status of the record that you want to retrieve for deletion.
- Specify any or all of the details in the corresponding fields on the screen.
- Click ‘Search’ button. All records with the specified fields are retrieved and displayed in the lower portion of the screen.
- Double click the record that you want to delete in the list of displayed records. . The Fund CPMF Detail screen is displayed.
- Select Delete Operation from the Action list. The system prompts you to confirm the deletion and the record is physically deleted from the system database.
4.23.5 Authorizing Fund CPMF Record
An unauthorized Fund CPMF record must be authorized in the system for it to be processed. To authorize a record:
- Invoke the Fund CPMF Summary screen from the Browser.
- Select the status of the record that you want to retrieve for authorization. Typically, choose the unauthorized option.
- Specify any or all of the details in the corresponding fields on the screen.
- Click ‘Search’ button. All records with the specified details that are pending authorization are retrieved and displayed in the lower portion of the screen.
- Double click the record that you wish to authorize. The Fund CPMF Detail screen is displayed. Select Authorize operation from the Action List.
When a checker authorizes a transaction, details of validation, if any, that were overridden by the maker of the transaction during the Save operation are displayed. If any of these overrides results in an error, the checker must reject the transaction.
4.23.6 Amending Fund CPMF Record
After a Fund CPMF record is authorized, it can be modified using the Unlock operation from the Action List. To make changes to a record after authorization:
- Invoke the Fund CPMF Summary screen from the Browser.
- Select the status of the record that you want to retrieve for authorization. You can only amend authorized records.
- Specify any or all of the details in the corresponding fields on the screen.
- Click ‘Search’ button. All records with the specified details that are pending authorization are retrieved and displayed in the lower portion of the screen.
- Double click the record that you wish to authorize. The Fund CPMF Detail screen is displayed in amendment mode. Select Unlock operation from the Action List to amend the record.
- Amend the necessary information and click on Save to save the changes.
4.23.7 Authorizing Amended Fund CPMF Record
An amended Fund CPMF record must be authorized for the amendment to be made effective in the system. The authorization of amended records can be done only from Fund Manager Module and Agency Branch module.
The subsequent process of authorization is the same as that for normal transactions.
4.23.8 Copying Attributes
If you want to create a new Fund CPMF record with the same attributes of an existing maintenance, you can copy the attributes of an existing Fund CPMF record to a new one.
To copy the attributes:
- Retrieve the record whose attributes the new Fund CPMF record should inherit. You can retrieve the record through the Summary screen or through the F7-F8 operation explained in the previous sections of this chapter.
- Click on Copy
- Indicate the ID for the new Fund CPMF record. You can, however, change the details of the new record.
4.24 Fund Account Set Up
This section contains the following topics:
4.24.1 Invoking Fund Account Maintenance Screen
Each of the funds floated by the AMC must maintain bank accounts that operate in the fund base currency and any or all of the fund transaction currencies. These fund accounts can be maintained through the Fund Account Maintenance screen.
You can capture multiple bank accounts for a fund in the same currency; however, a default fund account must be designated for a particular currency. You can also specify the account categories for each bank details.
To set up the bank accounts for a fund, use the ‘Fund Account Input’ screen. You can invoke this screen by typing ‘UTDFNDAC’ in the field at the top right corner of the Application tool bar and clicking on the adjoining arrow button. The ‘Fund Account Input’ screen is displayed.
Select ‘New’ from the Actions menu in the Application tool bar or click new icon to enter the details of the new fund account you wish to maintain.

Before you set up a fund account for a fund, it is desirable to ensure that the following information is already setup in the system:
- The fund for which the fund account is being set up must have an authorized set of fund rules profile records.
- The Banks and Branches must be maintained in the system through the Bank Maintenance and the Bank Branch Maintenance.
You can specify the following fields in this screen:
Fund ID
Alphanumeric; 6 Characters; Mandatory
Select the fund for which the fund account is to be set up, from the drop down list. This list contains the names of all the authorized funds in the system.
When you select the fund, the Fund Base Currency is picked up from the Fund Demographics profile for the selected fund and displayed in the Fund Base Currency field.
Fund Identification Number
Alphanumeric; 25 Characters; Mandatory
The system displays the fund identification number. However, you can amend this value.
Fund Name
Display
The system displays the fund name for the selected fund ID.
Fund Base Currency
Display
The currency in which the fund is denominated is defaulted here.
Description
Display
The system displays the fund base currency description.
Account Details
Bank Code
Alphanumeric; 12 Characters; Mandatory
Specify the name of the bank where the account is to be set up.
Branch Code
Alphanumeric; 12 Characters; Mandatory
Specify the name of the branch of the bank where the account is to be set up. When you select the bank name, the branches that have been set up for the selected bank are populated in the drop down list.
Account Number
Alphanumeric; 20 Characters; Mandatory
Enter the number of the account that will be operative for this fund.
IBAN
Alphanumeric; 40 Characters; Optional
Specify the IBAN (International Bank Account Number) of the account holder.
Account Currency
Alphanumeric; 3 Characters; Mandatory
Select the currency that the account is to operate in, from the drop down list provided. When the fund is selected, all the currencies that are permitted for the fund as transaction currencies are populated in this list, along with the fund base currency. This information is picked up from the Fund Demographics profile and the Fund Transaction Currency profile for the selected fund.
As mentioned earlier, multiple accounts can be set up for a Fund ID and an account currency. An account must be maintained for the Fund Base Currency, and if this is not done, the system prompts for this on usage of the Save option.
Account Name
Alphanumeric; 60 Characters; Mandatory
Specify the name of the fund account that is being set up.
Close Account
Mandatory
Select ‘Yes’ from the drop-down list to indicate closure of this fund account. Account closure is only available in Edit Mode.
Direct Debit Applicable
Optional
Select ‘Yes’ from the drop-down list to indicate that direct debits are applicable for the account.
Account Category
Alphanumeric; 2 Characters; Optional
Specify the category to which the account belongs.
Note
Only those accounts that operate in the fund base currency can be specified as an NPI-Trust account. For a given Fund ID and Fund Base Currency combination, only account can be maintained as NPI-Trust account.
Default Account
Optional
Select ‘Yes’ from the drop-down list to default account for each currency.
You must designate one default account for each currency, which would be deemed to be the default fund account in the selected currency, for the fund.
In case of currency of expression fund, while saving the record, the system will check if there is fund account maintenance for all fund base currency and all fund price currencies listed for the fund selected. The system will display an error message as ‘Maintain fund account for the account currency and currency code name’.
If fund account details are not maintained then the system will validate the number of authorized funds for which fund bank accounts have not been maintained for their Fund Base/ Fund Price Currency as part of Pre EOD.
The system will also validate the account currencies at transaction level if accounts for fund price currencies are not maintained.
4.25 Fund Account Summary Screen
This section contains the following topics:
- Section 4.25.1, "Retrieving Record in Fund Account Summary Screen"
- Section 4.25.2, "Editing Fund Account Record"
- Section 4.25.3, "Viewing Fund Account Record"
- Section 4.25.4, "Deleting Fund Account Record "
- Section 4.25.5, "Authorizing Fund Account Record"
- Section 4.25.6, "Amending Fund Account Record"
- Section 4.25.7, "Authorizing Amended Fund Account Record"
- Section 4.25.8, "Copying Attributes"
4.25.1 Retrieving Record in Fund Account Summary Screen
You can retrieve a previously entered record in the Summary Screen, as follows:
Specify any or all of the following details in the corresponding fields:
- Invoke the ‘Fund Account Input Summary’ screen by typing
‘UTSFNDAC’ in the field at the top right corner
of the Application tool bar and clicking on the adjoining arrow button

- The status of the record in the Authorization Status field. If you choose the ‘Blank Space’ option, then all the records are retrieved.
- The status of the record in the Open field. If you choose the ‘Blank Space’ option, then all records are retrieved
- Fund ID
Click ‘Search’ button to view the records. All the records with the specified details are retrieved and displayed in the lower portion of the screen.
Note
You can also retrieve the individual record detail from the detail screen by querying in the following manner:
- Press F7
- Input the Fund ID
- Press F8
You can perform Edit, Delete, Amend, Authorize, Reverse, Confirm operations by selecting the operation from the Action list. You can also search a record by using a combination of % and alphanumeric value.
Example
You can search the record for Fund ID by using the combination of % and alphanumeric value as follows:
- Search by A%: The system will fetch all the records whose Fund ID starts from Alphabet ‘A’. For example, AGC17, AGVO6, AGC74 and so forth.
- Search by %7:- The system will fetch all the records whose Fund ID ends by numeric value’ 7’. For example, AGC17, GSD267, AGC77 and so forth.
- Search by %17%:- The system will fetch all the records whose Fund ID contains the numeric value 17. For example, GSD217, GSD172, AGC17 and so forth.
4.25.2 Editing Fund Account Record
You can modify the details of a Fund Account record that you have already entered into the system, provided it has not been subsequently authorized. You can perform this operation as follows:
- Invoke the Fund Account Input Summary screen from the Browser.
- Select the status of the record that you want to retrieve for modification in the Authorized field. You can only modify records that are unauthorized. Accordingly, choose the unauthorized option.
- Specify any or all of the details in the corresponding fields to retrieve the record that is to be modified.
- Click ‘Search’ button. All unauthorized records with the specified details are retrieved and displayed in the lower portion of the screen.
- Double click the record that you want to modify in the list of displayed records. The Fund Account Input Detail screen is displayed.
- Select Unlock Operation from the Action list to modify the record. Modify the necessary information.
- Click Save to save your changes. The Fund Account Input Detail screen is closed and the changes made are reflected in the Fund Account Input Summary screen.
4.25.3 Viewing Fund Account Record
To view a record that you have previously input, you must retrieve the same in the Fund Account Input Summary screen as follows:
- Invoke the Fund Account Input Summary screen from the Browser.
- Select the status of the record that you want to retrieve for viewing in the Authorized field. You can also view all records that are either unauthorized or authorized only, by choosing the Unauthorized/ Authorized option.
- Specify any or all of the details of the record in the corresponding fields on the screen.
- Click ‘Search’ button. All records with the specified fields are retrieved and displayed in the lower portion of the screen.
- Double click the record that you want to view in the list of displayed records. The Fund Account Input Detail screen is displayed in View mode.
4.25.4 Deleting Fund Account Record
You can delete only unauthorized records in the system. To delete a record that you have previously entered:
- Invoke the Fund Account Input Summary screen from the Browser.
- Select the status of the record that you want to retrieve for deletion.
- Specify any or all of the details in the corresponding fields on the screen.
- Click ‘Search’ button. All records with the specified fields are retrieved and displayed in the lower portion of the screen.
- Double click the record that you want to delete in the list of displayed records. The Fund Account Input Detail screen is displayed.
- Select Delete Operation from the Action list. The system prompts you to confirm the deletion and the record is physically deleted from the system database.
4.25.5 Authorizing Fund Account Record
An unauthorized Fund Account record must be authorized in the system for it to be processed. To authorize a record:
- Invoke the Fund Account Input Summary screen from the Browser.
- Select the status of the record that you want to retrieve for authorization. Typically, choose the unauthorized option.
- Specify any or all of the details in the corresponding fields on the screen.
- Click ‘Search’ button. All records with the specified details that are pending authorization are retrieved and displayed in the lower portion of the screen.
- Double click the record that you wish to authorize. The Fund Account Input Detail screen is displayed. Select Authorize operation from the Action List.
When a checker authorizes a transaction, details of validation, if any, that were overridden by the maker of the transaction during the Save operation are displayed. If any of these overrides results in an error, the checker must reject the transaction.
4.25.6 Amending Fund Account Record
After a Fund Account record is authorized, it can be modified using the Unlock operation from the Action List. To make changes to a record after authorization:
- Invoke the Fund Account Input Summary screen from the Browser.
- Select the status of the record that you want to retrieve for authorization. You can only amend authorized records.
- Specify any or all of the details in the corresponding fields on the screen.
- Click ‘Search’ button. All records with the specified details that are pending authorization are retrieved and displayed in the lower portion of the screen.
- Double click the record that you wish to authorize. The Fund Account Input Detail screen is displayed in amendment mode. Select Unlock operation from the Action List to amend the record.
- Amend the necessary information and click on Save to save the changes.
4.25.7 Authorizing Amended Fund Account Record
An amended Fund Account record must be authorized for the amendment to be made effective in the system. The authorization of amended records can be done only from Fund Manager Module and Agency Branch module.
The subsequent process of authorization is the same as that for normal transactions.
4.25.8 Copying Attributes
If you want to create a new Fund Account record with the same attributes of an existing maintenance, you can copy the attributes of an existing Fund Account record to a new one.
To copy the attributes:
- Retrieve the record whose attributes the new Fund Account record should inherit. You can retrieve the record through the Summary screen or through the F7-F8 operation explained in the previous sections of this chapter.
- Click on Copy
- Indicate the ID for the new Fund Account. You can, however, change the details of the new record.
4.26 Funds to Products Mapping
This section contains the following topics:
4.26.1 Invoking the Product Fund Mapping Detail Screen
You can associate a share class fund with a non-taxable product. Invoke the ‘Product Fund Mapping Detail’ screen by typing ‘UTDPFMAP’ in the field at the top right corner of the Application tool bar and clicking on the adjoining arrow button. Select ‘New’ from the Actions menu in the Application tool bar or click new icon to enter the details of the mapping you wish for a particular product and fund.
After a share class fund has been mapped to a product, the mapping must be authorized for it to be effective.
Authorization of such a mapping can be done in the Product Fund Mapping screen itself. The mapping cannot be removed or deleted subsequently.

You can specify the following fields in this Screen
Product ID
Mandatory
Select Non Tax product from drop-down list to which the fund is mapped. This specification can be made only once for a fund, and once it is made, it cannot be reversed or deleted.
Fund(s) Mapped to this Product
Fund ID
Alphanumeric; 6 Characters; Mandatory
Select the share class fund that is to be mapped to a non-taxable product.
Fund Name
Display
Upon selection of the fund ID, the associated fund name gets displayed. However you are allowed to modify the same.
4.27 Wrap Fund Maintenance
This section contains the following topics:
4.27.1 Invoking Wrap Fund Maintenance
When an investor subscribes into a wrap fund, the investment is channelled into the underlying investment funds that are associated with the wrap fund.
In Oracle FLEXCUBE Investor Servicing, you can maintain details of wrap funds, with the underlying funds and the respective split percentages, using the ‘Wrap Fund Maintenance Detail’ screen. You can invoke this screen by typing ‘UTDWRFND’ in the field at the top right corner of the Application tool bar and clicking on the adjoining arrow button. Select ‘New’ from the Actions menu in the Application tool bar or click new icon to enter the details of the wrap fund you wish to maintain.
Note
You can maintain details of wrap funds in the system for information and reporting purposes only. No processing or validation in respect of the same is performed by the system when there is an investment into the fund or its underlying investment funds.
In this screen, any authorized fund in the system can be designated as a wrap fund, and any authorized funds in the system may be designated as underlying investment funds for the wrap fund. An effective date may also be specified for the wrap fund.

You can specify the following fields in this screen:
Wrap Fund ID
Alphanumeric; 6 Characters; Mandatory
Specify the ID of the wrap fund. The list contains authorized funds in the system.
ISIN No
Alphanumeric; 12 Characters; Optional
The system displays the ISIN number. However, you amend this value.
If you specify the ISIN Code, the ID of the fund is displayed in Wrap Fund ID field and vice versa.
Rule Effective Date
Date Format, Mandatory
Specify the date from which the fund is effective as a wrap fund in the system. This rule effective date is different from the effective date of the actual fund in the system, which is specified in the Fund Demographics profile for the fund.
Wrap Fund Ratio Table
Fund ID
Alphanumeric; 6 Characters; Mandatory
Specify the ID of the underlying investment fund. The list contains authorized funds in the system.
Fund Name Short
Display
The system displays the short fund name for the selected fund ID.
Split Percentage
Numeric; 5 Characters; Mandatory
Specify the percentage limit for investment into the selected underlying fund. This percentage must not exceed one hundred percent.
4.28 Wrap Fund Summary Screen
This section contains the following topics:
- Section 4.28.1, "Retrieving Record in Wrap Fund Summary screen"
- Section 4.28.2, "Editing Wrap Fund Record"
- Section 4.28.3, "Viewing Wrap Fund Record"
- Section 4.28.4, "Deleting Wrap Fund Record"
- Section 4.28.5, "Authorizing Wrap Fund Record"
- Section 4.28.6, "Amending Wrap Fund record"
- Section 4.28.7, "Authorizing Amended Wrap Fund Record"
- Section 4.28.8, "Copying Attributes"
4.28.1 Retrieving Record in Wrap Fund Summary screen
You can retrieve a previously entered record in the Summary Screen, as follows:
Specify any or all of the following details in the corresponding fields:
- Invoke the ‘Wrap Fund Maintenance Summary’ screen by
typing ‘UTSWRFND’ in the field at the top right corner
of the Application tool bar and clicking on the adjoining arrow button..
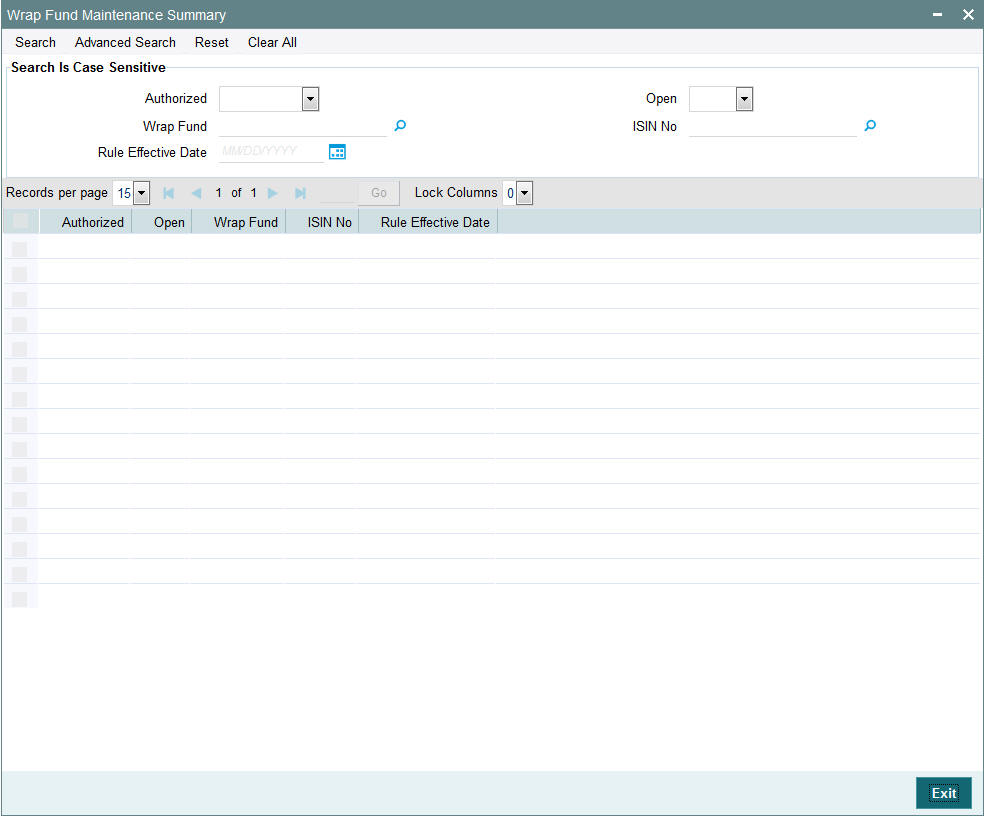
- The status of the record in the Authorized field. If you choose the ‘Blank Space’ option, then all the records are retrieved.
- The status of the record in the Open field. If you choose the ‘Blank Space’ option, then all records are retrieved
- Wrap Fund
- ISIN No
- Rule Effective Date
Click ‘Search’ button to view the records. All the records with the specified details are retrieved and displayed in the lower portion of the screen.
Note
You can also retrieve the individual record detail from the detail screen by querying in the following manner:
- Press F7
- Input the Wrap Fund
- Press F8
You can perform Edit, Delete, Amend, Authorize, Reverse, Confirm operations by selecting the operation from the Action list. You can also search a record by using a combination of % and alphanumeric value.
Example
You can search the record for Wrap Fund by using the combination of % and alphanumeric value as follows:-
- Search by A%:- System will fetch all the records whose Wrap Fund starts from Alphabet ‘A’. For example, AGC17, AGVO6, AGC74 etc.
- Search by %7:- System will fetch all the records whose Wrap Fund ends by numeric value’ 7’. For example, AGC17, GSD267, AGC77 etc.
- Search by %17%:- System will fetch all the records whose Wrap Fund contains the numeric value 17. For example, GSD217, GSD172, AGC17 etc.
4.28.2 Editing Wrap Fund Record
You can modify the details of a Wrap Fund record that you have already entered into the system, provided it has not been subsequently authorized. You can perform this operation as follows:
- Invoke the Wrap Fund Maintenance Summary screen from the Browser.
- Select the status of the record that you want to retrieve for modification in the Authorization Status field. You can only modify records that are unauthorized. Accordingly, choose the unauthorized option.
- Specify any or all of the details in the corresponding fields to retrieve the record that is to be modified.
- Click ‘Search’ button. All unauthorized records with the specified details are retrieved and displayed in the lower portion of the screen.
- Double click the record that you want to modify in the list of displayed records. The Wrap Fund Maintenance Detail screen is displayed.
- Select Unlock Operation from the Action list to modify the record. Modify the necessary information.
- Click Save to save your changes. The Wrap Fund Maintenance Detail screen is closed and the changes made are reflected in the Wrap Fund Maintenance Summary screen.
4.28.3 Viewing Wrap Fund Record
To view a record that you have previously input, you must retrieve the same in the Wrap Fund Maintenance Summary screen as follows:
- Invoke the Wrap Fund Maintenance Summary screen from the Browser.
- Select the status of the record that you want to retrieve for viewing in the Authorization Status field. You can also view all records that are either unauthorized or authorized only, by choosing the Unauthorized/ Authorized option.
- Specify any or all of the details of the record in the corresponding fields on the screen.
- Click ‘Search’ button. All records with the specified fields are retrieved and displayed in the lower portion of the screen.
- Double click the record that you want to view in the list of displayed records. The Wrap Fund Maintenance Detail screen is displayed in View mode.
4.28.4 Deleting Wrap Fund Record
You can delete only unauthorized records in the system. To delete a record that you have previously entered:
- Invoke the Wrap Fund Maintenance Summary screen from the Browser.
- Select the status of the record that you want to retrieve for deletion.
- Specify any or all of the details in the corresponding fields on the screen.
- Click ‘Search’ button. All records with the specified fields are retrieved and displayed in the lower portion of the screen.
- Double click the record that you want to delete in the list of displayed records. The Wrap Fund Maintenance Detail screen is displayed.
- Select Delete Operation from the Action list. The system prompts you to confirm the deletion and the record is physically deleted from the system database.
4.28.5 Authorizing Wrap Fund Record
An unauthorized Wrap Fund must be authorized in the system for it to be processed. To authorize a record:
- Invoke the Wrap Fund Maintenance Summary screen from the Browser.
- Select the status of the record that you want to retrieve for authorization. Typically, choose the unauthorized option.
- Specify any or all of the details in the corresponding fields on the screen.
- Click ‘Search’ button. All records with the specified details that are pending authorization are retrieved and displayed in the lower portion of the screen.
- Double click the record that you wish to authorize. The Wrap Fund Maintenance Detail screen is displayed. Select Authorize operation from the Action List.
When a checker authorizes a transaction, details of validation, if any, that were over ridden by the maker of the transaction during the Save operation are displayed. If any of these overrides results in an error, the checker must reject the transaction.
4.28.6 Amending Wrap Fund record
After a Wrap Fund record is authorized, it can be modified using the Unlock operation from the Action List. To make changes to a record after authorization:
- Invoke the Wrap Fund Maintenance Summary screen from the Browser.
- Select the status of the record that you want to retrieve for authorization. You can only amend authorized records.
- Specify any or all of the details in the corresponding fields on the screen.
- Click ‘Search’ button. All records with the specified details that are pending authorization are retrieved and displayed in the lower portion of the screen.
- Double click the record that you wish to authorize. The Wrap Fund Maintenance Detail screen is displayed in amendment mode. Select Unlock operation from the Action List to amend the record.
- Amend the necessary information and click on Save to save the changes.
4.28.7 Authorizing Amended Wrap Fund Record
An amended Wrap Fund record must be authorized for the amendment to be made effective in the system. The authorization of amended records can be done only from Fund Manager Module and Agency Branch module.
The subsequent process of authorization is the same as that for normal transactions.
4.28.8 Copying Attributes
If you want to create a new Wrap Fund record with the same attributes of an existing maintenance, you can copy the attributes of an existing Wrap Fund record to a new one.
To copy the attributes:
- Retrieve the record whose attributes the new Wrap Fund record should inherit. You can retrieve the record through the Summary screen or through the F7-F8 operation explained in the previous sections of this chapter.
- Click on Copy
- Indicate the ID for the new Wrap Fund. You can, however, change the details of the new record.
4.29 Access Restrictions
This section contains the following topics:
4.29.1 Invoking FBC Access Restriction Screen
You can impose restrictions on funds when there is a necessity to control inflows into, outflows from or both with regard to the funds. For example, when you change a fund from an open-ended fund to a close–ended fund or when limits on investment in a fund have been breached, you will need to restrict further subscriptions to the fund.
You can impose restrictions on clients on the basis of the RPO (Restricted Post Office) Code. For example, in case of an investor who is deceased, you may allow redemptions only if his address is known. You can also restrict any further subscriptions to his account.
You can restrict the operations/setup for a fund, broker or a client to specific users. The restrictions and the list of specific users can be maintained through the ‘FBC Access Restriction Detail’ screen. You can invoke this screen by typing ‘UTDFAR’ in the field at the top right corner of the Application tool bar and clicking on the adjoining arrow button.

Select ‘New’ from the Actions menu in the Application tool bar or click new icon to enter the details of the restrictions that you wish to maintain.
Note
- Restrictions on a broker are placed only when the broker has retired or has deceased. You can do this through broker disabling in the Broker Maintenance screen following which the system will not allow the broker to access any transaction, policy or unit holder account.
- The restrictions that are placed on any fund or client here do not apply to the system generated transactions like Standing Instructions etc.
You can specify the following fields in this screen:
Restriction Type
Mandatory
Select the basis on which you wish to apply restrictions from the drop-down list. The options are ‘Client’ and ‘Fund’.
Restriction
Mandatory
Choose ‘Yes’ from drop-down list if you want to apply restrictions. This prevents the users maintained in the list from performing the operation specified.
Choose ‘No’ if you do not want to apply restrictions. This ensures that only the users maintained in the list are allowed to perform the operation specified.
Fund ID
Alphanumeric; 6 Characters; Optional
Specify the fund ID if you have opted for restriction type ‘Fund’.
Auto Auth
Mandatory
If you want the users maintained in the list to be able to authorize their own transactions, choose ‘Yes’ from drop-down list. Else choose ‘No’.
If you choose ‘Yes’, this selection will take precedence over the Auto Auth maintained in the Security Maintenance System.
RPO Code
Display
The system displays the RPO Code if you have opted for restriction type ‘Client’.
Apply to All Users
Mandatory
The option you choose here will define if all or only particular users can perform the operation that you have specified. Choose ‘No’ from drop-down list if you wish the restriction on operations to be applicable only to the users maintained in the list. Choose ‘Yes’ if you wish the restriction to be applicable to all users. In this case, there will be no users maintained in the list.
Operation
Alphanumeric; 3 Characters; Mandatory
Specify the operation (s) that you wish to restrict. The following are the operations that are allowed for client and fund restrictions:
Operation |
Fund Level |
Client Level |
Subscriptions/ Policy Top Up |
Allowed |
Allowed |
Redemption/ Surrenders |
Allowed |
Allowed |
Subscription SI |
Allowed |
Allowed |
Recurring Premiums |
Allowed |
Allowed |
Redemption SI |
Allowed |
Allowed |
Recurring Annuities |
Allowed |
Allowed |
Switch Out |
Allowed |
Allowed |
Switch In |
Allowed |
Allowed |
Transfers |
Allowed |
Allowed |
View UH profile & Portfolio View |
Not Allowed |
Allowed |
Update of the profile |
Not Allowed |
Allowed |
Correspondence |
Not Allowed |
Allowed |
User Details
User ID
Alphanumeric; 15 Characters; Mandatory
List all the users that are allowed or disallowed to perform the operation that you have chosen.
User Name
Display
The system displays the corresponding Names for the User IDs that you select.
Example
Let us assume the following restriction parameters for a Fund:
Restriction Type |
Restriction |
Fund Id |
RPO Code |
Operation |
Apply to All Users |
User List |
Fund |
Yes |
OMGR |
|
Subscription |
No |
User 1 & User2 |
This implies that only User 1 and User 2 are not allowed to do subscription for the fund ‘OMGR’.
Let us assume the following restriction parameters for a Client:
Case |
Restriction Type |
Restriction |
Fund Id |
RPO Code |
Operation |
Apply to All Users |
User List |
Case 1 |
Client |
Yes |
|
UNKNOWN ADDR |
Redemptions |
Yes |
|
Case 2 |
Client |
No |
|
OVERPAID |
View UH Profile &Portfolio View |
No |
User3 |
In Case 1, no user is allowed to do redemptions for investors whose RPO Code has been specified as ‘UNKNOWN ADDR’.
In Case 2, only User 3 will be allowed to do the ‘Unit Holder View’ and ‘Portfolio View’ operations for clients with RPO Code as ‘OVERPAID’.
4.30 FBC Access Restriction Summary Screen
You can specify the following operations in this field:
- Section 4.30.1, "Retrieving Record in FBC Access Restriction Summary screen"
- Section 4.30.2, "Editing FBC Access Restriction "
- Section 4.30.3, "Viewing FBC Access Restriction"
- Section 4.30.4, "Deleting FBC Access Restriction"
- Section 4.30.5, "Authorizing FBC Access Restriction"
- Section 4.30.6, "Amending FBC Access Restriction"
- Section 4.30.7, "Authorizing Amended FBC Access Restriction"
- Section 4.30.8, "Copying Attributes"
4.30.1 Retrieving Record in FBC Access Restriction Summary screen
You can perform the following operations in the ‘FBC Access Restriction Summary’ screen:
You can retrieve a previously entered record in the Summary Screen, as follows:
Specify any or all of the following details in the corresponding fields:
- Invoke the ‘FBC Access Restriction Summary’ screen by
typing ‘UTSFAR’ in the field at the top right corner
of the Application tool bar and clicking on the adjoining arrow button
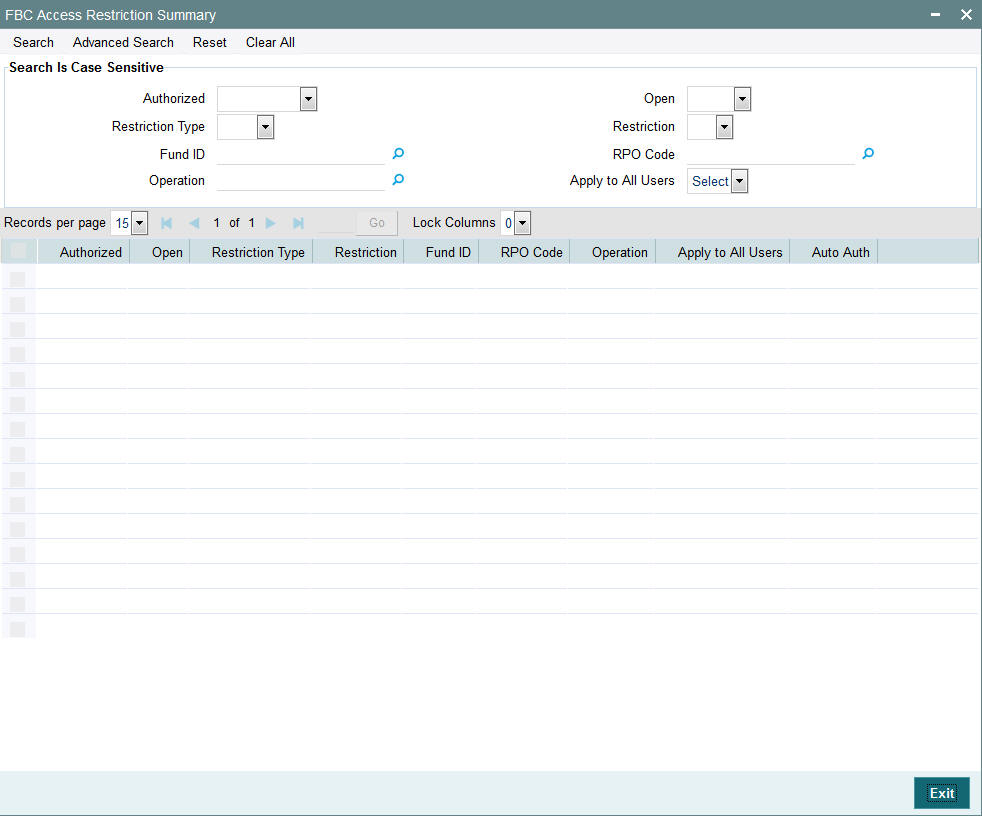
- The status of the record in the Authorized field. If you choose the ‘Blank Space’ option, then all the records are retrieved.
- The status of the record in the Open field. If you choose the ‘Blank Space’ option, then all records are retrieved
- Restriction Type
- Restriction
- Fund ID
- RPO Code
- Operation
- Apply to All Users
Click ‘Search’ button to view the records. All the records with the specified details are retrieved and displayed in the lower portion of the screen.
You can also retrieve the individual record detail from the detail screen by querying in the following manner:
- Press F7
- Input the Fund ID
- Press F8
You can perform Edit, Delete, Amend, Authorize operations by selecting the operation from the Action list. You can also search a record by using a combination of % and alphanumeric value.
Example
You can search the record for Fund ID by using the combination of % and alphanumeric value as follows:-
- Search by A%:- System will fetch all the records whose Fund ID starts from Alphabet ‘A’. For example, AGC17, AGVO6, AGC74 etc.
- Search by %7:- System will fetch all the records whose Fund ID ends by numeric value’ 7’. For example, AGC17, GSD267, AGC77 etc.
- Search by %17%:- System will fetch all the records whose Fund ID contains the numeric value 17. For example, GSD217, GSD172, AGC17 etc.
4.30.2 Editing FBC Access Restriction
You can modify the details of an FBC Access Restriction that you have already entered into the system, provided it has not been subsequently authorized. You can perform this operation as follows:
- Invoke the FBC Access Restriction Summary screen from the Browser.
- Select the status of the record that you want to retrieve for modification in the Authorized field. You can only modify records that are unauthorized. Accordingly, choose the unauthorized option.
- Specify any or all of the details in the corresponding fields to retrieve the record that is to be modified.
- Click ‘Search’ button or press F8. All unauthorized records with the specified details are retrieved and displayed in the lower portion of the screen.
- Double click the record that you want to modify in the list of displayed records. The FBC Access Restriction Detail screen is displayed.
- Select Unlock Operation from the Action list to modify the record. Modify the necessary information.
- Click Save to save your changes. The FBC Access Restriction Detail screen is closed and the changes made are reflected in the FBC Access Restriction Summary screen.
4.30.3 Viewing FBC Access Restriction
To view a record that you have previously input, you must retrieve the same in the FBC Access Restriction Summary screen as follows:
- Invoke the FBC Access Restriction Summary screen from the Browser.
- Select the status of the record that you want to retrieve for viewing in the Authorized field. You can also view all records that are either unauthorized or authorized only, by choosing the Unauthorized/ Authorized option.
- Specify any or all of the details of the record in the corresponding fields on the screen.
- Click ‘Search’ button. All records with the specified fields are retrieved and displayed in the lower portion of the screen.
- Double click the record that you want to view in the list of displayed records. The FBC Access Restriction Detail screen is displayed in View mode.
4.30.4 Deleting FBC Access Restriction
You can delete only unauthorized records in the system. To delete a record that you have previously entered:
- Invoke the FBC Access Restriction Summary screen from the Browser.
- Select the status of the record that you want to retrieve for deletion.
- Specify any or all of the details in the corresponding fields on the screen.
- Click ‘Search’ button. All records with the specified fields are retrieved and displayed in the lower portion of the screen.
- Double click the record that you want to delete in the list of displayed records. The FBC Access Restriction Detail screen is displayed.
- Select Delete Operation from the Action list. The system prompts you to confirm the deletion and the record is physically deleted from the system database.
4.30.5 Authorizing FBC Access Restriction
An unauthorized FBC Access Restriction must be authorized in the system for it to be processed. To authorize a record:
- Invoke the FBC Access Restriction Summary screen from the Browser.
- Select the status of the record that you want to retrieve for authorization. Typically, choose the unauthorized option.
- Specify any or all of the details in the corresponding fields on the screen.
- Click ‘Search’ button. All records with the specified details that are pending authorization are retrieved and displayed in the lower portion of the screen.
- Double click the record that you wish to authorize. The FBC Access Restriction Detail screen is displayed. Select Authorize operation from the Action List.
4.30.6 Amending FBC Access Restriction
After an FBC Access Restriction is authorized, it can be modified using the Unlock operation from the Action List. To make changes to a record after authorization:
- Invoke the FBC Access Restriction Summary screen from the Browser.
- Select the status of the record that you want to retrieve for authorization. You can only amend authorized records.
- Specify any or all of the details in the corresponding fields on the screen.
- Click ‘Search’ button. All records with the specified details that are pending authorization are retrieved and displayed in the lower portion of the screen.
- Double click the record that you wish to authorize. The FBC Access Restriction Detail screen is displayed in amendment mode. Select Unlock operation from the Action List to amend the record.
- Amend the necessary information and click on Save to save the changes.
4.30.7 Authorizing Amended FBC Access Restriction
An amended FBC Access Restriction must be authorized for the amendment to be made effective in the system. The authorization of amended records can be done only from Fund Manager Module.
The subsequent process of authorization is the same as that for normal records.
4.30.8 Copying Attributes
If you want to create a new FBC Access Restriction with the same attributes of an existing maintenance, you can copy the attributes of an existing FBC Access Restriction to a new one.
To copy the attributes:
- Retrieve the record whose attributes the new FBC Access Restriction should inherit. You can retrieve the record through the Summary screen or through the F7-F8 operation explained in the previous sections of this chapter.
- Click on Copy
- Indicate the ID for the new FBC Access Restriction. You can, however, change the details of the new restriction.
4.31 Corporate Actions for Fund
This section contains the following topics:
- Section 4.31.1, "Types of Corporate Actions"
- Section 4.31.2, "Invoking Corporate Actions Maintenance Screen"
- Section 4.31.3, "Split / ReverseSplitDetails Tab"
- Section 4.31.4, "Merge Details Tab"
- Section 4.31.5, "InvCategoryMap Tab"
- Section 4.31.6, "Fund Copy Tab"
4.31.1 Types of Corporate Actions
The holdings of investors in a fund are affected by corporate actions that are declared and processed in respect of the fund such as liquidations, mergers, splits, reverse splits, dividends, capital payouts, side pocket creations, side pocket mergers and so on.
These corporate actions are discussed below:
Liquidation
This corporate action simply means the liquidation of the entire corpus of the fund on a date decided by the fund. The proceeds of such liquidation are paid out to the investors. The date of liquidation is intimated to the investors in advance, so that they may redeem their holdings, prior to the liquidation date, if so desired.
Split and Reverse Split
The split corporate action involves the splitting of unit balances of a ‘parent’ fund into a ‘child’ fund. It results in an increase in the total outstanding holdings in the fund. However, both the par value and the price per unit decrease, according to the split ratio.
The reverse split corporate action results in a decrease in the total outstanding holdings in the fund. However, both the par value and the price per unit increase, according to the split ratio.
The split or reverse split ratio could result in fractional balances in the new fund, and in the event of the AMC not allowing such fractional balances, the fractions are redeemed and the proceeds paid out to the unit holders.
Merger
A merger involves the merging of unit balances from one or more parent funds into a resultant fund. It can be put through either according to a predetermined user –input ratio or a system-derived ratio of parent fund(s) to the resultant fund
If you wish the system to derive the merger ratio, you should specify the fund(s) being merged (Parent Fund) and the fund into which the merger is happening (Resultant Fund). The system will derive the merger ratio based on the available net asset values of the specified funds.
The merger ratio could result in fractional balances in the new fund, and in the event of the AMC not allowing such fractional balances, the fractions are redeemed and the proceeds paid out to the unit holders.
Capital Payout
A capital payout liquidates a preset percentage of unit balances due to transactions in a fund, the proceeds of which are paid out the corresponding unit holders with balances in the fund due to the transactions.
The percentage of balances liquidated, could include units as of the price date of the transaction (all units), transaction date (all or confirmed units) or allocation date (all or confirmed units).
Oracle FLEXCUBE Investor Servicing provides the facility of maintaining the corporate actions mentioned above and processing them in respect of a fund.
Side Pocket Creation
Side pockets are special type of accounts used in hedge funds to separate illiquid assets from other more liquid investments. Once an investment enters a side pocket account, only the present participants in the hedge fund will be entitled to a share of it. Future investors will not receive a share of the proceeds in the event the asset's returns get realized.
During side pocket creation, percentage-wise redemption transactions are generated for all unit holders, based on the split percentage specified in the corporate action. Unit-wise subscription transactions, equal to units redeemed from the main fund, are generated for side pocket fund.
Side Pocket Merger
During side pocket mergers, 100% redemption happens in the side pocket fund. Subscription transactions, equivalent to the side pocket redemption units, are generated for the main fund.
Series Fund Merger
During ‘Series Fund Merger’, the fund series that are maintained separately in the system are consolidated at period end.
Note
After merger process you need to manually disable the follow-up fund series.
4.31.2 Invoking Corporate Actions Maintenance Screen
You can maintain details for corporate actions in the ‘Corporate Actions Maintenance Detail’ screen. You can invoke this screen by typing ‘UTDCOACT’ in the field at the top right corner of the Application tool bar and clicking on the adjoining arrow button. The ‘Corporate Actions Maintenance Detail’ screen is displayed.

Select ‘New’ from the Actions menu in the Application tool bar or click new icon to enter the details of the relevant corporate action.
You can specify the following fields in this screen:
Basic Information Section
Corporate Action Type
Mandatory
From the drop down list, select the type of corporate action for which you are maintaining the processing parameters, in this screen. The options are as follows:
- Capital Payout
- Liquidation
- Merger
- Reverse Split
- Split
- Side Pocket Creation
- Side Pocket Merger
- Series Fund Merger
Corporation Action Date
Date Format; Mandatory
Specify the date on which the corporate action falls due for processing. This must be the same as the current date, or a future date. The implications for the fund in each case are as follows:
- Liquidation- The fund would cease to exist after the corporate action is processed on this date.
- Split and Reverse Split- The par value of the fund would change subsequent to processing of the corporate action on this date.
- Merger-The funds that are being merged would cease to exist and the new fund would become effective, after the corporate action is processed on this date.
Corporate Action Status
Display
The status of the corporate action is displayed in this field.
When you enter a new record, it is marked with the ‘Active’ or ‘Unprocessed’ status. After authorization, the corporate action record can be cancelled through an amendment, before it is processed. In such a case, it acquires the ‘Cancelled’ status.
After the corporate action has been processed, it acquires the ‘Processed’ status.
Fund Information Section
Fund ID
Alphanumeric; 6 Characters; Mandatory
Select the fund for which you are maintaining a corporate action, from the drop down list. This list contains the names of all the authorized funds in the system.
When you select the fund, the Fund Base Currency is picked up from the Fund Demographics profile for the selected fund and displayed in the Fund Base Currency field.
In the case of liquidation, specify the ID of the fund being liquidated. For splits and reverse splits, specify the ID of the child fund. In the case of mergers, you must specify the ID of the resultant fund in this field.
ISIN Code
Alphanumeric; 12 Characters; Mandatory
Select the ISIN Code of the fund for which you are maintaining a corporate action, from the options provided. If you specify the ISIN Code of a fund, the ID of the fund is displayed in the Fund field and vice versa.
In the case of liquidation, specify the ISIN Code of the fund being liquidated. For splits and reverse splits, specify the ISIN Code of the child fund. In the case of mergers, you must specify the ISIN Code of the resultant fund in this field.
Price Information
Last Price Date
Date Format; Optional
Specify the last pricing date which should be greater than or equal to the current system date.
Liquidation Price
Numeric; 9 Characters; Optional
For liquidation, specify the price at which the selected fund is to be liquidated. It is the value at which units are redeemed for liquidation.
Liquidation Price/Lot
Numeric; 17 Characters; Optional
Specify the liquidation price per lot based on the liquidation price and the lot size you specify.
New Unit Par Value
Numeric; 17 Characters; Optional
Specify the new par value for units in the new or existing (resultant) fund, to be applicable after the corporate action has been processed.
For Split and Reverse Split actions, the System computes the new par value, and displays the same in this field. You can change this computed value and specify the desired value, if required.
Lot Size
Numeric; 6 Characters; Optional
Specify the lots for liquidation. By default, the lot is considered to be one. You can alter this and specify the applicable lot size. The liquidation price per lot is computed by the system based on the liquidation price and the lot size you specify.
Fractions Allowed?
Optional
In this field, you can specify if fractional balances (as a result of processing the corporate action) are allowable, for the fund. Select ‘Yes’ from drop-down list to indicate that fractional balances are allowed. Select ‘No’ from drop-down list to indicate that fractional balances are not allowed.
If not allowed, the resulting fractions are redeemed and the proceeds paid out to the unit holders.
No. of Decimals
Numeric; 2 Characters; Optional
By default, the number of decimals allowed is zero. If you indicate that fractional balances are allowed, the number of decimals specified for the fund in the Corporate Actions fund rule profile, are applicable.
Other Information
Holiday Rule
Optional
Select whether the corporate action date must be moved forward (after) or backward (prior) in case it falls on a system, fund or AMC holiday. The drop-down list displays the following values:
- Prior
- After
Payment Lag (Days)
Numeric; 1 Character; Optional
Specify the payment lag to be applicable for liquidation.
Threshold Amount
Numeric; 30 Characters; Mandatory
Specify the threshold amount for processing of the corporate action.
Auto Initiation?
Mandatory
You can use this field to indicate whether the corporate action must be executed manually or automatically. Select ‘Yes’ from drop-down list to indicate automatic execution; leave it unchecked to indicate manual execution.
If automatic execution is indicated, the Beginning of Day processes execute the corporate action on the corporate action date. If manual execution is indicated, then you can manually trigger the execution on the corporate action date, through the Corporate Action Processing screen.
Book Closing From Date
Date Format; Optional
Specify the book closing dates, between which transactions into the fund are suspended, for processing the corporate action. The corporate action date must fall within the book-closing period.
Book Closing To Date
Date Format; Optional
Specify the book closing dates, between which transactions into the fund are suspended, for processing the corporate action. The corporate action date must fall within the book-closing period.
Exchange Rate Source
Alphanumeric; 6 Characters; Mandatory
Specify the exchange rate source from which the exchange rate would be derived for processing the corporate action, for conversion from fund base currency to unit holder preferred currency.
By default, the first source entry in the list is deemed to be the exchange rate source. You can change this and specify the requisite source by choosing from the list.
Exchange Rate Date
Date Format; Mandatory
Specify the date, the exchange rate prevalent on which, would be used for processing the corporate action, for conversion from fund base currency to unit holder preferred currency.
By default, it is considered to be the same as the corporate action date. You can change this and specify the requisite date.
Units for Corporate Action
Optional
Select the units for corporate action from the drop-down list. The list displays the following values:
- Allocation Date(ALL)
- Allocation Date(Confirmed)
- Price Date(ALL)
- Transaction Date(ALL)
- Transaction Date(Confirmed)
The following table depicts the possibilities for each corporate action:
Corporate action type |
Basis for holdings |
Remarks |
Liquidation |
Allocation date |
All available holdings must be liquidated as the fund would cease to exist subsequent to the corporate action. |
Split / Reverse split with ISIN change |
Allocation date |
All available holdings must be processed for split / reverse split as the fund would cease to exist subsequent to the corporate action. |
Split/ Reverse split with no ISIN change |
Transaction date Price date Allocation date |
Basis could be either of the options available. The processing logic is similar to dividend freeze holdings |
Merge |
Allocation date |
All available holdings must be processed for merge as the underlying funds would cease to exist subsequent to the corporate action. |
Capital Payout |
Transaction date Price date Allocation date |
Basis could be either of the options available. The processing logic is similar to dividend freeze holdings |
Payment Currency
Optional
Select whether the capital payout amount is paid in the default currency of the unit holders or the base currency of the fund in respect of which the payout is being processed from the drop-down list. The list displays the following values:
- Fund Base Currency
- Unit Holder Preferred Currency
Capital Payout Rate (%)
Numeric; 22 Characters; Optional
For capital payouts, specify the percentage of units in the fund that are to be liquidated as a result of processing the payout.
Include Prior Capital Redeemed Units
Optional
Select ‘Yes’ from drop-down list to redeem prior capital redeemed units redeemed as a result of the capital payout.
Update IDS
Optional
If you choose ‘Yes’ option from the drop-down list, the system updates the income distribution setup of the parent Fund ID with that of the resultant Fund ID. For a successful update, you should choose ‘No’ for the ‘Restrict IDS for the Unit Holder’ option for the resultant Fund ID in the Corporate Actions screen in Fund Rules Maintenance
Update SI
Optional
If you choose ‘Yes’ from drop-down list, the system changes the Fund ID of the following from the parent Fund ID to the resultant Fund ID:
- Standing Instructions for all types of Unit Trust transactions
- Policy Premium details
- Policy Annuity Details
- Policy Recurring Switch details
Examples
- Merger of Fund 1 into Fund 2: Let us assume Fund 1 is being merged into Fund 2.and both are available in the asset allocation for premium and annuity to the extent of 40% and 60% respectively. In this case, at the time of transaction processing, the system updates the resultant Fund Id to Fund 2 and the ratio to 100%.
- Merger of Fund 1 and Fund 2 into Fund 3: Let us assume Funds 1 and 2 are being merged into Fund 3 and both (Funds 1& 2) are available in the asset allocation for premium and annuity to the extent of 40% and 60% respectively. Here, at the time of transaction processing, the system updates the resultant Fund Id to Fund 3 and the ratio to 100%.
- Merger of Fund 1 into Fund 2: Let us assume Fund 1 is being merged into Fund 2. Both these funds (From Fund – Fund1 and To Fund – Fund2) are available in the asset allocation for switch. In this case, at the time of transaction processing, the system will not process the transaction.
4.31.3 Split / ReverseSplitDetails Tab
The details you maintain for reverse split corporate actions are similar in every way to those you maintain for a split. However, when you specify the parent – resultant ratio, the parent ratio must exceed the resultant (child) ratio, in the Reverse Split Details screen.
Fund ID
Alphanumeric; 6 Characters; Optional
Specify the parent fund for the corporate action. This list contains the names of all the authorized funds in the system.
ISIN Code
Alphanumeric; 12 Characters; Optional
Select the ISIN Code of the parent fund for the corporate action, from the options provided. If you specify the ISIN Code of a fund, the ID of the fund is displayed in the Fund field and vice versa.
In the case of mergers, you can specify more than one parent fund. Click on the Add link to add a row.
Ratio(Parent:Child)
Split Parent Ratio
Numeric; 22 Characters; Optional
Enter the split parent ratio. The parent ratio must be less than the resultant (child) ratio.
Split Resultant Ratio
Numeric; 22 Characters; Optional
Enter the split resultant ratio The parent ratio must be less than the resultant (child) ratio.
Note
For splits and mergers, the parent ratio must not be greater than the child ratio. For reverse splits, the parent ratio must be greater than the child ratio. The ratios you specify cannot be equal to or fall below zero.
4.31.4 Merge Details Tab
Click ‘Merge Details’ tab in ‘Corporate Actions Maintenance Detail’ screen. The following window is displayed:

You can specify the following details:
Fund ID
Alphanumeric; 6 Characters; Optional
Specify the parent fund for the corporate action. This list contains the names of all the authorized funds in the system.
ISIN Code
Alphanumeric; 12 Characters; Optional
Select the ISIN Code of the parent fund for the corporate action, from the options provided. If you specify the ISIN Code of a fund, the ID of the fund is displayed in the Fund field and vice versa.
Ratio Parent :
Numeric; 22 Characters; Optional
Specify the parent ratio.
Child
Numeric; 22 Characters; Optional
Specify the child ratio.
Apply CGT
Optional
Select ‘Yes’ from drop-down list to apply CGT. Else select ‘No’.
The parent – resultant ratio for the merger the parent ratio can either be less than or greater than the resultant ratio.
- Whether fractional units are allowable as a result of the merger. If you indicate so, you can also specify the applicable number of decimals.
- Whether the merger date must be moved forward or backward, if it falls on a holiday.
- Payment lag, if any, for the merger
- Threshold amount
- Whether or not the merger process must be automatically initiated on the merger date (the Beginning of Day processes initiate the merger process in the system, if automatic initiation is specified)
- The book closing period that signifies the dates between which transactions into the fund are suspended for processing the merger.
- The exchange rate source applicable and the exchange rate date
- Whether the system should update the income distribution setup for the merger
- Whether the system should change the standing instructions and policy details
- Fund merger can either result in transfer of holdings to a new fund or an existing fund based on Ratio Parent: Child defined in Corporate Action Maintenance Detail. The system will classify the holdings of an investor in the merger fund as ‘Execution Only Business’ and ‘Advised Business’ based on the classification of underlying transaction in the source fund.
Example
Fund A merging into Fund B in the ratio of 2:1
Holdings in Fund A are as follows:
|
Advised |
Execution |
Total |
UH1 |
120 |
10 |
130 |
UH2 |
180 |
|
180 |
UH3 |
|
100 |
100 |
Post merger, the Holdings in Fund B will be as follows:
|
Advised |
Execution |
Total |
UH1 |
60 |
5 |
65 |
UH2 |
90 |
|
90 |
UH3 |
|
50 |
50 |
4.31.5 InvCategoryMap Tab
Click ‘InvCategoryMap’ tab n ‘Corporate Actions Maintenance Detail’ screen. The following window is displayed.

You can specify the following details:
Restricted Investor Category
Alphanumeric; 255 Characters; Optional
Specify the restricted investor category.
4.31.6 Fund Copy Tab
Click ‘Fund Copy’ tab n ‘Corporate Actions Maintenance Detail’ screen. The following window is displayed.

You can specify the following details:
From Fund Details
Fund ID
Alphanumeric; 6 Characters; Optional
Specify the parent fund for the corporate action. This list contains the names of all the authorized funds in the system.
ISIN Code
Alphanumeric; 12 Characters; Optional
Select the ISIN Code of the parent fund for the corporate action, from the options provided. If you specify the ISIN Code of a fund, the ID of the fund is displayed in the Fund field and vice versa.
New Fund Details
Fund ID
Alphanumeric; 6 Characters; Optional
Specify the parent fund for the corporate action. This list contains the names of all the authorized funds in the system.
Fund Name
Alphanumeric; 60 Characters; Optional
Specify the fund name.
Fund Short Name
Alphanumeric; 15 Characters; Optional
Specify the short name of the fund.
Fund Tax ID
Alphanumeric; 60 Characters; Optional
Specify the fund tax ID.
ISIN Code
Alphanumeric; 12 Characters; Optional
Select the ISIN Code of the parent fund for the corporate action, from the options provided. If you specify the ISIN Code of a fund, the ID of the fund is displayed in the Fund field and vice versa.
Create Fund as an
Optional
Select ‘Authorised’ option from drop-down list to create fund as an authorized fund. Else select ‘Unauthorised’ option.
Fund Ticker Symbol
Alphanumeric; 25 Characters; Optional
Specify the fund ticker symbol.
After entering the above details, click ‘Create Fund’ button. The system will display the confirmation message.
4.31.6.1 Maintaining Details for Liquidation
For fund liquidations, you must maintain the details mentioned below in the ‘Corporate Actions Maintenance Detail’ screen. Select the ‘Liquidation’ option in the Corporate Action Type field.
- Date of liquidation
- ID and ISIN code of the fund that is being liquidated
- Price at which the fund will be liquidated
- Lot size. When you specify the lot size, the liquidation price per lot is computed by the system.
- Whether the liquidation date must be moved forward or backward, if it falls on a holiday.
- Payment lag, if any, for the liquidation.
- Threshold amount.
- Whether or not the liquidation process must be automatically initiated on the liquidation date (the Beginning of Day processes initiate the liquidation process in the system, if automatic initiation is specified).
- The book closing period that signifies the dates between which transactions into the fund are suspended for processing the liquidation.
- The exchange rate source applicable and the exchange rate date.
4.31.6.2 Maintaining Details for Split
For fund splits, you must maintain the details mentioned below in the Corporate Actions Maintenance screen. Select the ‘Split’ option in the Corporate Action Type field.
- Date of split
- ID and ISIN code of the resultant (or child) fund. Specify this in the Resultant Fund section in the screen. If a new resultant fund is to be created by the split, click on the Create Fund link to create the new fund.
- ID and ISIN code of the parent fund. Click on the Split Details link to invoke the Split Details screen, where you can specify the parent fund details.
- The split parent ratio for the split. The parent ratio must be less than the resultant (child) ratio.
- The split Resultant Ration for the split. The parent ratio must be less than the resultant (child) ratio.
- Whether fractional units are allowable as a result of the split. If you indicate so, you can also specify the applicable number of decimals.
- The new par value per unit, for the units being split.
- Whether the split date must be moved forward or backward, if it falls on a holiday.
- Payment lag, if any, for the split.
- Threshold amount.
- Whether or not the split process must be automatically initiated on the split date (the Beginning of Day processes initiate the split process in the system, if automatic initiation is specified).
- The book closing period that signifies the dates between which transactions into the fund are suspended for processing the split.
- The exchange rate source applicable and the exchange rate date.
- Whether the units to be considered for the split are to be considered as of the transaction date, allocation date or price date
4.31.6.3 Maintaining Details for Capital Payout
For capital payouts, you must maintain the details mentioned below in the Corporate Actions Maintenance screen. Select the ‘Capital Payout’ option in the Corporate Action Type field.
- Date of capital payout.
- ID and ISIN code of the fund, balances from which are being redeemed and paid out as a result of the capital payout.
- The new par value per unit, for the units being liquidated.
- Whether fractional units are allowable as a result of the capital payout. If you indicate so, you can also specify the applicable number of decimals.
- Whether the capital payout date must be moved forward or backward, if it falls on a holiday.
- Threshold amount.
- Whether or not the capital payout process is to be automatically initiated on the corporate action date (the Beginning of Day processes initiate the capital payout process in the system, if automatic initiation is specified)
- The book closing period that signifies the dates between which transactions into the fund are suspended for processing the capital payout.
- The exchange rate source applicable and the exchange rate date.
- The percentage of the units balance in the fund that are to be liquidated due to processing the capital payout.
- The units that are to be liquidated as part of the capital payout – as of price date of the transaction (all units), transaction date (all or confirmed units) or allocation date (all or confirmed units).
- Whether the payment for the liquidated units is to be made in the unit holders’ base currency or the fund base currency
- Whether prior capital redeemed units are to be redeemed when the capital payout is processed.
4.31.6.4 Maintaining Details for Side Pocket Creation
For side pocket creation, you must maintain related details in the Corporate Actions Maintenance screen. Select the ‘Side Pocket Creation’ option in the Corporate Action Type field.
- You need to select the Corporate action type as ‘Side Pocket Creation’
- Specify the date of side pocket creation
- Specify the ID and ISIN code of the fund
- If the split ratio is 10 then in split/ reverse split details, you need to specify the Parent Ratio as 10. Child ratio will be ignored in this case.
4.31.6.5 Maintaining Details for Side Pocket Merger
For side pocket merger, you must maintain related details in the Corporate Actions Maintenance screen. Select the ‘Side Pocket Merger’ option in the Corporate Action Type field.
You can perform merger of side pockets with the main fund by following the instructions specified below:
- Select ‘Side Pocket Merger’ option in the Corporate Action Type field.
- Specify the Parent Ratio for merger in ‘Merger Details’ tab.
- System performs 100% redemption of the side pocket fund
- Unit based subscription transactions are generated for the main fund
- The transactions are allotted based on the allocation lag and price availability
After merger, you need to manually disable the side pocket funds.
The example given below illustrates the merger of a side pocket fund:
Example:
Assume that JPMORG is a Hedge Fund and SIDEP1 is a side pocket of JPMORG. The current holdings of all unit holders are as below:
Unit holder ID |
Units |
UH1 |
1000 |
UH2 |
1500 |
UH3 |
2000 |
UH4 |
2500 |
Side Pocket Creation: Split Ratio 0.1
Units in JPMORG
Unit holder ID |
Units |
UH1 |
900 |
UH2 |
1350 |
UH3 |
1800 |
UH4 |
2250 |
Units in SIDEP1
Unit holder ID |
Units |
UH1 |
100 |
UH2 |
150 |
UH3 |
200 |
UH4 |
250 |
Side Pocket Merger: Merger Ratio .05
Units in JPMORG (before merger)
Unit holder ID |
Units |
UH1 |
900 |
UH2 |
1350 |
UH3 |
1800 |
UH4 |
2250 |
UH5 |
1000 |
UH6 |
2000 |
Units in JPMORG (after merger)
Unit holder ID |
Units |
UH1 |
905 |
UH2 |
1357.5 |
UH3 |
1810 |
UH4 |
2262.5 |
UH5 |
1000 |
UH6 |
2000 |
SIDEP1 fund will be disabled after merger process. There will not be any change in units of the new unit holders who subscribed in JPMORG after side pocket creation.
4.31.6.6 Maintaining Details for Series Fund Merger
During series fund merger, the fund series that are maintained separately in the system are consolidated at period end. For series fund merger, you must maintain related details in the Corporate Actions Maintenance screen. Select the ‘Series Fund Merger’ option in the Corporate Action Type field.
The example given below illustrates the corporate action ‘Series Fund Merger’
Example
Assume that Investor A purchases 1,000 units at the launch of the fund GFUND1, at US$1,000 per unit (HWM of GFUND1). This will be the "Lead Series" of Unit. It is also assumed that the incentive fees are being paid quarterly and HWM of fund is Greater of Subscription Price and Previous high water mark.
Also, assume that at the end of the first month the Gross NAV ("GNAV") (the NAV before deduction of incentive fee) for GFUND1 has risen to US$1,100 and therefore the NAV will be US$1,080, net of US$20 / 20% incentive fee (Assuming performance fee is 20%).
- NAV for GFUND1 is published at US$1,080
After the first pricing period, you need to create one more fund, say ‘GFUND2’, with NAV same as Lead Series. Assume that at this time Investor B subscribes US$1 million for 1,000 Unit (Series II) at, again US$1,000 (HWM of GFUND2) each.
At the end of second month, assuming that value of fund has risen by further 10%:
- GNAV of GFUND1 is now US$1,210 = NAV US$1,168; and
- GNAV of GFUND2 is now US$1,100 = NAV US$1,080
After second pricing period, you need to create one more fund with NAV same as Lead Series. Let’s say user create ‘GFUND3’ for creation of Series III as below,
Investor C subscribes US$1 million for 1,000 Series III Unit at, again US$1,000 (HWM of GFUND3) each.
At the end of the third month, the GNAV has yet again risen by a further 10%, so that:
- The GNAV per Share of the GFUND1 (Lead Series) is US$1,331, which translates to an NAV of US$1, 264.80;
- The GNAV of GFUND2 (Series II) is US$1,210, equaling an NAV of US$1,168; and
- The GNAV for GFUND1 (Series III) is US$1,100, equaling an NAV of US$1,080.
Thus, at the end of the first quarter, as a High Water-Mark ("HWM") has been reached and each of the Series of Unit have paid incentive fees, the Series II and Series III Unit can now be consolidated into the Lead Series.
This can be archived by using Corporate Action screen, by choosing the ‘Series Fund Merger’ option to merge GFUND2 (Series II) and GFUND3 (Series III) into GFNUD1 (Lead Series) as below,
- Units created for Investor B (Lead Series) = (NAV of GFUND2 / NAV of GFUND1) * Units allotted to Investor B.
Therefore, Investor B's units are worth US$1,168.00, which equates to 923.466 units at the NAV per Lead Series, at US$1,264.80 each.
- Units created for Investor C (Lead Series) = (NAV of GFUND3 / NAV of GFUND1) * Units allotted to Investor C.
Investor C will effectively liquidate his 1,000 Unit of US$1,080,000 and invest the proceeds of that liquidation into the Lead Series at US$1,264.80 per share, to receive 853.890 Lead Series Unit.
4.32 Corporate Actions Summary Screen
This section contains the following topics:
- Section 4.32.1, "Retrieving Record in Corporate Actions Summary screen"
- Section 4.32.2, "Editing Corporate Actions Record"
- Section 4.32.3, "Viewing Corporate Actions Record"
- Section 4.32.4, "Deleting Corporate Actions Record"
- Section 4.32.5, "Authorizing Corporate Actions Record"
- Section 4.32.6, "Amending Corporate Actions Record"
- Section 4.32.7, "Authorizing Amended Corporate Actions Record"
- Section 4.32.8, "Reversing Corporate Action"
- Section 4.32.9, "Copying Attributes"
4.32.1 Retrieving Record in Corporate Actions Summary screen
You can retrieve a previously entered record in the Summary Screen, as follows:
Specify any or all of the following details in the corresponding fields:
- Invoke the ‘Corporate Actions Maintenance Summary’ screen
by typing ‘UTSCOACT’ in the field at the top right corner
of the Application tool bar and clicking on the adjoining arrow button

- The status of the record in the Authorized field. If you choose the ‘Blank Space’ option, then all the records are retrieved.
- The status of the record in the Open field. If you choose the ‘Blank Space’ option, then all records are retrieved
- Corporate Action Date
- Corporate Action Type
- Fund ID
- ISIN Code
Click ‘Search’ button to view the records. All the records with the specified details are retrieved and displayed in the lower portion of the screen.
You can also retrieve the individual record detail from the detail screen by querying in the following manner:
- Press F7
- Input the Fund ID
- Press F8
You can perform Edit, Delete, Amend, Authorize operations by selecting the operation from the Action list. You can also search a record by using a combination of % and alphanumeric value.
Example
You can search the record for Fund ID by using the combination of % and alphanumeric value as follows:-
- Search by A%:- System will fetch all the records whose Fund ID starts from Alphabet ‘A’. For example, AGC17, AGVO6, AGC74 etc.
- Search by %7:- System will fetch all the records whose Fund ID ends by numeric value’ 7’. For example, AGC17, GSD267, AGC77 etc.
- Search by %17%:- System will fetch all the records whose Fund ID contains the numeric value 17. For example, GSD217, GSD172, AGC17 etc.
4.32.2 Editing Corporate Actions Record
You can modify the details of a Corporate Actions record that you have already entered into the system, provided it has not been subsequently authorized. You can perform this operation as follows:
- Invoke the Corporate Actions Summary screen from the Browser.
- Select the status of the record that you want to retrieve for modification in the Authorized field. You can only modify records that are unauthorized. Accordingly, choose the unauthorized option.
- Specify any or all of the details in the corresponding fields to retrieve the record that is to be modified.
- Click ‘Search’ button. All unauthorized records with the specified details are retrieved and displayed in the lower portion of the screen.
- Double click the record that you want to modify in the list of displayed records. The Corporate Actions Detail screen is displayed.
- Select Unlock Operation from the Action list to modify the record. Modify the necessary information.
- Click Save to save your changes. The Corporate Actions Detail screen is closed and the changes made are reflected in the Corporate Actions Summary screen.
4.32.3 Viewing Corporate Actions Record
To view a record that you have previously input, you must retrieve the same in the Corporate Actions Summary screen as follows:
- Invoke the Corporate Actions Summary screen from the Browser.
- Select the status of the record that you want to retrieve for viewing in the Authorized field. You can also view all records that are either unauthorized or authorized only, by choosing the Unauthorized/ Authorized option.
- Specify any or all of the details of the record in the corresponding fields on the screen.
- Click ‘Search’ button. All records with the specified fields are retrieved and displayed in the lower portion of the screen.
- Double click the record that you want to view in the list of displayed records. The Corporate Actions Detail screen is displayed in View mode.
4.32.4 Deleting Corporate Actions Record
You can delete only unauthorized records in the system. To delete a record that you have previously entered:
- Invoke the Corporate Actions Summary screen from the Browser.
- Select the status of the record that you want to retrieve for deletion.
- Specify any or all of the details in the corresponding fields on the screen.
- Click ‘Search’ button. All records with the specified fields are retrieved and displayed in the lower portion of the screen.
- Double click the record that you want to delete in the list of displayed records. The Corporate Actions Detail screen is displayed.
- Select Delete Operation from the Action list. The system prompts you to confirm the deletion and the record is physically deleted from the system database.
4.32.5 Authorizing Corporate Actions Record
An unauthorized Corporate Actions record must be authorized in the system for it to be processed. To authorize a record:
- Invoke the Corporate Actions Summary screen from the Browser.
- Select the status of the record that you want to retrieve for authorization. Typically, choose the unauthorized option.
- Specify any or all of the details in the corresponding fields on the screen.
- Click ‘Search’ button. All records with the specified details that are pending authorization are retrieved and displayed in the lower portion of the screen.
- Double click the record that you wish to authorize. The Corporate Actions Detail screen is displayed. Select Authorize operation from the Action List.
When a checker authorizes a transaction, details of validation, if any, that were overridden by the maker of the transaction during the Save operation are displayed. If any of these overrides results in an error, the checker must reject the transaction.
When you authorize a corporate action, you must re-key the liquidation price (for liquidations) or the parent – resultant ratio (for splits, reverse splits and mergers)
4.32.6 Amending Corporate Actions Record
After a Corporate Actions record is authorized, it can be modified using the Unlock operation from the Action List. To make changes to a record after authorization:
- Invoke the Corporate Actions Summary screen from the Browser.
- Select the status of the record that you want to retrieve for authorization. You can only amend authorized records.
- Specify any or all of the details in the corresponding fields on the screen.
- Click ‘Search’ button. All records with the specified details that are pending authorization are retrieved and displayed in the lower portion of the screen.
- Double click the record that you wish to authorize. The Corporate Actions Detail screen is displayed in amendment mode. Select Unlock operation from the Action List to amend the record.
- Amend the necessary information and click on Save to save the changes.
When you amend an authorized corporate action after it has been processed, you can only alter the liquidation price, lot size and book closing period (for liquidations) or the new unit par value, book closing period and parent – resultant ratio (for splits, reverse splits and mergers). The original corporate action is marked ‘cancelled’, and a new record is created, with a link to the original action record. Also, the book closing dates can be entered if required.
The exchange rate details, such as the rate source and rate date, can be amended provided the corporate action has not been processed.
When you amend an authorized corporate action before it has been processed, the amendment operation is similar to an edit operation. All the validations performed by the system when a new corporate actions record is initiated, are applicable. In this mode, the corporate action can also be marked as ‘cancelled’, in which case it will not be processed.
4.32.7 Authorizing Amended Corporate Actions Record
An amended Corporate Actions record must be authorized for the amendment to be made effective in the system. The authorization of amended records can be done only from Fund Manager Module and Agency Branch module.
The subsequent process of authorization is the same as that for normal records.
4.32.8 Reversing Corporate Action
When you reverse a corporate action that has been processed, the original action record is marked as ‘cancelled’, and the reversal is processed either by the Beginning of Day process (if designated as automatic) or manually, through the Corporate Action Processing screen.
In case of reversal or amendment of a corporate action after original processing, a reversal transaction is generated for all the transactions for the day with reference types indicating Split/ Reverse Split/ Merger/ Rollback/ Capital Payout.
4.32.9 Copying Attributes
If you want to create a new Corporate Actions record with the same attributes of an existing maintenance, you can copy the attributes of an existing Corporate Actions record to a new one.
To copy the attributes:
- Retrieve the record whose attributes the new Corporate Actions record should inherit. You can retrieve the record through the Summary screen or through the F7-F8 operation explained in the previous sections of this chapter.
- Click on Copy
- Indicate the ID for the new Corporate Actions. You can, however, change the details of the new record.
4.33 Corporate Actions Processing
This section contains the following topics:
- Section 4.33.1, "Processing Corporate Actions"
- Section 4.33.2, "Invoking Corporate Action Screen for Pre-Processing"
- Section 4.33.3, "Executing Corporate Actions Manually"
- Section 4.33.4, "Pre-processing Validations"
- Section 4.33.5, "Messages for Pre-processing Checks"
- Section 4.33.6, "System Processing for Corporate Actions"
- Section 4.33.7, "Reports for Corporate Actions"
4.33.1 Processing Corporate Actions
Automatic and Manual Execution
After a corporate action maintained in the Corporate Action Maintenance screen is authorized, it is ready for processing. If the initiation of the corporate action process is designated to be automatic, it is executed by the Beginning of Day processes on the corporate action date.
If automatic execution is not designated, the corporate action must be manually executed. You can use the Corporate Action Processing screen to manually execute the corporate action.
Pre-Processing for Corporate Actions
The system performs pre-processing validations before a corporate action can be processed. For automatic execution, the Beginning of Day processes perform the validations.
4.33.2 Invoking Corporate Action Screen for Pre-Processing
The system performs pre-processing validations before a corporate action can be processed. For automatic execution, the Beginning of Day processes perform the validations. For manual execution, you can trigger the pre-processing validations, using the ‘Corporate Actions (Fund)’ screen.
You can invoke this screen by typing ‘UTDCORAC’ in the field at the top right corner of the Application tool bar and clicking on the adjoining arrow button.

In this screen, you can trigger the pre-processing validations for corporate actions that fall due either on the current date or on the next working day.
Corporate Actions Online Check
As of next day?
Optional
Select ‘Yes’ from drop-down list if the online check has to be done as part of next day.
Corporate Actions online check status :
Display
The system displays the status of corporate actions online check.
Click the ‘Fetch Corporate Action’ button to submit the background job that performs the validations, and then click ‘View Corporate Action Results’ button to display the results in the list portion of the screen. The following details are displayed for each check:
- Serial number
- Messages in respect of performing the validation
- Whether the message is a standard one or is specific to the corporate action
- If the message is CA specific
- Whether the resolution of the message is critical to the execution of the corporate action. Those validations marked ‘critical’ must be resolved for successful execution of the corporate action.
- The number count for the message
- To view the message details for each validation, click the list box alongside the message row.
Click on the Details button, the Corporate Actions Online Check Details screen is opened
In the Corporate Actions Online Check Details screen you can view information on the following:
- Code
- Fund
- Sub Count
For more information about the pre-processing validations, refer the section titled ‘Pre-processing Validations’ in this chapter.
4.33.3 Executing Corporate Actions Manually
To recall, you can manually execute a corporate action on the corporate action date, in the Corporate Action Processing screen. You can invoke the ‘Corporate Actions (Fund) screen by typing ‘UTDCOAC’ in the field at the top right corner of the Application tool bar and clicking on the adjoining arrow button.
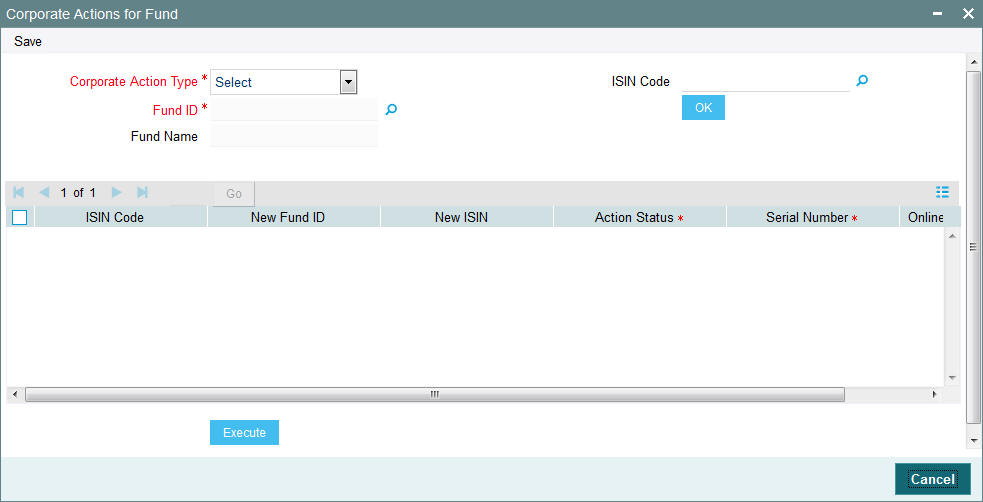
You can specify the following details:
Corporate Action Type
Mandatory
Select the type of corporate action from the drop-down list. The list displays the following values:
- Liquidation
- Split
- Reverse Split
- Fund Merger
- Capital Payout
- Side Pocket Creation
- Side Pocket Merger
- Series Merger
Fund ID
Alphanumeric; 6 Characters; Mandatory
Specify the fund ID. Alternatively, you can select fund ID from the option list. The list displays all valid fund ID maintained in the system.
Fund Name
Display
The system displays the name of the fund for the selected fund ID.
ISIN Code
Alphanumeric; 12 Characters; Mandatory
The system displays the ISIN code for the selected fund ID. However, you can amend this value.
If you specify the ISIN code, the system displays the fund ID and vice versa.
In this screen, specify the corporate action type you wish to manually execute and the ID and ISIN of the fund (resultant fund in the case mergers, and the source funds in case of split and reverse splits), and click ‘Ok’ button.
The details of the corporate actions falling due on the current date, which are either in ‘unprocessed’ or ‘error’ status, for the selected fund, are displayed as follows:
- ISIN Code
- New Fund ID
- New ISIN
- Action Status
- Serial Number
To trigger the pre-processing validations before you execute the corporate action, click ‘Online Check’ button. You can click on the ‘Execute’ button to actually execute the corporate action.
4.33.4 Pre-processing Validations
Unauthorized fund-related static maintenances
This check reports the unauthorized fund-related static maintenances, with respect to any of the maintenances mentioned below. It is a mandatory check and processing cannot continue till the check is successful.
- Fund rules
- Group definition
- Fund price
- Fund account
- Fund agency branch backdating limit
- Periodic load
- Fund holiday
- Fund dividend
- Fund sub-account
- General Ledger Interface setup
- Withholding tax setup
- Switch privilege list setup
- Fund sale restrictions
Broker Commission Processing
This check reports any pending commission (commission accrued but not adjusted). It is an optional check; the information is for reporting only, and will not block further processing of the corporate action.
Pending Transactions
This check reports transactions pending processing at any stage of the transaction life cycle, such as the following:
- Unauthorized transactions
- Incomplete (due to exchange rate or payment)
- Allotted but not settled
- Unconfirmed global orders
- Unprocessed / unauthorized SWIFT transactions
- Valid Limit orders which have not been executed
- Unauthorized overridden loads
All such transactions must be either allotted and settled, or, alternately, reversed. Alternately, they would need to be reversed. Limit orders must be reversed; if not, processing of the corporate action marks these as ‘EXPIRED’. All SWIFT transactions must also be processed or deleted.
This is a mandatory check and processing cannot continue till the check is successful.
Unprocessed dividend or reinvestments
This check reports unprocessed dividend or reinvestments, which would include dividends declared but not processed, so that appropriate action can be taken. It is an optional check; the information is for reporting only, and will not block further processing of the corporate action.
Trailing Commission
This check reports any accrued trail commission (trail commission for the period between the last processed date to the corporate action date), so that it can be cleared manually. The load id of the trailing commission is reported. It is an optional check; the information is for reporting only, and will not block further processing of the corporate action.
Standing Instructions
This check reports the following:
- Standing instructions for which action has not been taken after first reminder generation. (A warning is displayed)
- Standing instructions for which action has not been taken after last reminder generation. (A warning is displayed)
- Standing instructions which are generating on corporate action date
This is a mandatory check and must be successful for processing of the corporate action to continue.
Unconfirmed redemption transactions
This check reports the number of redemption transactions for which confirmations are due. It is a mandatory check and must be successful for processing of the corporate action to continue.
Funds that do not retain ageing to subscription
For a corporate action triggered from an existing ISIN to a different ISIN, the ageing of units is based on the parameter ‘Retain Ageing to Subscription’ set in the Transaction Processing Rules for the fund. If this parameter is not indicated as true for the resultant fund for the ‘Switch In’ transaction type, a warning is displayed.
Funds those are not active for corporate action processing
For a corporate action triggered from an existing ISIN to a different ISIN, the system checks that the resultant ISIN is effective as of the corporate action date. If not, an appropriate message is displayed. This is a mandatory check and must be successful for processing of the corporate action to continue.
Number of special deals for the fund
If any unit holder deals exist for the fund, a warning is displayed. This is an optional check.
Number of Letters of Intent (LOI) for the fund
If any Letters of Intent (LOI) exists for the fund, a warning is displayed. This is an optional check.
Number of Income Distribution Setups (IDS) in the fund
This check reports the number of reinvestments set up into the fund. This is an optional check.
Number of Interface Definitions to which the fund belongs
If the fund belongs to any of the parameters defined for any interface definition in the system, a warning is displayed. This is an optional check.
Number of jobs to which the fund belongs
If the fund belongs to any one or many of the job parameters defined for any job definition in the system, a warning is displayed. This is an optional check.
Funds for which holding period is applicable
If a holding period has been designated as applicable for the fund, a warning is displayed. This is an optional check.
Funds with minimum registered capital greater than zero
If the minimum registered capital of the fund exceeds zero, an appropriate message is displayed. his is a mandatory check and processing of the corporate action cannot continue if it is unsuccessful.
Maintenance of Switch Out transaction type for the ‘From’ fund
For corporate actions involving different parent and resultant funds, the system checks that the Switch Out transaction type has been maintained and is allowable for the ‘From’ fund. This is a mandatory check and processing of the corporate action cannot continue if it is unsuccessful.
Maintenance of Switch In transaction type for the ‘To’ fund
For corporate actions involving different parent and resultant funds, the system checks that the Switch In transaction type has been maintained and is allowable for the ‘To’ fund. This is a mandatory check and processing of the corporate action cannot continue if it is unsuccessful.
Funds for which fractional balances are not allowed, with rounding rules other than ‘truncate’
In case fractional units need to be paid out in the resulting fund, the system checks that the rounding options in the General Operating Rules must be set to ‘truncate’. If this has not been set for the resultant fund for the Switch In transaction type, an appropriate warning message is displayed. This is a mandatory check and processing of the corporate action cannot continue if it is unsuccessful.
4.33.5 Messages for Pre-processing Checks
According to the checks listed above, the appropriate messages that would be displayed as a result of performing the pre-processing checks are shown in the table below. A severity level of ‘Warning’ indicates an optional check, which would not impede the processing of the corporate action if the check fails. A severity level of ‘Critical’ indicates a mandatory check, which must succeed in order to continue with the processing of the corporate action.
Message |
Severity |
Unauthorized Fund |
Critical |
Unauthorized Fund Price |
Critical |
Unauthorized Fund Dividend record |
Critical |
Unauthorized Fund Account |
Critical |
Unauthorized Fund Agency Branch Backdating Limit Setup |
Critical |
Unauthorized Fund Sub Account record |
Critical |
Unauthorized Fund GL record |
Critical |
Unauthorized WH Tax Setup record |
Critical |
Unauthorized Periodic Load record |
Critical |
Unauthorized Switch Privilege Setup record |
Critical |
Unauthorized Fund Holiday record |
Critical |
Unauthorized Group Definition |
Critical |
Unauthorized Fund Sale Restriction record |
Critical |
Unconfirmed Global Order |
Critical |
Unauthorized Incoming SWIFT message |
Warning |
Unprocessed/Repaired Incoming SWIFT message |
Warning |
Unauthorized Outgoing SWIFT message |
Warning |
Unprocessed/Repaired Outgoing SWIFT message |
Warning |
Unauthorized Overridden Loads |
Critical |
Unprocessed Dividends |
Warning |
Unprocessed Reinvestments |
Warning |
Standing Instructions for which Action is not taken after generating the First Reminder or Last Reminder |
Warning |
Redemptions which are due for Confirmation |
Critical |
Unauthorized Transactions |
Critical |
Transactions which are either unallotted, unsettled or partially allotted |
Critical |
Unexecuted valid Limit Orders |
Warning |
SIs generating on corporate action date |
Warning |
Brokers for whom the Commission is pending due |
Warning |
Periodic loads for the fund for which trailing commission is pending due |
Warning |
Fund(s) which do not retain ageing to subscription |
Warning |
Fund(s) which do are not active for corporate action processing |
Critical |
Number of Special Deals in which the fund belongs to |
Warning |
Number of LOI(s) in which the fund belongs to |
Warning |
Number of Income distribution(s) in the fund |
Warning |
Number of Reinvestment set up into the fund |
Warning |
Number of Interface Definition(s) in which the fund belongs to |
Warning |
Number of Job(s) in which the fund belongs to |
Warning |
Fund(s) in which Holding Period is applicable |
Warning |
Fund(s) in which Minimum Registered Capital > 0 |
Critical |
Fund(s) in which minimum number of Unit Holders is greater than 0 |
Critical |
Fund in which Switch Out transaction type should be maintained |
Critical |
Fund in which Switch In transaction type should be maintained |
Critical |
Fund in which fraction is not allowed but rounding rules for units is not TRUNCATE |
Critical |
4.33.6 System Processing for Corporate Actions
Liquidation
During execution, the corporate actions procedure picks up all liquidations whose corporate action date is the same as the current date, and with status as ‘unprocessed’ or ‘error’. Subsequently, the pre-processing checks are performed. The liquidation procedure is then executed, which performs the following actions:
- Balances of all unit holders balances in the current fund, as of a date less than the action date, are picked up, and full redemptions in the fund are generated in respect of these unit holders
- If a reversal or an amendment has been done after original processing, a reversal transaction is generated for all transactions for the day with a reference type indicating liquidation
- Any underlying standing instructions for the unit holders are marked as ‘Cancelled’; if any reversal has been done after original processing, the original SI status is restored
- Any unexecuted limit orders for the unit holders are marked as ‘EXPIRED’, and the limit status for underlying limit orders is marked as ‘ungenerated’
Fund Split / Reverse Split
During execution, the corporate actions procedure picks up all splits (or reverse splits, as applicable) whose corporate action date is the same as the current date, and with status as ‘unprocessed’ or ‘error’. Subsequently, the pre-processing checks are performed.
A 'Fund Split' results in change of unit holders balance quantity based on the change in face-value of the fund. This is based on Split Parent Ratio and Split Resultant Ratio defined in the Corporate Action Maintenance Detail. The holdings in a fund post split will be ‘Execution Only Business’ and ‘Advised Business’ based on the classification in the source fund. Same is the case for Reverse Split.
Note
If RDR and MIFID regulation co exists and corporate action is declared, the transaction category will continue in the individual transaction category for MIFID and RDR for each of the CA types. For instance, if there are holdings in legacy as per RDR, the system will move the holding accordingly.
The split (or reverse split, as applicable) procedure is then executed, which performs the actions as shown below, in the appropriate scenario:
When the new fund is the same as the old fund
- The fund rule of the new fund is amended and the par value changed to reflect the latest split / reverse split ratio values
- Balances of all unit holders balances in the current fund, as of a date less than the action date, are picked up
- Changes in the outstanding units and the balances of the unit holders based on split / reverse split ratio, are posted as unit-based subscription transactions (split) or unit-based redemption transactions (reverse split)
- Certificates are destroyed and recreated for the new units
- Any underlying standing instructions for the unit holders are marked as ‘Cancelled’; if any reversal has been done after original processing, the original SI status is restored
- Any unexecuted limit orders for the unit holders are marked as ‘EXPIRED’, and the limit status for underlying limit orders is marked as ‘ungenerated’
- Subsequently, if any backdated transactions are entered with transaction date being earlier than the corporate action date, a message is shown, indicating that a corporate action has been processed within the period (this is done for limit orders and standing instructions too)
- If a reversal or an amendment has been done after original processing, a reversal transaction is generated for all transactions for the day with a reference type indicating split or reverse split
- Fractional units, if any, that result from the processing of the corporate action, are computed
When the new fund is not the same as the old fund
- The system checks that the new fund is an authorized fund in the system, with no existing holdings.
- The fund rule of the new fund is amended and the par value changed to reflect the latest split / reverse split ratio values
- Balances of all unit holders balances in the old fund, as of a date less than the action date, are picked up
- Unit-based switch transactions are initiated for the unit holders
- Any underlying standing instructions for the unit holders in the old fund are marked as ‘expired’; if any reversal has been done after original processing, the original SI status is restored
- Any unexecuted limit orders for the unit holders in the old fund are marked as ‘EXPIRED’, and the limit status for underlying limit orders is marked as ‘ungenerated’
- The corporate action is processed after checking the holiday rules, for all the funds
- If a reversal or an amendment has been done after original processing, a reversal transaction is generated for all transactions for the day with a reference type indicating split or reverse split
- Fractional units, if any, that result from the processing of the corporate action, are computed
Note
When units resulting from processing of a corporate action are redeemed, the computation of capital gains tax (CGT) in respect of them takes the corporate action into account.
Fund Merger
During execution, the corporate actions procedure picks up all mergers whose corporate action date is the same as the current date, and with status as ‘unprocessed’ or ‘error’. Subsequently, the pre-processing checks are performed. In case of the merger ratio not being specified, the system derives the parent-child ratio based on the respective net asset values of the funds in the merger.
The merge procedure is then executed, which performs the actions as shown below, in the appropriate scenario:
- The system checks that the new fund is an authorized fund in the system, with no existing holdings.
- The fund rule of the new fund is amended
- The par value of the resultant fund is changed to reflect the latest merger ratio values
- Balances of all unit holders balances in the old fund, as of a date less than the action date, are picked up (this procedure is repeated for each of the underlying funds)
- Amount-based switch transactions are initiated for the unit holders (this procedure is repeated for each of the underlying funds)
- Any unexecuted limit orders for the unit holders in the old fund are marked as ‘EXPIRED’, and the limit status for underlying limit orders is marked as ‘ungenerated’
- The system checks if the standing instructions have to be updated.
If you have chosen to Update SI, the system updates:
- Changes existing instruction and policy details from the old fund to the resultant fund.
- The old Fund ID with the resultant Fund ID
- The ratio for asset allocation
- The system checks if the Income Distribution Setup has to be updated. If so, the system updates the IDS of the old Fund Id with the resultant Fund Id. If the option chosen for ‘Restrict IDS for the Unit Holder’ is ‘No’ for the resultant Fund Id, the update is carried out. Otherwise the IDS update is not carried out and an error message is logged.
- The corporate action is processed after checking the holiday rules, for all the funds
- Subsequently, if any backdated transactions are entered with transaction date being earlier than the corporate action date, a message is shown, indicating that a corporate action has been processed within the period (this is done for limit orders and standing instructions too)
Note
When units resulting from processing of a corporate action are redeemed, the computation of capital gains tax (CGT) in respect of them takes the corporate action into account.
In case of Fund Merger, the system will modify RSP and DRSP based on the preference set at Corporate Actions:
- The system will update all active RSP plans with old fund with the ‘merge-into fund’
- The system will update all active DRSP plans with old fund with the ‘merge-into fund’, only if DRSP is allowed for the ‘merge-into fund’.
- The system will not modify RIS plans in case of fund merger.
4.33.7 Reports for Corporate Actions
In the system, you can obtain the following reports displaying details of corporate actions processed in respect of funds:
4.33.7.1 Reports for Announcement / Confirmation of Corporate Actions
You can print reports that you would need to send to investors listing details of either:
- Announcements of corporate actions, a stipulated period of time before the corporate action date
- Confirmation of processing the announced corporate action, displaying the booking (both debit and credit) details, which you would typically send to investors
To obtain such announcement/ confirmation reports, click on Corporate Actions in the Queries/ Reports menu, and Announcement / Confirmation Reports under it. The Announcement/ Confirmation Report screen is opened.
In this screen, you must specify the following as mandatory sorting parameters for report generation:
- Whether you require a corporate actions announcement report or a confirmation report
- Whether you are generating the report as a batch activity, or online
- The language in which the report must appear, in the Report Language field.
You could also print or view it as required, by making appropriate specifications in the remaining fields of the generation screen, as follows:
- Whether the report must reflect announcement / confirmation details for all corporate actions – liquidation, split, reverse split and merger, or for a specific corporate action.
- For a specific corporate action serial number
- For announcement reports, the appropriate lag before the corporate action date, and the lag type (daily). You can also specify the holiday rule to be used if the date of extraction (arrived by subtracting the lag from the action date) falls on a holiday.
After making your specifications, click the Run Report button. The report details are displayed in the Report Data Viewer screen.
Liquidation Announcement Report Details
The following details are displayed for liquidation announcement reports:
- Date on which the announcement report is being printed
- ID of the unit holder receiving payment due to the liquidation. The name and address (street, city and zip code) are also displayed
- ID, name and ISIN of the fund being liquidated. The base currency of the fund is also displayed.
- Total number of units held by the unit holder in the fund being liquidated
- Liquidation Declaration Date, which is the corporate action date for the liquidation.
- Liquidation ratio (displays the payment per unit due to the liquidation)
- Liquidation price (the payment per unit expressed in the fund base currency)
Liquidation Confirmation Report Details
The following details are displayed for liquidation confirmation reports:
- Date on which the confirmation report is being printed
- Corporate action number for the liquidation
- ID of the unit holder receiving payment due to the liquidation. The name and address (street, city and zip code) are also displayed.
- ID, name and ISIN of the fund being liquidated. The base currency of the fund is also displayed.
- Total number of units held by the unit holder in the fund being liquidated
- Trade Date, which is the corporate action date for the liquidation.
- Liquidation ratio (displays the payment per unit due to the liquidation)
- Liquidation price (the payment per unit expressed in the fund base currency)
- Stock exchange
Split Announcement Report Details
The following details are displayed for split announcement reports:
- Date on which the announcement report is being printed
- ID of the unit holder receiving payment due to the split. The name and address (street, city and zip code) are also displayed
- ID, name and ISIN of the parent fund being split. The base currency of the fund is also displayed.
- ID, name and ISIN of the resultant (child) fund due to the split. The base currency of the fund is also displayed.
- Total number of units held by the unit holder in the fund being split
- Split Declaration Date, which is the corporate action date for the split.
- Split ratio
Split Confirmation Report Booking Details (Debit or Credit)
The following details are displayed for split confirmation reports:
- Date on which the confirmation report is being printed
- Corporate action number for the split
- ID of the unit holder receiving payment due to the split. The name and address (street, city and zip code) are also displayed.
- ID, name and ISIN of the parent fund being split. The base currency of the fund is also displayed.
- ID, name and ISIN of the resultant (child) fund due to the split. The base currency of the fund is also displayed.
- Total number of units held by the unit holder in the fund being split
- Trade Date, which is the corporate action date for the split.
- Split ratio
- Stock exchange
Reverse Split Announcement Report Details
The following details are displayed for reverse split announcement reports:
- Date on which the announcement report is being printed
- ID of the unit holder receiving payment due to the reverse split. The name and address (street, city and zip code) are also displayed
- ID, name and ISIN of the parent fund being reverse split. The base currency of the fund is also displayed.
- ID, name and ISIN of the resultant (child) fund due to the reverse split. The base currency of the fund is also displayed.
- Total number of units held by the unit holder in the fund being reverse split
- Reverse Split Declaration Date, which is the corporate action date for the reverse split.
- Reverse split ratio
Reverse Split Confirmation Report Booking Details (Debit or Credit)
The following details are displayed for reverse split confirmation reports:
- Date on which the confirmation report is being printed
- Corporate action number for the reverse split
- ID of the unit holder receiving payment due to the reverse split. The name and address (street, city and zip code) are also displayed.
- ID, name and ISIN of the parent fund being reverse split. The base currency of the fund is also displayed.
- ID, name and ISIN of the resultant (child) fund due to the reverse split. The base currency of the fund is also displayed.
- Total number of units held by the unit holder in the fund being reverse split
- Trade Date, which is the corporate action date for the reverse split.
- Reverse split ratio
- Stock exchange
Merger Announcement Report Details
The following details are displayed for merger announcement reports:
- Date on which the announcement report is being printed
- ID of the unit holder receiving payment due to the merger. The name and address (street, city and zip code) are also displayed
- ID, name and ISIN of the parent fund being merged. The base currency of the fund is also displayed.
- ID, name and ISIN of the resultant (child) fund due to the merger. The base currency of the fund is also displayed.
- Total number of units held by the unit holder in the fund being merged
- Merger Declaration Date, which is the corporate action date for the merger.
- Merger ratio
Merger Confirmation Report Booking Details (Debit or Credit)
The following details are displayed for merger confirmation reports:
- Date on which the confirmation report is being printed
- Corporate action number for the merger
- ID of the unit holder receiving payment due to the merger. The name and address (street, city and zip code) are also displayed.
- ID, name and ISIN of the parent fund being merged. The base currency of the fund is also displayed.
- ID, name and ISIN of the resultant (child) fund due to the merger. The base currency of the fund is also displayed.
- Total number of units held by the unit holder in the fund being merged
- Trade Date, which is the corporate action date for the merger.
- Merger ratio
- Stock exchange
4.33.7.2 Corporate Actions Checks Report
This report details the results of pre-processing validations performed before execution of a corporate action.
To obtain this report, click Corporate Actions in the Queries / Reports menu and Check Report under it. The Corporate Actions Check Report screen is opened.
You must specify the ID and ISIN code of the fund for which you wish to generate the report. Check the ‘As of next day’ box to indicate that you wish to generate the report for a fund for which the checks prior to corporate actions processing would be performed the next day.
4.33.7.3 Corporate Actions Amendment Report
If you wish to view the details of changes in unit holder balances due to amendment of a corporate action, you can use this report. The changes in the unit holder balance could be due to any of the following factors:
- Change of liquidation price, in case of liquidation
- Change of split/reverse split ratio, in case of split/reverse split
- Change of merger ratio, in case of merger
The pre-amendment and post-amendment balances are displayed.
To obtain this report, click on Corporate Actions in the Queries / Reports menu, and Amendment Report under it.
The Corporate Actions Amendment Report screen is opened. You must specify the corporate action for which you wish to generate the amendment report.
4.34 Bank Reconciliation
This section contains the following topics:
- Section 4.34.1, "Reconciling Bank Records"
- Section 4.34.2, "Invoking Bank Reconciliation Detail Screen"
4.34.1 Reconciling Bank Records
Reconciliation is a process by which you will be able to match the bank statement entries with the corresponding transaction entries. System allows you to track reconciled, un-reconciled and partially reconciled transactions with the corresponding reconciled, un-reconciled and partially reconciled bank statement entries.
On uploading the bank statement, system will try to reconcile the entries automatically and update the cheque status as provided in the bank statement. Auto Reconciliation will happen based on the matching of Fund ID, Instrument Number, Instrument Amount and Drawee Bank/Branch code. Auto reconciled entries will be auto authorized by the system.
Manual reconciliation should be done for entries which the system fails to do auto reconciliation.
4.34.2 Invoking Bank Reconciliation Detail Screen
Reconciliation activity can be performed through the ‘Bank Reconciliation Detail’ screen. You can invoke this screen by typing ‘UTDBKREC’ in the field at the top right corner of the Application tool bar and clicking on the adjoining arrow button. The ‘Bank Reconciliation Detail’ screen is displayed.

The screen is divided into two frames; Bank Statement Search Option and Trade Search Option. Use the Bank statement search option to specify the search criteria to retrieve the uploaded bank statement entries. Similarly, use the Trade search option to specify the search criteria to retrieve the transaction entries that you want to reconcile.
Select the New option in the Operation field in this screen, to signify reconciliation.
Reconciliation activity can be amended in the same screen, by selecting the Amend option in the Operation field.
You can specify the following fields in this screen:
Operation
Choose the operation status from the drop-down list. The list displays the following values:
- Reconcile
- Un-Reconcile
Reference Number
Display
The system displays the reference number.
After specifying the operation Click ‘Ok’ button
Bank Statement Search Option
Bank
Alphanumeric; 12 Characters; Mandatory
From the option list, select the bank code in which the fund account is held.
Bank Name
Display
The system displays the name of the selected bank code.
Drawee Bank
Alphanumeric; 12 Characters; Optional
Specify the drawee bank code where the payment instrument is drawn, if the mode of payment is Check, Credit Card, Debit Card or Draft. In case of Transfer, specify the transfer bank code.
Drawee Bank Name
Display
The system displays the name of the selected drawee bank code.
Statement From Date
Date Format, Optional
Specify a date range between which the bank statement records that you want to retrieve was uploaded into the system. The To Date that you specify must be later than the From Date.
Statement Number
Alphanumeric; 25 Characters; Optional
Enter the number of the statement which you want to retrieve.
Drawee Branch
Alphanumeric; 12 Characters; Optional
Specify the branch of the selected bank where the payment is drawn, if the mode of payment is Check or Draft. In case of Transfer, specify the transfer branch code.
Drawee Branch Name
Display
The system displays the name of the selected drawee branch code.
Branch
Alphanumeric; 12 Characters; Mandatory
From option list, select the name of the branch of the bank in which the fund account is held.
Branch Name
Display
The system displays the name of the selected drawee branch code.
Payment Mode
Alphanumeric; 2 Characters; Optional
Enter the mode of payment for the transaction.
Payment Mode Description
Display
The system displays the description for the selected payment mode.
Statement To Date
Date Format, Optional
Specify a date range between which the bank statement records that you want to retrieve was uploaded into the system. The To Date that you specify must be later than the From Date.
Statement Transaction Code
Alphanumeric; 10 Characters; Optional
Enter the code of the transaction as printed on the statement.
Statement Ref/Inst Ref
Alphanumeric; 100 Characters; Optional
If you want to search based on a particular bank entry, enter the statement reference number. Else, if you wish to search based on a particular instrument, enter the instrument reference number.
Reconciliation Status
Mandatory
Select the reconciliation status from the drop-down list. The list displays the following values:
- Un reconciled
- Partially reconciled
- Reconciled
Account Number
Alphanumeric; 16 Characters; Optional
Specify the number of the fund account.
Transaction Type
Alphanumeric; 10 Characters; Optional
Specify a type of transaction; Pay in, payout, NPI, that you want to retrieve from selected fund bank account records uploaded into the system.
Fund ID
Alphanumeric; 6 Characters; Optional
Enter the ID of the fund involved in the transaction.
Location Code
Alphanumeric; 10 Characters; Optional
Enter the location code.
IBAN
Alphanumeric; 10 Characters; Optional
Specify the IBAN code.
After you have specified the fund account and statement details, click on OK. The required bank statement records that are located in the database are displayed in the lower grid.
The following details are displayed for each bank statement record in the Find Results section:
- The statement number
- The date of the transaction
- The reference number of the bank statement as generated by FCIS
- The bank reference number for the statement
- The fund account currency
- The amount to be debited from the account
- The amount to be credited to the account
- Transaction Amount
- The Fund ID
- The Drawee Bank
- The Drawee Branch
- The location code
- Check Status
- Un-Reconciled amount
You can capture the following details:
Journal Entry
Optional
Select ‘Yes’ from drop-down list to indicate if a particular bank entry is a journal entry. For instance, bank entries can contain bank interest details for which there will be no corresponding trade entry to link with in FCIS. In such cases, you need to manually set the status of the entry as journal entry.
Reconciliation Status
Display
If the operation is ‘NEW’, the system derives the status of the bank entry as reconcile (for Un-reconciled entries) or partially reconcile (for partially reconciled entries) and displays the appropriate status here.
If the operation is ‘AMEND’, the system derives the status of the bank entry as reconcile (for reconciled entries) or partially reconcile (for partially reconciled entries) and displays the appropriate status here.
However, if the bank entry is marked as a journal entry, you are not allowed to indicate the reconciliation status.
Write Off Amount
Numeric; 22 Characters; Optional
Enter the write off amount to reconcile the bank entry.
Select
Optional
Check the entry which should be reconciled with the trade side. You can select only one entry for reconciliation with the trade side at a time.
Trade Search Option
Event Code
Alphanumeric; 20 Characters; Optional
Select the event for which the transaction entry should be retrieved.
Event Name
Display
The system displays the name of the selected event code.
From and To Dates
Date Format; Optional
Specify a date range between which the transaction entry that you want to retrieve was entered into the system. The To Date that you specify must be later than the From Date.
Reference Number
Alphanumeric; 16 Characters; Optional
Specify the reference number.
Transaction Number
Alphanumeric; 16 Characters; Optional
Specify the transaction number.
Fund ID
Alphanumeric; 6 Characters; Optional
Specify the fund ID.
Fund Name
Display
The system displays the name of the fund for the selected fund ID.
Entry Type
Optional
Select the type of entity from the drop-down list. The list displays the following values:
- Normal
- Reversed
Bank
Alphanumeric; 12 Characters; Optional
Specify the bank code. Alternatively, you can select bank code from the adjoining option list. The list displays all valid bank code maintained in the system.
Bank Name
Display
The system displays the name of the bank for the selected bank code.
Branch
Alphanumeric; 12 Characters; Optional
Specify the branch code. Alternatively, you can select branch code from the adjoining option list. The list displays all valid branch code maintained in the system.
Branch Name
Display
The system displays the name of the branch for the selected branch code.
Bulk Reconcile
Optional
Select ‘Yes’ from drop-down list to generate a single transaction for a selected event for a given period by adding up all the transactions that fall within the search criteria.
Entity Type
Alphanumeric; 1 Character; Optional
Specify the entity type. Alternatively, you can select entity type from the adjoining option list. The list displays all valid entity type maintained in the system.
Entity Name
Display
The system displays the name of the entity for the selected entity type.
Entity ID
Alphanumeric; 12 Chara cters; Optional
Specify the entity ID.
Ref Type
Alphanumeric; 2 Characters; Optional
Specify the ref type.
Ref Type Description
Display
The system displays the description of the selected ref type.
Transaction Sub Type
Alphanumeric; 1 Character; Optional
Specify the transaction sub type.
Transaction Sub Type Description
Display
The system displays the description of the selected transaction sub type.
Payment Mode
Alphanumeric; 2 Characters; Optional
Specify the mode of payment.
Payment Mode
Display
The system displays the description of the selected payment mode.
Remarks
Alphanumeric; 255 Characters; Optional
Specify remarks, if any.
Fetch Unlinked Trades Only
Optional
If you select ‘Yes’ from drop-down list, the system will retrieve only un-reconciled trade entries. If you select ‘No’ from drop-down list, system will retrieve both un-reconciled and partially reconciled trade entries.
Location Code
Alphanumeric; 10 Characters; Optional
Specify the location code.
IBAN
Alphanumeric; 40 Characters; Optional
Specify the IBAN code.
Identification Type
Alphanumeric; 3 Characters; Optional
Specify the identification type.
Identification Name
Display
The system displays the description of the selected identification type.
IdentificationNumber
Alphanumeric; 50 Characters; Optional
Specify the identification number.
Telephone 1
Alphanumeric; 15 Characters; Optional
Specify the telephone number.
Cellphone Number
Alphanumeric; 16 Characters; Optional
Specify the cellphone number.
Account Number
Alphanumeric; 16 Characters; Optional
Specify the account number.
Match Currency
Mandatory
Select the match currency from the drop-down list. The list displays the following values:
- Fund Currency
- Transaction Currency
After you have specified the search criteria details, click on OK. The required bank statement records that are located in the database are displayed in the lower grid.
The following details are displayed for each transaction entry record:
- The Transaction number
- The Transaction Reference number
- The date of the transaction
- The ID of the fund involved in the transaction
- The ID and Name of the entity involved in the transaction
- The amount reckoned in the match currency
- The Unmatched transaction currency
- The Location Code
- Cheque Status
- The transaction amount
You can capture the following details:
Matched Amount
Numeric; 22 Characters; Optional
Enter the amount to be matched with the bank side entry. By default, system displays the transaction amount here. However, you can change the amount.
Status
Alphanumeric; 8 Characters; Optional
Specify the status of the trade record.
Select
Optional
Check the entry which should be reconciled with the bank side entry. You can select more than one entry for reconciliation with bank side at a time.
On specifying the above details, click the ‘Reconcile’ button to perform the reconciliation activity and save the reconciled entries.
Once the matching record is retrieved from the database, system will automatically reconcile and take the following actions:
- Clear the matched transaction and confirm the underlying units if Payment Status is marked ‘Credit Received’
- Reject or Reverse a particular transaction if Payment Status in Bank Feed is marked as Debit Received and existing Payment status for transaction record is ‘Reject Status Awaited’
- Reject or Reverse a particular transaction if Payment Status in Bank Feed is marked as ‘Reject Status Awaited’ and existing Payment status for transaction record is ‘Debit Received’
- If the existing payment status for transaction record is ‘Not Cleared’, then the record will not be auto reconciled. System will mark the Status as ‘Debit Received’ or ‘Reject Status Awaited’ as supplied in Bank Feed.
If system can not find a matching entry for a record in the Bank Feed, this record will be updated with Reconciliation status as ‘Unmatched Entry’.
If you are performing Amend operation, then click on the Un-Reconcile button to de-link the matched entries and save the un-reconciled entries.
4.35 Bank Reconciliation Summary Screen
This section contains the following topics:
- Section 4.35.1, "Retrieving Record in Bank Reconciliation Summary Screen"
- Section 4.35.2, "Viewing Bank Reconciliation Record"
- Section 4.35.3, "Deleting Bank Reconciliation Record"
- Section 4.35.4, "Authorizing Bank Reconciliation Record"
- Section 4.35.5, "Copying Attributes"
- Section 4.35.6, "Authorizing Bank Reconciliation"
4.35.1 Retrieving Record in Bank Reconciliation Summary Screen
You can retrieve a previously entered record in the Summary Screen, as follows:
Specify any or all of the following details in the corresponding fields:
- Invoke the ‘Bank Reconciliation Summary’ screen by typing
‘UTSBKREC’ in the field at the top right corner
of the Application tool bar and clicking on the adjoining arrow button.

- The status of the record in the Auth status field. If you choose the ‘Blank Space’ option, then all the records are retrieved.
- The status of the record in the Open field. If you choose the ‘Blank Space’ option, then all records are retrieved
- Statement Number
- Statement Date
- Reconciliation Status
- Fund ID
- Drawee Bank
- Drawee Branch
- From Date
- To Date
- Bank
- Payment Mode
- Reference Number
Click ‘Search’ button to view the records. All the records with the specified details are retrieved and displayed in the lower portion of the screen.
Note
You can also retrieve the individual record detail from the detail screen by querying in the following manner:
- Press F7
- Input the Fund ID
- Press F8
You can perform Edit, Delete, Amend, Authorize, Reverse, Confirm operations by selecting the operation from the Action list. You can also search a record by using a combination of % and alphanumeric value.
Example
You can search the record for Fund ID by using the combination of % and alphanumeric value as follows:-
- Search by A%:- System will fetch all the records whose Fund ID starts from Alphabet ‘A’. For example, AGC17, AGVO6, AGC74 etc.
- Search by %7:- System will fetch all the records whose Fund ID ends by numeric value’ 7’. For example, AGC17, GSD267, AGC77 etc.
- Search by %17%:- System will fetch all the records whose Fund ID contains the numeric value 17. For example, GSD217, GSD172, AGC17 etc.
4.35.2 Viewing Bank Reconciliation Record
To view a record that you have previously input, you must retrieve the same in the Bank Reconciliation Summary screen as follows:
- Invoke the Bank Reconciliation Summary screen from the Browser.
- Select the status of the record that you want to retrieve for viewing in the Authorization Status field. You can also view all records that are either unauthorized or authorized only, by choosing the Unauthorized/ Authorized option.
- Specify any or all of the details of the record in the corresponding fields on the screen.
- Click ‘Search’ button. All records with the specified fields are retrieved and displayed in the lower portion of the screen.
- Double click the record that you want to view in the list of displayed records. The Bank Reconciliation Detail screen is displayed in View mode.
4.35.3 Deleting Bank Reconciliation Record
You can delete only unauthorized records in the system. To delete a record that you have previously entered:
- Invoke the Bank Reconciliation Summary screen from the Browser.
- Select the status of the record that you want to retrieve for deletion.
- Specify any or all of the details in the corresponding fields on the screen.
- Click ‘Search’ button. All records with the specified fields are retrieved and displayed in the lower portion of the screen.
- Double click the record that you want to delete in the list of displayed records. . The Bank Reconciliation Detail screen is displayed.
- Select Delete Operation from the Action list. The system prompts you to confirm the deletion and the record is physically deleted from the system database.
4.35.4 Authorizing Bank Reconciliation Record
An unauthorized Bank Reconciliation record must be authorized in the system for it to be processed. To authorize a record:
- Invoke the Bank Reconciliation Summary screen from the Browser.
- Select the status of the record that you want to retrieve for authorization. Typically, choose the unauthorized option.
- Specify any or all of the details in the corresponding fields on the screen.
- Click ‘Search’ button. All records with the specified details that are pending authorization are retrieved and displayed in the lower portion of the screen.
- Double click the record that you wish to authorize. The Bank Reconciliation Detail screen is displayed. Select Authorize operation from the Action List.
When a checker authorizes a transaction, details of validation, if any, that were overridden by the maker of the transaction during the Save operation are displayed. If any of these overrides results in an error, the checker must reject the transaction.
4.35.5 Copying Attributes
If you want to create a new Bank Reconciliation record with the same attributes of an existing maintenance, you can copy the attributes of an existing Bank Reconciliation record to a new one.
To copy the attributes:
- Retrieve the record whose attributes the new Bank Reconciliation record should inherit. You can retrieve the record through the Summary screen or through the F7-F8 operation explained in the previous sections of this chapter.
- Click on Copy
- Indicate the ID for the new Bank Reconciliation record. You can, however, change the details of the new record.
4.35.6 Authorizing Bank Reconciliation
To authorize reconciled and un-reconciled entries, choose the operation ‘Authorize’ and the desired Reconcile Entry in the Bank Reconciliation Summary screen and enter the search criteria.
When you click ‘Ok’ button, records satisfying the search criteria that you have entered are displayed.
Check the option ‘Select’ against the entry which you wish to authorize. While authorizing the reconciled records you can specify the payment action the system should perform. The options are:
- Clear – If you choose this option, system will confirm the units
- Reject – If you choose this option, system will pass a reversal to the original transaction
- No Action - If you do not specify any payment action here, system will not take any action. The entry will be reconciled. The transaction will neither be cleared nor rejected irrespective of the cheque status.
If the status of the cheque in bank feed is ‘Debit Received’, ‘Reject Status Awaited’ or ‘Rejected’, then you can select the option ‘Reject’. If the status of the cheque in the bank feed is ‘Credit Received’, you will be allowed to select the ‘Clear’ action.
4.36 Performance Fee for Hedge Funds
This section contains the following topics:
- Section 4.36.1, "Computing Performance Fee for Hedge Funds"
- Section 4.36.2, "Processing Performance Fee Payment"
- Section 4.36.3, "Processing Performance Fee Accrual"
- Section 4.36.4, "Modifying Performance Fee Calculation Method"
- Section 4.36.5, "Series Method of Performance Fee Calculation"
4.36.1 Computing Performance Fee for Hedge Funds
Hedge fund managers charge the investors a fee called performance fee, which is a percentage of the gains received by the investor. As investors enter and exit hedge funds at different points in time, the performance gains received by them also differ accordingly.
Hence, the performance fee calculations are carried out using a special accounting methodology called equalization accounting which ensures that the fund manager is paid the correct performance fee and also that the fees are fairly allocated between each investor in the fund. The investors also receive profit only for the period during which they stay invested in the fund.
The following performance fee calculation methods are supported for hedge funds:
- EC / CL (Equalization Credit / Contingent Redemption)
- FR (Forced Redemption)
- EC/ED (Equalization Credit / Equalization Debit): also known as Equalization Redemption.
Note
Variations to the above listed methods are also possible by setting up new rules and rule groups in the system.
The different performance fee calculation methods are briefly explained below:
Contingent Liquidation
The contingent liquidation method is an arithmetic method applied to subscriptions made at a price below the current HWM plus hurdle rate.
The contingent liquidation process helps the investor avoid paying unfair performance fees, in case the fund recovers in price. This mechanism ensures that the investor pays the same rate of performance fees as all other investors for any gain in value.
Equalization Credit
The equalization credit method is an arithmetic method applied to subscriptions made at a price (GAVPS) above the current HWM plus hurdle rate.
The equalization credit process ensures that the investor does not pay performance fees for performance prior to investing in the fund. This process calculates a number of shares, identified as the equalization credit holding, in the name of the investor, and is tracked during the life-time of the dealing lot.
Forced Redemption
The forced redemption method is an arithmetic method applied to all subscriptions made at a price (GAVPS) regardless of whether it is above or below the current HWM plus hurdle rate.
The forced redemption method ensures that all investors are treated equitably with regard to the paying of performance fees for performance since investing in the fund. This process calculates the number of shares to be redeemed either at the point of an early redemption or at the end of the performance fee period based on the movement of the price since subscription time.
4.36.2 Processing Performance Fee Payment
An EOD batch ‘Performance Fee Payment Process’ is used to process period end calculation of performance fee, based on the next payment date defined at the Fund Rule. The steps involved in the processing of performance fee can be summarized in the steps given below:.
- If the current application date is greater than or equal to next payment date, the ‘Performance Fee Payment Process’ batch gets executed.
- During payment processing, the system performs period end calculations as per the period end rule maintained for the given group and crystallizes the performance fee for all outstanding inflow transactions captured in the system.
Note
The reference type ‘PE’ identifies the transactions generated due to period end calculations.
4.36.3 Processing Performance Fee Accrual
An EOD batch ‘Performance Fee Accrual Process’ handles the accrual of performance fee, based on the next accrual date defined at the Fund Rule. The accrual of the performance fee is carried out as follows:
- If the current application date is greater than or equal to next accrual date, the ‘Performance Fee Accrual Process’ batch gets executed.
- The rule mapped for the event ‘Period End’ in Group Rule maintenance, for a given group Id, is used for performance fee accrual calculations.
- Once accrual processing gets completed, the system updates the ‘Last Accrual date’ as current application date and ‘Next Accrual date’ as ‘current application date + accrual frequency’ for the fund rule.
Note
Accruals are performed only for reporting purpose and there will be no impact on transaction processing or further performance fee calculation.
4.36.4 Modifying Performance Fee Calculation Method
If you wish to change the performance fee calculation method for a given fund, you need to perform the steps given below. Two scenarios are explained based on the crystallization of the performance fee.
Case 1:
In this scenario, the crystallization of the performance fee is not required using existing performance fee method.
- Create a new group ID that represents the new performance fee calculation method.
- Amend the fund rule to replace the old Group ID with the new Group ID.
- On BOD of new rule effective date, the system updates the fund rule with newly mapped group and starts accruing and applying performance fee based on this new method.
Example:
Assume that the existing Fund Rule setup is as given below:
- Fund ID : HFUND1
- Rule Effective Date : 01-Jan-2009
- Group ID : 8001 (Represents EC/CL methodology)
- Last Payment Date : 31-Dec-2008
- Next Payment Date : 31-Dec-2009
- Application Date : 15-Jan-2009
Above setup indicates that the fund 'HFUND1' uses 'EC/CL' methodology for calculating performance fee. If you want to change the PF calculation method for the fund from ‘EC/CL’ to ‘FR’ (e.g. Group ID '8002') from 01-May-2009 onwards and period end processing is not required, then you need to perform the steps given below.
- Amend the fund ‘HFUND1’; change the Group ID to 8002 which represent ‘FR calculation methodology’ and specify the new Rule Effective Date for the fund as ’01-May-2009’.
- On BOD of ’01-May-2009’, system will update group Id for fund ‘HFUND1 as 8002.
- From 01-May onwards, the system starts applying performance fee based on ‘FR methodology’.
- On 31-Dec, system executes the period end calculation based on ‘FR methodology’.
Case 2:
In this scenario, the performance fee needs to be crystallized using existing performance fee method.
- Create a new group ID that represents the new performance fee calculation method.
- Amend the fund rule and update ‘Next Payment Date’, so that the system performs period end calculations as per the existing Group.
- On BOD of new rule effective date, the system updates the Next Payment Date.
- Before EOD of Next Payment Date, amend the fund rule to map with the new Group ID and specify the next payment date and next accrual date.
- On EOD, the system performs period end processing as per the existing Group ID.
- On BOD of New Rule Effective Date, the system updates the Group ID with the new Group ID.
- From this date onwards the system calculates performance fee based on the new Group ID.
Example
Assume that the existing Fund Rule setup is as given below:
- Fund ID : HFUND1
- Rule Effective Date : 01-Jan-2009
- Group ID : 8001 (Represents EC/CL methodology)
- Last Payment Date : 31-Dec-2008
- Next Payment Date : 31-Dec-2009
- Application Date : 15-Jan-2009
The above Fund Rule setup indicates that the fund 'HFUND1' is using 'EC/CL' methodology for calculating performance fee. If you want to change the PF calculation method for the fund from ‘EC/CL’ to ‘FR’ (e.g. Group ID '8002') from 01-May-2009 onwards and want the system to process period end calculation using existing method (8001) then, hen you need to perform the steps given below.
- Amend the fund ‘HFUND1’; specify the new Rule Effective Date for the fund as ’16-Jan-2009’ and change the Next Payment date to ’30-Apr-2009’ which represents next period end date. (Next Payment Date should be grater then new Rule Effective Date)
- On BOD of ’16-Jan-2009’, the system updates Next Payment Date as ’30-Apr-2009’ for fund ‘HFUND1’.
- Before EOD of ’30-Apr-2009’, amend the fund ‘HFUND1’ and specify the new Rule Effective Date for the fund as ’01-May-2009’; Change the Group ID to ‘8002’ and Next Payment date to ’31-Dec-2009’ for new group (8002).
- On EOD of ’30-Apr-2009’, the system executes the period end calculation based on Group 8001 (EC/CL methodology).
- On BOD of ’01-May-2009’, the system updates group Id to 8002 (FR methodology) and Next Payment Date to ’31-Dec-2009’ for fund ‘HFUND1’.
- From 01-May -2009 onwards, the system starts applying performance fee calculations based on Group Id 8002 (‘FR methodology’).
4.36.5 Series Method of Performance Fee Calculation
In the series method of performance fee calculation, a new series is created for a fund each time there are new subscribers for each pricing period during the performance fee period. These series are maintained separately until the time they are consolidated with other series belonging to the same fund.
The consolidation for each of the subsequent series issued usually happens at the end of every accounting period. For the consolidation to happen, an incentive fee needs to be paid for each of the series, including the series in which it is being merged, which could be done quarterly, half-yearly, or annually.
Note
You need to manually create new fund series for each fund pricing period and also handle the consolidation of the fund series operationally. The system does not provide any automated tasks to achieve this.
4.37 Override Trade Cycles Date For Funds
This section contains the following topics:
4.37.1 Invoking Override Trade Cycle Date Screen
You can specify trade cycle dates that are different from the ones defined for a fund for transactions falling within a limited period (known as the ‘Override Period’). If you maintain these details, for the transactions that take place within the period, the system will use the dates you have maintained rather than the ones at the fund level. This facility is available only for funds with specific fund prices and for the following events:
- Enrichment and Saving of UT Transactions
- Generation of SI Transactions
- Generation of Dividend Transactions
- Redemption of Periodic Loads
- Generation of UT transactions for LEP
- Generation of Policy SI – UT transactions
You can define the alternate trade cycle dates and the override period in the ‘Override Trade Cycle Date’ screen. To invoke this screen, type ‘UTDTDCYL’ in the field at the top right corner of the Application tool bar and clicking on the adjoining arrow button.

You can specify the following fields in this screen:
Fund ID
Alphanumeric; 6 Characters; Mandatory
Specify the ID of the fund for which you wish to maintain different trade cycle dates for transactions made during the override period. You can also select the fund ID from the adjoining option list. The list contains the IDs of all the funds which have a specific fund price setup.
Fund ISIN
Display
The system displays the Fund ISIN.
Fund Name
Display
The system displays the name for the fund selected.
Transaction Type
Mandatory
Select, from the adjoining drop-down list, the transaction type for which the trade cycle dates are applicable. It should be a valid transaction type for the fund.The options are:
- ALL
- IPO Subscription
- Subscription
- Redemption
- Switch
- Transfer
Transaction From Date
Date Format; Mandatory
Enter the starting date of the override period. This should be a valid date in the system and can be before, after or equal to the system date.
Transaction To Date
Date Format; Mandatory
Enter the ending date of the override period. This should be a valid date in the system and can be before, after or equal to the system date.
For all the transactions falling within the ‘Transaction From Date’ and ‘Transaction To Date’, the system will default the dealing, settlement and price dates maintained here.
Dealing Date
Date Format; Mandatory
Specify a valid date as the dealing date. This date should be greater than or equal to the the ‘Transaction To Date’. It can also be a holiday as per the system.
Settlement Date
Date Format; Mandatory
Enter a valid date as the settlement date. The date entered should be greater than or equal to the ‘Transaction From Date’ and should not be a fund, currency or system holiday.If the settlement date is a holiday in transaction currency, then the system will update the next working day of the transaction currency as settlement date
Price Date
Date Format; Mandatory
Enter a valid date as the price date. The date entered should be greater than or equal to the ‘Transaction To Date’ but not a fund holiday.
After you authorize the maintenance, the dealing date, settlement date and price date for a transaction type will be displayed in the transaction if the transactions falls within the override period specified and if no transaction has been allotted within the override period.
Note
- There should not be any overlap in the trade cycles maintained
- The price date should be greater than or equal to the first price date maintained under ‘General Operating Rules’ for the fund.
- If holiday maintenance for the system calendar is not available, system will use the default weekend holidays from the default maintenance
- The trade details will be default for both LEP transactions as well as system-generated ones.
- If a transaction is being reversed or a backdated transaction entered, the system will pick up the relevant override trade cycle maintenance based on the type and date of the transaction
- Existing override trade cycle maintenances can be closed only if there are no non-reversed or unauthorized transactions in the system.
4.38 Override Trade Cycle Date Summary Screen
This section contains the following topics:
- Section 4.38.1, "Retrieving Record in Override Trade Cycle Date Summary screen"
- Section 4.38.2, "Editing an Override Trade Cycle Date Record "
- Section 4.38.3, "Viewing an Override Trade Cycle Date Record"
- Section 4.38.4, "Deleting an Override Trade Cycle Date Record"
- Section 4.38.5, "Authorizing an Override Trade Cycle Date Record"
- Section 4.38.6, "Amending an Override Trade Cycle Date Record"
- Section 4.38.7, "Authorizing an Amended Override Trade Cycle Date Record"
- Section 4.38.8, "Copying Attributes"
4.38.1 Retrieving Record in Override Trade Cycle Date Summary screen
You can retrieve a previously entered record in the Summary Screen, as follows:
Specify any or all of the following details in the corresponding fields. Invoke the ‘Override Trade Cycle Date Summary’ screen by typing ‘UTSTDCYL’ in the field at the top right corner of the Application tool bar and clicking on the adjoining arrow button.

- The status of the record in the Authorized field. If you choose the ‘Blank Space’ option, then all the records are retrieved.
- The status of the record in the Open field. If you choose the ‘Blank Space’ option, then all records are retrieved
- Fund ID
- Transaction Type
- Transaction From Date
- Transaction To Date
- Dealing Date
- Settlement Date
- Price Date
Click ‘Search’ button to view the records. All the records with the specified details are retrieved and displayed in the lower portion of the screen.
You can also retrieve the individual record detail from the detail screen by querying in the following manner:
- Press F7
- Input the Fund ID
- Press F8
You can perform Edit, Delete, Amend, Authorize operations by selecting the operation from the Action list. You can also search a record by using a combination of % and alphanumeric value.
Example
You can search the record for Fund ID by using the combination of % and alphanumeric value as follows:-
- Search by A%:- System will fetch all the records whose Fund ID starts from Alphabet ‘A’. For example, AGC17, AGVO6, AGC74 etc.
- Search by %7:- System will fetch all the records whose Fund ID ends by numeric value’ 7’. For example, AGC17, GSD267, AGC77 etc.
- Search by %17%:- System will fetch all the records whose Fund ID contains the numeric value 17. For example, GSD217, GSD172, AGC17 etc.
4.38.2 Editing an Override Trade Cycle Date Record
You can modify the details of an Override Trade Cycle Date record that you have already entered into the system, provided it has not been subsequently authorized. You can perform this operation as follows:
- Invoke the Override Trade Cycle Date Summary screen from the Browser.
- Select the status of the record that you want to retrieve for modification in the Auth Status field. You can only modify records that are unauthorized. Accordingly, choose the unauthorized option.
- Specify any or all of the details in the corresponding fields to retrieve the record that is to be modified.
- Click ‘Search’ button. All unauthorized records with the specified details are retrieved and displayed in the lower portion of the screen.
- Double click the record that you want to modify in the list of displayed records. The Override Trade Cycle Date screen is displayed.
- Select Unlock Operation from the Action list to modify the record. Modify the necessary information.
- Click Save to save your changes. The Override Trade Cycle Date screen is closed and the changes made are reflected in the Override Trade Cycle Date Summary screen.
4.38.3 Viewing an Override Trade Cycle Date Record
To view a record that you have previously input, you must retrieve the same in the Override Trade Cycle Date Summary screen as follows:
- Invoke the Override Trade Cycle Date Summary screen from the Browser.
- Select the status of the record that you want to retrieve for viewing in the Authorization Status field. You can also view all records that are either unauthorized or authorized only, by choosing the Unauthorized/ Authorized option.
- Specify any or all of the details of the record in the corresponding fields on the screen.
- Click ‘Search’ button. All records with the specified fields are retrieved and displayed in the lower portion of the screen.
- Double click the record that you want to view in the list of displayed records. The Override Trade Cycle Date screen is displayed in View mode.
4.38.4 Deleting an Override Trade Cycle Date Record
You can delete only unauthorized records in the system. To delete a record that you have previously entered:
- Invoke the Override Trade Cycle Date Summary screen from the Browser.
- Select the status of the record that you want to retrieve for deletion.
- Specify any or all of the details in the corresponding fields on the screen.
- Click ‘Search’ button. All records with the specified fields are retrieved and displayed in the lower portion of the screen.
- Double click the record that you want to delete in the list of displayed records. The Override Trade Cycle Date screen is displayed.
- Select Delete Operation from the Action list. The system prompts you to confirm the deletion and the record is physically deleted from the system database.
4.38.5 Authorizing an Override Trade Cycle Date Record
An unauthorized Override Trade Cycle Date record must be authorized in the system for it to be processed. To authorize a record:
- Invoke the Override Trade Cycle Date Summary screen from the Browser.
- Select the status of the record that you want to retrieve for authorization. Typically, choose the unauthorized option.
- Specify any or all of the details in the corresponding fields on the screen.
- Click ‘Search’ button. All records with the specified details that are pending authorization are retrieved and displayed in the lower portion of the screen.
- Double click the record that you wish to authorize. The Override Trade Cycle Date screen is displayed. Select Authorize operation from the Action List.
4.38.6 Amending an Override Trade Cycle Date Record
After an Override Trade Cycle Date record is authorized, it can be modified using the Unlock operation from the Action List. To make changes to a record after authorization:
- Invoke the Override Trade Cycle Date Summary screen from the Browser.
- Select the status of the record that you want to retrieve for authorization. You can only amend authorized records.
- Specify any or all of the details in the corresponding fields on the screen.
- Click ‘Search’ button. All records with the specified details that are pending authorization are retrieved and displayed in the lower portion of the screen.
- Double click the record that you wish to authorize. The Override Trade Cycle Date screen is displayed in amendment mode. Select Unlock operation from the Action List to amend the record.
- Amend the necessary information and click on Save to save the changes.
4.38.7 Authorizing an Amended Override Trade Cycle Date Record
An amended Override Trade Cycle Date record must be authorized for the amendment to be made effective in the system. The authorization of amended records can be done only from Fund Manager Module.
The subsequent process of authorization is the same as that for normal records.
4.38.8 Copying Attributes
If you want to create a new Override Trade Cycle Date record with the same attributes of an existing maintenance, you can copy the attributes of an existing Override Trade Cycle Date record to a new one.
To copy the attributes:
- Retrieve the record whose attributes the new Override Trade Cycle Date should inherit. You can retrieve the record through the Summary screen or through the F7-F8 operation explained in the previous sections of this chapter.
- Click on Copy
- Indicate the ID for the new Override Trade Cycle Date record. You can, however, change the details of the new record.
4.39 Price Rounding Detail
This section contains the following topics:
4.39.1 Invoking Price Rounding Detail Screen
You can maintain the price rounding details using ‘Price Rounding Detail’ screen, which will be used to override the price rounding precession maintained in transaction processing rule of fund set up. If this maintenance is not available then rounding logic will prevail from the transaction processing rule.
You can invoke ‘Price Rounding Detail; screen by typing ‘UTDPRRRL’ in the field at the top right corner of the Application tool bar and clicking on the adjoining arrow button. Select ‘New’ from the Actions menu in the Application tool bar or click new icon to enter the details.
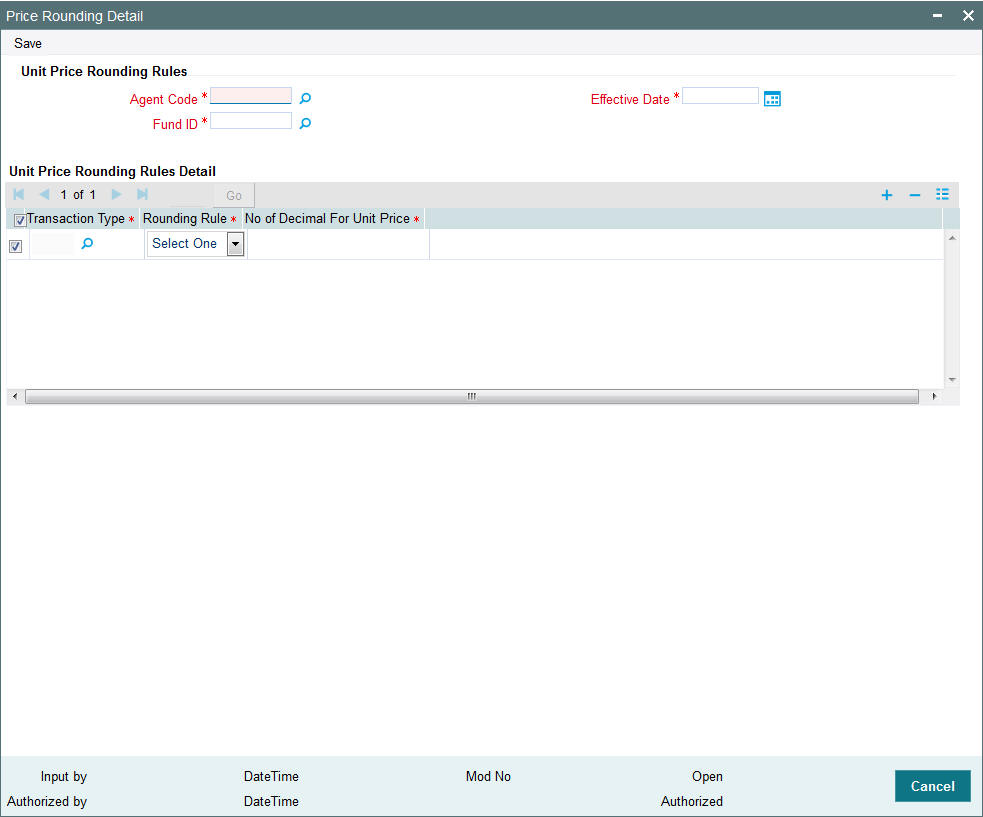
You can specify the following details:
Unit Price Rounding Rules
Agent Code
Alphanumeric; 12 Characters; Mandatory
Specify the agent code for which the price rounding needs to be applied. Alternatively, you can select agent code from the option list. The list displays all valid agent code maintained in the system.
Effective Date
Date Format; Mandatory
Select the effective date from the adjoining calendar for which the price rounding needs to be applied.
Fund ID
Alphanumeric; 12 Characters; Mandatory
Specify the Fund ID for which the price rounding needs to be applied. Alternatively, you can select fund ID from the option list. The list displays all valid fund ID maintained in the system.
Unit Price Rounding Rules Detail
Transaction Type
Alphanumeric; 2 Characters; Mandatory
Specify the transaction type for which the price rounding to be applied. Alternatively, you can select transaction type from the option list. The list displays all valid transaction type maintained in the system.
Rounding Rule
Mandatory
Select the rounding rule from the drop-down list. The list displays the following values:
- Round Up
- Round Down
- Round Off
No of Decimal For Unit Price
Numeric; 22 characters; Mandatory
Specify the decimal value till which the rounding needs to be done.
4.40 Unit Price Rounding Summary
This section contains the following topics:
- Section 4.40.1, "Retrieving Unit Price Rounding Record in Summary Screen"
- Section 4.40.2, "Editing Unit Price Rounding Record"
- Section 4.40.3, "Viewing Unit Price Rounding Record"
- Section 4.40.4, "Deleting Unit Price Rounding Record"
- Section 4.40.5, "Authorizing Unit Price Rounding Record"
- Section 4.40.6, "Amending Unit Price Rounding Record"
- Section 4.40.7, "Authorizing Amended Unit Price Rounding Record"
4.40.1 Retrieving Unit Price Rounding Record in Summary Screen
You can invoke the ‘Unit Price Rounding Summary’ screen by typing ‘UTSPRRRL’ in the field at the top right corner of the Application tool bar and clicking on the adjoining arrow button.

You can retrieve a previously entered Unit Price Rounding record in the Summary screen, as follows:
- Invoke the Unit Price Rounding Summary screen and specify the following:
- The status of the fund ID in the Authorized field. If you choose the “Blank Space” option, then all the fund IDs are retrieved.
- The status of the fund ID in the Open field. If you choose the “Blank Space” option, then all the fund IDs are retrieved.
- Agent Code
- Effective Date
- Fund ID
- After you have specified the required details, click ‘Search’ button. All Unit Price Rounding record with the specified details are retrieved and displayed in the lower portion of the screen.
You can also retrieve the Unit Price Rounding record from the detail screen by doing query in the following manner:-
- Press F7
- Input the Fund ID
- Press F8
You can perform Edit, Delete, Amend, Authorize, operation by selecting from the Action list.
You can also search the record by using combination of % and alphanumeric value.
For example, you can search the record for fund ID description by using the combination of % and alphanumeric value as follows:-
- Search by M%: The system will fetch all the records whose Fund ID starts from Alphabet ‘M’. For example, Mutual Fund.
- Search by %7 : The system will fetch all the records whose Fund ID ends by numeric value’ 7’ For example, 217,267,77 and so forth.
- Search by %17%: The system will fetch all the records whose Fund ID contains the numeric value 17. For example, 3217, 2172 and so forth.
4.40.2 Editing Unit Price Rounding Record
You can modify the details of a Unit Price Rounding record that you have already entered into the system, provided it has not been subsequently authorized. You can perform this operation as follows:
- Invoke the Unit Price Rounding Summary screen from the Browser.
- Select the status of the Unit Price Rounding record that you want to retrieve for modification in the Authorized field. You can only modify Unit Price Rounding record that are unauthorized. Accordingly, choose the Unauthorized option from the drop-down list.
- Specify any or all of the Unit Price Rounding record in the corresponding fields on the screen to retrieve the fund ID that is to be modified.
- Click ‘Search’ button. All unauthorized Unit Price Rounding record with the specified details are retrieved and displayed in the lower portion of the screen.
- Double click the Unit Price Rounding record that you want to modify. The Unit Price Rounding Detail screen is displayed.
- Select Unlock Operation from Action list to modify the record. Modify the necessary information.
- Click Save to save the changes. The Unit Price Rounding Detail screen is closed and the changes made are reflected in the Unit Price Rounding Summary screen.
4.40.3 Viewing Unit Price Rounding Record
To view a Unit Price Rounding record that you have previously entered:
- Invoke Unit Price Rounding Summary Screen from the Browser.
- Select the status of the Unit Price Rounding record that you want to retrieve for viewing in the Authorized field. You can also view all Unit Price Rounding record that are either unauthorized or authorized only, by choosing the Unauthorized/ Authorized option.
- Specify any or all of the Unit Price Rounding record in the corresponding fields on the screen.
- Click ‘Search’ button. All Unit Price Rounding record with the specified details are retrieved and displayed in the lower portion of the screen.
- Double click the Unit Price Rounding record that you want to view in the list of displayed Unit Price Rounding record. The Unit Price Rounding Detail screen is opened in view mode.
4.40.4 Deleting Unit Price Rounding Record
You can delete only unauthorized Unit Price Rounding record in the system.
- Invoke the Unit Price Rounding Summary screen from the Browser.
- Select the status of the Unit Price Rounding record that you want to retrieve for deletion.
- Specify any or all of the details of the Unit Price Rounding record in the corresponding fields on the screen.
- Click ‘Search’ button. All Unit Price Rounding record with the specified details are retrieved and displayed in the lower portion of the screen.
- Double click the Unit Price Rounding record that you want to delete. The Unit Price Rounding Detail screen is displayed.
- Select Delete operation from the Action list. The system prompts you to confirm the deletion, and the record is deleted physically from the system database.
4.40.5 Authorizing Unit Price Rounding Record
An unauthorized Unit Price Rounding record must be authorized in the system for it to be processed.
To authorize a Unit Price Rounding record:
- Invoke the Unit Price Rounding Summary screen from the Browser.
- Select the status of the Unit Price Rounding record that you want to retrieve for authorization. Typically, choose the Unauthorized option from the drop-down list.
- Specify any or all of the details of the fund ID in the corresponding fields on the screen.
- Click ‘Search’ button. All Unit Price Rounding record with the specified details that are pending authorization are retrieved and displayed in the lower portion of the screen.
- Double click the Unit Price Rounding record type that you wish to authorize. The Unit Price Rounding screen displayed. Select Authorize operation from Action.
When the checker authorizes Unit Price Rounding record, details of validations, if any, that were overridden by the maker of the transaction during the Save operation, are displayed. If any of these overrides results in an error, the checker must reject the stop code.
4.40.6 Amending Unit Price Rounding Record
After a Unit Price Rounding record is authorized, it can be modified using the Unlock operation from Action list. To make changes to a Unit Price Rounding record after authorization, you must invoke the Unlock operation which is termed as Amend Operation.
- Invoke the Unit Price Rounding record Summary screen from the Browser.
- Select the status of the Unit Price Rounding record that you wish to retrieve for amendment. You can only amend records of Unit Price Rounding record that are authorized.
- Specify any or all of the Unit Price Rounding record in the corresponding fields on the screen.
- Click ‘Search’ button. All Unit Price Rounding record with the specified details are retrieved and displayed in the lower portion of the screen.
- Double click the Unit Price Rounding record that you want to amend. The Unit Price Rounding screen is displayed in Amendment mode.
- Click the Unlock operation from the Action list to amend the Unit Price Rounding record.
- Amend the necessary information. Click the Save button to save the changes.
4.40.7 Authorizing Amended Unit Price Rounding Record
An amended Unit Price Rounding record must be authorized for the amendment to be made effective in the system. The process of authorization is subsequently the same as that for normal transactions.