3. Policy
After the products are defined in the system, you can accept requests for creating policies in the products, for Policy Holders. A Policy Holder can buy policies in any of the active products defined in the system. A Policy, therefore, essentially is an investment into the underlying portfolios of the Product, and the creation of a Policy lays down the profile or guidelines of the desired pattern of investment by a Policy Holder into a Product.
Note
Policies can be created through the Agency Branch component only.
The Policy Maintenance screen allows you to capture the details of a Policy. The next section gives you step-by-step instructions to do the same.
This chapter contains the following sections:
- Section 3.1, "Policy Creation"
- Section 3.2, "Policy Maintenance Summary Screen"
- Section 3.3, "Ratio Percentage Maintenance"
- Section 3.4, "Policy Transaction Enrichment"
- Section 3.5, "Interest Rate Details Maintenance"
- Section 3.6, "Interest Rate Maintenance Summary Screen"
- Section 3.7, "Authorization Screen"
- Section 3.8, "Policy Authorization"
- Section 3.9, "Policy Reversal Detail"
- Section 3.10, "Policy Reversal Summary"
- Section 3.11, "Policy SI Summary"
3.1 Policy Creation
This section contains the following topics:
- Section 3.1.1, "Invoking Policy Maintenance Detail Screen"
- Section 3.1.2, "Policy Information Tab"
- Section 3.1.3, "Policy Details Tab"
- Section 3.1.4, "Additional Details Tab"
- Section 3.1.5, "Intermediary Details Tab"
- Section 3.1.6, "Beneficiary Details Tab"
- Section 3.1.7, "Constituent Details Tab"
- Section 3.1.8, "Projected Return Value Details Tab"
- Section 3.1.9, "Payment Details Button"
- Section 3.1.10, "Asset Allocation Button"
- Section 3.1.11, "Premium Details Button"
- Section 3.1.12, "Annuity Details Button"
- Section 3.1.13, "Recurring Switch Details Button"
- Section 3.1.14, "Initial Load Override Button"
- Section 3.1.15, "Premium Load Override Button"
- Section 3.1.16, "Annuity Load Override Button"
- Section 3.1.17, "Recurring Switch Load Override Button"
- Section 3.1.18, "Add Info Button"
- Section 3.1.19, "Garnishee Details Button"
- Section 3.1.20, "Saving Information Entered"
- Section 3.1.21, "Creating Future-dated Rules for Policies"
- Section 3.1.22, "Processing Back Data Propagation for Transactions"
3.1.1 Invoking Policy Maintenance Detail Screen
Following are the steps you need to follow to create a Policy. Each of these steps is explained in detail in subsequent sections.
Note
Any investor, who desires to invest in any of the Products by purchasing a Policy in a product, can invest only if he is a valid Unit Holder with an account in the system. Therefore, you must first set up a Unit Holder account for the Policy Holder in the system.
Refer to the chapter ‘Managing Investor Accounts’ for further information.
- Invoke the Policy Maintenance screen
- Enter information in the Policy Maintenance screen.
- Save the information entered.
You can invoke the ‘Policy Maintenance Detail’ screen by typing ‘LEDPLAN’ in the field at the top right corner of the Application tool bar and clicking on the adjoining arrow button.
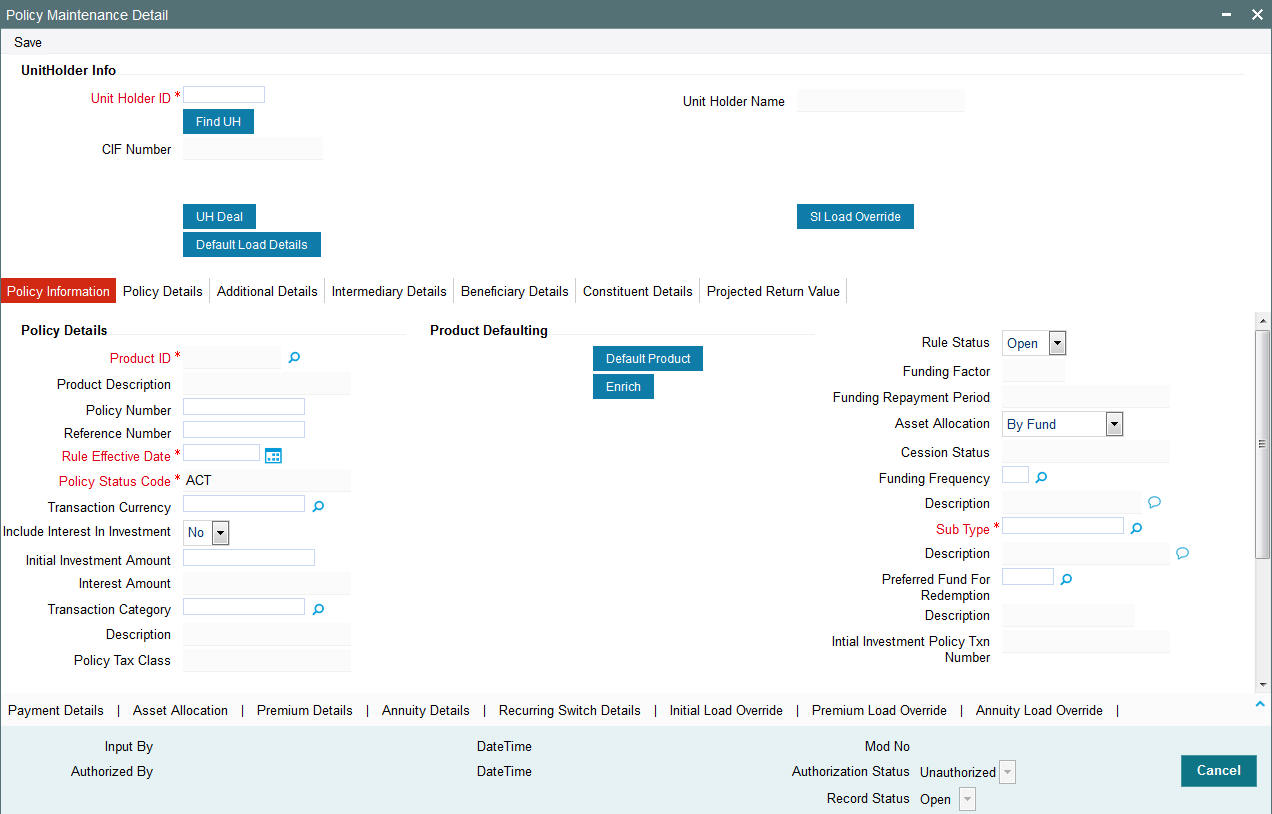
Select ‘New’ from the Actions menu in the Application tool bar or click new icon to enter the details of the Policy Maintenance.
You can specify the following fields in this screen:
Unit Holder ID
Alphanumeric; 12 Characters; Mandatory
Enter the Unit Holder ID of the Policy Holder. System allows you to create a policy for unauthorized Unit Holder IDs. However, a policy can be authorized only if the policy holder has been authorized in the system.
You can also search for unit holder ID by clicking ‘Find UH’ button.
Unit Holder Name
Display
System will default Unitholder Name for the selected Unit Holder ID.
CIF Number
Display
The system displays the CIF Number of the Policy Holder.
Note
- You have the option of using the Find Options screen to enter the CIF Number and Unit Holder ID. This screen is invoked when you click on the option list.
- Once you have entered the Unit holder ID, the CIF Number and the Unit Holder Name will get updated.
3.1.2 Policy Information Tab
Specify the following details in this section:

Policy Details
Product ID
Alphanumeric; 10 Characters; Mandatory
Select the product in which the Policy Holder wants to buy the Policy. The option list includes all valid and active Products.
Product Description
Display
The system displays the description of the selected product.
Policy Number
Alphanumeric; 16 Characters; Optional
Specify the Policy Number at the time of policy creation. The system validates the value input for its uniqueness. The policy number cannot, however, be changed during subsequent edit or amend operations.
When a Policy Holder subsequently contributes into this Policy that has been created, the same Policy number has to be specified, and the Policy must be an active, valid Policy for the transactions to be accepted.
Reference Number
Alphanumeric; 16 Characters; Optional
Specify a unique initial identification for this Policy. The Reference Number is the initial identification that you give to a Policy, before the Policy Number is generated.
You can invoke the Policy or retrieve it through the Find Form using this Reference Number for subsequent inquiries and transactions.
Rule Effective Date
Date Format, Mandatory
Specify the date from which the Policy will be effective. The format will be the one that has been maintained for your user ID in the ‘My Dash Board User’ setting date format.
Policy Status Code
Mandatory
By Default Policy Status will be 'ACT' on New Mode.
Transaction Currency
Alphanumeric; 3 Characters; Optional
Specify the transaction currency for the policy. If you do not maintain this value, the system will default this value at the time of saving the maintenance. The transaction currency maintained at the fund level will be default if all the transaction currencies for the fund are the same. If various currencies have been maintained at the fund level, then the system will default the policy base currency as the policy transaction currency.
Include Interest in Investment
Optional
Select, from the adjoining drop-down list, if the interest earned on the initial investment should be considered along with the initial investment for investment in the policy.
If you select ‘Yes’, the interest amount will be included in the investment and a single transaction will be generated for both. You need to manually add the interest amount calculated in the settlement details to the transaction amount of the particular currency in the asset allocation details.
For instance, if the interest amount is USD 1000 and the transaction amount is USD 100000, then you are required to add USD 1000 to the transaction amount for the currency USD in the asset allocation details.
If you select ‘No’, the interest amount will be generated as a separate UT transaction.
Initial Investment Amount
Numeric; 18 Characters; Optional
You have the option of entering the initial amount to be invested in the policy. If the product is a single premium product (the box ‘Multiple Premiums Allowed?’ is not checked while creating a product), and you enter an amount here, the system will generate a transaction for this amount.
You will be allowed to change the initial investment amount, interest amount and the asset allocation details for a policy that has been authorized as long as it has not been allocated. When you modify the details, the system will reverse the existing initial investment transaction and create a new policy transaction for the modified amount. You can modify the policy any number of times till policy allocation.
If transactions like allocation, premium, annuity, recurring switch, top-ups, and surrender have been generated for the policy, the system will not allow you to modify the initial investment amount.
Consider the following cases:
Case 1
The product is a multiple premium product; you enter the initial investment amount and premium details. The Start Date for the premiums is a system date when the policy is authorized.
When the policy is Authorized, a transaction will be created on the date mentioned for the initial investment amount you have entered.
Case 2
The product is a multiple premium product; you enter the initial investment amount and premium details. The Start Date for the premiums is the System Date. When the policy is saved:
- A transaction will be created for the initial investment amount you have entered.
- A transaction will also be generated for the first premium amount, at EOD.
Case 3
The product is a multiple premium product; you do not enter any initial investment amount, but only the premium amount. The Start Date for the premiums is the System Date.
When the policy is Authorized, an initial investment transaction will be generated with the premium amount.
Case 4
The product is a multiple premium product; you do not enter any initial investment amount, but only the premium amount. The Start Date for the premiums is a future date.
When the policy is Authorized, an initial investment transaction will be generated on the date specified, with the premium amount.
Note
In a scenario as described under Case 4, you will be allowed to amend the premium amount till the date specified. You will, however, not be allowed to enter an initial investment amount after you authorize a policy.
Case 5
The product is a multiple premium product; you do not enter either the initial investment amount or the premium amount. No transaction will be generated on saving the policy. An initial investment transaction will be generated only if you enter any premium details at a later stage.
Note
The initial investment amount and premium amounts are independent of each other. This means that changing the initial investment will not change the premium amount and vice versa.
Let us say, for example, you have not entered the initial investment amount and have entered only the premium amount. You now wish to enter an initial investment amount. You may do so before the policy is authorized, and in doing so, the premium amount you have entered will not be affected. Similarly, if you change the premium amount, the initial investment amount will not be affected.
Interest Amount
Display
The system computes the interest amount based on the interest calculation days and interest rate provided by you in the Interest Calculation Screen (explained below).
Transaction Category
Alphanumeric; 1 Character; Optional
Specify the type of transaction. Alternatively, you can select transaction category from the option list. The list displays all valid transaction category code maintained in the system.
If the transactions captured are for MIFID funds/ products, the transaction category ‘Advised and execution only’ will be applicable (if fund/ product is MIFID regulated). For MIFID funds/ products related transactions; the defaulting of transaction category to legacy will not be applicable, only if MIFID fund/ Product is selected as ‘Yes’ at fund and product level.
In the transaction screen, the transaction category will be based on ‘RDRTXNCATEGORY’ PARAM maintenance.
For products if the risk level for a product is defined and risk profile for a UH is maintained during LEP transactions (plan initial investment, premiums, plan switch, plan top up) the system will perform the risk checks for LEP transactions, considering the product level risk and UH risk profile along with risk expiry date.
If ‘MIFID fund/ product’ is selected as ‘Yes’, the transaction applicable are IPO subscriptions, subscription, switch, Standing instructions and transfer In, plan initial investment, premiums, plan switch, plan top up. For MIFID funds; ‘Transaction Category’ at the transaction level will be classified as either ‘Advised Business’ or ‘Execution Only Business’.
The SI transactions (subscriptions and switches, includes premiums and recurring switches) escalations will be categorized as ‘Advised Business’ or ‘Execution Only Business’. If you amend the SI, the system displays the warning message as ‘Transaction category amended for the SI’. The next SI will reflect the changed category.
If you change the ‘Transaction Category’ for a MIFID transaction during edit or amend operation, then the system displays the warning message as ‘Default Transaction Category has been overridden. Do you want to continue?’
Description
Display
The system displays the description for the selected transaction category.
Policy Tax Class
Display
The system displays the tax class of a Policy. The system will default this value from ‘Product Tax Class Maintenance’ screen.
If a UH Category gets modified, post authorisation the system will automatically change at EOD all the underlying policy Tax Class to new policy tax class (based on the new UH Category and Product combinations). The system will also update the SI’s with new tax class fund ID’s and generates 100% switch transactions from the old policy tax class funds.
Product Defaulting
Click ‘Default Product’ button to default the product values.
Rule Status
Optional
Select the rule status from the drop-down list. The list displays the following values:
- Open
- Closed
Funding Factor
Numeric; 5 Characters; Optional
The funding factor that is applicable to Policy transactions in this Product, which would have been set up at product-definition level, is displayed here. You can override this value at this stage. This must be expressed as a percentage and cannot exceed one hundred percent.
Funding Repayment Period
Numeric; 3 Characters; Optional
The duration of the repayment period, at the end of which the entire funded amount will be paid back to the investor, which would have been specified for this product, is displayed here. You can change the same for the Policy.
Asset Allocation
Optional
The asset allocation for the Policy can be specified either by the sponsor of the product, or by the Policy Holder. The drop-down list contains two options – ‘By Fund’ and ‘By Policy Holder’. Select the required option.
Cession Status
Display
When Policy Holders exercise the option of ‘ceding’ their policies on either a temporary or a permanent basis, the ceded Policy will be designated a ‘Cession ID’ and ‘Cession Status’ in the system. The Cession Status for this Policy is displayed here.
Typically, at the time of Policy creation, the newly created Policy does not have a Cession ID or Cession Status, and this field is blank, and locked. Subsequently, whenever this Policy record is viewed, any changes to Cession Status will be displayed in this field.
Funding Frequency
Alphanumeric; 1 Character; Optional
The frequency at which the funded amount will be repaid to the investor, which would have been set up at the time of Product definition, is displayed here. It cannot be changed at this stage.
Description
Display
The system displays the description of the specified funding frequency.
Sub Type
Alphanumeric; 3 Characters; Mandatory
Specify the sub transaction type.
Description
Display
The system displays the description of the specified sub type.
Preferred Fund for Redemption
Alphanumeric; 6 Characters; Optional
You can select or amend the redemption fund during the creation or amendment of the policy.
If you maintain adequate balance to recover periodic fees in ‘Preferred Fund for Redemption’, system will redeem entire periodic fees from the preferred fund.
If you do not maintain adequate balance ‘Preferred Fund for Redemption’ system will follow the present logic to recover the periodic fees.
Note
For a CMA applicable Product, system would treat CMA Fund as preferred fund for periodic fee redemptions, provided no preferred fund is selected at Product level.
The system will consider Policy level Preferred fund for redemption
and if this is not available then at unit holder level, the system will
consider the ratio of funds, i.e. same
as monthly ongoing fee transaction generation.
Refer the section ‘Cash Management Account’ in this chapter for more details on the operation of the Cash Management Account.
Description
Display
The system displays the description of the specified preference for fund redemption.
Initial Investment Policy Txn Number
Display
The system displays the transaction number of the initial investment policy.
Exchange Rate Details
The exchange rate details that are defaulted here or that you modify here will be used to convert the policy transaction amount as well as the interest on initial investment amount into the policy base currency.
Amount Applied
Display
The system displays the transaction amount in terms of the policy base currency.
Source ID
Alphanumeric; 6 Characters; Optional
You can select the source ID required from the adjoining option list. If you do not specify any, the system will default the source ID when you save the policy.
FX Deal Date
Date Format; Optional
Enter the deal date for exchange rate.
FX Value Date
Date Format; Optional
Enter the value date for the exchange rate.
Exchange Rate Applied
Numeric; 21 Characters; Optional
Specify the exchange rate to be used to convert the transaction amount from transaction base currency to policy base currency, if you have chosen to override the exchange rate.
Override Exchange Rate
Optional
Select ‘Yes’ if you wish to change the exchange rate that is displayed here. If you select ‘Y’, however, you need to specify the exchange rate to be used for the transaction in the ‘Exchange Rate Applied’ field. Select ‘No’ if you wish to retain the exchange rate that is displayed by the system.
3.1.3 Policy Details Tab
Click ‘Policy Details’ tab, to invoke the Policy Detail section:
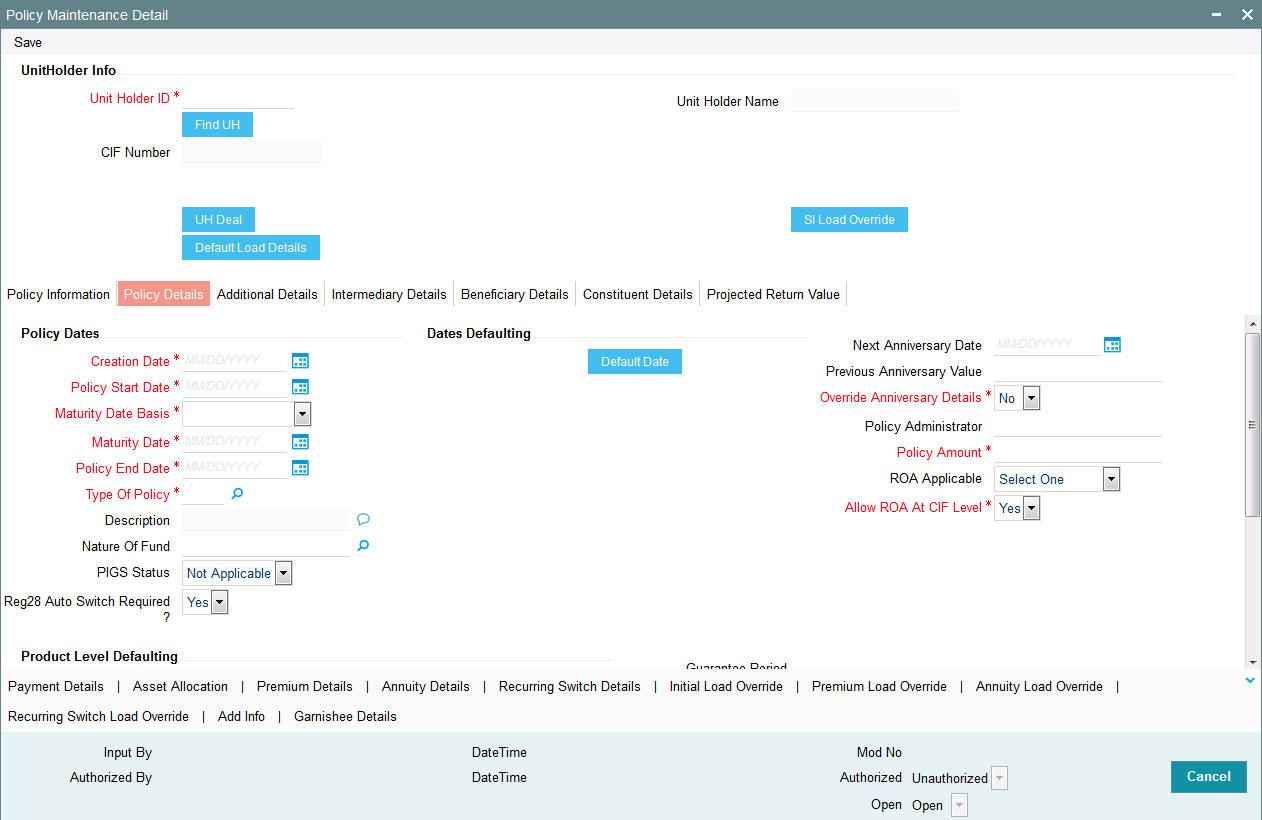
Policy Dates
Creation Date
Date Format; Mandatory
This signifies the date on which Policy record was entered into the system.
Policy Start Date
Date Format, Mandatory
Specify the date from which the Policy is available for transactions.
The Policy Start Date can be a past date if backdating is allowed for the product (if you have selected the option ‘BackDating Allowed?’ in the Product Maintenance screen), but it must not be earlier than the Product Start Date.
Maturity Date Basis
Mandatory
The option you select here, will decide on what basis the maturity date will be calculated.
You have the following two options:
- Retirement Age
- Minimum Tenor
You can select the option ‘Retirement Age’ only if you have selected the option ‘YES’ against the field ‘Retirement Features Supported’. In such a case, the maturity date will be calculated on the basis of the age of retirement you will specify at the Product level.
If you select the option ‘Minimum Tenor’, the maturity date will be calculated on the basis of the minimum tenor you will specify at the Product level.
Maturity Date
Date Format, Mandatory
When the Start Date of the Policy is specified, the system computes the maturity date for the Policy by adding the Minimum Tenor that has been specified at the product level for all policies, to the Policy Start Date, and defaults the computed date in this field. You can change this date.
The concept of a Maturity Date enables the AMC to keep track of premature closures of policies that take place, so that the applicable exit fees may be levied.
A Policy that has matured continues to exist in the product for all activities, but no transactions will be accepted into the Policy after the Policy End Date.
Policy End Date
Date Format, Mandatory
Specify the date beyond which the Policy should cease to be active. This date must not be earlier than the application date or the Policy Start Date.
Type of Policy
Alphanumeric; 2 Characters; Optional
Specify whether the Policy being created is a new Policy, a rollover from an existing Policy or whether the customer is transferring retirement assets.
Transfer-in option is applicable for fresh investment. If Balance Transfer-in is chosen from the drop down list the policy asset allocation will be enhanced to capture the unit transferred in each fund and WAC. The system will generate unit based transaction for such an initial investment.
Note
The option list includes the option ‘Accelerated Annuity’. If you select this option, in case of death of a policy holder, the policy will be transferred to a new policy opened in the name of the beneficiary .The initial amount of the new policy will be the maturity amount of the old one and the entire maturity proceed will be paid out over number of occurrences and frequency (maintained in the annuity tab).
Description
Display
The system displays the description of the selected policy type.
Nature of Fund
Alphanumeric; 3 Characters; Optional
Specify the nature of the fund based on param maintenance. The adjoining option list displays all valid accounts maintained in the system. You can choose the appropriate one.
The combination of product and the nature of the fund will then determine if PIGS rules can be applied while capturing the contributions and switches for the policy. Once applied, the system will apply PIGS rules for all transactions under the policy.
Policy PIGS Status
Optional
Select the contract status from the adjoining drop-down list. Following are the options available:
- Grandfathered
- Regulated
- Not Applicable
Policy PIGS Status is applicable only for those products for which PIGS and FOREX compliance is true.
If Policy start date is greater than or equal to PIGSREGDATE and product is PIGS compliant (with appropriate Nature of fund), then the system will mark the contract status as regulated.
If PIGSREGDATE is null then all Policy PIGS status will be by default Grandfathered. The system will display an warning message if you select ‘Regulated’ option.
If nature of fund is not mapped, Contract status will be derived based on PIGS compliance status at product level and PIGSREGDATE.
You can change PIGS status from Regulated to Grandfathered manually for policy which policy start date greater than or equal to PIGSREGDATE.
For policies with Grandfathered status, the system will not change policy status automatically to Regulated on material change before PIGSREGDATE.
If you change policy status manually to Regulated before PIGSREGDATE, then the system will not validate for material change and policy will continue to be in Regulated status.
Validating PIGS and FOREX
The system will automatically mark any contract created in system after PIGSREGDATE as Regulated. However, you can change it manually.
For premiums, the system will consider any change in Status, Start Date, End Date, Value, Frequency and Transaction, and Escalation details/Asset Allocation as material change and will mark the policy as ‘Regulated’.
For recurring switches the system will consider any change in Status, Start Date, End Date, Value, Frequency, number of phase in occurrences and Transaction category, and Escalation details/Asset Allocation as Material change will mark he policy as ‘Regulated’.
The following transactions are considered as material changes and will change the contract status from ‘Grandfathered’ to ‘Regulated’:
- Top up transactions / additional investments
- Unit Transfers
- User initiated Switch transactions
- Standing instruction, i.e. a new debit order, regular switch or phase in transaction
- The following amendments to debit orders, regular switches:
- Change in amount
- Frequency change
- Changes to the selected funds for either the debit order, phase in or regular switch.
- Adding an escalation value to an existing Standing Instruction
- Increasing the escalation value of an existing Standing Instruction considering the escalation frequency.
- The creation of a new Phase in transaction will change the status of the Grandfathered contracts to Regulated.
The following system generated transactions are not considered as material changes, and will not alter the ‘Grandfathered’ status to ‘Regulated’:
- Fund Merge transactions
- Reinvested Distributions
- Bonus payments
- Fees
- CMA switch transactions
- Redemptions / Withdrawals do not alter the ‘Grandfathered’ status as the funds under management will be reduced.
- Existing premiums (in the form of existing debit orders, regular switches, phase in and annuities).
The following amendments to debit orders and regular switches:
- Change in Bank details linked to a standing instruction (debit order or annuity payment) is not considered a material change
- Any changes to annuity payments will not affect the ‘Grandfathered’ status
- The amendment or cancellation of a Phase In will not change the status to Regulated
- The creation of a new Phase In will change the status.
If a transaction, for which the status is changed from Grandfathered to Regulated, is reversed or cancelled, then the system will automatically change the status back to ‘Grandfathered’.
The system will not check ‘Grandfathered’ contracts for asset limit compliance, when contract is amended to add or modify recurring debit orders or recurring switches. However, if a Top-up and switch transaction causes a contract to lose its ‘Grandfathered’ status, then that transaction will not be subjected to Regulation 28 compliance checks.
The following transactions will be checked for Regulation 28 compliance:
- New investments
- Top up transactions
- Switches
- Partial redemption
- 100% redemptions are not checked for compliance.
- Creation of a new recurring debit order
The Regulation 28 online checks will check compliance during the creation of a recurring debit order. For instance, if the debit order itself is validated, and the current value in the client’s portfolio is not taken into account, then that contract will be ‘non-compliant’. The system will only validate if the actual debit order instruction has passed Regulation 28 validation.
If a contract has failed compliance during a Quarterly monitoring run, and the contract is marked as ‘Non-compliant’, then the system will not allow the creation of new recurring debit orders.
The new investments and top up transactions must be checked for Regulation 28 compliance, taking into account the current market value of the contract as well.
On capturing a transaction, the system will aggregate the asset allocation for each selected fund on a weighted average basis and check the same against the Regulation 28 asset limits. If the aggregate position is not compliant, then the system will display a warning message.
The system will run Policy PIGS Status Updation batch as part of the EOD to amend the PIGS status of Grand Fathered contracts which had a material change transaction for the day. This batch will also change PIGS status for policy which may have been amended with a future effective date.
Reg28 Auto Switch Required?
Optional
Select if Reg28 auto switching is required or not from the drop-down list. The list displays the following values;
- Yes
- No
This field is mandatory for PIGS compliant product.
Processing Auto Switch
Auto Switch functionality is applicable only for Regulated contracts where Auto switch required is marked as ‘Yes’ at Policy level.
Once the maximum number of unsuccessful runs for auto switch is reached during quarterly compliance checking process, the system will check the contract against Actual components and update the serial number if the contract is non compliant. If the contract is compliant against AML, then the serial number will be updated to 0.
If a policy is failed consecutively for defined number of times, then the system will run auto switch as part of the following quarter. For instance, if the maximum non-compliance count is 4, auto switch will takes place as part of 5th quarter. In such cases, auto switch process shall pickup all the contracts whose current count is more than 4 and continue with the processing of auto switch.
The system will run ‘Policy – Reg28 Auto-Switch Generation’ batch to pick up all non-complaint contracts against the AML components for successive nth time i.e. maximum number of unsuccessful runs plus one, i.e N+1 times. The system will validate these contracts for Regulation 28 against rule with latest balance.
If the contract is complaint against rule maintained and latest balance then the contract will be marked as complaint and Serial Number will be updated to ‘0’.
If the contract is not compliant against this IML and latest balance then the batch will generate Auto-Switch forcing the contract to be Regulation 28 compliant by ‘Sell by Margin’ method. This Batch will also run on the same day as the current quarterly process.
You can maintain IML batch rule for Auto switch to take place. If IML batch rule is not maintained, system will mark the contract as ‘Compliant’ and the Serial number will be updated as 0 and policy will be marked as ‘Policy is compliant with IML’. In IML Batch rule, each rule can have only 1 component.
While determining the latest market value, for switch transactions, both the out and in leg must be allotted before they can be included in the market value calculation. The latest available prices will be used in the calculation. The system will evaluate the computed IML component values against latest IML rule to check whether contract is compliant or not.
If the contract is compliant against IML components then the system will mark the contract as ‘Compliant’ and the Serial number will be updated as 0 and will be marked as ‘Policy is compliant with the IMLs’ in data store as well.
If the contract is not compliant against IML, then system will take the Rule which has maximum breach. The breach is defined as the Portfolio’s IML limit less the asset limit.
The system will derive the required variable based on the Rule. It will derive the Sell% (excluding funds based on maintenance) after applying the formula.
The system will rebalance the portfolio by keeping the excluded funds values constant and by switching the amount from the eligible funds to Auto Switch fund.
The system will check to see whether the rebalanced portfolio passes Regulation 28 validation using IMLs. (Switch transaction calculated against Rule 10 must be included)
If Contract is compliant then system:
- Marks the contract as compliant by updating the serial number to 0 and update the remarks in the data store will be updated as ‘Policy is compliant with the IMLs’ against this contract.
- Creates a switch transaction as per the sell amount derived from respective funds into Money Market fund.
If the contract is still not compliant, then system will repeat re-balancing steps until contract is compliant. The system will generate only one switch transaction per contract. The switch transactions will generate 2 Adjustment Transaction Types, namely, LHO (for Switch Out leg) and LHI (for Switch In leg) during this process.
The system will track all the computed variables, values etc used in calculation of Switch generation with the iteration number for reconciliation and reporting purposes. You can also exclude funds for Reg 28 auto switch rebalancing while selecting funds in ‘Portfolio Mapping’ screen.
Dates Defaulting
Next Anniversary Date
Date Format; Optional
Specify the Anniversary Date for the annuity payment.
Previous Anniversary Value
Numeric; 30 Characters; Optional
Specify the preceding anniversary amount.
Note
Post authorization, you will be allowed to amend the ‘Anniversary Value’ and the ‘Previous Anniversary Value’ fields provided the ‘Override Anniversary Date?’ option has been checked.
Override Anniversary Details?
Mandatory
Select if anniversary details has to be overridden or not from the drop-down list. The list displays the following values:
- Yes
- No
When you enter the Start Date of the Policy in the Policy Details section of this screen, the system defaults the Anniversary Date to a date that is exactly one year after the Start Date.
Policy Administrator
Alphanumeric; 60 Characters; Optional
Specify the plan administrator details.
Policy Amount
Numeric; 30 Characters; Mandatory
Specify an indicative amount for which the Policy is taken in the product. The system does not perform any validation against this amount, and it is used only for information purposes.
ROA Applicable
Optional
Indicate whether a Rate of accumulation is applicable for the policy from the drop-down list. The list displays the following values:
- Policy Level
- Policy Holder Level
- Across Product
The initial administrator and broker will use the market value at policy level to derive the fee return value. The fee is calculated based on the gross amount of the individual transaction value.
You can select the applicable ROA for policy and policy holder. On selecting the Right of accumulation for Policy, an accumulation rate is applied on the policy, being created. On selecting Unit holder, the Right of Accumulation is applicable for all the policies mapped to the particular Unitholder.
For an ROA function to be applicable, a cumulative load would have to be setup and mapped in the Load Product.
Allow ROA at CIF Level
Optional
Indicate if ROA is to be allowed at CIF level or not by choosing from the drop-down list.
Product Level Defaulting
Statement Frequency
Alphanumeric; 1 Character; Mandatory
Specify the frequency at which the Policy statement must be mailed to the Policy Holder for this Policy.
Note
This frequency overrides the frequency specified for the Product.
Description
Display
The system displays the description of the specified statement frequency.
Policy Base Currency
Alphanumeric; 3 Character; Mandatory
Specify the base currency to be associated with the policy or select the policy base currency from the option list provided. All currencies maintained in the system get displayed in the option list.
While saving the record, the system validates whether the selected currency is supported by product and saves the record on successful validation.
Description
Display
The system displays the description of the specified policy base currency.
Life Cover Applicable
Mandatory
This field indicates whether or not the Policy Holder has an option to opt for a life cover while subscribing to this product. Select ‘Yes’ or ‘No’ from the drop-down list.
Life Cover Amount
Numeric; 30 Characters; Optional
Specify the amount to be paid by the Policy Holder as a fee for obtaining the life cover for any Policy held by him in this product.
Proof of Existence Certificate
Mandatory
Select whether or not the Policy Holder will need to produce a certificate of existence.
Guarantee Period
Numeric; 3 Characters; Optional
Specify the guarantee period.
Take on Annuity Amount
Numeric; 30 Characters; Optional
Enter the take-on annuity amount here. The annuity details will be calculated by the system based on the amount you enter here and not the annuity percentage, till the first anniversary. The annuity details will be taken into consideration after the first anniversary.
Number of Withdrawals Allowed
Numeric; 5 Characters; Optional
Specify the number of withdrawals allowed.
Withdrawal Counter
Display
This field displays the number of withdrawals taken by the policy holder. It will be displayed irrespective of the product to which the policy belongs.
System will update the Withdrawal counter at policy level after doing a withdrawal transaction, and also validates with the No. of withdrawals allowed at Policy level.
Example
If you enter the Start Date of the Policy as 3rd June 2005, the Anniversary Date will be defaulted to 3rd June 2006.
If you wish to change the Anniversary Date of the annuity payment, check the box ‘Override Anniversary Date’.
This field is enabled only if the ‘Override Anniversary Date?’ option has been checked
Retirement Age
Numeric; 3 Characters; Optional (Enabled only if Maturity Date Basis for Product is ‘Retirement Age’)
Specify the age that will be considered as retirement age for Policy Holders under this product. After this age, the Policy Holders will become eligible for retirement benefits, if any.
Note
This field will be enabled only if, for the Product, in the Product Maintenance screen:
- You have selected the option ‘Yes’ against the field ‘Retirement Features Supported?’
- You have selected the option ‘Retirement Age’ against the field ‘Maturity Date Basis’
Life Expectancy
Numeric; 3 Characters; Optional
User can enter life expectancy.
Policy Term (Years)
Numeric; 3 Characters; Optional
You can enter the policy term.
3.1.4 Additional Details Tab
Click ‘Additional Details’ tab, to invoke the Additional Details section:
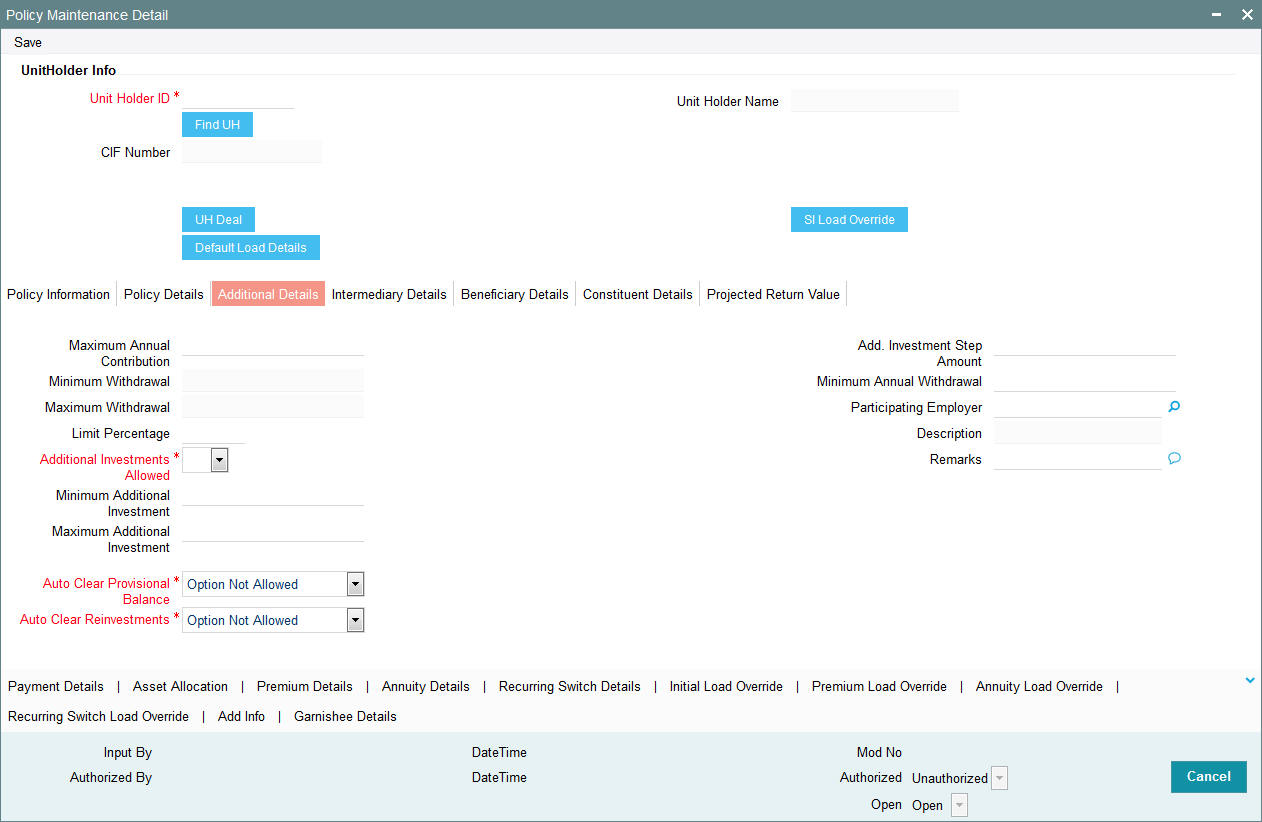
Maximum Annual Contribution
Numeric, 30 Characters; Optional
Specify the maximum amount that the Policy Holder can invest annually in a Policy in this Product. This amount includes top ups, if any. The amount displayed is the amount specified for the Product. You can change the same for the Policy.
Minimum Withdrawal
Numeric, 30 Characters; Optional
This field will be enabled if you have specified the Withdrawal Limit Mode as Amount. Specify the minimum amount that a Policy Holder can be withdraw from the holdings.
Maximum Withdrawal
Numeric, 30 Characters; Optional
This field will be enabled if you have specified the Withdrawal Limit Mode as ‘Amount’. Specify the maximum amount that a Policy Holder can be withdraw from the holdings.
Limit Percentage
Numeric; 5 Characters; Optional
This field will be enabled if you have specified the Withdrawal Limit Mode as ‘Percentage’. Specify the maximum withdrawal in terms of a percentage, that a Policy Holder can be withdraw from the holdings.
Additional Investments Allowed
Mandatory
This option indicates whether or not the Policy Holder can make an additional investment in a Policy. The option you have specified for the Product will be defaulted here.
Note
You will be allowed to uncheck this box if it is checked. You will, however, not be allowed to check this box if it is unchecked
Minimum Additional Investment
Numeric, 30 Characters; Optional
Specify the minimum additional investment amount that a Policy Holder should make (if the option ‘Additional Investments Allowed’ has been selected for the Policy Holder).
Maximum Additional Investment
Numeric, 30 Characters; Optional
Specify the maximum additional investment amount that a Policy Holder should make (if the option ‘Additional Investments Allowed’ has been selected for the Policy Holder).
Add. Investment Step Amount
Numeric, 30 Characters; Optional
Specify the step amount for an additional investment.
Minimum Annual Withdrawal
Numeric, 30 Characters; Optional
If the withdrawals are allowed at the Product level then the minimum amount that customer needs to withdraw annually can be specified here while creating a Policy. This will override the amount set at the Product level. The amount set at the product level will be shown here after user selects the Product.
Participating Employer
Alphanumeric; 12 Characters; Optional
Specify the underlying policyholders’ employer. The option list displays all participating employers linked to the chosen product.
Description
Display
The system displays the name of the selected participating employer.
Remarks
Alphanumeric; 255 Characters; Optional
Specify remarks, if any.
Auto Clear Provisional Balance
Mandatory
This field indicates whether 100% outflow transactions include provisionally allotted units. The option specified for the product, in the Product Maintenance screen, will be defaulted. However, you can change the defaulted option. You can specify any of the following options:
- Option not allowed: Provisionally allotted units should not be considered while processing 100% outflow transactions.
- Allowed – Default checked: Provisionally allotted units should be considered while processing 100% outflow transactions by default.
- Allowed – Default unchecked: Provisionally allotted units will not be considered while processing 100% outflow transactions by default. However, you can check this option while performing transactions.
Auto Clear Reinvestments
Mandatory
This field indicates whether 100% outflow transactions include freeze held and reinvestment units. The option specified for the product, in the Product Maintenance screen, will be defaulted. However, you can change the defaulted option.
You can specify any of the following options:
- Option not allowed: Freeze held/reinvestment units should not be considered while processing 100% outflow transactions.
- Allowed – Default checked: Freeze held/reinvestment units should be considered while processing 100% outflow transactions by default.
- Allowed – Default unchecked: Freeze held/reinvestment units will not be considered while processing 100% outflow transactions by default. However, you can check this option while performing transactions.
Refer to the chapter “Maintaining System Parameters” for more details.
3.1.5 Intermediary Details Tab
You will need to capture details of the intermediaries attached to the initial investment. When you click ‘Intermediary Details’ link, the screen is invoked:
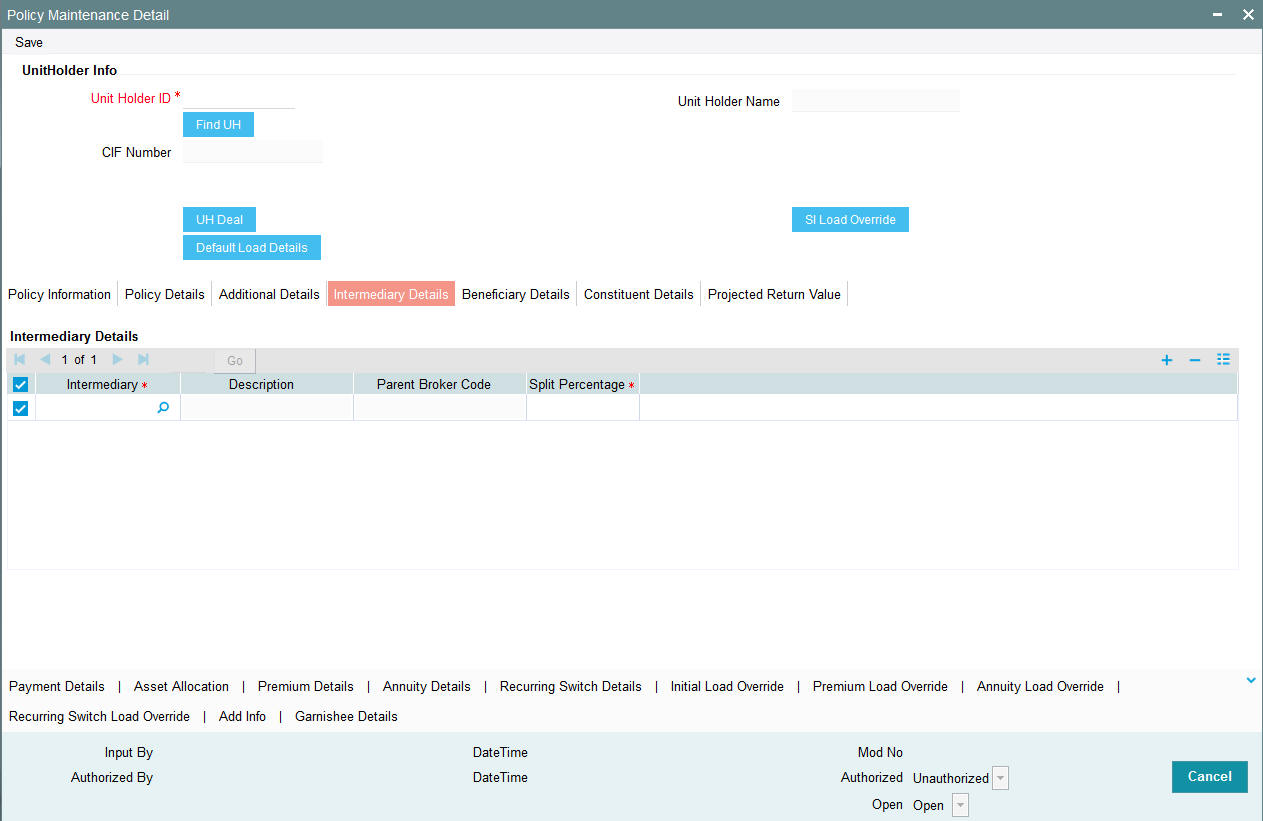
The default intermediary details maintained for the unit holder involved in the transaction are displayed here. However, you can change the defaulted values.
Intermediary
Alphanumeric; 12 Characters; Optional
From the list, select the broker preferred by the Policy Holder.
Description
Display
The system displays the description for the selected intermediary code.
Parent Broker Code
Display
The system will display the parent broker code once the intermediary code is chosen.
Split Percentage
Numeric; 22 Characters; Mandatory
Specify the percentage of the commission that the selected broker is entitled to receive on any transactions put through for the investor.
This percentage must not exceed one hundred percent.
Note
If you specify more than one broker in this section, the split percentages for all brokers, when summed up, must not exceed or fall below one hundred percent.
3.1.6 Beneficiary Details Tab
In this section, you must specify the details of one or more beneficiaries, if any, for the Policy Holder. A beneficiary could be an existing Unit Holder in the system or could be an external entity.
When you click ‘Beneficiary Details’ link, the screen is invoked:
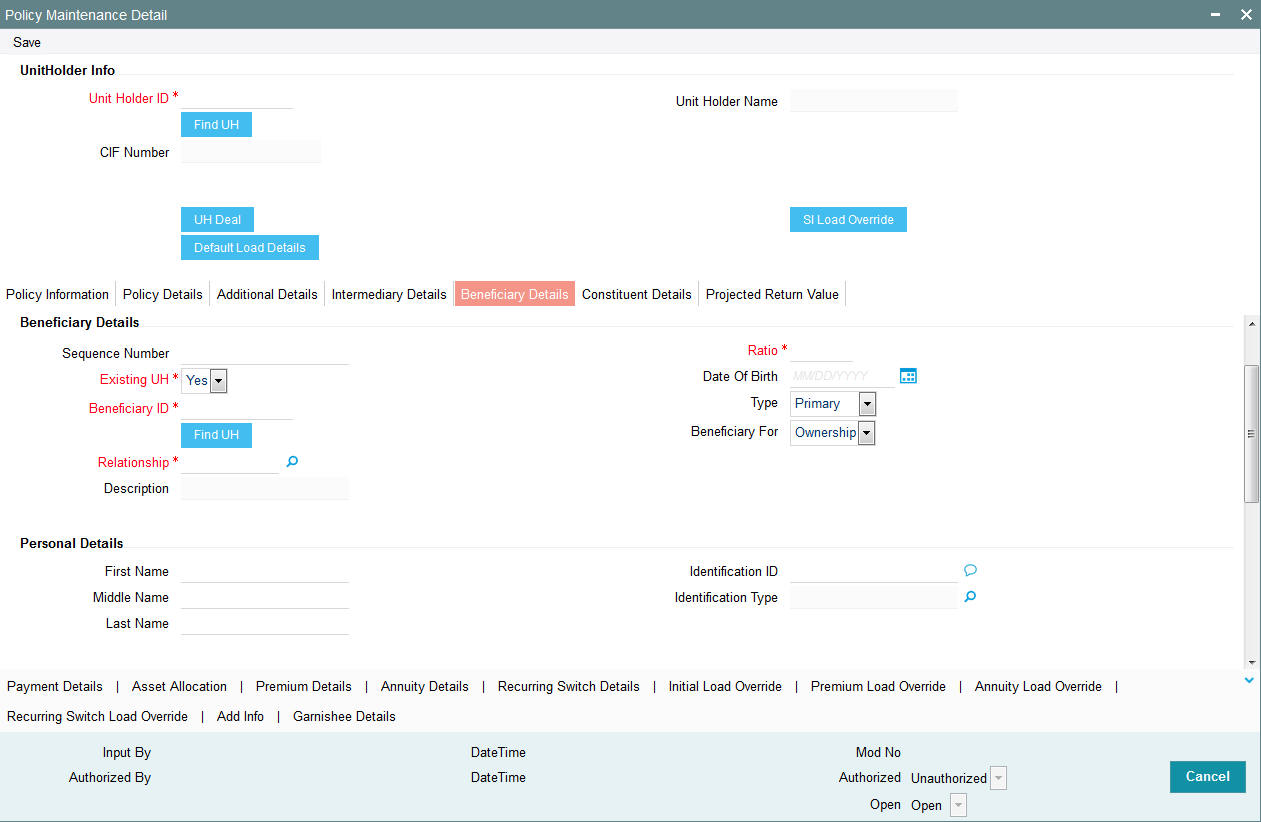
It is mandatory for you to maintain beneficiary details only if the option ‘Beneficiary Details Mandatory’ has been checked for the underlying product.
Beneficiary Details
Sequence Number
Display
The system displays the sequence number.
Existing UH
Mandatory
Select ‘Yes’ for existing Unit Holder. Else ‘No’.
Beneficiary ID
Alphanumeric; 12 Characters; Mandatory
If the beneficiary is an existing Policy Holder, you can invoke the same from the option list. Else, specify the same.
You can also search for beneficiary ID by clicking ‘Find UH’ button.
Relationship
Alphanumeric; 40 Characters; Mandatory
Specify the relationship of the beneficiary with the Policy Holder.
Description
Display
The system displays the description for the selected relationship code.
Ratio
Numeric; 5 Characters; Mandatory
Specify the percentage of the Policy Holder’s holdings that belongs to the beneficiary. The ratio should sum up to 100.
Date of Birth
Date Format; Optional
Enter the date of birth of the beneficiary.
Type
Optional
Specify whether the beneficiary is a primary or secondary holder from the drop-down list.
Beneficiary For
Optional
Select ‘Ownership’ or ‘Proceeds’ from the drop-down list.
Personal Details
First Name
Alphanumeric; 100 Characters; Optional
Specify the first name of the beneficiary.
Middle Name
Alphanumeric; 40 Characters; Optional
Specify the middle name of the beneficiary.
Last Name
Alphanumeric; 40 Characters; Optional
Specify the last name of the beneficiary.
Identification ID
Alphanumeric; 50 Characters; Optional
Specify the identification details.
Identification Type
Alphanumeric; 3 Characters; Optional
Select the identification type from the option list.
Address Details
Address
Alphanumeric; 255 Characters; Optional
Specify the address of the beneficiary.
City
Alphanumeric; 50 Characters; Optional
Specify the city name of the beneficiary.
Zip Code
Alphanumeric; 10 Characters; Optional
Specify the zip code of the beneficiary.
State or Country
Alphanumeric; 40 Characters; Optional
Specify the state or country name of the beneficiary.
Phone Number
Alphanumeric; 20 Characters; Optional
Enter the phone number of the beneficiary.
Fax Number
Alphanumeric; 20 Characters; Optional
Enter the fax number of the beneficiary.
E-Mail ID
Alphanumeric; 255 Characters; Optional
Enter the e-mail ID of the beneficiary.
Account Details
Bank
Alphanumeric; 12 Characters; Optional
Specify the bank code of the beneficiary’s bank. You can select the same from the option list, if the bank code is a valid code in the system.
Branch
Alphanumeric; 12 Characters; Optional
Specify the branch of the selected beneficiary bank.
Bank Name
Display
The system displays the name of the selected bank code.
Branch Name
Display
The system displays the name of the selected branch code.
Account Type
Alphanumeric; 1 Character; Optional
Specify the account type.
Account Number
Alphanumeric; 16 Characters; Optional
Specify the account number.
Account Currency
Alphanumeric; 16 Characters; Optional
Specify the account currency.
IBAN
Alphanumeric; 40 Characters; Optional
Specify the IBAN (International Bank Account Number) of the account holder.
3.1.7 Constituent Details Tab
When you click ‘Constituent Details’ link, the screen is invoked:
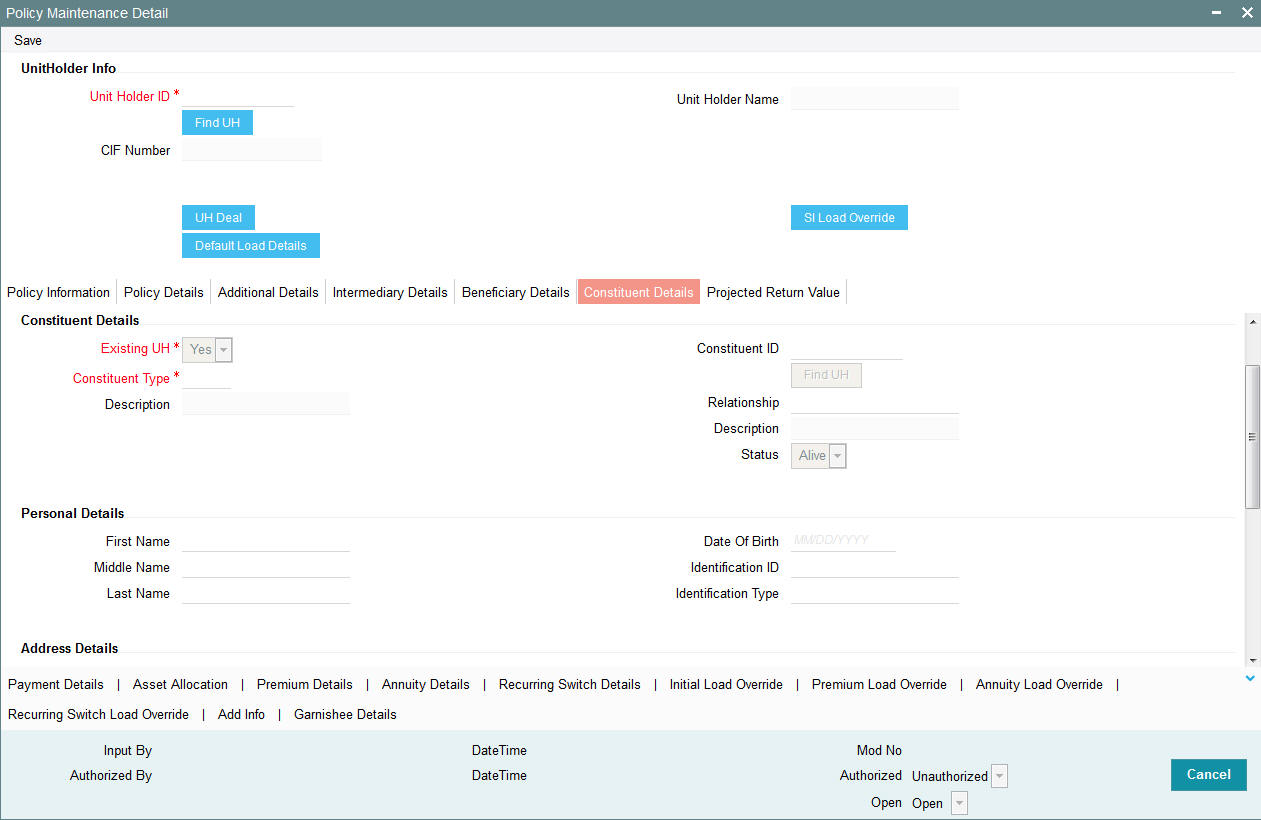
It is mandatory for you to maintain constituent details only if the option ‘Constituent Details Mandatory’ has been checked for the underlying product.
Constituent Details
The constituent details are given below:
Existing UH
Mandatory
Select ‘Yes’ for existing Unit Holder. Else ‘No’.
Constituent Type
Alphanumeric; 3 Characters; Mandatory
Select all the stakeholders of the Policy from the option list.
Description
Display
The system displays the description for the selected constituent type.
Constituent ID
Alphanumeric; 12 Characters; Mandatory
Specify the ID of the constituent from the option list. You can either select a valid Unit Holder in the system or enter a Constituent ID.
You can also select constituent ID by selecting ‘Find UH’ button.
Relationship
Alphanumeric; 40 Characters; Mandatory
Select the relationship of the constituent to the Policy Holder from the option list.
Description
Display
The system displays the description for selected relationship code.
Status
Mandatory
Select the status ‘Alive’ or ‘Dead’ from drop-down list.
Personal Details
First Name
Alphanumeric; 100 Characters; Optional
Specify the first name of the constituent holder.
Middle Name
Alphanumeric; 40 Characters; Optional
Specify the middle name of the constituent holder.
Last Name
Alphanumeric; 40 Characters; Optional
Specify the last name of the constituent holder.
Date Of Birth
Date Format; Optional
Select the date of birth of constituent holder from the adjoining calendar.
Identification ID
Alphanumeric; 50 Characters; Optional
Specify the identification details.
Identification Type
Alphanumeric; 3 Characters; Optional
Select the identification type from the option list.
Address Details
Address
Alphanumeric; 255 Characters; Optional
Specify the address of the constituent holder.
City
Alphanumeric; 50 Characters; Optional
Specify the city name of the constituent holder.
Zip Code
Alphanumeric; 10 Characters; Optional
Specify the zip code of the constituent holder.
State or Country
Alphanumeric; 40 Characters; Optional
Specify the state or country name of the constituent holder.
Phone Number
Alphanumeric; 20 Characters; Optional
Enter the phone number of the constituent holder.
Fax Number
Alphanumeric; 20 Characters; Optional
Enter the fax number of the constituent holder.
E-Mail ID
Alphanumeric; 255 Characters; Optional
Enter the e-mail ID of the constituent holder.
Account Details
Bank
Alphanumeric; 12 Characters; Optional
Specify the bank code of the constituent holder’s bank. You can select the same from the option list, if the bank code is a valid code in the system.
Branch
Alphanumeric; 12 Characters; Optional
Specify the branch of the selected constituent holder’s bank.
Bank Name
Display
The system displays the name of the selected bank code.
Branch Name
Display
The system displays the name of the selected branch code.
Account Type
Alphanumeric; 1 Character; Optional
Specify the account type.
Account Number
Alphanumeric; 16 Characters; Optional
Specify the account number.
Account Currency
Alphanumeric; 16 Characters; Optional
Specify the account currency.
IBAN
Alphanumeric; 40 Characters; Optional
Specify the IBAN (International Bank Account Number) of the account holder.
3.1.8 Projected Return Value Details Tab
In this section, you can override or alter the value of any load (including derived loads, if any) mapped to the selected fund and applicable for the transaction type, which is to be computed at the time of allocation. The frequency of computation for such loads would be "allocation".
Click on the ‘Projected Return Value’ tab to invoke the screen:

This section is only enabled for funds that have allocation time loads mapped to them as applicable for the transaction type.
Projected Return Value
Policy Number
Display
System displays the Policy Number.
Transaction Number
Display
System displays the Transaction Number.
Transaction Date
Display
System displays the Transaction Date.
Fund ID
Display
System displays the Fund ID.
Policy Holder
Display
System displays the Policy Holder.
Load ID
Display
System displays the Load ID.
Transaction Type
Display
System defaults the Transaction Type.
Ref Type
Display
System defaults the Reference Type.
Projected Return Value
Display
The System populates the return value from the load setup.
If there are criteria based loads, the criteria is evaluated during UT transaction generation and it will be used during allocation.
3.1.9 Payment Details Button
The Settlement Details screen is invoked when you click on this button.
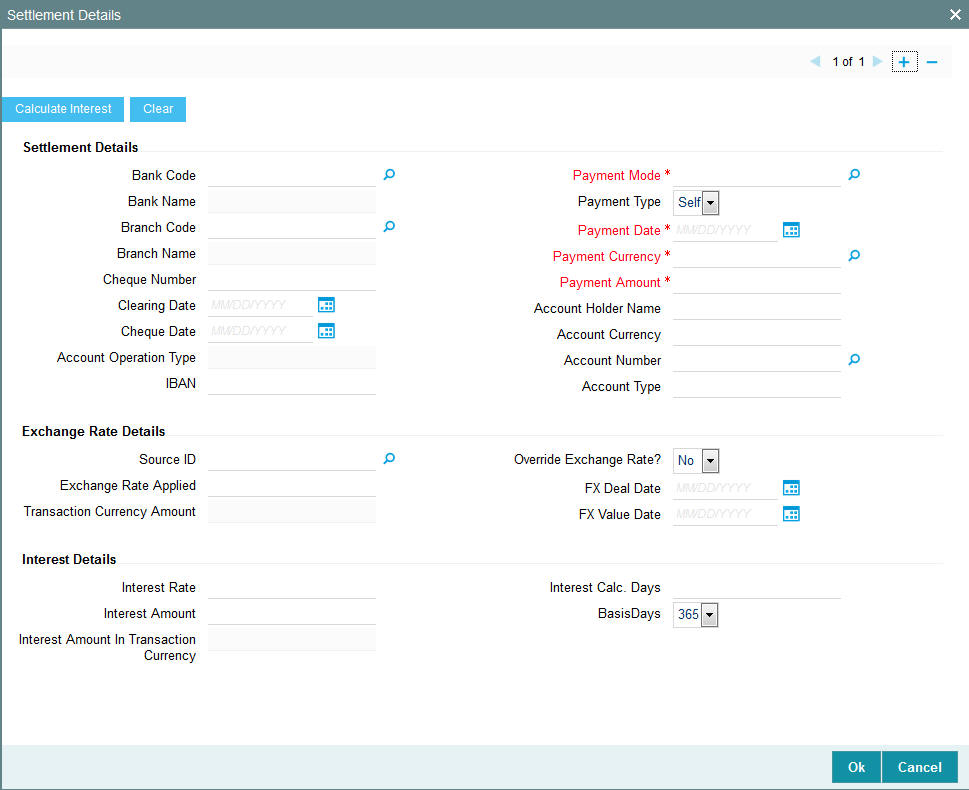
Bank Code
Alphanumeric; 12 Characters; Optional
Specify the bank code from which the transfer of payment is being made.
Bank Name
Display
The system displays the name of the bank for the specified bank code.
Branch Code
Alphanumeric; 12 Characters; Optional
Specify the branch from which the transfer of payment is being made.
Branch Name
Display
The system displays the name of the branch for the selected branch code.
Cheque Number
Alphanumeric; 16 Characters; Optional
Specify the cheque number.
Clearing Date
Date Format; Optional
Select the date of clearing from the adjoining calendar.
Cheque Date
Date Format; Optional
Select the date of cheque from the adjoining calendar.
Account Operation Type
Display
The system displays the type of account operation.
IBAN
Alphanumeric; 40 Characters; Optional
Specify the IBAN (International Bank Account Number) of the account holder.
Payment Mode
Alphanumeric; 1 Character; Optional
Specify the mode of payment.
Payment Type
Optional
Select the type of payment from the drop-down list. The list displays the following values:
- Self
Payment Date
Date Format; Mandatory
Specify the date on which the initial investment was done. You can deposit the amount in different currencies and on different dates.
Payment Currency
Alphanumeric; 3 Characters; Mandatory
Enter the currency in which the initial investment is being done. The initial amount can be deposited in multiple currencies.
Payment Amount
Numeric; 30 Characters; Mandatory
Enter the initial investment amount being paid in the particular currency.
Account Holder Name
Alphanumeric; 100 Characters; Optional
Specify the account holder name.
Account Currency
Alphanumeric; 3 Characters; Optional
Specify the account currency of the account number from which the transfer of payment is being made.
Account Number
Alphanumeric; 16 Characters; Optional
Specify the account number from which the transfer of payment is being made.
Account Type
Alphanumeric; 1 Character; Optional
Specify the account type from which the transfer of payment is being made.
Exchange Rate Details
When you click the ‘Enrich’ button in the ‘Policy Information’ tab, the system will default the following exchange rate details for each settlement:
Source ID
Alphanumeric; 6 Characters; Optional
Specify the source ID.
Exchange Rate Applied
Numeric; 21 Characters; Optional
Specify the exchange rate applied. ID.
Transaction Currency Amount
Display
The system displays the transaction currency amount.
Override Exchange Rate
Optional
Select if exchange rate has to be overridden or not from the drop-down list. The list displays the following values:
- Yes
- No
FX Deal Date
Date Format; Optional
Select the FX deal date from the adjoining calendar.
FX Value Date
Date Format; Optional
Select the FX value date from the adjoining calendar.
If exchange rate details are not available for any settlement when the transaction or policy is entered, the system will not generate a UT transaction. Once all the settlement details have been enriched in the ‘Policy Transaction Exchange Rate Enrichment’ screen and the ‘FCIS Enrich Exchange Rate Detail’ screen, the system will compute the transaction amount and generate the UT transaction. If it is not enriched, then the system will pick the exchange rate during EOD and generate the UT transaction.
Interest Details
When you click the ‘Enrich’ button in the ‘Policy Information’ tab, if the initial investment amount has been deposited prior to the policy start date, the system will calculate and display the interest on the payment amount in the ‘Policy Information’ tab. The interest will be calculated from the date of payment till the transaction date.
When you click ‘Calculate Interest’ button in the ‘Settlement Details’ screen, the system will calculate and display the interest amount in the ‘Interest Amount’ field in the same screen.
Interest Rate
Numeric; 12 Characters; Optional
Enter the rate of interest that is to be used to calculate interest amount for the particular currency. Alternatively, you can maintain the interest rate in the ‘Interest Rate Maintenance’ screen. If you do not maintain an interest rate, the system will take it as null.
Interest Amount
Numeric; 12 Characters; Optional
Specify the interest amount.
Interest Amount in Transaction Currency
Display Only
The system computes and displays the interest amount in terms of the transaction currency.
Interest Calc. Days
Numeric; 12 Characters; Optional
Specify the number of days for which interest calculation has to be done for a policy based on the policy start date and payment date.
Basis Days
Optional
Select the interest basis days, based on which the interest will be calculated. The options available are:
- 360
- 365
Click ‘Calculate Interest’ button to calculate the interest rate.
When you click the ‘Clear’ button, the interest-related details will be cleared.
3.1.10 Asset Allocation Button
The initial contribution towards the Policy can be directed into any number of mapped funds for the product, and annuity is paid out to the Policy Holder from any of these funds. The ratio of contributions received into the Policy to the annuity payouts for each of the mapped funds of the product, as specified at the time of Policy creation are displayed here. The initial contribution that you enter can be in different currencies. In this case, you need to mention the currency-wise details here.
Note
The asset allocation details that you specify here will be applicable to only the initial contribution towards the policy, and not the annuity and premium payments.
When you click ‘Asset Allocation’ button, the screen is invoked:
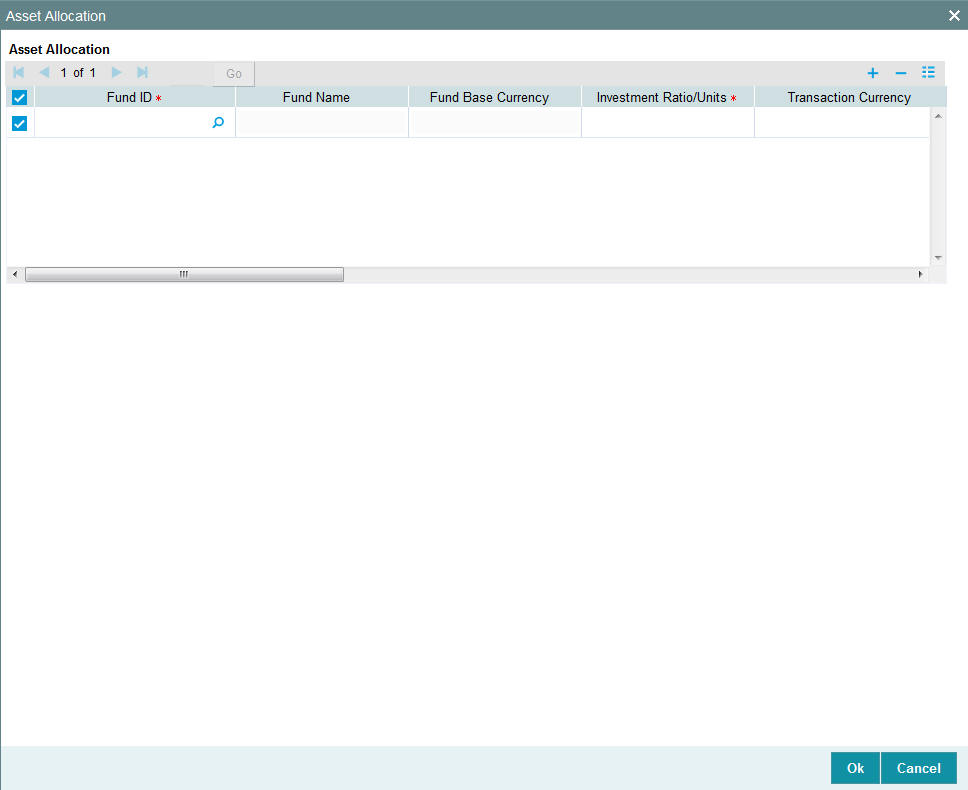
Enter information in the following fields:
Fund ID
Alphanumeric; 6 Characters; Mandatory
All the funds mapped for the selected product are displayed in the option list. Against each of these funds, you can specify the investment ratio and the annuity ratio.
Fund Name
Display
The system displays the name of the selected fund ID.
Fund Base Currency
Display
The system displays the fund base currency for the selected fund ID.
Investment Ratio/Units
Numeric; 27 Characters; Mandatory
For each fund that is displayed, specify the ratio of investment or the number of units to be made in the fund out of the total contribution towards the Policy. The sum total of the investment ratio should add up to 100.
If there are many currencies specified as part of settlements, then the system will not allow you to enter a ratio. Instead you need to enter the transaction currency and transaction amount for each currency. The system will compute and display the ratio based on the currency and amount details provided. To calculate the ratio, the transaction amounts will be
If the settlements are maintained in only one currency, then you can enter either the ratio or the transaction amount.
Note
If the type of policy is 'Balance Transfer-in' the number of units being transferred-in are mentioned and not the ratio of investment.
Transaction Currency
Alphanumeric; 3 Characters; Optional
Specify the transaction currency for the initial contribution. If many currencies have been mentioned in the settlements, then you are required to enter the amount for individual currencies. You can specify a transaction currency only if the transaction is amount-based.
Transaction Amount
Numeric; 18 Characters; Optional
Specify the transaction amount for the currency selected. If different currencies have been mentioned in settlements, then you can specify only the transaction amount. The system will default the ratio. If all the currencies in settlements are the same, then you can specify either the transaction amount or the ratio.
Note
- If you have checked the ‘Include Interest in Investment’ box, then the total of settlement and interest amounts for each currency needs to be equal to the asset allocation transaction amount for the currency.
- If the ‘Include Interest in Investment’ box has not been checked, then sum of currency wise settlement amount should be equal to the asset allocation transaction amount for the currency.
WAC
Numeric; 30 Characters; Optional
Specify the take-on WAC here. This will be used as the opening WAC in respective funds. CGT computation for initial investment transaction will be based on the take-on WAC
Note
WAC is mandatory in case of Balance Transfer-In type of policy.
Exchange Rate Source
Alphanumeric; 6 Characters; Optional
The system will display the exchange source maintained at default set-up in system parameters. You can change it by selecting the required exchange rate source from the adjoining option list. This will be used by the system to convert the transaction amount in terms of fund base currency.
Override Exchange Rate?
Optional
Select ‘Yes’ if you wish to change the exchange rate that is displayed here. If you select ‘Yes’, however, you need to specify the exchange rate to be used for the transaction in the ‘Exchange Rate Applied’ field. Select ‘No’ if you wish to retain the exchange rate that is displayed by the system.
Exchange Rate
Numeric; 21 Characters; Optional
The system will default the exchange rate available for the currency based on the exchange source specified. If you have elected to override the exchange rate, you need to enter the exchange rate to be used here. If exchange rate is not available, then the system will generate the transactions as incomplete ones. Such transactions can be enriched later through the ‘Policy Transaction Enrichment Screen’.
FX Deal Date
Date format; Optional
The system will default the starting date of the policy here. You can change it if required.
FX Value Date
Date format; Optional
The system will default the starting date of the policy here. You can change it if required.
KIID Compliant
Optional
Select if the policy is KIID compliant or not from the adjoining drop-down list. Following are the options available:
- Yes
- No
3.1.11 Premium Details Button
In this section, enter the details of the premium payment and the frequency at which the premium payments will be made.
You can enter the details for more than one premium.
When you click on the ‘Premium Details’ button, the screen is invoked:
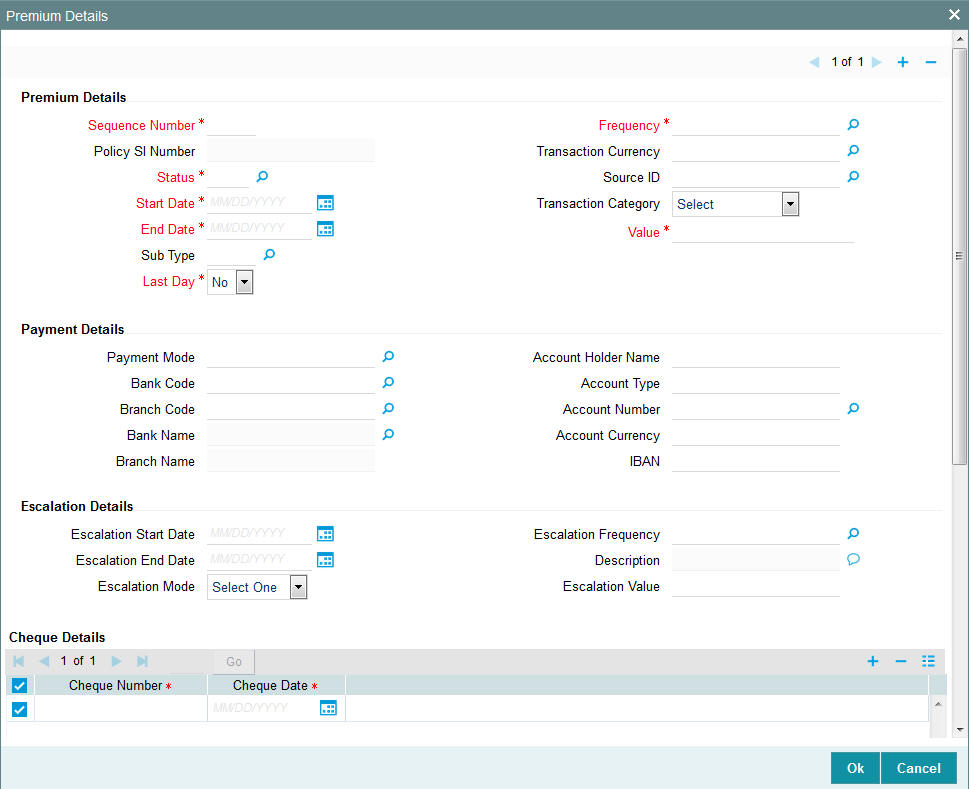
Enter information in the following fields:
Premium Details
Sequence Number
Numeric; 3 Characters; Mandatory
You can enter the sequence number.
Policy SI Number
Display
This number is generated by the system. It represents the number of premium payments between the Start Date and End Date specified for the premium payment.
Status
Alphanumeric; 1 Character; Mandatory
Select the status of the standing instruction for premium payment from the option list.
Note
If you select the status ‘STOP’, escalation will not be applied on the premium.
Transactions will not be generated for SIs on premiums whose status is ‘STOP’. It is possible for you to change the status of such SIs to ‘ACTIVE’ during amendment of the policy.
During amendment of a policy, you can change the status of an active SI, to ‘Paused’, ‘Stopped’ or ‘Cancelled’.
During amendment of an SI marked ‘Not Started’, you can change all details except the status of the SI. You will be allowed to delete the SI.
During amendment of an active SI:
- Escalation End Date can be amended only it is greater than the System Date
- Escalation Start Date and Escalation Frequency can be amended only if escalation has not been applied on the policy
Start Date
Date Format, Mandatory
Specify the date, beginning from which, the first premium payment is to be made for this Policy. Subsequent to this payment, premium payments will be made according to the premium frequency specified for the Policy.
Note
The Premium Start Date must not be equal to and earlier than the Policy Start Date.
End Date
Date Format, Mandatory
Specify the date on which the last premium payment will be made.
Note
The premium period of premium SIs cannot overlap.
Sub Type
Alphanumeric; 3 Characters; Optional
Specify the sub type.
Last Day
Mandatory
Select the last day from the drop-down list. The list displays the following values:
- Yes - If you select ‘Yes’, then the system will consider it as month-end order and the transaction get processed on the last day of the month.
- No - If you select ‘No’, then the system will consider it as date based instruction and the transaction will get processed on the exact date mentioned.
In case the SI date happens on a holiday, the system will consider the next working day for LEP transaction.
For a non-leap year, the system will consider 28th as the last day of the month for February, else the system will consider 29th as last day of the month for February.
This field is applicable for monthly, quarterly, half-yearly and Yearly frequencies.
This field will indicate if the SI is a date based SI or end of frequency (frequency could be monthly, quarterly, half-yearly and Yearly). If you have selected as ‘Yes’, then the system will process the subsequent SI on the last day of the frequency selected. If you have selected as ‘No’, then the system will process as per the given date. If it is the last date of any month, you need to select ‘Last Day’ field as ‘Yes’.
You can select ‘Yes’ only if the Premium start date is selected as 31st of any month. For the other dates which are not a valid last days of the month, you need to select ‘No’.
If you select 30th January as Start date and select ‘Last Date’ field as ‘Yes’, then the system will display an error message as ‘Premium Start Date is not month end, Last Day cannot be selected as Yes’
If you have selected a valid month end date, for instance, 28th of Feb (not a Leap Year) then the system will allow you to save the record without any error message.
Frequency
Alphanumeric; 1 Character; Mandatory
Specify the frequency at which the premium payments will be made, for this Policy, by the Policy Holder.
Transaction Currency
Alphanumeric; 3 Characters’ Optional
Specify the transaction currency.\
Source ID
Alphanumeric; 6 Characters; Optional
Specify the source ID.
Transaction Category
Alphanumeric; 1 Character; Optional
Select the transaction category from the adjoining drop-down list. Following are the options available:
- Legal
- Advised Business
- Execution Only
Description
Display
The system displays the description for the selected transaction category.
Value
Numeric, 30 Characters; Mandatory
Specify the amount paid by the Policy Holder as the premium amount for the Policy.
Payment Details
Payment Mode
Alphanumeric; 2 Characters; Optional
Select the mode of the premium payment.
You have the following options:
- Cheque
- Transfer
Bank Code
Alphanumeric; 12 Characters; Optional
Specify the bank code from which the transfer of payment is being made. The adjoining option list displays valid bank codes maintained in the system. You can choose the appropriate one.
Branch Code
Alphanumeric; 12 Characters; Optional
Specify the branch from which the transfer of payment is being made.
Bank Name
Display
The system displays the name of the bank for the selected bank code.
Branch Name
Display
The system displays the name of the branch for the selected branch code.
Account Holder Name
Alphanumeric; 100 Characters; Optional
Specify the account holder name.
Account Type
Alphanumeric; 1 Character; Optional
Specify the account type from which the transfer of payment is being made.
Account Number
Alphanumeric; 16 Characters; Optional
Specify the account number from which the transfer of payment is being made.
Account Currency
Alphanumeric; 3 Characters; Optional
Specify the account currency of the account number from which the transfer of payment is being made.
IBAN
Alphanumeric; 40 Characters; Optional
Specify the IBAN (International Bank Account Number) of the account holder.
Escalation Details
Enter escalation information in the following fields:
Escalation Start Date
Date Format, Optional
Specify the date from which escalation will commence. This date must be earlier than the End Date of the Policy, and must be later than the Premium Start Date.
Escalation End Date
Date Format, Optional
Specify the date from which the escalation must cease to be applied on the annuity. This date must be later than the Premium Start Date. If the Premium Escalation Start Date has been specified, then the End Date is mandatory and must be specified.
Escalation Mode
Optional
Annuity payments can be escalated periodically as a pre-defined percentage, amount or market value. Select the mode from the drop-down list.
Escalation Frequency
Alphanumeric; 1 Character; Optional
Select the frequency at which the escalation is to be applied, from the values in the drop-down list. If the Start Date has been specified, the frequency is mandatory and must be specified.
Description
Display
The system displays the description for the selected escalation frequency.
Escalation Value
Numeric; 30 Characters; Optional’
Specify the escalation amount that is to be applied.
Cheque Details
Enter the check details in the following fields:
Cheque Number
Alphanumeric; 16 Characters; Mandatory
Enter the cheque number of the cheque by which the premium is being paid.
Cheque Date
Date Format, Mandatory
Enter the cheque date of the cheque by which the premium is being paid.
Asset Allocation
Fund ID
Alphanumeric; 6 Characters; Mandatory
Specify the fund ID. Alternatively, you can select fund ID from the option list. The list displays all valid fund ID maintained in the system.
Fund Name
Display
The system displays the name of the selected fund ID.
Ratio
Numeric; 6 Characters; Mandatory
Specify the percentage of asset allocation.
3.1.12 Annuity Details Button
As mentioned earlier, this section is available only if, for the product you have chosen, you have selected the option ‘Annuity Applicable?’ in the Premium and Annuities section of the Product Maintenance Details screen.
If, for the product you have chosen, annuity details are applicable, the ‘Annuity Details’ screen is invoked when you click on the Annuity Details tab:
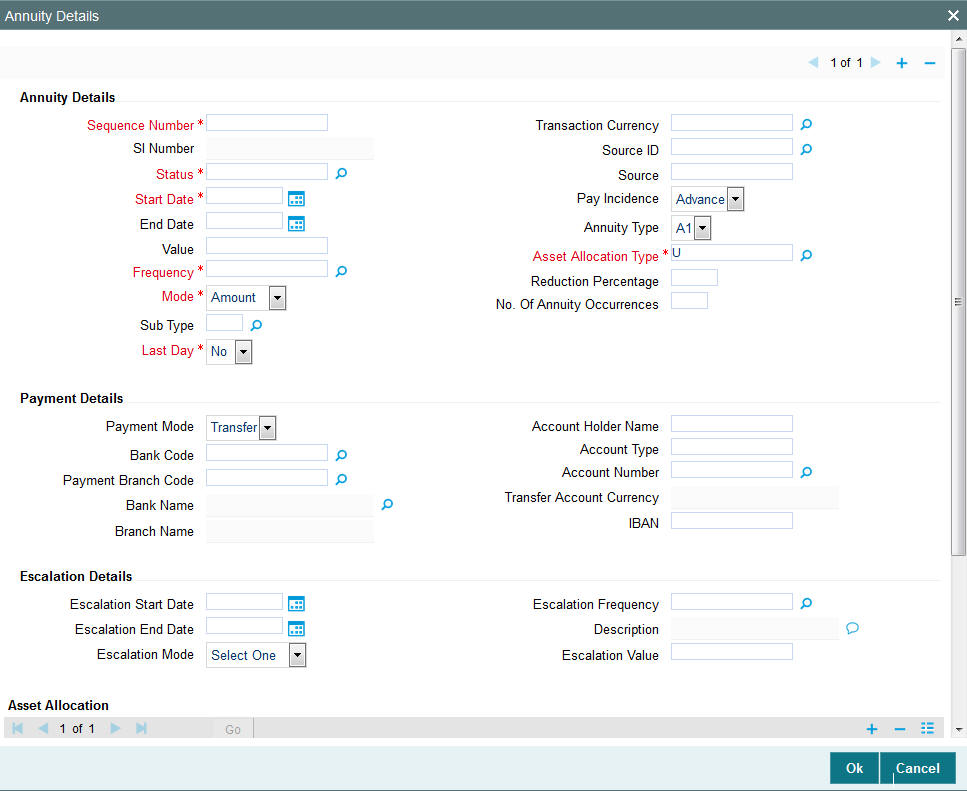
Annuity Details
Sequence Number
Numeric; 22 Characters; Optional
You can enter the sequence number.
SI Number
Display
When you save the details of the Policy you are entering, the Standing Instructions or SI Number will be generated by the system and displayed.
Status
Alphanumeric; 1 Character; Mandatory
Select the status of the standing instruction of the annuity payment from the option list. The options are:
- A-Active
- C-Cancel
- N-Not Started
- P-Pause
- S-Stop
Note
If you select the status ‘STOP’, escalation will not be applied on the annuity.
Transactions will not be generated for SIs on annuities whose status is ‘STOP’. It is possible for you to change the status of such SIs to ‘ACTIVE’ during amendment of the policy.
During amendment of a policy, you can change the status of an active SI, to ‘Paused’, ‘Stopped’ or ‘Cancelled’. However, if you have checked the box ‘Phase-In’, you will not be allowed to select the options ‘Paused’ and ‘Stopped’.
During amendment of an SI marked ‘Not Started’, you can change all details except the status of the SI. You will be allowed to delete the SI.
During amendment of an active SI:
- Escalation End Date can be amended only it is greater than the System Date
- Escalation Start Date and Escalation Frequency can be amended only if escalation has not been applied on the policy
Start Date
Date Format, Mandatory
Specify the date, beginning from which, the annuity payment is to be made for this Policy. Subsequent to this payment, annuity payments will be made according to the annuity frequency specified for the Policy.
Note
The Annuity Start Date must not be equal to and earlier than the Policy Start Date.
End Date
Date Format, Optional
Specify the date on which the last annuity payment is to be made for this Policy. This date must not be the same as the Annuity Start Date.
Note
The annuity period for annuity SIs cannot overlap.
Value
Numeric, 30 Characters; Optional
The amount that is to be paid as annuity to the Policy Holder over a time period in definite intervals / frequencies against the initial investment towards this Policy in this Product is displayed here. You can change this amount at this stage.
Note
The is not applicable if the type of policy is 'Accelerated Annuity'
If the value specified here is a percentage, it must be within the Annuity Minimum Ratio and the Annuity Maximum Ratio specified at product level.
Note
If you have selected the option ‘Amount’ against the field Mode, the value you enter will be the annuity amount to be paid in the frequency specified. If you have selected the option ‘Percentage’, the percentage value of the policy annuity amount will be calculated and paid in the frequency specified.
The same is illustrated with the following example:
Case 1
The Mode is ‘Amount’. Value is 1000 currency units. Frequency is Monthly. In this case, 1000 currency units will be paid to the policy holder every month.
Case 2
The Mode is ‘Percentage’. Value is 10%. Frequency is Monthly. In this case, 10% of the policy anniversary amount will be paid to the policy holder in that year.
Frequency
Alphanumeric; 1 Character; Mandatory
Specify the frequency at which annuity payments must be made for this Policy.
Mode
Mandatory
Annuity payments can be made either as a percentage of the net investment amount or as a flat amount. Accordingly, select the appropriate mode from the drop-down list. The options are as follows:
- Amount
- Annual %
Note
This is not applicable if the type of policy is 'Accelerated Annuity'.
Sub Type
Alphanumeric; 3 Characters; Optional
Specify the sub type.
Last Day
Mandatory
Select ‘Yes’ to maintain annuity details to the last day of a month from the drop-down list. The list displays the following values:
- Yes
- No
If you select ‘Yes’, then the system will process the transaction on the last day of the month irrespective of dates mentioned.
If you select ‘No’ then the system will consider SI date maintained.
If SI date happens on a holiday, then the system considers the next working day for LEP.
For non-leap year, the system will consider 28th as the last day of the month for February. For leap year, the system will consider 29th as the last day of the month for February.
Transaction Currency
Alphanumeric; 3 Characters; Optional
Specify the code of the transaction currency. The adjoining option list displays all valid currency codes along with their description. You can choose the appropriate one.
Source ID
Alphanumeric; 6 Characters; Optional
Specify the source ID.
Source
Alphanumeric; 20 Characters; Optional
Specify the source details.
Pay Incidence
Optional
The payment incidence for an annuity payment sets up the actual payout incidence within the specified frequency for the annuity payment. Select the pay incidence from the drop-down list. The list displays the following values:
- Advance
- Arrear
Annuity Type
Optional
Select the desired annuity type that is to be applicable for this Policy, from the options provided in the drop-down list.
For information purposes only, the annuitant has the option of specifying the type of annuity that should accrue. The four types provided are as follows:
- A1: In this type, the annuity is a single life annuity payable until the death of the annuitant.
- A2: In this type, the annuity is a joint life and last survivor annuity and is payable until the last death of both annuity and spouse, that is, while at least one of the annuitant or spouse is alive.
- A3: The annuity is a joint life and last survivor annuity where the amount of the annuity reduces on the first death of annuitant or spouse. The percentage reduction is specified by the annuitant at the outset.
- A4: The annuity is a joint life and last survivor annuity where the amount of the annuity reduces on the male death. The percentage reduction is specified by the annuitant at the outset.
Asset Allocation Type
Alphanumeric; 1 Character; Mandatory
Select the type of asset allocation from the drop down list provided. The options available are:
- User Input
- Policy Portfolio
If the option selected is “User Input” then you need to specify the annuity asset allocation.
If the option selected is “Policy Portfolio” then you will not be allowed to capture the ratio of funds for annuity or override the load details during policy maintenance. In this case the ratio of funds will be calculated based on policy portfolio.
If the type of asset allocation is specified as ‘Policy Portfolio’, then you will not be allowed to pass policy journal entries for such transactions.
Reduction Percentage
Numeric; 22 Characters; Optional
Specify the reduction in the annuity in the case of death of one or more of the annuitants, or the primary annuitant, as is applicable.
Note
This field is only applicable for Annuity Types 3 and 4.
No Of Annuity Occurrences
Numeric; 22 Characters; Optional
Enter the number of annuity occurrences. This is applicable only for accelerated annuity policies.
Payment Details
Payment Mode
Optional
Select the mode of the annuity payment from the drop-down list. The list displays the following values:
- Transfer
Bank Code
Alphanumeric; 12 Characters; Optional
Specify the bank code from which the transfer of payment is being made. The adjoining option list displays all valid bank codes maintained in the system. You can choose the appropriate one.
Payment Branch Code
Alphanumeric; 12 Characters; Optional
Specify the branch from which the transfer of payment is being made.
Bank Name
Display
The system displays the bank name for the selected bank code.
Branch Name
Display
The system displays the branch name for the selected payment branch code.
Account Holder Name
Alphanumeric; 100 Characters; Optional
Specify the account holder name.
Account Type
Alphanumeric; 1 Character; Optional
Specify the account type from which the transfer of payment is being made.
Account Number
Alphanumeric; 16 Character; Optional
Specify the account number from which the transfer of payment is being made.
Transfer Account Currency
Display
The system displays the account currency of the account number from which the transfer of payment is being made.
IBAN
Alphanumeric; 40 Characters; Optional
Specify IBAN details.
Escalation Details
Escalation Start Date
Date Format, Optional
Specify the date from which escalation will commence. This date must be earlier than the End Date of the Policy, and must be later than the Annuity Start Date.
Escalation End Date
Date Format, Optional
Specify the date from which the escalation must cease to be applied on the annuity. This date must be later than the Annuity Start Date, If the Annuity Escalation Start Date has been specified, then the End Date is mandatory and must be specified.
Escalation Mode
Optional
Annuity payments can be escalated periodically as a pre-defined percentage, amount or market value. Select the mode from the drop-down list.
Escalation Frequency
Alphanumeric; 1 Character; Optional
Select the frequency at which the escalation is to be applied, from the values in the drop-down list. If the Start Date has been specified, the frequency is mandatory and must be specified.
Description
Display
The system displays the description for the selected escalation frequency.
Escalation Value
Numeric; 22 Characters; Optional’
Specify the escalation amount that is to be applied.
Asset Allocation Details
Enter the following asset allocation details for the annuity details:
Fund ID
Alphanumeric; 6 Characters; Mandatory
All the funds mapped for the selected product are displayed in the option list. Against each of these funds, you can specify the investment ratio and the annuity ratio.
Fund Name
Display
The system displays the fund name for the selected fund ID.
Ratio
Numeric; 9 Characters; Mandatory
For each fund that is displayed, specify the ratio of annuity payment to be made from the fund, to the total annuity payment from the Policy. The sum total of the annuity ratio should add up to 100.
3.1.13 Recurring Switch Details Button
In this section, enter the details of any recurring switch transactions that the Policy Holder may want to enter into. The details maintained would be standing instructions for a switch transaction.
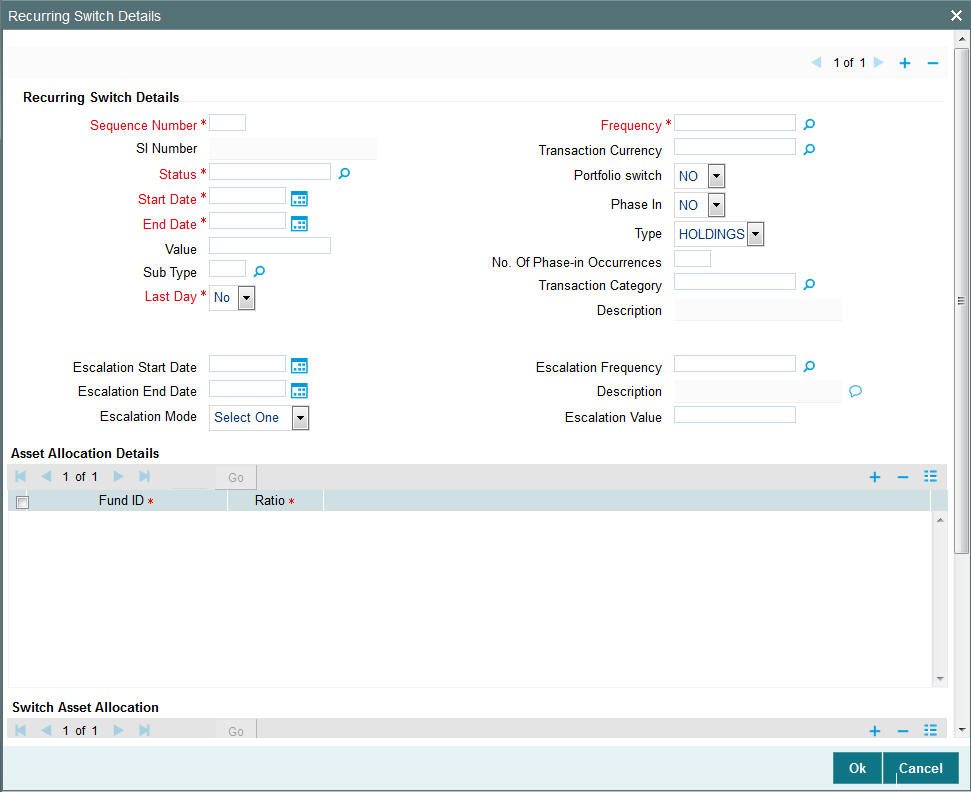
Recurring Switch Details
Sequence Number
Numeric; 22 Characters; Mandatory
You can enter the sequence number.
SI Number
Display
When you save the details of the Policy you are entering, the Standing Instructions or SI Number will be generated by the system and displayed.
Note
During amendment of a Policy you will not be allowed to change the number of occurrence that you already have specified.
Status
Alphanumeric; 1 Character; Mandatory
Select the status of the recurring switch from the option list. The options available are:
- A-Active
- C-Cancel
- N-Not Started
- P-Pause
- S-Stop
Note
If you select the status ‘STOP’, escalation will not be applied on the annuity.
Transactions will not be generated for SIs on annuities whose status is ‘STOP’. It is possible for you to change the status of such SIs to ‘ACTIVE’ during amendment of the policy.
During amendment of a policy, you can change the status of an active SI, to ‘Paused’, ‘Stopped’ or ‘Cancelled’.
During amendment of an SI marked ‘Not Started’, you can change all details except the status of the SI. You will be allowed to delete the SI.
During amendment of an active SI:
- Escalation End Date can be amended only it is greater than the System Date
- Escalation Start Date and Escalation Frequency can be amended only if escalation has not been applied on the policy
Start Date
Date Format, Mandatory
Enter the date on which the switch transactions should begin.
End Date
Date Format, Mandatory
Enter the date on which the switch transactions should stop.
Value
Numeric; 22 Characters;, Mandatory if the box ‘Portfolio Switch ’or ‘Phase In’ is not checked
Enter the value of the switch transaction.
Sub Type
Alphanumeric; 3 Characters; Optional
specify the sub type.
Last Day
Mandatory
Select ‘Yes’ to maintain switch details to the last day of a month from the drop-down list. The list displays the following values:
- Yes
- No
If you select ‘Yes’, then the system will process the transaction on the last day of the month irrespective of dates mentioned.
If you select ‘No’ then the system will consider SI date maintained.
If SI date happens on a holiday, then the system considers the next working day for LEP.
For non-leap year, the system will consider 28th as the last day of the month for February. For leap year, the system will consider 29th as the last day of the month for February.
Frequency
Alphanumeric; 1 Character; Mandatory
Select the frequency with which the switch transactions should occur.
Transaction Currency
Alphanumeric; 3 Characters; Optional
Specify the code of the transaction currency. The adjoining option list displays all valid currency codes along with their description. You can choose the appropriate one.
Portfolio Switch
Optional
Select ‘Yes’ to indicate the switch will be a portfolio switch. In such a case, the field ‘Transaction Value’ will be defaulted to 0 and locked. A portfolio switch can be a complete or partial switch.
Phase In
Optional
If you select ‘Yes’, the system will allow you to move the fund amount of one fund to into another and you will be able to enter the Start Date, Number of Occurrences and Frequency in this screen. The system will calculate the SI value, based on these parameters.
Note
- If you have selected ‘Yes’, Escalation Details will not be applicable.
- If you have selected ‘Yes’, the SI Status codes ‘PAUSED’ and ‘STOPPED’ are not applicable.
- If you have selected ‘Yes’, the system will allow you to move the fund amount of one fund to into another or from one fund to more than one fund. However movement from multiple funds to one fund or from multiple funds to multiple funds is not permitted.
- If you have selected ‘Yes’, you will not be allowed to enter more than one ‘From’ fund in the Recurring Switch Asset Allocation Details screen (which is invoked by clicking the Asset Allocation link).
- During amendment of a Policy you will not be allowed to change the preference you have specified for a phase-in. For example, If you have selected ‘Yes’ in Phase-In, you will not be allowed to uncheck it and vice-versa.
Type
Optional
Select the type of switch applicable from the drop-down list.
No Of Phase-in Occurrences
Numeric; 22 Characters; Optional
Enter the number of annuity occurrences. This is applicable only for accelerated annuity policies.
Transaction Category
Alphanumeric; 1 Character; Optional
Specify the transaction category from the adjoining option list. The list displays all valid transaction category maintained in the system.
Description
Display
The system displays the description for the selected transaction category
Escalation Start Date
Date Format, Optional
Specify the date from which escalation of the recurring switch will commence. This date must be earlier than the End Date of the recurring switch, and must be later than the Start Date of the recurring switch.
Escalation End Date
Date Format, Optional
Specify the date from which the escalation must cease to be applied on the recurring switch. This date must be later than the Start Date. If the Escalation Start Date for the recurring switch has been specified, then the End Date is mandatory and must be specified.
Escalation Mode
Optional
Switch payments can be escalated periodically as a pre-defined percentage, amount or market value. Select the mode from the drop-down list.
Escalation Frequency
Alphanumeric; 1 Character; Mandatory
Select the frequency at which the escalation is to be applied, from the values in the drop-down list. If the Start Date has been specified, the frequency is mandatory and must be specified.
Description
Display
The system displays the description for the selected escalation frequency.
Escalation Value
Numeric; 22 Characters; Mandatory’
Specify the escalation amount that is to be applied.
Asset Allocation Details
Fund ID
Alphanumeric; 6 Characters; Mandatory
All the funds mapped for the selected product are displayed in the option list. Select funds FROM which you are moving the investment amount.
Ratio
Numeric, 9 Characters; Mandatory
Specify the percentage of the amount that must be invested in each of the selected funds. The sum of all such percentages must add up to 100, and not fall below or exceed it. The percentages specified here must not be fractional. Typically, this field is only applicable for transactions for which the Transaction Mode is ‘Percentage’.
Note
If you have specified the investment amounts in each fund, the investment ratios are computed and displayed here, and this field is locked.
The latest investment ratio applicable for the Policy is displayed here when the form is opened. These values can be amended, and you can specify the required percentages.
Switch Asset Allocation Details
Capture the funds INTO which the investment amount is being moved, in the ‘Switch Asset Allocation’ section:
Fund ID
Alphanumeric; 6 Characters; Mandatory
All the funds mapped for the selected product are displayed in the option list. Select funds INTO which you are moving the investment amount.
Ratio
Numeric, 9 Characters; Mandatory
Specify the percentage of the amount that must be invested in each of the selected funds. The sum of all such percentages must add up to 100, and not fall below or exceed it. The percentages specified here must not be fractional. Typically, this field is only applicable for transactions for which the Transaction Mode is ‘Percentage’.
Note
If you have specified the investment amounts in each fund, the investment ratios are computed and displayed here, and this field is locked.
The latest investment ratio applicable for the Policy is displayed here when the form is opened. These values can be amended, and you can specify the required percentages.
3.1.14 Initial Load Override Button
You can override or alter the value of any load (including derived loads, if any) mapped to the selected fund in the Initial Load Override Details screen which is invoked by clicking on the initial load override button in the Policy Maintenance Details screen.
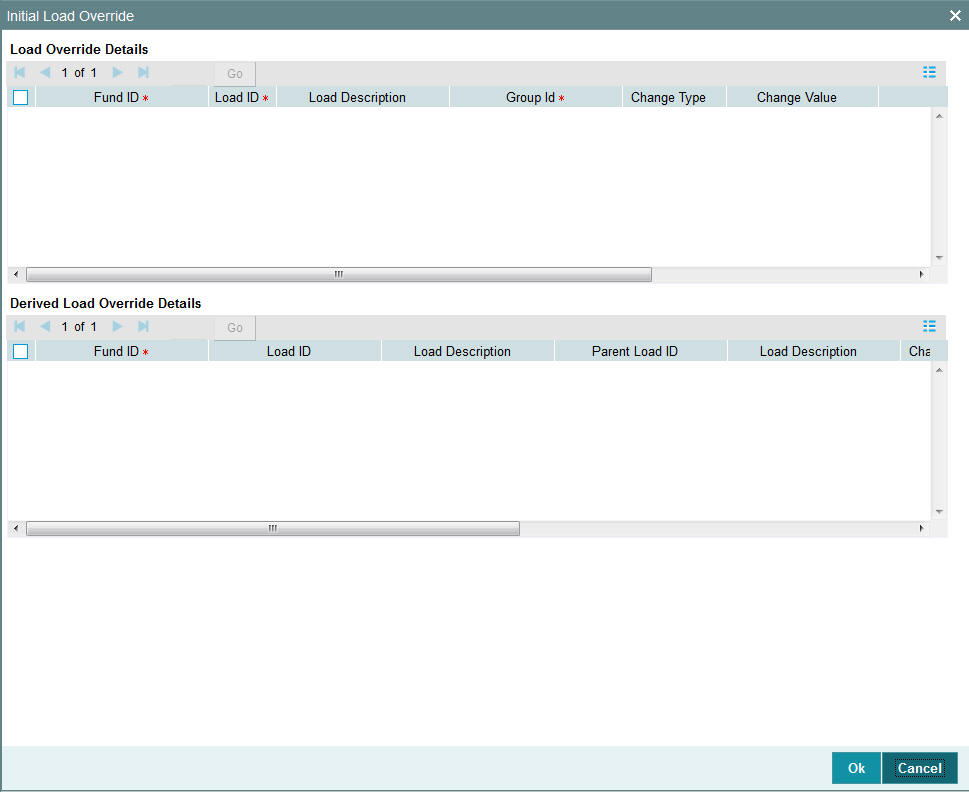
Initial Load Override Details
Fund ID
Display
The system displays the fund ID.
Load ID
Display
The ID of the load that has been mapped to the fund is displayed here. The load ID is displayed as a link. To view details of the load, click the ID link.
If a derived load has been mapped, it is also displayed here and can be overridden.
Load Description
Display
The system displays the description for the selected load ID.
Group ID
Display
The system displays the Group ID.
Change Type
Display
When you override or alter a load at the time of entering a transaction, you can effect the change in any of the following ways:
- Discount (reducing the load return value in all the slabs)
- Increase (increasing the load return value in all slabs)
- Return Value (assigning an altered return value that will be applicable to all the loads)
Change Value
Display
The system displays the altered return value for the allocation time load that you are overriding.
Txn Type
Display
This displays the transaction type.
Ref Type
Display
This displays the reference type.
Derived Load Override Details
The system displays the following derived load override details:
- Fund ID
- Load ID
- Load Description
- Parent Load ID
- Load Description
- Change Type
- Change Value
- Txn Type
- Ref Type
3.1.15 Premium Load Override Button
You can override or alter the value of load applied on premium payment mapped to the selected fund. You can do so in the Load Override Details screen which is invoked when you click on the Premium Load Override Details button in the Policy Maintenance Details screen.
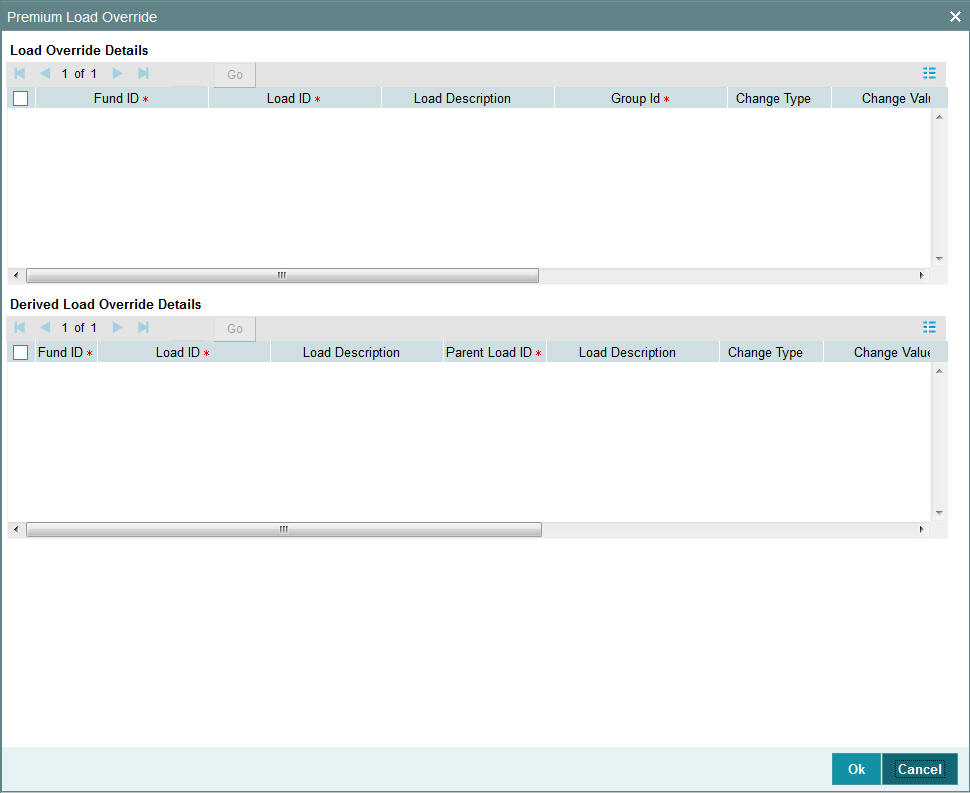
Fund ID
Display
The system displays the fund ID.
Load ID
Display
The ID of the load that has been mapped to the fund is displayed here. The load ID is displayed as a link. To view details of the load, click the ID link.
If a derived load has been mapped, it is also displayed here and can be overridden.
Load Description
Display
The system displays the description for the selected load ID.
Group ID
Display
The system displays the group ID.
Change Type
Display
When you override or alter a load at the time of entering a transaction, you can effect the change in any of the following ways:
- Discount (reducing the load return value in all the slabs)
- Increase (increasing the load return value in all slabs)
- Return Value (assigning an altered return value that will be applicable to all the loads)
Change Value
Display
The system displays the altered return value for the allocation time load that you are overriding.
Txn Type
Display
This displays the transaction type.
Ref Type
Display
This displays the reference type.
Sequence Number
Display
The system displays the sequence number.
Derived Load Override Details
The system displays the following derived load override details:
- Fund ID
- Load ID
- Load Description
- Parent Load ID
- Load Description
- Change Type
- Change Value
- Txn Type
- Ref Type
- Sequence Number
3.1.16 Annuity Load Override Button
You can override or alter the value of load applied on annuity amount towards the Policy mapped to the selected fund.
You can do so in the Annuity Load Override screen which is invoked when you click on the Annuity Load Override button in the Policy Maintenance Details screen.
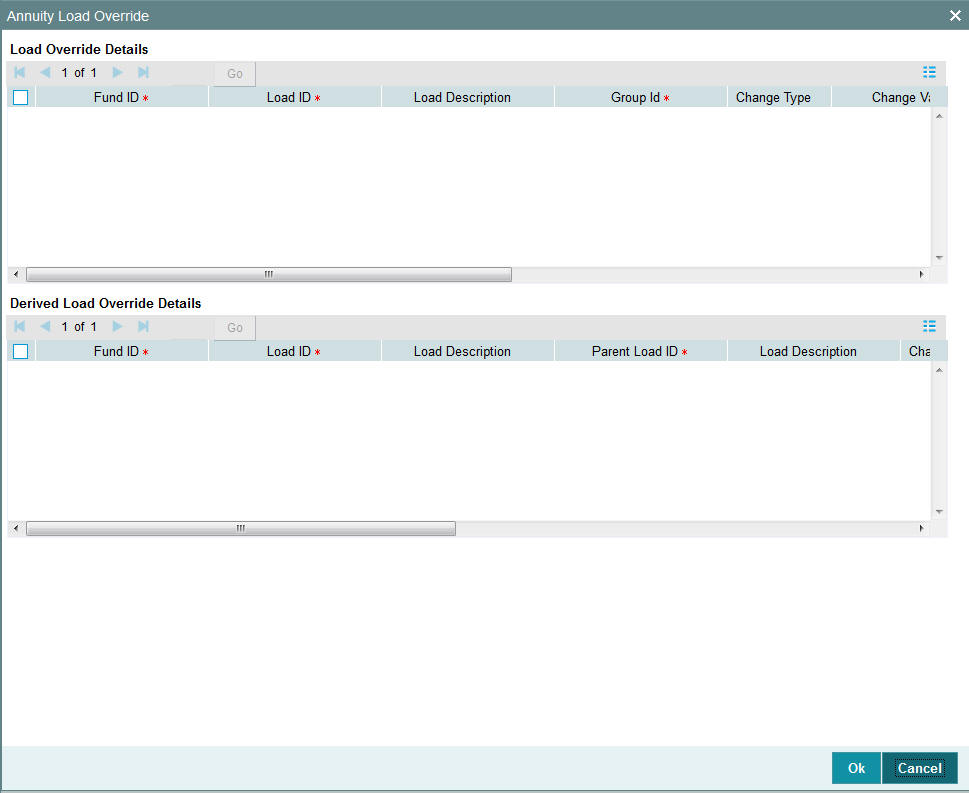
Fund ID
Display
The system displays the fund ID.
Load ID
Display
The ID of the load that has been mapped to the fund is displayed here. The load ID is displayed as a link. To view details of the load, click the ID link.
If a derived load has been mapped, it is also displayed here and can be overridden.
Load Description
Display
The system displays the description for the selected load ID.
Group ID
Display
The system displays the group ID.
Change Type
Display
When you override or alter a load at the time of entering a transaction, you can effect the change in any of the following ways:
- Discount (reducing the load return value in all the slabs)
- Increase (increasing the load return value in all slabs)
- Return Value (assigning an altered return value that will be applicable to all the loads)
Change Value
Display
The system displays the altered return value for the allocation time load that you are overriding.
Txn Type
Display
This displays the transaction type.
Ref Type
Display
This displays the Reference Type.
Sequence Number
Display
The system displays the sequence number.
Derived Load Override Details
The system displays the following derived load override details:
- Fund ID
- Load ID
- Load Description
- Parent Load ID
- Load Description
- Change Type
- Change Value
- Txn Type
- Ref Type
- Sequence Number
3.1.17 Recurring Switch Load Override Button
You can override or alter the value of load applied on the load mapped to the selected fund. You can do so in the Recurring Switch Load Details screen which is invoked when you click on the Recurring Switch Load Details‘ button in the Policy Maintenance Details screen.
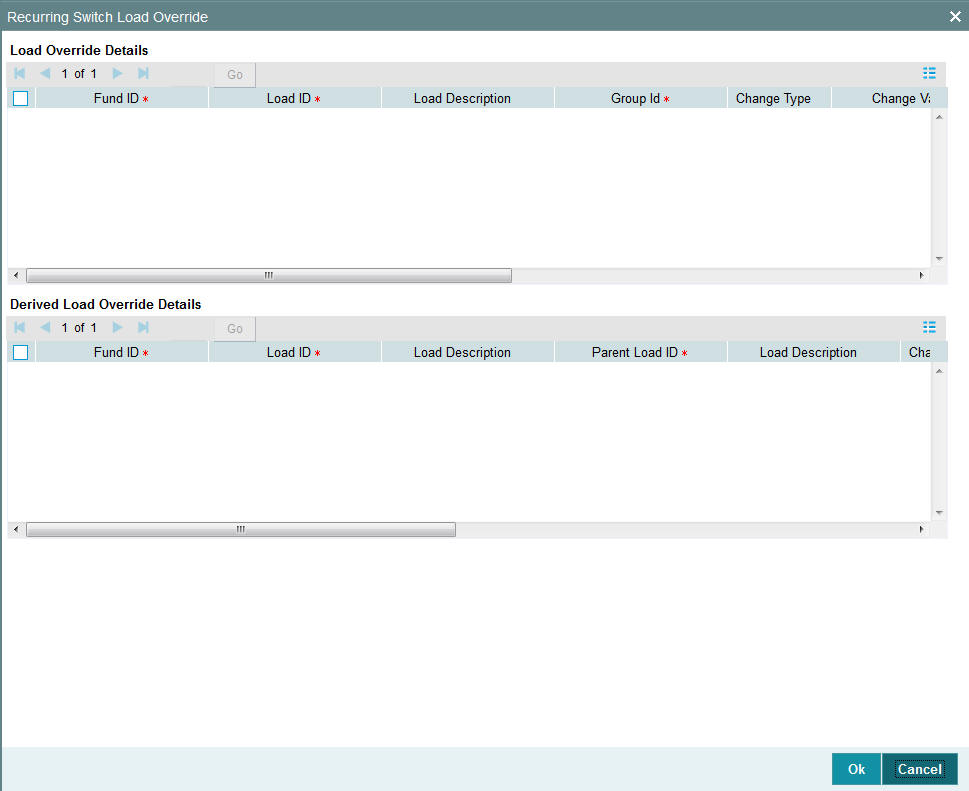
Fund ID
Display
The system displays the fund ID.
Load ID
Display Only
The ID of the load that has been mapped to the fund is displayed here. The load ID is displayed as a link. To view details of the load, click the ID link.
If a derived load has been mapped, it is also displayed here and can be overridden.
Load Description
Display
The system displays the description for the selected load ID.
Group ID
Display
The system displays the Group ID.
Change Type
Display
When you override or alter a load at the time of entering a transaction, you can effect the change in any of the following ways:
- Discount (reducing the load return value in all the slabs)
- Increase (increasing the load return value in all slabs)
- Return Value (assigning an altered return value that will be applicable to all the loads)
Change Value
Display
The system displays the altered return value for the allocation time load that you are overriding.
Txn Type
Display
This displays the Transaction Type.
Ref Type
Display
This displays the Reference Type.
Sequence Number
Display
The system displays the sequence number.
Derived Load Override Details
The system displays the following derived load override details:
- Fund ID
- Load ID
- Load Description
- Parent Load ID
- Load Description
- Change Type
- Change Value
- Txn Type
- Ref Type
- Sequence Number
3.1.18 Add Info Button
Click on this link to enter any additional information that you wish. You should have defined an additional information head along with valid values, use the Additional Information Maintenance screen, in order to be able to enter additional information.
Add Info screen is invoked when you click on the Add Info button in the Policy Maintenance Details screen.
Other Info Field
Display
The system displays the other information details.
Field Value
Alphanumeric; 60 Characters; Optional
Enter the valid value which is defined in the add info maintenance.
3.1.19 Garnishee Details Button
A garnishment is a means of collecting a monetary judgment against a defendant by ordering a third party (the garnishee) to pay money, otherwise owed to the defendant, directly to the plaintiff. In the case of collecting for taxes, the law of a jurisdiction may allow for collection without a judgment or other court order. For instance, if (Defendant) A owes (Plaintiff) B a certain sum of money as a judgment in a lawsuit against A that B won, and A does not pay it to B, and (Garnishee) C owes A some money, B may have a court issue a garnishee order to C, and then C has to pay the money directly to B. (C is often A's employer but could be anyone who owes A money, including someone who had borrowed from A).
Multiple garnishee orders are supported in the system.
Garnishee Order can be scheduled like annuity by specifying the start and end date and it will follow the same frequency as annuity. There can be more than one garnishee order running at the same time. Clicking on ‘Garnishee Details’ button in the ‘Policy Maintenance Details’ screen, to invoke ‘Garnishee Order Details’ screen.
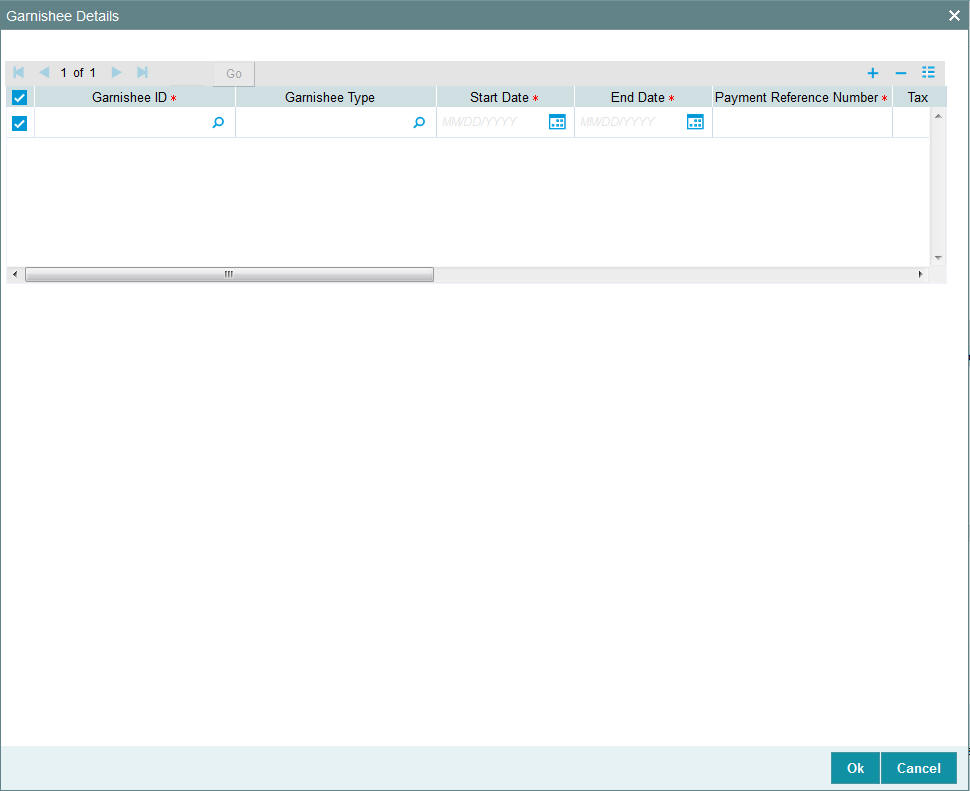
You can specify the following details:
Garnishee ID
Alphanumeric; 12 Characters; Mandatory
Specify the UH ID for Garnishee. Alternatively, you can select Garnishee ID from the option list. The list displays all valid Garnishee ID maintained in the system.
Garnishee Type
Alphanumeric; 3 Characters; Optional
Specify the Garnishee type. Alternatively, you can select Garnishee type from the option list. The list displays all valid Garnishee type maintained in the system.
Start Date
Date Format; Mandatory
Specify the start date for a Garnishee order.
End Date
Date Format; Mandatory
Specify the end date for a Garnishee order.
You should maintain the End date for a garnishee order as one day after the actual BOD closure for the garnishee to get the payment. For instance, if you want a Garnishee payout for 1st Jan, you should maintain the Garnishee closure date as 2nd Jan.
Payment Reference Number
Alphanumeric; 16 Characters; Mandatory
Specify the payment reference number.
Tax Reference Number
Alphanumeric; 16 Characters; Mandatory
Specify the tax reference number.
Status
Alphanumeric; 1 Character; Mandatory
Specify the status of a garnishee order. Alternatively, you can select the status from the option list. The list displays all valid status maintained in the system.
For instance, if a Garnishee order is valid till 1st Jan’2016, then during BOD of 1st Jan’2016 the system should change the status to Closed. You should maintain the closure date as one day after the actual BOD closure for the garnishee to get the payment, since the system cannot generate the payment on the closure date. Hence, if you want a Garnishee payout for 1st Jan, you should maintain the Garnishee closure date as 2nd jan.
Mode
Mandatory
Select if the garnishee order has to be placed as an amount or in percentage from the drop-down list. The list displays the following values:
- Amount
- Percent
Garnishee Currency
Display
The system displays the garnishee currency code.
Garnishee Value
Numeric; 30 Characters; Mandatory
Specify the amount of percentage that needs to be paid to garnishee.
Payment Details
Garnishee payment will be made only if the bank account in Journal/Annuity screen is a valid UH bank account. If there is any other bank account (like a third party) mapped then the garnishee amount will not be deducted from the proceeds. The entire surrender proceeds will be given to the bank account mapped in the /Journal/Annuity Screen.
Garnishee amount will be paid only if garnishee is effective on the transaction date of the policy surrender or annuity transaction irrespective of when the settlement or allocation happen. For instance, if the end date for Garnishee is 3rd March 2015. And the Out transaction gets generated on 2nd March’2015 with a lag (price, settlement or allocation) and the settlement happens on 5th March’2015.
In this case the settlement date is later than the garnishee effective date but since the garnishee was effective on the transaction date, garnishee will receive his share of payout. Similarly, the system should also check this when future or back dated transaction enters the system. For instance, if the garnishee effective date is from 1st March and a back dated transaction of 1st Jan gets into the system then the system should not pay anything to Garnsihee. If the garnishee is effective till 30th March and if a future dated transaction of 1st April is posted into the system, then the system should not pay the garnishee.
If the Annuity is insufficient to furnish all the garnishee orders associated with it, then no payment should be made either to the annuitant or to any of the garnishees attached to the annuity.
The system will log error while generating annuity, if garnishee amount or sum total of garnishee amount (in case of multiple garnishee) is greater than annuity amount. You can either reverse the annuity amount and pass an annuity journal entry with correct annuity amount or update garnishee amount appropriately.
In case of reversal of transaction, the amount paid to the policy holder will get reversed along with the amount that has been paid to the garnishee. However, you cannot reverse only the garnishee payment or one of the multiple garnishee payments. In case of a reversal, the amount recovery should be handled operationally.
If the Annuity is insufficient to furnish all the garnishee orders associated with it, then no payment should be made either to the annuitant or to any of the garnishees attached to the annuity.
For annuity transactions the Account currency of garnishee should be same as Policy base currency. Clicking on ‘Payment Details’ button, the ‘Payment Details’ screen is displayed:
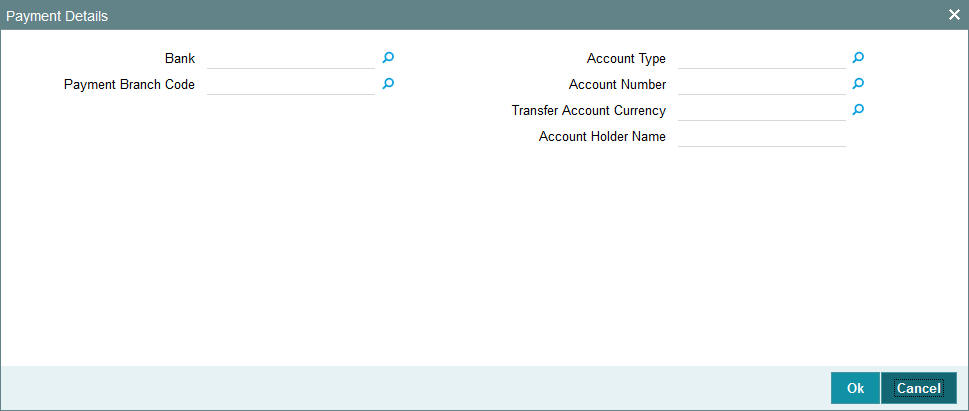
You can specify the following details:
Bank
Alphanumeric; 12 Characters; Mandatory
Specify the bank code. Alternatively, you can select the bank code from the option list. The list displays all valid bank code maintained in the system.
Payment Branch Code
Alphanumeric; 12 Characters; Mandatory
Specify the payment branch code. Alternatively, you can select the payment branch code from the option list. The list displays all valid payment branch code maintained in the system.
Account Type
Numeric; 1 Character; Mandatory
Specify the account type. Alternatively, you can select the account type from the option list. The list displays all valid account type maintained in the system.
Account Number
Numeric; 16 Characters; Mandatory
Specify the account number. Alternatively, you can select the account number from the option list. The list displays all valid account number maintained in the system.
Transfer Account Currency
Alphanumeric; 3 Characters; Optional
Specify the transfer account currency code. You can amend this value.
Account Holder Name
Alphanumeric; 100 Characters; Optional
Specify the account holder name.
3.1.20 Saving Information Entered
When you have entered all the mandatory information, click ‘Ok’ button.
The following message will be displayed:
The system displays the following confirmation message “Record Successfully Saved”
This indicates the record has been saved. Click ‘Ok’ button.
3.1.21 Creating Future-dated Rules for Policies
You can create a future-dated rule by copying a policy and making changes to the new rule with a Rule Effective Date in the future. The rule will become active on the ‘Rule Effective Date’. On this date, the system will mark the new rule as the latest rule and disregard the old rules for the policy. The system will allow you to create only one future-dated rule for a policy and on a given date only one rule will be active.
You can amend future-dated rule details including the Rule effective Date and also close an existing future-dated rule. In case, you wish to re-open a future-dated rule, the system will allow it only if there is no other future-dated rule maintained in the system for the policy.
3.1.22 Processing Back Data Propagation for Transactions
You can correct erroneous transactions as well as enter those that have been missed out and compute the effect these have on the current holdings of the unit holder through the back data propagation process. To facilitate this propagation process, two schemas are used – the business (or normal) schema and the report schema. You are required to enter the correct data in the business schema for the required transactions and select these for propagation, again from the business schema. The transactions will be simulated in the report schema and the results can be viewed in the business schema.
Refer the chapter ‘Back Data Propagation’ for more details on the back data propagation process.
3.2 Policy Maintenance Summary Screen
This section contains the following topics:
- Section 3.2.1, "Retrieving Policy in Policy Maintenance Screen"
- Section 3.2.2, "Editing Policy"
- Section 3.2.3, "Viewing Policy"
- Section 3.2.4, "Deleting Policy"
- Section 3.2.5, "Authorizing Policy"
- Section 3.2.6, "Amending Policy"
- Section 3.2.7, "Authorizing Amended Policy"
- Section 3.2.8, "Reversing Policy"
- Section 3.2.9, "Authorizing Reversal of Policy"
- Section 3.2.10, "Processing Product Annual Annuity Limit Mapping Details"
3.2.1 Retrieving Policy in Policy Maintenance Screen
You can retrieve a previously entered record in the Summary screen, as follows:
You can invoke the ‘Policy Maintenance Summary’ screen by typing ‘LESPLAN’ in the field at the top right corner of the Application tool bar and clicking on the adjoining arrow button.
Specify any or all of the following details in the Policy Maintenance Summary screen:
- Select the status of the record in the Authorization Status field. If you choose the “Blank Space” option, then all the records are retrieved.
- Select the status of the record in the Record Status field. If you choose the “Blank Space” option, then all the records are retrieved.
- Policy Number
- Rule Effective Date
- Policy Reference Number
- Policy Holder ID
- Product ID
- Policy Start Date
- Maturity Date
- Policy End Date
- Latest Rule
After you have specified the required details, click ‘Search’ button. All records with the specified details are retrieved and displayed in the lower portion of the screen.
Note
You can also retrieve the individual record detail from the detail screen by doing query in the following manner:
- Press F7
- Input the Policy Number
- Press F8
You can perform Edit, Delete, Amend, Authorize, Reverse, Confirm operation by selecting from the Action list.
You can also search the record by using combination of % and alphanumeric value.
Example
You can search the record for Policy Number by using the combination of % and alphanumeric value as follows:-
- Search by A%: System will fetch all the records whose Policy Number starts from Alphabet ‘A’. For example, AGC17, AGVO6, AGC74 etc.
- Search by %7: System will fetch all the records whose Policy Number ends by numeric value’ 7’. For example, AGC17, GSD267, AGC77 etc.
- Search by %17%:- System will fetch all the records whose Policy Number
contains the numeric value 17. For example, GSD217, GSD172, AGC17 etc.
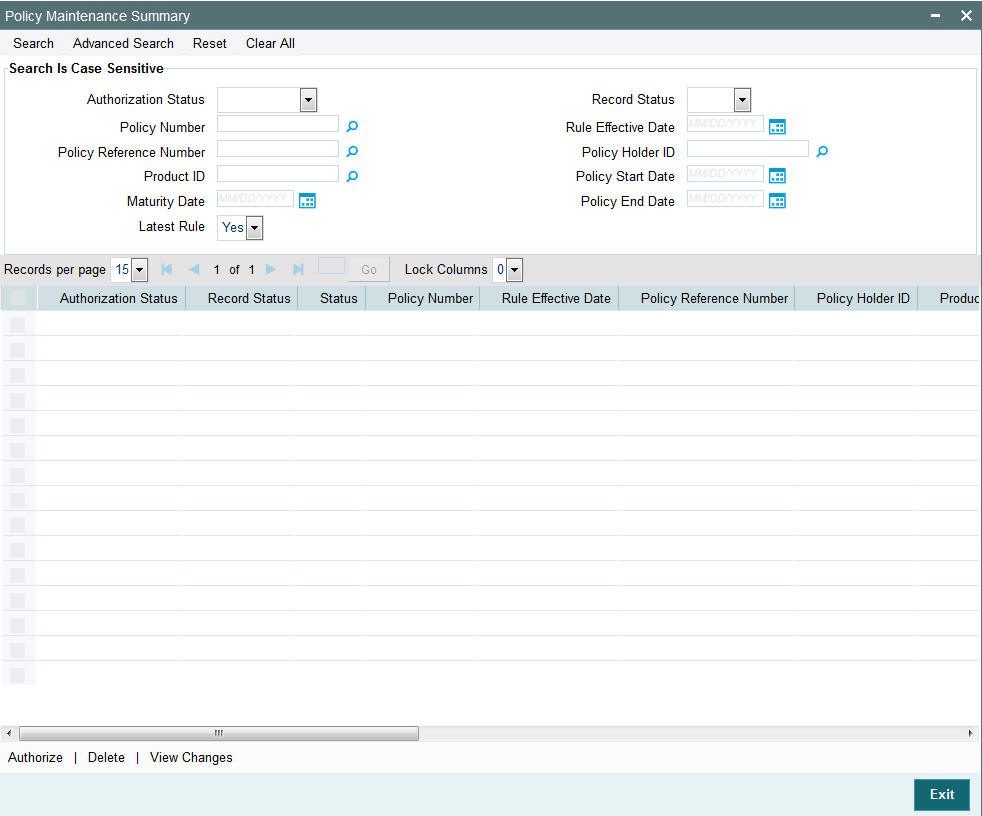
3.2.2 Editing Policy
You can modify the details of a record that you have already entered into the system, provided it has not been subsequently authorized. You can perform this operation as follows:
- Invoke the Policy Maintenance Summary screen from the Browser.
- Select the status of the record that you want to retrieve for modification in the Authorization Status field. You can only modify records that are unauthorized. Accordingly, choose the Unauthorized option from the drop down list.
- Specify any or all of the details of the record in the corresponding fields on the screen to retrieve the record that is to be modified. All unauthorized records with the specified details are retrieved and displayed in the lower portion of the screen.
- Double click the record that you want to modify in the list of displayed records. The Policy Maintenance Detail screen is displayed.
- Select Unlock Operation from Action list to modify the record. Modify the necessary information
- Click Save to save your changes. The Policy Maintenance Detail screen is closed and the changes made are reflected in the Policy Maintenance Summary screen.
3.2.3 Viewing Policy
To view a Policy you have previously entered, you must retrieve the same in the Policy Maintenance Summary screen, as follows:
- Invoke the Summary Screen from the Browser.
- Select the status of the Policy that you want to retrieve for viewing in the Authorization Status field. You can also view all records that are either unauthorized or authorized only, by choosing the Unauthorized/ Authorized option.
- Specify any or all of the details of the records in the corresponding fields on the screen, and click ‘Search’ button. All records with the specified details are retrieved and displayed in the lower portion of the screen.
- Double click the record that you want to view in the list of displayed records, in the lower portion of the screen. The Policy Maintenance screen is opened in view mode.
3.2.4 Deleting Policy
You can delete only unauthorized records in the system.
To delete a record that you have previously entered, you must retrieve the same in the Policy Maintenance Summary screen, as follows:
- Invoke the Policy Maintenance Summary screen from the browser.
- Select the status of the record that you want to retrieve for deletion.
- Specify any or all of the details of the record in the corresponding fields on the screen, and click ‘Search’ button. All records with the specified details are retrieved and displayed in the lower portion of the screen.
- Double click the record that you want to delete in the list of displayed records, in the lower portion of the screen. The Policy Maintenance Detail screen is opened in View mode.
- Select Delete operation from the Action list. The system prompts you to confirm the deletion, and the record is deleted physically from the system database.
3.2.5 Authorizing Policy
An unauthorized record must be authorized in the system for it to be processed.
To authorize a record, you must first retrieve the same in the Policy Maintenance Summary screen.
- Invoke the Policy Maintenance Summary screen from the Browser.
- Select the status of the record that you want to retrieve for authorization. Typically, choose the Unauthorized option from the drop down list.
- Specify any or all of the details of the record in the corresponding fields on the screen. Click ‘Search’ button. All records with the specified details that are pending authorization are retrieved and displayed in the lower portion of the screen.
- Double click the record that you wish to authorize. The Policy Maintenance Detail screen is opened in View mode.
- Select Authorize operation from Action list.
When the checker authorizes a record, details of validations, if any, that were overridden by the maker of the record during the Save operation, are displayed. If any of these overrides results in an error, the checker must reject the transaction.
3.2.6 Amending Policy
After a record is authorized, it can be modified using the Unlock operation from Action list. To make changes to a record after authorization, you must invoke the Unlock operation which is termed as Amend Operation.
- Invoke the Policy Maintenance Summary screen from the Browser.
- Select the status of the record that you wish to retrieve for amendment. You can only amend records that are authorized.
- Specify any or all of the details of the record in the corresponding fields on the screen. All records with the specified details are retrieved and displayed in the lower portion of the screen.
- Double click the record that you want to amend. The Policy Maintenance screen will be displayed in Amendment mode. Click the Unlock operation from the Action list to amend the record.
- Amend the necessary information. Click the Save button to save your changes.
3.2.7 Authorizing Amended Policy
An amended policy must be authorized for the amendment to be made effective in the system.
Authorization of amended records can only be done from Fund Manager Module and Agency branch Module. The process of authorization is subsequently the same as that for normal transactions.
3.2.8 Reversing Policy
You can reverse a policy that you have already entered into the system, provided it has not been subsequently authorized. You can perform this operation as follows:
- Invoke the Policy Maintenance Summary screen from the browser.
- Select the status of the record that you want to retrieve for reversal.
- Specify any or all of the details of the record in the corresponding fields on the screen, and click ‘Search’ button. All records with the specified details are retrieved and displayed in the lower portion of the screen.
- Double click the record that you want to reverse in the list of displayed records, in the lower portion of the screen. The Policy Maintenance Detail screen is opened in View mode.
- Select Reverse operation from the Action list. The system prompts you to confirm the reversal of record.
- Click the Save button to save your changes.
3.2.9 Authorizing Reversal of Policy
A reversed policy must be authorized. The process of authorization is subsequently the same as that for normal transactions.
3.2.10 Processing Product Annual Annuity Limit Mapping Details
3.2.10.1 Saving Policy Creation
During capture of amount based annuity, the system will validate the minimum and maximum annuity percentage with the derived annuity percentage. At the time of policy creation, % of annuity will be derived based on the Net Initial Investment Amount.
Net Initial Investment Amount = (Contribution amount – Contribution amount *buffer %).
If there is a breach in the limits, the system will display a warning message while saving the policy creation.
During capture of percentage based annuity, the system will validate minimum and maximum annuity percentage with the annuity percentage. If there is a breach in the limits, the system will display a warning message while saving the policy creation.
3.2.10.2 Saving Policy Amendment
During amendment of a policy for amount based annuity, the system will validate the minimum and maximum annuity percentage with the derived annuity percentage. At the time of policy amendment, % of annuity will be derived based on the anniversary value + top-up inclusive transaction at that time. If there is a breach in the limits, the system will display an error message while saving the policy amendment. The validation will be done only for both percentage and amount based annuity and escalated annuity amounts will not be validated. This validation will be done for ‘not started’ and ‘active’ annuities.
During amendment of a policy for percentage based annuity, the minimum and maximum annuity percentage will be validated with the annuity percentage.
The system will validate the annuity amount against the market value of the policy during annuity minimum/maximum rule validation. If the newly derived annuity % does not fall between the eligible minimum and maximum annuity percentage, the system will automatically update the annuity amount to an allowable value.
During anniversary value update, system will validate the annuity amount against the market value of the policy on the anniversary date. If the newly derived annuity % does not fall between the eligible minimum & maximum annuity percentage system will automatically update the annuity amount to an allowable value.
Any updates done by the system will trigger policy amendment.
During policy save or amendment, if the anniversary period is less than 365 days, the system will annualize the SI value (any annuity paid will also be considered) for minimum/maximum annuity validation purposes.
During policy save or amendment, if the anniversary period is less than 365 days, but the policy has an annuity paid (i.e., either via Annuity or via Policy Journal), the system will consider the sum of ‘Annuity Paid’ and ‘Annuity Projected for the remaining periods in the anniversary period’ for 5/20 validation.
If the annuity paid out is exceeding the annuity to be paid as per the limits applicable, then the system will cancel SI value for the remaining periods in the anniversary period. A new SI that starts from first SI start date from the next anniversary date will be added if the SI is to be given in the next anniversary period also; otherwise SI value will be amended to either apply the lower limit or the upper limit.
In case a SI is cancelled due to limit violation and there is a top-up that happens subsequently, then you should add another SI for the current anniversary period, if required.
Annuity income percentage check validations will not be done for take on annuities during the first anniversary period. Validations will not be done for accelerated annuities also.
In case SI has escalated, then the system will not consider escalated value for the validations for the projected value for the remaining periods. The SI value will be used for the projection. Also, if the SI value has to be amended, then the system will not consider escalations.
3.3 Ratio Percentage Maintenance
Fund Products and Policies, invested by the client can be divided into components. The components can be singular or a combination of two or more components. According to the Prudential Investment Guidelines these Funds are classified as components or combination of the same, these can be invested according to a specified percentage.
For example; a fund investment of F1 can be allocated under the following ratios of components:
- Onshore Cash (25%)
- Onshore Property (40%)
- Offshore Cash (35%)
The cumulative investment ratio would add up to the total Fund Investment F1.
You have to maintain the rules for Prudential Investment Guidelines and Forex compliance in accordance with this asset allocation. You can do so by invoking the Prudential Investment Guidelines/ Forex Compliance Screen from the browser, and click on Detailed.
Refer to the chapter ‘Prudential Investment Guidelines and Forex compliance (PIGS)’ in LEP User Manual for further details on UM.
3.4 Policy Transaction Enrichment
This section contains the following topics:
3.4.1 Invoking the Policy Transaction Exchange Rate Enrichment
The initial investment for a policy can be deposited in multiple currencies. If the exchange rate is not available while saving the policy, the policy is incompletely generated and hence the underlying UT transactions are also generated incompletely. Till the policy is allocated, it can be enriched. The enrichment can be done using the ‘Policy Transaction Exchange Rate Enrichment’ screen.
All the settlements of a policy transaction need to be enriched before the policy transaction itself can be enriched. When the settlements are being enriched, the system will compute the policy transaction amount and asset allocation ratio. Subsequently, when the policy transaction is enriched, the system will convert the policy transaction amount in terms of the policy base currency.
To invoke the ‘Policy Transaction Exchange Rate Enrichment’ screen, type ‘LEDTXNEE’ in the field at the top right corner of the Application tool bar and clicking on the adjoining arrow button.
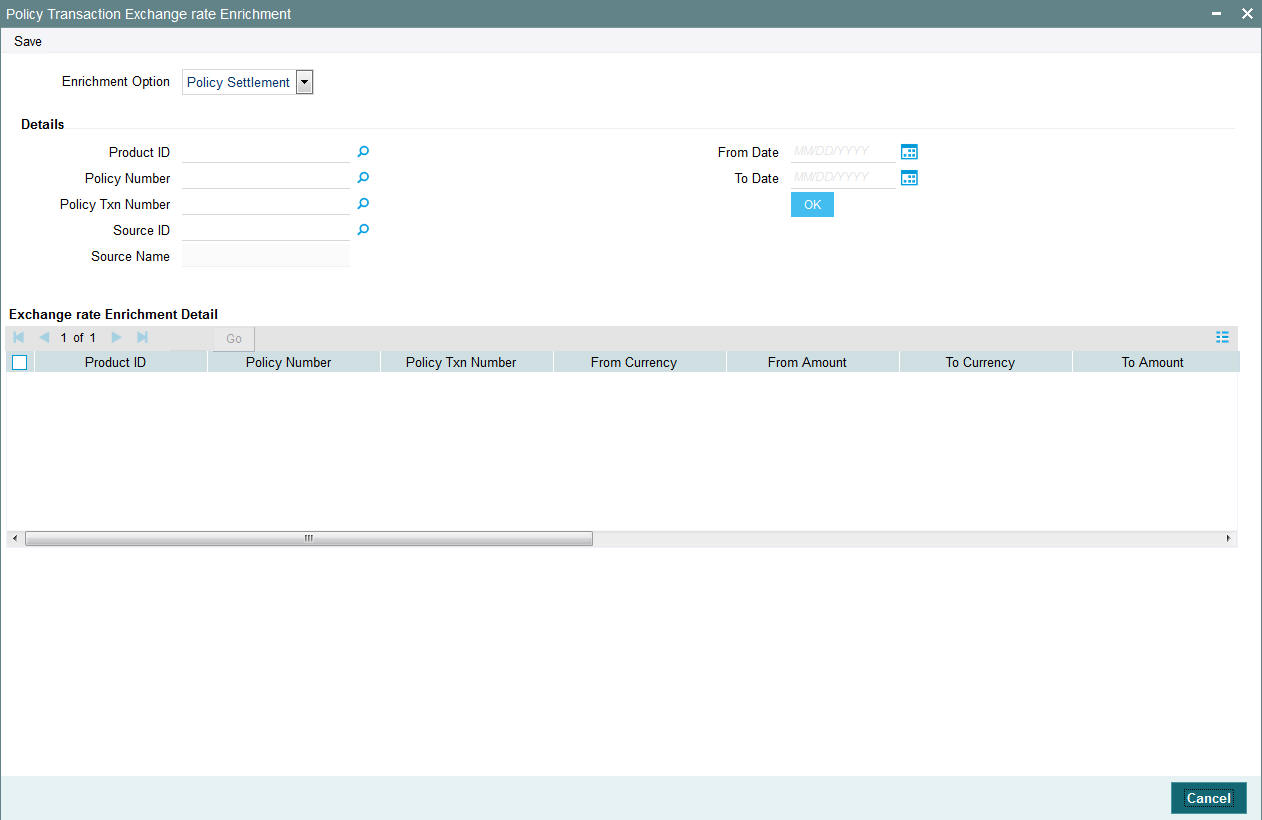
You can specify the following details in this screen:
Enrichment Option
Optional
Select the enrichment option from the adjoining drop-down list. The options are:
- Policy Settlement
- Policy Transaction
Details
Product ID
Alphanumeric; 10 Characters; Optional
Specify the Product ID for which you wish to enrich transactions.
Policy Number
Alphanumeric; 16 Characters; Optional
Specify the policy number for which enrichment is required.
Policy Txn Number
Alphanumeric; 16 Characters; Optional
Specify the policy transaction number for which enrichment is required.
Source ID
Alphanumeric; 6 Characters; Optional
Specify the Source ID for which enrichment is required.
Source Name
Display
The system defaults the name for the Source ID selected.
From Date
Date Format; Optional
Specify the date from which enrichment is required.
To Date
Date Format; Optional
Specify the date till which enrichment is required.
After you specify the required details, press ‘OK’. The system will display all the matching records in the ‘Exchange Rate Enrichment Details’ grid
3.4.1.1 Exchange Rate Enrichment Details
In this grid, the system will display the following values for the records matching the criteria specified above.
- Product ID
- Policy Number
- Policy Txn Number
- From Currency
- From Amount
- To Currency
- To Amount
- Source ID
- Exchange Rate Applied
- Override Exchange Rate?
- FX Deal Date
- FX Value Date
- Operate
- Status
If you have selected ‘Policy Settlement’ as the enrichment option, then all settlement details for the selected policy are available and the exchange rates can be enriched from settlement currency to transaction currency. If ‘Policy Transaction’ has been selected as the enrichment option, then exchange rate details to convert the policy transaction amount into policy base currency can be changed (after the settlements of the policy transactions have been enriched).
Note
If you have not changed the ‘FX Deal Date’ and ‘FX Value Date’, that is, the dates are current dates, then the LEP policy settlement and policy transaction will not be available for enrichment on the next day. This is because clearance would have been done during EOD.
If you change the ‘FX Deal Date’ and ‘FX Value Date’ to the next day, then policy settlement and policy transaction will be available for enrichment the next day.
3.5 Interest Rate Details Maintenance
This section contains the following topics:
3.5.1 Invoking FCIS Interest Rate Maintenance Screen
The interest rate that is to be used for interest calculation is maintained using the Interest Rate Maintenance screen. In order to arrive at the rate of interest, you have to maintain the effective date, transaction currency details and Interest Rate of the transaction.
You can invoke the ‘FCIS Interest Rate Maintenance Detail’ screen by typing ‘UTDINRMN’ n the field at the top right corner of the Application tool bar and clicking on the adjoining arrow button.

Select ‘New’ from the Actions menu in the Application tool bar or click new icon to enter the details of the Interest Rate Maintenance.
You can specify the following fields in this screen:
Effective Date
Date Format; Mandatory
Specify the date the system should consider for calculating the rate of interest.
Interest Rate (%)
Numeric; 30 Characters; Mandatory
Specify the Interest Rate for the currency you have selected.
Translation Currency
Alphanumeric; 30 Characters; Mandatory
Select the currency of transaction from the option list.
Currency Name
Display
The system displays the name of the Translation Currency selected.
3.6 Interest Rate Maintenance Summary Screen
This section contains the following topics:
- Section 3.6.1, "Retrieving Interest Rate in Interest Rate Maintenance Screen"
- Section 3.6.2, "Editing Interest Rate"
- Section 3.6.3, "Viewing Interest Rate"
- Section 3.6.4, "Deleting Interest Rate "
- Section 3.6.5, "Authorizing Interest Rate"
- Section 3.6.6, "Amending Interest Rate "
- Section 3.6.7, "Authorizing Amended Interest Rate "
- Section 3.6.8, "Checking for Duplicate Transactions"
3.6.1 Retrieving Interest Rate in Interest Rate Maintenance Screen
You can retrieve a previously entered record in the Summary screen, as follows:
You can invoke the ‘FCIS Interest Rate Maintenance Summary’ screen by typing ‘UTSINRMN’ in the field at the top right corner of the Application tool bar and clicking on the adjoining arrow button.
Specify any or all of the following details in the Interest Rate Maintenance Summary screen:
- Select the status of the record in the Authorization Status field. If you choose the “Blank Space” option, then all the records are retrieved.
- Select the status of the record in the Open field. If you choose
the “Blank Space” option, then all the records are retrieved.
- Effective Date
- Transaction Currency
- Interest Rate(%)
After you have specified the required details, click ‘Search’ button. All records with the specified details are retrieved and displayed in the lower portion of the screen.
Note
You can also retrieve the individual record detail from the detail screen by doing query in the following manner:
- Press F7
- Input the Transaction Currency
- Press F8
You can perform Edit, Delete, Amend, Authorize, Reverse, Confirm operation by selecting from the Action list.
You can also search the record by using combination of % and alphanumeric value.
Example
You can search the record for Transaction Currency by using the combination of % and alphanumeric value as follows:-
- Search by A%: System will fetch all the records whose Transaction Currency starts from Alphabet ‘A’. For example, AGC17, AGVO6, AGC74 etc.
- Search by %7: System will fetch all the records whose Transaction Currency ends by numeric value’ 7’. For example, AGC17, GSD267, AGC77 etc.
- Search by %17%:- System will fetch all the records whose Transaction
Currency contains the numeric value 17. For example, GSD217, GSD172,
AGC17 etc.
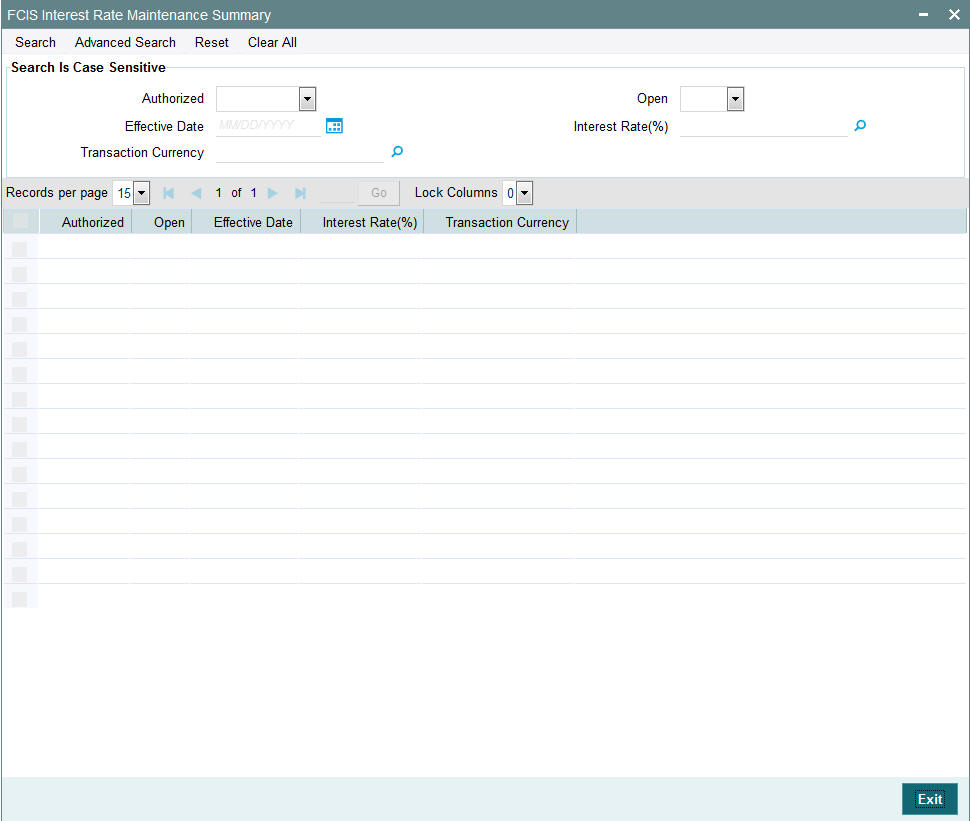
3.6.2 Editing Interest Rate
You can modify the details of a record that you have already entered into the system, provided it has not been subsequently authorized. You can perform this operation as follows:
- Invoke the Interest Rate Maintenance Summary screen from the Browser.
- Select the status of the record that you want to retrieve for modification in the Authorization Status field. You can only modify records that are unauthorized. Accordingly, choose the Unauthorized option from the drop down list.
- Specify any or all of the details of the record in the corresponding fields on the screen to retrieve the record that is to be modified. All unauthorized records with the specified details are retrieved and displayed in the lower portion of the screen.
- Double click the record that you want to modify in the list of displayed records. The Interest Rate Maintenance Detail screen is displayed.
- Select Unlock Operation from Action list to modify the record. Modify the necessary information
- Click Save to save your changes. The Interest Rate Maintenance Detail screen is closed and the changes made are reflected in the Interest Rate Maintenance Summary screen.
3.6.3 Viewing Interest Rate
To view an Interest Rate you have previously entered, you must retrieve the same in the Interest Rate Maintenance Summary screen, as follows:
- Invoke the Summary Screen from the Browser.
- Select the status of the Interest Rate that you want to retrieve for viewing in the Authorization Status field. You can also view all records that are either unauthorized or authorized only, by choosing the Unauthorized/ Authorized option.
- Specify any or all of the details of the records in the corresponding fields on the screen, and click ‘Search’ button. All records with the specified details are retrieved and displayed in the lower portion of the screen.
- Double click the record that you want to view in the list of displayed records, in the lower portion of the screen. The Interest Rate Maintenance screen is opened in view mode.
3.6.4 Deleting Interest Rate
You can delete only unauthorized records in the system.
To delete a record that you have previously entered, you must retrieve the same in the Interest Rate Maintenance Summary screen, as follows:
- Invoke the Interest Rate Maintenance Summary screen from the browser.
- Select the status of the record that you want to retrieve for deletion.
- Specify any or all of the details of the record in the corresponding fields on the screen, and click ‘Search’ button. All records with the specified details are retrieved and displayed in the lower portion of the screen.
- Double click the record that you want to delete in the list of displayed records, in the lower portion of the screen. The Interest Rate Maintenance Detail screen is opened in View mode.
- Select Delete operation from the Action list. The system prompts you to confirm the deletion, and the record is deleted physically from the system database.
3.6.5 Authorizing Interest Rate
An unauthorized record must be authorized in the system for it to be processed.
To authorize a record, you must first retrieve the same in the Interest Rate Maintenance Summary screen.
- Invoke the Interest Rate Maintenance Summary screen from the Browser.
- Select the status of the record that you want to retrieve for authorization. Typically, choose the Unauthorized option from the drop down list.
- Specify any or all of the details of the record in the corresponding fields on the screen. Click ‘Search’ button. All records with the specified details that are pending authorization are retrieved and displayed in the lower portion of the screen.
- Double click the record that you wish to authorize. The Interest Rate Maintenance Detail screen is opened in View mode.
- Select Authorize operation from Action list.
When the checker authorizes a record, details of validations, if any, that were overridden by the maker of the record during the Save operation, are displayed. If any of these overrides results in an error, the checker must reject the transaction.
3.6.6 Amending Interest Rate
After a record is authorized, it can be modified using the Unlock operation from Action list. To make changes to a record after authorization, you must invoke the Unlock operation which is termed as Amend Operation.
- Invoke the Interest Rate Maintenance Summary screen from the Browser.
- Select the status of the record that you wish to retrieve for amendment. You can only amend records that are authorized.
- Specify any or all of the details of the record in the corresponding fields on the screen. All records with the specified details are retrieved and displayed in the lower portion of the screen.
- Double click the record that you want to amend. The Interest Rate Maintenance screen will be displayed in Amendment mode. Click the Unlock operation from the Action list to amend the record.
- Amend the necessary information. Click the Save button to save your changes.
3.6.7 Authorizing Amended Interest Rate
An amended Interest Rate must be authorized for the amendment to be made effective in the system.
Authorization of amended records can only be done from Fund Manager Module and Agency branch Module. The process of authorization is subsequently the same as that for normal transactions.
3.6.8 Checking for Duplicate Transactions
At the time of saving the transaction details, the system checks for the Policy Number -Transaction Type combination. If there are any existing transactions for the same combination that has been captured in the past ‘n’ days, the system will display you an warning message if you try to save another transaction with the same combination within those ‘n’ days. You need to specify this ‘n’ number of days which the system has to consider for validation.
The system performs the duplicate transaction validation:
- For unauthorized transactions
- If a parameter code called “DUPWARNINGLAG” and the value for the ‘n’ number of days has been maintained. The validation fails if the ‘n’ number of days is specified as zero.
Maintaining Parameter Code for Displaying Warning Messages
You need to maintain the parameter code “DUPWARNINGLAG” and the number of days as the Parameter Value in the Parameter Setup screen.
Refer to the chapter “Maintaining System Parameters” for further details on maintaining the parameters.
3.7 Authorization Screen
This section contains the following topics:
3.7.1 Invoking Authorization Screen
You can invoke Authorization Screen by typing ‘LEDPLNAU’ in the field at the top right corner of the Application tool bar and clicking on the adjoining arrow button.
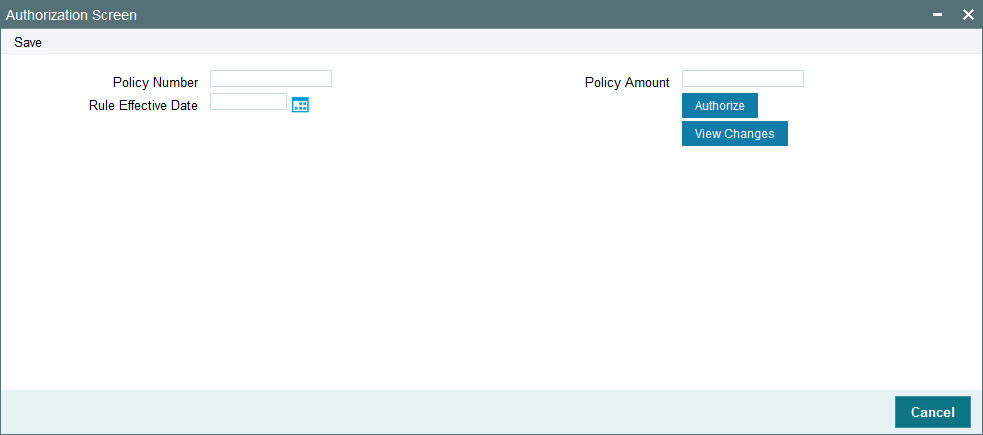
You can specify the following details:
Policy Number
Alphanumeric; 16 Characters; Optional
Specify the policy number.
Rule Effective Date
Date Format; Optional
Select the rule effective date from the adjoining calendar.
Policy Amount
Numeric; 12 Characters; Optional
Specify the policy amount.
After specifying the necessary details click ‘Authorize’ button. Click ‘View Changes’ button to view the changes. The following screen is displayed:
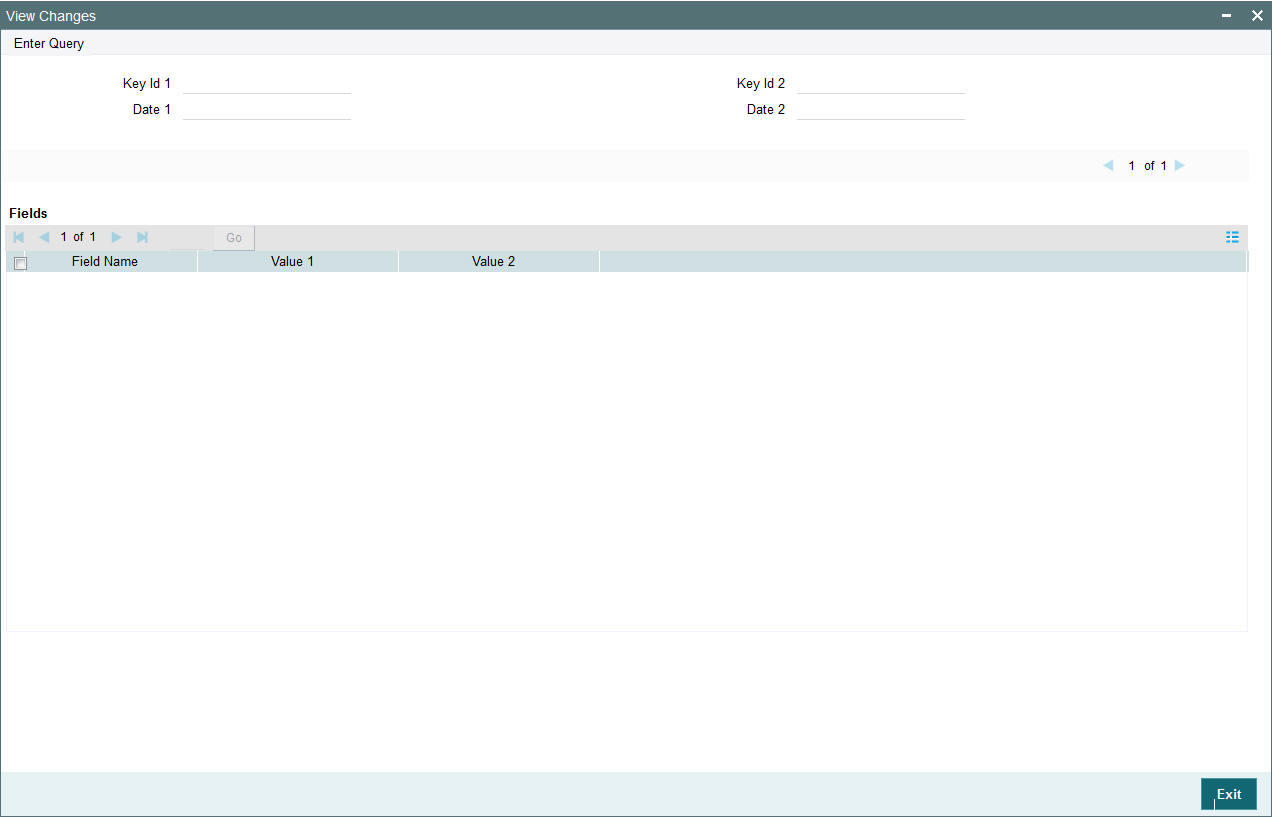
The system displays the following values:
- Key ID 1
- Date 1
- Key ID 2
- Date 2
Fields
- Field Name
- Value 1
- Value 2
You can also invoke ‘View Changes’ screen by typing ‘UTDVWCHG’ in the field at the top right corner of the Application tool bar and clicking on the adjoining arrow button.
3.8 Policy Authorization
This section contains the following topics:
3.8.1 Invoking Authorization Screen
You can authorize policy transactions using ‘Authorization Screen’. You can invoke this screen by typing ‘LEDTXNAU’ in the field at the top right corner of the Application tool bar and clicking on the adjoining arrow button.
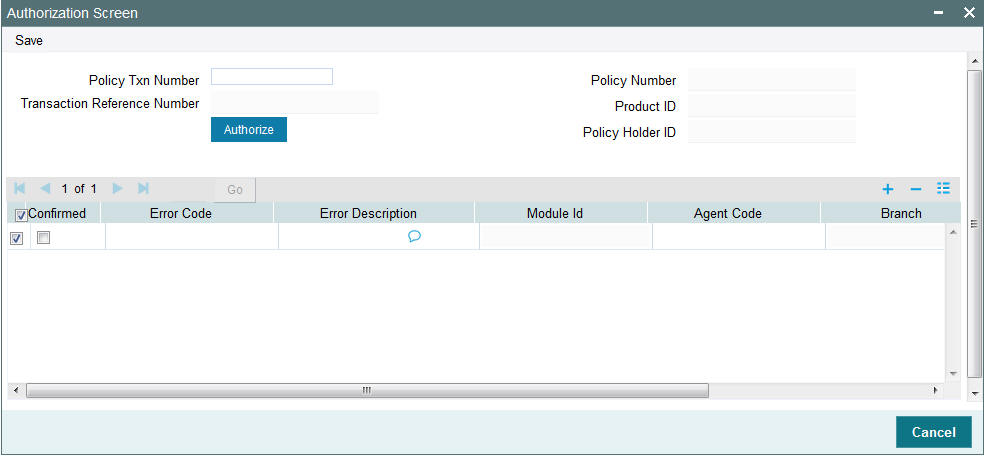
You can specify the following details:
Policy Txn Number
Alphanumeric; 16 Characters; Optional
Specify the policy transaction number.
Transaction Reference Number
Display
The system displays the transaction reference number.
Policy Number
Display
The system displays the policy number.
Product ID
Display
The system displays the product ID.
Policy Holder ID
Display
The system displays the policy holder ID.
Click ‘Authorize’ button to authorize the policy transaction.
Confirmed
Optional
Check this box to confirm the operation on transaction.
Error Code
Alphanumeric; 20 Characters; Optional
Specify the error code to be displayed if the authorization of transaction fails.
Error Description
Alphanumeric; 20 Characters; Optional
Specify the error description of the selected error code.
Module Id
Display
The system displays the module ID of the transaction.
Agent Code
Display
The system displays the agent code of the policy transaction.
Branch
Display
The system displays the branch code of the policy transaction.
User ID
Alphanumeric; 15 Characters; Optional
Specify the user ID of the policy transaction.
3.9 Policy Reversal Detail
This section contains the following topics:
3.9.1 Invoking Policy Reversal Detail Screen
You can reverse the policy using ‘Policy Reversal Detail’ screen. You can invoke this screen by typing ‘LEDPLREV’ in the field at the top right corner of the Application tool bar and clicking on the adjoining arrow button.
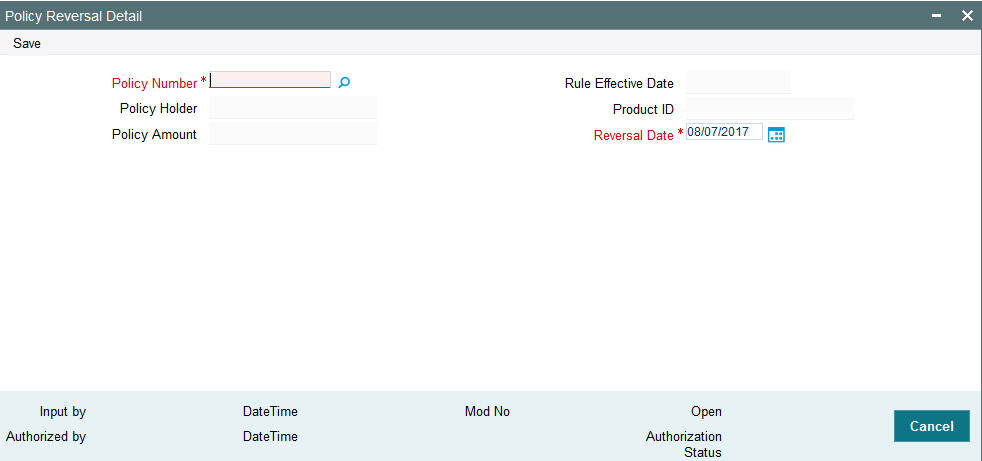
You can specify the following details:
Policy Number
Alphanumeric; 16 Characters; Mandatory
Specify the policy number to be reversed. Alternatively, you can select policy number from the option list. The list displays all valid policy number maintained in the system.
Policy Holder
Display
The system displays the policy holder details for the selected policy number.
Policy Amount
Display
The system displays the policy amount for the selected policy number.
Rule Effective Date
Display
The system displays the rule effective date for the selected policy number.
Product ID
Display
The system displays the product ID for the selected policy number.
Reversal Date
Date Format; Mandatory
The system displays the reversal date. However, you can select the reversal date from the adjoining calendar.
3.10 Policy Reversal Summary
This section contains the following topics:
- Section 3.10.1, "Retrieving Policy Reversal Transaction in Policy Reversal Screen"
- Section 3.10.2, "Editing Policy Reversal Transaction"
- Section 3.10.3, "Viewing Policy Reversal Transaction"
- Section 3.10.4, "Deleting Policy Reversal Transaction"
- Section 3.10.5, "Authorizing Policy Reversal Transaction"
- Section 3.10.6, "Amending Policy Reversal Transaction"
- Section 3.10.7, "Authorizing Amended Policy Reversal Transaction"
3.10.1 Retrieving Policy Reversal Transaction in Policy Reversal Screen
You can retrieve a previously entered record in the Summary screen, as follows:
Invoke the ‘Policy Reversal Summary’ screen by typing ‘LESPLREV’ in the field at the top right corner of the Application tool bar and clicking on the adjoining arrow button.
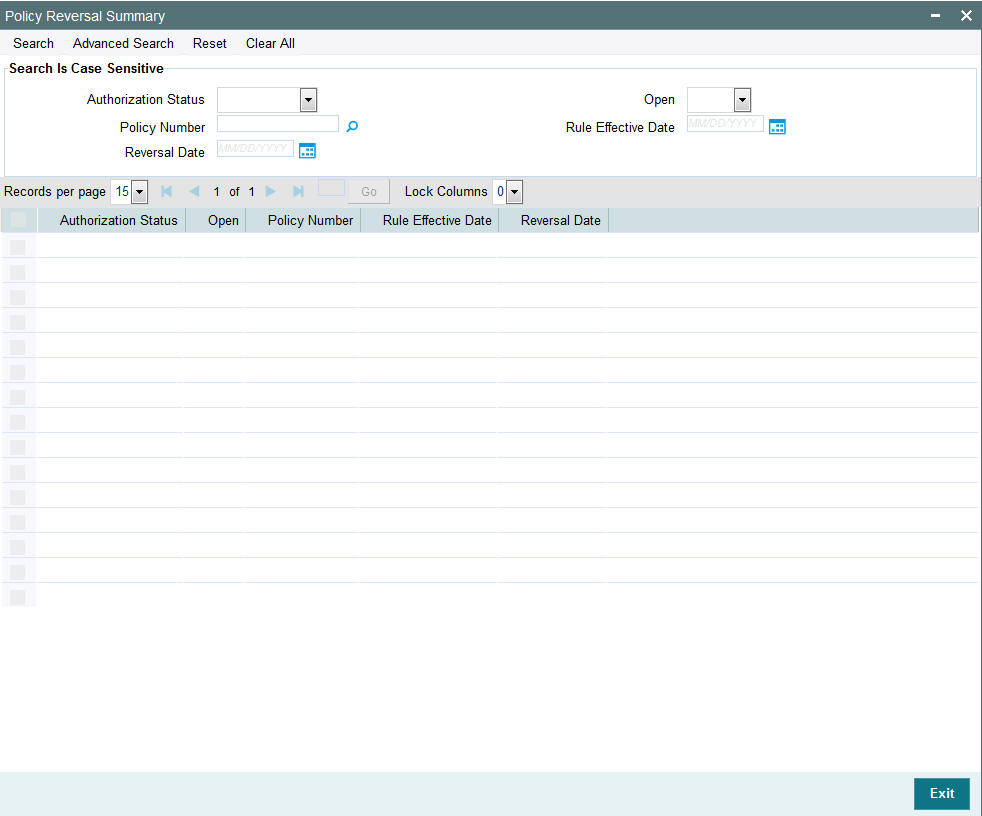
Specify any or all of the following details in the Policy Reversal Summary screen:
- Select the status of the record in the Authorization Status field. If you choose the “Blank Space” option, then all the records are retrieved.
- Select the status of the record in the Open field. If you choose the “Blank Space” option, then all the records are retrieved.
- Policy Number
- Rule Effective Date
- Reversal Date
After you have specified the required details, click ‘Search’ button. All records with the specified details are retrieved and displayed in the lower portion of the screen.
Note
You can also retrieve the individual record detail from the detail screen by doing query in the following manner:
- Press F7
- Input Policy Number
- Press F8
You can perform Edit, Delete, Amend, Authorize, Reverse, Confirm operation by selecting from the Action list.
You can also search the record by using combination of % and alphanumeric value.
Example
You can search the record for Policy Number by using the combination of % and alphanumeric value as follows:
- Search by A%: System will fetch all the records whose Policy Number starts from Alphabet ‘A’. For example, AGC17, AGVO6, AGC74 etc.
- Search by %7: System will fetch all the records whose Policy Number ends by numeric value’ 7’. For example, AGC17, GSD267, AGC77 etc.
- Search by %17%: System will fetch all the records whose Policy Number contains the numeric value 17. For example, GSD217, GSD172, AGC17 etc.
3.10.2 Editing Policy Reversal Transaction
You can modify the details of a record that you have already entered into the system, provided it has not been subsequently authorized. You can perform this operation as follows:
- Invoke the Policy Reversal Summary screen from the Browser.
- Select the status of the record that you want to retrieve for modification in the Authorization Status field. You can only modify records that are unauthorized. Accordingly, choose the Unauthorized option from the drop-down list.
- Specify any or all of the details of the record in the corresponding fields on the screen to retrieve the record that is to be modified. All unauthorized records with the specified details are retrieved and displayed in the lower portion of the screen.
- Double click the record that you want to modify in the list of displayed records. The Policy Reversal Detail screen is displayed.
- Select Unlock Operation from Action list to modify the record. Modify the necessary information.
- Click Save to save your changes. The Policy Reversal Detail screen is closed and the changes made are reflected in the Policy Reversal Summary screen.
3.10.3 Viewing Policy Reversal Transaction
To view a policy reversal record you have previously entered, you must retrieve the same in the Policy Reversal Summary screen, as follows:
- Invoke Policy Reversal Summary screen from the Browser.
- Select the status of the record that you want to retrieve for viewing in the Authorization Status field. You can also view all records that are either unauthorized or authorized only, by choosing the Unauthorized / Authorized option.
- Specify any or all of the details of the records in the corresponding fields on the screen, and click ‘Search’ button. All records with the specified details are retrieved and displayed in the lower portion of the screen.
- Double click the record that you want to view in the list of displayed records, in the lower portion of the screen. The Policy Reversal screen is opened in View mode.
3.10.4 Deleting Policy Reversal Transaction
You can delete only unauthorized records in the system.
To delete a record that you have previously entered, you must retrieve the same in the Policy Reversal Summary screen, as follows:
- Invoke the Policy Reversal Summary screen from the browser.
- Select the status of the record that you want to retrieve for deletion.
- Specify any or all of the details of the record in the corresponding fields on the screen, and click ‘Search’ button. All records with the specified details are retrieved and displayed in the lower portion of the screen.
- Double click the record that you want to delete in the list of displayed records, in the lower portion of the screen. The Policy Reversal Detail screen is opened in View mode.
- Select Delete operation from the Action list. The system prompts you to confirm the deletion, and the record is deleted physically from the system database.
3.10.5 Authorizing Policy Reversal Transaction
An unauthorized record must be authorized in the system for it to be processed.
To authorize a record, you must first retrieve the same in the Policy Reversal Summary screen.
- Invoke the Policy Reversal Summary screen from the Browser.
- Select the status of the record that you want to retrieve for authorization. Typically, choose the Unauthorized option from the drop down list.
- Specify any or all of the details of the record in the corresponding fields on the screen. Click ‘Search’ button.. All records with the specified details that are pending authorization are retrieved and displayed in the lower portion of the screen.
- Double click the record that you wish to authorize. The Policy Reversal Detail screen is opened in View mode.
- Select Authorize operation from Action list.
When the checker authorizes a record, details of validations, if any, that were overridden by the maker of the record during the Save operation, are displayed. If any of these overrides results in an error, the checker must reject the record.
3.10.6 Amending Policy Reversal Transaction
After a record is authorized, it can be modified using the Unlock operation from Action list. To make changes to a record after authorization, you must invoke the Unlock operation which is termed as Amend Operation.
- Invoke the Policy Reversal Summary screen from the Browser.
- Select the status of the record that you wish to retrieve for amendment. You can only amend records that are authorized.
- Specify any or all of the details of the record in the corresponding fields on the screen. All records with the specified details are retrieved and displayed in the lower portion of the screen.
- Double click the record that you want to amend. The Policy Reversal Detail screen will be displayed in Amendment mode. Click the Unlock operation from the Action list to amend the record.
- Amend the necessary information. Click the Save button to save your changes.
3.10.7 Authorizing Amended Policy Reversal Transaction
An amended Policy Reversal record must be authorized for the amendment to be made effective in the system.
Authorization of amended records can only be done from Fund Manager Module and Agency branch Module. The process of authorization is subsequently the same as that for normal transactions.
3.11 Policy SI Summary
This section contains the following topics:
3.11.1 Invoking Policy SI Summary Screen
You can view, reverse, delete or authorize a policy transactions using ‘Policy SI Summary’ screen. You can invoke this screen by typing ‘LEDPLYIS’ in the field at the top right corner of the Application tool bar and clicking on the adjoining arrow button.
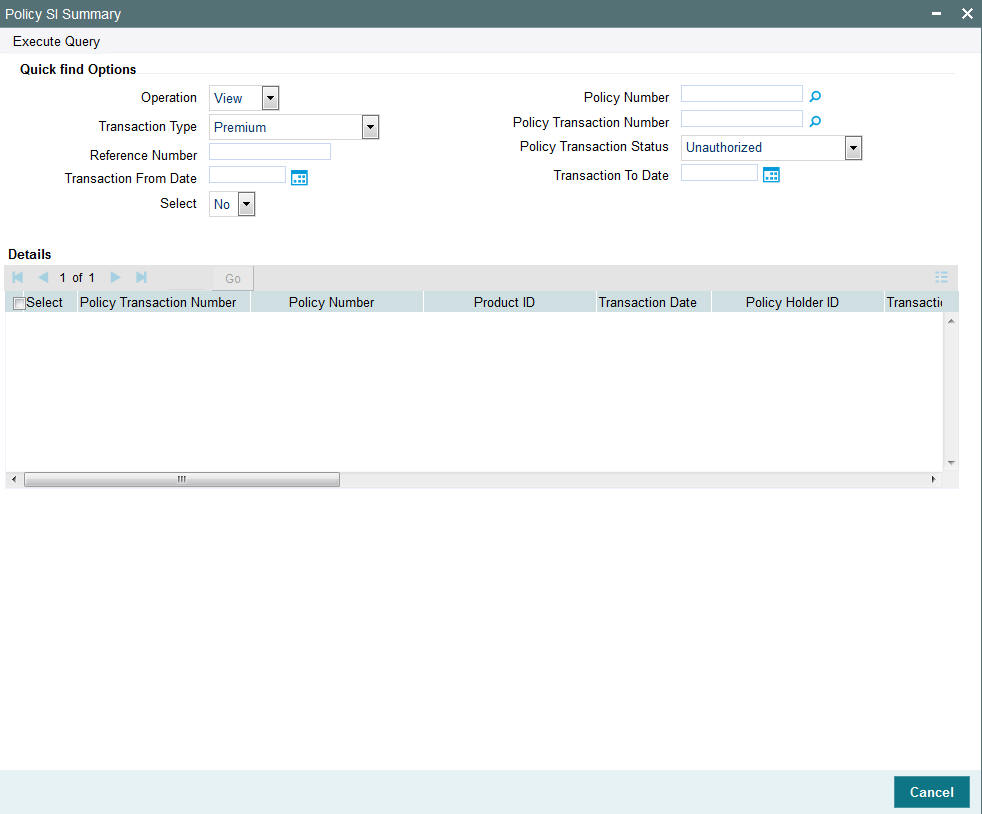
You can specify the following details:
Quick Find Options
Operation
Optional
Select the operation for policy transaction from the drop-down list. The list displays the following values:
- View
- Reverse
- Delete
- Auth
Transaction Type
Optional
Select the type of transaction from the drop-down list. The list displays the following values:
- Premium
- Annuity
- Tax on Annuity
- Phase In
- Periodic Fee Redemption
- Policy Reinvestment
- Policy Rebate
Reference Number
Alphanumeric; 16 Characters; Optional
Specify the reference number for the policy.
Transaction From Date
Date Format; Optional
Specify the from date from which the policy SI transactions are to be fetched.
Select
Optional
Select ‘Yes’ from the drop-down list to select the policy transaction. Else select ‘No’.
Policy Number
Alphanumeric; 16 Characters; Optional
Specify the policy number. Alternatively, you can select policy number from the option list. The list displays all valid policy number maintained in the system.
Policy Transaction Number
Alphanumeric; 16 Characters; Optional
Specify the policy transaction number. Alternatively, you can select policy transaction number from the option list. The list displays all valid policy transaction number maintained in the system.
Policy Transaction Status
Optional
Select the policy transaction status from the drop-down list. The list displays the following values:
- Unauthorized
- Authorized/ UnAllotted
- Allotted
- Amend Before Allocation
- Amend After Allocation
- All
Transaction To Date
Optional; Date Format
Specify the to date up to which the policy SI transactions are to be fetched.
After specifying the necessary details, click ‘Execute Query’ button. The system displays the following values:
Policy Transaction Number
Display
The system defaults the selected policy transaction number. If the policy transaction number is not selected, then the system will show all the policy transactions satisfying the filter criteria.
Policy Number
Display
The system displays the policy number
Product ID
Display
The system displays the Product ID for the policy.
Transaction Date
Display
The system displays the Transaction date for the policy transaction.
Policy Holder ID
Display
The system displays the Policy holder ID for the policy.
Transaction Reference Number
Display
The system displays the Reference number for the policy transaction.
Maker ID
Display
The system displays the Maker ID for the policy transaction.
Maker Date Stamp
Display
The system displays the Maker date stamp for the policy transaction.
Checker ID
Display
The system displays the Checker ID for the policy transaction.
Checker Date Stamp
Display
The system displays the Checker date stamp for the policy transaction.
Auth Status
Display
The system displays the Auth status for the policy transaction.
Status
Display
The system displays the status of the operation carried on policy transaction.
Policy Transaction Status
Display
The system displays the status of the policy transaction.
Note
System in menu shows the operation code as per the operation selected by user in the screen.