5. Policy Transactions – Switch
A Policy Holder can initiate any of the following transactions in a policy that he has purchased:
- Top Ups
- Partial or Full Redemption Transactions, known as Surrender Transactions
- Partial or Full Switch Transactions
Note
Policy transactions can be carried out through the Agency Branch component only.
Policy Transactions can only be initiated into authorized policies for which the underlying initial investment transaction has already been generated. The policy transaction must be authorized before it becomes effective and the underlying transactions are generated.
This chapter contains the following sections:
5.1 Switch Transactions
This section contains the following topics:
- Section 5.1.1, "Entering Switch Transaction"
- Section 5.1.2, "Invoking Policy Transaction- Switch Detail Screen"
- Section 5.1.3, "Transaction Details Tab"
- Section 5.1.4, "Asset Allocation Tab"
- Section 5.1.5, "Broker Details Tab"
- Section 5.1.6, "Load Override Details Tab"
- Section 5.1.7, "Add Info Tab"
- Section 5.1.8, "Un-Allotted Fee Transaction"
- Section 5.1.9, "Saving Information Entered"
- Section 5.1.10, "Processing Back Data Propagation for Transactions"
5.1.1 Entering Switch Transaction
A partial or total switch transaction is effected when a Policy Holder chooses to re-allocate his assets in the underlying funds of the policy. As a result, he re-distributes his investment in some or all funds of the policy. He may choose to invest in a different fund set or change his investment ratios in the same funds. The funds he wishes to invest should be mapped as allowable portfolios for the product.
In the system, a switch transaction is processed as two separate transactions; the first involving a redemption from the first or ‘From’ fund, and the second involving a subscription to the second or ‘To’ fund.
The following are the steps you need to follow to enter and save a Switch Transaction. Each of these steps is explained in detail in subsequent sections.
- Invoke the Policy Transaction – Switch screen.
- Enter information in the Policy Transaction – Switch screen.
- Save the information entered.
5.1.2 Invoking Policy Transaction- Switch Detail Screen
You can invoke the ‘Policy Transaction-Switch Detail’ screen by typing ‘LEDPLSWI’ in the field at the top right corner of the Application tool bar and clicking on the adjoining arrow button.
![]()
Select ‘New’ from the Actions menu in the Application tool bar or click new icon to enter the details of the Policy Transaction Switch.
You can specify the following details in this screen:
Policy Transaction
In the Policy Transaction section, you will have to enter information in the following fields:
Policy Transaction Number
Display
This is a unique identification for the policy transaction that is effected in this policy. It is generated by the system when all details that are mandatory for the transaction profile have been successfully entered, and the transaction record is saved.
Transaction Reference Number
Alphanumeric; 16 Characters; Optional
Specify a unique identification for this policy transaction that will be used in all subsequent references to this transaction, before it is authorized.
Policy Number
Alphanumeric; 16 Characters; Mandatory
Select the policy on which this transaction is to be effected from the option list. The policy selected must be an authorized, active policy on which the underlying initial investment transaction has already been generated.
Policy Start Date
Display
When you select the Policy Number, the start date of the selected Policy is displayed here.
Product ID
Display
When the Policy is specified, the ID of the Product under which the corresponding Policy has been created is displayed in this field.
Product Name
Display
When the Policy is specified, the name of the Product under which the corresponding Policy has been created is displayed in this field.
Policy Holder ID
Display
When you specify the Policy Number, the ID of the Policy Holder is displayed here.
Name
Display
When the Policy Number is selected, the name of the corresponding Policy Holder is displayed here.
Policy Maturity Date
Display
The Maturity Date of the Policy is taken from the policy creation details and displayed here. You will not be allowed to change the same.
You will also have to enter information in the fields in the following tabs in this screen:
- Transaction Details
- Asset Allocation
- Brokers Details
5.1.2.1 Policy Financial Wizard Button
When you click ‘Policy Financial Wizard’ button, the screen in invoked:
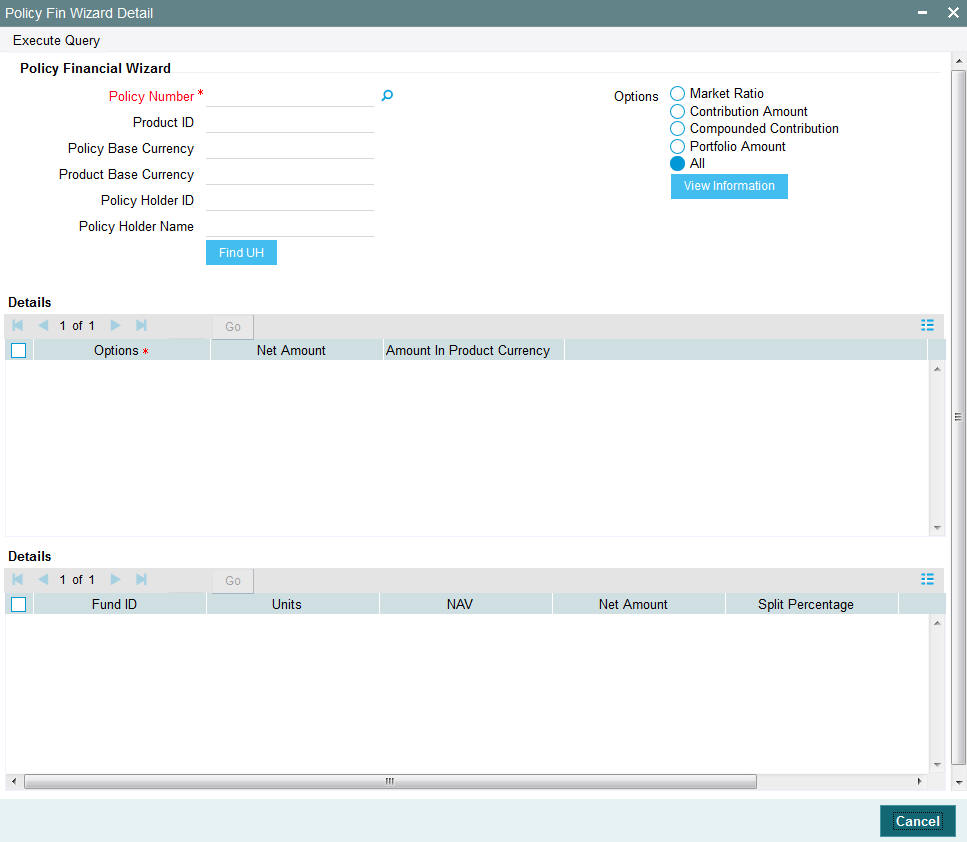
The Policy Financial Wizard enables a Policy Holder to know, at a glance, the value of his Policy and the details of his holdings in the funds. The following details are displayed:
- Policy Number
- Product ID
- Policy Base Currency
- Product Base Currency
- Policy Holder ID
- Policy Holder Name
Options Section
The details of the holdings that can be viewed are given below:
- Market Ratio
- Contribution Amount
- Compounded Contribution
- Portfolio Amount
- All of the above
Select one of the options (the option ‘All of the above’ allows you to view all details together) and click ‘View Information’ button. The following details are displayed:
- Options
- Net Amount
- Amount In Product Currency
- Fund ID
- Units
- NAV
- Net Amount
- Split Percentage
- Policy Number
The position of the Policy Holder’s investment and the holding value in product base currency are thus available at a glance, and will aid him when transaction amounts are specified.
5.1.2.2 PH Deal Button
Click ‘Ph Deal’ button to view the details of all the deals set up for the unit holder..
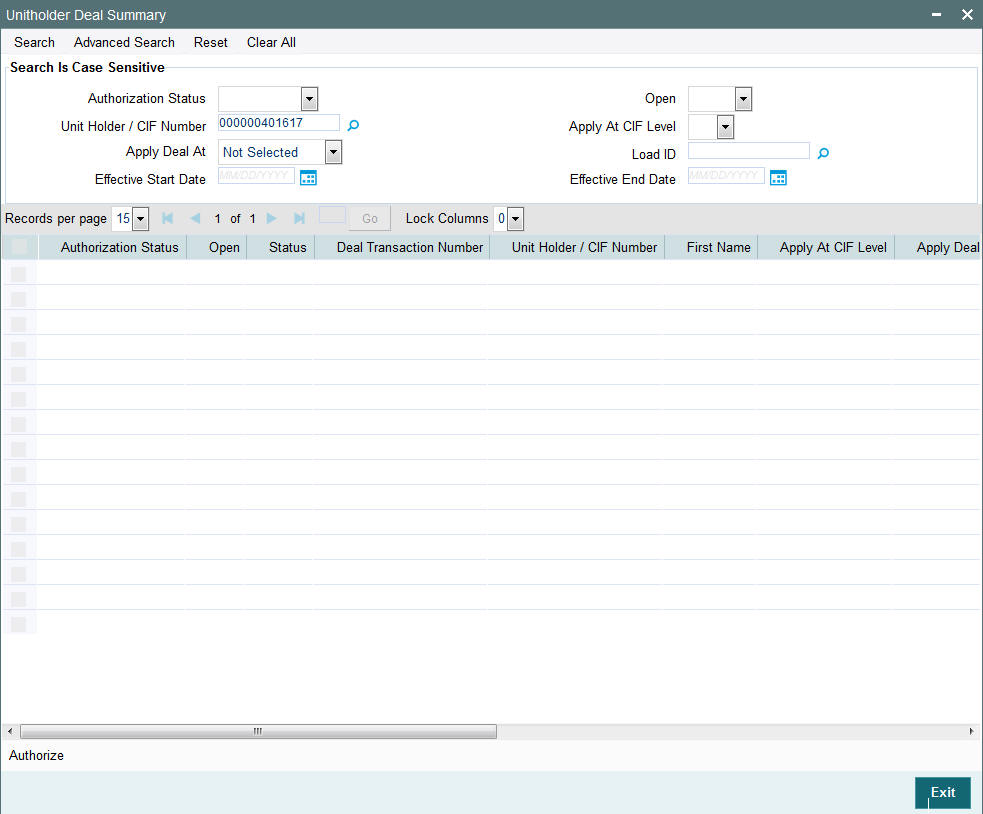
Retrieving Unit Holder Deal in Unitholder Deal Screen
You can retrieve a previously entered record in the Summary screen, as follows:
- Invoke the Unitholder Deal Summary screen by clicking ‘Ph Deal’ button.
- Select the status of the record in the Authorization Status field. If you choose the “Blank Space” option, then all the records are retrieved.
- Select the status of the record in the Open field. If you choose the “Blank Space” option, then all the records are retrieved.
- Unit Holder/ CIF Number
- Apply At CIF Level
- Apply Deal At
- Load ID
- Effective Start Date
- Effective End Date
After you have specified the required details, click ‘Search’ button. All records with the specified details are retrieved and displayed in the lower portion of the screen.
Note
You can also retrieve the individual record detail from the detail screen by doing query in the following manner:-
- Press F7
- Input Load ID
- Press F8
You can perform Edit, Delete, Amend, Authorize, Reverse, Confirm operation by selecting from the Action list.
You can also search the record by using combination of % and alphanumeric value.
Example
You can search the record for Load ID by using the combination of % and alphanumeric value as follows:
- Search by A%: System will fetch all the records whose Load ID starts from Alphabet ‘A’. For example, AGC17, AGVO6, AGC74 etc.
- Search by %7: System will fetch all the records whose Load ID ends by numeric value’ 7’. For example, AGC17, GSD267, AGC77 etc.
- Search by %17%:- System will fetch all the records whose Load ID contains the numeric value 17. For example, GSD217, GSD172, AGC17 etc.
Editing Unit Holder Deal
You can modify the details of a record that you have already entered into the system, provided it has not been subsequently authorized. You can perform this operation as follows:
- Invoke the Unitholder Deal Summary screen by clicking ‘Ph Deal’ button.
- Select the status of the record that you want to retrieve for modification in the Authorization Status field. You can only modify records that are unauthorized. Accordingly, choose the Unauthorized option from the drop down list.
- Specify any or all of the details of the record in the corresponding fields on the screen to retrieve the record that is to be modified. All unauthorized records with the specified details are retrieved and displayed in the lower portion of the screen.
- Double click the record that you want to modify in the list of displayed records. The Unitholder Deal Detail screen is displayed.
- Select Unlock Operation from Action list to modify the record. Modify the necessary information.
- Click Save to save your changes. The Unitholder Deal Detail screen is closed and the changes made are reflected in the Unitholder Deal Summary screen.
Viewing Unit Holder Deal
To view a Unitholder Deal you have previously entered, you must retrieve the same in the Unitholder Deal Summary screen, as follows:
- Invoke Unitholder Deal Summary screen by clicking ‘Ph Deal’ button.
- Select the status of the Unitholder Deal that you want to retrieve for viewing in the Authorization Status field. You can also view all records that are either unauthorized or authorized only, by choosing the Unauthorized/ Authorized option.
- Specify any or all of the details of the records in the corresponding fields on the screen, and click ‘Search’ button. All records with the specified details are retrieved and displayed in the lower portion of the screen.
- Double click the record that you want to view in the list of displayed records, in the lower portion of the screen. The Unitholder Deal screen is opened in View mode.
Deleting Unit Holder Deal
You can delete only unauthorized records in the system.
To delete a record that you have previously entered, you must retrieve the same in the Unitholder Deal Summary screen, as follows:
- Invoke the Unitholder Deal Summary screen by clicking ‘Ph Deal’ button.
- Select the status of the record that you want to retrieve for deletion.
- Specify any or all of the details of the record in the corresponding fields on the screen, and click ‘Search’ button. All records with the specified details are retrieved and displayed in the lower portion of the screen.
- Double click the record that you want to delete in the list of displayed records, in the lower portion of the screen. The Unitholder Deal Detail screen is opened in View mode.
- Select Delete operation from the Action list. The system prompts you to confirm the deletion, and the record is deleted physically from the system database.
Authorizing Unit Holder Deal
An unauthorized record must be authorized in the system for it to be processed.
To authorize a record, you must first retrieve the same in the Unitholder Deal Summary screen.
- Invoke the Unitholder Deal Summary screen by clicking ‘Ph Deal’ button.
- Select the status of the record that you want to retrieve for authorization. Typically, choose the Unauthorized option from the drop down list.
- Specify any or all of the details of the record in the corresponding fields on the screen. Click ‘Search’ button. All records with the specified details that are pending authorization are retrieved and displayed in the lower portion of the screen.
- Double click the record that you wish to authorize. The Unitholder Deal Detail screen is opened in View mode.
- Select Authorize operation from Action list.
When the checker authorizes a record, details of validations, if any, that were overridden by the maker of the record during the Save operation, are displayed. If any of these overrides results in an error, the checker must reject the record.
Amending Unit Holder Deal
After a record is authorized, it can be modified using the Unlock operation from Action list. To make changes to a record after authorization, you must invoke the Unlock operation which is termed as Amend Operation.
- Invoke the Unitholder Deal Summary screen by clicking ‘Ph Deal’ button.
- Select the status of the record that you wish to retrieve for amendment. You can only amend records that are authorized.
- Specify any or all of the details of the record in the corresponding fields on the screen. All records with the specified details are retrieved and displayed in the lower portion of the screen.
- Double click the record that you want to amend. The Unitholder Deal screen will be displayed in Amendment mode. Click the Unlock operation from the Action list to amend the record.
- Amend the necessary information. Click the Save button to save your changes.
5.1.3 Transaction Details Tab
![]()
Transaction Details
Transaction Currency
Alphanumeric; 3 Characters; Mandatory
If the switch is done in a currency other than the policy base currency, then you are required to specify the transaction currency. If you do not, then the system will default the base currency of the corresponding policy or plan from the Policy details record as the transaction currency.
Currency Name
Display
The system displays the currency name for the selected transaction currency.
Transaction Date
Date Format, Mandatory
Specify the date for the transaction. You can enter a backdated transaction here, if backdated transactions are allowed in the corresponding product. If backdated transactions are not allowed, then this date must not be earlier than the application date.
The Transaction Date must be earlier than the End Date of the Policy, and must not be a holiday. The transaction date cannot be earlier than the first Rule Effective Date of the policy.
Transaction Entry Date
Display
The Transaction Entry Date signifies the date on which the transaction is entered into the system. By default, the application date is displayed in this field, and it cannot be altered.
Transaction Amount
Numeric; 30 Characters; Mandatory if the Transaction Mode is ‘Amount’
Specify the investment amount of the transaction.
On saving amount based policy switch transactions, the system will compute the market value of policy across all funds.
If the transaction amount is greater than the threshold limit of policy market value, the system will display the following error message “Transaction amount exceeds threshold limit of the policy market value. Please use transaction mode as percentage - % to ensure guaranteed execution of transaction”. You will then have to change the Transaction Mode to Percentage and indicate the percentage as 100%.
Policy Base Currency
Display
When the Policy is selected, the corresponding Plan (or Policy) Base Currency is displayed here from the policy details record. This currency cannot be changed at this stage.
Transaction Mode
Mandatory
Select the mode in which the transaction must be put through, from the drop-down list. Transactions can be put through either by amount, percentage and units of holdings.
If you select the option ‘Units’ then the system defaults the following fields:
- Transaction Amount and Percentage of holdings field will be disabled and default amount will be zero.
Portfolio Switch
Optional
Select ‘Yes’ to indicate the switch is a complete or partial switch transaction within the funds in which the investor as invested. Portfolio switch is applicable to both transaction put through by amount or by percentage of holdings.
Percentage Holding
Numeric; 5 Characters;, Mandatory if Transaction Mode is ‘Percent’
If the specified Transaction Mode is ‘Percentage of Holdings’, then specify the percentage of the Policy Holder’s holdings that is to be reckoned as the transaction amount for this transaction.
When you specify this percentage, the transaction amount is computed and displayed in the ‘Transaction Amount’ field, and locked.
The percentage you specify here must not exceed one hundred.
Remarks
Alphanumeric, 255 Characters; Optional
Enter a brief description of the transaction, or any applicable remarks about the transaction.
Transaction Category
Alphanumeric; 1 Character; Optional
Select the transaction category from the adjoining option list.
Description
Display
The system displays the description for the selected transaction category.
Sub Type
Alphanumeric; 3 Characters; Mandatory
Specify the sub type of transaction.
Sub Type Description
Display
The system displays the description for the selected sub type.
Exchange Rate Details
The policy transaction currency can be different from the base currency of the policy. In this section, you can maintain the details related to the exchange rate to be used for currency conversion.
Amount Applied
Display
The amount calculated based on the exchange rate specified gets displayed here, after the calculation.
Source ID
Alphanumeric; 6 Characters; Optional
Specify the source from which the exchange rate is obtained or select the source ID from the option list provided.
Exchange Rate Applied
Numeric; 15 Characters; Optional
The exchange rate corresponding to the combination of policy base currency and policy transaction currency gets displayed here. The exchange rate for a switch transaction will be between policy base currency and transaction currency.
Override Exchange Rate
Optional
Select the option to indicate if you wish to override the exchange rate that gets defaulted. Select ‘Yes’ to indicate that you wish to override the exchange rate and ‘No’ to indicate otherwise.
FX Value Date
Date Format; Optional
Select the FX value date.
FX Deal Date
Date Format; Optional
Select the FX deal date.
Click ‘Enrich’ button to display the transaction details.
5.1.4 Asset Allocation Tab
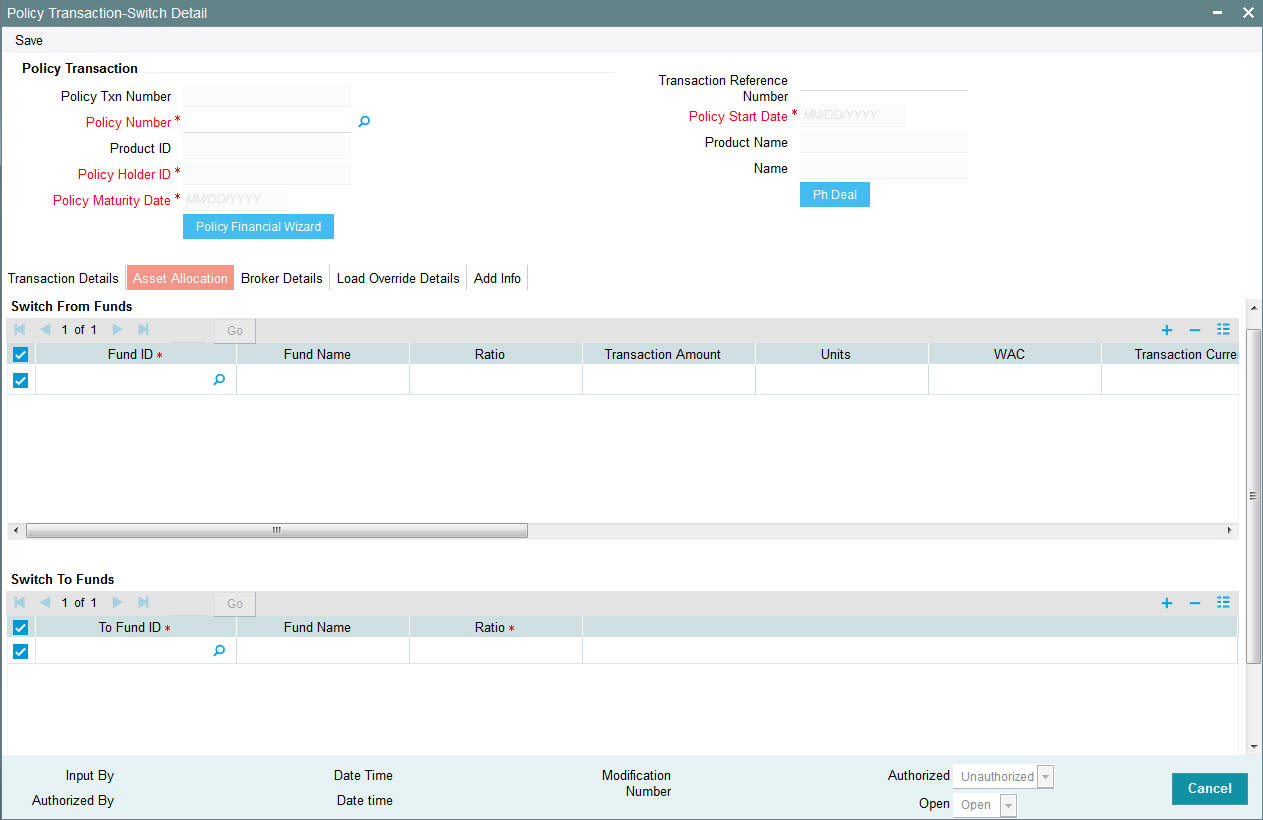
If the transaction amount that you enter is in different currencies, you need to mention the currency-wise details here.
Capture the funds FROM which the investment amount is being moved, in the Asset Allocation Details section of this tab:
Switch From Funds
Fund ID
Alphanumeric; 6 Characters; Mandatory
All the funds mapped for the selected Product where the Policy holder has a balance are displayed in the option list. Select funds FROM which you are moving the investment amount.
Fund Name
Display
The system displays the fund name for the selected fund ID.
Ratio
Numeric; 9 Characters; Optional
Specify the percentage of the amount that must be invested in each of the selected funds. The sum of all such percentages must add up to 100, and not fall below or exceed it. The percentages specified here must not be fractional. Typically, this field is only applicable for transactions for which the Transaction Mode is ‘Percentage’.
Note
If you have specified the investment amounts in each fund, the investment ratios are computed and displayed here, and this field is locked.
The latest investment ratio applicable for the Policy is displayed here when the form is opened. These values can be amended, and you can specify the required percentages.
If there are many currencies specified as part of settlements, then the system will not allow you to enter a ratio. Instead you need to enter the transaction currency and transaction amount for each currency. The system will compute and display the ratio based on the currency and amount details provided. To calculate the ratio, the transaction amounts will be converted to policy transaction currency based on the exchange rate defined in settlements.
If the settlements are maintained in only one currency, then you can enter either the ratio or the transaction amount
Transaction Amount
Numeric; 30 Characters; Optional
Specify the portion of the transaction amount/units that are to be invested in each of the selected funds. The sum of these amount/units must not be greater than the total transaction amount/units specified in the transaction details tab for this transaction.
If different currencies have been mentioned in settlements, then you can specify only the transaction amount. The system will default the ratio. If all the currencies in settlements are the same, then you can specify either the transaction amount or the ratio.
Note
If you have specified the investment ratios in each fund, the investment amounts are computed and displayed here, and this field is locked.
Units
Numeric; 27 Characters; Optional
Specify the units
WAC
Numeric; 30 Characters; Optional
Enter the Weighted Average Cost.
Transaction Currency
Alphanumeric; 3 Characters; Optional
Specify the transaction currency for the initial contribution. If many currencies have been mentioned in the settlements, then you are required to enter the amount for individual currencies. You can specify a transaction currency only if the transaction is amount-based..
Source ID
Alphanumeric; 6 Characters; Optional
The system will display the exchange source maintained at the default set-up in system parameters. You can change it by selecting the required exchange rate source from the adjoining option list. This will be used by the system to convert the transaction amount in terms of fund base currency.
Override Exchange Rate?
Optional
Select ‘Yes’ if you wish to change the exchange rate that is displayed here. If you select ‘Yes’, however, you need to specify the exchange rate to be used for the transaction in the ‘Exchange Rate Applied’ field. Select ‘No’ if you wish to retain the exchange rate that is displayed by the system
Exchange Rate Applied
Numeric; 21 Characters; Optional
The system will default the exchange rate available for the currency based on the exchange source specified. If you have elected to override the exchange rate, you need to enter the exchange rate to be used here. If exchange rate is not available, then the system will generate the transactions as incomplete ones. Such transactions can be enriched later through the ‘Policy Transaction Enrichment Screen’.
FX Deal Date
Date format; Optional
Select the FX deal date from the adjoining calendar.
FX Value Date
Date format; Optional
Select the FX value date from the adjoining calendar.
Auto Clear Provisional Balance
Mandatory
For a complete switch transaction, you can use this field to indicate that the outflow transaction should include units in provisional balance.
If the policy transaction already has an underlying UT transaction with this option checked, then system throws up a warning and tracks the provisionally allotted transactions for auto clearing.
Auto Clear Reinvestments
Mandatory
Use this field to indicate that for a complete switch transaction, the out flow transaction should include freeze held and reinvestment units.
Note
The ‘Auto Clear Provisional Balance’ and ‘Auto Clear Reinvestments’ fields will be checked or unchecked based on the specification for the same in the policy maintenance screen. However, you can change the defaulted value. These options will be enabled if the Percentage of Holdings is ‘100’.
KIID Compliant
Optional
Select if the policy is KIID compliant or not from the adjoining drop-down list. Following are the options available:
- Yes
- No
Switch To Funds
You can capture the funds INTO which the investment amount is being moved in the Switch Asset Allocation Details Section:,
To Fund ID
Alphanumeric; 6 Characters; Mandatory
All the funds mapped for the selected product are displayed in the option list. Select funds INTO which you are moving the investment amount.
Fund Name
Display
The system displays the fund name for the selected To Fund ID.
Ratio
Numeric; 9 Characters; Mandatory
Specify the ratio.
You can click delete icon to delete any specified fund.
Note
- If the ‘From’ and ‘To’ funds do not belong to the same AMC, the switch will be a pseudo-switch. The system will generate a redemption transaction on the same day and the subscription transaction on the settlement day. While doing a reversal for 100% Switch Transaction prior fee, system should throw an override able warning message if periodic fee has been charged for the switch.
- In policy portfolio switch, the system does not support the combination of Internal and External switch.
5.1.5 Broker Details Tab
The broker details can be fetched in the following two ways:
- It can be fetched directly by clicking ‘Fetch Broker Details’ button. The system will automatically default the broker details maintained at the policy level
- It can also be selected in the screen itself by clicking
add icon. Select the Broker Code from the option list. You should also
specify the split percentage. You can follow this step when you want
to fetch the broker details that are maintained at the policy level.
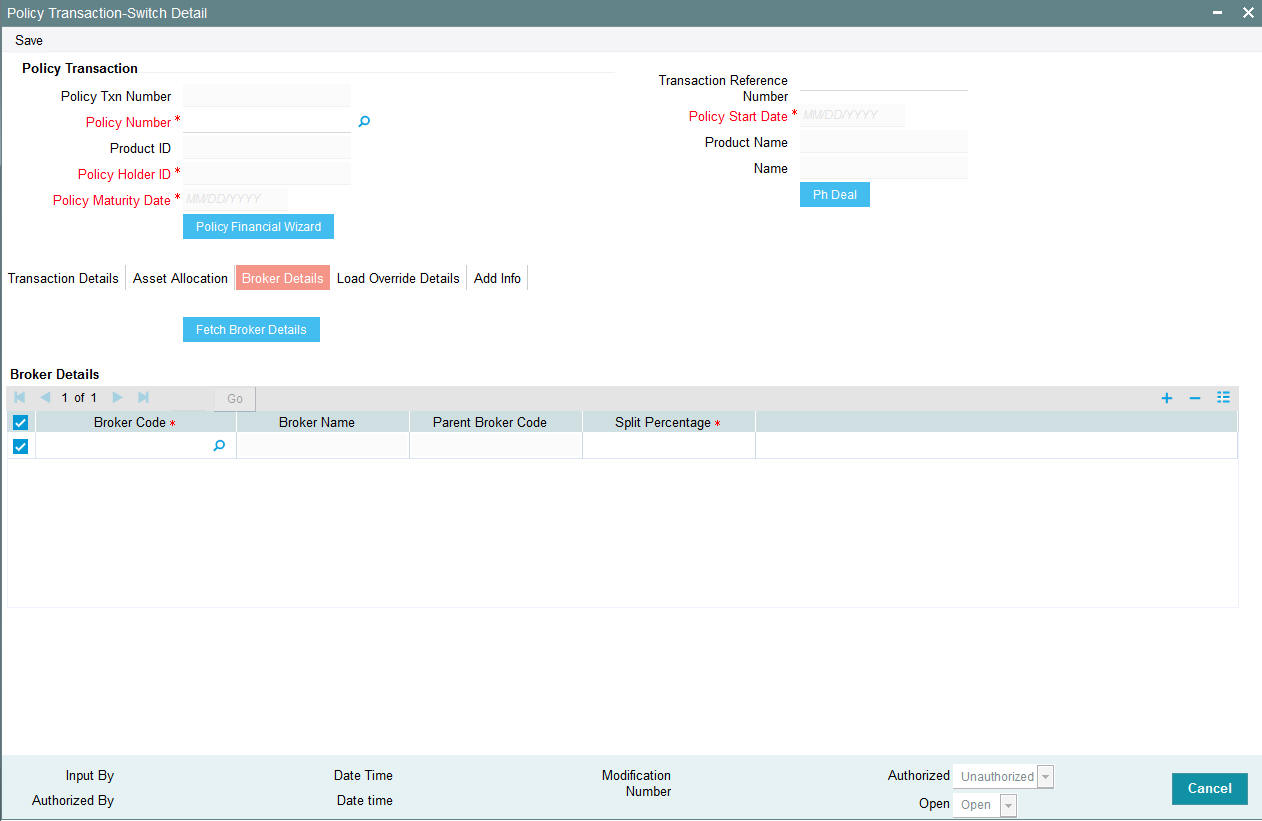
Click ‘Fetch Broker Details’ to view broker details. However, you can amend the values.
Broker Details
Broker Code
Alphanumeric; 12 Characters; Mandatory
Broker Code is defined when a broker is created. Select the broker code from the option list.
Broker Name
Display
Once you select the broker code, the broker name gets populated.
Parent Broker Code
Display
Once you select the broker code, system the parent broker code gets populated.
Split Percentage
Numeric; 5 Characters; Mandatory
Specify the percentage of the commission that the selected broker is entitled to receive on any transactions put through for the investor. When the Policy Number is selected the split percentage as mentioned in the policy is defaulted here.
This percentage must not exceed one hundred percent.
Note
If you specify more than one broker in this section, the split percentages for all brokers, when summed up, must not exceed or fall below one hundred percent.
5.1.6 Load Override Details Tab
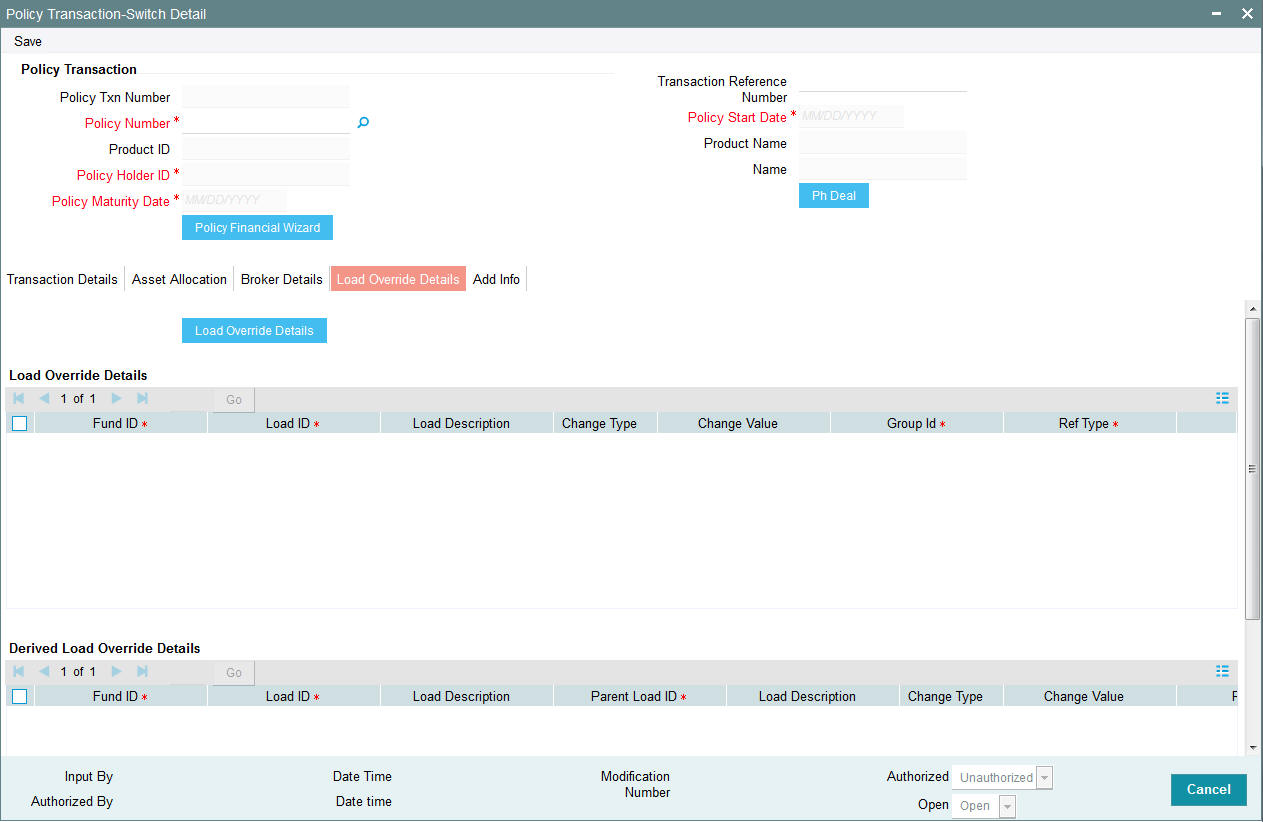
You can override or alter the value of load mapped to the selected fund. You can do so in the Load Override Details screen which is invoked when you click on the Load Override Details Link. The following details are displayed:
If you click ‘Load Override Details’ button, the system defaults the load details. If you do not click this button, then the system will not default even if the fund has load. In this case, load will get computed during allocation only.
Fund ID
Display
The system displays the fund ID.
Load ID
Display
The ID of the allocation time load that has been mapped to the fund for the transaction type is displayed here. The load ID is displayed as a link. To view details of the load, click the ID link.
If a derived load has been mapped, it is also displayed here and can be overridden.
Load Description
Display
The description of the allocation time load that has been mapped to the fund for the transaction type is displayed here.
Change Value
Display
The system displays the change value details.
Change Type
Display
When you override or alter an allocation time load at the time of entering a transaction, you can effect the change in any of the following ways:
- Discount (reducing the load return value in all the slabs)
- Increase (increasing the load return value in all slabs)
- Return Value (assigning an altered return value that will be applicable to all the loads)
Group ID
Display
The system displays the group ID.
Ref Type
Display
The system displays the reference type.
Derived Load Override Details
The system displays the following values:
Fund ID
Display
The system displays the fund ID.
Load ID
Display
The system displays the load ID.
Load Description
Display
The system displays the load description.
Parent Load ID
Display
The system displays the parent load ID.
Load Description
Display
The system displays the load description.
Change Type
Display
The system displays the change type.
Change Value
Display
The system displays the change value.
Ref Type
Display
The system displays the reference type.
5.1.7 Add Info Tab
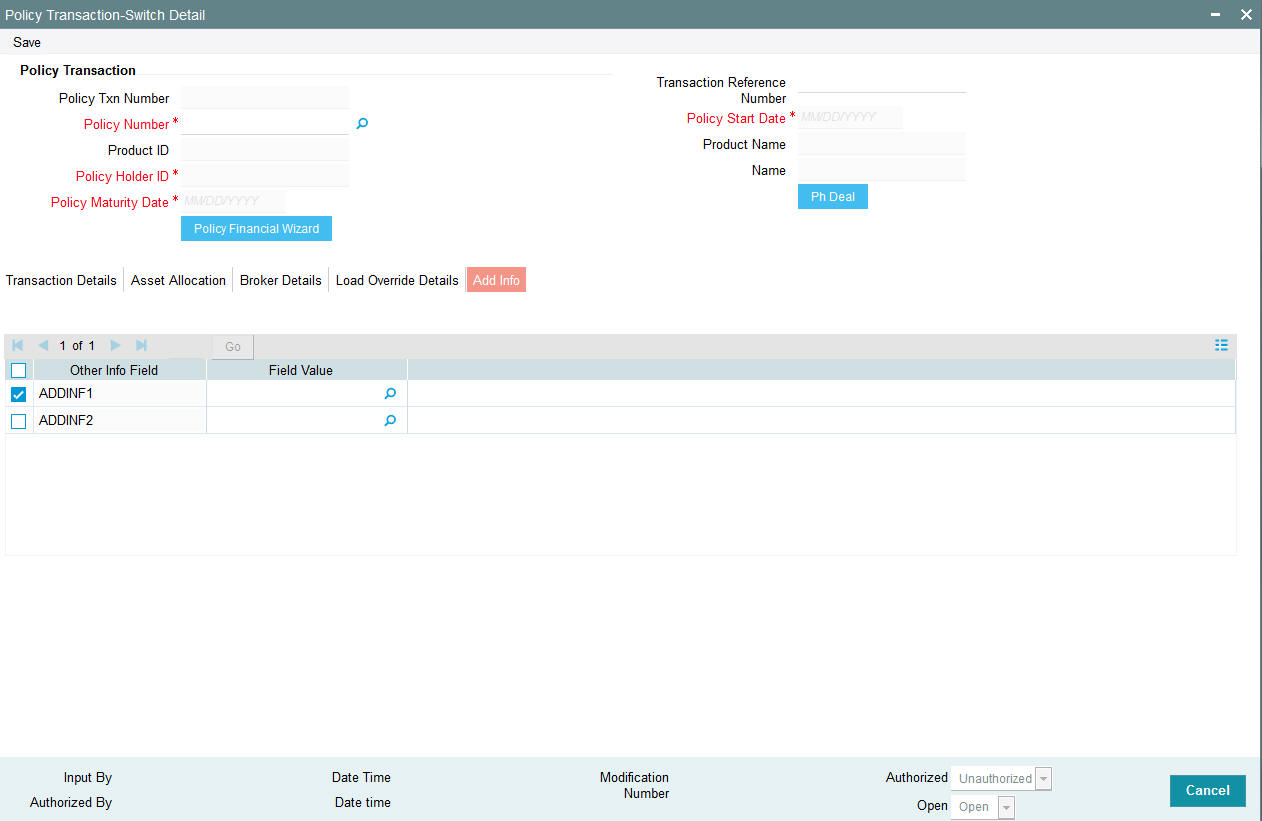
You can specify the following details:
Other Info Field
Display
The system displays the other information details.
Field Value
Alphanumeric; 60 Characters; Optional
Specify the field values.
5.1.8 Un-Allotted Fee Transaction
During the fee redemption transaction generation process, the system will check for 100% switch transaction that is Un-Allotted. If Un-allotted, then the fee transaction is reversed:
- If there is an external switch (Pseudo), the fee would be taken proportionately from the switch in fund/s by means of a fee override and the fee transaction would not get generated.
- If there is an internal switch, the fee transaction would be generated from the switch in fund
Note
And during the 100% switch transaction process, the system will check for any fee transaction that is un-allotted.
Annuity Transaction
When you have entered all the mandatory information for a 100% switch transaction, system checks if the annuity is applicable for the policy and the month.
If annuity is applicable for the policy system will calculate the next annuity generation date using annuity frequency & annuity payment lag. If difference between annuity generation date and 100% switch transaction date is greater than or equal to 6 days (External switch) or 4 days (Internal Switch, then system will check for the funds for which 100% switch is being processed are also part of the annuity asset allocation.
If funds are common between 100% switch transaction & annuity asset allocation then following warning message gets displayed:
Annuity transaction is applicable for this policy, are you sure you wish to proceed with this switch?
Select override, for the normal annuity transaction.
If difference between annuity generation date & 100% switch transaction date is less than 6 days (External switch) or 4 days(Internal Switch), then system will check for the funds for which 100% switch is being processed are also part of the annuity asset allocation.
If funds are common between 100% switch transaction and annuity asset allocation then the system will display an error message as ‘Annuity is in progress, this transaction can not be processed’.
If annuity has already been generated before the switch and If funds are common between 100% switch transaction and annuity asset allocation then the system will display an error message as ‘Annuity is in progress, this transaction can not be processed’.
User should not be allowed to proceed with the transaction.
5.1.9 Saving Information Entered
When you have entered all the mandatory information, click ‘Ok’ button.
The following message will be displayed:
The system displays the following confirmation message “Record Successfully Saved ”
This indicates the record has been saved. Click ‘Ok’ button.
5.1.10 Processing Back Data Propagation for Transactions
You can correct erroneous transactions as well as enter those that have been missed out and compute the effect these have on the current holdings of the unit holder through the back data propagation process. To facilitate this propagation process, two schemas are used – the business (or normal) schema and the report schema. You are required to enter the correct data in the business schema for the required transactions and select these for propagation, again from the business schema. The transactions will be simulated in the report schema and the results can be viewed in the business schema.
Refer the chapter ‘Back Data Propagation’ for more details on the back data propagation process
5.2 Policy Transaction Switch Summary Screen
This section contains the following topics:
- Section 5.2.1, "Retrieving Transaction Switch in Policy Transaction Switch Screen"
- Section 5.2.2, "Editing Transaction Switch"
- Section 5.2.3, "Viewing Transaction Switch"
- Section 5.2.4, "Deleting Transaction Switch"
- Section 5.2.5, "Authorizing Policy Switch"
- Section 5.2.6, "Amending Transaction Switch"
- Section 5.2.7, "Authorizing Amended Transaction Switch"
- Section 5.2.8, "Reversing Transaction Switch"
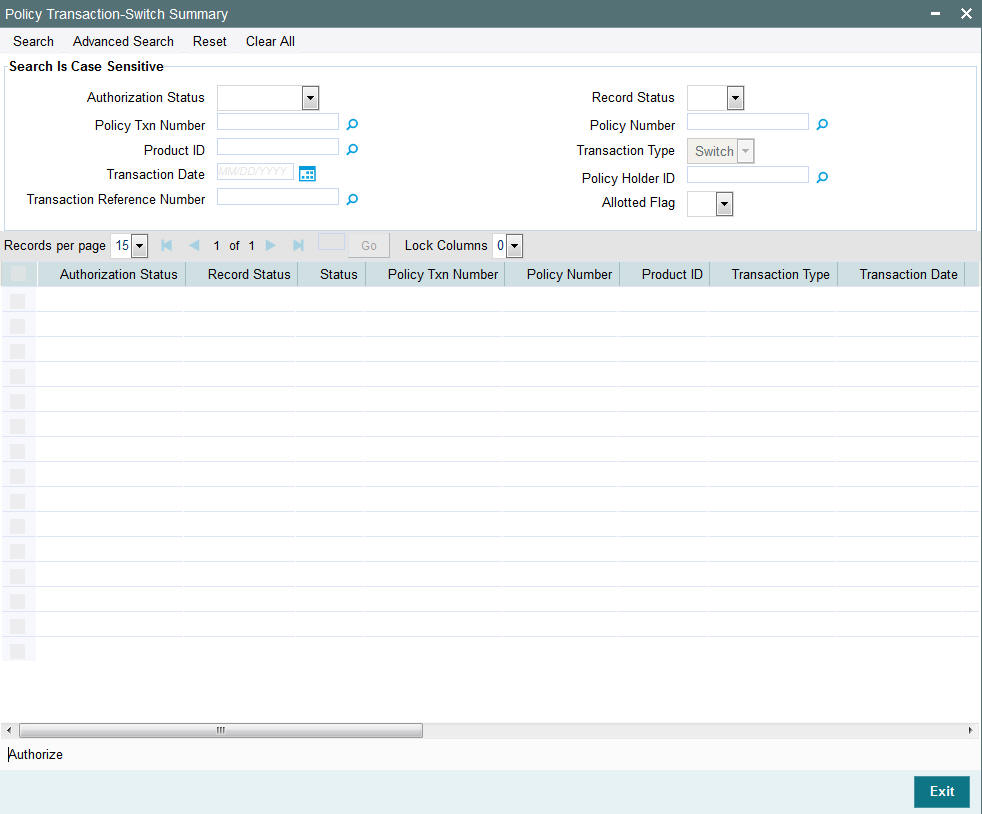
5.2.1 Retrieving Transaction Switch in Policy Transaction Switch Screen
You can retrieve a previously entered record in the Summary screen, as follows:
You can invoke the ‘Policy Transaction-Switch Summary’ screen by typing ‘LESPLSWI’ in the field at the top right corner of the Application tool bar and clicking on the adjoining arrow button.
Specify any or all of the following details in the Policy Transaction Switch Summary screen:
- Select the status of the record in the Authorization Status field. If you choose the “Blank Space” option, then all the records are retrieved.
- Select the status of the record in the Record Status field. If you choose the “Blank Space” option, then all the records are retrieved.
- Policy Txn Number
- Policy Number
- Product ID
- Transaction Type
- Transaction Date
- Policy Holder ID
- Transaction Reference Number
- Allotted Flag
After you have specified the required details, click ‘Search’ button. All records with the specified details are retrieved and displayed in the lower portion of the screen.
Note
You can also retrieve the individual record detail from the detail screen by doing query in the following manner:
- Press F7
- Input the Policy Transaction Number
- Press F8
You can perform Edit, Delete, Amend, Authorize, Reverse, Confirm operation by selecting from the Action list.
You can also search the record by using combination of % and alphanumeric value.
Example
You can search the record for Policy Transaction Number by using the combination of % and alphanumeric value as follows:
- Search by A%: System will fetch all the records whose Policy Transaction Number starts from Alphabet ‘A’. For example, AGC17, AGVO6, AGC74 etc.
- Search by %7: System will fetch all the records whose Policy Transaction Number ends by numeric value’ 7’. For example, AGC17, GSD267, AGC77 etc.
- Search by %17%: System will fetch all the records whose Policy Transaction Number contains the numeric value 17. For example, GSD217, GSD172, AGC17 etc.
- Search by 66%: System will fetch all the switch transactions.
5.2.2 Editing Transaction Switch
You can modify the details of a record that you have already entered into the system, provided it has not been subsequently authorized. You can perform this operation as follows:
- Invoke Policy Transaction Switch Summary screen from the Browser.
- Select the status of the record that you want to retrieve for modification in the Authorization Status field. You can only modify records that are unauthorized. Accordingly, choose the Unauthorized option from the drop down list.
- Specify any or all of the details of the record in the corresponding fields on the screen to retrieve the record that is to be modified. All unauthorized records with the specified details are retrieved and displayed in the lower portion of the screen.
- Double click the record that you want to modify in the list of displayed records. The Policy Transaction Switch Detail screen is displayed.
- Select Unlock Operation from Action list to modify the record. Modify the necessary information
- Click Save to save your changes. The Policy Transaction Switch Detail screen is closed and the changes made are reflected in the Policy Transaction Switch Summary screen.
5.2.3 Viewing Transaction Switch
To view a Policy Switch you have previously entered, you must retrieve the same in the Policy Transaction Switch Summary screen, as follows:
- Invoke the Policy Transaction Switch Summary screen from the browser.
- Select the status of the Policy that you want to retrieve for viewing in the Authorization Status field. You can also view all records that are either unauthorized or authorized only, by choosing the Unauthorized/ Authorized option.
- Specify any or all of the details of the records in the corresponding fields on the screen, and click ‘Search’ button. All records with the specified details are retrieved and displayed in the lower portion of the screen.
- Double click the record that you want to view in the list of displayed records, in the lower portion of the screen. The Policy Transaction Switch screen is opened in view mode.
5.2.4 Deleting Transaction Switch
You can delete only unauthorized records in the system.
To delete a record that you have previously entered, you must retrieve the same in the Policy Transaction Switch Summary screen, as follows:
- Invoke the Policy Transaction Switch Summary screen from the browser.
- Select the status of the record that you want to retrieve for deletion.
- Specify any or all of the details of the record in the corresponding fields on the screen, and click ‘Search’ button. All records with the specified details are retrieved and displayed in the lower portion of the screen.
- Double click the record that you want to delete in the list of displayed records, in the lower portion of the screen. The Policy Transaction Switch Detail screen is opened in View mode.
- Select Delete operation from the Action list. The system prompts you to confirm the deletion, and the record is deleted physically from the system database.
5.2.5 Authorizing Policy Switch
An unauthorized record must be authorized in the system for it to be processed. To authorize a record, you must first retrieve the same in the Policy Transaction Switch Summary screen.
- Invoke the Policy Transaction Switch Summary screen from the Browser.
- Select the status of the record that you want to retrieve for authorization. Typically, choose the Unauthorized option from the drop down list.
- Specify any or all of the details of the record in the corresponding fields on the screen. Click ‘Search’ button.. All records with the specified details that are pending authorization are retrieved and displayed in the lower portion of the screen.
- Double click the record that you wish to authorize. The Policy Transaction Switch Detail screen is opened in View mode.
- Select Authorize operation from Action list.
When the checker authorizes a record, details of validations, if any, that were overridden by the maker of the record during the Save operation, are displayed. If any of these overrides results in an error, the checker must reject the transaction.
5.2.6 Amending Transaction Switch
After a record is authorized, it can be modified using the Unlock operation from Action list. To make changes to a record after authorization, you must invoke the Unlock operation which is termed as Amend Operation.
- Invoke the Policy Transaction Switch Summary screen from the Browser.
- Select the status of the record that you wish to retrieve for amendment. You can only amend records that are authorized.
- Specify any or all of the details of the record in the corresponding fields on the screen. All records with the specified details are retrieved and displayed in the lower portion of the screen.
- Double click the record that you want to amend. The Policy Transaction Switch screen will be displayed in Amendment mode. Click the Unlock operation from the Action list to amend the record.
- Amend the necessary information. Click the Save button to save your changes.
5.2.7 Authorizing Amended Transaction Switch
An amended policy must be authorized for the amendment to be made effective in the system.
Authorization of amended records can only be done from Fund Manager Module and Agency branch Module. The process of authorization is subsequently the same as that for normal transactions.
5.2.8 Reversing Transaction Switch
You can reverse a policy that you have already entered into the system, provided it has not been subsequently authorized. You can perform this operation as follows:
- Invoke the Policy Transaction Switch Summary screen from the browser.
- Select the status of the record that you want to retrieve for reversal.
- Specify any or all of the details of the record in the corresponding fields on the screen, and click ‘Search’ button. All records with the specified details are retrieved and displayed in the lower portion of the screen.
- Double click the record that you want to reverse in the list of displayed records, in the lower portion of the screen. The Policy Transaction Switch Detail screen is opened in View mode.
- Select Reverse operation from the Action list. The system prompts you to confirm the reversal of record.
- Click the Save button to save your changes.
Refer to the chapter ‘Allocation Details’ for information on the Allocation Details screen