2. Pension Funds Administration
Oracle FLEXCUBE Investor Servicing component allows you to handle occupational pension and personal pension administration.
This chapter contains the following sections:
- Section 2.1, "Introduction"
- Section 2.2, "Linkage between TA and PA"
- Section 2.3, "Module Default Information"
- Section 2.4, "Defaults Maintenance"
- Section 2.5, "Parameter Setup"
- Section 2.6, "Additional Information Maintenance"
- Section 2.7, "Entity Additional Information Mapping"
- Section 2.8, "Country Currency"
- Section 2.9, "Currency Maintenance"
- Section 2.10, "Source Currency Pair"
- Section 2.11, "Holiday Maintenance"
- Section 2.12, "Exchange Rate"
- Section 2.13, "Entity Mapping"
- Section 2.14, "Exchange Rate Source Mapping"
- Section 2.15, "Clearing Users"
- Section 2.16, "Asset Class Definition"
- Section 2.17, "Asset Class Definition Summary"
- Section 2.18, "Instrument Definition"
- Section 2.19, "Instrument Definition Summary"
- Section 2.20, "Rule Definition"
- Section 2.21, "Rule Definition Summary"
- Section 2.22, "Portfolio Type Maintenance"
- Section 2.23, "Portfolio Type Maintenance Summary"
- Section 2.24, "Portfolio Definition"
- Section 2.25, "Portfolio Definition Summary"
- Section 2.26, "Bank Details"
- Section 2.27, "Bank Details Summary"
- Section 2.28, "Identification Details"
- Section 2.29, "Identification Details Summary"
- Section 2.30, "Address Details"
- Section 2.31, "Address Details Summary"
- Section 2.32, "Party Maintenance"
- Section 2.33, "Party Maintenance Summary"
- Section 2.34, "Party Role Mapping"
- Section 2.35, "Role Mapping Summary"
- Section 2.36, "Investment Account"
- Section 2.37, "Investment Account Summary"
- Section 2.38, "Investment Account Status Change Maintenance"
- Section 2.39, "Investment Account Status Change Summary"
- Section 2.40, "Portfolio Mapping"
- Section 2.41, "Portfolio Mapping Summary"
- Section 2.42, "Investment Detail"
- Section 2.43, "Investment Summary"
- Section 2.44, "Payment Clearing Screen"
- Section 2.45, "Withdrawal Detail"
- Section 2.46, "Withdrawal Summary"
- Section 2.47, "Switch Detail"
- Section 2.48, "Switch Summary"
- Section 2.49, "Order Status of Orders"
- Section 2.50, "Allocation Details"
- Section 2.51, "View Portfolio Balance"
- Section 2.52, "Interface Maintenance"
- Section 2.53, "Interface Maintenance Summary Screen"
- Section 2.54, "Party Role Migration"
- Section 2.55, "Party Role Migration Summary"
- Section 2.56, "Party Data Merger Screen"
- Section 2.57, "Instruction Date Update Screen"
- Section 2.58, "Order Summary"
- Section 2.59, "Process Group Pension Order"
- Section 2.60, "EOD Maintenance"
- Section 2.61, "Online Interface Execution"
- Section 2.62, "Upload Status Summary"
- Section 2.63, "Pre End of Day Check"
- Section 2.64, "EOD Execution"
- Section 2.65, "Upload Status Report"
- Section 2.66, "Consent Maintenance Detail"
- Section 2.67, "Consent Maintenance Summary"
2.1 Introduction
Pension record will interact with TA system for order processing. Functional environment is as follows:

You can fetch report pertaining to UH in TA, (UH which got generated as a result of orders from Pension Administration).
Following list of parameters will be used for Pension Administration module:
Param Code |
Description |
Whether User Maintainable |
ASSETCLASSDETAILS |
Asset Class list |
Yes |
CALENDARTYPE |
Calendar Types |
No |
COMPLIANCECODES |
The regulatory rule applicable |
Yes |
COUNTRYCODES |
ISO Country Codes |
Yes |
DEALINGTYPE |
Dealing Types |
Yes |
ENTITYTITLE |
Title list for entities |
Yes |
HEALTHSTATUS |
Health Status of the unitholder |
No |
IDENTIFICATIONTYPE |
Identification types for unitholders |
Yes |
INDINVCATEGORY |
Individual Investor Categories |
Yes |
INSTRUMENTTYPE |
Instrument types |
Yes |
INTDIALCODE |
The International Dialing Country Code |
Yes |
INVACCSTATUS |
Investment Account Status |
Yes |
LIMITPERIOD |
Limit Period |
No |
MARITALSTATUS |
Marital Status |
No |
OCCUPATIONTYPE |
Occupation types for individual unitholders |
Yes |
OWNERSHIPTYPE |
Ownership Type |
Yes |
PARTYROLELIST |
Party role list |
No |
PASTRANSACTIONTYPE |
PAS Transaction Type |
No |
PENSIONACCSTATUS |
PENSION ACCOUNT STATUS |
Yes |
SEX |
Sex |
No |
PASIVTXNSUBTYPE |
PAS Investment Transaction Sub Types |
Yes |
PASWDTXNSUBTYPE |
PAS Withdrawal Transaction Sub Types |
Yes |
PASSWTXNSUBTYPE |
PAS Switch Transaction Sub Types |
Yes |
PAPDISCONTRIBUTIONCCY |
PAPDIS contribution currency |
Yes |
Note
These set of parameters are common for both LOB and PAS in integrated setup.
2.2 Linkage between TA and PA
You can link TA and Pension Administration using a scheduler. Orders, brokers will be handed off and on from and to PA with the schedulers.
An export interface will create a file in the path which will be used by an import interface to upload the data to a system.
Data will move from one system to the other either on auth, pre EOD, EOD, BOD or an event.This would be based on the scheduler configuration.
Following are the applicable event codes for Pension Administration system for users to define event based scheduler configuration:
EVENTCODE |
EVENTDESCRIPTION |
BE00001 |
BOD Completed |
BE00002 |
EOD Started |
BE00003 |
EOD Completed |
BEPREEOD |
Pre-EOD completed |
The system will hand-off the amendment of address and ID detail in party to TA through interfaces only if the party has investment account mapped to a portfolio.
If any address is expired then the hand-off will be done accordingly and new address will be in effect for the relative UH.
For a party with multiple ID details, the system will hand-off only first ID detail to TA.
You can specify a deal for the UH created due to order import coming from PA.
For a UH created by order import, the reference number of UH will be investment account number of the party and this linkage will be maintained in an external table.However for the UH created, UH ID will be the reference number when queried in front end.
You need to create a new bulk client code named PA under UH bulk client details in order to Import PA Orders to TA
A ‘TA to PA module handoff’ EOD batch hands-off allocated transactions from PA to TA. The PA allocation handoff (IF20192130001601) will generate files only when this batch is completed in EOD activity.
You can copy a UH from PA, but while amending this UH the system will validate the same since the UH category will be P.
2.3 Module Default Information
This section contains the following topics:
Section 2.3.1, "Invoking Module Default Detail Screen"
2.3.1 Invoking Module Default Detail Screen
You can maintain module defaults and holiday preferences for PAS module using ‘Module Default Detail’ screen. You can invoke this screen by typing UTDMODDE in the field at the top right corner of the Application tool bar and clicking the adjoining arrow button.
For further details, refer ‘Module Default Detail’ section in ‘Overview’ chapter in ‘Reference_Information’ user manual.
2.4 Defaults Maintenance
This section contains the following topics:
Section 2.4.1, "Invoking Defaults Maintenance Screen"
2.4.1 Invoking Defaults Maintenance Screen
You can change the defaults for the currently logged module using ‘Defaults Maintenance’ screen. You can invoke this screen by typing ‘PADDEFMT/ UTDDEFMT’ in the field at the top right corner of the Application tool bar and clicking on the adjoining arrow button.
For further details, refer ‘System Default Information’ section in ‘Maintaining System Parameters’ chapter in ‘Reference_Information’ user manual.
2.5 Parameter Setup
This section contains the following topics:
Section 2.5.1, "Invoking Parameter Setup Detail Screen"
2.5.1 Invoking Parameter Setup Detail Screen
You can view and modify the parameters for the system using ‘Parameter Setup Detail’ screen. You can invoke this screen by typing ‘UTDPARAM’ in the field at the top right corner of the Application tool bar and clicking on the adjoining arrow button.
For further details, refer ‘System Parameters’ section in ‘Maintaining System Parameters’ chapter in ‘Reference_Information’ user manual.
2.6 Additional Information Maintenance
This section contains the following topics:
Section 2.6.1, "Invoking Additional Information Maintenance Screen"
2.6.1 Invoking Additional Information Maintenance Screen
You can create custom and non-customer additional information using ‘Additional Information Maintenance’ screen. You can invoke this screen by typing ‘UTDADINF’ in the field at the top right corner of the Application tool bar and clicking on the adjoining arrow button.
Additional Information will not flow from Pension Administration PA to TA and vice versa.
For further details, refer ‘Additional Information Heads’ section in ‘Maintaining System Parameters’ chapter in ‘Reference_Information’ user manual.
2.7 Entity Additional Information Mapping
This section contains the following topics:
Section 2.7.1, "Invoking Entity Additional Information Mapping Screen"
2.7.1 Invoking Entity Additional Information Mapping Screen
You can map additional information to an entity using ‘Entity Additional Information Mapping’ screen. You can invoke this screen by typing ‘UTDENMAP’ in the field at the top right corner of the Application tool bar and clicking on the adjoining arrow button.
For further details, refer ‘Entity Additional Information Mapping’ section in ‘Maintaining System Parameters’ chapter in ‘Reference_Information’ user manual.
2.8 Country Currency
This section contains the following topics:
2.8.1 Invoking Country Currency Screen
To set up the country-currency association, use the ‘Country Currency Maintenance Detail’ screen. You can invoke this screen by typing ‘UTDCONCU’ in the field at the top right corner of the Application tool bar and clicking on the adjoining arrow button.
For further details, refer ‘Country Association with its Currency’ section in ‘Maintaining Currencies’ chapter in ‘Reference_Information’ user manual.
2.9 Currency Maintenance
This section contains the following topics:
2.9.1 Invoking Currency Maintenance Screen
You can use the ‘Currency Maintenance Detail’ screen to set up the currencies in the system. You can invoke this screen by typing ‘UTDCURMA’ in the field at the top right corner of the Application tool bar and clicking on the adjoining arrow button.
For further details, refer ‘Currency Maintenance’ section in ‘Maintaining Currencies’ chapter in ‘Reference_Information’ user manual.
2.10 Source Currency Pair
This section contains the following topics:
Section 2.10.1, "Invoking Source Currency Pair Maintenance Screen"
2.10.1 Invoking Source Currency Pair Maintenance Screen
You can map source to the currencies using ‘Source Currency Pair Maintenance Detail’ screen. You can invoke this screen by typing ‘UTDSORCE’ in the field at the top right corner of the Application tool bar and clicking on the adjoining arrow button.
For further details, refer ‘Exchange Rate Sources’ section in ‘Maintaining Currencies’ chapter in ‘Reference_Information’ user manual.
2.11 Holiday Maintenance
This section contains the following topics:
Section 2.11.1, "Invoking Holiday Maintenance Screen"
2.11.1 Invoking Holiday Maintenance Screen
You can maintain system holidays in ‘Holiday Maintenance’ screen. You can invoke this screen by typing ‘UTDHOLID’ in the field at the top right corner of the Application tool bar and clicking the adjoining arrow button.
For further details, refer ‘Holiday Maintenance’ section in ‘Maintaining Reference Information’ chapter in ‘Reference_Information’ user manual.
2.12 Exchange Rate
This section contains the following topics:
2.12.1 Invoking Exchange Rate Maintenance Screen
You can maintain exchange rate for the currency and source using ‘Exchange Rate Maintenance’ screen. You can invoke this screen by typing ‘UTDEXCRM’ in the field at the top right corner of the Application tool bar and clicking on the adjoining arrow button.
For further details, refer ‘Exchange Rates’ section in ‘Maintaining Currencies’ chapter in ‘Reference_Information’ user manual.
2.13 Entity Mapping
This section contains the following topics:
2.13.1 Invoking Entity Mapping Screen
You can map an entity to PAS module using ‘Entity Mapping’ screen. You can invoke this screen by typing ‘UTDENTMP’ in the field at the top right corner of the Application tool bar and clicking on the adjoining arrow button.
For further details, refer ‘Entity Mapping Detail’ section in ‘Maintaining Reference Information’ chapter in ‘Reference_Information’ user manual.
2.14 Exchange Rate Source Mapping
This section contains the following topics:
2.14.1 Invoking Exchange Rate Source Mapping Details Screen
You can map an exchange rate source to the PAS module using ‘Exchange Rate Source Mapping Detail’ screen. You can invoke this screen by typing ‘UTDEXRMP’ in the field at the top right corner of the Application tool bar and clicking the adjoining arrow button.
For further details, refer ‘Exchange Rate Source Mapping for Different Schemas’ section in ‘Setting up Loads’ chapter in ‘Reference_Information’ user manual.
2.15 Clearing Users
This section contains the following topics:
2.15.1 Invoking Clear User Profile Detail Screen
If a user exits the system abnormally, the administrative users can clear the logged in user profile so that the user can log in normally again
To clear a user, log in to the system as an administrative user, and type ‘’PADCLUSR’ in the field at the top right corner of the Application tool bar and click the adjoining arrow. The ‘Clear User Profile Detail’ screen is displayed.
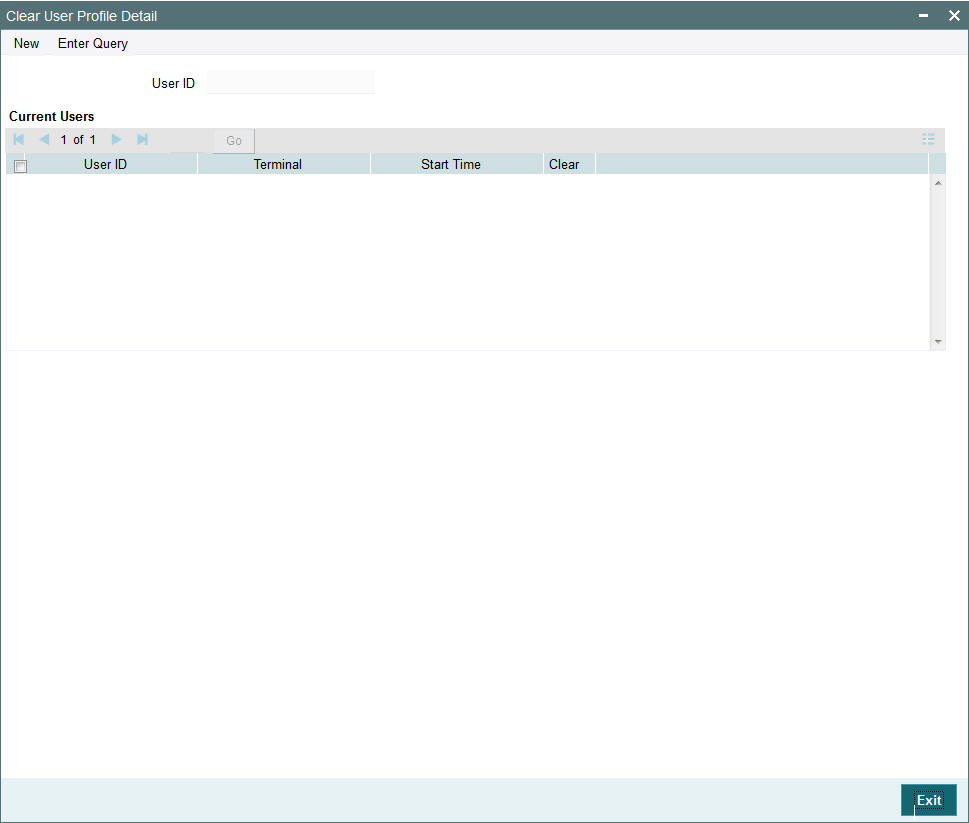
User ID
Display
The system displays the user ID.
Current Users
The system displays the following values:
- User ID
- Terminal
- Start Time
Clear
Optional
Select if the specified user has to be cleared or not from he drop-down list. The list displays the following values:
- Yes
- No
In this screen, press F7 and select the User ID from the adjoining option list which displays the users logged in currently. After specifying the user id to be cleared, press F8. Upon pressing F8, system displays the User ID, terminal and start time information. Select the option ‘Yes’ from ‘Clear’ drop-down to clear the selected user.
Now click on the unlock icon from the toolbar menu and then click on save icon. The system will clear the selected user id and will display the Information message:

Click on OK to confirm.
To clear a user, check ‘Clear’ in the required row, and then click ‘Clear’ button.
2.16 Asset Class Definition
This section contains the following topics:
2.16.1 Invoking Asset Class Definition Detail Screen
You can maintain different asset classes which are managed by the pension service provider. Assets can be either managed or held away assets. You can define an asset class using ‘Asset Class Definition Detail’ screen. You can invoke this screen by typing ‘PADASDEF’ in the field at the top right corner of the Application tool bar and clicking on the adjoining arrow button.
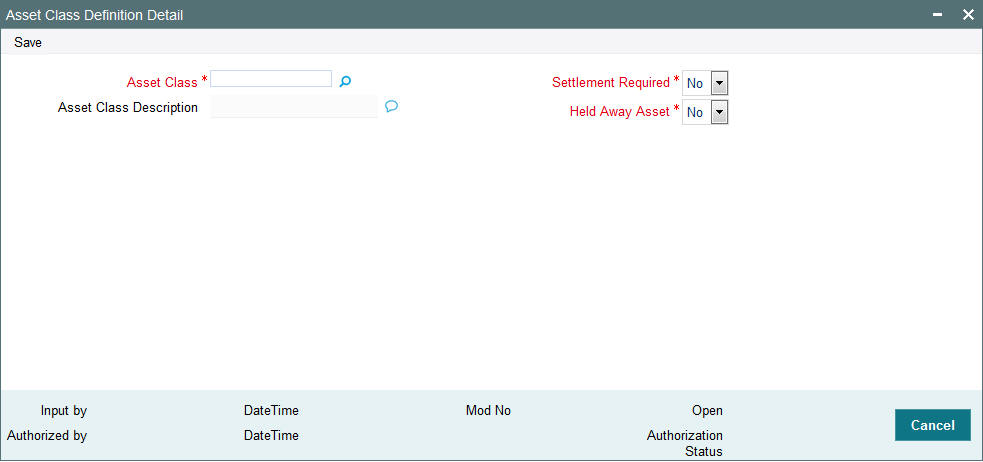
You can specify the following details:
Asset Class
Alphanumeric; 10 Characters; Mandatory
Specify the asset class code. Alternatively, you can select asset class code from the option list. The list displays all valid asset code maintained in the system.
Note
You need to maintain one class of type MF if it is integrated with a TA.
Asset Class Description
Display
The system displays the description for the selected asset class code.
Settlement Required
Mandatory
Select if the settlement is required for that particular asset class or not from the drop-down list. The list displays the following values:
- Yes
- No
Note
This field is applicable only for managed assets.
Held Away Asset
Mandatory
Select if the held away asset is required or not from the drop-down list. The list displays the following values:
- Yes
- No
2.17 Asset Class Definition Summary
This section contains the following topics:
- Section 2.17.1, "Retrieving a Record in Asset Class Definition Summary Screen"
- Section 2.17.2, "Editing Asset Class Definition Record"
- Section 2.17.3, "Viewing Asset Class Definition Record"
- Section 2.17.4, "Deleting Asset Class Definition Record"
- Section 2.17.5, "Authorizing Asset Class Definition Record"
- Section 2.17.6, "Amending Asset Class Definition Record"
- Section 2.17.7, "Authorizing Amended Asset Class Definition Record"
2.17.1 Retrieving a Record in Asset Class Definition Summary Screen
You can retrieve a previously entered record in the Summary screen, as follows:
Invoke the ‘Asset Class Definition Summary’ screen by typing ‘PASASDEF’ in the field at the top right corner of the Application tool bar and clicking on the adjoining arrow button and specify any or all of the following details in the corresponding details.
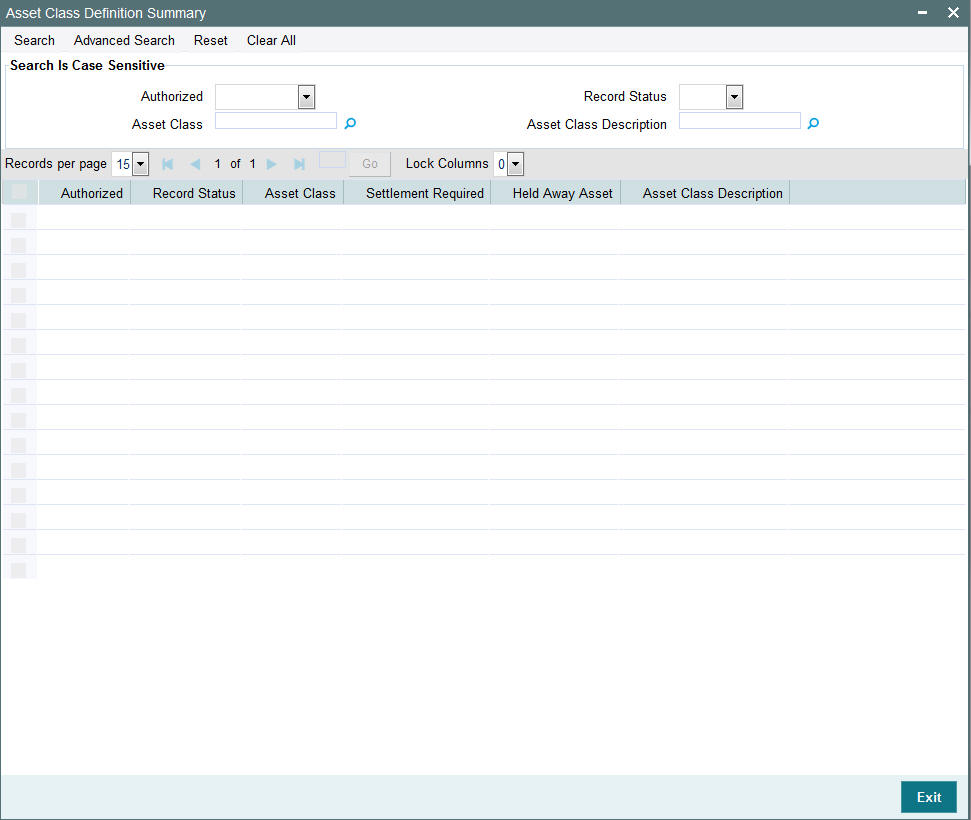
- The status of the record in the Authorization Status field. If you choose the ‘Blank Space’ option, then all the records are retrieved.
- The status of the record in the Record Status field. If you choose the ‘Blank Space’ option, then all records are retrieved
- Asset Class
- Asset Class Definition
Click ‘Search’ button to view the records. All the records with the specified details are retrieved and displayed in the lower portion of the screen.
Note
You can also retrieve the individual record detail from the detail screen by querying in the following manner:
- Press F7
- Input the Asset Class
- Press F8
You can perform Edit, Delete, Amend, Authorize, operations by selecting the operation from the Action list. You can also search a record by using a combination of % and alphanumeric value
2.17.2 Editing Asset Class Definition Record
You can modify the details of Asset Class Definition record that you have already entered into the system, provided it has not subsequently authorized. You can perform this operation as follows:
- Invoke the Asset Class Definition Summary screen from the Browser.
- Select the status of the record that you want to retrieve for modification in the Authorization Status field. You can only modify records that are unauthorized. Accordingly, choose the Unauthorized option.
- Specify any or all of the details in the corresponding fields to retrieve the record that is to be modified.
- Click ‘Search’ button. All unauthorized records with the specified details are retrieved and displayed in the lower portion of the screen.
- Double click the record that you want to modify in the list of displayed records. The Asset Class Definition Detail screen is displayed.
- Select Unlock Operation from the Action list to modify the record. Modify the necessary information.
Click Save to save your changes. The Asset Class Definition Detail screen is closed and the changes made are reflected in the Asset Class Definition Summary screen.
2.17.3 Viewing Asset Class Definition Record
To view a record that you have previously input, you must retrieve the same in the Asset Class Definition Summary screen as follows:
- Invoke the Asset Class Definition Summary screen from the Browser.
- Select the status of the record that you want to retrieve for viewing in the Authorization Status field. You can also view all records that are either unauthorized or authorized only, by choosing the unauthorized / Authorized option.
- Specify any or all of the details of the record in the corresponding fields on the screen.
- Click ‘Search’ button. All records with the specified fields are retrieved and displayed in the lower portion of the screen.
- Double click the record that you want to view in the list of displayed records. The Asset Class Definition Detail screen is displayed in View mode.
2.17.4 Deleting Asset Class Definition Record
You can delete only unauthorized records in the system. To delete a record that you have previously entered:
- Invoke the Asset Class Definition Summary screen from the Browser.
- Select the status of the record that you want to retrieve for deletion.
- Specify any or all of the details in the corresponding fields on the screen.
- Click ‘Search’ button. All records with the specified fields are retrieved and displayed in the lower portion of the screen.
- Double click the record that you want to delete in the list of displayed records. The Asset Class Definition Detail screen is displayed.
- Select Delete Operation from the Action list. The system prompts you to confirm the deletion and the record is physically deleted from the system database.
2.17.5 Authorizing Asset Class Definition Record
An unauthorized Asset Class Definition record must be authorized in the system for it to be processed. To authorize a record:
- Invoke the Asset Class Definition Summary screen from the Browser.
- Select the status of the record that you want to retrieve for authorization. Typically, choose the unauthorized option.
- Specify any or all of the details in the corresponding fields on the screen.
- Click ‘Search’ button. All records with the specified details that are pending authorization are retrieved and displayed in the lower portion of the screen.
- Double click the record that you wish to authorize. The Asset Class Definition Detail screen is displayed. Select Authorize operation from the Action List.
When a checker authorizes a record, details of validation, if any, that were overridden by the maker of the record during the Save operation are displayed. If any of these overrides results in an error, the checker must reject the record.
2.17.6 Amending Asset Class Definition Record
After a Asset Class Definition record is authorized, it can be modified using the Unlock operation from the Action List. To make changes to a record after authorization:
- Invoke the Asset Class Definition Summary screen from the Browser.
- Select the status of the record that you want to retrieve for authorization. You can only amend authorized records.
- Specify any or all of the details in the corresponding fields on the screen.
- Click ‘Search’ button. All records with the specified details that are pending authorization are retrieved and displayed in the lower portion of the screen.
- Double click the record that you wish to authorize. The Asset Class Definition Detail screen is displayed in amendment mode. Select Unlock operation from the Action List to amend the record.
- Amend the necessary information and click on Save to save the changes
2.17.7 Authorizing Amended Asset Class Definition Record
An amended Asset Class Definition record must be authorized for the amendment to be made effective in the system.
The subsequent process of authorization is the same as that for normal transactions.
2.18 Instrument Definition
This section contains the following topics:
- Section 2.18.1, "Invoking Instrument Definition Screen"
- Section 2.18.2, "Basic Info Tab"
- Section 2.18.3, "Related Parties Tab"
- Section 2.18.4, "Bank Details Tab"
- Section 2.18.5, "Asset Allocation Tab"
- Section 2.18.6, "Limits Tab"
2.18.1 Invoking Instrument Definition Screen
You can define different instruments for investment along with limits using ‘Instrument Definition’ screen.
Assets need not be mapped for the instrument for which both asset class and Instrument type are not MF. The system will not validate the Asset ID passed in the upload template for Held away asset. You can use the instrument without asset for held away asset upload.
You can invoke ‘Instrument Definition’ screen by typing ‘PADINSDF’ in the field at the top right corner of the Application tool bar and clicking on the adjoining arrow button.

You can specify the following details:
Instrument ID
Alphanumeric; 16 Characters; Mandatory
Specify unique ID for an investment instrument.
Instrument Name
Alphanumeric; 60 Characters; Mandatory
Specify the instrument name.
Rule Effective Date
Date Format; Mandatory
Select the rule effective date from the adjoining calendar.
Note
The rule effective date cannot be back dated.
2.18.2 Basic Info Tab
Click ‘Basic Info’ tab in ‘Instrument Definition’ screen to specify the basic information.
You can specify the following details:
Asset Class
Alphanumeric; 10 Characters; Mandatory
Specify the asset class code. Alternatively, you can select asset class code from the option list. The list displays all valid asset class code maintained in the system.
Asset Class Description
Display
The system displays the description for the selected asset class code.
Instrument Type
Alphanumeric; 3 Characters; Mandatory
Specify the type of instrument. Alternatively, you can select instrument type from the option list. The list displays all valid instrument type maintained in the system.
Note
Asset class and Instrument type should be set to MF if it is integrated with a TA
Instrument Type Description
Display
The system displays the description for the selected instrument type.
Instrument Base Currency
Alphanumeric; 3 Characters; Mandatory
Specify the instrument base currency. Alternatively, you can select instrument base currency from the option list. The list displays all valid instrument base currency maintained in the system.
Base Currency Description
Display
The system displays the description for the selected instrument base currency.
Instrument Base Country
Alphanumeric; 3 Characters; Mandatory
Specify the instrument base country. Alternatively, you can select instrument base country from the option list. The list displays all valid instrument base country maintained in the system.
Base Country Description
Display
The system displays the description for the selected instrument base country.
Fiscal Start Date
Date Format; Mandatory
Select the financial year start date from the adjoining calendar.
Fiscal End Date
Date Format; Mandatory
Select the financial year end date from the adjoining calendar.
2.18.3 Related Parties Tab
You can maintain related parties like trustee, custodian etc as parties in the system through party maintenance and also assign appropriate roles through party role maintenance system.
You can capture instrument administrator as related party and there can be only one instrument administrator mapped to the instrument. If more than one instrument administrator is attached to an instrument, then the system displays an error message.
Click ‘Related Parties’ tab in ‘Instrument Definition’ screen to specify related parties details.
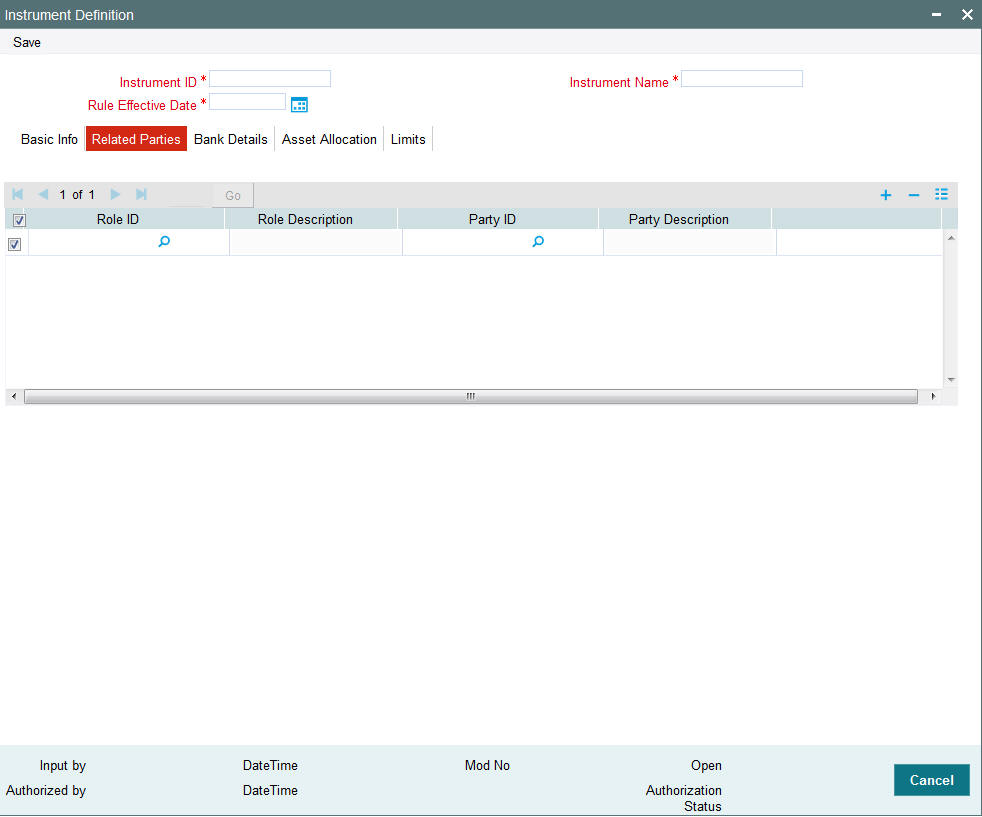
You can specify the following details:
Role ID
Alphanumeric; 2 Characters; Optional
Specify the role ID. Alternatively, you can select role ID from the option list. The list displays all valid role ID maintained in the system.
Role Description
Display
The system displays the description for the selected role ID.
Party ID
Alphanumeric; 16 Characters; Optional
Specify the party ID. Alternatively, you can select party ID from the option list. The list displays all valid party ID maintained in the system.
Party Description
Display
The system displays the description for the selected party ID.
2.18.4 Bank Details Tab
You can capture bank details of instrument administrators bank accounts with account currency matching instrument currency as Instrument Bank account.
Click ‘Bank Details’ tab in ‘Instrument Definition’ screen to specify bank details of instrument administrators.
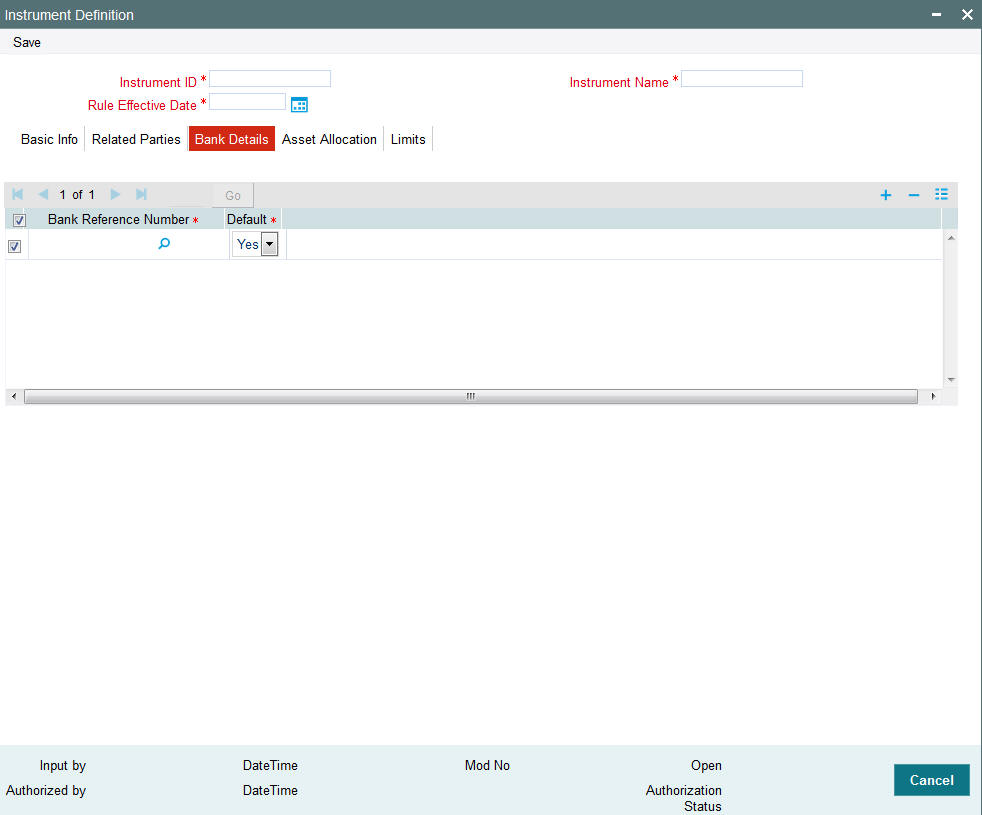
You can specify the following details:
Bank Reference Number
Alphanumeric; 16 Characters; Mandatory
Specify the unique reference number of bank account. Alternatively, you can select bank reference number from the option list. The list displays all valid bank reference number of the instrument administrator in instrument currency.
Default
Mandatory
Select ‘Yes’ option from the drop-down list to default bank account details. Else select ‘No’.
2.18.5 Asset Allocation Tab
You can maintain underlying assets with investment ratio for the instrument. The system lists the fees/ charges applicable for each assets. You cannot remove an asset from the instrument if it is part of investment portfolio. You need to remove the same from portfolio mapping and then remove from instrument.
If an asset is added with over-ridable as ‘No’, the system will add an asset to the portfolio where the instrument is associated. This is done on authorisation of the instrument. If an asset is added to an instrument with over-ridable investment ratio as ‘Yes’, system will not propagate the same to portfolio mapping, the same needs to be operationally handled.
An Instrument will have same fiscal start year and end year. The system will tag assets from TA with the asset class 'MF'.
Click ‘Asset Allocation’ tab in ‘Instrument Definition’ screen to specify asset allocation details.
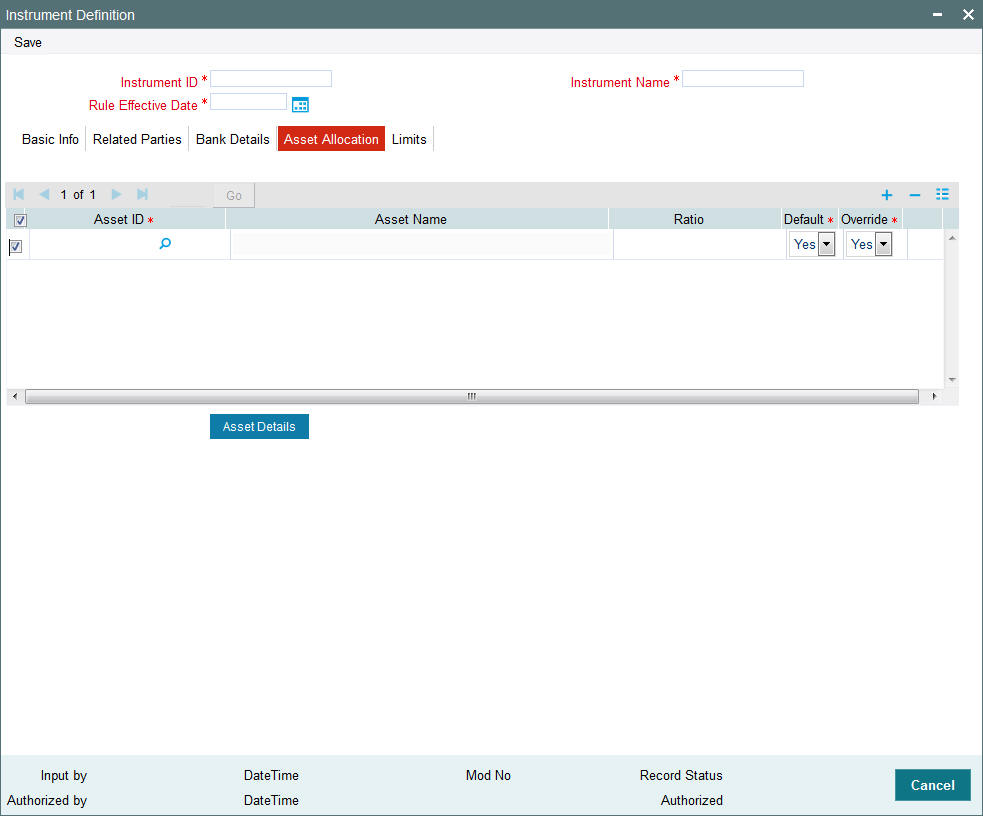
You can specify the following details:
Asset ID
Alphanumeric; 16 Characters; Mandatory
Specify the asset ID. Alternatively, you can select asset ID from the option list. The list displays all valid asset ID maintained in the system.
Asset Name
Display
The system displays the name of the selected asset ID.
Ratio
Numeric; 3 Characters; Optional
Specify the investment ratio for the asset.
Default
Mandatory
Select ‘Yes’ option from drop-down list to default asset allocation details. Else select ‘No’.
Override
Mandatory
Select ‘Yes’ option from drop-down list to override the asset ratio. Else select ‘No’.
Note
Asset ratio override is applicable for default investment ratio only.
2.18.5.1 Asset Details Button
After specifying all the mandatory details, click ‘Asset Details’ button to view the asset details. The following window is displayed:

The system displays the following details:
- Asset ID
- Start Date
- Minimum Amount
- Minimum Units
- Minimum Initial Transaction Amount
- Minimum Initial Transaction Units
- Step Amount
- Transaction Enabled?
- Transaction Type
- End Date
- Maximum Amount
- Maximum Units
- Maximum Initial Transaction Amount
- Maximum Initial Transaction Units
- Step Units
Asset Load Details
- Load ID
- Load Description
- Transaction Type
Load Details
- Load ID
- Slab Sequence No
- From Amount
- To Amount
- From Units
- To Units
- From Date
- To Date
- From Period
- To Period
- From Counter
- To Counter
- Load Value
2.18.6 Limits Tab
Click ‘Limits’ tab in ‘Instrument Definition’ screen to specify limits details.
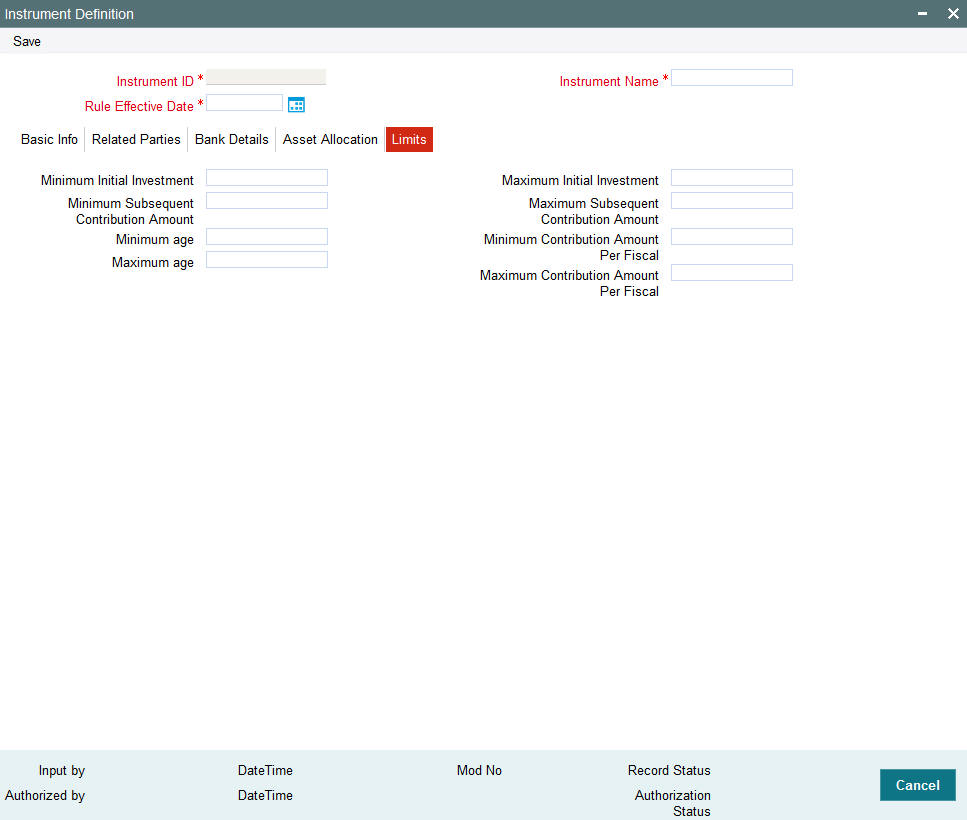
You can specify the following details:
Minimum Initial Investment
Numeric; 18 Characters; Optional
Specify the minimum initial investment amount.
Maximum Initial Investment
Numeric; 18 Characters; Optional
Specify the maximum initial investment amount.
Minimum Subsequent Contribution Amount
Numeric; 18 Characters; Optional
Specify the minimum amount for subsequent contribution.
Maximum Subsequent Contribution Amount
Numeric; 18 Characters; Optional
Specify the maximum amount for subsequent contribution.
Minimum age
Numeric; 3 Characters; Optional
Specify the minimum age for investment.
Maximum age
Numeric; 3 Characters; Optional
Specify the maximum age for investment.
Minimum Contribution Amount Per Fiscal
Numeric; 18 Characters; Optional
Specify the minimum contribution amount allowed per fiscal.
Maximum Contribution Amount Per Fiscal
Numeric; 18 Characters; Optional
Specify the maximum contribution amount allowed per fiscal.
2.19 Instrument Definition Summary
This section contains the following topics:
- Section 2.19.1, "Retrieving a Record in Instrument Definition Summary Screen"
- Section 2.19.2, "Editing Instrument Definition Record"
- Section 2.19.3, "Viewing Instrument Definition Record"
- Section 2.19.4, "Deleting Instrument Definition Record"
- Section 2.19.5, "Authorizing Instrument Definition Record"
- Section 2.19.6, "Amending Instrument Definition Record"
- Section 2.19.7, "Authorizing Amended Instrument Definition Record"
2.19.1 Retrieving a Record in Instrument Definition Summary Screen
You can retrieve a previously entered record in the Summary screen, as follows:
Invoke the ‘Instrument Definition Summary’ screen by typing ‘PASINSDF’ in the field at the top right corner of the Application tool bar and clicking on the adjoining arrow button and specify any or all of the following details in the corresponding details.

- The status of the record in the Authorization Status field. If you choose the ‘Blank Space’ option, then all the records are retrieved.
- The status of the record in the Open field. If you choose the ‘Blank Space’ option, then all records are retrieved
- Instrument ID
- Rule Effective Date
- Instrument Type
- Instrument Base Currency
- Instrument Name
- Latest Rule
- Asset Class
Click ‘Search’ button to view the records. All the records with the specified details are retrieved and displayed in the lower portion of the screen.
Note
You can also retrieve the individual record detail from the detail screen by querying in the following manner:
- Press F7
- Input the Instrument ID
- Press F8
You can perform Edit, Delete, Amend, Authorize, operations by selecting the operation from the Action list. You can also search a record by using a combination of % and alphanumeric value
2.19.2 Editing Instrument Definition Record
You can modify the details of Instrument Definition record that you have already entered into the system, provided it has not subsequently authorized. You can perform this operation as follows:
- Invoke the Instrument Definition Summary screen from the Browser.
- Select the status of the record that you want to retrieve for modification in the Authorization Status field. You can only modify records that are unauthorized. Accordingly, choose the Unauthorized option.
- Specify any or all of the details in the corresponding fields to retrieve the record that is to be modified.
- Click ‘Search’ button. All unauthorized records with the specified details are retrieved and displayed in the lower portion of the screen.
- Double click the record that you want to modify in the list of displayed records. The Instrument Definition Detail screen is displayed.
- Select Unlock Operation from the Action list to modify the record. Modify the necessary information.
Click Save to save your changes. The Instrument Definition Detail screen is closed and the changes made are reflected in the Instrument Definition Summary screen.
2.19.3 Viewing Instrument Definition Record
To view a record that you have previously input, you must retrieve the same in the Instrument Definition Summary screen as follows:
- Invoke the Instrument Definition Summary screen from the Browser.
- Select the status of the record that you want to retrieve for viewing in the Authorization Status field. You can also view all records that are either unauthorized or authorized only, by choosing the unauthorized / Authorized option.
- Specify any or all of the details of the record in the corresponding fields on the screen.
- Click ‘Search’ button. All records with the specified fields are retrieved and displayed in the lower portion of the screen.
- Double click the record that you want to view in the list of displayed records. The Instrument Definition Detail screen is displayed in View mode.
2.19.4 Deleting Instrument Definition Record
You can delete only unauthorized records in the system. To delete a record that you have previously entered:
- Invoke the Instrument Definition Summary screen from the Browser.
- Select the status of the record that you want to retrieve for deletion.
- Specify any or all of the details in the corresponding fields on the screen.
- Click ‘Search’ button. All records with the specified fields are retrieved and displayed in the lower portion of the screen.
- Double click the record that you want to delete in the list of displayed records. The Instrument Definition Detail screen is displayed.
- Select Delete Operation from the Action list. The system prompts you to confirm the deletion and the record is physically deleted from the system database.
2.19.5 Authorizing Instrument Definition Record
An unauthorized Instrument Definition record must be authorized in the system for it to be processed. To authorize a record:
- Invoke the Instrument Definition Summary screen from the Browser.
- Select the status of the record that you want to retrieve for authorization. Typically, choose the unauthorized option.
- Specify any or all of the details in the corresponding fields on the screen.
- Click ‘Search’ button. All records with the specified details that are pending authorization are retrieved and displayed in the lower portion of the screen.
- Double click the record that you wish to authorize. The Instrument Definition Detail screen is displayed. Select Authorize operation from the Action List.
When a checker authorizes a record, details of validation, if any, that were overridden by the maker of the record during the Save operation are displayed. If any of these overrides results in an error, the checker must reject the record.
2.19.6 Amending Instrument Definition Record
After a Instrument Definition record is authorized, it can be modified using the Unlock operation from the Action List. To make changes to a record after authorization:
- Invoke the Instrument Definition Summary screen from the Browser.
- Select the status of the record that you want to retrieve for authorization. You can only amend authorized records.
- Specify any or all of the details in the corresponding fields on the screen.
- Click ‘Search’ button. All records with the specified details that are pending authorization are retrieved and displayed in the lower portion of the screen.
- Double click the record that you wish to authorize. The Instrument Definition Detail screen is displayed in amendment mode. Select Unlock operation from the Action List to amend the record.
- Amend the necessary information and click on Save to save the changes
2.19.7 Authorizing Amended Instrument Definition Record
An amended Instrument Definition record must be authorized for the amendment to be made effective in the system.
The subsequent process of authorization is the same as that for normal transactions.
2.20 Rule Definition
This section contains the following topics:
2.20.1 Invoking Rule Definition Screen
You can define rules for different account status using ‘Rule Definition’ screen. You can invoke this screen by typing ‘PADRULDF’ in the field at the top right corner of the Application tool bar and clicking on the adjoining arrow button.
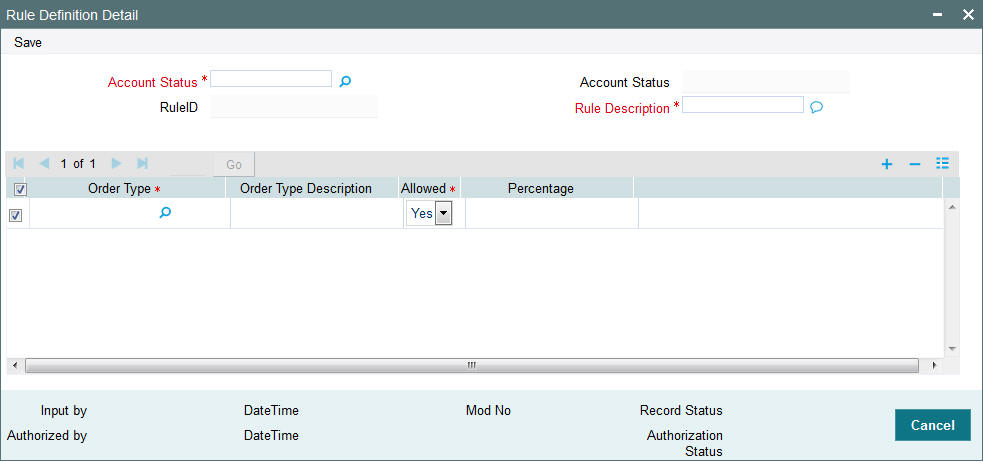
You can specify the following details:
Account Status
Alphanumeric; 16 Characters; Mandatory
Specify the status of the account holder. Alternatively, you can select account status from option list. The list displays all valid account status maintained in the system.
Account Status
Display
The system displays the description of the selected account status.
Rule ID
Display
The system displays the rule ID.
Rule Description
Alphanumeric; 60 Characters; Mandatory
Specify the rule description.
Order Type
Alphanumeric; 3 Characters; Mandatory
Specify the order type. Alternatively, you can select order type from the option list. The list displays all valid order type maintained in the system.
Order Type Description
Display
The system displays the description of the selected order type.
Allowed
Mandatory
Select if the rule is allowed or not from the drop-down list. The list displays the following values:
- Yes
- No
Percentage
Numeric; 3 Characters; Optional
Specify the percentage value.
The sum total should be 100.
2.21 Rule Definition Summary
This section contains the following topics:
- Section 2.21.1, "Retrieving a Record in Rule Definition Summary Screen"
- Section 2.21.2, "Editing Rule Definition Record"
- Section 2.21.3, "Viewing Rule Definition Record"
- Section 2.21.4, "Deleting Rule Definition Record"
- Section 2.21.5, "Authorizing Rule Definition Record"
- Section 2.21.6, "Amending Rule Definition Record"
- Section 2.21.7, "Authorizing Amended Rule Definition Record"
2.21.1 Retrieving a Record in Rule Definition Summary Screen
You can retrieve a previously entered record in the Summary screen, as follows:
Invoke the ‘Rule Definition Summary’ screen by typing ‘PASRULDF’ in the field at the top right corner of the Application tool bar and clicking on the adjoining arrow button and specify any or all of the following details in the corresponding details.

- The status of the record in the Authorization Status field. If you choose the ‘Blank Space’ option, then all the records are retrieved.
- The status of the record in the Record Status field. If you choose the ‘Blank Space’ option, then all records are retrieved
- Account Status
- Rule ID
- Rule Description
Click ‘Search’ button to view the records. All the records with the specified details are retrieved and displayed in the lower portion of the screen.
Note
You can also retrieve the individual record detail from the detail screen by querying in the following manner:
- Press F7
- Input the Rule ID
- Press F8
You can perform Edit, Delete, Amend, Authorize, operations by selecting the operation from the Action list. You can also search a record by using a combination of % and alphanumeric value
2.21.2 Editing Rule Definition Record
You can modify the details of Rule Definition record that you have already entered into the system, provided it has not subsequently authorized. You can perform this operation as follows:
- Invoke the Rule Definition Summary screen from the Browser.
- Select the status of the record that you want to retrieve for modification in the Authorization Status field. You can only modify records that are unauthorized. Accordingly, choose the Unauthorized option.
- Specify any or all of the details in the corresponding fields to retrieve the record that is to be modified.
- Click ‘Search’ button. All unauthorized records with the specified details are retrieved and displayed in the lower portion of the screen.
- Double click the record that you want to modify in the list of displayed records. The Rule Definition Detail screen is displayed.
- Select Unlock Operation from the Action list to modify the record. Modify the necessary information.
Click Save to save your changes. The Rule Definition Detail screen is closed and the changes made are reflected in the Rule Definition Summary screen.
2.21.3 Viewing Rule Definition Record
To view a record that you have previously input, you must retrieve the same in the Rule Definition Summary screen as follows:
- Invoke the Rule Definition Summary screen from the Browser.
- Select the status of the record that you want to retrieve for viewing in the Authorization Status field. You can also view all records that are either unauthorized or authorized only, by choosing the unauthorized / Authorized option.
- Specify any or all of the details of the record in the corresponding fields on the screen.
- Click ‘Search’ button. All records with the specified fields are retrieved and displayed in the lower portion of the screen.
- Double click the record that you want to view in the list of displayed records. The Rule Definition Detail screen is displayed in View mode.
2.21.4 Deleting Rule Definition Record
You can delete only unauthorized records in the system. To delete a record that you have previously entered:
- Invoke the Rule Definition Summary screen from the Browser.
- Select the status of the record that you want to retrieve for deletion.
- Specify any or all of the details in the corresponding fields on the screen.
- Click ‘Search’ button. All records with the specified fields are retrieved and displayed in the lower portion of the screen.
- Double click the record that you want to delete in the list of displayed records. The Rule Definition Detail screen is displayed.
- Select Delete Operation from the Action list. The system prompts you to confirm the deletion and the record is physically deleted from the system database.
2.21.5 Authorizing Rule Definition Record
An unauthorized Rule Definition record must be authorized in the system for it to be processed. To authorize a record:
- Invoke the Rule Definition Summary screen from the Browser.
- Select the status of the record that you want to retrieve for authorization. Typically, choose the unauthorized option.
- Specify any or all of the details in the corresponding fields on the screen.
- Click ‘Search’ button. All records with the specified details that are pending authorization are retrieved and displayed in the lower portion of the screen.
- Double click the record that you wish to authorize. The Rule Definition Detail screen is displayed. Select Authorize operation from the Action List.
When a checker authorizes a record, details of validation, if any, that were overridden by the maker of the record during the Save operation are displayed. If any of these overrides results in an error, the checker must reject the record.
2.21.6 Amending Rule Definition Record
After a Rule Definition record is authorized, it can be modified using the Unlock operation from the Action List. To make changes to a record after authorization:
- Invoke the Rule Definition Summary screen from the Browser.
- Select the status of the record that you want to retrieve for authorization. You can only amend authorized records.
- Specify any or all of the details in the corresponding fields on the screen.
- Click ‘Search’ button. All records with the specified details that are pending authorization are retrieved and displayed in the lower portion of the screen.
- Double click the record that you wish to authorize. The Rule Definition Detail screen is displayed in amendment mode. Select Unlock operation from the Action List to amend the record.
- Amend the necessary information and click on Save to save the changes
2.21.7 Authorizing Amended Rule Definition Record
An amended Rule Definition record must be authorized for the amendment to be made effective in the system.
The subsequent process of authorization is the same as that for normal transactions.
2.22 Portfolio Type Maintenance
This section contains the following topics:
- Section 2.22.1, "Invoking Portfolio Type Maintenance Screen"
- Section 2.22.2, "Basic Details Tab"
- Section 2.22.3, "Restriction Tab"
- Section 2.22.4, "Age Based Limits Tab"
2.22.1 Invoking Portfolio Type Maintenance Screen
You can create portfolio types required using ‘Portfolio Type Maintenance’ screen. You can define basic rules for each portfolio type. You can invoke this screen by typing ‘PADPFTYP’ in the field at the top right corner of the Application tool bar and clicking on the adjoining arrow button.
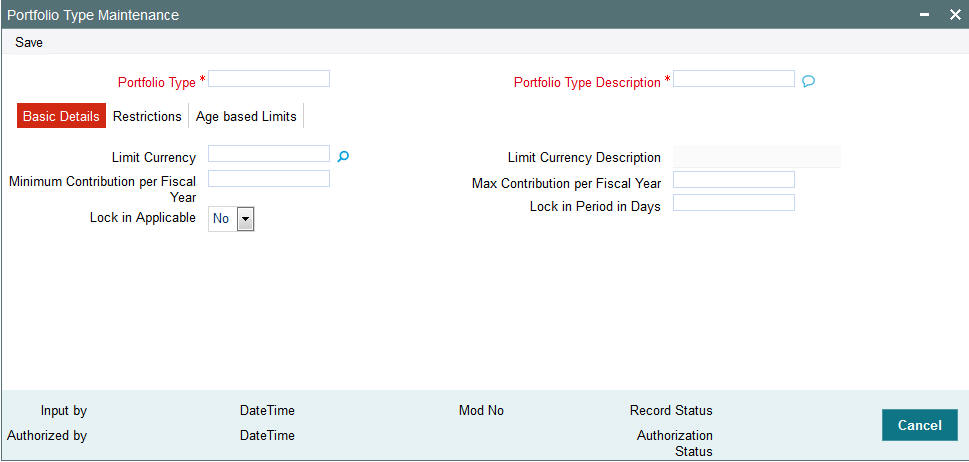
You can specify the following details:
Portfolio Type
Alphanumeric; 16 Characters; Mandatory
Specify the type of portfolio.
Portfolio Type Description
Alphanumeric; 60 Characters; Mandatory
Specify the description for the selected portfolio type.
2.22.2 Basic Details Tab
Click ‘Basic Details’ tab in ‘Portfolio Type Maintenance’ screen to specify the basic details.
You can specify the following details:
Limit Currency
Alphanumeric; 3 Characters; Optional
Specify the limit currency code. Alternatively, you can select limit currency code from the option list. The list displays all valid limit currency code maintained in the system.
Limit Currency Description
Display
The system displays the description for the selected limit currency.
Minimum Contribution per Fiscal Year
Numeric; 18 Characters; Optional
Specify the minimum contribution made per fiscal year.
Max Contribution per Fiscal Year
Numeric; 18 Characters; Optional
Specify the maximum contribution made per fiscal year.
Lock in Applicable
Optional
Select if lock in is applicable or not from the drop-down list. The list displays the following values:
- Yes
- No
Note
The system will refer the calendar days for a particular limit period.
Lock in Period in Days
Numeric; 22 Characters; Optional
Specify the lock in period in number of days format.
You need to specify this value if ‘Lock in Applicable’ field is set to ‘Yes’.
2.22.3 Restriction Tab
Click ‘Restrictions’ tab in ‘Portfolio Type Maintenance’ screen to specify the switch and redemption details.
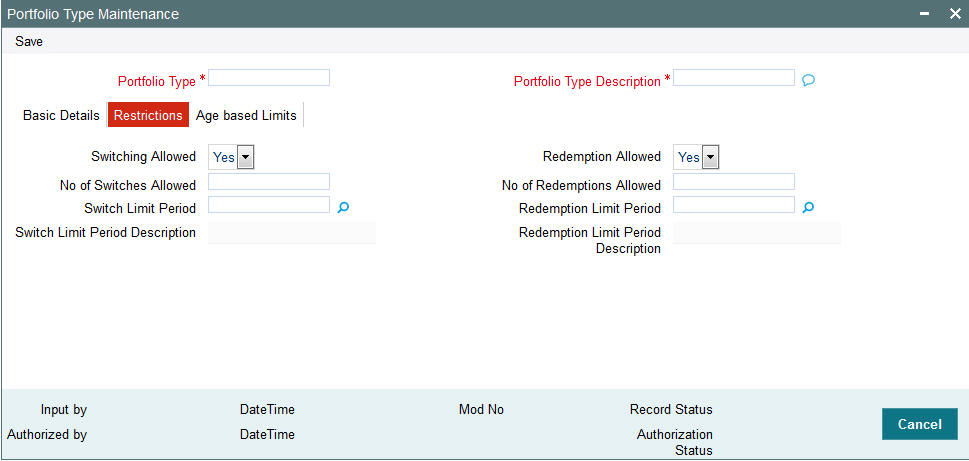
You can specify the following details:
Switching Allowed
Optional
Select if switching is allowed or not from the drop-down list. The list displays the following values:
- Yes
- No
No of Switches allowed
Numeric; Optional
Specify the number of switches allowed in portfolio type maintenance.
Switch Limit Period
Alphanumeric; 1 Character; Optional
Specify the switch limit period. Alternatively, you can select switch limit period from the option list. The list displays all valid switch limit period maintained in the system.
You need to specify ‘Number of Switches Allowed’ and ‘Switch Limit Period’ should be specified if you have selected ‘Switching Allowed’ as Yes.
Switch Limit Period Description
Display
The system displays the description of the selected switch limit period.
Redemption Allowed
Optional
Select if redemption is allowed or not from the drop-down list. The list displays the following values:
- Yes
- No
No of Redemptions Allowed
Numeric; 22 Characters; Optional
Specify the number of redemption allowed in portfolio type maintenance.
Redemption Limit Period
Alphanumeric; 1 Character; Optional
Specify the redemption limit period. Alternatively, you can select redemption limit period from the option list. The list displays all valid redemption limit period maintained in the system.
You need to specify ‘Number of Redemptions Allowed’ and ‘Redemption Limit Period’ should be specified if you have selected ‘Redemption Allowed’ as Yes.
Redemption Limit Period Description
Display
The system displays the description of the selected redemption limit period.
2.22.4 Age Based Limits Tab
Click ‘Age Based Limits’ tab in ‘Portfolio Type Maintenance’ screen to specify age based limits details.
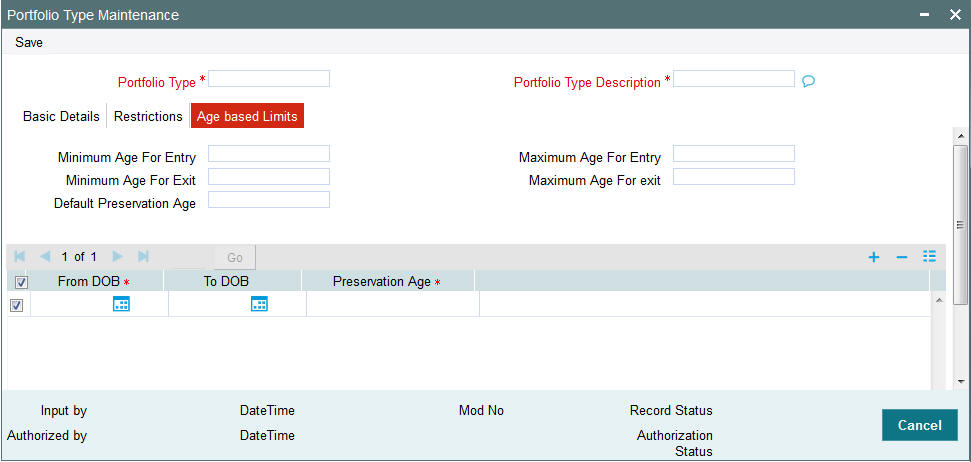
You can specify the following details:
Minimum Age for Entry
Numeric; 3 Characters; Optional
Specify the minimum age to start investment.
Maximum Age for Entry
Numeric; 3 Characters; Optional
Specify the maximum age to start investment.
Minimum Age for Exit
Numeric; 3 Characters; Optional
Specify the minimum age to exit from investment.
Maximum Age for Exit
Numeric; 3 Characters; Optional
Specify the maximum age to exit from investment.
Default Preservation Age
Numeric; 3 Characters; Optional
Specify the default preservation age for pension type portfolio.
From DOB
Date Format; Mandatory
Select From date of birth from the adjoining calendar.
To DOB
Date Format; Optional
Select To date of birth from the adjoining calendar.
Preservation Age
Numeric; 3 Characters; Mandatory
Specify the preservation age for pension type portfolio.
2.23 Portfolio Type Maintenance Summary
This section contains the following topic:
- Section 2.23.1, "Retrieving a Record in Portfolio Type Maintenance Summary Screen"
- Section 2.23.2, "Editing Portfolio Type Maintenance Record"
- Section 2.23.3, "Viewing Portfolio Type Maintenance Record"
- Section 2.23.4, "Deleting Portfolio Type Maintenance Record"
- Section 2.23.5, "Authorizing Portfolio Type Maintenance Record"
- Section 2.23.6, "Amending Portfolio Type Maintenance Record"
- Section 2.23.7, "Authorizing Amended Portfolio Type Maintenance Record"
2.23.1 Retrieving a Record in Portfolio Type Maintenance Summary Screen
You can retrieve a previously entered record in the Summary screen, as follows:
Invoke the ‘Portfolio Type Maintenance Summary’ screen by typing ‘PASPFTYP’ in the field at the top right corner of the Application tool bar and clicking on the adjoining arrow button and specify any or all of the following details in the corresponding details.
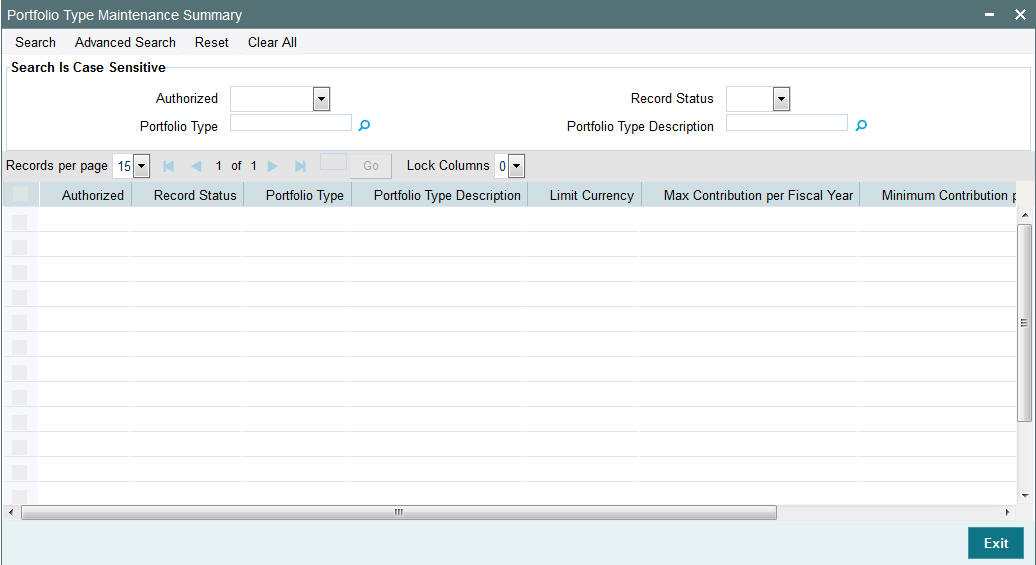
- The status of the record in the Authorization Status field. If you choose the ‘Blank Space’ option, then all the records are retrieved.
- The status of the record in the Open field. If you choose the ‘Blank Space’ option, then all records are retrieved
- Portfolio Type
- Portfolio Type Description
Click ‘Search’ button to view the records. All the records with the specified details are retrieved and displayed in the lower portion of the screen.
Note
You can also retrieve the individual record detail from the detail screen by querying in the following manner:
- Press F7
- Input the Portfolio Type
- Press F8
You can perform Edit, Delete, Amend, Authorize, operations by selecting the operation from the Action list. You can also search a record by using a combination of % and alphanumeric value
2.23.2 Editing Portfolio Type Maintenance Record
You can modify the details of Portfolio Type Maintenance record that you have already entered into the system, provided it has not subsequently authorized. You can perform this operation as follows:
- Invoke the Portfolio Type Maintenance Summary screen from the Browser.
- Select the status of the record that you want to retrieve for modification in the Authorization Status field. You can only modify records that are unauthorized. Accordingly, choose the Unauthorized option.
- Specify any or all of the details in the corresponding fields to retrieve the record that is to be modified.
- Click ‘Search’ button. All unauthorized records with the specified details are retrieved and displayed in the lower portion of the screen.
- Double click the record that you want to modify in the list of displayed records. The Portfolio Type Maintenance Detail screen is displayed.
- Select Unlock Operation from the Action list to modify the record. Modify the necessary information.
Click Save to save your changes. The Portfolio Type Maintenance Detail screen is closed and the changes made are reflected in the Portfolio Type Maintenance Summary screen.
2.23.3 Viewing Portfolio Type Maintenance Record
To view a record that you have previously input, you must retrieve the same in the Portfolio Type Maintenance Summary screen as follows:
- Invoke the Portfolio Type Maintenance Summary screen from the Browser.
- Select the status of the record that you want to retrieve for viewing in the Authorization Status field. You can also view all records that are either unauthorized or authorized only, by choosing the unauthorized / Authorized option.
- Specify any or all of the details of the record in the corresponding fields on the screen.
- Click ‘Search’ button. All records with the specified fields are retrieved and displayed in the lower portion of the screen.
- Double click the record that you want to view in the list of displayed records. The Portfolio Type Maintenance Detail screen is displayed in View mode.
2.23.4 Deleting Portfolio Type Maintenance Record
You can delete only unauthorized records in the system. To delete a record that you have previously entered:
- Invoke the Portfolio Type Maintenance Summary screen from the Browser.
- Select the status of the record that you want to retrieve for deletion.
- Specify any or all of the details in the corresponding fields on the screen.
- Click ‘Search’ button. All records with the specified fields are retrieved and displayed in the lower portion of the screen.
- Double click the record that you want to delete in the list of displayed records. The Portfolio Type Maintenance Detail screen is displayed.
- Select Delete Operation from the Action list. The system prompts you to confirm the deletion and the record is physically deleted from the system database.
2.23.5 Authorizing Portfolio Type Maintenance Record
An unauthorized Portfolio Type Maintenance record must be authorized in the system for it to be processed. To authorize a record:
- Invoke the Portfolio Type Maintenance Summary screen from the Browser.
- Select the status of the record that you want to retrieve for authorization. Typically, choose the unauthorized option.
- Specify any or all of the details in the corresponding fields on the screen.
- Click ‘Search’ button. All records with the specified details that are pending authorization are retrieved and displayed in the lower portion of the screen.
- Double click the record that you wish to authorize. The Portfolio Type Maintenance Detail screen is displayed. Select Authorize operation from the Action List.
When a checker authorizes a record, details of validation, if any, that were overridden by the maker of the record during the Save operation are displayed. If any of these overrides results in an error, the checker must reject the record.
2.23.6 Amending Portfolio Type Maintenance Record
After a Portfolio Type Maintenance record is authorized, it can be modified using the Unlock operation from the Action List. To make changes to a record after authorization:
- Invoke the Portfolio Type Maintenance Summary screen from the Browser.
- Select the status of the record that you want to retrieve for authorization. You can only amend authorized records.
- Specify any or all of the details in the corresponding fields on the screen.
- Click ‘Search’ button. All records with the specified details that are pending authorization are retrieved and displayed in the lower portion of the screen.
- Double click the record that you wish to authorize. The Portfolio Type Maintenance Detail screen is displayed in amendment mode. Select Unlock operation from the Action List to amend the record.
- Amend the necessary information and click on Save to save the changes
2.23.7 Authorizing Amended Portfolio Type Maintenance Record
An amended Portfolio Type Maintenance record must be authorized for the amendment to be made effective in the system.
The subsequent process of authorization is the same as that for normal transactions.
2.24 Portfolio Definition
This section contains the following topics
2.24.1 Invoking Portfolio Definition Screen
You can define the portfolio and map instruments under portfolio using ‘Portfolio Definition’ screen. The system defaults the rules and limits from ‘Portfolio Type Maintenance’ screen. However, you can override the same at portfolio level.
You can invoke ‘Portfolio Definition’ screen by typing ‘PADPFDFN’ in the field at the top right corner of the Application tool bar and clicking on the adjoining arrow button.

You can specify the following details:
Portfolio Type
Alphanumeric; 16 Characters; Mandatory
Specify the portfolio type. Alternatively, you can select portfolio type from the option list. The list displays all valid portfolio type maintained in the system.
Portfolio Type Description
Display
The system displays the description for the selected portfolio type.
Portfolio ID
Alphanumeric; 16 Characters; Mandatory
Specify the portfolio ID.
Portfolio Description
Alphanumeric; 60 Characters; Mandatory
Specify the description for the selected portfolio ID.
Instrument ID
Alphanumeric; 16 Characters; Mandatory
Specify the instrument ID. Alternatively, you can select instrument ID from the option list. The list displays all valid instrument ID maintained in the system.
Instrument Name
Display
The system displays the name of the selected instrument ID.
2.24.2 Preferences Button
Click ‘Preferences’ button in ‘Portfolio Definition’ screen. The ‘Preferences’ screen is displayed.

You can specify the following details:
Portfolio ID
Display
The system displays the portfolio ID mentioned in ‘Portfolio Definition’ screen.
2.24.2.1 Basic Details Tab
Click ‘Basic Details’ tab in ‘Preferences’ screen to specify the basic information..
You can specify the following details:
Limit Currency
Alphanumeric; 3 Characters; Optional
The system displays the limit currency code based on the details mentioned in ‘Portfolio Definition’ screen. However, you can amend this value. You can also select limit currency code from the option list. The list displays all valid limit currency code maintained in the system.
Limit Currency Description
Display
The system displays the description of the selected limit currency code.
Minimum Contribution per Fiscal Year
Numeric; 18 Characters; Optional
The system displays the minimum contribution done per fiscal year. However, you can amend this value.
Maximum Contribution per Fiscal Year
Numeric; 18 Characters; Optional
The system displays the maximum contribution done per fiscal year. However, you can amend this value.
Lock in Applicable
Optional
Select if lock in is applicable or not from the drop-down list. The list displays the following values:
- Yes
- No
Note
The system will refer the calendar days for a particular limit period.
Lock in Period in Days
Numeric; 22 Characters; Optional
Specify the lock in period in days.
You need to specify this value if ‘Lock in Applicable’ field is set to ‘Yes’.
2.24.2.2 Restrictions Tab
Click ‘Restrictions’ tab in ‘Preferences’ screen to specify the switch and redemption details.
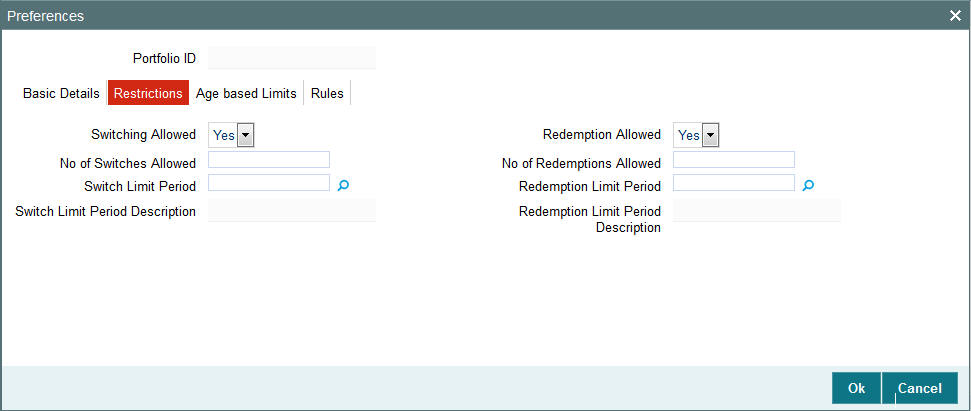
You can specify the following details:
Switching Allowed
Optional
Select if switching is allowed or not from the drop-down list. The list displays the following values:
- Yes
- No
No of Switches Allowed
Numeric; Optional
The system displays the number of switches allowed in portfolio type maintenance. However, you can amend this value.
Switch Limit Period
Alphanumeric; 1 Character; Optional
The system displays the number of switches allowed in portfolio type maintenance. However, you can amend this value. You can select switch limit period from the option list. The list displays all valid switch limit period maintained in the system.
You need to specify ‘Number of Switches Allowed’ and ‘Switch Limit Period’ should be specified if you have selected ‘Switching Allowed’ as Yes.
Switch Limit Period Description
Display
The system displays the description of the selected switch limit period.
Redemption Allowed
Optional
Select if redemption is allowed or not from the drop-down list. The list displays the following values:
- Yes
- No
No of Redemptions Allowed
Numeric; 22 Characters; Optional
The system displays the number of redemptions allowed in portfolio type maintenance. However, you can amend this value.
Redemption Limit Period
Alphanumeric; 1 Character; Optional
The system displays the redemption limit period. However, you can amend this value. You can select redemption limit period from the option list. The list displays all valid redemption limit period maintained in the system.
You need to specify ‘Number of Redemptions Allowed’ and ‘Redemption Limit Period’ should be specified if you have selected ‘Redemption Allowed’ as Yes.
Redemption Limit Period Description
Display
The system displays the description of the selected redemption limit period.
2.24.2.3 Age Based Limits Tab
Click ‘Age Based Limits’ tab in ‘Preferences’ screen to specify age based limits details.

You can specify the following details:
Minimum Age for Entry
Numeric; 3 Characters; Optional
The system displays the minimum age to start investment. However, you can amend this value.
Maximum Age for Entry
Numeric; 3 Characters; Optional
The system displays the maximum age to start investment. However, you can amend this value.
Minimum Age for Exit
Numeric; 3 Characters; Optional
The system displays the minimum age to exit from investment. However, you can amend this value.
Maximum Age for Exit
Numeric; 3 Characters; Optional
The system displays the maximum age to exit from investment. However, you can amend this value.
Default Preservation Age
Numeric; 3 Characters; Optional
The system displays the default preservation age for pension type portfolio. However, you can amend this value.
From DOB
Date Format; Mandatory
The system displays From date of birth. However, you can amend this value.
To DOB
Date Format; Optional
The system displays To date of birth. However, you can amend this value.
Preservation Age
Numeric; 3 Characters; Mandatory
The system the preservation age for pension type portfolio. However, you can amend this value.
2.24.2.4 Rules Tab
Click ‘Rules’ tab in ‘Preferences’ screen to specify the rules.

You can specify the following details:
Rule ID
Alphanumeric; 16 Characters; Optional
Specify the rule ID. Alternatively, you can select rule ID from the option list. The list displays all valid rule ID maintained in the system.
Rule Description
Display
The system displays the description of the selected rule ID.
Account Status
Display
The system displays the account status based on the rule ID selected.
Account Status Description
Display
The system displays the description of the account status based on the rule ID selected.
2.25 Portfolio Definition Summary
This section contains the following topics
- Section 2.25.1, "Retrieving a Record in Portfolio Definition Summary Screen"
- Section 2.25.2, "Editing Portfolio Definition Record"
- Section 2.25.3, "Viewing Portfolio Definition Record"
- Section 2.25.4, "Deleting Portfolio Definition Record"
- Section 2.25.5, "Authorizing Portfolio Definition Record"
- Section 2.25.6, "Amending Portfolio Definition Record"
- Section 2.25.7, "Authorizing Amended Portfolio Definition Record"
2.25.1 Retrieving a Record in Portfolio Definition Summary Screen
You can retrieve a previously entered record in the Summary screen, as follows:
Invoke the ‘Portfolio Definition Summary’ screen by typing ‘PASPFDFN’ in the field at the top right corner of the Application tool bar and clicking on the adjoining arrow button and specify any or all of the following details in the corresponding details.

- The status of the record in the Authorization Status field. If you choose the ‘Blank Space’ option, then all the records are retrieved.
- The status of the record in the Open field. If you choose the ‘Blank Space’ option, then all records are retrieved
- Portfolio Type
- Portfolio Description
- Portfolio ID
Click ‘Search’ button to view the records. All the records with the specified details are retrieved and displayed in the lower portion of the screen.
Note
You can also retrieve the individual record detail from the detail screen by querying in the following manner:
- Press F7
- Input the Portfolio Type
- Press F8
You can perform Edit, Delete, Amend, Authorize, operations by selecting the operation from the Action list. You can also search a record by using a combination of % and alphanumeric value
2.25.2 Editing Portfolio Definition Record
You can modify the details of Portfolio Definition record that you have already entered into the system, provided it has not subsequently authorized. You can perform this operation as follows:
- Invoke the Portfolio Definition Summary screen from the Browser.
- Select the status of the record that you want to retrieve for modification in the Authorization Status field. You can only modify records that are unauthorized. Accordingly, choose the Unauthorized option.
- Specify any or all of the details in the corresponding fields to retrieve the record that is to be modified.
- Click ‘Search’ button. All unauthorized records with the specified details are retrieved and displayed in the lower portion of the screen.
- Double click the record that you want to modify in the list of displayed records. The Portfolio Definition Detail screen is displayed.
- Select Unlock Operation from the Action list to modify the record. Modify the necessary information.
Click Save to save your changes. The Portfolio Definition Detail screen is closed and the changes made are reflected in the Portfolio Definition Summary screen.
2.25.3 Viewing Portfolio Definition Record
To view a record that you have previously input, you must retrieve the same in the Portfolio Definition Summary screen as follows:
- Invoke the Portfolio Definition Summary screen from the Browser.
- Select the status of the record that you want to retrieve for viewing in the Authorization Status field. You can also view all records that are either unauthorized or authorized only, by choosing the unauthorized / Authorized option.
- Specify any or all of the details of the record in the corresponding fields on the screen.
- Click ‘Search’ button. All records with the specified fields are retrieved and displayed in the lower portion of the screen.
- Double click the record that you want to view in the list of displayed records. The Portfolio Definition Detail screen is displayed in View mode.
2.25.4 Deleting Portfolio Definition Record
You can delete only unauthorized records in the system. To delete a record that you have previously entered:
- Invoke the Portfolio Definition Summary screen from the Browser.
- Select the status of the record that you want to retrieve for deletion.
- Specify any or all of the details in the corresponding fields on the screen.
- Click ‘Search’ button. All records with the specified fields are retrieved and displayed in the lower portion of the screen.
- Double click the record that you want to delete in the list of displayed records. The Portfolio Definition Detail screen is displayed.
- Select Delete Operation from the Action list. The system prompts you to confirm the deletion and the record is physically deleted from the system database.
2.25.5 Authorizing Portfolio Definition Record
An unauthorized Portfolio Definition record must be authorized in the system for it to be processed. To authorize a record:
- Invoke the Portfolio Definition Summary screen from the Browser.
- Select the status of the record that you want to retrieve for authorization. Typically, choose the unauthorized option.
- Specify any or all of the details in the corresponding fields on the screen.
- Click ‘Search’ button. All records with the specified details that are pending authorization are retrieved and displayed in the lower portion of the screen.
- Double click the record that you wish to authorize. The User Portfolio Definition Detail screen is displayed. Select Authorize operation from the Action List.
When a checker authorizes a record, details of validation, if any, that were overridden by the maker of the record during the Save operation are displayed. If any of these overrides results in an error, the checker must reject the record.
2.25.6 Amending Portfolio Definition Record
After a Portfolio Definition record is authorized, it can be modified using the Unlock operation from the Action List. To make changes to a record after authorization:
- Invoke the Portfolio Definition Summary screen from the Browser.
- Select the status of the record that you want to retrieve for authorization. You can only amend authorized records.
- Specify any or all of the details in the corresponding fields on the screen.
- Click ‘Search’ button. All records with the specified details that are pending authorization are retrieved and displayed in the lower portion of the screen.
- Double click the record that you wish to authorize. The Portfolio Definition Detail screen is displayed in amendment mode. Select Unlock operation from the Action List to amend the record.
- Amend the necessary information and click on Save to save the changes
2.25.7 Authorizing Amended Portfolio Definition Record
An amended Portfolio Definition record must be authorized for the amendment to be made effective in the system.
The subsequent process of authorization is the same as that for normal transactions.
2.26 Bank Details
This section contains the following topics
2.26.1 Invoking Bank Details Screen
You can maintain master bank account details using ‘Bank Details’ screen. You can invoke this screen by typing ‘PADBKDET’ in the field at the top right corner of the Application tool bar and clicking on the adjoining arrow button.
You can specify the following details:
Bank Reference Number
Display
The system displays the bank reference number.
User Reference Number
Alphanumeric; 16 Characters; Optional
Specify the user reference number to identify the bank account.
Bank
Alphanumeric; 16 Characters; Mandatory
Specify the bank name. Alternatively, you can select bank name from the option list. The list displays all valid bank names maintained in the system.
Bank Description
Display
The system displays the description of the selected bank code.
Branch
Alphanumeric; 12 Characters; Mandatory
Specify the branch name. Alternatively, you can select branch name from the option list. The list displays all valid branch names maintained in the system.
Branch Description
Display
The system displays the description of the selected branch code.
Account Type
Alphanumeric; 1 Character; Mandatory
Specify the account type. Alternatively, you can select account type from the option list. The list displays all valid account type maintained in the system.
Account Type Description
Display
The system displays the description of the selected account type.
Account Currency
Alphanumeric; 3 Characters; Mandatory
Specify the account currency. Alternatively, you can select account currency from the option list. The list displays all valid account currency maintained in the system.
Account Currency Description
Display
The system displays the description of the selected account currency code.
Account Number
Numeric; 20 Characters; Mandatory
Specify the account number.
Account Holder Name
Alphanumeric; 20 Characters; Mandatory
Specify the name of the account holder.
IBAN
Alphanumeric; 40 Characters; Optional
Specify the IBAN details.
Verification Status
Optional
Select the tha bank details are verified or not from the drop-down list. The list displays the following values:
- Yes
- No
Last Verified Date
Date Format; Optional
Select the last verified date for the account number from the adjoining calendar.
Note
Last verified date cannot be future dated.
2.27 Bank Details Summary
This section contains the following topics:
- Section 2.27.1, "Retrieving a Record in Bank Details Summary Screen"
- Section 2.27.2, "Editing Bank Details Record"
- Section 2.27.3, "Viewing Bank Details Record"
- Section 2.27.4, "Deleting Bank Details Record"
- Section 2.27.5, "Authorizing Bank Details Record"
- Section 2.27.6, "Amending Bank Details Record"
- Section 2.27.7, "Authorizing Amended Bank Details Record"
2.27.1 Retrieving a Record in Bank Details Summary Screen
You can retrieve a previously entered record in the Summary screen, as follows:
Invoke the ‘Bank Details Summary’ screen by typing ‘PASBKDET’ in the field at the top right corner of the Application tool bar and clicking on the adjoining arrow button and specify any or all of the following details in the corresponding details.
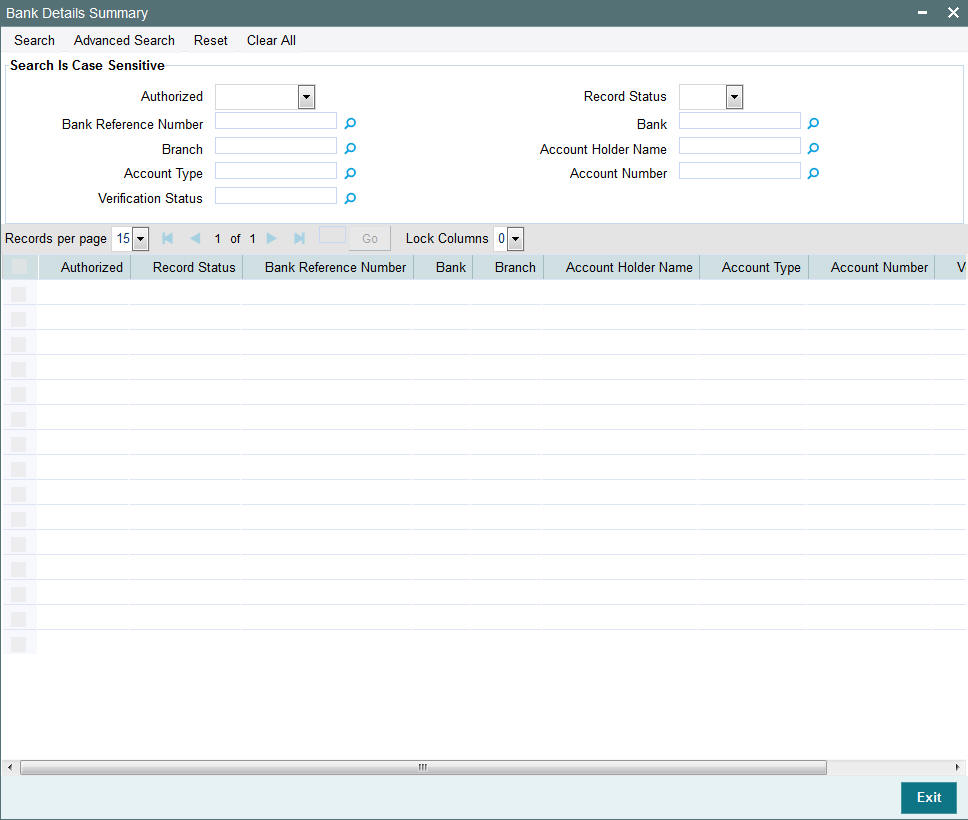
- The status of the record in the Authorization Status field. If you choose the ‘Blank Space’ option, then all the records are retrieved.
- The status of the record in the Record Status field. If you choose the ‘Blank Space’ option, then all records are retrieved
- Bank Reference Number
- Branch
- Account Type
- Verification Status
- Bank
- Account Holder Name
- Account Number
Click ‘Search’ button to view the records. All the records with the specified details are retrieved and displayed in the lower portion of the screen.
Note
You can also retrieve the individual record detail from the detail screen by querying in the following manner:
- Press F7
- Input the Account Number
- Press F8
You can perform Edit, Delete, Amend, Authorize, operations by selecting the operation from the Action list. You can also search a record by using a combination of % and alphanumeric value
2.27.2 Editing Bank Details Record
You can modify the details of Bank Details record that you have already entered into the system, provided it has not subsequently authorized. You can perform this operation as follows:
- Invoke the Bank Details Summary screen from the Browser.
- Select the status of the record that you want to retrieve for modification in the Authorization Status field. You can only modify records that are unauthorized. Accordingly, choose the Unauthorized option.
- Specify any or all of the details in the corresponding fields to retrieve the record that is to be modified.
- Click ‘Search’ button. All unauthorized records with the specified details are retrieved and displayed in the lower portion of the screen.
- Double click the record that you want to modify in the list of displayed records. The Bank Details Detail screen is displayed.
- Select Unlock Operation from the Action list to modify the record. Modify the necessary information.
Click Save to save your changes. The Bank Details Detail screen is closed and the changes made are reflected in the Bank Details Summary screen.
2.27.3 Viewing Bank Details Record
To view a record that you have previously input, you must retrieve the same in the Bank Details Summary screen as follows:
- Invoke the Bank Details Summary screen from the Browser.
- Select the status of the record that you want to retrieve for viewing in the Authorization Status field. You can also view all records that are either unauthorized or authorized only, by choosing the unauthorized / Authorized option.
- Specify any or all of the details of the record in the corresponding fields on the screen.
- Click ‘Search’ button. All records with the specified fields are retrieved and displayed in the lower portion of the screen.
- Double click the record that you want to view in the list of displayed records. The Bank Details Detail screen is displayed in View mode.
2.27.4 Deleting Bank Details Record
You can delete only unauthorized records in the system. To delete a record that you have previously entered:
- Invoke the Bank Details Summary screen from the Browser.
- Select the status of the record that you want to retrieve for deletion.
- Specify any or all of the details in the corresponding fields on the screen.
- Click ‘Search’ button. All records with the specified fields are retrieved and displayed in the lower portion of the screen.
- Double click the record that you want to delete in the list of displayed records. The Bank Details Detail screen is displayed.
- Select Delete Operation from the Action list. The system prompts you to confirm the deletion and the record is physically deleted from the system database.
2.27.5 Authorizing Bank Details Record
An unauthorized Bank Details record must be authorized in the system for it to be processed. To authorize a record:
- Invoke the Bank Details Summary screen from the Browser.
- Select the status of the record that you want to retrieve for authorization. Typically, choose the unauthorized option.
- Specify any or all of the details in the corresponding fields on the screen.
- Click ‘Search’ button. All records with the specified details that are pending authorization are retrieved and displayed in the lower portion of the screen.
- Double click the record that you wish to authorize. The Bank Details Detail screen is displayed. Select Authorize operation from the Action List.
When a checker authorizes a record, details of validation, if any, that were overridden by the maker of the record during the Save operation are displayed. If any of these overrides results in an error, the checker must reject the record.
2.27.6 Amending Bank Details Record
After a Bank Details record is authorized, it can be modified using the Unlock operation from the Action List. To make changes to a record after authorization:
- Invoke the Bank Details Summary screen from the Browser.
- Select the status of the record that you want to retrieve for authorization. You can only amend authorized records.
- Specify any or all of the details in the corresponding fields on the screen.
- Click ‘Search’ button. All records with the specified details that are pending authorization are retrieved and displayed in the lower portion of the screen.
- Double click the record that you wish to authorize. The Bank Details Detail screen is displayed in amendment mode. Select Unlock operation from the Action List to amend the record.
- Amend the necessary information and click on Save to save the changes
2.27.7 Authorizing Amended Bank Details Record
An amended Bank Details record must be authorized for the amendment to be made effective in the system.
The subsequent process of authorization is the same as that for normal transactions.
2.28 Identification Details
This section contains the following topics
2.28.1 Invoking Identification Details Screen
You can maintain identification master data using ‘Identification Details’ screen. You can invoke this screen by typing ‘PADIDDET’ in the field at the top right corner of the Application tool bar and clicking on the adjoining arrow button.

You can specify the following details:
ID Reference Number
Display
The system displays the unique identification reference number.
User Reference Number
Alphanumeric; 16 Characters; Optional
Specify the user reference number to identify the bank account.
ID Type
Alphanumeric; 20 Characters; Mandatory
Specify the identification type.
ID Type description
Display
The system displays the description of the selected ID type.
ID Value
Alphanumeric; 50 Characters; Mandatory
Specify the identification value.
Issuing Authority
Alphanumeric; 50 Characters; Mandatory
Specify the issuing authority details.
Place of Issue
Alphanumeric; 3 Characters; Mandatory
Specify the place of issue. Alternatively, you can select place of issue code from the option list. The list displays all valid place of issue code maintained in the system.
Place of issue description
Display
The system displays the description of the selected place of issue code.
Issuing Country
Alphanumeric; 3 Characters; Mandatory
Specify the issuing country code. Alternatively, you can select issuing country code from the option list. The list displays all valid issuing country code maintained in the system.
Issuing country description
Display
The system displays the description of the selected issuing country code.
Date of Issue
Date Format; Mandatory
Select the issuing date from the adjoining calendar.
Verification Status
Optional
Select if the bank details are verified or not from the drop-down list. The list displays the following values:
- Yes
- No
Date of Expiry
Date Format; Optional
Select the date of expiry from the adjoining calendar.
Last Verified Date
Date Format; Optional
Select the last verified date from the adjoining calendar.
Note
You cannot specify last verified date for unverified accounts. Also, last verified date cannot be future dated.
2.29 Identification Details Summary
This section contains the following topics
- Section 2.29.1, "Retrieving a Record in Identification Details Summary Screen"
- Section 2.29.2, "Editing Identification Details Record"
- Section 2.29.3, "Viewing Identification Details Record"
- Section 2.29.4, "Deleting Identification Details Record"
- Section 2.29.5, "Authorizing Identification Details Record"
- Section 2.29.6, "Amending Identification Details Record"
- Section 2.29.7, "Authorizing Amended Identification Details Record"
2.29.1 Retrieving a Record in Identification Details Summary Screen
You can retrieve a previously entered record in the Summary screen, as follows:
Invoke the ‘Identification Details Summary’ screen by typing ‘PASIDDET’ in the field at the top right corner of the Application tool bar and clicking on the adjoining arrow button and specify any or all of the following details in the corresponding details.
- The status of the record in the Authorization Status field. If you choose the ‘Blank Space’ option, then all the records are retrieved.
- The status of the record in the Record Status field. If you choose the ‘Blank Space’ option, then all records are retrieved
- ID Reference Number
- ID Value
- ID Type
- Verification Status
Click ‘Search’ button to view the records. All the records with the specified details are retrieved and displayed in the lower portion of the screen.
Note
You can also retrieve the individual record detail from the detail screen by querying in the following manner:
- Press F7
- Input the ID Reference Number
- Press F8
You can perform Edit, Delete, Amend, Authorize, operations by selecting the operation from the Action list. You can also search a record by using a combination of % and alphanumeric value
2.29.2 Editing Identification Details Record
You can modify the details of Identification Details record that you have already entered into the system, provided it has not subsequently authorized. You can perform this operation as follows:
- Invoke the Identification Details Summary screen from the Browser.
- Select the status of the record that you want to retrieve for modification in the Authorization Status field. You can only modify records that are unauthorized. Accordingly, choose the Unauthorized option.
- Specify any or all of the details in the corresponding fields to retrieve the record that is to be modified.
- Click ‘Search’ button. All unauthorized records with the specified details are retrieved and displayed in the lower portion of the screen.
- Double click the record that you want to modify in the list of displayed records. The Identification Details Detail screen is displayed.
- Select Unlock Operation from the Action list to modify the record. Modify the necessary information.
Click Save to save your changes. The Identification Details Detail screen is closed and the changes made are reflected in the Identification Details Summary screen.
2.29.3 Viewing Identification Details Record
To view a record that you have previously input, you must retrieve the same in the Identification Details Summary screen as follows:
- Invoke the Identification Details Summary screen from the Browser.
- Select the status of the record that you want to retrieve for viewing in the Authorization Status field. You can also view all records that are either unauthorized or authorized only, by choosing the unauthorized / Authorized option.
- Specify any or all of the details of the record in the corresponding fields on the screen.
- Click ‘Search’ button. All records with the specified fields are retrieved and displayed in the lower portion of the screen.
- Double click the record that you want to view in the list of displayed records. The Identification Details Detail screen is displayed in View mode.
2.29.4 Deleting Identification Details Record
You can delete only unauthorized records in the system. To delete a record that you have previously entered:
- Invoke the Identification Details Summary screen from the Browser.
- Select the status of the record that you want to retrieve for deletion.
- Specify any or all of the details in the corresponding fields on the screen.
- Click ‘Search’ button. All records with the specified fields are retrieved and displayed in the lower portion of the screen.
- Double click the record that you want to delete in the list of displayed records. The Identification Details Detail screen is displayed.
- Select Delete Operation from the Action list. The system prompts you to confirm the deletion and the record is physically deleted from the system database.
2.29.5 Authorizing Identification Details Record
An unauthorized Identification Details record must be authorized in the system for it to be processed. To authorize a record:
- Invoke the Identification Details Summary screen from the Browser.
- Select the status of the record that you want to retrieve for authorization. Typically, choose the unauthorized option.
- Specify any or all of the details in the corresponding fields on the screen.
- Click ‘Search’ button. All records with the specified details that are pending authorization are retrieved and displayed in the lower portion of the screen.
- Double click the record that you wish to authorize. The Identification Details Detail screen is displayed. Select Authorize operation from the Action List.
When a checker authorizes a record, details of validation, if any, that were overridden by the maker of the record during the Save operation are displayed. If any of these overrides results in an error, the checker must reject the record.
2.29.6 Amending Identification Details Record
After a Identification Details record is authorized, it can be modified using the Unlock operation from the Action List. To make changes to a record after authorization:
- Invoke the Identification Details Summary screen from the Browser.
- Select the status of the record that you want to retrieve for authorization. You can only amend authorized records.
- Specify any or all of the details in the corresponding fields on the screen.
- Click ‘Search’ button. All records with the specified details that are pending authorization are retrieved and displayed in the lower portion of the screen.
- Double click the record that you wish to authorize. The Identification Details Detail screen is displayed in amendment mode. Select Unlock operation from the Action List to amend the record.
- Amend the necessary information and click on Save to save the changes
2.29.7 Authorizing Amended Identification Details Record
An amended Identification Details record must be authorized for the amendment to be made effective in the system.
The subsequent process of authorization is the same as that for normal transactions.
2.30 Address Details
This section contains the following topics
2.30.1 Invoking Address Details Screen
You can maintain address details using ‘Address Details’ screen. You can invoke this screen by typing ‘PADADDET’ in the field at the top right corner of the Application tool bar and clicking on the adjoining arrow button.
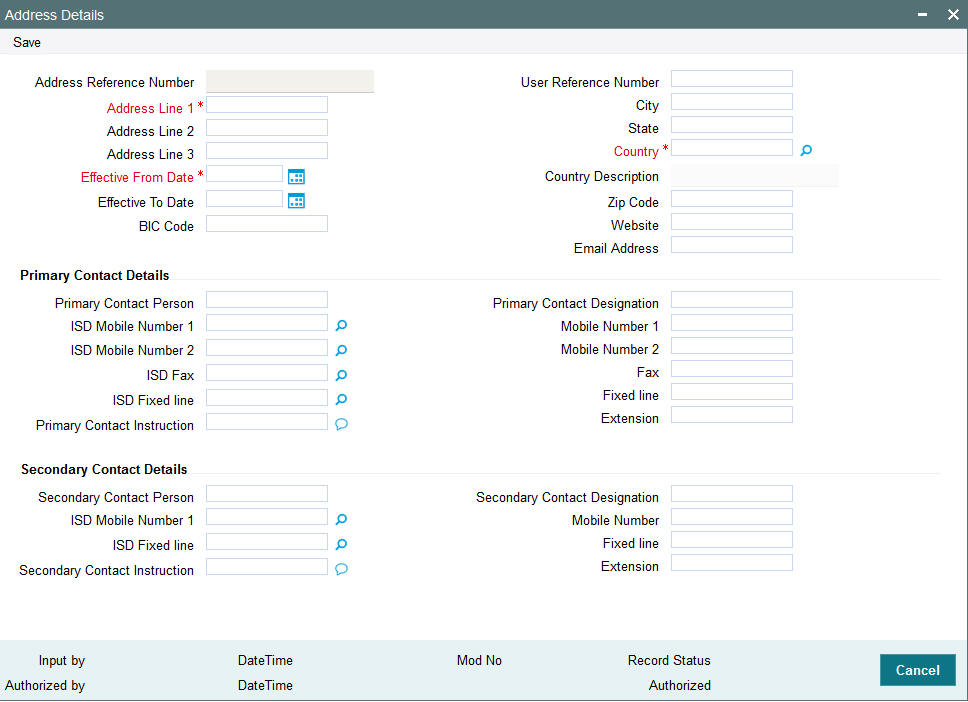
You can specify the following details:
Address Reference Number
Display
The system displays the automatically generated address reference number.
User Reference Number
Alphanumeric; 16 Characters; Optional
Specify the user reference number.
Address Line 1
Alphanumeric; 105 Characters; Mandatory
Specify the address details.
Address Line 2
Alphanumeric; 105 Characters; Optional
Specify the address details.
Address Line 3
Alphanumeric; 105 Characters; Optional
Specify the address details.
City
Alphanumeric; 80 Characters; Optional
Specify the city name.
State
Alphanumeric; 80 Characters; Optional
Specify the state name.
Country
Alphanumeric; 3 Characters; Mandatory
Specify the country code. Alternatively, you can select country code from the option list. The list displays all valid country code maintained in the system.
Country Description
Display
The system displays the description of the selected country code.
Effective From Date
Date Format; Mandatory
Select the effective From date from the adjoining calendar.
Effective To Date
Date Format; Optional
Select the effective To date from the adjoining calendar.
Note
Effective To Date should not be less than Effective From Date.
BIC Code
Alphanumeric; 16 Characters; Optional
Specify the BIC code.
Zip Code
Alphanumeric; 10 Characters; Optional
Specify the zip code of the customer.
Website
Alphanumeric; 100 Characters; Optional
Specify the website details of the customer.
Email Address
Alphanumeric; 100 Characters; Optional
Specify the e-mail address of the customer.
Primary Contact Details
Primary Contact Person
Alphanumeric; 100 Characters; Optional
Specify the primary contact person details.
Primary Contact designation
Alphanumeric; 100 Characters; Optional
Specify the designation of the customer.
ISD Mobile Number 1
Alphanumeric; 10 Characters; Optional
Specify ISD code to be used to prefix while dialling mobile number of the customer.
Mobile Number 1
Alphanumeric; 60 Characters; Optional
Specify the mobile number of the customer.
ISD Mobile Number 2
Alphanumeric; 10 Characters; Optional
Specify the alternative ISD code to be used to prefix while dialling mobile number of the customer.
Mobile Number 2
Alphanumeric; 60 Characters; Optional
Specify the alternative mobile number of the customer.
ISD Fax
Alphanumeric; 10 Characters; Optional
Specify ISD code to be used to prefix while dialling fax number of the customer.
Fax
Alphanumeric; 60 Characters; Optional
Specify the fax number of the customer.
ISD Fixed line
Alphanumeric; 10 Characters; Optional
Specify ISD code to be used to prefix while dialling fixed line number of the customer.
Fixed line
Alphanumeric; 60 Characters; Optional
Specify the fixed line number of the customer.
Primary Contact Instruction
Alphanumeric; 100 Characters; Optional
Specify the primary contact details.
Extension
Alphanumeric; 60 Characters; Optional
Specify the extension number of the customer.
Secondary Contact Details
Secondary Contact Person
Alphanumeric; 100 Characters; Optional
Specify the secondary contact person details.
Secondary Contact designation
Alphanumeric; 100 Characters; Optional
Specify the designation of the customer.
ISD Mobile Number 1
Alphanumeric; 10 Characters; Optional
Specify ISD code to be used to prefix while dialling mobile number of the secondary contact person.
Mobile Number
Alphanumeric; 60 Characters; Optional
Specify the mobile number of the secondary contact person.
ISD Fixed line
Alphanumeric; 10 Characters; Optional
Specify ISD code to be used to prefix while dialling fixed line number of the secondary contact person.
Fixed line
Alphanumeric; 60 Characters; Optional
Specify the fixed line number of the secondary contact person.
Secondary Contact Instruction
Alphanumeric; 100 Characters; Optional
Specify the secondary contact details.
Extension
Alphanumeric; 60 Characters; Optional
Specify the extension number of the secondary contact person.
2.31 Address Details Summary
This section contains the following topics
- Section 2.31.1, "Retrieving a Record in Address Details Summary Screen"
- Section 2.31.2, "Editing Address Details Record"
- Section 2.31.3, "Viewing Address Details Record"
- Section 2.31.4, "Deleting Address Details Record"
- Section 2.31.5, "Authorizing Address Details Record"
- Section 2.31.6, "Amending Address Details Record"
- Section 2.31.7, "Authorizing Amended Address Details Record"
2.31.1 Retrieving a Record in Address Details Summary Screen
You can retrieve a previously entered record in the Summary screen, as follows:
Invoke the ‘Address Details Summary’ screen by typing ‘PASADDET’ in the field at the top right corner of the Application tool bar and clicking on the adjoining arrow button and specify any or all of the following details in the corresponding details.
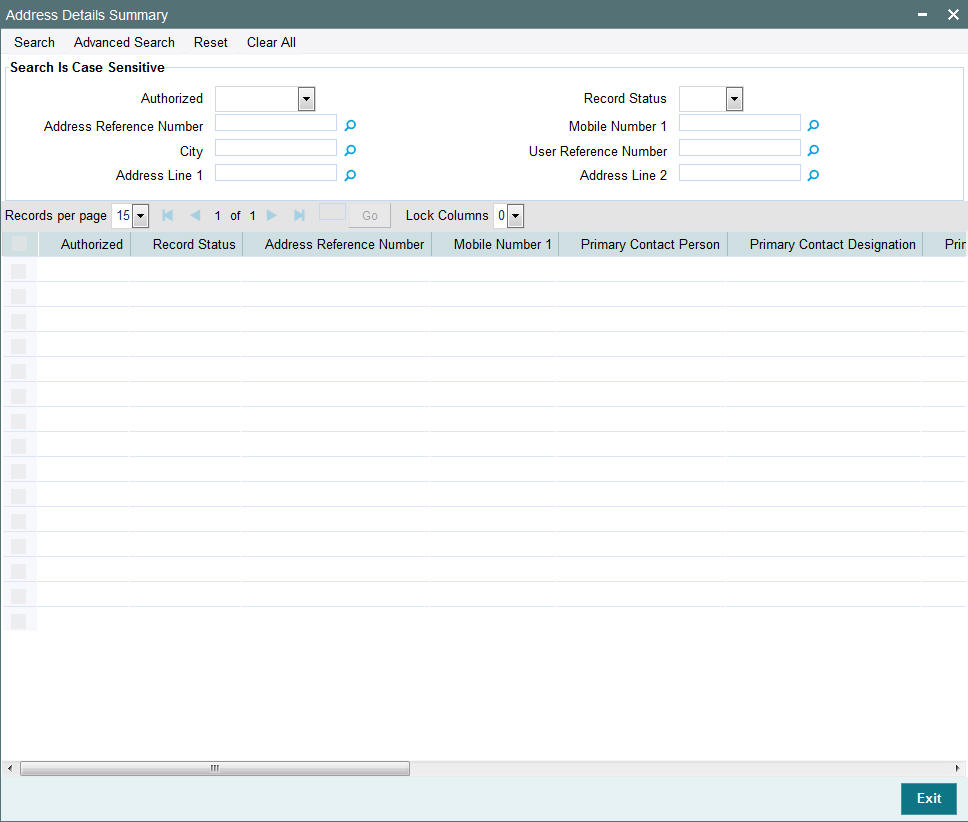
- The status of the record in the Authorization Status field. If you choose the ‘Blank Space’ option, then all the records are retrieved.
- The status of the record in the Record Status field. If you choose the ‘Blank Space’ option, then all records are retrieved
- Address Reference Number
- City
- Address Line 1
- Mobile Number 1
- User Reference Number
- Address Line 2
Click ‘Search’ button to view the records. All the records with the specified details are retrieved and displayed in the lower portion of the screen.
Note
You can also retrieve the individual record detail from the detail screen by querying in the following manner:
- Press F7
- Input the Address Reference Number
- Press F8
You can perform Edit, Delete, Amend, Authorize, operations by selecting the operation from the Action list. You can also search a record by using a combination of % and alphanumeric value
2.31.2 Editing Address Details Record
You can modify the details of Address Details record that you have already entered into the system, provided it has not subsequently authorized. You can perform this operation as follows:
- Invoke the Address Details Summary screen from the Browser.
- Select the status of the record that you want to retrieve for modification in the Authorization Status field. You can only modify records that are unauthorized. Accordingly, choose the Unauthorized option.
- Specify any or all of the details in the corresponding fields to retrieve the record that is to be modified.
- Click ‘Search’ button. All unauthorized records with the specified details are retrieved and displayed in the lower portion of the screen.
- Double click the record that you want to modify in the list of displayed records. The Address Details Detail screen is displayed.
- Select Unlock Operation from the Action list to modify the record. Modify the necessary information.
Click Save to save your changes. The Address Details Detail screen is closed and the changes made are reflected in the Address Details Summary screen.
2.31.3 Viewing Address Details Record
To view a record that you have previously input, you must retrieve the same in the Address Details Summary screen as follows:
- Invoke the Address Details Summary screen from the Browser.
- Select the status of the record that you want to retrieve for viewing in the Authorization Status field. You can also view all records that are either unauthorized or authorized only, by choosing the unauthorized / Authorized option.
- Specify any or all of the details of the record in the corresponding fields on the screen.
- Click ‘Search’ button. All records with the specified fields are retrieved and displayed in the lower portion of the screen.
- Double click the record that you want to view in the list of displayed records. The Address Details Detail screen is displayed in View mode.
2.31.4 Deleting Address Details Record
You can delete only unauthorized records in the system. To delete a record that you have previously entered:
- Invoke the Address Details Summary screen from the Browser.
- Select the status of the record that you want to retrieve for deletion.
- Specify any or all of the details in the corresponding fields on the screen.
- Click ‘Search’ button. All records with the specified fields are retrieved and displayed in the lower portion of the screen.
- Double click the record that you want to delete in the list of displayed records. The Address Details Detail screen is displayed.
- Select Delete Operation from the Action list. The system prompts you to confirm the deletion and the record is physically deleted from the system database.
2.31.5 Authorizing Address Details Record
An unauthorized Address Details record must be authorized in the system for it to be processed. To authorize a record:
- Invoke the Address Details Summary screen from the Browser.
- Select the status of the record that you want to retrieve for authorization. Typically, choose the unauthorized option.
- Specify any or all of the details in the corresponding fields on the screen.
- Click ‘Search’ button. All records with the specified details that are pending authorization are retrieved and displayed in the lower portion of the screen.
- Double click the record that you wish to authorize. The Address Details Detail screen is displayed. Select Authorize operation from the Action List.
When a checker authorizes a record, details of validation, if any, that were overridden by the maker of the record during the Save operation are displayed. If any of these overrides results in an error, the checker must reject the record.
2.31.6 Amending Address Details Record
After a Address Details record is authorized, it can be modified using the Unlock operation from the Action List. To make changes to a record after authorization:
- Invoke the Address Details Summary screen from the Browser.
- Select the status of the record that you want to retrieve for authorization. You can only amend authorized records.
- Specify any or all of the details in the corresponding fields on the screen.
- Click ‘Search’ button. All records with the specified details that are pending authorization are retrieved and displayed in the lower portion of the screen.
- Double click the record that you wish to authorize. The Address Details Detail screen is displayed in amendment mode. Select Unlock operation from the Action List to amend the record.
- Amend the necessary information and click on Save to save the changes
2.31.7 Authorizing Amended Address Details Record
An amended Address Details record must be authorized for the amendment to be made effective in the system.
The subsequent process of authorization is the same as that for normal transactions.
2.32 Party Maintenance
This section contains the following topics:
- Section 2.32.1, "Invoking Party Maintenance Screen"
- Section 2.32.2, "Individual Details Tab"
- Section 2.32.3, "Corporate Details Tab"
- Section 2.32.4, "Director Details Tab"
- Section 2.32.5, "Address Details Tab"
- Section 2.32.6, "Bank Details Tab"
- Section 2.32.7, "Identification Details Tab"
- Section 2.32.8, "Tax Compliance Tab"
- Section 2.32.9, "Add Info Details Tab"
2.32.1 Invoking Party Maintenance Screen
You can create customers and other parties in the system. The system creates any person/ institution involved in pension processing as parties and attaches respective roles. The system identifies each party by a unique Party ID.
You cannot amend Address, Bank and Identification details from ‘Party Maintenance’ screen. You can amend the same from standalone screens only. However, you cannot amend the bank details even in stand-alone screen except last verified date and status.
Any amendment done in party screen which has the role of investor or employee will be hand-off to TA system to enrich the investor accounts.
The following section data from party screen will be hand-off to TA:
- Basic individual/corporate details
- Director details for corporate parties
- Address details
- Bank and ID details
Following details will not be hand-off to TA:
- Tax compliance
- Additional information
Note
- Unitholder Income distribution setup (UH IDS) for the pension investment accounts in FCIS should be of re-investments only. The system validates the same using ‘Pre-EOD check’.
- The Pre-EOD sequence number ‘3050’ checks the number of IDS setup with payout option, for Pension Administration investment accounts.
You can maintain party details using ‘Party Maintenance Detail’ screen. You can invoke this screen by typing ‘PADPARTY’ in the field at the top right corner of the Application tool bar and clicking on the adjoining arrow button.
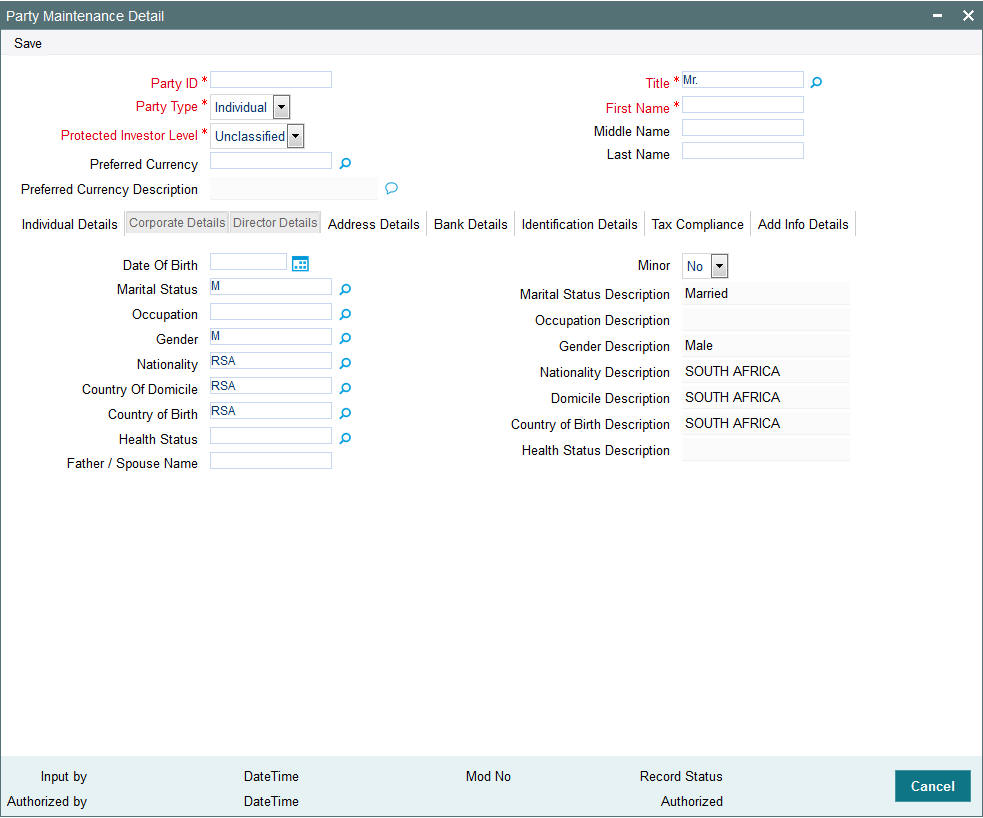
You can specify the following details:
Party ID
Alphanumeric; 16 Characters; Mandatory
Specify the party ID.
Party Type
Mandatory
Select the type of party from the drop-down list. The list displays the following values:
- Individual
- Corporate
Protected Investor Level
Mandatory
Select the protected investor level from the drop-down list. The list displays the following values:
- Classified
- Unclassified
Preferred Currency
Alphanumeric; 3 Characters; Optional
Specify the preferred currency code. Alternatively, you can select preferred currency code from the option list. The list displays all valid preferred currency code maintained in the system.
If preferred currency is not provided, then the default bank account currency will be the preferred currency for that account. If preferred currency is provided, there should be at least one bank account maintained for that preferred currency.
You can still capture a party with preferred currency passed without bank details.
Note
If broker and other entities are coming from TA to Pension Administration, then any amendment of such entities in Pension Administration will NOT be handed off the TA. The system will consider TA details as final record. Add info will not be passed on from TA to Pension Administration and vice versa.
Preferred Currency Description
Display
The system displays the description of the selected preferred currency code.
Title
Alphanumeric; 3 Characters; Mandatory
Specify the title assigned to the customer. Alternatively, you can select the title from the option list. The list displays all valid titles maintained in the system.
First Name
Alphanumeric; 100 Characters; Mandatory
Specify the first name of the customer.
Middle Name
Alphanumeric; 100 Characters; Optional
Specify the middle name of the customer.
Last Name
Alphanumeric; 100 Characters; Optional
Specify the last name of the customer.
2.32.2 Individual Details Tab
Select ‘Individual Details’ tab in ‘Party Maintenance Detail’ screen to specify individual details. This tab is enabled only if you have selected ‘Party Type’ filed as ‘Individual’.
You can specify the following details:
Date Of Birth
Date Format; Optional
Select the date of birth from adjoining calendar.
Minor
Optional
Select if the customer is minor or not from the drop-down list. The list displays the following values:
- Yes
- No
Marital Status
Alphanumeric; 1 Character; Optional
The system displays the marital status of the customer. However, you can amend this value. Alternatively, you can select marital status from the option list. The list displays all valid marital status maintained in the system.
Marital Status Description
Display
The system displays the description for the selected marital status.
Occupation
Alphanumeric; 3 Characters; Optional
Specify the occupation code. Alternatively, you can select occupation code from the option list. The list displays all valid occupation code maintained in the system.
Occupation Description
Display
The system displays the description for the selected occupation code.
Gender
Alphanumeric; 1 Character; Optional
The system displays the gender code of the customer. However, you can amend this value. Alternatively, you can select gender code from the option list. The list displays all valid gender code maintained in the system.
Gender Description
Display
The system displays the description for the gender code.
Nationality
Alphanumeric; 3 Characters; Optional
The system displays the nationality of the customer. However, you can amend this value. Alternatively, you can select nationality code from the option list. The list displays all valid nationality code maintained in the system.
Nationality Description
Display
The system displays the description of the selected nationality code.
Country Of Domicile
Alphanumeric; 3 Characters; Optional
The system displays the country of domicile of the customer. However, you can amend this value. Alternatively, you can select country of domicile from the option list. The list displays all valid country of domicile maintained in the system.
Domicile Description
Display
The system displays the description of the selected country of domicile.
Country of Birth
Alphanumeric; 3 Characters; Optional
The system displays the country of birth of the customer. However, you can amend this value. Alternatively, you can select country of birth from the option list. The list displays all valid country of birth maintained in the system.
Country of Birth Description
Display
The system displays the description of the selected country of birth.
Health Status
Alphanumeric; 1 Character; Optional
Specify the health status of the customer. Alternatively, you can select health status from the option list. The list displays all valid health status maintained in the system.
Health Status Description
Display
The system displays the description of the selected health status.
Father / Spouse Name
Alphanumeric; 105 Characters; Optional
Specify the customer’s father’s name or spouse’s name if married.
2.32.3 Corporate Details Tab
Click ‘Corporate Details’ tab in ‘Party Maintenance Detail’ screen to specify the corporate details. This tab is enabled only if you have selected ‘Party Type’ as ‘Corporate’.
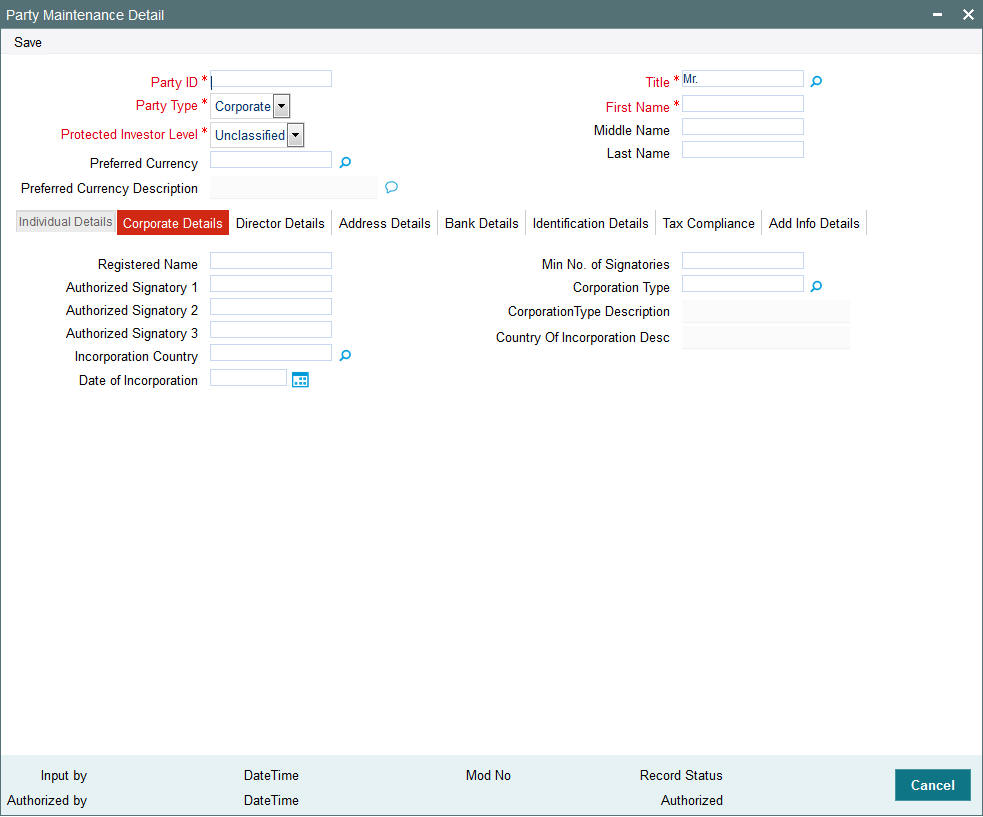
You can specify the following details:
Registered Name
Alphanumeric; 100 Characters; Optional
Specify the registered name of the corporate.
Authorized Signatory 1
Alphanumeric; 100 Characters; Optional
Specify the authorized signatory details for corporate accounts.
Authorized Signatory 2
Alphanumeric; 100 Characters; Optional
Specify the authorized signatory details for corporate accounts.
Authorized Signatory 3
Alphanumeric; 100 Characters; Optional
Specify the authorized signatory details for corporate accounts.
Incorporation Country
Alphanumeric; 3 Characters; Optional
Select the incorporation country code of the corporate. Alternatively, you can select country of incorporation code from the option list. The list displays all valid country code maintained in the system.
Country Of Incorporation Desc
Display
The system displays the description for the selected country of incorporation code.
Date of Incorporation
Date Format; Optional
Select the date of incorporation from the adjoining calendar.
Min No. of Signatories
Numeric; 22 Characters; Optional
Specify the minimum number of signatories.
Corporation Type
Alphanumeric; 3 Characters; Optional
Specify the type of corporation selected for corporate account. Alternatively, you can select corporation type from the option list. The list displays all valid corporation type maintained in the system.
Corporation Type Description
Display
The system displays the description for the selected corporation type.
2.32.4 Director Details Tab
Click ‘Director Details’ tab in ‘Party Maintenance Detail’ screen to specify the corporate details. This tab is enabled only if you have selected ‘Party Type’ as ‘Corporate’.
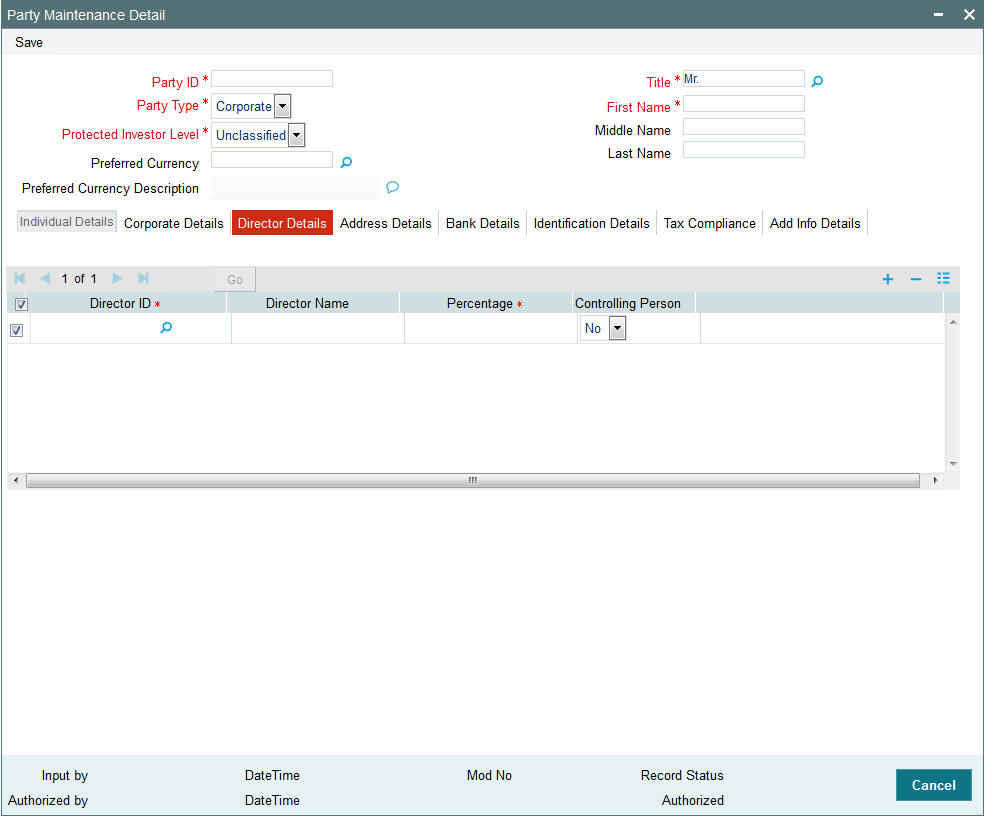
You can specify the following details:
Director ID
Alphanumeric; 16 Characters; Mandatory
Specify the director ID. Alternatively, you can select director ID from the option list. The list displays all valid director ID maintained in the system.
Director Name
Display
The system displays the name of the selected director ID.
Percentage
Numeric; 3 Characters; Mandatory
Specify the share percentage.
The sum total should be 100.
Controlling Person
Optional
Select if the director is controlling person or not from the drop-down list. The list displays the following values:
- Yes
- No
2.32.5 Address Details Tab
Click ‘Address Details’ tab in ‘Party Maintenance Detail’ screen to specify the address details.
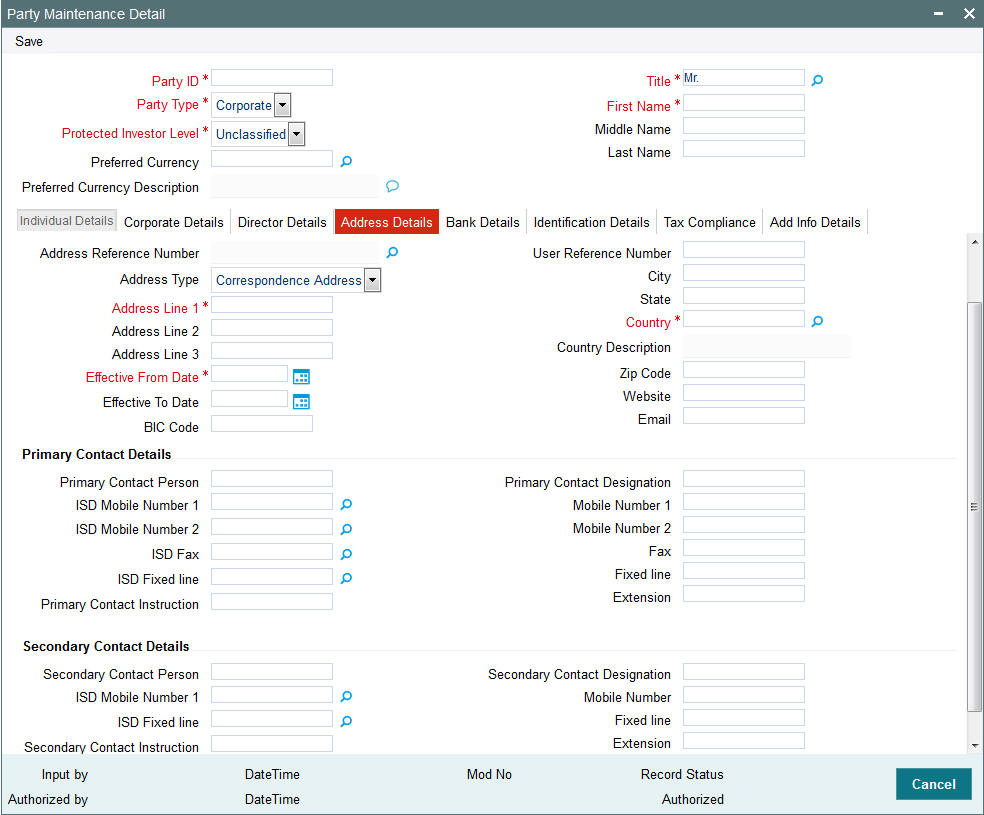
You can specify the following details:
Address Reference Number
Alphanumeric; 16 Characters; Optional
Specify the address reference number. Alternatively, you can select address reference number from the option list. The list displays all valid address reference number maintained in the system.
Once you specify the address reference number, the system displays the following details:
- Address Type
- Address Line 1
- Address Line 2
- Address Line 3
- Effective From Date
- Effective To Date
- BIC Code
- Address Reference Number
- Address Type
- Address Line 1
- Address Line 2
- Address Line 3
- Effective From Date
- Effective To Date
- BIC Code
Primary Contact Details
- Primary Contact Person
- ISD Mobile Number 1
- ISD Mobile Number 2
- ISD Fax
- ISD Fixed line
- Primary Contact Instruction
- Primary Contact designation
- Mobile Number 1
- Mobile Number 2
- Fax
- Fixed line
- Extension
Secondary Contact Details
- Secondary Contact Person
- ISD Mobile Number 1
- ISD Fixed line
- Secondary Contact Instruction
- Secondary Contact designation
- Mobile Number
- Fixed line
- Extension
If you have not specified address reference number, then you need to fill the above details manually.
Address Type
Optional
Select the type of address from the drop-down list. The list displays the following values:
- Correspondence Address
- Alternate Address
- SWIFT Address
Address Line 1
Alphanumeric; 105 Characters; Mandatory
Specify the address details.
Address Line 2
Alphanumeric; 105 Characters; Optional
Specify the address details.
Address Line 3
Alphanumeric; 105 Characters; Optional
Specify the address details.
Effective From Date
Date Format; Mandatory
Select the effective From date from the adjoining calendar.
Effective To Date
Date Format; Optional
Select the effective To date from the adjoining calendar.
BIC Code
Alphanumeric; 16 Characters; Optional
Specify the Bank Identifier Code (BIC) of the entity.
User Reference Number
Alphanumeric; 16 Characters; Optional
Specify the user reference number.
City
Alphanumeric; 80 Characters; Optional
Enter the city where the customer is located.
State
Alphanumeric; 80 Characters; Optional
Enter the State name of the mentioned city.
Country
Alphanumeric; 3 Characters; Optional
Specify the country code of the customer. Alternatively, you can select country code from the option list. The list displays all valid country code maintained in the system.
Country Description
Display
The system displays the description of the selected country code.
Zip Code
Alphanumeric; 10 Characters; Optional
Specify the zip code of the city of residence of the customer.
Website
Alphanumeric; 100 Characters; Optional
Specify the website details.
Alphanumeric; 100 Characters; Optional
Specify the address of the customer.
Primary Contact Details
Primary Contact Person
Alphanumeric; 100 Characters; Optional
Specify the primary contact person’s name.
ISD Mobile Number 1
Alphanumeric; 60 Characters; Optional
Specify the primary contact person’s ISD mobile number.
ISD Mobile Number 2
Alphanumeric; 60 Characters; Optional
Specify the primary contact person’s alternative ISD mobile number.
ISD Fax
Alphanumeric; 60 Characters; Optional
Specify the primary contact person’s ISD fax number.
ISD Fixed line
Alphanumeric; 60 Characters; Optional
Specify the primary contact person’s ISD fixed line number.
Primary Contact Instruction
Alphanumeric; 100 Characters; Optional
Specify the primary contact instruction details.
Primary Contact Designation
Alphanumeric; 100 Characters; Optional
Specify the primary contact designation details.
Mobile Number 1
Alphanumeric; 60 Characters; Optional
Specify the primary contact person’s mobile number.
Mobile Number 2
Alphanumeric; 60 Characters; Optional
Specify the primary contact person’s alternative mobile number.
Fax
Alphanumeric; 60 Characters; Optional
Specify the primary contact person’s fax number.
Fixed line
Alphanumeric; 60 Characters; Optional
Specify the primary contact person’s fixed line number.
Extension
Alphanumeric; 60 Characters; Optional
Specify the primary contact person’s extension number of the fixed line.
Secondary Contact Details
Secondary Contact Person
Alphanumeric; 100 Characters; Optional
Specify the secondary contact person’s name.
ISD Mobile Number 1
Alphanumeric; 60 Characters; Optional
Specify the secondary contact person’s ISD mobile number.
ISD Fixed line
Alphanumeric; 60 Characters; Optional
Specify the secondary contact person’s ISD fixed line number.
Secondary Contact Instruction
Alphanumeric; 100 Characters; Optional
Specify the secondary contact instruction details.
Secondary Contact Designation
Alphanumeric; 100 Characters; Optional
Specify the secondary contact designation details.
Mobile Number
Alphanumeric; 60 Characters; Optional
Specify the secondary contact person’s mobile number.
Fixed line
Alphanumeric; 60 Characters; Optional
Specify the secondary contact person’s fixed line number.
Extension
Alphanumeric; 60 Characters; Optional
Specify the secondary contact person’s extension number of the fixed line.
2.32.6 Bank Details Tab
Click ‘Bank Details’ tab in ‘Party Maintenance Detail’ screen to specify the bank details.
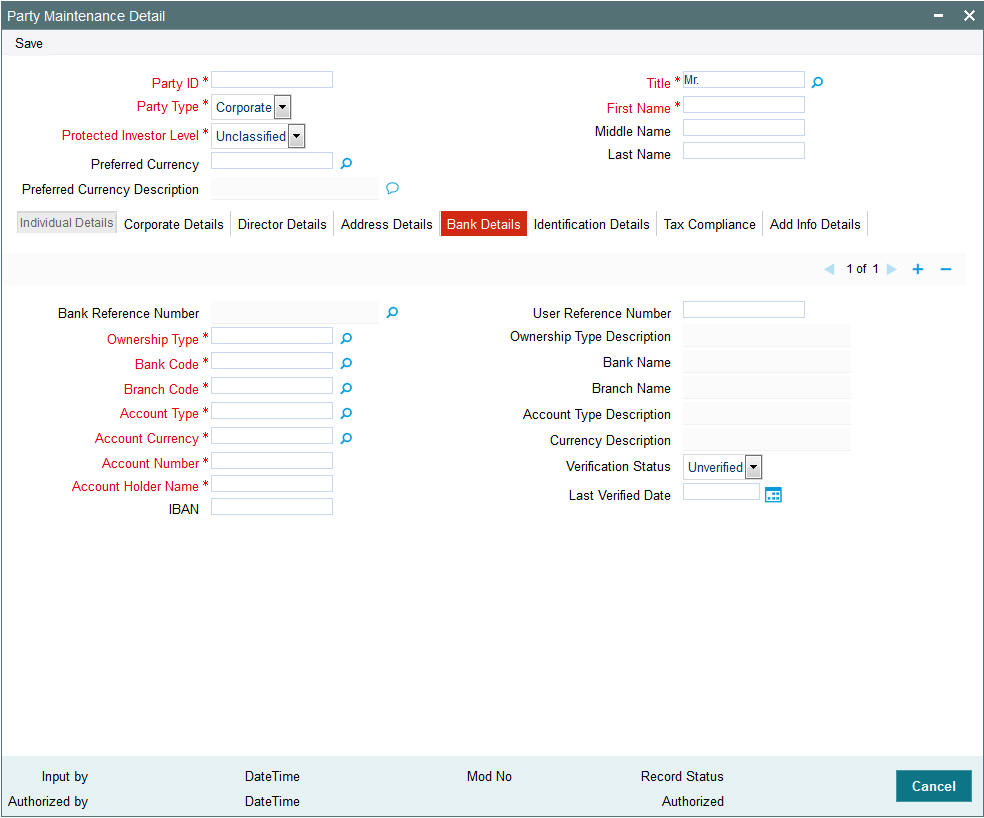
You can specify the following details:
Bank Reference Number
Alphanumeric; 16 Characters; Optional
Select bank reference number from the option list. The list displays all valid bank reference number maintained in the system.
Once you specify the bank reference number, the system displays the following details:
- Bank Code
- Branch Code
- Account Type
- Account Currency
- Account Number
- Account Holder Name
- IBAN
- User Reference Number
- Ownership Type Description
- Bank Name
- Branch Name
- Account Type Description
- Currency Description
- Verification Status
- Last Verified Date
If you have not specified bank reference number, then you need to fill the above details manually.
User Reference Number
Alphanumeric; 16 Characters; Optional
Specify the user reference number.
Ownership Type
Alphanumeric; 1 Character; Mandatory
Specify the type of ownership. Alternatively, you can select ownership type from the option list. The list displays all valid ownership type maintained in the system.
Ownership Type Description
Display
The system displays the description of the selected ownership type.
Bank Code
Alphanumeric; 16 Characters; Optional
Specify the bank code. Alternatively, you can select bank code from the option list. The list displays all valid bank code maintained in the system.
Bank Name
Display
The system displays the name of the selected bank code.
Branch Code
Alphanumeric; 12 Characters; Optional
Specify the branch code. Alternatively, you can select branch code from the option list. The list displays all valid branch code maintained in the system.
Branch Name
Display
The system displays the name of the selected branch code.
Account Type
Alphanumeric; 1 Character; Optional
Specify the account type. Alternatively, you can select account type from the option list. The list displays all valid account type maintained in the system.
Account Type Description
Display
The system displays the name of the selected account type.
Account Currency
Alphanumeric; 3 Characters; Optional
Specify the account currency code. Alternatively, you can select account currency code from the option list. The list displays all valid account currency code maintained in the system.
Currency Description
Display
The system displays the name of the selected account currency code.
Account Number
Alphanumeric; 16 Characters; Optional
Specify the account number. Alternatively, you can select account number from the option list. The list displays all valid account number maintained in the system.
Account Holder Name
Alphanumeric; 100 Characters; Optional
Specify the name of the owner of the account holder.
IBAN
Alphanumeric; 40 Characters; Optional
Specify the IBAN (International Bank Account Number) of the account holder.
Verification Status
Optional
Select the verification status from the drop-down list. The list displays the following values:
- Verified
- Unverified
Last Verified Date
Date Format; Optional
Select the last verified date from the adjoining calendar.
2.32.7 Identification Details Tab
Click ‘Identification Details’ tab in ‘Party Maintenance Detail’ screen to specify the identification details.

You can specify the following details:
ID Reference Number
Alphanumeric; 16 Characters; Optional
Specify the ID reference number. Alternatively, you can select ID reference number from the option list. The list displays all valid ID reference number maintained in the system.
Once you specify the ID reference number, the system displays the following details:
- Identification Type
- Identification Number
- Place of Issue
- Issuing Country
- Date of Issue
- Date of Expiry
- User Reference Number
- ID Type Description
- Issuing Authority
- Place of Issue Description
- Issuing Country Description
- Verification Status
- Last Verified Date
If you have not specified ID reference number, then you need to fill the above details manually.
User Reference Number
Alphanumeric; 16 Characters; Optional
Specify the user reference number.
Identification Type
Alphanumeric; 3 Characters; Mandatory
Specify the identification type. Alternatively, you can select identification type from the option list. The list displays all valid identification type maintained in the system.
ID Type Description
Display
The system displays the description for the selected identification type.
Identification Number
Alphanumeric; 50 Characters; Optional
Specify the identification number.
Issuing Authority
Alphanumeric; 50 Characters; Optional
Specify the issuing authority details.
Place of Issue
Alphanumeric; 3 Characters; Optional
Specify the place of issue details. Alternatively, you can select place of issue from the option list. The list displays all valid place of issue details maintained in the system.
Place of Issue Description
Display
The system displays the description for the selected place of issue code.
Issuing Country
Alphanumeric; 3 Characters; Optional
Specify the issuing country code. Alternatively, you can select issuing country code from the option list. The list displays all valid issuing country code maintained in the system.
Issuing Country Description
Display
The system displays the description for the selected issuing country code.
Date of Issue
Date Format; Optional
Select the date of issue from the adjoining calendar.
Date of Expiry
Date Format; Optional
Select the date of expiry from the adjoining calendar.
Verification Status
Optional
Select the verification status from the drop-down list. The list displays the following values:
- Verified
- Unverified
Last Verified Date
Date Format; Optional
Select the last verified date from the adjoining calendar.
2.32.8 Tax Compliance Tab
Click ‘Tax Compliance’ tab in ‘Party Maintenance Detail’ screen to specify the tax compliance details.
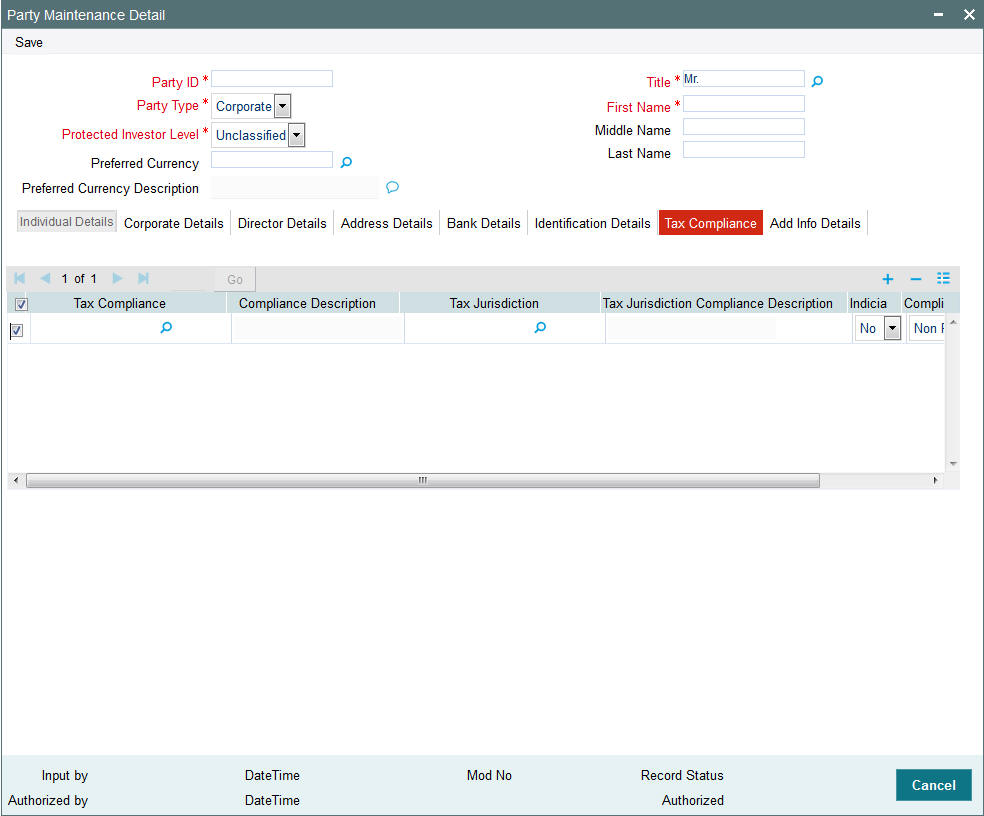
You can specify the following details:
Tax Compliance
Alphanumeric; 3 Characters; Mandatory
Specify the tax compliance codes based on rules maintained at PARAMS. Alternatively, you can select tax compliance code from the option list. The list displays all valid tax compliance maintained in the system.
Compliance Description
Display
The system displays the description of the selected tax compliance code.
Tax Jurisdiction
Alphanumeric; 3 Characters; Mandatory
Specify the tax jurisdiction code. Alternatively, you can select tax jurisdiction code from the option list. The list displays all valid tax jurisdiction code maintained in the system.
Tax Jurisdiction Compliance Description
Display
The system displays the description of the selected tax jurisdiction compliance code.
Indicia
Optional
Select if indicia is available or not from the drop-down list. The list displays the following values:
- Yes
- No
Compliance Status
Optional
Select the compliance status from the drop-down list. The list displays the following values:
- Reportable
- Non Reportable
2.32.9 Add Info Details Tab
Click ‘Add Info’ tab in ‘Party Maintenance Detail’ screen to specify the mapped additional information.

You can specify the following details:
Other Info Field
Display
The system displays the other information maintained for party maintenance.
Field Value
Alphanumeric; 60 Characters; Optional
Specify the field value.
Note
Add Info is module specific for TA and Pension Administration.
2.33 Party Maintenance Summary
This section contains the following topics:
- Section 2.33.1, "Retrieving a Record in Party Maintenance Summary Screen"
- Section 2.33.2, "Editing Party Maintenance Record"
- Section 2.33.3, "Viewing Party Maintenance Record"
- Section 2.33.4, "Deleting Party Maintenance Record"
- Section 2.33.5, "Authorizing Party Maintenance Record"
- Section 2.33.6, "Amending Party Maintenance Record"
- Section 2.33.7, "Authorizing Amended Party Maintenance Record"
2.33.1 Retrieving a Record in Party Maintenance Summary Screen
You can retrieve a previously entered record in the Summary screen, as follows:
Invoke the ‘Party Maintenance Summary’ screen by typing ‘PASPARTY’ in the field at the top right corner of the Application tool bar and clicking on the adjoining arrow button and specify any or all of the following details in the corresponding details.
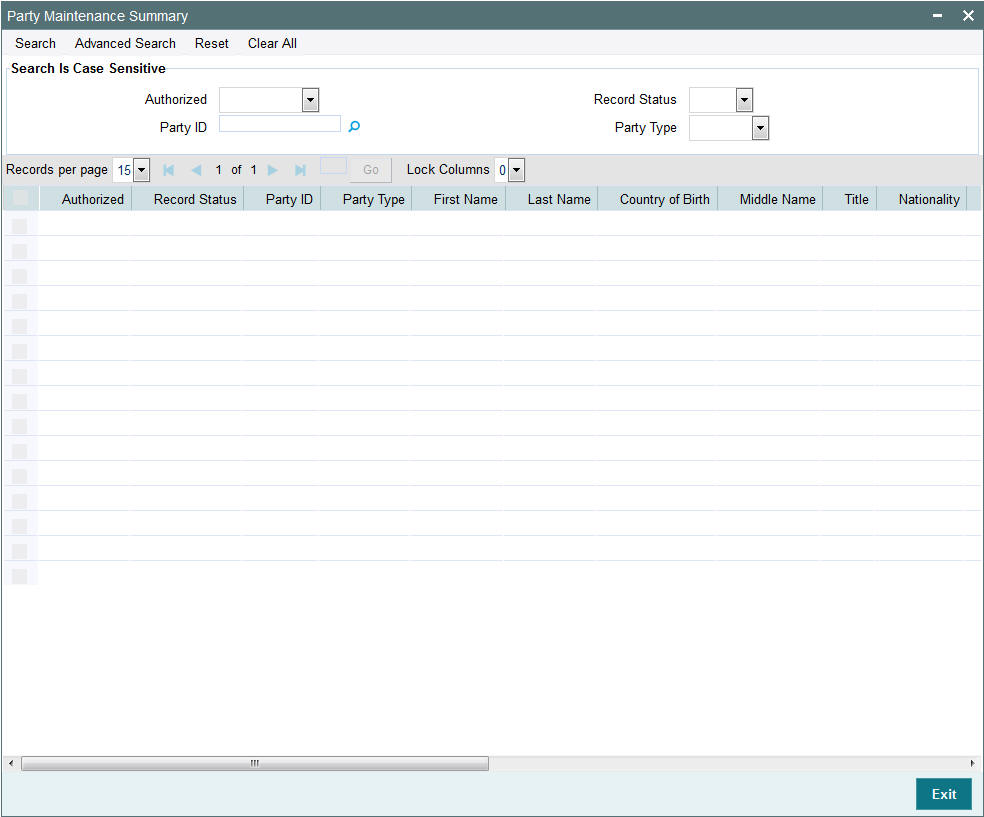
- The status of the record in the Authorized Status field. If you choose the ‘Blank Space’ option, then all the records are retrieved.
- The status of the record in the Record Status field. If you choose the ‘Blank Space’ option, then all records are retrieved
- Party ID
- Party Type
Click ‘Search’ button to view the records. All the records with the specified details are retrieved and displayed in the lower portion of the screen.
Note
You can also retrieve the individual record detail from the detail screen by querying in the following manner:
- Press F7
- Input the Party ID
- Press F8
You can perform Edit, Delete, Amend, Authorize, operations by selecting the operation from the Action list. You can also search a record by using a combination of % and alphanumeric value
2.33.2 Editing Party Maintenance Record
You can modify the details of Party Maintenance record that you have already entered into the system, provided it has not subsequently authorized. You can perform this operation as follows:
- Invoke the Party Maintenance Summary screen from the Browser.
- Select the status of the record that you want to retrieve for modification in the Authorized field. You can only modify records that are unauthorized. Accordingly, choose the Unauthorized option.
- Specify any or all of the details in the corresponding fields to retrieve the record that is to be modified.
- Click ‘Search’ button. All unauthorized records with the specified details are retrieved and displayed in the lower portion of the screen.
- Double click the record that you want to modify in the list of displayed records. The Party Maintenance Detail screen is displayed.
- Select Unlock Operation from the Action list to modify the record. Modify the necessary information.
Click Save to save your changes. The Party Maintenance Detail screen is closed and the changes made are reflected in the Party Maintenance Summary screen.
2.33.3 Viewing Party Maintenance Record
To view a record that you have previously input, you must retrieve the same in the Party Maintenance Summary screen as follows:
- Invoke the Party Maintenance Summary screen from the Browser.
- Select the status of the record that you want to retrieve for viewing in the Authorized field. You can also view all records that are either unauthorized or authorized only, by choosing the unauthorized / Authorized option.
- Specify any or all of the details of the record in the corresponding fields on the screen.
- Click ‘Search’ button. All records with the specified fields are retrieved and displayed in the lower portion of the screen.
- Double click the record that you want to view in the list of displayed records. The Party Maintenance Detail screen is displayed in View mode.
2.33.4 Deleting Party Maintenance Record
You can delete only unauthorized records in the system. To delete a record that you have previously entered:
- Invoke the Party Maintenance Summary screen from the Browser.
- Select the status of the record that you want to retrieve for deletion.
- Specify any or all of the details in the corresponding fields on the screen.
- Click ‘Search’ button. All records with the specified fields are retrieved and displayed in the lower portion of the screen.
- Double click the record that you want to delete in the list of displayed records. The Party Maintenance Detail screen is displayed.
- Select Delete Operation from the Action list. The system prompts you to confirm the deletion and the record is physically deleted from the system database.
2.33.5 Authorizing Party Maintenance Record
An unauthorized Party Maintenance record must be authorized in the system for it to be processed. To authorize a record:
- Invoke the Party Maintenance Summary screen from the Browser.
- Select the status of the record that you want to retrieve for authorization. Typically, choose the unauthorized option.
- Specify any or all of the details in the corresponding fields on the screen.
- Click ‘Search’ button. All records with the specified details that are pending authorization are retrieved and displayed in the lower portion of the screen.
- Double click the record that you wish to authorize. The Party Maintenance Detail screen is displayed. Select Authorize operation from the Action List.
When a checker authorizes a record, details of validation, if any, that were overridden by the maker of the record during the Save operation are displayed. If any of these overrides results in an error, the checker must reject the record.
2.33.6 Amending Party Maintenance Record
After a Party Maintenance record is authorized, it can be modified using the Unlock operation from the Action List. To make changes to a record after authorization:
- Invoke the Party Maintenance Summary screen from the Browser.
- Select the status of the record that you want to retrieve for authorization. You can only amend authorized records.
- Specify any or all of the details in the corresponding fields on the screen.
- Click ‘Search’ button. All records with the specified details that are pending authorization are retrieved and displayed in the lower portion of the screen.
- Double click the record that you wish to authorize. The Party Maintenance Detail screen is displayed in amendment mode. Select Unlock operation from the Action List to amend the record.
- Amend the necessary information and click on Save to save the changes
2.33.7 Authorizing Amended Party Maintenance Record
An amended Party Maintenance record must be authorized for the amendment to be made effective in the system.
The subsequent process of authorization is the same as that for normal transactions.
2.34 Party Role Mapping
This section contains the following topics:
- Section 2.34.1, "Intermediary Hand-off from PA to TA"
- Section 2.34.2, "Invoking Party Role Mapping Screen"
- Section 2.34.3, "Employment History Button"
2.34.1 Intermediary Hand-off from PA to TA
Intermediary hand-off from TA to PA is as follows:
- Intermediaries and entities created in Integrated TA system will flow to PA system from TA. In Pension Administration, system will create party and automatically maps a party role as part of upload of these entities in the system.
- The system updates the external reference ID with the broker ID during broker upload into Pension Administration from TA
- For these intermediaries or entities, if investor role is attached and you try capture orders, the same will fail, as broker does not have ID details captured in TA.
- You need to the amend the party and add ID details else the transactions will not be successful.
Note
This approach is supported for party role B - Broker only.
2.34.2 Invoking Party Role Mapping Screen
You can map roles to parties created through party maintenance system. You can map a party to multiple roles in the system using ‘Role Mapping’ screen. You can invoke this screen by typing ‘PADPRROL’ in the field at the top right corner of the Application tool bar and clicking on the adjoining arrow button.
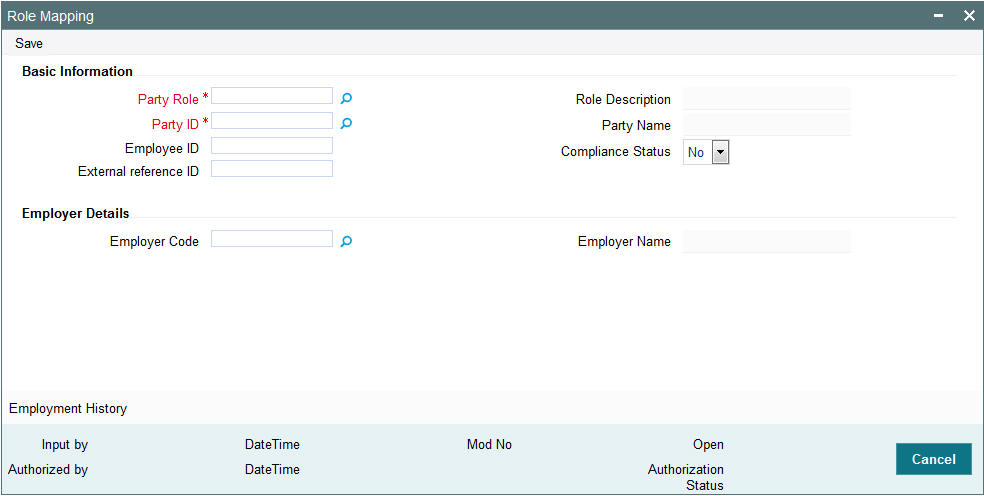
You can specify the following details:
Basic Information
Party Role
Alphanumeric; 2 Characters; Mandatory
Specify the party role to which party ID is attached. Alternatively, you can select party role code from the option list. The list displays all valid party role code maintained in the system.
Role Description
Display
The system displays the description of the selected party role code.
Party ID
Alphanumeric; 16 Characters; Mandatory
Specify the party ID. Alternatively, you can select party ID from the option list. The list displays all valid party ID maintained in the system.
Party Name
Display
The system displays the name of the selected party ID.
Employee ID
Alphanumeric; 20 Characters; Mandatory if Role is EP
Specify the employee ID.
External reference ID
Alphanumeric; 16 Characters; Optional
Specify the employee reference ID.
If you have not specified the external reference ID, then the system will auto generate the same.
Compliance Status
Optional
Select the compliance status from the drop-down list. The list displays the following values:
- Yes
- No
Employer Details
Employer Code
Alphanumeric; 12 Characters; Optional
Specify the employer code. Alternatively, you can select employer code from the option list. The list displays all valid employer code maintained in the system.
This data is mandatory if Employee (EP) is maintained as a party role.
Employer Name
Display
The system displays the name of the selected employer code.
2.34.3 Employment History Button
Click ‘Employment History’ button in ‘Role Mapping’ screen. The ‘Employment History’ screen is displayed. You can also invoke this screen by typing ‘PADEHROL’ in the field at the top right corner of the Application tool bar and clicking on the adjoining arrow button and specify any or all of the following details in the corresponding details.

You can specify the following details:
Party ID
Display
The system displays the party ID mentioned in ‘Role Mapping’ screen.
Click ‘Execute Query’ button to view the following details:
- Employee ID
- Employer Code
- Employer Name
- Log Date
2.35 Role Mapping Summary
This section contains the following topics:
- Section 2.35.1, "Retrieving a Record in Role Mapping Summary Screen"
- Section 2.35.2, "Editing Role Mapping Record"
- Section 2.35.3, "Viewing Role Mapping Record"
- Section 2.35.4, "Deleting Role Mapping Record"
- Section 2.35.5, "Authorizing Role Mapping Record"
- Section 2.35.6, "Amending Role Mapping Record"
- Section 2.35.7, "Authorizing Amended Role Mapping Record"
2.35.1 Retrieving a Record in Role Mapping Summary Screen
You can retrieve a previously entered record in the Summary screen, as follows:
Invoke the ‘Role Mapping Summary’ screen by typing ‘PASPRROL’ in the field at the top right corner of the Application tool bar and clicking on the adjoining arrow button and specify any or all of the following details in the corresponding details.
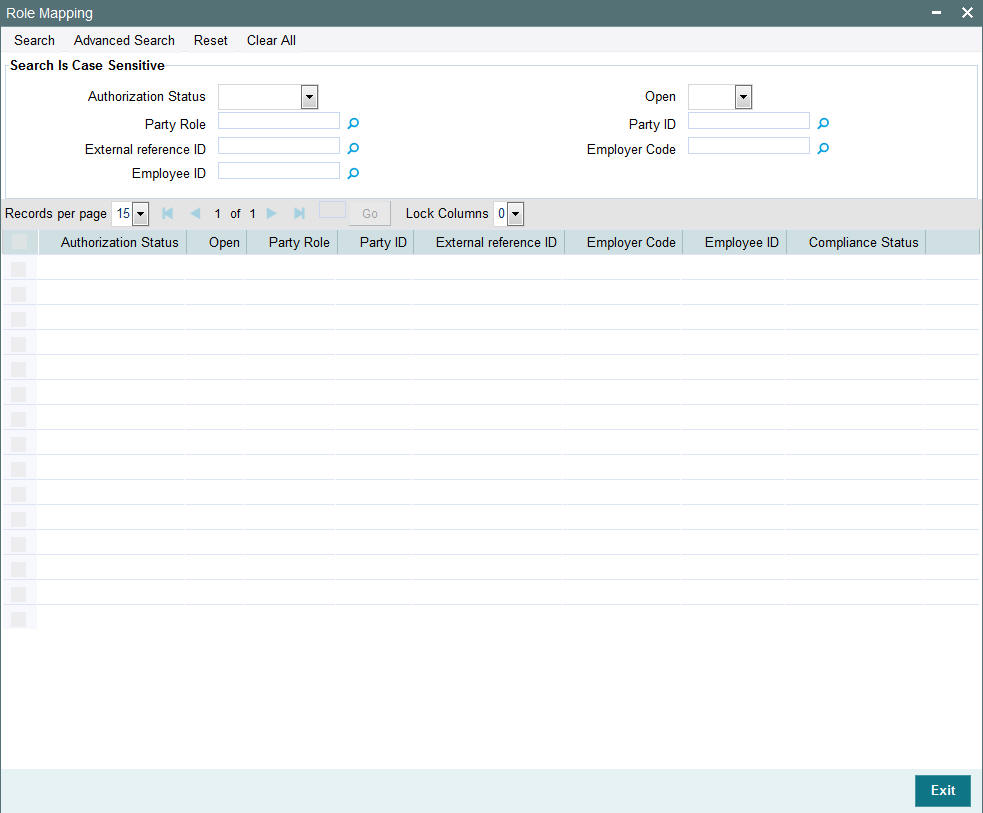
- The status of the record in the Authorization Status field. If you choose the ‘Blank Space’ option, then all the records are retrieved.
- The status of the record in the Open field. If you choose the ‘Blank Space’ option, then all records are retrieved
- Party Role
- External Reference ID
- Employee ID
- Party ID
- Employer Code
Click ‘Search’ button to view the records. All the records with the specified details are retrieved and displayed in the lower portion of the screen.
Note
You can also retrieve the individual record detail from the detail screen by querying in the following manner:
- Press F7
- Input the Party ID
- Press F8
You can perform Edit, Delete, Amend, Authorize, operations by selecting the operation from the Action list. You can also search a record by using a combination of % and alphanumeric value
2.35.2 Editing Role Mapping Record
You can modify the details of Role Mapping record that you have already entered into the system, provided it has not subsequently authorized. You can perform this operation as follows:
- Invoke the Role Mapping Summary screen from the Browser.
- Select the status of the record that you want to retrieve for modification in the Authorization Status field. You can only modify records that are unauthorized. Accordingly, choose the Unauthorized option.
- Specify any or all of the details in the corresponding fields to retrieve the record that is to be modified.
- Click ‘Search’ button. All unauthorized records with the specified details are retrieved and displayed in the lower portion of the screen.
- Double click the record that you want to modify in the list of displayed records. The Role Mapping Detail screen is displayed.
- Select Unlock Operation from the Action list to modify the record. Modify the necessary information.
Click Save to save your changes. The Role Mapping Detail screen is closed and the changes made are reflected in the Role Mapping Summary screen.
2.35.3 Viewing Role Mapping Record
To view a record that you have previously input, you must retrieve the same in the Role Mapping Summary screen as follows:
- Invoke the Role Mapping Summary screen from the Browser.
- Select the status of the record that you want to retrieve for viewing in the Authorization Status field. You can also view all records that are either unauthorized or authorized only, by choosing the unauthorized / Authorized option.
- Specify any or all of the details of the record in the corresponding fields on the screen.
- Click ‘Search’ button. All records with the specified fields are retrieved and displayed in the lower portion of the screen.
- Double click the record that you want to view in the list of displayed records. The Role Mapping Detail screen is displayed in View mode.
2.35.4 Deleting Role Mapping Record
You can delete only unauthorized records in the system. To delete a record that you have previously entered:
- Invoke the Role Mapping Summary screen from the Browser.
- Select the status of the record that you want to retrieve for deletion.
- Specify any or all of the details in the corresponding fields on the screen.
- Click ‘Search’ button. All records with the specified fields are retrieved and displayed in the lower portion of the screen.
- Double click the record that you want to delete in the list of displayed records. The Role Mapping Detail screen is displayed.
- Select Delete Operation from the Action list. The system prompts you to confirm the deletion and the record is physically deleted from the system database.
2.35.5 Authorizing Role Mapping Record
An unauthorized Role Mapping record must be authorized in the system for it to be processed. To authorize a record:
- Invoke the Role Mapping Summary screen from the Browser.
- Select the status of the record that you want to retrieve for authorization. Typically, choose the unauthorized option.
- Specify any or all of the details in the corresponding fields on the screen.
- Click ‘Search’ button. All records with the specified details that are pending authorization are retrieved and displayed in the lower portion of the screen.
- Double click the record that you wish to authorize. The Role Mapping Detail screen is displayed. Select Authorize operation from the Action List.
When a checker authorizes a record, details of validation, if any, that were overridden by the maker of the record during the Save operation are displayed. If any of these overrides results in an error, the checker must reject the record.
2.35.6 Amending Role Mapping Record
After a Role Mapping record is authorized, it can be modified using the Unlock operation from the Action List. To make changes to a record after authorization:
- Invoke the Role Mapping Summary screen from the Browser.
- Select the status of the record that you want to retrieve for authorization. You can only amend authorized records.
- Specify any or all of the details in the corresponding fields on the screen.
- Click ‘Search’ button. All records with the specified details that are pending authorization are retrieved and displayed in the lower portion of the screen.
- Double click the record that you wish to authorize. The Role Mapping Detail screen is displayed in amendment mode. Select Unlock operation from the Action List to amend the record.
- Amend the necessary information and click on Save to save the changes
2.35.7 Authorizing Amended Role Mapping Record
An amended Role Mapping record must be authorized for the amendment to be made effective in the system.
The subsequent process of authorization is the same as that for normal transactions.
2.36 Investment Account
This section contains the following topics:
- Section 2.36.1, "Invoking Investment Account Detail Screen"
- Section 2.36.2, "Basic Info Tab"
- Section 2.36.3, "Intermediary Tab"
- Section 2.36.4, "Bank Details Tab"
- Section 2.36.5, "Beneficiary Details Tab"
- Section 2.36.6, "Joint Account Details Tab"
- Section 2.36.7, "Nominee Details Tab"
- Section 2.36.8, "Add Info Details Tab"
2.36.1 Invoking Investment Account Detail Screen
If KYCAML client country is switched ON in LOB schema, then:
- A new UH category called `P-PENSION to be made available
- KYCAML setup should not be done for this category investor accounts
- ALLKYC received for PAS accounts and transactions will be stamped as Yes.
You can capture the investment account for parties using ‘Investment Account Detail’ screen. You can invoke this screen by typing ‘PADINVAC’ in the field at the top right corner of the Application tool bar and clicking on the adjoining arrow button.
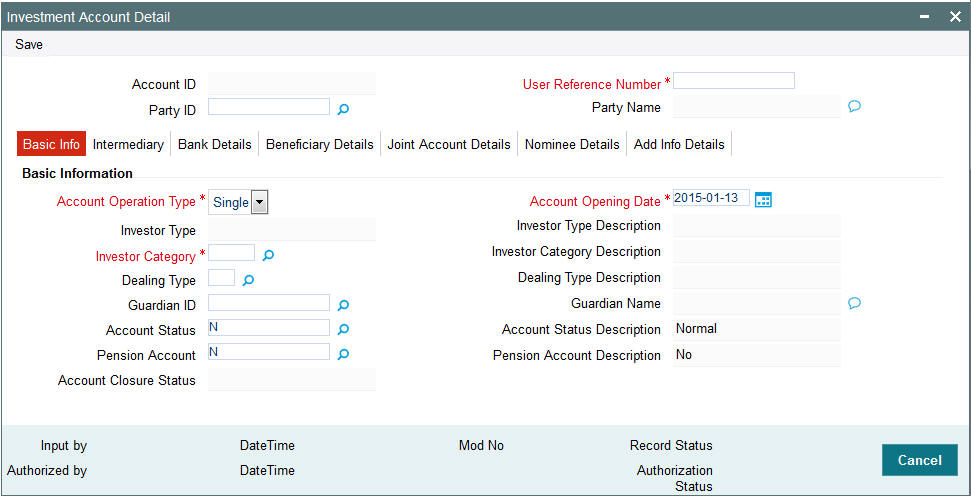
You can specify the following details:
Account ID
Display
The system auto generates the account ID.
User Reference Number
Alphanumeric; 16 Characters; Mandatory
Specify the user reference number.
Party ID
Alphanumeric; 12 Characters; Mandatory
Specify the party ID for which the investment account is created. Alternatively, you can select party ID from the option list. The list displays all valid party ID maintained in the system.
Party Name
Display
The system displays the name of the selected party ID.
2.36.2 Basic Info Tab
Click ‘Basic Info’ tab in ‘Investment Account Detail’ screen to specify basic information.
Basic Information
Account Operation Type
Mandatory
Select the account operation type from the drop-down list. The list displays the following values:
- Single
- Joint
Account Opening Date
Date Format Mandatory
Select the account opening date from the adjoining calendar.
Investor Type
Alphanumeric; 2 Characters; Optional
Specify the type of investor. Alternatively, you can select investor type from the option list. The list displays all valid investor type maintained in the system.
Investor Type Description
Display
The system displays the description of the selected investor type.
Investor Category
Alphanumeric; 2 Characters; Mandatory
Specify the investor’s category. Alternatively, you can select the investor category from option list. The list displays all valid investor categories maintained in the system.
Investor Category Description
Display
The system displays the description for the selected investor category.
Dealing Type
Alphanumeric; 3 Characters; Optional
Specify the dealing type. Alternatively, you can select dealing type from option list. The list displays all valid dealing type maintained in the system.
Dealing Type Description
Display
The system displays the description of the selected dealing type.
Guardian ID
Alphanumeric; 12 Characters; Optional
Specify the guardian ID for minor. Alternatively, you can select guardian ID from option list. The list displays all valid guardian ID maintained in the system.
Guardian Name
Display
The system displays the name of the selected guardian ID.
Account Status
Alphanumeric; 1 Character; Optional
The system displays the status of the account. However, you can amend this value. Alternatively, you can select account status from option list. The list displays all valid account status maintained in the system.
Account Status Description
Display
The system displays the description of the selected account status.
Pension Account
Alphanumeric; 1 Character; Optional
The system displays the status of the pension account. However, you can amend this value. Alternatively, you can select pension account status from option list. The list displays all valid pension account status maintained in the system.
Pension Account Description
Display
The system displays the description of the selected pension account status.
Account Closure Status
Display
The system displays the status of the closure of the account.
2.36.3 Intermediary Tab
Click ‘Intermediary’ tab in ‘Investment Account Detail’ screen to specify intermediary details screen.
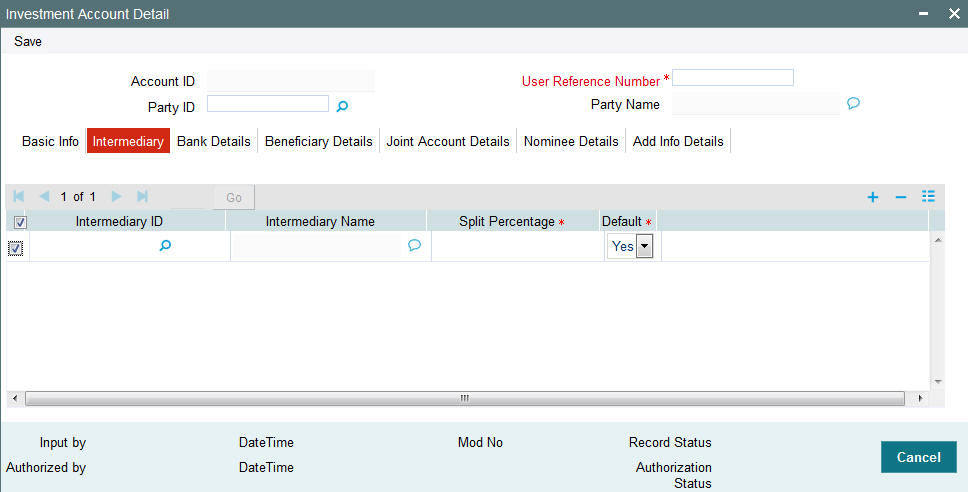
You can specify the following details:
Intermediary ID
Alphanumeric; 12 Characters; Optional
Specify Intermediary ID. Alternatively, you can select intermediary ID from option list. The list displays all valid intermediary ID maintained in the system.
Intermediary Name
Display
The system displays the name of the selected intermediary ID.
Split Percentage
Numeric; 3 Characters; Mandatory
Specify the split percentage details.
The sum total should be 100
Default
Mandatory
Select if the values has to be defaulted or not from the drop-down list. The list displays the following values:
- Yes
- No
2.36.4 Bank Details Tab
Click ‘Bank Details’ tab in ‘Investment Account Detail’ screen to specify the bank details.

You can specify the following details:
Bank Reference Number
Alphanumeric; 16 Characters; Optional
Specify the bank reference number. Alternatively, you can select bank reference number from the option list. The list displays all valid bank accounts mapped to the party.
Default
Mandatory
Select if the bank details has to be defaulted or not from the drop-down list. The list displays the following values:
- Yes
- No
Direct Debit Applicable
Mandatory
Select if direct debit is applicable or not from the drop-down list. The list displays the following values:
- Yes
- No
2.36.4.1 Bank Details Button
Click ‘Bank Details’ button in ‘Investment Account Detail’ screen. The ‘Bank Details’ screen is displayed (PADBKDET).
The system displays the following details:
- Bank Reference Number
- Bank
- Branch
- Account Type
- Account Currency
- Account Number
- Account Holder Name
- IBAN
- User Reference Number
- Bank Description
- Branch Description
- Account Type Description
- Account Currency Description
- Verification Status
- Last Verified Date
2.36.5 Beneficiary Details Tab
Click ‘Beneficiary Details’ tab in ‘Investment Account Detail’ screen to specify the beneficiary details.
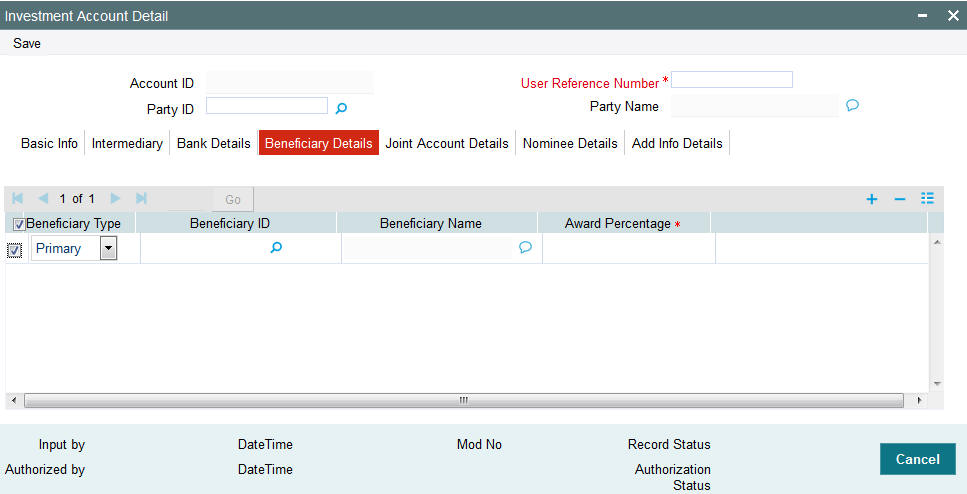
You can specify the following details:
Beneficiary Type
Optional
Select the type of beneficiary from the drop-down list. The list displays the following values:
- Primary
- Secondary
Beneficiary ID
Alphanumeric; 12 Characters; Optional
Specify the beneficiary ID. Alternatively, you can select beneficiary ID from the option list. The list displays all valid beneficiary ID maintained in the system.
Beneficiary Name
Display
The system displays the name of the selected beneficiary ID.
Award Percentage
Numeric; 3 Characters; Mandatory
Specify the beneficiary award percentage.
The sum total should be 100.
2.36.6 Joint Account Details Tab
Click ‘Joint Account Details’ tab in ‘Investment Account Detail’ screen to specify the joint account details.
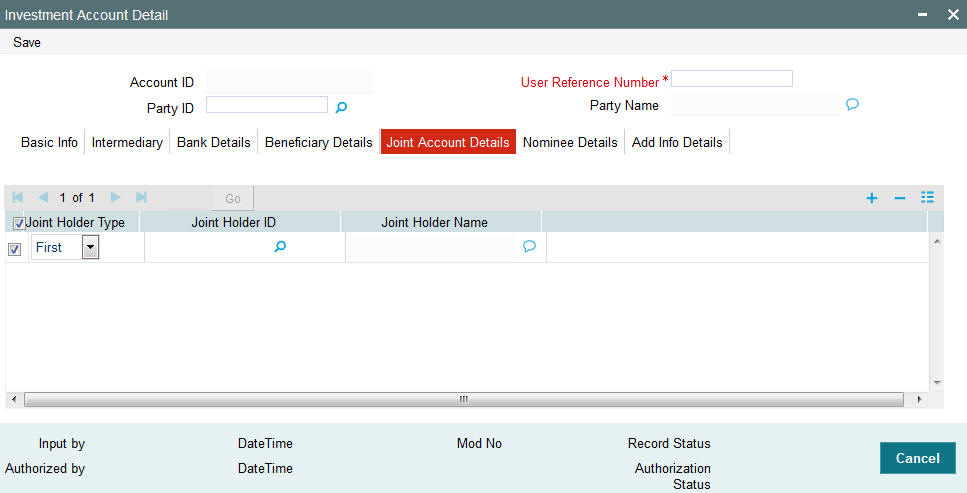
You can specify the following details:
Joint Holder Type
Optional
Select the type of joint holder from the drop-down list. The list displays the following values:
- First
- Second
- Third
Joint Holder ID
Alphanumeric; 12 Characters; Optional
Specify the joint holder ID. Alternatively, you can select joint holder ID from the option list. The list displays all valid joint holder IDs maintained in the system.
Joint Holder Name
Display
The system displays the name of the selected joint holder ID.
2.36.7 Nominee Details Tab
Click ‘Nominee Details’ tab in ‘Investment Account Detail’ screen to specify the nominee details.
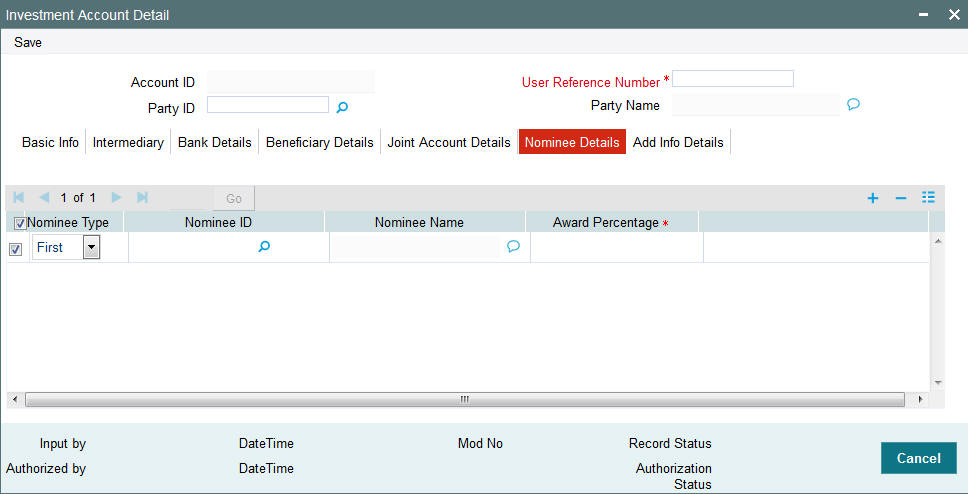
You can specify the following details:
Nominee Type
Optional
Select the type of nominee from the drop-down list. The list displays the following values:
- First
- Second
- Third
Nominee ID
Alphanumeric; 12 Characters; Optional
Specify the nominee ID. Alternatively, you can select nominee ID from the option list. The list displays all valid nominee IDs maintained in the system.
Nominee Name
Display
The system displays the name of the selected nominee ID.
Award Percentage
Numeric; 3 Characters; Mandatory
Specify the nominee award percentage.
The sum total should be 100.
2.36.8 Add Info Details Tab
Click ‘Add Info’ tab in ‘Investment Account Detail’ screen to specify the mapped additional information.

You can specify the following details:
Other Info Field
Display
The system displays the other information maintained for investment account.
Field Value
Alphanumeric; 60 Characters; Optional
Specify the field value.
2.37 Investment Account Summary
This section contains the following topics:
- Section 2.37.1, "Retrieving a Record in Investment Account Summary Screen"
- Section 2.37.2, "Editing Investment Account Record"
- Section 2.37.3, "Viewing Investment Account Record"
- Section 2.37.4, "Deleting Investment Account Record"
- Section 2.37.5, "Authorizing Investment Account Record"
- Section 2.37.6, "Amending Investment Account Record"
- Section 2.37.7, "Authorizing Amended Investment Account Record"
2.37.1 Retrieving a Record in Investment Account Summary Screen
You can retrieve a previously entered record in the Summary screen, as follows:
Invoke the ‘Investment Account Summary’ screen by typing ‘PASINVAC’ in the field at the top right corner of the Application tool bar and clicking on the adjoining arrow button and specify any or all of the following details in the corresponding details.

- The status of the record in the Authorization Status field. If you choose the ‘Blank Space’ option, then all the records are retrieved.
- The status of the record in the Open field. If you choose the ‘Blank Space’ option, then all records are retrieved
- Account ID
- Party ID
- User Reference Number
- Account Opening Date
Click ‘Search’ button to view the records. All the records with the specified details are retrieved and displayed in the lower portion of the screen.
Note
You can also retrieve the individual record detail from the detail screen by querying in the following manner:
- Press F7
- Input the Account ID
- Press F8
You can perform Edit, Delete, Amend, Authorize, operations by selecting the operation from the Action list. You can also search a record by using a combination of % and alphanumeric value
2.37.2 Editing Investment Account Record
You can modify the details of Investment Account record that you have already entered into the system, provided it has not subsequently authorized. You can perform this operation as follows:
- Invoke the Investment Account Summary screen from the Browser.
- Select the status of the record that you want to retrieve for modification in the Authorization Status field. You can only modify records that are unauthorized. Accordingly, choose the Unauthorized option.
- Specify any or all of the details in the corresponding fields to retrieve the record that is to be modified.
- Click ‘Search’ button. All unauthorized records with the specified details are retrieved and displayed in the lower portion of the screen.
- Double click the record that you want to modify in the list of displayed records. The Investment Account Detail screen is displayed.
- Select Unlock Operation from the Action list to modify the record. Modify the necessary information.
Click Save to save your changes. The Investment Account Detail screen is closed and the changes made are reflected in the Investment Account Summary screen.
2.37.3 Viewing Investment Account Record
To view a record that you have previously input, you must retrieve the same in the Investment Account Summary screen as follows:
- Invoke the Investment Account Summary screen from the Browser.
- Select the status of the record that you want to retrieve for viewing in the Authorization Status field. You can also view all records that are either unauthorized or authorized only, by choosing the unauthorized / Authorized option.
- Specify any or all of the details of the record in the corresponding fields on the screen.
- Click ‘Search’ button. All records with the specified fields are retrieved and displayed in the lower portion of the screen.
- Double click the record that you want to view in the list of displayed records. The Investment Account Detail screen is displayed in View mode.
2.37.4 Deleting Investment Account Record
You can delete only unauthorized records in the system. To delete a record that you have previously entered:
- Invoke the Investment Account Summary screen from the Browser.
- Select the status of the record that you want to retrieve for deletion.
- Specify any or all of the details in the corresponding fields on the screen.
- Click ‘Search’ button. All records with the specified fields are retrieved and displayed in the lower portion of the screen.
- Double click the record that you want to delete in the list of displayed records. The Investment Account Detail screen is displayed.
- Select Delete Operation from the Action list. The system prompts you to confirm the deletion and the record is physically deleted from the system database.
2.37.5 Authorizing Investment Account Record
An unauthorized Investment Account record must be authorized in the system for it to be processed. To authorize a record:
- Invoke the Investment Account Summary screen from the Browser.
- Select the status of the record that you want to retrieve for authorization. Typically, choose the unauthorized option.
- Specify any or all of the details in the corresponding fields on the screen.
- Click ‘Search’ button. All records with the specified details that are pending authorization are retrieved and displayed in the lower portion of the screen.
- Double click the record that you wish to authorize. The Investment Account Detail screen is displayed. Select Authorize operation from the Action List.
When a checker authorizes a record, details of validation, if any, that were overridden by the maker of the record during the Save operation are displayed. If any of these overrides results in an error, the checker must reject the record.
2.37.6 Amending Investment Account Record
After a Investment Account record is authorized, it can be modified using the Unlock operation from the Action List. To make changes to a record after authorization:
- Invoke the Investment Account Summary screen from the Browser.
- Select the status of the record that you want to retrieve for authorization. You can only amend authorized records.
- Specify any or all of the details in the corresponding fields on the screen.
- Click ‘Search’ button. All records with the specified details that are pending authorization are retrieved and displayed in the lower portion of the screen.
- Double click the record that you wish to authorize. The Investment Account Detail screen is displayed in amendment mode. Select Unlock operation from the Action List to amend the record.
- Amend the necessary information and click on Save to save the changes
2.37.7 Authorizing Amended Investment Account Record
An amended Investment Account record must be authorized for the amendment to be made effective in the system.
The subsequent process of authorization is the same as that for normal transactions.
2.38 Investment Account Status Change Maintenance
This section contains the following topics:
2.38.1 Invoking Investment Account Status Change Detail Screen
If an account has units, status of account will be pending closure when it is marked to closed. After this no inflows will be allowed to the account. Also, you can redeem the account completely through withdrawals and can mark it to closure.
You can change the status of an investment account for a particular party using ‘Investment Account Status Change Detail’ screen. You can invoke this screen by typing ‘PADACCLS’ in the field at the top right corner of the Application tool bar and clicking on the adjoining arrow button..

.

You can specify the following details:
Account ID
Alphanumeric; 16 Characters; Optional
Specify the account ID. Alternatively, you can select account ID from the option list. The list displays all valid account ID maintained in the system.
Party ID
Display
The system displays the party ID for the selected account ID.
Party Name
Display
The system displays the party name for the selected account ID.
Change Date
Date Format; Optional
Select the change date from the adjoining calendar.
Closure Remarks
Alphanumeric; 255 Characters; Optional
Specify remarks, if any.
Closure Reference No
Alphanumeric; 16 Characters; Optional
Specify the closure reference number.
Account Status
Optional
Select the status of the account from the drop-down list. The list displays the following values:
- Active
- Closed
Current Status
Display
The system displays the current status of the account.
Note
For a successful order import from Pension Administration to TA, you need to ensure if the following two things are maintained at the user level who is importing an order:
- Access to classified information should be allowed for successful order import
- VIEW PII: Should be Yes
For the accounts closed in PAS (with Closed Account field set to Yes), the system will send the investment account hand-off file to TA. Upon receiving the file, TA will trigger UH account closure for all unitholders under the account.
2.39 Investment Account Status Change Summary
This section contains the following topic:
- Section 2.39.1, "Retrieving a Record in Investment Account Status Change Summary Screen"
- Section 2.39.2, "Editing Investment Account Status Change Record"
- Section 2.39.3, "Viewing Investment Account Status Change Record"
- Section 2.39.4, "Deleting Investment Account Status Change Record"
- Section 2.39.5, "Authorizing Investment Account Status Change Record"
- Section 2.39.6, "Amending Investment Account Status Change Record"
- Section 2.39.7, "Authorizing Amended Investment Account Status Change Record"
2.39.1 Retrieving a Record in Investment Account Status Change Summary Screen
You can retrieve a previously entered record in the Summary screen, as follows:
Invoke the ‘Investment Account Status Change Summary’ screen by typing ‘PASACCLS’ in the field at the top right corner of the Application tool bar and clicking on the adjoining arrow button and specify any or all of the following details in the corresponding details.

- The status of the record in the Authorized field. If you choose the ‘Blank Space’ option, then all the records are retrieved.
- The status of the record in the Record Status field. If you choose the ‘Blank Space’ option, then all records are retrieved
- Account ID
- Change Date
- Closure Reference No
Click ‘Search’ button to view the records. All the records with the specified details are retrieved and displayed in the lower portion of the screen.
Note
You can also retrieve the individual record detail from the detail screen by querying in the following manner:
- Press F7
- Input the Account ID
- Press F8
You can perform Edit, Delete, Amend, Authorize, operations by selecting the operation from the Action list. You can also search a record by using a combination of % and alphanumeric value
2.39.2 Editing Investment Account Status Change Record
You can modify the details of Investment Account Status Change record that you have already entered into the system, provided it has not subsequently authorized. You can perform this operation as follows:
- Invoke the Investment Account Status Change Summary screen from the Browser.
- Select the status of the record that you want to retrieve for modification in the Authorized field. You can only modify records that are unauthorized. Accordingly, choose the Unauthorized option.
- Specify any or all of the details in the corresponding fields to retrieve the record that is to be modified.
- Click ‘Search’ button. All unauthorized records with the specified details are retrieved and displayed in the lower portion of the screen.
- Double click the record that you want to modify in the list of displayed records. The Investment Account Status Change Detail screen is displayed.
- Select Unlock Operation from the Action list to modify the record. Modify the necessary information.
Click Save to save your changes. The Investment Account Status Change Detail screen is closed and the changes made are reflected in the Investment Account Status Change Summary screen.
2.39.3 Viewing Investment Account Status Change Record
To view a record that you have previously input, you must retrieve the same in the Investment Account Status Change Summary screen as follows:
- Invoke the Investment Account Status Change Summary screen from the Browser.
- Select the status of the record that you want to retrieve for viewing in the Authorized field. You can also view all records that are either unauthorized or authorized only, by choosing the unauthorized / Authorized option.
- Specify any or all of the details of the record in the corresponding fields on the screen.
- Click ‘Search’ button. All records with the specified fields are retrieved and displayed in the lower portion of the screen.
- Double click the record that you want to view in the list of displayed records. The Investment Account Status Change Detail screen is displayed in View mode.
2.39.4 Deleting Investment Account Status Change Record
You can delete only unauthorized records in the system. To delete a record that you have previously entered:
- Invoke the Investment Account Status Change Summary screen from the Browser.
- Select the status of the record that you want to retrieve for deletion.
- Specify any or all of the details in the corresponding fields on the screen.
- Click ‘Search’ button. All records with the specified fields are retrieved and displayed in the lower portion of the screen.
- Double click the record that you want to delete in the list of displayed records. The Investment Account Status Change Detail screen is displayed.
- Select Delete Operation from the Action list. The system prompts you to confirm the deletion and the record is physically deleted from the system database.
2.39.5 Authorizing Investment Account Status Change Record
An unauthorized Investment Account Status Change record must be authorized in the system for it to be processed. To authorize a record:
- Invoke the Investment Account Status Change Summary screen from the Browser.
- Select the status of the record that you want to retrieve for authorization. Typically, choose the unauthorized option.
- Specify any or all of the details in the corresponding fields on the screen.
- Click ‘Search’ button. All records with the specified details that are pending authorization are retrieved and displayed in the lower portion of the screen.
- Double click the record that you wish to authorize. The Investment Account Status Change Detail screen is displayed. Select Authorize operation from the Action List.
When a checker authorizes a record, details of validation, if any, that were overridden by the maker of the record during the Save operation are displayed. If any of these overrides results in an error, the checker must reject the record.
2.39.6 Amending Investment Account Status Change Record
After a Investment Account Status Change record is authorized, it can be modified using the Unlock operation from the Action List. To make changes to a record after authorization:
- Invoke the Investment Account Status Change Summary screen from the Browser.
- Select the status of the record that you want to retrieve for authorization. You can only amend authorized records.
- Specify any or all of the details in the corresponding fields on the screen.
- Click ‘Search’ button. All records with the specified details that are pending authorization are retrieved and displayed in the lower portion of the screen.
- Double click the record that you wish to authorize. The Investment Account Status Change Detail screen is displayed in amendment mode. Select Unlock operation from the Action List to amend the record.
- Amend the necessary information and click on Save to save the changes
2.39.7 Authorizing Amended Investment Account Status Change Record
An amended Investment Account Status Change record must be authorized for the amendment to be made effective in the system.
The subsequent process of authorization is the same as that for normal transactions.
2.40 Portfolio Mapping
This section contains the following topics
2.40.1 Invoking Portfolio Mapping Screen
Any investment into instruments can be done under a portfolio, hence portfolio mapping is mandatory for any investments. Online screens will list the mapped portfolios for the parties.
You can define the portfolio for party role combination using ‘Portfolio Mapping’ screen. You can map the portfolio for the following roles:
- Portfolio mapping for Employer - Its mandatory that portfolio mapping should be done for each portfolio at employer level and this will be used as default asset allocation for all employees under the employer. Upon selection of the instrument, the system will default all the assets pertaining to the instrument along with default ratio and over ridable indicator.
- Portfolio mapping for Employee - The system will not allow portfolio mapping for employees if the same is not done for employer. The Employee assets is a subset of employers assets defined as part of employer portfolio. You can define multiple portfolios and their underlying instruments and assets. Upon selection of the instrument, the system will default all the assets pertaining to the instrument along with default ratio and over ridable indicator
- Portfolio mapping for Private Investor - You can define multiple portfolios and their underlying instruments and assets. Once you select an instrument, the system will list down all the instruments under the portfolio. Upon selection of the instrument, the system will default all the assets pertaining to the instrument along with default ratio and over ridable indicator.
You can invoke ‘Portfolio Mapping’ screen by typing ‘PADPFMAP’ in the field at the top right corner of the Application tool bar and clicking on the adjoining arrow button.
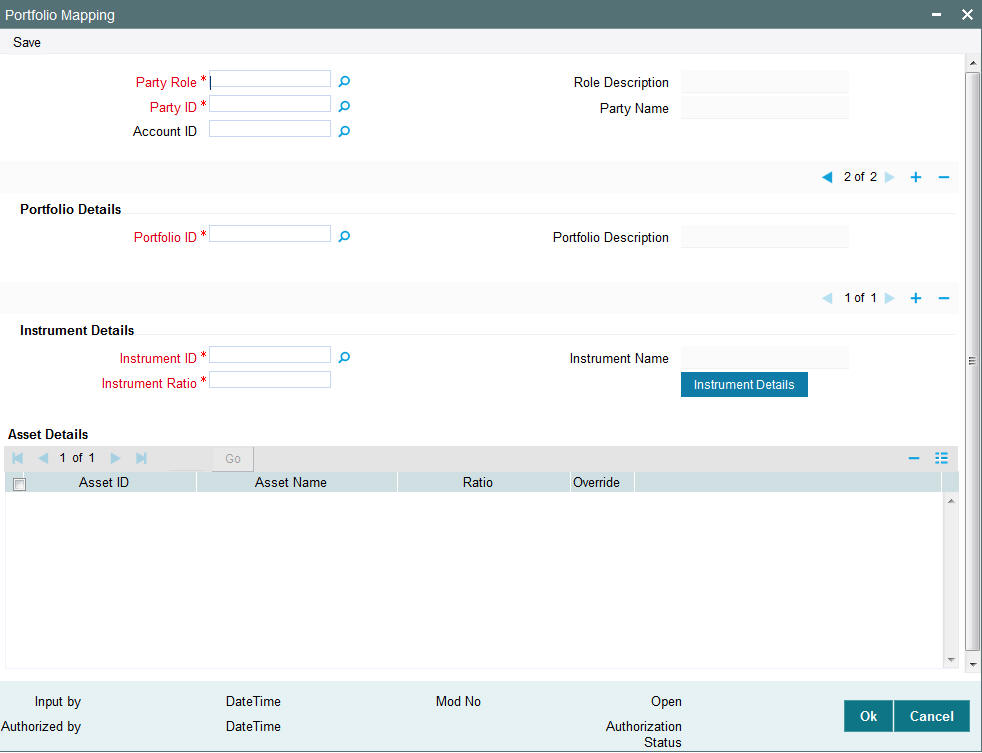
You can specify the following details:
Party Role
Alphanumeric; 16 Characters; Mandatory
Specify the party role ID. Alternatively, you can select party role ID from the option list. The list displays all valid party role IDs maintained in the system.
Role Description
Display
The system displays the description of the selected party role ID.
Party ID
Alphanumeric; 16 Characters; Mandatory
Specify the party ID. Alternatively, you can select party ID from the option list. The list displays all valid party IDs maintained in the system.
Party Name
Display
The system displays the name of the selected party ID.
Account ID
Alphanumeric; 16 Characters; Optional
Specify the account ID. Alternatively, you can select account ID from the option list. The list displays all valid account IDs maintained in the system.
Portfolio Details
Portfolio ID
Alphanumeric; 16 Characters; Mandatory
Specify the portfolio ID. Alternatively, you can select portfolio ID from the option list. The list displays all valid portfolio IDs maintained in the system.
Portfolio Description
Display
The system displays the description of the selected portfolio ID.
Instrument Details
Instrument ID
Alphanumeric; 16 Characters; Mandatory
Specify the instrument ID. Alternatively, you can select instrument ID from the option list. The list displays all valid instrument IDs maintained in the system.
Instrument Name
Display
The system displays the description of the selected instrument ID.
Instrument Ratio
Numeric; 5 Characters; Mandatory
Specify the instrument ratio.
Asset Details
After specifying the mandatory details, click ‘Instrument Details’ button. The system displays the following values:
- Asset ID
- Asset Name
- Ratio
- Override
2.41 Portfolio Mapping Summary
This section contains the following topics
- Section 2.41.1, "Retrieving a Record in Portfolio Mapping Summary Screen"
- Section 2.41.2, "Editing Portfolio Mapping Record"
- Section 2.41.3, "Viewing Portfolio Mapping Record"
- Section 2.41.4, "Deleting Portfolio Mapping Record"
- Section 2.41.5, "Authorizing Portfolio Mapping Record"
- Section 2.41.6, "Amending Portfolio Mapping Record"
- Section 2.41.7, "Authorizing Amended Portfolio Mapping Record"
2.41.1 Retrieving a Record in Portfolio Mapping Summary Screen
You can retrieve a previously entered record in the Summary screen, as follows:
Invoke the ‘Portfolio Mapping Summary’ screen by typing ‘PASPFMAP’ in the field at the top right corner of the Application tool bar and clicking on the adjoining arrow button and specify any or all of the following details in the corresponding details.
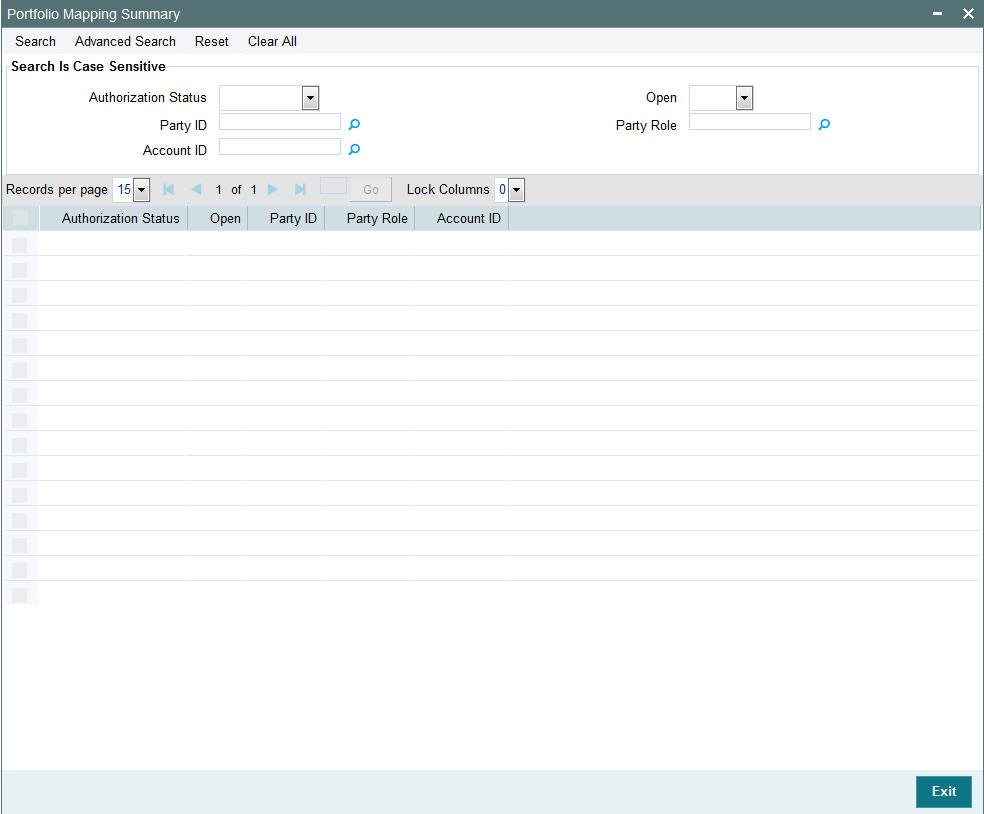
- The status of the record in the Authorization Status field. If you choose the ‘Blank Space’ option, then all the records are retrieved.
- The status of the record in the Open field. If you choose the ‘Blank Space’ option, then all records are retrieved
- Party ID
- Party Role
- Account ID
Click ‘Search’ button to view the records. All the records with the specified details are retrieved and displayed in the lower portion of the screen.
Note
You can also retrieve the individual record detail from the detail screen by querying in the following manner:
- Press F7
- Input the Party ID
- Press F8
You can perform Edit, Delete, Amend, Authorize, operations by selecting the operation from the Action list. You can also search a record by using a combination of % and alphanumeric value
2.41.2 Editing Portfolio Mapping Record
You can modify the details of Portfolio Mapping record that you have already entered into the system, provided it has not subsequently authorized. You can perform this operation as follows:
- Invoke the Portfolio Mapping Summary screen from the Browser.
- Select the status of the record that you want to retrieve for modification in the Authorization Status field. You can only modify records that are unauthorized. Accordingly, choose the Unauthorized option.
- Specify any or all of the details in the corresponding fields to retrieve the record that is to be modified.
- Click ‘Search’ button. All unauthorized records with the specified details are retrieved and displayed in the lower portion of the screen.
- Double click the record that you want to modify in the list of displayed records. The Portfolio Mapping Detail screen is displayed.
- Select Unlock Operation from the Action list to modify the record. Modify the necessary information.
Click Save to save your changes. The Portfolio Mapping Detail screen is closed and the changes made are reflected in the Portfolio Mapping Summary screen.
2.41.3 Viewing Portfolio Mapping Record
To view a record that you have previously input, you must retrieve the same in the Portfolio Mapping Summary screen as follows:
- Invoke the Portfolio Mapping Summary screen from the Browser.
- Select the status of the record that you want to retrieve for viewing in the Authorization Status field. You can also view all records that are either unauthorized or authorized only, by choosing the unauthorized / Authorized option.
- Specify any or all of the details of the record in the corresponding fields on the screen.
- Click ‘Search’ button. All records with the specified fields are retrieved and displayed in the lower portion of the screen.
- Double click the record that you want to view in the list of displayed records. The Portfolio Mapping Detail screen is displayed in View mode.
2.41.4 Deleting Portfolio Mapping Record
You can delete only unauthorized records in the system. To delete a record that you have previously entered:
- Invoke the Portfolio Mapping Summary screen from the Browser.
- Select the status of the record that you want to retrieve for deletion.
- Specify any or all of the details in the corresponding fields on the screen.
- Click ‘Search’ button. All records with the specified fields are retrieved and displayed in the lower portion of the screen.
- Double click the record that you want to delete in the list of displayed records. The Portfolio Mapping Detail screen is displayed.
- Select Delete Operation from the Action list. The system prompts you to confirm the deletion and the record is physically deleted from the system database.
2.41.5 Authorizing Portfolio Mapping Record
An unauthorized Portfolio Mapping record must be authorized in the system for it to be processed. To authorize a record:
- Invoke the Portfolio Mapping Summary screen from the Browser.
- Select the status of the record that you want to retrieve for authorization. Typically, choose the unauthorized option.
- Specify any or all of the details in the corresponding fields on the screen.
- Click ‘Search’ button. All records with the specified details that are pending authorization are retrieved and displayed in the lower portion of the screen.
- Double click the record that you wish to authorize. The Portfolio Mapping Detail screen is displayed. Select Authorize operation from the Action List.
When a checker authorizes a record, details of validation, if any, that were overridden by the maker of the record during the Save operation are displayed. If any of these overrides results in an error, the checker must reject the record.
2.41.6 Amending Portfolio Mapping Record
After a Portfolio Mapping record is authorized, it can be modified using the Unlock operation from the Action List. To make changes to a record after authorization:
- Invoke the Portfolio Mapping Summary screen from the Browser.
- Select the status of the record that you want to retrieve for authorization. You can only amend authorized records.
- Specify any or all of the details in the corresponding fields on the screen.
- Click ‘Search’ button. All records with the specified details that are pending authorization are retrieved and displayed in the lower portion of the screen.
- Double click the record that you wish to authorize. The Portfolio Mapping Detail screen is displayed in amendment mode. Select Unlock operation from the Action List to amend the record.
- Amend the necessary information and click on Save to save the changes
2.41.7 Authorizing Amended Portfolio Mapping Record
An amended Portfolio Mapping record must be authorized for the amendment to be made effective in the system.
The subsequent process of authorization is the same as that for normal transactions.
2.42 Investment Detail
This section contains the following topics:
- Section 2.42.1, "Invoking Investment Detail Screen"
- Section 2.42.2, "Order Details Tab"
- Section 2.42.3, "Instrument Details Tab"
- Section 2.42.4, "Intermediary Details Tab"
- Section 2.42.5, "Add Info Details Tab"
- Section 2.42.6, "Settlement Details Button"
- Section 2.42.7, "Allocation Details Button"
2.42.1 Invoking Investment Detail Screen
You can maintain investment details for the parties under a portfolio. You can map a portfolio before capturing investments for a party. The system will not allow you to capture the parties without ID details and address details.
For group pension – auto contributions
The employer level portfolio is mandatory for the portfolios in which employee invests in.
For group pensions, if in case employee portfolio details are not maintained and the transaction comes in for employee for the transacted portfolio, then the system follows the employer portfolio set up.
In case employee portfolio details are not maintained and adjustment transaction comes in for employee investment screen (online), the transaction will fail. For adjustment transaction portfolio mapping is mandatory for the employee.
When investment is done for the first time, TA system will trigger UH Account creation, number of UH being created depends on the number of portfolio mapping done for that investment account.
For Portfolio-Instrument-Account combination, the system creates an UH in TA.
In case only employer portfolio mapping is done for group pension, then the system will create 2 UH for employer and employee.
You can maintain investment detail using ‘Investment Detail’ screen. You can invoke this screen by typing ‘PADINVDE’ in the field at the top right corner of the Application tool bar and clicking on the adjoining arrow button.
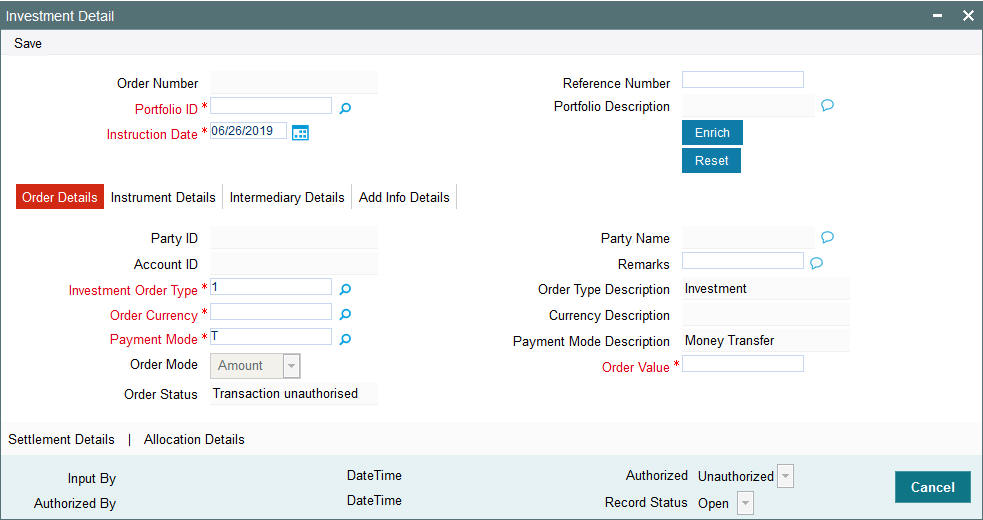
You can specify the following details:
Order Number
Display
The system displays the order number.
Reference Number
Alphanumeric; 16 Characters; Optional
Specify the reference number,
Portfolio ID
Alphanumeric; 16 Characters; Mandatory
Specify the portfolio ID. Alternatively, you can select portfolio ID from the option list. The list displays all valid portfolio ID maintained in the system.
Portfolio Description
Display
The system displays the description of the selected portfolio ID.
Instruction Date
Date Format; Mandatory
The system defaults the application date. However, you can amend this value to specify the future date.
Note
Future date cannot be a system holiday. The system does not allow back dated instructions.
If holiday is declared after maintaining a future dated instruction, system will not update the order details automatically.
After specifying the mandatory details, click ‘Enrich’ button. The system displays the party details based on the portfolio ID selected.
2.42.2 Order Details Tab
Click ‘Order Details’ tab in ‘Investment Detail’ screen to specify order details.
You can specify the following details:
Party ID
Display
The system displays the party ID based on the portfolio ID selected.
Party Name
Display
The system displays the name of the party based on the portfolio ID selected.
Remarks
Alphanumeric; 255 Characters; Optional
Specify remarks, if any.
Account ID
Display
The system displays the account number of the party based on the portfolio ID selected.
Investment Order Type
Alphanumeric; 3 Characters; Mandatory
Specify the investment order type. Alternatively, you can select investment order type from the option list. The list displays all valid investment order type maintained in the system.
Order Type Description
Display
The system displays the description of the selected investment order type.
Order Currency
Alphanumeric; 3 Characters; Mandatory
Specify the order currency code. Alternatively, you can select the currency code from the option list. The list displays all valid currency code maintained in the system.
Currency Description
Display
The system displays the description of the selected order currency code.
Payment Mode
Alphanumeric; 2 Characters; Mandatory
Specify the mode of payment. Alternatively, you can select the payment mode from the option list. The list displays all valid payment mode maintained in the system.
Payment Mode Description
Display
The system displays the description of the selected payment mode.
Order Mode
Display
The system displays the mode or order.
Order Value
Numeric; 18 Characters; Mandatory
Specify the order value.
Order Status
Display
The system displays the status of the order.
2.42.3 Instrument Details Tab
Click ‘Instrument Details’ tab in ‘Investment Detail’ screen to specify the instrument details.

You can specify the following details:
Instrument ID
Alphanumeric; 16 Characters; Mandatory
Specify the instrument ID. Alternatively, you can select instrument ID from the option list. The list displays all valid instrument ID maintained in the system.
Instrument Name
Display
The system displays the name of the instrument for the selected instrument ID.
Instrument Ratio
Numeric; 5 Characters; Optional
Specify the numeric ratio.
Asset ID
Alphanumeric; 16 Characters; Mandatory
The system defaults the asset ID based on the instrument ID selected. However, you can amend this value if ‘Overridabe’ field is set to ‘Yes’.
Asset Name
Display
The system displays the name of the selected asset ID.
Ratio
Numeric; 5 Characters; Optional
Specify the ratio.
Overridable
Mandatory
Select ‘Yes’ option from the drop-down list to over-write the instrument details. Else select ‘No’.
2.42.4 Intermediary Details Tab
Click ‘Intermediary Details’ tab in ‘Investment Detail’ screen to specify intermediary details.
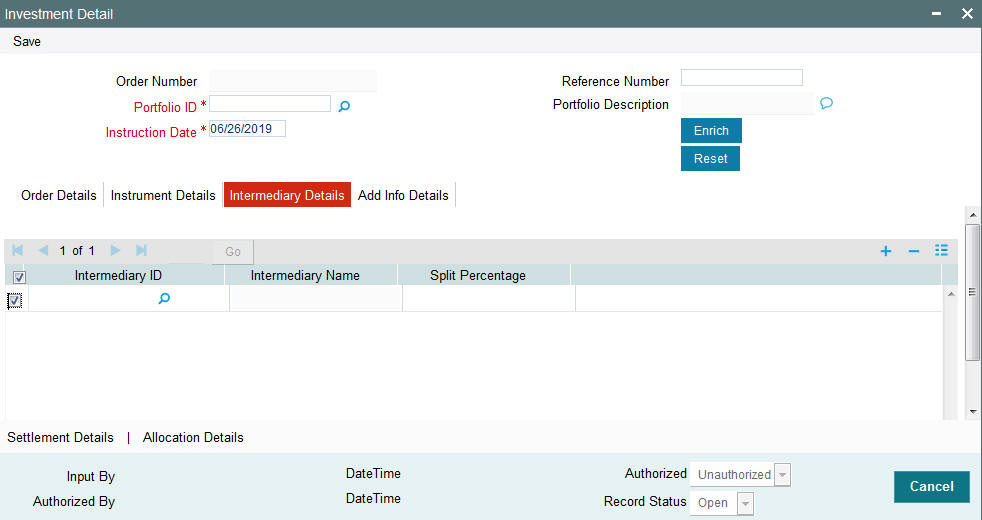
You can specify the following details:
Intermediary ID
Alphanumeric; 12 Characters; Optional
The system displays the intermediary ID based on the investment account. However, you can override the same.
Intermediary Name
Display
The system displays the name of the selected intermediary ID.
Split Percentage
Numeric; 3 Characters; Optional
Specify the split percentage details.
The sum total should be 100.
2.42.5 Add Info Details Tab
Click ‘Add Info Details’ tab in ‘Investment Detail’ screen to specify the mapped additional information.
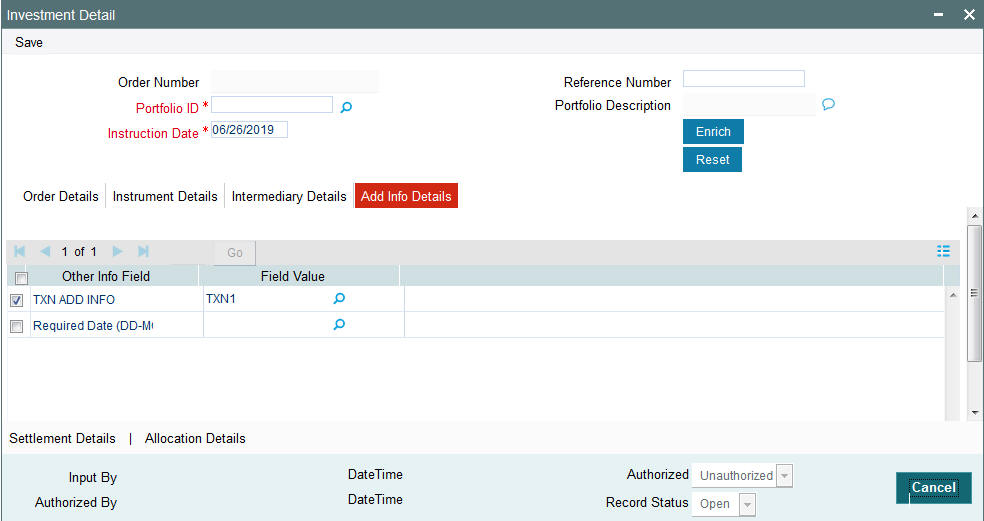
You can specify the following details:
Other Info Field
Alphanumeric; 100 Characters; Optional
Specify the other information.
Field Value
Alphanumeric; 60 Characters; Optional
Specify the field value.
2.42.6 Settlement Details Button
Click ‘Settlement Details’ button in ‘Investment Detail’ screen to specify settlement details.

You can specify the following details:
Payment Reference Number
Display
The system displays the payment reference number.
Payment Currency
Display
The system displays the payment currency code.
Payment Amount
Numeric; 18 Characters; Optional
Specify the payment amount.
Bank Reference Number
Alphanumeric; 16 Characters; Optional
Specify the bank reference number. Alternatively, you can select bank reference number from the option list. The list displays all valid bank reference number maintained in the system.
Settled
Optional
Select the status from the drop-down list. The list displays the following values:
- Yes
- No
Paid Date
Date Format; Optional
Select the paid date from the adjoining calendar.
Cheque Number
Alphanumeric; 20 Characters; Optional
Specify the cheque number.
Cheque Date
Date Format; Optional
Select the date to be mentioned in the cheque from the adjoining calendar.
2.42.6.1 Bank Details Button
Click ‘Bank Details’ button in ‘Settlement Details’ screen to view bank details.
For Group pensions, the system defaults the Instrument Administrators bank account during the hand-off. For private investments, the system will use the bank accounts of the parties mapped at investment account level (PADINVAC).
The system displays the following details:
- Bank Reference Number
- Bank
- Branch
- Account Type
- Account Currency
- Account Number
- Account Holder Name
- IBAN
- User Reference Number
- Bank description
- Branch Description
- Account Type Description
- Account Currency Description
- Verification Status
- Last Verified Date
You can amend all the details except in the header post authorization prior to order hand-off to TA.
2.42.7 Allocation Details Button
Click ‘Allocation Details’ button in ‘Switch Detail’ screen to specify allocation details. The ‘Allocation Details’ screen (PADALLOC) is displayed.
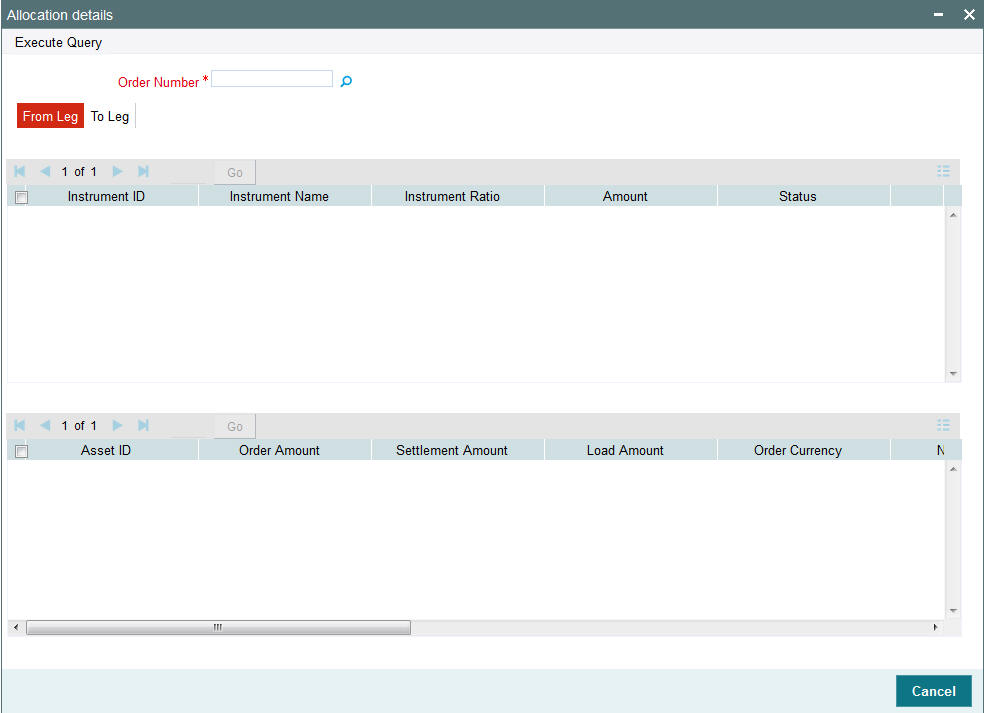
You can specify the following details:
Order Number
Alphanumeric; 16 Characters; Mandatory
Specify the order number. Alternatively, you can select order number from the option list. The system displays all valid order number maintained in the system.
2.42.7.1 From Leg Tab
Click ‘From Leg’ tab in ‘Allocation Details’ screen to view allocation details:
You can view the following details:
- Instrument ID
- Instrument Name
- Instrument Ratio
- Amount
- Status
- Asset ID
- Order Amount
- Settlement Amount
- Load Amount
- Order Currency
- Net Amount
- Allocation Date
- Unit Price
- Asset Base Currency
- Allotted Units
- Status
2.42.7.2 To Leg Tab
Click ‘To Leg’ tab in ‘Allocation Details’ screen to view allocation details:
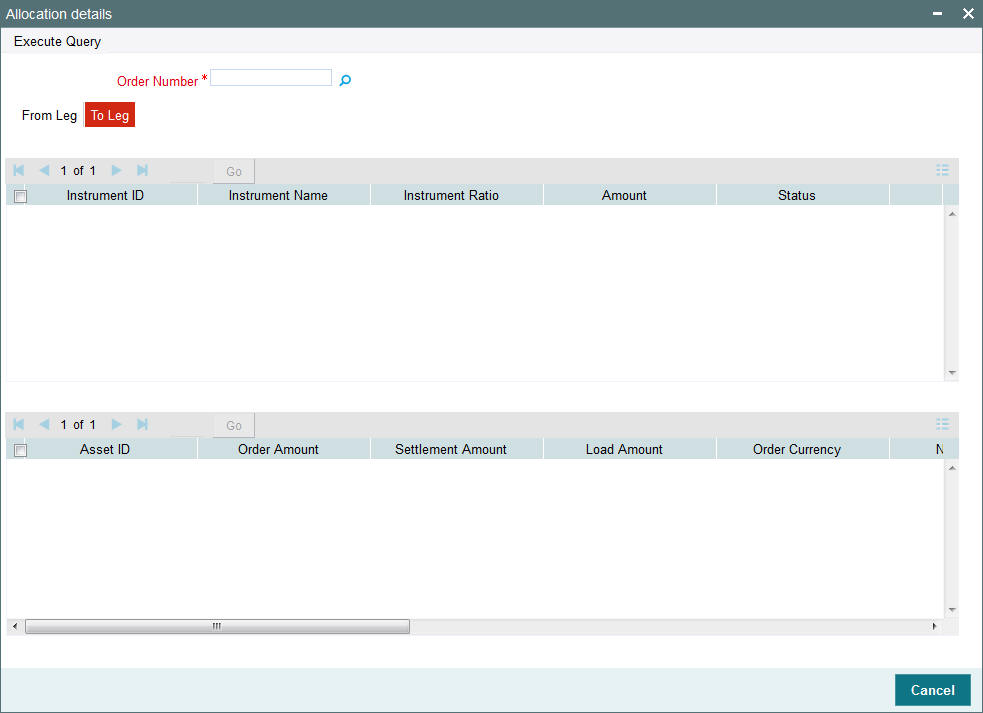
You can view the following details:
- Instrument ID
- Instrument Name
- Instrument Ratio
- Amount
- Status
- Asset ID
- Order Amount
- Settlement Amount
- Load Amount
- Order Currency
- Net Amount
- Allocation Date
- Unit Price
- Asset Base Currency
- Allotted Units
- Status
On saving the withdrawal, the system validates the same with available balance and allow or restrict that particular withdrawal.
You can check the available balance for the Party ID, portfolio ID and account ID using View Balance (PADPFBAL) launch form.
The system defaults the instruments and assets mapped to the portfolio with the default ratios. You cannot override the same.
The system splits the transaction percentage within the instruments and eventually to assets according to the default percentage.
2.43 Investment Summary
This section contains the following topics:
- Section 2.43.1, "Retrieving a Record in Investment Summary Screen"
- Section 2.43.2, "Editing Investment Record"
- Section 2.43.3, "Viewing Investment Record"
- Section 2.43.4, "Deleting Investment Record"
- Section 2.43.5, "Authorizing Investment Record"
- Section 2.43.6, "Amending Investment Record"
- Section 2.43.7, "Authorizing Amended Investment Record"
2.43.1 Retrieving a Record in Investment Summary Screen
You can retrieve a previously entered record in the Summary screen, as follows:
Invoke the ‘Investment Summary’ screen by typing ‘PASINVDE’ in the field at the top right corner of the Application tool bar and clicking on the adjoining arrow button and specify any or all of the following details in the corresponding details.
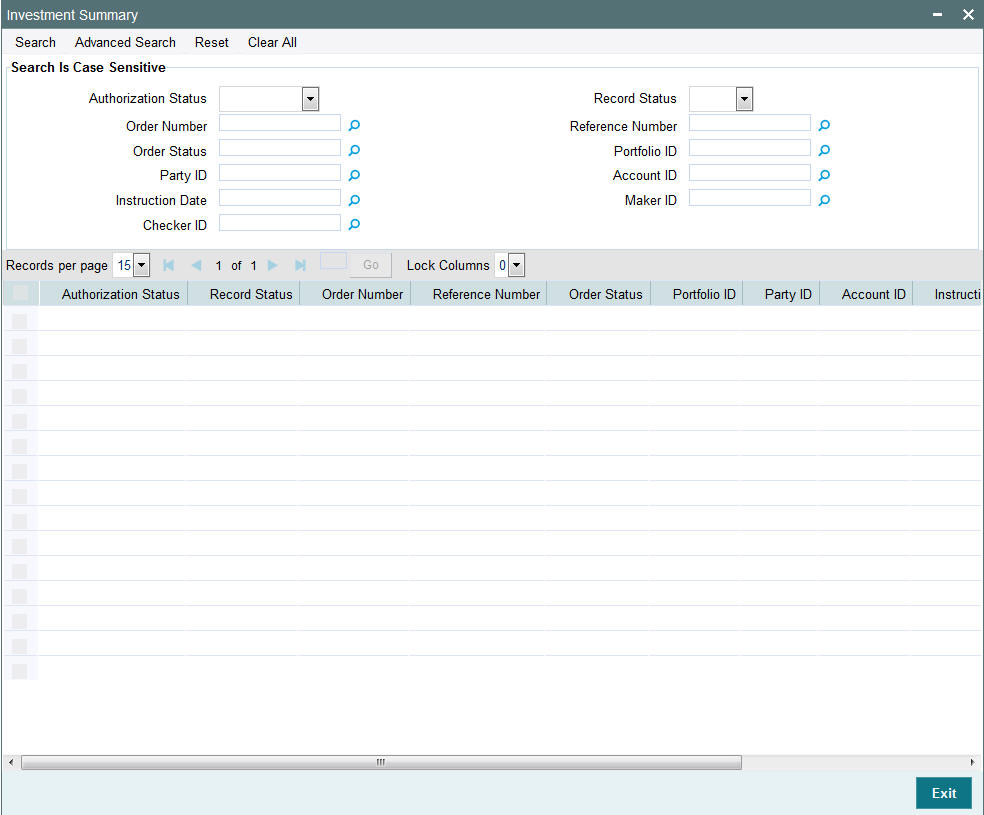
- The status of the record in the Authorization Status field. If you choose the ‘Blank Space’ option, then all the records are retrieved.
- The status of the record in the Record Status field. If you choose the ‘Blank Space’ option, then all records are retrieved
- Order Number
- Order Status
- Party ID
- Instruction Date
- Checker ID
- Reference Number
- Portfolio ID
- Account ID
- Maker ID
Click ‘Search’ button to view the records. All the records with the specified details are retrieved and displayed in the lower portion of the screen.
Note
You can also retrieve the individual record detail from the detail screen by querying in the following manner:
- Press F7
- Input the Party ID
- Press F8
You can perform Edit, Delete, Amend, Authorize, operations by selecting the operation from the Action list. You can also search a record by using a combination of % and alphanumeric value
2.43.2 Editing Investment Record
You can modify the details of Investment record that you have already entered into the system, provided it has not subsequently authorized. You can perform this operation as follows:
- Invoke the Investment Summary screen from the Browser.
- Select the status of the record that you want to retrieve for modification in the Authorization Status field. You can only modify records that are unauthorized. Accordingly, choose the Unauthorized option.
- Specify any or all of the details in the corresponding fields to retrieve the record that is to be modified.
- Click ‘Search’ button. All unauthorized records with the specified details are retrieved and displayed in the lower portion of the screen.
- Double click the record that you want to modify in the list of displayed records. The Investment Detail screen is displayed.
- Select Unlock Operation from the Action list to modify the record. Modify the necessary information.
Click Save to save your changes. The Investment Detail screen is closed and the changes made are reflected in the Investment Summary screen.
2.43.3 Viewing Investment Record
To view a record that you have previously input, you must retrieve the same in the Investment Summary screen as follows:
- Invoke the Investment Summary screen from the Browser.
- Select the status of the record that you want to retrieve for viewing in the Authorization Status field. You can also view all records that are either unauthorized or authorized only, by choosing the unauthorized / Authorized option.
- Specify any or all of the details of the record in the corresponding fields on the screen.
- Click ‘Search’ button. All records with the specified fields are retrieved and displayed in the lower portion of the screen.
- Double click the record that you want to view in the list of displayed records. The Investment Detail screen is displayed in View mode.
2.43.4 Deleting Investment Record
You can delete only unauthorized records in the system. To delete a record that you have previously entered:
- Invoke the Investment Summary screen from the Browser.
- Select the status of the record that you want to retrieve for deletion.
- Specify any or all of the details in the corresponding fields on the screen.
- Click ‘Search’ button. All records with the specified fields are retrieved and displayed in the lower portion of the screen.
- Double click the record that you want to delete in the list of displayed records. The Investment Detail screen is displayed.
- Select Delete Operation from the Action list. The system prompts you to confirm the deletion and the record is physically deleted from the system database.
2.43.5 Authorizing Investment Record
An unauthorized Investment record must be authorized in the system for it to be processed. To authorize a record:
- Invoke the Investment Summary screen from the Browser.
- Select the status of the record that you want to retrieve for authorization. Typically, choose the unauthorized option.
- Specify any or all of the details in the corresponding fields on the screen.
- Click ‘Search’ button. All records with the specified details that are pending authorization are retrieved and displayed in the lower portion of the screen.
- Double click the record that you wish to authorize. The Investment Detail screen is displayed. Select Authorize operation from the Action List.
When a checker authorizes a record, details of validation, if any, that were overridden by the maker of the record during the Save operation are displayed. If any of these overrides results in an error, the checker must reject the record.
2.43.6 Amending Investment Record
After a Investment record is authorized, it can be modified using the Unlock operation from the Action List.
You can amend the order only till hand-off. Post order is handed off, you cannot amend an order.
To make changes to a record after authorization:
- Invoke the Investment Summary screen from the Browser.
- Select the status of the record that you want to retrieve for authorization. You can only amend authorized records.
- Specify any or all of the details in the corresponding fields on the screen.
- Click ‘Search’ button. All records with the specified details that are pending authorization are retrieved and displayed in the lower portion of the screen.
- Double click the record that you wish to authorize. The Investment Detail screen is displayed in amendment mode. Select Unlock operation from the Action List to amend the record.
- Amend the necessary information and click on Save to save the changes
2.43.7 Authorizing Amended Investment Record
An amended Investment record must be authorized for the amendment to be made effective in the system.
The subsequent process of authorization is the same as that for normal transactions.
2.44 Payment Clearing Screen
This section contains the following topics:
2.44.1 Invoking Payment Clearing Screen
You can settle unsettled transactions using ‘Payment Clearing Detail’ screen. You can invoke this screen by typing ‘PADPYCLR’ in the field at the top right corner of the Application tool bar and clicking on the adjoining arrow button.
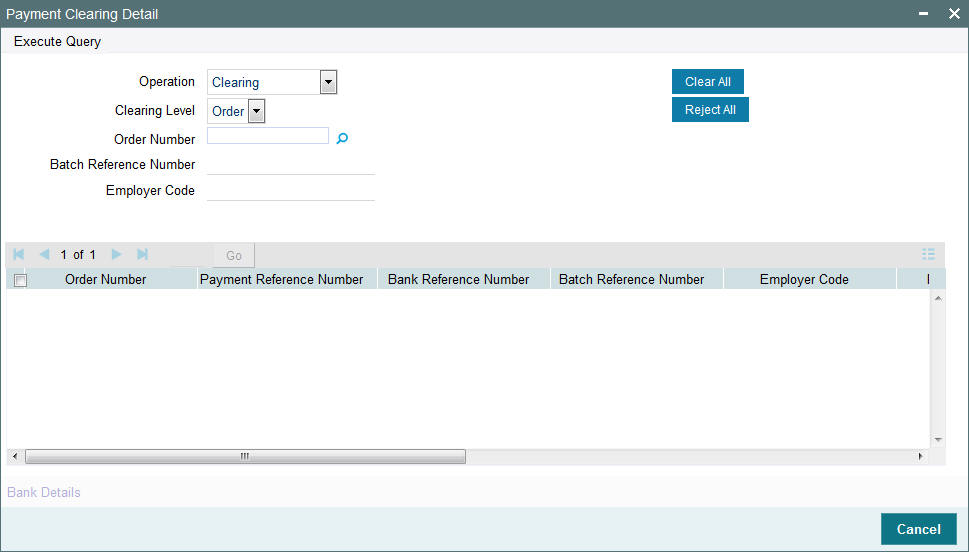
You can specify the following details:
Operation
Optional
Select the operation status from the drop-down list. The list displays the following values:
- Clearing
- Authorize Clearing
Clearing Level
Optional
Select the clearing level from the drop-down list. The list displays the following values:
- Order
- Batch
Order Number
Alphanumeric; 16 Characters; Optional
Specify the order number. Alternatively, you can select order number from the option list. The list displays all valid order number maintained in the system.
This field is enabled only if you have selected ‘Clearing Level’ as ‘Order’.
Batch Reference Number
Alphanumeric; 16 Characters; Optional
Select the batch reference number. Alternatively, you can select batch reference number from the option list. The list displays all valid batch reference number maintained in the system.
This field is enabled only if you have selected ‘Clearing Level’ as ‘Batch’.
Employer Code
Alphanumeric; 12 Characters; Optional
Select the employer code. Alternatively, you can select employer code from the option list. The list displays all valid employer code maintained in the system.
This field is enabled only if you have selected ‘Clearing Level’ as ‘Batch’.
Click ‘Clear All’ option to clear the specified details.
Click ‘Reject All’ option to reject the specified details.
Click ‘Execute Query’ option to view the following details:
- Order Number
- Payment Reference Number
- Bank Reference Number
- Batch Reference Number
- Employer Code
- Payment Amount
- Cheque Date
- Check Number
Clearing Status
Optional
Select the clearing status from the drop-down list. The list displays the following values:
- Clear - On authorization, if you select this option then the transactions will be settled
- Reject - On authorization, if you select this option then the transactions will be reversed and the settlement status will be ‘R’.
Remarks
Alphanumeric; 255 Characters; Optional
Specify remarks, if any.
You cannot edit or delete the records once saved. For batch, single clearing /rejection will clear/reject payment for all underlying orders. Once cleared /rejected, the system will clear the status and gets updated in settlement section of the underlying transaction.
2.44.2 Bank Details Button
Click ‘Bank Details’ button in ‘Payment Clearing Detail’ screen. The ‘Bank Details’ screen is displayed (PADBKDET).
The system displays the following details:
- Bank Reference Number
- Bank
- Branch
- Account Type
- Account Currency
- Account Number
- Account Holder Name
- IBAN
- User Reference Number
- Bank description
- Branch Description
- Account Type Description
- Account Currency Description
- Verification Status
- Last Verified Date
2.45 Withdrawal Detail
This section contains the following topics:
- Section 2.45.1, "Invoking Withdrawal Detail Screen"
- Section 2.45.2, "Order Details Tab"
- Section 2.45.3, "Instrument Details Tab"
- Section 2.45.4, "Intermediary Details Tab"
- Section 2.45.5, "Add Info Details Tab"
- Section 2.45.6, "Settlement Details Button"
- Section 2.45.7, "Allocation Details Button"
- Section 2.45.8, "View Balance Button"
2.45.1 Invoking Withdrawal Detail Screen
You can capture withdrawal details using ‘Withdrawal Detail’ screen. You can define basic rules for each portfolio type. You can invoke this screen by typing ‘PADWITHD’ in the field at the top right corner of the Application tool bar and clicking on the adjoining arrow button.

You can specify the following details:
Order Number
Display
The system displays the order number.
Reference Number
Alphanumeric; 16 Characters; Optional
Specify the reference number. If you do not specify the value in this field, then the system generates the reference number.
Portfolio ID
Alphanumeric; 16 Characters; Mandatory
Specify the portfolio ID. Alternatively, you can select portfolio ID from the option list. The list displays all valid portfolio ID which have balance for the parties.
Portfolio Description
Display
The system displays the description of the selected portfolio ID.
Instruction Date
Date Format; Mandatory
The system defaults the application date. However, you can amend this value to specify the future date.
Note
Future date cannot be a system holiday. The system does not allow back dated instructions.
After specifying the mandatory details, click ‘Enrich’ button. The system displays the party, instrument and asset details based on the balance for the portfolio ID selected.
2.45.2 Order Details Tab
Click ‘Order Details’ tab in ‘Withdrawal Detail’ screen to specify order details.
You can specify the following details:
Party ID
Display
The system displays the party ID based on the portfolio ID selected.
Party Name
Display
The system displays the name of the party based on the portfolio ID selected.
Account ID
Display
The system displays the account number of the party based on the portfolio ID selected.
Remarks
Alphanumeric; 255 Characters; Optional
Specify remarks, if any.
Withdrawal Order Type
Alphanumeric; 3 Characters; Mandatory
Specify the withdrawal order type. Alternatively, you can select withdrawal order type from the option list. The list displays ‘Withdrawal’ order type maintained in the system.
The system uses ‘PASWDTXNSUBTYPE’ param code to maintain the withdrawal order type.
Order Type Description
Display
The system displays the description of the selected withdrawal order type.
Order Currency
Alphanumeric; 3 Characters; Mandatory
Specify the order currency code. Alternatively, you can select the currency code from the option list. The list displays all valid currency code maintained in the system.
Currency Description
Display
The system displays the description of the selected order currency code.
Payment Mode
Alphanumeric; 2 Characters; Mandatory
Specify the payment mode. Alternatively, you can select the mode of payment from the option list. The list displays all valid payment mode maintained in the system.
Payment Mode Description
Display
The system displays the description of the selected mode of payment.
Order Mode
Optional
Select the order mode from the drop-down list. The list displays the following values:
- Amount
- Percentage
Order Value
Numeric; 18 Characters; Mandatory
Specify the order value.
Order Status
Display
The system displays the status of the order.
2.45.3 Instrument Details Tab
Click ‘Instrument Details’ tab in ‘Withdrawal Detail’ screen to view the instrument details.
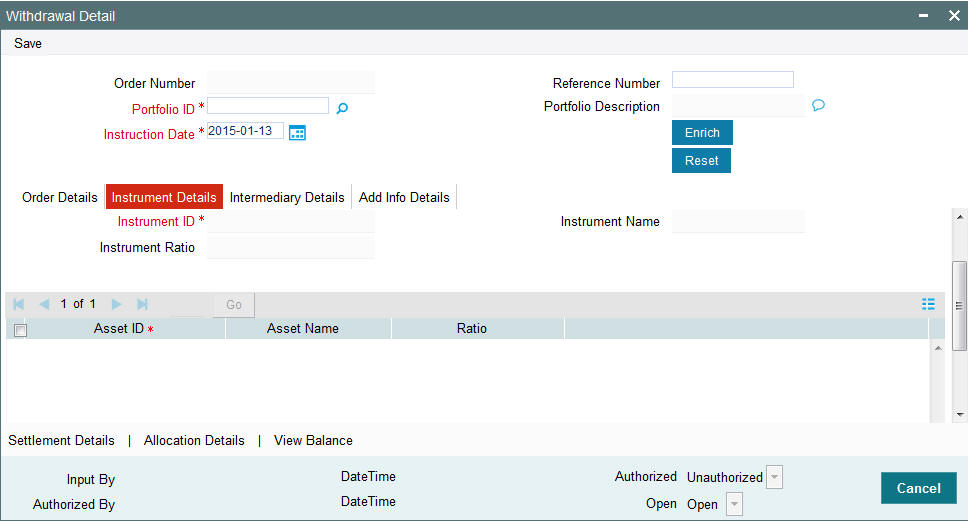
The system displays the following details based on the selected portfolio ID:
- Instrument ID
- Instrument Name
- Instrument Ratio
- Asset ID
- Asset Name
- Ratio
2.45.4 Intermediary Details Tab
Click ‘Intermediary Details’ tab in ‘Withdrawal Detail’ screen to specify intermediary details.
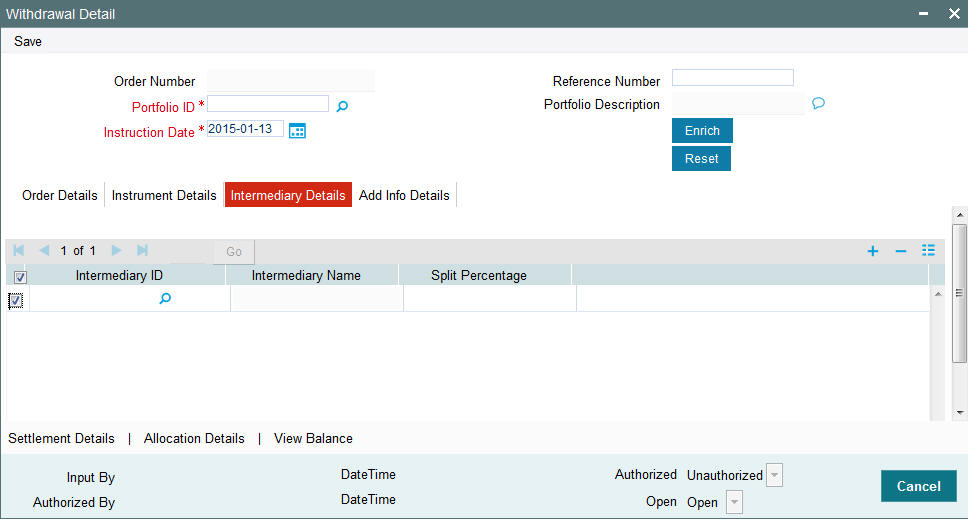
You can specify the following details:
Intermediary ID
Alphanumeric; 12 Characters; Optional
Specify the intermediary ID. Alternatively, you can select intermediary ID from the option list. The list displays all valid intermediary ID maintained in the system.
Intermediary Name
Display
The system displays the name of the selected intermediary ID.
Split Percentage
Numeric; 3 Characters; Optional
Specify the split percentage details.
The sum total should be 100.
The system will split the transaction percentage within the instruments and eventually to assets according to the default percentage.
2.45.5 Add Info Details Tab
Click ‘Add Info Details’ tab in ‘Withdrawal Detail’ screen to view additional information.

You can view the following details:
- Other Info Field
- Field Value
2.45.6 Settlement Details Button
Click ‘Settlement Details’ button in ‘Withdrawal Detail’ screen to specify settlement details.
You can specify the following details:
Payment Reference Number
Display
The system displays the payment reference number.
Payment Currency
Display
The system displays the payment currency code.
Payment Amount
Numeric; 18 Characters; Optional
Specify the payment amount.
Bank Reference Number
Alphanumeric; 16 Characters; Optional
Specify the bank reference number. Alternatively, you can select bank reference number from the option list. The list displays all valid bank reference number maintained in the system for the investment account of a party.
Settled
Optional
Select the status from the drop-down list. The list displays the following values:
- Yes
- No
Paid Date
Date Format; Optional
Select the paid date from the adjoining calendar.
Cheque Number
Alphanumeric; 20 Characters; Optional
Specify the cheque number.
Cheque Date
Date Format; Optional
Select the date to be mentioned in the cheque from the adjoining calendar.
2.45.6.1 Bank Details Button
Click ‘Bank Details’ button in ‘Settlement Details’ screen to view bank details.
For Group pensions, the system defaults the Instrument Administrators bank account during the hand-off. For private investments, the system will use the bank accounts of the parties mapped at investment account level (PADINVAC).
The system displays the following details:
- Bank Reference Number
- Bank
- Branch
- Account Type
- Account Currency
- Account Number
- Account Holder Name
- IBAN
- User Reference Number
- Bank description
- Branch Description
- Account Type Description
- Account Currency Description
- Verification Status
- Last Verified Date
You can amend all the details except in the header post authorization prior to order hand-off to TA.
2.45.7 Allocation Details Button
Click ‘Allocation Details’ button in ‘Switch Detail’ screen to specify allocation details. The ‘Allocation Details’ screen (PADALLOC) is displayed.
You can specify the following details:
Order Number
Alphanumeric; 16 Characters; Mandatory
Specify the order number. Alternatively, you can select order number from the option list. The system displays all valid order number maintained in the system.
2.45.7.1 From Leg Tab
Click ‘From Leg’ tab in ‘Allocation Details’ screen to view allocation details:
You can view the following details:
- Instrument ID
- Instrument Name
- Instrument Ratio
- Amount
- Status
- Asset ID
- Order Amount
- Settlement Amount
- Load Amount
- Order Currency
- Net Amount
- Allocation Date
- Unit Price
- Asset Base Currency
- Allotted Units
- Status
2.45.7.2 To Leg Tab
Click ‘To Leg’ tab in ‘Allocation Details’ screen to view allocation details:
You can view the following details:
- Instrument ID
- Instrument Name
- Instrument Ratio
- Amount
- Status
- Asset ID
- Order Amount
- Settlement Amount
- Load Amount
- Order Currency
- Net Amount
- Allocation Date
- Unit Price
- Asset Base Currency
- Allotted Units
- Status
Post allocation, you can view allocation details through the allocation details (PADALLOC) launch form. This launch form can be viewed as a standalone screen as well.
You can reset the order details in header and remove the data from tabs beneath other than defaults.
In case of ununalloted amount based order, the system will compute the unallotted units as follows:
Unallotted units = Amount/ (Latest Available NAV * (1 - Fluctuation %)
Fluctuation % is a system level param value that can be maintained in ‘Parameter Maintenance’ screen (UTDPARAM) considering the maximum fluctuation in price that can happen. The system maintains the Param Code as ‘FLUCTUATIONPERCENT’.
2.45.8 View Balance Button
Click ‘View Balance’ button in ‘Switch Detail’ screen to view the portfolio balance. The ‘View Portfolio Balance’ (PADPFBAL) screen is displayed.

You can view the following details:
- Party ID
- Party Name
- Portfolio ID
- Portfolio Description
PF Balance
- Portfolio ID
- Portfolio Description
- Account ID
- Unit Balance
- Currency
- Market Value
Instrument Balance
- Instrument ID
- Instrument Description
- Unit Balance
- Holding Ratio
- Instrument Currency
- Market Value
Asset Balance
- Asset ID
- Asset Name
- Balance Units
- Holding Ratio
- Asset Base Currency
- Market Value
2.46 Withdrawal Summary
This section contains the following topics:
- Section 2.46.1, "Retrieving a Record in Withdrawal Summary Screen"
- Section 2.46.2, "Editing Withdrawal Record"
- Section 2.46.3, "Viewing Withdrawal Record"
- Section 2.46.4, "Deleting Withdrawal Record"
- Section 2.46.5, "Authorizing Withdrawal Record"
- Section 2.46.6, "Amending Withdrawal Record"
- Section 2.46.7, "Authorizing Amended Withdrawal Record"
2.46.1 Retrieving a Record in Withdrawal Summary Screen
You can retrieve a previously entered record in the Summary screen, as follows:
Invoke the ‘Withdrawal Summary’ screen by typing ‘PASWITHD’ in the field at the top right corner of the Application tool bar and clicking on the adjoining arrow button and specify any or all of the following details in the corresponding details.

- The status of the record in the Authorization Status field. If you choose the ‘Blank Space’ option, then all the records are retrieved.
- The status of the record in the Record Status field. If you choose the ‘Blank Space’ option, then all records are retrieved
- Order Number
- Order Status
- Party ID
- Instruction Date
- Reference Number
- Portfolio ID
- Account ID
Click ‘Search’ button to view the records. All the records with the specified details are retrieved and displayed in the lower portion of the screen.
Note
You can also retrieve the individual record detail from the detail screen by querying in the following manner:
- Press F7
- Input the Party ID
- Press F8
You can perform Edit, Delete, Amend, Authorize, operations by selecting the operation from the Action list. You can also search a record by using a combination of % and alphanumeric value
2.46.2 Editing Withdrawal Record
You can modify the details of Withdrawal record that you have already entered into the system, provided it has not subsequently authorized. You can perform this operation as follows:
- Invoke the Withdrawal Summary screen from the Browser.
- Select the status of the record that you want to retrieve for modification in the Authorization Status field. You can only modify records that are unauthorized. Accordingly, choose the Unauthorized option.
- Specify any or all of the details in the corresponding fields to retrieve the record that is to be modified.
- Click ‘Search’ button. All unauthorized records with the specified details are retrieved and displayed in the lower portion of the screen.
- Double click the record that you want to modify in the list of displayed records. The Withdrawal Detail screen is displayed.
- Select Unlock Operation from the Action list to modify the record. Modify the necessary information.
Click Save to save your changes. The Withdrawal Detail screen is closed and the changes made are reflected in the Withdrawal Summary screen.
2.46.3 Viewing Withdrawal Record
To view a record that you have previously input, you must retrieve the same in the Withdrawal Summary screen as follows:
- Invoke the Withdrawal Summary screen from the Browser.
- Select the status of the record that you want to retrieve for viewing in the Authorization Status field. You can also view all records that are either unauthorized or authorized only, by choosing the unauthorized / Authorized option.
- Specify any or all of the details of the record in the corresponding fields on the screen.
- Click ‘Search’ button. All records with the specified fields are retrieved and displayed in the lower portion of the screen.
- Double click the record that you want to view in the list of displayed records. The Withdrawal Detail screen is displayed in View mode.
2.46.4 Deleting Withdrawal Record
You can delete only unauthorized records in the system. To delete a record that you have previously entered:
- Invoke the Withdrawal Summary screen from the Browser.
- Select the status of the record that you want to retrieve for deletion.
- Specify any or all of the details in the corresponding fields on the screen.
- Click ‘Search’ button. All records with the specified fields are retrieved and displayed in the lower portion of the screen.
- Double click the record that you want to delete in the list of displayed records. The Withdrawal Detail screen is displayed.
- Select Delete Operation from the Action list. The system prompts you to confirm the deletion and the record is physically deleted from the system database.
2.46.5 Authorizing Withdrawal Record
An unauthorized Withdrawal record must be authorized in the system for it to be processed. To authorize a record:
- Invoke the Withdrawal Summary screen from the Browser.
- Select the status of the record that you want to retrieve for authorization. Typically, choose the unauthorized option.
- Specify any or all of the details in the corresponding fields on the screen.
- Click ‘Search’ button. All records with the specified details that are pending authorization are retrieved and displayed in the lower portion of the screen.
- Double click the record that you wish to authorize. The Withdrawal Detail screen is displayed. Select Authorize operation from the Action List.
When a checker authorizes a record, details of validation, if any, that were overridden by the maker of the record during the Save operation are displayed. If any of these overrides results in an error, the checker must reject the record.
2.46.6 Amending Withdrawal Record
After a Withdrawal record is authorized, it can be modified using the Unlock operation from the Action List. To make changes to a record after authorization:
- Invoke the Withdrawal Summary screen from the Browser.
- Select the status of the record that you want to retrieve for authorization. You can only amend authorized records.
- Specify any or all of the details in the corresponding fields on the screen.
- Click ‘Search’ button. All records with the specified details that are pending authorization are retrieved and displayed in the lower portion of the screen.
- Double click the record that you wish to authorize. The Withdrawal Detail screen is displayed in amendment mode. Select Unlock operation from the Action List to amend the record.
- Amend the necessary information and click on Save to save the changes
2.46.7 Authorizing Amended Withdrawal Record
An amended Withdrawal record must be authorized for the amendment to be made effective in the system.
The subsequent process of authorization is the same as that for normal transactions.
2.47 Switch Detail
This section contains the following topics
- Section 2.47.1, "Invoking Switch Detail Screen"
- Section 2.47.2, "Order Details Tab"
- Section 2.47.3, "From Instrument Tab"
- Section 2.47.4, "To Instrument Tab"
- Section 2.47.5, "Intermediary Details Tab"
- Section 2.47.6, "Add Info Details Tab"
- Section 2.47.7, "View Balance Button"
- Section 2.47.8, "Allocation Details Button"
2.47.1 Invoking Switch Detail Screen
You can capture switch detail using ‘Switch Detail’ screen. You can invoke this screen by typing ‘PADSWIDE’ in the field at the top right corner of the Application tool bar and clicking on the adjoining arrow button.
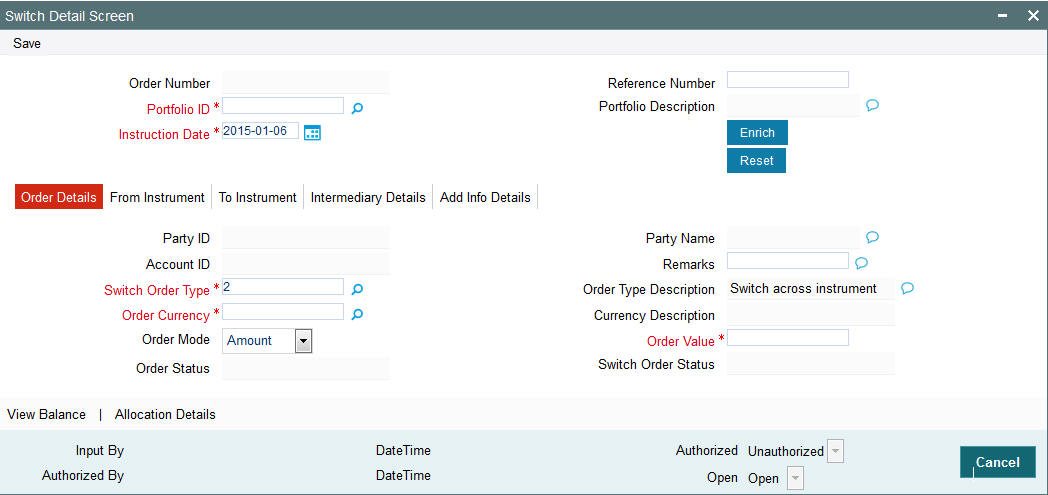
You can specify the following details:
Order Number
Display
The system displays the order number.
Reference Number
Alphanumeric; 16 Characters; Optional
Specify the reference number,
Portfolio ID
Alphanumeric; 16 Characters; Mandatory
Specify the portfolio ID. Alternatively, you can select portfolio ID from the option list. The list displays all valid portfolio ID maintained in the system.
Portfolio Description
Display
The system displays the description of the selected portfolio ID.
Instruction Date
Date Format; Mandatory
The system defaults the application date. However, you can amend this value to specify the future date.
Note
Future date cannot be a system holiday. The system does not allow back dated instructions.
If holiday is declared after maintaining a future dated instruction, system will not update the order details automatically.
After specifying the mandatory details, click ‘Enrich’ button. The system displays the party details based on the portfolio ID selected.
2.47.2 Order Details Tab
Click ‘Order Details’ tab in ‘Switch Detail’ screen to specify order details.
You can specify the following details:
Party ID
Display
The system displays the party ID based on the portfolio ID selected.
Party Name
Display
The system displays the name of the party based on the portfolio ID selected.
Account ID
Display
The system displays the account number of the party based on the portfolio ID selected.
Remarks
Alphanumeric; 255 Characters; Optional
Specify remarks, if any.
Switch Order Type
Alphanumeric; 3 Characters; Mandatory
Specify the switch order type. Alternatively, you can select switch order type from the option list. The list displays ‘Switch Across Instrument’ value.
Order Type Description
Display
The system displays the description of the selected switch order type.
Order Currency
Alphanumeric; 3 Characters; Mandatory
Specify the order currency code. Alternatively, you can select the currency code from the option list. The list displays all valid currency code maintained in the system.
Currency Description
Display
The system displays the description of the selected order currency code.
Order Mode
Optional
Select the order mode from the drop-down list. The list displays the following values:
- Amount
- Percentage
Order Value
Numeric; 18 Characters; Mandatory
Specify the order value.
You need to specify the ‘Order Value’ if you have selected ‘Order Mode’ as ‘Percentage’.
Order Status
Display
The system displays the status of the order.
Switch Order Status
Display
The system displays the in-legs order status.
2.47.3 From Instrument Tab
Click ‘From Instrument’ tab in ‘Switch Detail’ screen to view the instrument details.

The system displays the following details based on the selected portfolio ID:
- Instrument ID
- Instrument Name
- Instrument Ratio
- Asset ID
- Asset Name
- Ratio
2.47.4 To Instrument Tab
Click ‘To Instrument’ tab in ‘Switch Detail’ screen to specify the instrument details.
You can specify the following details:
Instrument ID
Alphanumeric; 16 Characters; Mandatory
Specify the instrument ID. Alternatively, you can select instrument ID from the option list. The list displays all valid instrument ID maintained in the system.
Instrument Name
Display
The system displays the name of the instrument for the selected instrument ID.
Instrument Ratio
Numeric; 5 Characters; Mandatory
Specify the numeric ratio.
Asset ID
Alphanumeric; 16 Characters; Mandatory
Specify the asset ID. Alternatively, you can select asset ID from the option list. The list displays all valid asset ID maintained in the system.
Asset Name
Display
The system displays the name of the selected asset ID.
Ratio
Numeric; 5 Characters; Optional
Specify the ratio.
Override
Display
The system displays the override status.
2.47.5 Intermediary Details Tab
Click ‘Intermediary Details’ tab in ‘Switch Detail’ screen to specify intermediary details.

You can specify the following details:
Intermediary ID
Alphanumeric; 12 Characters; Optional
Specify the intermediary ID. Alternatively, you can select intermediary ID from the option list. The list displays all valid intermediary ID maintained in the system.
Intermediary Name
Display
The system displays the name of the selected intermediary ID.
Split Percentage
Numeric; 3 Characters; Optional
Specify the split percentage details.
The sum total should be 100.
The system will split the transaction percentage within the instruments and eventually to assets according to the default percentage.
2.47.6 Add Info Details Tab
Click ‘Add Info Details’ tab in ‘Switch Detail’ screen to view additional information.
You can view the following details:
- Other Info Field
- Field Value
2.47.7 View Balance Button
Click ‘View Balance’ button in ‘Switch Detail’ screen to view the portfolio balance. The ‘View Portfolio Balance’ (PADPFBAL) screen is displayed.
You can view the following details:
- Party ID
- Party Name
- Portfolio ID
- Portfolio Description
PF Balance
- Portfolio ID
- Portfolio Description
- Account ID
- Unit Balance
- Currency
- Market Value
Instrument Balance
- Instrument ID
- Instrument Description
- Unit Balance
- Holding Ratio
- Instrument Currency
- Market Value
Asset Balance
- Asset ID
- Asset Name
- Balance Units
- Holding Ratio
- Asset Base Currency
- Market Value
2.47.8 Allocation Details Button
Click ‘Allocation Details’ button in ‘Switch Detail’ screen to specify allocation details. The ‘Allocation Details’ screen (PADALLOC) is displayed.
You can specify the following details:
Order Number
Alphanumeric; 16 Characters; Mandatory
Specify the order number. Alternatively, you can select order number from the option list. The system displays all valid order number maintained in the system.
2.47.8.1 From Leg Tab
Click ‘From Leg’ tab in ‘Allocation Details’ screen to view allocation details:
You can view the following details:
- Instrument ID
- Instrument Name
- Instrument Ratio
- Amount
- Status
- Asset ID
- Order Amount
- Settlement Amount
- Load Amount
- Order Currency
- Net Amount
- Allocation Date
- Unit Price
- Asset Base Currency
- Allotted Units
- Status
2.47.8.2 To Leg Tab
Click ‘To Leg’ tab in ‘Allocation Details’ screen to view allocation details:
You can view the following details:
- Instrument ID
- Instrument Name
- Instrument Ratio
- Amount
- Status
- Asset ID
- Order Amount
- Settlement Amount
- Load Amount
- Order Currency
- Net Amount
- Allocation Date
- Unit Price
- Asset Base Currency
- Allotted Units
- Status
Post allocation, you can view allocation details through the allocation details (PADALLOC) launch form. This launch form can be viewed as a standalone screen as well.
Switch limits will be based on fiscal year of instrument.
You can reset the order details in header and remove the data from tabs beneath other than defaults.
2.48 Switch Summary
This section contains the following topics:
- Section 2.48.1, "Retrieving a Record in Switch Summary Screen"
- Section 2.48.2, "Editing Switch Record"
- Section 2.48.3, "Viewing Switch Record"
- Section 2.48.4, "Deleting Switch Record"
- Section 2.48.5, "Authorizing Switch Record"
- Section 2.48.6, "Amending Switch Record"
- Section 2.48.7, "Authorizing Amended Switch Record"
2.48.1 Retrieving a Record in Switch Summary Screen
You can retrieve a previously entered record in the Summary screen, as follows:
Invoke the ‘Switch Summary’ screen by typing ‘PASSWIDE’ in the field at the top right corner of the Application tool bar and clicking on the adjoining arrow button and specify any or all of the following details in the corresponding details.

- The status of the record in the Authorization Status field. If you choose the ‘Blank Space’ option, then all the records are retrieved.
- The status of the record in the Record Status field. If you choose the ‘Blank Space’ option, then all records are retrieved
- Order Number
- Order Status
- Party ID
- Instruction Date
- Checker ID
- Reference Number
- Portfolio ID
- Account ID
- Maker ID
Click ‘Search’ button to view the records. All the records with the specified details are retrieved and displayed in the lower portion of the screen.
Note
You can also retrieve the individual record detail from the detail screen by querying in the following manner:
- Press F7
- Input the Party ID
- Press F8
You can perform Edit, Delete, Amend, Authorize, operations by selecting the operation from the Action list. You can also search a record by using a combination of % and alphanumeric value
2.48.2 Editing Switch Record
You can modify the details of Switch record that you have already entered into the system, provided it has not subsequently authorized. You can perform this operation as follows:
- Invoke the Switch Summary screen from the Browser.
- Select the status of the record that you want to retrieve for modification in the Authorization Status field. You can only modify records that are unauthorized. Accordingly, choose the Unauthorized option.
- Specify any or all of the details in the corresponding fields to retrieve the record that is to be modified.
- Click ‘Search’ button. All unauthorized records with the specified details are retrieved and displayed in the lower portion of the screen.
- Double click the record that you want to modify in the list of displayed records. The Switch Detail screen is displayed.
- Select Unlock Operation from the Action list to modify the record. Modify the necessary information.
Click Save to save your changes. The Switch Detail screen is closed and the changes made are reflected in the Switch Summary screen.
2.48.3 Viewing Switch Record
To view a record that you have previously input, you must retrieve the same in the Switch Summary screen as follows:
- Invoke the Switch Summary screen from the Browser.
- Select the status of the record that you want to retrieve for viewing in the Authorization Status field. You can also view all records that are either unauthorized or authorized only, by choosing the unauthorized / Authorized option.
- Specify any or all of the details of the record in the corresponding fields on the screen.
- Click ‘Search’ button. All records with the specified fields are retrieved and displayed in the lower portion of the screen.
- Double click the record that you want to view in the list of displayed records. The Switch Detail screen is displayed in View mode.
2.48.4 Deleting Switch Record
You can delete only unauthorized records in the system. To delete a record that you have previously entered:
- Invoke the Switch Summary screen from the Browser.
- Select the status of the record that you want to retrieve for deletion.
- Specify any or all of the details in the corresponding fields on the screen.
- Click ‘Search’ button. All records with the specified fields are retrieved and displayed in the lower portion of the screen.
- Double click the record that you want to delete in the list of displayed records. The Switch Detail screen is displayed.
- Select Delete Operation from the Action list. The system prompts you to confirm the deletion and the record is physically deleted from the system database.
2.48.5 Authorizing Switch Record
An unauthorized Switch record must be authorized in the system for it to be processed. To authorize a record:
- Invoke the Switch Summary screen from the Browser.
- Select the status of the record that you want to retrieve for authorization. Typically, choose the unauthorized option.
- Specify any or all of the details in the corresponding fields on the screen.
- Click ‘Search’ button. All records with the specified details that are pending authorization are retrieved and displayed in the lower portion of the screen.
- Double click the record that you wish to authorize. The Switch Detail screen is displayed. Select Authorize operation from the Action List.
When a checker authorizes a record, details of validation, if any, that were overridden by the maker of the record during the Save operation are displayed. If any of these overrides results in an error, the checker must reject the record.
2.48.6 Amending Switch Record
After a Switch record is authorized, it can be modified using the Unlock operation from the Action List. To make changes to a record after authorization:
- Invoke the Switch Summary screen from the Browser.
- Select the status of the record that you want to retrieve for authorization. You can only amend authorized records.
- Specify any or all of the details in the corresponding fields on the screen.
- Click ‘Search’ button. All records with the specified details that are pending authorization are retrieved and displayed in the lower portion of the screen.
- Double click the record that you wish to authorize. The Switch Detail screen is displayed in amendment mode. Select Unlock operation from the Action List to amend the record.
- Amend the necessary information and click on Save to save the changes
Note
You can modify the record any number of time unless the record is handed-off. Once record is handed-off, you can only reverse the record.
2.48.7 Authorizing Amended Switch Record
An amended Switch record must be authorized for the amendment to be made effective in the system. The authorization of amended records can be done only from Agency Branch module.
The subsequent process of authorization is the same as that for normal transactions.
2.49 Order Status of Orders
The system will use the following order status for orders. The system will show the order status in detail as well as summary screen:
Order Status |
Order Status Description |
0 |
Order unauthorised |
1 |
Order authorised |
3 |
Payment cleared |
4 |
Reversed due to payment rejection |
8 |
Order reversed before handoff |
9 |
Order handoff pending allocation |
10 |
Out-leg allotted/in-leg handoff pending |
11 |
In-leg handoff pending allocation |
13 |
Order reversed after handoff |
14 |
Order generated, Allocation pending |
15 |
Order allotted |
19 |
Reversed after allocation |
20 |
Reversal handed off |
25 |
Reversal completed |
Investment Order Status
.jpg)
Withdrawal Order Status
.jpg)
Switch Order Status
.jpg)
2.50 Allocation Details
This section contains the following topics:
- Section 2.50.1, "Invoking Allocation Details Screen"
- Section 2.50.2, "From Leg Tab"
- Section 2.50.3, "To Leg Tab"
2.50.1 Invoking Allocation Details Screen
You can view allocation details of an order using ‘Allocation Details’ screen. You can invoke this screen by typing ‘PADALLOC’ in the field at the top right corner of the Application tool bar and clicking on the adjoining arrow button.
You can specify the following details by clicking ‘Execute Query’ button:
Order Number
Alphanumeric; 16 Characters; Mandatory
Specify the order number. Alternatively, you can select order number from the option list. The system displays all valid order number maintained in the system.
2.50.2 From Leg Tab
Click ‘From Leg’ tab in ‘Allocation Details’ screen to view allocation details:
You can view the following details:
- Instrument ID
- Instrument Name
- Instrument Ratio
- Amount
- Status
- Asset ID
- Order Amount
- Settlement Amount
- Load Amount
- Order Currency
- Net Amount
- Allocation Date
- Unit Price
- Asset Base Currency
- Allotted Units
- Status
2.50.3 To Leg Tab
Click ‘To Leg’ tab in ‘Allocation Details’ screen to view allocation details:
You can view the following details:
- Instrument ID
- Instrument Name
- Instrument Ratio
- Amount
- Status
- Asset ID
- Order Amount
- Settlement Amount
- Load Amount
- Order Currency
- Net Amount
- Allocation Date
- Unit Price
- Asset Base Currency
- Allotted Units
- Status
2.51 View Portfolio Balance
This section contains the following topics:
2.51.1 Invoking View Portfolio Balance Screen
You can view available balance for a party using ‘View Portfolio Balance’ screen. You can invoke this screen by typing ‘PADPFBAL’ in the field at the top right corner of the Application tool bar and clicking on the adjoining arrow button.
You can specify the following details:
Party ID
Alphanumeric; 16 Characters; Optional
Specify the party ID. Alternatively, you can select party ID from the option list. The list displays all valid party ID maintained in the system.
Party Name
Display
The system displays the name for the selected party ID.
Portfolio ID
Alphanumeric; 16 Characters; Mandatory
Specify the portfolio ID. Alternatively, you can select portfolio ID from the option list. The list displays all valid portfolio ID maintained in the system.
Portfolio Description
Display
The system displays the description of the selected portfolio ID.
After specifying the necessary details, click ‘Execute Query’ button. The following details are displayed:
Portfolio Balance
- Portfolio ID
- Portfolio Description
- Account ID
- Unit Balance
- Currency
- Market Value
Instrument Balance
- Instrument ID
- Instrument Description
- Unit Balance
- Holding Ratio
- Instrument Currency
- Market Value
Asset Balance
- Asset ID
- Asset Name
- Balance Units
- Holding Ratio
- Asset Base Currency
- Market Value
2.52 Interface Maintenance
This section contains the following topics:
Section 2.52.1, "Invoking Interface Maintenance Detail Screen"
2.52.1 Invoking Interface Maintenance Detail Screen
You can maintain interfaces for upload and export using ‘FCIS Interface Maintenance Detail’ screen. You can invoke this screen by typing ‘PADIFAC’ in the field at the top right corner of the Application tool bar and clicking on the adjoining arrow button.

You can specify the following details:
Export Format
Optional
Select the export format from the drop-down list. The list displays the following values:
- Segment Wise
- Segment Record Wise
For further details, refer ‘Setting up and Maintaining Interfaces’ section in ‘Interfaces with External Systems’ chapter in ‘Interface’ user manual.
2.53 Interface Maintenance Summary Screen
This section contains the following topics:
2.53.1 Invoking Interface Maintenance Summary Screen
You can retrieve a previously entered record in the Summary Screen, as follows:
Invoke the ‘FCIS Interface Maintenance Summary’ screen by typing ‘PASIFAC’ in the field at the top right corner of the Application tool bar and clicking on the adjoining arrow button.
For further details, refer ‘Interface Maintenance Summary Screen’ section in ‘Interfaces with External Systems’ chapter in ‘Interface’ user manual.
2.54 Party Role Migration
This section contains the following topics:
2.54.1 Invoking Party Role Migration
To handle broker mergers and transfer of business from one broker/ brokerage house to another, you can run party role migration batch.
In case of PAS-TA integration, if broker migration is done in TA, the system will not migrate automatically to PAS brokers.
You can run party role migration batch using ‘Party Role Migration’ screen. This screen is used to merge broker/ intermediary. Once the batch is processed, old broker is not available for future transactions. The system will update the new broker ID for all investment accounts.
You can invoke ‘Party Role Migration’ screen by typing ‘PADPRMIG’ in the field at the top right corner of the Application tool bar and clicking on the adjoining arrow button.
You can specify the following details:
Party Role
Alphanumeric; 2 Characters; Mandatory
Specify the party role ID. Alternatively, you can select party role ID from the option list. The list displays all valid party role ID maintained in the system.
Role Description
Display
The system displays the description of the selected party role ID.
Source Party ID
Alphanumeric; 16 Characters; Mandatory
Specify the source party ID. Alternatively, you can select source party ID from the option list. The list displays all valid source party ID maintained in the system.
Source Party Name
Display
The system displays the name of the selected source party ID.
Destination Party ID
Alphanumeric; 16 Characters; Mandatory
Specify the destination party ID. Alternatively, you can select destination party ID from the option list. The list displays all valid destination party ID maintained in the system.
Destination Party Name
Display
The system displays the name of the selected destination party ID.
Effective Date
Date Format; Mandatory
Select the effective date from the adjoining calendar.
Status
Display
The system displays the party role migration status.
2.55 Party Role Migration Summary
This section contains the following topics:
- Section 2.55.1, "Retrieving a Record in Party Role Migration Summary Screen"
- Section 2.55.2, "Editing Party Role Migration Record"
- Section 2.55.3, "Viewing Party Role Migration Record"
- Section 2.55.4, "Deleting Party Role Migration Record"
- Section 2.55.5, "Authorizing Party Role Migration Record"
- Section 2.55.6, "Amending Party Role Migration Record"
- Section 2.55.7, "Authorizing Amended Party Role Migration Record"
2.55.1 Retrieving a Record in Party Role Migration Summary Screen
You can retrieve a previously entered record in the Summary screen, as follows:
You can invoke the ‘Party Role Migration Summary’ screen by typing ‘PASPRMIG’ in the field at the top right corner of the Application tool bar and clicking on the adjoining arrow button and specify any or all of the following details in the corresponding details.

- The status of the record in the Authorized Status field. If you choose the ‘Blank Space’ option, then all the records are retrieved.
- The status of the record in the Record Status field. If you choose the ‘Blank Space’ option, then all records are retrieved
- Party Role
- Role Description
- Source Party ID
- Source Party Name
Click ‘Search’ button to view the records. All the records with the specified details are retrieved and displayed in the lower portion of the screen.
Note
You can also retrieve the individual record detail from the detail screen by querying in the following manner:
- Press F7
- Input the Party Role
- Press F8
You can perform Edit, Delete, Amend, Authorize, operations by selecting the operation from the Action list. You can also search a record by using a combination of % and alphanumeric value
2.55.2 Editing Party Role Migration Record
You can modify the details of Party Role Migration record that you have already entered into the system, provided it has not subsequently authorized. You can perform this operation as follows:
- Invoke the Party Role Migration Summary screen from the Browser.
- Select the status of the record that you want to retrieve for modification in the Authorized field. You can only modify records that are unauthorized. Accordingly, choose the Unauthorized option.
- Specify any or all of the details in the corresponding fields to retrieve the record that is to be modified.
- Click ‘Search’ button. All unauthorized records with the specified details are retrieved and displayed in the lower portion of the screen.
- Double click the record that you want to modify in the list of displayed records. The Party Role Migration Detail screen is displayed.
- Select Unlock Operation from the Action list to modify the record. Modify the necessary information.
Click Save to save your changes. The Party Role Migration Detail screen is closed and the changes made are reflected in the Party Role Migration Summary screen.
2.55.3 Viewing Party Role Migration Record
To view a record that you have previously input, you must retrieve the same in the Party Role Migration Summary screen as follows:
- Invoke the Party Role Migration Summary screen from the Browser.
- Select the status of the record that you want to retrieve for viewing in the Authorized field. You can also view all records that are either unauthorized or authorized only, by choosing the unauthorized / Authorized option.
- Specify any or all of the details of the record in the corresponding fields on the screen.
- Click ‘Search’ button. All records with the specified fields are retrieved and displayed in the lower portion of the screen.
- Double click the record that you want to view in the list of displayed records. The Party Role Migration Detail screen is displayed in View mode.
2.55.4 Deleting Party Role Migration Record
You can delete only unauthorized records in the system. To delete a record that you have previously entered:
- Invoke the Party Role Migration Summary screen from the Browser.
- Select the status of the record that you want to retrieve for deletion.
- Specify any or all of the details in the corresponding fields on the screen.
- Click ‘Search’ button. All records with the specified fields are retrieved and displayed in the lower portion of the screen.
- Double click the record that you want to delete in the list of displayed records. The Party Role Migration Detail screen is displayed.
- Select Delete Operation from the Action list. The system prompts you to confirm the deletion and the record is physically deleted from the system database.
2.55.5 Authorizing Party Role Migration Record
An unauthorized Party Role Migration record must be authorized in the system for it to be processed. To authorize a record:
- Invoke the Party Role Migration Summary screen from the Browser.
- Select the status of the record that you want to retrieve for authorization. Typically, choose the unauthorized option.
- Specify any or all of the details in the corresponding fields on the screen.
- Click ‘Search’ button. All records with the specified details that are pending authorization are retrieved and displayed in the lower portion of the screen.
- Double click the record that you wish to authorize. The Party Role Migration Detail screen is displayed. Select Authorize operation from the Action List.
When a checker authorizes a record, details of validation, if any, that were overridden by the maker of the record during the Save operation are displayed. If any of these overrides results in an error, the checker must reject the record.
2.55.6 Amending Party Role Migration Record
After a Party Role Migration record is authorized, it can be modified using the Unlock operation from the Action List. To make changes to a record after authorization:
- Invoke the Party Role Migration Summary screen from the Browser.
- Select the status of the record that you want to retrieve for authorization. You can only amend authorized records.
- Specify any or all of the details in the corresponding fields on the screen.
- Click ‘Search’ button. All records with the specified details that are pending authorization are retrieved and displayed in the lower portion of the screen.
- Double click the record that you wish to authorize. The Party Role Migration Detail screen is displayed in amendment mode. Select Unlock operation from the Action List to amend the record.
- Amend the necessary information and click on Save to save the changes
2.55.7 Authorizing Amended Party Role Migration Record
An amended Party Role Migration record must be authorized for the amendment to be made effective in the system.
The subsequent process of authorization is the same as that for normal transactions.
2.56 Party Data Merger Screen
This section contains the following topics:
2.56.1 Invoking Party Data Merger Screen
You can merge the customer details such as address ID, bank details etc from old to new one using ‘Party Data Merger’ screen. This screen is used to merge Address/ Identity proof and Bank details in case if you have created the proofs multiple times. Post successfully execution of the batch, the system will replace old details with new details in the respective party, investment account
You can invoke ‘Party Data Merger’ screen by typing ‘PADMERGE’ in the field at the top right corner of the Application tool bar and clicking on the adjoining arrow button.
You can specify the following details:
Category
Optional
Select the category to be merged from the drop-down list. The list displays the following values:
- Address
- Bank
- ID
Effective Date
Date Format; Mandatory
Select the effective date from the adjoining calendar. This indicates the date from when the data merger is effective.
From Reference Number
Alphanumeric; 16 Characters; Mandatory
Specify the From reference number. Alternatively, you can select From reference number from the option list. The list displays all valid From reference number maintained in the system.
To Reference Number
Alphanumeric; 16 Characters; Mandatory
Specify the To reference number. Alternatively, you can select To reference number from the option list. The list displays all valid To reference number maintained in the system.
Status
Display
The system displays the merge status of the party.
2.57 Instruction Date Update Screen
This section contains the following topics:
2.57.1 Invoking Instruction Date Update Screen
You can modify the instruction date for the selected order type using ‘Instruction Date Update’ screen. This screen is used to move the instruction/ transaction date of orders captured prior to future working day maintained as holiday. If you had captured future date orders and subsequently if the day is marked as a holiday, this screen will move Instruction date to another working day.
You can invoke this screen by typing ‘PADINDTU’ in the field at the top right corner of the Application tool bar and clicking on the adjoining arrow button.
You can specify the following details:
Original Instruction Date
Date Format; Mandatory
Select the original instruction date from the adjoining calendar.
Modified Instruction Date
Date Format; Mandatory
Select the modified instruction date from the adjoining calendar.
Order Type
Alphanumeric; 3 Characters; Mandatory
Specify the order type. Alternatively, you can select order type from the option list. The list displays all valid order type maintained in the system.
You can change the instruction date for all order types in one go if you select ‘ALL’ from option list.
Operation
Optional
Select the operation status from the drop-down list. The list displays the following values:
- Execute
- Process
2.58 Order Summary
This section contains the following topics:
2.58.1 Invoking Order Summary Screen
You can view the summary of the orders captured for a party using ‘Order Summary’ screen. It also gives an idea about the allotted units of a party under particular investment account and a portfolio. You can invoke ‘Order Summary’ screen by typing ‘PADACCST’ in the field at the top right corner of the Application tool bar and clicking on the adjoining arrow button.
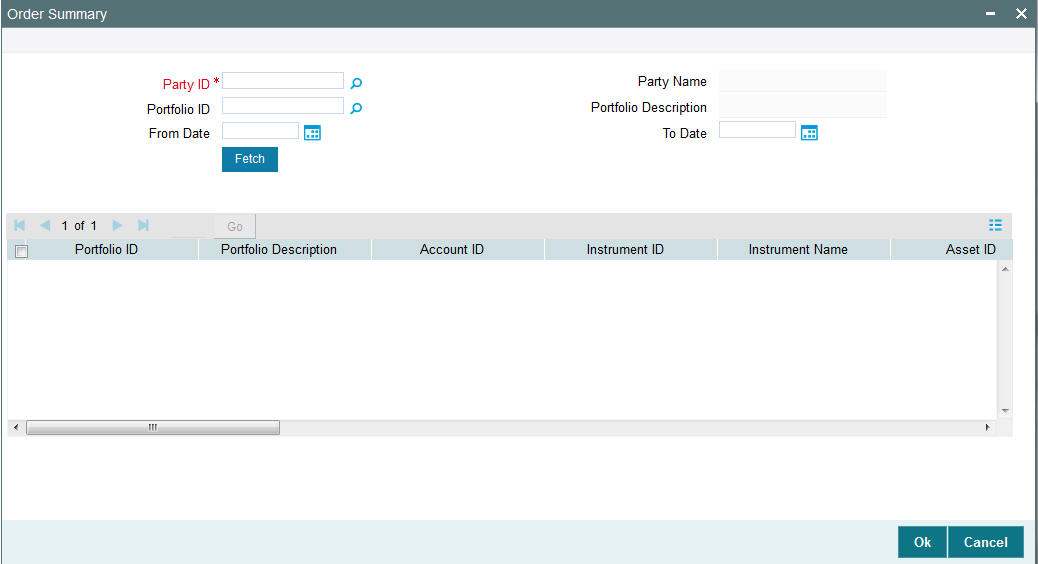
You can specify the following details:
Party ID
Alphanumeric; 12 Characters; Mandatory
Specify the party ID. Alternatively, you can select party ID from the option list. The list displays all valid party ID maintained in the system.
Party Name
Display
The system displays the name of the selected party ID.
Portfolio ID
Alphanumeric; 12 Characters; Optional
Specify the portfolio ID. Alternatively, you can select party ID from the option list. The list displays all valid party ID maintained in the system.
Portfolio Description
Display
The system the description of the selected portfolio ID.
From Date
Date Format; Optional
Select the date from when the order summary needs to be generated.
To Date
Date Format; Optional
Select the date till when the order summary needs to be generated.
Click ‘Fetch’ button to view the following details:
- Portfolio ID
- Portfolio Description
- Account ID
- Instrument ID
- Instrument Name
- Asset ID
- Asset Name
- Order Number
- Original Order Number
- Order Type
- Instruction Date
- Order Currency
- Order Amount
- Allocation Date
- Unit Price
- Asset Base Currency
- Alloted Units
- Status
2.59 Process Group Pension Order
This section contains the following topics:
2.59.1 Invoking Process Group Pension Orders Screen
You can process the contribution file PAPDIS using as common batch screen. You can also execute the respective interface using ‘Process Group Pension Orders’ screen. You can invoke this screen by typing ‘PADPRCFU’ in the field at the top right corner of the Application tool bar and clicking on the adjoining arrow button.
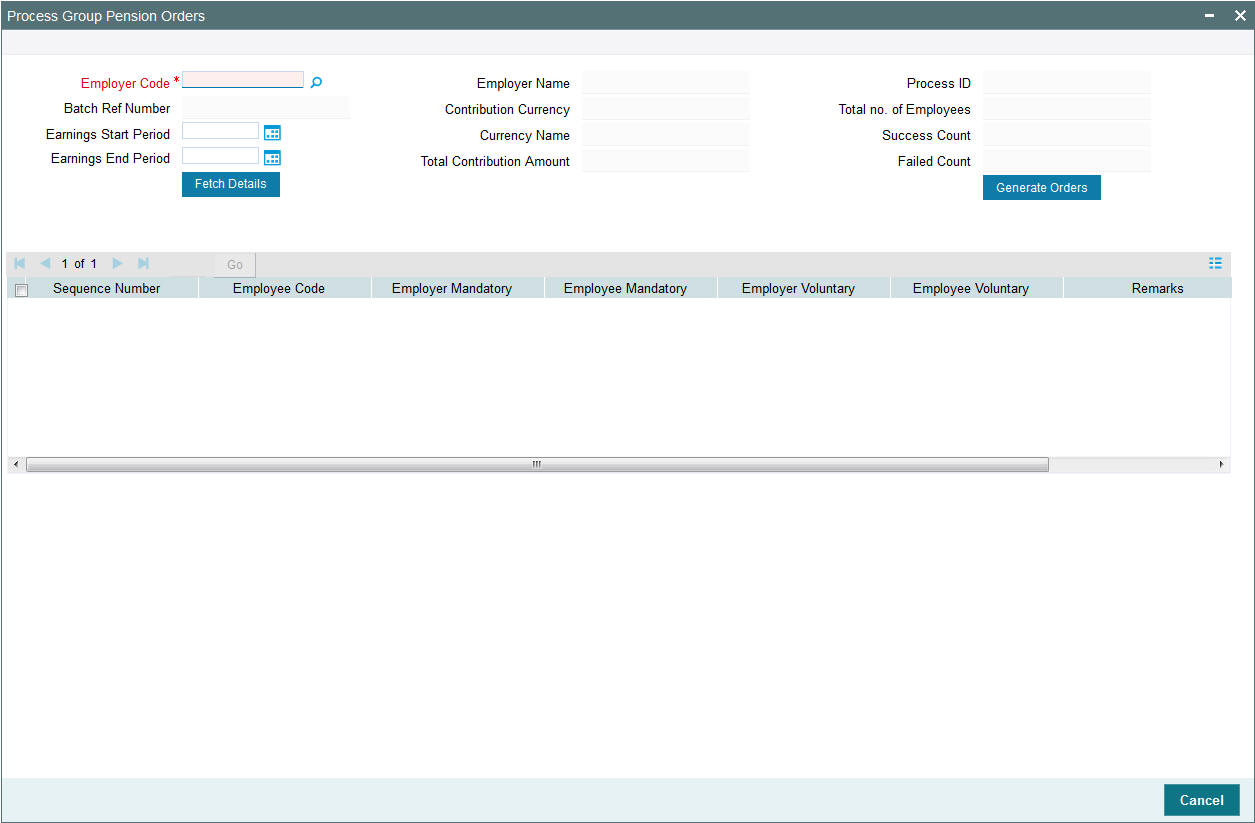
Employer Code
Alphanumeric; 12 Characters; Mandatory
Specify the employer code. Alternatively, you can select employer code from the option list. The list displays all valid employer code maintained in the system.
Employer Name
Display
The system displays the name of the employer for the selected employer code.
Process ID
Display
The system displays the process ID for the selected employer code.
Batch Ref Number
Display
The system displays the batch reference number for the selected employer code.
After specifying the ‘Employer Code’. click ‘Fetch Details’ button. The following details are displayed:
- Contribution Currency
- Total number of Employees
- Earnings Start Period
- Earnings End Period
- Currency Name
- Total Contribution Amount
- Success Count
- Failed Count
- Sequence Number
- Employee Code
- Employer Mandatory
- Employee Mandatory
- Employer Voluntary
- Employee Voluntary
- Remarks
To process the records or to generate orders click ‘Generate Orders’. button.
Once the order is processed query the process ID (User enter query-execute query option) to check the success and error details.
To view the error, click ‘View Error Log’ button to view the errors.
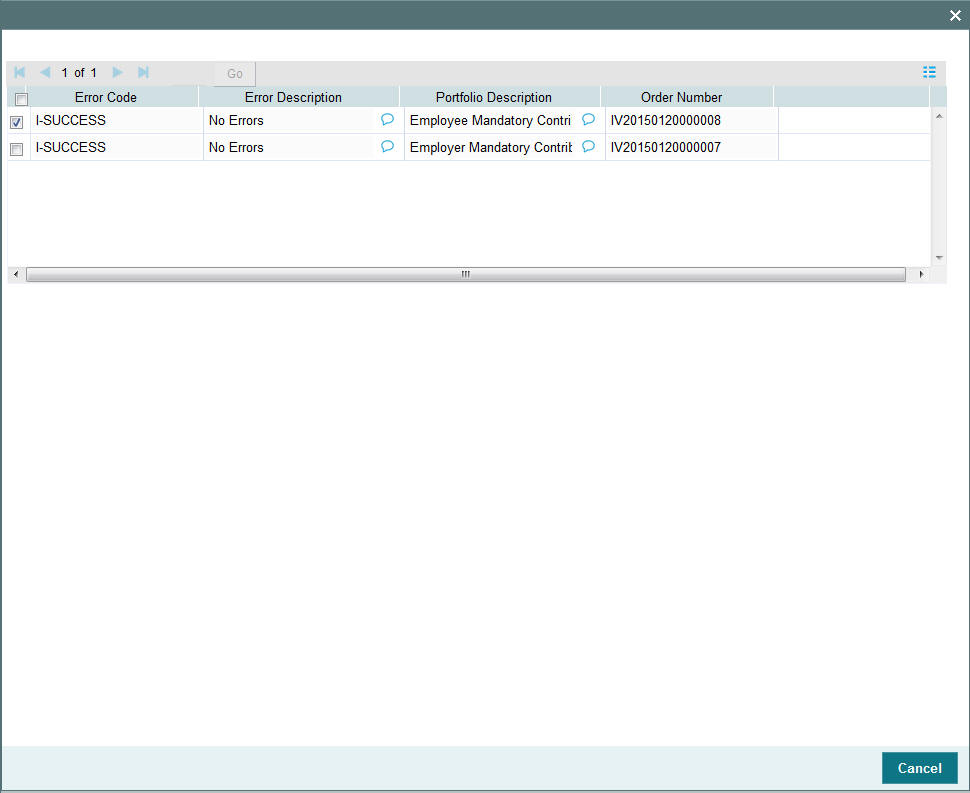
You can view the following details:
- Error Code
- Error Description
- Portfolio Description
- Order Number
2.60 EOD Maintenance
This section contains the following topics:
- Section 2.60.1, "Invoking EOD Maintenance Screen"
- Section 2.60.2, "Invoking EOD Maintenance Summary Screen"
2.60.1 Invoking EOD Maintenance Screen
You can schedule and reschedule the EOD activities using ‘EOD Maintenance Detail’ screen. You can invoke this screen by typing ‘UTDEODMT’ in the field at the top right corner of the Application tool bar and clicking on the adjoining arrow button.
For further details, refer ‘End of Day Maintenance’ section in ‘End of Day Activities’ chapter in ‘Batch_Process’ user manual.
2.60.2 Invoking EOD Maintenance Summary Screen
You can view EOD activities using ‘EOD Maintenance Summary’ screen. You can invoke this screen by typing ‘UTSEODMT’ in the field at the top right corner of the Application tool bar and clicking on the adjoining arrow button.
For further details, refer ‘EOD Maintenance Summary’ section in ‘End of Day Activities’ chapter in ‘Batch_Process’ user manual.
2.61 Online Interface Execution
This section contains the following topics:
2.61.1 Invoking Online Interface Execution Screen
You can upload or export the files to or from the system respectively using ‘Online Interface Execution’ screen. You can invoke this screen by typing ‘PASONLIN’ in the field at the top right corner of the Application tool bar and clicking on the adjoining arrow button.
If any errors result, you can view the same using the upload status summary or upload status report.
For further details, refer ‘Online Execution of Interfaces’ section in ‘Interfaces with External System’ chapter in ‘Interface’ user manual.
2.62 Upload Status Summary
This section contains the following topics:
2.62.1 Invoking Upload Status Summary Screen
You can view upload summary details using ‘Upload Status Summary’ screen. You can invoke this screen by typing ‘PASUPRP’ in the field at the top right corner of the Application tool bar and clicking on the adjoining arrow button. The ‘Upload Status Summary’ screen is displayed.

Specify any of the following details:
- Import Option
- Process ID
- Status
- Upload Date
To retrieve the uploaded record that is to be viewed, specify any or all of the details of the transaction in the corresponding fields on the screen, and click ‘Search’ button. All records with the specified details are retrieved and displayed in the lower portion of the screen.
Select the record that you want to view in the list of displayed records, in the lower portion of the screen.
The Upload Status screen is opened by double clicking the selected record, with the selected record displayed in view mode.
2.63 Pre End of Day Check
This section contains the following topics:
2.63.1 Invoking Pre End of Day Check - Execute Pre EOD Screen
Before doing an EOD, you should clear all the mandatory pre end of the checks listed in ‘Pre End of Day Check - Execute Pre EOD’ screen. Once all checks are over, you can execute pre-EOD and then proceed for EOD. You can invoke ‘Pre End of Day Check - Execute Pre EOD’ screen by typing ‘UTDPREOD’ in the field at the top right corner of the Application tool bar and clicking on the adjoining arrow button.
For further details, refer ‘Executing Pre-End of Day Operations’ section in ‘End of Day Activities’ chapter in ‘Batch_Process’ user manual.
2.64 EOD Execution
This section contains the following topics:
2.64.1 Invoking EOD Execution Screen
To move the system to the next working date, you need to execute the end of the day process using ‘EOD Execution Detail’ screen.
EOD sequence will be as following sequence:
- EOD in PA
- EOD in TA
- BOD in TA
- BOD in PA
However both can be run independently also, information flow will happen based on the source system.
A EOD batch program in TA - 2200- TA to PA module hand-off should be maintained in order to extract the allocation hand-off export.
You can execute the end of day process to move the system to the next working date using ‘EOD Execution Detail’ screen. You can invoke this screen by typing ‘UTDEODEX’ in the field at the top right corner of the Application tool bar and clicking on the adjoining arrow button.
For further details, refer ‘Executing EOD Operations’ section in ‘End of Day Activities’ chapter in ‘Batch_Process’ user manual.
2.65 Upload Status Report
This section contains the following topics:
2.65.1 Generating Upload Status Report
You can generate upload status report using ‘Upload Status Report’ screen. You can invoke this screen by typing ‘PARUPRP’ in the field at the top right corner of the Application tool bar and clicking on the adjoining arrow button.
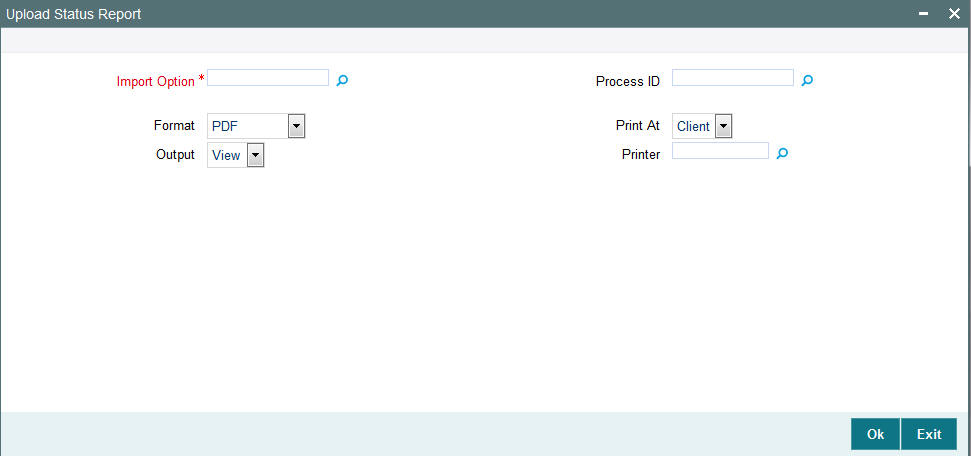
Import Option
Alphanumeric; 50 Characters; Optional
Specify the import option. Alternatively, you can select import option from the option list. The list displays all valid import option maintained in the system.
Process ID
Alphanumeric; 50 Characters; Optional
Specify the process ID. Alternatively, you can select process ID from the option list. The list displays all valid process ID maintained in the system.
Format
Optional
Select the format from the drop-down list. The list displays the following values:
- HTML
- Excel
- Excel (.xlsx)
- RTF
Output
Optional
Select the output from the drop-down list. The list displays the following values:
- View
- Spool
Print At
Optional
Select the printing location from the drop-down list. The list displays the following values:
- Client
- Server
Printer
Alphanumeric; 15 Characters; Optional
Specify the printer details from adjoining option list.
Click ‘Ok’ button to generate the report.
2.66 Consent Maintenance Detail
This section contains the following topics:
2.66.1 Invoking Consent Maintenance Detail Screen
You can capture the consent details using ‘Consent Maintenance Detail’ screen. You can invoke this screen by typing ‘PADCONMT’ in the field at the top right corner of the Application tool bar and clicking on the adjoining arrow button.
For further details, refer ‘Consent Maintenance Detail’ section in ‘Maintaining Reference Information’ chapter in ‘Reference_Information’ user manual.
2.67 Consent Maintenance Summary
This section contains the following topics:
2.67.1 Invoking Consent Maintenance Summary Screen
You can invoke the ‘Consent Maintenance Summary’ screen by typing ‘PASCONMT’ in the field at the top right corner of the Application tool bar and clicking on the adjoining arrow button and specify any or all of the following details in the corresponding details.
For further details, refer ‘Consent Maintenance Summary’ section in ‘Maintaining Reference Information’ chapter in ‘Reference_Information’ user manual.