2. Privacy By Design
Privacy by Design is to include functionality and options that allow customers to configure many privacy-related controls, such as logging, log retention and secure personally identifiable information.
In Oracle FLEXCUBE Investor servicing privacy by design is achieved by the following features:
- Multi Factor Authentication
- Pseudonymization Data Masking
- Anonymization Data Masking
- Consent Recording
- Transparent Data Encryption (TDE)
- General Logging & Audit Logging
- Data Minimization / Data Deletion at Contract Term or Termination
- Data Portability
- End-user Access and Other Requests
- Separation of Duties
This chapter contains the following sections:
- Section 2.1, "Multi Factor Authentication - Access Control"
- Section 2.2, "Pseudonymization Data Masking"
- Section 2.3, "Pseudonymization Personal Information Batch"
- Section 2.4, "Anonymization Data Masking"
- Section 2.5, "Anonymization Personal Information Batch"
- Section 2.6, "Transparent Data Encryption"
- Section 2.7, "Consent Recording"
- Section 2.8, "Consent Maintenance Summary"
- Section 2.9, "Data Minimization/ Data Deletion"
- Section 2.10, "Data Portability"
- Section 2.11, "Separation of Duties"
- Section 2.12, "General Logging- Audit Controls"
- Section 2.13, "Backup and Recovery"
2.1 Multi Factor Authentication - Access Control
This section contains the following topics:
- Section 2.1.1, "Introduction"
- Section 2.1.2, "Implementation of Multi Factor Authentication"
- Section 2.1.3, "Enabling Multi Factor Authentication for User"
- Section 2.1.4, "Logging Multi Factor Authentication Screen"
2.1.1 Introduction
Multi Factor Authentication (MFA) is a method of confirming user access after multiple level of user access validation.
- Authenticating the application user ID and password
- Additional authentication via third party multi-factor authentication provider
Oracle FLEXCUBE Investor Servicing provides framework to enable Multi Factor Authentication (MFA) using third part MFA provider. MFA can be enabled at user level. If MFA is applicable for a user, user will be allowed to login only after successful additional authentication implemented using MFA.
Oracle FLEXCUBE Investor Servicing is not shipped with any inbuilt third party MFA. IMFAAuthenticatePassword interface needs to be extended to implement MFA validation.
2.1.2 Implementation of Multi Factor Authentication
In Oracle FLEXCUBE Investor Servicing framework support is provided to implement any third party MFA provider.
Steps to implement third party MFA authentication
Following are the steps to implement third party MFA authentication:
- New class “MFAAuthenticatePassword” to be created by extending IMFAAuthenticatePassword interface.
- MFAAuthenticatePassword.class file needs to be placed in
- \FCJNeoWeb\Javasource\com\ofss\fcc\mfa before building application EAR.
- MFAAuthenticatePassword.process input parameter “dataMap” is of HashMap data type with Key values “UserId”, ”MFAId”,” MFAPin”.
- MFAAuthenticatePassword.process method should return xml with tag “msgStatus” as “SUCCESS” or “FAILURE”.
MFA Login will be considered as successful if “msgStatus” tag value is “SUCCESS”.
2.1.3 Enabling Multi Factor Authentication for User
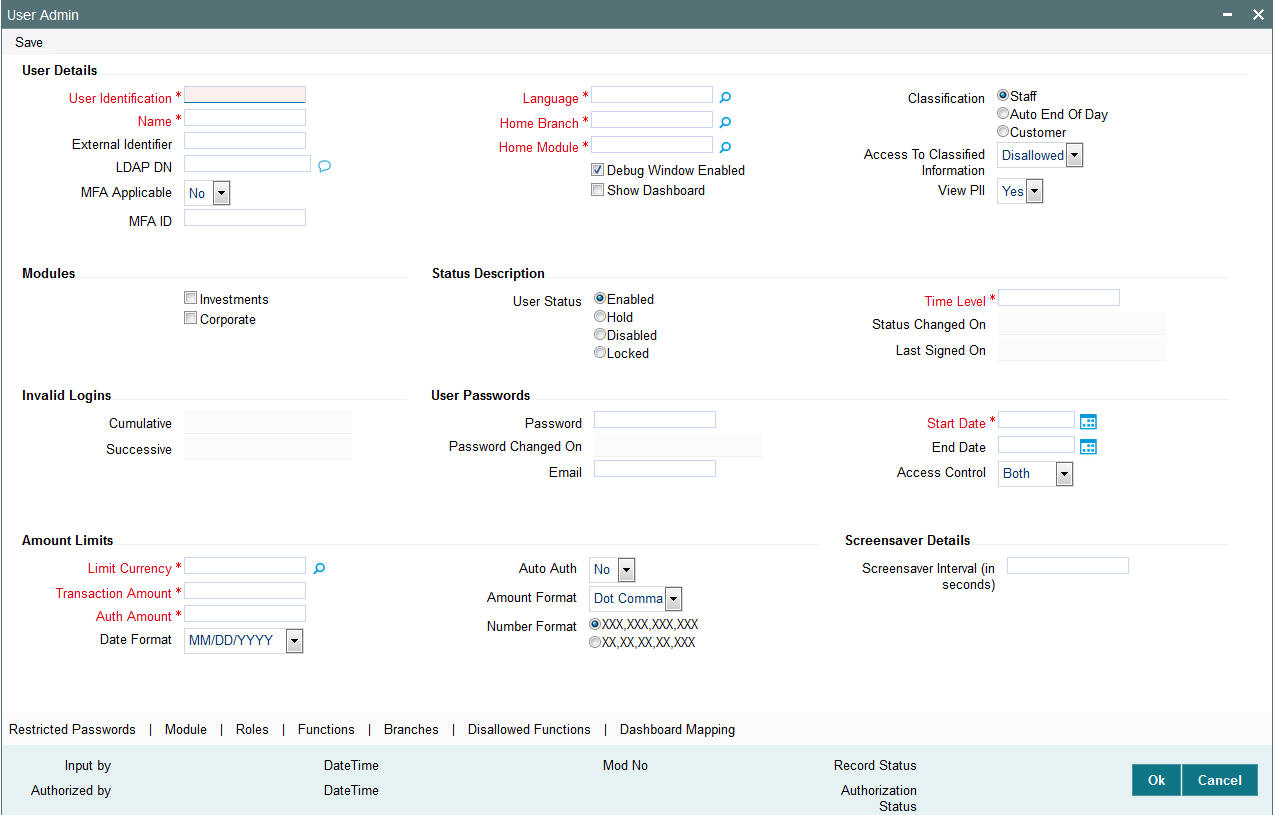
You can capture MFA applicability and MFA ID for a user using ‘User Maintenance’ screen. If MFA applicable is selected as ‘Yes’, then MFA ID is mandatory.
MFA ID should be unique. You can map one MFA ID to one user in the system. Closed user will also be considered for unique MFA ID validation. MFA ID is an amendable field.
2.1.4 Logging Multi Factor Authentication Screen
If user is enabled for Multi Factor Authentication (MFA), after successful application user authentication, user will be prompted to input multi factor PIN of user’s MFA ID
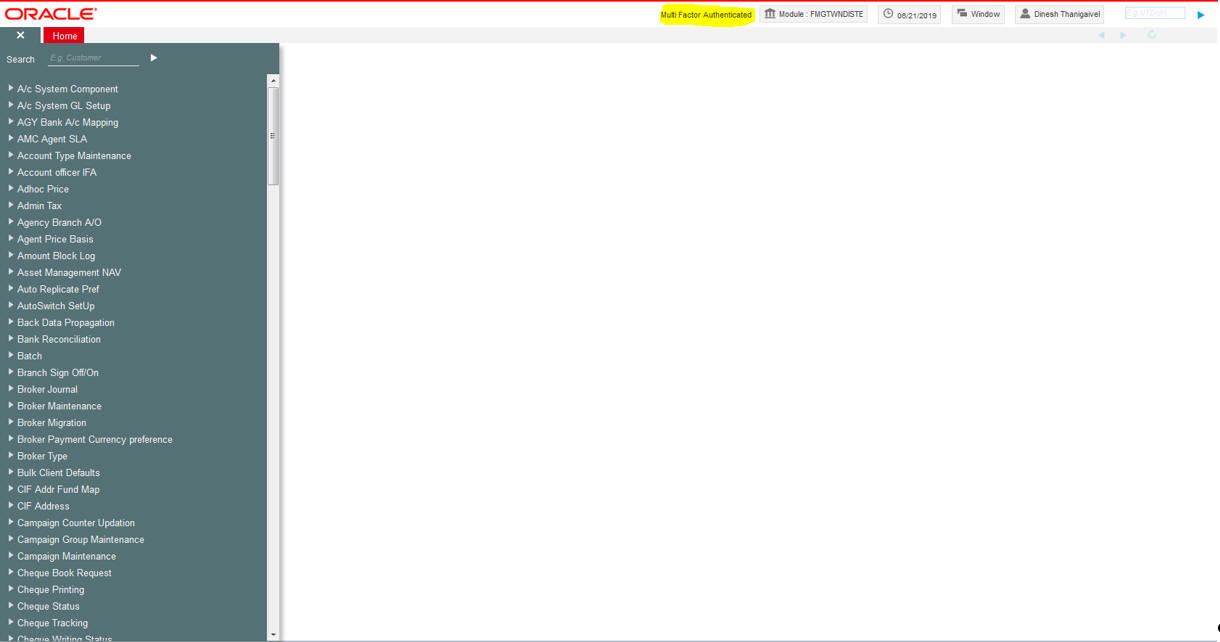
The system will validate MFA PIN for the MFA ID using implemented MFA class. After successful authentication using MFA, system will log in to the application. If user is MFA authenticated, system will show the MFA authentication status in the home page.You can provide multi factor pin to authenticate.
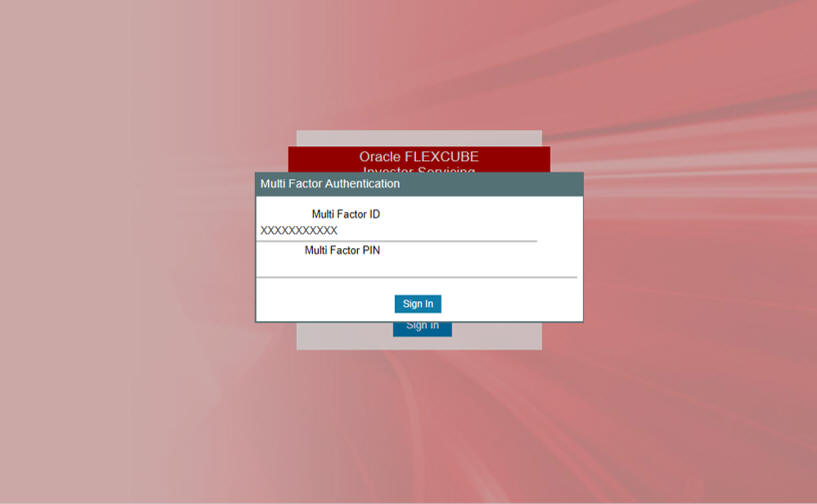
On successful authentication, the system will log in to the application.
2.2 Pseudonymization Data Masking
This section contains the following topics:
- Section 2.2.1, "Introduction"
- Section 2.2.2, "Pseudonymization - User Classification"
- Section 2.2.3, "Pseudonymization Personal Information Maintenance"
2.2.1 Introduction
Pseudonymization is a procedure by which personally identifiable information within a data set is replaced by one or more artificial identifiers during view.
- Application users are allowed to view personal identifiable information as masked or clear text based on user classification.
- User with access to all personal information can view/modify all details as applicable in the roles mapped.
- User with no access to personal information will be restricted to access limited functions with only view option.
2.2.2 Pseudonymization - User Classification
User maintenance screen is enhanced to allow /dis-allow user to view PII data. If View PII is maintained as “No”, you will be restricted to map only PIIVIEWROLE, PIIVIEWROLE_PAS roles.
You cannot modify factory shipped PIIVIEWROLE, PIIVIEWROLE_PA to add other function IDs or other actions. There will not be any validation for amending these roles.
2.2.3 Pseudonymization Personal Information Maintenance
Personal Identifiable Information screen will be used to maintain Pseudonymization table column mapping as needed. This maintenance allows enabling table column to be anonymized.
You can invoke ‘PII Access Policy Maintenance’ screen by typing UTDPIIMT’ in UT Module and PADPIIMT in Pension Administration module in the field at the top right corner of the Application tool bar and clicking on the adjoining arrow button.
Select ‘Enter Query’ from the Actions menu in the Application tool bar to query the required details. Only view and modify operation are supported in the screen.
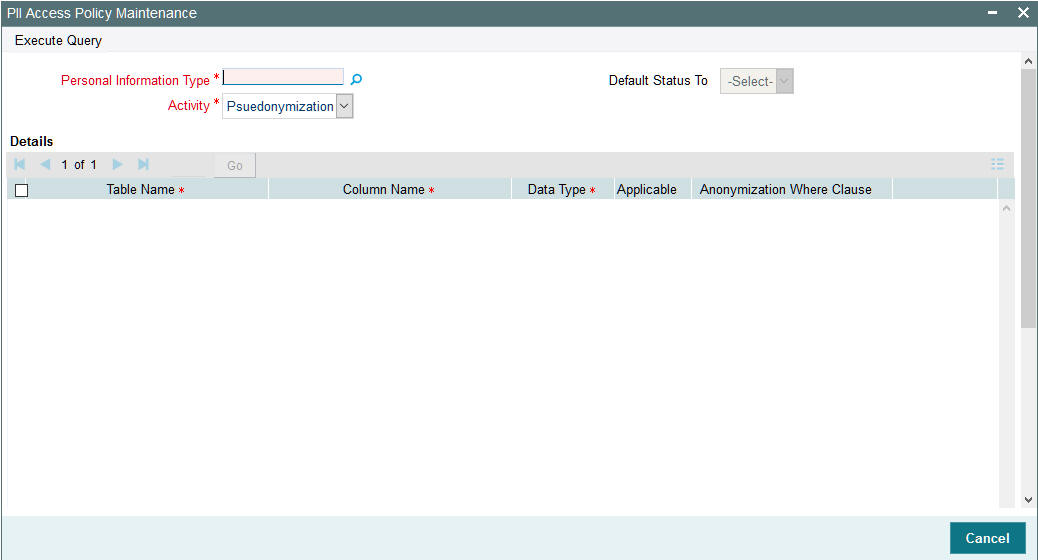
You can specify the following details:
Personal Information Type
Alphanumeric; 200 Characters; Mandatory
Specify the personal information type to be restricted. Alternatively, you can select personal information type from the option list. The list displays all valid personal information type maintained in the system.
Activity
Mandatory
Select the activity status from the drop-down list. The list displays the following values:
- Pseudonymization
- Anonymization
After specifying personal information type and Activity, click ‘Execute Query’ option. The system displays the following values pertaining to the personal information type details:
- Table Name
- Column Name
- Data Type
- Applicable
- Anonymization Where Clause
You can edit the above values by clicking ‘Unlock option.
Personal Information Type
Display
The system displays the personal information type details provided before executing the query.
Default Status to
Optional
Select the status that needs to be defaulted from the drop-down list. The list displays the following values:
- Yes
- No
If you select ‘Yes’ then the system resets ‘Applicable’ field to Yes for all the records. Same is the case if you select ‘No’.
Details
Table Name
Display
The system displays the table name based on the ‘Personal Information Type’ value selected.
Column Name
Display
The system displays the column name based on the ‘Personal Information Type’ value selected.
Data Type
Display
The system displays the data type based on the ‘Personal Information Type’ value selected.
Applicable
Mandatory
The system default the status based on the ‘Default Status to’ value selected. However, you can amend this value by selecting ‘Yes’ or ‘No’ from the from the drop-down list.
For Pseudonymization, if you select ‘Applicable’ field as ‘Yes’, then system will mask data as the format maintained. Else, the system will not mask the data.
For Anonymization, if you select ‘Applicable’ field as ‘Yes’, the system will update data with hashed value. Else, the system will not update the data.
Anonymization Where Clause
Display
The system displays the Anonymization where clause for the table column.
Note
Anonymization where clause is applicable only for Anonymization batch.
After providing the necessary details, click ‘Save’ option. If Pseudonymization Applicable field is changed, then the system will mark the same for regeneration of policy.
Note
You can add or modify the service provider related table masking only in default FMG as maintained. All the Redact related details will be factory shipped. For any new maintenance the predefined data needs to be maintained operationally.
The factory shipped data will show only first 3 characters and rest will be masked for the remaining length of the data. The system will mask the data whose length is less than 3.
Note the following:
- The system defaults Marital status, Sex to predetermined values.
- Schema user with DBA Role or Grants, PII protection will not be applicable.
- Data Masking of Tanked data is not applicable.
- Redact Policy creation on particular table makes all the objected references invalid.
- Redact Policy needs to be done during non-business hours.
2.3 Pseudonymization Personal Information Batch
This section contains the following topics:
- Section 2.3.1, "Invoking PII Data Masking Batch Screen"
- Section 2.3.2, "View Activity Status Button"
2.3.1 Invoking PII Data Masking Batch Screen
You can start the Pseudonymization process using ‘PII Data Masking Batch’ screen. You can invoke this screen by typing ‘UTDPIIBT’ from FMG module or ‘PADPIIBT’ from Pension module in the field at the top right corner of the Application tool bar and clicking on the adjoining arrow button.
Select ‘Pseudonymization; option from ‘Activity’ field. Click ‘Process’..
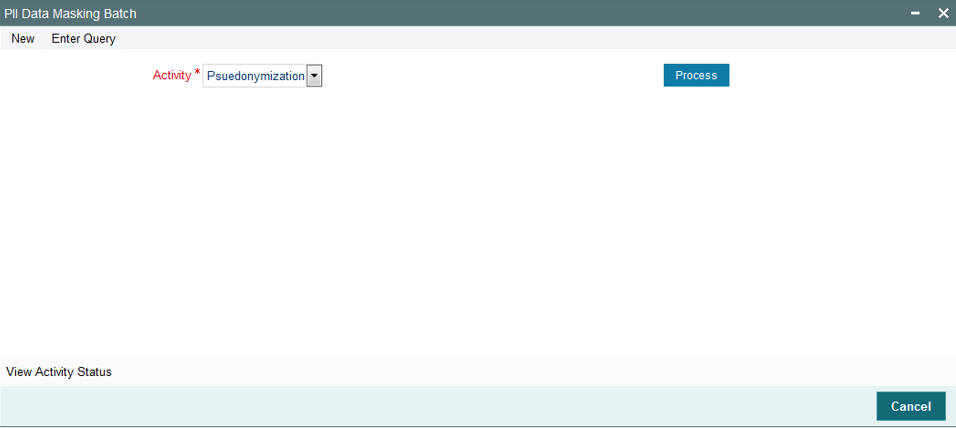
You can specify the following details:
Activity
Mandatory
Select the activity from the drop-down list. The list displays the following values:
- Pseudonymization
- Anonymization
Click ‘Process’ button to process the batch.
To process Pseudonymization policy creation, select ‘Pseudonymization’ in ‘Activity’ field and click ‘Process’ button. The system submits the job to create/alter redact policy for which changes are done.
To view the status of the Pseudonymization process, specify Keystring details and click ‘View ‘Activity Status’. The system displays the following values:
- Tables
- Column Name
- Status
- Error Code
- Error Description
To process Anonymization, select Anonymization’ in ‘Activity’ field and click ‘Process’ button.
2.3.2 View Activity Status Button
Once the batch is processed, you can view the activity status.To view the status of the Anonymization process, click ‘View ‘Activity Status’ button.
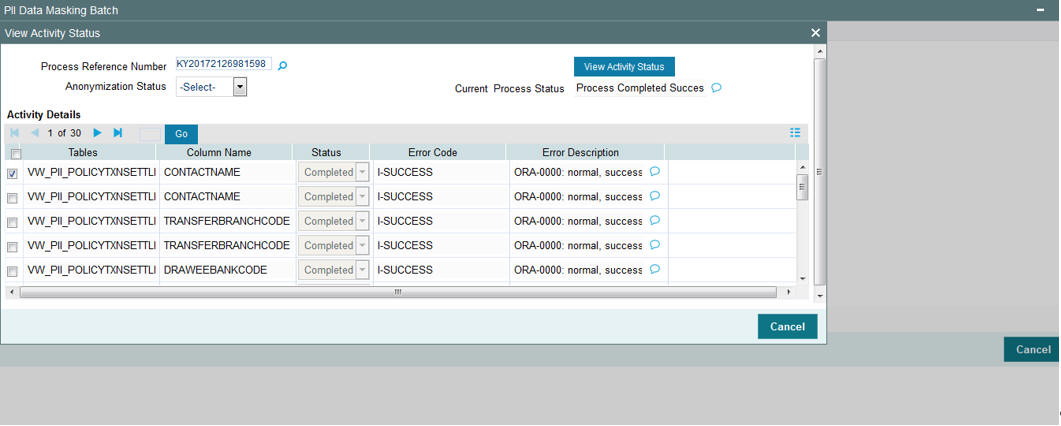
Process Reference Number
Alphanumeric; 50 Characters; Optional
The system displays the process reference number to query the status. However you can amend this value by selecting the values from the option list. The list displays all valid key string maintained in the system.
Anonymization Status
Optional
Select the anonymization status from the drop-down list. The list displays the following values:
- Not Started
- Running
- Failed
- Completed
Current Process Status
Optional
Select the current status from the drop-down list. The list displays the following values:
- Not Started
- Running
- Failed
- Completed
After specifying the necessary details, click ‘View Activity Status’ button. The system displays the following values:
- Tables
- Column Name
- Status
- Error Code
- Error Description
Once all the Anonymization static data is verified you can start the process.
Once the process is running you cannot run another process. If you click ‘Process’ button while Anonymization job is running, the system will display an error message. For failed Anonymization process, you can restart the same after correcting the necessary data process.
On abort, you should update the status to restart.
If the job is completed with an error, and then you click ‘Process’ button, the system restarts the masking process for the failed tables.
You can mask the data by giving Seed value in ‘SEEDDATA’ Param code in ‘Parameter Setup Detail’ screen. This can be changed before each process of Anonymization i.e. one seed data for one complete process for all fund managers.
All the policy related Pseudonymization and row level security should be disabled or dropped.
2.4 Anonymization Data Masking
This section contains the following topics:
2.4.1 Introduction
Anonymization process is either encrypting or partially removing personally identifiable information permanently in the database. Anonymization used when moving database from production server to other environment.
2.4.2 Anonymization Personal Information Maintenance
Personal Identifiable Information screen is used to edit Anonymization table column mapping.
This maintenance allows enabling table column applicable for implementing Anonymization. Application user cannot add any data in the screen.
User can invoke ‘PII Access Policy Maintenance’ screen by typing UTDPIIMT’ in UT Module and PADPIIMT in Pension Administration module in the field at the top right corner of the Application tool bar and clicking on the adjoining arrow button.
Select ‘Enter Query’ from the Actions menu in the Application tool bar to query the required details. Only View and Modify operations are supported in the screen. User will not be allowed to add additional details through screen..
For further details on this screen, refer ‘Pseudonymization Personal Information Maintenance’ section in this user manual.
2.5 Anonymization Personal Information Batch
This section contains the following topics:
2.5.1 Invoking Personal Identifiable Information Batch
Anonymization Personal Information Batch is to permanently anonymize PII data after execution of this batch. For every execution one batch number will be generated. Batch number is used to view the activity status.
User can start the Anonymization process using ‘PII Data Masking Batch’ screen. You can invoke this screen by typing ‘UTDPIIBT’ in UT Module and PADPIIBT in Pension Administration module in the field at the top right corner of the Application tool bar and clicking on the adjoining arrow button.
Select “Anonymization” activity and click on process to initiate anonymization.
You can click View Activity Status button to view the list of activities in each status by selecting current status and batch number..
For further details, refer ‘Pseudonymization personal information Batch’ section in this user manual.
2.6 Transparent Data Encryption
This section contains the following topics:
2.6.1 Introduction
Transparent Data Encryption (TDE) enables to encrypt sensitive data, such as Personally Identifiable Information stored in tables and tablespaces.
After the data is encrypted, this data is transparently decrypted for authorized users or applications when they access this data. TDE helps protect data stored on media (also called data at rest) in the event that the storage media or data file is stolen
Oracle Database uses authentication, authorization, and auditing mechanisms to secure data in the database, but not in the operating system data files where data is stored. To protect these data files, Oracle Database provides Transparent Data Encryption (TDE). TDE encrypts sensitive data stored in data files. To prevent unauthorized decryption, TDE stores the encryption keys in a security module external to the database, called a keystore.
2.6.2 Enabling TDE for Database
Enabling TDE for a database is explained in Installation manual database.pdf
2.7 Consent Recording
This section contains the following topics:
2.7.1 Introduction
Customer options for providing consent on data usage and sharing at point and time where the end-user data is collected.
Consent Maintenance screen allows to capture consent/opt-in for service offering. Also for customer to configure list of data captured, stored, shared and for what business purpose. It also allows customer to opt-out of the service provided or accept and opt-out request from the process.
If consent is provided for the same purpose, existing consent details will be overridden. Only new consent details for the same purpose will be stored in the system. History of consent details available only in audit logs.
2.7.2 Consent Maintenance Screen
You can capture the consent details using ‘Consent Maintenance Detail’ screen. You can invoke this screen by typing ‘UTDCONMT’ from agency branch module or ‘PADCONMT’ from Pension Module in the field at the top right corner of the Application tool bar and clicking on the adjoining arrow button..

You can specify the following details:
Consent Entity Type
Alphanumeric; 1 Character; Mandatory
Specify the consent entity type. Alternatively, you can select consent entity type from adjoining option list. The list displays all valid consent entity type maintained in CONSENTENTITY Param code.
Description
Display
The system displays the description for the selected consent entity type.
Consent Entity ID
Alphanumeric; 12 Characters; Mandatory
Specify the consent entity ID. Alternatively, you can select consent entity ID from adjoining option list. The list displays all valid consent entity ID maintained in the system.
If you select ‘U - Unit Holder ID’ in ‘Consent Entity Type field, then ‘Find UH’ button will return unit holder details. If you select ‘P - PAS Party ID’, then ‘Find UH’ is not applicable.
Consent Details
Consent purpose cannot be deleted but can be withdrawn.
Consent Purpose
Alphanumeric; 100 Characters; Mandatory
Specify the purpose of consent. Alternatively, you can select consent purpose from adjoining option list. The list displays all valid consent purpose maintained in the CONSENTPURS param code.
Consent Details
Alphanumeric; 255 Characters; Optional
Specify the details of the consent.
Status
Optional
Select the status of consent from the drop-down list. The list displays the following values:
- Accept
- Withdraw
Submitted Date
Date Format; Mandatory
Select the date on when the consent request is received from the adjoining calendar.
Valid From Date
Date Format; Mandatory
Select the validity period from the adjoining calendar.
This field is applicable only if you have selected ‘Status’ field as ‘Active’.
Valid Till Date
Date Format; Mandatory
Select the validity period from the adjoining calendar.
This field is applicable only if you have selected ‘Status’ field as ‘Active’.
Withdrawal Date
Date Format; Optional
Select the date of withdrawal from the adjoining calendar.
This field is applicable only if you have selected ‘Status’ field as ‘Withdraw’. Record modified date will be considered as Withdraw date.
2.8 Consent Maintenance Summary
This section contains the following topics:
2.8.1 Invoking Consent Maintenance Summary Screen
You can retrieve a previously entered record in the Summary Screen, as follows:
Invoke the ‘Consent Maintenance Summary’ screen by typing ‘UTSCONMT’ in the field at the top right corner of the Application tool bar and clicking on the adjoining arrow button and specify any or all of the following details in the corresponding details.
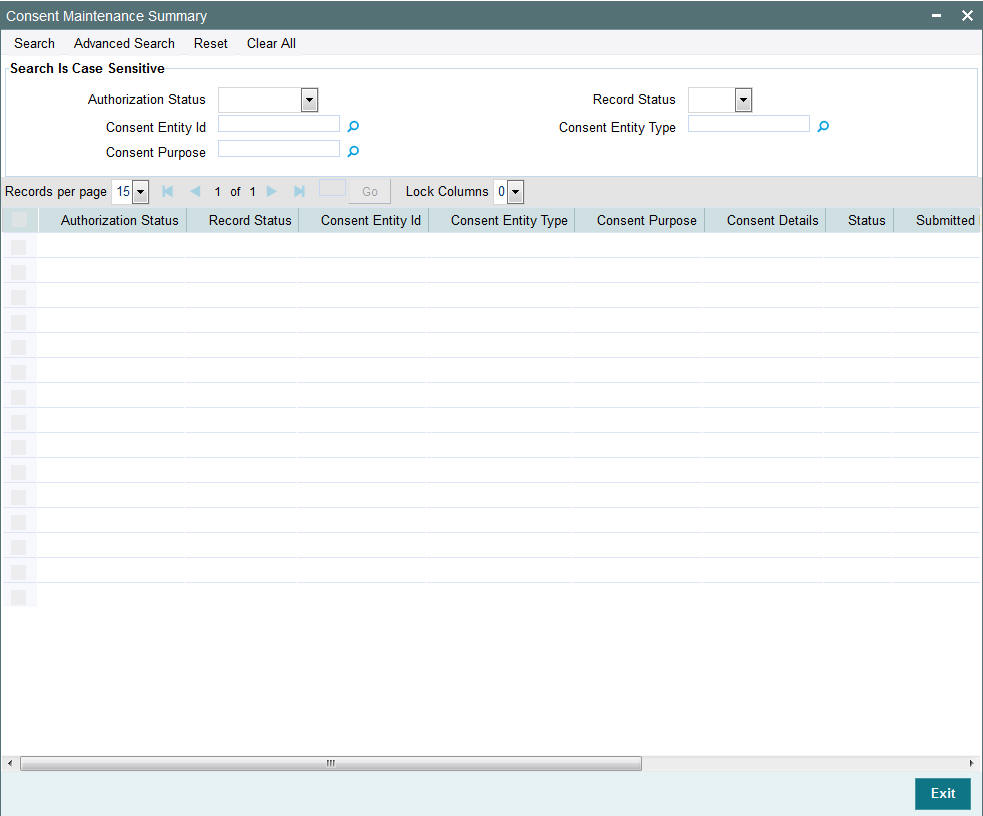
- The status of the record in the Authorization Status field. If you choose the ‘Blank Space’ option, then all the records are retrieved.
- The status of the record in the Record Status field. If you choose the ‘Blank Space’ option, then all records are retrieved
- Consent Entity ID
- Consent Purpose
- Consent Entity Type
Click ‘Search’ button to view the records. All the records with the specified details are retrieved and displayed in the lower portion of the screen.
Note
You can also retrieve the individual record detail from the detail screen by querying in the following manner:
- Press F7
- Input the Source Code
- Press F8
You can perform Edit, Amend, Authorize, operations by selecting the operation from the Action list. You can also search a record by using a combination of % and alphanumeric value
2.9 Data Minimization/ Data Deletion
This section contains the following topics:
2.9.1 Introduction
Data minimization is the process of deleting the data on expiry of the holding period.
2.9.2 End-user Access and Other Requests
Purge/Archival process can be used to minimize the data set.
You can specify Purge/Archival process at functionality level or at table level.
You can specify the table and the set of records to be deleted by maintaining valid join conditions among the tables.
Data minimization can also be scheduled to run on specific time intervals.
For further details, refer ‘Purge Frequency Maintenance’ section in ‘Admin’ user manual.
2.10 Data Portability
This section contains the following topics:
2.10.1 Introduction
Customers may be required to provide end-users with copies of their data in a structured, commonly used electronically readable format. Support a configuration that lets customers enable their end-users to perform the export themselves or provide means for end-users to request that customer perform it.
2.10.2 Import/Export of Data
User can export or import data set with Data Interface maintenance.
User can specify the set of tables, columns that need to be exported or imported.
User can also specify the format in which export/import file need to be generated.
For further details, refer ‘Setting up and Maintaining Interfaces’ section in ‘Interface’ user manual.
2.11 Separation of Duties
This section contains the following topics:
2.11.1 Row Level Security
Application users are classified to allow/disallow to access sensitive information. Customers will be classified as protected and unprotected.
Users with full access are allowed to see all customers. Users with limited access are allowed to view unprotected customer.
For further details, refer ‘Row Level Security Maintenance’ section in ‘Security’ user manual.
For further details, refer ‘Invoking Customer Maintenance Detail Screen’ section in ‘Entities’ user manual.
2.11.2 Introduction
Role based access to the User with appropriate module will be able to perform his duties.
With grouping of Function ids into roles users can be mapped to particular roles as per their requirements. Also user’s access across module to specific function ID can be restricted.
For further details, refer ‘Ensuring Security for Fund Manager’ and ‘Ensuring Security for Agency Branch’ section in ‘Security’ user manual.
2.12 General Logging- Audit Controls
This section contains the following topics:
- Section 2.12.1, "Logging PII Data Access"
- Section 2.12.2, "General Logging"
- Section 2.12.3, "Enabling/ Disabling Application Logs"
2.12.1 Logging PII Data Access
FCIS supports storing PII data accessed by the business user. The data access audit log covers the following data
- Unit Holder Account Information and change of information(amendment)
- Customer Information and change of information
- Transactions
- Unit holder balance
- Consolidated inquiry
- Unit holder income distribution setup
- Balance view through various transaction screen (through hyperlinks)
- Audit of personnel accessing the above data will stored/ logged and
the details are as following
- User Identification
- Access date and Time( Application date and system date)
- Operation
- function id accessed
- Unit holder account/Entity ID/Auth rep ID
- Customer account
- To unit holder account (in case of transfers)
- To Customer account (in case of transfers)
For further details, refer Personal Data Protection Act document.
2.12.2 General Logging
FCIS supports logging data captured or modified by the business user. The audit log stores the user name, data captured date time and the captured data for audit purposes.
2.12.3 Enabling/ Disabling Application Logs
Application logs can be enabled at application level to identify any failures. By default, application logs are disabled. Administrators or support team only can enable application logs.
2.13 Backup and Recovery
You should take backup of all database related files such as, data files, control files, redologs, archived files, init.ora, config.ora etc periodically to reduce the data loss.
Securing Backup
Security Guide provides detailed information on securing database, Backup controls and securing database backups.