3. Maintaining Reference Information
Before you begin to use the Oracle FLEXCUBE Investor Servicing system (FCIS), you must ensure that all data that will eventually be used by the system to help you operate funds has been set up in the system. You must prepare the system to recognize this data and process it the way you want it to. Therefore, you must ensure that the following activities are done:
- Setting up System Parameters
- Setting up Reference Information, including entities
- Setting up Currencies and capturing Exchange Rates
- Setting up Funds
- Setting up miscellaneous maintenance functions
Only after these maintenance activities are completed, can you actually set up your unit holders and accept transactions for the funds. The maintenance activities that fall under each of the categories mentioned above are available as menu items in the Maintenance Menu Item of the Fund Manager component.
This chapter deals with the first category, the maintenance of reference information.
This section contains the following topics:
- Section 3.1, "Reference Information Setup"
- Section 3.2, "Fund Types"
- Section 3.3, "Fund Type Maintenance Summary Screen"
- Section 3.4, "Entities"
- Section 3.5, "Single Entity Maintenance (Summary) Screen"
- Section 3.6, "Entity Mapping Detail"
- Section 3.7, "Entity Mapping Summary"
- Section 3.8, "Relationship Maintenance Detail"
- Section 3.9, "Income Distribution Setup (IDS) Options"
- Section 3.10, "Income Distribution Setup Summary"
- Section 3.11, "Payment Details for Entities"
- Section 3.12, "FCIS Entity Payment Maintenance Summary Screen"
- Section 3.13, "Consent Maintenance Detail"
- Section 3.14, "Consent Maintenance Summary"
- Section 3.15, "Agents Setup"
- Section 3.16, "Agency Branches Setup"
- Section 3.17, "AMC Setup"
- Section 3.18, "Distributors Setup"
- Section 3.19, "Bank Details Maintenance"
- Section 3.20, "Unit Holder Bank Verification Summary"
- Section 3.21, "Setting up ISA Fund Managers"
- Section 3.22, "Withholding Tax"
- Section 3.23, "Withholding Tax Setup Summary Screen"
- Section 3.24, "UH Dividend Component Override"
- Section 3.25, "Holidays Maintenance"
- Section 3.27, "Emergency Holiday Maintenance"
- Section 3.28, "Emergency Holiday Maintenance Summary"
- Section 3.29, "Emergency Holiday Transaction Processing"
- Section 3.30, "Fund Transaction Sign Off Screen"
- Section 3.31, "Mode of Payment"
- Section 3.32, "Mode of Payment Detail Summary Screen"
- Section 3.33, "Static Maintenance for Switch Transactions"
- Section 3.34, "Switch Privilege List Setup Summary Screen"
- Section 3.35, "Period Definition for Allowing Automatic Switch"
- Section 3.36, "Exchange List Maintenance Summary Screen"
- Section 3.37, "Indexation Values"
- Section 3.38, "Indexation Summary Screen"
- Section 3.39, "Collection Centers and Payout Accounts"
- Section 3.40, "AGY Bank A/C Mapping Summary Details Screen"
- Section 3.41, "Replication of Changes"
- Section 3.42, "Auto Replication Preference Maintenance Summary"
- Section 3.43, "Preferences for Country"
- Section 3.44, "Country Preference Maintenance Summary Screen"
- Section 3.45, "Multiple Languages Maintenance"
- Section 3.46, "KYC/ AML Maintenance"
- Section 3.47, "KYC Maintenance Summary Screen"
- Section 3.48, "KYC Ref Type Restrictions"
- Section 3.49, "KYC Ref Type Restrictions Summary Screen"
- Section 3.50, "SIP/ SWP/ STP Rules"
- Section 3.51, "Frequency Preferences Summary Screen"
- Section 3.52, "Interest Rate Details"
- Section 3.53, "Interest Rate Summary Screen"
- Section 3.54, "Rate Details for Hedge Funds"
- Section 3.55, "Rate Maintenance Summary Screen"
- Section 3.56, "High Water Mark Details"
- Section 3.57, "High Water Mark Summary Screen"
- Section 3.58, "Data Elements"
- Section 3.59, "Element Maintenance Summary Screen"
- Section 3.60, "Rules for Performance Fee Calculation"
- Section 3.61, "Rule Maintenance Summary"
- Section 3.62, "Group Rule Mapping"
- Section 3.63, "PF Group Maintenance Summary Screen"
- Section 3.64, "Policy Restrictions for Guaranteed Funds"
- Section 3.65, "GF Policy Restrict Mapping Summary Screen"
- Section 3.66, "Delegate Detail at Fund Price"
- Section 3.67, "Settlement Basis Detail"
- Section 3.68, "Settlement Basis Summary"
- Section 3.69, "Settlement Cycle Maintenance Detail"
- Section 3.70, "Settlement Cycle Maintenance Summary"
- Section 3.71, "Settlement Price Detail"
- Section 3.72, "Succession Price Detail"
- Section 3.73, "Succession Price Summary"
3.1 Reference Information Setup
Information that is static and will need to be set up only the first time, and subsequently altered very little or not at all, constitutes reference information. This includes:
- Entities that the AMC would transact with, such as agents, agency branches, banks, bank branches, registrars, trustees, bulk clients, check vendors, underwriters and custodians. You can also maintain different AMC’s as entities.
- The different values for static system parameters, such as countries, identification, corporation and occupation types, account types, investor categories, fee categories, and so on.
- Currency information, such as the different currencies, exchange rate sources and pair currencies. On a daily basis, you can also capture the prevalent exchange rates.
- Tax processing information that would be applicable to investor categories, country tax laws, cash dividends, brokers and funds floated by the AMC.
- The different fees, incentives or loads that would apply to transactions of investors in the funds of the AMC. This includes fees such as contingent deferred sales charge (CDSC), trailing commissions and ongoing management fees.
- The holiday calendar for the AMC, and the holiday calendar for the fund, if required.
This chapter deals with setting up the following reference information:
- Fund Types
- Entities
- Withholding Tax
- Modes of Payment
- Holidays
- Static maintenance for switch transactions
- Indexation values for capital gains tax
3.2 Fund Types
This section contains the following topics:
3.2.1 Setting up Fund Types
Before any fund may be set up in the system, the types of funds that can be maintained must be set up in the ‘Fund Type Maintenance Detail’ screen. You can invoke the ‘Fund Type Maintenance Detail’ screen by typing ‘UTDFNTYP’ in the field at the top right corner of the Application tool bar and clicking on the adjoining arrow button. The ‘Fund Type Maintenance Detail’ screen is displayed. Select ‘New’ from the Actions menu in the Application tool bar or click new icon to enter the Fund Type.
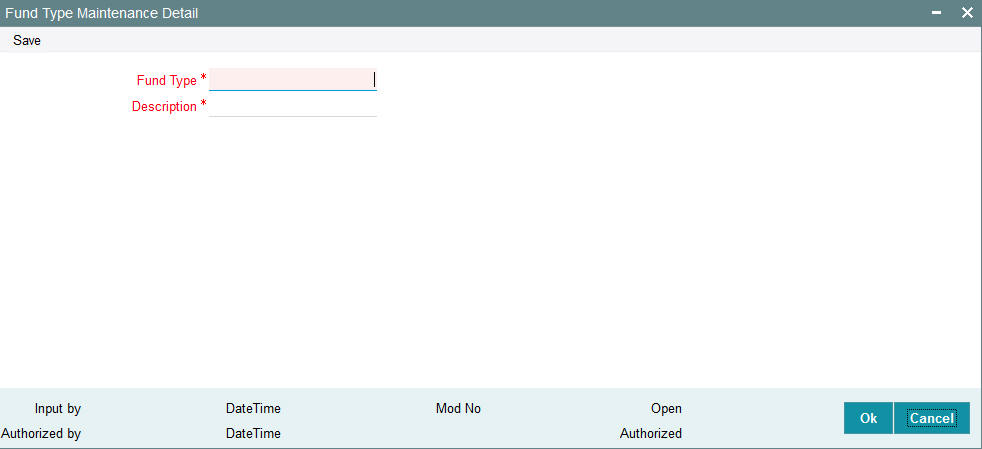
Fund Type
Numeric; 38 Characters; Mandatory
Specify an identification for the fund type that you wish to set up.
Description
Alphanumeric; 20 Characters; Mandatory
Enter a brief description for the fund type.
3.3 Fund Type Maintenance Summary Screen
This section contains the following topics:
- Section 3.3.1, "Invoking the Fund Type Maintenance Summary Screen"
- Section 3.3.2, "Retrieving Fund Type in Summary Screen"
- Section 3.3.3, "Editing Fund Type"
- Section 3.3.4, "Viewing Fund Type"
- Section 3.3.5, "Deleting Fund Type"
- Section 3.3.6, "Authorizing Fund Types"
- Section 3.3.7, "Amending Fund Types"
- Section 3.3.8, "Authorizing Amended Fund Types"
- Section 3.3.9, "Copying Attributes"
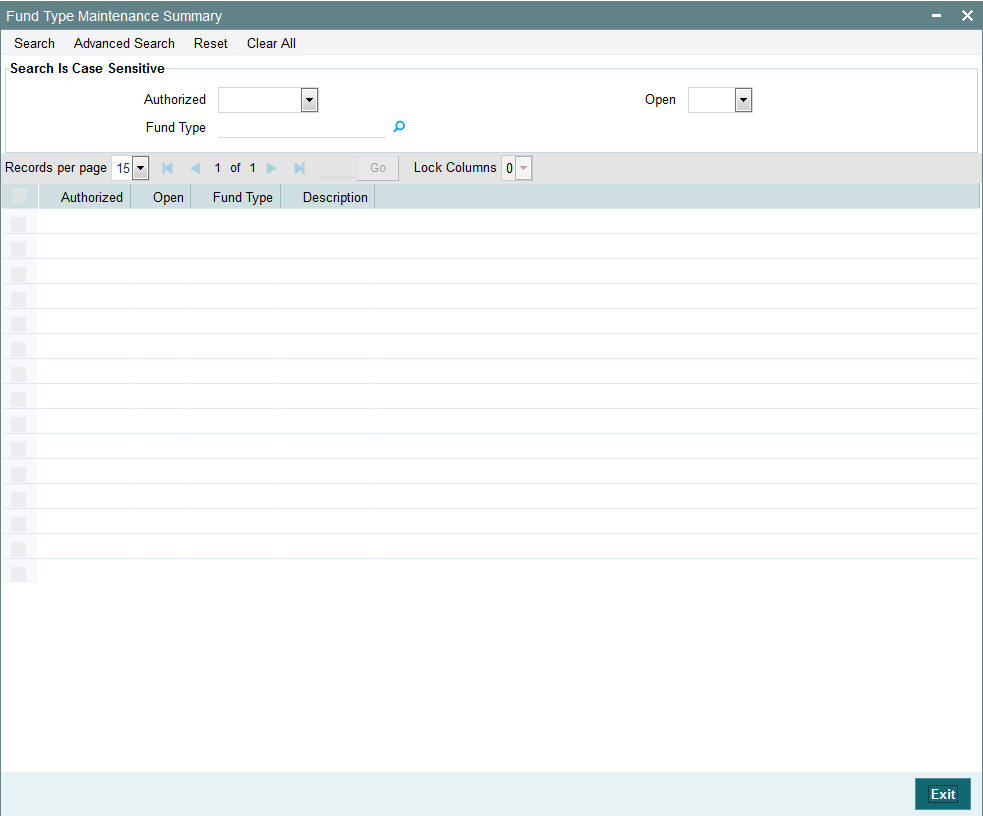
3.3.1 Invoking the Fund Type Maintenance Summary Screen
You can use the ‘Fund Type Maintenance Summary’ screen to:
- Edit an existing fund type
- View existing fund types
- Delete an existing fund type
- Authorize a fund type
- Amend an authorized fund type
You can invoke the ‘Fund Type Maintenance Summary’ screen by typing ‘UTSFNTYP’ in the field at the top right corner of the Application tool bar and clicking on the adjoining arrow button.
3.3.2 Retrieving Fund Type in Summary Screen
You can retrieve a previously entered fund type in the Summary screen, as follows:
- Invoke the Fund Type Summary screen and specify the following:
- The status of the fund type in the Authorized field. If you choose the “Blank Space” option, then all the fund types are retrieved.
- The status of the fund type in the Open field. If you choose the “Blank Space” option, then all the fund types are retrieved.
- The Fund Type
- After you have specified the required details, click ‘Search’ button. All Fund Types with the specified details are retrieved and displayed in the lower portion of the screen.
You can also retrieve the individual fund type detail from the detail screen by doing query in the following manner:-
- Press F7
- Input the Fund Type
- Press F8
You can perform Edit, Delete, Amend, Authorize, Reverse, Confirm operation by selecting from the Action list.
You can also search the record by using combination of % and alphanumeric value.
For example, you can search the record for Fund Type or Fund Type description by using the combination of % and alphanumeric value as follows:-
- Search by M%: The system will fetch all the records whose Fund Type description starts from Alphabet ‘M’. For example, Mutual Fund.
- Search by %7 : The system will fetch all the records whose Fund Type ends by numeric value’ 7’ For example, 217,267,77 and so forth.
- Search by %17%: The system will fetch all the records whose Fund Type contains the numeric value 17. For example, 3217, 2172 and so forth.
3.3.3 Editing Fund Type
You can modify the details of a fund type that you have already entered into the system, provided it has not been subsequently authorized. You can perform this operation as follows:
- Invoke the Fund Type Summary screen from the Browser.
- Select the status of the fund type that you want to retrieve for modification in the Authorization Status field. You can only modify records of fund types that are unauthorized. Accordingly, choose the Unauthorized option from the drop-down list.
- Specify any or all of the details of the fund type in the corresponding fields on the screen to retrieve the fund type that is to be modified.
- Click ‘Search’ button. All unauthorized fund types with the specified details are retrieved and displayed in the lower portion of the screen.
- Double click the fund type that you want to modify. The Fund Type Maintenance screen is displayed.
- Select Unlock Operation from Action list to modify the record. Modify the necessary information.
- Click Save to save the changes. The Fund Type Maintenance screen is closed and the changes made are reflected in the Fund Type Summary screen.
3.3.4 Viewing Fund Type
To view a fund type that you have previously entered:
- Invoke the Summary Screen from the Browser.
- Select the status of the fund type that you want to retrieve for viewing in the Authorization Status field. You can also view all fund types that are either unauthorized or authorized only, by choosing the Unauthorized/ Authorized option.
- Specify any or all of the details of the fund type in the corresponding fields on the screen.
- Click ‘Search’ button. All fund types with the specified details are retrieved and displayed in the lower portion of the screen.
- Double click the fund type that you want to view in the list of displayed fund types. The Fund Type Maintenance screen is opened in view mode.
3.3.5 Deleting Fund Type
You can delete only unauthorized fund types in the system.
To delete a fund type:
- Invoke the Fund Type Summary screen from the Browser.
- Select the status of the fund types that you want to retrieve for deletion.
- Specify any or all of the details of the fund type in the corresponding fields on the screen.
- Click ‘Search’ button. All fund types with the specified details are retrieved and displayed in the lower portion of the screen.
- Double click the fund type that you want to delete. The Fund Type Maintenance Detail screen is displayed.
- Select Delete operation from the Action list. The system prompts you to confirm the deletion, and the record is deleted physically from the system database.
3.3.6 Authorizing Fund Types
An unauthorized fund type must be authorized in the system for it to be processed.
To authorize a fund type:
- Invoke the Fund Type Summary screen from the Browser.
- Select the status of the fund type that you want to retrieve for authorization. Typically, choose the Unauthorized option from the drop down list.
- Specify any or all of the details of the fund type in the corresponding fields on the screen.
- Click ‘Search’ button. All fund types with the specified details that are pending authorization are retrieved and displayed in the lower portion of the screen.
- Double click the fund type that you wish to authorize. The Fund Type Maintenance screen displayed. Select Authorize operation from Action.
When the checker authorizes a fund type, details of validations, if any, that were overridden by the maker of the transaction during the Save operation, are displayed. If any of these overrides results in an error, the checker must reject the fund type.
3.3.7 Amending Fund Types
After a fund type is authorized, it can be modified using the Unlock operation from Action list. To make changes to a fund type after authorization, you must invoke the Unlock operation which is termed as Amend Operation.
- Invoke the Fund Type Summary screen from the Browser.
- Select the status of the fund type that you wish to retrieve for amendment. You can only amend records of fund types that are authorized.
- Specify any or all of the details of the fund type in the corresponding fields on the screen.
- Click ‘Search’ button. All fund types with the specified details are retrieved and displayed in the lower portion of the screen.
- Double click the fund type that you want to amend. The Fund Type Maintenance screen is displayed in Amendment mode.
- Click the Unlock operation from the Action list to amend the fund type.
- Amend the necessary information. Click the Save button to save the changes.
3.3.8 Authorizing Amended Fund Types
An amended fund type must be authorized for the amendment to be made effective in the system.
The process of authorization is subsequently the same as that for normal transactions.
3.3.9 Copying Attributes
If you want to create a Fund Type having the same attributes of an existing Fund Type, you can copy the attributes of an existing fund type to a new fund type.
To copy the attributes:
- Retrieve the fund type whose attributes the new fund type should inherit. You can retrieve the record through the Summary screen or through the F7- F8 operation which is explained in the previous sections of this chapter.
- Click on ‘Copy’ in the Actions list.
- Indicate the ID for the new Fund Type. You can however change the details of the Fund Type if required.
3.4 Entities
This section contains the following topics:
- Section 3.4.1, "Setting up Entities"
- Section 3.4.2, "Invoking Single Entity Maintenance Detail"
- Section 3.4.3, "Basic Information Tab"
- Section 3.4.4, "Other Information Allowed"
- Section 3.4.5, "Correspondence Address Tab"
- Section 3.4.6, "Bank Details Tab"
- Section 3.4.7, "Alternate Language Details Tab"
- Section 3.4.8, "CPF Account Types Tab"
- Section 3.4.9, "Default Broker Details Tab"
- Section 3.4.10, "Additional Information Tab"
- Section 3.4.11, "Related Parties Tab"
- Section 3.4.12, "Swift Message Type Button"
- Section 3.4.13, "Mapped Installation IDs Button"
3.4.1 Setting up Entities
Each business entity that the AMC interacts with in the course of managing investment can be profiled in the FC-IS system with a unique profile. You can use the Single Entity Maintenance screen to set up the following entities in the system:
- Agency Branches
- Agents
- AMC
- Banks
- Bank Branches
- Bulk Clients
- Registrars
- Trustees
- Check Vendors
- Underwriters
- Custodians
- Clearing Agents
- Account and Valuation Agents
- Independent Financial Advisors (IFA)
- Participating Employer
- Account Officers
- Paying Agent
- Cash Management Account
- ISA (Individual Savings Account) Manager
- Legal Entity
Note
AMCs can only be maintained at Distributor installations. At an AMC installation, the profile of the logged in AMC can be viewed in the Single Entity screen, but a new profile cannot be created.
3.4.2 Invoking Single Entity Maintenance Detail
You can invoke the ‘Single Entity Maintenance Detail’ screen by typing ‘UTDENTMN’ in the field at the top right corner of the Application tool bar and clicking on the adjoining arrow button.
The ‘Single Entity Maintenance Detail’ screen is displayed. Select ‘New’ from the Actions menu in the Application tool bar or click new icon to enter the details of the entity.
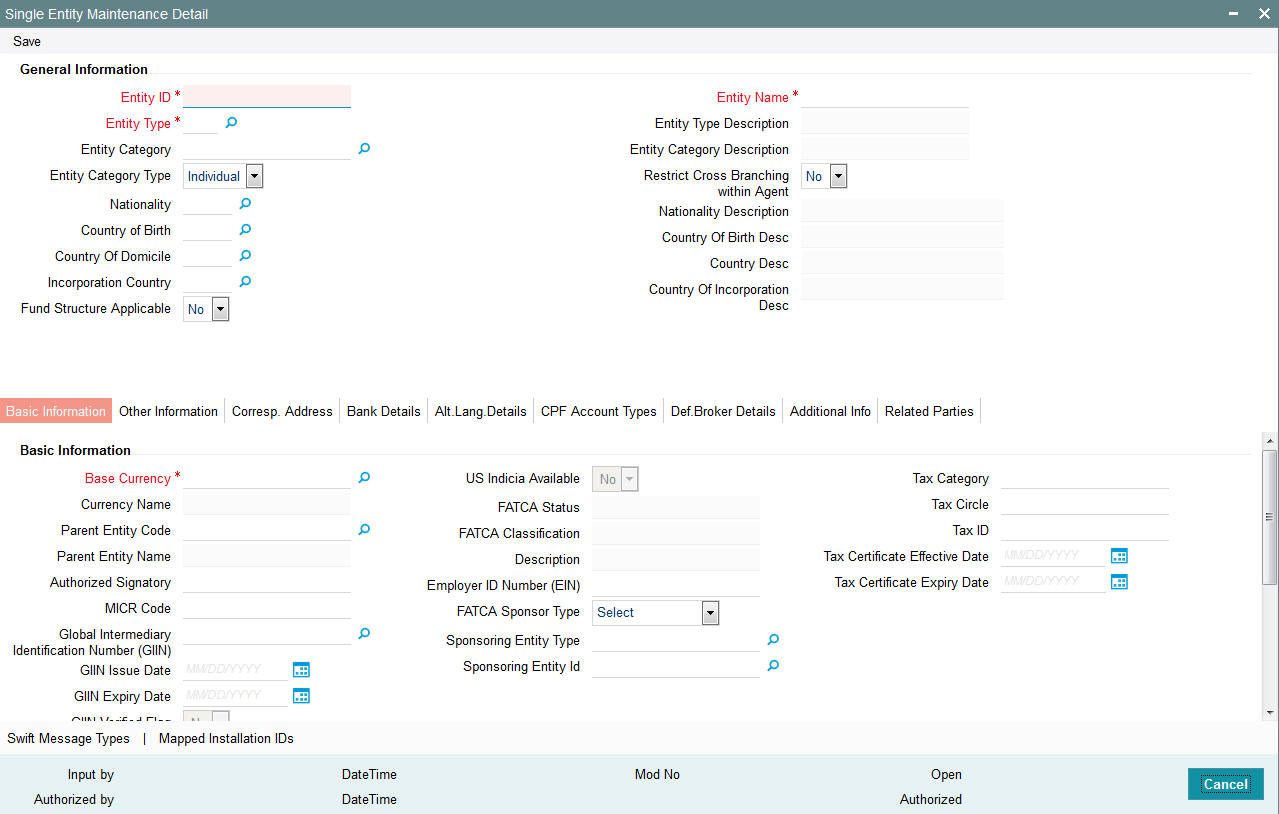
You can specify the following details:
Entity ID
Alphanumeric; 12 Characters; Mandatory
The Entity ID is a unique Identification for an entity in the system. Any detail regarding an entity is obtained by using the entity ID for reference. The ID you specify here must be unique and not already in use for any other entity in the system.
Entity Name
Alphanumeric; 60 Characters; Mandatory
Specify the name (or description) of the entity being set up in the system.
Entity Type
Alphanumeric; 1 Character; Mandatory
Specify the type of entity being set up. This could be any of the following:
- Agency Branch
- Agent
- AMC
- Bank
- Bank Branch
- Bulk Client
- Registrar
- Trustee
- Check Vendor
- Underwriter
- Custodian
- Clearing Agent
- Account and Valuation Agent
- Independent Financial Advisors (IFA)
- Participating Employer
- Paying Agent
- Cash Management Account
- Fund Manager
Entity Type Description
Display
The system displays description for the specified entity type here based on the details maintained in the system.
Entity Category
Alphanumeric; 2 Characters; Optional
Specify whether the entity being maintained belongs to the Individual or Corporate categories. This specification is optional; if specified, you must also select the appropriate category in the Entity Category field.
Entity Category Description
Display
The system displays the description for the selected entity category.
Entity Category Type
Optional
Select type of entity category from the drop-down list. The list displays the following values:
- Individual
- Corporate
Restrict cross branching within agent
Optional
Select Yes Cross Branching is allowed at this branch. By enabling this, the agency branch will be allowed to view details, perform transactions pertaining to the unit holders created by the other agency branches in the system. If this field is not clicked, the agency branch will be able to view details and transact for the unit holders created by him only.
Nationality
Alphanumeric; 3 Characters; Optional
Select the nationality from the adjoining option list.
Nationality Description
Display
The system displays the description of the selected nationality code.
Country of Birth
Alphanumeric; 3 Characters; Optional
Select the country of birth from the adjoining option list.
Country Of Birth Desc
Display
The system displays the description of the selected country of birth code.
Country of Domicile
Alphanumeric; 3 Characters; Optional
Select the country of domicile from the adjoining option list.
Country Of Domicile Desc
Display
The system displays the description of the selected country of domicile code.
Incorporation Country
Alphanumeric; 3 Characters; Optional
Select the Incorporation country from the adjoining option list.
Country Of Incorporation Desc
Display
The system displays the description of the selected country of incorporation code.
Fund Structure Applicable
Optional
Select if fund structure is applicable or not from the adjoining drop-down list. Following are the options available:
- Yes
- No
3.4.3 Basic Information Tab
The following window is displayed:
Base Currency
Alphanumeric; 3 Characters; Mandatory
Select the base currency of the entity, from the drop down list. This is the currency in which the entity normally transacts.
Currency Name
Display
The system displays the name of the currency for the selected base currency.
Parent Entity Code
Alphanumeric; 12 Characters; Optional
Specify the parent entity code. The adjoining option list displays all valid parent entity code maintained in the system. You can choose the appropriate one.
This is applicable only for specific entity types.
Parent Entity Name
Display
The system displays the name for the selected parent entity code.
Authorized Signatory
Alphanumeric; 70 Characters; Optional
Enter the name of the Authorized Signatory at the office of the AMC.
MICR Code
Alphanumeric; 12 Characters; Optional
Specify MICR code of the specified Bank here. This code is applicable for both Bank and Bank Branch entity.
Global Intermediary Identification Number (GIIN)
Alphanumeric; 30 Characters; Optional
You can select or specify the GIIN from the adjoining option list.
GIIN Issue Date
Date Format; Optional
Specify the GIIN issue date.
The GIIN issue date cannot be greater than the application date.
GIIN Expiry Date
Date Format; Optional
Specify the GIIN expiry date.
The GIIN expiry date cannot be lesser than the GIIN issue date.
GIIN Verified Flag
Display
System displays the GIIN verified flag based on the GIIN. If you specify the GIIN then, GIIN verified flag gets displayed as ‘No’. If you select the GIIN then, GIIN verified Flag gets displayed as ‘Yes’.
Electronic Dealing Allowed
Optional
Check this box to enable specific AMC / Legal Entity for electronic dealing trades.
This field will be available for the entity types AMC / Legal Entity.
Default Agency Branch
Optional
Check this box to default the agency branch code.
US Indicia Available
Display
The system defaults US Indicia Available as Yes or No depending on the following:
- The nationality is US
- The country of birth is US
- The country of domicile is US
- The country of incorporation is US
- The country of correspondence or alternate address is US
- The country code of the telephone number is 01
- The country code of the bank branch address is US
FATCA Status
Display
The system displays the FATCA Status based on the FATCA maintenance.
FATCA Classification
Display
The system displays the FATCA classification type.
Description
Display
The system displays the description for the selected FATCA classification.
Employer ID Number
Alphanumeric; 50 Characters; Optional
Specify the employer ID number.
FATCA Sponsor Type
Optional
Select the FATCA sponsor type from the adjoining drop down list. The values are:
- Sponsoring Entity
- Sponsored
If you select ‘Sponsoring Entity’, you need to specify the sponsoring entity type and sponsoring entity ID.
If you select ‘Sponsored’, you need not to specify the sponsoring entity type and sponsoring entity ID.
Sponsoring Entity Type
Alphanumeric; 1 Character; Optional
Specify the sponsoring entity type. You can also select the valid entity type from the adjoining option list.
Sponsoring Entity ID
Alphanumeric; 12 Characters; Optional
Specify the sponsoring entity for the FATCA entity type. You can also select the valid entity ID from the adjoining option list.
Tax Category
Alphanumeric; 12 Characters; Optional
Specify the tax category.
Tax Circle
Alphanumeric; 15 Characters; Optional
Specify the tax circle country details.
Tax ID
Alphanumeric; 50 Characters; Optional
Specify the tax identification.
Tax Certificate Effective Date
Date Format; Optional
Specify the date from which the tax certificate is effective.
Tax Certificate Expiry Date
Date Format; Optional
Specify the expiry date of the tax certificate.
Week
Check the appropriate box to indicate the day in a week. The options are as follows:
- Sunday
- Monday
- Tuesday
- Wednesday
- Thursday
- Friday
- Saturday
3.4.4 Other Information Allowed
Clicking ‘Other Information’ tab in the ‘Single Entity Maintenance Detail’ screen, the following window is displayed:
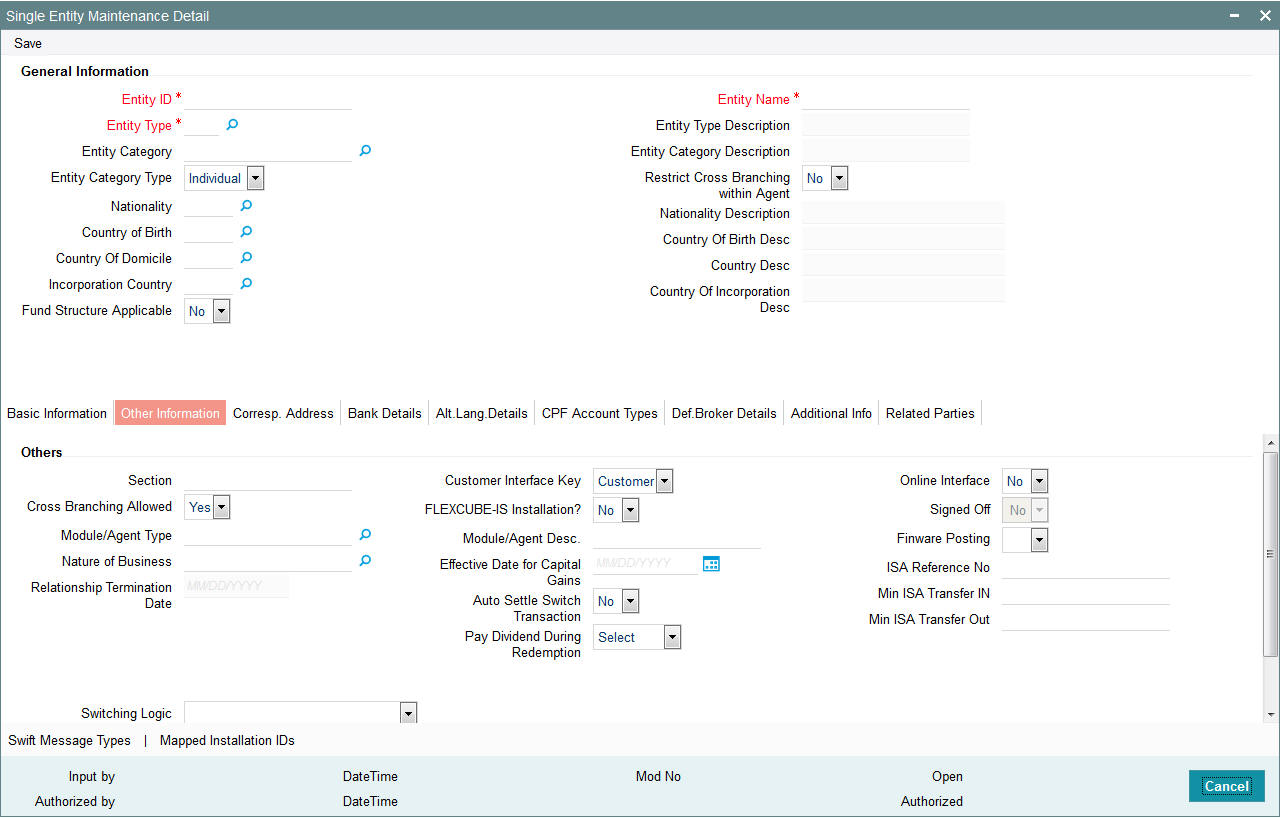
Others
Section
Alphanumeric; 40 Characters; Optional
Specify any descriptive text about or qualification for the AMC being maintained.
Cross Branching Allowed
Optional
Select ‘Yes’ if you want to allow cross branching for the specified entity ID from the adjoining drop-down list. If you need to disallow cross branching, then select ‘No’ from the adjoining drop-down list.
This field is applicable only for Agency Branch entity type. It indicates whether Cross Branching is allowed or not in given agency branch. If you select ‘Yes’, Cross branching is True for a agency branch, Unit holders that are created in other agency branches are allowed to view and transact in this agency branch.Otherwise this agency branch is allowed to view and transact only for the unit holders that are created in the agency branch.
Module/Agent Type
Alphanumeric; 3 Characters; Optional
Select the type of the Module that is being set up.
Nature of Business
Alphanumeric; 1 Character; Optional
Specify the business avenues supported by the AMC. This option is only available for entities where the entity type is AMC.
Relationship Termination Date
Display
The system displays the relationship termination date.
Customer Interface Key
Optional
This facility is to be used if customer information from an installation of Oracle FLEXCUBE Corporate (FCC) is to be imported into the FC-IS system using the bulk interface facility, for the creation of unit holder accounts.
The customer interface key determines the level at which unit holder account creation must take place in the FC-IS system, for a given Customer Information File (CIF) in Oracle FLEXCUBE Corporate – either at CIF level or at a customer account level. Accordingly, you can indicate either of the following two options:
- For each CIF, a corresponding unit holder may be created in the FC-IS system. For this option, choose CIF from the drop down list in this field.
- For each CASA (Customer Access System Account) account in a CIF, a corresponding unit holder may be created in the FC-IS system. For this option, choose Account from the drop down list in this field.
The FC-IS system will create corresponding unit holder accounts when the customer information is imported from FCC, according to option you exercise in this field.
Note
If you select either FCR or FCC as the Bulk Client Type, then you must specify the Customer Interface Key as mandatory information.
FLEXCUBE-IS Installed
Optional
Select ‘Yes’ from the drop-down list to check if Oracle FLEXCUBE Investor Servicing is installed at the Agency Branch.
Module/Agent Desc
Alphanumeric; 60 Characters; Optional
The system displays description for the specified agent type.
Effective Date for Capital Gains Calculations
Date Format, Mandatory
Specify the date on which capital gains calculations must begin, for the AMC. This feature is only available if your installation has specifically requested for it.
It is mandatory for you to specify the effective date if EUSD average cost is to be computed.
Auto Settle Switch Transaction
Optional
Select if switch in transactions needs to be auto settled or not from the adjoining drop-down list. Following are the options available:
- Yes
- No
This field is enabled only for AMC entity type.
While saving, If ‘Fund Structure Applicable’ and ‘Auto Settle Switch Transaction’ fields are selected as ‘Yes’ for other Entity types (apart from AMC), then the system will display the warning message as ‘Selected field (fund structure applicable/Auto settle switch transaction) not applicable for the entity type’.
Pay Dividend During Redemption
Optional
Select pay dividend during redemption status from the drop-down list. The list displays the following values:
- 100% Only
- ALL
Online Interface
Optional
Select ‘Yes’ to utilize the created Bulk Client as online interface from the adjoining drop-down list, if you have maintained ‘Entity Type’ as ‘Bulk Client’. This field is not applicable for other entity types.
Signed Off?
Display
This indicates whether the given Agent has signed off for the day. This is not used at setup time, but used only for EOD purposes. by default, when you set up an agent, the agent record is set up with the status ‘signed on’, which means this field has a ‘No’ value.
Finware Posting
Optional
Choose ‘Yes’ if you wish to allow FINWARE posting.
ISA Reference Number
Alphanumeric; 5 Characters; Optional
Specify ISA reference number.
Min ISA Transfer IN
Numeric; 18 Characters; Optional
Specify the minimum ISA that is validated during the transfer in.
Min ISA Transfer Out
Numeric; 18 Characters; Optional
Specify the minimum ISA that is validated during the transfer out.
Switching Logic
Optional
Select the type of logic to be enforced by the AMC in accepting switch transactions from the drop-down list. The list displays the following values:
- Switch transactions restricted to fund family: In this case, switch transactions will be accepted only if the From and To funds are part of the same fund family. Cross-fund family switching is not allowed.
- Switch transactions within AMC: In this case, switch transactions are accepted across fund families so long as both families belong to the same AMC.
- No Restrictions
For distributor installations, the switching logic will not be applicable.
Unit Holder Generation Logic
Optional
Click on the drop-down menu and choose any one of the options available as follows:
- AGT&BRN&SERIAL
- SERIAL&AMC/DIST&CHK
- SERIAL&AGT&CHK
- No Logic
- Reference Number
- AJF Generation Logic
- Ctry(1)&Busi(1)&FMG/DIST&A-Z(1)&NUM(5) stands
- InstallationId(4)&(A-Z)(1)&Num(7)
This option enables multiple AMC branches to opt for different unit holder ID generation logic. Therefore the UH Generation Logic field will be a valid value from UH generation table for a specific AMC, service provider, or a distributor.
- The first option i.e., AGT&BRN&SERIAL&CHK stands for the Agent Code, Branch Code, Serial Number and Check Digit.
- The second option i.e., SERIAL&AMC&CHK stands for the Serial Number, AMC ID (or Distributor ID) and Check Digit.
- The third option i.e., SERIAL&AGT&CHK stands for the Serial Number, Agent Code and Check Digit.
- The fourth option i.e., LEADINGZERO&SERIAL stands for Leading Six Zeros and a running Serial Number.
- The fifth option i.e., Unit Holder ID is assigned with User entered Unit Holder Reference Number.
- The sixth option i.e., AJF Generation Logic
- The seventh option i.e, Ctry(1)&Busi(1)&FMG/DIST(4)&A-Z(1)&NUM(5) stands for Country Code, Business Type, AMC ID (or Distributor ID), a running Serial character and running Serial Number.
- The eight option i.e., <Installed Entity ID/ 4 characters segment code> + Sequence Type + Running Serial No
Note
The above option is applicable only for service provider installations.
3.4.5 Correspondence Address Tab
As part of correspondence details, you can capture correspondence address, alternate address and SWIFT address. Click ‘Corresp Address’ tab to maintain the correspondence details.

Contact Information
Address Type
Mandatory
Select the type of address from the drop-down list. The list displays the following values:
- Correspondence Address
- Alternate Address
- Swft Address
Address Lines 1-2
Alphanumeric; 80 Characters; Optional (Address Line 1 is Mandatory)
Enter the address of the entity being set up in the system.
City
Alphanumeric; 80 Characters; Optional
Enter the city where the entity is located. You can select the city from the drop down list provided. The available options depend on the values defined at the params maintenance. If the city is not available in the list, you can specify the city in the field provided alongside.
State
Alphanumeric; 80 Characters; Optional
Enter the State where the City is located. You can select the state from the drop down list provided. The available options depend on the values defined at the params maintenance. If the state is not available in the list, you can specify the city in the field provided alongside.
US State
Optional
Select ‘Yes’ option from drop-down list to indicate that the specified state is a US (United States) state.
Zip Code
Alphanumeric; 10 Characters; Optional
Enter the Zip Code of the Address of the entity being set up.
Country
Alphanumeric; 3 Characters; Mandatory
Select the country in which the entity is based, from the drop-down list. If the Address type is SWIFT Address, enter the country of the SWIFT address for the entity.
Int. Dialing Code +
Alphanumeric; 10 Characters; Optional
Specify the international dialling code.
Telephone 1
Alphanumeric; 60 Characters; Optional
Enter the telephone number of the entity who is being set up in the system.
Int. Dialing Code +
Alphanumeric; 10 Characters; Optional
Specify the international dialling code.
Telephone 2
Alphanumeric; 60 Characters; Optional
Enter the telephone number of the entity who is being set up in the system.
Fax Number
Alphanumeric; 120 Characters; Optional
Enter the fax number of the entity who is being set up in the system.
Alphanumeric; 255 Characters; Optional
Specify the Email address of the entity being set up.
Contact Person
Alphanumeric; 70 Characters; Optional
Enter the name of the contact person at the entity’s offices.
Int. Dialing Code +
Alphanumeric; 10 Characters; Optional
Specify the international dialling code.
Cell Phone Number
Alphanumeric; 60 Characters; Optional
Specify the cell phone number of the entity being set up.
Effective From Date
Date Format; Optional
This is applicable if the Address Type is Alternate Address.
Specify the date that marks the beginning of the period for which the specified alternate address is in effect.
Effective To Date
Date Format; Optional
This is applicable if the Address Type is Alternate Address.
Specify the date that marks the end of the period for which the specified alternate address is in effect.
BIC Code
Alphanumeric; 12 Characters; Optional
Specify the Bank Identifier Code (BIC) of the entity.
3.4.6 Bank Details Tab
You can capture details of bank accounts held by the entity, with multiple accounts in foreign currencies, if required. These are the settlement details that would be used for settlement of payment to the entities. You must designate one default account for each currency, which would be deemed to be the default settlement account in the selected currency, for the entities.
Bank details can be captured for all entities other than Bank Branches, and are optional for all entities except AMCs and Distributors. For Banks, you can capture the details of Correspondent Banks as part of the bank details.
Commission payments for an entity are made to the default settlement account designated in the Income Distribution Setup (IDS) record maintained for the entity. If no IDS have been maintained, the default bank account designated in the entity details record is considered as the default settlement account.
You can capture the following details for each entity bank account:
- Bank and branch in which the account resides
- Account number
- Account name and the owner of the account
- Account currency
- Whether direct debits are allowed for the account
- Whether the account is the default account for the entity
Click ‘Bank Details’ tab to capture the bank details in the Bank Details section in the Single Entity Maintenance screen.
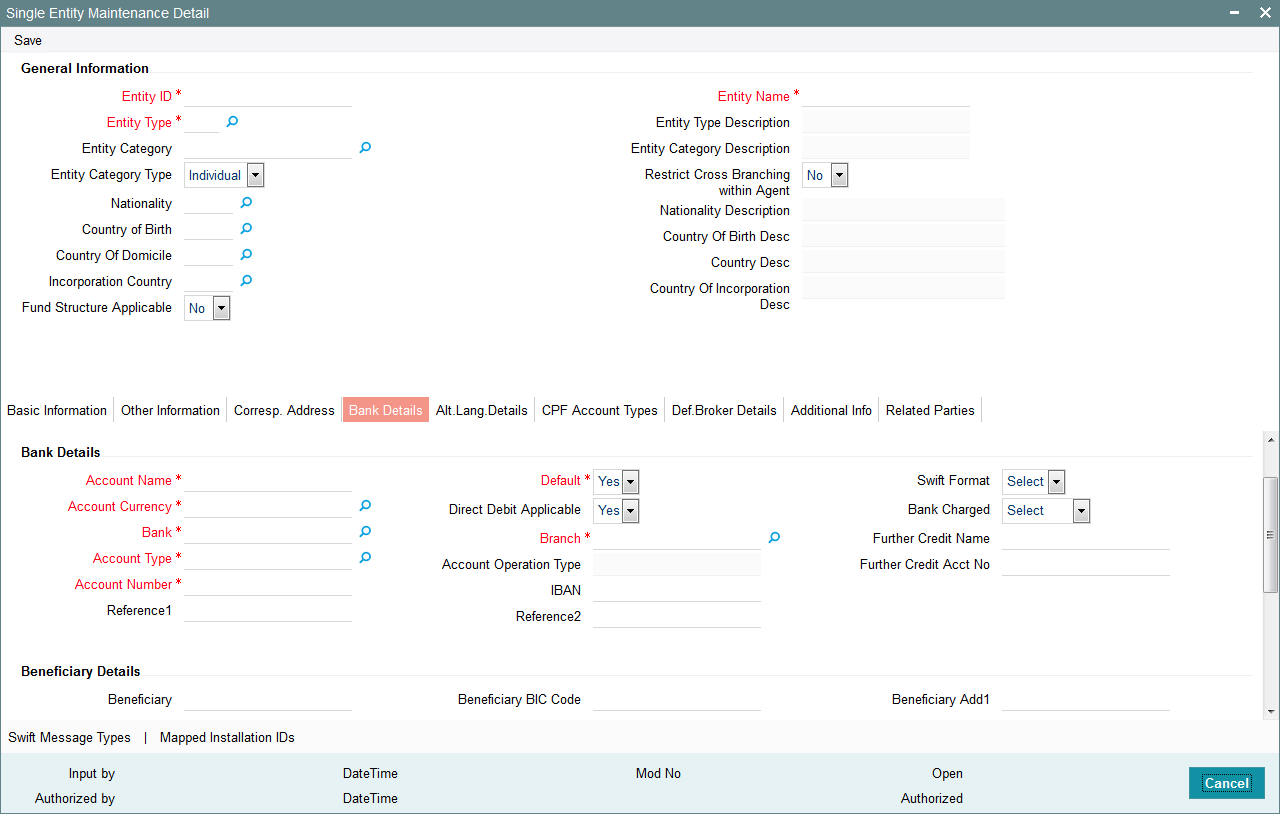
Bank Details
Account Name
Alphanumeric; 100 Character; Mandatory
Specify the name in which the entity holds the specified bank account.
Account Currency
Alphanumeric, 3 Characters; Mandatory
From the list, select the currency that the specified bank account uses. You can maintain any number of accounts in each currency; however, you must designate one default bank account for each currency.
Bank
Alphanumeric; 12 Characters; Mandatory
From the list, select the name of the bank in which the account is held.
Account Type
Alphanumeric; 1 Character; Mandatory
From the list, select the nature of the account held by the entity.
The list provides all account types that have been set up in the Account Type Maintenance records.
Account Number
Alphanumeric; 16 Characters; Mandatory
Specify the number of the account held by the entity in the selected bank.
Reference 1
Alphanumeric; 35 Characters; Optional
Enter the first reference
Default
Optional
Select ‘Yes’ from drop-down list to identify the bank account that is to be reckoned as the default bank account for the entity in the system, for the selected currency.
Direct Debit Applicable
Optional
You can use this field to indicate whether direct debits may be raised in respect of the bank account you are defining for the entity. Select ‘Yes’ to indicate that direct debits are allowed; leave it unchecked to indicate that they are not.
Branch
Alphanumeric; 60 Characters; Mandatory
From the list, select the name of the branch of the bank in which the account is held.
Account Operation Type
Display
The system displays the description of account operation type.
IBAN
Alphanumeric; 40 Characters; Optional
Specify the IBAN (International Bank Account Number) of the account holder.
Reference2
Alphanumeric; 35 Characters; Optional
Specify the second reference
Swift Format
Optional
Indicate one of the following swift formats from the drop-down list:
- MT103
- MT102
Bank Charged
Optional
Indicate one of the following from the drop-down list:
- Beneficiary
- Remitter
- Share
Further Credit Name
Alphanumeric; 35 Characters; Optional
Specify the further credit name.
Further Credit Acct No
Alphanumeric; 35 Characters; Optional
Specify the further credit account number.
Beneficiary Details
Beneficiary
Alphanumeric; 35 Characters; Optional
Enter the beneficiary Details.
Beneficiary Acct No
Alphanumeric; 24 Characters; Optional
Specify the account number of the beneficiary.
Beneficiary Info
Alphanumeric; 100 Characters; Optional
Specify the information about the beneficiary.
Beneficiary BIC Code
Alphanumeric; 24 Characters; Optional
Specify the BIC code of the beneficiary.
Beneficiary Code
Alphanumeric; 24 Characters; Optional
Specify the code of the beneficiary.
Beneficiary IBAN
Alphanumeric; 40 Characters; Optional
Specify the beneficiary IBAN.
Beneficiary Add1
Alphanumeric; 35 Characters; Optional
Specify the first line of beneficiary address.
Beneficiary Add2
Alphanumeric; 35 Characters; Optional
Specify the second line of beneficiary address.
Beneficiary Add3
Alphanumeric; 35 Characters; Optional
Specify the third line of beneficiary address.
Intermediary Details
Intermediary
Alphanumeric; 35 Characters; Optional
Specify the intermediary details.
Intermediary Acct No
Alphanumeric; 24 Characters; Optional
Specify the account number of the intermediary.
Intermediary Info
Alphanumeric; 100 Characters; Optional
Specify the information about the intermediary.
Intermediary BIC Code
Alphanumeric; 24 Characters; Optional
Specify the BIC Code of the intermediary.
Intermediary Code
Alphanumeric; 24 Characters; Optional
Specify the code of the intermediary.
Intermediary IBAN
Alphanumeric; 40 Characters; Optional
Specify the intermediary IBAN.
Intermediary Add 1
Alphanumeric; 35 Characters; Optional
Specify the first line of beneficiary intermediary.
Intermediary Add 2
Alphanumeric; 35 Characters; Optional
Specify the second line of beneficiary intermediary.
Intermediary Add 3
Alphanumeric; 35 Characters; Optional
Specify the third line of beneficiary intermediary.
3.4.7 Alternate Language Details Tab
The system allows you to capture entity details in an alternate language of your desire. These fields are captured for information purposes only and no processing would be done on them. Click ‘Alt Lang Details’ tab to maintain the alternate language details.
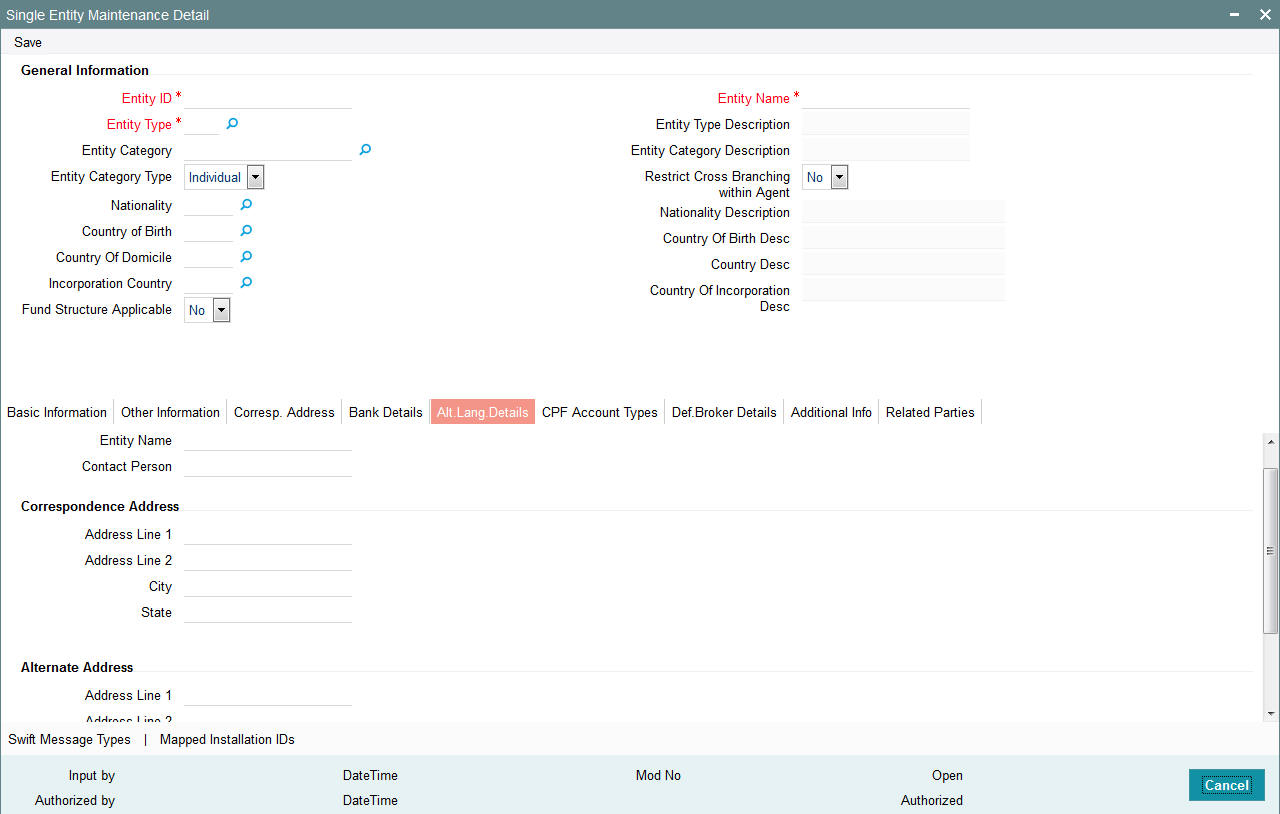
You can maintain the following information in an alternate language provided you have captured the information in the default language.
Entity Name
Alphanumeric; 60 Characters; Optional
Specify the name of the entity being set up in the system.
Contact Person
Alphanumeric; 70 Characters; Optional
Enter the name of the contact person at the entity’s offices.
Correspondence Address
Address Lines 1-2
Alphanumeric; 80 Characters; Optional
Enter the default postal address that is to be used for correspondence with the entity being set up in the system.
City
Alphanumeric; 80 Characters; Optional
Enter the city where the entity is located.
State
Alphanumeric; 80 Characters; Optional
Enter the State where the City is located.
Alternate Address
Address Lines 1-2
Alphanumeric; 80 Characters; Optional
Enter the alternate postal address that is to be used for correspondence with the entity being set up in the system.
City
Alphanumeric; 80 Characters; Optional
Enter the city where the entity is located.
State
Alphanumeric; 80 Characters; Optional
Enter the State where the City is located.
3.4.8 CPF Account Types Tab

Each Fund is explicitly defined for the eligibility of a specific investment type (Like CPFOA Approved? CPFSA Approved? etc) and only on this basis, transactions like Subscription, Redemption, Switch can be processed for specific investment types on these Funds. Also, the approval date and the corresponding Fund ID as identified for that investment account type is captured for each of the fund in the system.
Only the agent banks that are approved by the CPF board or any other relevant authority are allowed to maintain these accounts for its customers.
The Account Type for the unit holder bank details should be of same type as UH Account Type for a CPF Account. The number of bank details to be captured for the CPF Account will be restricted to only one account. Also it will be mandatory to specify at least one account.
Unit holder upload will capture of CPF account types and also validate the account type with bank details. For non-CPF account types, the system will check that bank details maintained for the unit holder is not a CPF account type.
You can specify the following information on Central Provident Fund (CPF) account types:
Account Type
Alphanumeric; 2 Characters; Mandatory
Specify the account type. Alternatively, you can select account type from the option list. The list displays all valid account type maintained in the system.
Account Type Description
Display
Enter the CPF account type description.
3.4.9 Default Broker Details Tab
Click ‘Def.Broker Details’ tab to enter the defaulting broker details.
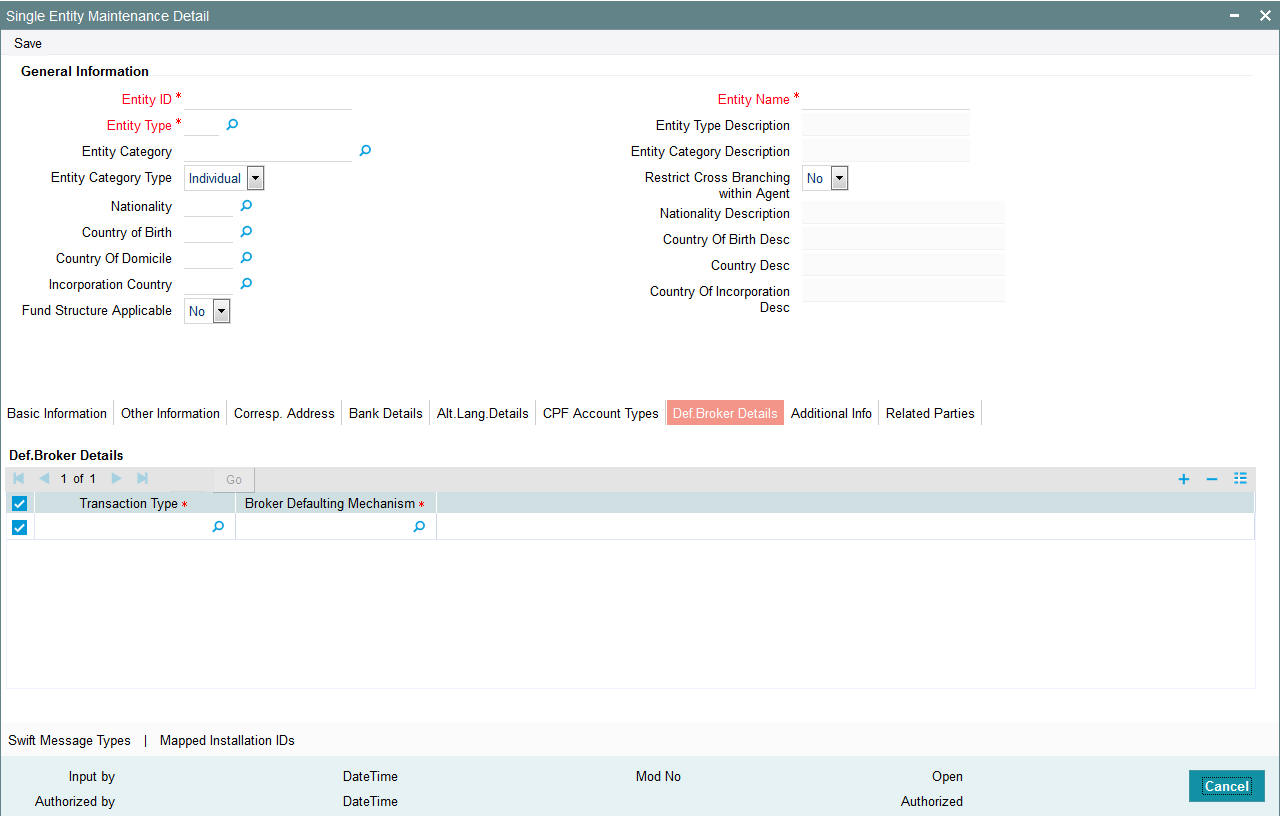
Transaction Type
Alphanumeric; 20 Characters; Mandatory
Indicate the type of transaction for which you are specifying the broker details defaulting preferences. You can specify the defaulting preferences for IPO Subscription, Subscription, Redemption, Switch, Transfer and Reinvestment type of transaction.
Broker Defaulting Mechanism
Alphanumeric; 3 Characters; Optional
Specify the defaulting preferences for broker details for the AMC. The following options are available in the list:
- No Defaulting – Broker details will not be defaulted to DIRECT
- Last Transaction Broker – If the user does not have any transaction
in that fund, then system looks for the immediate last transaction (based
on the authorized time stored with the system). If the user has not done
any transaction, system will default the default intermediary of the
unit holder.
While defaulting, if one of the Brokers is disabled, system will default from the unit holder. If the broker is disabled at the unit holder level as well then system will default to DIRECT - Split Percentage – This is applicable only Reinvestment type of transactions. System tracks the holdings per broker. During re-investment generation, system will use these brokers as the reinvestment transaction’s intermediaries with the appropriate ratio.
- While defaulting, if one of the Brokers is disabled, system will default from the unit holder. If the broker is disabled at the unit holder level as well then system will default to DIRECT.
- Default Broker – Broker maintained at the unit holder will be defaulted
If the broker is disabled at the unit holder level as well then system will default to DIRECT.
Note
You can view the ‘Defaulting of Broker Details Section’ provided the client country parameter ‘TXNBROKERS’ is set to True for the installation in your bank.
3.4.10 Additional Information Tab
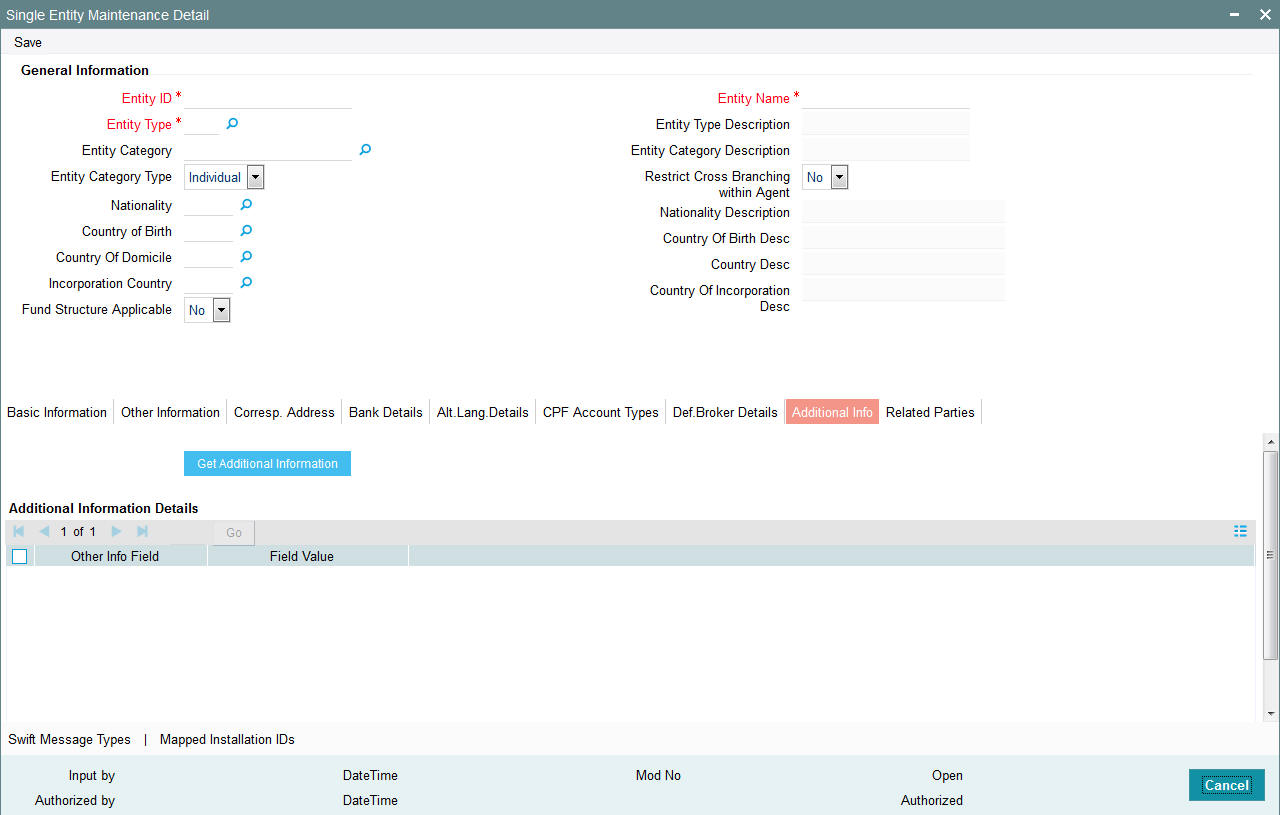
The system displays the following values:
- Other Info Field - The system displays the additional info data type, maintained as Date, which is mapped to an entity (agent).
- Field Value
Default date format (DD-MON-YYYY) is mentioned in ‘Other Info’ field label for date data type while defaulting.
Click ‘Get Additional Information’ button in the screen. Any additional info like bank details will be maintained.
After saving the above listed details in the single entity maintenance screen, click on the Exit button.
3.4.11 Related Parties Tab
Click ‘Related Parties’ tab to specify the details.

You can specify the following details:
Entity Type
Alphanumeric; 2 Characters; Mandatory
Select the entity type. Alternatively, you can select entity type from the option list. The list displays all valid entity type maintained in the system.
The system will allow you to add a related Party only for the Agent Entity Type.
Entity ID
Alphanumeric; 12 Characters; Mandatory
Select the entity ID from the option list. These entities are based on the Entity Type chosen.
Entity Name
Display
The entity name gets displayed on selection of entity ID.
Reporting Level
Alphanumeric; 1 Character; Mandatory
Select the reporting level from the list. The following are the reporting levels:
- A: All Reports
- C: Contract notes and trade acknowledgement
- V: Valuations and statements
- N: No Reporting
By default, the system defaults Reporting Level as ‘ALL’.
Preferred Mailing Mode
Alphanumeric; 1 Character; Optional
Select the preferred mailing mode from the list. The following are the preferred mailing modes:
- Fax
- SWIFT
Link Notes
Alphanumeric; 255 Characters; Optional
The link notes stores free format text which is used to explain the reason for linking the entity with the unit holder.
Note
Related Parties are captured for informational purpose only and no processing impact is associated.
Related Party Level
Mandatory
Select the related party level from the adjoining drop-down list. Following are the options available:
- All
- Fund
- Fund Family
- Legal Entity
- AMC
Related Party Value
Alphanumeric; 12 Characters; Mandatory
Specify the related party value. The adjoining option list displays all valid related party values maintained in the system. You can choose the appropriate one.
If you select ‘All’ in ‘Related Party Level’ field, then you need to select ‘All’ from the adjoinin option list in ‘Related Party Value’ field as well. The system will not allow any more records to be added if ALL has been selected in the ‘Related Party Level’ field for a particular entity ID and entity type combination.
3.4.12 Swift Message Type Button
Clicking ‘Swift Message Type’ button to specify the list of SWIFT messages allowed for that given AMC.
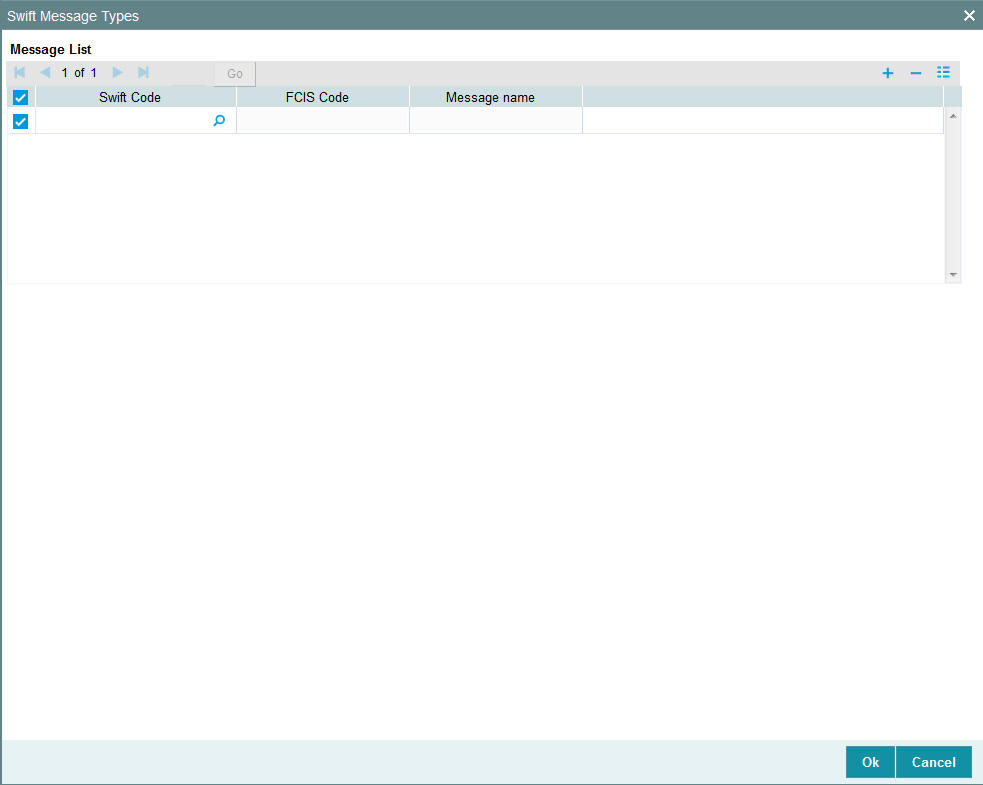
You can specify the following details:
Swift Code
Alphanumeric; 30 Characters; Optional
Specify the swift code. Alternatively, you can select the swift code from the option list. The list displays the following values:
FCIS Code
Display
The system displays the FCIS code based on the Swift code selected.
Message Code
Display
The system displays the message code based on the swift code selected.
The ‘Swift Message Type’ screen is enabled only if you have checked ‘Electronic deal box in ‘Basic Information’ tab.
3.4.13 Mapped Installation IDs Button
Click ‘Mapped Installation IDs’ button to view the mapped installation IDs.

You can view the following details:
- Entity ID
- Entity Type
- Installation ID
- Module ID
3.5 Single Entity Maintenance (Summary) Screen
This section contains the following topics:
- Section 3.5.1, "Invoking the Single Entity Maintenance Summary Screen"
- Section 3.5.2, "Retrieving Entity in Summary Screen"
- Section 3.5.3, "Editing Entity"
- Section 3.5.4, "Viewing Entity"
- Section 3.5.5, "Deleting Entity"
- Section 3.5.6, "Authorizing Entities"
- Section 3.5.7, "Amending Entities"
- Section 3.5.8, "Authorizing Amended Entities"
3.5.1 Invoking the Single Entity Maintenance Summary Screen
After you have set up an entity of any type in the system, you must have another user authorize the record so that it would be effective in the system.
Before the entity record is authorized, you can edit it as many times as necessary. You can also disable an entity before the entity record is authorized.
After authorization, you can only make changes to the entity details through an amendment.
The ‘Single Entity Maintenance Summary’ screen can be used for the following operations on entities:
- Retrieval for viewing
- Editing unauthorized records
- Disabling unauthorized entities
- Authorizing entities
- Amending authorized entities.
Invoke the ‘Single Entity Maintenance Summary’ screen by typing ‘UTSENTMN’ in the field at the top right corner of the Application tool bar and clicking on the adjoining arrow button.
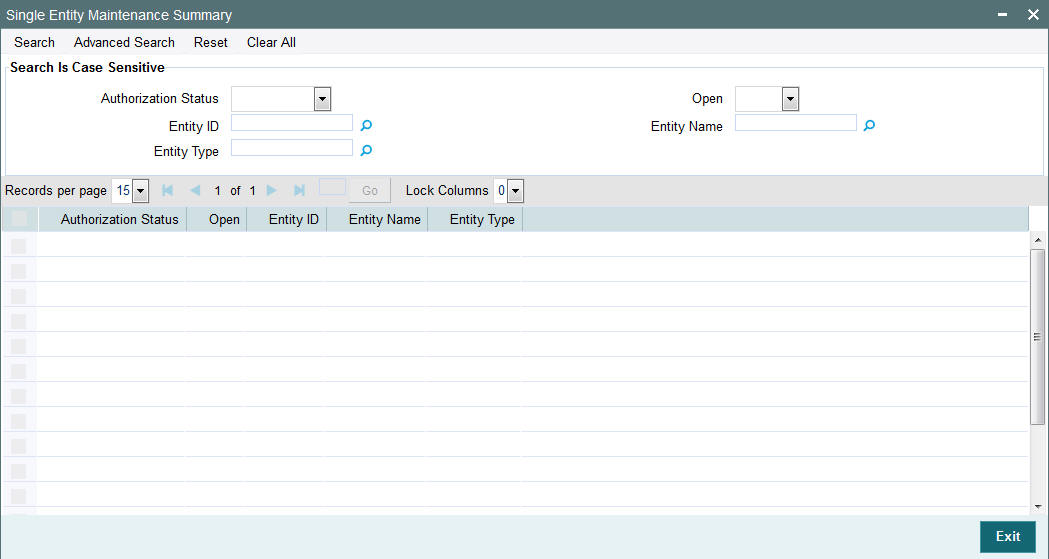
3.5.2 Retrieving Entity in Summary Screen
You can retrieve a previously entered entity as follows:
- Invoke the Entity Maintenance Summary screen and specify the following:
- The status of the entity in the Authorization Status field. If you choose the “Blank Space” option, then all the entities are retrieved.
- The status of the entity in the Open field. If you choose the “Blank Space” option, then all the entities are retrieved.
- The Entity ID
- Entity Type
- Entity Name
- Click ‘Search’ button after you have specified the required details, all entities with the specified details are retrieved and displayed in the lower portion of the screen.
Note
You can also retrieve the individual entity detail from the Detail screen by doing query in the following manner:-
- Press F7
- Input any parameter in the screen
- Press F8
You can perform Edit, Delete, Amend, Authorize, Reverse, Confirm operation by selecting from the Action list.
You can also search the record by using combination of % and alphanumeric value.
For example, you can search the record for Entity ID by using the combination of % and alphanumeric value as follows:-
- Search by D%:- System will fetch all the records whose Entity ID starts from Alphabet ‘D’. For example, Direct.
- Search by %7:- System will fetch all the records whose entity ID Type ends by numeric value’ 7’. For example, AGENT7.
- Search by %17%:- System will fetch all the records whose Entity ID contains the numeric value 17. For example, AGENT17.
3.5.3 Editing Entity
You can modify the details of an entity that you have already entered into the system, provided it has not been subsequently authorized. You can perform this operation as follows:
- Invoke the Single Entity Summary screen from the Browser.
- Select the status of the entity that you want to retrieve for modification in the Authorization Status field. You can only modify records of entities that are unauthorized. Accordingly, choose the Unauthorized option from the drop down list.
- Specify any or all of the details of the entity in the corresponding fields on the screen to retrieve the entity that is to be modified.
- Click ‘Search’ button. All unauthorized entities with the specified details are retrieved and displayed in the lower portion of the screen.
- Double click the entity that you want to modify. The Single Entity Maintenance screen is displayed.
- Select Unlock Operation from Action list to modify the record. Modify the necessary information.
- Click Save to save the changes. The Single Entity Maintenance screen is closed and the changes made are reflected in the Single Entity Summary screen.
3.5.4 Viewing Entity
To view an entity that you have previously entered:
- Invoke the Single Entity Summary Screen from the Browser.
- Select the status of the entity that you want to retrieve for viewing in the Authorization Status field. You can also view all entities that are either unauthorized or authorized only, by choosing the Unauthorized / Authorized option.
- Specify any or all of the details of the entity in the corresponding fields on the screen.
- Click ‘Search’ button. All entities with the specified details are retrieved and displayed in the lower portion of the screen.
- Double click the entity that you want to view. The Single Entity Maintenance screen is displayed in view mode.
3.5.5 Deleting Entity
You can delete only unauthorized entities in the system. To delete an entity:
- Invoke the Single Entity Summary screen from the Browser.
- Select the status of the entity that you want to retrieve for deletion.
- Specify any or all of the details of the entity in the corresponding fields on the screen.
- Click ‘Search’ button. All entities with the specified details are retrieved and displayed in the lower portion of the screen.
- Double click the entity that you want to delete. The Single Entity Maintenance Detail screen is displayed.
- Select Delete operation from the Action list. The system prompts you to confirm the deletion, and the record is deleted physically from the system database.
3.5.6 Authorizing Entities
An unauthorized entity must be authorized in the system for it to be processed. To authorize an entity:
- Invoke the Single Entity Summary screen from the Browser.
- Select the status of the entity that you want to retrieve for authorization. Typically, choose the Unauthorized option from the drop down list.
- Specify any or all of the details of the entity in the corresponding fields on the screen.
- Click ‘Search’ button. All entities with the specified details that are pending authorization are retrieved and displayed in the lower portion of the screen.
- Double click the entity that you wish to authorize. The Single Entity Maintenance screen displayed. Select Authorize operation from Action.
When the checker authorizes an entity, details of validations, if any, that were overridden by the maker of the transaction during the Save operation, are displayed. If any of these overrides results in an error, the checker must reject the entity.
3.5.7 Amending Entities
After an entity is authorized, it can be modified using the Unlock operation from Action list. To make changes to an entity after authorization, you must invoke the Unlock operation which is termed as Amend Operation.
- Invoke the Single Entity Summary screen from the Browser.
- Select the status of the entity that you wish to retrieve for amendment. You can only amend records of entities that are authorized.
- Specify any or all of the details of the entity in the corresponding fields on the screen.
- Click ‘Search’ button. All entities with the specified details are retrieved and displayed in the lower portion of the screen.
- Double click the entity that you want to amend. The Single Entity Maintenance screen is displayed in Amendment mode.
- Click the Unlock operation from the Action list to amend the entity.
- Amend the necessary information. Click the Save button to save the changes.
3.5.8 Authorizing Amended Entities
An amended entity must be authorized for the amendment to be made effective in the system.
The process of authorization is subsequently the same as that for normal process.
Copying Attributes
If you want to create an entity having the same attributes of an existing entity, you can copy the attributes of an existing entity to a new entity.
To copy the attributes:
- Retrieve the entity whose attributes the new entity should inherit. You can retrieve the record through the Summary screen or through the F7- F8 operation which is explained in the previous sections of this chapter.
- Click on ‘Copy’ in the Actions list.
- Indicate the ID for the new Entity. You can however change the details of the entity if required.
3.6 Entity Mapping Detail
This section contains the following topics:
3.6.1 Invoking Entity Mapping Detail Screen
You can map entity details using ‘Entity Mapping Detail’ screen. You can invoke this screen by typing ‘UTDENTMP’ in the field at the top right corner of the Application tool bar and clicking on the adjoining arrow button.
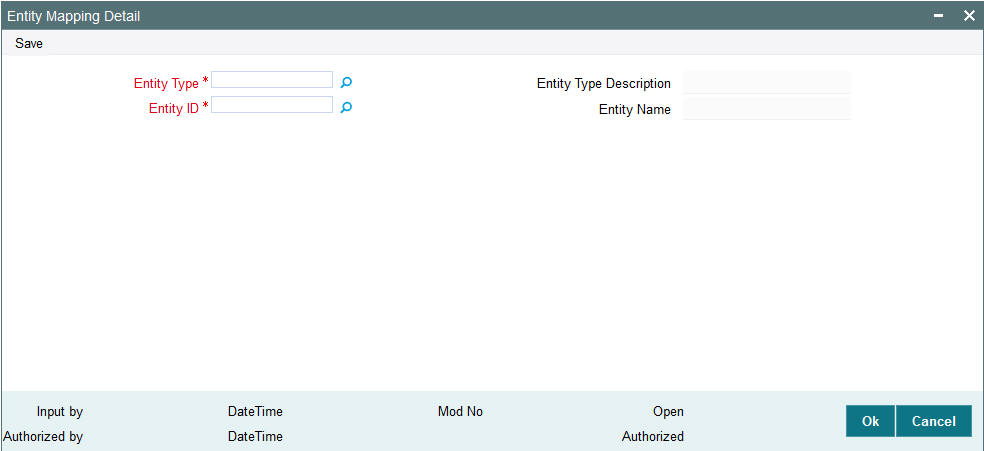
You can specify the following details:
Entity Type
Alphanumeric; 1 Character; Mandatory
Specify the entity type. Alternatively, you can select entity type from option list. The list displays all valid entity type maintained in the system.
Entity Type Description
Display
The system displays the description for the selected entity type.
Entity ID
Alphanumeric; 12 Characters; Mandatory
Specify the entity ID. Alternatively, you can select entity ID from option list. The list displays all valid entity ID maintained in the system.
Entity Name
Display
The system displays the description for the selected entity ID.
3.7 Entity Mapping Summary
This section contains the following topics:
- Section 3.7.1, "Retrieving Entity Mapping Record in Summary Screen"
- Section 3.7.2, "Editing Entity Mapping Record"
- Section 3.7.3, "Viewing Entity Mapping Record"
- Section 3.7.4, "Deleting Entity Mapping Record"
- Section 3.7.5, "Authorizing Entity Mapping Record"
- Section 3.7.6, "Amending Entity Mapping Record"
- Section 3.7.7, "Authorizing Amended Entity Mapping Record"
3.7.1 Retrieving Entity Mapping Record in Summary Screen
You can invoke the ‘Entity Mapping Summary’ screen by typing ‘UTSENTMP’ in the field at the top right corner of the Application tool bar and clicking on the adjoining arrow button.

You can retrieve a previously entered Entity Mapping records in the Summary screen, as follows:
- Invoke the Entity Mapping Summary screen and specify the following:
- The status of the entity ID in the Authorized field. If you choose the “Blank Space” option, then all the entity IDs are retrieved.
- The status of the entity ID in the Open field. If you choose the “Blank Space” option, then all the entity IDs are retrieved.
- Entity ID
- Entity Type
- After you have specified the required details, click ‘Search’ button. All Entity Mapping records with the specified details are retrieved and displayed in the lower portion of the screen.
You can also retrieve the Entity Mapping records from the detail screen by doing query in the following manner:-
- Press F7
- Input the Entity ID
- Press F8
You can perform Edit, Delete, Amend, Authorize, operation by selecting from the Action list.
You can also search the record by using combination of % and alphanumeric value.
For example, you can search the record for Entity ID by using the combination of % and alphanumeric value as follows:-
- Search by M%: The system will fetch all the records whose Entity ID starts from Alphabet ‘M’. For example, Mutual Fund.
- Search by %7 : The system will fetch all the records whose Entity ID ends by numeric value’ 7’ For example, 217,267,77 and so forth.
- Search by %17%: The system will fetch all the records whose Entity ID contains the numeric value 17. For example, 3217, 2172 and so forth.
3.7.2 Editing Entity Mapping Record
You can modify the details of a Entity Mapping record that you have already entered into the system, provided it has not been subsequently authorized. You can perform this operation as follows:
- Invoke the Entity Mapping Summary screen from the Browser.
- Select the status of the Entity Mapping records that you want to retrieve for modification in the Authorized field. You can only modify Entity Mapping records that are unauthorized. Accordingly, choose the Unauthorized option from the drop-down list.
- Specify any or all of the details of the Entity Mapping records in the corresponding fields on the screen to retrieve the entity ID type that is to be modified.
- Click ‘Search’ button. All unauthorized Entity Mapping records with the specified details are retrieved and displayed in the lower portion of the screen.
- Double click the Entity Mapping records that you want to modify. The Entity Mapping Detail screen is displayed.
- Select Unlock Operation from Action list to modify the record. Modify the necessary information.
- Click Save to save the changes. The Entity Mapping Detail screen is closed and the changes made are reflected in the Entity Mapping Summary screen.
3.7.3 Viewing Entity Mapping Record
To view a Entity Mapping records that you have previously entered:
- Invoke Entity Mapping Summary Screen from the Browser.
- Select the status of the Entity Mapping records that you want to retrieve for viewing in the Authorized field. You can also view all Entity Mapping records that are either unauthorized or authorized only, by choosing the Unauthorized/ Authorized option.
- Specify any or all of the details of the Entity Mapping records in the corresponding fields on the screen.
- Click ‘Search’ button. All Entity Mapping records with the specified details are retrieved and displayed in the lower portion of the screen.
- Double click the Entity Mapping records that you want to view in the list of displayed Entity Mapping records. The Entity Mapping Detail screen is opened in view mode.
3.7.4 Deleting Entity Mapping Record
You can delete only unauthorized Entity Mapping records in the system.
- Invoke the Entity Mapping Summary screen from the Browser.
- Select the status of the Entity Mapping records that you want to retrieve for deletion.
- Specify any or all of the details of the Entity Mapping records in the corresponding fields on the screen.
- Click ‘Search’ button. All Entity Mapping records with the specified details are retrieved and displayed in the lower portion of the screen.
- Double click the stop code type that you want to delete. The Entity Mapping Detail screen is displayed.
- Select Delete operation from the Action list. The system prompts you to confirm the deletion, and the record is deleted physically from the system database.
3.7.5 Authorizing Entity Mapping Record
An unauthorized Entity Mapping records must be authorized in the system for it to be processed.
To authorize a Entity Mapping records:
- Invoke the Entity Mapping Summary screen from the Browser.
- Select the status of the Entity Mapping records that you want to retrieve for authorization. Typically, choose the Unauthorized option from the drop-down list.
- Specify any or all of the details of the entity ID type in the corresponding fields on the screen.
- Click ‘Search’ button. All Entity Mapping records with the specified details that are pending authorization are retrieved and displayed in the lower portion of the screen.
- Double click the Entity Mapping records that you wish to authorize. The Entity Mapping Detail screen displayed. Select Authorize operation from Action.
When the checker authorizes Entity Mapping records, details of validations, if any, that were overridden by the maker of the transaction during the Save operation, are displayed. If any of these overrides results in an error, the checker must reject the stop code.
3.7.6 Amending Entity Mapping Record
After a Entity Mapping records is authorized, it can be modified using the Unlock operation from Action list. To make changes to a Entity Mapping records after authorization, you must invoke the Unlock operation which is termed as Amend Operation.
- Invoke the Entity Mapping Summary screen from the Browser.
- Select the status of the Entity Mapping records that you wish to retrieve for amendment. You can only amend records of Entity Mapping records that are authorized.
- Specify any or all of the details of the Entity Mapping records in the corresponding fields on the screen.
- Click ‘Search’ button. All Entity Mapping records with the specified details are retrieved and displayed in the lower portion of the screen.
- Double click the Entity Mapping records that you want to amend. The Entity Mapping Detail screen is displayed in Amendment mode.
- Click the Unlock operation from the Action list to amend the Entity Mapping records.
- Amend the necessary information. Click the Save button to save the changes.
3.7.7 Authorizing Amended Entity Mapping Record
An amended Entity Mapping records must be authorized for the amendment to be made effective in the system. The process of authorization is subsequently the same as that for normal transactions.
3.8 Relationship Maintenance Detail
This section contains the following topics:
3.8.1 Invoking Relationship Maintenance Detail Screen
You can maintain relationship detail using ‘Relationship Maintenance Detail’ screen. You can invoke this screen by typing ‘UTDENTRL’ in the field at the top right corner of the Application tool bar.
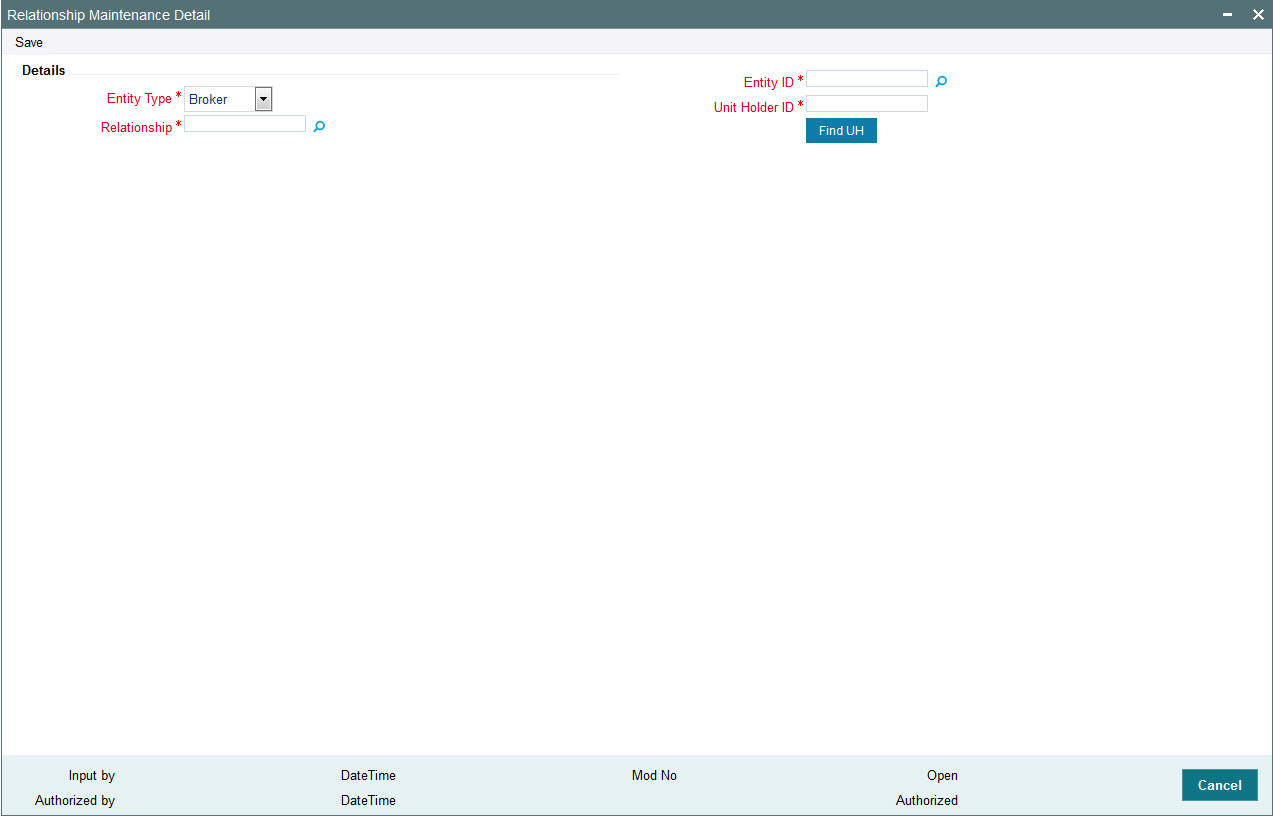
You can specify the following details:
Details
Entity Type
Mandatory
Select the type of entity from the drop-down list. The list displays the following values:
- Broker
- Unit Holder
Relationship
Alphanumeric; 2 Characters; Mandatory
Specify the relationship status. Alternatively, you can select relationship status from the option list. The list displays all valid relationship status maintained in the system.
Entity ID
Alphanumeric; 12 Characters; Mandatory
Specify the entity ID. Alternatively, you can select entity ID from the option list. The list displays all valid entity ID maintained in the system.
Unit Holder ID
Alphanumeric; 12 Characters; Mandatory
Specify the unit holder ID.
You can also query for unit holder ID by clicking ‘Find UH’ button.
3.9 Income Distribution Setup (IDS) Options
This section contains the following topics:
- Section 3.9.1, "Maintaining Income Distribution Setup (IDS) Options"
- Section 3.9.2, "Payment Details Tab "
- Section 3.9.3, "Reinvestment Details Tab"
- Section 3.9.4, "Routing Details Tab"
3.9.1 Maintaining Income Distribution Setup (IDS) Options
The different entities involved in transactions in funds of the AMC avail of earnings resulting from their involvement. For instance, an intermediary (such as a broker) derives commission earnings from the transactions in the funds of the AMC.
Each of the entities could opt for any of the following ways of using earnings from transactions:
- Receive the entire earnings, dividend or commission, as payment, either entirely through checks or account transfer.
- Not receive the earnings by way of payment, but invest the earnings back into the funds of the AMC. This is known as reinvestment. Also, the reinvestment could be made into a designated unit holder account too.
- Receive a portion of the earnings by way of payment, and reinvest the remaining portion.
The pattern chosen by the entity to use earnings is known as the Income Distribution Setup pattern or the IDS pattern for the entity.
You can capture this pattern for any entity in the Oracle FLEXCUBE Investor Servicing system, in the ‘Income Distribution Setup Detail’ screen. You can invoke this screen by typing ‘UTDBRIDS’ in the field at the top right corner of the Application tool bar and clicking on the adjoining arrow button.
Select ‘New’ from the Actions menu in the Application tool bar or click new icon to enter the details.
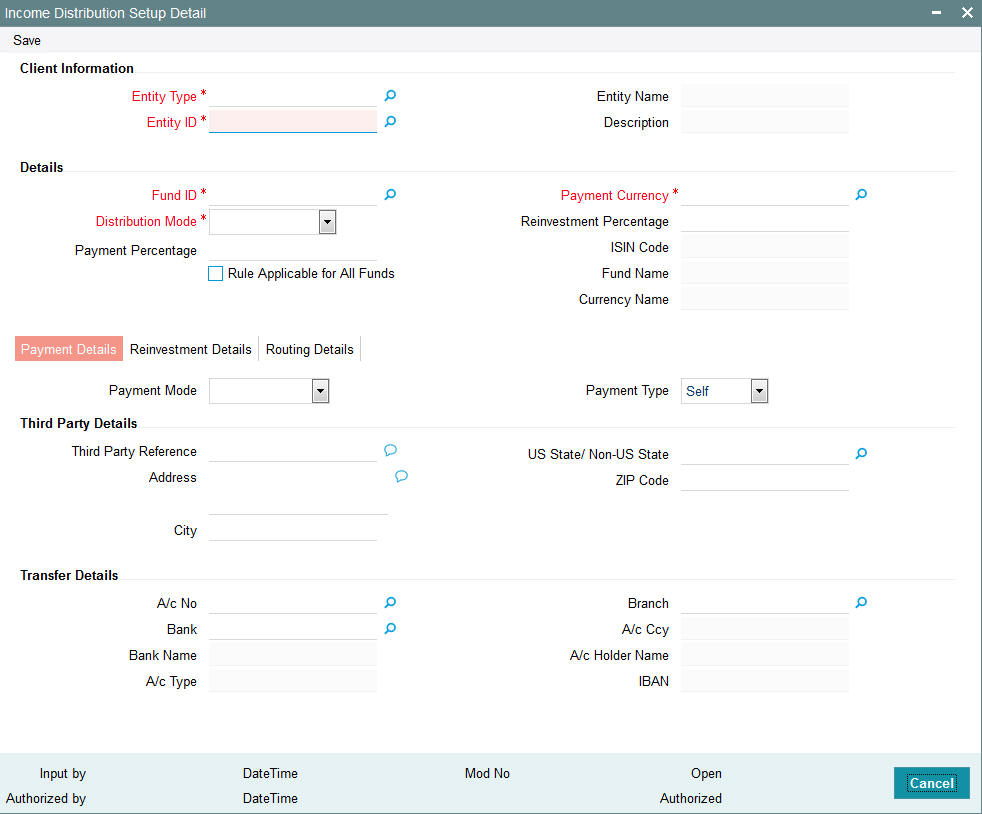
In this screen, you set up the IDS pattern by:
- Specifying the type of entity for which the IDS options are being maintained.
- Indicating the entity for which the option is being set up, by specifying the entity ID.
- Specifying the fund for which the option is applicable, in the Fund ID field. You can also specify the ISIN Code for the fund. The option you will set up will be applied only for dividend earnings on the fund you select here. If you wish to set up income distribution options to be applicable for all funds, you can do so by setting the ‘Rule Applicable for All Funds’ option (this option is available for all entity types except brokers and unit holders)
- Specifying the mode of distribution, in the Distribution Mode field. For brokers, distribution by payment or reinvestment, or both, can be set. For all other entities, only distribution by payment can be set.
- For brokers, specifying the percentages that represent the portions of dividend earnings to be paid and reinvested, as desired by the broker, in the Payment Percentage and Reinvestment Percentage fields.
- For brokers, specifying the payment details for the paid portion, in the Payment Details section, and the reinvestment details, for the reinvestment portion, in the Reinvestment Details section.
- For entities other than brokers, specifying the payment details for commission payments, in the Payment Details section.
- Save your changes.
Client Information
In this section, select the code of the broker for whom you are creating an income distribution setup record.
Entity Type
Alphanumeric; 1 Character; Mandatory
Select the type of entity for which you are setting up Income Distribution options from the option list. You can select any of the following entity types, as applicable:
- Accounting and Valuation Agent
- Agent
- Agency Branch
- AMC
- Broker
- Bulk Client
- Check Vendor
- Clearing Agent
- Custodian
- Distributor
- IFA
- Registrar
- Trustee
- Underwriter
- Product Administrator
For entities other than brokers, the IDS options that you set up in this screen are applicable for commission payments only, and only the ‘Payment’ distribution mode can be set.
Entity Name
Display
Based on your selection for Entity ID, the system displays the corresponding Entity Name.
Entity ID
Alphanumeric; 12 Characters; Mandatory
Specify the ID of the entity for whom you are creating the income distribution options in this screen. The name of the entity that you select is displayed alongside the field.
Description
Display
The system displays description of the specified entity here based on the details maintained at ‘Single Entity Maintenance’ level.
Details
In this section, you can indicate the fund, the income earnings from which will be distributed according to the IDS options you are creating for the selected entity. You can also indicate the manner in which the income must be distributed.
For all entity types other than brokers and unit holders, you can define IDS options to be applicable for all funds. Specific IDS options for individual funds can still be defined for the entity even if IDS options have been defined to be applicable for all funds, and these specific options will supersede the option defined for all funds.
Fund ID
Alphanumeric; 6 Characters; Mandatory
Select the ID of the fund from which the selected entity derives income, which will be distributed according to the IDS options you are creating in this screen.
If the selected entity receives income from many funds, then you must create the IDS options for the income from each fund in this screen as applicable, if so requested by the entity.
When you specify the ID of the fund, the ISIN Code of the fund is displayed in the ISIN Code field.
Note
The ALL option is defaulted in this field and cannot be changed if the ‘Rule Applicable for All Funds’ option has been chosen. In such a case, the IDS options being defined would be applicable for income earned by the selected entity from all funds. Also, if specific options need to be defined for an individual fund, they can be defined separately. Such specific options, if defined for an individual fund, would take precedence (only for income earnings from the fund for which they are defined) over options defined for ALL funds.
ISIN Code
Display
The system displays the ISIN Code for the selected fund.
Note
The ALL option is defaulted in this field and cannot be changed if the ‘Rule Applicable for All Funds’ option has been chosen. In such a case, the IDS options being defined would be applicable for income earned by the selected entity from all funds. Also, if specific options need to be defined for an individual fund, they can be defined separately. Such specific options, if defined for an individual fund, would take precedence (only for income earnings from the fund for which they are defined) over options defined for ALL funds.
Fund Name
Display
The system displays name of the specified fund ID based on the details maintained at ‘Fund Maintenance’ level.
Currency Name
Display
The system displays name of the specified payment currency based on the details maintained at ‘Currency Maintenance’ level.
Distribution Mode
Mandatory
From the drop-down list, indicate the manner in which the selected entity prefers to avail of income earned in the selected fund. The list displays the following values:
- Full Payment: Choose this option to indicate that the entity prefers to receive the entire income derived from an income distribution cycle in the selected fund as a payment.
Note
For commission payments for entities other than brokers, the distribution mode is considered to be ‘Full Payment’ by default. This option is selected and cannot be changed.
Further, the entity can choose to avail of payment either in the form of a check, or an account transfer.
- Full Reinvestment: Choose this option to indicate that the entity prefers to reinvest the entire income derived from an income distribution cycle in the AMC back into the funds of the AMC. This option is available only for brokers and not for other entity types.
Further, the entity can choose to have the income reinvested either in the entity’s own default unit holder account or the account of another unit holder. In the latter case, the unit holder in whose account the reinvestment is proposed (i.e., the Reinvestment Unit Holder) must belong to the same AMC as the source entity.
- Both: Choose this option to indicate that the entity prefers to have the income derived from an entire income distribution cycle in the selected fund divided into two portions, receive one portion as payment, and reinvest the remaining portion. This option is available only for brokers and not for other entity types.
Note
In some funds in which reinvestment is not allowed, according to the Corporate Actions profile for the fund and corporate action type, the entity cannot choose to have income earnings reinvested. In such cases, this field is locked with the “Full Payment” option displayed as a non-editable default option. Also, the Payment Percentage field is locked with a default, non-editable value of one hundred percent displayed, and the Reinvestment Percentage field is locked with a default, non-editable value of zero percent displayed.
If you have chosen the distribution mode in this field as ‘Full Reinvestment” or “Both”, and the reinvestment fund has a restriction on the nationality of the entity as maintained in the Fund Residency Restriction list, then reinvestment is not allowed at all.
Payment Percentage
Numeric; 5 Characters; Optional (Mandatory if distribution mode is either Both or Full Payment)
Specify the percentage of income earned that the entity prefers to receive by way of payment.
- If the distribution mode chosen is Both, specify a percentage that is below one hundred percent.
- If the distribution mode chosen is Full Payment, this field contains one hundred percent as a default value. If so, you cannot specify any other value.
- If the distribution mode chosen is Full Reinvestment, and the reinvestment is disallowed for the selected fund, this field contains one hundred percent as a default value. If so, you cannot change it.
Payment Currency
Alphanumeric; 3 Characters; Mandatory
Specify the currency of income earned that the entity prefers to receive by way of payment.
Reinvestment Percentage
Numeric; 22 Characters; Optional (Mandatory if distribution mode is either Both or Full Reinvestment)
Specify the percentage of income earned that the entity prefers to reinvest back into the funds of the AMC.
- If the distribution mode chosen is Both, specify a percentage that is below one hundred percent.
- If the distribution mode chosen is Full Reinvestment, this field contains one hundred percent as a default value. If so, you cannot specify any other value.
- If the distribution mode chosen is Full Reinvestment, and the reinvestment is disallowed for the selected fund, this field contains zero as a default value. If so, you cannot change it.
Rule Applicable for All Funds
Optional
You can use this field to indicate that the IDS options being defined are applicable for income earned by the entity from all funds. If this option is chosen,
- This cannot be changed through either the edit or amend operations.
- The ‘ALL’ option is displayed in the Fund ID and ISIN Code fields and cannot be changed.
- The specific IDS options can still be separately defined for individual funds, which would mean that the selected entity might have IDS options defined for all funds, as well as specifically for individual funds. In such a case, the specific IDS setup for an individual fund (if any) would take precedence over the IDS options defined for all funds.
Note
This option is available for all entity types except unit holders and brokers.
3.9.2 Payment Details Tab
As part of maintaining the payment details, you can define the pattern in which the entity can receive income earnings in the form of payment. The entity can receive the payment income either in the form of checks or through account transfers.
If you have chosen either Both or Full Payment as the distribution mode, you must specify all information in this section.
Click ‘Payment Details’ tab in the ‘Income Distribution Set Up Detail’ screen to specify the payment details for the entity.
Payment Mode
Optional
From the drop-down list, select the mode in which the entity prefers to receive the paid portion of the income earned – either in the form of a check or an account transfer.
Payment Type
Optional
From the drop-down list, indicate whether the check payment instrument must be addressed to the entity (self) or a third party.
Third Party Details
You will be allowed to maintain the third party details if you have selected ‘Third Party’ for Payment Type.
Third Party Reference
Alphanumeric; 255 Characters; Mandatory for ‘Third Party’ payment
Specify the name or reference of the third party for which the check instrument must be made out.
Address
Alphanumeric; 255 Characters; Mandatory for ‘Third Party’ payment
Specify the address of the third party for which the check instrument must be made out.
City
Alphanumeric; 20 Characters; Mandatory for ‘Third Party’ payment
Select the city of residence of the third party for which the check instrument must be made out.
US State/Non-US State
Alphanumeric; 20 Characters; Mandatory for ‘Third Party’ payment
Select the state of residence of the third party for which the check instrument must be made out.
Zip Code
Alphanumeric; 10 Characters; Mandatory for ‘Third Party’ payment
Specify the zip code of the city of residence of the third party for which the check instrument must be made out.
Transfer Details
A/c No
Alphanumeric; 16 Characters; Mandatory for Self payment type
Select the bank account number to which the transfer payment of the income must be made.
The details of the account you select are displayed in the bank account details fields.
You must select a bank account number for which the currency is a valid fund bank account currency so that the income payment transfer can be affected.
Note
For commission payments for entities other than brokers, the account you specify here is used as the default settlement account. If IDS options have not been set for an entity, (and this account is not specified), settlement of commission payment is made to the entity’s default bank account, specified in the Entity Maintenance.
Bank Name
Alphanumeric; 12 Characters; Mandatory for Third Party transfer payment
Select the name of the bank in which the transfer account is present, from the drop down list.
Branch
Alphanumeric; 12 Characters; Mandatory for Third Party transfer payment
Specify the branch name of the bank in which the transfer account is present.
A/C Type
Display
The system displays the account type (Fixed, Savings or Current) of the transfer account.
A/C Ccy
Display
The system displays the currency of the transfer account.
A/C Holder Name
Display
The system displays the name of the holder of the third party account.
IBAN
Display
The system displays the IBAN (International Bank Account Number) of the account holder.
3.9.3 Reinvestment Details Tab
As part of maintaining the reinvestment details, you can define the pattern in which the entity can reinvest income earnings back into the funds of the AMC. The entity can reinvest earned income in any of the following ways:
- Reinvest either in the entity’s own default unit holder account, or another unit holder account. In the latter case, the unit holder in whose account the reinvestment is proposed (i.e., the Reinvestment Unit Holder) must belong to the same AMC as the source entity.
- Reinvest the income back into any of the funds of the AMC.
- Reinvest the income in as many target fund/unit holder combinations, subject to the constraints expressed above. This is again subject to the consideration that the sum of the percentages of reinvestment in all these combinations must be equal to 100.
Note
Reinvestment is only allowed into or out of a fund if so designated in the Corporate Actions profile for the fund and corporate action type.
If you have chosen either Both or Full Reinvestment as the distribution mode, specifying all information in this section is mandatory.
Click ‘Reinvestment Details’ tab to capture the details.
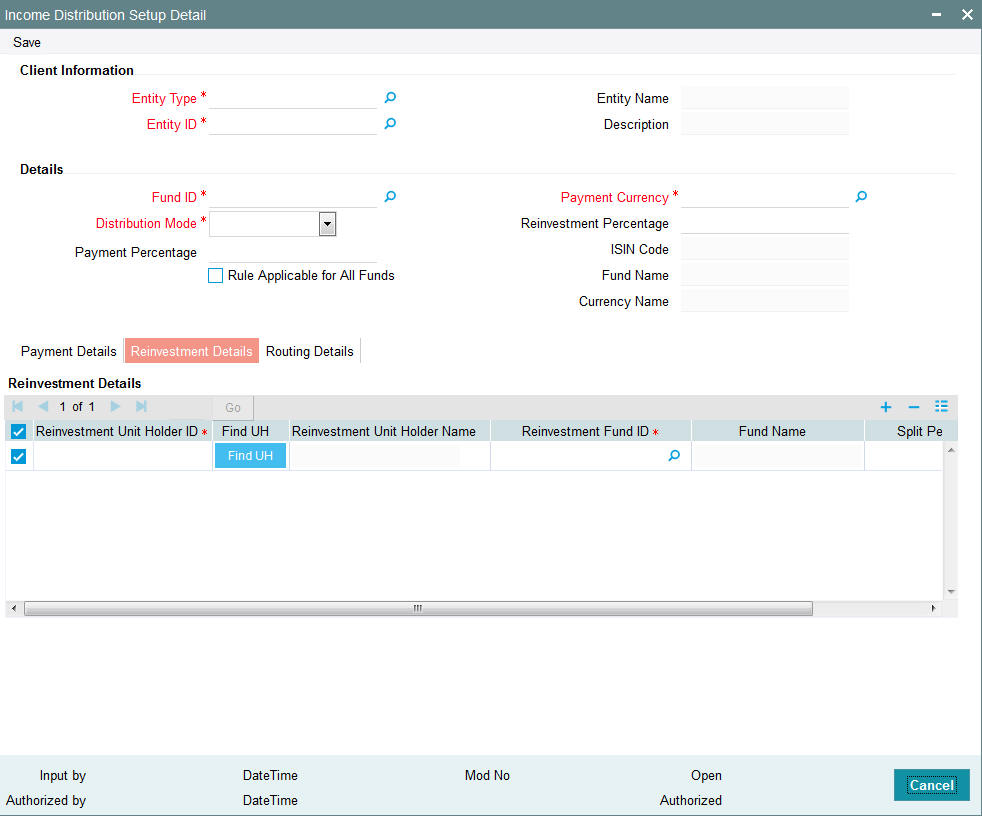
Reinvestment Unit Holder ID
Alphanumeric; 12 Characters; Mandatory
Specify the ID of the unit holder in whose account the income is to be reinvested. When you select the ID of the reinvestment unit holder, the name of the unit holder is displayed in the Reinvestment Unit Holder Name field.
The entity’s default Unit Holder ID is displayed here. If necessary, you can change it.
You can also query reinvestment unit holder ID by clicking ‘Find UH’ button.
Reinvestment Unit Holder Name
Display
The system displays the name of the Unit Holder based on the Reinvestment Unit Holder ID.
Reinvestment Fund ID
Alphanumeric; 6 Characters; Mandatory
Select the ID of the fund in which the income is to be reinvested.
Fund Name
Display
The system displays name of the specified reinvestment fund based on the details maintained at ‘Fund Maintenance’ level.
Split Percentage
Numeric; 5 Characters; Mandatory
Specify the percentage of the derived income that is to be reinvested in the specified reinvestment unit holder's account, in the specified reinvestment fund. You can make any number of such entries, specifying a percentage for each combination. The sum total of all split percentages for all reinvestment unit holder – reinvestment fund ID combinations you have specified must be equal to one hundred percent.
3.9.4 Routing Details Tab
Click on the Routing Details tab to enter routing details.

You need to maintain the following details:
SWIFT Format
Optional
Select the SWIFT format from the drop-down list. The list displays the following values:
- MT103
- MT202
At the time of transaction input, the routing details specified here are picked up for the combination of fund, transaction type and transaction currency.
Bank Charged
Optional
Indicate whether the bank charges must be levied upon the beneficiary, the remitter or must be shared between the two. The drop-down list displays the following values:
- Beneficiary
- Remitter
- Share
Beneficiary Details
Beneficiary
Alphanumeric; 35 Characters; Optional
Specify the beneficiary name.
Beneficiary Add 1-3
Alphanumeric; 35 Characters; Optional
Specify the beneficiary address. There are three lines available for the same.
Beneficiary BIC Code
Alphanumeric; 24 Characters; Optional
Specify the BIC code of the beneficiary.
Beneficiary Acct No
Alphanumeric; 24 Characters; Optional
Specify the account number of the beneficiary.
Beneficiary Code
Alphanumeric; 24 Characters; Optional
Specify the code of the beneficiary.
Beneficiary Info
Alphanumeric; 100 Characters; Optional
Enter more information about the beneficiary.
Beneficiary IBAN
Alphanumeric; 40 Characters; Optional
Specify the beneficiary IBAN details.
Intermediary Details
Intermediary
Alphanumeric; 35 Characters; Optional
Specify the intermediary detail.
Intermediary Add 1-3
Alphanumeric; 35 Characters; Optional
Specify the intermediary address. There are three lines available for the same
Intermediary BIC Code
Alphanumeric; 24 Characters; Optional
Specify the BIC code of the Intermediary.
Intermediary Acct No
Alphanumeric; 24 Characters; Optional
Specify the account number of the Intermediary.
Intermediary Code
Alphanumeric; 24 Characters; Optional
Specify the code of the Intermediary.
Intermediary Info
Alphanumeric; 100 Characters; Optional
Enter more information about the Intermediary.
Intermediary IBAN
Alphanumeric; 40 Characters; Optional
Specify the intermediary IBAN details.
Further Credit Details
Further Credit Name
Alphanumeric; 40 Characters; Optional
Specify the further credit name.
Further Credit Acct No
Alphanumeric; 35 Characters; Optional
Specify the further credit account number.
Reference
Reference1
Alphanumeric; 35 Characters; Optional
Specify reference details.
Reference2
Alphanumeric; 35 Characters; Optional
Specify reference details.
Save all the details to proceed or click Cancel button to cancel the operation.
3.10 Income Distribution Setup Summary
This section contains the following topics:
- Section 3.10.1, "Operations on Income Distribution Setup Records"
- Section 3.10.2, "Retrieving Income Distribution Setup Record"
- Section 3.10.3, "Editing Income Distribution Setup Parameters"
- Section 3.10.4, "Viewing Income Distribution Setup Record"
- Section 3.10.5, "Deleting Income Distribution Setup Record"
- Section 3.10.6, "Authorizing Income Distribution Setup"
- Section 3.10.7, "Amending Income Distribution Setup"
- Section 3.10.8, "Authorizing Amended Income Distribution Setup Details"
- Section 3.10.9, "Copying Attributes"
3.10.1 Operations on Income Distribution Setup Records
After you set up the IDS options for an entity in the Income Distribution Setup screen, you can perform any of the following operations before the record is authorized:
- Edit the specified options in the setup. At this stage, you can alter any of the details, other than the fund and the unit holder ID.
- Delete the setup.
After authorization, you can make changes to the options through an amendment operation. To perform any of these operations – Edit, Delete, Authorize or Amend, use the Income Distribution Setup Summary screen.
Invoke the ‘Income Distribution Setup Summary’ screen by typing ‘UTSBRIDS’ in the field at the top right corner of the Application tool bar and clicking on the adjoining arrow button.
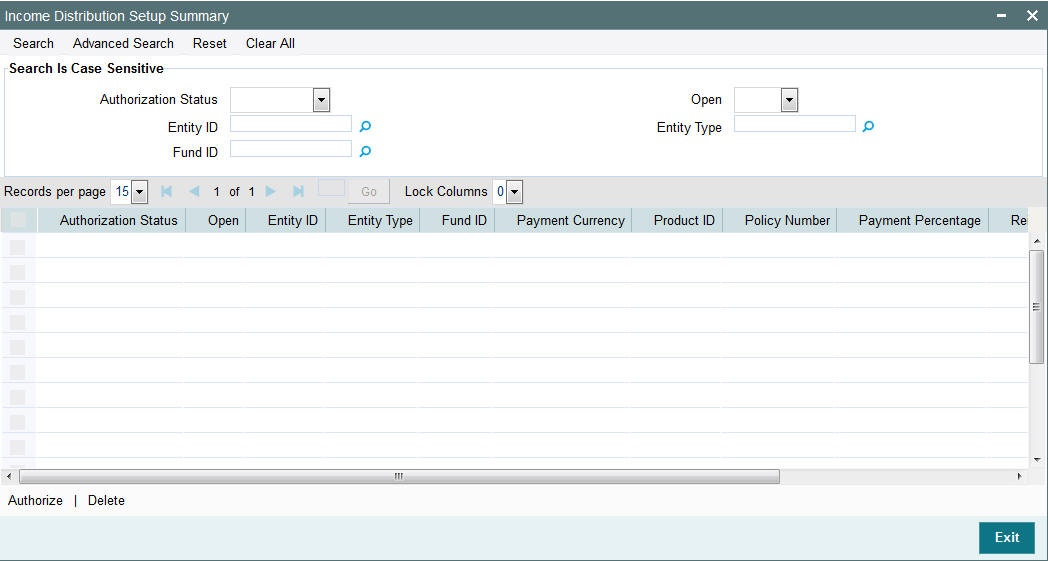
3.10.2 Retrieving Income Distribution Setup Record
You can retrieve a previously entered record in the Summary screen, as follows:
- Specify any or all of the following details in the Income Distribution
Setup Summary screen:
- The status of the record in the Authorization Status field. If you choose the “Blank Space” option, then all the records that involve are retrieved.
- The status of the Income Distribution Setup record in the Open field. If you choose the “Blank Space” option, then all the records are retrieved.
- The Entity ID
- The Entity Type
- Fund ID
- Click ‘Search’ button to view the records. All records with the specified details are retrieved and displayed in the lower portion of the screen.
You can also retrieve the individual Income Distribution Setup detail from the Detail screen by doing a query in the following manner:
- Press F7
- Input the Entity ID
- Press F8
You can perform Edit, Delete, Amend, Authorize, Reverse, Confirm operation by selecting from the Action list.
You can also search the record by using combination of % and alphanumeric value.
Example
You can search the record for Entity ID by using the combination of % and alphanumeric value as follows:-
- Search by A%:- System will fetch all the records whose Entity ID starts from Alphabet ‘A’. Ex: - AGC17, AGVO6, AGC74 etc.
- Search by %7:- System will fetch all the records whose Entity ID ends by numeric value’ 7’. Ex: - AGC17, GSD267, AGC77 etc.
- Search by %17%:- System will fetch all the records whose Entity ID contains the numeric value 17. Ex: - GSD217, GSD172, AGC17 etc.
3.10.3 Editing Income Distribution Setup Parameters
You can modify the details of Income Distribution Setup parameters that you have already entered into the system, provided it has not been subsequently authorized. You can perform this operation as follows:
- Invoke the Income Distribution Setup Summary screen from the Browser.
- Select the status of the record that you want to retrieve for modification in the Authorization Status field. You can only modify records that are unauthorized. Accordingly, choose the Unauthorized option.
- Specify any or all of the details in the corresponding fields to retrieve the record that is to be modified.
- Click ‘Search’ button. All unauthorized records with the specified details are retrieved and displayed in the lower portion of the screen.
- Double click the record that you want to modify. The Income Distribution Setup Detail screen is displayed.
- Select Unlock Operation from Action list to modify the record. Modify the necessary information.
- Click Save to save your changes. The Income Distribution Setup Detail screen is closed and the changes made are reflected in the Income Distribution Setup Summary screen.
3.10.4 Viewing Income Distribution Setup Record
To view a record that you have previously entered, you must retrieve the same in the Income Distribution Setup Summary screen, as follows:
- Invoke the Summary Screen from the Browser.
- Select the status of the record that you want to retrieve for viewing in the Authorization Status field. You can also view all records that are either unauthorized or authorized only, by choosing the Unauthorized / Authorized option.
- Specify any or all of the details of the record in the corresponding fields on the screen.
- Click ‘Search’ button. All records with the specified details are retrieved and displayed in the lower portion of the screen.
- Double click the record that you want to view in the list of displayed records. The Income Distribution Setup Detail screen is displayed in View mode.
3.10.5 Deleting Income Distribution Setup Record
You can delete only unauthorized records in the system. To delete a record that you have previously entered:
- Invoke the Income Distribution Setup Summary screen from the Browser.
- Select the status of the record that you want to retrieve for deletion.
- Specify any or all of the details and click ‘Search’ button. All records with the specified details are retrieved and displayed in the lower portion of the screen.
- Double click the record that you want to delete. The Income Distribution Setup Detail screen is displayed.
- Select Delete operation from the Action list. The system prompts you to confirm the deletion, and the record is deleted physically from the system database.
3.10.6 Authorizing Income Distribution Setup
An unauthorized Income Distribution Setup must be authorized in the system for it to be processed. To authorize a record:
- Invoke the Income Distribution Summary screen from the Browser.
- Select the status of the record that you want to retrieve for authorization. Typically, choose the Unauthorized option.
- Specify any or all of the details of the record in the corresponding fields on the screen.
- Click ‘Search’ button. All the records with the specified details that are pending authorization are retrieved and displayed in the lower portion of the screen.
- Double click the record that you wish to authorize. The Income Distribution Setup screen is displayed. Select Authorize operation from Action.
When the checker authorizes a record, details of validations, if any, that were overridden by the maker of the record during the Save operation, are displayed. If any of these overrides results in an error, the checker must reject the record.
3.10.7 Amending Income Distribution Setup
After an Income Distribution Setup is authorized, it can be modified using the Unlock operation from Action list. To make changes to an income distribution setup after authorization:
- Invoke the Income Distribution Setup Summary screen from the Browser.
- Select the status of the record that you wish to retrieve for amendment. You can only amend only authorized records.
- Specify any or all of the details of the Income Distribution Setup in the screen.
- Click ‘Search’ button. All records with the specified details are retrieved and displayed in the lower portion of the screen.
- Double click the record that you want to amend. The Income Distribution Setup Detail screen is displayed in Amendment mode. Click the Unlock operation from the Action list to amend the record.
- Amend the necessary information. Click the Save button to save the changes.
3.10.8 Authorizing Amended Income Distribution Setup Details
An amended Income Distribution Setup record must be authorized for the amendment to be made effective in the system. The authorization of amended records can only be done from Fund Manager Module and Agency branch Module.
The process of authorization is subsequently the same as that for normal transactions.
3.10.9 Copying Attributes
If you want to create a new Income Distribution Setup having the same attributes of an existing Setup, you can copy the attributes of an existing Income Distribution Setup to a new Income Distribution Setup.
To copy the attributes:
- Retrieve the record whose attributes the new Income Distribution should inherit. You can retrieve the record through the Summary screen or through the F7- F8 operation which is explained in the previous sections of this chapter.
- Click on ‘Copy’ from the Action list.
- Indicate the ID for the new Income Distribution Setup. You can however change the details of the new Income Distribution Setup if required.
3.11 Payment Details for Entities
This section contains the following topics:
3.11.1 Setting up Payment Details for Entities
You can define the payment details for entities, which would be used for commission payments, using the ‘FCIS Entity Payment Maintenance Detail’ screen. You can invoke the ‘FCIS Entity Payment Maintenance Detail’ screen by typing ‘UTDENTPY’ in the field at the top right corner of the Application tool bar and clicking on the adjoining arrow button. Select ‘New’ from the Actions menu in the Application tool bar or click new icon to enter the details.

Entity Payment Details
Entity Type
Alphanumeric; 1 Character; Mandatory
Select the type of entity for which the payment details are being defined.
Description
Display
The system displays description of the specified entity type based on the details maintained at ‘Single Entity Maintenance’ level.
Entity ID
Alphanumeric; 12 Characters; Mandatory
Specify the ID for the entity for whom you are defining the payment details.
Entity Name
Display
Based on your selection for Entity ID, the system displays the corresponding Entity Name.
Payment Options
Next Payment Date
Date Format, Mandatory
When you are setting up the Payment Details for the first time, specify the next payment date on which the entity is to receive commission payment.
Payment Frequency
Alphanumeric; 1 Character; Mandatory
Specify the frequency at which commission payment is to be processed for the entity. The following commission payment frequencies are available:
- Daily
- Weekly
- Fortnightly
- Monthly
- Quarterly
- Half Yearly
- Yearly
If the next payment date is 1st June and Payment Frequency selected is Monthly then the next payment date will be 1st july
Payment Frequency Description
Display
The system displays description of the selected payment frequency.
Last Processed Date
Display
The system displays the last date when the entity commission was processed.
Last Payment No
Display
The system displays the payment number of the entity commission which was processed last.
GST Applicable
Mandatory
Indicate whether GST is applicable or not for the entity. The rate maintained will get added to commission amount.
GST Rate (%)
Numeric; 5 Characters; Mandatory (If you have indicated GST Applicable)
If you have made GST applicable, specify the GST rate as a percentage.
GST applicable rate is for the entity payment
Min Amount Reference Currency
Alphanumeric; 3 Characters; Optional
This indicates the currency of the minimum accrued amount that can be paid to the entity.
Reference Currency Description
Display
The system displays currency name of the specified reference currency here.
Min. Payment Amount (in Ref. Ccy)
Numeric; 30 Characters; Optional
Stipulate the minimum accrued amount that can be paid out to the entity.
If the amount accrued for the payment period is less than the minimum amount specified, the system carries forward this amount to the next payment cycle.
For instance, if the commission is set to 100 USD, and if the computed commission falls below 100 USD then there will not be any payout made, once the commission exceeds 100 USD for the corresponding payment, then the payout will be made including the residual commission which was not paid earlier.
Mode of Payment
Alphanumeric; 1 Character; Mandatory
Select the mode of payment - Check or Transfer.
Mode of Payment Description
Display
The system displays description of the selected mode of payment.
Include Trailer Fee?
Mandatory
Select ‘Yes’ from drop-down list to indicate that trailing commission in respect of the entity must be paid out using the payment details you have specified.
Hold Back Payment?
Mandatory
Indicate if commission payment to the entity is to be held and not paid. If you select ‘Yes’ from the drop-down list, then all commission accrued is carried forward to the next cycle.
Payment Currency
Alphanumeric; 3 Characters; Mandatory
Specify the payment currency. The adjoining option list displays all valid payment currencies maintained in the system. You can choose the appropriate one.
Payment Currency Description
Display
Upon selection of the payment currency, the system displays the description of the specified payment currency.
3.12 FCIS Entity Payment Maintenance Summary Screen
This section contains the following topics:
- Section 3.12.1, "Invoking the FCIS Entity Payment Maintenance Summary Screen"
- Section 3.12.2, "Retrieving an Entity Payment Record"
- Section 3.12.3, "Editing an Entity Payment Record"
- Section 3.12.4, "Viewing an Entity Payment Record"
- Section 3.12.5, "Delete an Entity Payment Record"
- Section 3.12.6, "Authorizing an Entity Payment Record"
- Section 3.12.7, "Amending an Entity Payment Record"
- Section 3.12.8, "Authorizing an amended Entity Payment Record"
- Section 3.12.9, "Copying Attributes"
3.12.1 Invoking the FCIS Entity Payment Maintenance Summary Screen
You can invoke the ‘FCIS Entity Payment Maintenance Summary’ screen by typing ‘UTSENTPY’ in the field at the top right corner of the Application tool bar and clicking on the adjoining arrow button.
The following operations can be performed in the Fund Entity Payment Maintenance Summary screen:
- Retrieving an Entity Payment Record
- Editing an Entity Payment Record
- Viewing an Entity Payment Record
- Delete an Entity Payment Record
- Authorizing an Entity Payment Record
- Amending an Entity Payment Record
- Authorizing an amended Entity Payment Record
- Copying the Attributes

3.12.2 Retrieving an Entity Payment Record
To retrieve a previously entered exchange rate record:
- Invoke the Entity Payment Summary screen and specify the following:
- The authorization status of the exchange rate record in the Authorized field. If you choose the “Blank Space” option, then all the records are retrieved.
- The status of the exchange rate records in the Open field. If you choose the “Blank Space” option, then all the records are retrieved.
- Entity ID
- Entity Type
- After you have specified the required details, click 'Search'. All records with the specified details are retrieved and displayed in the lower portion of the screen.
You can also retrieve an individual exchange rate detail from the Detail screen by doing query in the following manner:-
- Press F7
- Input the Entity ID
- Press F8
You can perform Edit, Delete, Amend, Authorize, Reverse, Confirm operation by selecting from the Action list.
You can also search the record by using combination of % and alphanumeric value.
3.12.3 Editing an Entity Payment Record
You can modify the details of a currency that you have already entered into the system, provided it has not been subsequently authorized. You can perform this operation as follows:
- Invoke the Entity Payment Summary screen from the Browser.
- Select the authorization status of the records that you want to retrieve for modification in the Authorized field. You can only modify records that are unauthorized. Accordingly, choose the Unauthorized option from the drop down list.
- Specify any or all of the search parameters for retrieving the records.
- Click 'Search'. All unauthorized exchange rate records with the specified details are retrieved and displayed in the lower portion of the screen.
- Double click the record that you want to modify. The Entity Payment Detail screen is displayed.
- Select Unlock Operation from Action list to modify the record. Modify the necessary information.
- Click Save to save the changes. The Entity Payment Detail screen is closed and the changes made are reflected in the Entity Payment Summary screen.
3.12.4 Viewing an Entity Payment Record
To view the exchange rate details that you have previously entered:
- Invoke the Entity Payment Summary Screen from the Browser.
- Select the authorization status of the exchange rate records that you want to retrieve for viewing in the Authorized field. You can also view all the exchange rate records that are either unauthorized or authorized only, by choosing the Unauthorized / Authorized option.
- Specify any or all of the search parameters for retrieving the records.
- Click 'Search'. All records with the specified details are retrieved and displayed in the lower portion of the screen.
- Double click the record that you want to view. The Entity Payment screen Detail is displayed in view mode.
3.12.5 Delete an Entity Payment Record
You can delete only unauthorized records in the system. To delete an exchange rate record:
- Invoke the Entity Payment Summary screen from the Browser.
- Select the status of the record that you want to retrieve for deletion.
- Specify any or all of the search parameters in the corresponding fields on the screen.
- Click 'Search'. All records with the specified details are retrieved and displayed in the lower portion of the screen.
- Double click the currency record that you want to delete. The Entity Payment Detail screen is displayed.
- Select Delete operation from the Action list. The system prompts you to confirm the deletion, and the record is deleted physically from the system database.
3.12.6 Authorizing an Entity Payment Record
An unauthorized exchange rate record must be authorized in the system for it to come into effect. To authorize an exchange rate:
- Invoke the Entity Payment Summary screen from the Browser.
- Select the status of the exchange rate record that you want to retrieve for authorization. Typically, choose the unauthorized option from the drop down list.
- Specify any or all of the search parameters in the corresponding fields on the screen.
- Click 'Search'. All records with the specified details that are pending authorization are retrieved and displayed in the lower portion of the screen.
- Double click the record that you wish to authorize. The Entity Payment screen displayed. Select Authorize operation from Action.
When the checker authorizes an exchange rate, details of validations, if any, that were overridden by the maker of the exchange rate during the Save operation, are displayed. If any of these overrides results in an error, the checker must reject the maintenance.
3.12.7 Amending an Entity Payment Record
After an entity payment record is authorized, it can be modified using the Unlock operation from Action list. To make changes to an exchange rate after authorization, you must invoke the Unlock operation which is termed as Amend Operation.
- Invoke the Entity Payment Summary screen from the Browser.
- Select the status of the record that you wish to retrieve for amendment. You can only amend records that are authorized.
- Specify any or all of the search parameters in the corresponding fields on the screen.
- Click 'Search'. All records with the specified details are retrieved and displayed in the lower portion of the screen.
- Double click the record that you want to amend. The Entity Payment Detail screen is displayed in Amendment mode.
- Click the Unlock operation from the Action list to amend the record.
- Amend the necessary information. Click the Save button to save the changes
3.12.8 Authorizing an amended Entity Payment Record
An amended exchange rate record must be authorized for the amendment to be made effective in the system. The process of authorization is the same as the process of normal authorization.
3.12.9 Copying Attributes
If you want to create an entity type having the same attributes of an existing entity type, you can copy the attributes of an existing entity type to a new entity type.
To copy the attributes:
- Retrieve the entity type whose attributes the new entity type should inherit. You can retrieve the record through the Summary screen or through the F7- F8 operation which is explained in the previous sections of this chapter.
- Click on ‘Copy’ in the Actions list.
- Indicate the ID for the new entity type. You can however change the details of the entity type if required.
3.13 Consent Maintenance Detail
This section contains the following topics:
3.13.1 Invoking Consent Maintenance Detail Screen
You can capture the consent details using ‘Consent Maintenance Detail’ screen. You can invoke this screen by typing ‘UTDCONMT’ in the field at the top right corner of the Application tool bar and clicking on the adjoining arrow button.
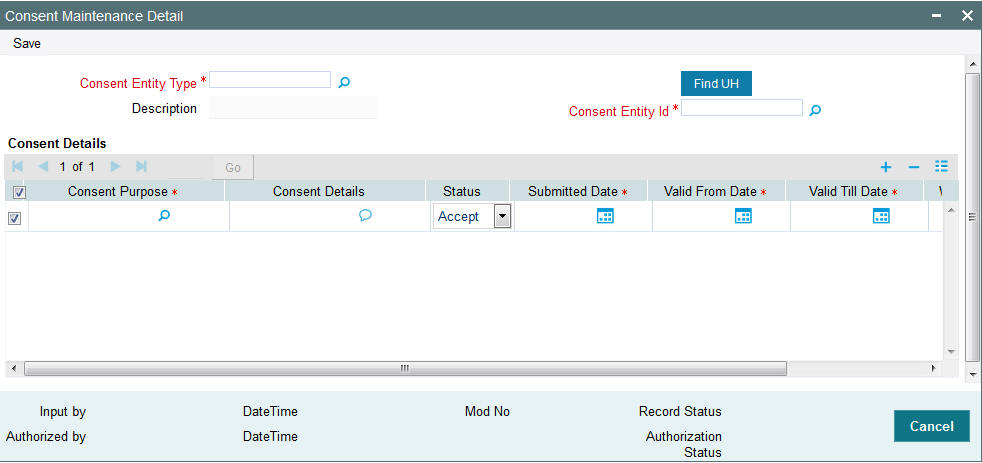
You can specify the following details:
Consent Entity Type
Alphanumeric; 1 Character; Mandatory
Specify the consent entity type. Alternatively, you can select consent entity type from adjoining option list. The list displays all valid consent entity type maintained in CONSENTENTITY Param code.
Description
Display
The system displays the description for the selected consent entity type.
Consent Entity ID
Alphanumeric; 12 Characters; Mandatory
Specify the consent entity ID. Alternatively, you can select consent entity ID from adjoining option list. The list displays all valid consent entity ID maintained in the system.
If you select ‘U - Unit Holder ID’ in ‘Consent Entity Type field, then ‘Find UH’ button will return unit holder details. If you select ‘P - PAS Party ID’, then ‘Find UH’ is not applicable.
Consent Details
Consent Purpose
Alphanumeric; 100 Characters; Mandatory
Specify the purpose of consent. Alternatively, you can select consent purpose from adjoining option list. The list displays all valid consent purpose maintained in the CONSENTPURS param code.
Consent Details
Alphanumeric; 255 Characters; Optional
Specify the details of the consent.
Status
Optional
Select the status of consent from the drop-down list. The list displays the following values:
- Accept
- Withdraw
Submitted Date
Date Format; Mandatory
Select the date on when the consent request is received from the adjoining calendar.
Valid From Date
Date Format; Mandatory
Select the validity period from the adjoining calendar.
This field is applicable only if you have selected ‘Status’ field as ‘Active’.
Valid Till Date
Date Format; Mandatory
Select the validity period from the adjoining calendar.
This field is applicable only if you have selected ‘Status’ field as ‘Active’.
Withdrawal Date
Date Format; Optional
Select the date of withdrawal from the adjoining calendar.
This field is applicable only if you have selected ‘Status’ field as ‘Withdraw’.
3.14 Consent Maintenance Summary
This section contains the following topics:
- Section 3.14.1, "Retrieving a Record in Consent Maintenance Summary Screen"
- Section 3.28.2, "Editing Emergency Holiday Record"
- Section 3.28.3, "Viewing Emergency Holiday Record "
- Section 3.28.4, "Deleting Emergency Holiday Record"
- Section 3.28.5, "Authorizing Emergency Holiday Record "
- Section 3.29, "Emergency Holiday Transaction Processing"
- Section 3.14.6, "Authorizing Amended Consent Maintenance Record"
3.14.1 Retrieving a Record in Consent Maintenance Summary Screen
You can retrieve a previously entered record in the Summary Screen, as follows:
Invoke the ‘Consent Maintenance Summary’ screen by typing ‘UTSCONMT’ in the field at the top right corner of the Application tool bar and clicking on the adjoining arrow button and specify any or all of the following details in the corresponding details.
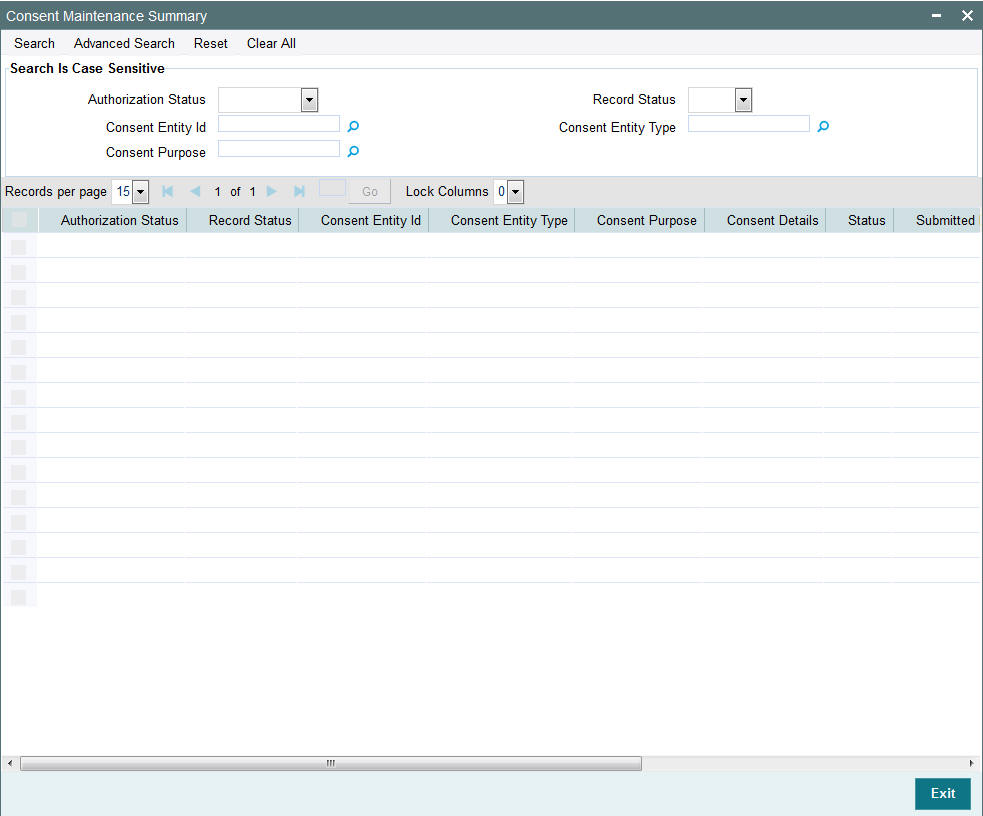
- The status of the record in the Authorization Status field. If you choose the ‘Blank Space’ option, then all the records are retrieved.
- The status of the record in the Record Status field. If you choose the ‘Blank Space’ option, then all records are retrieved
- Consent Entity ID
- Consent Purpose
- Consent Entity Type
Click ‘Search’ button to view the records. All the records with the specified details are retrieved and displayed in the lower portion of the screen.
Note
You can also retrieve the individual record detail from the detail screen by querying in the following manner:
- Press F7
- Input the Source Code
- Press F8
You can perform Edit, Amend, Authorize, operations by selecting the operation from the Action list. You can also search a record by using a combination of % and alphanumeric value
3.14.2 Editing Consent Maintenance Record
You can modify the details of Consent Maintenance record that you have already entered into the system, provided it has not subsequently authorized. You can perform this operation as follows:
- Invoke the Consent Maintenance Summary screen from the Browser.
- Select the status of the record that you want to retrieve for modification in the Authorization Status field. You can only modify records that are unauthorized. Accordingly, choose the Unauthorized option.
- Specify any or all of the details in the corresponding fields to retrieve the record that is to be modified.
- Click ‘Search’ button. All unauthorized records with the specified details are retrieved and displayed in the lower portion of the screen.
- Double click the record that you want to modify in the list of displayed records. The Consent Maintenance screen is displayed.
- Select Unlock Operation from the Action list to modify the record. Modify the necessary information.
Click Save to save your changes. The Consent Maintenance screen is closed and the changes made are reflected in the Consent Maintenance Summary screen.
3.14.3 Viewing Consent Maintenance Record
To view a record that you have previously input, you must retrieve the same in the Consent Maintenance Summary screen as follows:
- Invoke the Consent Maintenance Summary screen from the Browser.
- Select the status of the record that you want to retrieve for viewing in the Authorization Status field. You can also view all records that are either unauthorized or authorized only, by choosing the unauthorized / Authorized option.
- Specify any or all of the details of the record in the corresponding fields on the screen.
- Click ‘Search’ button. All records with the specified fields are retrieved and displayed in the lower portion of the screen.
- Double click the record that you want to view in the list of displayed records. The Consent Maintenance screen is displayed in View mode.
3.14.4 Authorizing Consent Maintenance Record
- An unauthorized Consent Maintenance record must be authorized in the system for it to be processed. To authorize a record:
- Invoke the Consent Maintenance Summary screen from the Browser.
- Select the status of the record that you want to retrieve for authorization. Typically, choose the unauthorized option.
- Specify any or all of the details in the corresponding fields on the screen.
- Click ‘Search’ button. All records with the specified details that are pending authorization are retrieved and displayed in the lower portion of the screen.
- Double click the record that you wish to authorize. The Consent Maintenance screen is displayed. Select Authorize operation from the Action List.
When a checker authorizes a record, details of validation, if any, that were overridden by the maker of the record during the Save operation are displayed. If any of these overrides results in an error, the checker must reject the record.
3.14.5 Amending Consent Maintenance Record
After a Consent Maintenance record is authorized, it can be modified using the Unlock operation from the Action List. To make changes to a record after authorization:
- Invoke the Consent Maintenance Summary screen from the Browser.
- Select the status of the record that you want to retrieve for authorization. You can only amend authorized records.
- Specify any or all of the details in the corresponding fields on the screen.
- Click ‘Search’ button. All records with the specified details that are pending authorization are retrieved and displayed in the lower portion of the screen.
- Double click the record that you wish to authorize. The Consent Maintenance screen is displayed in amendment mode. Select Unlock operation from the Action List to amend the record.
- Amend the necessary information and click on Save to save the changes
3.14.6 Authorizing Amended Consent Maintenance Record
An amended Consent Maintenance record must be authorized for the amendment to be made effective in the system. The authorization of amended records can be done only from Fund Manager Module and Agency Branch module.
The subsequent process of authorization is the same as that for normal transactions.
3.15 Agents Setup
Agents, as mentioned earlier, are conduits that the AMC uses for broad-basing its operations. Each Agent that will be operating for the AMC is given a unique profile in the system.
The term Agents as used in the system is distinct from Brokers. This distinction can be depicted as follows:
- Level 1 : Fund Manager - representing the AMC
- Level 2 : Agents - who act for the AMC
- Level 3 : Agency branches - which act for the agents
- Level 4 : Brokers - that interact with investors directly and mobilize investments from them
You can set up an Agent in the Single Entity Maintenance screen. You can invoke this screen by clicking the Detail option under the Entity menu item in the Maintenance menu category of the Browser menu.
To set up an agent in the Single Entity Maintenance screen, select the Agent option from the drop down list in the Entity Type field in the Common Information section, and then proceed to enter the details for the agent.
The attributes specific to maintaining agents are:
- Restrict Cross Banking Within Agent
- Agent Type
- Signed Off
Refer to the section ‘Fields in the Single Entity Maintenance Screen’ in this chapter for details.
3.16 Agency Branches Setup
Agency branches in the system perform the role of accepting new unit holder related information and transactions from unit holders in various funds.
Only such agency branches as are set up using this screen can have Oracle FLEXCUBE installations.
You can set up an Agency Branch in the Single Entity Maintenance screen. You can invoke this screen by clicking the Detail option under the Entity menu item in the Browser. To set up an agency branch, select the Agency Branch option from the drop down list in the Entity Type field and then proceed to enter the details for the agency branch
The Agent Code - Branch Code combination should be unique, and not already in use for any other entity in the system. If so, an error message is displayed when you save the record.
3.17 AMC Setup
You can enter the record of an AMC into the system, by creating it as an entity.
You can set up an AMC in the Single Entity Maintenance screen. You can invoke this screen by clicking the Detail option under the Entity menu in the Browser.
To set up an AMC, select the AMC option from the drop down list in the Entity Type field and then proceed to enter the details for the AMC. You must specify all information such as the common information, basic information and contact details for any AMC that you set up.
Note
AMCs can only be maintained at Distributor installations. At an AMC installation, the profile of the logged in AMC can be viewed in the Single Entity screen, but a new profile cannot be created.
The attributes specific to setting up of AMC’s are:
- Weekend
- Section
- Switching Logic
- UH Generation Logic
- Nature of Business
- Effective Date for Capital Gains Calculations
- Finware Posting
- Address Details
Refer to the section ‘Fields in the Single Entity Maintenance Screen’ in this chapter for details on each of these attributes.
3.18 Distributors Setup
The details that must be captured for a distributor are the same as those you capture for an AMC.
If your installation is a distributor installation, you can view the record of the default distributor in this screen. You can edit the profile. You cannot, however, create a new distributor record in this screen. The distributor installation feature is only available if your installation has specifically requested for it.
3.19 Bank Details Maintenance
This section contains the following topics:
- Section 3.19.1, "Maintaining Bank Details"
- Section 3.19.2, "Bank Branch Entity Maintenance"
- Section 3.19.3, "Registrars Setup"
- Section 3.19.4, "Trustees Setup"
- Section 3.19.5, "Check Vendors Setup"
- Section 3.19.6, "Underwriters Setup"
- Section 3.19.7, "Custodians Setup"
- Section 3.19.8, "Accounting and Valuation Agents Setup"
- Section 3.19.9, "Participating Employers Setup"
- Section 3.19.10, "Paying Agents Setup"
3.19.1 Maintaining Bank Details
You can enter the record of a bank into the system, by creating it as an entity.
You can set up a bank in the Single Entity Maintenance screen. You can invoke this screen by clicking the Detail option under the Entity menu in the Browser.
To set up a bank, select the Bank option from the drop-down list in the Entity Type field, and then proceed to enter the details for the bank.
3.19.2 Bank Branch Entity Maintenance
You can enter the record of a branch of a bank into the system, by creating it as an entity.
You can set up a bank branch in the Single Entity Maintenance screen. Invoke this screen by clicking the Detail option under the Entity menu in the Browser.
To set up a bank branch, select the Bank Branch option from the drop down list in the Entity Type field in the Common Information section, and then proceed to enter the details for the bank branch.
You must specify all information such as the common information, basic information and contact details for all bank branches that you set up. You must also capture the following additional details specifically for bank branches
3.19.3 Registrars Setup
You can enter the record of a registrar into the system, by creating it as an entity.
You can set up a registrar in the Single Entity Maintenance screen. You can invoke this screen by clicking the Detail option under the Entity menu in the Browser.
To set up a registrar, select the Registrar option from the drop down list in the Entity Type field and then proceed to enter the details for the registrar.
3.19.4 Trustees Setup
You can enter the record of a trustee into the system, by creating it as an entity.
You can set up a trustee in the Single Entity Maintenance screen. You can invoke this screen by clicking the Detail option under the Entity menu in the Browser.
To set up a trustee, select the Trustee option from the drop down list in the Entity Type field and then proceed to enter the details for the trustee. You must specify all information such as the common information, basic information and contact details for all trustees that you set up. You must also capture the following additional details specifically for trustees:
3.19.5 Check Vendors Setup
The AMC may issue checkbooks to investors who wish to avail the check writing facility. Such checkbooks are typically printed by external agencies called check vendors. You can also maintain records for check vendors as entities in the system. For check vendors, you can maintain basic details such as contact information, signatories and base currency.
You can set up a check vendor in the Single Entity Maintenance screen. You can invoke this screen by clicking the Detail option under the Entity menu in the Browser.
To set up a check vendor, select the Check Vendor option list in the Entity Type field and then proceed to enter the details for the vendor. You must specify all information such as the common information, basic information and contact details for all check vendors that you set up.
Note
You must associate a check vendor that you create a record for, to the fund for which investors avail the check writing facility. You can indicate the association in the Fund Entity screen.
3.19.6 Underwriters Setup
Underwriters are entities to which the AMC would pay trailing commission and ongoing management fees for underwriting any of the funds floated by the AMC. You can also maintain records for underwriters as entities in the system. For underwriters, you can maintain basic details such as contact information, signatories and base currency.
You can set up an underwriter in the Single Entity Maintenance screen. You can invoke this screen by clicking the Detail option under the Entity menu in the Browser.
To set up an underwriter, select the Underwriter option from the drop down list in the Entity Type field in the Common Information section, and then proceed to enter the details for the underwriter. You must specify all information such as the common information, basic information and contact details for all underwriters that you set up.
Note
You must associate an underwriter that you create a record for, to the fund for which investors avail the check writing facility. You can indicate the association in the Fund Entity screen. You can also associate an underwriter with the trailing fee load due to the underwriter, in the Periodic Load Maintenance screen.
3.19.7 Custodians Setup
You can also maintain records for custodians as entities in the system. For custodians, you can maintain basic details such as contact information, signatories and base currency.
You can set up a custodian in the Single Entity Maintenance screen. You can invoke this screen by clicking the Detail option under the Entity menu in the Browser.
To set up a custodian, select the Custodian option in the Entity Type field and then proceed to enter the details for the vendor. You must specify all information such as the common information, basic information and contact details for all custodians that you set up.
3.19.8 Accounting and Valuation Agents Setup
You can enter the record of an accounting and valuation agent into the system, by creating it as an entity, in the Single Entity Maintenance screen. You can invoke this screen by clicking the Detail option under the Entity menu in the Browser.
To set up an accounting and valuation agent, select the Account and Valuation Agent option from the drop down list in the Entity Type field in the Common Information section, and then proceed to enter the details for the agent. You must specify all information such as the common information, basic information and contact details for all agents that you set up.
You must also capture the following additional details specifically for accounting and valuation agents:
3.19.9 Participating Employers Setup
You can maintain records for participating employers as entities in the system. For participating employers, you can maintain basic details such as contact information, signatories and base currency.
You can set up a participating employer in the Single Entity Maintenance screen. You can invoke this screen by clicking the Detail option under the Entity menu in the Browser.
To set up a participating employer, select the Participating Employer in the Entity Type field and then proceed to enter the details. You must specify all information such as the common information, basic information, bank details and contact details for all participating employers that you set up.
3.19.10 Paying Agents Setup
You can maintain records for paying agents as entities in the system. For paying agents, you can maintain basic details such as contact information, signatories and base currency.
You can set up a paying agent in the Single Entity Maintenance screen. You can invoke this screen by clicking the Detail option under the Entity menu in the Browser.
To set up a paying agent, select the Paying Agent option from the drop down list in the Entity Type field in the Common Information section, and then proceed to enter the details. You must specify all information such as the common information, basic information, and contact details for all paying agents that you set up.
3.20 Unit Holder Bank Verification Summary
This section contains the following topics:
3.20.1 Invoking Bank Verification Summary
You can verify unit holder bank details using ‘Unitholder Bank Verification Summary’ screen. You can invoke this screen by typing ‘UTDUHBVR’ in the field at the top right corner of the Application tool bar and clicking on the adjoining arrow button.
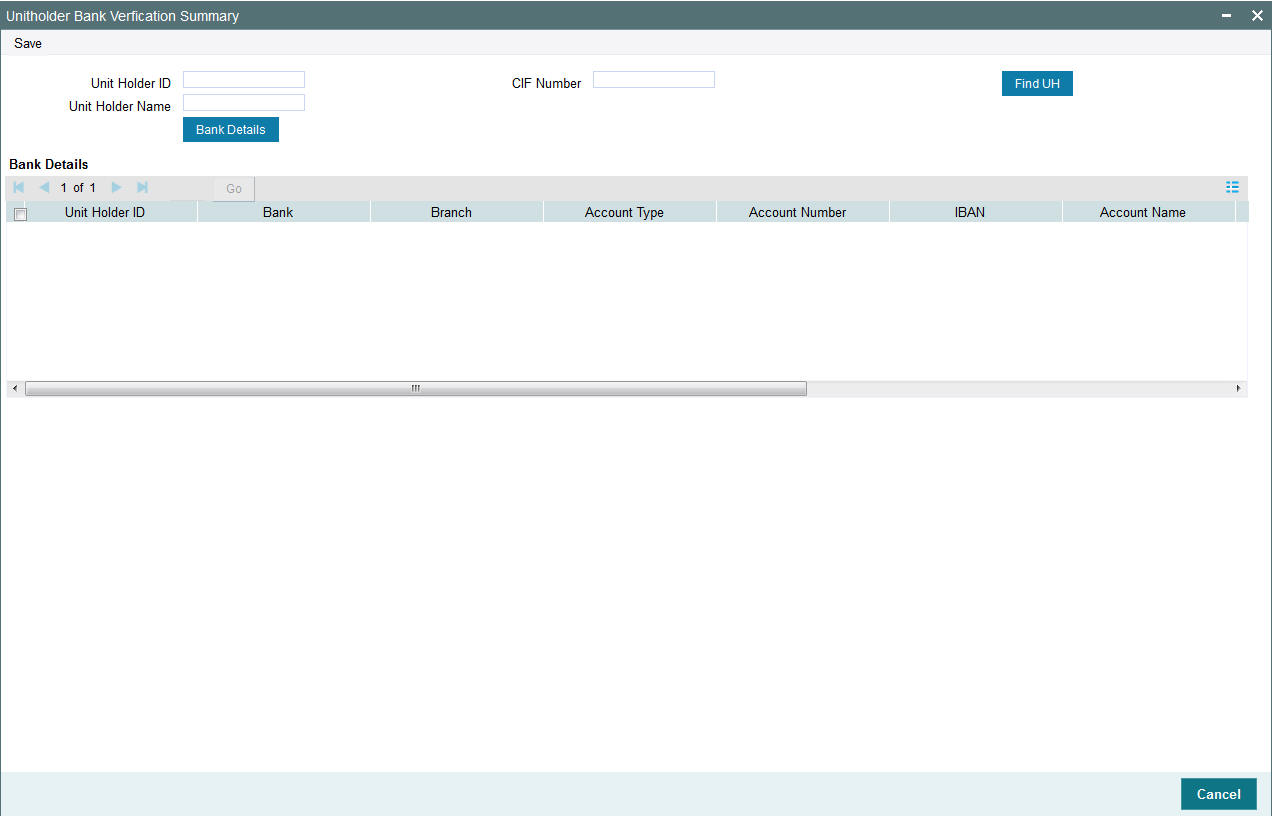
You can specify the following details:
Unit Holder ID
Alphanumeric; 12 Characters; Optional
Specify the unit holder ID. You can also query for unit holder ID clicking ‘Find UH’ button.
Unit Holder Name
Display
The system displays the name of the unit holder ID of the selected unit holder ID.
CIF Number
Display
The system displays the CIF number of the selected unit holder ID.
After specifying unit holder ID, click ‘Bank Details’ button. The system displays the following values:
- Unit Holder ID
- Bank
- Branch
- Account Type
- Account Number
- IBAN
- Account Name
- Account Currency
- Account Category
- Current Status
Status
Optional
Select the bank verification status from the drop-down list. The list displays the following values:
- Verified
- Failed
Process
Optional
Select the processing status from the drop-down list. The list displays the following values:
- Yes
- No
3.21 Setting up ISA Fund Managers
You can maintain records for ISA Managers as entities in the system. For ISA Fund Managers, you can maintain details such as ISA Reference Number, Minimum ISA Transfer in and Minimum ISA Transfer Out.
You can set up an ISA Manager in the Single Entity Maintenance screen. You can invoke this screen by clicking the Detail option under the Entity menu in the Browser.
To set up an ISA Fund Manager, select the ISA Fund Manager option (entity 2) from the drop down list in the Entity Type field in the Common Information section, and then proceed to enter the details. You must specify all information such as the common information, basic information, and contact details for all ISA Managers that you set up.
During Unit holder Modify operation, if ISA unit holder resident status is changed, then the system will display the warning message as ‘This is an existing ISA account and will affect future investments’
You can then change RPO code accordingly to disallow transactions into this account. The system will display an error message if you try to open more accounts than the limit specified at the account type maintenance level.
3.22 Withholding Tax
This section contains the following topics:
3.22.1 Setting up Withholding Tax
You can configure the system to perform withholding tax (WHT) deductions out of the earnings derived from any investor or a broker. To do this, you must specify the slabs according to which the rates will be determined. WHT is deducted from the earnings of an investor or a broker, according to the WHT slabs that you maintain in the system, before the net earnings are paid out or reinvested depending upon the Income Distributions Setup.
You can maintain such slabs for earnings from cash dividends that involve capital gains as well as income earnings.
In the system, you maintain the slab details for WHT Input in the ‘FCIS Withholding Tax Setup Detail’ screen. You can invoke this screen by typing ‘UTDWHTAX’ in the field at the top right corner of the Application tool bar and clicking on the adjoining arrow button. Select ‘New’ from the Actions menu in the Application tool bar or click new icon to enter the details.
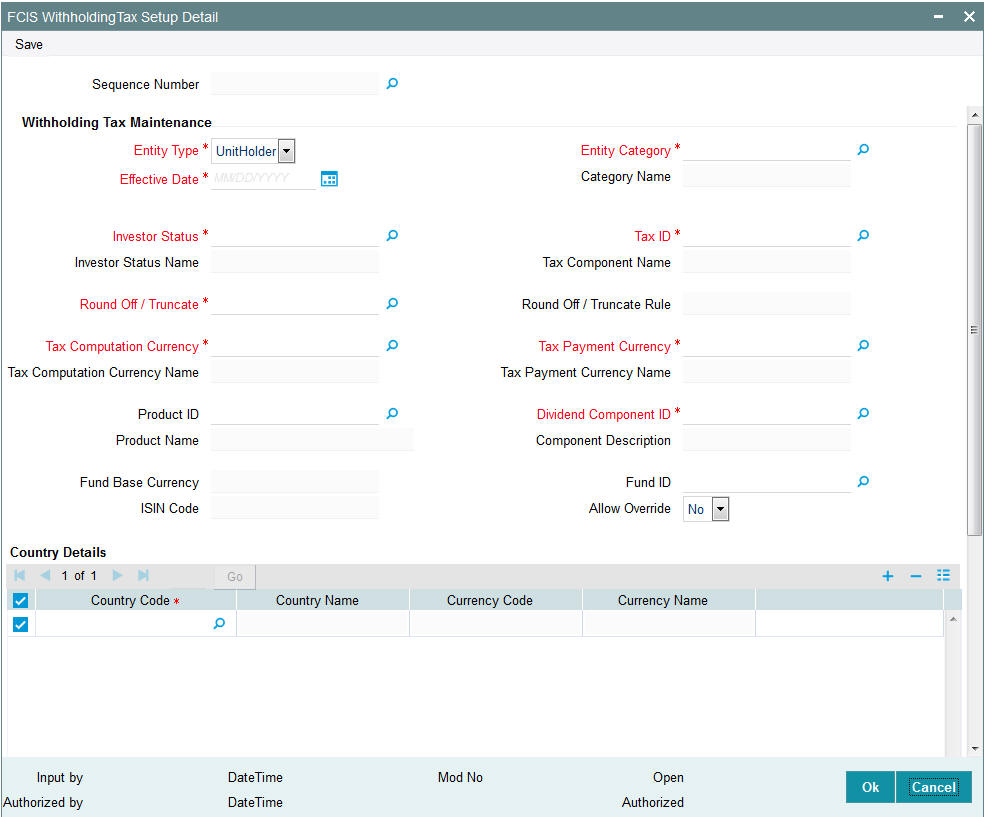
You can use this screen to enter the Withholding Tax component slab details that are applicable:
- For a particular investor category
- For a broker category
- For a particular country and currency
- For a specific fund and fund base currency
- For a specific product
- For investors of local residence as well as foreign investors
- For earnings from cash dividends involving capital gains
- For income earnings from cash dividends
You can either to choose to set up tax slabs at the fund level or at the product level. Product level WHT applies to all funds available in that product portfolio.
You can also give each set of slabs a separate tax component ID.
You can define slabs for different income ranges and give each of the slabs a sequence number. You cannot, however, set up duplicate tax slab sequences for the same investor category.
Before you set up the Withholding Tax details for an investor category for a country, it is desirable to ensure that the following information is already set up in the system:
- The countries have been maintained in the Country Maintenance and the currencies have been set up in the Currency Maintenance.
- The countries have been associated with currencies in the Country Currency Maintenance.
- The different investor and broker categories have been maintained in the System Parameters.
Specify the following fields in this screen:
Sequence Number
Alphanumeric 16 Characters; Optional
Specify the sequence number. Alternatively, you can select the sequence number from the option list. The list displays all valid sequence number maintained in system.
Note
This field is enabled only in ‘Enter Query’ option.
Withholding Tax Maintenance
Entity Type
Mandatory
Indicate whether the WHT slabs are being maintained to be applicable to an Unit Holder or a broker from the drop-down list. The values in drop-down list are as follows:
- Unit Holder
- Broker
Entity Category
Alphanumeric; 6 Characters; Mandatory
Specify a valid category of the unit holder you need to assign to specified entity type. The adjoining option list displays all valid entity categories maintained. You can select the appropriate one.
Category Name
Display
The system displays unit holder’s category name, if the ‘Entity Type’ is maintained as ‘Unitholder’.
Effective Date
Date Format; Mandatory
Specify the date the system should consider for calculating tax.
Investor Status
Alphanumeric, 1 Character; Mandatory
You will be allowed to select the status if the entity type is ‘Unit Holder’. Select the status for which this tax slab is applicable. The system displays the corresponding ‘Investor Status Name’. This will enable the system to decide which tax slab needs to be applied depending on whether the unit holder is a foreign / resident unit holder.
If the entity type is a broker, the system defaults the investor status. You will not be able to modify the status.
Investor Status Name
Display
The system displays the description for the selected investor status name.
Tax ID
Alphanumeric, 3 Characters; Mandatory
From the list, select the tax ID to be used for application of withholding tax according to the slabs maintained, for the entity type. The system displays the associated Tax Component Name.
Each set of slabs can be given an ID that reflects the nature of the slabs.
The value list for the Tax ID’s is obtained from the system parameter values maintained for the Tax ID system parameter code.
Tax Component Name
Display
The system displays the description for the selected tax ID.
Roundoff/Truncate
Alphanumeric; 1 Character; Mandatory
Indicate whether the decimal portion of the amount should be rounded off or truncated.
Round Off/ Truncate Rule
Display
The system displays the rule used to round off or truncate the decimal portion of the amount based on the roundoff or truncate selected.
Tax Computation Currency
Alphanumeric; 3 Characters; Mandatory
Specify the currency in which the tax must be computed for the selected tax ID. By default, it is reckoned to be the currency of the selected country. You will be allowed to specify the currency only for Unit Holders.
Tax Computation Currency Name
Display
The system displays the description for the selected tax computation currency code.
Tax Payment Currency
Alphanumeric; 3 Characters; Mandatory
Specify the currency in which the tax must be paid for the selected tax ID. By default, it is reckoned to be the fund base currency. You will be allowed to specify the currency only for Unit Holders.
Tax Payment Currency Name
Display
The system displays specified tax payment currency name based on the details maintained at ‘Currency Maintenance’ level.
Product ID
Alphanumeric; 10 Characters; Optional
Select the product for which you are setting up the tax slabs. The option list contains all valid products maintained in the system. With-Holding Tax will be applicable to all funds mapped to the product. GL entries will be populated with the respective product Id and policy number along with the dividend payment details and tax details.
Product Name
Display
The system displays the name of the product for the selected product ID.
Dividend Component ID
Alphanumeric; 25 Characters; Mandatory
Specify whether the tax slab details being maintained apply to capital gains earnings from cash dividends or income earnings from cash dividends, for the fund.
The system defaults the Dividend Component ID and Description for brokers. You will not be able to modify the ID.
Component Description
Display
The system displays the description for the selected dividend component ID.
Fund ID
Alphanumeric; 6 Characters; Optional
Select the fund for which you are setting up the tax slabs. The base currency of the fund is displayed in the Fund Base Currency Code field.
Fund Base Currency
Display
The system displays the fund base currency name for the selected fund ID.
ISIN Code
Display
The system displays the ISIN code for the selected fund ID.
This is applicable only for Unit Holder type of entity. If you specify the ISIN Code of a fund, the ID of the fund is displayed in the Fund ID field.
Allow Override
Optional
Select if you need to override the taxation applicability for UT /LEP or not from the adjoining drop-down list. Following are the options available:
- Yes
- No
Country Details
Country Code
Alphanumeric; 3 Characters; Mandatory
Specify the country code. Alternatively, you can select the country code from the option list. The list displays all valid country code maintained in the system.
This is the country for which the tax slabs that are being set up must be applicable. All tax deductions and computations will be done in this currency.
Country Name
Display
The system displays the country name for the selected country code.
Currency Code
Display
The system displays the currency code for the selected country code.
Currency Name
Display
The system displays the currency code for the selected country code.
Tax Details section
In the lower grid portion of the screen, maintain the details of each slab, as follows:
Slab Sequence No
Numeric; 22 Characters; Optional
Enter the slab number for this investor category tax definition.
Income From
Numeric; 30 Characters; Mandatory
Specify the minimum income for which this tax slab definition is applicable, for the specified investor category. This slab will apply to incomes that range between the values you specify in this field and the Income To field for the specified investor category.
Income To
Numeric; 30 Characters; Mandatory
Specify the maximum income for which this tax slab definition is applicable, for the specified investor category. This slab will apply to incomes that range between the values you specify in this field and the Income From field, for the specified investor category.
Tax Percent
Numeric; 5 Characters; Mandatory
Enter the Tax Percent that is applicable to the given Investor category in the specified slab. This percentage may be equal to or below one hundred percent, but not greater.
No of Decimals for Tax
Numeric; 1 Character; Mandatory
Indicate the rounding precision or the number of decimals to be applied on the withholding tax amount pertaining to the slab. The decimal portion of the amount will be rounded off or truncated to the number of decimal places you specify here.
3.22.2 Computation of Withholding Tax
Withholding tax is computed for funds for cash dividend corporate action types only. This is applicable for normal UT investments. Dividend tax can be computed based on the source product and With-Holding Tax maintained for the product. For stock dividends, the TDS Basis maintained in Corporate Actions profile is “Tax-exempt”, and the tax is not computed.
For each tax component, the computation currency and payment currency may be specified as two different currencies, so as to enable payment to be made in the desired currency. By default, when you set up a withholding tax record for a fund, investor category and country combination, the computation currency is deemed to be the currency of the country and the payment currency is deemed to be the fund base currency.
3.23 Withholding Tax Setup Summary Screen
This section contains the following topics:
- Section 3.23.1, "Invoking the Witholding Tax Setup Summary Screen"
- Section 3.23.2, "Retrieving Withholding Tax Details Record"
- Section 3.23.3, "Editing Withholding Tax Setup Record"
- Section 3.23.4, "Viewing Withholding Tax Setup Record"
- Section 3.23.5, "Deleting Withholding Tax Setup Record"
- Section 3.23.6, "Authorizing Withholding Tax Setup"
- Section 3.23.7, "Amending Withholding Tax Setup Parameters"
- Section 3.23.8, "Authorizing Amended Withholding Tax Setup Parameters"
- Section 3.23.9, "Copying Attributes"
3.23.1 Invoking the Witholding Tax Setup Summary Screen
After you have set up the WHT details, you must have another user authorize them so that they would be effective in the system.
Before the WHT details are authorized, you can edit them as many times as necessary. You can also delete a WHT record before it is authorized.
After authorization, you can only make changes to WHT details through an amendment.
The With-Holding Tax Find screen can be used for the following operations on WHT details:
- Retrieval for viewing
- Editing unauthorized details
- Disabling unauthorized details if necessary. This is possible during editing or amendment.
- Authorizing details
- Amending authorized details
Invoke the ‘FCIS Withholding Tax Setup Summary’ screen by typing ‘UTSWHTAX’ in the field at the top right corner of the Application tool bar and clicking on the adjoining arrow button.
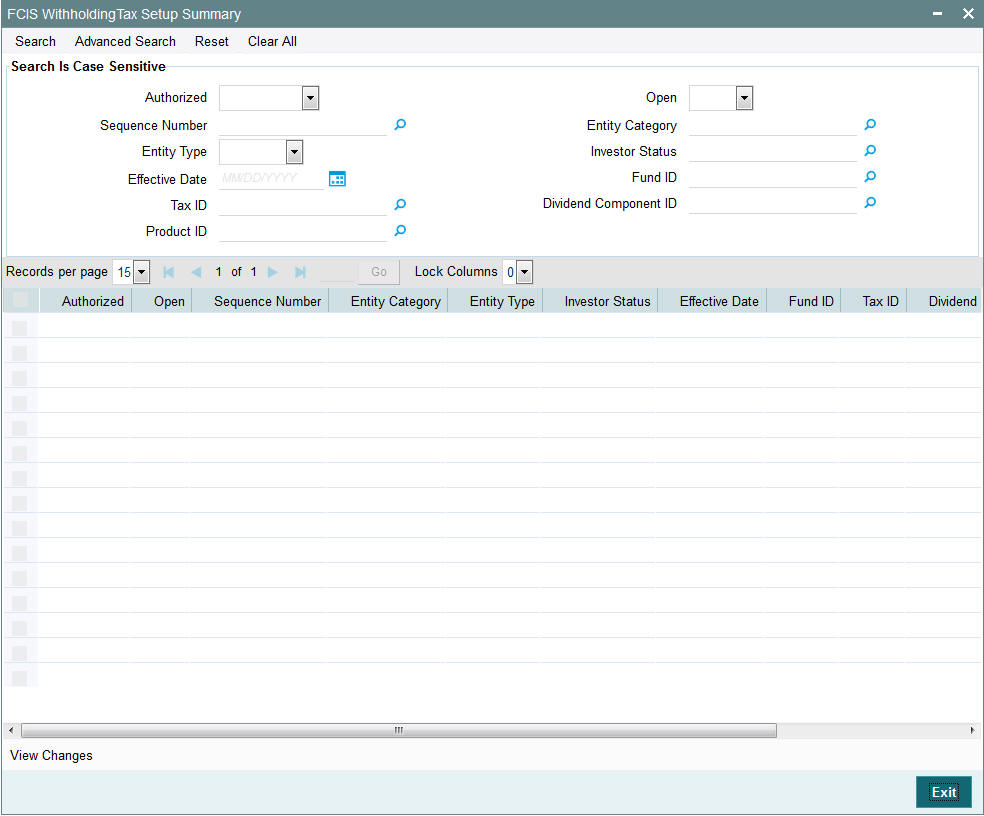
3.23.2 Retrieving Withholding Tax Details Record
You can retrieve a previously entered entity in the Summary screen, as follows:
- Invoke FCIS Withholding Tax Setup Summary screen and specify the
following:
- The status of the entity in the Authorized field. If you choose the “Blank Space” option, then all the entities are retrieved.
- The status of the entity in the Open field. If you choose the “Blank Space” option, then all the entities are retrieved.
- Sequence Number
- Entity Category
- Entity Type
- Investor Status
- Effective Date
- Fund ID
- Tax ID
- Dividend Component ID
- Product ID
- After you have specified the required details, click ‘Search’ button. All records with the specified details are retrieved and displayed in the lower portion of the screen.
Note
You can also retrieve the individual Withholding Tax record from the detail screen by doing query in the following manner:
- Press F7
- Input any Withholding Tax setup parameter
- Press F8
You can perform Edit, Delete, Amend, Authorize, Reverse, Confirm operation by selecting from the Action list.
You can also search the record by using combination of % and alphanumeric value.
3.23.3 Editing Withholding Tax Setup Record
You can modify the details of a withholding tax setup record that you have already entered into the system, provided it has not been subsequently authorized. You can perform this operation as follows:
- Invoke the FCIS Withholding Tax Setup Summary screen from the Browser.
- Select the status of the record that you want to retrieve for modification in the Authorization Status field. You can only modify records of entities that are unauthorized. Accordingly, choose the Unauthorized option from the drop down list.
- Specify any or all of the details of the record in the corresponding fields on the screen to retrieve the withholding tax setup record that is to be modified.
- Click ‘Search’ button. All unauthorized records with the specified details are retrieved and displayed in the lower portion of the screen.
- Double click the record that you want to modify. The FCIS Withholding Tax Setup Maintenance screen is displayed.
- Select Unlock Operation from Action list to modify the record. Modify the necessary information.
- Click Save to save the changes. The FCIS Withholding Tax Maintenance screen is closed and the changes made are reflected in the FCIS Withholding Tax Summary screen.
3.23.4 Viewing Withholding Tax Setup Record
To view a withholding tax setup record that you have previously entered:
- Invoke the FCIS Withholding Tax Setup Summary Screen from the Browser.
- Select the status of the record that you want to retrieve for viewing in the Authorization Status field. You can also view all records that are either unauthorized or authorized only, by choosing the Unauthorized/ Authorized option.
- Specify any or all of the details of the record in the corresponding fields on the screen.
- Click ‘Search’ button. All the records with the specified details are retrieved and displayed in the lower portion of the screen.
- Double click the entity that you want to view. The FCIS Withholding Tax Setup Maintenance screen is opened in view mode.
3.23.5 Deleting Withholding Tax Setup Record
You can delete only unauthorized records in the system. To delete a withholding tax setup record:
- Invoke the FCIS Withholding Tax Setup Summary screen from the Browser.
- Select the status of the record that you want to retrieve for deletion.
- Specify any or all of the details of the Withholding Tax Setup in the corresponding fields on the screen.
- Click ‘Search’ button. All records with the specified details are retrieved and displayed in the lower portion of the screen.
- Double click the record that you want to delete. The FCIS Withholding Tax Setup Maintenance Detail screen is displayed.
- Select Delete operation from the Action list. The system prompts you to confirm the deletion, and the record is deleted physically from the system database.
3.23.6 Authorizing Withholding Tax Setup
An unauthorized withholding tax setup must be authorized in the system for it to be processed. To authorize a record:
- Invoke the FCIS Withholding Tax Setup Summary screen from the Browser.
- Select the status of the record that you want to retrieve for authorization. Typically, choose the Unauthorized option from the drop down list.
- Specify any or all of the details of the record in the corresponding fields on the screen.
- Click ‘Search’ button. All records with the specified details that are pending authorization are retrieved and displayed in the lower portion of the screen.
- Double click the record that you wish to authorize. The FCIS Withholding Tax Setup Maintenance screen displayed. Select Authorize operation from Action.
When the checker authorizes an entity, details of validations, if any, that were overridden by the maker of the transaction during the Save operation, are displayed. If any of these overrides results in an error, the checker must reject the entity.
3.23.7 Amending Withholding Tax Setup Parameters
After a withholding tax setup is authorized, it can be modified using the Unlock operation from Action list. To make changes to an withholding tax setup record after authorization, you must invoke the Unlock operation which is termed as Amend Operation.
- Invoke the FCIS Withholding Tax Setup Summary screen from the Browser.
- Select the status of the record that you wish to retrieve for amendment. You can only amend records of entities that are authorized.
- Specify any or all of the details of the withholding tax setup in the corresponding fields on the screen.
- Click ‘Search’ button. All records with the specified details are retrieved and displayed in the lower portion of the screen.
- Double click the record that you want to amend. The FCIS Withholding Tax Setup Maintenance screen is displayed in Amendment mode.
- Click the Unlock operation from the Action list to amend the tax setup.
- Amend the necessary information. Click the Save button to save the changes.
3.23.8 Authorizing Amended Withholding Tax Setup Parameters
An amended record must be authorized for the amendment to be made effective in the system.
The process of authorization is subsequently the same as that for normal transactions.
3.23.9 Copying Attributes
If you want to create a withholding tax setup having the same attributes of an existing record, you can copy the attributes of an existing tax setup to a new tax setup.
To copy the attributes:
- Retrieve the entity whose attributes the new entity should inherit. You can retrieve the record through the Summary screen or through the F7- F8 operation which is explained in the previous sections of this chapter.
- Click on ‘Copy’ in the Actions list.
- Indicate the ID for the new Entity. You can however change the details of the entity if required.
3.24 UH Dividend Component Override
This section contains the following topic:
3.24.1 Invoking UH Dividend Component Override Screen
You can override the tax rate for an UH- component combination. You can also mention the policy number for which the new tax rate has to be applicable using ‘UH Dividend Component Override’ screen. You can invoke this screen by typing ‘UTDDCTRO’ in the field at the top right corner of the Application tool bar and clicking on the adjoining arrow button.
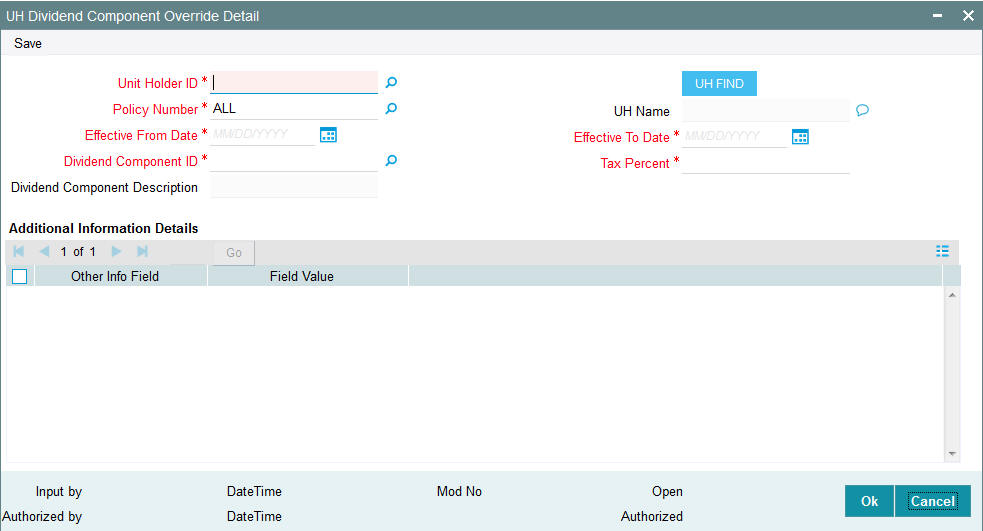
You can specify the following details:
Unit Holder ID
Alphanumeric; 12 Characters; Mandatory
Specify the unit holder for which the new tax rate has to be defined.
You can also query unit holder ID by clicking ‘UH FIND’ button.
UH Name
Display
The system displays the unit holder name for the selected unit holder ID.
Policy Number
Alphanumeric; 16 Characters; Mandatory
Specify the policy number for which the new tax rates to be applied. By default ALL will be selected.
- If the policy number field value is maintained as ‘ALL’ (system default value) then the new tax defined for a Unit holder and component combination with the new dates and rates will be applicable across LEP and UT.
- If the default value in the policy field is maintained as ‘UT’ then the override maintained will be applicable for the UH and component only (applicable for UT alone).
- If you specify the policy number then the new tax defined for a Unit holder and component combination with the new dates and rates will be applicable for the specified policy number alone and will not be applicable for any other fund where the component ID is mapped for a dividend process
Effective From Date
Date Format; Mandatory
Specify effective from date for the tax rate to be applicable.
Effective To Date
Date Format; Mandatory
Specify effective to date for the tax rate to be applicable.
Dividend Component ID
Alphanumeric; 2 Characters; Mandatory
Specify dividend component ID for which the new tax rate has to be defined.
Dividend Component Description
Display
The system displays the description for the selected dividend component ID.
Tax Percent
Numeric; 5 Characters; Mandatory
Specify the tax percent for the slab being defined.
The system will check if there is new tax rate for the UH- component combination and withhold the tax as per the new effective date and rate maintained.
Note
The new tax defined for a Unit holder and component combination with the new dates and rates will be applicable across UT and LEP wherever the component is mapped for the UH.
Additional Information Details
Other Info Field
Display
The system displays the other information.
Field Value
Display
The system displays the field value.
The system will allow 30 add info details along with other operations. For instance, at the ‘Entity Additional Information Mapping (UTDENMAP)’ the entity type will be ‘5’ and description will be ‘Override WHT’.
3.24.1.1 Processing UH Dividend Component Override
The system will check if there is new tax rate for the UH- component combination and withhold the tax as per the new effective date and rate maintained. This maintenance is applicable only during WHT processing.
The new tax defined for a Unit holder and component combination with the new dates and rates will be applicable across UT and LEP wherever the component is mapped for the UH.
If the policy number field value is maintained as ‘ALL’ (system default value) then the new tax defined for a Unit holder and component combination with the new dates and rates will be applicable across LEP and UT.
If the default value in the policy field is maintained as ‘UT’ then the override maintained will be applicable for the UH and component only (applicable for UT alone).
If you specify the policy number, then the new tax defined for a Unit holder and component combination with the new dates and rates will be applicable for the specified policy number alone and will not be applicable for any other fund where the component ID is mapped for a dividend process.
This maintenance will have “additional information” tab where the user can maintain the required additional defined values.
The system will not allow you to maintain a duplicate record for UH-Component and date combination. If new tax rate to be maintained (override the existing override tax rate) then you should amend the record and maintain new tax rate.
If any change to the Tax rate, the maintenance has to be closed and a new maintenance with new tax rate and date should to be maintained.
3.25 Holidays Maintenance
This section contains the following topics:
3.25.1 Invoking the Holiday Maintenance Detail Screen
You must define the weekly holidays and yearly holidays in the holiday calendar for each year.
Different AMCs’ could have different holiday calendars. Further, for funds floated by a single AMC across different locations, the holiday calendar for specific funds could be different from the AMC holiday calendar. You may, therefore, need to designate holiday calendars separately for the following entities:
- System
- AMC
- Fund
- Currencies
In the system, you designate holidays for any of the above, in the Holiday Maintenance screen. You must first designate the System Calendar, before you designate the other calendars. The system calendar, once designated, is taken to be the default AMC and fund calendar. You can make appropriate changes, if necessary, for each.
Invoke the ‘Holiday Maintenance Detail’ screen by typing ‘UTDHOLID’ in the field at the top right corner of the Application tool bar and clicking on the adjoining arrow button.
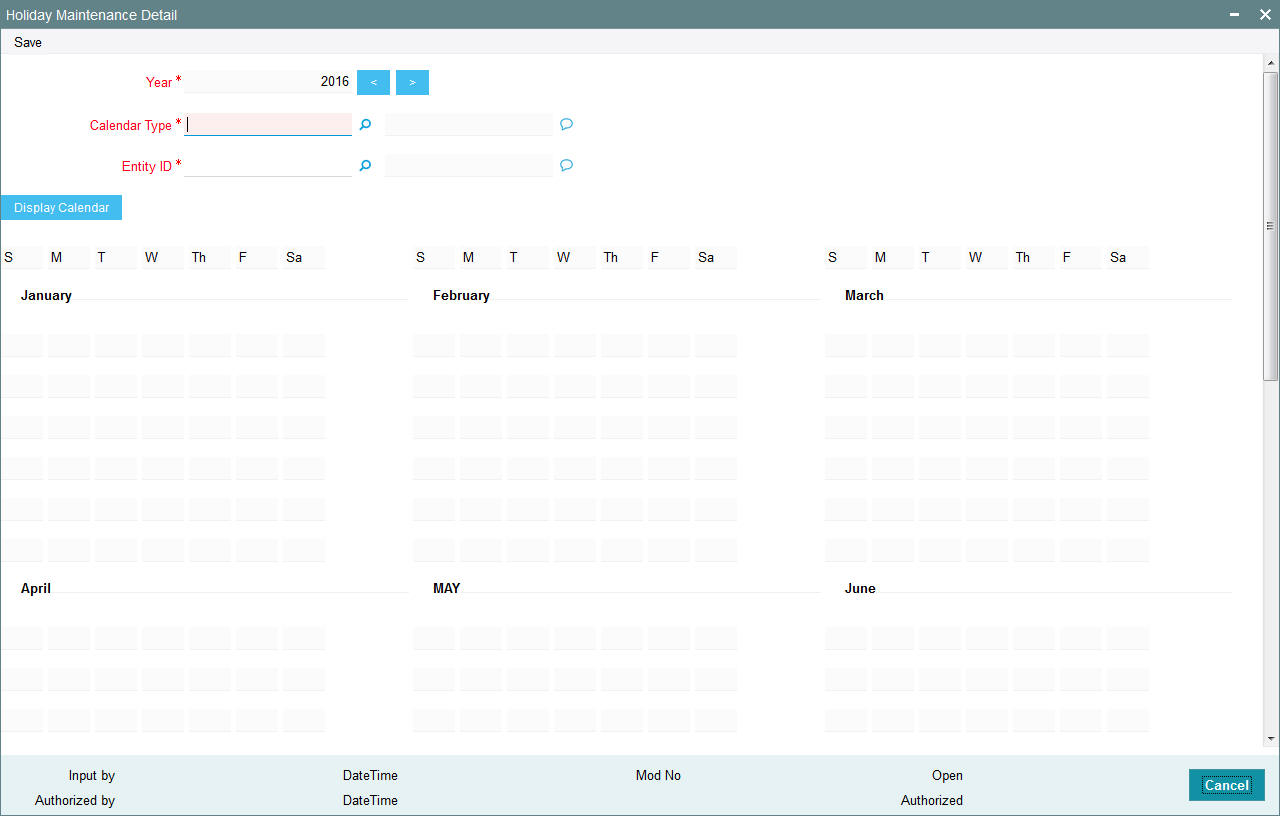
Year
Numeric; 4 Characters; Mandatory
The system displays the year. However, you can change the calendar year after specifying the calendar type and entity ID.
Calendar Type
Alphanumeric; 1 Character; Mandatory
Specify the calendar type. The system displays the description in the adjoining field.
Entity ID
Alphanumeric; 12 Character; Mandatory
Specify the entity ID. The system displays the description in the adjoining field.
You can use this screen to:
- View the system holiday calendar for the year
- Designate the system holiday calendar for future years
- Designate a holiday calendar for either an AMC, or a fund, or a currency, or for all, for the year
- Add to the holiday list in the AMC, fund and / or currency calendar
- Make a previously designated holiday a working day in any or all of the calendars
On opening this screen, by default the system holiday calendar for the current year, which was set up at the time of installation, with the designated holiday dates checked off against their respective boxes in each month. You can use the Previous and Next links to navigate between years.
Select the day in the calendar and check the box alongside the date to add it to the list of Holidays. Select the day from the list of holidays and uncheck the box alongside it to remove it from the list of Holidays.
Click ‘Ok’ button to save your changes. The changes must be authorized by another user to be effective in the system.
To maintain an AMC holiday calendar, specify ‘AMC’ in the Calendar Type field, and select the AMC for which the calendar is being maintained, in the AMC field. Similarly, to maintain a fund holiday calendar, specify ‘Fund’ in the Calendar Type field, and select the fund for which the calendar is being maintained, in the Fund ID field, and the ISIN Code for the fund in the Fund ISIN field.
To maintain a currency holiday calendar, select the ‘Currency’ option in the Calendar Type field, and select the currency for which the calendar is being maintained in the Currency Code field.
3.25.1.1 Guidelines for Holiday Calendars
- The main system calendar must be maintained as mandatory reference information, before the AMC and fund calendars can be maintained.
- A separate AMC calendar can only be maintained if the system calendar has already been maintained, and a separate fund calendar can only be maintained if both the AMC and system calendars have already been maintained.
- The system calendar, once maintained, is replicated to be the AMC calendar as well as the fund calendar for all funds of the AMC. If separate calendars are required for the AMC and for a specific fund, these can be maintained after the system calendar is maintained. Therefore, maintaining the AMC and fund calendars is optional.
- If separate calendars are maintained, a day can be designated a working day in the AMC calendar only if it is also a working day in the system calendar. A day can be designated a working day in the fund calendar only if it is also a working day in both the AMC as well as system calendars.
- If a working date in the system calendar is set as a holiday, it takes effect after authorization of the record.
- When a fund calendar is maintained, the rule effective date of the fund cannot be designated as a holiday. Similarly, when the AMC calendar is maintained, the rule effective date of any of the funds of the AMC cannot be designated as a holiday.
- If a working day in the system calendar is subsequently designated a system holiday, it must be a holiday in the AMC and fund calendars too, if they have been maintained.
- The weekend options maintained at the time of installation (i.e., for the system) are reckoned by default to be the weekend options for the AMC calendar; however, you can alter these options when you set up the AMC calendar. Similarly, the AMC calendar weekend options are taken as default options for the fund calendar, and you can alter them when you set up the fund calendar.
- The current system date cannot be set as a holiday.
3.25.1.2 Effect of Defining Holiday Calendars
The effect of setting up holiday calendars in the system is discussed below, for all maintenance or transaction input operation:
Fund Rules
Fund Demographics
The Start Date and Rule Effective Dates for a fund must be working days for the AMC or in the system calendar.
General Operating Rules
The Next Price Date and Maturity Date must be a working day in the system calendar and AMC calendar (if maintained) and the fund calendar (if maintained).
For limit order processing, the ‘prior’ or ‘after’ rule may be specified.
Corporate Actions
The First Dividend Declare Date must be a working day in the system calendar and AMC calendar (if maintained) and the fund calendar (if maintained).
Amendment of Fund Rules
The new (amended) Rule Effective Date for the fund must be a working day in the system calendar and AMC calendar (if maintained) and the fund calendar (if maintained).
Fund Price
The prices for a fund cannot be entered into the system for a holiday in the system calendar or AMC calendar (if maintained) and the fund calendar (if maintained). If fund prices are being uploaded through bulk upload process, the fund calendar is used to arrive at the Next Price Date.
Fund Dividend Maintenance
Dividend maintenance for the fund can be done only on working days in the system calendar, AMC calendar (if maintained) and the fund calendar (if maintained).
Also, the Freeze Holdings Date and Ex-Dividend NAV Date must also be working days for the system, AMC (if maintained) and the fund (if maintained).
Specifying transaction sign off on a working day
On a working day for the fund, you can signal the end of transaction input on an ad-hoc basis, if necessary. The transaction date of any transaction that is entered after the sign off status has been marked for the day, will be defaulted to the next working day according to the fund calendar (if maintained) or AMC calendar (if maintained) or the system calendar.
3.26 Holiday Maintenance Summary Screen
This section contains the following topics:
- Section 3.26.1, "Invoking the Holiday Maintenance Summary Screen"
- Section 3.26.2, "Retrieving Holiday List"
- Section 3.26.3, "Editing Holiday Maintenance Record"
- Section 3.26.4, "Viewing Holiday Maintenance Record"
- Section 3.26.5, "Deleting Holiday Maintenance Record"
- Section 3.26.6, "Authorizing Holidays"
- Section 3.26.7, "Amending Holiday Records"
- Section 3.26.8, "Authorizing Amended Holiday Records"
3.26.1 Invoking the Holiday Maintenance Summary Screen
After you have set up the list of designated system holidays in the Holiday Maintenance Detail screen, you must have another user authorize the list.
Before the holiday list is authorized, you can edit it as many times as necessary. You can also delete a holiday list before it is authorized.
After authorization, you can make changes to the holiday list through an amendment.
The ‘Holiday Maintenance Summary’ screen can be used for the following operations on holiday lists:
- Retrieval for viewing.
- Editing an unauthorized list.
- Deleting an unauthorized list.
- Authorizing a list.
- Amending an authorized list.
You can invoke the ‘Holiday Maintenance Summary’ screen by typing ‘UTSHOLID’ in the field at the top right corner of the Application tool bar and clicking on the adjoining arrow button.
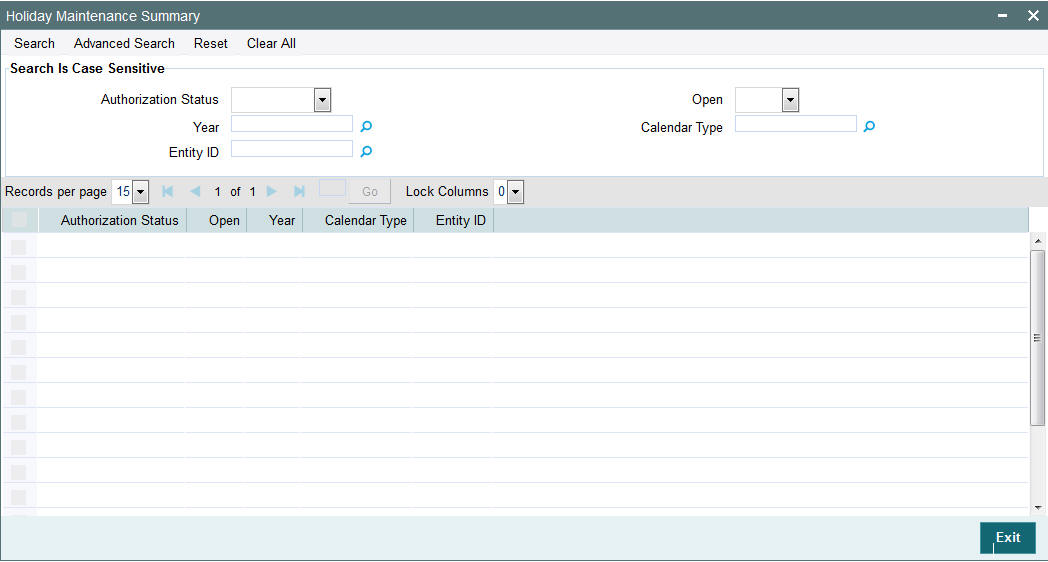
3.26.2 Retrieving Holiday List
You can retrieve a previously entered holiday in the Summary screen, as follows:
- Invoke the Holiday Maintenance Summary screen and specify the following
:
- The status of the record in the Authorized field. If you choose the “Blank Space” option, then all the records are retrieved.
- The status of the entity in the Open field. If you choose the “Blank Space” option, then all the records are retrieved.
- Year
- Calendar Type
- Entity ID
- After you have specified the required details, click ‘Search’ button. All the records with the specified details are retrieved and displayed in the lower portion of the screen.
Note
You can also retrieve an individual record detail from the Detail screen by doing query in the following manner:-
- Press F7
- Input the Entity ID
- Press F8
You can perform Edit, Delete, Amend, Authorize, Reverse, Confirm operation by selecting from the Action list.
You can also search the record by using combination of % and alphanumeric value.
For example, you can search the record for Entity ID by using the combination of % and alphanumeric value as follows:-
- Search by D%:- System will fetch all the records whose Entity ID starts from Alphabet ‘M’. For example, Direct.
- Search by %7:- System will fetch all the records whose Entity ID Type ends by numeric value’ 7’. For example, AGENT7.
- Search by %17%:- System will fetch all the records whose Entity ID contains the numeric value 17. For example, AGEN17.
3.26.3 Editing Holiday Maintenance Record
You can modify the details of a holiday that you have already entered into the system, provided it has not been subsequently authorized. You can perform this operation as follows:
- Invoke the Holiday Maintenance Summary screen from the Browser.
- Select the status of the holiday maintenance record that you want to retrieve for modification in the Authorized field. You can only modify records of holidays that are unauthorized. Accordingly, choose the Unauthorized option from the drop down list.
- Specify any or all of the parameters of the holiday in the corresponding fields on the screen to retrieve the record that is to be modified.
- Click ‘Search’ button. All unauthorized records with the specified details are retrieved and displayed in the lower portion of the screen.
- Double click the record that you want to modify. The Holiday Maintenance screen is displayed.
- Select Unlock Operation from Action list to modify the record. Modify the necessary information.
- Click Save to save the changes. The Holiday Maintenance screen is closed and the changes made are reflected in the Holiday Summary screen.
3.26.4 Viewing Holiday Maintenance Record
To view a holiday record that you have previously entered:
- Invoke the Holiday Maintenance Summary Screen from the Browser.
- Select the status of the record that you want to retrieve for viewing in the Authorization Status field. You can also view all entities that are either unauthorized or authorized only, by choosing the Unauthorized/ Authorized option.
- Specify any or all of the parameters of the holiday in the corresponding fields on the screen.
- Click ‘Search’ button. All records with the specified details are retrieved and displayed in the lower portion of the screen.
- Double click the record that you want to view. The Holiday Maintenance screen is opened in view mode.
3.26.5 Deleting Holiday Maintenance Record
You can delete only unauthorized records in the system. To delete an holiday record:
- Invoke the Holiday Maintenance Summary screen from the Browser.
- Select the status of the record that you want to retrieve for deletion.
- Specify any or all of the parameters of the holiday in the corresponding fields on the screen.
- Click ‘Search’ button. All records with the specified details are retrieved and displayed in the lower portion of the screen.
- Double click the record that you want to delete. The Holiday Maintenance Detail screen is displayed.
- Select Delete operation from the Action list. The system prompts you to confirm the deletion, and the record is deleted physically from the system database.
3.26.6 Authorizing Holidays
An unauthorized holiday must be authorized in the system for it to be come into effect. To authorize a holiday:
- Invoke the Holiday Maintenance Summary screen from the Browser.
- Select the status of the holiday record that you want to retrieve for authorization. Typically, choose the Unauthorized option from the drop down list.
- Specify any or all of the parameters of the holiday in the corresponding fields on the screen.
- Click ‘Search’ button. All records with the specified details that are pending authorization are retrieved and displayed in the lower portion of the screen.
- Double click the record that you wish to authorize. The Holiday Maintenance screen displayed. Select Authorize operation from Action.
When the checker authorizes an entity, details of validations, if any, that were overridden by the maker of the transaction during the Save operation, are displayed. If any of these overrides results in an error, the checker must reject the holiday record.
3.26.7 Amending Holiday Records
After a holiday record is authorized, it can be modified using the Unlock operation from Action list. To make changes to an entity after authorization, you must invoke the Unlock operation which is termed as Amend Operation.
- Invoke the Holiday Maintenance Summary screen from the Browser.
- Select the status of the record that you wish to retrieve for amendment. You can only amend records of entities that are authorized.
- Specify any or all of the parameters of the holiday in the corresponding fields on the screen.
- Click ‘Search’ button. All records with the specified details are retrieved and displayed in the lower portion of the screen.
- Double click the record that you want to amend. The Holiday Maintenance screen is displayed in Amendment mode.
- Click the Unlock operation from the Action list to amend the entity.
- Amend the necessary information. Click the Save button to save the changes.
3.26.8 Authorizing Amended Holiday Records
An amended holiday record must be authorized for the amendment to be made effective in the system.
The process of authorization is subsequently the same as that for normal transactions.
3.27 Emergency Holiday Maintenance
This section contains the following topics:
3.27.1 Invoking Emergency Holiday Maintenance Screen
A typhoon is a mature tropical cyclone that develops in the western part of the North Pacific Ocean. It comes as a warning in typically mid day and depending on the severity, a holiday can be declared on the same day thereby necessitating the need to postpone the operations/processing activities to next business day.
A normal business day declared as a non-business day or Typhoon day when there is a typhoon incident happened on that day. In view of this, there is a requirement on the contingency procedures on the external system to handle the Typhoon day activities. The system should treat all transactions fall under that typhoon date as non-business date and automatically move the unprocessed activities to next business date.
All un-allotted transactions fall under such emergency holiday will be treated as non-business date transactions and automatically move the transaction attributes to next business date.
On emergency holiday, you can move the transaction date, price date, settlement date and other attributes of un-allotted transactions to next applicable day. Also system will complete other pending activities and move the calendar to be followed for each date fields in the new date derivation as follows:
Date Type |
Calendar to be considered |
Transaction Date |
Fund |
Price Date |
Fund/ Maintenance at Specific Fund Price |
Dealing Date |
Fund |
FX Deal Date |
Currency |
FX Value Date |
Currency |
Settlement Due Date |
Currency |
Payment Date |
System |
You can maintain current business day as emergency holiday using ‘Emergency Holiday Maintenance’ screen. You can invoke this screen by typing ‘UTDEMHOL’ in the field at the top right corner of the Application tool bar and clicking on the adjoining arrow button.

You can specify the following details:
Emergency Maintenance
Emergency Date
Display
The system defaults the system date.
Entity Type
Mandatory
Select the level of emergency holiday declaration from the drop-down list. The list displays the following values:
- System - If you select ‘Entity Type’ as ‘System’ then the entity ID always will be System
- Fund - If you select ‘Entity Type’ as ‘Fund’, then the entity ID will fetch the Funds that need to be marked as emergency holiday
- AMC - If you select ‘Entity Type’ as ‘AMC’, then the entity ID will fetch the AMC list that need to be marked as emergency holiday. All the funds linked to that AMC will be considered as emergency holiday maintained on that day
- Fund Country - If you select ‘Entity Type’ as ‘Fund Country’ then the entity ID will fetch the Country list that need to be marked as emergency holiday. This will declare emergency holiday for all the funds which are mapped to the mentioned country
- Currency - If you select ‘Entity Type’ as ‘Currency’ then the entity ID will fetch the available currency list that need to be marked as emergency holiday on that day.
Entity ID
Alphanumeric; 12 Characters; Mandatory
Specify the entity ID corresponding to the Entity type selected. Alternatively, you can select entity ID from the option list. The list displays entity ID corresponding to the entity type selected.
Alert Received Time(HH24:MI)
Time Format; Mandatory
Specify the time when the alert is received. You need to maintain the time in HH24:MI format.
Copy Exchange Rate
Optional
Select if the exchange rate should be copied or not from the drop-down list. The list displays the following values:
- Yes
- No
If you select ‘Yes’, and if exchange rate is not maintained for any of the currency pair, the system will copy the latest exchange rate maintained to current date.
Note
In case of continuous emergency holiday, you need to maintain current day as emergency holiday. If subsequent dates are also declared as emergency holiday, then the system declares those days as system holiday using Holiday Maintenance.
The system will allow you to maintain the emergency holiday only once for the following combination:
- Emergency Date
- Entity Type
- Entity ID
If you have declared SYSTEM level emergency holiday for a particular day then the system will not allow you to maintain other level of emergency day for the same day. The system will display an error message as “Emergency holiday already maintained for current day with entity ID as SYSTEM”.
For instance, if you declare emergency holiday on 05-MAY-2017 for the fund FUNDA against fund level. You maintain another emergency holiday on 05-MAY-2017 for AMC/ Fund Country level. This AMC/ Fund Country also includes FUNDA. In this case, the system will not raise error message for duplicate record for the fund ID ‘FUNDA’.
On Authorization, the funds which are linked to the entity type and entity ID will be marked as emergency holiday for the entity types other than SYSTEM and Currency.
If you have maintained calendar in Holiday Maintenance (UTDHOLID) screen and maintain emergency holiday for an entity type, then the system will display corresponding day in different colour to indicate that emergency holiday has been declared on that particular day.
Note
This screen supports Interface Upload for IF20170750000001.
3.28 Emergency Holiday Maintenance Summary
This section contains the following topics:
- Section 3.28.1, "Retrieving a Record in Emergency Holiday Maintenance Summary Screen"
- Section 3.28.2, "Editing Emergency Holiday Record"
- Section 3.28.3, "Viewing Emergency Holiday Record "
- Section 3.28.4, "Deleting Emergency Holiday Record"
- Section 3.28.5, "Authorizing Emergency Holiday Record "
3.28.1 Retrieving a Record in Emergency Holiday Maintenance Summary Screen
You can retrieve a previously entered record in the Summary Screen, as follows:
You can invoke ‘Emergency Holiday Maintenance Summary’ screen by typing ‘UTSEMHOL’ in the field at the top right corner of the Application tool bar and clicking on the adjoining arrow button and specify any or all of the following details in the corresponding details.
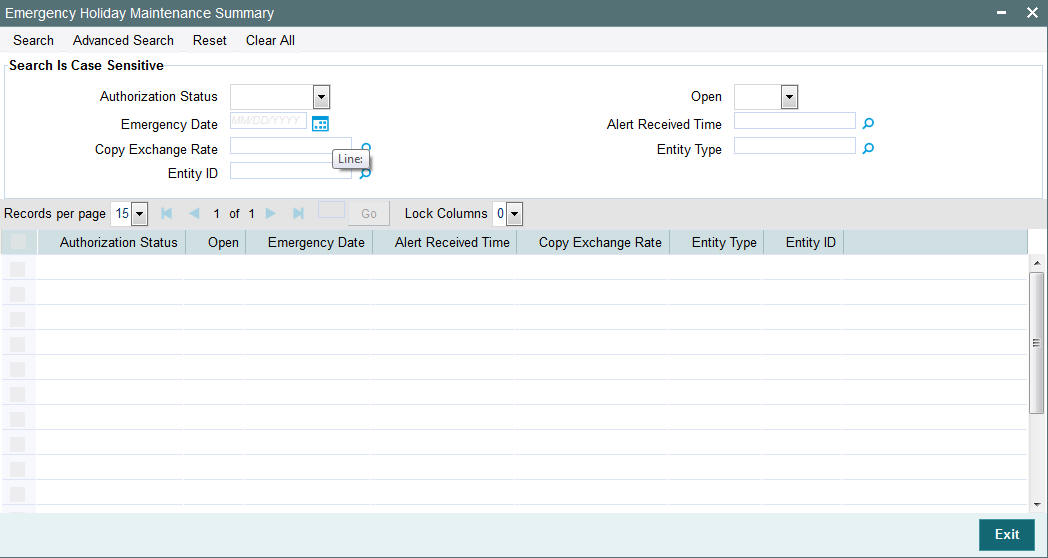
- The status of the record in the Authorization Status field. If you choose the ‘Blank Space’ option, then all the records are retrieved.
- The status of the record in the Open field. If you choose the ‘Blank Space’ option, then all records are retrieved
- Emergency Date
- Alert Received Time
- Copy Exchange Rate
- Entity Type
- Entity ID
Click ‘Search’ button to view the records. All the records with the specified details are retrieved and displayed in the lower portion of the screen.
Note
You can also retrieve the individual record detail from the detail screen by querying in the following manner:
- Press F7
- Input the Entity ID
- Press F8
You can perform Edit, Delete, Amend, Authorize, Reverse, Confirm operations by selecting the operation from the Action list. You can also search a record by using a combination of % and alphanumeric value.
Note
The status field in the Records pane of the summary screen displays the bulk operation results.
3.28.2 Editing Emergency Holiday Record
You can modify the details of Emergency Holiday record that you have already entered into the system, provided it has not subsequently authorized. You can perform this operation as follows:
- Invoke the Emergency Holiday Maintenance Summary screen from the Browser.
- Select the status of the record that you want to retrieve for modification in the Authorization Status field. You can only modify records that are unauthorized. Accordingly, choose the Unauthorized option.
- Specify any or all of the details in the corresponding fields to retrieve the record that is to be modified.
- Click ‘Search’ button. All unauthorized records with the specified details are retrieved and displayed in the lower portion of the screen.
- Double click the record that you want to modify in the list of displayed records. The Emergency Holiday Maintenance Detail screen is displayed.
- Select Unlock Operation from the Action list to modify the record. Modify the necessary information.
Click Save to save your changes. The Emergency Holiday Maintenance Detail screen is closed and the changes made are reflected in the Emergency Holiday Maintenance Summary screen.
3.28.3 Viewing Emergency Holiday Record
To view a record that you have previously input, you must retrieve the same in the Emergency Holiday Maintenance Summary screen as follows:
- Invoke the Emergency Holiday Maintenance Summary screen from the Browser.
- Select the status of the record that you want to retrieve for viewing in the Authorization Status field. You can also view all records that are either unauthorized or authorized only, by choosing the unauthorized / Authorized option.
- Specify any or all of the details of the record in the corresponding fields on the screen.
- Click ‘Search’ button. All records with the specified fields are retrieved and displayed in the lower portion of the screen.
- Double click the record that you want to view in the list of displayed records. The Emergency Holiday Maintenance Detail screen is displayed in View mode.
3.28.4 Deleting Emergency Holiday Record
You can delete only unauthorized records in the system. To delete a record that you have previously entered:
- Invoke the Emergency Holiday Maintenance Summary screen from the Browser.
- Select the status of the record that you want to retrieve for deletion.
- Specify any or all of the details in the corresponding fields on the screen.
- Click ‘Search’ button. All records with the specified fields are retrieved and displayed in the lower portion of the screen.
- Double click the record that you want to delete in the list of displayed records. The Emergency Holiday Maintenance Detail screen is displayed.
- Select Delete Operation from the Action list. The system prompts you to confirm the deletion and the record is physically deleted from the system database.
3.28.5 Authorizing Emergency Holiday Record
- An unauthorized Emergency Holiday record must be authorized in the system for it to be processed. To authorize a record:
- Invoke the Emergency Holiday Maintenance Summary screen from the Browser.
- Select the status of the record that you want to retrieve for authorization. Typically, choose the unauthorized option.
- Specify any or all of the details in the corresponding fields on the screen.
- Click ‘Search’ button. All records with the specified details that are pending authorization are retrieved and displayed in the lower portion of the screen.
- Double click the record that you wish to authorize. The Emergency Holiday Maintenance Detail screen is displayed. Select Authorize operation from the Action List.
When a checker authorizes a record, details of validation, if any, that were overridden by the maker of the record during the Save operation are displayed. If any of these overrides results in an error, the checker must reject the record.
After authorization of emergency holiday maintenance, transactions captured in the system will be moved to next business date.
3.29 Emergency Holiday Transaction Processing
This section contains the following topics:
- Section 3.29.1, "Processing Emergency Holiday Transaction"
- Section 3.29.2, "Invoking Emergency Holiday Transaction Processing Screen"
- Section 3.29.3, "Processing Emergency Day"
3.29.1 Processing Emergency Holiday Transaction
If there are any changes in price date, dealing date or settlement date of previously captured transactions due to emergency holiday those transactions will be logged by the system during Mini EOD. You need to review and confirm all transactions to proceed with EOD. The transactions logged during mini EOD process will be populated based on the criteria.
If any of the listed transaction to be excluded, you can manually remove the same before saving. Based on the action selected, system will either confirm the date changes or ignore these transactions. On save, the system will generate a reference number for this batch update.
You should review all the applicable transactions to proceed with emergency day EOD. The system will perform mandatory pre-EOD check to show the transactions which are not reviewed for date change.
You can use ‘Emergency Day Transaction Processing’ to review or modify transactions having price date, settlement date, and dealing Date as current date or future date. For un-allotted transactions, the system will update transaction date, price date, settlement date and dealing date. For unsettled allotted transactions, the system will update settlement date and payment date.
Note
When we query for emergency holiday transaction, the system will display the emergency holidays in different color (blue color) to differentiate emergency holiday with the normal holidays.
3.29.2 Invoking Emergency Holiday Transaction Processing Screen
You can process emergency holiday transaction using ‘Emergency Holiday Transaction Processing’ screen. You can invoke this screen by typing ‘UTDEMPRC’ in the field at the top right corner of the Application tool bar and clicking on the adjoining arrow button.
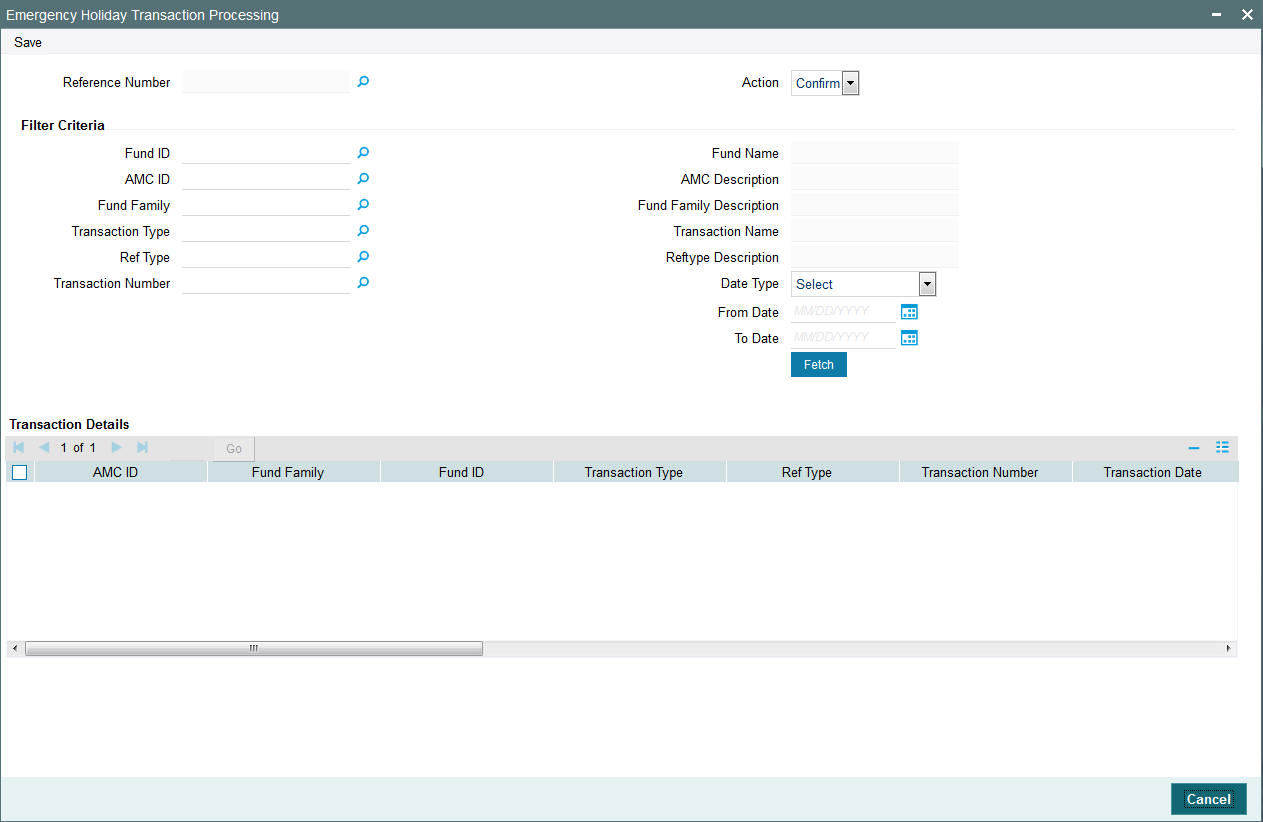
You can specify the following details:
Reference Number
Display
The system generates the reference number during save.
This field is applicable only for Query option.
Action
Optional
Select the action required for processing emergency holiday from the drop-down list. the list displays the following values:
- Confirm - select this option to confirm the processing of emergency holiday
- Ignore - select this option to ignore the processing of emergency holiday
Filter Criteria
Fund ID
Alphanumeric; 6 Characters; Optional
Specify the fund ID. Alternatively, you can select fund ID from the option list. The list displays the valid fund ID from the option list.
Fund Name
Display
The system displays the fund name based on the fund name selected.
AMC ID
Alphanumeric; 6 Characters; Optional
Specify the AMC ID. Alternatively, you can select AMC ID from the option list. The list displays the valid AMC ID from the option list.
AMC Description
Display
The system displays the description for the selected AMC ID.
Fund Family
Alphanumeric; 6 Characters; Optional
Specify the fund family. Alternatively, you can select fund family from the option list. The list displays the valid fund family from the option list.
Fund Family Description
Display
The system displays the description for the selected fund family.
Transaction Type
Alphanumeric; 2 Characters; Optional
Specify the transaction type. Alternatively, you can select transaction type from the option list. The list displays the valid transaction type from the option list.
Transaction Name
Display
The system displays the name of the selected transaction type.
Ref Type
Alphanumeric; 2 Characters; Optional
Specify the reference type. Alternatively, you can select reference type from the option list. The list displays the valid reference type from the option list.
Reftype Description
Display
The system displays the description for the selected reference type.
Transaction Number
Alphanumeric; 16 Characters; Optional
Specify the transaction number. Alternatively, you can select transaction number from the option list. The list displays the valid transaction number from the option list.
Date Type
Optional
Select the date type from the drop-down list. The list displays the following values
- Transaction Date
- Price Date
- Settlement Due Date
- Dealing Date
- Payment Date
From Date
Date Format; Optional
Select the from date from the adjoining calendar.
To Date
Date Format; Optional
Select the to date from the adjoining calendar.
Transaction Details
Clicking ‘Fetch’ button, the system displays the following values:
- AMC ID
- Fund Family
- Fund ID
- Transaction Type
- Ref Type
- Transaction Number
- Transaction Date
- New Transaction Date
- Price Date
- New Price Date
- Settlement Due Date
- New Settlement Due Date
- Dealing Date
- New Dealing Date
- Payment Date
- New Payment Date
For all un-allotted transactions which are having transaction date as emergency holiday date, the system will update the following attributes:
- Transaction Date
- Settlement due date
- Payment Date
- Price Date
- Dealing Date
- FX Deal date
- FX Value Date
For unsettled allotted transactions, the system will update the payment date and settlement due date.
Example: [Assuming all transactions are un-allotted]
The transaction attributes will be as follows:
Consider the following setup:
Current day: 05th July
|
Transaction Type |
Holiday |
Settlement |
Price Date |
Fund A |
SUB |
9,10 |
T+2 |
T+1 |
Fund A |
RED |
9,10 |
T+2 |
T+1 |
Fund A |
Transfer |
9,10 |
T+0 |
T+0 |
Fund B |
SUB |
6 |
T+0 |
T+0 |
Fund B |
RED |
6 |
T+2 |
T+0 |
Consider the following transactions have been identified as impacted by the emergency holiday:
Fund |
Transaction type |
Transaction Date |
Settlement Due Date |
Payment Date |
Fund A |
Subscription |
5-Jul |
7-Jul |
7-Jul |
Fund B |
Subscription |
5-Jul |
5-Jul |
5-Jul |
Fund A |
Redemption |
4-Jul |
6-Jul |
6-Jul |
Fund B |
Redemption |
1-Jul |
5-Jul |
5-Jul |
Fund B |
Redemption |
4-Jul |
7-Jul |
7-Jul |
Fund B |
Switch out |
4-Jul |
7-Jul |
7-Jul |
Fund B |
Switch In |
7-Jul |
7-Jul |
7-Jul |
Fund B |
RSP (system generated) |
5-Jul |
5-Jul |
5-Jul |
Fund A |
Target Yield Switch Out (system generated) |
4-Jul |
6-Jul |
6-Jul |
Fund B |
Reinvestments (system generated) |
8-Jul |
8-Jul |
8-Jul |
Fund A |
Dividend payment (system generated) |
NA |
8-Jul |
8-Jul |
Fund B |
Dividend payment (system generated) |
NA |
5-Jul |
5-Jul |
Post executing the emergency holiday process, the attributes will be as follows:
Settlement Due Date |
Paid Date |
Transaction Date |
Fund |
Transaction type |
New Transaction date |
New Price Date |
New Settlement Due date |
|
New Payment Date |
7-Jul |
7-Jul |
5-Jul |
Fund A |
Subscription |
6-Jul |
7-Jul |
8-Jul |
|
8-Jul |
5-Jul |
5-Jul |
5-Jul |
Fund B |
Subscription |
7-Jul |
7-Jul |
7-Jul |
|
7-Jul |
6-Jul |
6-Jul |
4-Jul |
Fund A |
Redemption |
Unchanged |
6-Jul |
7-Jul |
|
7-Jul |
5-Jul |
5-Jul |
1-Jul |
Fund B |
Redemption |
Unchanged |
Unchanged |
7-Jul |
|
7-Jul |
7-Jul |
7-Jul |
4-Jul |
Fund B |
Redemption |
Unchanged |
Unchanged |
8-Jul |
|
8-Jul |
7-Jul |
7-Jul |
4-Jul |
Fund B |
Switch out |
Unchanged |
unchanged |
8-Jul |
|
8-Jul |
7-Jul |
7-Jul |
7-Jul |
Fund B |
Switch In |
8-Jul |
8-Jul |
8-Jul |
|
8-Jul |
5-Jul |
5-Jul |
5-Jul |
Fund B |
RSP (system generated) |
7-Jul |
7-Jul |
7-Jul |
|
7-Jul |
6-Jul |
6-Jul |
4-Jul |
Fund A |
Target Yield Switch out(system generated) |
4-Jul |
6-Jul |
7-Jul |
|
7-Jul |
8-Jul |
8-Jul |
8-Jul |
Fund B |
Reinvestments (system generated) |
unchanged |
unchanged |
unchanged |
|
unchanged |
8-Jul |
8-Jul |
NA |
Fund A |
Dividend (system generated) |
NA |
NA |
Unchanged |
|
Unchanged |
5-Jul |
5-Jul |
NA |
Fund B |
Dividend (system generated) |
NA |
NA |
7-Jul |
|
7-Jul |
If there is a weekly price fund C for which the transaction cut off is 5th July for pricing on 8th, the system will consider only transactions captured till 4th July in this cycle (for pricing on 8th)
The system will move all transactions captured on 5th July to the next pricing cycle, i.e.,15th July.
3.29.3 Processing Emergency Day
The existing date attribute changes will be impacted only if the emergency holiday has been declared for the particular fund if emergency day has been declared other than SYSTEM and Currency. It can be either fund level or AMC level or Fund Country level.
The impacted UT transactions are as follows:
- All un-allotted transactions with transaction date as emergency holiday
date, the system will update the following attributes:
- Transaction Date
- Settlement due date
- Payment Date
- Price Date
- Dealing Date
- FX Deal date
- FX Value Date
- For unsettled allotted transactions, the system will update confirmation date, payment date and settlement due date.
Note
If the settlement due date is greater than or equal to derived date then the settlement due date will not be impacted.
Currency level emergency holiday will impact the Settlement Due Date/ Settlement Date derivation for all the unsettled allotted transactions.
The system changes the date attribute accordingly for the following scenarios:
Settlement Due Date Example
Fund level parameters
Fund ID |
Payment Lag |
Payment Lag Basis |
FUND1 |
2 |
Fund Calendar |
FUND2 |
2 |
Currency Calendar |
The following examples shows that the settlement due date impact on different entity type of emergency level holidays for the above fund level setup:
Fund ID |
Transaction Date |
Settlement Due Date |
Emergency Day |
Emergency Level |
New Settlement Due Date |
FUND1 |
2-May-17 |
4-May-17 |
3-May-17 |
Fund |
5-May-17 |
FUND1 |
2-May-17 |
4-May-17 |
3-May-17 |
Currency |
4-May-17 |
FUND2 |
2-May-17 |
4-May-17 |
3-May-17 |
Fund |
4-May-17 |
FUND2 |
2-May-17 |
4-May-17 |
3-May-17 |
Currency |
5-May-17 |
FUND1 |
2-May-17 |
4-May-17 |
4-May-17 |
Fund |
5-May-17 |
FUND1 |
2-May-17 |
4-May-17 |
4-May-17 |
Currency |
5-May-17 |
FUND2 |
2-May-17 |
4-May-17 |
4-May-17 |
Fund |
5-May-17 |
FUND2 |
2-May-17 |
4-May-17 |
4-May-17 |
Currency |
5-May-17 |
Payment Date Example
Fund level parameters
Fund ID |
Transaction Type |
Allocation Lag |
FUND3 |
3 |
1 |
The following examples shows that the payment date impact on different entity type of emergency level holidays for the above fund level setup:
Fund ID |
Transaction Date |
Payment Date |
Emergency Day |
Emergency Level |
New Payment Date |
FUND3 |
2-May-17 |
3-May-17 |
3-May-17 |
Fund |
4-May-17 |
FUND3 |
2-May-17 |
3-May-17 |
3-May-17 |
Currency |
3-May-17 |
FUND3 |
2-May-17 |
3-May-17 |
3-May-17 |
System |
4-May-17 |
Confirmation Date Example
When fund is made emergency holiday then the system will confirm the next fund working date after the (allocation date + confirmation lag)
Fund level parameters
Fund ID |
Confirmation Lag |
FUND3 |
2 |
The following example shows that the confirmation date impact on different entity type of emergency level holidays for the above fund level setup:
Fund ID |
Transaction Date |
Allocation Date |
Actual Confirmation Date |
Emergency Day |
Emergency Level |
Revised Confirmation Date |
FUND3 |
2-May-17 |
3-May-17 |
5-May-17 |
4-May-17 |
Fund |
5-May-17 |
FUND3 |
2-May-17 |
3-May-17 |
5-May-17 |
4-May-17 |
Currency |
5-May-17 |
FUND3 |
2-May-17 |
3-May-17 |
5-May-17 |
4-May-17 |
System |
5-May-17 |
FUND3 |
2-May-17 |
3-May-17 |
5-May-17 |
5-May-17 |
Fund |
6-May-17 |
FUND3 |
2-May-17 |
3-May-17 |
5-May-17 |
5-May-17 |
Currency |
5-May-17 |
FUND3 |
2-May-17 |
3-May-17 |
5-May-17 |
5-May-17 |
System |
6-May-17 |
Entity Commission Payment due date
The system will not process entity commission payment for system level emergency holiday, whereas the system will process for all other emergency holidays.
Broker Commission Payment Date
The system will not process broker commission payment for system level emergency holiday, whereas the system will process for all other emergency holidays.
LEP Transaction Date
The system will move all LEP transactions date to next business day which is common to all the attached funds in that product.
The system will move Policy Start Date of policy to next business day which is common to all the attached funds in that product.
Example:
Policy Number |
Rule Effective Date |
Policy Start Date |
HSPOLICY01 |
2-May-17 |
2-May-17 |
If emergency holiday is declared on 02-MAY-2017 at Fund level for any one of the fund which is attached to the policy HSPOLICY01 then policy date will be next working date of all the funds.
Policy Number |
Rule Effective Date |
Policy Start Date |
HSPOLICY01 |
2-May-17 |
3-May-17 |
Dividend Date
Fund dividends with Daily Payments for which Daily Dividends have not been processed, then the system will skip that dividend.
Emergency holiday defined for Fund will be having the following impact:
- If freeze holding is completed, then the system will not move freeze holding date to next business date, Unprocessed dividends declared for the date will be moved to next business day.
- The system will move Payment Date and Reinvestment Date to next business day. Dividend Declare Date and Freeze Holdings Date will be moved to non MMF funds.
Emergency holiday defined for Currency will have following impact:
- For dividend payout operation, if the dividend payment currency is marked as emergency holiday at Currency level then the system will move dividend payment date to next working date in that currency.
If you declare an emergency holiday for the fund, then MMF and non MMF fund dividend attribute changes as follows:
Example 1: Non MMF Fund
Fund ID |
Dividend No |
Dividend Declare Date |
Freeze Holding Date |
Payment Date |
Reinvestment Date |
AFUND1 |
5 |
2-May-17 |
2-May-17 |
2-May-17 |
2-May-17 |
If emergency holiday is declared on 02-MAY-2017 for the fund AFUND1 then dividend attributes will be moved to next business day as follows:
Fund ID |
Dividend No |
Dividend Declare Date |
Freeze Holding Date |
Payment Date |
Reinvestment Date |
AFUND1 |
5 |
3-May-17 |
3-May-17 |
3-May-17 |
3-May-17 |
Example 2:
Fund ID |
Dividend No |
Dividend Declare Date |
Freeze Holding Date |
Payment Date |
Reinvestment Date |
MMFFND |
575 |
2-May-17 |
2-May-17 |
2-May-17 |
2-May-17 |
If emergency holiday is declared on 02-MAY-2017 for the fund MMFFND then dividend attributes will be moved to next business day as follows:
Fund ID |
Dividend No |
Dividend Declare Date |
Freeze Holding Date |
Payment Date |
Reinvestment Date |
MMFFND |
575 |
2-May-17 |
2-May-17 |
3-May-17 |
3-May-17 |
3.30 Fund Transaction Sign Off Screen
This section contains the following topics:
3.30.1 Invoking Fund Transaction Sign Off Screen
You can mark the sign off status in the ‘Fund Transaction Sign Off’ screen. You can invoke this screen by typing ‘UTDTSOFF’ in the field at the top right corner of the Application tool bar and clicking on the adjoining arrow button. Select ‘New’ from the Actions menu in the Application tool bar or click new icon to enter the details.
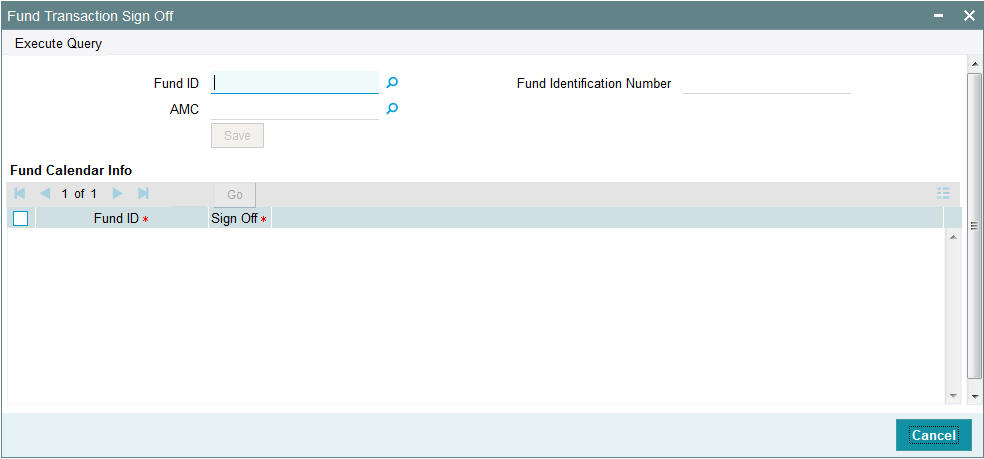
Fund ID
Alphanumeric; 6 Characters; Optional
Specify the Fund ID.
Fund Identification Number
Display
The system displays the description for the selected fund ID.
AMC
Display
The system displays the description for the selected fund ID.
After specifying fund ID, click ‘Execute Query’ button. the following fund calendar information is displayed:
- Fund ID
- Sign Off
Trading Transactions
Trading transactions can only be entered on working days for the fund in the fund calendar (if maintained) or AMC calendar (if maintained) or system calendar.
Transactions
The transaction date (date of entry) is defaulted to the application date.
The transaction date is defaulted to next working day for the fund if it falls on a holiday, or if the transaction is entered after marking of transaction sign off for the day, or after cut-off time. The transaction date for switch transactions is arrived at by considering the fund calendar, if any, maintained for the ‘switch from’ fund; the date must be a working day for the ‘switch from’ fund, but need not be so for the ‘switch to’ fund.
The backdating limit for backdated transactions is derived from the fund calendar.
Dates for instrument clearing are also based on the fund calendar.
Settlement Dates
The settlement dates for payments must not be holidays for the settlement currency, as designated in the currency calendar.
During transaction entry, the payment date or clearing date for a subscription is computed based on the transaction date and payment lag. The system checks that the payment date derived is a working date for the transaction currency.
For redemptions, the redemption confirmation process arrives at the payment date (check date) based on payment lag. This date should be a working date for the currency.
Dividend payments in respect of unit holders are in each unit holder’s preferred currency. The payment date for a unit holder should be a working date for the currency of payment. Therefore a single dividend payment may still be made on different dates for different unit holders. The payment date for a broker should be a working date for the broker payment currency.
Batch Functions
Menu Allocation
Menu allocation is done only for funds working on the application date.
Redemption Confirmation
Redemption Confirmation is done only for funds working on the application date.
Dividend Payments
The payment date must be a working day for the fund.
Dividend Reinvestments
Value date for dividend reinvestment must be a working day in the system calendar.
If the reinvestment fund has a holiday on the reinvestment transaction value date, the transaction date is set to the next fund working day.
Pre-End of Day Checks
The pre-end of day checks are only performed for the funds working on the application date.
End of Day Activities
- Broker reinvestment transactions are only processed for those funds working on the application date.
- Allocations for transactions of all types, for all funds working on the application date, are performed.
- Switch transactions are only allocated if the current date is a working day for both funds. The ‘switch from’ leg is allocated at the prevalent price on transaction date, and the ‘switch to’ leg, with the current price. Ageing entries for the ‘switch from’ leg are booked as of transaction date, and those for the ‘switch to’ leg, as of the allocation date.
- The Specific Fund Price date is arrived at after applying the ‘Prior’ or ‘After’ holiday rule, as specified in the fund rules. Specific price dates for a fund, if applicable, are updated only on fund working days.
- Periodic load processing is done for all funds only on the value date for periodic load processing, which is arrived at after periodic fee computation, and must be a fund working date.
- Trading net settlement processing as well as trading summary calculation is done only for funds working on the current date.
- Fund bank account transfer processing is done only for funds working on the current date.
- Dividend processing, dividend reinvestment processing and the generation of dividend records are done only for funds working on the current date. For those funds working on the current date, the first dividend record will be generated. For other dividends, if the dividend record generation date arrived at is a fund holiday, the ‘Prior’ or ‘After’ fund holiday rule is applied to arrive at a valid fund working day from the fund calendar. If this date is the same as the system date, the dividend record for the fund is generated.
- GL Export processing is done only for funds working on the current date.
- Updating of the latest rule for a fund is done only for funds working on the current date.
- The Beginning of Day outstanding units for a fund are only updated if the fund is working on the current date.
- After the system date change, the fund holiday status change process updates the holiday status for all the funds, and resets the transaction sing-on status.
- Standing instructions escalation processing is done only for funds working on the current date. The generation of standing instructions is done on fund working days, and the generation date is arrived at taking into account the fund calendar, after the standing instructions holiday rule has been applied.
- Amount unblock transactions, as well as amount block escalations and amount block transaction generation for the fund are generated only on fund working days.
- Automatic redemption transactions are only generated for funds working on the current date.
3.30.1.1 Restricting Transactions into Fund on Working Day
On a working day for the fund, you restrict sale of the fund, if necessary. On doing so, the current date is marked as a holiday for the fund.
When a sale restriction is marked, it must be authorized for it to be effective in the system.
When you restrict sale of a fund in this manner, you can opt for either of the following options for transactions that have been entered after the restrict sale status has been marked for the day:
Reverse
If you choose this option, any unauthorized transactions entered after the restrict sale status has been marked for the day are deleted. Any authorized transactions including system generated transactions or those that have been entered on the previous system working day after the transaction cut-off time are reversed.
Any transactions allotted after the restrict sale status has been marked are left unaltered. An error message is displayed when the sale restriction is authorized, in respect of these transactions.
Carry forward
If you choose this option, the transaction date of any transaction that is entered after the restrict sale status has been marked for the day, will be defaulted to the next working day according to the fund calendar (if maintained) or AMC calendar (if maintained) or the system calendar.
Any transactions allotted after the restrict sale status has been marked are left unaltered. An error message is displayed when the sale restriction is authorized, in respect of these transactions.
3.30.1.2 Uploading Holiday Details
You can use the upload facility to upload holiday details, if required.
For more details on holiday upload file formats, refer Upload File Formats chapter in FC-IS system..
3.31 Mode of Payment
This section contains the following topics:
3.31.1 Invoking the Mode of Payment Detail Screen
You can use this screen to set up the clearing options for the various modes of payments that are valid in the system. For each mode of payment, you can:
- Enter the clearing options.
- Edit the existing, unauthorized clearing options.
- Authorize the clearing periods.
- View existing clearing options for any of the Modes of Payment.
- Amend the authorized clearing periods. During amendment or editing, it is possible to alter the Clearing Period and set the Auto Clear Option.
During installation, the modes of payment and the default clearing periods for each mode are entered into the system automatically. Subsequently, if you need to view or make a change to any of the clearing options, you can retrieve the record in this screen by clicking on ‘Ok’ button in this screen. All the clearing options maintained for each of the modes of payment are displayed in the lower portion of the screen.
You can invoke the ‘Mode Of Payment Detail’ screen by typing ‘UTDMPAYS’ in the field at the top right corner of the Application tool bar and clicking on the adjoining arrow button.
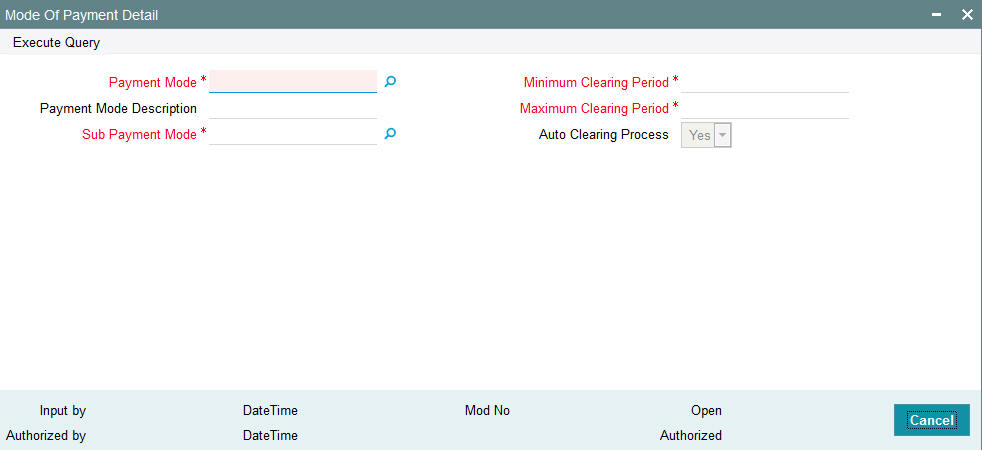
Payment Mode
Alphanumeric; 1 Character; Mandatory
Specify the different modes of payment. The different modes of payments can be Cash, Demand Draft, and Money Transfer and so forth.
Payment Mode Description
Display
A description of the mode of payment is displayed here. This could be any of the instruments such as Draft, Check, Transfer, Credit Card, etc.
Sub Payment Mode
Alphanumeric; 2 Characters; Mandatory
Specify the code or short name given to any of the payment modes used in the system.
After specifying payment and sub payment mode, click ‘Execute Query’ button. The following values are displayed:
Minimum Clearing Period
Numeric; 22 Characters; Mandatory
The system displays the number of days after which you will be able to clear the payment instrument for a particular mode of payment. You can alter the value that is displayed here by clicking ‘Unlock’ button.
For each mode of payment, the Minimum Clearing Period is the period after which you will be able to clear the payment instrument.
Maximum Clearing Period
Numeric; 22 Characters; Mandatory
The system displays the number of days before which the payment instrument must be cleared for a particular mode of payment. You can alter the value that is displayed here.
For each mode of payment, the Maximum Clearing Period is the period before which you must clear the payment instrument.
Auto Clearing Process
Optional
Select auto clearing process from the drop-down list. The list displays the following values:
- Yes
- No
If you have selected ‘Yes’ option, the instrument automatically gets cleared if you do not clear the same before the maximum clearing period.
3.32 Mode of Payment Detail Summary Screen
This section contains the following topics:
- Section 3.32.1, "Retrieving Mode of Payment Summary Screen"
- Section 3.32.2, "Editing Mode of Payment Details"
- Section 3.32.3, "Viewing Mode of Payment Details"
- Section 3.32.4, "Deleting Mode of Payment Details"
- Section 3.32.5, "Authorizing Mode of Payment Details"
- Section 3.32.6, "Amending Mode of Payment Details"
- Section 3.32.7, "Authorizing Amended Mode of Payment Details"
3.32.1 Retrieving Mode of Payment Summary Screen
You can use this screen to set up the clearing options for the various modes of payments that are valid in the system. For each mode of payment, you can:
- Enter the clearing options
- Edit the existing, unauthorized clearing options
- Authorize the clearing periods
- View existing clearing options for any of the Modes of Payment
- Amend the authorized clearing periods. During amendment or editing, it is possible to alter the Clearing Period and set the Auto Clear Option.
During installation, the modes of payment and the default clearing periods for each mode are entered into the system automatically. Subsequently, if you need to view or make a change to any of the clearing options, you can retrieve the record in this screen by clicking on OK in this screen. All the clearing options maintained for each of the modes of payment are displayed in the lower portion of the screen.
You can invoke the ‘Holiday Maintenance Summary’ screen by typing ‘UTSMPAYS’ in the field at the top right corner of the Application tool bar and clicking on the adjoining arrow button.
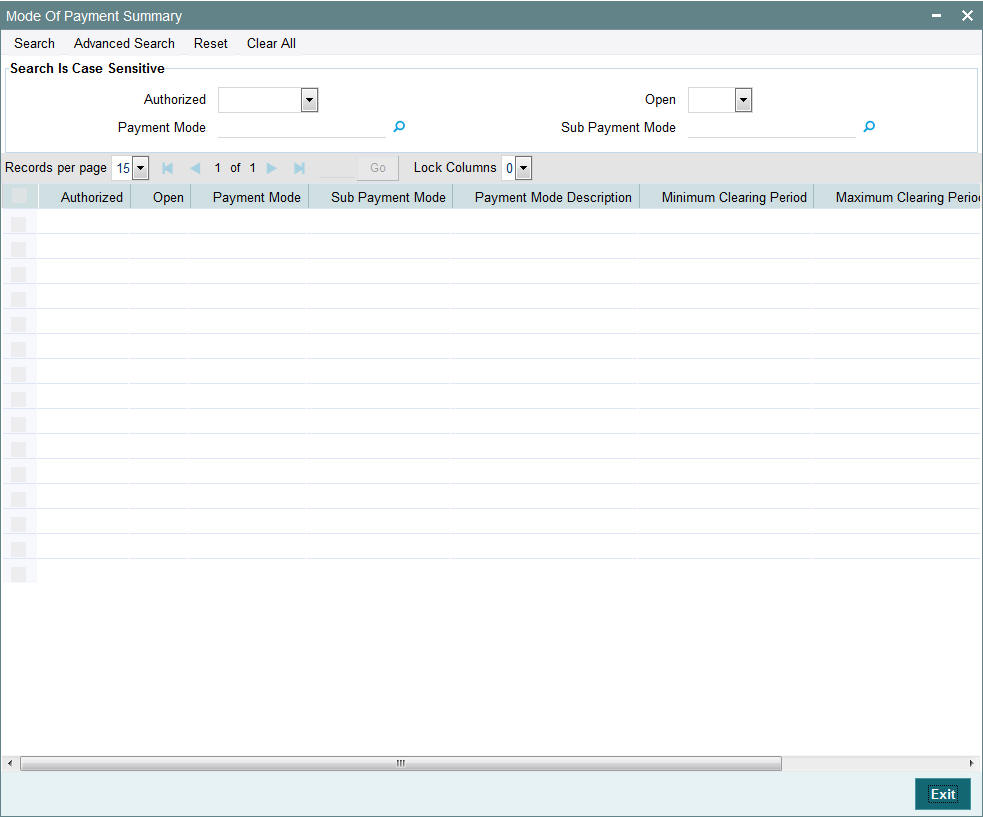
You can retrieve a previously entered Payment Mode in the Summary screen, as follows:
- Invoke the Mode Of Payment Summary screen and specify the following:
- The status of the fund type in the Authorized field. If you choose the “Blank Space” option, then all the fund types are retrieved.
- The status of the fund type in the Open field. If you choose the “Blank Space” option, then all the fund types are retrieved.
- Payment Mode
- Sub Payment Mode
- After you have specified the required details, click ‘Search’ button. All mode of payments with the specified details are retrieved and displayed in the lower portion of the screen.
You can also retrieve the Payment Mode detail from the detail screen by doing query in the following manner:-
- Press F7
- Input the Payment Mode
- Press F8
You can perform Edit, Delete, Amend, Authorize, Reverse, Confirm operation by selecting from the Action list.
You can also search the record by using combination of % and alphanumeric value.
For example, you can search the record for Payment Mode by using the combination of % and alphanumeric value as follows:-
- Search by M%: The system will fetch all the records whose Payment Mode description starts from Alphabet ‘M’. For example, Mutual Fund.
- Search by %7 : The system will fetch all the records whose Payment Mode ends by numeric value’ 7’ For example, 217,267,77 and so forth.
- Search by %17%: The system will fetch all the records whose Payment Mode contains the numeric value 17. For example, 3217, 2172 and so forth.
3.32.2 Editing Mode of Payment Details
You can modify the details of a Mode Of Payment that you have already entered into the system, provided it has not been subsequently authorized. You can perform this operation as follows:
- Invoke the Mode of Payment Summary screen from the Browser.
- Select the status of the Payment Mode that you want to retrieve for modification in the Authorization Status field. You can only modify records of Payment Mode of that are unauthorized. Accordingly, choose the Unauthorized option from the drop-down list.
- Specify any or all of the details of the Payment Mode in the corresponding fields on the screen to retrieve the fund type that is to be modified.
- Click ‘Search’ button. All unauthorized Payment Mode with the specified details are retrieved and displayed in the lower portion of the screen.
- Double click the Payment Mode that you want to modify. The Mode of Payment Detail screen is displayed.
- Select Unlock Operation from Action list to modify the record. Modify the necessary information.
- Click Save to save the changes. The Mode of Payment Detail screen is closed and the changes made are reflected in the Mode of Payment Summary screen.
3.32.3 Viewing Mode of Payment Details
To view a Payment Mode that you have previously entered:
- Invoke Mode of Payment Summary Screen from the Browser.
- Select the status of the Payment Mode that you want to retrieve for viewing in the Authorized field. You can also view all Payment Modes that are either unauthorized or authorized only, by choosing the Unauthorized/ Authorized option.
- Specify any or all of the details of the payment mode in the corresponding fields on the screen.
- Click ‘Search’ button. All Payment Mode with the specified details are retrieved and displayed in the lower portion of the screen.
- Double click the Payment Mode that you want to view in the list of displayed Mode of Payment. The Mode of Payment Detail screen is opened in view mode.
3.32.4 Deleting Mode of Payment Details
You can delete only unauthorized Payment Modes in the system.
- Invoke the Mode of Payment Summary screen from the Browser.
- Select the status of the payment mode that you want to retrieve for deletion.
- Specify any or all of the details of the Payment Mode in the corresponding fields on the screen.
- Click ‘Search’ button. All Payment Modes with the specified details are retrieved and displayed in the lower portion of the screen.
- Double click the Payment Mode type that you want to delete. The Mode of Payment Detail screen is displayed.
- Select Delete operation from the Action list. The system prompts you to confirm the deletion, and the record is deleted physically from the system database.
3.32.5 Authorizing Mode of Payment Details
An unauthorized payment mode must be authorized in the system for it to be processed.
To authorize a Payment Mode code:
- Invoke the Mode of Payment Summary screen from the Browser.
- Select the status of the Payment mode Code that you want to retrieve for authorization. Typically, choose the Unauthorized option from the drop-down list.
- Specify any or all of the details of the fund type in the corresponding fields on the screen.
- Click ‘Search’ button. All Payment Modes with the specified details that are pending authorization are retrieved and displayed in the lower portion of the screen.
- Double click the Payment Mode code type that you wish to authorize. The Mode of Payment screen displayed. Select Authorize operation from Action.
When the checker authorizes Payment Mode, details of validations, if any, that were overridden by the maker of the transaction during the Save operation, are displayed. If any of these overrides results in an error, the checker must reject the payment mode.
3.32.6 Amending Mode of Payment Details
After a Payment Mode is authorized, it can be modified using the Unlock operation from Action list. To make changes to a Payment Mode after authorization, you must invoke the Unlock operation which is termed as Amend Operation.
- Invoke the Mode of Payment Summary screen from the Browser.
- Select the status of the Payment Mode that you wish to retrieve for amendment. You can only amend records of Payment Modes that are authorized.
- Specify any or all of the details of the Payment Mode in the corresponding fields on the screen.
- Click ‘Search’ button. All Payment Modes with the specified details are retrieved and displayed in the lower portion of the screen.
- Double click the Payment Mode that you want to amend. The Mode of Payment screen is displayed in Amendment mode.
- Click the Unlock operation from the Action list to amend the payment mode.
- Amend the necessary information. Click the Save button to save the changes.
3.32.7 Authorizing Amended Mode of Payment Details
An amended Payment mode must be authorized for the amendment to be made effective in the system.
The process of authorization is subsequently the same as that for normal transactions.
3.33 Static Maintenance for Switch Transactions
This section contains the following topics:
3.33.1 Setting up Switch Privileges
You can set up a restrictive list of switching between share classes for switch transactions, in the ‘Switch Privilege Setup Detail’ screen. You can invoke this screen by typing ‘UTDSWPRV’ in the field at the top right corner of the Application tool bar and clicking on the adjoining arrow button.
Select ‘New’ from the Actions menu in the Application tool bar or click new icon to enter the details.
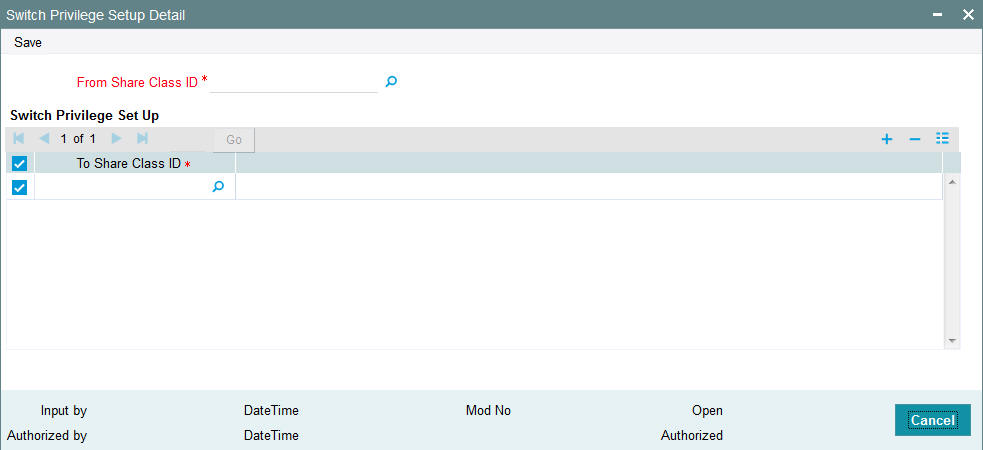
From Share Class ID
Alphanumeric; 2 Characters; Mandatory
Select the share class from which a switch transaction can be entered into from the option list.
Switch Privilege Set Up
To Share Class ID
Alphanumeric; 2 Characters; Mandatory
Select the share classes to which switching must be allowed from the option list.
Save your changes by clicking the Save button.
3.34 Switch Privilege List Setup Summary Screen
This section contains the following topics:
- Section 3.34.1, "Invoking the Switch Privilege List Setup Screen"
- Section 3.34.2, "Retrieving Switch Privilege Setup List in Summary Screen"
- Section 3.34.3, "Editing Switch Privilege Setup List"
- Section 3.34.4, "Viewing Switch Privilege Setup List"
- Section 3.34.5, "Deleting a Switch Privilege Setup"
- Section 3.34.6, "Authorizing Switch Privilege Setup Lists"
- Section 3.34.7, "Amending Switch Privilege Setup Lists "
- Section 3.34.8, "Authorizing Amended Switch Privilege Setups"
3.34.1 Invoking the Switch Privilege List Setup Screen
After you have set up a restrictive list of switching between share classes for switch transactions, you must have another user authorize it so that it becomes effective in the system.
Before the restrictive list is authorized, you can edit it as many times as necessary. You can also delete it before it is authorized.
After authorization, you can only change the switch period through an amendment.
The ‘Switch Privilege Setup Summary’ screen can be used for the following operations on restrictive (privilege) lists:
- Retrieval for viewing
- Editing an unauthorized restrictive (privilege) list
- Deleting unauthorized restrictive (privilege) list
- Authorizing switch restrictive (privilege) list
- Amending switch restrictive (privilege) list
Invoke the ‘Switch Privilege Setup Summary’ screen by typing ‘UTSSWPRV’ in the field at the top right corner of the Application tool bar and clicking on the adjoining arrow button.

3.34.2 Retrieving Switch Privilege Setup List in Summary Screen
You can retrieve a previously entered entity in the Summary screen, as follows:
- Invoke the Switch Privilege Setup Summary screen and specify the
following:
- The status of the privilege setup in the Authorized field. If you choose the “Blank Space” option, then all the records are retrieved.
- The status of the record in the Open field. If you choose the “Blank Space” option, then all the records are retrieved.
- From Share Class ID
- After you have specified the required details, click ‘Search’ button. All records with the specified details are retrieved and displayed in the lower portion of the screen.
Note
You can also retrieve an individual record from the Detail screen by doing query in the following manner:-
- Press F7.
- Input any parameter in the screen.
- Press F8.
You can perform Edit, Delete, Amend, Authorize, Reverse, Confirm operation by selecting from the Action list.
You can also search the record by using combination of % and alphanumeric value.
For example, you can search the record for From Share Class Type ID by using the combination of % and alphanumeric value as follows:-
- Search by A%: The system will fetch all the records whose Share Class ID starts from Alphabet ‘A’. For example, AA.
- Search by %7: The system will fetch all the records whose Share Class ID Type ends by numeric value’ 7’. For example, -S7.
- Search by %17%: The system will fetch all the records whose Share Class ID contains the numeric value 17. For example, - 17.
3.34.3 Editing Switch Privilege Setup List
You can modify the switch privilege setup that you have already entered into the system, provided it has not been subsequently authorized. You can perform this operation as follows:
- Invoke the Switch Privilege Setup List Summary screen from the Browser.
- Select the status of the records that you want to retrieve for modification in the Authorization Status field. You can only modify records that are unauthorized. Accordingly, choose the Unauthorized option from the drop down list.
- Specify the From Share Class ID (optional) in the corresponding field.
- Click ‘Search’ button. All unauthorized switch privilege setup lists with the specified details are retrieved and displayed in the lower portion of the screen.
- Double click the record that you want to modify. The Switch Privilege Setup Maintenance screen is displayed.
- Select Unlock Operation from Action list to modify the record. Modify the necessary information.
- Click Save to save the changes. The Switch Privilege Setup Maintenance screen is closed and the changes made are reflected in the Switch Privilege Setup Summary screen.
3.34.4 Viewing Switch Privilege Setup List
To view a switch privilege list that you have previously entered:
- Invoke the Switch Privilege Setup List Summary Screen from the Browser.
- Select the status of the switch privilege list that you want to retrieve for viewing in the Authorized field. You can also view all records that are either unauthorized or authorized only, by choosing the Unauthorized / Authorized option.
- Specify the Share Class ID (optional) in the corresponding field.
- Click ‘Search’ button. All records with the specified details are retrieved and displayed in the lower portion of the screen.
- Double click the record that you want to view. The Switch Privilege Setup List Maintenance screen is opened in view mode.
3.34.5 Deleting a Switch Privilege Setup
You can delete only unauthorized switch privilege setup in the system. To delete a switch privileges setup list:
- Invoke the Switch Privilege List Setup Summary screen from the Browser.
- Select the status of the record that you want to retrieve for deletion.
- Specify Share Class ID (Optional) in the corresponding fields on the screen.
- Click ‘Search’ button. All records with the specified details are retrieved and displayed in the lower portion of the screen.
- Double click the record that you want to delete. The Switch Privilege List Setup Maintenance Detail screen is displayed.
- Select Delete operation from the Action list. The system prompts you to confirm the deletion, and the record is deleted physically from the system database.
3.34.6 Authorizing Switch Privilege Setup Lists
An unauthorized switch privilege setup must be authorized in the system for it to come into effect. To authorize:
- Invoke the Switch Privilege Setup Summary screen from the Browser.
- Select the status of the records that you want to retrieve for authorization. Typically, choose the Unauthorized option from the drop down list.
- Specify the Share Class ID (optional) in the corresponding fields on the screen.
- Click ‘Search’ button. All records with the specified details that are pending authorization are retrieved and displayed in the lower portion of the screen.
- Double click the record that you wish to authorize. The Switch Privilege Setup Maintenance screen is displayed. Select Authorize operation from Action.
When the checker authorizes an entity, details of validations, if any, that were overridden by the maker of the transaction during the Save operation, are displayed. If any of these overrides results in an error, the checker must reject the entity.
3.34.7 Amending Switch Privilege Setup Lists
After a switch privilege setup is authorized, it can be modified using the Unlock operation from Action list. To make changes to a switch privilege setup after authorization, you must invoke the Unlock operation which is termed as Amend Operation.
- Invoke the Switch Privilege Setup Summary screen from the Browser.
- Select the status of the record that you wish to retrieve for amendment. You can only amend records of entities that are authorized.
- Specify Share Class ID (optional) in the corresponding fields on the screen.
- Click ‘Search’ button. All records with the specified details are retrieved and displayed in the lower portion of the screen.
- Double click the record that you want to amend. The Switch Privilege Setup screen is displayed in Amendment mode.
- Click the Unlock operation from the Action list to amend the setup.
- Amend the necessary information. Click the Save button to save the changes.
3.34.8 Authorizing Amended Switch Privilege Setups
An amended switch privilege setup must be authorized for the amendment to be made effective in the system. The process of authorization is subsequently the same as that for normal transactions.
3.35 Period Definition for Allowing Automatic Switch
This section contains the following topics:
3.35.1 Invoking the Auto Switch Setup Detail Screen
You can define a period for allowing switch transactions between share classes, in the ‘Auto Switch Setup Detail’ screen. You can invoke this screen by typing ‘UTDASSSD’ in the field at the top right corner of the Application tool bar and clicking on the adjoining arrow button.
Select ‘New’ from the Actions menu in the Application tool bar or click new icon to maintain the list.
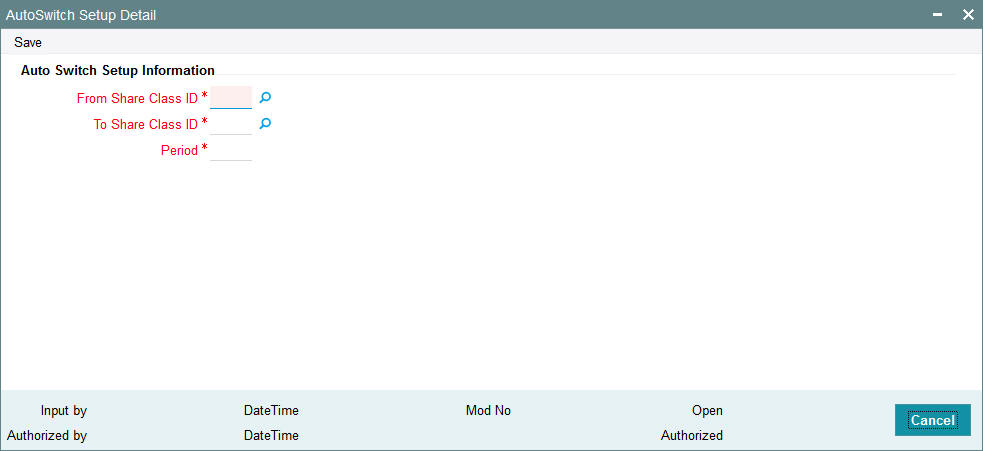
Auto Switch Setup Information
From Share Class ID
Alphanumeric; 2 Characters; Mandatory
Specify the share classes, switching between which will be allowed after the period has elapsed.
To Share Class ID
Alphanumeric; 2 Characters; Mandatory
Specify the share classes, switching between which will be allowed after the period has elapsed.
Period
Numeric; 2 Characters; Mandatory
Specify the period at the end of which the switching will be permitted.
Save your changes by clicking the Save button.
3.36 Exchange List Maintenance Summary Screen
This section contains the following topics:
- Section 3.36.1, "Invoking the Exchange List Maintenance Summary Screen"
- Section 3.36.2, "Retrieving Exchange List in Summary Screen"
- Section 3.36.3, "Editing Exchange List"
- Section 3.36.4, "Viewing Exchange List Record"
- Section 3.36.5, "Deleting Exchange List Record"
- Section 3.36.6, "Authorizing Exchange Lists"
- Section 3.36.7, "Amending Exchange Lists "
- Section 3.36.8, "Authorizing Amended Exchange Lists"
- Section 3.36.9, "Copying Attributes"
3.36.1 Invoking the Exchange List Maintenance Summary Screen
After you have designated a period for allowing switch transactions between share classes, you must have another user authorize it so that it becomes effective in the system.
Before the switch period is authorized, you can edit it as many times as necessary. You can also delete it before it is authorized.
After authorization, you can only change the switch period through an amendment.
The ‘Exchange List Maintenance Summary’ screen can be used for the following operations on switch periods:
- Retrieval for viewing
- Editing an unauthorized switch period
- Deleting unauthorized switch periods
- Authorizing switch period definitions
- Amending switch period definitions
Invoke the ‘Exchange List Maintenance Summary’ screen by typing ‘UTSASSSD’ in the field at the top right corner of the Application tool bar and clicking on the adjoining arrow button.
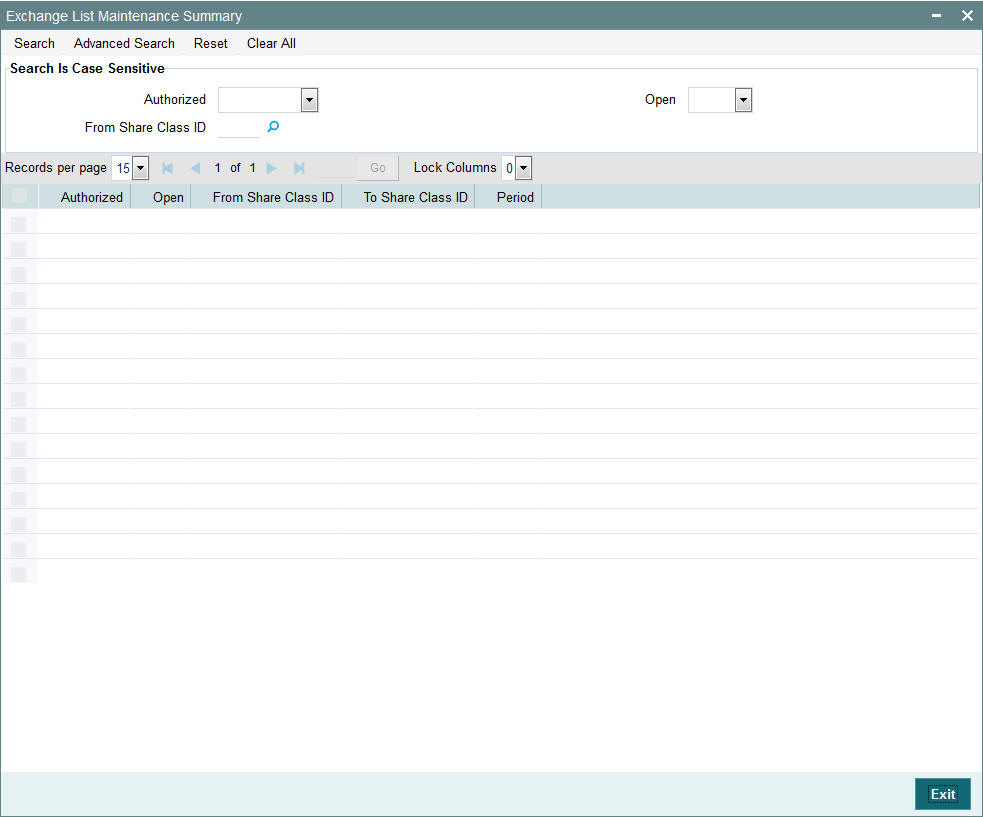
3.36.2 Retrieving Exchange List in Summary Screen
You can retrieve a previously entered entity in the Summary screen, as follows:
- Invoke the Exchange List Maintenance Summary screen and specify the
following:
- The status of the exchange list in the Authorized field. If you choose the “Blank Space” option, then all the records are retrieved.
- The status of the record in the Open field. If you choose the “Blank Space” option, then all the records are retrieved.
- From Share Class ID
- After you have specified the required details, click ‘Search’ button. All records with the specified details are retrieved and displayed in the lower portion of the screen.
You can also retrieve an individual record from the Detail screen by doing query in the following manner:-
- Press F7
- Input any parameter in the screen
- Press F8
You can perform Edit, Delete, Amend, Authorize, Reverse, Confirm operation by selecting from the Action list.
You can also search the record by using combination of % and alphanumeric value.
For Example:
You can search the record for From Share Class ID by using the combination of % and alphanumeric value as follows:-
- Search by A%: The system will fetch all the records whose From Share Class ID starts from Alphabet ‘A’. For example, AA.
- Search by %7: The system will fetch all the records whose From Share Class ID Type ends by numeric value’ 7’. For example, S7.
- Search by %17%: The system will fetch all the records whose From Share Class ID contains the numeric value 17. For example, 17.
3.36.3 Editing Exchange List
You can modify the exchange list that you have already entered into the system, provided it has not been subsequently authorized. You can perform this operation as follows:
- Invoke the Exchange List Summary screen from the Browser.
- Select the status of the records that you want to retrieve for modification in the Authorization Status field. You can only modify records that are unauthorized. Accordingly, choose the Unauthorized option from the drop down list.
- Specify the From Share Class Type ID (optional) in the corresponding field.
- Click ‘Search’ button. All unauthorized exchange lists with the specified details are retrieved and displayed in the lower portion of the screen.
- Double click the record that you want to modify. The Exchange List Maintenance screen is displayed.
- Select Unlock Operation from Action list to modify the record. Modify the necessary information.
- Click Save to save the changes. The Exchange List Maintenance screen is closed and the changes made are reflected in the Exchange List Summary screen.
3.36.4 Viewing Exchange List Record
To view an exchange list record that you have previously entered:
- Invoke the Exchange List Summary Screen from the Browser.
- Select the status of the exchange list records that you want to retrieve for viewing in the Authorization Status field. You can also view all records that are either unauthorized or authorized only, by choosing the Unauthorized / Authorized option.
- Specify the Share Class ID (optional) in the corresponding field.
- Click ‘Search’ button. All records with the specified details are retrieved and displayed in the lower portion of the screen.
- Double click the record that you want to view. The Exchange List Maintenance screen is opened in view mode.
3.36.5 Deleting Exchange List Record
You can delete only unauthorized exchange list records in the system. To delete an exchange list record:
- Invoke the Switch Privilege List Setup Summary screen from the Browser.
- Select the status of the record that you want to retrieve for deletion.
- Specify Share Class Type ID (Optional) in the corresponding fields on the screen.
- Click ‘Search’ button. All records with the specified details are retrieved and displayed in the lower portion of the screen.
- Double click the record that you want to delete. The Switch Privilege List Setup Maintenance Detail screen is displayed.
- Select Delete operation from the Action list. The system prompts you to confirm the deletion, and the record is deleted physically from the system database.
3.36.6 Authorizing Exchange Lists
An unauthorized exchange list setup must be authorized in the system for it to come into effect. To authorize:
- Invoke the Exchange List Summary screen from the Browser.
- Select the status of the records that you want to retrieve for authorization. Typically, choose the Unauthorized option from the drop-down list.
- Specify the Share Class ID (optional) in the corresponding field on the screen.
- Click ‘Search’ button. All records with the specified details that are pending authorization are retrieved and displayed in the lower portion of the screen.
- Double click the record that you wish to authorize. The Exchange List Maintenance screen is displayed. Select Authorize operation from Action.
When the checker authorizes an entity, details of validations, if any, that were overridden by the maker of the transaction during the Save operation, are displayed. If any of these overrides results in an error, the checker must reject the exchange list.
3.36.7 Amending Exchange Lists
After an exchange list setup is authorized, it can be modified using the Unlock operation from Action list. To make changes to an exchange list after authorization, you must invoke the Unlock operation which is termed as Amend Operation.
- Invoke the Exchange List Summary screen from the Browser.
- Select the status of the record that you wish to retrieve for amendment. You can only amend records of entities that are authorized.
- Specify Share Class ID (optional) in the corresponding field on the screen.
- Click ‘Search’ button. All records with the specified details are retrieved and displayed in the lower portion of the screen.
- Double click the record that you want to amend. The Exchange List Summary screen is displayed in Amendment mode.
- Click the Unlock operation from the Action list to amend the list.
- Amend the necessary information. Click the Save button to save the changes.
3.36.8 Authorizing Amended Exchange Lists
An amended exchange list must be authorized for the amendment to be made effective in the system. The process of authorization is subsequently the same as that for normal transactions.
3.36.9 Copying Attributes
If you want to create an exchange list having the same attributes of an existing setup, you can copy the attributes of an existing setup to a new setup.
To copy the attributes:
- Retrieve the exchange list whose attributes the new entity should inherit. You can retrieve the record through the Summary screen or through the F7- F8 operation which is explained in the previous sections of this chapter.
- Click on ‘Copy’ in the Actions list.
- Indicate the ID for the new exchange list. You can however change the details of the exchange list if required.
3.37 Indexation Values
This section contains the following topics:
3.37.1 Setting up Indexation Values
Investors may opt for indexation to be applicable for the computation of income or capital gains on earnings from investments, on which capital gains tax can be applied. You must maintain the indexation values to be applicable for specific periods, which can then be applied for the computation of capital gains income.
You maintain indexation values to be applicable within a specific period bounded by a ‘From’ and a ‘To’ date.
You can use the ‘Indexation Maintenance Detail’ screen to maintain indexation values. You can invoke this screen by typing ‘UTDINDEX’ in the field at the top right corner of the Application tool bar and clicking on the adjoining arrow button. Select ‘New’ from the Actions menu in the Application tool bar or click new icon to maintain the indexation.

You must specify the indexation value to be applicable between two given dates. Any transactions allocated between those two dates, which result in application of capital gains tax with indexation, will use these values for the tax computation.
From Date
Date Format; Mandatory
Specify the date on and following which the indexation value is to be applicable, for computation of capital gains income.
To Date
Date Format, Mandatory
Specify the date up to which the indexation value is applicable for computation of capital gains income.
Indexation
Numeric; 22 Characters; Mandatory
Specify the indexation value that is to be applicable between the ‘From’ and ‘To’ dates that you have specified. You cannot specify duplicate indexation values for a period, and for a given range, you can only specify one value.
3.38 Indexation Summary Screen
This section contains the following topics:
- Section 3.38.1, "Invoking the Indexation Maintenance Summary Screen"
- Section 3.38.2, "Retrieving Indexation in Summary Screen"
- Section 3.38.3, "Editing Indexation"
- Section 3.38.4, "Viewing Exchange List Record"
- Section 3.38.5, "Authorizing Indexations"
- Section 3.38.6, "Amending Indexations "
- Section 3.38.7, "Authorizing Amended Exchange Lists"
- Section 3.38.8, "Copying Attributes"
3.38.1 Invoking the Indexation Maintenance Summary Screen
An indexation value you have specified for a given period must be authorized for it to be effective in the system. You can use the Indexation Summary screen to authorize the value.
You can also perform the following operations on an indexation value record in this screen:
- Edit unauthorized values
- View records
- Delete unauthorized values
- Amend authorized values. You can only amend the current indexation value record, and not any of the earlier records.
When you amend a value specified for a period, it will come into effect when another user authorizes the amendment.
You can invoke the ‘Indexation Maintenance Summary’ screen by typing ‘UTSINDEX’ in the field at the top right corner of the Application tool bar and clicking on the adjoining arrow button.

3.38.2 Retrieving Indexation in Summary Screen
You can retrieve a previously entered entity in the Summary screen, as follows:
- Invoke the Exchange List Maintenance Summary screen and specify the
following:
- The status of the indexation record in the Authorized field. If you choose the “Blank Space” option, then all the records are retrieved.
- The status of the record in the Open field. If you choose the “Blank Space” option, then all the records are retrieved.
- From Date and To Date for which the indexation is maintained.
- Specify the indexation value. The adjoining option list displays the valid indexation values maintained in the system. You can choose the appropriate one.
- After you have specified the required details, click ‘Search’ button. All records with the specified details are retrieved and displayed in the lower portion of the screen.
Note
You can also retrieve an individual record from the Detail screen by doing query in the following manner:-
- Press F7.
- Input any parameter in the screen.
- Press F8.
You can perform Edit, Delete, Amend, Authorize, Reverse, Confirm operation by selecting from the Action list.
You can also search the record by using combination of % and alphanumeric value.
For example, you can search the record for Indexations ID by using the combination of % and numeric value as follows:-
- Search by %7: The system will fetch all the records whose Indexation ID ends by numeric value’ 7’. For example, 27.
- Search by %17%: The system will fetch all the records whose Indexation ID contains the numeric value 17. For example, 17.
3.38.3 Editing Indexation
You can modify the indexation parameters that you have already entered into the system, provided it has not been subsequently authorized. You can perform this operation as follows:
- Invoke the Indexation Summary screen from the Browser.
- Select the status of the records that you want to retrieve for modification in the Authorized field. You can only modify records that are unauthorized. Accordingly, choose the Unauthorized option from the drop down list.
- Specify the parameters based on which you want to search.
- Click ‘Search’ button. All unauthorized indexations with the specified details are retrieved and displayed in the lower portion of the screen.
- Double click the record that you want to modify. The Indexation Maintenance screen is displayed.
- Select Unlock Operation from Action list to modify the record. Modify the necessary information.
- Click Save to save the changes. The Indexation Maintenance screen is closed and the changes made are reflected in the Indexation Summary screen.
3.38.4 Viewing Exchange List Record
To view an indexation list record that you have previously entered:
- Invoke the Indexation Summary Screen from the Browser.
- Select the status of the indexations that you want to retrieve for viewing in the Authorized field. You can also view all records that are either unauthorized or authorized only, by choosing the Unauthorized / Authorized option.
- Specify the other parameters based on which you want to retrieve the records (Optional).
- Click ‘Search’ button. All records with the specified details are retrieved and displayed in the lower portion of the screen.
- Double click the record that you want to view. The Indexation Maintenance screen is displayed in view mode.
3.38.5 Authorizing Indexations
An unauthorized indexation must be authorized in the system for it to come into effect. To authorize:
- Invoke the Indexation Summary screen from the Browser.
- Select the status of the records that you want to retrieve for authorization. Typically, choose the Unauthorized option from the drop down list.
- Specify the parameters based on which you want to retrieve the records (Optional).
- Click ‘Search’ button. All records with the specified details that are pending authorization are retrieved and displayed in the lower portion of the screen.
- Double click the record that you wish to authorize. The Indexation Maintenance screen is displayed. Select Authorize operation from Action.
When the checker authorizes an entity, details of validations, if any, that were overridden by the maker of the transaction during the Save operation, are displayed. If any of these overrides results in an error, the checker must reject the indexation.
3.38.6 Amending Indexations
After an indexation is authorized, it can be modified using the Unlock operation from Action list. To make changes to an indexation after authorization, you must invoke the Unlock operation which is termed as Amend Operation.
- Invoke the Indexation Summary screen from the Browser.
- Select the status of the record that you wish to retrieve for amendment. You can only amend records of entities that are authorized.
- Specify the date parameters based on which the system should retrieve the records.
- Click ‘Search’ button. All records with the specified details are retrieved and displayed in the lower portion of the screen.
- Double click the record that you want to amend. The Indexation Summary screen is displayed in Amendment mode.
- Click the Unlock operation from the Action list to amend the list.
- Amend the necessary information. Click the Save button to save the changes.
3.38.7 Authorizing Amended Exchange Lists
An amended exchange list must be authorized for the amendment to be made effective in the system. The process of authorization is subsequently the same as that for normal transactions.
3.38.8 Copying Attributes
If you want to create an indexation having the same attributes of an existing indexation, you can copy the attributes of an existing indexation to a new indexation.
To copy the attributes:
- Retrieve the indexation whose attributes the new indexation should inherit. You can retrieve the record through the Summary screen or through the F7- F8 operation which is explained in the previous sections of this chapter.
- Click on ‘Copy’ in the Actions list.
- Indicate the indexation number for the new indexation. You can however change the details if required.
3.38.9 Applying Indexation
When you have specified the indexation values for a period, you must also configure the system to apply indexation for the computation of capital gains tax for an investor, by taking the following steps:
- You must indicate the application of indexation for capital gains tax, in the unit holder’s account profile.
- Set up a load for the application of capital gains tax, in the Load Maintenance.
- You must associate this load with the appropriate fund, in the Fund
Load Setup, in the fund rules. You must set up the following attributes
for this association:
- The applicability of indexation for the load.
- The slab basis (gross or net amount)
- The basis of application (as ‘capital gains indexation’)
- The frequency of application (as ‘post allocation’)
For more information on how the indexation value is applied in the computation of capital gains tax, refer the chapter The Allocation Process of FC-IS system.
3.39 Collection Centers and Payout Accounts
This section contains the following topics:
- Section 3.39.1, "Maintaining Collection Centers and Payout Accounts"
- Section 3.39.2, "Maintaining Collection Center Accounts"
- Section 3.39.3, "Maintaining Default and Correspondent Payout Accounts"
3.39.1 Maintaining Collection Centers and Payout Accounts
The agency branch maintains accounts in banks that serve as collection centers for receipt of payment for inflow transactions from unit holders. Also, it maintains payout accounts to which payment for outflow transactions would be directed, from where unit holders could cash their payment instruments. Maintenance of collection center accounts and payout accounts is necessary as the default local accounts would not be able to service all unit holders who subscribe to the funds of the AMC.
From each collection center bank and payout bank, the agency branch receives a list of zip codes serviced by the banks. The system uses the maintained accounts and the zip code information while printing payment instruments for outflow transactions or pay-in slips for inflow transactions, to direct them to collection or payout banks that service the unit holders’ zip code.
For instance, if your AMC’s local branch is in London, you would maintain a default collection center and payout account with a London-based bank. However, to service investors of your AMC in Dover, you would need to maintain a collection center and payout account with a bank based in Dover, on a correspondent basis.
For details on how the collection center account or the payout account is reckoned for a transaction, refer to the section ‘Printing Checks and Pay-in Slips’ in the Dividend Maintenance chapter of FC-IS system.
For each agency branch, in FLEXCUBE, you can maintain the appropriate collection center accounts as well as payout accounts to be used. You can assign a default collection center, and a default payout account. You can also maintain other collection center accounts and correspondent payout accounts, to service investors whose zip code is different from any codes serviced by the local default accounts.
3.39.2 Maintaining Collection Center Accounts
In the ‘AGY Bank A/C Mapping Detail’ screen, you can maintain collection center accounts for a combination of:
- Agency branch module ID
- Inflow transaction type (either subscription or IPO)
- Payment mode or sub payment mode
- Fund ID
This would mean that you could maintain collection centers for each agency branch, to receive payments through any mode, from unit holders for subscriptions or IPO transactions into each fund.
Use the ‘AGY Bank A/C Mapping Detail’ screen to designate the collection centers and payout accounts. You can invoke this screen by typing ‘UTDAGYBN’ in the field at the top right corner of the Application tool bar and clicking on the adjoining arrow button.
Select ‘New’ from the Actions menu in the Application tool bar or click new icon to enter the details.

For each collection center account, you need to specify the following information in the ‘AGY Bank A/C Mapping Detail’ screen:
- The code of the bank and branch collection center
- The type of account maintained in the collection center bank or branch
- The currency of the account
- The number of the account and the owner of the account
- Whether the account is the default collection center account for the agency branch, transaction type, payment mode and fund ID combination.
You must maintain at least one default collection center account.
3.39.3 Maintaining Default and Correspondent Payout Accounts
In the AGY Bank A/C Mapping Details Maintenance screen, you can maintain payout accounts for a combination of:
- Agency branch module ID
- Outflow transaction type (either redemption, switch out or transfer)
- Payment mode
- Fund ID
This would mean that you could maintain payout accounts for each agency branch, to direct payments to unit holders through any mode, for outflow transactions from each fund.
For each payout account, you need to specify the following information in the AGY Bank Branch Details screen:
- The code of the payout bank and branch
- The type of account maintained in the payout bank or branch
- The currency of the account
- The number of the account and the owner of the account
- The limit placed on the payment amount directed to the bank for a transaction. If this limit is exceeded, a demand draft payment would have to be made.
- Whether the account is the default payout account for the agency branch, transaction type, payment mode and fund ID combination. You must maintain at least one default payout account.
- The correspondent bank accounts to which payment would be directed, if the zip code of the unit holder receiving the payment is not serviced by the payout bank
To maintain correspondent bank details, click on the Details button. The Correspondent Bank Details Section screen is opened, where you can specify the details. You maintain the same details as for a payout account, with a limit amount.
Module ID
Alphanumeric; 30 Characters; Mandatory
Select the module (agency branch) for which you are designating the collection center or payout account in this screen.
Transaction Type
Alphanumeric; 15 Characters; Mandatory
Select the type of outflow transaction for which you are designating the payout account, or the type of inflow transaction for which you are designating a collection center, in this screen.
Payment Mode
Alphanumeric; 2 Characters; Mandatory
Specify the mode of payment for which the collection center is applicable, for the selected module and transaction type. For redemption transactions, the payment mode is not applicable.
Fund ID
Alphanumeric; 6 Characters; Mandatory
Specify the fund for which the collection center or payout account is applicable, for the selected module, transaction type and payment mode.
Bank Details
Bank
Alphanumeric; 12 Characters; Mandatory
Specify the code of the bank that is being designated as a collection center or a payout bank. The collection account or the payout account must reside in this bank.
Branch
Alphanumeric; 12 Characters; Mandatory
Specify the code of the branch of the bank that is being designated as a collection center or a payout bank. The collection account or the payout account must reside in this branch of the selected bank.
Account Type
Alphanumeric; 1 Character; Mandatory
Specify the type of the collection or payout account.
Account Currency
Alphanumeric; 3 Characters; Mandatory
Specify the currency of the collection or payout account.
IBAN
Alphanumeric; 40 Characters; Optional
Specify the IBAN (International Bank Account Number) of the account holder.
Account Holder Name
Alphanumeric; 100 Characters; Mandatory
Specify the name of the owner of the collection or payout account.
Account Number
Alphanumeric; 16 Characters; Mandatory
Specify the number of the collection or payout account.
Limit Amount
Numeric; 22 Characters; Mandatory
Specify the value of the limit placed on payouts to the payout account. If the value of the payment exceeds this value, a demand draft payment must be made. For payments below this value, check payments may be made.
Default Account
Optional
You can use this field to indicate whether the specified account is deemed to be the default collection or payout account for the selected module, transaction type, payment mode and fund combination. Select this box to indicate that it is the default account, or leave it unselected to indicate that it is one of the other accounts.
Correspondent Bank Details
Bank Code
Alphanumeric; 12 Characters; Optional
Specify the code of the bank that is being designated as a correspondent bank for the collection center or a payout bank. The correspondent collection account or the payout account must reside in this bank.
Branch Code
Alphanumeric; 12 Characters; Optional
Specify the code of the branch of the bank that is being designated as a correspondent bank for collection center or a payout bank. The correspondent collection account or the payout account must reside in this branch of the selected bank.
Account Type
Alphanumeric; 1 Character; Optional
Specify the type of the correspondent collection or payout account.
Account Currency
Alphanumeric; 3 Characters; Optional
Specify the currency of the correspondent collection or payout account.
Account Number
Alphanumeric; 16 Characters; Optional
Specify the number of the correspondent collection or payout account.
Account Holder Name
Alphanumeric; 100 Characters; Optional
Specify the name of the owner of the correspondent collection or payout account.
Limit Amount
Numeric; 22 Characters; Optional
Specify the value of the limit placed on payouts to the correspondent payout account. If the value of the payment exceeds this value, a demand draft payment must be made. For payments below this value, check payments may be made.
Correspondent IBAN
Alphanumeric; 40 Characters; Optional
Specify the IBAN (International Bank Account Number) of the account holder.
3.40 AGY Bank A/C Mapping Summary Details Screen
This section contains the following topics:
- Section 3.40.1, "Invoking the AGY Bank A/C Mapping Summary Details Screen"
- Section 3.40.2, "Retrieving an AGY Bank Branch Record"
- Section 3.40.3, "Editing an AGY Bank Branch Record"
- Section 3.40.4, "Viewing an AGY Bank Branch Record".
- Section 3.40.5, "Deleting an AGY Bank Branch Record"
- Section 3.40.6, "Authorizing an AGY Bank Branch Record"
- Section 3.40.7, "Amending an AGY Bank Branch Record"
- Section 3.40.8, "Authorizing an amended AGY Bank Branch Record"
- Section 3.40.9, "Copying the Attributes"
3.40.1 Invoking the AGY Bank A/C Mapping Summary Details Screen
You can invoke the ‘AGY Bank A/C Mapping Summary’ screen by typing ‘UTSAGYBN’ in the field at the top right corner of the Application tool bar and clicking on the adjoining arrow button.
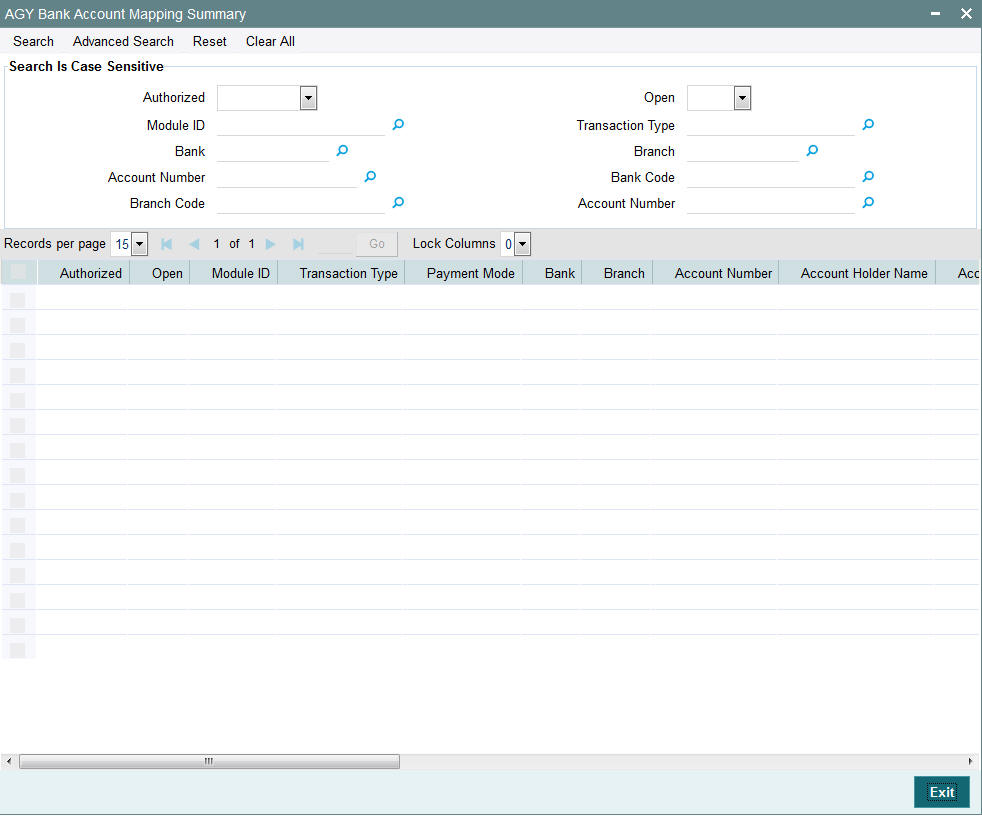
You can perform the following operations from this screen:
- Retrieving an AGY Bank Branch Record
- Editing an AGY Bank Branch Record
- Viewing an AGY Bank Branch Record
- Deleting an AGY Bank Branch Record
- Authorizing an AGY Bank Branch Record
- Amending an AGY Bank Branch Record
- Authorizing an amended AGY Bank Branch Record
- Copying the Attributes
3.40.2 Retrieving an AGY Bank Branch Record
You can retrieve a previously entered record in the Summary Screen, as follows:
- Invoke the AGY Bank A/C Mapping Summary screen
- The status of the record in the Authorized field. If you choose the ‘Blank Space’ option, then all the records are retrieved.
- The status of the record in the Open field. If you choose the ‘Blank Space’ option, then all records are retrieved
- Module ID
- Transaction Type
- Bank
- Branch
- Account Number
- Bank Code
- Branch Code
Click 'Search' to view the records. All the records with the specified details are retrieved and displayed in the lower portion of the screen.
You can also retrieve the individual record detail from the detail screen by querying in the following manner:
- Press F7
- Input the Module ID
- Press F8
You can perform Edit, Delete, Amend, Authorize, Reverse, Confirm operations by selecting the operation from the Action list. You can also search a record by using a combination of % and alphanumeric value.
3.40.3 Editing an AGY Bank Branch Record
You can modify the details of a AGY Bank A/C Mapping record that you have already entered into the system, provided it has not subsequently authorized. You can perform this operation as follows:
- Invoke the AGY Bank A/C Mapping Summary screen from the Browser.
- Select the status of the record that you want to retrieve for modification in the Authorized field. You can only modify records that are unauthorized. Accordingly, choose the unauthorized option.
- Specify any or all of the details in the corresponding fields to retrieve the record that is to be modified.
- Click 'Search'. All unauthorized records with the specified details are retrieved and displayed in the lower portion of the screen.
- Double click the record that you want to modify in the list of displayed records. The AGY Bank A/C Mapping Detail screen is displayed.
- Select Unlock Operation from the Action list to modify the record. Modify the necessary information.
- Click Save to save your changes. The AGY Bank A/C Mapping Detail screen is closed and the changes made are reflected in the AGY Bank A/C Mapping Summary screen.
3.40.4 Viewing an AGY Bank Branch Record
To view a record that you have previously input, you must retrieve the same in the AGY Bank A/C Mapping Summary screen as follows:
- Invoke the AGY Bank A/C Mapping Summary screen from the Browser.
- Select the status of the record that you want to retrieve for viewing in the Authorization Status field. You can also view all records that are either unauthorized or authorized only, by choosing the Unauthorized/ Authorized option.
- Specify any or all of the details of the record in the corresponding fields on the screen.
- Click 'Search'. All records with the specified fields are retrieved and displayed in the lower portion of the screen.
- 5. Double click the record that you want to view in the list of displayed records. The AGY Bank A/C Mapping Detail screen is displayed in View mode.
3.40.5 Deleting an AGY Bank Branch Record
You can delete only unauthorized records in the system. To delete a record that you have previously entered:
- Invoke the AGY Bank A/C Mapping Summary screen from the Browser.
- Select the status of the record that you want to retrieve for deletion.
- Specify any or all of the details in the corresponding fields on the screen.
- Click 'Search'. All records with the specified fields are retrieved and displayed in the lower portion of the screen.
- Double click the record that you want to delete in the list of displayed records. The AGY Bank A/C Mapping Detail screen is displayed.
- Select Delete Operation from the Action list. The system prompts you to confirm the deletion and the record is physically deleted from the system database.You can delete only unauthorized records in the system. To delete a record that you have previously entered:
1. Invoke the Agency Branch A/O Summary screen from the Browser.
2. Select the status of the record that you want to retrieve for deletion.
3. Specify any or all of the details in the corresponding fields on the screen.
4. Click ‘Search’. All records with the specified fields are retrieved and displayed in the lower portion of the screen.
5. Double click the record that you want to delete in the list of displayed records. The Agency Branch A/O Detail screen is displayed.
6. Select Delete Operation from the Action list. The system prompts you to confirm the deletion and the record is physically deleted from the system database.
3.40.6 Authorizing an AGY Bank Branch Record
An unauthorized AGY Bank A/C Mapping record must be authorized in the system for it to be processed. To authorize a record:
- Invoke the AGY Bank A/C Mapping Summary screen from the Browser.
- Select the status of the record that you want to retrieve for authorization. Typically, choose the unauthorized option.
- Specify any or all of the details in the corresponding fields on the screen.
- Click 'Search'. All records with the specified details that are pending authorization are retrieved and displayed in the lower portion of the screen.
- Double click the record that you wish to authorize. The AGY Bank A/C Mapping Detail screen is displayed. Select Authorize operation from the Action List.
When a checker authorizes a record, details of validation, if any, that were overridden by the maker of the record during the Save operation are displayed. If any of these overrides results in an error, the checker must reject the record.
3.40.7 Amending an AGY Bank Branch Record
After a AGY Bank A/C Mapping record is authorized, it can be modified using the Unlock operation from the Action List. To make changes to a record after authorization:
- Invoke the AGY Bank A/C Mapping Summary screen from the Browser.
- Select the status of the record that you want to retrieve for authorization. You can only amend authorized records.
- Specify any or all of the details in the corresponding fields on the screen.
- Click 'Search'. All records with the specified details that are pending authorization are retrieved and displayed in the lower portion of the screen.
- Double click the record that you wish to authorize. The AGY Bank A/C Mapping Detail screen is displayed in amendment mode. Select Unlock operation from the Action List to amend the record.
- Amend the necessary information and click on Save to save the changes.
3.40.8 Authorizing an amended AGY Bank Branch Record
An amended AGY Bank A/C Mapping record must be authorized for the amendment to be made effective in the system. The authorization of amended records can be done only from Fund Manager Module and Agency Branch module.
The subsequent process of authorization is the same as that for normal transactions.
3.40.9 Copying the Attributes
If you want to create an AGY Bank A/C Mapping record having the same attributes of an existing AGY Bank A/C Mapping record, you can copy the attributes of an existing AGY Bank A/C Mapping record to a AGY Bank A/C Mapping record.
To copy the attributes:
- Retrieve the AGY Bank A/C Mapping record whose attributes the new AGY Bank A/C Mapping record should inherit. You can retrieve the record through the Summary screen or through the F7- F8 operation which is explained in the previous sections of this chapter.
- Click on ‘Copy’ in the Actions list.
3.41 Replication of Changes
This section contains the following topics:
3.41.1 Invoking the Auto Replication Preference Maintenance Detail Screen
Modifications made to a unit holder account under a CIF, through an Information Change operation, might require to be replicated to all unit holder accounts under the CIF. Oracle FLEXCUBE Investor Servicing provides the facility of configuring the system so that automatic replication could be achieved.
You can maintain a template that contains the fields in the Unit Holder New Account Maintenance, for which you require replication of any modifications that are made through an Information Change. The templates can be maintained at two levels – CIF level and Identification Type level.
To maintain the templates, use the ‘Auto Replication Preference Maintenance Detail’ screen. You can invoke this screen by typing ‘UTDAUTRE’ in the field at the top right corner of the Application tool bar and clicking on the adjoining arrow button.
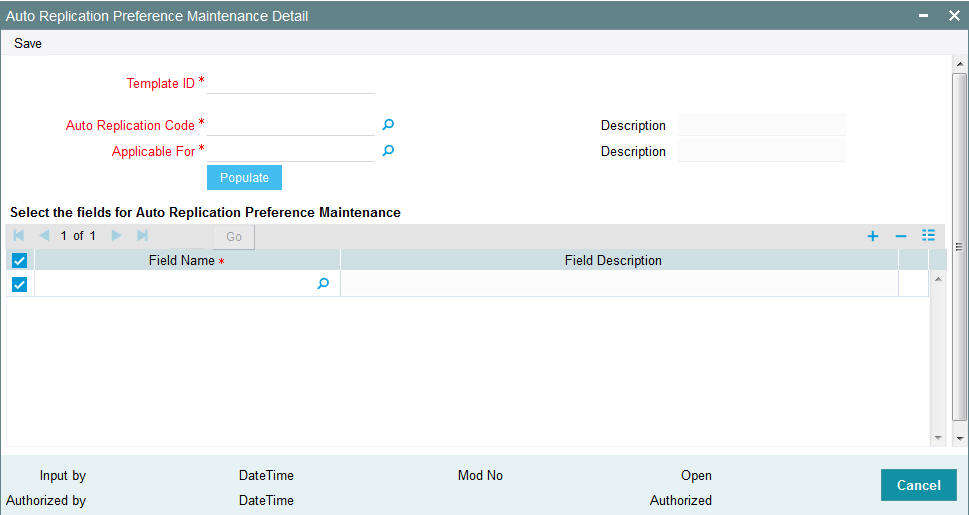
In this screen, you must maintain the following details to maintain the template:
- A unique ID for the template.
- The level at which the automatic replication of changes made through Information Change is required – either CIF level or Identification Type level.
Template ID
Alphanumeric; 6 Characters; Mandatory
Specify a unique identification for the automatic replication template being maintained.
Auto Replication Code
Alphanumeric; 25 Characters; Mandatory
This field indicates the type of entity for which the automatic replication template preferences are being maintained. The entity types for which the automatic replication feature is available are pre-configured for your installation. The Unit Holder Information Change and Broker Info Change options are displayed in this field and cannot be changed.
Description
Display
The appropriate description is displayed in the Description field.
Applicable For
Alphanumeric; 1 Character; Mandatory
Specify the level at which the automatic replication of changes made through Information Change is required – either CIF level or Identification Type level. Depending upon your choice, CIF-relevant fields or Identification Type fields are available for selection for automatic replication.
Note
If you select auto replication code as ‘BROKERINFOCHANGE’ and applicable for option as B-Broker and click on Populate button, the system displays the list of all available fields for creating a template.
Description
Display
The appropriate description is displayed in the Description field.
After specifying the mandatory details, click on ‘Populate’ button to view the field name and field description. However, you can amend these values.
Field Name
Alphanumeric; 30 Characters; Mandatory
Select the fields in the Unit Holder New Account maintenance, changes to which are to be replicated to all accounts under a CIF. You can choose either CIF-relevant fields, or fields pertaining to Identification Type, depending on the level at which the automatic replication is required, which you have selected in the Applicable For field.
The list of fields for which the automatic replication feature is available is pre-configured for your installation.
Field Description
Display
The system displays the description for the selected field name.
3.42 Auto Replication Preference Maintenance Summary
This section contains the following topics:
- Section 3.42.1, "Invoking Auto Replication Preference Maintenance Summary Screen"
- Section 3.42.2, "Retrieving Template "
- Section 3.42.3, "Editing Template Parameters"
- Section 3.42.4, "Viewing Auto Replication Record"
- Section 3.42.5, "Deleting Auto Replication Preference"
- Section 3.42.6, "Authorizing Auto Replication Preference"
- Section 3.42.7, "Amending Auto Replication Preference"
- Section 3.42.8, "Authorizing Amended Auto Replication Preferences"
- Section 3.42.9, "Copying Attributes"
3.42.1 Invoking Auto Replication Preference Maintenance Summary Screen
You can perform the following operations on a template for automatic replication:
- Edit the fields defined for the template, before authorization
- Delete the template before authorization
- View the template
- Have another user authorize the template
- Amend the template after authorization
Note
During edit or amend operations, the template ID cannot be changed. Only the fields tagged to the template, are allowed to be changed.
To perform any of these operations, use the ‘Auto Replication Preference Maintenance Summary’ screen. You can invoke this screen by typing ‘UTSAUTRE’ in the field at the top right corner of the Application tool bar and clicking on the adjoining arrow button.
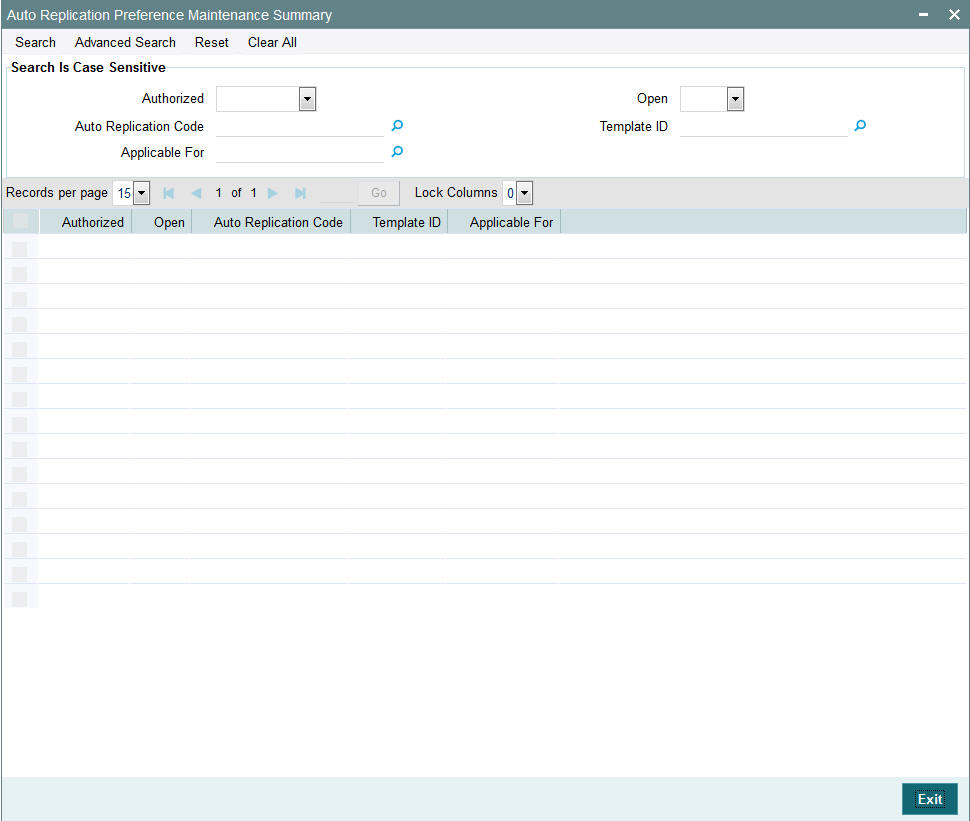
3.42.2 Retrieving Template
You can retrieve a previously entered template in the Summary screen, as follows:
- Specify any or all of the following details in the Auto Replication
Preference Summary screen:
- The status of the record in the Authorized field. If you choose the “Blank Space” option, then all the records that involve the specified unit holder are retrieved.
- The status of the Template record in the open field. If you choose the “Blank Space” option, then all the records are retrieved.
- Auto Replication Code
- Template ID
- Applicable For
- Click ‘Search’ button to view the records. All records with the specified details are retrieved and displayed in the lower portion of the screen.
Note
You can also retrieve the individual Template ID details from the Detail screen by doing a query in the following manner:
- Press F7.
- Input any parameter in the screen.
- Press F8.
You can perform Edit, Delete, Amend, Authorize, Reverse, Confirm operation by selecting from the Action list.
You can also search the record by using combination of % and alphanumeric value.
For example, you can search the record for Template ID by using the combination of % and alphanumeric value as follows:-
- Search by T%: The system will fetch all the records whose Template ID starts from Alphabet ‘A’. For example, TMPL.
- Search by %7: The system will fetch all the records whose Template ID ends by numeric value’ 7’. For example, TMP7.
- Search by %17%: The system will fetch all the records whose Template ID contains the numeric value 17. For example, TMP17.
3.42.3 Editing Template Parameters
You can modify the details of the template that you have already entered into the system, provided it has not been subsequently authorized. You can perform this operation as follows:
- Invoke the Auto Replication Preference Summary screen from the Browser.
- Select the status of the record that you want to retrieve for modification in the Authorized field. You can only modify records that are unauthorized. Accordingly, choose the Unauthorized option.
- Specify any or all of the details in the corresponding fields to retrieve the record that is to be modified.
- Click ‘Search’ button. All unauthorized records with the specified details are retrieved and displayed in the lower portion of the screen.
- Double click the record that you want to modify. The Auto Replication Preference Maintenance screen is displayed.
- Select Unlock Operation from Action list to modify the record. Modify the necessary information.
- Click Save to save your changes. The Auto Replication Preference Maintenance screen is closed and the changes made are reflected in the Auto Replication Preference Summary screen.
3.42.4 Viewing Auto Replication Record
To view a record that you have previously entered, you must retrieve the same in the Auto Replication Preference Summary screen, as follows:
- Invoke the Summary Screen from the Browser.
- Select the status of the record that you want to retrieve for viewing in the Authorized field. You can also view all records that are either unauthorized or authorized only, by choosing the Unauthorized / Authorized option.
- Specify any or all of the details of the record in the corresponding fields on the screen.
- Click ‘Search’ button. All records with the specified details are retrieved and displayed in the lower portion of the screen.
- Double click the record that you want to view in the list of displayed records. The Auto Replication Preference screen is displayed in View mode.
3.42.5 Deleting Auto Replication Preference
You can delete only unauthorized records in the system. To delete a record that you have previously entered:
- Invoke the Auto Replication Preference Summary screen from the Browser.
- Select the status of the record that you want to retrieve for deletion.
- Specify any or all of the details and click ‘Search’ button. All records with the specified details are retrieved and displayed in the lower portion of the screen.
- Double click the record that you want to delete. The Auto Replication Preference Maintenance screen is displayed.
- Select Delete operation from the Action list. The system prompts you to confirm the deletion, and the record is deleted physically from the system database.
3.42.6 Authorizing Auto Replication Preference
An unauthorized auto replication preference must be authorized in the system for it to be processed. To authorize a record:
- Invoke the Auto Replication Preference Summary screen from the Browser.
- Select the status of the record that you want to retrieve for authorization. Typically, choose the Unauthorized option.
- Specify any or all of the details of the record in the corresponding fields on the screen.
- Click ‘Search’ button. All the records with the specified details that are pending authorization are retrieved and displayed in the lower portion of the screen.
- Double click the record that you wish to authorize. The Auto Replication Preference Maintenance screen is displayed. Select Authorize operation from Action.
When the checker authorizes a record, details of validations, if any, that were overridden by the maker of the record during the Save operation, are displayed. If any of these overrides results in an error, the checker must reject the record.
3.42.7 Amending Auto Replication Preference
After an auto replication preference is authorized, it can be modified using the Unlock operation from Action list. To make changes to an auto replication preference record after authorization:
- Invoke the Auto Replication Preference Summary screen from the Browser.
- Select the status of the record that you wish to retrieve for amendment. You can only amend only authorized records.
- Specify any or all of the details of the Income Distribution Setup in the screen.
- Click ‘Search’ button. All records with the specified details are retrieved and displayed in the lower portion of the screen.
- Double click the record that you want to amend. The Auto Replication Preference Maintenance screen is displayed in Amendment mode. Click the Unlock operation from the Action list to amend the record.
- Amend the necessary information. Click the Save button to save the changes.
3.42.8 Authorizing Amended Auto Replication Preferences
An amended auto replication preference record must be authorized for the amendment to be made effective in the system. The authorization of amended records can only be done from Fund Manager Module and Agency branch Module. The process of authorization is subsequently the same as that for normal transactions.
3.42.9 Copying Attributes
If you want to create a new auto replication preference having the same attributes of an existing preference, you can copy the attributes of an existing preference to a new preference.
To copy the attributes:
- Retrieve the record whose attributes the new preference should inherit. You can retrieve the record through the Summary screen or through the F7- F8 operation which is explained in the previous sections of this chapter.
- Click on ‘Copy’ from the Action list.
- Indicate the Template ID for the auto replication preference Setup. You can however change the details of the new setup if required.
3.43 Preferences for Country
This section contains the following topics:
3.43.1 Invoking the Country Preference Maintenance Detail Screen
Oracle FLEXCUBE Investor Servicing provides the facility to associate certain attributes for countries maintained in the system. You can define the reputation risk of a country, the EUSD option associated with it and assign alpha codes in the Country Preference Maintenance screen. You can invoke the ‘Country Preference Maintenance Detail’ screen by typing ‘UTDCONPF’ in the field at the top right corner of the Application tool bar and clicking on the adjoining arrow button.
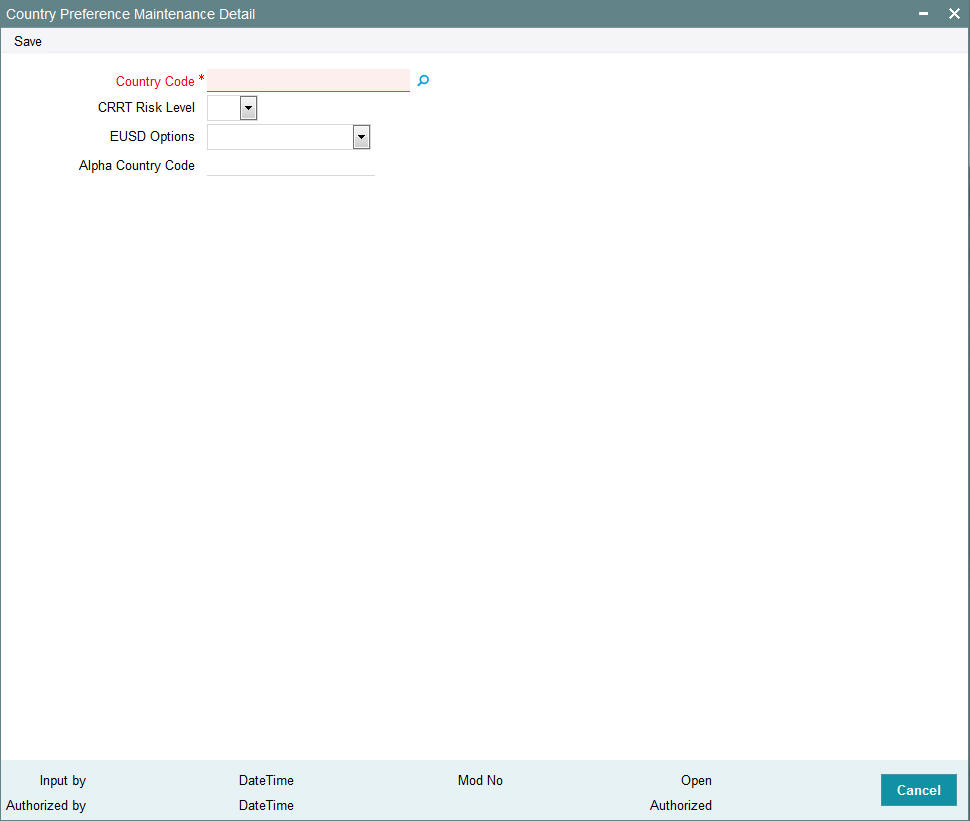
Before you associate any attribute with a country, it is desirable to ensure that the following information is already setup in the system:
- The countries that must be associated with EUSD options must be set up in the system in the Country Maintenance.
Country Code
Alphanumeric; 3 Characters; Mandatory
Select the country for which you wish to define preferences.
CRRT Risk Level
Optional
Select the CRRT i.e. the Country Reputation Risk Table associated with the country from the drop-down list. The reputation risk level may either be ‘High’ or ‘Low’. High implies that it is a high risk country while Low indicates cautionary risk country.
While creating a unit holder, if the unit holder domicile country is listed in the CRRT list, then system throws up an error depending on the country risk level.
EUSD Options
Optional
You need to associate a EUSD (European Union Savings Directive) option with each country. Based upon unit holder’s country of domicile, the corresponding EUSD option of that country will get defaulted during unit holder creation.
The list displays the following values:
- With Holding Tax
- Exchange of Information
By default no option will be selected. If no option is selected the system will consider that the EUSD is not applicable and the system will not track the average cost as required for EUSD. If any of the option is selected then the system will consider that the EUSD is applicable.
The EUSD option at transaction level will be defaulted from the unit holder’s EUSD Option. You can also modify the EUSD option at transaction level. The transaction level option will be taken as the EUSD option for a transaction. The following EUSD Options would be available at transaction level.
- With Holding Tax (WHT)
- Exchange of Information (EOI)
- Tax Certificate (TCE)
For all of the above three options, the system will calculate the EUSD tax. However, if you select With Holding Tax, the system will deduct it from the settlement amount.
Alpha Country Code
Alphanumeric; 3 Characters; Optional
After you have defined the preferences of a country, you must have another user authorize it so that it would be effective in the system.
Before the record is authorized, you can edit it as many times as necessary. You can also delete it before it is authorized.
After authorization, you can only make changes to the record through an amendment.
3.44 Country Preference Maintenance Summary Screen
This section contains the following topics:
- Section 3.44.1, "Invoking the Country Preference Maintenance Summary Screen"
- Section 3.44.2, "Retrieving Country Preference Details"
- Section 3.44.3, "Editing Country Preference Details"
- Section 3.44.4, "Viewing Country Preference Details"
- Section 3.44.5, "Deleting Country Preference Details"
- Section 3.44.6, "Authorizing Country Preference Details"
- Section 3.44.7, "Amending Country Preference Details"
- Section 3.44.8, "Authorizing Country Preference Details"
- Section 3.44.9, "Copying the attributes"
3.44.1 Invoking the Country Preference Maintenance Summary Screen
After you have set up the country preferences, you must have another user authorize it so that it would be effective in the system. Country preferences for an unauthorized record will not be used in the system
You can invoke the ‘Country Preference Maintenance Summary’ screen by typing ‘UTSCONPF’ in the field at the top right corner of the Application tool bar and clicking on the adjoining arrow button.

You can perform the following operations from this screen:
- Retrieving Country Preference Details
- Editing Country Preference Details
- Viewing Country Preference Details
- Deleting Country Preference Details
- Authorizing Country Preference Details
- Amending Country Preference Details
- Authorizing Country Preference Details
- Copying the Attributes
3.44.2 Retrieving Country Preference Details
To retrieve a previously entered currency record:
- Invoke the Country Preference Maintenance Summary screen and specify the following:
- The authorization status of the currency record in the Authorization Status field. If you choose the “Blank Space” option, then all the records are retrieved.
- The status of the currency records in the Open field. If you choose the “Blank Space” option, then all the records are retrieved.
- The Country Code
- EUSD Options
- CRRT Risk Level
- After you have specified the required details, click 'Search'. All records with the specified details are retrieved and displayed in the lower portion of the screen.
You can also retrieve an individual Country Preference Maintenance from the Detail screen by doing query in the following manner:
- 1. Press F7
- 2. Input the Country Code
- 3. Press F8
You can perform Edit, Delete, Amend, Authorize, Reverse, Confirm operation by selecting from the Action list.
You can also search the record by using combination of % and alphanumeric value.
For example, you can search the record for country code by using the combination of % and alphanumeric value.
Search by Z% :- System will fetch all the records whose country code starts from Alphabet ‘Z’.
3.44.3 Editing Country Preference Details
You can modify the details of a country preference that you have already entered into the system, provided it has not been subsequently authorized. You can perform this operation as follows:
- Invoke the Country Preference Maintenance Summary screen from the Browser.
- Select the authorization status of the currency records that you want to retrieve for modification in the Authorized field. You can only modify records of currencies that are unauthorized. Accordingly, choose the unauthorized option from the drop down list.
- Specify any or all of the search parameters of the currency for retrieving the records.
- Click 'Search'. All unauthorized currencies with the specified details are retrieved and displayed in the lower portion of the screen.
- Double click the currency that you want to modify. The Country Preference Maintenance Detail screen is displayed.
- Select Unlock Operation from Action list to modify the record. Modify the necessary information.
- Click Save to save the changes. The Country Preference Maintenance screen is closed and the changes made are reflected in the Country Preference Maintenance Summary screen.
3.44.4 Viewing Country Preference Details
To view the currency details that you have previously entered:
- Invoke the Country Preference Maintenance Summary Screen from the Browser.
- Select the authorization status of the currency records that you want to retrieve for viewing in the Authorized field. You can also view all currencies that are either unauthorized or authorized only, by choosing the Unauthorized / Authorized option.
- Specify any or all of the search parameters.
- Click 'Search'. All records with the specified details are retrieved and displayed in the lower portion of the screen.
- Double click the record that you want to view. The Country Preference Maintenance screen Detail is displayed in view mode.
3.44.5 Deleting Country Preference Details
You can delete only unauthorized records in the system. To delete a country preference record:
- Invoke the Country Preference Maintenance Summary screen from the Browser.
- Select the status of the currency record that you want to retrieve for deletion.
- Specify any or all of the search parameters of the currency record in the corresponding fields on the screen.
- Click 'Search'. All records with the specified details are retrieved and displayed in the lower portion of the screen.
- Double click the currency record that you want to delete. The Country Preference Maintenance Detail screen is displayed.
- Select Delete operation from the Action list. The system prompts you to confirm the deletion, and the record is deleted physically from the system database.
You can delete only unauthorized records in the system. To delete a currency record:
- Invoke the Currency Maintenance Summary screen from the Browser.
- Select the status of the currency record that you want to retrieve for deletion.
- Specify any or all of the search parameters of the currency record in the corresponding fields on the screen.
- Click ‘Search’. All records with the specified details are retrieved and displayed in the lower portion of the screen.
- Double click the currency record that you want to delete. The Currency Maintenance Detail screen is displayed.
- Select Delete operation from the Action list. The system prompts you to confirm the deletion, and the record is deleted physically from the system database.
3.44.6 Authorizing Country Preference Details
An unauthorized currency must be authorized in the system for it to be processed. To authorize a currency:
- Invoke the Country Preference Maintenance Summary screen from the Browser.
- Select the status of the currency record that you want to retrieve for authorization. Typically, choose the unauthorized option from the drop down list.
- Specify any or all of the search parameters of the currency in the corresponding fields on the screen.
- Click 'Search'. All records with the specified details that are pending authorization are retrieved and displayed in the lower portion of the screen.
- Double click the currency that you wish to authorize. The Country Preference Maintenance screen displayed. Select Authorize operation from Action.
When the checker authorizes a preference, details of validations, if any, that were overridden by the maker of the currency code during the Save operation, are displayed. If any of these overrides results in an error, the checker must reject the currency.
3.44.7 Amending Country Preference Details
After a country preference is authorized, it can be modified using the Unlock operation from Action list. To make changes to a currency after authorization, you must invoke the Unlock operation which is termed as Amend Operation.
- Invoke the Country Preference Maintenance Summary screen from the Browser.
- Select the status of the currency record that you wish to retrieve for amendment. You can only amend records of currencies that are authorized.
- Specify any or all of the search parameters of the currency in the corresponding fields on the screen.
- Click 'Search'. All currency records with the specified details are retrieved and displayed in the lower portion of the screen.
- Double click the currency that you want to amend. The Country Preference Maintenance screen is displayed in Amendment mode.
- Click the Unlock operation from the Action list to amend the currency.
- Amend the necessary information. Click the Save button to save the changes.
3.44.8 Authorizing Country Preference Details
An amended country preference record must be authorized for the amendment to be made effective in the system. The process of authorization is the same as the process of normal authorization.
3.44.9 Copying the attributes
If you want to create a new country preference record having the same attributes of an existing country preference record, you can copy the attributes of an existing country preference record to a new country preference record.
To copy the attributes:
- Retrieve the country preference record whose attributes the new preference should inherit. You can retrieve the country preference record through the Summary screen or through the F7- F8 operation which is explained in the previous sections of this chapter.
3.45 Multiple Languages Maintenance
This section contains the following topics:
3.45.1 Invoking the Language Support Detail Screen
FCIS provides the facility to maintain multiple languages in the system. You may select different languages at the time of installation. However, you may select additional languages at a later stage. Existing Information entered in the default language gets copied to all the languages selected.
The ‘Multiple Language Support Maintenance’ screen allows you to select languages in which information is stored in the system apart from the default English language.
A list of factory shipped languages is provided. You may select the language codes that the system should support. You can capture information such as the currency name, fund name, etc. in the languages chosen in this screen.
The Multiple Language Support Maintenance screen can be used for the following operations on multiple languages:
- Retrieval for viewing
- Selecting additional language codes
- Editing an unauthorized language selection
- Authorizing language codes selected
- Amending authorized language selections
You can invoke the ‘Language Support Detail’ screen by typing ‘UTDLNGSU’ in the field at the top right corner of the Application tool bar and clicking on the adjoining arrow button.
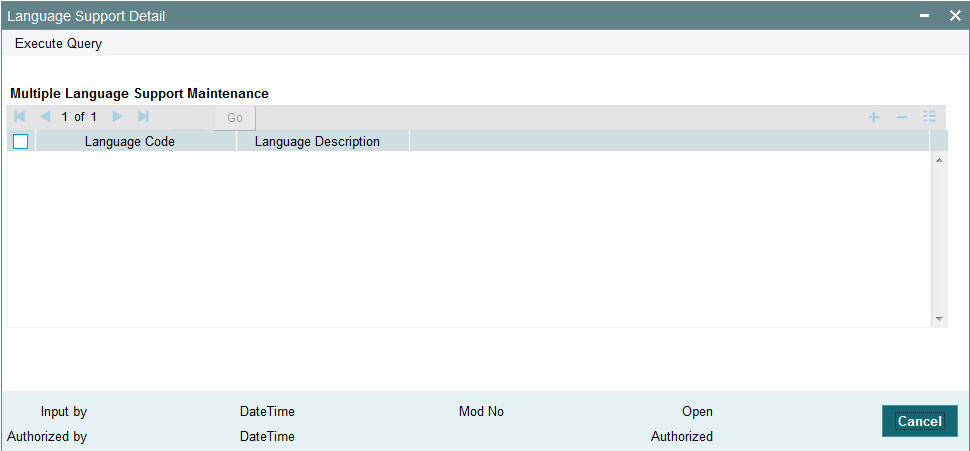
Specify the following language support details:
Multiple Language Support Maintenance
Language Code
Alphanumeric; 12 Characters; Optional
Specify the code of the language. The adjoining option list displays valid language codes maintained in the system. You can select the appropriate one.
Language Description
Display
Upon selection of the language code, the system displays the description of the specified language code.
The above fields will be enabled only after executing the query.
3.46 KYC/ AML Maintenance
This section contains the following topics:
3.46.1 Invoking the KYC Maintenance Detail Screen
For each jurisdiction (segment), you need to maintain standard and additional lists of documents to be collected from the investor. You may capture transactions; however system does not allow you to complete a transaction unless all the KYC requirements for that unit holder are met.
The lists of such documents vary based on the following parameters:
- Investor Entity Type (Trust, Individual, Fund, etc)
- Origin of funds: the investor’s bank account is in a FATF or Non FATF Country
Use the ‘KYC Maintenance Detail’ screen to maintain the standard and additional lists of documents. You can invoke this screen by typing ‘UTDKYCMT’ in the field at the top right corner of the Application tool bar and clicking on the adjoining arrow button. Select ‘New’ from the Actions menu in the Application tool bar or click new icon to enter the KYC details.:
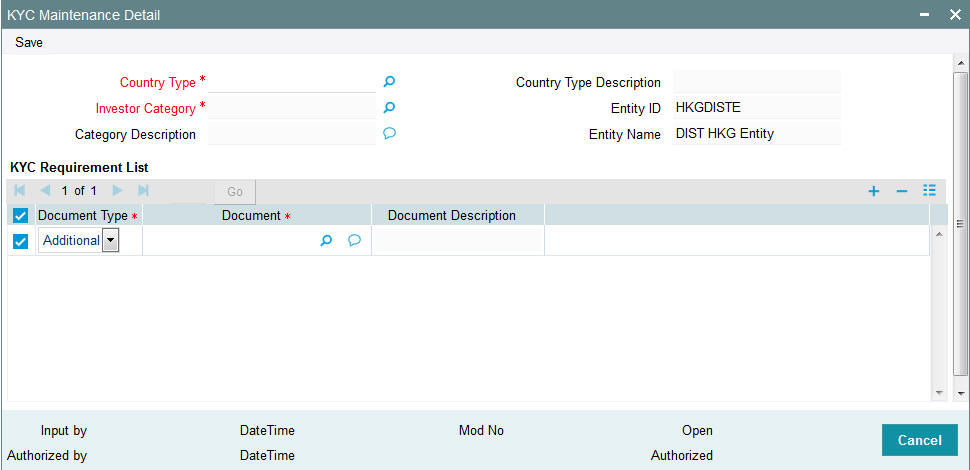
The ID of the entity assigned to the agent and its corresponding description are shown when you invoke the screen.
You need to set up the following parameters:
Country Type
Alphanumeric; 1 Character; Mandatory
In FC-IS, countries are categorized into four types; FATF (Financial Action Task Force), Non – FATF, NCCT, CRRT. FATF is an inter-governmental body for developing and promoting policies to combat money laundering.
Select FATF if you wish to maintain list of required KYC documents for investor account residing in a FATF country. Else, select Non - FATF.
Country Type Description
Display
The system displays the description for the selected country type.
Investor Category
Alphanumeric; 2 Characters; Mandatory
Select the category of investor for whom the list of required KYC documents is to be set up, from the drop-down list.
Category Description
Display
The system displays the description for the selected investor category.
Entity ID
Display
The system defaults the Entity ID linked to the selected country type.
Entity Name
Display
The system defaults the corresponding name of the defaulted entity here.
KYC Requirement List
Document Type
Optional
You can either classify documents as Standard or as Additional.
Document
Alphanumeric; 255 Characters; Mandatory
Specify the document name.
Document Description
Display
The system displays document description for the selected document.
3.47 KYC Maintenance Summary Screen
This section contains the following topics:
- Section 3.47.1, "Invoking the KYC Maintenance Summary Screen"
- Section 3.47.2, "Retrieving KYC List"
- Section 3.47.3, "Editing KYC Parameters"
- Section 3.47.4, "Viewing KYC Details"
- Section 3.47.5, "Deleting KYC Details"
- Section 3.47.6, "Authorizing KYC Details"
- Section 3.47.7, "Amending KYC Details"
- Section 3.47.8, "Authorizing Amended KYC Details"
- Section 3.47.9, "Copying Attributes"
3.47.1 Invoking the KYC Maintenance Summary Screen
After you have maintained lists of required KYC documents in the system, you can perform any of the following operations before the record is authorized:
- Edit the specified documents in the record.
- Delete the record.
After authorization, you can make changes to the record through an amendment operation.
The KYC Find Options screen helps you locate and retrieve the KYC list that you want to edit, view, delete, authorize or amend, from the database. You can invoke the ‘KYC Maintenance Summary’ screen by typing ‘UTSKYCMT’ in the field at the top right corner of the Application tool bar and clicking on the adjoining arrow button.

3.47.2 Retrieving KYC List
The KYC Documents feature is available only if your installation has specifically requested for it.
To perform any operation on a KYC record, you must first retrieve the record from the database in the Summary screen.
- Specify any or all of the following details in the KYC Maintenance
Summary screen:
- The status of the record in the Authorized field. If you choose the “Blank Space” option, then all the records that involve are retrieved.
- The status of the KYC records in the Open field. If you choose the “Blank Space” option, then all the records are retrieved.
- Country Type
- Investor Category
- Click ‘Search’ button to view the records. All records with the specified details are retrieved and displayed in the lower portion of the screen.
Note
You can also retrieve the individual KYC record from the Detail screen by doing a query in the following manner:
- Press F7.
- Input any parameter in the screen.
- Press F8.
You can perform Edit, Delete, Amend, Authorize, Reverse, Confirm operation by selecting from the Action list.
You can also search the record by using combination of % and alphanumeric value.
Example
You can search the record for Investor Category by using the combination of % and alphanumeric value that is, Search by N%: The system will fetch all the records whose Investor Category starts with the alphabet ‘N’. Ex: NR.
3.47.3 Editing KYC Parameters
You can modify the KYC details that you have already entered into the system, provided it has not been subsequently authorized. You can perform this operation as follows:
- Invoke the KYC Maintenance Summary screen from the Browser.
- Select the status of the record that you want to retrieve for modification in the Authorized field. You can only modify records that are unauthorized. Accordingly, choose the unauthorized option.
- Specify any or all of the search parameters in the corresponding fields to retrieve the record that is to be modified.
- Click ‘Search’ button. All unauthorized records with the specified details are retrieved and displayed in the lower portion of the screen.
- Double click the record that you want to modify. The KYC Maintenance Detail screen is displayed.
- Select Unlock Operation from Action list to modify the record. Modify the necessary information.
- Click Save to save your changes. The KYC Maintenance Detail screen is closed and the changes made are reflected in the KYC Maintenance Summary screen.
3.47.4 Viewing KYC Details
To view the KYC details, that you have previously entered:
- Invoke the KYC Maintenance Summary Screen from the Browser.
- Select the status of the KYC records that you want to retrieve for viewing in the Authorized field. You can also view all records that are either unauthorized or authorized only, by choosing the Unauthorized / Authorized option.
- Specify any or all of the search parameters of the record in the corresponding fields on the screen.
- Click ‘Search’ button. All records with the specified details are retrieved and displayed in the lower portion of the screen.
- Double click the record that you want to view in the list of displayed records. The KYC Maintenance Detail screen is displayed in View mode.
3.47.5 Deleting KYC Details
You can delete only unauthorized KYC records in the system. To delete a record that you have previously entered:
- Invoke the KYC Maintenance Summary screen from the Browser.
- Select the status of the record that you want to retrieve for deletion.
- Specify any or all of the details and click ‘Search’ button. All records with the specified details are retrieved and displayed in the lower portion of the screen.
- Double click the record that you want to delete. The KYC Maintenance Detail screen is displayed.
- Select Delete operation from the Action list. The system prompts you to confirm the deletion, and the record is deleted physically from the system database.
3.47.6 Authorizing KYC Details
An unauthorized KYC record must be authorized in the system for it to be processed. To authorize a record:
- Invoke the KYC Maintenance Summary screen from the Browser.
- Select the status of the record that you want to retrieve for authorization. Typically, choose the Unauthorized option.
- Specify any or all of the search parameters of the record in the corresponding fields on the screen.
- Click ‘Search’ button. All the records with the specified details that are pending authorization are retrieved and displayed in the lower portion of the screen.
- Double click the record that you wish to authorize. The KYC Maintenance screen is displayed. Select Authorize operation from Action.
When the checker authorizes a record, details of validations, if any, that were overridden by the maker of the record during the Save operation, are displayed. If any of these overrides results in an error, the checker must reject the record.
3.47.7 Amending KYC Details
After the KYC details are authorized, it can be modified using the Unlock operation from Action list. To make changes to the KYC details after authorization:
- Invoke the KYC Maintenance Summary screen from the Browser.
- Select the status of the record that you wish to retrieve for amendment. You can only amend only authorized records.
- Specify any or all of the search parameters of the KYC Maintenance screen.
- Click ‘Search’ button. All records with the specified details are retrieved and displayed in the lower portion of the screen.
- Double click the record that you want to amend. The KYC Maintenance Detail screen is displayed in Amendment mode. Click the Unlock operation from the Action list to amend the record.
- Amend the necessary information. Click the Save button to save the changes.
3.47.8 Authorizing Amended KYC Details
An amended KYC record must be authorized for the amendment to be made effective in the system. The authorization of amended records can only be done from Fund Manager Module and Agency branch Module.
The process of authorization is subsequently the same as that for normal transactions.
3.47.9 Copying Attributes
If you want to create a new KYC record having the same attributes of an existing record, you can copy the attributes of an existing KYC record to a new KYC record.
To copy the attributes:
- Retrieve the record whose attributes the new Income Distribution should inherit. You can retrieve the record through the Summary screen or through the F7- F8 operation which is explained in the previous sections of this chapter.
- Click on ‘Copy’ from the Action list.
- Indicate the ID for the new Income Distribution Setup. You can however change the details of the new Income Distribution Setup if required.
3.48 KYC Ref Type Restrictions
This section contains the following topics:
3.48.1 Invoking the KYC Ref Type Restrictions Screen
According to FICA (Financial Intelligence Compliance Act), redemption payment transactions should not be processed until the required KYC documents have been received from the investor. However, you can configure the system to exclude certain reference types of transactions from the restrictions on redemption payouts even though the unit holder is FICA non-compliant.
Use the ‘KYC Ref Type Restrictions Detail’ screen to exclude ref types from redemption payout restrictions. You can invoke this screen by typing ‘UTDKYCRE’ in the field at the top right corner of the Application tool bar and clicking on the adjoining arrow button. Select ‘New’ from the Actions menu in the Application tool bar or click new icon to enter the details.
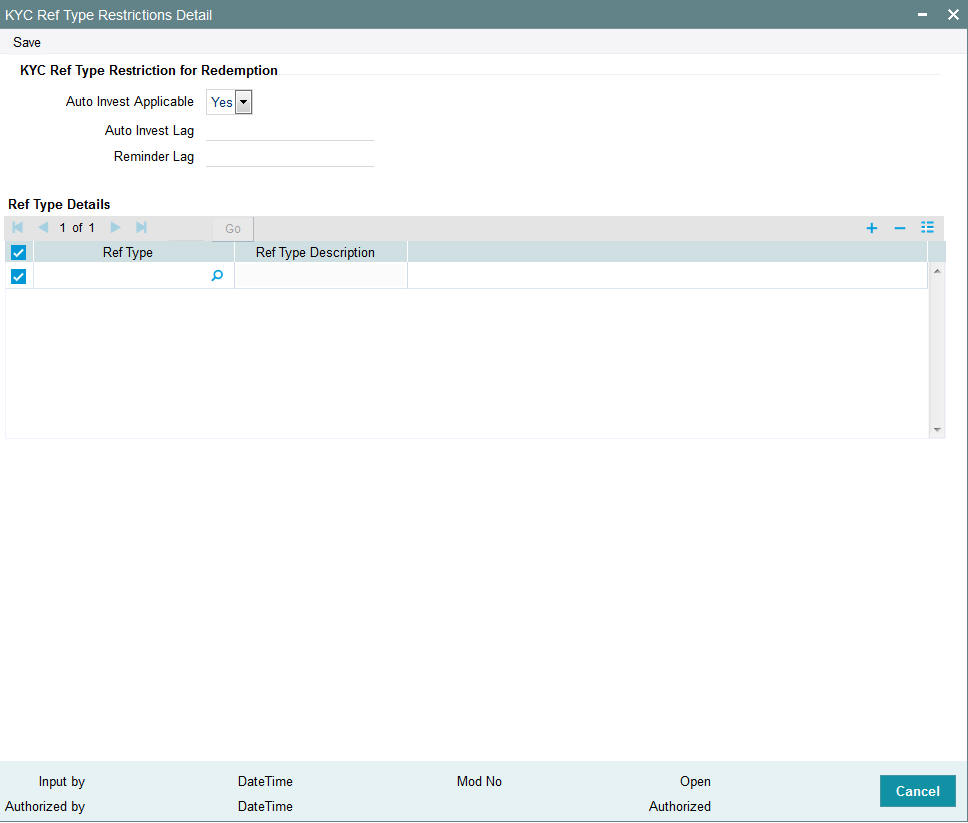
You can use this screen to:
- Enter new KYC ref type restrictions.
- Edit existing KYC ref type restrictions.
- View existing KYC ref type restrictions.
- Delete existing KYC ref type restrictions.
- Authorize KYC ref type restrictions.
- Amend authorized KYC ref type restrictions.
You can specify the following details in this screen:
Auto Invest Applicable
Optional
Check this box to indicate auto investment feature is applicable.
Auto Invest Lag
Numeric; 22 Characters; Optional
If auto investment feature is applicable, then you need to specify the payment lag in days, if any, to be applicable for redemption payouts.
Reminder Lag
Numeric; 22 Characters; Optional
Specify the reminder lag, in days, after which reminders must be generated for the redemption payout. The reminder lag must be less than the auto invest lag period specified in the previous field.
Ref Type Details Section
Ref Type
Alphanumeric; 50 Characters; Optional
Select the code of the reference type from the adjoining option list.
Ref Type Description
Display
The system displays the description of the selected reference type.
3.49 KYC Ref Type Restrictions Summary Screen
This section contains the following topics:
- Section 3.49.1, "Invoking the KYC Ref Type Restriction Summary Screen"
- Section 3.49.2, "Retrieving KYC Ref Type Restriction Record"
- Section 3.49.3, "Editing KYC Ref Type Restrictions"
- Section 3.49.4, "Viewing KYC Ref Type Restrictions Record"
- Section 3.49.5, "Delete KYC Ref Type Restrictions Record"
- Section 3.49.6, "Authorizing KYC Ref Type Restrictions Record"
- Section 3.49.7, "Amending KYC Ref Type Restrictions Record"
- Section 3.51.8, "Authorizing Amended Frequency Preferences"
- Section 3.51.9, "Copying Attributes"
3.49.1 Invoking the KYC Ref Type Restriction Summary Screen
You can invoke the ‘KYC Ref Type Restrictions Summary’ screen by typing ‘UTSKYCRE’ in the field at the top right corner of the Application tool bar and clicking on the adjoining arrow button.

The following operations can be performed in the KYC Ref Type Restrictions Summary screen:
- Retrieving KYC Ref Type Restriction Record
- Editing KYC Ref Type Restrictions
- Viewing KYC Ref Type Restrictions Record
- Delete KYC Ref Type Restrictions Record
- Authorizing KYC Ref Type Restrictions Record
- Amending KYC Ref Type Restrictions Record
- Authorizing KYC Ref Type Restrictions Record
- Copying the Attributes
3.49.2 Retrieving KYC Ref Type Restriction Record
You can retrieve a previously entered entity in the Summary screen, as follows:
Invoke the KYC Ref Type Restriction Summary screen and specify the following:
- The status of the entity in the Authorized field. If you choose the “Blank Space” option, then all the entities are retrieved.
- The status of the entity in the Open field. If you choose the “Blank Space” option, then all the entities are retrieved.
- Auto Invest Applicable
- Auto Invest lag
- Reminder Lag
After you have specified the required details, click 'Search'. All records with the specified details are retrieved and displayed in the lower portion of the screen.
You can also retrieve the individual interest rate details from the Detail screen by doing query in the following manner:-
- Press F7
- Indicate whether auto invest applicable
- Press F8
You can perform Edit, Delete, Amend, Authorize, Reverse, Confirm operation by selecting from the Action list.
3.49.3 Editing KYC Ref Type Restrictions
You can modify the details of an interest rate that you have already entered into the system, provided it has not been subsequently authorized. You can perform this operation as follows:
- Invoke the KYC Ref Type Restriction Summary screen from the Browser.
- Select the status of the records that you want to retrieve for modification in the Authorization Status field. You can only modify records of entities that are unauthorized. Accordingly, choose the unauthorized option from the drop down list.
- Specify any or all of the search parameters of KYC Ref Type Restriction parameters in the corresponding fields on the screen to retrieve the entity that is to be modified.
- Click 'Search'. All unauthorized entities with the specified details are retrieved and displayed in the lower portion of the screen.
- Double click the record that you want to modify. The KYC Ref Type Restriction Detail screen is displayed.
- Select Unlock Operation from Action list to modify the record. Modify the necessary information.
- Click Save to save the changes. The KYC Ref Type Restriction Detail screen is closed and the changes made are reflected in the KYC Ref Type Restriction Summary screen.
3.49.4 Viewing KYC Ref Type Restrictions Record
To view the interest rate details that you have previously entered:
- Invoke the KYC Ref Type Restriction Summary Screen from the Browser.
- Select the status of the record that you want to retrieve for viewing in the Authorization Status field. You can also view all records that are either unauthorized or authorized only, by choosing the Unauthorized / Authorized option.
- Specify any or all of the search parameters in the corresponding fields on the screen.
- Click 'Search'. All records with the specified details are retrieved and displayed in the lower portion of the screen.
- Double click the record that you want to view. The KYC Ref Type Restriction Detail screen is opened in view mode.
3.49.5 Delete KYC Ref Type Restrictions Record
You can delete only unauthorized records in the system. To delete a record:
- Invoke the KYC Ref Type Restriction Summary screen from the Browser.
- Select the status of the record that you want to retrieve for deletion.
- Specify any or all of the search parameters in the corresponding fields on the screen.
- Click 'Search'. All records with the specified details are retrieved and displayed in the lower portion of the screen.
- Double click the record that you want to delete. The KYC Ref Type Restriction Detail screen is displayed.
- Select Delete operation from the Action list. The system prompts you to confirm the deletion, and the record is deleted physically from the system database.
3.49.6 Authorizing KYC Ref Type Restrictions Record
An unauthorized record must be authorized in the system for it to be processed. To authorize the interest rate details:
- Invoke the KYC Ref Type Restriction Summary screen from the Browser.
- Select the status of the record that you want to retrieve for authorization. Typically, choose the unauthorized option from the drop down list.
- Specify any or all of the details of the record in the corresponding fields on the screen.
- Click 'Search'. All records with the specified details that are pending authorization are retrieved and displayed in the lower portion of the screen.
- Double click the record that you wish to authorize. The KYC Ref Type Restriction screen displayed. Select Authorize operation from Action.
When the checker authorizes an entity, details of validations, if any, that were overridden by the maker of the transaction during the Save operation, are displayed. If any of these overrides results in an error, the checker must reject the entity.
3.49.7 Amending KYC Ref Type Restrictions Record
After the interest rate details are authorized, they can be modified using the Unlock operation from Action list. To make changes to the interest rate details after authorization, you must invoke the Unlock operation which is termed as Amend Operation.
- Invoke the ‘Interest Rate Maintenance’ Summary screen from the Browser.
- Select the status of the record that you wish to retrieve for amendment. You can only amend records of entities that are authorized.
- Specify any or all of the search parameters in the corresponding fields on the screen.
- Click 'Search'. All records with the specified details are retrieved and displayed in the lower portion of the screen.
- Double click the record that you want to amend. The ‘Interest Rate Maintenance’ screen is displayed in Amendment mode.
- Click the Unlock operation from the Action list to amend the entity.
- Amend the necessary information. Click the Save button to save the changes.
3.49.8 Authorizing KYC Ref Type Restrictions Record
Any amended interest rate details must be authorized for the amendment to be made effective in the system. The process of authorization is subsequently the same as that for normal transactions.
3.49.9 Copying the Attributes
If you want to create a KYC Ref Type Restriction having the same attributes of an existing restriction, you can copy the attributes of an existing KYC Ref Type restriction to a new restriction.
To copy the attributes:
- Retrieve the KYC Ref Type Restriction record whose attributes the restriction should inherit. You can retrieve the record through the Summary screen or through the F7- F8 operation which is explained in the previous sections of this chapter.
- Click on ‘Copy’ in the Actions list.
- Indicate the parameters for the new KYC Ref Restriction type. You can however change the details if required.
3.50 SIP/ SWP/ STP Rules
This section contains the following topics:
3.50.1 Maintaining Systematic Plans
FCIS allows you to meet the following requirements related to rules for systematic plans:
- Multiple frequencies for SIP/ SWP/ STP
- Min / Max SI amount per frequency and automatic cancellation after ‘n’ failures
- Minimum number of SIP/ SWP/ STP to be committed per frequency
- Validation of holdings for SWP/ STP setup
- Automatic cancellation after last installment in SWP/ STP
The multiple frequencies provided for SI at Fund level are as mentioned below:
Frequency |
Available values for each frequency |
Explanation |
Weekly (A) |
1,8,15,22 2,10,20,28 3,6,16,27 4,7,18,29 5,10,15,20 |
You need to select any 4 dates from 1 to 31. There would be 5 such sets of dates at fund level. While capturing SI, you can select any of the sets available at the fund level and map it to the unitholder. |
Weekly (B) |
Sun/Mon/Tue/ Wed/Thu/Fri/Sat |
At the fund rules level, there are a set of values from Sunday to Saturday. Fund would map any day(s) as applicable. While capturing SI, you would be able to select any day from the set available at Fund level. |
Fortnightly |
1,22 2,28 3,27 4,29 5,20 |
You can select any 2 dates from 1 to 31. There would be 5 such sets of dates at fund level. While capturing SI, you can select any of the sets available at Fund level. |
Monthly |
Any date of month |
User would choose any date(s) from 1 to 31. While capturing SI, user would select any of the date from the allowed dates at fund level. |
Quarterly |
Any date of month |
You can choose any date(s) from 1 to 31. While capturing SI, you can select any of the date from the allowed dates at fund level. If the first SI is to generate on 18th Jan, the next generation would happen on 18th April. |
Note
Only one of the weekly frequencies is applicable to a fund i.e. either date based or week based.
You are allowed to capture minimum amount, maximum amount and minimum balance of SI for each frequency and transaction type. Example, for SIP of weekly frequency, the minimum amount is Rs. 500 and maximum amount is Rs. 1000.The SI setup validates the SI for the amount captured at the frequency level.
The System should automatically cancels SIP/ SWP/ STP after 3 (parameterized value) continuous failures. Also, minimum balance in amount is captured for every frequency. At the time of setting up SWP and STP, the system validates this amount against the amount by multiplying the balance and the latest NAV. The STP validation is applicable in the fund from which STP is done.
FCIS also allows you to capture the minimum number of SI at frequency level. SI setup is allowed until the criteria for minimum number of SI is met. The start date and end date of the SI is generated depending on the SI rules.
For example,
UH can invest in monthly frequency – SI dates are 2nd or 10th of a month
UH can invest in quarterly frequency – SI dates are 3rd or 15th of a month
Minimum number of installments for monthly frequency is 6 and for quarterly frequency is 2.
Assuming that a unit holder decides to invest in monthly SIP and selects 10th as the SIP date. The application is submitted on 9th Jan and UH gives 6 instructions. The SI setup is allowed because criteria for 6 SI’s are met. Also the start date and end date is defaulted to 10th Jan and 10th Jun respectively.
In case SWP/ STP results in lesser amount being confirmed back by RTA (a case where no further balance is available), the SWP/ STP is automatically canceled.
The ‘Frequency Preferences Detail’ screen can be used to define setup of dates / days that can be used for mapping in Fund rules and Standing Instructions.
You can invoke this screen by typing ‘UTDFRQPR’ in the field at the top right corner of the Application tool bar and clicking on the adjoining arrow button. Select ‘New’ from the Actions menu in the Application tool bar or click new icon to enter the frequency preference details.
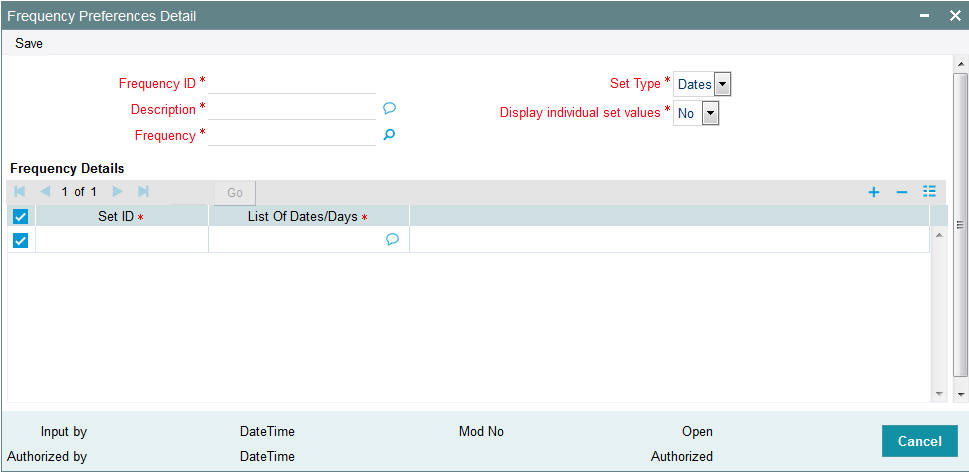
You can capture the following information
Frequency ID
Alphanumeric; 10 Characters; Mandatory
Enter a unique ID for the setup.
Description
Alphanumeric; 255 Characters; Mandatory
Specify the description of the setup.
Frequency
Alphanumeric; 1 Character; Mandatory
Specify the frequency. Alternatively, you can select frequency code from the option list. The list displays all valid frequency code maintained in the system.
Set Type
Mandatory
This is applicable only if frequency selected is Weekly. The Applicable values being
- Dates
- Days
For other frequencies, it would be defaulted to Dates and you will not be allowed to change it.
Display individual set values
Mandatory
Select ‘Yes’ to display individual set values
For instance, in case the frequency is fortnightly, the SI screen should display the set values as
- 1,22
- 2,28
Where as for weekly frequency by days, the values should be displayed individually for a set which would be (Mon/Thu/Fri) and thus this check box would be unchecked.
Frequency Details
Set ID
Alphanumeric; 10 Characters; Mandatory
Specify the unique ID for this set depending on the frequency specified.
Note
If Set ID is already mapped to the SI, you cannot delete the same during amendment. This will be checked by looking at the funds that are mapped to the Freq. ID for which SI has been setup for a particular Set ID
List Of Dates/Days
Alphanumeric; 255 Characters; Mandatory
Specify the dates or days based on the ‘Set Type’.
Note
If the client country parameter is set to “SIRULEATFREQ” for your bank please refer to Annex_A.doc for further details.
3.51 Frequency Preferences Summary Screen
This section contains the following topics:
- Section 3.51.1, "Invoking the Preferences Frequency Summary Screen"
- Section 3.51.2, "Retrieving Frequency Preferences"
- Section 3.51.3, "Editing Frequency Preference Record"
- Section 3.51.4, "Viewing Frequency Preference Record"
- Section 3.51.5, "Deleting Frequency Preference Record"
- Section 3.51.6, "Authorizing Frequency Preferences"
- Section 3.51.7, "Amending Frequency Preferences"
- Section 3.51.8, "Authorizing Amended Frequency Preferences"
- Section 3.51.9, "Copying Attributes"
3.51.1 Invoking the Preferences Frequency Summary Screen
The ‘Frequency Preferences Summary’ screen can be used to view the details regarding setup of dates / days that can be used for mapping in Fund rules and Standing Instructions.
You can invoke this screen by typing ‘UTSFRQPR’ in the field at the top right corner of the Application tool bar and clicking on the adjoining arrow button.
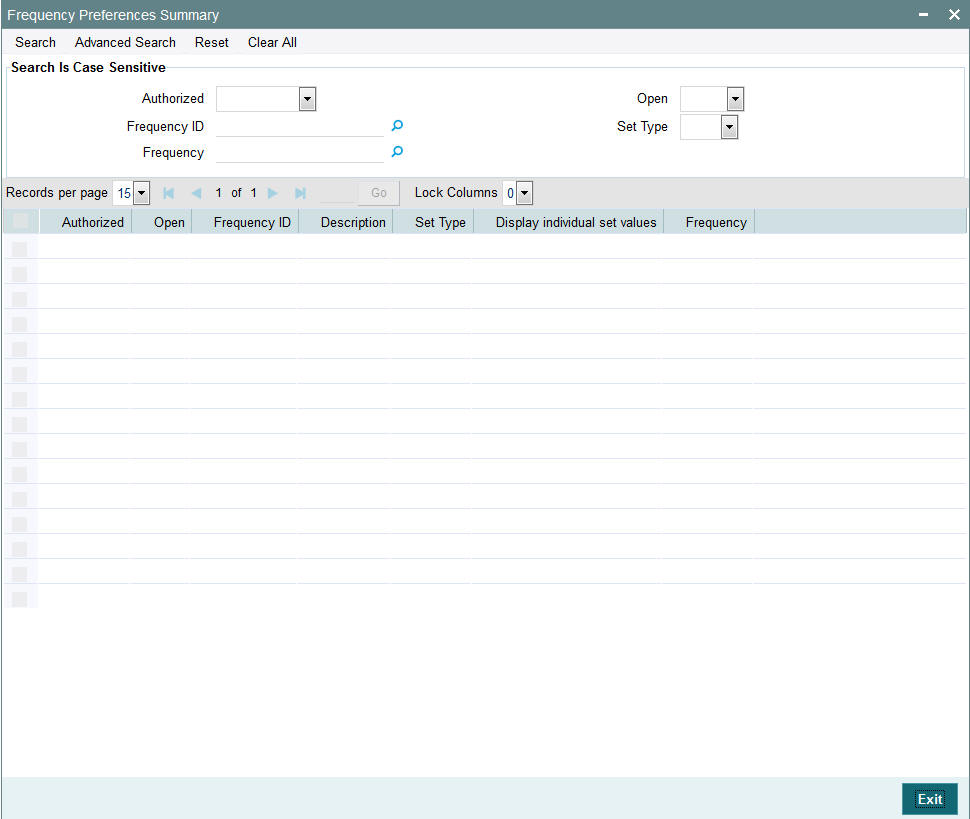
3.51.2 Retrieving Frequency Preferences
You can retrieve a previously entered frequency preferences record in the Summary screen, as follows:
- Invoke the Frequency Preferences Summary screen and specify the following:
- The authorization status of the record in the Authorized field.
- The status of the record in the Open field.
- The Frequency ID
- Frequency
- Set Type
- After you have specified the required details, click ‘Search’ button. All entities with the specified details are retrieved and displayed in the lower portion of the screen.
Note
You can also retrieve the individual Frequency Preference record from the detail screen by doing query in the following manner:-
- Press F7.
- Input any parameter in the screen.
- Press F8.
You can perform Edit, Delete, Amend, Authorize, Reverse, Confirm operation by selecting from the Action list.
You can also search the record by using combination of % and alphanumeric value.
For Example:
- You can search the record for Entity ID by using the combination of % and numeric value:
- Search by %7:- System will fetch all the records whose entity ID Type ends by numeric value’ 7’. For example, 1247.
- Search by %17%:- System will fetch all the records whose Entity ID contains the numeric value 17. For example, 1417.
3.51.3 Editing Frequency Preference Record
You can modify the details of a frequency preference record that you have already entered into the system, provided it has not been subsequently authorized. You can perform this operation as follows:
- Invoke the Frequency Preference Summary screen from the Browser.
- Select the status of the frequency ID record that you want to retrieve for modification in the Authorized field. You can only modify records of entities that are unauthorized. Accordingly, choose the Unauthorized option from the drop down list.
- Specify any or all of the search parameters in the corresponding fields on the screen to retrieve the entity that is to be modified.
- Click ‘Search’ button. All unauthorized records with the specified details are retrieved and displayed in the lower portion of the screen.
- Double click the entity that you want to modify. The Frequency Preferences Maintenance screen is displayed.
- Select Unlock Operation from Action list to modify the record. Modify the necessary information.
- Click Save to save the changes. The Frequency Preferences Maintenance screen is closed and the changes made are reflected in the Frequency Preferences Summary screen.
3.51.4 Viewing Frequency Preference Record
To view a frequency preference record that you have previously entered:
- Invoke the Frequency Preference Summary Screen from the Browser.
- Select the status of the record that you want to retrieve for viewing in the Authorized field. You can also view all records that are either unauthorized or authorized only, by choosing the Unauthorized / Authorized option.
- Specify any or all of the search parameters in the corresponding fields on the screen.
- Click ‘Search’ button . All entities with the specified details are retrieved and displayed in the lower portion of the screen.
- Double click the entity that you want to view. The Frequency Preferences Maintenance screen is displayed in view mode.
3.51.5 Deleting Frequency Preference Record
You can delete only unauthorized records in the system. To delete a frequency preference record:
- Invoke the Frequency Preferences Summary screen from the Browser.
- Select the status of the record that you want to retrieve for deletion.
- Specify any or all of the search parameters of the record in the corresponding fields on the screen.
- Click ‘Search’ button. All records with the specified details are retrieved and displayed in the lower portion of the screen.
- Double click the record that you want to delete. The Frequency Preferences Maintenance Detail screen is displayed.
- Select Delete operation from the Action list. The system prompts you to confirm the deletion, and the record is deleted physically from the system database.
3.51.6 Authorizing Frequency Preferences
An unauthorized frequency preference must be authorized in the system for it to be processed. To authorize a frequency preference:
- Invoke the Frequency Preferences Summary screen from the Browser.
- Select the status of the record that you want to retrieve for authorization. Typically, choose the Unauthorized option from the drop down list.
- Specify any or all of the search parameters in the corresponding fields on the screen.
- Click ‘Search’ button. All records with the specified details that are pending authorization are retrieved and displayed in the lower portion of the screen.
- Double click the entity that you wish to authorize. The Frequency Preferences Maintenance screen displayed. Select Authorize operation from Action.
When the checker authorizes an entity, details of validations, if any, that were overridden by the maker of the transaction during the Save operation, are displayed. If any of these overrides results in an error, the checker must reject the record.
3.51.7 Amending Frequency Preferences
After a frequency preference is authorized, it can be modified using the Unlock operation from Action list. To make changes to an entity after authorization, you must invoke the Unlock operation which is termed as Amend Operation.
- Invoke the Frequency Preference Summary screen from the Browser.
- Select the status of the record that you wish to retrieve for amendment. You can only amend records of entities that are authorized.
- Specify any or all of the search parameters in the corresponding fields on the screen.
- Click ‘Search’ button. All records with the specified details are retrieved and displayed in the lower portion of the screen.
- Double click the entity that you want to amend. The Single Entity Maintenance screen is displayed in Amendment mode.
- Click the Unlock operation from the Action list to amend the entity.
- Amend the necessary information. Click the Save button to save the changes.
3.51.8 Authorizing Amended Frequency Preferences
An amended frequency preference must be authorized for the amendment to be made effective in the system.
The process of authorization is subsequently the same as that for normal transactions.
3.51.9 Copying Attributes
If you want to create a frequency preference having the same attributes of an existing preference, you can copy the attributes of an existing preference to a new preference.
To copy the attributes:
- Retrieve the record whose attributes the new frequency preference should inherit. You can retrieve the record through the Summary screen or through the F7- F8 operation which is explained in the previous sections of this chapter.
- Click on ‘Copy’ in the Actions list.
- Indicate the Frequency ID for the new preference. You can however change the details if required.
3.52 Interest Rate Details
This section contains the following topics:
3.52.1 Maintaining Interest Rate Details
The interest rate that is to be used for interest calculation is maintained using the Interest Rate Maintenance screen. In order to arrive at the rate of interest, you have to maintain the effective date, transaction currency details and Interest Rate of the transaction.
You can invoke the ‘FCIS Interest Rate Maintenance Detail’ screen by typing ‘UTDINRMN’ in the field at the top right corner of the Application tool bar and clicking on the adjoining arrow button. Select ‘New’ from the Actions menu in the Application tool bar or click new icon to enter the details.
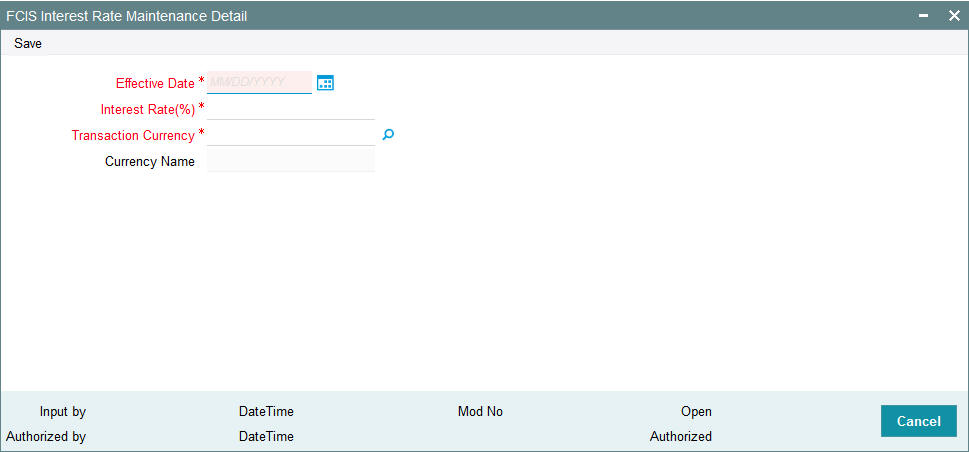
Effective Date
Date Format; Mandatory
Specify the date the system should consider for calculating the rate of interest.
Interest Rate (%)
Numeric; 30 Characters; Mandatory
Specify the Interest Rate for the currency you have selected.
Transaction Currency
Alphanumeric; 3 Characters; Mandatory
Select the currency of transaction from the option list.
Currency Name
Display
The system displays the name of the selected transaction currency.
3.53 Interest Rate Summary Screen
This section contains the following topics:
- Section 3.53.1, "Invoking the FCIS Interest Rate Maintenance Summary Screen"
- Section 3.53.2, "Retrieving Entity in Summary Screen"
- Section 3.53.3, "Editing Interest Rate"
- Section 3.53.4, "Viewing Interest Rate Details"
- Section 3.53.5, "Deleting Interest Rate Details"
- Section 3.53.6, "Authorizing Interest Rate Details"
- Section 3.53.7, "Amending Interest Rate Details"
- Section 3.53.8, "Authorizing Amended Interest Rate Details"
- Section 3.53.9, "Copying Attributes"
3.53.1 Invoking the FCIS Interest Rate Maintenance Summary Screen
After you have maintained Interest Rates, you must authorize it to be effective in the system. Before the Interest Rates are authorized, you can edit it as many times as necessary.
Here, in this screen you can view the summary of all the transactions on different dates, currencies and interest rates. Hence this screen helps you keep track of the interest rates.
You can invoke the ‘FCIS Interest Rate Maintenance Summary’ screen by typing ‘UTSINRMN’ in the field at the top right corner of the Application tool bar and clicking on the adjoining arrow button.
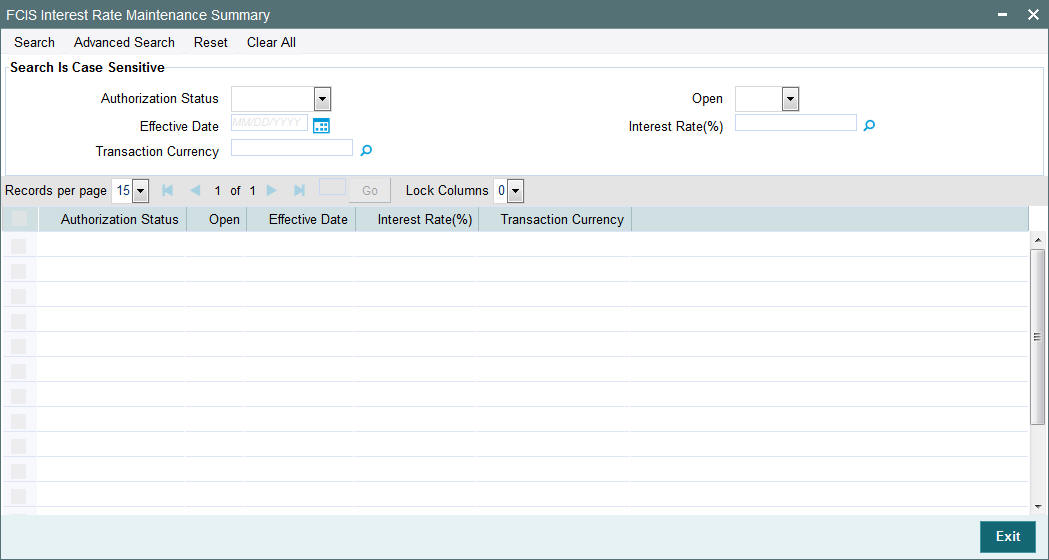
3.53.2 Retrieving Entity in Summary Screen
You can retrieve a previously entered entity in the Summary screen, as follows:
- Invoke the Entity Maintenance Summary screen and specify the following
:
- The status of the entity in the Authorization Status field. If you choose the “Blank Space” option, then all the entities are retrieved.
- The status of the entity in the Open field. If you choose the “Blank Space” option, then all the entities are retrieved.
- Effective Date
- Interest Rate(%)
- Transaction Currency
- After you have specified the required details, click ‘Search’ button. All records with the specified details are retrieved and displayed in the lower portion of the screen.
Note
You can also retrieve the individual interest rate details from the Detail screen by doing query in the following manner:-
- Press F7
- Input any parameter in the screen
- Press F8
You can perform Edit, Delete, Amend, Authorize, Reverse, Confirm operation by selecting from the Action list.
You can also search the record by using combination of % and alphanumeric value.
Example:
You can search the record for Interest Rate by using the combination of % and alphanumeric value as follows:-
- Search by Z%: The system will fetch all the records whose Interest Rate starts from Alphabet ‘Z’. For example, ZAR.
- Search by %2: The system will fetch all the records whose Interest Rate ends by numeric value’ 2’. For example, 12.
3.53.3 Editing Interest Rate
You can modify the details of an interest rate that you have already entered into the system, provided it has not been subsequently authorized. You can perform this operation as follows:
- Invoke the Interest Rate Summary screen from the Browser.
- Select the status of the interest rate records that you want to retrieve for modification in the Authorization Status field. You can only modify records of entities that are unauthorized. Accordingly, choose the Unauthorized option from the drop-down list.
- Specify any or all of the search parameters of the interest rate details in the corresponding fields on the screen to retrieve the entity that is to be modified.
- Click ‘Search’ button. All unauthorized entities with the specified details are retrieved and displayed in the lower portion of the screen.
- Double click the record that you want to modify. The Interest Rate Maintenance Detail screen is displayed.
- Select Unlock Operation from Action list to modify the record. Modify the necessary information.
- Click Save to save the changes. The Interest Rate Maintenance Detail screen is closed and the changes made are reflected in the Interest Rate Maintenance Summary screen.
3.53.4 Viewing Interest Rate Details
To view the interest rate details that you have previously entered:
- Invoke the Interest Rate Maintenance Summary Screen from the Browser.
- Select the status of the record that you want to retrieve for viewing in the Authorization Status field. You can also view all records that are either unauthorized or authorized only, by choosing the Unauthorized / Authorized option.
- Specify any or all of the search parameters in the corresponding fields on the screen.
- Click ‘Search’ button. All records with the specified details are retrieved and displayed in the lower portion of the screen.
- Double click the record that you want to view. The Interest Rate Maintenance Detail screen is opened in view mode.
3.53.5 Deleting Interest Rate Details
You can delete only unauthorized records in the system. To delete an interest rate parameter:
- Invoke the Interest Rate Summary screen from the Browser.
- Select the status of the record that you want to retrieve for deletion.
- Specify any or all of the search parameters in the corresponding fields on the screen.
- Click ‘Search’ button. All records with the specified details are retrieved and displayed in the lower portion of the screen.
- Double click the record that you want to delete. The Interest Rate Maintenance Detail screen is displayed.
- Select Delete operation from the Action list. The system prompts you to confirm the deletion, and the record is deleted physically from the system database.
3.53.6 Authorizing Interest Rate Details
An unauthorized record must be authorized in the system for it to be processed. To authorize the interest rate details:
- Invoke the Interest Rate Maintenance Summary screen from the Browser.
- Select the status of the record that you want to retrieve for authorization. Typically, choose the Unauthorized option from the drop down list.
- Specify any or all of the details of the record in the corresponding fields on the screen.
- Click ‘Search’ button. All records with the specified details that are pending authorization are retrieved and displayed in the lower portion of the screen.
- Double click the record that you wish to authorize. The Interest Rate Maintenance screen displayed. Select Authorize operation from Action.
When the checker authorizes an entity, details of validations, if any, that were overridden by the maker of the transaction during the Save operation, are displayed. If any of these overrides results in an error, the checker must reject the entity.
3.53.7 Amending Interest Rate Details
After the interest rate details are authorized, they can be modified using the Unlock operation from Action list. To make changes to the interest rate details after authorization, you must invoke the Unlock operation which is termed as Amend Operation.
- Invoke the Interest Rate Maintenance Summary screen from the Browser.
- Select the status of the record that you wish to retrieve for amendment. You can only amend records of entities that are authorized.
- Specify any or all of the search parameters in the corresponding fields on the screen.
- Click ‘Search’ button. All records with the specified details are retrieved and displayed in the lower portion of the screen.
- Double click the record that you want to amend. The Interest Rate Maintenance screen is displayed in Amendment mode.
- Click the Unlock operation from the Action list to amend the entity.
- Amend the necessary information. Click the Save button to save the changes.
3.53.8 Authorizing Amended Interest Rate Details
Any amended interest rate details must be authorized for the amendment to be made effective in the system.
The process of authorization is subsequently the same as that for normal transactions.
3.53.9 Copying Attributes
If you want to create an interest rate definition having the same attributes of an existing interest rate, you can copy the attributes of an existing interest rate to a new rate.
To copy the attributes:
- Retrieve the interest rate record whose attributes the new interest rate should inherit. You can retrieve the record through the Summary screen or through the F7- F8 operation which is explained in the previous sections of this chapter.
- Click on ‘Copy’ in the Actions list.
- Indicate the parameters for the new interest rate. You can however change the details if required
3.54 Rate Details for Hedge Funds
This section contains the following topics:
- Section 3.54.1, "Invoking the Rate Maintenance Screen"
- Section 3.54.2, "Operations on Interest Rate Details"
3.54.1 Invoking the Rate Maintenance Screen
You can maintain the interest rate details for hedge funds in ‘Rate Maintenance’ screen. You can invoke this screen by typing ‘UTDRATES’ in the field at the top right corner of the Application tool bar and clicking on the adjoining arrow button.
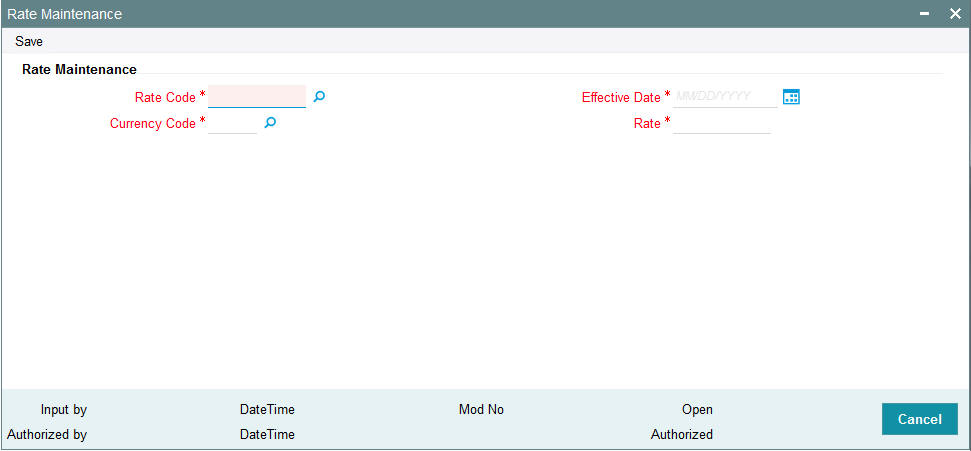
Rate Code
Alphanumeric; 10 Characters; Mandatory
Specify the rate code applicable for hedge fund or select the rate code from the option list provided. All rate codes maintained for the system parameter ‘RATECODE’ get displayed in the option list.
Currency Code
Alphanumeric; 3 Characters; Mandatory
Specify currency code related to the hedge fund or select the same from the option list provided. All valid currency codes maintained in the system get displayed in the option list.
Effective Date
Date Format; Mandatory
Specify the date on which the selected rate code becomes effective in the system. You can select the date by clicking the ‘Calendar’ icon provided.
Rate
Numeric; 10 Characters; Mandatory
Specify the interest rate to be applied for hedge funds. The rate specified here becomes effective on the ‘Effective Date’ indicated previously.
3.54.2 Operations on Interest Rate Details
You can perform the following operations on an interest rate record.
- New – an unauthorized record will be created. If you have rights for auto Authorization, the record will be authorized
- Modify – an unauthorized record can be modified by the maker (edit rights required)
- Delete – an unauthorized record can be deleted by the maker. You can not delete the unauthorized record created by amendment (delete rights required).
- Authorize – an unauthorized record can be authorized by anyone other than the maker (authorize rights required)
- Amendment – you can also amend a rate record, if required
3.55 Rate Maintenance Summary Screen
This section contains the following topics:
- Section 3.55.1, "Invoking the Rate Maintenance Summary Screen"
- Section 3.55.2, "Viewing a Rate Maintenance Record"
- Section 3.55.3, "Modifying a Rate Maintenance Record"
- Section 3.55.4, "Deleting a Rate Maintenance Record"
- Section 3.55.5, "Authorizing a Rate Maintenance Record"
- Section 3.55.6, "Amending a Rate Maintenance Record"
3.55.1 Invoking the Rate Maintenance Summary Screen
You can invoke the ‘Rate Maintenance Summary’ screen by typing ‘UTSRATES’ in the field at the top right corner of the Application tool bar and clicking on the adjoining arrow button.

You can perform the following operations in this screen:
- Viewing a Rate Maintenance record
- Modifying a Rate Maintenance record
- Deleting a Rate Maintenance record
- Authorizing a Rate Maintenance record
- Amending a Rate Maintenance record
3.55.2 Viewing a Rate Maintenance Record
To view a record that you have previously input, you must retrieve the same in the Rate Maintenance Summary screen as follows:
- Invoke the Rate Maintenance Summary screen from the Browser.
- Select the status of the record that you want to retrieve for viewing in the Authorized field. You can also view all records that are either unauthorized or authorized only, by choosing the Unauthorized/ Authorized option.
- The status of the record in the Open field. If you choose the ‘Blank Space’ option, then all the records that involve the specified tax compliance document Maintenance are retrieved.
- Rate Code
- Currency Code
- Click Query. All records with the specified fields are retrieved and displayed in the lower portion of the screen.
- Double click the record that you want to view in the list of displayed records. The Rate Maintenance screen is displayed in View mode.
3.55.3 Modifying a Rate Maintenance Record
You can modify the details of a Rate Maintenance record that you have already entered into the system, provided it has not been subsequently authorized. You can perform this operation as follows:
- Invoke the Rate Maintenance Summary screen from the Browser.
- Select the status of the record that you want to retrieve for modification in the Authorized field. You can only modify records that are unauthorized. Accordingly, choose the unauthorized option.
- The status of the record in the Open field. If you choose the ‘Blank Space’ option, then all the records that involve the specified tax compliance document Maintenance are retrieved.
- Rate Code
- Currency Code
- Click Query. All unauthorized records with the specified details are retrieved and displayed in the lower portion of the screen.
- Double click the record that you want to modify in the list of displayed records. The Rate Maintenance Detail screen is displayed.
- Select Unlock Operation from the Action list to modify the record. Modify the necessary information.
- Click Save to save your changes. The High Water Mark Detail screen is closed and the changes made are reflected in the Rate Maintenance Summary screen.
3.55.4 Deleting a Rate Maintenance Record
You can delete only unauthorized records in the system. To delete a record that you have previously entered:
- Invoke the Rate Maintenance Summary screen from the Browser.
- Select the status of the record that you want to retrieve for deletion.
- Specify any or all of the details in the corresponding fields on the screen.
- Click Query. All records with the specified fields are retrieved and displayed in the lower portion of the screen.
- Double click the record that you want to delete in the list of displayed records. The Rate Maintenance Detail screen is displayed.
- Select Delete Operation from the Action list. The system prompts you to confirm the deletion and the record is physically deleted from the system database.
3.55.5 Authorizing a Rate Maintenance Record
An unauthorized Rate Maintenance record must be authorized in the system for it to be processed. To authorize a record:
- Invoke the Rate Maintenance Summary screen from the Browser.
- Select the status of the record that you want to retrieve for authorization. Typically, choose the unauthorized option.
- Specify any or all of the details in the corresponding fields on the screen.
- Click Query. All records with the specified details that are pending authorization are retrieved and displayed in the lower portion of the screen.
- Double click the record that you wish to authorize. The Rate Maintenance Detail screen is displayed. Select Authorize operation from the Action List.
When a checker authorizes a record, details of validation, if any, that were overridden by the maker of the record during the Save operation are displayed. If any of these overrides results in an error, the checker must reject the record.
3.55.6 Amending a Rate Maintenance Record
After a Rate Maintenance record is authorized, it can be modified using the Unlock operation from the Action List. To make changes to a record after authorization:
Invoke the Rate Maintenance Summary screen from the Browser.
- Select the status of the record that you want to retrieve for authorization. You can only amend authorized records.
- Specify any or all of the details in the corresponding fields on the screen.
- Click Query. All records with the specified details that are pending authorization are retrieved and displayed in the lower portion of the screen.
- Double click the record that you wish to authorize. The Rate Maintenance screen is displayed in amendment mode. Select Unlock operation from the Action List to amend the record.
- Amend the necessary information and click on Save to save the changes.
3.56 High Water Mark Details
This section contains the following topics:
- Section 3.56.1, "Maintaining High Water Mark Details"
- Section 3.56.2, "Operations on High Water Mark"
3.56.1 Maintaining High Water Mark Details
High Water Mark (HWM) is defined to determine the performance fee associated with a hedge fund. High Water Mark mechanism ensures that the Fund Managers do not get the performance fee when the fund has negative performance compared to the previous performance fee period. The Fund Manager receives performance fee only on increases in Net Asset Value of the fund, in excess of the highest net asset value (High Water Mark) it had previously achieved.
The following example illustrates performance fee calculations for hedge funds having High Water Marks:
Example,
Assume that a fund launched at a net asset value of $100 per share, rose to $120 in its first year. In this case performance fee would be payable on the $20 return on each share. If in the next year the share value drops to $110, no performance fee will be paid. If in the third year the share value rises to $130, performance fee will be calculated only on the $10 return from the previous highest value, $120 (high water mark), rather than on the full return from $110 to $130.
You can maintain the details related high water mark for a fund in ‘High Water Mark Maintenance’ screen. You can invoke this screen by typing ‘UTDHWM’ in the field at the top right corner of the Application tool bar and clicking the adjoining arrow button.
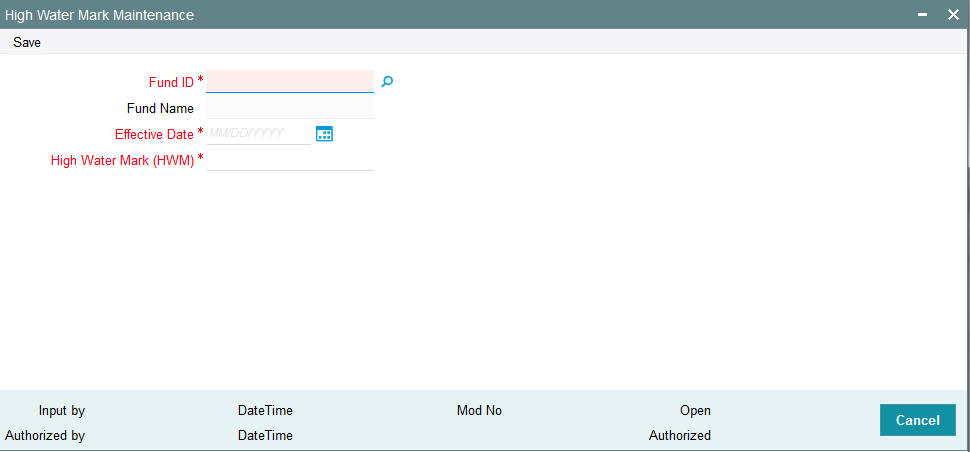
Fund ID
Alphanumeric; 6 Characters; Mandatory
Specify the fund Id for which you wish to maintain high water mark or select the fund Id from the option list provided.
Fund Name
Display
The name of the selected fund gets displayed here.
Effective Date
Date Format; Mandatory
Specify the date on which the high water mark value becomes effective for the fund. You can also select the date by clicking the ‘Calendar’ icon provided.
High Water Mark
Numeric; 27 Characters; Mandatory
Specify the high water mark value for the selected fund, beyond which if the fund value increases, the performance fee gets collected. You need to capture this value only for the first valuation period for the fund. For subsequent periods, the system will automatically populate the highest net asset value previously achieved by the fund.
3.56.2 Operations on High Water Mark
You can perform the following operations on a high water mark record.
- New – an unauthorized record will be created. If you have rights for auto Authorization, the record will be authorized
- Modify – an unauthorized record can be modified by the maker (edit rights required)
- Delete – an unauthorized record can be deleted by the maker. You can not delete the unauthorized record created by amendment (delete rights required).
- Authorize – an unauthorized record can be authorized by anyone other than the maker (authorize rights required)
- Amendment – you can amend an HWM record; however the amendment will not be allowed if fund price is maintained for the day later than or equal to HWM effective date.
3.57 High Water Mark Summary Screen
This section contains the following topics:
- Section 3.57.1, "Invoking the High Water Mark Summary Screen"
- Section 3.57.2, "Viewing a High Water Mark record"
- Section 3.57.3, "Modifying a High Water Mark record"
- Section 3.57.4, "Deleting a High Water Mark record"
- Section 3.57.5, "Authorizing a High Water Mark record"
- Section 3.57.6, "Amending High Water Mark record"
3.57.1 Invoking the High Water Mark Summary Screen
You can invoke the ‘High Water Mark Summary’ screen by typing ‘UTSHWM’ in the field at the top right corner of the Application tool bar and clicking on the adjoining arrow button.

You can perform the following operations in this screen:
3.57.2 Viewing a High Water Mark record
To view a record that you have previously input, you must retrieve the same in the High Water Mark Summary screen as follows:
- Invoke the High Water Mark Summary screen from the Browser.
- Select the status of the record that you want to retrieve for viewing in the Authorized field. You can also view all records that are either unauthorized or authorized only, by choosing the Unauthorized/ Authorized option.
- Specify any or all of the details of the record in the corresponding fields on the screen.
- Click Query. All records with the specified fields are retrieved and displayed in the lower portion of the screen.
- Double click the record that you want to view in the list of displayed records. The High Water Mark Detail screen is displayed in View mode.
3.57.3 Modifying a High Water Mark record
You can modify the details of a High Water Mark record that you have already entered into the system, provided it has not been subsequently authorized. You can perform this operation as follows:
- Invoke the High Water Mark Summary screen from the Browser.
- Select the status of the record that you want to retrieve for modification in the Authorized field. You can only modify records that are unauthorized. Accordingly, choose the unauthorized option.
- Specify any or all of the details in the corresponding fields to retrieve the record that is to be modified.
- Click Query. All unauthorized records with the specified details are retrieved and displayed in the lower portion of the screen.
- Double click the record that you want to modify in the list of displayed records. The High Water Mark Detail screen is displayed.
- Select Unlock Operation from the Action list to modify the record. Modify the necessary information.
- Click Save to save your changes. The High Water Mark Detail screen is closed and the changes made are reflected in the High Water Mark Summary screen.
3.57.4 Deleting a High Water Mark record
You can delete only unauthorized records in the system. To delete a record that you have previously entered:
- Invoke the High Water Mark Summary screen from the Browser.
- Select the status of the record that you want to retrieve for deletion.
- Specify any or all of the details in the corresponding fields on the screen.
- Click Query. All records with the specified fields are retrieved and displayed in the lower portion of the screen.
- Double click the record that you want to delete in the list of displayed records. The High Water Mark Detail screen is displayed.
- Select Delete Operation from the Action list. The system prompts you to confirm the deletion and the record is physically deleted from the system database.
3.57.5 Authorizing a High Water Mark record
An unauthorized High Water Mark record must be authorized in the system for it to be processed. To authorize a record:
- Invoke the High Water Mark Summary screen from the Browser.
- Select the status of the record that you want to retrieve for authorization. Typically, choose the unauthorized option.
- Specify any or all of the details in the corresponding fields on the screen.
- Click Query. All records with the specified details that are pending authorization are retrieved and displayed in the lower portion of the screen.
- Double click the record that you wish to authorize. The High Water Mark Detail screen is displayed. Select Authorize operation from the Action List.
When a checker authorizes a record, details of validation, if any, that were overridden by the maker of the record during the Save operation are displayed. If any of these overrides results in an error, the checker must reject the record.
3.57.6 Amending High Water Mark record
After a High Water Mark record is authorized, it can be modified using the Unlock operation from the Action List. You will not be allowed to amend the record if fund price is maintained for the day later than or equal to HWM effective date.
- To make changes to a record after authorization:
- Invoke the High Water Mark Summary screen from the Browser.
- Select the status of the record that you want to retrieve for authorization. You can only amend authorized records.
- Specify any or all of the details in the corresponding fields on the screen.
- Click Query. All records with the specified details that are pending authorization are retrieved and displayed in the lower portion of the screen.
- Double click the record that you wish to authorize. The High Water Mark screen is displayed in amendment mode. Select Unlock operation from the Action List to amend the record.
- Amend the necessary information and click on Save to save the changes.
3.58 Data Elements
This section contains the following topics:
3.58.1 Maintaining Data Elements
Data elements are maintained to calculate the performance fee associated with hedge funds. Data elements can be of either of the following two types:
- Non-Derived or factory shipped - e.g. HWM, SUB_PRICE (Subscription price), RED_PRICE (Redemption price) etc.
- Derived - you can define your own set of elements to use while building the performance fee formula
Some of the derived elements like APFPS, CL_FACTOR, RED_AMT, SUB_AMT, RED_UNITS, SUB_UNITS and PF_VAL are also factory shipped.
You can capture the details related to derived data elements in ‘Element Maintenance’ screen.
You can invoke this screen by typing ‘UTDENMNT’ in the field at the top right corner of the Application tool bar and clicking the adjoining arrow button.
Element ID
Alphanumeric; 20 Characters; Mandatory
Specify a unique code to identify the data element.
Element Description
Alphanumeric; 255 Characters; Mandatory
Specify a suitable description for the element.
In this screen, you can also modify an existing derived data element. The tables given below list the factory-shipped non-derived and derived data elements:
Non-derived (Factory Shipped)
Element Id |
Element Description |
HWM |
Latest High Water Mark |
HWM_RED |
High Water Mark at time of redemption |
HWM_SUB |
High Water Mark at time of subscription |
HWMHR_RED |
(High Water Mark+Hurdle Rate) at time of redemption |
HWMHR_SUB |
(High Water Mark+Hurdle Rate) at time of subscription |
HWMHR_LAT |
Latest (High Water Mark+Hurdle Rate) |
END_PRC |
End Price (Price at period end) |
SUB_PRC |
Subscription Price |
RED_PRC |
Redemption Price |
GAV |
Latest Gross Asset Value |
GAV_SUB |
Gross Asset Value ( On Subscription Date) |
GAV_RED |
Gross Asset Value ( On Redemption Date) |
LOT_HWM_RED |
Lot level High Water Mark at time of redemption |
LOT_HWM_SUB |
Lot level High Water Mark at time of subscription |
LOT_HWMHR_RED |
(Lot level High Water Mark+Hurdle) at time of redemption |
LOT_HWMHR_SUB |
(Lot level High Water Mark+Hurdle) at time of subscription |
TXN_UNITS |
Transaction Units |
PF_RATE |
Performance Fee Rate defined at Fund/Investor Category level. |
Element Id |
Element Description |
APFPS_IN |
Accrued Performance fee per share calculated during inflow transactions |
CLFAC_IN |
Contingent Liquidation Factor calculated during inflow transactions |
RED_AMT |
Redemption Amt |
SUB_AMT |
subscription Amt |
RED_UNITS |
Redemption units |
SUB_UNITS |
subscription units |
PF_VAL |
PF Value |
CL_VAL |
Contingent liquidation Value calculated during inflow(Will be used as an expression element id to calculate the total CL value, This represent the additional performance fee investor needs to pay to the fund manager in case of Early redemption /Period End, if Sub Price < HWM + hurdle during subscription and during redemption GAV > red / end price. |
3.58.2 Operations on Data Elements
You can perform the following operations on a data element record.
- New – an unauthorized record will be created. If you have rights for auto Authorization, the record will be authorized
- Modify – an unauthorized record can be modified by the maker (edit rights required)
- Delete – an unauthorized record can be deleted by the maker. You can not delete the unauthorized record created by amendment (delete rights required).
- Authorize – an unauthorized record can be authorized by anyone other than the maker (authorize rights required)
3.59 Element Maintenance Summary Screen
This section contains the following topics:
- Section 3.59.1, "Invoking the Element Maintenance Summary Screen"
- Section 3.59.2, "Viewing an Element Maintenance record"
- Section 3.59.3, "Modifying an Element Maintenance record"
- Section 3.59.4, "Deleting an Element Maintenance record"
- Section 3.59.5, "Authorizing an Element Maintenance record "
3.59.1 Invoking the Element Maintenance Summary Screen
You can invoke the ‘Element Maintenance Summary’ screen by typing ‘UTSENMNT’ in the field at the top right corner of the Application tool bar and clicking on the adjoining arrow button.

You can perform the following operations in this screen:
- Viewing an Element Maintenance record
- Modifying an Element Maintenance record
- Deleting an Element Maintenance record
- Authorizing an Element Maintenance record
3.59.2 Viewing an Element Maintenance record
To view a record that you have previously input, you must retrieve the same in the Element Maintenance Summary screen as follows:
- Invoke the Element Maintenance Summary screen from the Browser.
- Select the status of the record that you want to retrieve for viewing in the Authorized field. You can also view all records that are either unauthorized or authorized only, by choosing the Unauthorized/ Authorized option.
- Specify any or all of the details of the record in the corresponding fields on the screen.
- Click Query. All records with the specified fields are retrieved and displayed in the lower portion of the screen.
- Double click the record that you want to view in the list of displayed records. The Element Maintenance screen is displayed in View mode.
3.59.3 Modifying an Element Maintenance record
You can modify the details of an Element Maintenance record that you have already entered into the system, provided it has not been subsequently authorized. You can perform this operation as follows:
- Invoke the Element Maintenance Summary screen from the Browser.
- Select the status of the record that you want to retrieve for modification in the Authorized field. You can only modify records that are unauthorized. Accordingly, choose the unauthorized option.
- Specify any or all of the details in the corresponding fields to retrieve the record that is to be modified.
- Click Query. All unauthorized records with the specified details are retrieved and displayed in the lower portion of the screen.
- Double click the record that you want to modify in the list of displayed records. The Element Maintenance Detail screen is displayed.
- Select Unlock Operation from the Action list to modify the record. Modify the necessary information.
- Click Save to save your changes. The Element Maintenance Detail screen is closed and the changes made are reflected in the Element Maintenance Summary screen.
3.59.4 Deleting an Element Maintenance record
You can delete only unauthorized records in the system. To delete a record that you have previously entered:
- Invoke the Element Maintenance Summary screen from the Browser.
- Select the status of the record that you want to retrieve for deletion.
- Specify any or all of the details in the corresponding fields on the screen.
- Click Query. All records with the specified fields are retrieved and displayed in the lower portion of the screen.
- Double click the record that you want to delete in the list of displayed records. The Element Maintenance Detail screen is displayed.
- Select Delete Operation from the Action list. The system prompts you to confirm the deletion and the record is physically deleted from the system database.
3.59.5 Authorizing an Element Maintenance record
An unauthorized Element Maintenance must be authorized in the system for it to be processed. To authorize a record:
- Invoke the Element Maintenance Summary screen from the Browser.
- Select the status of the record that you want to retrieve for authorization. Typically, choose the unauthorized option.
- Specify any or all of the details in the corresponding fields on the screen.
- Click Query. All records with the specified details that are pending authorization are retrieved and displayed in the lower portion of the screen.
- Double click the record that you wish to authorize. The Element Maintenance Detail screen is displayed. Select Authorize operation from the Action List.
When a checker authorizes a record, details of validation, if any, that were overridden by the maker of the record during the Save operation are displayed. If any of these overrides results in an error, the checker must reject the record.
3.60 Rules for Performance Fee Calculation
This section contains the following topics:
- Section 3.60.1, "Maintaining Rules for Performance Fee Calculation"
- Section 3.60.2, "Condition Builder Button"
- Section 3.60.3, "Expression Builder Button"
- Section 3.60.4, "Operations on Performance Fee Rules"
3.60.1 Maintaining Rules for Performance Fee Calculation
You can maintain the formulas and expressions used to set up the rule for performance fee calculation in ‘Rule Maintenance’ screen. The derived and non derived data elements are used to create expressions and formula while setting up the rules.
You can invoke ‘Rule Maintenance’ screen by typing ‘UTDHDRUL’ in the field at the top right corner of the Application tool bar and clicking the adjoining arrow button.
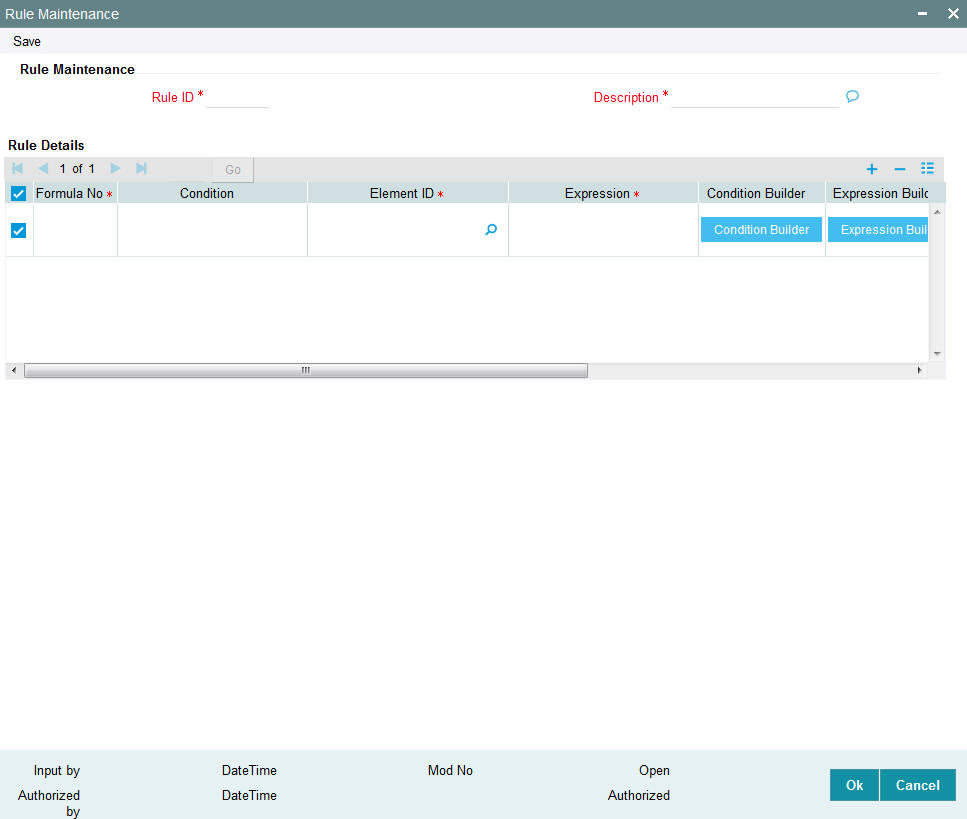
Rule ID
Numeric; 5 Characters; Mandatory
Specify a unique code to identify the performance fee calculation rule.
Description
Alphanumeric; 255 Characters; Mandatory
Specify a suitable description for the rule.
Rule Details
Formula No
Numeric; 5 Characters; Mandatory
Specify the line number associated with the rule.
Condition
Alphanumeric; 4000 Characters; Optional
Click ‘Condition Builder’ to specify the condition to be associated with the rule. The condition specified in the ‘Condition Builder’ screen is displayed here.
Element ID
Alphanumeric; 20 Characters; Mandatory
The result obtained from the ‘Expression Builder’ screen is displayed here.
Expression
Alphanumeric; 4000 Characters; Mandatory
Click ‘Expression Builder’ to specify the expression to be used to derive the performance fee. The condition specified in the ‘Expression Builder’ screen is displayed here.
Rounding Basis
Mandatory
Select the basis for rounding from the options provided in the drop-down list. The following options are provided:
- Unit Rounding - unit based rounding defined at the given fund level
- Currency Rounding - rounding option as defined at FBC
- User defined - Round up/Round Down /Round/Truncate with number of decimals
Rounding Option
Optional
Select the rounding options from the drop-down list. The following options are provided:
- Round Standard
- Rounding Up
- Rounding Down
- Truncate
No of Decimals
Numeric; 2 Characters; Optional
Specify the number of decimals to be applied during rounding.
3.60.2 Condition Builder Button
Click ‘Condition Builder’ to invoke the ‘Condition Builder’ screen where you can specify the condition to be checked for performance fee calculation.
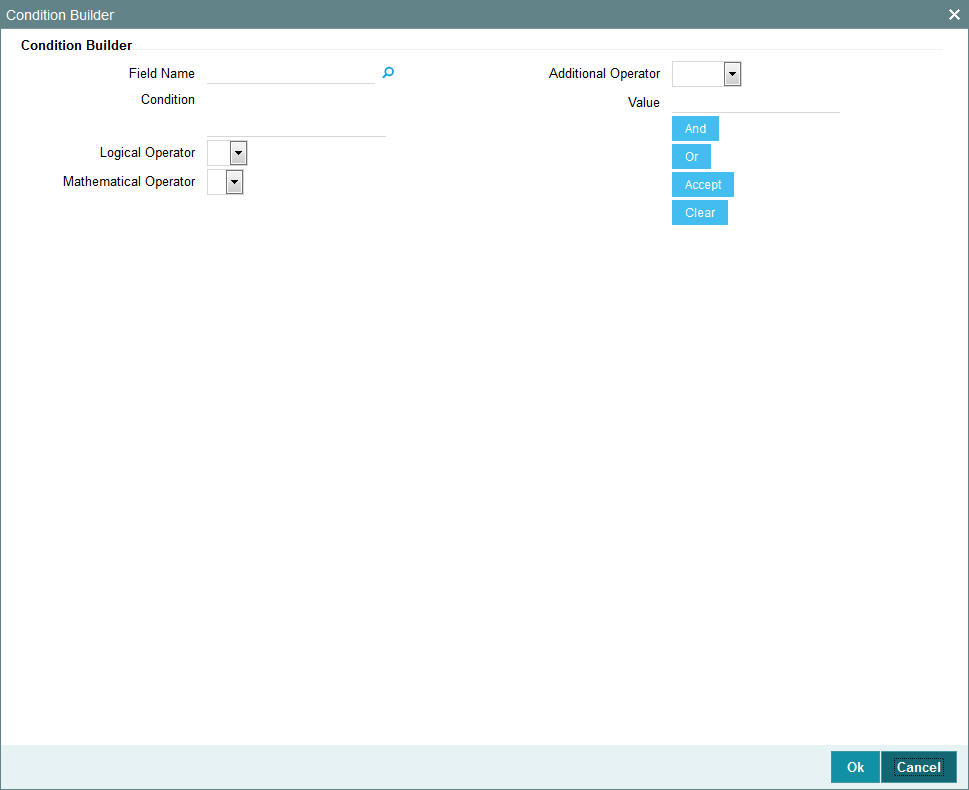
You can specify the following details in this screen:
Field Name
Alphanumeric; 30 Characters; Optional
Specify the data element to be used to derive the condition for the rule or select the element Id from the option list provided.
Condition
Alphanumeric; 4000 Characters; Optional
Specify the condition to be used.
Logical Operator
Optional
Select the logical operator to be used to derive the condition for the rule from the drop-down list provided. The list displays the following values:
- <
- >
- =
- <>
- <=
- >=
Mathematical Operator
Optional
Select the mathematical operator to be used to derive the condition for the rule from the drop-down list provided. The list displays the following values:
- +
- -
- %
- /
Additional Operator
Optional
Select the additional operator to be used to derive the condition for the rule from the drop-down list provided. The list displays the following values:
- Comma
- (
- )
- Min
- Max
Value
Alphanumeric; 30 Characters; Optional
Specify the value.
You can use the ‘And’ or ‘Or’ button to join the conditions, if required.
Click ‘Accept’ to add to the existing value in the condition and click ‘Clear’ to clear the condition.
3.60.3 Expression Builder Button
You can specify the expression to be evaluated to derive the performance fee in the ‘Expression Builder’ screen. Click ‘Expression Builder’ in ‘Rule Maintenance’ screen to invoke the ‘Expression Builder’ screen.
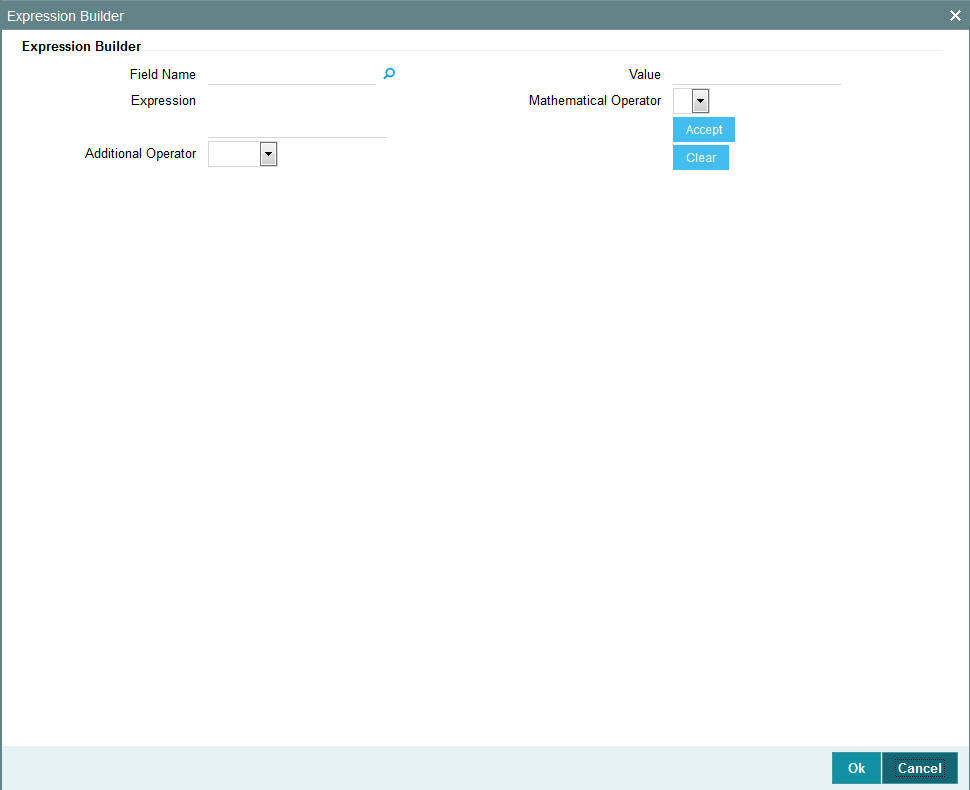
Field Name
Alphanumeric; 30 Characters; Mandatory
Specify the data element to be used to derive the condition for the rule or select the element Id from the option list provided.
Expression
Alphanumeric; 4000 Characters; Optional
Specify the expression to be used.
Additional Operator
Optional
Select the additional operator to be used to derive the condition for the rule from the drop-down list provided. The list displays the following values:
- Comma
- (
- )
- Min
- Max
Value
Alphanumeric; 30 Characters; Optional
Specify the value.
Mathematical Operator
Optional
Select the mathematical operator to be used to derive the condition for the rule from the drop-down list provided. The list displays the following values:
- +
- -
- %
- /
Click ‘Accept’ to add to the existing value in the condition and click ‘Clear’ to clear the condition.
In this screen, you can specify the expression to derive performance fee in the same manner as condition builder. The result obtained from the ‘Expression Builder’ screen gets displayed at the ‘Element ID’ field.
If the system encounters predefined factory shipped elements like RED_AMT, SUB_AMT, RED_UNITS or SUB_UNITS as expression element, then the system generates the transactions as indicated below.
- RED_AMT - amount based (Net) redemption transaction is generated
- SUB_AMT - amount based (Gross) subscription transaction is generated
- RED_UNIT - unit based (Gross) redemption transaction is generated
- SUB_UNIT - unit based (Net) subscription transaction is generated
For outflow transactions, the elements ‘PF_VAL’ and ‘CL_VAL’ are used for the performance fee calculation.
3.60.4 Operations on Performance Fee Rules
You can perform the following operations of a performance fee rule record.
- New – an unauthorized record will be created. If you have rights for auto Authorization, the record will be authorized
- Modify – an unauthorized record can be modified by the maker (edit rights required)
- Delete – an unauthorized record can be deleted by the maker. You can not delete the unauthorized record created by amendment (delete rights required).
- Authorize – an unauthorized record can be authorized by anyone other than the maker (authorize rights required)
Note
The dynamic packages will get recreated on unlock, save and authorisation.
3.61 Rule Maintenance Summary
This section contains the following topics:
- Section 3.61.1, "Retrieving a Record in Rule Maintenance Summary Screen"
- Section 3.61.2, "Editing Rule Maintenance Record"
- Section 3.61.3, "Viewing Rule Maintenance Record"
- Section 3.61.4, "Deleting Rule Maintenance Record"
- Section 3.61.5, "Authorizing Rule Maintenance Record"
- Section 3.61.6, "Amending Rule Maintenance Record"
- Section 3.61.7, "Authorizing Amended Rule Maintenance Record"
3.61.1 Retrieving a Record in Rule Maintenance Summary Screen
You can retrieve a previously entered record in the Summary Screen, as follows:
Invoke the ‘Rule Maintenance Summary’ screen by typing ‘UTSHDRUL’ in the field at the top right corner of the Application tool bar. Click on the adjoining arrow button and specify any or all of the following details in the corresponding details.
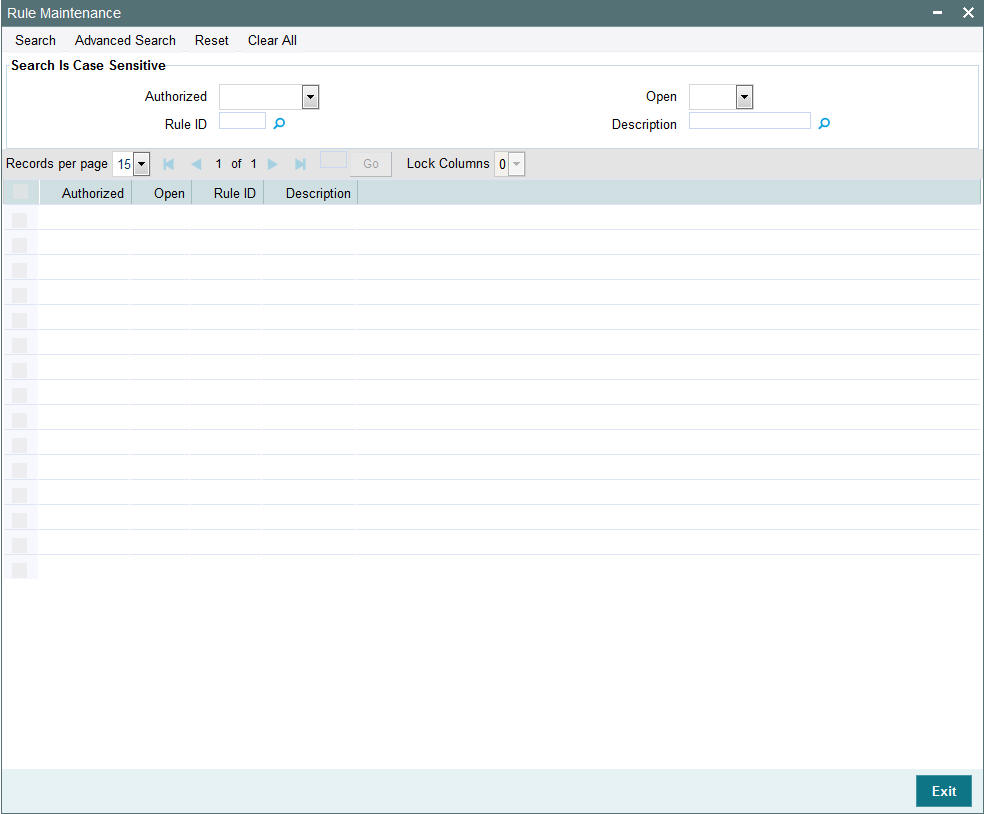
- The status of the record in the Authorized field. If you choose the ‘Blank Space’ option, then all the records are retrieved.
- The status of the record in the Open field. If you choose the ‘Blank Space’ option, then all records are retrieved
- Rule ID
Click ‘Search’ button to view the records. All the records with the specified details are retrieved and displayed in the lower portion of the screen.
Note
You can also retrieve the individual record detail from the detail screen by querying in the following manner:
- Press F7
- Input the Rule ID
- Press F8
You can perform Edit, Delete, Amend, Authorize, Reverse, Confirm operations by selecting the operation from the Action list. You can also search a record by using a combination of % and alphanumeric value
3.61.2 Editing Rule Maintenance Record
You can modify the details of Rule Maintenance record that you have already entered into the system, provided it has not subsequently authorized. You can perform this operation as follows:
- Invoke the Rule Maintenance Summary screen from the Browser.
- Select the status of the record that you want to retrieve for modification in the Authorized field. You can only modify records that are unauthorized. Accordingly, choose the Unauthorized option.
- Specify any or all of the details in the corresponding fields to retrieve the record that is to be modified.
- Click ‘Search’ button. All unauthorized records with the specified details are retrieved and displayed in the lower portion of the screen.
- Double click the record that you want to modify in the list of displayed records. The Rule Maintenance screen is displayed.
- Select Unlock Operation from the Action list to modify the record. Modify the necessary information.
Click Save to save your changes. The Rule Maintenance screen is closed and the changes made are reflected in the Rule Maintenance Summary screen.
3.61.3 Viewing Rule Maintenance Record
To view a record that you have previously input, you must retrieve the same in the Rule Maintenance Summary screen as follows:
- Invoke the Rule Maintenance Summary screen from the Browser.
- Select the status of the record that you want to retrieve for viewing in the Authorized field. You can also view all records that are either unauthorized or authorized only, by choosing the unauthorized / Authorized option.
- Specify any or all of the details of the record in the corresponding fields on the screen.
- Click ‘Search’ button. All records with the specified fields are retrieved and displayed in the lower portion of the screen.
- Double click the record that you want to view in the list of displayed records. The Rule Maintenance screen is displayed in View mode.
3.61.4 Deleting Rule Maintenance Record
You can delete only unauthorized records in the system. To delete a record that you have previously entered:
- Invoke the Rule Maintenance Summary screen from the Browser.
- Select the status of the record that you want to retrieve for deletion.
- Specify any or all of the details in the corresponding fields on the screen.
- Click ‘Search’ button. All records with the specified fields are retrieved and displayed in the lower portion of the screen.
- Double click the record that you want to delete in the list of displayed records. The Rule Maintenance screen is displayed.
- Select Delete Operation from the Action list. The system prompts you to confirm the deletion and the record is physically deleted from the system database.
3.61.5 Authorizing Rule Maintenance Record
- An unauthorized Rule Maintenance record must be authorized in the system for it to be processed. To authorize a record:
- Invoke the Rule Maintenance Summary screen from the Browser.
- Select the status of the record that you want to retrieve for authorization. Typically, choose the unauthorized option.
- Specify any or all of the details in the corresponding fields on the screen.
- Click ‘Search’ button. All records with the specified details that are pending authorization are retrieved and displayed in the lower portion of the screen.
- Double click the record that you wish to authorize. The Rule Maintenance screen is displayed. Select Authorize operation from the Action List.
When a checker authorizes a record, details of validation, if any, that were overridden by the maker of the record during the Save operation are displayed. If any of these overrides results in an error, the checker must reject the record.
3.61.6 Amending Rule Maintenance Record
After a Rule Maintenance record is authorized, it can be modified using the Unlock operation from the Action List. To make changes to a record after authorization:
- Invoke the Rule Maintenance Summary screen from the Browser.
- Select the status of the record that you want to retrieve for authorization. You can only amend authorized records.
- Specify any or all of the details in the corresponding fields on the screen.
- Click ‘Search’ button. All records with the specified details that are pending authorization are retrieved and displayed in the lower portion of the screen.
- Double click the record that you wish to authorize. The Rule Maintenance screen is displayed in amendment mode. Select Unlock operation from the Action List to amend the record.
- Amend the necessary information and click on Save to save the changes
3.61.7 Authorizing Amended Rule Maintenance Record
An amended Rule Maintenance record must be authorized for the amendment to be made effective in the system. The authorization of amended records can be done only from Fund Manager Module and Agency Branch module.
The subsequent process of authorization is the same as that for normal transactions.
3.62 Group Rule Mapping
This section contains the following topics:
3.62.1 Maintaining Group Rule Mapping
You can define a Group ID and map the default Rule Ids for a given event like Inflow, Outflow or Period End in ‘PF Group Maintenance’ screen.
You can invoke ‘PF Group Maintenance’ screen by typing ‘UTDHRGMP’ in the field at the top right corner of the Application tool bar and clicking the adjoining arrow button.
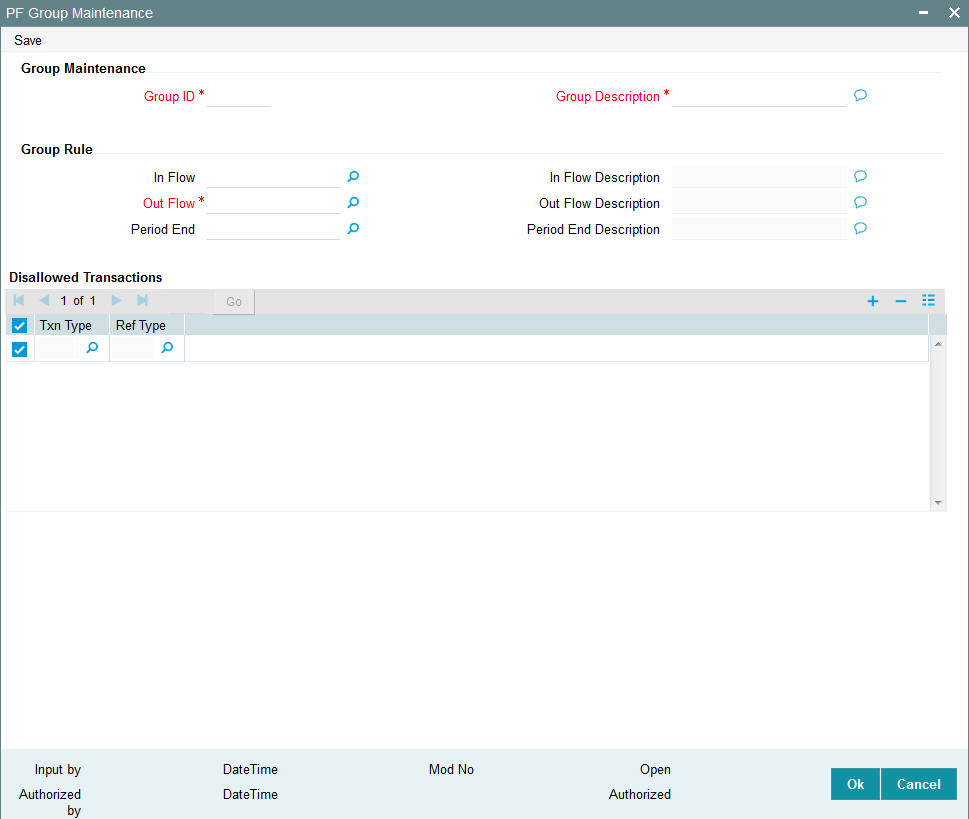
Group Maintenance
Group ID
Alphanumeric; 5 Characters; Mandatory
Specify a group Id for mapping the rules or select a group Id from the option list provided. This Group ID created will get linked at fund level.
Group Description
Alphanumeric; 255 Characters; Mandatory
Specify a suitable description for the group.
Group Rule
Inflow
Alphanumeric; 5 Characters; Optional
Specify the default rule to be used for inflows for the given group Id. You can also select the rule Id from the option list provided.
Inflow description
Display
The system displays the description for the selected inflow rule.
Outflow
Alphanumeric; 5 Characters; Mandatory
Specify the default rule to be used for outflows for the given group Id. You can also select the rule Id from the option list provided.
Out Flow Description
Display
The system displays the description for the selected outflow rule.
Period End
Numeric; 5 Characters; Optional
Specify the default rule to be used for period end for the given group Id. You can also select the rule Id from the option list provided.
Period End Description
Display
The system displays the description for the selected period end rule.
Disallowed Transactions
In this section you can indicate if you wish to disallow any transaction based on the transaction type and reference type.
For e.g., If you map Rule ID ‘001’ to the event ‘Inflow’ and choose to disallow this rule for transaction type ‘02’ (subscription transaction) and if the reference type is ‘RE’ (Reinvestment), then during processing the system will not apply this rule for reinvestment transactions generated as a result of dividend processing.
Disallowed transaction type is applicable for all the rules maintained for the group.
Txn Type
Alphanumeric; 2 Characters; Optional
Specify the transaction type for which you wish to disallow the transaction or select the transaction type from the option list provided.
Ref Type
Alphanumeric; 2 Characters; Optional
Specify the transaction reference type for which you wish to disallow the transaction or select the reference type from the option list provided.
3.62.2 Operations on Group Rule Mapping
You can perform the following operations of a group-rule mapping record.
- New – an unauthorized record will be created. If you have rights for auto Authorization, the record will be authorized
- Modify – an unauthorized record can be modified by the maker (edit rights required)
- Delete – an unauthorized record can be deleted by the maker. You can not delete the unauthorized record created by amendment (delete rights required).
- Authorize – an unauthorized record can be authorized by anyone other than the maker (authorize rights required)
3.63 PF Group Maintenance Summary Screen
This section contains the following topics:
- Section 3.63.1, "Invoking the PF Group Maintenance Summary Screen"
- Section 3.63.2, "Viewing a Group Maintenance record"
- Section 3.63.3, "Modifying a Group Maintenance record"
- Section 3.63.4, "Deleting a Group Maintenance record"
- Section 3.63.5, "Authorizing a Group Maintenance record"
3.63.1 Invoking the PF Group Maintenance Summary Screen
You can invoke the ‘PF Group Maintenance Summary’ screen by typing ‘UTSHRGMP’ in the field at the top right corner of the Application tool bar and clicking on the adjoining arrow button.
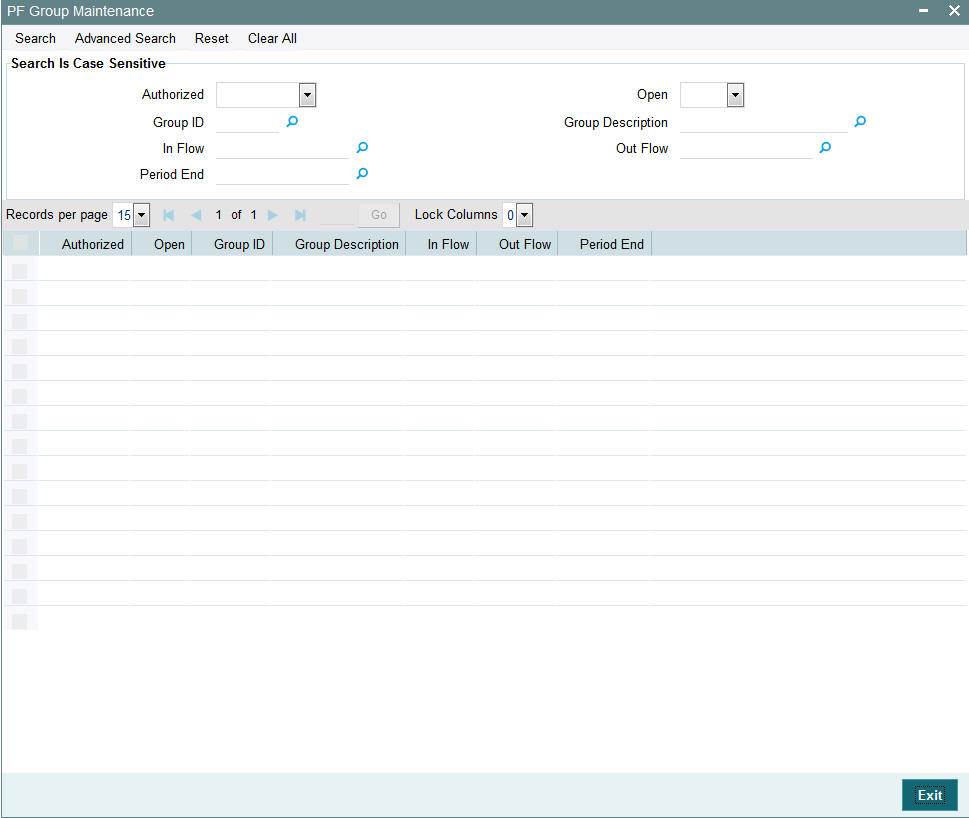
You can perform the following operations in this screen:
- Viewing an Element Maintenance record
- Modifying an Element Maintenance record
- Deleting an Element Maintenance record
- Authorizing an Element Maintenance record
3.63.2 Viewing a Group Maintenance record
To view a record that you have previously input, you must retrieve the same in the Group Maintenance Summary screen as follows:
- Invoke the Group Maintenance Summary screen from the Browser.
- Select the status of the record that you want to retrieve for viewing in the Authorized field. You can also view all records that are either unauthorized or authorized only, by choosing the Unauthorized/ Authorized option.
- Specify any or all of the details of the record in the corresponding fields on the screen.
- Click Query. All records with the specified fields are retrieved and displayed in the lower portion of the screen.
- Double click the record that you want to view in the list of displayed records. The Group Maintenance screen is displayed in View mode.
3.63.3 Modifying a Group Maintenance record
You can modify the details of a Group Maintenance record that you have already entered into the system, provided it has not been subsequently authorized. You can perform this operation as follows:
- Invoke the Group Maintenance Summary screen from the Browser.
- Select the status of the record that you want to retrieve for modification in the Authorized field. You can only modify records that are unauthorized. Accordingly, choose the unauthorized option.
- Specify any or all of the details in the corresponding fields to retrieve the record that is to be modified.
- Click Query. All unauthorized records with the specified details are retrieved and displayed in the lower portion of the screen.
- Double click the record that you want to modify in the list of displayed records. The Group Maintenance Detail screen is displayed.
- Select Unlock Operation from the Action list to modify the record. Modify the necessary information.
- Click Save to save your changes. The Group Maintenance Detail screen is closed and the changes made are reflected in the Group Maintenance Summary screen.
3.63.4 Deleting a Group Maintenance record
You can delete only unauthorized records in the system. To delete a record that you have previously entered:
- Invoke the Group Maintenance Summary screen from the Browser.
- Select the status of the record that you want to retrieve for deletion.
- Specify any or all of the details in the corresponding fields on the screen.
- Click Query. All records with the specified fields are retrieved and displayed in the lower portion of the screen.
- Double click the record that you want to delete in the list of displayed records. The Group Maintenance Detail screen is displayed.
- Select Delete Operation from the Action list. The system prompts you to confirm the deletion and the record is physically deleted from the system database.
3.63.5 Authorizing a Group Maintenance record
An unauthorized Group Maintenance must be authorized in the system for it to be processed. To authorize a record:
- Invoke the Group Maintenance Summary screen from the Browser.
- Select the status of the record that you want to retrieve for authorization. Typically, choose the unauthorized option.
- Specify any or all of the details in the corresponding fields on the screen.
- Click Query. All records with the specified details that are pending authorization are retrieved and displayed in the lower portion of the screen.
- Double click the record that you wish to authorize. The Group Maintenance Detail screen is displayed. Select Authorize operation from the Action List.
When a checker authorizes a record, details of validation, if any, that were overridden by the maker of the record during the Save operation are displayed. If any of these overrides results in an error, the checker must reject the record.
3.64 Policy Restrictions for Guaranteed Funds
This section contains the following topics:
3.64.1 Maintaining Policy Restrictions for Guaranteed Funds
You can maintain a list of policies that you wish to either include or exclude for GF Correction run. You can do this by enabling (disabling to exclude) the policies in the ‘GF Policy Restrict Mapping‘ screen.
You can invoke this screen by typing ‘UTDGFPLR’ in the field at the top right corner of the Application tool bar and clicking the adjoining arrow button
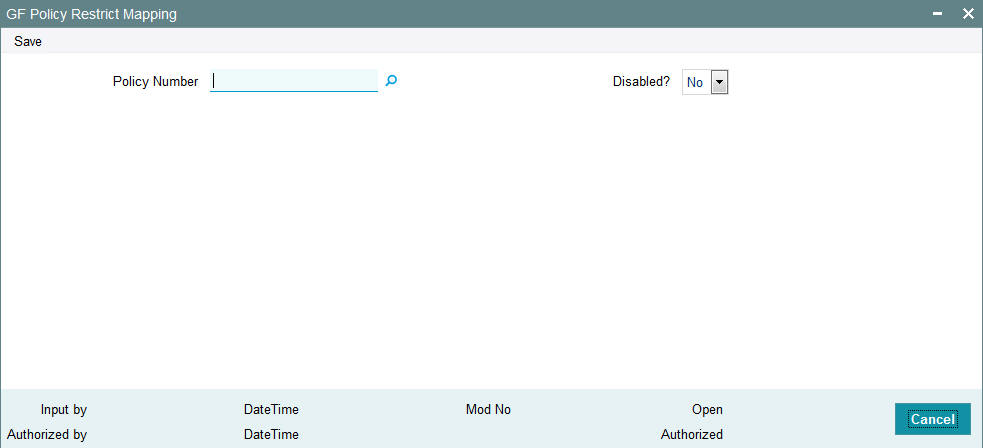
You can specify the following details in this screen:
Policy Number
Alphanumeric; 16 Characters; Optional
Specify the policy for which you wish to indicate the correction run preferences. You can also select the policy number from the option list provided.
Disabled?
Optional
Select the option to indicate whether you wish to enable or disable correction run for the policy number specified.
You can indicate your preferences for both Simulation run and Final run. For any GF Correction run, the system considers only those policies which have this option enabled.
In this screen, you can perform the following operations:
- Create a new record
- Authorize a record
- Amend a record
For details on Mock Processing for Guaranteed Funds, refer to the chapter ‘End of Day Activities’ in FC-IS system..
3.65 GF Policy Restrict Mapping Summary Screen
This section contains the following topics:
- Section 3.65.1, "Invoking the GF Policy Restrict Mapping Summary Screen"
- Section 3.65.2, "Retrieving a Record in the Policy Guaranteed Summary screen "
- Section 3.65.3, "Editing a Policy Guaranteed Fund Record"
- Section 3.65.4, "Viewing a Policy Guaranteed Fund Record"
- Section 3.65.5, "Deleting a Policy Guaranteed Fund Record"
- Section 3.65.6, "Authorizing a Policy Guaranteed Fund Record"
- Section 3.65.7, "Amending a Policy Guaranteed Fund Record"
- Section 3.65.8, "Authorizing an Amended Policy Guaranteed Fund Record"
- Section 3.65.9, "Copying the Attributes"
3.65.1 Invoking the GF Policy Restrict Mapping Summary Screen
You can invoke the ‘GF Policy Restrict Mapping Summary’ screen by typing ‘UTSGFPLR’ in the field at the top right corner of the Application tool bar and clicking on the adjoining arrow button.

You can perform the following operations in the Policy Guaranteed Summary screen:
- Retrieving a Record in the Policy Guaranteed Summary screen
- Editing a Policy Guaranteed Fund Record
- Viewing a Policy Guaranteed Fund Record
- Deleting a Policy Guaranteed Fund Record
- Authorizing a Policy Guaranteed Fund Record
- Amending a Policy Guaranteed Fund Record
- Authorizing an Amended Policy Guaranteed Fund Record
- Copying the Attributes
3.65.2 Retrieving a Record in the Policy Guaranteed Summary screen
You can retrieve a previously entered record in the Summary Screen, as follows:
- In the Browser, select GF Restrict Mapping menu and click on Summary, specify any or all of the following details in the corresponding fields:
- The status of the record in the Authorized field. If you choose the ‘Blank Space’ option, then all the records are retrieved.
- The status of the record in the Open field. If you choose the ‘Blank Space’ option, then all records are retrieved
- Policy Number
- Disable?
Click 'Search' to view the records. All the records with the specified details are retrieved and displayed in the lower portion of the screen.
- You can also retrieve the individual record detail from the detail screen by querying in the following manner:
- 1. Press F7
- 2. Input the Policy Number, Disabled.
- 3. Press F8
You can perform Edit, Delete, Amend, Authorize, Reverse, Confirm operations by selecting the operation from the Action list. You can also search a record by using a combination of % and alphanumeric value.
Example
You can search the record for Policy Number by using the combination of % and alphanumeric value as follows:-
- Search by P%: System will fetch all the records whose Policy Number starts from Alphabet ‘P’. For example, POLS117, PLY118, PLC110 etc.
- Search by %7: System will fetch all the records whose Policy Number ends by numeric value’ 7’. For example, POL117, GSD267, AGC77 etc.
- Search by %17%: System will fetch all the records whose Policy Number contains the numeric value 17. For example, POL117, GSD172, AGC17 etc.
3.65.3 Editing a Policy Guaranteed Fund Record
You can modify the details of a Policy Guaranteed Fund record that you have already entered into the system, provided it has not been subsequently authorized. You can perform this operation as follows:
- Invoke the Policy Guaranteed Fund Summary screen from the Browser.
- Select the status of the record that you want to retrieve for modification in the Authorization Status field. You can only modify records that are unauthorized. Accordingly, choose the unauthorized option.
- Specify any or all of the details in the corresponding fields to retrieve the record that is to be modified.
- Click ‘Search’. All unauthorized records with the specified details are retrieved and displayed in the lower portion of the screen.
- Double click the record that you want to modify in the list of displayed records. The Policy Guaranteed Fund Detail screen is displayed.
- Select Unlock Operation from the Action list to modify the record. Modify the necessary information.
- Click Save to save your changes. The Policy Guaranteed Fund Detail screen is closed and the changes made are reflected in the Policy Guaranteed Fund Summary screen.
3.65.4 Viewing a Policy Guaranteed Fund Record
To view a record that you have previously input, you must retrieve the same in the Policy Guaranteed Fund Summary screen as follows:
- Invoke the Policy Guaranteed Fund Summary screen from the Browser.
- Select the status of the record that you want to retrieve for viewing in the Authorization Status field. You can also view all records that are either unauthorized or authorized only, by choosing the Unauthorized/ Authorized option.
- Specify any or all of the details of the record in the corresponding fields on the screen.
- Click 'Search'. All records with the specified fields are retrieved and displayed in the lower portion of the screen.
- Double click the record that you want to view in the list of displayed records. The Policy Guaranteed Fund Detail screen is displayed in View mode.
3.65.5 Deleting a Policy Guaranteed Fund Record
You can delete only unauthorized records in the system. To delete a record that you have previously entered:
- Invoke the Policy Guaranteed Fund Summary screen from the Browser.
- Select the status of the record that you want to retrieve for deletion.
- Specify any or all of the details in the corresponding fields on the screen.
- Click 'Search'. All records with the specified fields are retrieved and displayed in the lower portion of the screen.
- Double click the record that you want to delete in the list of displayed records. The Policy Guaranteed Fund Detail screen is displayed.
- Select Delete Operation from the Action list. The system prompts you to confirm the deletion and the record is physically deleted from the system database.
3.65.6 Authorizing a Policy Guaranteed Fund Record
An unauthorized Policy Guaranteed Fund record must be authorized in the system for it to be processed. To authorize a record:
- Invoke the Policy Guaranteed Fund Summary screen from the Browser.
- Select the status of the record that you want to retrieve for authorization. Typically, choose the unauthorized option.
- Specify any or all of the details in the corresponding fields on the screen.
- Click 'Search'. All records with the specified details that are pending authorization are retrieved and displayed in the lower portion of the screen.
- Double click the record that you wish to authorize. The Policy Guaranteed Fund Detail screen is displayed. Select Authorize operation from the Action List.
When a checker authorizes a transaction, details of validation, if any, that were overridden by the maker of the transaction during the Save operation are displayed. If any of these overrides results in an error, the checker must reject the transaction.
3.65.7 Amending a Policy Guaranteed Fund Record
After a Policy Guaranteed Fund record is authorized, it can be modified using the Unlock operation from the Action List. To make changes to a record after authorization:
- Invoke the Policy Guaranteed Fund Summary screen from the Browser.
- Select the status of the record that you want to retrieve for authorization. You can only amend authorized records.
- Specify any or all of the details in the corresponding fields on the screen.
- Click 'Search'. All records with the specified details that are pending authorization are retrieved and displayed in the lower portion of the screen.
- Double click the record that you wish to authorize. The Policy Guaranteed Fund Detail screen is displayed in amendment mode. Select Unlock operation from the Action List to amend the record.
- Amend the necessary information and click on Save to save the changes.
3.65.8 Authorizing an Amended Policy Guaranteed Fund Record
An amended Policy Guaranteed Fund record must be authorized for the amendment to be made effective in the system. The authorization of amended records can be done only from Fund Manager Module and Agency Branch module.
The subsequent process of authorization is the same as that for normal transactions.
3.65.9 Copying the Attributes
If you want to create a new Policy Guaranteed Fund record with the same attributes of an existing one, you can copy the attributes of an existing Policy Guaranteed Fund record to a new one.
To copy the attributes:
- Retrieve the record whose attributes the new Policy Guaranteed Fund should inherit. You can retrieve the record through the Summary screen or through the F7-F8 operation explained in the previous sections of this chapter.
- Click on Copy.
- Indicate the ID for the new Policy Guaranteed Fund. You can, however, change the details of the new maintenance.
3.66 Delegate Detail at Fund Price
This section contains the following topics:
3.66.1 Invoking Delegate Detail Screen
You can delegate the amendment or deletion of the fund price to another user to help in reducing the risk of authorizing or wrong fund price. It will also help to reduce delay in the end of day process for which authorization of a fund price is mandatory.
The delegate operation will allow you to change the maker ID of fund price maintenance. This will enable the new maker to Edit /delete the specific fund price. You can delegate using ‘Delegate Detail’ screen. You can invoke this screen by typing ‘UTDDELGA’ in the field at the top right corner of the Application tool bar and clicking on the adjoining arrow button.
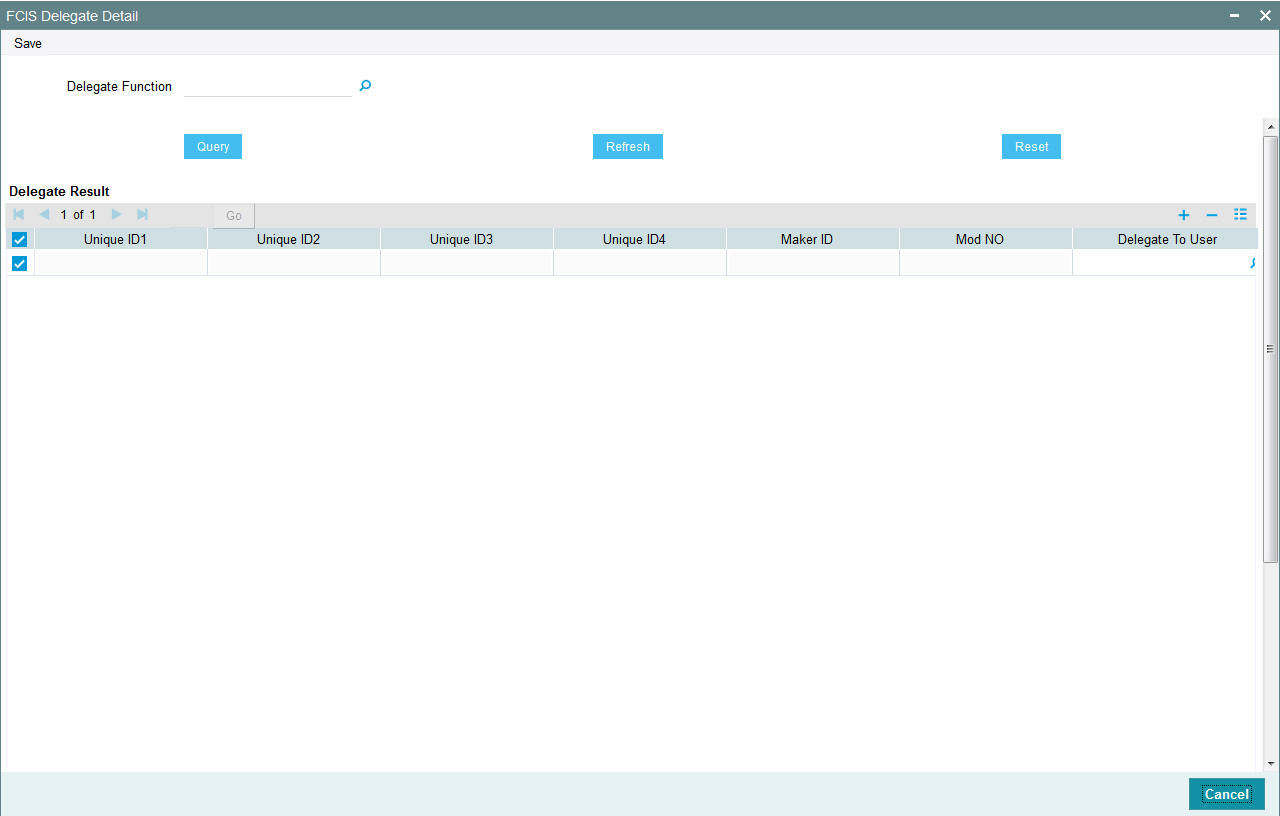
You can specify the following details:
Delegate Function
Alphanumeric; 25 Characters; Optional
Specify the delegate function. The adjoining option list displays all valid delegate functions maintained in the system. You can choose the appropriate one. from the adjoining drop-down list.
For Fund Manager, following are the options available in the option list:
- Fund Price Maintenance
For Agency Branch, following are the options available in the option list:
- Policy
- Policy Transaction
- Unit Holder
- Unit Trust Transaction
Clicking on the ‘Query’ button, the system displays the following details:
- The unique fund ID for which the maker ID delegation has to be done
- Maker identification number of the user who has input the fund price
- Number of times the fund price maintenance has been modified
- The list of user IS’s maintained in the system to whom the fund price maintenance can be delegated to
Click ‘Refresh’ button to refresh the delegate details.
Click ‘Reset’ button to reset the entered details.
While saving, the fund price maintenance maker ID is delegated to another user.
Note
Delegate cannot be supported when Tanking is set.
During authorization, the system will validate the current User ID and the original Maker ID. If both are same, then the system will display an error message as ‘Original/ Delegated Maker cannot authorise the record’.
If Unit holder and Fund Price is been selected for delegation and Tanking is enabled, then system will display an error message as ‘Tanked record cannot be delegated’.
Note
Based on the role mapped, you can access corresponding screens/batches. For running EOD like operations, separate privileges needs to be maintained and the same needs to be mapped for the user.
3.67 Settlement Basis Detail
This section contains the following topics:
3.67.1 Invoking Settlement Basis Detail Screen
You can specify the settlement basis for agent code under the AMC for specific account types using ‘Settlement Basis Details’ screen. You can invoke this screen by typing UTDSETBA in the field at the top right corner of the Application tool bar and clicking on the adjoining arrow button.
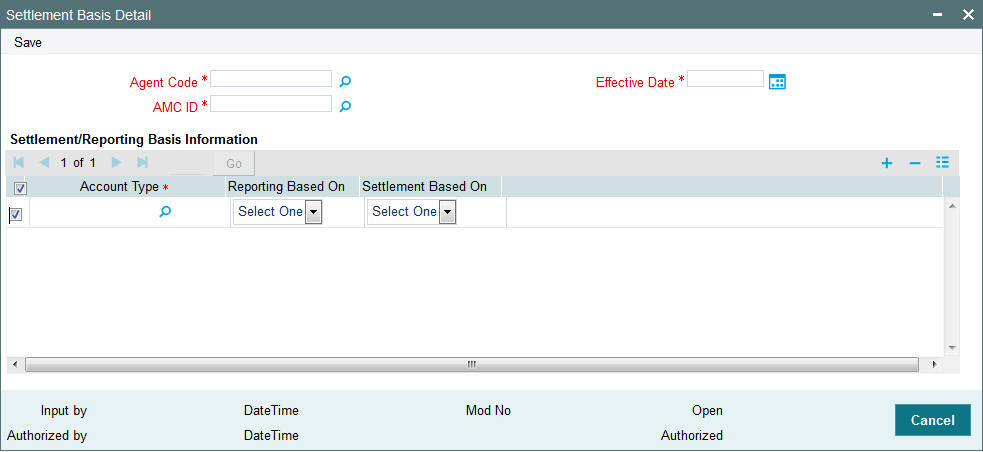
You can specify the following details:
Agent Code
Alphanumeric; 12 Characters; Mandatory
Specify the agent code for which the settlement basis needs to be captured. Alternatively, you can select agent code from the option list. The list displays all valid agent code maintained in the system.
AMC ID
Alphanumeric; 12 Characters; Mandatory
Specify the AMC ID for which the settlement basis needs to be captured. Alternatively, you can select AMC ID from the option list. The list displays all valid AMC ID maintained in the system.
Effective Date
Date Format; Mandatory
Select the effective date from the adjoining calendar.
Account Type
Alphanumeric; 2 Characters; Mandatory
Specify the account type for which the settlement basis needs to be captured. Alternatively, you can select account type from the option list. The list displays all valid account type maintained in the system.
Reporting Based on
Optional
Select the reporting base from the drop-down list. The list displays the following values:
- Gross
- Net
Settlement Based on
Optional
Select the settlement base from the drop-down list. The list displays the following values:
- Gross
- Net
3.68 Settlement Basis Summary
This section contains the following topics:
- Section 3.68.1, "Retrieving a Settlement Basis Record"
- Section 3.68.2, "Editing Settlement Basis Record"
- Section 3.68.3, "Viewing Settlement Basis Record "
- Section 3.68.4, "Deleting Settlement Basis Record"
- Section 3.68.5, "Authorizing Settlement Basis Record "
- Section 3.68.6, "Amending Settlement Basis Record "
- Section 3.68.7, "Authorizing Amended Settlement Basis Record"
3.68.1 Retrieving a Settlement Basis Record
You can retrieve a previously entered record in the Summary Screen, as follows:
You can invoke ‘Settlement Basis Summary’ screen by typing ‘UTSSETBA’ in the field at the top right corner of the Application tool bar and clicking on the adjoining arrow button.

- The status of the record in the Authorized field. If you choose the ‘Blank Space’ option, then all the records are retrieved.
- The status of the record in the Open field. If you choose the ‘Blank Space’ option, then all records are retrieved
- Agent Code
- Effective Date
- AMC ID
Click ‘Search’ button to view the records. All the records with the specified details are retrieved and displayed in the lower portion of the screen.
Note
You can also retrieve the individual record detail from the detail screen by querying in the following manner:
- Press F7
- Input the AMC ID
- Press F8
You can perform Edit, Delete, Amend, Authorize, operations by selecting the operation from the Action list. You can also search a record by using a combination of % and alphanumeric value.
Note
The status field in the Records pane of the summary screen displays the bulk operation results.
For example:
You can search the record for AMC ID by using the combination of % and alphanumeric value as follows:-
- Search by A% :- System will fetch all the records whose AMC ID starts from Alphabet ‘A’. For example:- AGC17,AGVO6,AGC74 etc.
- Search by %7:- System will fetch all the records whose AMC ID ends by numeric value’ 7’ . For example: AGC17, GSD267, AGC77 etc.
- Search by %17%:- System will fetch all the records whose AMC ID contains the numeric value 17. For example: GSD217, GSD172, AGC17 etc.
3.68.2 Editing Settlement Basis Record
You can modify the details of Settlement Basis record that you have already entered into the system, provided it has not subsequently authorized. You can perform this operation as follows:
- Invoke the Settlement Basis Summary screen from the Browser.
- Select the status of the record that you want to retrieve for modification in the Authorized field. You can only modify records that are unauthorized. Accordingly, choose the Unauthorized option.
- Specify any or all of the details in the corresponding fields to retrieve the record that is to be modified.
- Click ‘Search’ button. All unauthorized records with the specified details are retrieved and displayed in the lower portion of the screen.
- Double click the record that you want to modify in the list of displayed records. The Settlement Basis Detail screen is displayed.
- Select Unlock Operation from the Action list to modify the record. Modify the necessary information.
Click Save to save your changes. The Settlement Basis Detail screen is closed and the changes made are reflected in the Settlement Basis Summary screen.
3.68.3 Viewing Settlement Basis Record
To view a record that you have previously input, you must retrieve the same in the Settlement Basis Summary screen as follows:
- Invoke the Settlement Basis Summary screen from the Browser.
- Select the status of the record that you want to retrieve for viewing in the Authorized field. You can also view all records that are either unauthorized or authorized only, by choosing the unauthorized / Authorized option.
- Specify any or all of the details of the record in the corresponding fields on the screen.
- Click ‘Search’ button. All records with the specified fields are retrieved and displayed in the lower portion of the screen.
- Double click the record that you want to view in the list of displayed records. The Settlement Basis Detail screen is displayed in View mode.
3.68.4 Deleting Settlement Basis Record
You can delete only unauthorized records in the system. To delete a record that you have previously entered:
- Invoke the Settlement Basis Summary screen from the Browser.
- Select the status of the record that you want to retrieve for deletion.
- Specify any or all of the details in the corresponding fields on the screen.
- Click ‘Search’ button. All records with the specified fields are retrieved and displayed in the lower portion of the screen.
- Double click the record that you want to delete in the list of displayed records. The Settlement Basis Detail screen is displayed.
- Select Delete Operation from the Action list. The system prompts you to confirm the deletion and the record is physically deleted from the system database.
3.68.5 Authorizing Settlement Basis Record
- An unauthorized Settlement Basis record must be authorized in the system for it to be processed. To authorize a record:
- Invoke the Settlement Basis Summary screen from the Browser.
- Select the status of the record that you want to retrieve for authorization. Typically, choose the unauthorized option.
- Specify any or all of the details in the corresponding fields on the screen.
- Click ‘Search’ button. All records with the specified details that are pending authorization are retrieved and displayed in the lower portion of the screen.
- Double click the record that you wish to authorize. The Settlement Basis Detail screen is displayed. Select Authorize operation from the Action List.
When a checker authorizes a record, details of validation, if any, that were overridden by the maker of the record during the Save operation are displayed. If any of these overrides results in an error, the checker must reject the record.
3.68.6 Amending Settlement Basis Record
After a Settlement Basis record is authorized, it can be modified using the Unlock operation from the Action List. To make changes to a record after authorization:
- Invoke the Settlement Basis Summary screen from the Browser.
- Select the status of the record that you want to retrieve for authorization. You can only amend authorized records.
- Specify any or all of the details in the corresponding fields on the screen.
- Click ‘Search’ button. All records with the specified details that are pending authorization are retrieved and displayed in the lower portion of the screen.
- Double click the record that you wish to authorize. The Settlement Basis Detail screen is displayed in amendment mode. Select Unlock operation from the Action List to amend the record.
- Amend the necessary information and click on Save to save the changes
3.68.7 Authorizing Amended Settlement Basis Record
An amended Settlement Basis record must be authorized for the amendment to be made effective in the system. The authorization of amended records can be done only from Fund Manager Module and Agency Branch module.
3.69 Settlement Cycle Maintenance Detail
This section contains the following topic:
3.69.1 Invoking Settlement Cycle Maintenance Detail Screen
You can maintain the settlement cycle for agent for the inflow and outflow transactions. using ‘Settlement Cycle Maintenance Details’ screen. You can invoke this screen by typing ‘UTDSETCY’ in the field at the top right corner of the Application tool bar and clicking on the adjoining arrow button.
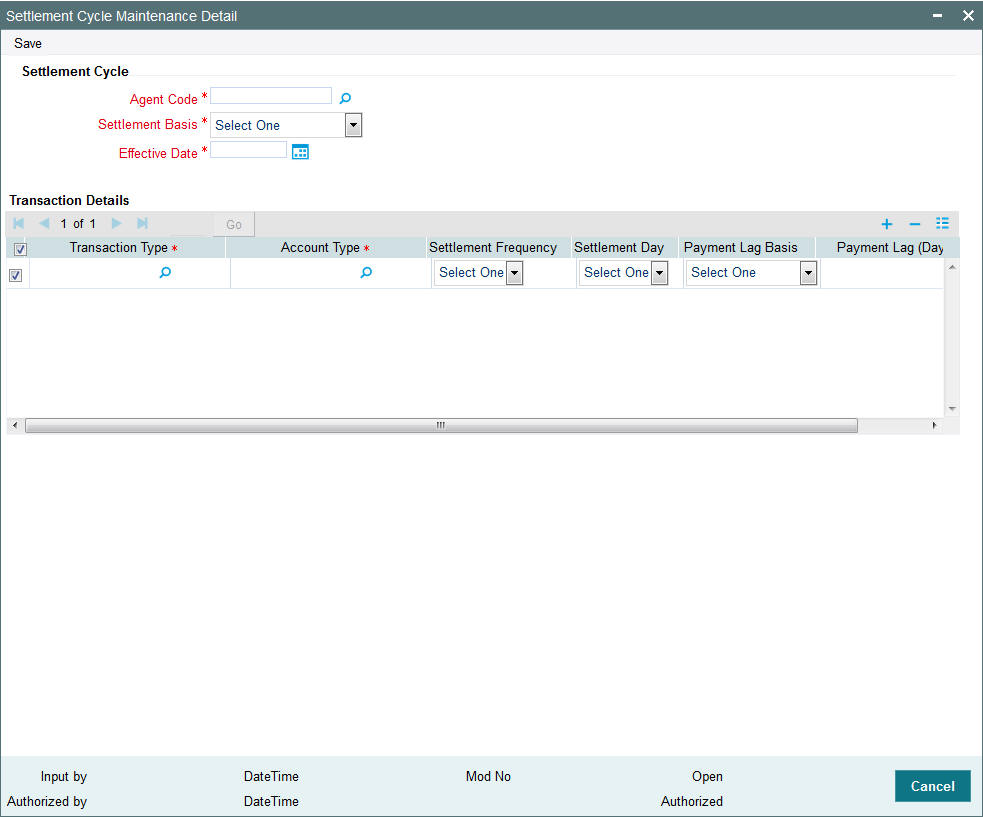
You can specify the following details:
Settlement Cycle
Agent Code
Alphanumeric; 12 Characters; Mandatory
Specify the agent code. Alternatively, you can select agent code from the option list. The list displays all valid agent code maintained in the system.
Settlement Basis
Mandatory
Select the settlement basis from the drop-down list. The list displays the following values:
- Payment Lag
- Settlement Frequency
Effective Date
Date Format; Mandatory
Select the effective date from the adjoining calendar.
Transaction Details
Transaction Type
Alphanumeric; 2 Characters; Mandatory
Specify the transaction type. Alternatively, you can select transaction type from the option list. The list displays all valid transaction type maintained in the system.
Account Type
Alphanumeric; 2 Characters; Mandatory
Specify the account type. Alternatively, you can select account type from the option list. The list displays all valid account type maintained in the system.
Settlement Frequency
Optional
Select the settlement frequency from the drop-down list. The list displays the following values:
- Weekly
Settlement Day
Optional
Select the settlement day from the drop-down list. The list displays the following values:
- 1st
- 2nd
- 3rd
- 4th
- 5th
- 6th
- 7th
Payment Lag Basis
Optional
Select the payment lag basis from the drop-down list. The list displays the following values:
- Fund Calendar
- System Calendar
- Currency Calendar
Payment Lag (Days)
Numeric; 3 Characters; Optional
Specify the payment lag details.
3.70 Settlement Cycle Maintenance Summary
This section contains the following topics:
- Section 3.70.1, "Retrieving a Settlement Cycle Maintenance Record"
- Section 3.70.2, "Editing Settlement Cycle Maintenance Record"
- Section 3.70.3, "Viewing Settlement Cycle Maintenance Record "
- Section 3.70.4, "Deleting Settlement Cycle Maintenance Record"
- Section 3.70.5, "Authorizing Settlement Cycle Maintenance Record "
- Section 3.70.6, "Amending Settlement Cycle Maintenance Record "
- Section 3.70.7, "Authorizing Amended Settlement Cycle Maintenance Record"
3.70.1 Retrieving a Settlement Cycle Maintenance Record
You can retrieve a previously entered record in the Summary Screen, as follows:
You can invoke ‘Settlement Cycle Maintenance Summary’ screen by typing ‘UTSSETCY’ in the field at the top right corner of the Application tool bar and clicking on the adjoining arrow button.
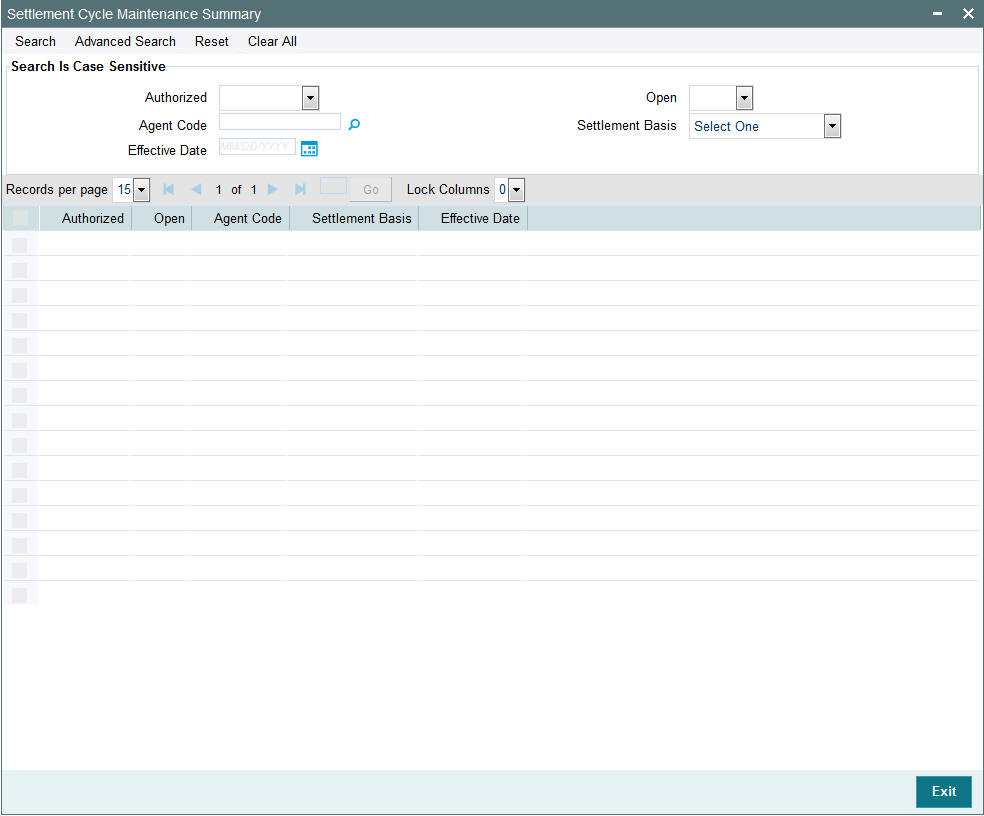
- The status of the record in the Authorized field. If you choose the ‘Blank Space’ option, then all the records are retrieved.
- The status of the record in the Open field. If you choose the ‘Blank Space’ option, then all records are retrieved
- Agent Code
- Effective Date
- Settlement Basis
Click ‘Search’ button to view the records. All the records with the specified details are retrieved and displayed in the lower portion of the screen.
Note
You can also retrieve the individual record detail from the detail screen by querying in the following manner:
- Press F7
- Input the Agent Code
- Press F8
You can perform Edit, Delete, Amend, Authorize, operations by selecting the operation from the Action list. You can also search a record by using a combination of % and alphanumeric value.
Note
The status field in the Records pane of the summary screen displays the bulk operation results.
For example:
You can search the record for Agent Code by using the combination of % and alphanumeric value as follows:-
- Search by A% :- System will fetch all the records whose Agent Code starts from Alphabet ‘A’. For example:- AGC17,AGVO6,AGC74 etc.
- Search by %7:- System will fetch all the records whose Agent Code ends by numeric value’ 7’ . For example: AGC17, GSD267, AGC77 etc.
- Search by %17%:- System will fetch all the records whose Agent Code contains the numeric value 17. For example: GSD217, GSD172, AGC17 etc.
3.70.2 Editing Settlement Cycle Maintenance Record
You can modify the details of Settlement Cycle Maintenance record that you have already entered into the system, provided it has not subsequently authorized. You can perform this operation as follows:
- Invoke the Settlement Cycle Maintenance Summary screen from the Browser.
- Select the status of the record that you want to retrieve for modification in the Authorized field. You can only modify records that are unauthorized. Accordingly, choose the Unauthorized option.
- Specify any or all of the details in the corresponding fields to retrieve the record that is to be modified.
- Click ‘Search’ button. All unauthorized records with the specified details are retrieved and displayed in the lower portion of the screen.
- Double click the record that you want to modify in the list of displayed records. The Settlement Cycle Maintenance Detail screen is displayed.
- Select Unlock Operation from the Action list to modify the record. Modify the necessary information.
Click Save to save your changes. The Settlement Cycle Maintenance Detail screen is closed and the changes made are reflected in the Settlement Cycle Maintenance Summary screen.
3.70.3 Viewing Settlement Cycle Maintenance Record
To view a record that you have previously input, you must retrieve the same in the Settlement Cycle Maintenance Summary screen as follows:
- Invoke the Settlement Cycle Maintenance Summary screen from the Browser.
- Select the status of the record that you want to retrieve for viewing in the Authorized field. You can also view all records that are either unauthorized or authorized only, by choosing the unauthorized / Authorized option.
- Specify any or all of the details of the record in the corresponding fields on the screen.
- Click ‘Search’ button. All records with the specified fields are retrieved and displayed in the lower portion of the screen.
- Double click the record that you want to view in the list of displayed records. The Settlement Cycle Maintenance Detail screen is displayed in View mode.
3.70.4 Deleting Settlement Cycle Maintenance Record
You can delete only unauthorized records in the system. To delete a record that you have previously entered:
- Invoke the Settlement Cycle Maintenance Summary screen from the Browser.
- Select the status of the record that you want to retrieve for deletion.
- Specify any or all of the details in the corresponding fields on the screen.
- Click ‘Search’ button. All records with the specified fields are retrieved and displayed in the lower portion of the screen.
- Double click the record that you want to delete in the list of displayed records. The Settlement Cycle Maintenance Detail screen is displayed.
- Select Delete Operation from the Action list. The system prompts you to confirm the deletion and the record is physically deleted from the system database.
3.70.5 Authorizing Settlement Cycle Maintenance Record
- An unauthorized Settlement Cycle Maintenance record must be authorized in the system for it to be processed. To authorize a record:
- Invoke the Settlement Cycle Maintenance Summary screen from the Browser.
- Select the status of the record that you want to retrieve for authorization. Typically, choose the unauthorized option.
- Specify any or all of the details in the corresponding fields on the screen.
- Click ‘Search’ button. All records with the specified details that are pending authorization are retrieved and displayed in the lower portion of the screen.
- Double click the record that you wish to authorize. The Settlement Cycle Maintenance Detail screen is displayed. Select Authorize operation from the Action List.
When a checker authorizes a record, details of validation, if any, that were overridden by the maker of the record during the Save operation are displayed. If any of these overrides results in an error, the checker must reject the record.
3.70.6 Amending Settlement Cycle Maintenance Record
After a Settlement Cycle Maintenance record is authorized, it can be modified using the Unlock operation from the Action List. To make changes to a record after authorization:
- Invoke the Settlement Cycle Maintenance Summary screen from the Browser.
- Select the status of the record that you want to retrieve for authorization. You can only amend authorized records.
- Specify any or all of the details in the corresponding fields on the screen.
- Click ‘Search’ button. All records with the specified details that are pending authorization are retrieved and displayed in the lower portion of the screen.
- Double click the record that you wish to authorize. The Settlement Cycle Maintenance Detail screen is displayed in amendment mode. Select Unlock operation from the Action List to amend the record.
- Amend the necessary information and click on Save to save the changes
3.70.7 Authorizing Amended Settlement Cycle Maintenance Record
An amended Settlement Cycle Maintenance record must be authorized for the amendment to be made effective in the system. The authorization of amended records can be done only from Fund Manager Module and Agency Branch module.
3.71 Settlement Price Detail
This section contains the following topic:
3.71.1 Invoking Settlement Price Detail Screen
You can update the fund price for the closed ended funds for settlement using ‘Settlement Price Detail’ screen. You can invoke this screen by typing ‘UTDSETTP’ in the field at the top right corner of the Application tool bar and clicking on the adjoining arrow button.
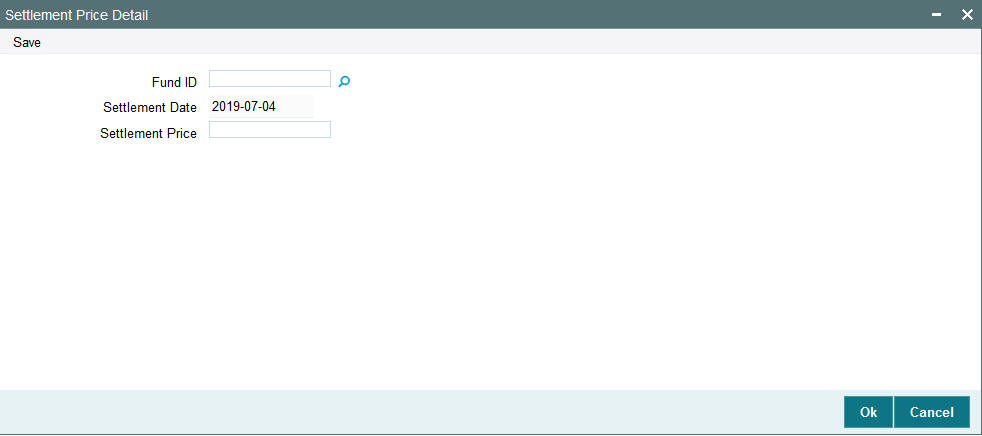
You can specify the following details:
Fund ID
Alphanumeric; 6 Characters; Optional
Specify the closed ended fund for doing the settlement. Alternatively, you can select fund ID from the option list. The list displays all valid fund ID maintained in the system.
Settlement Date
Display
The system displays the current application date.
Settlement Price
Numeric; 22 Characters; Optional
Specify the price for settlement of all eligible redemption transactions for a closed ended funds here. The system allots redemptions based on this price.
3.72 Succession Price Detail
This section contains the following topic:
3.72.1 Invoking Succession Price Detail Screen
You can update the succession price using ‘Settlement Price Detail’ screen. You can invoke this screen by typing ‘UTDSUCPR’ in the field at the top right corner of the Application tool bar and clicking on the adjoining arrow button.

You can specify the following details:
Criteria
Price Date
Display
The system displays the price date.
From Date
Date Format; Mandatory
Select the date from when succession price to be considered from the adjoining calendar.
To Date
Date Format; Mandatory
Select the date till when succession price to be considered from the adjoining calendar.
Succession Price
Fund ID
Alphanumeric; 6 Characters; Optional
Specify the fund ID. Alternatively, you can select fund ID from the option list. The list displays all valid fund ID maintained in the system.
Fund Base Currency
Display
The system displays the fund base currency.
Price Details
Numeric; 22 Characters; Mandatory
Specify the succession price details.
Price In Euro
Display
The system displays the price in Euro.
3.73 Succession Price Summary
This section contains the following topic:
- Section 3.73.1, "Retrieving a Record in Succession Price Summary Screen"
- Section 3.73.2, "Editing Succession Price Record"
- Section 3.73.3, "Viewing Succession Price Record"
- Section 3.73.4, "Deleting Succession Price Record"
- Section 3.73.5, "Authorizing Succession Price Record"
- Section 3.73.6, "Amending Succession Price Record"
- Section 3.73.7, "Authorizing Amended Succession Price Record"
3.73.1 Retrieving a Record in Succession Price Summary Screen
You can retrieve a previously entered record in the Summary Screen, as follows:
Invoke the ‘Succession Price Summary’ screen by typing ‘UTSSUCPR’ in the field at the top right corner of the Application tool bar. Click on the adjoining arrow button and specify any or all of the following details in the corresponding details.

- The status of the record in the Authorized field. If you choose the ‘Blank Space’ option, then all the records are retrieved.
- The status of the record in the Open field. If you choose the ‘Blank Space’ option, then all records are retrieved
- Price Date
- From Date
- To Date
Click ‘Search’ button to view the records. All the records with the specified details are retrieved and displayed in the lower portion of the screen.
Note
You can also retrieve the individual record detail from the detail screen by querying in the following manner:
- Press F7
- Input the Price Date
- Press F8
You can perform Edit, Delete, Amend, Authorize, operations by selecting the operation from the Action list. You can also search a record by using a combination of % and alphanumeric value
3.73.2 Editing Succession Price Record
You can modify the details of Succession Price record that you have already entered into the system, provided it has not subsequently authorized. You can perform this operation as follows:
- Invoke the Succession Price Summary screen from the Browser.
- Select the status of the record that you want to retrieve for modification in the Authorized field. You can only modify records that are unauthorized. Accordingly, choose the Unauthorized option.
- Specify any or all of the details in the corresponding fields to retrieve the record that is to be modified.
- Click ‘Search’ button. All unauthorized records with the specified details are retrieved and displayed in the lower portion of the screen.
- Double click the record that you want to modify in the list of displayed records. The Succession Price Detail screen is displayed.
- Select Unlock Operation from the Action list to modify the record. Modify the necessary information.
Click Save to save your changes. The Succession Price Detail screen is closed and the changes made are reflected in the Succession Price Summary screen.
3.73.3 Viewing Succession Price Record
To view a record that you have previously input, you must retrieve the same in the Succession Price Summary screen as follows:
- Invoke the Succession Price Summary screen from the Browser.
- Select the status of the record that you want to retrieve for viewing in the Authorization Status field. You can also view all records that are either unauthorized or authorized only, by choosing the unauthorized / Authorized option.
- Specify any or all of the details of the record in the corresponding fields on the screen.
- Click ‘Search’ button. All records with the specified fields are retrieved and displayed in the lower portion of the screen.
- Double click the record that you want to view in the list of displayed records. The Succession Price Detail screen is displayed in View mode.
3.73.4 Deleting Succession Price Record
You can delete only unauthorized records in the system. To delete a record that you have previously entered:
- Invoke the Succession Price Summary screen from the Browser.
- Select the status of the record that you want to retrieve for deletion.
- Specify any or all of the details in the corresponding fields on the screen.
- Click ‘Search’ button. All records with the specified fields are retrieved and displayed in the lower portion of the screen.
- Double click the record that you want to delete in the list of displayed records. The Succession Price Detail screen is displayed.
- Select Delete Operation from the Action list. The system prompts you to confirm the deletion and the record is physically deleted from the system database.
3.73.5 Authorizing Succession Price Record
- An unauthorized Succession Price record must be authorized in the system for it to be processed. To authorize a record:
- Invoke the Succession Price Summary screen from the Browser.
- Select the status of the record that you want to retrieve for authorization. Typically, choose the unauthorized option.
- Specify any or all of the details in the corresponding fields on the screen.
- Click ‘Search’ button. All records with the specified details that are pending authorization are retrieved and displayed in the lower portion of the screen.
- Double click the record that you wish to authorize. The Succession Price Detail screen is displayed. Select Authorize operation from the Action List.
When a checker authorizes a record, details of validation, if any, that were overridden by the maker of the record during the Save operation are displayed. If any of these overrides results in an error, the checker must reject the record.
3.73.6 Amending Succession Price Record
After a Succession Price record is authorized, it can be modified using the Unlock operation from the Action List. To make changes to a record after authorization:
- Invoke the Succession Price Summary screen from the Browser.
- Select the status of the record that you want to retrieve for authorization. You can only amend authorized records.
- Specify any or all of the details in the corresponding fields on the screen.
- Click ‘Search’ button. All records with the specified details that are pending authorization are retrieved and displayed in the lower portion of the screen.
- Double click the record that you wish to authorize. The Succession Price Detail screen is displayed in amendment mode. Select Unlock operation from the Action List to amend the record.
- Amend the necessary information and click on Save to save the changes
3.73.7 Authorizing Amended Succession Price Record
An amended Succession Price record must be authorized for the amendment to be made effective in the system. The authorization of amended records can be done only from Fund Manager Module and Agency Branch module.
The subsequent process of authorization is the same as that for normal transactions.