3. Generating Reports
Oracle FLEXCUBE Investor Servicing provides an extensive reporting facility. You can query the database to obtain pre-defined reports relating to any aspect of fund management, entity management, transaction processing or security.
The reports are grouped into the following categories:
- Activity Reports
- Broker Reports
- Certificate Printing
- Confirmation Reports
- Inquiry
- LEP Reports
- Other Reports
- Print Reports
- Queries
- Reinvestment Report
- SI Reports
- Threshold Balance
- Transfer Register
- Transaction Reports
- UH Info Reports
- Unit Holder Reports
This chapter contains the following sections:
- Section 3.1, "Activity Reports"
- Section 3.2, "Broker Reports"
- Section 3.3, "Confirmation Reports"
- Section 3.4, "Other Reports"
- Section 3.5, "Queries"
- Section 3.6, "SI Reports"
- Section 3.7, "Transaction Reports"
- Section 3.8, "UH Info Reports"
- Section 3.9, "Unit Holder Reports"
- Section 3.10, "Corporate Action Reports"
- Section 3.11, "Reinvestment Report"
- Section 3.12, "Certificate Printing"
- Section 3.13, "Threshold Balance Report"
- Section 3.14, "Transfer Register Report"
- Section 3.15, "Tax Statements Reports"
- Section 3.16, "Investment Simulator"
- Section 3.17, "Multi Transaction Error Log Report"
- Section 3.18, "Tax Credit Report"
- Section 3.19, "Redemption Confirmation Report"
- Section 3.20, "Subscription Confirmation Report"
- Section 3.21, "Switch Confirmation Report"
- Section 3.22, "Account Balance Statement Report"
- Section 3.23, "Portfolio Holdings Report"
- Section 3.24, "Portfolio Statement Report"
- Section 3.25, "Portfolio Performance Report"
- Section 3.26, "Transaction Category Updation Report"
- Section 3.27, "LEP Reports"
- Section 3.28, "SMS Reports"
- Section 3.29, "AUT Report"
- Section 3.30, "Fund Reports"
3.1 Activity Reports
This section contains the following topics:
- Section 3.1.1, "Activity Report Details"
- Section 3.1.2, "Generating the Fund Activity Report"
- Section 3.1.3, "Generating Inactive Users Report"
- Section 3.1.4, "Generating the User Profile Info Report"
3.1.1 Activity Report Details
The reports in this section display data regarding the logging of activities performed by the users that access the Oracle FLEXCUBE system. These are mainly security management related reports.
3.1.2 Generating the Fund Activity Report
This report will print the Activity Summary or Super Sheet of the fund for the day. It is printed on request. You can invoke the ‘Fund Activity Detail’ screen by typing ‘UTR00033’ in the field at the top right corner of the Application tool bar and clicking on the adjoining arrow button.

Enter the search criteria and click ‘Ok’ button to generate the report.
Umbrella Fund
Optional
Select if Umbrella fund should be selected or not from the drop-down list. The list displays the following values:
- Yes
- No
Fund ID
Alphanumeric; 6 Characters; Mandatory
Specify the fund ID. Alternatively, you can select fund ID from the option list.
Fund Identification Number
Display
The system displays the fund identification number for the selected fund ID.
Transaction Date
Date Format; Mandatory
Select the transaction date from the adjoining calendar.
Format
Optional
Select the format from the drop-down list. The list displays the following values:
- HTML
- Excel
- Excel (.xlsx)
- RTF
Output
Optional
Select the output from the drop-down list. The list displays the following values:
- View
- Spool
Print At
Optional
Select the printing location from the drop-down list. The list displays the following values:
- Client
- Server
Printer
Alphanumeric; 15 Characters; Optional
Specify the printer details from adjoining option list.
3.1.2.1 Contents of the Fund Activity Report
Subscription
The sum of the total subscription, in units and amounts that have been made.
Switch To
The sum of the total Switch transactions, in units and amounts that have been made to this fund.
Total Subscriptions
The sum of the total Subscription, in units and amounts that have been made. This includes Subscriptions and Switch To this fund.
Redemption
The sum of the total redemption, in units and amounts that have been made.
Switch From
The sum of the total Switches, in units and amounts that have been made from this fund.
Dividends
The sum of the total Dividends, in units and amounts that have been declared.
Total Redemption
The sum of the total Redemption, in units and amounts that have been made. This includes redemption, switch from this fund, dividends.
Net
This is the Total Subscriptions minus the Total Redemption made.
3.1.3 Generating Inactive Users Report
This report is generated to view the details of the inactive users. You can invoke the ‘Inactive Users List’ screen by typing ‘UTR00193’ in the field at the top right corner of the Application tool bar and clicking on the adjoining arrow button.
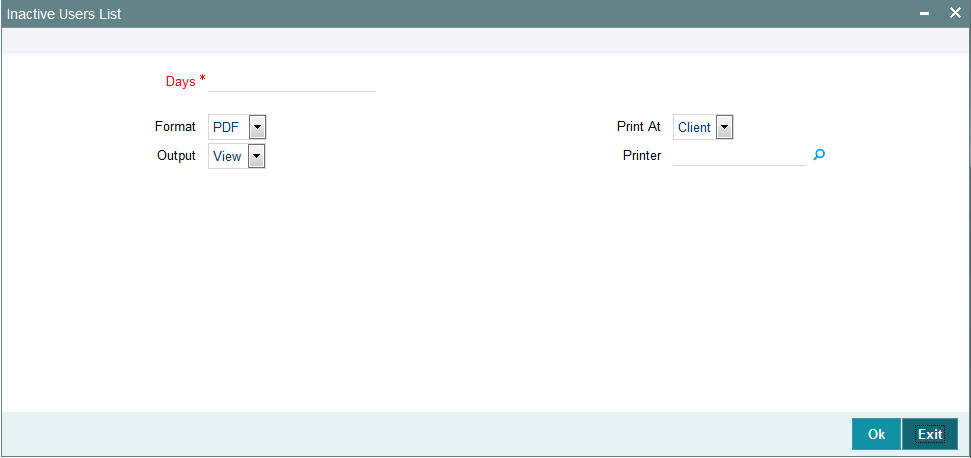
Days
Numeric; 22 Characters; Mandatory
Specify the number of days from the application date since when the user’s status has been inactive.
Format
Optional
Select the format from the drop-down list. The list displays the following values:
- HTML
- Excel
- Excel (.xlsx)
- RTF
Output
Optional
Select the output from the drop-down list. The list displays the following values:
- View
- Spool
Print At
Optional
Select the printing location from the drop-down list. The list displays the following values:
- Client
- Server
Printer
Alphanumeric; 15 Characters; Optional
Specify the printer details from adjoining option list.
Enter the search criteria and click ‘OK’ button to generate the report.
3.1.4 Generating the User Profile Info Report
This report is generated to view the details of the inactive users. You can invoke the ‘User Profile Info’ screen by typing ‘UTR00192’ in the field at the top right corner of the Application tool bar and clicking on the adjoining arrow button.

User Status
Optional
Select the user status from the drop-down list. The list displays the following values:
- ALL
- Enabled
- Hold
- Disabled
- Locked
Format
Optional
Select the format from the drop-down list. The list displays the following values:
- HTML
- Excel
- Excel (.xlsx)
- RTF
Output
Optional
Select the output from the drop-down list. The list displays the following values:
- View
- Spool
Print At
Optional
Select the printing location from the drop-down list. The list displays the following values:
- Client
- Server
Printer
Alphanumeric; 15 Characters; Optional
Specify the printer details from adjoining option list.
Enter the search criteria and click ‘OK’ button to generate the report.
3.1.4.1 Contents of the User Profile Info Report
In this screen, the following are the parameters for the generation of the report:
- The user’s status the options being
- Disable
- Enable
- All
- The language in which the report must appear.
- The mandatory box needs to be checked against the fields which are mandatory for the generation of the report.
3.2 Broker Reports
This section contains the following topics:
- Section 3.2.1, "Broker Reports Details"
- Section 3.2.2, "Broker Communique Report"
- Section 3.2.3, "Broker Details Report Description"
- Section 3.2.4, "Generating Reporting Structure for Brokers Report"
- Section 3.2.5, "Broker Commission Payment Report Description"
3.2.1 Broker Reports Details
Any information related to brokers in the system can be displayed by generating the reports in the reports in this section.
3.2.2 Broker Communique Report
This report shows you the commission details for a broker, over a period, with summaries as well as fund-wise and transaction-wise groupings.
Also, this report shows you the value of the broker’s holdings in each fund, along with the CASA account balances.
The following details are displayed in the report:
3.2.2.1 Broker Details
In this section of the report, the Name, Code, Telephone and Facsimile Numbers, Mobile Number, Email Address and Postal Address of the concerned broker are displayed.
Also, the Last Paid On Date, which refers to the last commission payment date and the Next Payment On Date are displayed.
The VAT Registration Number is also displayed.
3.2.2.2 Summary of Commission Details
Here, the summary details of commissions that have accrued to this broker over the given time period are displayed. This includes the following information:
- The Payment Dates of the Commissions
- The Opening Balance
- The Commission Accrued, Earned, Paid and Reinvested
Here, the commission accrued will include the commission that has accrued from transactions for which the payment instruments have not been cleared, too. This portion of the commission is not paid out till the payment instruments are cleared.
3.2.2.3 Payment Details
The details of each commission payment are displayed here. Both Check as well as Transfer payments are displayed under the appropriate head.
For Check Payments, the following details are available for view:
- The Payment Reference Number and Payment Date
- The Check Amount, the Check Number, the Clearing Date and the Clearing Status.
For Transfer Payments, the following details are available for view:
- The Payment Date
- The Transfer Amount, Transfer Bank Name and Branch Name
- The Transfer Account Type and Account Number.
The commission paid out will not include the commission that has accrued from transactions for which the payment instruments have not been cleared. This portion of the commission is not paid out till the payment instruments are cleared.
3.2.2.4 Commission Details Grouped by Transaction and Fund
In this section, the details of commission in each fund, grouped according to transactions, are displayed. For each transaction that has resulted in a commission payment, the following details are displayed:
- Client Details such as the Unit Holder that has entered into the transaction and the Unit Holder Number.
- Transaction Details such as the Transaction Date and Type, the Number of Units involved in the transaction, the Buy Price and the Amount in fund base currency.
- Commission Details, such as the Commission Earned
If the payment instrument for the transaction is not cleared, the commission as a result of the transaction is processed and accrued, but it is not paid out till the payment instrument is cleared.
3.2.2.5 Unit holder Balances across Funds and CASA Account Balances
In the final section of this report, the fund-wise balances held by each unit holder whose introducer broker is the broker for whom the report is being printed, are displayed. For each unit holder, the following details are displayed fund-wise:
- The Unit Balance in each of the funds, with Provisional Units and Blocked Units. The Value of Fund Holdings is also displayed, in unit holder currency.
- The Total Value of Holdings of the unit holder across funds is also summed up and displayed in fund base currency.
- The CASA Account Balance for the unit holder is also displayed.
- The Total Blocked Amount, across funds, is also displayed.
The Grand Total of Holdings is the sum of all the total values of holdings for all unit holders across funds. This is also displayed in the report.
3.2.2.6 Generating Broker Communique Report
You can invoke the ‘Broker Communique’ screen by typing ‘UTR00107’ in the field at the top right corner of the Application tool bar and clicking on the adjoining arrow button.
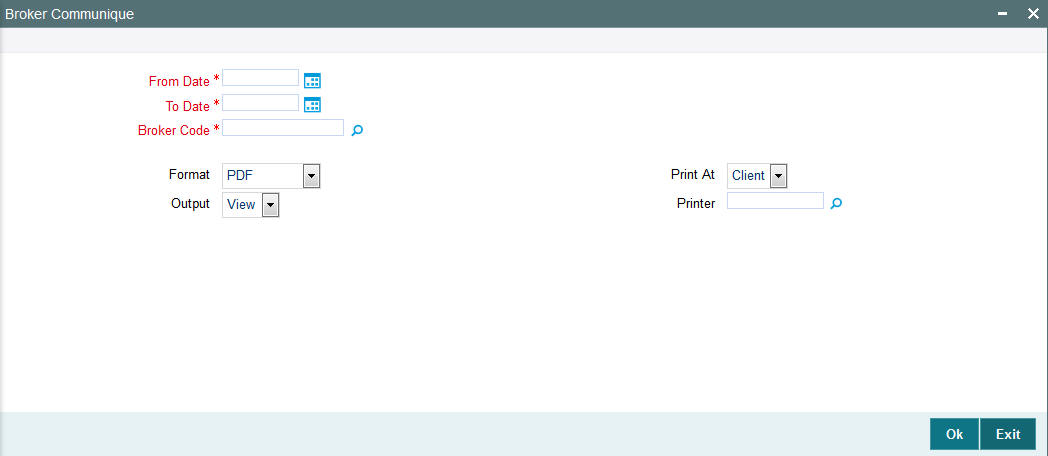
In this screen, you must specify the following as mandatory sorting parameters for the generation of the report:
From Date and To Date
Date Format; Mandatory
The dates that specify the period between which you want to view the broker details, in the From Date and To Date fields.
Broker Code
Alphanumeric; 12 Characters; Mandatory
Specify the code of the broker for whom you want to view the details between the specified dates.
After making your specifications, click ‘Ok’ button.
Format
Optional
Select the format from the drop-down list. The list displays the following values:
- HTML
- Excel
- Excel (.xlsx)
- RTF
Output
Optional
Select the output from the drop-down list. The list displays the following values:
- View
- Spool
Print At
Optional
Select the printing location from the drop-down list. The list displays the following values:
- Client
- Server
Printer
Alphanumeric; 15 Characters; Optional
Specify the printer details from adjoining option list.
3.2.3 Broker Details Report Description
This report displays all information regarding the Broker that you have entered in the broker's record, in the ‘Broker Maintenance’ screen. The information is logically grouped under the following heads:
- Broker Details such as the Broker Name and the Parent Broker Name.
- Contact Details
- Commission Details
- Bank Details
- Income Distribution Set-up Details
- Reinvestment Setup Details
3.2.3.1 Broker Details
In this portion of the report, the following details are displayed:
- The Broker's Name
- The Broker's Code (i.e., the broker's identification within the system)
- The name of the Parent Broker to whom this broker reports.
- The Broker Code of this Parent Broker
3.2.3.2 Contact Details
In this portion of the report, the following details are displayed:
- The Broker's complete address, with the City, State and Zip Code.
- The Broker's telephone, fax and cell-phone numbers.
- The name of the Contact Person for this broker.
3.2.3.3 Commission Details
In this portion of the report, the following details are displayed:
- The VAT details of the broker (i.e, whether the broker is a VAT Registered Broker or not, and if so, his VAT Registration Number)
- The hierarchical commission percentage that is payable to this Broker.
- The Commission Payment Frequency, with the Next Payment Date, Last Payment Date, Last Payment Number and Last Processed Date.
- The Commission that has been carried forward.
3.2.3.4 Bank Details
In this portion of the report, the following details are displayed:
- The name and branch name of the Bank where the Broker has an account.
- The ID of the account in the concerned Bank which must be used to make or receive payments regarding this broker, and the name of the Account Holder. If this is the default account for this broker, this will also be mentioned.
3.2.3.5 Income Distribution Set-up Details
In this portion of the report, all details that pertain to the income distribution set-up for this broker are displayed, as follows:
- The Income Distribution Mode, the Payment Split Percentage and the Check or Transfer Payment Split Percentage.
- The Transfer Details such as the Account Type, Number, Bank Name and Branch Name.
3.2.3.6 Reinvestment Setup Details
In this portion of the report, all details that pertain to the Reinvestment Options set up for this Broker are displayed, such as the Reinvestment Unit Holder ID, the Reinvestment Fund ID and the Split Percentage.
3.2.3.7 Generating Broker Details Report
You can invoke the ‘Broker Details’ screen by typing ‘UTR00048’ in the field at the top right corner of the Application tool bar and clicking on the adjoining arrow button.
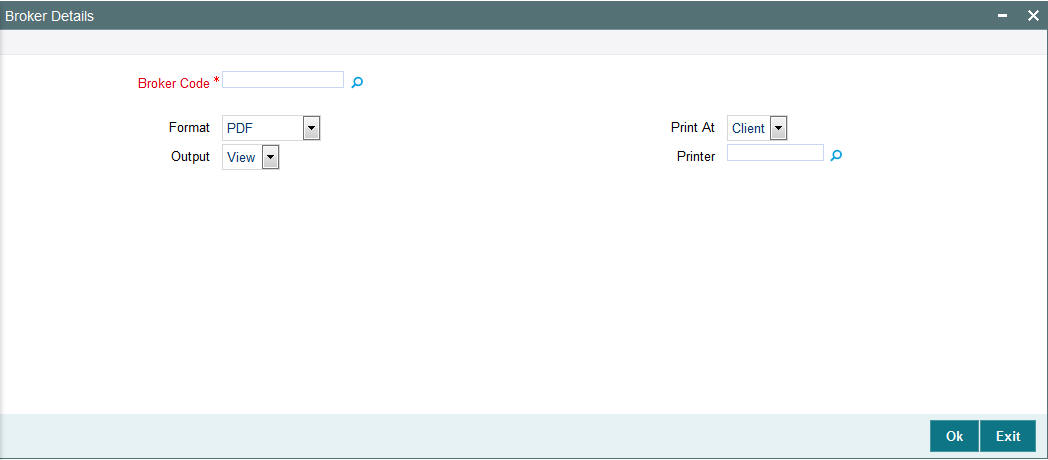
In this screen, you must specify the code of the broker whose details you want to view, in the Broker Code field. as mandatory sorting parameters for the generation of the report. After making your specifications, click ‘Ok’ button.
You can specify the following details:
Broker Code
Alphanumeric; 12 Characters; Optional
Specify the broker code.
Format
Optional
Select the format from the drop-down list. The list displays the following values:
- HTML
- Excel
- Excel (.xlsx)
- RTF
Output
Optional
Select the output from the drop-down list. The list displays the following values:
- View
- Spool
Print At
Optional
Select the printing location from the drop-down list. The list displays the following values:
- Client
- Server
Printer
Alphanumeric; 15 Characters; Optional
Specify the printer details from adjoining option list.
3.2.4 Generating Reporting Structure for Brokers Report
This report may also be termed as the Broker Hierarchy Report. You can use it to view the details and the framework of the reporting structure in a given Hierarchy Structure, for a given Parent Broker. The following details are displayed at each Reporting Hierarchy Level:
- The Broker Code, Name and Address details, the Telephone, Cell Phone, Fax Numbers and the E-Mail Address.
- The Code of the Broker to whom the concerned Broker reports
- Commission Percentage payable by the broker to the immediate Parent Broker in the hierarchy
- The Commission Payment Frequency
- The Last Paid On and Next Payment On dates
- The carried forward Commission
- The VAT Registration Number
You can invoke the ‘Broker Hierarchy’ screen by typing ‘UTR00046’ in the field at the top right corner of the Application tool bar and clicking on the adjoining arrow button.

3.2.4.1 Contents of the Broker Hierarchy Report
In this screen, you must specify the following as sorting parameters for the generation of the report:
Broker Code
Alphanumeric; 1000 Characters; Mandatory
Specify the code of the broker whose hierarchy structure details.
Level Number
Alphanumeric; 1000 Characters; Optional
The level number of the selected broker in the hierarchy. Specify this in the level number field.
Note
None of these details are mandatory.
Format
Optional
Select the format from the drop-down list. The list displays the following values:
- HTML
- Excel
- Excel (.xlsx)
- RTF
Output
Optional
Select the output from the drop-down list. The list displays the following values:
- View
- Spool
Print At
Optional
Select the printing location from the drop-down list. The list displays the following values:
- Client
- Server
Printer
Alphanumeric; 15 Characters; Optional
Specify the printer details from adjoining option list.
After making your specifications, click ‘Ok’ button. The report details are displayed.
3.2.5 Broker Commission Payment Report Description
You can use this report to view the details of commission payment and commission reinvestment processing for a broker.
The information that is displayed is grouped under the following heads:
- Broker Details
- Commission Details
- Payment Details
- Reinvestment Details
- Broker Journal Details
3.2.5.1 Broker Details
In this section of the report, the Name, Code, Telephone Number and Postal Address of the concerned broker are displayed.
3.2.5.2 Commission Details
Here, the details of commissions that have accrued to this broker over the given time period are displayed. This includes the following information:
- The Payment Dates of the Commissions
- The Opening Balance
- The Commission Accrued, Paid and Reinvested
Here, the commission accrued will include the commission that has accrued from transactions for which the payment instruments have not been cleared, too. This portion of the commission is not paid out till the payment instruments are cleared.
- The VAT Amount
- The VAT Registration Number
- Whether VAT Amount has been paid or not.
3.2.5.3 Payment Details
The details of each commission payment are displayed here. Both Check as well as Transfer payments are displayed under the appropriate head.
For Check Payments, the following details are available for view:
- The Payment Reference Number and Payment Date
- The Check Amount, the Check Number, the Clearing Date and the Clearing Status.
For Transfer Payments, the following details are available for view:
- The Payment Date
- The Transfer Amount, Transfer Bank Name and Branch Name
- The Transfer Account Type and Account Number.
The commission paid out will not include the commission that has accrued from transactions for which the payment instruments have not been cleared. This portion of the commission is not paid out till the payment instruments are cleared.
3.2.5.4 Reinvestment Details
The details of the reinvestment options that are set up for this broker are displayed here. These details include the Payment Date corresponding to the commission which is being reinvested in part or full, the Reinvestment Unit Holder ID, Reinvestment Fund ID and the Reinvestment Amount.
3.2.5.5 Broker Journal Details
The details of the journal of commission payment for this broker are displayed here. This includes transaction number corresponding to the journal entry, Adjustment of payments of commissions, Payables and Receivables for the broker resulting from the transaction and the Remarks, if any.
3.2.5.6 Generating Broker Commission Payment Report
You can invoke the ‘Commission Payment’ screen by typing ‘UTR00083’ in the field at the top right corner of the Application tool bar and clicking on the adjoining arrow button.
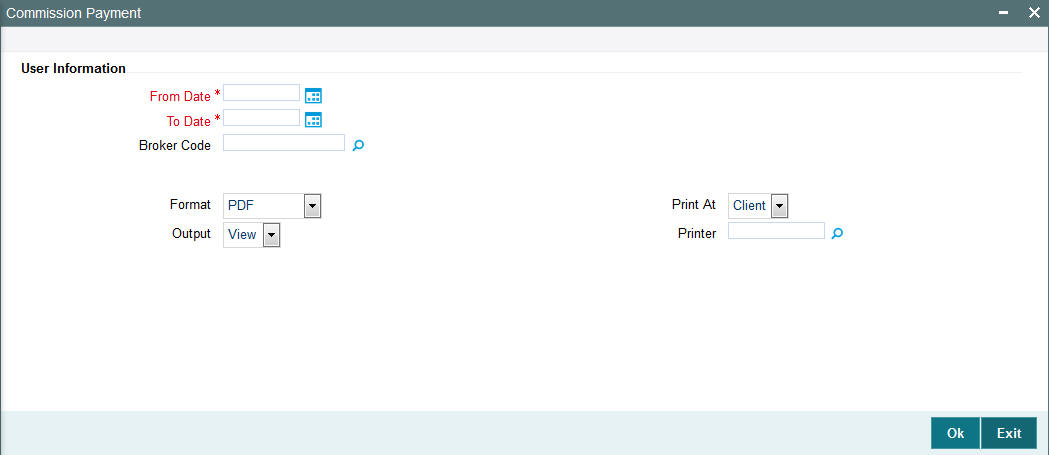
In this screen, you must specify the following as mandatory sorting parameters for the generation of the report:
From Date and To Date
Date Format; Mandatory
Specify the dates that specify the period between which you want to view the commission payment details, in the From Date and To Date fields.
Broker Code
Alphanumeric; 12 Characters; Optional
Specify the code of the broker for whom you want to view the commission details between the specified dates.
Format
Optional
Select the format from the drop-down list. The list displays the following values:
- HTML
- Excel
- Excel (.xlsx)
- RTF
Output
Optional
Select the output from the drop-down list. The list displays the following values:
- View
- Spool
Print At
Optional
Select the printing location from the drop-down list. The list displays the following values:
- Client
- Server
Printer
Alphanumeric; 15 Characters; Optional
Specify the printer details from adjoining option list.
After making your specifications, click ‘Ok’ button. The report details are displayed.
3.3 Confirmation Reports
This section contains the following topics:
3.3.1 Generating Confirmation Reports
The Oracle FLEXCUBE Investor Servicing (FC-IS) system provides the facility of printing confirmation reports for all allocated transactions that have been confirmed on a given business day.
You can invoke ‘IPO Confirmation’ screen by typing ‘UTR00103’ in the field at the top right corner of the Application tool bar and click the adjoining arrow. The transaction type confirmation report generation screen is displayed
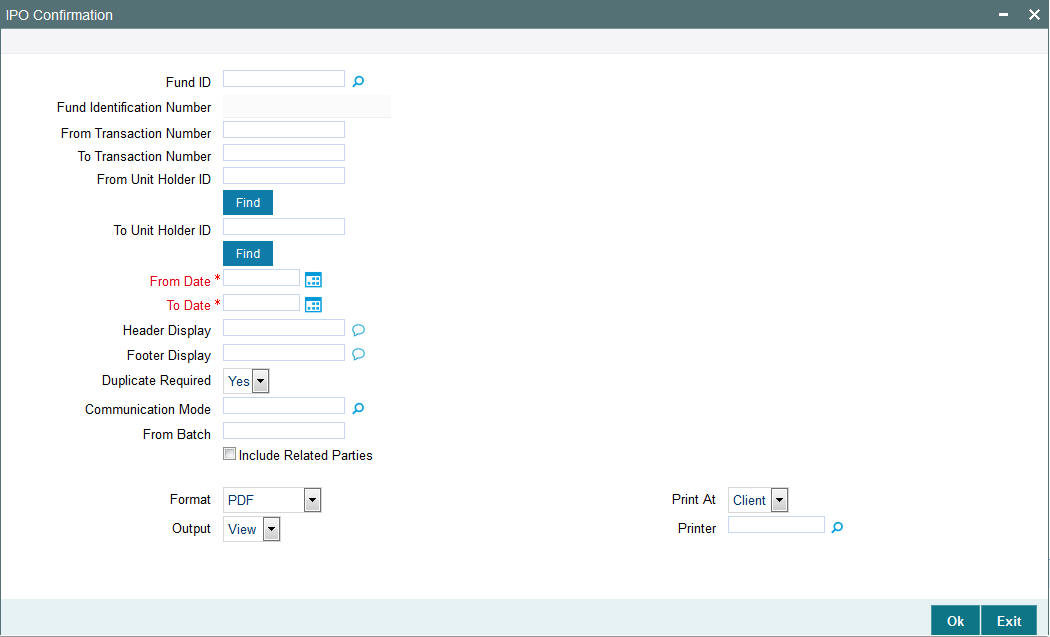
In this screen, you must specify the following as mandatory sorting parameters for the generation of the report:
Fund ID
Alphanumeric; 6 Characters; Optional
Specify the ID of the fund, for which you want to view the confirmed transactions on a given business day (or range of dates).
Fund Identification Number
Display
The system displays the fund identification number.
From and To Transaction Number
Alphanumeric; 16 Characters; Optional
Specify to reflect all allocated and confirmed transactions from a given transaction number to a given transaction number, between any two dates.
From and To Unit Holder ID
Alphanumeric; 12 Characters; Optional
Specify to reflect all allocated and confirmed transactions requested by a range of unit holders, between any two dates.
You can also search From and To Unit Holder ID, click on ‘Find’ button respectively.
From and To Date
Date Format; Mandatory
Specify From and To date to reflect all allocated and confirmed transactions, for a range of unit holders or all unit holders, between a range of dates.
Header and Footer Display
Alphanumeric; 255 Characters; Optional
Specify the header and footer details to be displayed.
Duplicate Required
Optional
Select if duplicate is required or not from the drop-down list. The list displays the following values:
- Yes
- No
Communication Mode
Alphanumeric; 2 Characters; Optional
Specify the communication mode.
From Batch
Alphanumeric; 1 Character; Optional
Specify From batch details.
Include Related Parties
Optional
Check this box to include related parties.
Format
Optional
Select the format from the drop-down list. The list displays the following values:
- HTML
- Excel
- Excel (.xlsx)
- RTF
Output
Optional
Select the output from the drop-down list. The list displays the following values:
- View
- Spool
Print At
Optional
Select the printing location from the drop-down list. The list displays the following values:
- Client
- Server
Printer
Alphanumeric; 15 Characters; Optional
Specify the printer details from adjoining option list.
After making your specifications, click ‘Ok’ button. The report details are displayed.
3.3.2 Details in Confirmation Reports
The following details are printed in the report:
- The ID, name and the address details of the unit holder that has requested the transaction.
- The transaction date.
- The fund in which the unit holder has requested the transaction.
- The market value of the total investments held by the unit holder in the AMC as on the dates of printing the confirmation report.
- The opening and closing balance for the unit holder in the fund as a result of the transaction.
- The volume of the transaction in number of units.
- The payment details for the transaction.
- The transaction number.
- The fees break-up for the transaction.
In the case of switch transaction, confirmation notes are printed for both the legs of the transaction. For transfer transactions, separate confirmation notes are printed for both the transferor and the transferee.
3.4 Other Reports
This section contains the following topics:
- Section 3.4.1, "Generating the Allocation Error Report"
- Section 3.4.2, "Generating the Derived Load Report"
- Section 3.4.3, "Generating the Entity Details Report"
- Section 3.4.4, "Generating the Exchange Override Report"
- Section 3.4.5, "Generating IDS Summary Report"
- Section 3.4.6, "Generating Income Advice Report"
- Section 3.4.7, "Generating LOI Non Fulfilment Report"
- Section 3.4.8, "Generating Load Override Report"
- Section 3.4.8.2, "Generating Trailing Commission Report"
- Section 3.4.10, "Generating Transaction Summary Report"
- Section 3.4.11, "Generating Fund Label Report"
3.4.1 Generating the Allocation Error Report
This report displays the errors logged by the allocation process between any two dates.
The FMG Allocation Error Report screen is as shown. You can invoke the ‘Allocation Errors’ screen by typing ‘UTR00066’ in the field at the top right corner of the Application tool bar and clicking on the adjoining arrow button.

In this screen, you must specify the following as mandatory sorting parameters for the generation of the report:
From Date and To Date
Date Format; Mandatory
Specify the dates that enclose the period during which you want to view the corresponding allocation error data.
Format
Optional
Select the format from the drop-down list. The list displays the following values:
- HTML
- Excel
- Excel (.xlsx)
- RTF
Output
Optional
Select the output from the drop-down list. The list displays the following values:
- View
- Spool
Print At
Optional
Select the printing location from the drop-down list. The list displays the following values:
- Client
- Server
Printer
Alphanumeric; 15 Characters; Optional
Specify the printer details from adjoining option list.
After making your specifications, click ‘Ok’ button. The report details are displayed.
3.4.2 Generating the Derived Load Report
This report can be used to obtain a list of all the authorized loads that have been set up in the system and the loads that are dependent on the same. There are no parameters for the report. It will list the following details, grouped by the information item, Parent Load.
- The ID of the derived Load
- The description of the derived load
- The Parent Load that the specified load is mapped to
- The Load Percentage
- The Type of the receiving Entity( or the To Entity)
- The ID of the receiving Entity( or the To Entity)
- The Criteria for this derived load
- Mandatory / Optional Option
- The Priority for the derived load
- The Rule Effective Date of the derived load
You can invoke the ‘Derived Load Details’ screen by typing ‘UTR00063’ in the field at the top right corner of the Application tool bar and clicking on the adjoining arrow button.
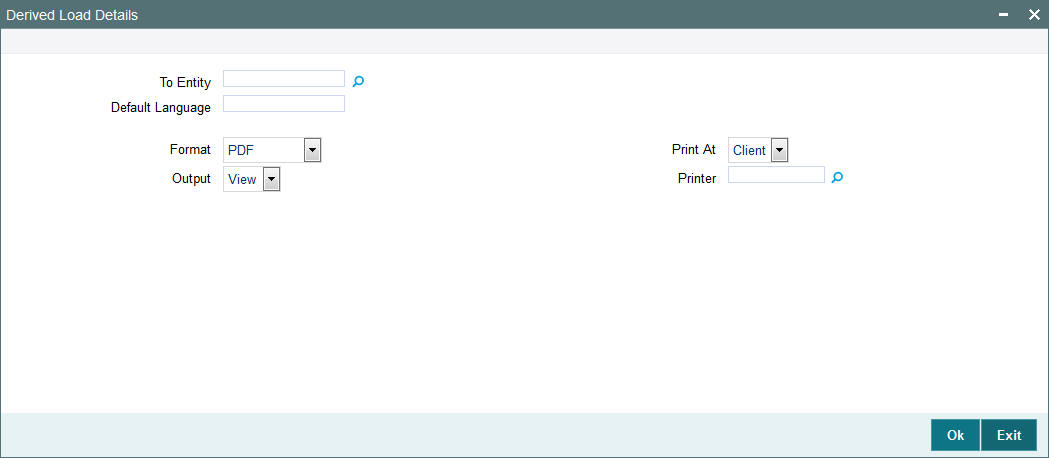
In this screen, you must specify the following as mandatory sorting parameters for the generation of the report:
To Entity
Alphanumeric; 20 Characters; Optional
Specify the entity that is the recipient for the proceeds of the derived load.
Default Language
Alphanumeric; 20 Characters; Optional
The language in which the report must appear, in the Report Language field.
Format
Optional
Select the format from the drop-down list. The list displays the following values:
- HTML
- Excel
- Excel (.xlsx)
- RTF
Output
Optional
Select the output from the drop-down list. The list displays the following values:
- View
- Spool
Print At
Optional
Select the printing location from the drop-down list. The list displays the following values:
- Client
- Server
Printer
Alphanumeric; 15 Characters; Optional
Specify the printer details from adjoining option list.
After making your specifications, click ‘Ok’ button. The report details are displayed.
3.4.3 Generating the Entity Details Report
This report displays all the entities present in the system - all the AMC, Registrars and Trustees.
It is printed on request, and the details are ordered according to Entity Type and Entity ID. All the static data that is available for the entities is displayed, such as the entity type, name, address, contact person, authorized signatory, phone number, fax number, etc.
You can invoke the ‘Entity Details’ screen by typing ‘UTR00062’ in the field at the top right corner of the Application tool bar and clicking on the adjoining arrow button.
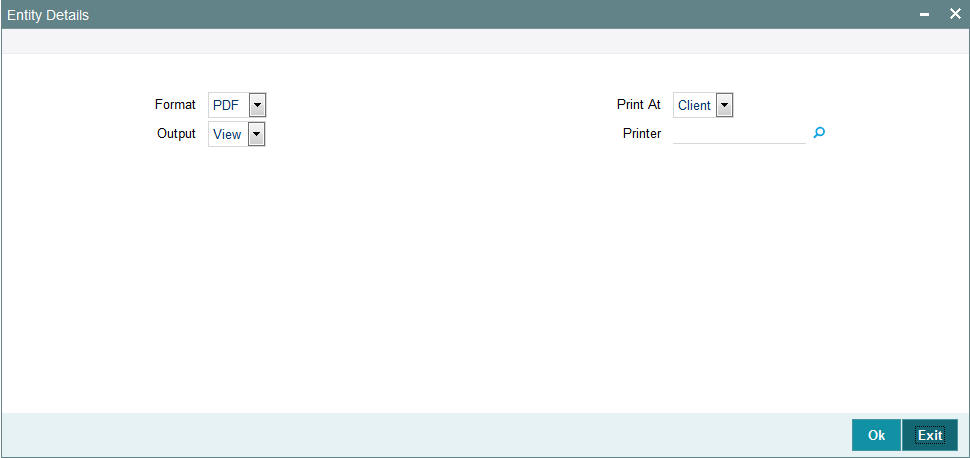
Enter the following details:
Format
Optional
Select the format from the drop-down list. The list displays the following values:
- HTML
- Excel
- Excel (.xlsx)
- RTF
Output
Optional
Select the output from the drop-down list. The list displays the following values:
- View
- Spool
Print At
Optional
Select the printing location from the drop-down list. The list displays the following values:
- Client
- Server
Printer
Alphanumeric; 15 Characters; Optional
Specify the printer details from adjoining option list.
Enter the printing options and Click ‘Ok’ button to print.
3.4.4 Generating the Exchange Override Report
This report displays details of overridden exchange rates for a fund on a given date. The details are displayed grouped by each Agent Code.
The following details are displayed:
- Transaction Number
- Applied Exchange Rate
- Overridden Exchange Rate
- The Variance percentage
- The Source ID of the Source from which the applied exchange rate was derived.
You can invoke the ‘Exchange Rate Overrides’ screen by typing ‘UTR00065’ in the field at the top right corner of the Application tool bar and clicking on the adjoining arrow button.
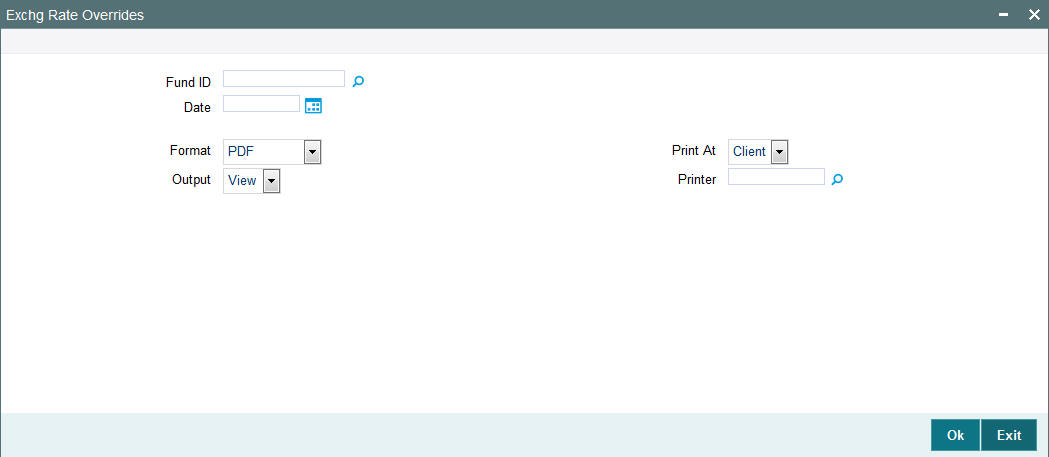
In this screen, you must specify the following as mandatory sorting parameters for the generation of the report:
Fund ID
Alphanumeric; 6 Characters; Optional
Specify the ID of the fund, for which the exchange rate override was performed.
Date
Date Format; Optional
Specify the date on which the exchange rate was overridden.
Format
Optional
Select the format from the drop-down list. The list displays the following values:
- HTML
- Excel
- Excel (.xlsx)
- RTF
Output
Optional
Select the output from the drop-down list. The list displays the following values:
- View
- Spool
Print At
Optional
Select the printing location from the drop-down list. The list displays the following values:
- Client
- Server
Printer
Alphanumeric; 15 Characters; Optional
Specify the printer details from adjoining option list.
After making your specifications, click ‘Ok’ button. The report details are displayed.
3.4.5 Generating IDS Summary Report
To obtain a summary of income distribution payments made for a fund, you can use this report.
You can invoke the ‘Income Distribution’ screen by typing ‘UTR00115’ in the field at the top right corner of the Application tool bar and clicking on the adjoining arrow button.
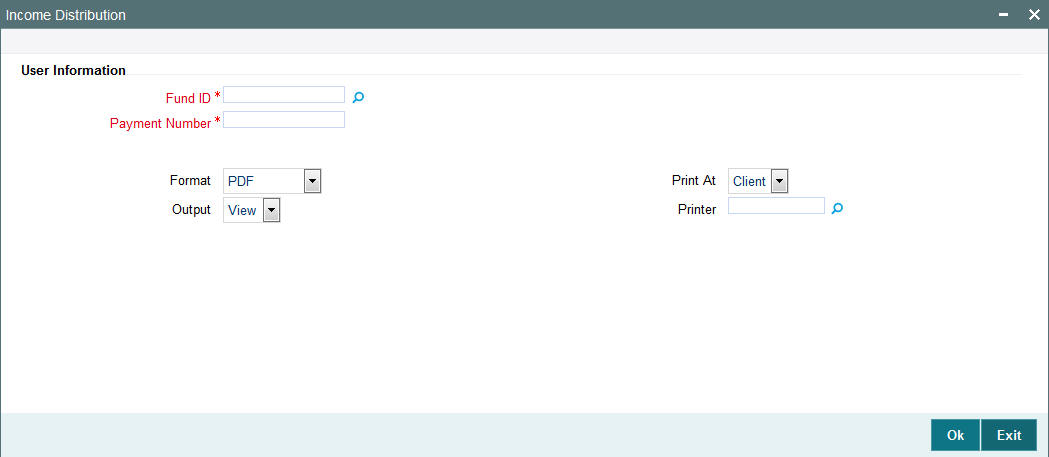
In this screen, you must specify the following as mandatory sorting parameters for the generation of the report:
Fund ID
Alphanumeric; 6 Characters; Mandatory
Specify the fund ID for which you want to view the price details.
Payment Number
Numeric; 22 Characters; Mandatory
Specify the number of the payment made as a result of the income distribution cycle.
Format
Optional
Select the format from the drop-down list. The list displays the following values:
- HTML
- Excel
- Excel (.xlsx)
- RTF
Output
Optional
Select the output from the drop-down list. The list displays the following values:
- View
- Spool
Print At
Optional
Select the printing location from the drop-down list. The list displays the following values:
- Client
- Server
Printer
Alphanumeric; 15 Characters; Optional
Specify the printer details from adjoining option list.
After making your specifications, click ‘Ok’ button. The report details are displayed.
3.4.6 Generating Income Advice Report
You can invoke the ‘Income Advice Detail’ screen by typing ‘UTR00110’ in the field at the top right corner of the Application tool bar and clicking on the adjoining arrow button.
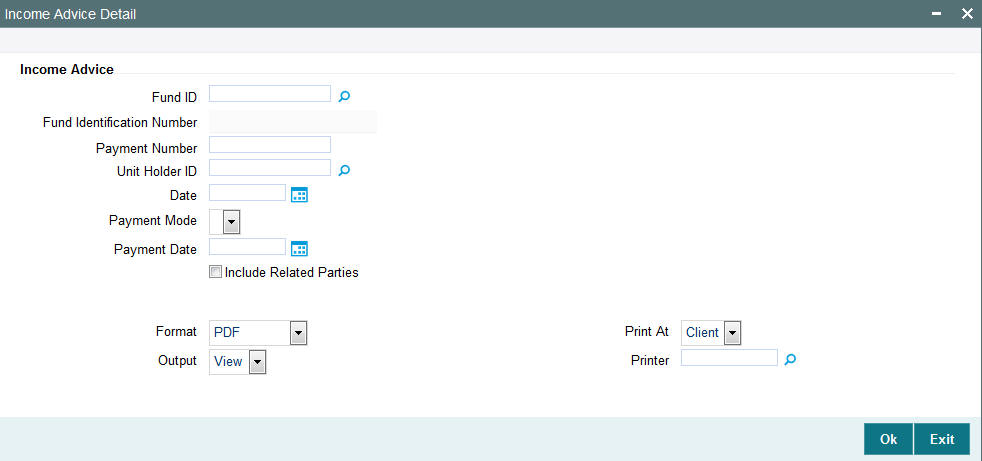
In this screen, you must specify the following as mandatory sorting parameters for the generation of the report:
Fund ID
Alphanumeric; 6 Characters; Optional
Specify the ID of the fund for which the income payment was made.
Fund Identification Number
Display
The system displays the fund identification number.
Payment Number
Numeric; 22 Characters; Mandatory
Specify the number of the payment made as a result of the income distribution cycle.
Unit Holder ID
Alphanumeric; 12 Characters; Optional
Specify the ID of the unit holder for whom the income payment was made. Alternatively, you can select unit holder ID from the option list.
Date
Date Format; Optional
Specify the date.
Payment Mode
Optional
Select the payment mode from the drop-down list. The list displays the following values:
- Reinvestment
- Cheque
- Transfer
Payment Date
Date Format; Optional
Select the payment date from the adjoining calendar.
Include Related Parties
Optional
Check this box to include related parties.
Format
Optional
Select the format from the drop-down list. The list displays the following values:
- HTML
- Excel
- Excel (.xlsx)
- RTF
Output
Optional
Select the output from the drop-down list. The list displays the following values:
- View
- Spool
Print At
Optional
Select the printing location from the drop-down list. The list displays the following values:
- Client
- Server
Printer
Alphanumeric; 15 Characters; Optional
Specify the printer details from adjoining option list.
After making your specifications, click ‘Ok’ button. The report details are displayed.
3.4.7 Generating LOI Non Fulfilment Report
This report displays details of Letter of Intent indemnifications by unit holders that have nor been fulfilled in the LOI Period.
You can invoke the ‘LOI Non Fulfillment’ screen by typing ‘UTR00104’ in the field at the top right corner of the Application tool bar and clicking on the adjoining arrow button.
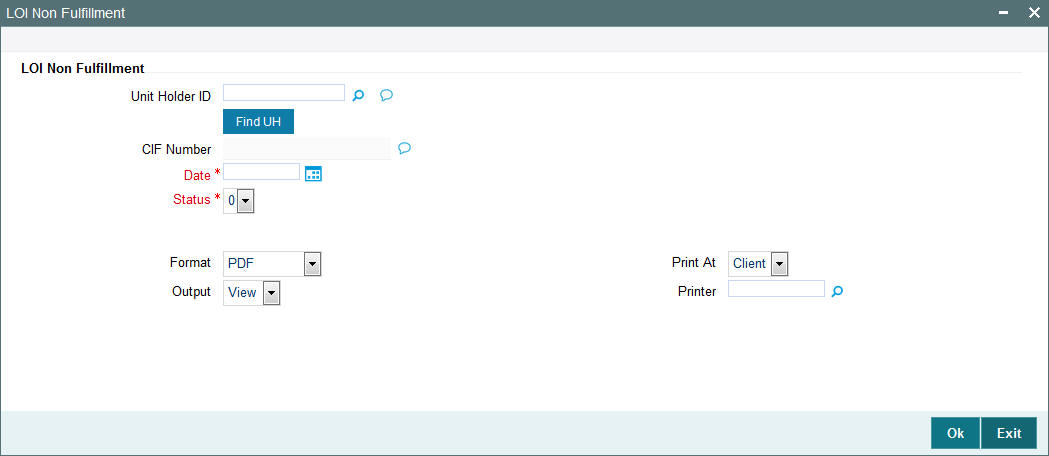
You can specify any of the following as sorting parameters for the generation of the report:
Unit Holder ID
Alphanumeric; 16 Characters; Optional
Specify the ID of the unit holder that has not fulfilled the LOI indemnification amount.
You can search unit holder ID by clicking ‘Find UH’ button.
CIF Number
Display
The system displays the CIF number for the selected unit holder ID.
Date
Date Format; Mandatory
Specify the date.
Status
Mandatory
Select the status from the drop-down list. The list displays the following values:
- 0
- 1
Format
Optional
Select the format from the drop-down list. The list displays the following values:
- HTML
- Excel
- Excel (.xlsx)
- RTF
Output
Optional
Select the output from the drop-down list. The list displays the following values:
- View
- Spool
Print At
Optional
Select the printing location from the drop-down list. The list displays the following values:
- Client
- Server
Printer
Alphanumeric; 15 Characters; Optional
Specify the printer details from adjoining option list.
After making your specifications, click ‘Ok’ button.
3.4.8 Generating Load Override Report
You can invoke the ‘Load Override Detail’ screen by typing ‘UTR00094’ in the field at the top right corner of the Application tool bar and clicking on the adjoining arrow button.
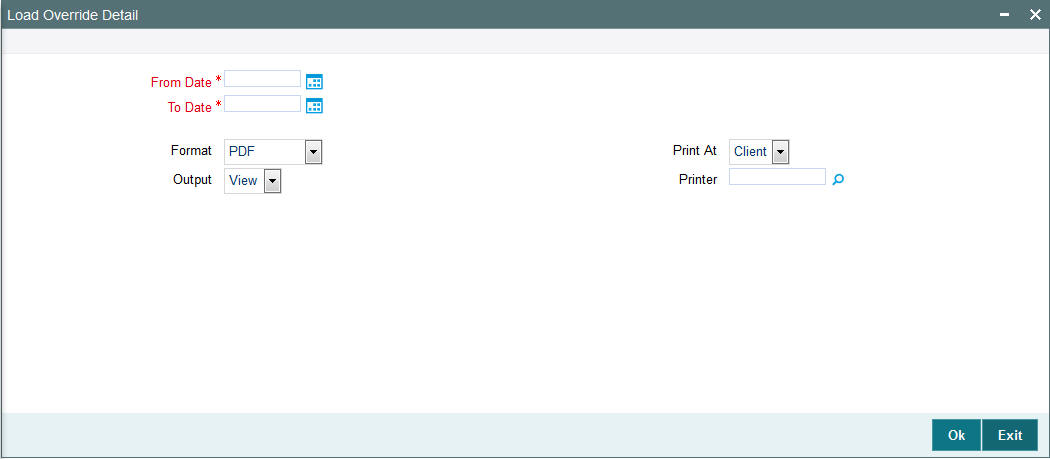
From Date and To Date
Date Format; Mandatory
Specify the dates that enclose the period during which you want to view the details of load overrides that have been performed for the generation of the report.
Format
Optional
Select the format from the drop-down list. The list displays the following values:
- HTML
- Excel
- Excel (.xlsx)
- RTF
Output
Optional
Select the output from the drop-down list. The list displays the following values:
- View
- Spool
Print At
Optional
Select the printing location from the drop-down list. The list displays the following values:
- Client
- Server
Printer
Alphanumeric; 15 Characters; Optional
Specify the printer details from adjoining option list.
After making your specifications, click ‘Ok’ button.
3.4.8.1 Generating Transaction Load Override Report
This report presents a list of all transactions that have overridden loads, and have been entered from the branch where it is being generated. The details of each override such as the original percentage/amount, override percentage/amount and the load calculation method are displayed.
The report may be generated based on the Transaction From Date and To Date.
Fields in Transaction Load Override Report screen
Transaction Number
Display Only
In this field, the transaction numbers of the transactions for which the load is applicable are displayed.
Transaction Date
Display Only
The dates of the concerned transactions are displayed here.
Unit Holder Number
Display Only
The ID of the unit holder who has made the transaction is displayed here.
Unit Holder Name
Display Only
The name of the unit holder who has made the transaction is displayed here.
Fund ID
Display Only
The Fund ID of the transaction, if any, is displayed here.
Broker Code
Display Only
The Code of the Broker that is involved in the transaction, if any, is displayed here.
Load ID
Display Only
The IDs of the loads that are applicable to the given transaction is displayed here.
Transaction Mode
Display Only
This shows whether the transaction is based on Units or Transaction Amount
Value Applied
Display Only
The transaction amount, upon which the load has been computed, is displayed here.
Original Load Percentage
Display Only
If the load is computed as a percentage, the original percentage that had been applicable before the override is displayed here.
Override Load Percentage
Display Only
If the load is computed as a percentage, the percentage became applicable after the override is displayed here.
Original Load Amount
Display Only
If the load is computed as an amount, the new amount that had been applicable before the override is displayed here.
Override Load Amount
Display Only
If the load is computed as an amount, the new amount that became applicable after the override is displayed here.
Date Allotted
Display Only
If the transaction has been allotted, the date on which the allotment took place is displayed here.
Units Allotted
Display Only
If the transaction has been allotted, the number of units that were allotted at the time of allotment is displayed here.
Maker ID
Display Only
The ID of the user who actually entered the override is displayed here.
Checker ID
Display Only
The ID of the user who actually authorized the override is displayed here.
Agent Code
Display Only
The Agent Code of the Agency from where the override was performed and entered into the system is displayed here.
Branch Code
Display Only
The Branch Code of the Agency from where the override was performed and entered into the system is displayed here.
Override Module
Display Only
The Module (FUNDMANAGER/AGENCY BRANCH) where the override was actually done is displayed here.
3.4.8.2 Generating Trailing Commission Report
This report displays details of the trailing commissions paid to brokers, across all funds, for a given period.
The following details are displayed:
- The Transaction Number
- Last Processed on Date
- The From and to Branches
- The Basis Amount
- The equivalent basis amount in Euro Currency
- The Load Amount
- The equivalent load amount in Euro Currency
- The Referral Entity
- The Load ID
- The To Entity Type and To Entity ID
- The From Entity Type
You can invoke the ‘Trailing Commission’ screen by typing ‘UTR00152’ in the field at the top right corner of the Application tool bar and clicking on the adjoining arrow button.
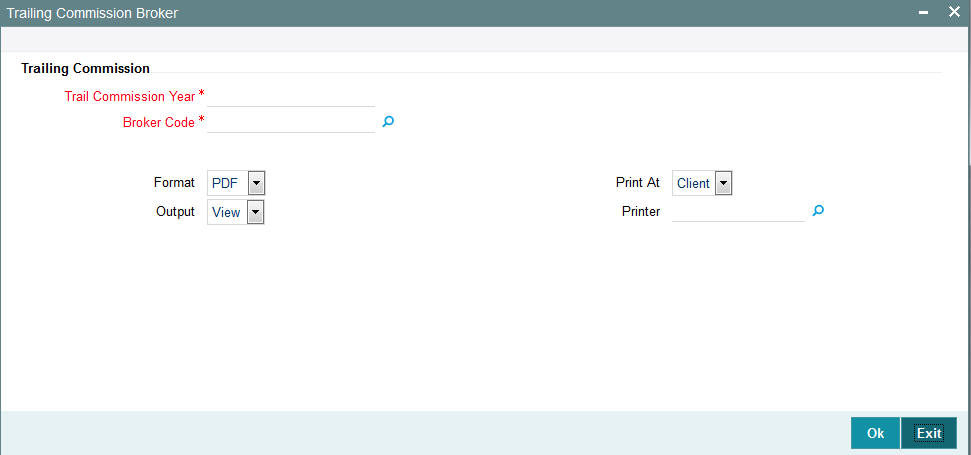
In this screen, you must specify the following as mandatory sorting parameters for the generation of the report:
Trail Commission Year
Alphanumeric; 5 Characters; Mandatory
Specify the trail commission year to view the details of trailing commission accruals.
Broker Code
Alphanumeric; 12 Characters; Mandatory
Specify the broker code.
Format
Optional
Select the format from the drop-down list. The list displays the following values:
- HTML
- Excel
- Excel (.xlsx)
- RTF
Output
Optional
Select the output from the drop-down list. The list displays the following values:
- View
- Spool
Print At
Optional
Select the printing location from the drop-down list. The list displays the following values:
- Client
- Server
Printer
Alphanumeric; 15 Characters; Optional
Specify the printer details from adjoining option list.
After making your specifications, click ‘Ok’ button. The report details are displayed.
3.4.9 Generating Trailing Commissions Report
You can generate trailing commission report using ‘Trailing Commissions Details’ screen. You can invoke the ‘Transaction Summary’ screen by typing ‘UTR00092’ in the field at the top right corner of the Application tool bar and clicking on the adjoining arrow button.
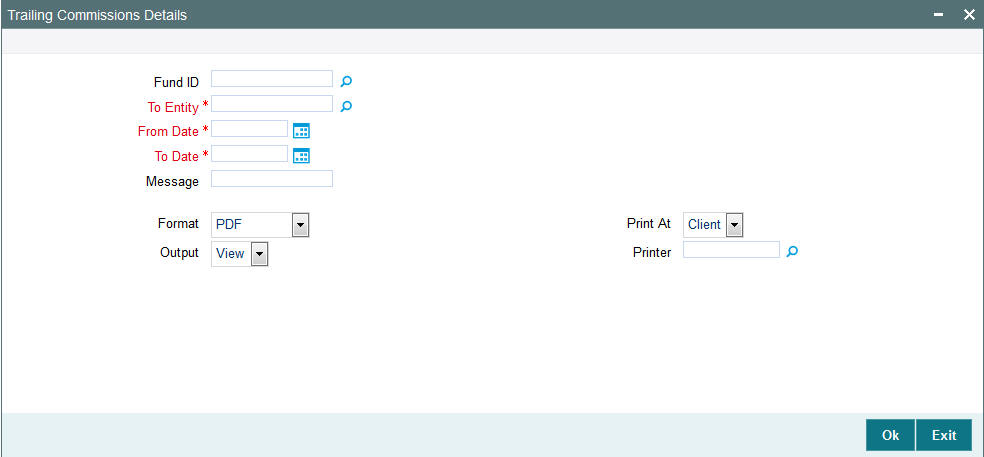
You can specify the following details:
Fund ID
Alphanumeric; 6 Characters; Optional
Specify the fund ID. Alternatively, you can select fund ID from the option list. The list displays all valid fund ID maintained in the system.
To Entity
Alphanumeric; 6 Characters; Mandatory
Specify To entity ID. Alternatively, you can select To entity ID from the option list. The list displays all valid entity ID maintained in the system.
From Date and To Date
Date Format; Mandatory
Specify the dates that enclose the period during which you want to view the details of transactions that have been allotted.
Message
Alphanumeric; 10 Characters; Optional
Specify the message details.
Format
Optional
Select the format from the drop-down list. The list displays the following values:
- HTML
- Excel
- Excel (.xlsx)
- RTF
Output
Optional
Select the output from the drop-down list. The list displays the following values:
- View
- Spool
Print At
Optional
Select the printing location from the drop-down list. The list displays the following values:
- Client
- Server
Printer
Alphanumeric; 15 Characters; Optional
Specify the printer details from adjoining option list.
After making your specifications, click ‘Ok’ button. The report details are displayed.
3.4.10 Generating Transaction Summary Report
You can invoke the ‘Transaction Summary’ screen by typing ‘UTR00001’ in the field at the top right corner of the Application tool bar and clicking on the adjoining arrow button.
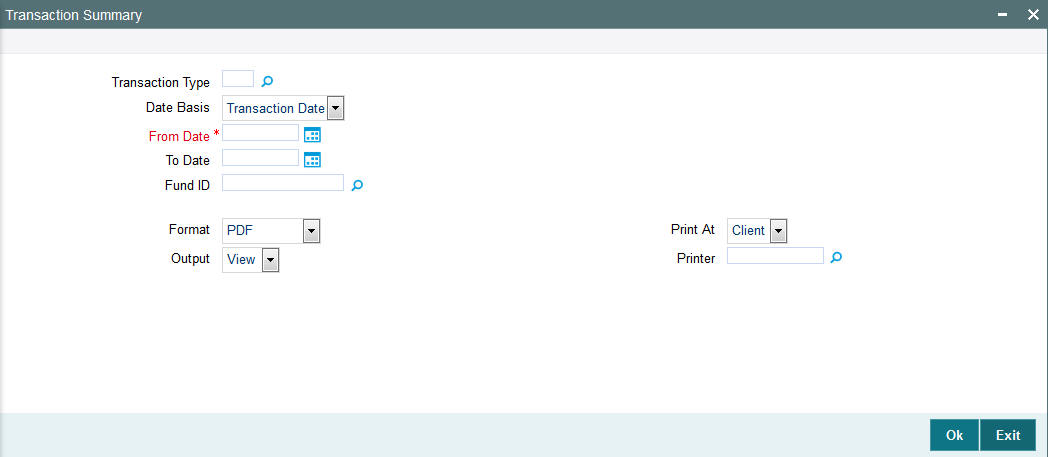
This report displays all the transactions of any selected type received for a given date for which units have been allotted, between any two dates. It must typically be printed by the AMC at the end of the day after the unit price is allotted.
The details are ordered according to agent / branch / transaction numbers. The report is printed fund-wise.
Sub totals of total units subscribed, amount subscribed, total fee and consideration for each branch is also calculated and printed for the same.
Grand totals of total units subscribed, amount subscribed, total fee and consideration across all branches for the agent are also calculated and printed for the transactions.
In this screen, you must specify the following as mandatory sorting parameters for the generation of the report:
Transaction Type
Alphanumeric; 2 Characters; Optional
Specify the transaction type. Alternatively, you can select from the option list.
Date Basis
Optional
Select the basis for the dates from the drop-down list that will form the period for which you want details of all allotted transactions. The list displays the following values:
- Transaction Date
- Allocation Date
From Date and To Date
Date Format; Mandatory
Specify the dates that enclose the period during which you want to view the details of transactions that have been allotted.
Fund ID
Alphanumeric; 6 Characters; Optional
Specify the fund ID.
Format
Optional
Select the format from the drop-down list. The list displays the following values:
- HTML
- Excel
- Excel (.xlsx)
- RTF
Output
Optional
Select the output from the drop-down list. The list displays the following values:
- View
- Spool
Print At
Optional
Select the printing location from the drop-down list. The list displays the following values:
- Client
- Server
Printer
Alphanumeric; 15 Characters; Optional
Specify the printer details from adjoining option list.
After making your specifications, click ‘Ok’ button.
3.4.10.1 Generating Transaction Summary Report
This report displays all the transactions of any selected type received for a given date for which units have been allotted, between any two dates. It must typically be printed by the AMC at the end of the day after the unit price is allotted.
The details are ordered according to agent / branch / transaction numbers. The report is printed fund-wise.
Sub totals of total units subscribed, amount subscribed, total fee and consideration for each branch is also calculated and printed for the same.
Grand totals of total units subscribed, amount subscribed, total fee and consideration across all branches for the agent are also calculated and printed for the transactions.
Transaction Summary Report Information
For each transaction type, the following details are displayed:
Unit Holder ID
The IDs of the unit holders who have entered into transactions of the selected type for the day.
Unit Holder Name
The Full Name (Title, First Name, Last Name and Middle Name) of the unit holders who have entered into transactions of the selected type for the day.
Agent Code
The code of the Agent where transactions of the selected type were entered into the system.
Branch Code
The code of the Agency Branch where transactions of the selected type were entered into the system.
Broker
The code of the broker involved in the transaction.
Sub Broker
The code of the sub-broker involved in the transaction.
Amount or Units
Enter the mode of the transaction.
Transaction Value
Enter the value of the transaction, in amount, units or percentage of holdings, as applicable to the transaction mode and the transaction type.
Net Units Allotted
Enter the actual number of units that have been allotted for the transaction.
Total VAT %
The rate of VAT charged on the fee for the transaction.
Total Fee
Enter the sum of all the fees applicable for the transaction.
Total Incentive
Enter the sum of all the Incentives applicable for the transaction.
Gross Fee
Enter the total fee applicable for the transaction. It is the sum of the total fees and the total VAT % that is applicable for the transaction.
Net Consideration
Enter the net consideration for the transaction. It is the total amount applied (Transaction Amount) minus the gross fee.
Total Amount
Displays the total amount value of transactions for the transaction type made for the day.
Remarks
Enter the Remarks for the transaction.
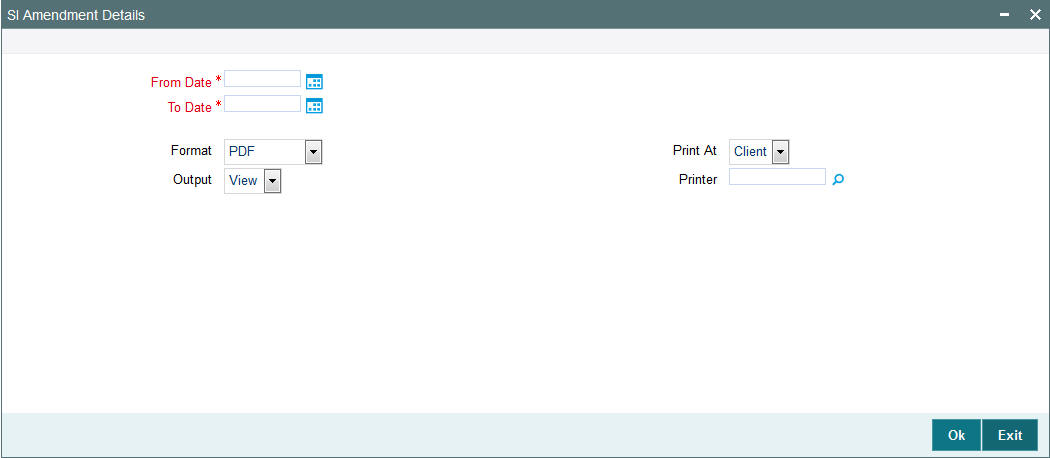
3.4.11 Generating Fund Label Report
You can view fund label details report using ‘Fund Label Details’ screen. You can invoke the ‘SI Amendment Details’ screen by typing ‘UTR00122’ in the field at the top right corner of the Application tool bar and clicking on the adjoining arrow button.
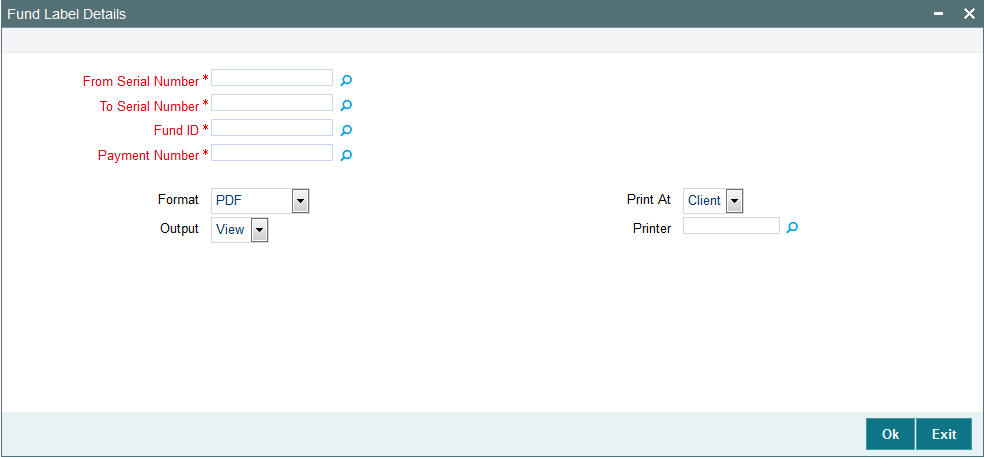
You can specify the following details:
From Serial Number
Numeric; 22 Characters; Mandatory
Specify the serial number from where the fund details need to be generated.
To Serial Number
Numeric; 22 Characters; Mandatory
Specify the serial number till where the fund details need to be generated.
Fund ID
Alphanumeric; 6 Characters; Mandatory
Specify the fund ID. Alternatively, you can select fund ID from the option list. The list displays all valid fund ID maintained in the system.
Payment Number
Numeric; 22 Characters; Mandatory
Specify the payment number. Alternatively, you can select the payment number from the option list. The list displays all valid payment number maintained in the system.
Format
Optional
Select the format from the drop-down list. The list displays the following values:
- HTML
- Excel
- Excel (.xlsx)
- RTF
Output
Optional
Select the output from the drop-down list. The list displays the following values:
- View
- Spool
Print At
Optional
Select the printing location from the drop-down list. The list displays the following values:
- Client
- Server
Printer
Alphanumeric; 15 Characters; Optional
Specify the printer details from adjoining option list.
Click ‘Ok’ button after making your specifications.
3.5 Queries
This section contains the following topics:
- Section 3.5.1, "Queries Reports Details"
- Section 3.5.2, "Generating Consolidated Inquiry"
- Section 3.5.3, "Invoking Transaction Summary Screen"
- Section 3.5.4, "Viewing Details of Investor Fund Balances"
- Section 3.5.5, "Viewing Other Details"
- Section 3.5.6, "View Jobs Scheduled"
3.5.1 Queries Reports Details
You can use this section of the Reports to query the database for any details regarding the following information:
- Unit holder accounts or CIF customer accounts
- Fund rules
- Fund prices
- Jobs that have been scheduled through the Scheduler Services
3.5.2 Generating Consolidated Inquiry
You can view any details related to any unit holder account or CIF customer account at any point of time using the Consolidated Inquiry query. The number of unit holders that you are able to access depends upon the agency branches you are mapped to and the groups of unit holders that you are restricted to.
You can invoke the ‘Consolidated Enquiry Summary’ screen by typing ‘UTSCOINQ’ in the field at the top right corner of the Application tool bar and clicking on the adjoining arrow button.:
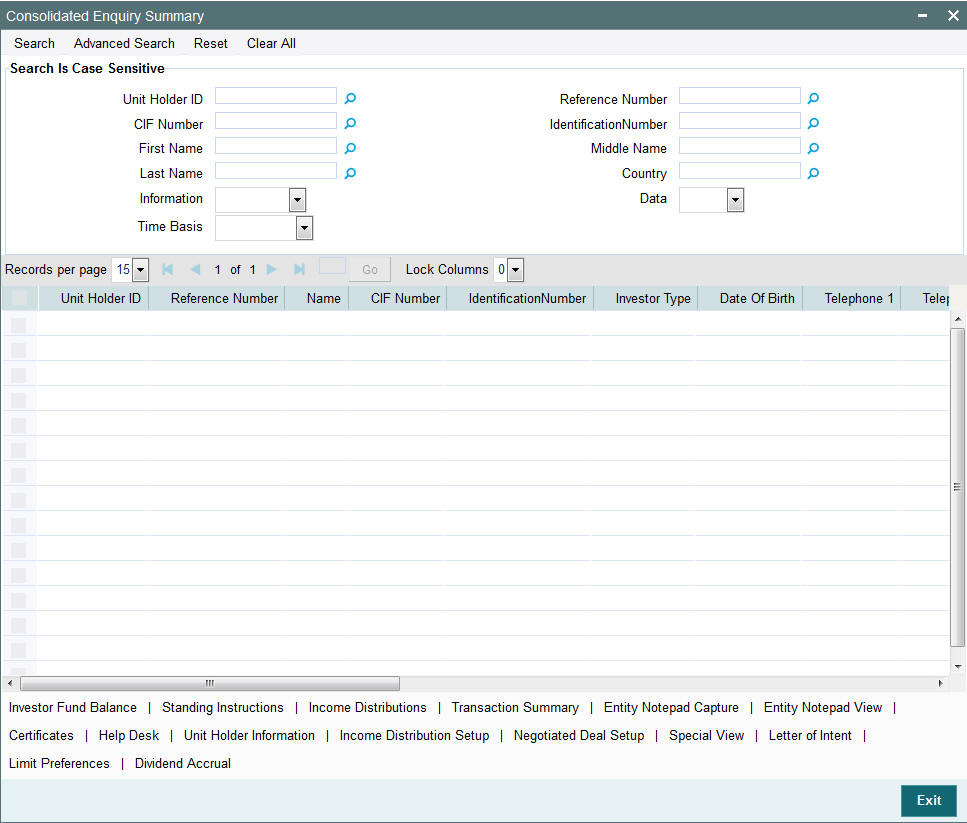
Each time you query a UH in this screen, the system displays all details pertaining to the UH only if you are mapped to the following:
- The agency branch of the UH
- The group to which the default intermediary agent of the UH belongs
If you are mapped to all the groups, then you can view the information of all the unit holders with-in the mapped agency branches.
The details regarding the account that you can view include the following:
- Investor Fund Balance
- Standing Instructions
- Income Distributions
- Transaction Summaries
- Entity Notepad Capture
- Entity Notepad View
- Certificates
- Help Desk
- Unit holder/ CIF information
- Income Distribution Setup
- Negotiated Deal Setup
- Special View
- Letter of Intent
- Limit Preferences
- Dividend Accrual
3.5.2.1 Viewing Investor Fund Balance
You can view investor fund balance by clicking ‘Investor Fund Balance’ button in ‘Consolidated Enquiry Summary’ screen. The ‘Investor Fund Balance’ screen is displayed.
For more details, refer ‘Viewing Details of Investor Fund Balances’ section in this user manual.
3.5.2.2 Viewing Standing Instructions
You can view standing instructions by clicking ‘Standing Instructions’ button in ‘Consolidated Enquiry Summary’ screen. The ‘FCIS Standing Instruction Summary’ screen is displayed. You can also invoke this screen by typing ‘UTSFIN’ in the field at the top right corner of the Application tool bar and click the adjoining arrow. The screen is displayed
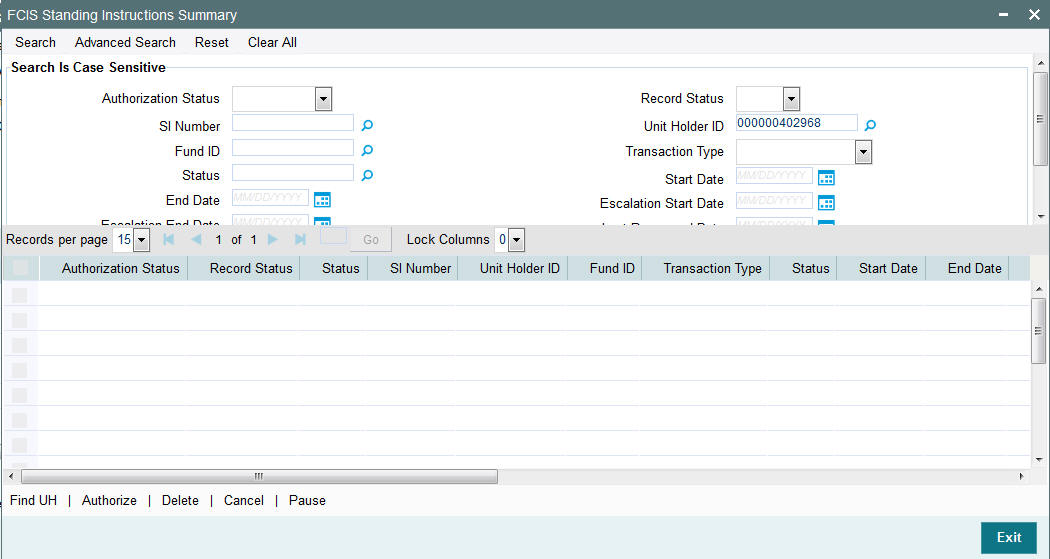
For more details, refer ‘Standing Instruction Summary’ section in Transactions user manual.
3.5.2.3 Viewing Income Distributions
You can view income distributions by clicking ‘Income Distributions’ button in ‘Consolidated Enquiry Summary’ screen. The ‘Income Distribution’ screen is displayed.
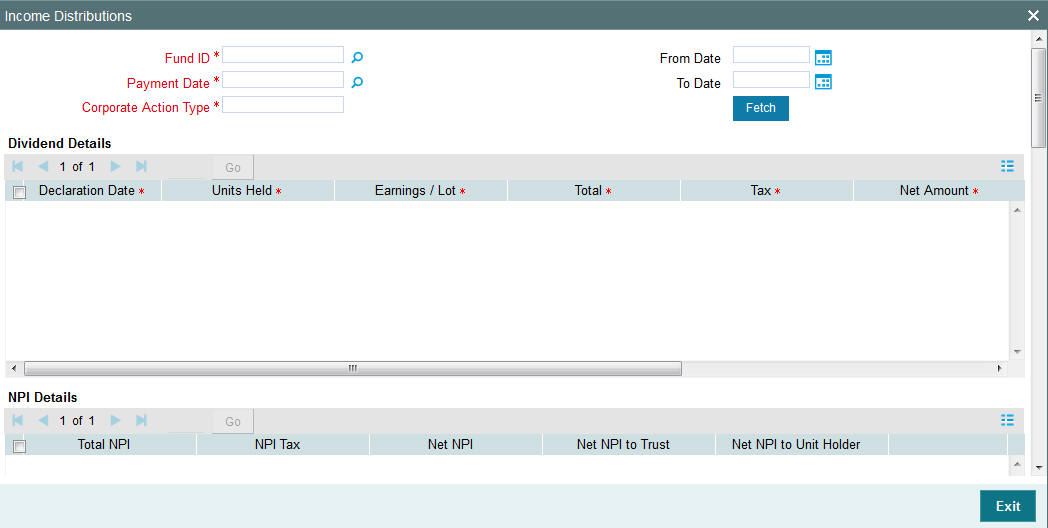
You can specify the following details:
Fund ID
Alphanumeric; 6 Characters; mandatory
Specify the fund ID.
Payment Date
Date Format; Mandatory
Specify the payment date.
Corporate Action Type
Alphanumeric; 1 Character; Mandatory
Specify the corporate action type.
From Date and To Date
Date Format; Optional
Select From and To date of the report to be generated.
Click ‘Fetch’ button to view the following details:
- Dividend Details
- Declaration Date
- Units Held
- Earnings / Lot
- Total
- Tax
- Net Amount
- Equalization Income
- Gross Income
- NPI Details
- Total NPI
- NPI Tax
- Net NPI
- Net NPI to Trust
- Net NPI to Unit Holder
- Earning Details
- Description
- Earnings Per Unit
- Total Earned
- Payment Details
- Payment Mode Description
- Bank Name
- Branch Name
- Amount
- Payment Date
- Reinvestment Details - Cash Dividend
- Unit Holder ID
- Unit Holder Name
- Fund Name
- Amount
- Unit Price
- No Of Units
- Reinvestment Date
- Reinvestment Details - Stock Dividend
- Unit Holder ID
- Unit Holder Name
- Fund Name
- No Of Units
3.5.2.4 Viewing Transaction Summary
You can view transaction summary by clicking ‘Transaction Summary’ button in ‘Consolidated Enquiry Summary’ screen. The ‘Transaction Summary’ screen is displayed.
For more details, refer ‘Invoking Transaction Summary Screen’ section in this user manual.
3.5.2.5 Maintaining NotePad of Entities Detail
You can maintain Notepad of entities details by clicking ‘Entity Notepad Capture’ button in ‘Consolidated Enquiry Summary’ screen. The ‘NotePad of Entities Details’ screen is displayed.

For more details, refer ‘NotePad of Entities Detail Screen’ section in the Entity user manual.
3.5.2.6 Viewing NotePad of Entities Detail
You can view Notepad of entities details by clicking ‘Entity Notepad View’ button in ‘Consolidated Enquiry Summary’ screen. The ‘NotePad of Entities Summary’ screen is displayed.

For more details, refer ‘NotePad of Entities Summary Screen’ section in the Entity user manual.
3.5.2.7 Viewing Certificates
You can view certificates details by clicking ‘Certificates’ button in ‘Consolidated Enquiry Summary’ screen. The ‘Certificates Summary’ screen is displayed. You can also invoke this screen by typing ‘UTSENQCE’ in the field at the top right corner of the Application tool bar and click the adjoining arrow. The screen is displayed.
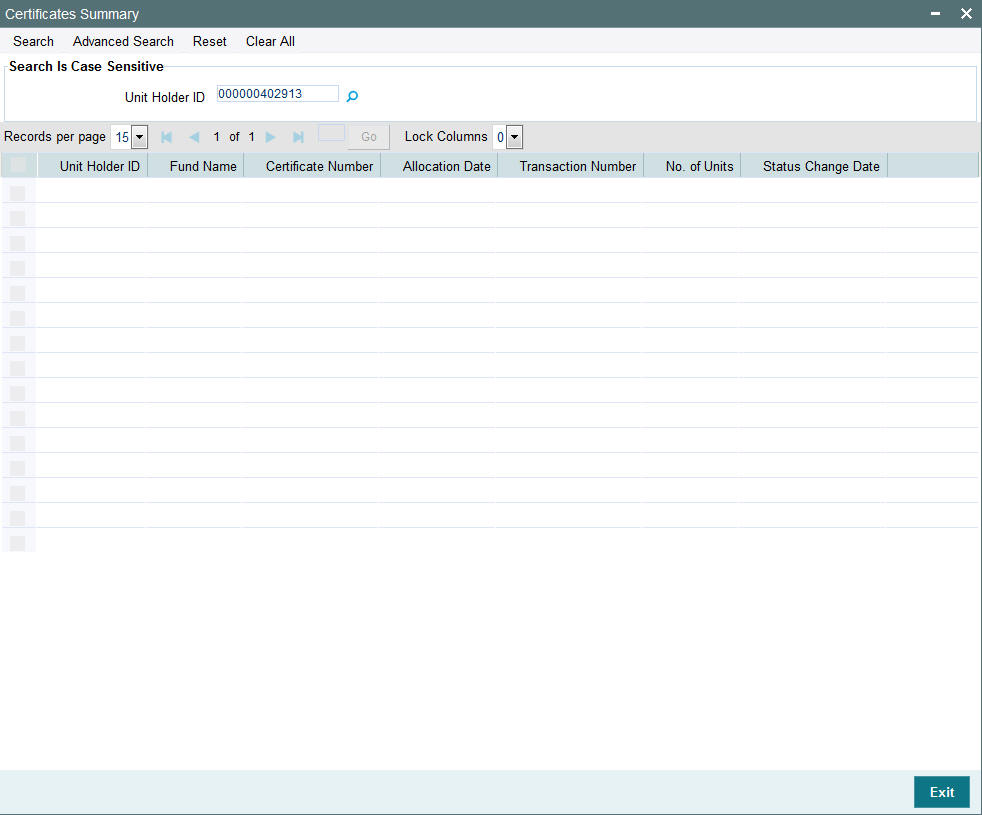
You can search for the records for the specified Unit Holder ID in ‘Unit Holder ID’ field.
3.5.2.8 Viewing Help Desk Details
You can view Help desk details by clicking ‘Help Desk’ button in ‘Consolidated Enquiry Summary’ screen. The ‘Help Desk Summary’ screen is displayed.

For more details, refer ‘Help Desk Summary’ section in the Transactions user manual.
3.5.2.9 Viewing Unit Holder Maintenance Details
You can view Unit Holder Maintenance details by clicking ‘Unit Holder Information’ button in ‘Consolidated Enquiry Summary’ screen. The ‘Unit Holder Maintenance Summary’ screen is displayed. You can also invoke this screen by typing ‘UTSFH’ in the field at the top right corner of the Application tool bar and click the adjoining arrow. The screen is displayed

For more details, refer ‘Unit Holder Maintenance Summary’ section in the Entities user manual.
3.5.2.10 Viewing Income Distribution Setup Details
You can view Income Distribution setup details by clicking ‘Income Distribution Setup’ button in ‘Consolidated Enquiry Summary’ screen. The ‘Income Distribution Setup Summary’ screen is displayed. You can also invoke this screen by typing ‘UTSFHIDS’ in the field at the top right corner of the Application tool bar and click the adjoining arrow. The screen is displayed

For more details, refer ‘Income Distribution Setup Summary’ section in the Entities user manual.
3.5.2.11 Viewing Negotiated Deal Setup
You can view Negotiated Deal setup details by clicking ‘Negotiated Deal Setup’ button in ‘Consolidated Enquiry Summary’ screen. The ‘Unitholder Deal Summary’ screen is displayed.

For more details, refer ‘UnitHolder Deal Summary’ section in the Entities user manual.
3.5.2.12 Special View
You can view special view details by clicking ‘Special View’ button in ‘Consolidated Enquiry Summary’ screen. The ‘Special View Summary’ screen is displayed. You can also invoke this screen by typing ‘UTSSPEVW’ in the field at the top right corner of the Application tool bar and click the adjoining arrow. The screen is displayed.
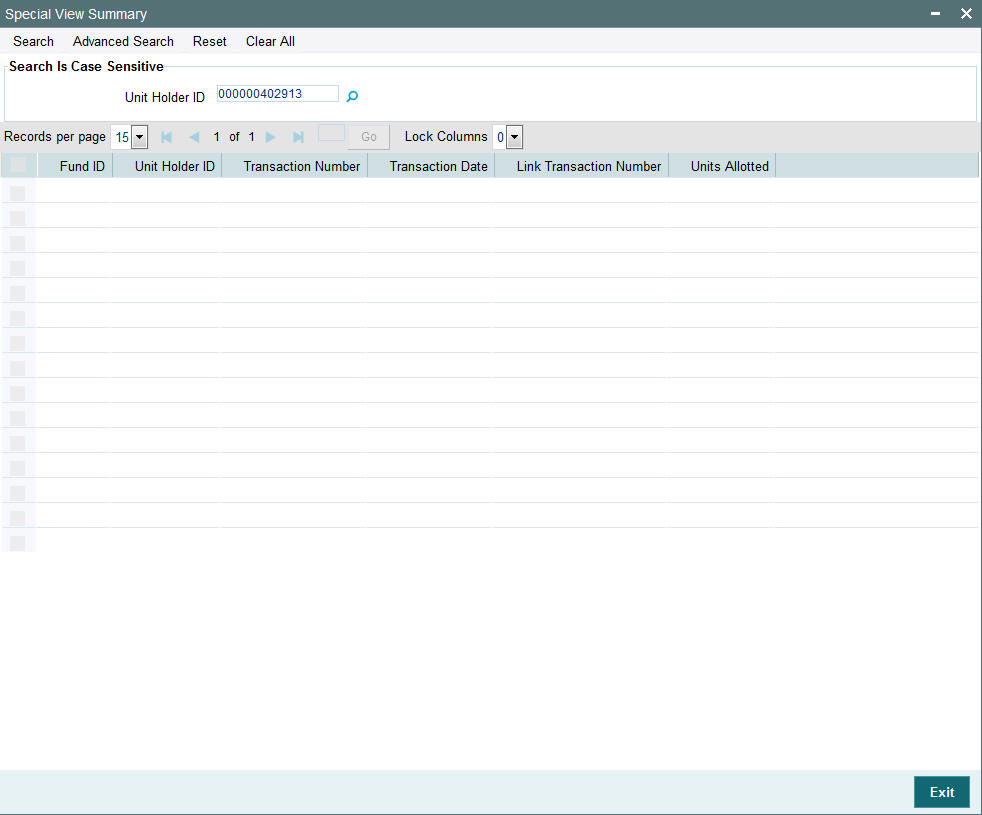
You can search for the records for the specified Unit Holder ID in ‘Unit Holder ID’ field.
3.5.2.13 Viewing Unit Holder LOI Setup Details
You can view Unit Holder LOI details by clicking ‘Letter of Intent’ button in ‘Consolidated Enquiry Summary’ screen. The ‘Unit Holder LOI Setup Summary’ screen is displayed. You can also invoke this screen by typing ‘UTSUHLOA’ in the field at the top right corner of the Application tool bar and click the adjoining arrow. The screen is displayed.

For more details, refer ‘Unit Holder LOI Setup Summary’ section in the Entities user manual.
3.5.2.14 Viewing Unit Holder Non Tax Limits Summary
You can view Unit Holder non tax details by clicking ‘Limit Preferences’ button in ‘Consolidated Enquiry Summary’ screen. The ‘UH Non Tax Limits summary’ screen is displayed. You can also invoke this screen by typing ‘UTSURATX’ in the field at the top right corner of the Application tool bar and click the adjoining arrow. The screen is displayed.

For more details, refer ‘UH Non Tax Limits Summary’ section in the Entities user manual.
3.5.2.15 Viewing Dividend Accrual Details
You can view Dividend Accrual details by clicking ‘Dividend Accrual’ button in ‘Consolidated Enquiry Summary’ screen. The ‘Dividend Accrual’ screen is displayed.
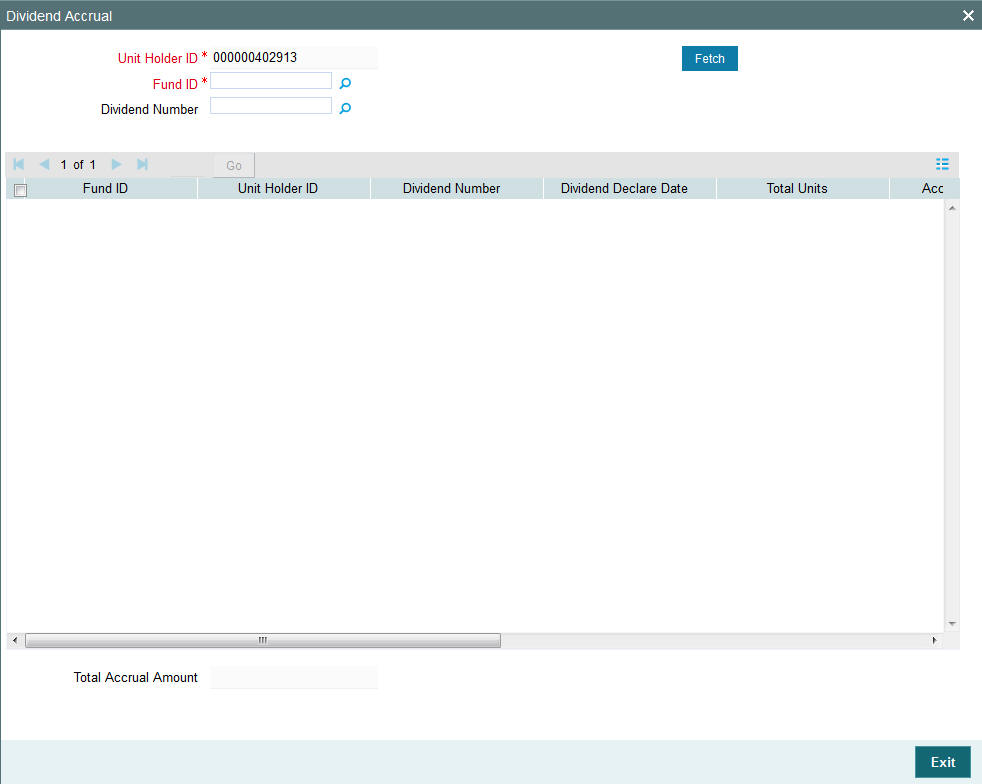
You can specify the following details:
Unit Holder ID
Alphanumeric; 12 Characters; Mandatory
Specify the unit holder ID.
Fund ID
Alphanumeric; 6 Characters; Mandatory
Specify the fund ID.
Dividend Number
Numeric; 5 Characters; Optional
Specify the dividend number.
Click ‘Fetch’ button after specifying the necessary details. The system displays the following values:
- Fund ID
- Unit Holder ID
- Dividend Number
- Dividend Declare Date
- Total Units
- Accrued Amount
- Dividend From Date
- Dividend To Date
- Redemption Dividend Amount
- Total Accrual Amount
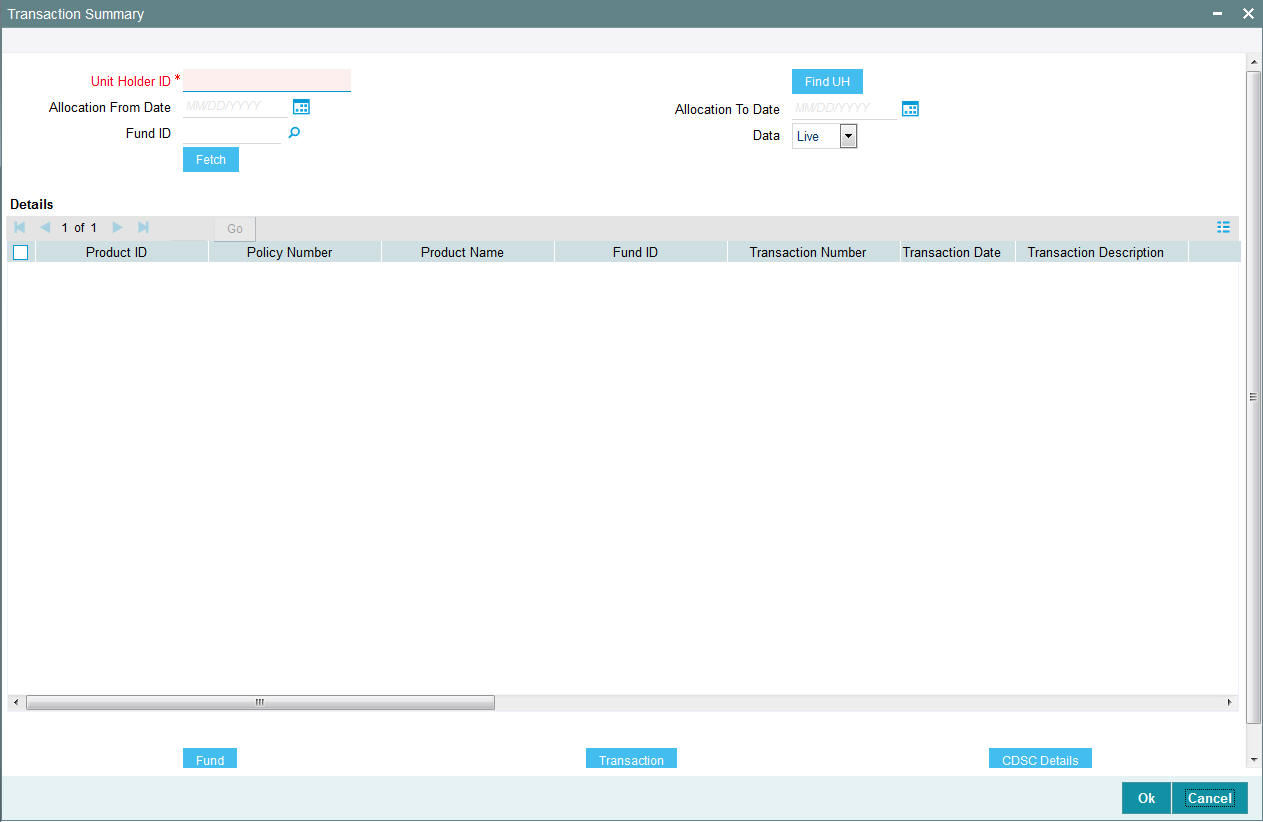
3.5.3 Invoking Transaction Summary Screen
You can view transaction details using ‘Transaction Summary’ screen. You can invoke this screen by typing ‘UTDACCST’ in the field at the top right corner of the Application tool bar and clicking on the adjoining arrow button.
You can specify the following details:
Unit Holder ID
Alphanumeric; 12 Characters; Mandatory
Specify the unit holder ID.
Search unit holder ID by clicking ‘Find UH’ button.
Allocation From Date
Date Format; Optional
Select allocation from date from the adjoining calendar.
Allocation To Date
Date Format; Optional
Select allocation To date from the adjoining calendar.
Fund ID
Alphanumeric; 6 Characters; Optional
Specify the fund ID. Alternatively, you can select fund ID from the option list. The list displays all the valid fund ID maintained in the system.
Data
Optional
Select data from the drop-down list. The list displays the following values:
- Live
- History
After specifying the above details, clicking ‘Fetch’ button, the system will display the following details:
- Product ID
- Policy Number
- Product Name
- Fund ID
- Transaction Number
- Transaction Date
- Transaction Description
- Units
- Price Details
- Book Value
- Running Total (Units)
- Status
- Gross Amount in FBC
- Net Amount in FBC
- Total Fees
- HWM + Hurdle
3.5.3.1 Fund Button
Clicking ‘Fund’ button, the system will display the details related to fund.
3.5.3.2 Transaction Button
Clicking ‘Transaction’ button, the system will display the details related to transaction.
3.5.3.3 CSDC Details Button
Clicking ‘CSDC Details’ button, the system will display the following details:
- Fund ID
- ISIN Code
- Unit Holder ID
- CIF Number
- Unit Holder Name
- Transaction Number
- Transaction Date
- Fund Name
Inflow Transaction
- Transaction Number
- Transaction Type
- CDSC
- Entry Date
- Entry Shares
- Entry Cost
- CDSC Due
- Balance Units
- Unit Price
- Estimated CDSC Due
Outflow Transaction
- Transaction Number
- Lot Price
- Free Shares
- Entry Shares
- Age in Months
- CDSC Rate
- CDSC Amount
3.5.4 Viewing Details of Investor Fund Balances
After you have retrieved the details of the account so that it is displayed in the main Client Enquiry screen, click the Investor Fund Balances button to view the holdings balance of the investor in each of the funds of the AMC.
You can also invoke ’Investor Fund Balance Summary’ screen by typing ‘UTDFNBAL’ in the field at the top right corner of the Application tool bar and click the adjoining arrow. The screen is displayed
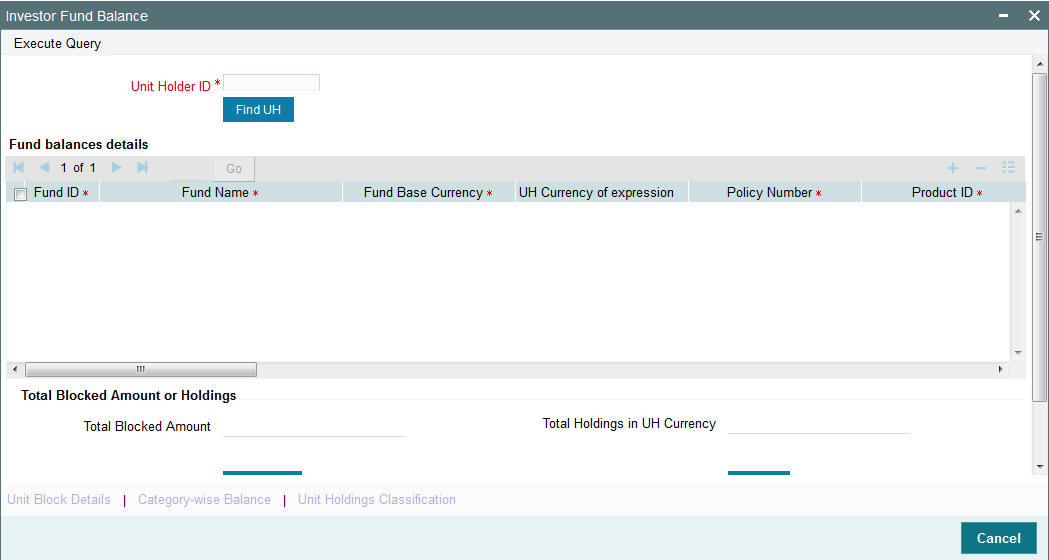
In addition to viewing the fund details of a unit holder, you can perform the following operations through the links in this screen:
- Purchase – On clicking this link, the ‘Subscription’ screen gets displayed for the selected unit holder and fund combination. You can then input the transaction amount, mode of payment and settlement date and then save the subscription transaction.
- Redeem – On clicking this link, the redemption screen gets displayed to capture a new redemption for the selected unit holder and fund combination. This process validates the zero balance in the fund. Here too you need to input minimal mandatory information to save the transaction.
- Switch – On clicking this link, the ‘Switch’ screen gets displayed to capture a switch transaction for that unit holder and fund combination. The selected fund is treated as a ‘From Fund’. This also validates the zero balance in the ‘From Fund’.
- New SI – Through this link you can invoke the ‘SI’ screen for the selected unit holder and fund combination. You can set up a new SI from here.
- Modify SI – This link opens the SI summary screen in ‘Amend’ mode and lets you amend an existing SI for the selected fund.
Unit Holder ID
Alphanumeric; 12 Characters; Mandatory
Specify the unit holder ID. Alternatively, you can select unit holder ID form the option list.
You can also search for unit holder ID by clicking ‘Find UH’ button.
Click ‘Execute Query’ button to view the following fund balance details:
- Fund ID
- Fund Name
- Fund Base Currency
- UH Currency of Expression
- Policy Number
- Product ID
- Unit Balance
- Total Blocked Units
- FBC redeemable
- FBC Holding
- UHBC Redeemable
- Average Cost
- Provisional Units
- UHBC Holding
- Balance in Currency of Expression
- UH Preferred Currency
- Balance in UH Preferred Currency
- G1 Units
- G2 Units
The system also displays the Total Blocked Amount or Total Holdings in UH Currency.
3.5.4.1 Unit Block Details Button
You can also view financier and fund-wise blocked units and total number of units blocked in the ‘Total Block Units’ screen. You can invoke this screen by clicking the ‘Total Blocked Units’ button in the ’Investor Fund Balance Summary’ screen.

The system displays the following values:
- Unit Holder ID
- Financier Details
- Financer
- Fund ID
- Fund Name Short
- Units
- Total Blocked Units
During block transaction, if the financier name is not maintained, then all the records will be categorized and consolidated under financier as ‘Others’.
Note
You will be able to open the subscription /redemption/switch/SI screens from the Client Enquiry Fund Balances screen provided you have the SMS rights to open and transact in those screens.
3.5.4.2 Category-wise Balance Button
You can also view transaction category and unit holder details in the ‘CAT BAL’ screen. You can invoke this screen by clicking the ‘Category-wise Balance’ button in the ‘Investor Fund Balance Summary’ screen.

The system displays the following values:
- Unit Holder ID
- Fund ID
- Product ID
- Policy Number
- Transaction Category
- Confirmed Units
- Provisional Units
- Blocked Units
3.5.4.3 Unit Holdings Classification Button
You can view unit holder holdings classification details in ‘Unit Holder Holdings Classification’ screen. You can invoke this screen by clicking the ‘Unit Holdings Classification’ button in the ’Investor Fund Balance Summary’ screen.
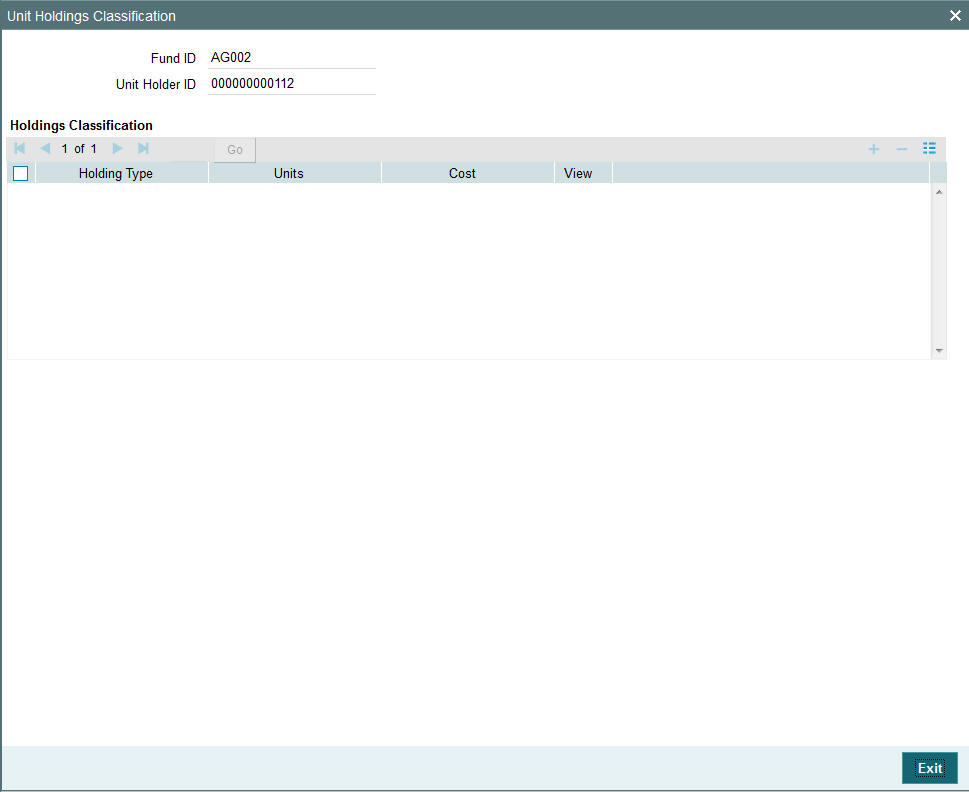
Unit Holder ID
Display
The system displays the unit holder ID for which holding details will be displayed based on the value selected in ‘Consolidate Enquiry Screen’ (UTSCOINQ).
Fund ID
Display
The system defaults the fund ID for which holding details will be displayed based on the fund that is selected in the ‘Investor Fund Balance Details’ grid.
You need to select only one fund from the Fund Balance Detail grid.
Holding Classification
Display
The system displays the unit classification based on the fund selected.
Total Units
Display
The system displays the total sum of units for the corresponding classification.
Cost
Display
The system displays the total cost of the unit holdings for the classification.
The detail section will be populated with corresponding details as the case of on-shore or off-shore fund
For on-shore fund, the system displays the FEL/ CDSC holdings summary.
For off-shore fund holdings will be grouped into 2 different categories based on the Transaction Currency.
- All transaction with Transaction currency as Installed Entity Base Currency (TWD) (refers to AMC base currency)
- All transaction with Transaction currency other than Installed Entity Base Currency.
Click ‘View’ button to view the details of the selected unit classification. On click of ‘View’ button Holding Details screen will be launched.
The system displays the units holding and the cost for following classifications:
- Holding Type: CDSC, FEL, TWD etc.
- Transaction Type: Subscription, RSP
- Certificate option: Certificate or non-Certificate
- Redeemable: Redeemable or Blocked
- Units: Current units balance for the said classification
- Cost: Cost of the current unit holdings
Clicking ‘Purchase’ button, ‘FCIS Subscription Transaction Detail’ screen is displayed. After specifying the necessary details, save the transaction to purchase the same.
Clicking ‘Redeem’ button, ‘FCIS Redemption Transaction Detail’ screen is displayed. After specifying the necessary details, save the transaction to redeem the same.
Clicking ‘Switch’ button, ‘FCIS Transaction Switch Detail’ screen is displayed. After specifying the necessary details, save the transaction to switch the same.
Clicking ‘New SI’ button, ‘FCIS Standing Instructions Detail’ screen is displayed. After specifying the necessary details, save the standing instruction.
3.5.5 Viewing Other Details
After you have retrieved the details of the account so that it is displayed in the main Client Enquiry screen, fine tune your query as follows:
- To retrieve transaction information for the unit holder, check the Transactions radio button in the Information section.
- To retrieve information related to the account profile of the unit holder, check the Static radio button in the Information section
- To view a history of the data, which will show the details of changes made since the account was opened, check the History radio button in the Data section.
- To view data that is the latest for the account (the effective data present in the database as on the date of query) check the Live radio button in the Data section.
- To view data pertaining to the last month, check the Last Month radio button in the Time Basis section. For data in the last quarter, check the Last Month radio button.
- After you have made all these specifications, click the Show button.
- The following additional buttons appear at the bottom of the screen,
in the Transaction Information - Live section:
- Standing Instructions
- Certificates
- Help Desk
- Income Distribution Setup
- Transaction Summary
- Entity Note Pad Capture
- Entity Note Pad View
- To capture information about any entity involved in the transaction, click on the Entity Note Pad Capture button.
- Click on the appropriate button to view the required data.
3.5.6 View Jobs Scheduled
You can view details regarding any scheduler activities, using this query. This includes details of jobs that are scheduled for execution as on the application date. You can invoke the ‘View Jobs Scheduled’ screen by typing ‘UTDJBVIW’ in the field at the top right corner of the Application tool bar and clicking on the adjoining arrow button.
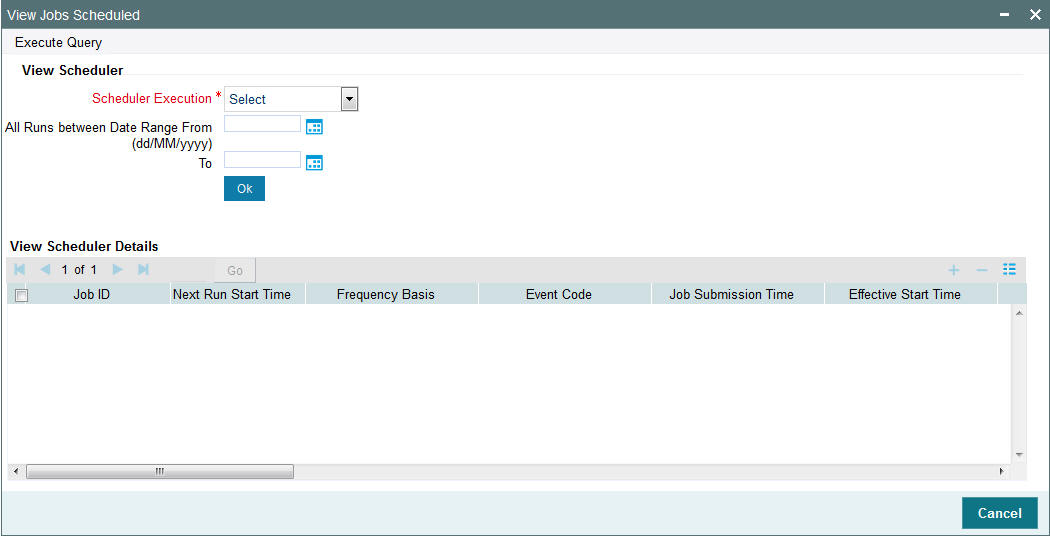
View Scheduler
Scheduler Execution
Mandatory
Select the scheduler execution from the drop-down list. The list displays the following values:
- All Jobs
- Recurring Jobs
- One Time Jobs
- On Demand Jobs
- All Runs
- All Cancelled Runs
All Runs between Date Range From (dd/MM/yyyy) and To
Date Format; Optional
Specify the date range for which you want to view details of the scheduler activity, in the All Runs between Date Range Between fields.
Click ‘Ok’ button to trigger the query.
Click ‘Execute Query’ button. The details of all the scheduled jobs as on the application date are displayed in the screen as follows:
- Job ID
- Next Run Start Time
- Frequency Basis
- Event Code
- Job Submission Time
- Effective Start Time
- Effective End Date
- Effective Start Time
- Effective Stop Time
- Schedule Type
- Interval Unit
- Interval Value
- Job Mandatory
- Status
- Last Run Start time
- Last Run End time
- Last Run Status
- Count Of Runs
3.6 SI Reports
This section contains the following topics:
- Section 3.6.1, "SI Reports Details"
- Section 3.6.2, "Generating Standing Instructions Amendments"
- Section 3.6.3, "Generating Standing Instructions Escalations"
- Section 3.6.4, "Generating Standing Instructions Reminders"
- Section 3.6.5, "Generating Standing Instructions Transaction Details Report"
3.6.1 SI Reports Details
These reports display details of standing instructions maintained for investors.
3.6.2 Generating Standing Instructions Amendments
You can use this report to view details about amendments to standing instructions maintained for investors that were affected between any two dates.
You can invoke the ‘SI Amendment Details’ screen by typing ‘UTR00078’ in the field at the top right corner of the Application tool bar and clicking on the adjoining arrow button.
From Date and To Date
Date Format; Mandatory
Specify the dates that enclose the period during which the amendments were made any standing instructions maintained for any investor.
Format
Optional
Select the format from the drop-down list. The list displays the following values:
- HTML
- Excel
- Excel (.xlsx)
- RTF
Output
Optional
Select the output from the drop-down list. The list displays the following values:
- View
- Spool
Print At
Optional
Select the printing location from the drop-down list. The list displays the following values:
- Client
- Server
Printer
Alphanumeric; 15 Characters; Optional
Specify the printer details from adjoining option list.
Click ‘Ok’ button after making your specifications.
3.6.3 Generating Standing Instructions Escalations
You can use this report to view details about escalations to standing instruction amounts for investors.
You can invoke the ‘SI Escalation Detail’ screen by typing ‘UTR00073’ in the field at the top right corner of the Application tool bar and clicking on the adjoining arrow button.
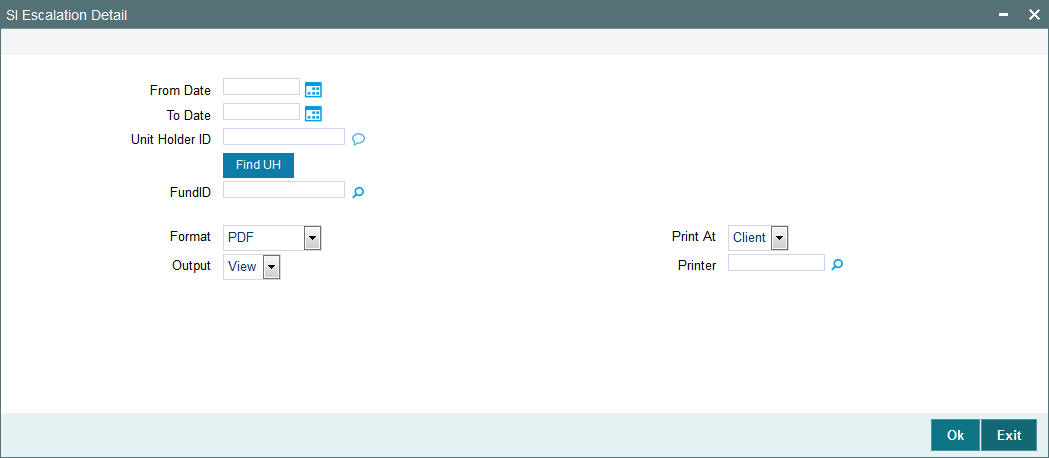
From Date and To Date
Date Format; Optional
Select the From and To date from the adjoining calendar.
Unit Holder ID
Alphanumeric; 12 Characters; Optional
Specify the unit holder ID. You can also search unit holder ID by clicking ‘Find UH’ button.
Fund ID
Alphanumeric; 6 Characters; Optional
Specify the fund ID. Alternatively, you can select from option list. The list displays all valid fund ID maintained in the system.
Format
Optional
Select the format from the drop-down list. The list displays the following values:
- HTML
- Excel
- Excel (.xlsx)
- RTF
Output
Optional
Select the output from the drop-down list. The list displays the following values:
- View
- Spool
Print At
Optional
Select the printing location from the drop-down list. The list displays the following values:
- Client
- Server
Printer
Alphanumeric; 15 Characters; Optional
Specify the printer details from adjoining option list.
Click ‘Ok’ button to generate the report.
3.6.4 Generating Standing Instructions Reminders
This report will print the reminders for any standing instructions for the given fund. It is generated based on the reminder action period. This is a word interface document with standard template. It will contain information telling that SI has been generated and needs to be processed.
You can invoke the ‘SI Reminder Details’ screen by typing ‘UTR00079’ in the field at the top right corner of the Application tool bar and clicking on the adjoining arrow button.
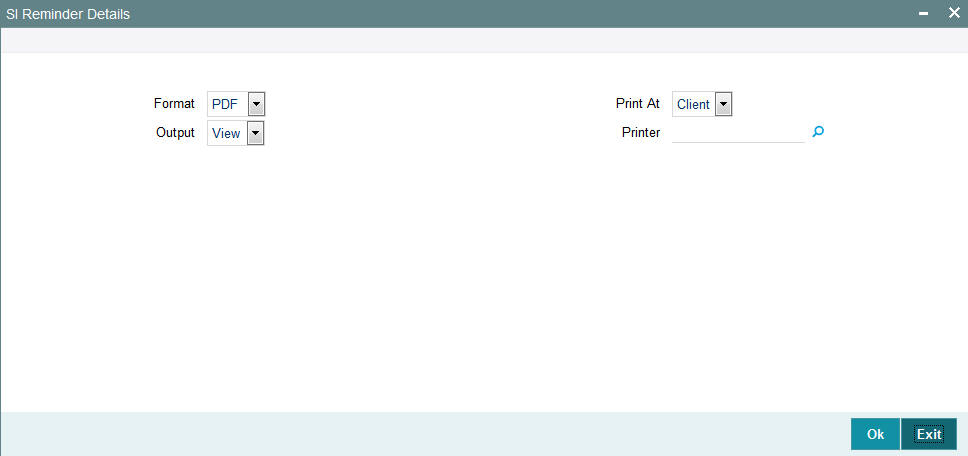
Format
Optional
Select the format from the drop-down list. The list displays the following values:
- HTML
- Excel
- Excel (.xlsx)
- RTF
Output
Optional
Select the output from the drop-down list. The list displays the following values:
- View
- Spool
Print At
Optional
Select the printing location from the drop-down list. The list displays the following values:
- Client
- Server
Printer
Alphanumeric; 15 Characters; Optional
Specify the printer details from adjoining option list.
After making your specifications, click ‘Ok’ button.
3.6.5 Generating Standing Instructions Transaction Details Report
This report will print all the standing instructions for the given fund as of that date. It will only print the details of those standing instructions that are effective as of that date. Details of elapsed standing instructions will not be printed.
This report is typically printed as a monthly or quarterly report.
Details of the transactions that have been generated for the standing instructions are also printed. The data is ordered according to the standing instructions ID.
Along with the transaction details, any applicable fees, details of check numbers and dates for post dated checks, provided this option is available. Escalation details and the unit holder contact address details are also displayed.
You can invoke the ‘SI Details’ screen by typing ‘UTR00067’ in the field at the top right corner of the Application tool bar and clicking on the adjoining arrow button.
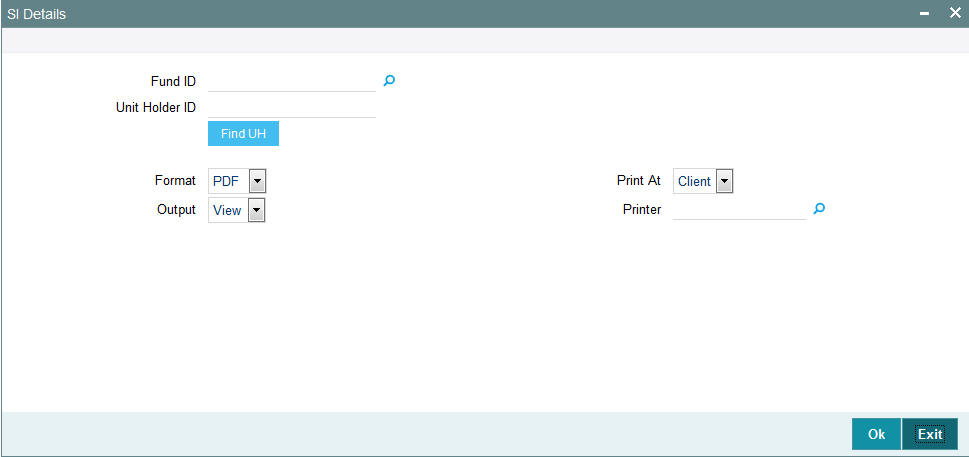
Fund ID
Alphanumeric; 6 Characters; Optional
Specify the fund ID for any unit holder. Alternatively, you can select fund ID from the option list.
Unit Holder ID
Alphanumeric; 12 Characters; Optional
Specify the unit holder ID. You can also search for unit holder by clicking ‘Find UH’ button.
Format
Optional
Select the format from the drop-down list. The list displays the following values:
- HTML
- Excel
- Excel (.xlsx)
- RTF
Output
Optional
Select the output from the drop-down list. The list displays the following values:
- View
- Spool
Print At
Optional
Select the printing location from the drop-down list. The list displays the following values:
- Client
- Server
Printer
Alphanumeric; 15 Characters; Optional
Specify the printer details from adjoining option list.
After making your specifications, click ‘Ok’ button. The report details are displayed.
3.7 Transaction Reports
This section contains the following topics:
- Section 3.7.1, "Generating Transaction Reports"
- Section 3.7.2, "Generating Transaction Enquiry Report"
- Section 3.7.3, "Generating IPO Transactions - By Fund"
- Section 3.7.4, "Generating IPO Transactions - By Payment Mode"
- Section 3.7.5, "Generating Subscription By Fund Report"
- Section 3.7.6, "Generating Subscription - By Payment Mode Report"
- Section 3.7.7, "Generating Subscription Pay-In Slip Report"
- Section 3.7.8, "Generating Redemption - By Fund Report"
- Section 3.7.9, "Generating Redemption-By Payment Mode Report"
- Section 3.7.10, "Generating Reissue Details Report"
- Section 3.7.11, "Generating Split Details Report"
- Section 3.7.12, "Generating Daily Switch Transactions"
- Section 3.7.13, "Generating Daily Transfer Transactions"
- Section 3.7.14, "Generating Daily Block Transactions"
- Section 3.7.15, "Generating Daily Unblock Transactions"
- Section 3.7.16, "Generating Daily Split Transactions"
- Section 3.7.17, "Generating Daily Consolidation Transactions"
- Section 3.7.18, "Generating Daily Reissue Transactions"
- Section 3.7.19, "Generating Fee Incentive Details Report"
- Section 3.7.20, "Generating Fee Incentive Cheque Report"
- Section 3.7.21, "Generating Fee Incentive DDs Report"
- Section 3.7.22, "Generating Fee Incentive Others Report"
- Section 3.7.23, "Generating Block Details Report"
- Section 3.7.24, "Generating Un-Block Details Report"
- Section 3.7.25, "Generating Clearing Status Report"
- Section 3.7.26, "Generating Consolidation Detail Report"
- Section 3.7.27, "Generating Delivery Confirmation Report"
- Section 3.7.28, "Generating Print Certificate"
- Section 3.7.29, "Generating Redemption Cheques Report"
- Section 3.7.30, "Generating Redemption DDs Report"
- Section 3.7.31, "Generating Redemption Payout Report"
- Section 3.7.32, "Generating Transaction Category Mismatch Report"
- Section 3.7.33, "Generating Transfer Details Report"
- Section 3.7.34, "Generating Transfer Confirmation Report"
- Section 3.7.35, "Generating Transaction and Status Report"
3.7.1 Generating Transaction Reports
The Transaction reports displays information about transactions of any type received from investors on any given business day. The output will be Market value in currency of expression and price in currency of expression.
You can invoke ‘IPO Confirmation’ screen by typing ‘UTR00103’ in the field at the top right corner of the Application tool bar and click the adjoining arrow.
You can specify the following details:
Fund ID
Alphanumeric; 6 Characters; Optional
Specify the fund ID. Alternatively, you can select fund ID from the option list. The system displays all valid fund ID maintained in the system.
Fund Identification Number
Display
The system displays the fund identification number.
From Transaction Number
Alphanumeric; 16 Characters; Optional
Specify the transaction number details.
To Transaction Number
Alphanumeric; 16 Characters; Optional
Specify the transaction number details.
From Unit Holder ID
Alphanumeric; 12 Characters; Optional
Specify the unit holder ID details.
To Unit Holder ID
Alphanumeric; 12 Characters; Optional
Specify the unit holder ID details.
You can search From and To unit holder ID by clicking ‘Find’ button.
From Date
Date Format; Optional
Enter the date from when you want to generate the report.
To Date
Date Format; Optional
Enter the date till when you want to generate the report.
Header Display
Alphanumeric; 255 Characters; Optional
Specify the header details to be displayed.
Footer Display
Alphanumeric; 255 Characters; Optional
Specify the footer details to be displayed.
Duplicate Required
Optional
Select if duplication of record is required or not from the drop-down list. The list displays the following values:
- Yes
- No
Communication Mode
Alphanumeric; 2 Characters; Optional
Specify the communication mode.
From Batch
Alphanumeric; 1 Character; Optional
Specify the batch details.
Include Related Parties
Optional
Check this box if related parties details are to be included.
Format
Optional
Select the format from the drop-down list. The list displays the following values:
- HTML
- Excel
- Excel (.xlsx)
- RTF
Output
Optional
Select the output from the drop-down list. The list displays the following values:
- View
- Spool
Print At
Optional
Select the printing location from the drop-down list. The list displays the following values:
- Client
- Server
Printer
Alphanumeric; 15 Characters; Optional
Specify the printer details from adjoining option list.
After making your specifications, click ‘Ok’ button.
3.7.2 Generating Transaction Enquiry Report
The Transaction Enquiry report displays all the transactions details made by all the unit holders maintained in the system on a desired search criteria.
You can invoke the ‘Transaction Enquiry Report’ screen by typing ‘UTR00228’ in the field at the top right corner of the Application tool bar and click the adjoining arrow.
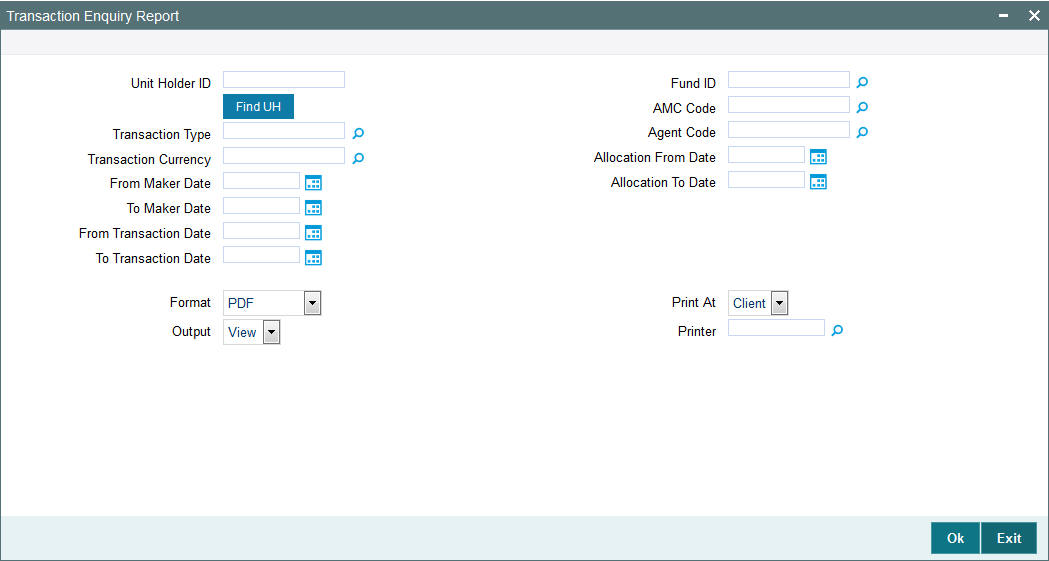
Unit Holder ID
Alphanumeric; 16 Characters; Optional
Specify the unit holder ID. You can also select unit holder ID by clicking ‘Find UH’ button.
Transaction Type
Alphanumeric; 2 Characters; Optional
Specify the transaction type. Alternatively, you can select transaction type from the option list.
Transaction Currency
Alphanumeric; 3 Characters; Optional
Specify the transaction currency.
From Maker Date
Date Format; Optional
Select From Maker date from the adjoining calendar.
To Maker Date
Date Format; Optional
Select To Maker date from the adjoining calendar.
From Transaction Date
Date Format; Optional
Select From Transaction date from the adjoining calendar.
To Transaction Date
Date Format; Optional
Select To Transaction date from the adjoining calendar.
Fund ID
Alphanumeric; 6 Characters; Optional
Specify the fund ID. Alternatively, you can select fund ID from the option list.
AMC Code
Alphanumeric; 12 Characters; Optional
Specify the AMC code. Alternatively, you can select AMC code from the option list.
Agent Code
Alphanumeric; 12 Characters; Optional
Specify the agent code. Alternatively, you can select agent code from the option list.
Allocation From Date
Date Format; Optional
Select Allocation From date from the adjoining calendar.
Allocation To Date
Date Format; Optional
Select the allocation To date from the adjoining calendar.
Format
Optional
Select the format from the drop-down list. The list displays the following values:
- HTML
- Excel
- Excel (.xlsx)
- RTF
Output
Optional
Select the output from the drop-down list. The list displays the following values:
- View
- Spool
Print At
Optional
Select the printing location from the drop-down list. The list displays the following values:
- Client
- Server
Printer
Alphanumeric; 15 Characters; Optional
Specify the printer details from adjoining option list.
After making your specifications, click ‘Ok’ button.
Based on the selected criteria, the following details are displayed in the report:
- Transaction Number
- Old Transaction Number
- Reference Number
- Unit Holder
- Fund Name
- Transaction Type
- Transaction Date
- Transaction Currency
- Transaction Mode
- Transaction Value
- Current Transaction Status
- AMC ID
- Dealing Date
3.7.2.1 Fields in Transaction Enquiry Report Screen
Unit Holder ID
Enter the ID of the unit holder for whom the transaction report is being generated.
From Maker Date, To Maker Date
Enter the date range to generate a report displaying all the transactions created by all the unit holders maintained in the system.
From Transaction Date, To Transaction Date
Enter the date range to generate a report displaying all the transaction details made by all the unit holders maintained in the system.
From Allocation Date, To Allocation Date
Enter the date range to generate a report displaying all the allotted transactions made by all the unit holders in the system.
AMC
Select the AMC to generate a report displaying all the transactions made by all the unit holders in the selected AMC.
Distributor
Select the distributor to generate a report displaying all the transactions made by all the unit holders for a selected distributor.
Fund ID
Select the fund ID to generate a report displaying all the transactions made by all the unit holders for a selected fund ID.
Transaction Type
Select the type of transaction for which the transaction enquiry report is being generated.
Currency
Select the currency for which the transaction enquiry report is being generated.
3.7.3 Generating IPO Transactions - By Fund
This report will print all the IPO transactions (both authorized and unauthorized transactions) received on the current business day at the Agency Branch.
Typically, the Agency Branch prints this report at the end of the day.
Click the IPO – By Fund option to group the transactions fund-wise.
Totals and sub totals will be shown at the following levels:
- Amount received for each type of payment for every fund.
- Total amount received for every fund.
- Total amount received for the day.
You can invoke the ‘IPO By Fund’ screen by typing ‘UTR00060’ in the field at the top right corner of the Application tool bar and click the adjoining arrow.
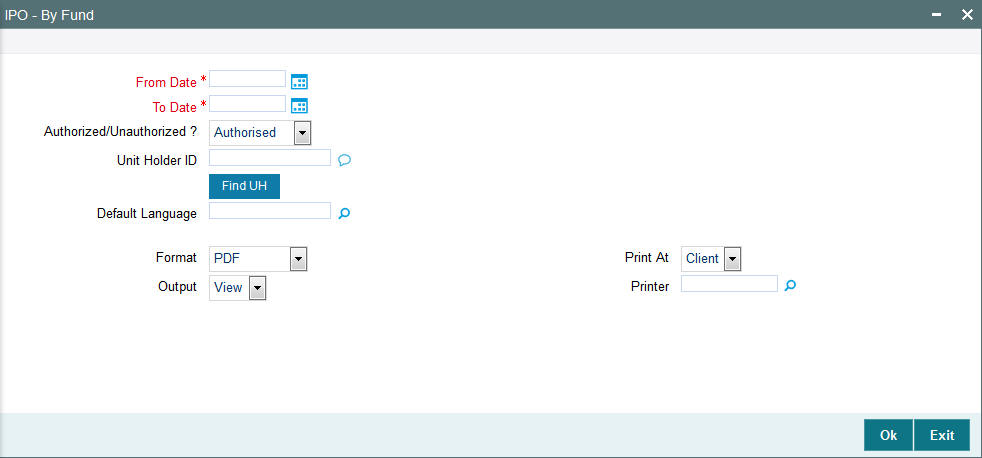
You can generate a report specific to a unit holder account, or the authorization status of the accounts, or to any unit holder account opened on a certain date, by specifying:
From Date and To Date
Date Format; Mandatory
Specify the dates that specify the period between which you want to view the Amount received in the fund.
Authorized/Unauthorized?
Optional
Select the status of the transaction, whether authorized or unauthorized from the drop-down list. The list displays the following values:
- Authorized
- Unauthorized
Unit Holder ID
Alphanumeric; 12 Characters; Optional
Specify the ID of the unit holder whose specific account you want to generate. You can also search unit holder ID by clicking ‘Find UH’ button.
Default Language
Alphanumeric; 14 Characters; Optional
Specify the default language.
Format
Optional
Select the format from the drop-down list. The list displays the following values:
- HTML
- Excel
- Excel (.xlsx)
- RTF
Output
Optional
Select the output from the drop-down list. The list displays the following values:
- View
- Spool
Print At
Optional
Select the printing location from the drop-down list. The list displays the following values:
- Client
- Server
Printer
Alphanumeric; 15 Characters; Optional
Specify the printer details from adjoining option list.
After making your specifications, click ‘Ok’ button.
3.7.4 Generating IPO Transactions - By Payment Mode
Click the IPO – By Payment option to group the transactions according to the mode of payment as well as fund-wise.
Totals and sub totals will be shown at the following levels:
- Amount received for each fund for that payment type.
- Total amount received for each payment type.
- Total amount received for the day.
You can invoke the ‘IPO - By Payment Mode’ screen by typing ‘UTR00061’ in the field at the top right corner of the Application tool bar and click the adjoining arrow.
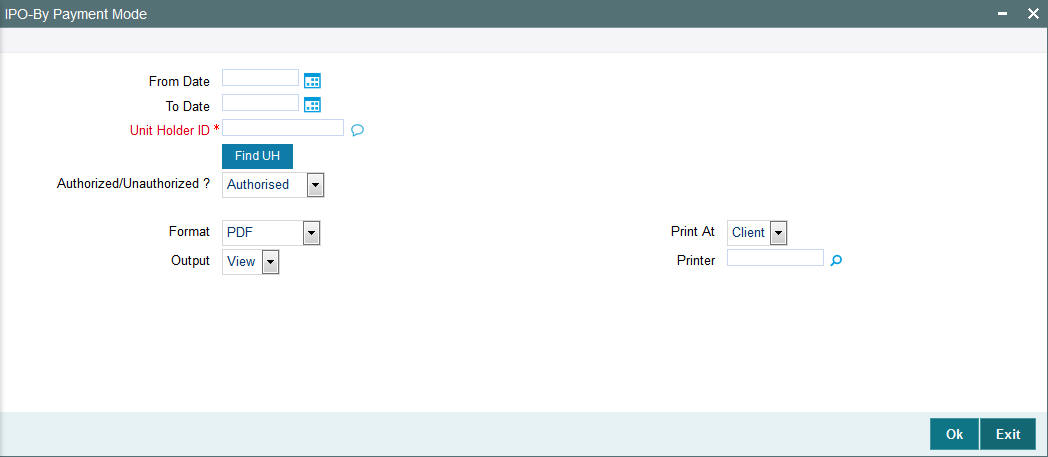
You can generate a report specific to a unit holder account, or the authorization status of the accounts, or to any unit holder account opened on a certain date, by specifying:
From Date and To Date
Date Format; Optional
Specify the dates that specify the period between which you want to view the Amount received in the fund.
Unit Holder ID
Alphanumeric; 12 Characters; Mandatory
Specify the ID of the unit holder whose specific account you want to generate. You can also search unit holder ID by clicking ‘Find UH’ button.
Authorized/Unauthorized?
Optional
Select the status of the transaction, whether authorized or unauthorized from the drop-down list. The list displays the following values:
- Authorized
- Unauthorized
Format
Optional
Select the format from the drop-down list. The list displays the following values:
- HTML
- Excel
- Excel (.xlsx)
- RTF
Output
Optional
Select the output from the drop-down list. The list displays the following values:
- View
- Spool
Print At
Optional
Select the printing location from the drop-down list. The list displays the following values:
- Client
- Server
Printer
Alphanumeric; 15 Characters; Optional
Specify the printer details from adjoining option list.
After making your specifications, click ‘Ok’ button.
3.7.5 Generating Subscription By Fund Report
This report will print all the subscription transactions (both authorized and unauthorized transactions) received on the current business day at the Agency Branch.
Typically, the Agency Branch prints this report at the end of the day.
Click the Purchases – By Fund option to group the transactions fund-wise.
Totals and sub totals will be shown at the following levels:
- Amount received for each type of payment for every fund.
- Total amount received for every fund.
- Total amount received for the day.
You can invoke the ‘Subscription - By Fund’ screen by typing ‘UTR00053’ in the field at the top right corner of the Application tool bar and click the adjoining arrow.
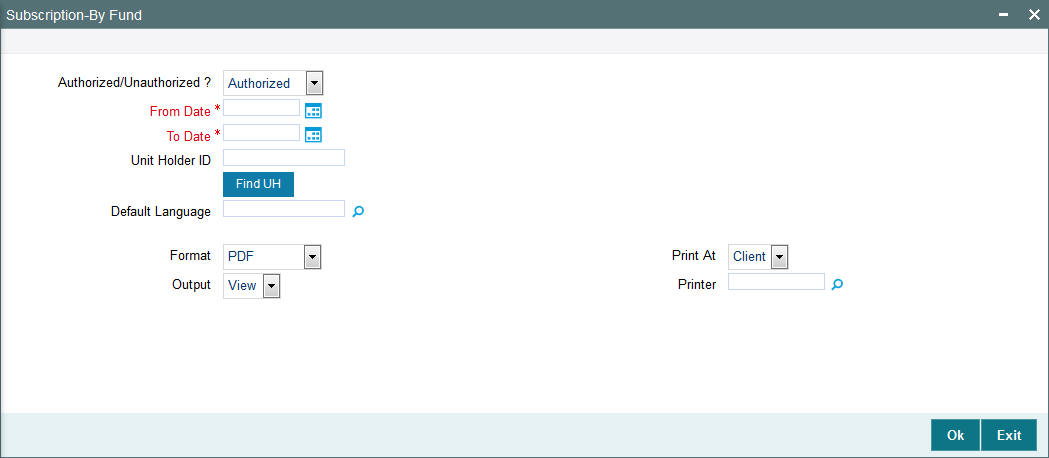
You can generate a report specific to a unit holder account, or the authorization status of the accounts, or to any unit holder account opened on a certain date, by specifying:
From Date and To Date
Date Format; Mandatory
Specify the dates that specify the period between which you want to view the Amount received in the fund.
Authorized/Unauthorized?
Optional
Select the status of the transaction, whether authorized or unauthorized from the drop-down list. The list displays the following values:
- Authorized
- Unauthorized
Unit Holder ID
Alphanumeric; 12 Characters; Optional
Specify the ID of the unit holder whose specific account you want to generate. You can also search unit holder ID by clicking ‘Find UH’ button.
Default Language
Alphanumeric; 14 Characters; Optional
Specify the default language.
Format
Optional
Select the format from the drop-down list. The list displays the following values:
- HTML
- Excel
- Excel (.xlsx)
- RTF
Output
Optional
Select the output from the drop-down list. The list displays the following values:
- View
- Spool
Print At
Optional
Select the printing location from the drop-down list. The list displays the following values:
- Client
- Server
Printer
Alphanumeric; 15 Characters; Optional
Specify the printer details from adjoining option list.
After making your specifications, click ‘Ok’ button.
3.7.6 Generating Subscription - By Payment Mode Report
Click the Purchases – By Payment option to group the transactions according to the mode of payment as well as fund-wise.
Totals and sub totals will be shown at the following levels:
- Amount received for each fund for that payment type.
- Total amount received for each payment type.
- Total amount received for the day.
You can invoke the ‘Subscription - By Payment Mode’ screen by typing ‘UTR00054’ in the field at the top right corner of the Application tool bar and click the adjoining arrow.
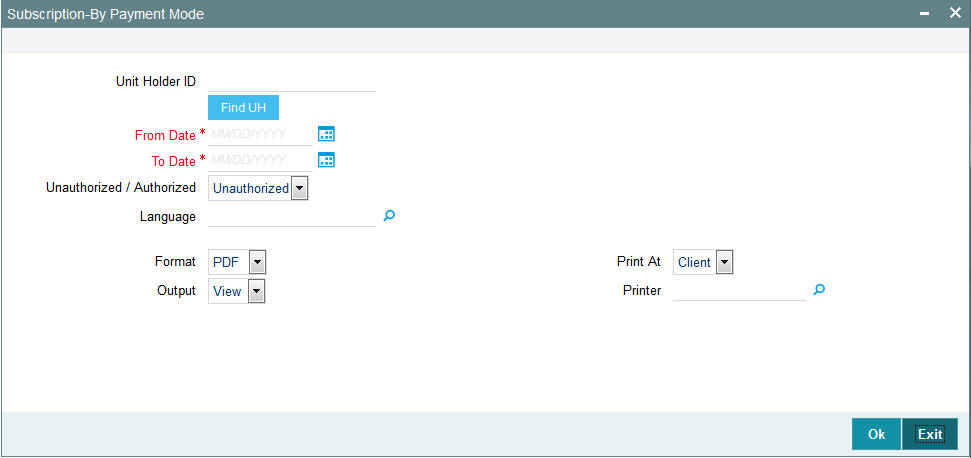
You can generate a report specific to a unit holder account, or the authorization status of the accounts, or to any unit holder account opened on a certain date, by specifying:
Unit Holder ID
Alphanumeric; 12 Characters; Optional
Specify the ID of the unit holder whose specific account you want to generate. You can also search unit holder ID by clicking ‘Find UH’ button.
From Date and To Date
Date Format; Mandatory
Specify the dates that specify the period between which you want to view the Amount received in the fund.
Authorized/Unauthorized?
Optional
Select the status of the transaction, whether authorized or unauthorized from the drop-down list. The list displays the following values:
- Authorized
- Unauthorized
Language
Alphanumeric; 14 Characters; Optional
Specify the default language.
Format
Optional
Select the format from the drop-down list. The list displays the following values:
- HTML
- Excel
- Excel (.xlsx)
- RTF
Output
Optional
Select the output from the drop-down list. The list displays the following values:
- View
- Spool
Print At
Optional
Select the printing location from the drop-down list. The list displays the following values:
- Client
- Server
Printer
Alphanumeric; 15 Characters; Optional
Specify the printer details from adjoining option list.
After making your specifications, click ‘Ok’ button.
3.7.7 Generating Subscription Pay-In Slip Report
The report displays the pay in slip for all the funds and transaction that has processed. This pay in slip is used to deposit the checks to the bank to remit the money in the respective fund account.
You can generate pay in slip using ‘Pay-In Slip’ screen. You can invoke this screen by typing ‘UTR00157’ in the field at the top right corner of the Application tool bar and click the adjoining arrow button.
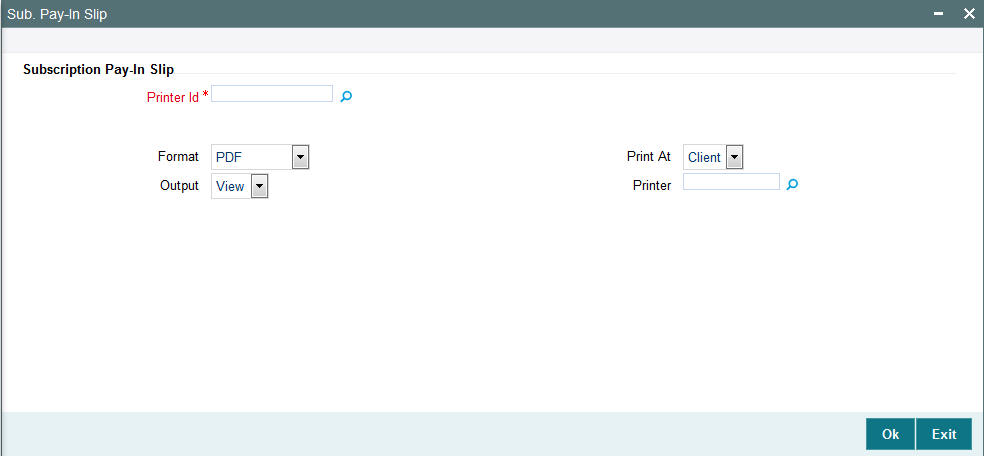
You can specify the following details:
Subscription Pay-In Slip
Printer Id
Alphanumeric; 15 Characters; Optional
Specify the printer ID. Alternatively, you can select printer ID from the option list. The list displays all valid printer ID maintained in the system.
Format
Optional
Select the format from the drop-down list. The list displays the following values:
- HTML
- Excel
- Excel (.xlsx)
- RTF
Output
Optional
Select the output from the drop-down list. The list displays the following values:
- View
- Spool
Print At
Optional
Select the printing location from the drop-down list. The list displays the following values:
- Client
- Server
Printer
Alphanumeric; 15 Characters; Optional
Specify the printer details from adjoining option list.
After making your specifications, click ‘Ok’ button.
3.7.8 Generating Redemption - By Fund Report
This report will print all the redemption transactions (both authorized and unauthorized transactions) received on the current business day at the Agency Branch.
Typically, the Agency Branch prints this report at the end of the day.
Click the Sales – By Fund option to group the transactions fund-wise.
Totals and sub totals will be shown at the following levels:
- Amount received for each type of payment for every fund.
- Total amount received for every fund.
- Total amount received for the day.
You can invoke the ‘Redemption - By Fund’ screen by typing ‘UTR00057’ in the field at the top right corner of the Application tool bar and click the adjoining arrow.

You can generate a report specific to a unit holder account, or the authorization status of the accounts, or to any unit holder account opened on a certain date, by specifying:
Authorized/Unauthorized?
Optional
Select the status of the transaction, whether authorized or unauthorized from the drop-down list. The list displays the following values:
- Authorized
- Unauthorized
From Date and To Date
Date Format; Mandatory
Specify the dates that specify the period between which you want to view the Amount received in the fund.
Unit Holder ID
Alphanumeric; 12 Characters; Optional
Specify the ID of the unit holder whose specific account you want to generate. You can also search unit holder ID by clicking ‘Find UH’ button.
Default Language
Alphanumeric; 14 Characters; Optional
Specify the default language.
Format
Optional
Select the format from the drop-down list. The list displays the following values:
- HTML
- Excel
- Excel (.xlsx)
- RTF
Output
Optional
Select the output from the drop-down list. The list displays the following values:
- View
- Spool
Print At
Optional
Select the printing location from the drop-down list. The list displays the following values:
- Client
- Server
Printer
Alphanumeric; 15 Characters; Optional
Specify the printer details from adjoining option list.
After making your specifications, click ‘Ok’ button.
3.7.9 Generating Redemption-By Payment Mode Report
Click the Sales – By Payment option to group the transactions according to the mode of payment as well as fund-wise.
Totals and sub totals will be shown at the following levels:
- Amount received for each fund for that payment type.
- Total amount received for each payment type.
- Total amount received for the day.
You can invoke the ‘Redemption - By Payment Mode’ screen by typing ‘UTR00058’ in the field at the top right corner of the Application tool bar and click the adjoining arrow.
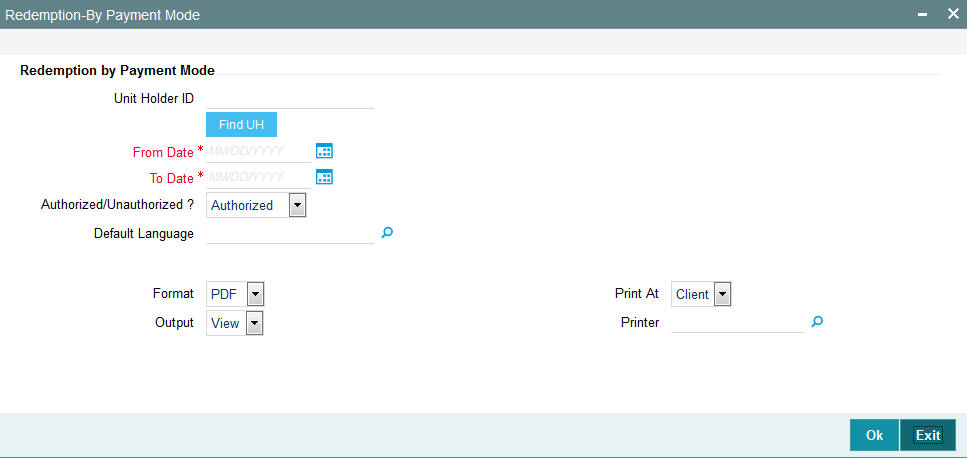
You can generate a report specific to a unit holder account, or the authorization status of the accounts, or to any unit holder account opened on a certain date, by specifying:
Redemption by Payment Mode
Unit Holder ID
Alphanumeric; 12 Characters; Optional
Specify the ID of the unit holder whose specific account you want to generate. You can also search unit holder ID by clicking ‘Find UH’ button.
From Date and To Date
Date Format; Mandatory
Specify the dates that specify the period between which you want to view the Amount received in the fund.
Authorized/Unauthorized?
Optional
Select the status of the transaction, whether authorized or unauthorized from the drop-down list. The list displays the following values:
- Authorized
- Unauthorized
Default Language
Alphanumeric; 14 Characters; Optional
Specify the default language.
Format
Optional
Select the format from the drop-down list. The list displays the following values:
- HTML
- Excel
- Excel (.xlsx)
- RTF
Output
Optional
Select the output from the drop-down list. The list displays the following values:
- View
- Spool
Print At
Optional
Select the printing location from the drop-down list. The list displays the following values:
- Client
- Server
Printer
Alphanumeric; 15 Characters; Optional
Specify the printer details from adjoining option list.
After making your specifications, click ‘Ok’ button.
3.7.10 Generating Reissue Details Report
You can generate ‘Reissue Details’ report using ‘Reissue Details’ screen. You can invoke this screen by typing ‘UTR00056’ in the field at the top right corner of the Application tool bar and clicking on the adjoining arrow button.
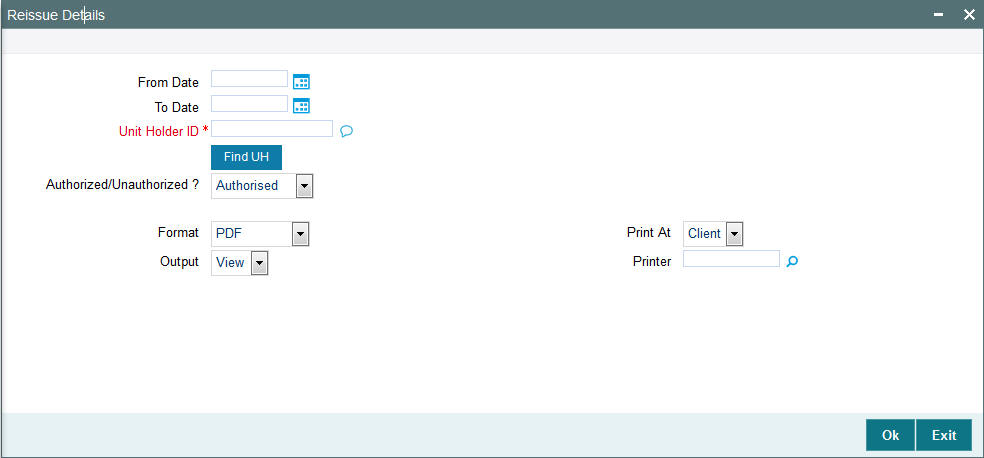
From Date and To Date
Date Format; Optional
Specify the dates that specify the period between which you want to view the reissue details.
Unit Holder ID
Alphanumeric; 12 Characters; Mandatory
Specify the ID of the unit holder whose specific account you want to generate. You can also search unit holder ID by clicking ‘Find UH’ button.
Authorized/Unauthorized?
Optional
Select the status of the reissue details, whether authorized or unauthorized from the drop-down list. The list displays the following values:
- Authorized
- Unauthorized
Format
Optional
Select the format from the drop-down list. The list displays the following values:
- HTML
- Excel
- Excel (.xlsx)
- RTF
Output
Optional
Select the output from the drop-down list. The list displays the following values:
- View
- Spool
Print At
Optional
Select the printing location from the drop-down list. The list displays the following values:
- Client
- Server
Printer
Alphanumeric; 15 Characters; Optional
Specify the printer details from adjoining option list.
After making your specifications, click ‘Ok’ button.
3.7.11 Generating Split Details Report
You can generate ‘Split Details’ report using ‘Split Details’ screen. You can invoke this screen by typing ‘UTR00055’ in the field at the top right corner of the Application tool bar and clicking on the adjoining arrow button.
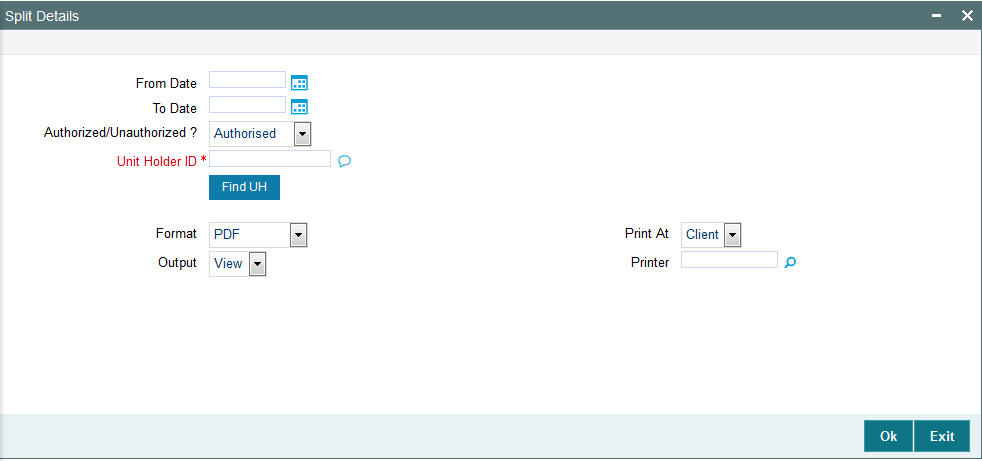
You can specify the following details:
From Date and To Date
Date Format; Optional
Specify the dates that specify the period between which you want to view the split details.
Unit Holder ID
Alphanumeric; 12 Characters; Mandatory
Specify the ID of the unit holder whose specific account you want to generate. You can also search unit holder ID by clicking ‘Find UH’ button.
Authorized/Unauthorized?
Optional
Select the status of the split details, whether authorized or unauthorized from the drop-down list. The list displays the following values:
- Authorized
- Unauthorized
Format
Optional
Select the format from the drop-down list. The list displays the following values:
- HTML
- Excel
- Excel (.xlsx)
- RTF
Output
Optional
Select the output from the drop-down list. The list displays the following values:
- View
- Spool
Print At
Optional
Select the printing location from the drop-down list. The list displays the following values:
- Client
- Server
Printer
Alphanumeric; 15 Characters; Optional
Specify the printer details from adjoining option list.
After making your specifications, click ‘Ok’ button.
3.7.12 Generating Daily Switch Transactions
This report will print all the switch transactions (both authorized and unauthorized transactions) received on the current business day at the Agency Branch.
Typically, the Agency Branch prints this report at the end of the day.
Totals and sub totals will be shown at the following levels:
- Units switched for every fund.
- Total units switched across all the funds.
You can generate Switches Details report using ‘Switches Details’ screen. You can invoke this screen by typing ‘UTR00047’ in the field at the top right corner of the Application tool bar and clicking on the adjoining arrow button.
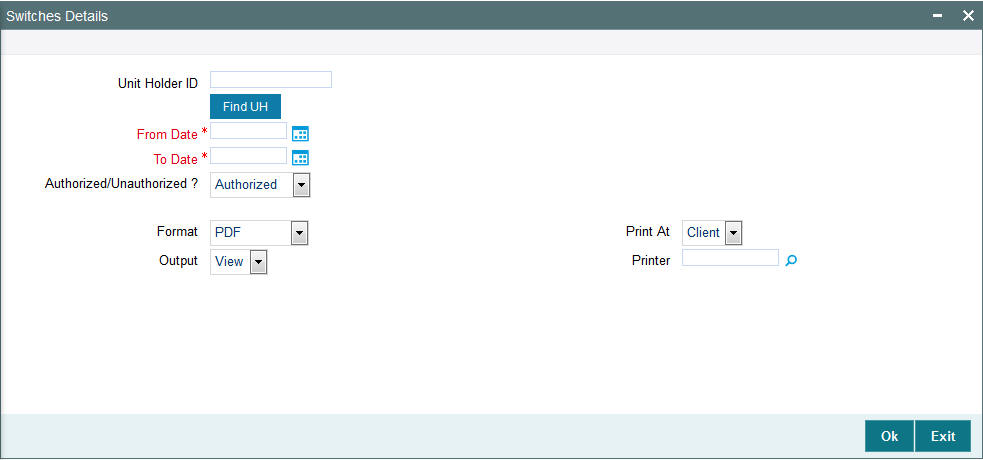
You can specify the following details:
Unit Holder ID
Alphanumeric; 12 Characters; Optional
Specify the ID of the unit holder whose specific account you want to generate. You can also search unit holder ID by clicking ‘Find UH’ button.
From Date and To Date
Date Format; Mandatory
Specify the dates that specify the period between which you want to view the split details.
Authorized/Unauthorized?
Optional
Select the status of the split details, whether authorized or unauthorized from the drop-down list. The list displays the following values:
- Authorized
- Unauthorized
Format
Optional
Select the format from the drop-down list. The list displays the following values:
- HTML
- Excel
- Excel (.xlsx)
- RTF
Output
Optional
Select the output from the drop-down list. The list displays the following values:
- View
- Spool
Print At
Optional
Select the printing location from the drop-down list. The list displays the following values:
- Client
- Server
Printer
Alphanumeric; 15 Characters; Optional
Specify the printer details from adjoining option list.
After making your specifications, click ‘Ok’ button.
3.7.13 Generating Daily Transfer Transactions
This report will print all the transfer transactions (both authorized and unauthorized transactions) received on the current business day at the Agency Branch.
Typically, the Agency Branch prints this report at the end of the day.
Totals and sub totals will be shown at the following levels:
- Units transferred for every fund.
- Total units transferred across all the funds.
3.7.14 Generating Daily Block Transactions
This report will print all the block transactions (both authorized and unauthorized transactions) received on the current business day at the Agency Branch.
Typically, the Agency Branch prints this report at the end of the day.
Totals and sub totals will be shown at the following levels:
- Units blocked for every fund.
- Total units blocked across all the funds.
3.7.15 Generating Daily Unblock Transactions
This report will print all the unblock transactions (both authorized and unauthorized transactions) received on the current business day at the Agency Branch.
Typically, the Agency Branch prints this report at the end of the day.
Totals and sub totals will be shown at the following levels:
- Units unblocked for every fund.
- Total units unblocked across all the funds.
3.7.16 Generating Daily Split Transactions
This report will print all the split transactions (both authorized and unauthorized transactions) received on the current business day at the Agency Branch. Typically, the Agency Branch prints this report at the end of the day.
Totals and sub totals will be shown at the following levels:
- Units split for every fund.
- Total units split across all the funds.
3.7.17 Generating Daily Consolidation Transactions
This report will print all the consolidation transactions (both authorized and unauthorized transactions) received on the current business day at the Agency Branch.
Typically, the Agency Branch prints this report at the end of the day.
Totals and sub totals will be shown at the following levels:
- Units consolidated for every fund.
- Total units consolidated across all the funds.
3.7.18 Generating Daily Reissue Transactions
This report will print all the transfer transactions (both authorized and unauthorized transactions) received on the current business day at the Agency Branch.
Typically, the Agency Branch prints this report at the end of the day.
Totals and sub totals will be shown at the following levels:
- Units reissued for every fund.
- Total units reissued across all the funds.
3.7.19 Generating Fee Incentive Details Report
You can generate fee incentive details using ‘Fee Incentive Detail’ screen. You can invoke this screen by typing ‘UTR00036’ in the field at the top right corner of the Application tool bar and clicking on the adjoining arrow button.
You can specify the following details:
User Information
From Date and To Date
Date Format; Mandatory
Select the dates that specify the period between which you want to view the fee incentive details.
Fund ID
Alphanumeric; 6 Characters; Optional
Specify the fund ID. Alternatively, you can select fund ID from the option list. The list displays all valid fund ID maintained in the system.
From Entity Type
Alphanumeric; 1 Character; Optional
Specify the From entity type. Alternatively, you can select From Entity Type from the option list. The list displays all valid From Entity Type maintained in the system.
From Entity
Display
The system displays the From entity details for the selected From Entity Type.
To Entity Type
Alphanumeric; 1 Character; Optional
Specify the To entity type. Alternatively, you can select To Entity Type from the option list. The list displays all valid To Entity Type maintained in the system.
To Entity
Display
The system displays the To entity details for the selected To Entity Type.
Load ID
Numeric; 5 Characters; Optional
Specify the load ID. Alternatively, you can select the load ID from the option list. The list displays all valid load ID maintained in the system.
Free Transaction
Optional
Select if free transaction is allowed or not from the drop-down list. The list displays the following values:
- Yes
- No
Format
Optional
Select the format from the drop-down list. The list displays the following values:
- HTML
- Excel
- Excel (.xlsx)
- RTF
Output
Optional
Select the output from the drop-down list. The list displays the following values:
- View
- Spool
Print At
Optional
Select the printing location from the drop-down list. The list displays the following values:
- Client
- Server
Printer
Alphanumeric; 15 Characters; Optional
Specify the printer details from adjoining option list.
After making your specifications, click ‘Ok’ button.
3.7.20 Generating Fee Incentive Cheque Report
You can generate fee incentive cheque details using ‘Fee Incentive Cheque’ screen. You can invoke this screen by typing ‘UTR00156’ in the field at the top right corner of the Application tool bar and clicking on the adjoining arrow button.

You can specify the following details:
Registrar ID
Alphanumeric; 1000 Characters; Optional
Specify the registrar ID.
ID
Numeric; 22 Characters; Optional
Specify the fee incentive ID details.
Cheque Printing Sort Order
Optional
Select the cheque printing sort order from the drop-down list. The list displays the following values:
- Zip Code
- Broker Name
Format
Optional
Select the format from the drop-down list. The list displays the following values:
- HTML
- Excel
- Excel (.xlsx)
- RTF
Output
Optional
Select the output from the drop-down list. The list displays the following values:
- View
- Spool
Print At
Optional
Select the printing location from the drop-down list. The list displays the following values:
- Client
- Server
Printer
Alphanumeric; 15 Characters; Optional
Specify the printer details from adjoining option list.
After making your specifications, click ‘Ok’ button.
3.7.21 Generating Fee Incentive DDs Report
You can generate fee incentive DD details using ‘Fee Incentive DDs’ screen. You can invoke this screen by typing ‘UTR00161’ in the field at the top right corner of the Application tool bar and clicking on the adjoining arrow button.
You can specify the following details:
Fee Incentive Details
Registrar ID
Alphanumeric; 1000 Characters; Optional
Specify the registrar ID.
ID
Numeric; 22 Characters; Optional
Specify the fee incentive ID details.
Cheque Printing Sort Order
Optional
Select the cheque printing sort order from the drop-down list. The list displays the following values:
- Zip Code
- Broker Name
Format
Optional
Select the format from the drop-down list. The list displays the following values:
- HTML
- Excel
- Excel (.xlsx)
- RTF
Output
Optional
Select the output from the drop-down list. The list displays the following values:
- View
- Spool
Print At
Optional
Select the printing location from the drop-down list. The list displays the following values:
- Client
- Server
Printer
Alphanumeric; 15 Characters; Optional
Specify the printer details from adjoining option list.
After making your specifications, click ‘Ok’ button.
3.7.22 Generating Fee Incentive Others Report
You can generate fee incentive other details using ‘Fee Incentive Others’ screen. You can invoke this screen by typing ‘UTR00163’ in the field at the top right corner of the Application tool bar and clicking on the adjoining arrow button.

You can specify the following details:
Registrar ID
Alphanumeric; 1000 Characters; Optional
Specify the registrar ID.
ID
Numeric; 22 Characters; Optional
Specify the fee incentive ID details.
Cheque Printing Sort Order
Optional
Select the cheque printing sort order from the drop-down list. The list displays the following values:
- Zip Code
- Broker Name
Format
Optional
Select the format from the drop-down list. The list displays the following values:
- HTML
- Excel
- Excel (.xlsx)
- RTF
Output
Optional
Select the output from the drop-down list. The list displays the following values:
- View
- Spool
Print At
Optional
Select the printing location from the drop-down list. The list displays the following values:
- Client
- Server
Printer
Alphanumeric; 15 Characters; Optional
Specify the printer details from adjoining option list.
After making your specifications, click ‘Ok’ button.
3.7.23 Generating Block Details Report
You can generate block details report using ‘Block Details’ screen. You can invoke this screen by typing ‘UTR00042’ in the field at the top right corner of the Application tool bar and clicking on the adjoining arrow button.

You can specify the following details:
Authorized/Unauthorized?
Optional
Select if the block details are authorized or unauthorized from the drop-down list.
From Date and To Date
Date Format; Mandatory
Select the dates that specify the period between which you want to view the block details.
Unit Holder ID
Alphanumeric; 12 Characters; Optional
Specify the unit holder ID. You can also query for unit holder ID by clicking ‘Find UH’ button.
Format
Optional
Select the format from the drop-down list. The list displays the following values:
- HTML
- Excel
- Excel (.xlsx)
- RTF
Output
Optional
Select the output from the drop-down list. The list displays the following values:
- View
- Spool
Print At
Optional
Select the printing location from the drop-down list. The list displays the following values:
- Client
- Server
Printer
Alphanumeric; 15 Characters; Optional
Specify the printer details from adjoining option list.
After making your specifications, click ‘Ok’ button.
3.7.24 Generating Un-Block Details Report
You can generate un-block details report using ‘Un-Block Details’ screen. You can invoke this screen by typing ‘UTR00064’ in the field at the top right corner of the Application tool bar and clicking on the adjoining arrow button.
You can specify the following details:
Unit Holder ID
Alphanumeric; 12 Characters; Optional
Specify the unit holder ID. You can also query for unit holder ID by clicking ‘Find UH’ button.
From Date and To Date
Date Format; Mandatory
Select the dates that specify the period between which you want to view the un-block details.
Authorization Status?
Optional
Select if the un-block details are authorized or unauthorized from the drop-down list.
Format
Optional
Select the format from the drop-down list. The list displays the following values:
- HTML
- Excel
- Excel (.xlsx)
- RTF
Output
Optional
Select the output from the drop-down list. The list displays the following values:
- View
- Spool
Print At
Optional
Select the printing location from the drop-down list. The list displays the following values:
- Client
- Server
Printer
Alphanumeric; 15 Characters; Optional
Specify the printer details from adjoining option list.
After making your specifications, click ‘Ok’ button.
3.7.25 Generating Clearing Status Report
You can generate clearing status report using ‘Clearing Status’ screen. You can invoke this screen by typing ‘UTR00043’ in the field at the top right corner of the Application tool bar and clicking on the adjoining arrow button.
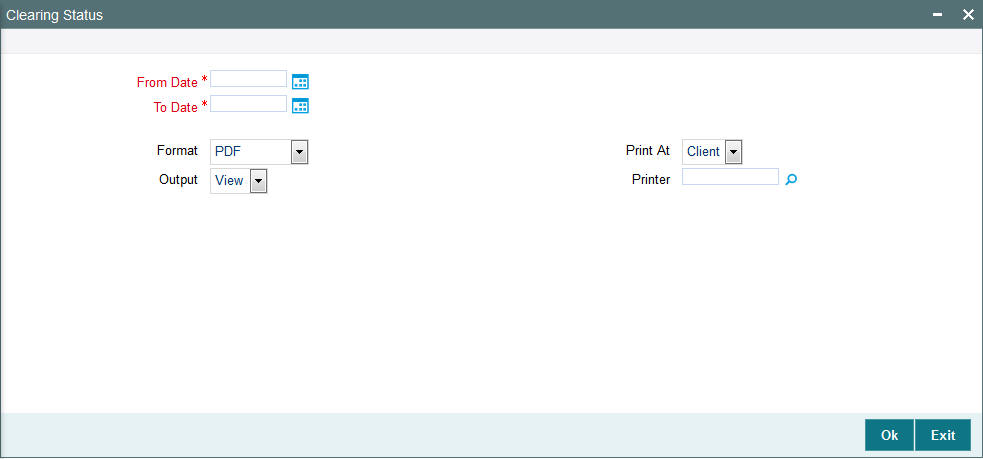
You can specify the following details:
From Date and To Date
Date Format; Mandatory
Select the dates that specify the period between which you want to view the clearing status details.
Format
Optional
Select the format from the drop-down list. The list displays the following values:
- HTML
- Excel
- Excel (.xlsx)
- RTF
Output
Optional
Select the output from the drop-down list. The list displays the following values:
- View
- Spool
Print At
Optional
Select the printing location from the drop-down list. The list displays the following values:
- Client
- Server
Printer
Alphanumeric; 15 Characters; Optional
Specify the printer details from adjoining option list.
After making your specifications, click ‘Ok’ button.
3.7.26 Generating Consolidation Detail Report
You can generate consolidated report using ‘Consolidation Status’ screen. You can invoke this screen by typing ‘UTR00059’ in the field at the top right corner of the Application tool bar and clicking on the adjoining arrow button.
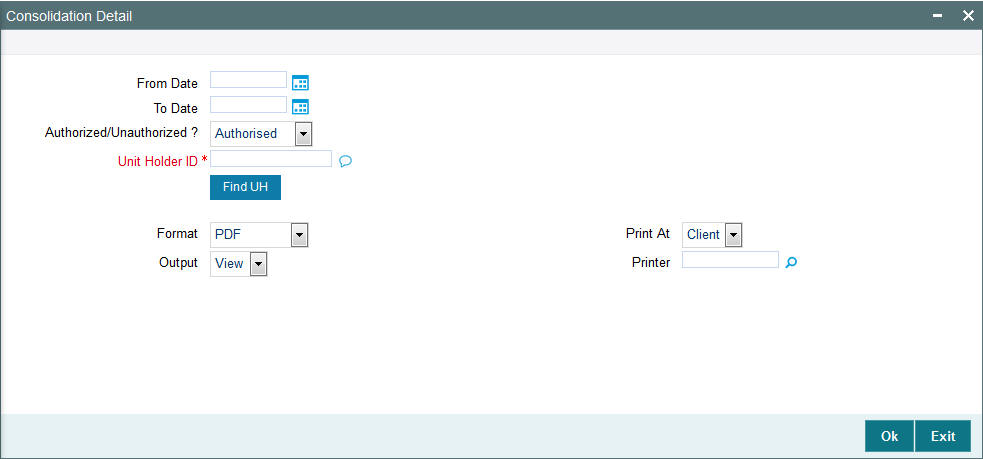
You can specify the following details:
From Date and To Date
Date Format; Optional
Select the dates that specify the period between which you want to view the consolidation details.
Authorized/Unauthorized?
Optional
Select if the consolidation details are authorized or unauthorized from the drop-down list.
Unit Holder ID
Alphanumeric; 12 Characters; Mandatory
Specify the unit holder ID. You can also query for unit holder ID by clicking ‘Find UH’ button.
Format
Optional
Select the format from the drop-down list. The list displays the following values:
- HTML
- Excel
- Excel (.xlsx)
- RTF
Output
Optional
Select the output from the drop-down list. The list displays the following values:
- View
- Spool
Print At
Optional
Select the printing location from the drop-down list. The list displays the following values:
- Client
- Server
Printer
Alphanumeric; 15 Characters; Optional
Specify the printer details from adjoining option list.
After making your specifications, click ‘Ok’ button.
3.7.27 Generating Delivery Confirmation Report
You can generate delivery confirmation report using ‘Delivery Confirmation’ screen. You can invoke this screen by typing ‘UTR00172’ in the field at the top right corner of the Application tool bar and clicking on the adjoining arrow button.
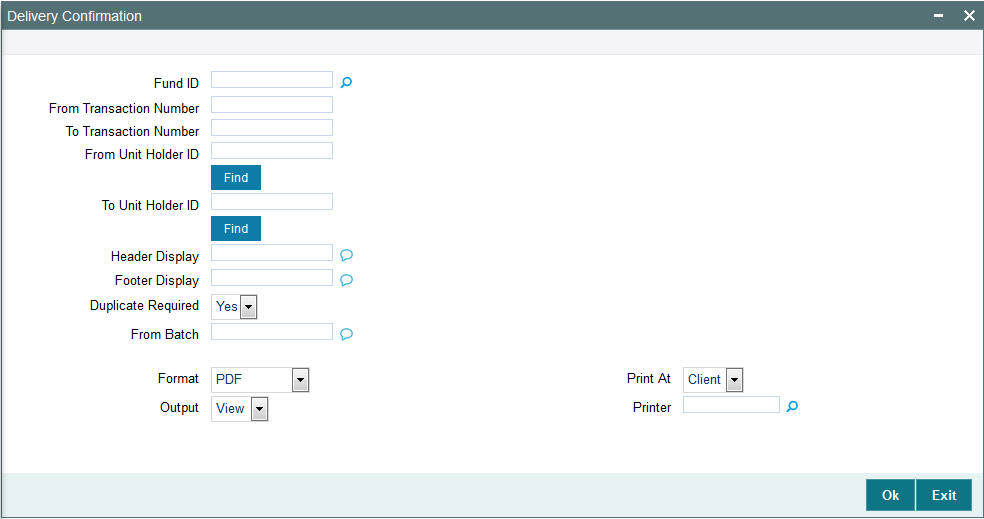
You can specify the following details:
Fund ID
Alphanumeric; 6 Characters; Optional
Specify the fund ID. Alternatively, you can select fund ID from the option list. The list displays all valid fund ID maintained in the system.
From Transaction Number
Alphanumeric; 16 Characters; Optional
Specify From transaction number.
To Transaction Number
Alphanumeric; 16 Characters; Optional
Specify To transaction number.
From Unit Holder ID
Alphanumeric; 12 Characters; Optional
Specify From unit holder ID. You can also query for unit holder ID by clicking ‘Find’ button.
To Unit Holder ID
Alphanumeric; 12 Characters; Optional
Specify To unit holder ID. You can also query for unit holder ID by clicking ‘Find’ button.
Header Display
Alphanumeric; 1000 Characters; Optional
Specify the header details to be displayed in the report.
Footer Display
Alphanumeric; 1000 Characters; Optional
Specify the footer details to be displayed in the report.
Duplicate Required
Optional
Select ‘Yes’ from drop-down list if duplicate report is required. Else select ‘No’.
From Batch
Alphanumeric; 1000 Characters; Optional
Specify From Batch details.
Format
Optional
Select the format from the drop-down list. The list displays the following values:
- HTML
- Excel
- Excel (.xlsx)
- RTF
Output
Optional
Select the output from the drop-down list. The list displays the following values:
- View
- Spool
Print At
Optional
Select the printing location from the drop-down list. The list displays the following values:
- Client
- Server
Printer
Alphanumeric; 15 Characters; Optional
Specify the printer details from adjoining option list.
After making your specifications, click ‘Ok’ button.
3.7.28 Generating Print Certificate
You can print certificate using ‘Print Certificate’ screen. You can invoke this screen by typing ‘UTR00133’ in the field at the top right corner of the Application tool bar and clicking on the adjoining arrow button.
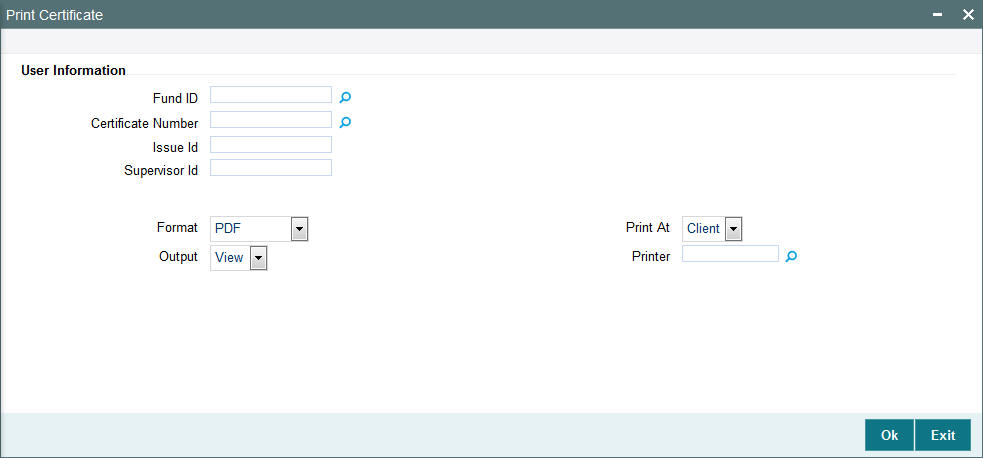
You can specify the following details:
User Information
Fund ID
Alphanumeric; 6 Characters; Optional
Specify the fund ID. Alternatively, you can select fund ID from the option list. The list displays all valid fund ID maintained in the system.
Certificate Number
Numeric; 22 Characters; Optional
Specify the certificate number. Alternatively, you can select certificate number from the option list. The list displays all valid certificate number maintained in the system.
Issue Id
Alphanumeric; 20 Characters; Optional
Specify the issue ID.
Supervisor Id
Alphanumeric; 20 Characters; Optional
Specify the supervisor ID.
Format
Optional
Select the format from the drop-down list. The list displays the following values:
- HTML
- Excel
- Excel (.xlsx)
- RTF
Output
Optional
Select the output from the drop-down list. The list displays the following values:
- View
- Spool
Print At
Optional
Select the printing location from the drop-down list. The list displays the following values:
- Client
- Server
Printer
Alphanumeric; 15 Characters; Optional
Specify the printer details from adjoining option list.
After making your specifications, click ‘Ok’ button.
3.7.29 Generating Redemption Cheques Report
You can generate redemption cheques report using ‘Redemption Cheques’ screen. You can invoke this screen by typing ‘UTR00155’ in the field at the top right corner of the Application tool bar and clicking on the adjoining arrow button.

You can specify the following details:
Registrar ID
Alphanumeric; 16 Characters; Optional
Specify the registrar ID. Alternatively, you can select registrar ID from the option list. The list displays all valid registrar ID maintained in the system.
Printer Id
Alphanumeric; 15 Characters; Optional
Specify the printer ID. Alternatively, you can select printer ID from the option list. The list displays all valid printer ID maintained in the system.
Cheque Printing Sort Order
Optional
Select the cheque printing sort order from the drop-down list. The list displays the following values:
- Zip Code
- Unit Holder Name
Format
Optional
Select the format from the drop-down list. The list displays the following values:
- HTML
- Excel
- Excel (.xlsx)
- RTF
Output
Optional
Select the output from the drop-down list. The list displays the following values:
- View
- Spool
Print At
Optional
Select the printing location from the drop-down list. The list displays the following values:
- Client
- Server
Printer
Alphanumeric; 15 Characters; Optional
Specify the printer details from adjoining option list.
After making your specifications, click ‘Ok’ button.
3.7.30 Generating Redemption DDs Report
The redemption DD are printed once the allocation of redemption units is made for the unit holder in the respective fund where investor has opted for redemption payout and payment option as DD/ Cheque.
You can generate redemption DDs details report using ‘Redemption DDs’ screen. You can invoke this screen by typing ‘UTR00160’ in the field at the top right corner of the Application tool bar and clicking on the adjoining arrow button.

You can specify the following details:
Registrar ID
Alphanumeric; 16 Characters; Optional
Specify the registrar ID. Alternatively, you can select registrar ID from the option list. The list displays all valid registrar ID maintained in the system.
ID
Alphanumeric; 15 Characters; Optional
Specify the printer ID. Alternatively, you can select printer ID from the option list. The list displays all valid printer ID maintained in the system.
Cheque Printing Sort Order
Optional
Select the cheque printing sort order from the drop-down list. The list displays the following values:
- Zip Code
- Unit Holder Name
Format
Optional
Select the format from the drop-down list. The list displays the following values:
- HTML
- Excel
- Excel (.xlsx)
- RTF
Output
Optional
Select the output from the drop-down list. The list displays the following values:
- View
- Spool
Print At
Optional
Select the printing location from the drop-down list. The list displays the following values:
- Client
- Server
Printer
Alphanumeric; 15 Characters; Optional
Specify the printer details from adjoining option list.
After making your specifications, click ‘Ok’ button.
3.7.31 Generating Redemption Payout Report
You can generate redemption Payout report using ‘Redemption Payout’ screen. You can invoke this screen by typing ‘UTR00189’ in the field at the top right corner of the Application tool bar and clicking on the adjoining arrow button.
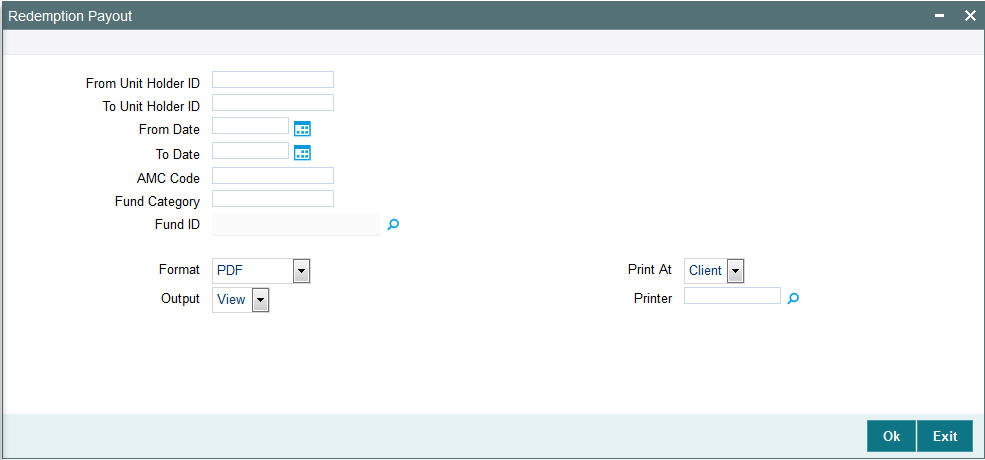
You can specify the following details:
From Unit Holder ID
Alphanumeric; 12 Characters; Optional
Specify From unit holder ID.
To Unit Holder ID
Alphanumeric; 12 Characters; Optional
Specify To unit holder ID.
From Date and To Date
Date Format; Optional
Select the dates that specify the period between which you want to view the redemption payout details.
AMC Code
Alphanumeric; 12 Characters; Optional
Specify the AMC code.
Fund Category
Alphanumeric; 2 Characters; Optional
Specify the fund category.
Fund ID
Alphanumeric; 6 Characters; Optional
Specify the fund ID. Alternatively, you can select fund ID from the option list. The list displays all valid fund ID maintained in the system.
Format
Optional
Select the format from the drop-down list. The list displays the following values:
- HTML
- Excel
- Excel (.xlsx)
- RTF
Output
Optional
Select the output from the drop-down list. The list displays the following values:
- View
- Spool
Print At
Optional
Select the printing location from the drop-down list. The list displays the following values:
- Client
- Server
Printer
Alphanumeric; 15 Characters; Optional
Specify the printer details from adjoining option list.
After making your specifications, click ‘Ok’ button.
3.7.32 Generating Transaction Category Mismatch Report
You can generate the transaction category mis-match record using ‘Transaction Category Mismatch’ report. You can invoke this screen by typing ‘UTRTXCTR’ in the field at the top right corner of the Application tool bar and clicking on the adjoining arrow button.
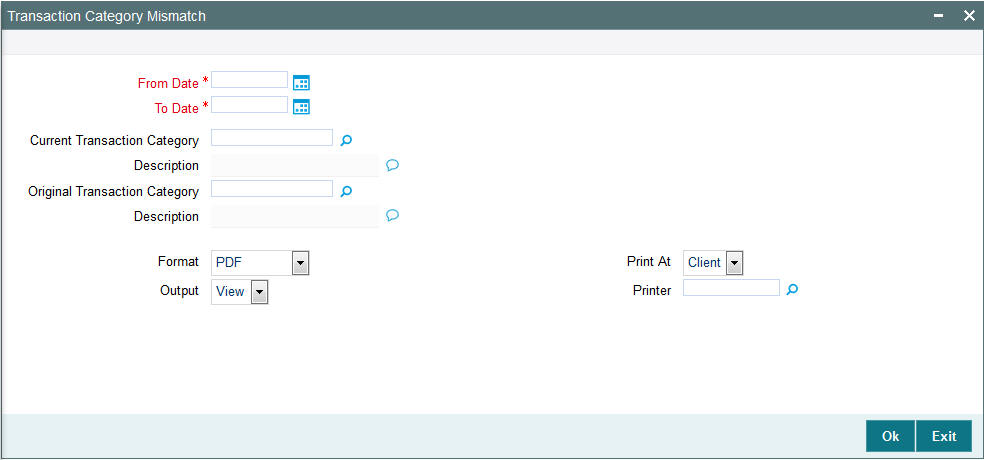
You can specify the following details:
From Date and To Date
Date Format; Mandatory
Select the dates that specify the period between which you want to view the Transaction category mismatch details.
Current Transaction Category
Alphanumeric; 25 Characters; Optional
Specify the current transaction category details. Alternatively, you can select current transaction category from the option list. The list displays all valid current transaction category details maintained in the system.
Description
Display
The system displays the description for the selected current transaction category.
Original Transaction Category
Alphanumeric; 25 Characters; Optional
Specify the original transaction category details. Alternatively, you can select original transaction category from the option list. The list displays all valid original transaction category details maintained in the system.
Description
Display
The system displays the description for the selected original transaction category.
Format
Optional
Select the format from the drop-down list. The list displays the following values:
- HTML
- Excel
- Excel (.xlsx)
- RTF
Output
Optional
Select the output from the drop-down list. The list displays the following values:
- View
- Spool
Print At
Optional
Select the printing location from the drop-down list. The list displays the following values:
- Client
- Server
Printer
Alphanumeric; 15 Characters; Optional
Specify the printer details from adjoining option list.
After making your specifications, click ‘Ok’ button.
3.7.33 Generating Transfer Details Report
You can generate transfer details report using ‘Transfer Details’ screen. You can invoke this screen by typing ‘UTR00102’ in the field at the top right corner of the Application tool bar and clicking on the adjoining arrow button.

You can specify the following details:
Unit Holder ID
Alphanumeric; 12 Characters; Optional
Specify the unit holder ID. You can also query for unit holder ID by clicking ‘Find UH’ button.
Authorized/Unauthorized?
Optional
Select if the consolidation details are authorized or unauthorized from the drop-down list.
From Date and To Date
Date Format; Mandatory
Select the dates that specify the period between which you want to view the transfer details.
Format
Optional
Select the format from the drop-down list. The list displays the following values:
- HTML
- Excel
- Excel (.xlsx)
- RTF
Output
Optional
Select the output from the drop-down list. The list displays the following values:
- View
- Spool
Print At
Optional
Select the printing location from the drop-down list. The list displays the following values:
- Client
- Server
Printer
Alphanumeric; 15 Characters; Optional
Specify the printer details from adjoining option list.
After making your specifications, click ‘Ok’ button.
3.7.34 Generating Transfer Confirmation Report
You can view the transfer confirmation report using ‘Transfer Confirmation’ screen. The output will be Market value in currency of expression and price in currency of expression. You can invoke ‘Transfer Confirmation’ screen by typing ‘UTR00100‘ in the field at the top right corner of the Application tool bar and click the adjoining arrow.
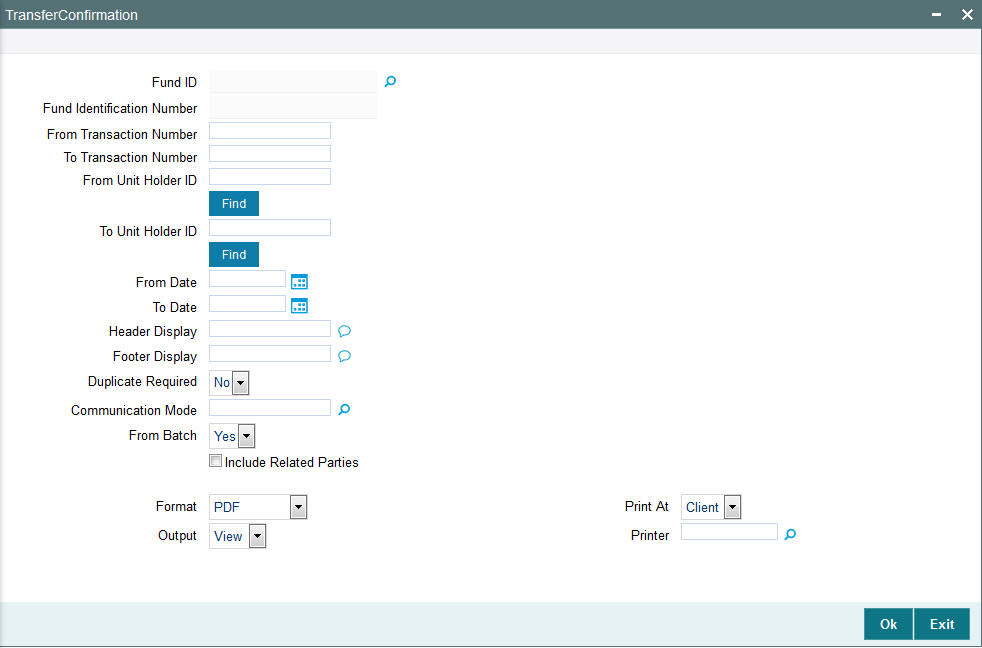
You can specify the following details:
Fund ID
Alphanumeric; 6 Characters; Optional
Specify the fund ID. Alternatively, you can select fund ID from the option list. The system displays all valid fund ID maintained in the system.
Fund Identification Number
Display
The system displays the fund identification number.
From Transaction Number
Alphanumeric; 16 Characters; Optional
Specify the transaction number details.
To Transaction Number
Alphanumeric; 16 Characters; Optional
Specify the transaction number details.
From Unit Holder ID
Alphanumeric; 12 Characters; Optional
Specify the unit holder ID details.
You can also select unit holder ID by clicking ‘Find’ button.
To Unit Holder ID
Alphanumeric; 12 Characters; Optional
Specify the unit holder ID details.
You can also select unit holder ID by clicking ‘Find’ button.
From Date
Date Format; Optional
Enter the date from when you want to generate the report.
To Date
Date Format; Optional
Enter the date till when you want to generate the report.
Header Display
Alphanumeric; 255 Characters; Optional
Specify the header details to be displayed.
Footer Display
Alphanumeric; 255 Characters; Optional
Specify the footer details to be displayed.
Duplicate Required
Optional
Select if duplication of record is required or not from the drop-down list. The list displays the following values:
- Yes
- No
Communication Mode
Alphanumeric; 2 Characters; Optional
Specify the communication mode.
From Batch
Optional
Select ‘Yes’ from drop-down list if From batch has to be selected.
Include Related Parties
Optional
Check this box if related parties details are to be included.
Format
Optional
Select the format from the drop-down list. The list displays the following values:
- HTML
- Excel
- Excel (.xlsx)
- RTF
Output
Optional
Select the output from the drop-down list. The list displays the following values:
- View
- Spool
Print At
Optional
Select the printing location from the drop-down list. The list displays the following values:
- Client
- Server
Printer
Alphanumeric; 15 Characters; Optional
Specify the printer details from adjoining option list.
Enter the printing options and Click ‘Ok’ button to print.
3.7.35 Generating Transaction and Status Report
You can generate transaction and status report using ‘Txn. and Status’ screen. You can invoke this screen by typing ‘UTR00187’ in the field at the top right corner of the Application tool bar and click the adjoining arrow.

You can specify the following details:
From Unit Holder ID
Alphanumeric; 12 Characters; Optional
Specify the unit holder ID details.
You can also select unit holder ID by clicking ‘Find UH’ button.
To Unit Holder ID
Alphanumeric; 12 Characters; Optional
Specify the unit holder ID details.
You can also select unit holder ID by clicking ‘Find UH’ button.
From Date
Date Format; Mandatory
Enter the date from when you want to generate the report.
To Date
Date Format; Mandatory
Enter the date till when you want to generate the report.
AMC Code
Alphanumeric; 12 Characters; Optional
Specify the AMC code. Alternatively, you can select AMC code from the option list.
Fund Type
Alphanumeric; 38 Characters; Optional
Specify the type of fund.
Fund ID
Alphanumeric; 6 Characters; Optional
Specify the fund ID. Alternatively, you can select fund ID from the option list.
Transaction Type
Alphanumeric; 2 Characters; Optional
Specify the type of transaction. Alternatively, you can select transaction type from the option list.
Transaction Status
Optional
Select the transaction status from the drop-down list. The list displays the following values:
- Order Placed
Format
Optional
Select the format from the drop-down list. The list displays the following values:
- HTML
- Excel
- Excel (.xlsx)
- RTF
Output
Optional
Select the output from the drop-down list. The list displays the following values:
- View
- Spool
Print At
Optional
Select the printing location from the drop-down list. The list displays the following values:
- Client
- Server
Printer
Alphanumeric; 15 Characters; Optional
Specify the printer details from adjoining option list.
Enter the printing options and Click ‘Ok’ button to print.
3.8 UH Info Reports
This section contains the following topics:
- Section 3.8.1, "UH Info Reports Details"
- Section 3.8.2, "Generating Unit Holder Acknowledgment"
- Section 3.8.3, "Generating Unit Holder Dividend Details Report"
- Section 3.8.4, "Generating Unit Holder Zero Balance Report"
3.8.1 UH Info Reports Details
These reports display information regarding unit holder / CIF accounts.
3.8.2 Generating Unit Holder Acknowledgment
Use this report to list the acknowledgement reports generated for new unit holder accounts.
You can invoke the ‘Acknowledgement’ screen by typing ‘UTR00095’ in the field at the top right corner of the Application tool bar and clicking on the adjoining arrow button.
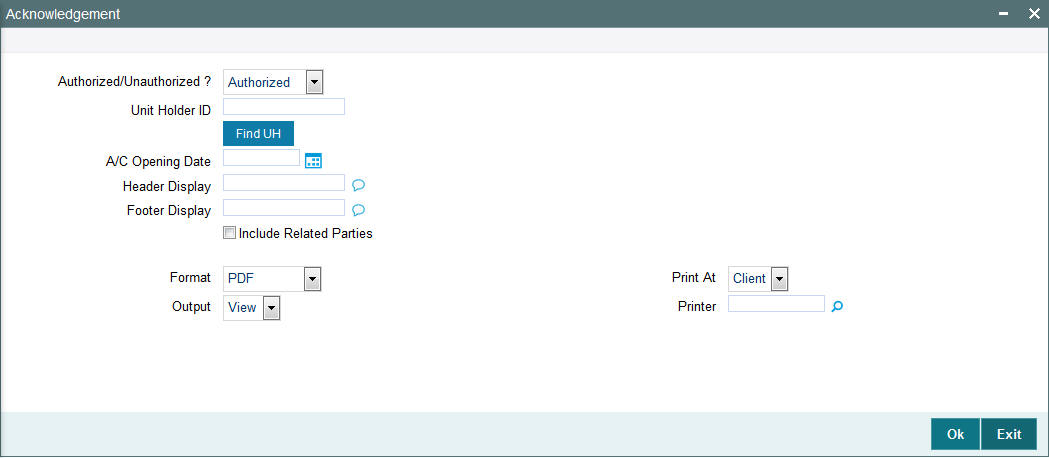
You can generate a report specific to a unit holder account, or the authorization status of the accounts, or to any unit holder account opened on a certain date, by specifying:
Authorized/Unauthorized?
Optional
Select the status of the transaction, whether authorized or unauthorized from the drop-down list. The list displays the following values:
- Authorized
- Unauthorized
Unit Holder ID
Alphanumeric; 12 Characters; Optional
Specify the ID of the unit holder whose specific account you want to generate. You can also search unit holder ID by clicking ‘Find UH’ button.
Account Opening Date
Date Format; Optional
Select the date on which you want to view all the unit holder accounts opened from the adjoining calendar.
Header Display
Alphanumeric; 255 Characters; Mandatory
Specify the header details to be displayed.
Footer Display
Alphanumeric; 255 Characters; Mandatory
Specify the footer details to be displayed.
Include Related Parties
Optional
Check this box to include related parties.
Format
Optional
Select the format from the drop-down list. The list displays the following values:
- HTML
- Excel
- Excel (.xlsx)
- RTF
Output
Optional
Select the output from the drop-down list. The list displays the following values:
- View
- Spool
Print At
Optional
Select the printing location from the drop-down list. The list displays the following values:
- Client
- Server
Printer
Alphanumeric; 15 Characters; Optional
Specify the printer details from adjoining option list.
After making your specifications, click ‘Ok’ button.
3.8.3 Generating Unit Holder Dividend Details Report
This report may be generated to view previous dividend payments for a unit holder in a fund. The payment details are presented, along with the reinvestment details and EPU component breakups. The following information is presented:
- The name, address and ID of the unit holder whose dividend payment details are being displayed in this report.
- The name of the fund for which the dividend declaration and payment was made.
- The payment date for the payment cycle that is being viewed.
- The total dividend paid to the unit holder, the tax deducted and the net dividend paid out for the particular payment cycle. (This represents the dividend distributed for the payment cycle under view)
- The payment details as under the following:
- Total payment amount (i.e., the pay out component of the dividend)
- Amounts paid out by check and amounts paid out by transfer.
- The check details (Bank and branch of issue, date of issue and check number)
- The transfer details (Bank and branch name, account type and account number)
- The reinvestment details as under the following:
- The Reinvestment Unit Holder ID and Name
- The Reinvestment Fund ID and Name
- The amount reinvested in each Unit Holder ID/Fund combination
- The reinvestment transaction numbers
- The earnings by components as under:
- The ID and description of the component which the unit holder has derived a portion of his income from.
- The breakup of the earnings of the unit holder by component. Each figure in the breakup represents the summation of the product of the component value and the Freeze Holding Units for each declaration in the Payment Cycle.
You can invoke the ‘Dividend Details’ screen by typing ‘UTR00070’ in the field at the top right corner of the Application tool bar and clicking on the adjoining arrow button.
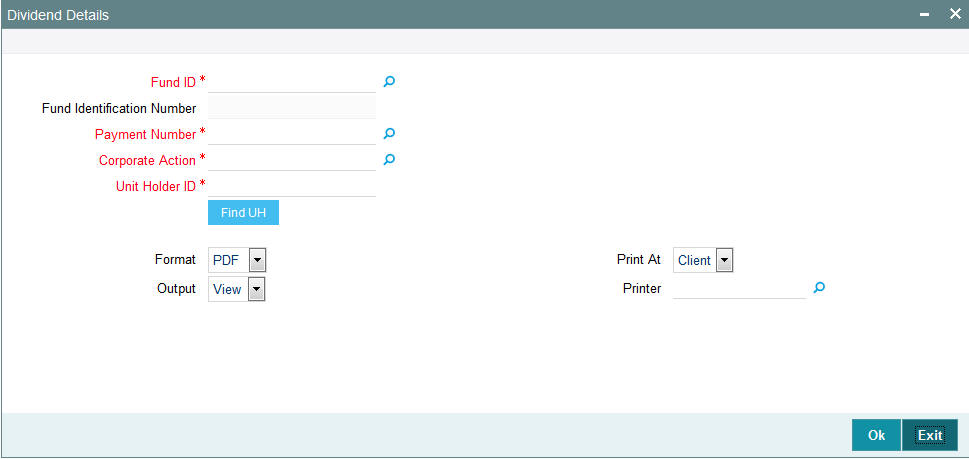
In this screen, you must specify the following as mandatory sorting parameters for the generation of the report:
Fund ID
Alphanumeric; 6 Characters; Mandatory
Specify the fund for which the dividend was declared, that resulted in dividend payment to unit holders.
Fund Identification Number
Display
The system displays the fund identification number.
Payment Number
Numeric; 22 Characters; Mandatory
Specify the number of the dividend payment.
Corporate Action
Alphanumeric; 1 Character; Mandatory
Specify the corporate action.
Unit Holder ID
Alphanumeric; 12 Characters; Mandatory
Specify the unit holder ID.
Format
Optional
Select the format from the drop-down list. The list displays the following values:
- HTML
- Excel
- Excel (.xlsx)
- RTF
Output
Optional
Select the output from the drop-down list. The list displays the following values:
- View
- Spool
Print At
Optional
Select the printing location from the drop-down list. The list displays the following values:
- Client
- Server
Printer
Alphanumeric; 15 Characters; Optional
Specify the printer details from adjoining option list.
After making your specifications, click ‘Ok’ button.
3.8.4 Generating Unit Holder Zero Balance Report
This report will print the summary of the list of unit holders whose balances have become zero for the given fund along with the date on which the balances touched zero.
You can invoke the ‘Zero Balance Details’ screen by typing ‘UTR00044’ in the field at the top right corner of the Application tool bar and clicking on the adjoining arrow button.

In this screen, you must specify the following as mandatory sorting parameters for the generation of the report:
Zero Balance Date
Date Format; Mandatory
Select the zero balance date from the adjoining calendar.
Fund ID
Alphanumeric; 6 Characters; Mandatory
Specify the fund ID.
Fund Identification Number
Display
The system displays the fund identification number.
Format
Optional
Select the format from the drop-down list. The list displays the following values:
- HTML
- Excel
- Excel (.xlsx)
- RTF
Output
Optional
Select the output from the drop-down list. The list displays the following values:
- View
- Spool
Print At
Optional
Select the printing location from the drop-down list. The list displays the following values:
- Client
- Server
Printer
Alphanumeric; 15 Characters; Optional
Specify the printer details from adjoining option list.
After making your specifications, click ‘Ok’ button.
3.9 Unit Holder Reports
This section contains the following topics:
- Section 3.9.1, "Printing Account Statements"
- Section 3.9.2, "Generating Auto Investment Reminder Report"
- Section 3.9.3, "Generating Unit Holder Holdings Summary Report"
- Section 3.9.4, "Generating Unit Holder Withholding Tax Report"
- Section 3.9.5, "Generating Covering Letter"
- Section 3.9.6, "Generating Debit Credit Statement"
- Section 3.9.7, "Generating Print Dividend DD Report"
- Section 3.9.8, "Generating Other Print Dividend Report"
- Section 3.9.9, "Generating Print Dividend Cheques"
- Section 3.9.10, "Generating IT3B Report"
- Section 3.9.11, "Generating Transaction Statement Report"
- Section 3.9.12, "Generating Dividend Received Report"
- Section 3.9.13, "Generating Portfolio and Tax Report"
3.9.1 Printing Account Statements
For the given fund, the Account Statement of all the Unit Holders is printed. By availing of the Holdings Statement option, the Holdings Statement can be printed along with the Account Statement. It is printed as per the Account Statement Period. Account statements can either be printed as of the latest market value or as of the market value on the end date of the account statement period.
In case the fund is a currency of expression fund, the output to show the UH currency of expression, total value in UH currency of expression, NAV in currency of expression; else this will be shown as blank.
You must specify the Fund ID, unit holder ID range, date range and report language as mandatory information to generate the report. Also, indicate whether the market value of the investor’s holdings is ‘Latest’ or as of the report’s ‘To date’.
In case the fund is a currency of expression fund, the output will be the UH currency of expression, total value in UH currency of expression, NAV in currency of expression; else this will be shown as blank.
You can invoke the ‘Account. Statement’ screen by typing ‘UTR00137’ in the field at the top right corner of the Application tool bar and clicking on the adjoining arrow button.
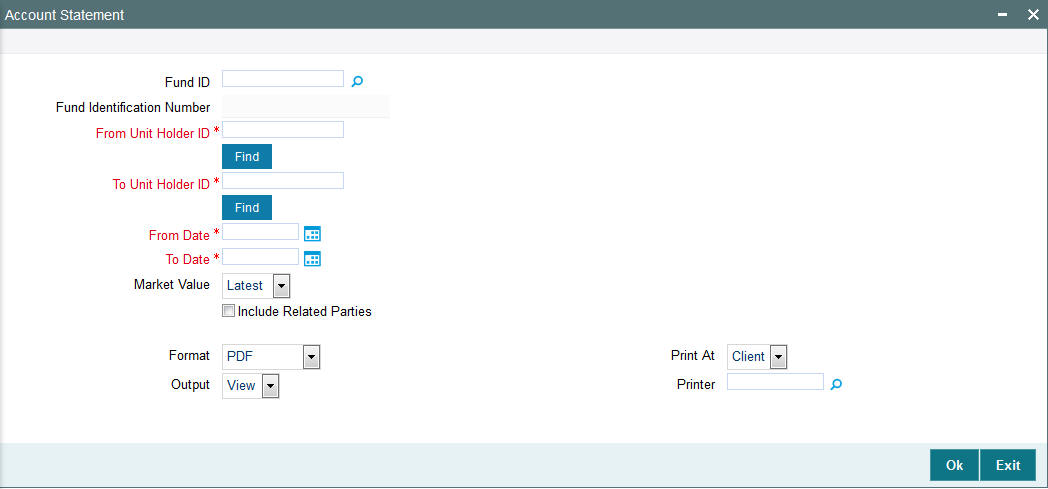
3.9.1.1 Fields in Account Statement screens
Fund ID
Alphanumeric, 6 Characters; Optional
The ID of the Fund, for which the Account Statement is to be printed, is displayed.
Fund Identification Number
Display
The Full Name of the Fund, for which the Account Statement is to be printed, is displayed.
From Unit Holder ID
Alphanumeric; 12 Characters; Mandatory
Specify From unit holder ID for whom the Account Statement is to be printed.
You can also search From unit holder ID by clicking ‘Find’ button.
To Unit Holder ID
Alphanumeric; 12 Characters; Mandatory
Specify To unit holder ID for whom the Account Statement is to be printed.
You can also search To unit holder ID by clicking ‘Find’ button.
From Date and To Date
Date Format; Mandatory
Select From Date and To date from the adjoining calendar.
Market Value
Optional
Select the market value from the drop-down list. The list displays the following values:
- Latest
- To Date
Include Related Parties
Optional
Check this box to include related parties.
Format
Optional
Select the format from the drop-down list. The list displays the following values:
- HTML
- Excel
- Excel (.xlsx)
- RTF
Output
Optional
Select the output from the drop-down list. The list displays the following values:
- View
- Spool
Print At
Optional
Select the printing location from the drop-down list. The list displays the following values:
- Client
- Server
Printer
Alphanumeric; 15 Characters; Optional
Specify the printer details from adjoining option list.
3.9.2 Generating Auto Investment Reminder Report
This report will print the details of redemption transaction for which payment is held back due to the unit holder being FICA non-compliant. The report also displays the Auto Investment date i.e. the date on which the redemption will be automatically invested back in the fund. You can invoke the ‘Auto Invest Reminder’ screen by typing ‘UTR00212’ in the field at the top right corner of the Application tool bar and clicking on the adjoining arrow button.
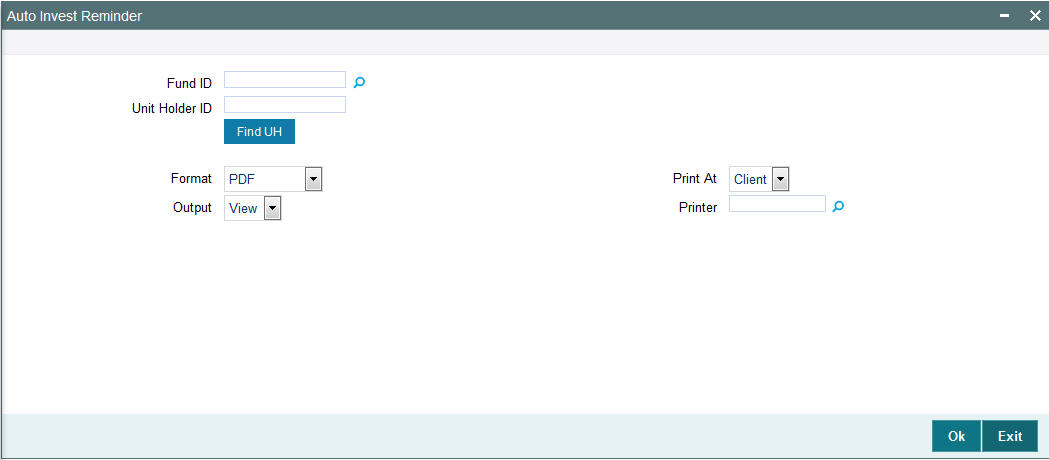
Fund ID
Alphanumeric; 6 Characters; Optional
Specify the fund ID.
Unit Holder ID
Alphanumeric; 12 Characters; Optional
Specify the unit holder ID. You can also search for unit holder ID by clicking ‘Find UH’ button
Format
Optional
Select the format from the drop-down list. The list displays the following values:
- HTML
- Excel
- Excel (.xlsx)
- RTF
Output
Optional
Select the output from the drop-down list. The list displays the following values:
- View
- Spool
Print At
Optional
Select the printing location from the drop-down list. The list displays the following values:
- Client
- Server
Printer
Alphanumeric; 15 Characters; Optional
Specify the printer details from adjoining option list.
Click ‘OK’ button to generate the report.
3.9.3 Generating Unit Holder Holdings Summary Report
This report will print details of the Unit Holder Holdings in terms of distribution by Nationality or distribution by holdings.
This report will have two parts:
- Distribution By Nationality
- Distribution By Holdings
You can invoke the ‘Holdings Details’ screen by typing ‘UTR00124’ in the field at the top right corner of the Application tool bar and clicking on the adjoining arrow button.
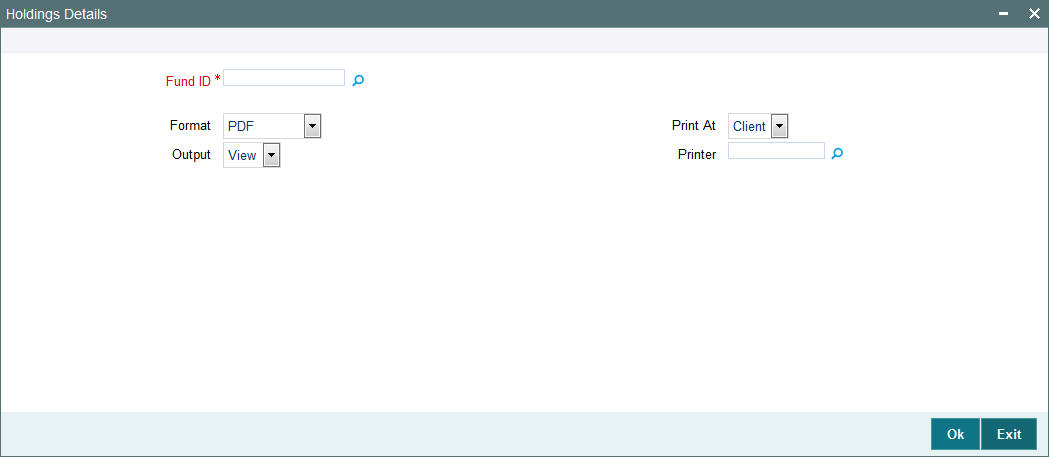
The Report takes the Fund ID as the input. It has Totals / Sub-totals for the Number of Unit Holders, Number of Units and Percentage of Units.
Fund ID
Alphanumeric; 6 Characters; Mandatory
Specify the fund ID.
Format
Optional
Select the format from the drop-down list. The list displays the following values:
- HTML
- Excel
- Excel (.xlsx)
- RTF
Output
Optional
Select the output from the drop-down list. The list displays the following values:
- View
- Spool
Print At
Optional
Select the printing location from the drop-down list. The list displays the following values:
- Client
- Server
Printer
Alphanumeric; 15 Characters; Optional
Specify the printer details from adjoining option list.
3.9.3.1 Fields in Unit Holder Holdings Summary Report Screen

Fund ID
6 Character Maximum, Alphanumeric, Display
This is the Fund ID of the fund for which the unit holder holdings summary report is to be printed.’
Fund Name
20 Character Maximum, Alphanumeric, Display
This displays the Name of the fund for which the Unit Holder holdings Summary Report is to be printed.
Part A (Main)
Distribution by Nationality
Type
1 Character Maximum, Alphanumeric, Display
This indicates the category of the unit holder (Local or Foreigner).
Number
Numeric, Display
This shows the number of the unit holder that falls in this category.
Units
Numeric, Display
This displays Number of Units that fall under this category type.
Percentage of Units
Numeric, Display
This shows the percentage based on Units.
Part A (Sub)
Distribution by Investor type
Type
1 Character Maximum, Alphanumeric, Display
This indicates the category of the unit holder (Corporate or Individual)
Number
Numeric, Display
This is the number of the unit holders who fall into this category type.
Units
Numeric, Display
This is the Number of Units that fall under this category type.
Percentage of Units
Numeric, Display
This displays the percentage based on Units.
Part B (Main)
Distribution by Holdings
Type
1 Character Maximum, Alphanumeric, Display
This indicates the category of the unit holder. Type is based on the unit holder’s holdings based on units.
- Holdings over 0.5 Percentage
- Holdings not over 0.5 Percentage but more than one board lot
- Holdings not over one board lot
Number
Numeric, Display
This is the number of the unit holders who fall into this category type.
Units
Numeric, Display
This is the Number of Units that fall under this category type.
Percentage of Units
Numeric, Display
This is the percentage based on Units.
Part B (Sub)
Distribution by Investor type
Type
1 Character Maximum, Alphanumeric, Display
This indicates the category of the unit holder (Corporate or Individual).
Number
Numeric, Display
This is the number of unit holders who fall into this category type.
Units
Numeric, Display
This is the Number of Units that fall under this category type.
Percentage of Units
Numeric, Display
This is the percentage based on Units.
3.9.4 Generating Unit Holder Withholding Tax Report
Based on the Unit Holder Dividend Payment information, the withholdings tax certificate / form can be printed for those unit holders who have requested for tax to be deducted at source.
This report will print the number of units, the dividend rate per unit, the total dividend, minus the income tax net payable and dividend reference number for every unit holder. This is printed for each Dividend Payment Period and is ordered by the unit holder.
You can invoke the ‘Withholding Tax’ screen by typing ‘UTR00134’ in the field at the top right corner of the Application tool bar and clicking on the adjoining arrow button.
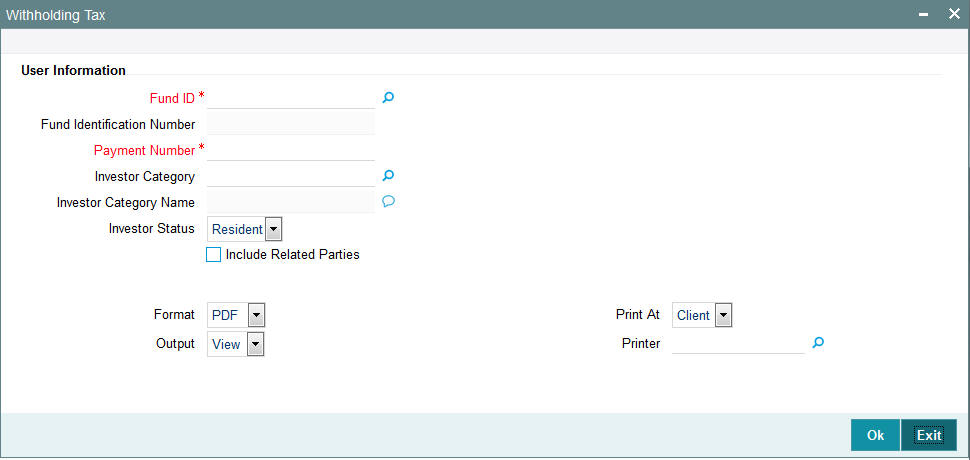
You must specify the ID of the fund, dividend payment number and report language as mandatory information to generate the report. You can also specify the Investor Category and the Investor Status.
Fund ID
Alphanumeric; 6 Characters; Input
Specify the ID of the fund for which the Unit Holder Withholdings tax screen is printed.
Fund Identification Number
Display
The system displays the Name of the fund for which the Unit Holder Withholdings tax form is printed.
Payment Number
Numeric; 22 Characters; Mandatory
Specify the payment number.
Investor Category
Alphanumeric; 6 Characters; Optional
Specify the investor category.
Investor Category Name
Alphanumeric; 255 Characters; Optional
Specify the investor category name.
Investor Status
Optional
Select the investor status from the option list. The list displays the following values:
- Resident
- Foreign
Include Related Parties
Optional
Check this box to include related parties.
Format
Optional
Select the format from the drop-down list. The list displays the following values:
- HTML
- Excel
- Excel (.xlsx)
- RTF
Output
Optional
Select the output from the drop-down list. The list displays the following values:
- View
- Spool
Print At
Optional
Select the printing location from the drop-down list. The list displays the following values:
- Client
- Server
Printer
Alphanumeric; 15 Characters; Optional
Specify the printer details from adjoining option list.
3.9.5 Generating Covering Letter
You can generate the covering letter for corporate action benefits given to unit holder using ‘Covering Letter’ screen. Based on the Registrar ID, identification number, and cheque printing sort order the covering letters are to be printed. You can invoke this screen by typing ‘UTR00154’ in the field at the top right corner of the Application tool bar and clicking on the adjoining arrow button.
You can specify the following details:
Registrar ID
Alphanumeric; 12 Characters; Optional
Specify the registrar ID. Alternatively, you can select registrar ID from the option list. The list displays all valid registrar ID maintained in the system.
Identification Number
Alphanumeric; 12 Characters; Optional
Specify the identification number.
Cheque Printing Sort Order
Optional
Select the cheque printing sort order from the drop-down list. The system displays the following values:
- Zip Code
Format
Optional
Select the format from the drop-down list. The list displays the following values:
- HTML
- Excel
- Excel (.xlsx)
- RTF
Output
Optional
Select the output from the drop-down list. The list displays the following values:
- View
- Spool
Print At
Optional
Select the printing location from the drop-down list. The list displays the following values:
- Client
- Server
Printer
Alphanumeric; 15 Characters; Optional
Specify the printer details from adjoining option list.
3.9.6 Generating Debit Credit Statement
You can generate debit and credit statement using ‘DR CR Statement’ screen. You can invoke this screen by typing ‘UTR00169’ in the field at the top right corner of the Application tool bar and clicking on the adjoining arrow button.
You can specify the following details:
Footer Display
Alphanumeric; 255 Characters; Optional
Specify the footer details to be displayed.
From Date
Date Format; Optional
Enter the date from when you want to generate the report.
From Unit Holder ID
Alphanumeric; 12 Characters; Optional
Specify the unit holder ID details.
You can also select unit holder ID by clicking ‘Find’ button.
Fund ID
Alphanumeric; 6 Characters; Mandatory
Specify the fund ID. Alternatively, you can select fund ID from the option list. The system displays all valid fund ID maintained in the system.
Fund Identification Number
Display
The system displays the fund identification number.
Header Display
Alphanumeric; 255 Characters; Optional
Specify the header details to be displayed.
To Date
Date Format; Optional
Enter the date till when you want to generate the report.
To Unit Holder ID
Alphanumeric; 12 Characters; Optional
Specify the unit holder ID details.
You can also select unit holder ID by clicking ‘Find’ button.
Format
Optional
Select the format from the drop-down list. The list displays the following values:
- HTML
- Excel
- Excel (.xlsx)
- RTF
Output
Optional
Select the output from the drop-down list. The list displays the following values:
- View
- Spool
Print At
Optional
Select the printing location from the drop-down list. The list displays the following values:
- Client
- Server
Printer
Alphanumeric; 15 Characters; Optional
Specify the printer details from adjoining option list.
Enter the printing options and Click ‘Ok’ button to print.
3.9.7 Generating Print Dividend DD Report
The dividend DD are printed once the allocation of dividend units is made for the unit holder in the respective fund where investor has opted for dividend payout and payment option as DD/Cheque.
You can generate print dividend report using ‘Print Dividend Cheque’. You can invoke this screen by typing ‘UTR00158’ in the field at the top right corner of the Application tool bar and clicking on the adjoining arrow button.

You can specify the following details:
Registrar ID
Alphanumeric; 12 Characters; Optional
Specify the registrar ID. Alternatively, you can select registrar ID from the option list. The list displays all valid registrar ID maintained in the system.
Identification Number
Alphanumeric; 12 Characters; Optional
Specify the identification number.
Cheque Printing Sort Order
Optional
Select the cheque printing sort order from the drop-down list. The system displays the following values:
- Broker Name
- Zip Code
Format
Optional
Select the format from the drop-down list. The list displays the following values:
- HTML
- Excel
- Excel (.xlsx)
- RTF
Output
Optional
Select the output from the drop-down list. The list displays the following values:
- View
- Spool
Print At
Optional
Select the printing location from the drop-down list. The list displays the following values:
- Client
- Server
Printer
Alphanumeric; 15 Characters; Optional
Specify the printer details from adjoining option list.
3.9.8 Generating Other Print Dividend Report
You can invoke ‘Print Div Others’ screen by typing ‘UTR00159’ in the field at the top right corner of the Application tool bar and clicking on the adjoining arrow button.
You can specify the following details:
Registrar ID
Alphanumeric; 12 Characters; Optional
Specify the registrar ID. Alternatively, you can select registrar ID from the option list. The list displays all valid registrar ID maintained in the system.
Identification Number
Alphanumeric; 12 Characters; Optional
Specify the identification number.
Cheque Printing Sort Order
Optional
Select the cheque printing sort order from the drop-down list. The system displays the following values:
- Broker Name
- Zip Code
Format
Optional
Select the format from the drop-down list. The list displays the following values:
- HTML
- Excel
- Excel (.xlsx)
- RTF
Output
Optional
Select the output from the drop-down list. The list displays the following values:
- View
- Spool
Print At
Optional
Select the printing location from the drop-down list. The list displays the following values:
- Client
- Server
Printer
Alphanumeric; 15 Characters; Optional
Specify the printer details from adjoining option list.
3.9.9 Generating Print Dividend Cheques
You can print the dividend cheques using ‘Print Div Cheques’ screen. You can invoke this screen by typing ‘UTR00123’ in the field at the top right corner of the Application tool bar and clicking on the adjoining arrow button.
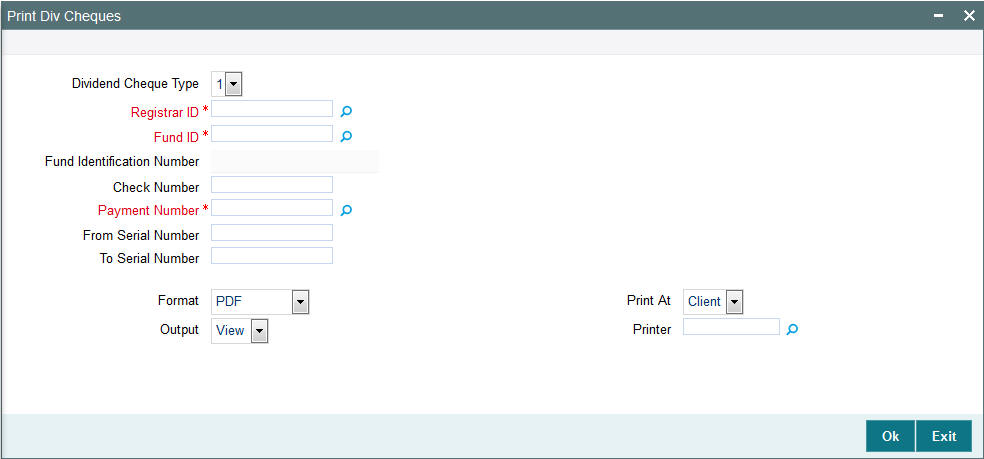
You can specify the following details:
Dividend Cheque Type
Optional
Select the type of dividend cheque from the drop-down list. The list displays the following values:
- 1
- 2
- 3
- 4
Registrar ID
Alphanumeric; 12 Characters; Mandatory
Specify the registrar ID. Alternatively, you can select registrar ID from the option list. The list displays all valid registrar ID maintained in the system.
Fund ID
Alphanumeric; 6 Characters; Mandatory
Specify the fund ID. Alternatively, you can select fund ID from the option list. The list displays all valid fund ID maintained in the system.
Fund Identification Number
Display
The system displays the fund identification number for the selected fund ID.
Check Number
Alphanumeric; 16 Characters; Optional
Specify the cheque number.
Payment Number
Alphanumeric; 5 Characters; Mandatory
Specify the payment number.
From Serial Number
Alphanumeric; 25 Characters; Optional
Specify the serial number from where the dividend cheque needs to be printed.
To Serial Number
Alphanumeric; 25 Characters; Optional
Specify the serial number till where the dividend cheque needs to be printed.
Format
Optional
Select the format from the drop-down list. The list displays the following values:
- HTML
- Excel
- Excel (.xlsx)
- RTF
Output
Optional
Select the output from the drop-down list. The list displays the following values:
- View
- Spool
Print At
Optional
Select the printing location from the drop-down list. The list displays the following values:
- Client
- Server
Printer
Alphanumeric; 15 Characters; Optional
Specify the printer details from adjoining option list.
3.9.10 Generating IT3B Report
You can generate IT3B report using ‘IT3B Report’ screen. You can invoke this screen by typing ‘UTR00164’ in the field at the top right corner of the Application tool bar and clicking on the adjoining arrow button.
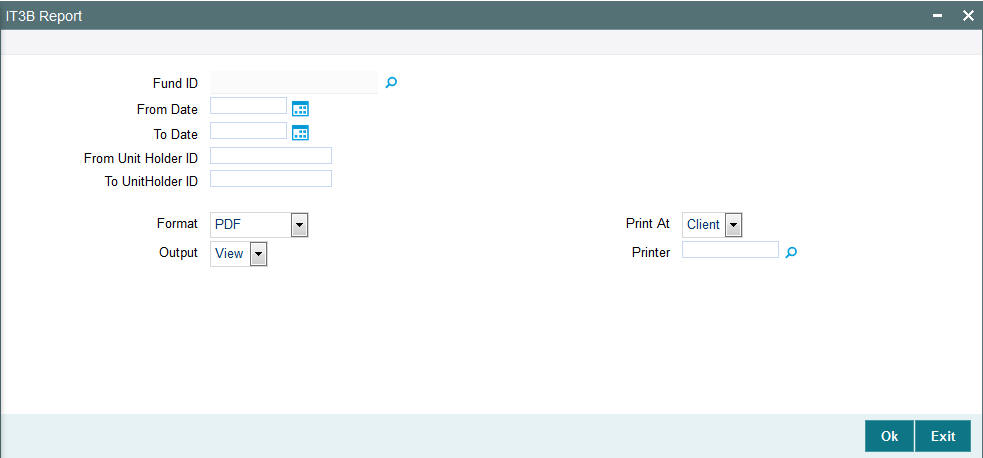
You can specify the following details:
Fund ID
Alphanumeric; 6 Characters; Optional
Specify the fund ID. Alternatively, you can select fund ID from the option list. The list displays all valid fund ID maintained in the system.
From Date and To Date
Date Format; Optional
Select the dates that specify the period between which you want to view IT3B details.
From Unit Holder ID and To Unit Holder ID
Alphanumeric; 12 Characters; Optional
Specify the From and To unit holder ID for whom IT3B statement is to be printed.
You can also select unit holder ID by selecting ‘Find UH’ button.
Format
Optional
Select the format from the drop-down list. The list displays the following values:
- HTML
- Excel
- Excel (.xlsx)
- RTF
Output
Optional
Select the output from the drop-down list. The list displays the following values:
- View
- Spool
Print At
Optional
Select the printing location from the drop-down list. The list displays the following values:
- Client
- Server
Printer
Alphanumeric; 15 Characters; Optional
Specify the printer details from adjoining option list.
3.9.11 Generating Transaction Statement Report
You can generate transaction statement report using ‘Txn. Statement’ screen. You can invoke this screen by typing ‘UTR00185’ in the field at the top right corner of the Application tool bar and clicking on the adjoining arrow button.
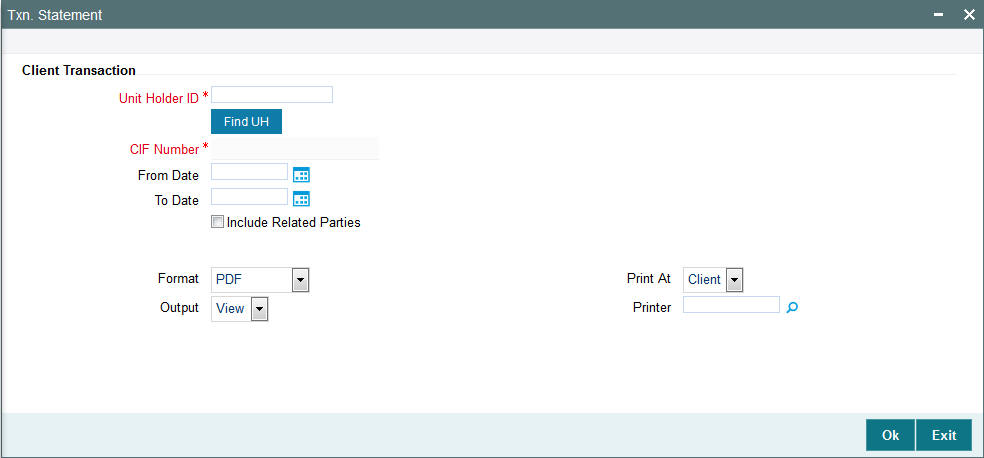
You can specify the following details:
Client Transaction
Unit Holder ID
Alphanumeric; 12 Characters; Mandatory
Specify the unit holder ID. You can also select unit holder ID by selecting ‘Find UH’ button.
CIF Number
Display
The system displays the CIF number for the selected unit holder ID.
From Date and To Date
Date Format; Optional
Select the dates that specify the period between which you want to view transaction statement details.
Include Related Parties
Optional
Check this box to include related parties.
Format
Optional
Select the format from the drop-down list. The list displays the following values:
- HTML
- Excel
- Excel (.xlsx)
- RTF
Output
Optional
Select the output from the drop-down list. The list displays the following values:
- View
- Spool
Print At
Optional
Select the printing location from the drop-down list. The list displays the following values:
- Client
- Server
Printer
Alphanumeric; 15 Characters; Optional
Specify the printer details from adjoining option list.
3.9.12 Generating Dividend Received Report
You can generate dividend received report using ‘Dividend Received’ screen. You can invoke this screen by typing ‘UTR00186’ in the field at the top right corner of the Application tool bar and clicking on the adjoining arrow button.
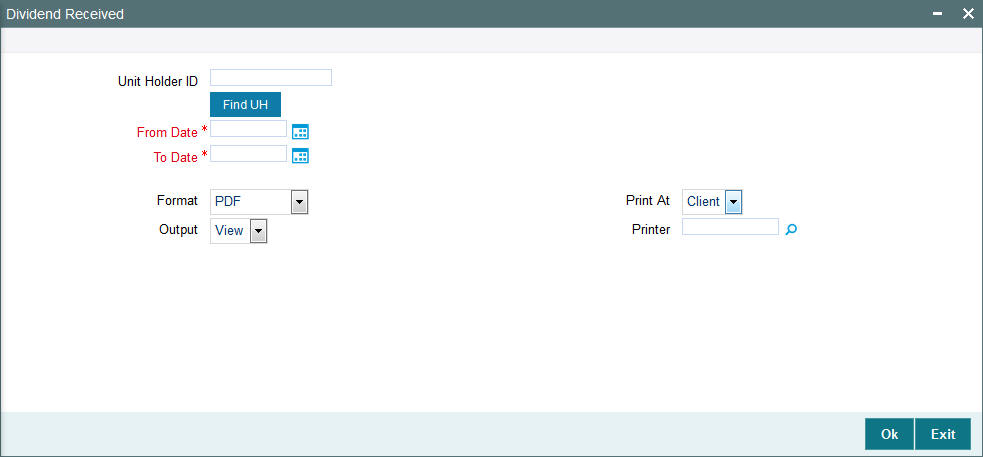
You can specify the following details:
Unit Holder ID
Alphanumeric; 12 Characters; Mandatory
Specify the unit holder ID. You can also select unit holder ID by selecting ‘Find UH’ button.
From Date and To Date
Date Format; Mandatory
Select the dates that specify the period between which you want to view Dividend Received details.
Format
Optional
Select the format from the drop-down list. The list displays the following values:
- HTML
- Excel
- Excel (.xlsx)
- RTF
Output
Optional
Select the output from the drop-down list. The list displays the following values:
- View
- Spool
Print At
Optional
Select the printing location from the drop-down list. The list displays the following values:
- Client
- Server
Printer
Alphanumeric; 15 Characters; Optional
Specify the printer details from adjoining option list.
3.9.13 Generating Portfolio and Tax Report
You can generate portfolio and tax report using ‘Portfolio and Tax’ screen. You can invoke this screen by typing ‘UTR00196’ in the field at the top right corner of the Application tool bar and clicking on the adjoining arrow button.
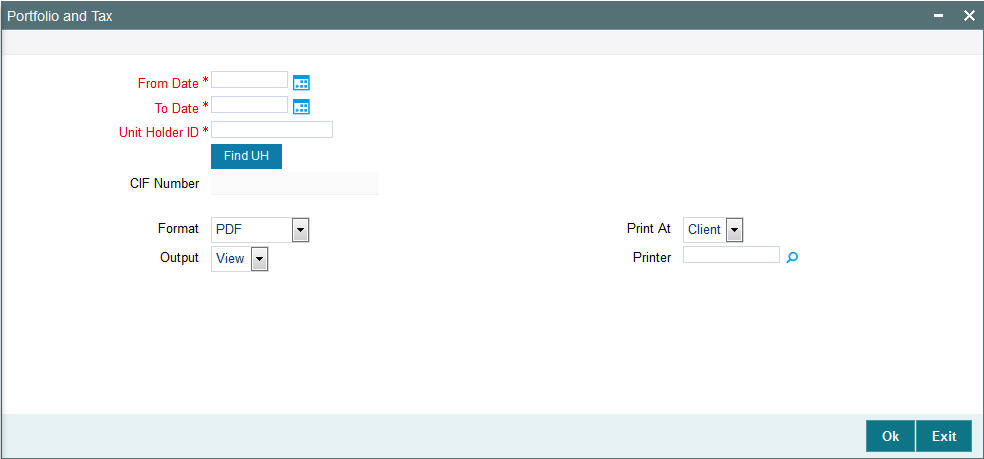
You can specify the following details:
From Date and To Date
Date Format; Mandatory
Select the dates that specify the period between which you want to view Dividend Received details.
Unit Holder ID
Alphanumeric; 12 Characters; Mandatory
Specify the unit holder ID. You can also select unit holder ID by selecting ‘Find UH’ button.
CIF Number
Display
The system displays the CIF number for the selected unit holder ID.
Format
Optional
Select the format from the drop-down list. The list displays the following values:
- HTML
- Excel
- Excel (.xlsx)
- RTF
Output
Optional
Select the output from the drop-down list. The list displays the following values:
- View
- Spool
Print At
Optional
Select the printing location from the drop-down list. The list displays the following values:
- Client
- Server
Printer
Alphanumeric; 15 Characters; Optional
Specify the printer details from adjoining option list.
3.10 Corporate Action Reports
This section contains the following topics:
- Section 3.10.1, "Generating Amendment Details"
- Section 3.10.2, "Generating Announcement Conf Reports"
- Section 3.10.3, "Generating Corporate Action Checks Report"
- Section 3.10.4, "Generating Modified Dividend Extract Report"
- Section 3.10.5, "Generating Modified Dividend Report"
- Section 3.10.6, "Generating Payout Details Report"
- Section 3.10.7, "Generating Payment Details Report"
3.10.1 Generating Amendment Details
You can generate amendment details using ‘Amendment Details’ screen. You can invoke this screen by typing ‘UTR00176’ in the field at the top right corner of the Application tool bar and clicking on the adjoining arrow button.
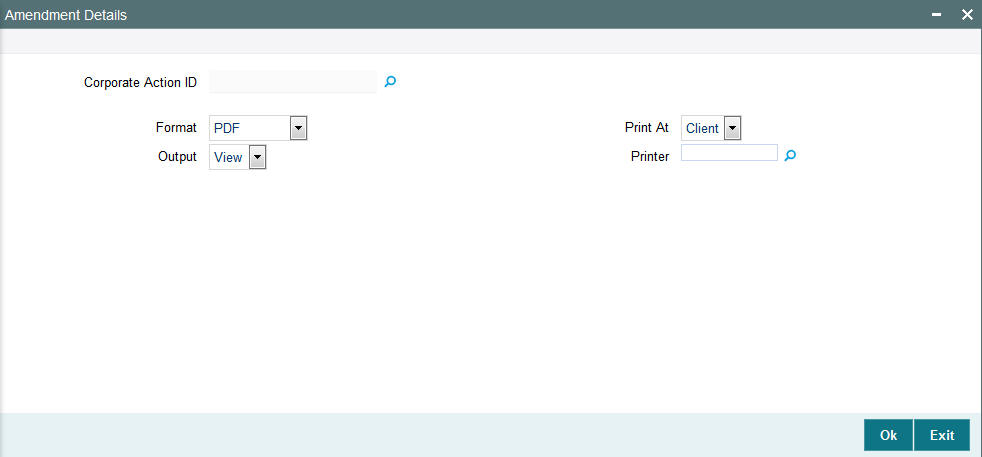
You can specify the following details:
Corporate Action ID
Numeric; 22 Characters; Optional
Specify the corporate action ID. Alternatively, you can select corporate action ID from the option list. The list displays all valid corporate action ID maintained in the system.
Format
Optional
Select the format from the drop-down list. The list displays the following values:
- HTML
- Excel
- Excel (.xlsx)
- RTF
Output
Optional
Select the output from the drop-down list. The list displays the following values:
- View
- Spool
Print At
Optional
Select the printing location from the drop-down list. The list displays the following values:
- Client
- Server
Printer
Alphanumeric; 15 Characters; Optional
Specify the printer details from adjoining option list.
3.10.2 Generating Announcement Conf Reports
You can generate announcement conf report using ‘Announcement Conf’ screen. You can invoke this screen by typing ‘UTR00182’ in the field at the top right corner of the Application tool bar and clicking on the adjoining arrow button.
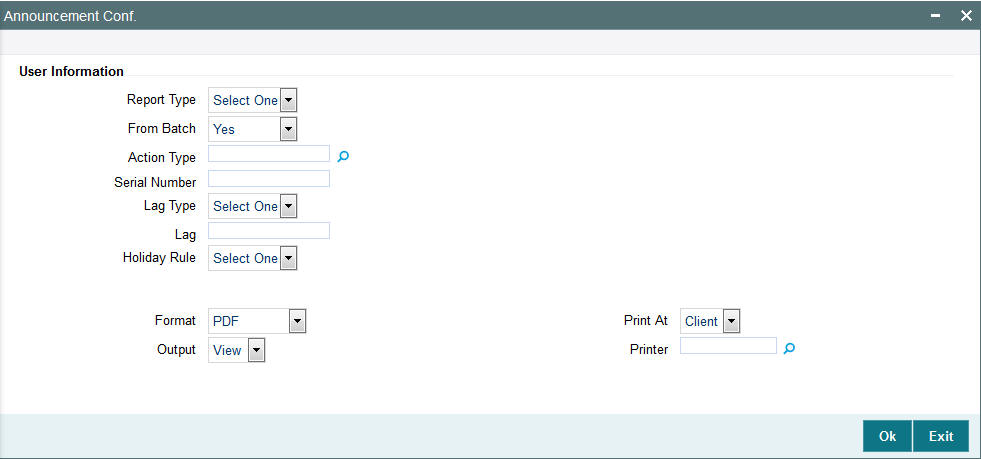
You can specify the following details:
User Information
Report Type
Optional
Select the type of report from the drop-down list. The list displays the following values:
- Announce
- Confirm
From Batch
Optional
Select From Batch option from the drop-down list. The list displays the following values:
- Yes
- No
Action Type
Alphanumeric; 1 Character; Optional
Specify the action type. Alternatively, you can select the action type from the option list. The list displays all valid action type maintained in the system.
Serial Number
Numeric; 22 Characters; Optional
Specify the serial number.
Lag Type
Optional
Select the type of lag from the drop-down list. The list displays the following values:
- Daily
Lag
Numeric; 22 Characters; Optional
Specify the lag details.
Holiday Rule
Optional
Select the holiday rule to be applied. The list displays the following values:
- Prior
- After
Format
Optional
Select the format from the drop-down list. The list displays the following values:
- HTML
- Excel
- Excel (.xlsx)
- RTF
Output
Optional
Select the output from the drop-down list. The list displays the following values:
- View
- Spool
Print At
Optional
Select the printing location from the drop-down list. The list displays the following values:
- Client
- Server
Printer
Alphanumeric; 15 Characters; Optional
Specify the printer details from adjoining option list.
3.10.3 Generating Corporate Action Checks Report
You can generate corporate action check report using ‘Corp Action Checks’ screen. You can invoke this screen by typing ‘UTR00173’ in the field at the top right corner of the Application tool bar and clicking on the adjoining arrow button.
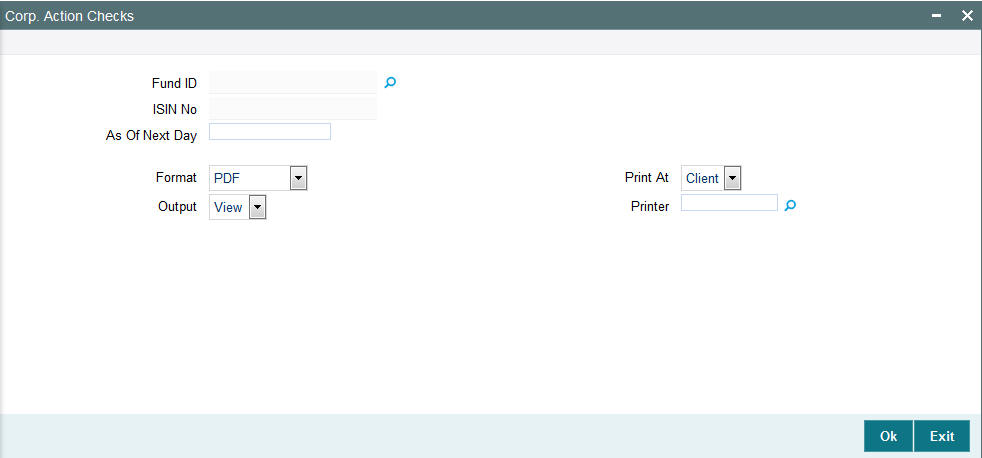
You can specify the following details:
Fund ID
Alphanumeric; 6 Characters; Optional
Specify the fund ID. Alternatively, you can select fund ID from the option list. The list displays all valid fund ID maintained in the system.
ISIN Code
Display
The system displays the ISIN code for the selected fund ID.
As Of Next Day
Numeric; 22 Characters; Optional
Specify the as of next day details.
Format
Optional
Select the format from the drop-down list. The list displays the following values:
- HTML
- Excel
- Excel (.xlsx)
- RTF
Output
Optional
Select the output from the drop-down list. The list displays the following values:
- View
- Spool
Print At
Optional
Select the printing location from the drop-down list. The list displays the following values:
- Client
- Server
Printer
Alphanumeric; 15 Characters; Optional
Specify the printer details from adjoining option list.
3.10.4 Generating Modified Dividend Extract Report
You can generate the modified dividend extract report using ‘Modified Div Extract’ screen. You can invoke this screen by typing ‘UTR00191’ in the field at the top right corner of the Application tool bar and clicking on the adjoining arrow button.

You can specify the following details:
From Date and To Date
Date Format; Optional
Select the dates that specify the period between which you want to view the modified dividend extract details.
Fund Family
Alphanumeric; 6 Characters; Optional
Specify the fund family. Alternatively, you can select fund family from the option list. The list displays all valid fund family maintained in the system.
AMC Code
Alphanumeric; 12 Characters; Optional
Specify the AMC code. Alternatively, you can select AMC code from the option list.
Dividend
Optional
Select the dividend from the drop-down list. The list displays the following values:
- Payout-A/c Transfer
- Payout-Cheque
- Full Reinvestment
Format
Optional
Select the format from the drop-down list. The list displays the following values:
- HTML
- Excel
- Excel (.xlsx)
- RTF
Output
Optional
Select the output from the drop-down list. The list displays the following values:
- View
- Spool
Print At
Optional
Select the printing location from the drop-down list. The list displays the following values:
- Client
- Server
Printer
Alphanumeric; 15 Characters; Optional
Specify the printer details from adjoining option list.
3.10.5 Generating Modified Dividend Report
You can generate modified dividend report using ‘Modified Dividend’ screen. You can invoke this screen by typing ‘UTR00190’ in the field at the top right corner of the Application tool bar and clicking on the adjoining arrow button.
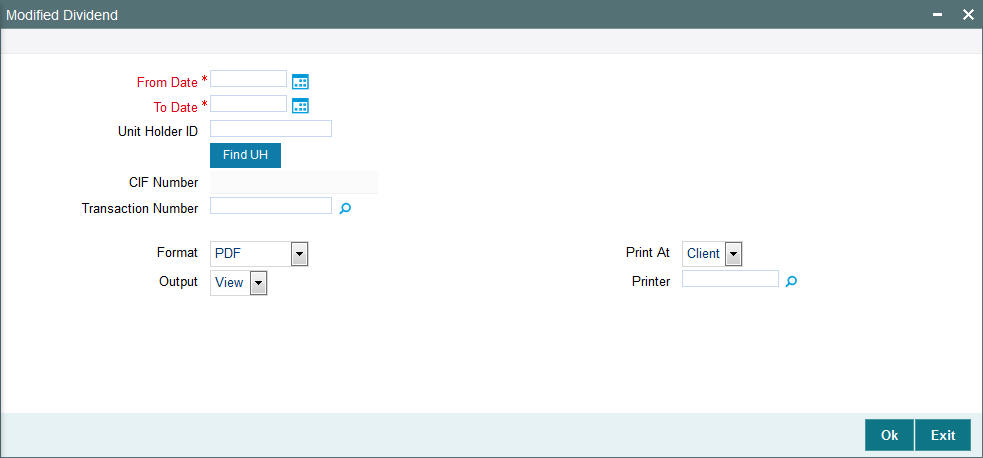
You can specify the following details:
From Date and To Date
Date Format; Mandatory
Select the dates that specify the period between which you want to view the modified dividend extract details.
Unit Holder ID
Alphanumeric; 12 Characters; Optional
Specify the unit holder ID. You can also query for unit holder ID by clicking ‘Find UH’ button.
CIF Number
Display
The system displays the CIF number for the selected unit holder ID.
Transaction Number
Alphanumeric; 22 Characters; Optional
Specify the transaction number. Alternatively, you can select transaction number from the option list. The list displays all valid transaction number maintained in the system.
Format
Optional
Select the format from the drop-down list. The list displays the following values:
- HTML
- Excel
- Excel (.xlsx)
- RTF
Output
Optional
Select the output from the drop-down list. The list displays the following values:
- View
- Spool
Print At
Optional
Select the printing location from the drop-down list. The list displays the following values:
- Client
- Server
Printer
Alphanumeric; 15 Characters; Optional
Specify the printer details from adjoining option list.
3.10.6 Generating Payout Details Report
You can generate payout details report using ‘Payout Details’ screen. You can invoke this screen by typing ‘UTR00188’ in the field at the top right corner of the Application tool bar and clicking on the adjoining arrow button.
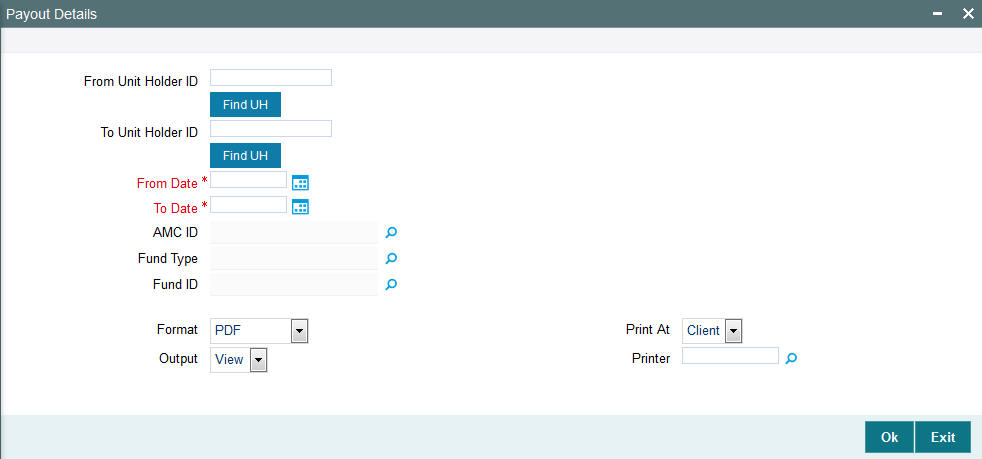
You can specify the following details:
From Unit Holder ID
Alphanumeric; 12 Characters; Optional
Specify the unit holder ID details.
You can also select unit holder ID by clicking ‘Find UH’ button.
To Unit Holder ID
Alphanumeric; 12 Characters; Optional
Specify the unit holder ID details.
You can also select unit holder ID by clicking ‘Find UH’ button.
From Date and To Date
Date Format; Mandatory
Select the dates that specify the period between which you want to view the payout details.
AMC ID
Alphanumeric; 12 Characters; Optional
Specify the AMC ID. Alternatively, you can select AMC ID from the option list. The list displays all valid AMC ID maintained in the system.
Fund Type
Alphanumeric; 28 Characters; Optional
Specify the fund type. Alternatively, you can select fund type from the option list. The list displays all valid fund type maintained in the system.
Fund ID
Alphanumeric; 6 Characters; Optional
Specify the fund ID. Alternatively, you can select fund ID from the option list. The list displays all valid fund ID maintained in the system.
Format
Optional
Select the format from the drop-down list. The list displays the following values:
- HTML
- Excel
- Excel (.xlsx)
- RTF
Output
Optional
Select the output from the drop-down list. The list displays the following values:
- View
- Spool
Print At
Optional
Select the printing location from the drop-down list. The list displays the following values:
- Client
- Server
Printer
Alphanumeric; 15 Characters; Optional
Specify the printer details from adjoining option list.
3.10.7 Generating Payment Details Report
You can generate payment details report using ‘Payment Details’ screen. You can invoke this screen by typing ‘UTR00183’ in the field at the top right corner of the Application tool bar and clicking on the adjoining arrow button.
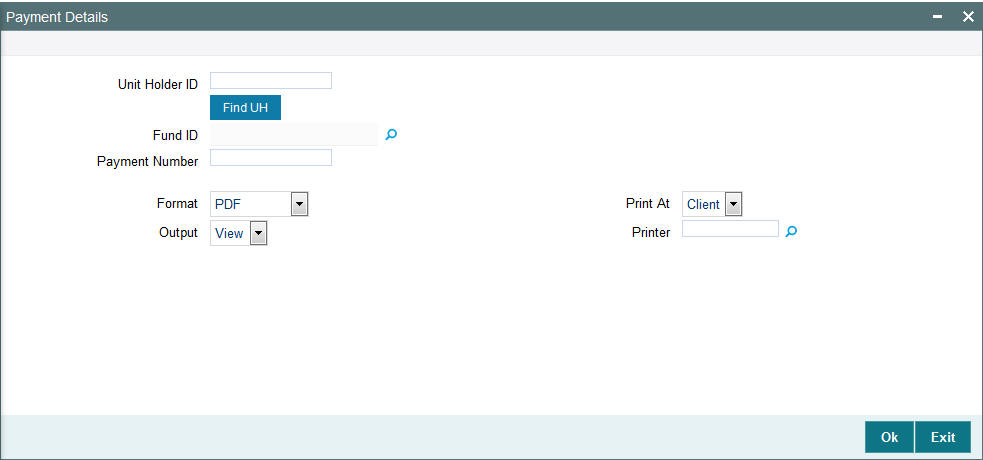
You can specify the following details:
Unit Holder ID
Alphanumeric; 12 Characters; Optional
Specify the unit holder ID. You can also query for unit holder ID by clicking ‘Find UH’ button.
Fund ID
Alphanumeric; 6 Characters; Optional
Specify the fund ID. Alternatively, you can select fund ID maintained in the system. The system displays all valid fund ID maintained in the system.
Payment Number
Numeric; 22 Characters; Optional
Specify the payment number.
Format
Optional
Select the format from the drop-down list. The list displays the following values:
- HTML
- Excel
- Excel (.xlsx)
- RTF
Output
Optional
Select the output from the drop-down list. The list displays the following values:
- View
- Spool
Print At
Optional
Select the printing location from the drop-down list. The list displays the following values:
- Client
- Server
Printer
Alphanumeric; 15 Characters; Optional
Specify the printer details from adjoining option list.
3.11 Reinvestment Report
This section contains the following topics:
- Section 3.11.1, "Generating Reinvestment Report"
- Section 3.11.2, "Contents of the Reinvestment Report screen"
3.11.1 Generating Reinvestment Report
This report will print the list of unit holders who have requested for reinvestment of their dividend earnings.
This report will print the list of all the unit holders who have requested for reinvestment for a given fund. This Report is printed ad-hoc or before dividend payment and is ordered by unit holder ID.
You can invoke the ‘ReInvestment Details’ screen by typing ‘UTR00128’ in the field at the top right corner of the Application tool bar and clicking on the adjoining arrow button.
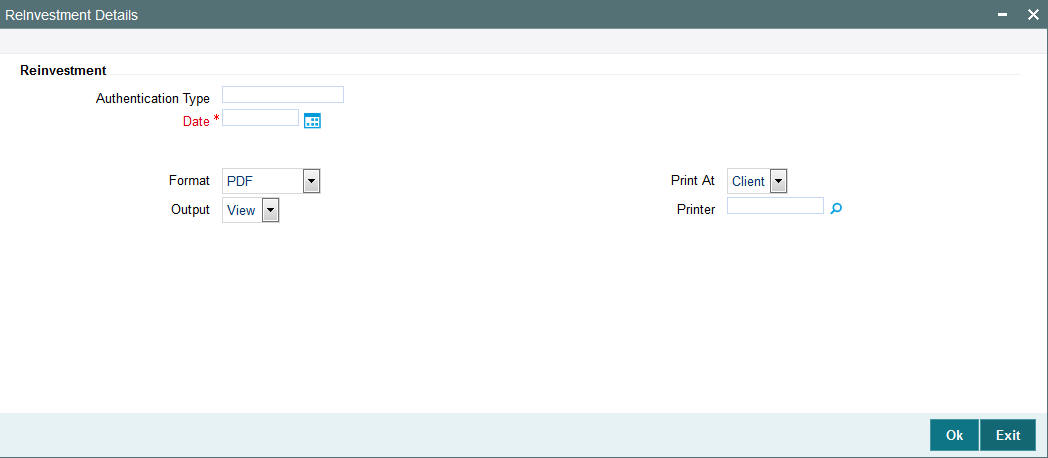
Authentication Type
Alphanumeric; 1 Character; Optional
Specify the authentication type.
Date
Date Format; Mandatory
Select date on which the reinvestment transaction was authorized from the adjoining calendar.
Format
Optional
Select the format from the drop-down list. The list displays the following values:
- HTML
- Excel
- Excel (.xlsx)
- RTF
Output
Optional
Select the output from the drop-down list. The list displays the following values:
- View
- Spool
Print At
Optional
Select the printing location from the drop-down list. The list displays the following values:
- Client
- Server
Printer
Alphanumeric; 15 Characters; Optional
Specify the printer details from adjoining option list.
Click ‘Ok’ button to generate the report.
3.11.2 Contents of the Reinvestment Report screen
Reinvestment
Unit Holder ID
12 Character Maximum, Alphanumeric, Display
This is the ID of the unit holder who has requested for reinvestment.
Unit Holder Name
85 Character Maximum, Alphanumeric, Display
This is the Name of the unit holder who has requested for reinvestment.
Fund ID
12 Character Maximum, Alphanumeric, Display
The Fund ID in which the unit holder wants to reinvest.
3.12 Certificate Printing
This section contains the following topics:
- Section 3.12.1, "Printing New Certificates"
- Section 3.12.2, "Printing Duplicate Certificates"
- Section 3.12.3, "Reprinting Certificates"
3.12.1 Printing New Certificates
The certificates are printed once the allocation of units is made for the unit holder. These are certificates that are being printed for the first time. This report will print certificates for the given range and fund.
You can invoke the ‘New Certificate’ screen by typing ‘UTR00129’ in the field at the top right corner of the Application tool bar and clicking on the adjoining arrow button.
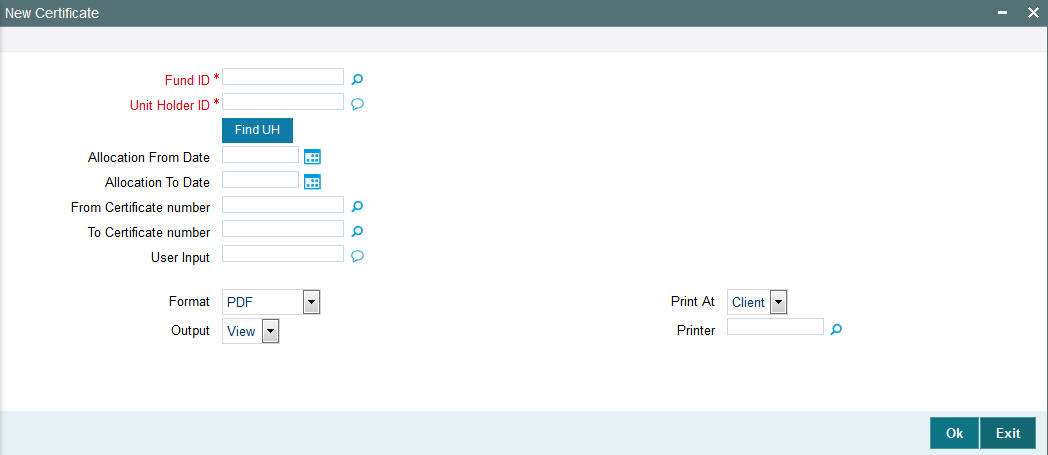
You must specify the Fund ID, the certificate number range, and the date range within which the transaction was authorized, to generate the report. You can also specify the unit holder ID as a parameter for the generation of the certificates.
Click ‘Ok’ button to generate the report. A screen with print options is displayed. Enter the printing options and Click ‘Ok’ button to print.
3.12.1.1 Fields in Printing New Certificates screen
Fund ID
Alphanumeric; 6 Characters Mandatory
Select the Fund ID for which the new certificates are to be printed, from the list provided.
Unit Holder ID
Alphanumeric; 12 Characters; Mandatory
Enter the ID of the unit holder for whom the Certificate is being printed.
You can also select unit holder ID by clicking ‘Find UH’ button.
Allocation From Date
Date, Optional
Enter the start date for the Allocation.
Allocation To Date
Date, Optional
Enter the end date for the Allocation.
From Certificate Number
Alphanumeric; 10 Characters; Optional
Enter the beginning of the range of new certificates to be printed.
To Certificate Number
Alphanumeric; 10 Characters; Optional
Enter the end of the range of new certificates to be printed.
User Input
Alphanumeric, 1000 Characters; Optional
Enter any characteristic or remark relating to the certificate.
Format
Optional
Select the format from the drop-down list. The list displays the following values:
- HTML
- Excel
- Excel (.xlsx)
- RTF
Output
Optional
Select the output from the drop-down list. The list displays the following values:
- View
- Spool
Print At
Optional
Select the printing location from the drop-down list. The list displays the following values:
- Client
- Server
Printer
Alphanumeric; 15 Characters; Optional
Specify the printer details from adjoining option list.
If no options are chosen for either of the above, then, on clicking ‘Ok’ button the system automatically prints all the certificates.
3.12.2 Printing Duplicate Certificates
The certificates are printed once the allocation of units is made for the unit holder. These are certificates are printed after the first print. This report will print certificates for the given range and fund.
You can invoke the ‘Dup. Certificate’ screen by typing ‘UTR00130’ in the field at the top right corner of the Application tool bar and clicking on the adjoining arrow button.
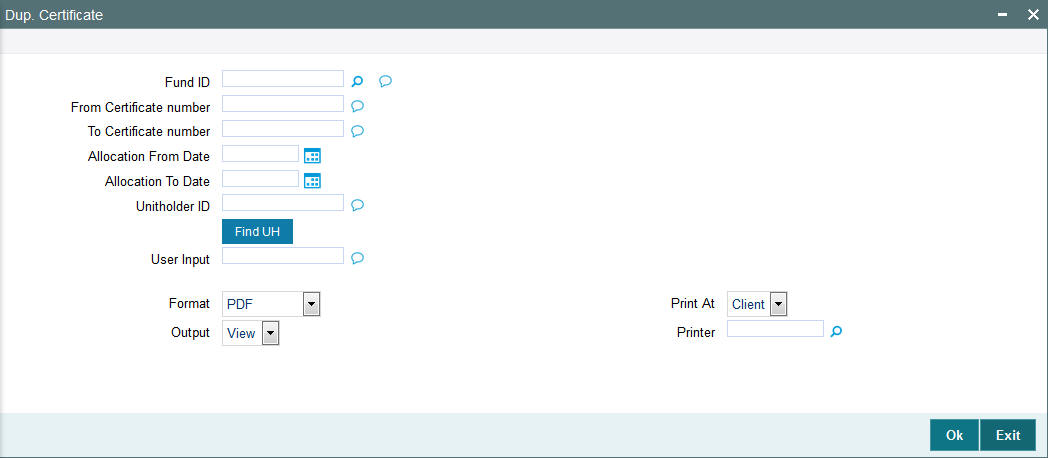
3.12.2.1 Fields in Dup. Certificate Screen
Fund ID
Alphanumeric; 6 Characters; Optional
Select the Fund Name for which the duplicate certificates are to be printed, from the list provided.
From Certificate Number
Alphanumeric; 1000 Characters; Optional
Enter the beginning of the range of duplicate certificates to be printed.
To Certificate Number
Alphanumeric; 1000 Characters; Optional
Enter the end of the range of duplicate certificates to be printed.
Allocation From Date
Date Format; Optional
Enter the start date for the Allocation.
Allocation To Date
Date Format; Optional
Enter the end date for the Allocation.
Unit Holder ID
Alphanumeric; 12 Characters; Optional
Enter the ID of the unit holder for whom the duplicate certificate is being printed.
You can also select unit holder ID by selecting ‘Find UH’ button.
User Input
Alphanumeric; 1000 Characters; Optional
Enter any characteristic or remark relating to the duplicate certificate.
Format
Optional
Select the format from the drop-down list. The list displays the following values:
- HTML
- Excel
- Excel (.xlsx)
- RTF
Output
Optional
Select the output from the drop-down list. The list displays the following values:
- View
- Spool
Print At
Optional
Select the printing location from the drop-down list. The list displays the following values:
- Client
- Server
Printer
Alphanumeric; 15 Characters; Optional
Specify the printer details from adjoining option list.
3.12.3 Reprinting Certificates
The certificates are printed once the allocation of units is made for the unit holder. These are certificates that are reprinted. This report will print certificates for the given range and fund.
You can invoke the ‘Re-Print Certificate’ screen by typing ‘UTR00131’ in the field at the top right corner of the Application tool bar and clicking on the adjoining arrow button.
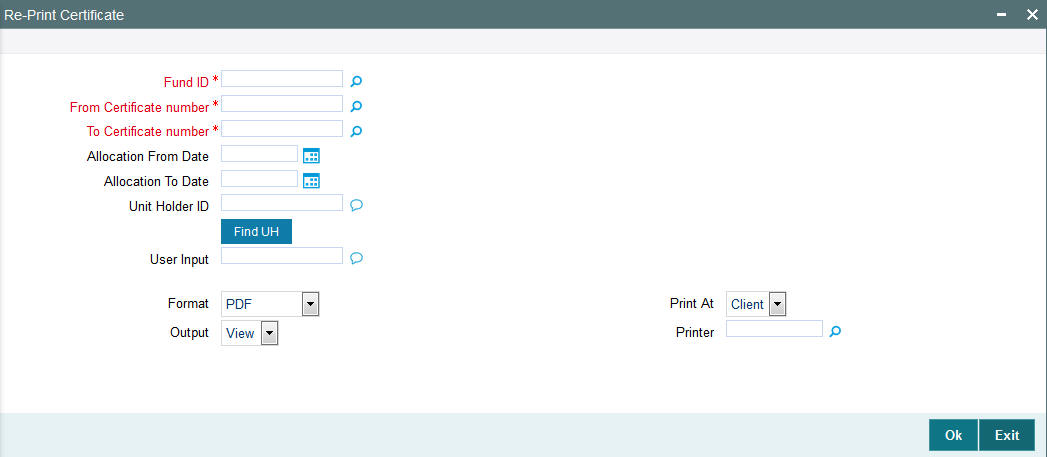
Fund ID
Alphanumeric; 6 Characters Mandatory
Select the Fund ID for which the new certificates are to be printed, from the list provided.
From Certificate Number
Alphanumeric; 10 Characters; Mandatory
Enter the beginning of the range of new certificates to be printed.
To Certificate Number
Alphanumeric; 10 Characters; Mandatory
Enter the end of the range of new certificates to be printed.
Allocation From Date
Date, Optional
Enter the start date for the Allocation.
Allocation To Date
Date, Optional
Enter the end date for the Allocation.
Unit Holder ID
Alphanumeric; 12 Characters; Mandatory
Enter the ID of the unit holder for whom the Certificate is being printed.
You can also select unit holder ID by clicking ‘Find UH’ button.
User Input
Alphanumeric, 1000 Characters; Optional
Enter any characteristic or remark relating to the certificate.
Format
Optional
Select the format from the drop-down list. The list displays the following values:
- HTML
- Excel
- Excel (.xlsx)
- RTF
Output
Optional
Select the output from the drop-down list. The list displays the following values:
- View
- Spool
Print At
Optional
Select the printing location from the drop-down list. The list displays the following values:
- Client
- Server
Printer
Alphanumeric; 15 Characters; Optional
Specify the printer details from adjoining option list.
3.13 Threshold Balance Report
This section contains the following topics:
- Section 3.13.1, "Threshold Balance Report Details"
- Section 3.13.2, "By Amount"
- Section 3.13.3, "By Units"
- Section 3.13.4, "Fields in Threshold Balance Report screen"
3.13.1 Threshold Balance Report Details
This report will print the Unit Balance of the Unit holders whose Balances fall below a specified limit entered in terms of Units / Amount. If the Calculation Mode is in terms of Amount, the number of units for the entered Amount as per the latest Fund Price is calculated. This Report is printed at a Fund Level.
3.13.2 By Amount
You can invoke the ‘Threshold Balance’ screen by typing ‘UTR00126’ in the field at the top right corner of the Application tool bar and clicking on the adjoining arrow button.
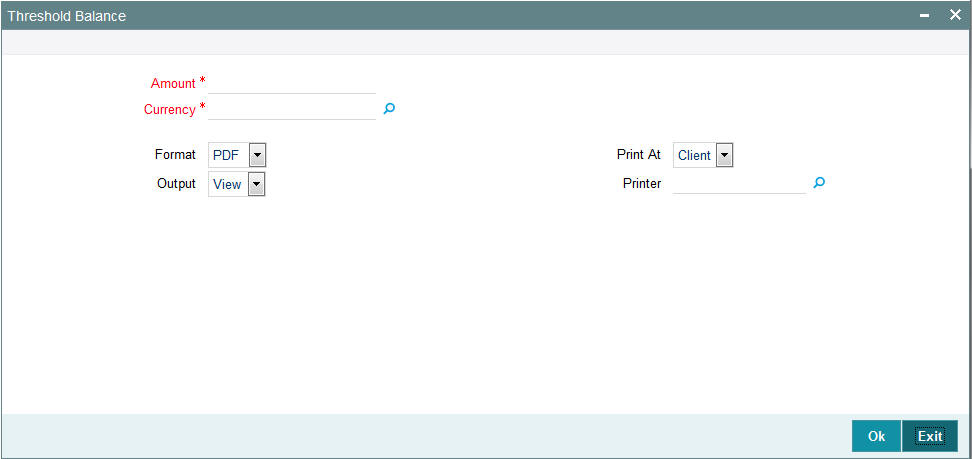
Amount
Numeric; 22 Characters; Mandatory
Specify the threshold amount
Currency
Alphanumeric; 3 Characters; Mandatory
Specify the threshold currency code.
Format
Optional
Select the format from the drop-down list. The list displays the following values:
- HTML
- Excel
- Excel (.xlsx)
- RTF
Output
Optional
Select the output from the drop-down list. The list displays the following values:
- View
- Spool
Print At
Optional
Select the printing location from the drop-down list. The list displays the following values:
- Client
- Server
Printer
Alphanumeric; 15 Characters; Optional
Specify the printer details from adjoining option list.
Enter the search criteria and click ‘Ok’ button to generate the report.
3.13.3 By Units
You can invoke the ‘Threshold Unit Bal’ screen by typing ‘UTR00132’ in the field at the top right corner of the Application tool bar and clicking on the adjoining arrow button.

Number of Units
Numeric; 22 Characters; Mandatory
Specify the number of threshold units.
Format
Optional
Select the format from the drop-down list. The list displays the following values:
- HTML
- Excel
- Excel (.xlsx)
- RTF
Output
Optional
Select the output from the drop-down list. The list displays the following values:
- View
- Spool
Print At
Optional
Select the printing location from the drop-down list. The list displays the following values:
- Client
- Server
Printer
Alphanumeric; 15 Characters; Optional
Specify the printer details from adjoining option list.
Enter the search criteria and click ‘Ok’ button to generate the report.
3.13.4 Fields in Threshold Balance Report screen
Calculation Mode
1 Character Maximum, Alphanumeric, Mandatory
Select the Calculation Mode (Units / Amount) of the Unit holder.
Value
Numeric, Mandatory
Enter the Threshold value based on which the Report is generated.
Number of Units
Numeric, Display
This is the Number of Units held by the unit holder in the given fund, on the day of book closing.
Total Dividend
Numeric, Display
This is the Total Dividend that is applicable to the unit holder for the given fund, based on the Units held.
Dividend Date
Date, Display
This is the Date of Dividend Payment.
Net Paid
Numeric, Display
This is the Net amount paid to the unit holder after tax.
Tax Withheld
Numeric, Display
This is the Amount of Withholdings tax deducted from the unit holder dividend.
Authorized Signatory
20 Character Maximum, Alphanumeric, Display
This is the name of the person who is the Authorized signatory for Withholdings Tax.
Date
Date, Display
This is the date of reporting, usually the date when the report is being generated.
3.14 Transfer Register Report
This section contains the following topics:
- Section 3.14.1, "Generating Transfer Register Report"
- Section 3.14.2, "Fields in Transfer Register Report screen"
3.14.1 Generating Transfer Register Report
This report will print the details of all Transfers affected by the Registrar. The Registrar will print this report. You can invoke the ‘Transfer Reg Details’ screen by typing ‘UTR00121’ in the field at the top right corner of the Application tool bar and clicking on the adjoining arrow button.
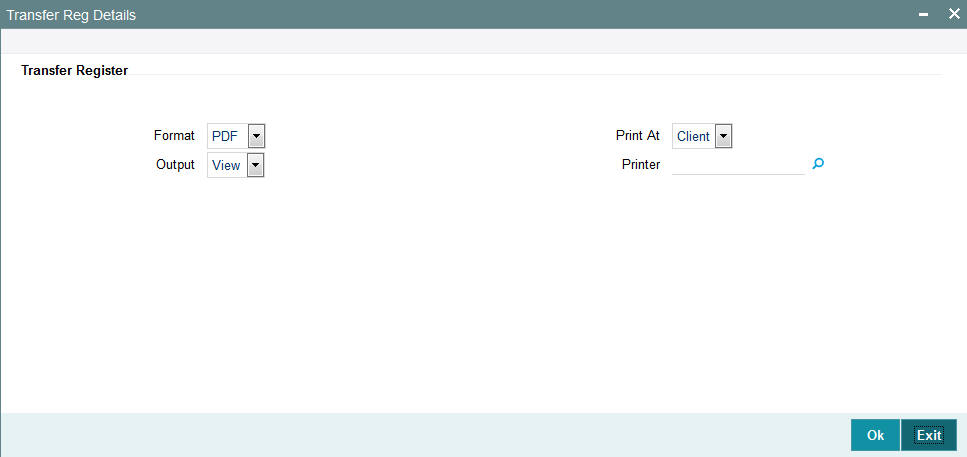
Format
Optional
Select the format from the drop-down list. The list displays the following values:
- HTML
- Excel
- Excel (.xlsx)
- RTF
Output
Optional
Select the output from the drop-down list. The list displays the following values:
- View
- Spool
Print At
Optional
Select the printing location from the drop-down list. The list displays the following values:
- Client
- Server
Printer
Alphanumeric; 15 Characters; Optional
Specify the printer details from adjoining option list.
Click ‘Ok’ button to generate the report.
3.14.2 Fields in Transfer Register Report screen
Transfer Register Report
Unit Holder ID
12 Character Maximum, Alphanumeric, Display
The ID of the Unit holder that has transferred the units is displayed here.
Transaction Date
Date, Display
Enter the date on which the transaction occurred is shown here.
Transfer Deed Number
12 Character Maximum, Alphanumeric, Display
This is the Reference number or deed reference number of the Transaction.
Transaction Number
12 Character Maximum, Alphanumeric, Display
This is the Transaction Number generated by the system for this transaction.
Transfer Number
12 Character Maximum, Alphanumeric, Display
This is the Transfer Number provided by the Registrar.
Transfer Date
Date, Display
This is the date of the Transfer provided by the Registrar.
Units Transferred
Numeric, Display
This is the Number of Units transferred.
3.15 Tax Statements Reports
This section contains the following topics:
- Section 3.15.1, "Employee Tax IT 3(a) Report"
- Section 3.15.2, "Employee Tax IRP5 Report"
- Section 3.15.3, "Tax Deduction Directive A&D Report"
- Section 3.15.4, "Tax Deduction Directive B Report"
- Section 3.15.5, "Tax Deduction Directive Report"
3.15.1 Employee Tax IT 3(a) Report
This report will be printed for redemption transactions confirmed allocated within the specified period for a given fund and unitholder. Only those redemption transactions whose settlement amount is lesser than or equal to 2000 reckoned in the fund base currency will be considered.
The Employee Tax 3(a) Report screen allows you to enter search criteria for the generation of an Employee Tax Report. You can invoke the ‘Employee Tax Details’ screen by typing ‘UTR00216’ in the field at the top right corner of the Application tool bar and clicking on the adjoining arrow button.
In this screen, the following are the parameters for the generation of the report:
Fund ID
Alphanumeric; 6 Characters; Optional
Specify the fund ID.
Fund Identification Number
Display
The system displays the fund identification number.
Unit Holder ID
Alphanumeric; 12 Characters; Optional
Specify the ID of the unit holder for whom the tax statement is to be printed.
You can also select unit holder ID by selecting ‘Find UH’ button.
From Date and To Date
Date Format; Mandatory
Select the dates that specify the period between which you want to view the tax statement details.
Format
Optional
Select the format from the drop-down list. The list displays the following values:
- HTML
- Excel
- Excel (.xlsx)
- RTF
Output
Optional
Select the output from the drop-down list. The list displays the following values:
- View
- Spool
Print At
Optional
Select the printing location from the drop-down list. The list displays the following values:
- Client
- Server
Printer
Alphanumeric; 15 Characters; Optional
Specify the printer details from adjoining option list.
3.15.1.1 Details in Employee Tax IT3(a) Reports
The following details are printed in the report:
- The fund in which the unit holder has requested the transaction.
- A unique Eight digit IT3(a) code generated by FC-IS
- The PAYE reference number captured for each fund
- The tax assessment end date
- The address details of the unitholder’s employer.
- The following employee details
- First, Middle and Last name of the unit holder
- Identification Type and Number
- Passport Number
- Date of Birth
- Residential address details
- Income tax number
- Unit Holder Account Number
- Date of employment
- Employment period
- The details of the income sources and the redemption settlement amount in terms of the fund base currency
- The gross remuneration details
- Tax deduction details
3.15.2 Employee Tax IRP5 Report
This report will be printed for redemption transactions confirmed allocated within the specified period for a given fund and unitholder. Only those redemption transactions whose settlement amount is greater than 2000 reckoned in the fund base currency will be considered.
The Employee Tax IRP5 Report screen allows you to enter search criteria for the generation of an Employee Tax Report.
You can invoke the ‘Employee Tax IRP5’ screen by typing ‘UTR00217’ in the field at the top right corner of the Application tool bar and clicking on the adjoining arrow button.
In this screen, you must specify the following as mandatory sorting parameters for the generation of the report:
Fund ID
Alphanumeric; 6 Characters; Optional
Specify the fund ID.
Unit Holder ID
Alphanumeric; 12 Characters; Optional
Specify the ID of the unit holder for whom the tax statement is to be printed.
You can also select unit holder ID by selecting ‘Find UH’ button.
From Date and To Date
Date Format; Mandatory
Select the dates that specify the period between which you want to view the tax statement details.
Format
Optional
Select the format from the drop-down list. The list displays the following values:
- HTML
- Excel
- Excel (.xlsx)
- RTF
Output
Optional
Select the output from the drop-down list. The list displays the following values:
- View
- Spool
Print At
Optional
Select the printing location from the drop-down list. The list displays the following values:
- Client
- Server
Printer
Alphanumeric; 15 Characters; Optional
Specify the printer details from adjoining option list.
3.15.2.1 Details in Employee Tax IRP 5 Reports
The following details are printed in the report:
- The fund in which the unit holder has requested the transaction.
- A unique Eight digit IRP 5 code generated by FC-IS
- The PAYE reference number captured for each fund
- The tax assessment end date
- The address details of the unitholder’s employer.
- The following employee details
- First, Middle and Last name of the unit holder
- Identification Type and Number
- Passport Number
- Date of Birth
- Residential address details
- Income tax number
- Unit Holder Account Number
- Date of employment
- Employment period
- The details of the income sources and the redemption settlement amount in terms of the fund base currency
- The gross remuneration details
- Tax deduction details
3.15.3 Tax Deduction Directive A&D Report
This report will be printed for switch transactions confirmed allocated within the specified period for a given fund and unitholder. This report is applicable on death/retirement of a member.
The Tax Deduction Directive A&D Report screen allows you to enter search criteria for the generation of a request for tax deduction directive. You can invoke the ‘Tax Ded. Directive’ screen by typing ‘UTR00213’ in the field at the top right corner of the Application tool bar and clicking on the adjoining arrow button.
In this screen, you must specify the following as mandatory sorting parameters for the generation of the report:
Report ID
Alphanumeric; 6 Characters; Mandatory
Specify the report ID.
Fund ID
Alphanumeric; 6 Characters; Optional
Specify the fund ID.
Fund Identification Number
Display
The system displays the fund identification number.
Unit Holder ID
Alphanumeric; 12 Characters; Optional
Specify the ID of the unit holder for whom the tax statement is to be printed.
You can also select unit holder ID by selecting ‘Find UH’ button.
From Date and To Date
Date Format; Mandatory
Select the dates that specify the period between which you want to view the tax statement details.
Format
Optional
Select the format from the drop-down list. The list displays the following values:
- HTML
- Excel
- Excel (.xlsx)
- RTF
Output
Optional
Select the output from the drop-down list. The list displays the following values:
- View
- Spool
Print At
Optional
Select the printing location from the drop-down list. The list displays the following values:
- Client
- Server
Printer
Alphanumeric; 15 Characters; Optional
Specify the printer details from adjoining option list.
3.15.3.1 Details in Tax Deduction Directive A&D Reports
The following details are printed in the report:
- The tax assessment end date
- Unit holder Tax ID
- The following member details
- First and Last name of the unit holder
- Identification Type and Number
- Annual Income
- Date of Birth
- Residential address details
- The details of the fund in which the unit holder has requested the
transaction. This includes:
- Contact details, name and type of the fund
- Fund PAYE reference number
- The details of the gross lump sum due to the unit holder. This includes:
- Reason for the directive
- Allocation date of the redemption transaction
- Gross lump sum amount
- The dates that specify the period between the unit holder invested into the fund
- The details of the salary earned by the unit holder.
- The contact address details of the unitholder’s employer.
3.15.4 Tax Deduction Directive B Report
This report will be printed for switch transactions confirmed allocated within the specified period for a given fund and unitholder. This report is applicable on withdrawal of funds from preservation pension/provident fund.
The Tax Deduction Directive B Report screen allows you to enter search criteria for the generation of a request for tax deduction directive B. You can invoke the ‘Tax Ded. Directive B’ screen by typing ‘UTR00214’ in the field at the top right corner of the Application tool bar and clicking on the adjoining arrow button.
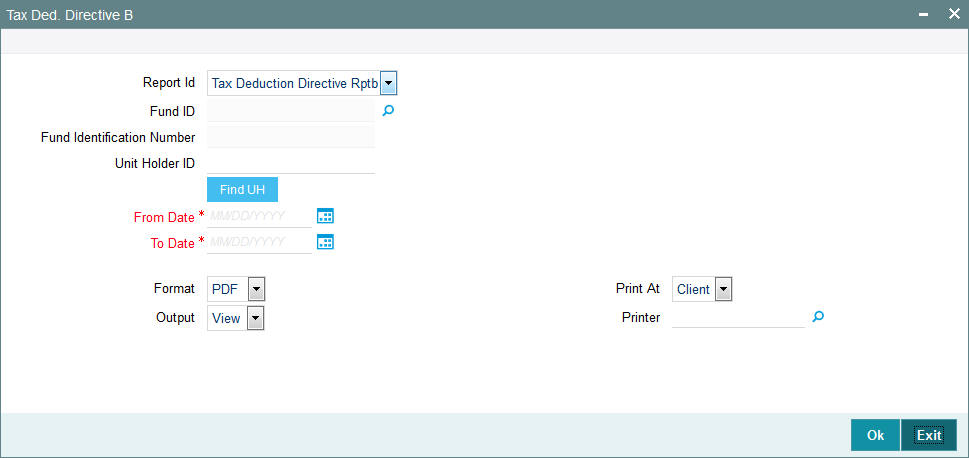
In this screen, you must specify the following as mandatory sorting parameters for the generation of the report:
Report ID
Optional
Select the report from the drop-down list. The list displays the following values:
- Tax Deduction Directive Rptb
Fund ID
Alphanumeric; 6 Characters; Optional
Specify the fund ID.
Fund Identification Number
Display
The system displays the fund identification number.
Unit Holder ID
Alphanumeric; 12 Characters; Optional
Specify the ID of the unit holder for whom the tax statement is to be printed.
You can also select unit holder ID by selecting ‘Find UH’ button.
From Date and To Date
Date Format; Mandatory
Select the dates that specify the period between which you want to view the tax statement details.
Format
Optional
Select the format from the drop-down list. The list displays the following values:
- HTML
- Excel
- Excel (.xlsx)
- RTF
Output
Optional
Select the output from the drop-down list. The list displays the following values:
- View
- Spool
Print At
Optional
Select the printing location from the drop-down list. The list displays the following values:
- Client
- Server
Printer
Alphanumeric; 15 Characters; Optional
Specify the printer details from adjoining option list.
3.15.4.1 Details in Tax Deduction Directive B Reports
The following details are printed in the report:
- The tax assessment end date
- Unit holder Tax ID
- The following member details
- First and Last name of the unit holder
- Identification Type and Number
- Date of Birth
- Annual Income
- Residential address details
- The details of the fund in which the unit holder has requested the
transaction. This includes:
- Contact details, name and type of the fund
- Fund PAYE reference number
- The details of the gross lump sum due to the unit holder. This includes:
- Reason for the directive
- Allocation date of the redemption transaction
- Gross lump sum amount
- The dates that specify the period between the unit holder invested into the fund
- The details of the salary earned by the unit holder.
3.15.5 Tax Deduction Directive Report
This report will be printed for switch transactions confirmed allocated within the specified period for a given fund and unitholder. This report is applicable retirement annuity funds.
The ‘Tax Deduction Directive Report’ screen allows you to enter search criteria for the generation of a request for tax deduction directive. You can invoke the ‘Tax Ded. Directive C’ screen by typing ‘UTR00215’ in the field at the top right corner of the Application tool bar and clicking on the adjoining arrow button.
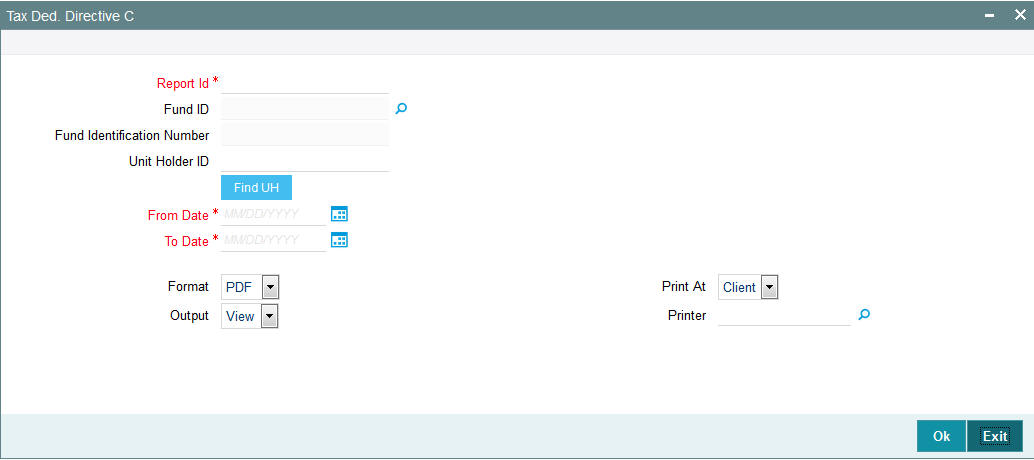
In this screen, you must specify the following as mandatory sorting parameters for the generation of the report:
Report ID
Alphanumeric; 6 Characters; Mandatory
Select the report ID.
Fund ID
Alphanumeric; 6 Characters; Optional
Specify the fund ID.
Fund Identification Number
Display
The system displays the fund identification number.
Unit Holder ID
Alphanumeric; 12 Characters; Optional
Specify the ID of the unit holder for whom the tax statement is to be printed.
You can also select unit holder ID by selecting ‘Find UH’ button.
From Date and To Date
Date Format; Mandatory
Select the dates that specify the period between which you want to view the tax statement details.
Format
Optional
Select the format from the drop-down list. The list displays the following values:
- HTML
- Excel
- Excel (.xlsx)
- RTF
Output
Optional
Select the output from the drop-down list. The list displays the following values:
- View
- Spool
Print At
Optional
Select the printing location from the drop-down list. The list displays the following values:
- Client
- Server
Printer
Alphanumeric; 15 Characters; Optional
Specify the printer details from adjoining option list.
3.15.5.1 Details in Tax Deduction Directive C Reports
The following details are printed in the report:
- The tax assessment end date
- Unit holder Tax ID
- The following member details
- First and Last name of the unit holder
- Identification Type and Number
- Date of Birth
- Annual Income
- Residential address details
- The details of the fund in which the unit holder has requested the
transaction. This includes :
- Contact details, name and type of the fund
- Fund PAYE reference number
- The details of the gross lump sum due to the unit holder. This includes:
- Reason for the directive
- Allocation date of the redemption transaction
- Gross lump sum amount
- The dates that specify the period between the unit holder invested into the fund
3.16 Investment Simulator
This section contains the following topics:
- Section 3.16.1, "Investment Simulator Reports"
- Section 3.16.2, "For Non Pension Funds"
- Section 3.16.3, "For Pension Funds"
3.16.1 Investment Simulator Reports
Oracle FLEXCUBE provides you with the option of investment simulator for both; pension and non pension funds.
3.16.2 For Non Pension Funds
For a given period, you can simulate the NAV for various combination of fund IDs and investment amount. Based on the application date (i.e. the date of subscription), redemption date, fund ID and the investment amount, the profit based on the NAV as per the days of subscription and redemption will be calculated by the investment simulator along with the gross amount and displayed.
Note
The investment simulator does not consider any loads or taxes set up in the system.
You can invoke ‘Investment Simulator – Non Pension Funds’ screen by typing ‘UTDHINAV’ in the field at the top right corner of the Application tool bar and click the adjoining arrow.
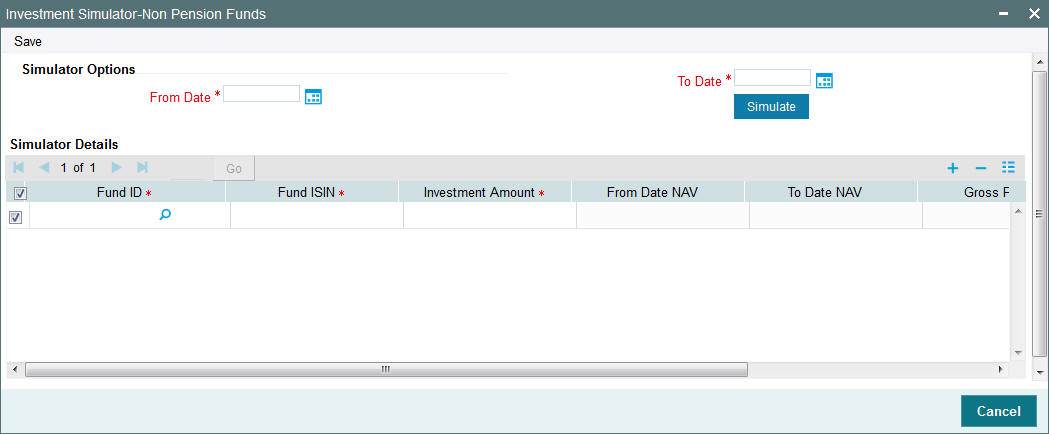
For a given period, you can simulate the NAV for various combination of fund IDs and investment amount. Based on the application date (i.e. the date of subscription), redemption date, fund ID and the investment amount, the profit based on the NAV as per the days of subscription and redemption will be calculated by the investment simulator along with the gross amount and displayed.
Simulator Options
From Date
Date Format; Mandatory
Specify the date from which you wish to simulate the NAV for various combination of fund IDs and investment amount.
To Date
Date Format; Mandatory
Specify the date till which you wish to simulate the NAV for various combination of fund IDs and investment amount.
Click 'Simulate' button to simulate the investment. The following details are displayed:
Simulator Details
Fund ID
Alphanumeric; 6 Characters; Mandatory
Select the ID of the funds which are Historic NAV Based as captured in the General Operating Rules screen.
Note
Only the funds for which the option ‘Historic NAV Based’ has been selected for the field ‘Investment Simulation Method’ in the General Operating Rules screen will be listed in the option list provided.
You can not simulate the investment option for the same fund more than once and thus the Fund ID should not be repeated in the panel.
Fund ISIN
Alphanumeric; 12 Characters; Mandatory
Select the ISIN Code of the selected fund.
Investment Amount
Numeric, 22 Characters; Mandatory
Specify the amount that you wish to invest. The value here should be greater than zero.
From Date NAV
Display
Depending on the selected fund and the From Period, the NAV Value is displayed here.
To Date NAV
Display
Depending on the selected fund and the To Period, the NAV is displayed here.
Gross Profit
Display
The Gross profit is displayed here and is calculated as follows:
(To Date NAV – From Date NAV) * (Investment Amount / From Date NAV)
Gross Balance
Display
The Gross balance is displayed here and is calculated as follows:
(Investment Amount / From Date NAV) * To Date NAV.
3.16.3 For Pension Funds
You can invoke ‘Investment Simulator –Pension Funds’ screen by typing ‘UTDPENFD’ in the field at the top right corner of the Application tool bar and click the adjoining arrow.
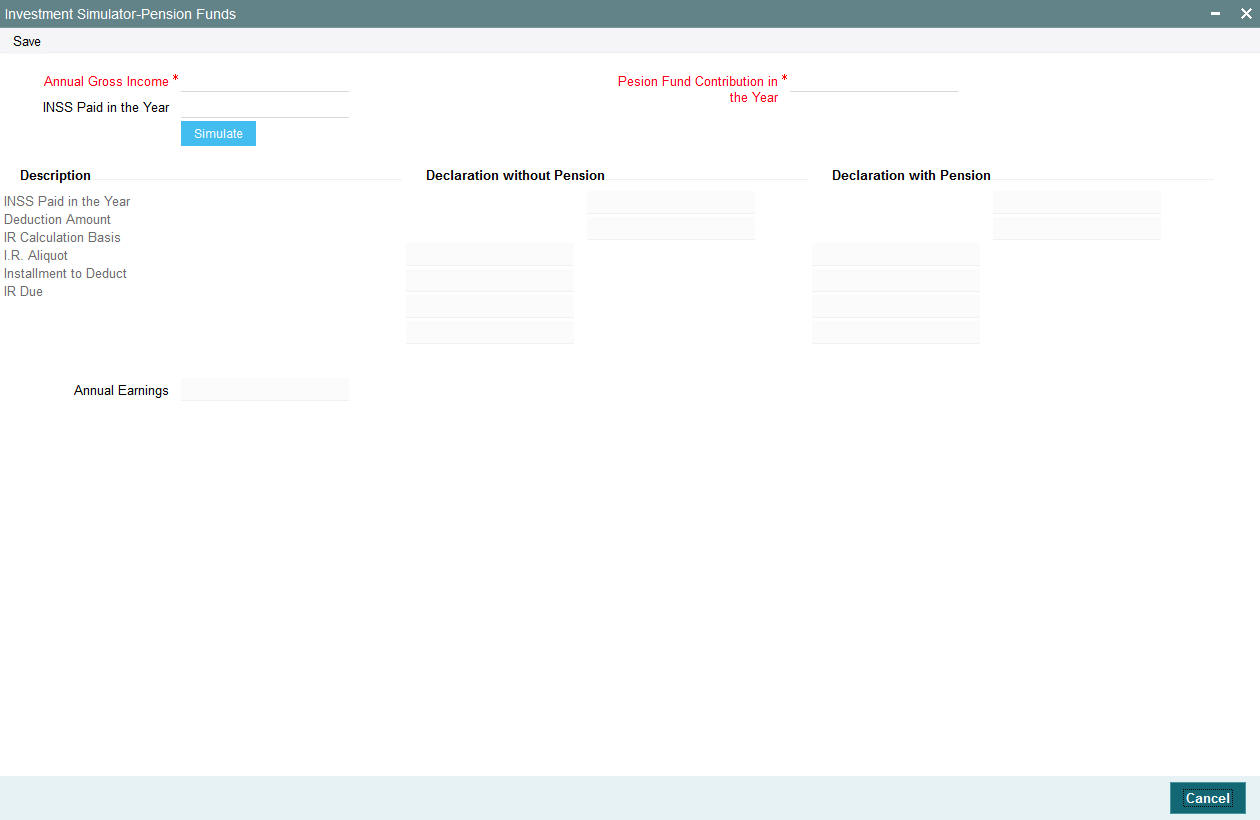
FCIS also allows you to simulate the tax saving in a pension fund. It demonstrates the value of tax liability of the customer in case no investments are made and compares it with a scenario, where a specified investment is made by the customer.
Note
The investment simulator does not consider any loads or taxes set up in the system.
The following are the fields in this screen.:
Annual Gross Income
Numeric; 30 Characters; Mandatory
Specify the gross annual income of the investor.
Pension fund contribution in the Year
Numeric; 30 Characters; Mandatory
Indicate the pension fund contribution that the investor has made or wishes to make during the year.
INSS Paid in the Year
Numeric; 30 Characters; Mandatory
Indicate INSS paid in the year. This field is optional. In case the INSS paid during the year is not specified the same will be calculated based on the Load ID for INSS.
INSS load ID, IR Calculation Basis and IR. Aliquot load are also parameterized in system parameters under 'INVSIMULATOR '. If there is any changes in the load, then the load maintenance should be changed and not the system parameters.
Click on the 'Simulate' button to simulate the investment. Click on the 'Clear' button if you wish to clear the panel of the choices that have been made.
On simulation the following details are displayed.
INSS paid in the year
Display
The INSS paid as specified above with or without the pension fund is displayed here.
Deduction amount
Display
The deduction amount is displayed here.
IR Calculation Basis
Display
The minimum of the two values one of which is arrived at by adding the values of INSS and the Pension fund contribution in the year and the other by calculating the Limit for deduction by applying Percentage Limit for IR Contribution on the annual gross income, is deducted from the gross annual income to get the IR Calculation Basis, which is displayed here.
I.R. Aliquot
Display
The IR percentage is calculated based on the Load Id for IR and displayed here.
Installment to Deduct
Display
The Installment to deduct amount is calculated based on the Load Id for IR and displayed here.
IR Due
Display
The IR percentage is applied to the IR calculation basis and subtracted from the Installment to Deduct. This result gives the IR amount due from the investor which is displayed here.
Annual Earnings
Display
The system displays the annual earnings.
3.17 Multi Transaction Error Log Report
This section contains the following topics:
- Section 3.17.1, "Generating Multi Transaction Error Log Report"
- Section 3.17.2, "Contents of the Multi Transaction Error Log Report"
3.17.1 Generating Multi Transaction Error Log Report
You can view the multiple transactions errors occurred and their status using ‘Multi Transaction Error Log Report’ screen. You can invoke this screen by typing ‘UTR00218’ in the field at the top right corner of the Application tool bar and click the adjoining arrow.
3.17.2 Contents of the Multi Transaction Error Log Report
You can specify the following details:
Unit Holder ID
Alphanumeric; 12 Characters; Optional
Specify the unit holder ID for whom you want to generate the report.
You can also search unit holder details by clicking ‘Find UH’ button.
CIF Number
Alphanumeric; 12 Characters; Optional
Specify the customer information number of the unit holder.
Wrapper Transaction Number
Alphanumeric; 50 Characters; Optional
Specify the wrapper transaction number of the multi transaction for which you want to generate report.
You need to mention one of the values, Unit holder, CIF number or Wrapper transaction number. Else the system displays an error message.
From Date
Date Format; Optional
Enter the date from when you want to generate the report.
To Date
Date Format; Optional
Enter the date till when you want to generate the report.
Format
Optional
Select the format from the drop-down list. The list displays the following values:
- HTML
- Excel
- Excel (.xlsx)
- RTF
Output
Optional
Select the output from the drop-down list. The list displays the following values:
- View
- Spool
Print At
Optional
Select the printing location from the drop-down list. The list displays the following values:
- Client
- Server
Printer
Alphanumeric; 15 Characters; Optional
Specify the printer details from adjoining option list.
3.18 Tax Credit Report
This section contains the following topics:
3.18.1 Generating Tax Credit Report
You can view the tax credit report to view all unit holder and dividend details for which tax credit /reversal has been successful/unsuccessful. You can invoke this screen by typing ‘UTRTAXCR’ in the field at the top right corner of the Application tool bar and click the adjoining arrow.
3.18.2 Contents of Tax Credit Report
You can specify the following details:
From Date
Date Format; Mandatory
Enter the date from when you want to generate the report.
To Date
Date Format; Mandatory
Enter the date till when you want to generate the report.
Fund ID
Alphanumeric; 6 Characters; Mandatory
Specify the fund ID. This adjoining option list displays all valid fund ID maintained in the system. You can choose the appropriate one.
Processing Mode
Mandatory
Select the processing mode of the record from the drop-down list. Following are the options available:
- All
- Processed
- Reversed
Format
Optional
Select the format from the drop-down list. The list displays the following values:
- HTML
- Excel
- Excel (.xlsx)
- RTF
Output
Optional
Select the output from the drop-down list. The list displays the following values:
- View
- Spool
Print At
Optional
Select the printing location from the drop-down list. The list displays the following values:
- Client
- Server
Printer
Alphanumeric; 15 Characters; Optional
Specify the printer details from adjoining option list.
3.19 Redemption Confirmation Report
This section contains the following topics:
- Section 3.19.1, "Generating Red Confirmation Report"
- Section 3.19.2, "Contents of Red Confirmation Report"
3.19.1 Generating Red Confirmation Report
You can view the redemption confirmation report. The output will be Market value in currency of expression and price in currency of expression.
You can invoke this screen by typing ‘UTR00099‘ in the field at the top right corner of the Application tool bar and click the adjoining arrow.
3.19.2 Contents of Red Confirmation Report
You can specify the following details:
Fund ID
Alphanumeric; 6 Characters; Optional
Specify the fund ID. Alternatively, you can select fund ID from the option list. The system displays all valid fund ID maintained in the system.
Fund Identification Number
Display
The system displays the fund identification number.
From Date
Date Format; Optional
Enter the date from when you want to generate the report.
To Date
Date Format; Optional
Enter the date till when you want to generate the report.
From Transaction Number
Alphanumeric; 16 Characters; Optional
Specify the transaction number details.
To Transaction Number
Alphanumeric; 16 Characters; Optional
Specify the transaction number details.
From Unit Holder ID
Alphanumeric; 12 Characters; Optional
Specify the unit holder ID details.
You can also select unit holder ID by clicking ‘Find’ button.
To Unit Holder ID
Alphanumeric; 12 Characters; Optional
Specify the unit holder ID details.
You can also select unit holder ID by clicking ‘Find’ button.
Header Display
Alphanumeric; 255 Characters; Optional
Specify the header details to be displayed.
Footer Display
Alphanumeric; 255 Characters; Optional
Specify the footer details to be displayed.
Duplicate Required
Optional
Select if duplication of record is required or not from the drop-down list. The list displays the following values:
- Yes
- No
Communication Mode
Alphanumeric; 2 Characters; Optional
Specify the communication mode.
From Batch
Optional
Specify the batch details.
Include Related Parties
Optional
Check this box if related parties details are to be included.
Format
Optional
Select the format from the drop-down list. The list displays the following values:
- HTML
- Excel
- Excel (.xlsx)
- RTF
Output
Optional
Select the output from the drop-down list. The list displays the following values:
- View
- Spool
Print At
Optional
Select the printing location from the drop-down list. The list displays the following values:
- Client
- Server
Printer
Alphanumeric; 15 Characters; Optional
Specify the printer details from adjoining option list.
Enter the printing options and Click ‘Ok’ button to print.
3.20 Subscription Confirmation Report
This section contains the following topics:
- Section 3.20.1, "Generating Sub Confirmation Report"
- Section 3.20.2, "Contents of Sub Confirmation Report"
3.20.1 Generating Sub Confirmation Report
You can view the subscription confirmation report. The output will be Market value in currency of expression and price in currency of expression.
You can invoke this screen by typing ‘UTR00098‘ in the field at the top right corner of the Application tool bar and click the adjoining arrow.

3.20.2 Contents of Sub Confirmation Report
You can specify the following details:
Fund ID
Alphanumeric; 6 Characters; Optional
Specify the fund ID. Alternatively, you can select fund ID from the option list. The system displays all valid fund ID maintained in the system.
Fund Identification Number
Display
The system displays the fund identification number.
From Transaction Number
Alphanumeric; 16 Characters; Optional
Specify the transaction number details.
To Transaction Number
Alphanumeric; 16 Characters; Optional
Specify the transaction number details.
From Unit Holder ID
Alphanumeric; 12 Characters; Optional
Specify the unit holder ID details.
You can also select unit holder ID by clicking ‘Find’ button.
To Unit Holder ID
Alphanumeric; 12 Characters; Optional
Specify the unit holder ID details.
You can also select unit holder ID by clicking ‘Find’ button.
From Date
Date Format; Optional
Enter the date from when you want to generate the report.
To Date
Date Format; Optional
Enter the date till when you want to generate the report.
Header Display
Alphanumeric; 255 Characters; Optional
Specify the header details to be displayed.
Footer Display
Alphanumeric; 255 Characters; Optional
Specify the footer details to be displayed.
Duplicate Required
Optional
Select if duplication of record is required or not from the drop-down list. The list displays the following values:
- Yes
- No
Communication Mode
Alphanumeric; 2 Characters; Optional
Specify the communication mode.
From Batch
Optional
Specify the batch details.
Include Related Parties
Optional
Check this box if related parties details are to be included.
Format
Optional
Select the format from the drop-down list. The list displays the following values:
- HTML
- Excel
- Excel (.xlsx)
- RTF
Output
Optional
Select the output from the drop-down list. The list displays the following values:
- View
- Spool
Print At
Optional
Select the printing location from the drop-down list. The list displays the following values:
- Client
- Server
Printer
Alphanumeric; 15 Characters; Optional
Specify the printer details from adjoining option list.
Enter the printing options and Click ‘Ok’ button to print.
3.21 Switch Confirmation Report
This section contains the following topics:
3.21.1 Generating Switch Report
You can view the switch report. The output will be Market value in currency of expression and price in currency of expression.
You can invoke this screen by typing ‘UTR00101‘ in the field at the top right corner of the Application tool bar and click the adjoining arrow.
3.21.2 Contents of Switch Report
You can specify the following details:
Fund ID
Alphanumeric; 6 Characters; Optional
Specify the fund ID. Alternatively, you can select fund ID from the option list. The system displays all valid fund ID maintained in the system.
Fund Identification Number
Display
The system displays the fund identification number.
From Transaction Number
Alphanumeric; 16 Characters; Optional
Specify the transaction number details.
To Transaction Number
Alphanumeric; 16 Characters; Optional
Specify the transaction number details.
From Unit Holder ID
Alphanumeric; 16 Characters; Optional
Specify the unit holder ID details.
You can also select unit holder ID by clicking ‘Find’ button.
To Unit Holder ID
Alphanumeric; 16 Characters; Optional
Specify the unit holder ID details.
You can also select unit holder ID by clicking ‘Find’ button.
From Date
Date Format; Mandatory
Enter the date from when you want to generate the report.
To Date
Date Format; Mandatory
Enter the date till when you want to generate the report.
Header Display
Alphanumeric; 255 Characters; Optional
Specify the header details to be displayed.
Footer Display
Alphanumeric; 255 Characters; Optional
Specify the footer details to be displayed.
Duplicate Required
Optional
Select if duplication of record is required or not from the drop-down list. The list displays the following values:
- Yes
- No
Communication Mode
Alphanumeric; 2 Characters; Optional
Specify the communication mode.
From Batch
Optional
Specify the batch details.
Include Related Parties
Optional
Check this box if related parties details are to be included.
Format
Optional
Select the format from the drop-down list. The list displays the following values:
- HTML
- Excel
- Excel (.xlsx)
- RTF
Output
Optional
Select the output from the drop-down list. The list displays the following values:
- View
- Spool
Print At
Optional
Select the printing location from the drop-down list. The list displays the following values:
- Client
- Server
Printer
Alphanumeric; 15 Characters; Optional
Specify the printer details from adjoining option list.
Enter the printing options and Click ‘Ok’ button to print.
3.22 Account Balance Statement Report
This section contains the following topics:
- Section 3.22.1, "Generating Account Balance Statement Report"
- Section 3.22.2, "Contents of Account Balance Statement Report"
3.22.1 Generating Account Balance Statement Report
You can view the account balance statement report. In case the fund is a currency of expression fund, the output will be the UH currency of expression, total value in UH currency of expression, else this will be shown as blank (report output to show the currency of expression, latest available NAV in price currency and Total balance in UHCOE)
You can invoke this screen by typing ‘UTR00168‘ in the field at the top right corner of the Application tool bar and click the adjoining arrow.
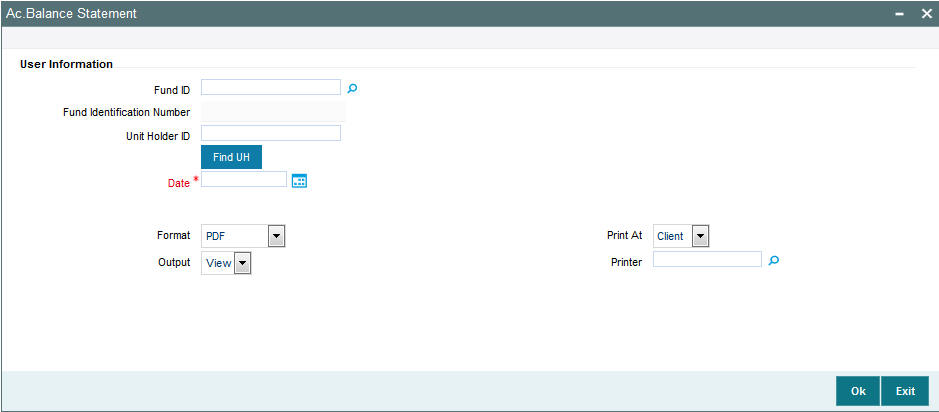
3.22.2 Contents of Account Balance Statement Report
You can specify the following details:
Fund ID
Alphanumeric; 6 Characters; Optional
Specify the fund ID. Alternatively, you can select fund ID from the option list. The system displays all valid fund ID maintained in the system.
Fund Identification Number
Display
The system displays the fund identification number.
Unit Holder ID
Alphanumeric; 16 Characters; Optional
Specify the unit holder ID.
You can also select unit holder ID by clicking ‘Find UH’ button.
Date
Date Format; Mandatory
Specify the date range to generate the account balance statement.
Format
Optional
Select the format from the drop-down list. The list displays the following values:
- HTML
- Excel
- Excel (.xlsx)
- RTF
Output
Optional
Select the output from the drop-down list. The list displays the following values:
- View
- Spool
Print At
Optional
Select the printing location from the drop-down list. The list displays the following values:
- Client
- Server
Printer
Alphanumeric; 15 Characters; Optional
Specify the printer details from adjoining option list.
Enter the printing options and Click ‘Ok’ button to print.
3.23 Portfolio Holdings Report
This section contains the following topics:
- Section 3.23.1, "Generating Portfolio Holdings Report"
- Section 3.23.2, "Contents of Portfolio Holdings Report"
3.23.1 Generating Portfolio Holdings Report
You can view the Portfolio Holdings report. In case the fund is a currency of expression fund, the output will be the UH currency of expression, NAV in currency of expression, total value in UH currency of expression and Present value (in unit holder currency of expression), else this will be shown as blank.
You can invoke this screen by typing ‘UTR00184‘ in the field at the top right corner of the Application tool bar and click the adjoining arrow.
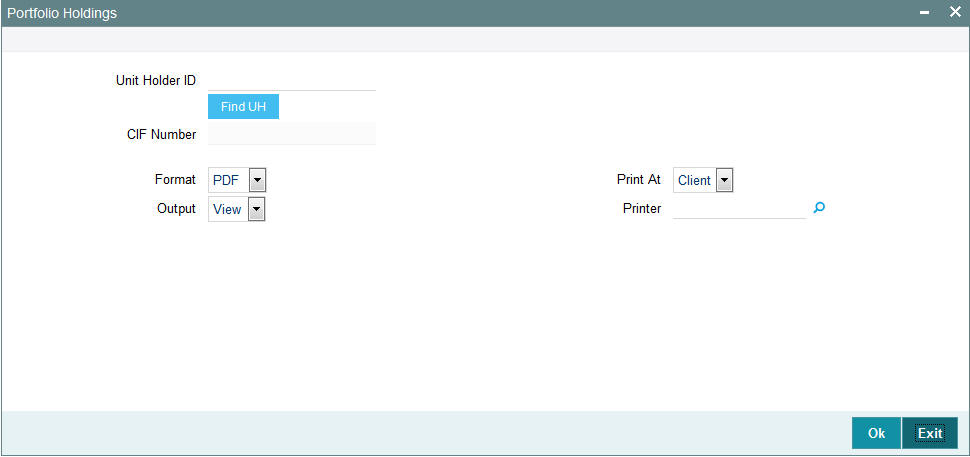
3.23.2 Contents of Portfolio Holdings Report
You can specify the following details:
Unit Holder ID
Alphanumeric; 16 Characters; Optional
Specify the unit holder ID. You can also select unit holder ID by clicking ‘Find UH’ button.
CIF Number
Display
The system displays the CIF Number.
Format
Optional
Select the format from the drop-down list. The list displays the following values:
- HTML
- Excel
- Excel (.xlsx)
- RTF
Output
Optional
Select the output from the drop-down list. The list displays the following values:
- View
- Spool
Print At
Optional
Select the printing location from the drop-down list. The list displays the following values:
- Client
- Server
Printer
Alphanumeric; 15 Characters; Optional
Specify the printer details from adjoining option list.
Enter the printing options and Click ‘Ok’ button to print.
3.24 Portfolio Statement Report
This section contains the following topics:
- Section 3.24.1, "Generating Portfolio Statement Report"
- Section 3.24.2, "Contents of Portfolio Statement Report"
3.24.1 Generating Portfolio Statement Report
You can view the Portfolio Statement report. The output will be Present value ( in unit holder currency of expression), NAV in currency of expression.
You can invoke this screen by typing ‘UTR00194‘ in the field at the top right corner of the Application tool bar and click the adjoining arrow.

3.24.2 Contents of Portfolio Statement Report
You can specify the following details:
Unit Holder ID
Alphanumeric; 16 Characters; Mandatory
Specify the unit holder ID.
Click ‘Find UH’ button to query unit holder ID.
CIF Number
Display
The system displays the CIF Number.
To Date
Date Format; Optional
Specify the date till which you wish to generate the portfolio statement report.
Format
Optional
Select the format from the drop-down list. The list displays the following values:
- HTML
- Excel
- Excel (.xlsx)
- RTF
Output
Optional
Select the output from the drop-down list. The list displays the following values:
- View
- Spool
Print At
Optional
Select the printing location from the drop-down list. The list displays the following values:
- Client
- Server
Printer
Alphanumeric; 15 Characters; Optional
Specify the printer details from adjoining option list.
Enter the printing options and Click ‘Ok’ button to print.
3.25 Portfolio Performance Report
This section contains the following topics:
- Section 3.25.1, "Generating Portfolio Performance Report"
- Section 3.25.2, "Contents of Portfolio Performance Report"
3.25.1 Generating Portfolio Performance Report
You can view the Portfolio performance report.
Performance report will display UH currency of expression also in case the fund is a currency of expression fund and Present value (in unit holder currency of expression)
You can invoke this screen by typing ‘UTR00195‘ in the field at the top right corner of the Application tool bar and click the adjoining arrow.

3.25.2 Contents of Portfolio Performance Report
You can specify the following details:
Unit Holder ID
Alphanumeric; 12 Characters; Mandatory
Specify the unit holder ID.
You can query unit holder ID by clicking ‘Find UH’ button.
CIF Number
Display
The system displays the CIF Number.
To Date
Date Format; Optional
Specify the date till which you wish to generate the portfolio performance report.
Format
Optional
Select the format from the drop-down list. The list displays the following values:
- HTML
- Excel
- Excel (.xlsx)
- RTF
Output
Optional
Select the output from the drop-down list. The list displays the following values:
- View
- Spool
Print At
Optional
Select the printing location from the drop-down list. The list displays the following values:
- Client
- Server
Printer
Alphanumeric; 15 Characters; Optional
Specify the printer details from adjoining option list.
Enter the printing options and Click ‘Ok’ button to print.
3.26 Transaction Category Updation Report
This section contains the following topic:
- Section 3.26.1, "Generating Transaction Category Updation Report"
- Section 3.26.2, "Contents of Portfolio Performance Report"
3.26.1 Generating Transaction Category Updation Report
You can view the Transaction Category Updation report. All transactions for which the transaction category has been changed will be available as in transaction category updation report.
You can invoke this screen by typing ‘UTR00308‘ in the field at the top right corner of the Application tool bar and click the adjoining arrow.

3.26.2 Contents of Portfolio Performance Report
You can specify the following details:
Entity Type
Optional
Select the entity type from the drop-down list. The list displays the following values:
- Agent
- Branch Code
- IFA
- Account Officer
- Broker
Transaction Option
Optional
Select the transaction option from the drop-down list. The list displays the following values:
- UT
- LEP
Entity ID / Broker Code
Alphanumeric; 20 Characters; Optional
Specify the entity ID or the broker code. Alternatively, you can select entity ID or broker code from the option list. The list displays all valid entity ID or broker code maintained in the system.
Entity / Broker Name
Display
The system displays the entity or the broker name for the selected entity ID or broker code.
Unit Holder ID
Alphanumeric; 12 Characters; Optional
Specify the unit holder ID.
You can search for unit holder ID by clicking ‘Find UH’ button in the screen.
Unit Holder Name
Display
The system displays the unit holder name for the selected unit holder ID.
From Transaction Category
Alphanumeric; 10 Characters; Optional
Specify the From transaction category. Alternatively, you can select From Transaction Category from the option list. The list displays all valid from transaction category maintained in the system.
To Transaction Category
Alphanumeric; 10 Characters; Optional
Specify the To transaction category. Alternatively, you can select To Transaction Category from the option list. The list displays all valid To transaction category maintained in the system.
Transaction From Date
Date Format; Mandatory
Select the transaction from date from the adjoining calendar.
Transaction To Date
Date Format; Mandatory
Select the transaction To date from the adjoining calendar.
Transaction Number
Alphanumeric; 16 Characters; Optional
Specify the transaction number. Alternatively, you can select transaction number from the option list. The list displays all valid transaction number maintained in the system.
Format
Optional
Select the format from the drop-down list. The list displays the following values:
- HTML
- Excel
- Excel (.xlsx)
- RTF
Output
Optional
Select the output from the drop-down list. The list displays the following values:
- View
- Spool
Print At
Optional
Select the printing location from the drop-down list. The list displays the following values:
- Client
- Server
Printer
Alphanumeric; 15 Characters; Optional
Specify the printer details from adjoining option list.
Click ‘Ok’ button to print.
3.27 LEP Reports
This section contains the following topic:
- Section 3.27.1, "Generating Invest Limit Ratio Report"
- Section 3.27.2, "Generating Policy Transaction Error Log Report"
- Section 3.27.3, "Generating Annual Balance Check Report"
- Section 3.27.4, "Generating 5-20 Validations Report"
- Section 3.27.5, "Generating Suspense AC Position Report"
3.27.1 Generating Invest Limit Ratio Report
You can view the invest limit ratio report using ‘Invest Limit Ratio’ screen. You can invoke this screen by typing ‘LER00074‘ in the field at the top right corner of the Application tool bar and click the adjoining arrow.

You can specify the following details:
Product ID
Alphanumeric; 16 Characters; Mandatory
Specify the product ID. Alternatively, you can select product ID from the option list. The system displays all valid product ID maintained in the system.
Transaction Date
Date Format; Optional
Specify the transaction date range to generate the invest limit ratio report.
Format
Optional
Select the format from the drop-down list. The list displays the following values:
- HTML
- Excel
- Excel (.xlsx)
- RTF
Output
Optional
Select the output from the drop-down list. The list displays the following values:
- View
- Spool
Print At
Optional
Select the printing location from the drop-down list. The list displays the following values:
- Client
- Server
Printer
Alphanumeric; 15 Characters; Optional
Specify the printer details from adjoining option list.
Enter the printing options and Click ‘Ok’ button to print.
3.27.2 Generating Policy Transaction Error Log Report
You can view the policy transaction error log report using ‘Policy Txn Error Log’ screen. You can invoke this screen by typing ‘LER00075‘ in the field at the top right corner of the Application tool bar and click the adjoining arrow.

You can specify the following details:
Policy Number
Alphanumeric; 16 Characters; Optional
Specify the policy number. Alternatively, you can select policy number from the option list. The system displays all valid policy number maintained in the system.
From Date and To Date
Date Format; Mandatory
The dates that specify the period between which you want to view the policy transaction error log details, in the From Date and To Date fields.
Format
Optional
Select the format from the drop-down list. The list displays the following values:
- HTML
- Excel
- Excel (.xlsx)
- RTF
Output
Optional
Select the output from the drop-down list. The list displays the following values:
- View
- Spool
Print At
Optional
Select the printing location from the drop-down list. The list displays the following values:
- Client
- Server
Printer
Alphanumeric; 15 Characters; Optional
Specify the printer details from adjoining option list.
Enter the printing options and Click ‘Ok’ button to print.
3.27.3 Generating Annual Balance Check Report
You can view the annual balance check for a policy using ‘Annual Balance Checks’ screen. You can invoke this screen by typing ‘LER00076‘ in the field at the top right corner of the Application tool bar and click the adjoining arrow.
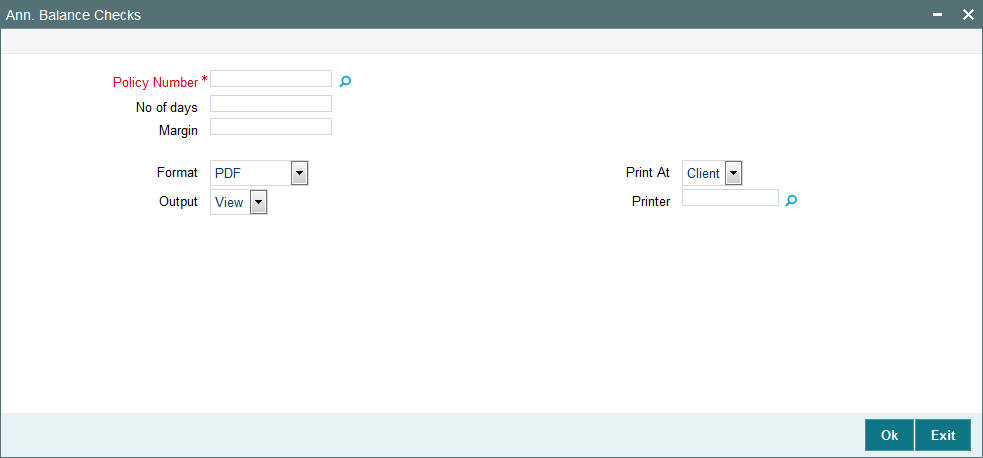
You can specify the following details:
Policy Number
Alphanumeric; 16 Characters; Mandatory
Specify the policy number. Alternatively, you can select policy number from the option list. The system displays all valid policy number maintained in the system.
No of days
Numeric; 10 Characters; Optional
Specify the number of days counted for the annual balance check for a policy.
Margin
Numeric; 10 Characters; Optional
Specify the margin limit for annual balance check for a policy.
Format
Optional
Select the format from the drop-down list. The list displays the following values:
- HTML
- Excel
- Excel (.xlsx)
- RTF
Output
Optional
Select the output from the drop-down list. The list displays the following values:
- View
- Spool
Print At
Optional
Select the printing location from the drop-down list. The list displays the following values:
- Client
- Server
Printer
Alphanumeric; 15 Characters; Optional
Specify the printer details from adjoining option list.
Enter the printing options and Click ‘Ok’ button to print.
3.27.4 Generating 5-20 Validations Report
You can view 5-20 validations report using ‘5-20 Validations’ screen. You can invoke this screen by typing ‘LER00077‘ in the field at the top right corner of the Application tool bar and click the adjoining arrow.
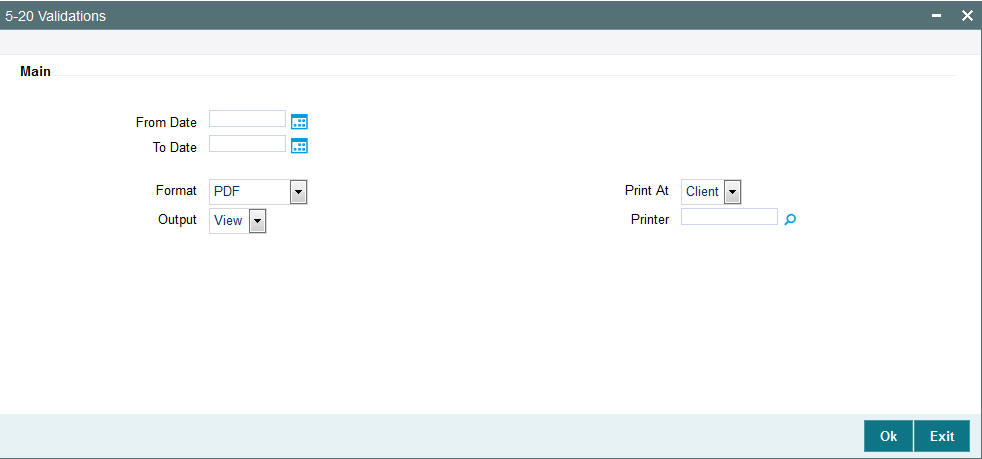
You can specify the following details:
From Date and To Date
Date Format; Optional
The dates that specify the period between which you want to view the broker details, in the From Date and To Date fields.
Format
Optional
Select the format from the drop-down list. The list displays the following values:
- HTML
- Excel
- Excel (.xlsx)
- RTF
Output
Optional
Select the output from the drop-down list. The list displays the following values:
- View
- Spool
Print At
Optional
Select the printing location from the drop-down list. The list displays the following values:
- Client
- Server
Printer
Alphanumeric; 15 Characters; Optional
Specify the printer details from adjoining option list.
Enter the printing options and Click ‘Ok’ button to print.
3.27.5 Generating Suspense AC Position Report
You can view Suspense AC Position report using ‘Suspense AC Position’ screen. You can invoke this screen by typing ‘LER00088‘ in the field at the top right corner of the Application tool bar and click the adjoining arrow button.

You can specify the following details:
Product ID
Alphanumeric; 10 Characters; Optional
Specify the product ID. Alternatively, you can select product ID from the option list. The list displays all valid product ID maintained in the system.
Transaction Type
Alphanumeric; 2 Characters; Optional
Specify the transaction type. Alternatively, you can select transaction type from the option list. The list displays all valid transaction type maintained in the system.
From Date and To Date
Date Format; Optional
The dates that specify the period between which you want to view the broker details, in the From Date and To Date fields.
Format
Optional
Select the format from the drop-down list. The list displays the following values:
- HTML
- Excel
- Excel (.xlsx)
- RTF
Output
Optional
Select the output from the drop-down list. The list displays the following values:
- View
- Spool
Print At
Optional
Select the printing location from the drop-down list. The list displays the following values:
- Client
- Server
Printer
Alphanumeric; 15 Characters; Optional
Specify the printer details from adjoining option list.
Enter the printing options and Click ‘Ok’ button to print.
3.28 SMS Reports
This section contains the following topic:
3.28.1 Generating Violation Activity Report
You can view violation activity report using ‘Violation Activity’ screen. You can invoke this screen by typing ‘UTR00082‘ in the field at the top right corner of the Application tool bar and click the adjoining arrow button.
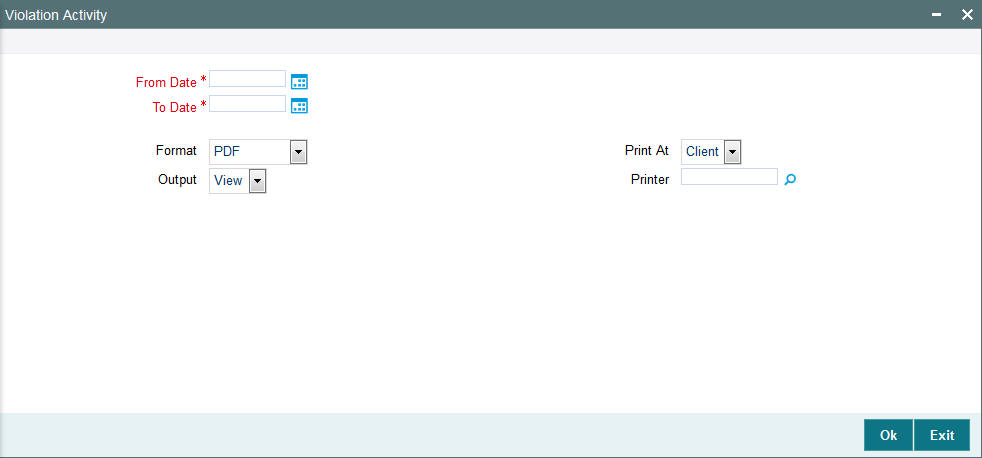
You can specify the following details:
From Date and To Date
Date Format; Optional
The dates that specify the period between which you want to view the violation activity details, in the From Date and To Date fields.
Format
Optional
Select the format from the drop-down list. The list displays the following values:
- HTML
- Excel
- Excel (.xlsx)
- RTF
Output
Optional
Select the output from the drop-down list. The list displays the following values:
- View
- Spool
Print At
Optional
Select the printing location from the drop-down list. The list displays the following values:
- Client
- Server
Printer
Alphanumeric; 15 Characters; Optional
Specify the printer details from adjoining option list.
Enter the printing options and Click ‘Ok’ button to print.
3.29 AUT Report
This section contains the following topic:
3.29.1 Generating AUT Report
You can view AUT report using ‘AUT Report’ screen. You can invoke this screen by typing ‘UTR00139‘ in the field at the top right corner of the Application tool bar and click the adjoining arrow button.
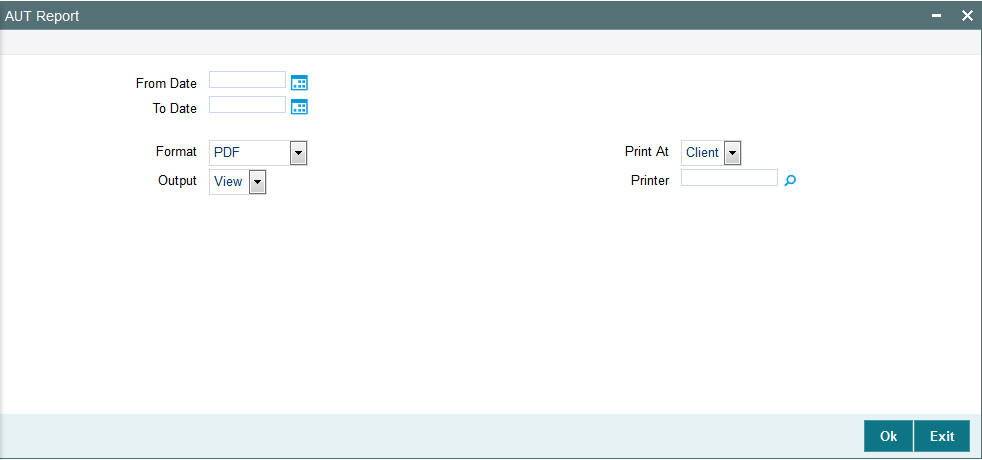
You can specify the following details:
From Date and To Date
Date Format; Optional
The dates that specify the period between which you want to view the AUT report, in the From Date and To Date fields.
Format
Optional
Select the format from the drop-down list. The list displays the following values:
- HTML
- Excel
- Excel (.xlsx)
- RTF
Output
Optional
Select the output from the drop-down list. The list displays the following values:
- View
- Spool
Print At
Optional
Select the printing location from the drop-down list. The list displays the following values:
- Client
- Server
Printer
Alphanumeric; 15 Characters; Optional
Specify the printer details from adjoining option list.
Enter the printing options and Click ‘Ok’ button to print.
3.30 Fund Reports
This section contains the following topic:
- Section 3.30.1, "Generating Fund Price Report"
- Section 3.30.2, "Generating Series Fund NNAV Details Report"
3.30.1 Generating Fund Price Report
This report will contain all the data with respect to the Fund Price maintenance. It will contain details of the Real NAV per unit, Declared NAV for fund base currency, and fund price currencies in case of COE Funds, Total assets, Outstanding Units, Total Foreign Investors Outstanding Units, Total number of Unit Holders. It also has details of the base prices of the all the transactions that are operational with the fund as of that particular date.
The output will include all the FPC for currency of expression fund. You can invoke the ‘Fund Price Details’ screen by typing ‘UTR00040’ in the field at the top right corner of the Application tool bar and clicking on the adjoining arrow button.
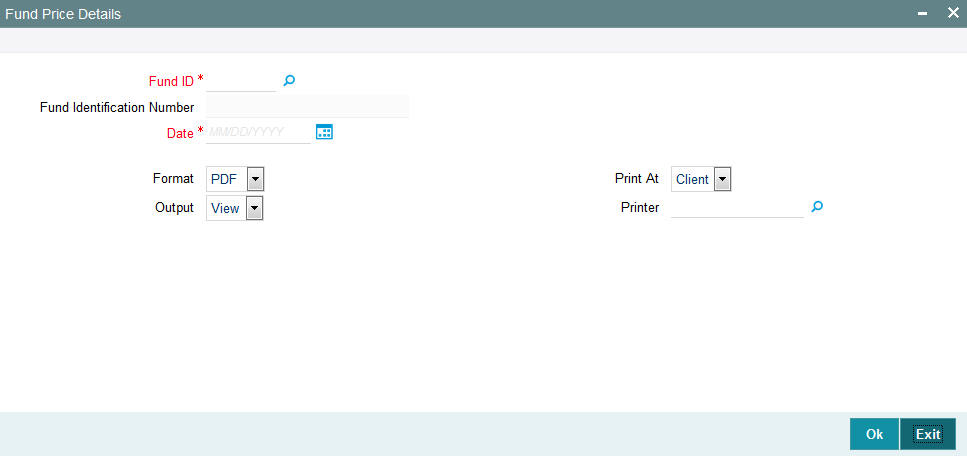
In this screen, you must specify the following as mandatory sorting parameters for the generation of the report:
Fund ID
Alphanumeric; 6 Characters; Mandatory
Specify the ID of the fund, for which you want to view the price details.
Fund Identification Number
Display
The system displays the fund identification number for the selected fund ID.
Date
Date Format; Mandatory
Select the date on which you want to view the price details.
Format
Optional
Select the format from the drop-down list. The list displays the following values:
- HTML
- Excel
- Excel (.xlsx)
- RTF
Output
Optional
Select the output from the drop-down list. The list displays the following values:
- View
- Spool
Print At
Optional
Select the printing location from the drop-down list. The list displays the following values:
- Client
- Server
Printer
Alphanumeric; 15 Characters; Optional
Specify the printer details from adjoining option list.
After making your specifications, click ‘Ok’ button. The report details are displayed.
3.30.2 Generating Series Fund NNAV Details Report
You can generate series fund NAV Details report using ‘Series Fund NNAV Details’ screen. You can invoke this screen by typing ‘UTR00225’ in the field at the top right corner of the Application tool bar and clicking on the adjoining arrow button.

You can specify the following details:
Lead Fund
Alphanumeric; 6 Characters; Optional
Specify the lead fund. Alternatively, you can select lead fund from the option list. The list displays all valid lead fund maintained in the system.
Fund ID
Alphanumeric; 6 Characters; Optional
Specify the fund ID. Alternatively, you can select fund ID from the option list. The list displays all valid fund ID maintained in the system.
Date
Date Format; Optional
Select the date from when the series fund NAV details needs to be printed from the adjoining calendar.
Format
Optional
Select the format from the drop-down list. The list displays the following values:
- HTML
- Excel
- Excel (.xlsx)
- RTF
Output
Optional
Select the output from the drop-down list. The list displays the following values:
- View
- Spool
Print At
Optional
Select the printing location from the drop-down list. The list displays the following values:
- Client
- Server
Printer
Alphanumeric; 15 Characters; Optional
Specify the printer details from adjoining option list.
After making your specifications, click ‘Ok’ button. The report details are displayed.