2. Maintaining Standing Instructions
An investor in your AMC may wish to subscribe into any of the funds of the AMC at regular periodic intervals separated by a pre-defined frequency. The investor may want to withdraw investment from any of the funds at regular periodic intervals.
These transactions of subscribing or withdrawing investment could be requested by investors could be based on any regular savings plans or withdrawal plans they have decided upon for the purpose of managing their investment and savings.
Whenever these kind of periodic transactions are to be effected, the investor gives the AMC a standing instruction to carry out the same. This would mean that according to the preferences of the investor, the AMC would automatically enter and process these periodic transactions in the investor’s account, without manual intervention from the investor.
A standing instruction given by an investor will always result in a transaction in the investor account.
This chapter contains the following sections:
- Section 2.1, "Standing Instructions Detail"
- Section 2.2, "Standing Instructions Summary"
- Section 2.3, "SI Lag Maintenance Screen"
- Section 2.4, "SI Lag Summary Screen"
- Section 2.5, "Unitholder Deal Summary"
- Section 2.6, "Plan Maintenance Detail"
- Section 2.7, "Plan Maintenance Summary"
- Section 2.8, "Transaction Category Updation"
2.1 Standing Instructions Detail
This section contains the following topics:
- Section 2.1.1, "Invoking FCIS Standing Instructions Detail Screen"
- Section 2.1.2, "Basic Info Tab"
- Section 2.1.3, "SI Preferences Tab"
- Section 2.1.4, "Intermediary Tab"
- Section 2.1.5, "Delivery Details Button"
- Section 2.1.6, "Bank and Routing Details Button"
- Section 2.1.7, "Additional Information Button"
2.1.1 Invoking FCIS Standing Instructions Detail Screen
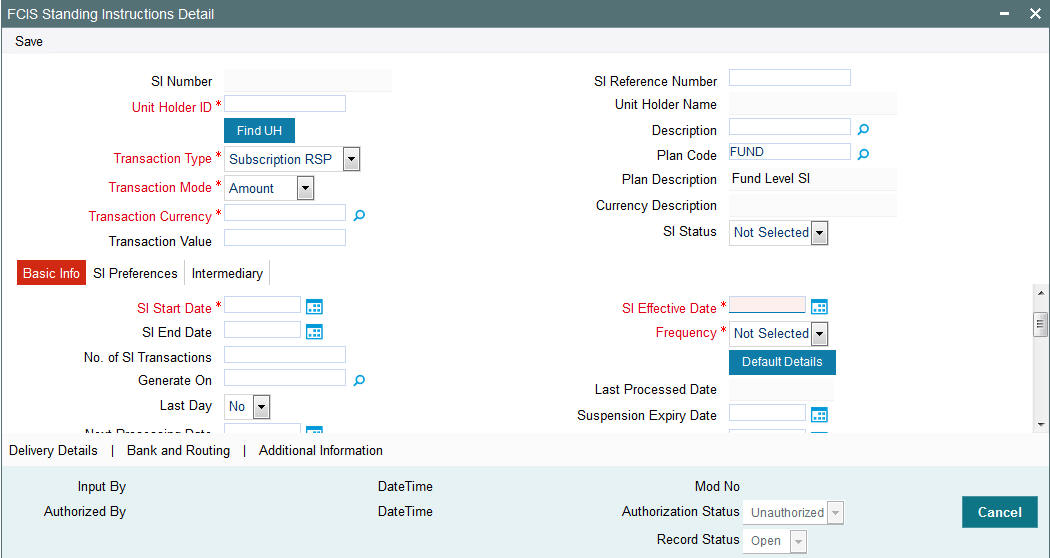
To enter a standing instruction for an investor into the system, you must capture the details of the instruction in the ‘FCIS Standing Instructions Detail’ screen. You can invoke this screen by typing ‘UTDSIN’ in the field at the top right corner of the Application tool bar and clicking on the adjoining arrow button.
Note
You can enter details regarding standing instructions provided you have checked the ‘Allow Systematic Plans’ Option in the Transaction Processing Rules screen.
In this screen, you must capture the following details for the instruction, as given by the investor:
- The unit holder ID of the investor that is requesting the standing instruction.
- The description of the standing instruction.
- The level at which you are entering the standing instruction; plan level or fund level.
- If you have chosen Plan Level, indicate the funds in which the transactions resulting from the standing instruction would be put through, in the investor’s account. However, if you are entering the standing instructions for a single fund then indicate the SI Level as fund Level and indicate the fund in which the transactions resulting from the standing instruction would be put through, in the investor’s account.
- At this stage, all the fields will be available in the screen.
- The type of transaction that would result when the standing instruction is processed.
- Whether the processing of the standing instruction must result in the generation of authorized transactions in the investor’s account.
- The mode in which the resulting transaction of the specified type must be accepted.
- The currency for the resulting transaction.
- The value of the transaction, to be reckoned in the preferred mode.
- Whether the loads for the resulting transactions must be applied on a gross basis or net basis.
- The brokers, if any, identified for the transactions, with their appropriate split percentages.
- For certificate option funds and scrip-based funds, the certificate details.
- The start and end dates that signify the period during which the standing instruction must be processed, at the specified frequency.
- The frequency at which the standing instructions must be processed, during the defined period.
- The period, in days, during which reminders must be generated for the standing instruction.
- The details of any desired escalation in transaction values.
- The details of payment, if any, for the transactions.
- Select the transaction type. In case for a particular transaction type restriction is ‘Not Applicable’, then the system will display an error message as ‘STOPACCOUNT is issued for ‘Transaction Type’ to this Unit Holder’.
After you specify all these details, click ‘Ok’ button. The record of the instruction is saved and the Standing Instructions Number is generated and displayed to you, for future reference.
If a transaction type has been suspended for the fund you have selected, standing instructions related to the fund for that transaction are also suspended. The system, however, allows you to maintain exceptions for which the suspension will not be applicable.
The transaction date will be derived based on the application received date and time recorded at the transaction level.
For switch in transaction, the application received date and time stamp recorded at switch transaction will be considered.
The process of saving standard instructions, if suspension rules and exemptions have been maintained, is as follows:
- At the time of saving, the system checks if a suspension rule applies for the given fund and transaction type selected for the SI.
- If suspension is applicable, then system would check if reference type applicable for standing instruction (reference type for standing instruction 41) is exempt from the suspension rule.
- If the reference type is exempt from the suspension rule, then system checks the value of field ‘Suspension applicability for SI’.
- If the value is ‘N’ (New) or ‘B’ (Both), the system allows the save. Else, it displays the following error message as “Transaction Type is Suspended”.
- For more details on maintaining exceptions for suspended transactions,
please refer the chapter ‘Setting Up Fund Rules (II)’
Select 'New' from the Actions menu in the Application tool bar or click new icon to enter the details of the Standing Instruction screen.
SI Number
Display
The system displays the SI number.
SI Reference Number
Alphanumeric; 16 Characters; Optional
Specify the SI reference number.
If you do not specify the SI reference number, then the system will default the SI number as SI reference number.
Unit Holder ID
Alphanumeric; 12 Characters; Mandatory
Specify the unit holder for whom the standing instruction request is being entered.
When you specify the CIF Number, all the unit holders that fall under the CIF are displayed in this field. You can make your choice from this list.
You must select a unit holder that is not restricted (or does not belong to a restricted category) for the fund into which the transaction is being entered. If not, the system does not allow the transaction to be saved.
Click ‘Find UH’ button to search for unit holder ID.
Unitholder Name
Display
The system displays the name of the unit holder for the selected unit holder ID.
Description
Alphanumeric; 50 Characters; Optional
Specify the SI description. Alternatively, you can select description from the option list.
Transaction Type
Mandatory
Select the type of transaction from the drop-down list. The list displays the following values:
- Subscription RSP
- Subscription DRSP
- Redemption
- Normal Switch
- Pseudo Switch
- Phase In Switch
- Transfer
Note
If you have chosen Plan Level as the SI level then the transaction type is defaulted as ‘Subscription’. You will not be allowed to change this.
The ‘Phase In’ field is enabled only if the ‘Transaction Type’ field is set to ‘Switch’.
Select ‘Yes’, if you want the system to allow Multiple Fund Transfer, i.e. moving fund amount from many funds to another.
The ‘Phase In’ switch feature is generally used by the Investment Frontiers. You would not be able to capture the ratio from these funds as these would be phased out in same number of occurrences. For example, if Fund1 is phased in to Fund3 and Fund4 with Phase occurrence of 5, say, after 2 occurrences, the investor cannot phase in to Fund 5 and Fund 6, as the process will be duplicated.
Note
The following points need to be considered:
- If a particular date a phase-in has been scheduled is a holiday the transaction will be generated on the next working day.
- If the ‘From’ and the ‘To’ funds belong to two different AMC’s the switch will be considered a normal switch and not a pseudo switch.
- Many to Many Funds feature will not be supported for the following:
- Pensions
- Unit Trust Standing Instructions
Example
An investor John wants to invest amount 3000 on Funds, say FUND1 and FUND2. He has set ‘Phase In Occurrences’ to 5, and frequency as Monthly, i.e., the fund will be divided into 5 units on monthly basis.
‘To Fund Ratio’ has been set to 50%, i.e., FUND1 is equally divided into FUND 3 and FUND4. Similarly, FUND 2 is also equally divided into FUND3 and FUND4.
This is displayed in the table as shown:
From Funds |
To Funds |
To Fund Ratio |
FUND1 |
FUND3 |
50% |
FUND2 |
FUND4 |
50% |
Unit balances can be set for every month manually shown as follows:
Month |
Fund |
Units |
1st |
FUND1 |
1000 |
FUND2 |
2000 |
|
2nd |
FUND1 |
850 |
FUND2 |
1700 |
|
3rd |
FUND1 |
630 |
FUND2 |
1260 |
|
4th |
FUND1 |
450 |
FUND2 |
850 |
|
5th |
FUND1 |
250 |
FUND2 |
500 |
For the first month, the phase occurrence value is 5. The unit for the first month for FUND1 is 1000/5 = 200 and for FUND2 is 2000/5 = 400. Similarly, for second month, the unit for FUND1 is 850/4 = 212.5 and for FUND2 is 1700/4 = 425 and so on.
The unit details for 5 phase occurrences are as shown in the table:
Policy SI Details |
Fund Split Details |
|
||||
Ref No |
Month |
Mode |
Value |
Fund |
Units |
Remaining Occurrences |
Ref 1 |
1 |
Units |
0 |
FUND1 |
200 |
5 |
|
FUND2 |
400 |
|
|||
Ref 2 |
2 |
Units |
0 |
FUND1 |
212.5 |
4 |
|
FUND2 |
425 |
|
|||
Ref 3 |
3 |
Units |
0 |
FUND1 |
210 |
3 |
|
FUND2 |
420 |
|
|||
Ref 4 |
4 |
Units |
0 |
FUND1 |
225 |
2 |
|
FUND2 |
425 |
|
|||
Ref 5 |
5 |
Units |
0 |
FUND1 |
250 |
1 |
|
FUND2 |
500 |
|
|||
Since the ‘To Fund Ratio’ is set to 50%, the units obtained in the above table are equally divided into FUND3 and FUND4.
The Unit Transaction details are as shown in the table below:
Ref No |
Month |
From Fund |
To Fund |
Units |
SW1 |
1 |
FUND1 |
FUND3 |
100 |
SW2 |
FUND1 |
FUND4 |
100 |
|
SW3 |
FUND2 |
FUND3 |
200 |
|
SW4 |
FUND2 |
FUND4 |
200 |
|
SW5 |
2 |
FUND1 |
FUND3 |
106.25 |
SW6 |
FUND1 |
FUND4 |
106.25 |
|
SW7 |
FUND2 |
FUND3 |
212.5 |
|
SW8 |
FUND2 |
FUND4 |
212.5 |
|
SW9 |
3 |
FUND1 |
FUND3 |
105 |
SW10 |
FUND1 |
FUND4 |
105 |
|
SW11 |
FUND2 |
FUND3 |
210 |
|
SW12 |
FUND2 |
FUND4 |
210 |
|
SW13 |
4 |
FUND1 |
FUND3 |
112.5 |
SW14 |
FUND1 |
FUND4 |
112.5 |
|
SW15 |
FUND2 |
FUND3 |
212.5 |
|
SW16 |
FUND2 |
FUND4 |
212.5 |
|
SW17 |
5 |
FUND1 |
FUND3 |
125 |
SW18 |
FUND1 |
FUND4 |
125 |
|
SW19 |
FUND2 |
FUND3 |
250 |
|
SW20 |
FUND2 |
FUND4 |
250 |
Selecting the ‘Phase In Type’ to ‘Holdings’, the system will switch out the fund holdings within the specified number of occurrences to the selected fund.
Transaction Mode
Mandatory
Select the mode in which the transaction value is to be reckoned, for transactions generated in respect of processing of the standing instruction from the drop-down list. The list displays the following values:
- Amount
- Units
- Percentage
Note
If you have chosen Plan Level as the SI level then the transaction mode is defaulted as ‘Amount’. You will not be allowed to change this.
Plan Code
Alphanumeric; 6 Characters; Optional
Select the plan for which the standing instruction will be applicable. Any transactions resulting from the standing instruction will be put through in the funds maintained in the plan. When you specify the plan, the description of the plan is displayed alongside.
Note
This field will be displayed only if the SI level is ‘Plan Level’.
Plan Description
Display
The system displays the description for the selected plan code.
Transaction Currency
Alphanumeric, 3 Characters; Mandatory
Specify the transaction currency. Alternatively, you can select transaction currency from the option list. The list displays all valid transaction currency codes maintained in the system
In case, the unit holder does not have an account for the transaction currency, you can choose the multi-currency account in SI Bank Details screen – if the mode of payment is ‘Transfer’ and payment type is ‘Self’.
Currency Description
Display
The system displays the currency name of the specified SI Transaction Currency based on the details maintained at ‘Currency Maintenance’ level.
Transaction Value
Numeric; 22 Characters; Mandatory
Specify the transaction value.
SI Status
Optional
Select the SI status from the drop-down list. the list displays the following values:
- Active: This means that the instruction is still being processed, and transactions have been put through.
- Paused: This means that the authorized instruction record exists in the database, but no processing is taking place in respect of the same.
- Cancelled: This means that the instruction has been annulled and no processing is scheduled to take place in respect of the same.
- Not Started
- Not Selected
2.1.2 Basic Info Tab
The system retrieves the name of the selected unit holder and displays it alongside this field when you click the Validate link.
Click ‘SI Basic Info’ tab to enter the details.
Dates
In this section, specify the period during which the standing instruction is to be processed for the unit holder, as well as the frequency at which it must be processed.
SI Start Date
Date Format; Mandatory
Specify the date on and following which the standing instruction must be processed, at the defined frequency. You can select the date using the system provided calendar.
SI End Date
Date Format; Optional
Specify the date until which the standing instructions must be processed, at the defined frequency. You can select the date using the system provided calendar.
No. of SI Transactions
Numeric; 22 Characters; Optional
Specify the number of SI transactions for Monthly, Quarterly, Half yearly and Yearly frequencies.
Generate On
Alphanumeric; 100 Characters; Optional
Specified the transaction generated date.
Last Day
Optional
Select the last day from the drop-down list. The list displays the following values:
- Yes
- No
If you select ‘Yes’ option, the system will consider holiday rule as Prior irrespective of the Fund level maintenance.
If you select ‘No’ option, the system will derive next SI generation date based on the SI start date’s ‘Day’. For instance, if SI Start Date is 28-Jan-2016 and frequency is monthly, SI generation date will be always 28th of every month as long as it is not a holiday.
If the SI generation date is a holiday, the system will generate the SI either on next working date or previous working date based on system calendar and holiday rule set up at Fund Rules. If holiday rule is not maintained, system will generate SI on next working date based on system calendar.
Example
Holiday Rule Maintained at Fund Rules as "After" |
|
Assume 08-Mar-2016 is a holiday |
|
SI Generation Date |
Actual Generation date |
8-Jan-16 |
8-Jan-16 |
8-Feb-16 |
8-Feb-16 |
8-Mar-16 |
9-Mar-16 |
Holiday Rule Maintained at Fund Rules as "Prior" |
|
Assume 08-Mar-2016 is a holiday |
|
SI Generation Date |
Actual Generation date |
8-Jan-16 |
8-Jan-16 |
8-Feb-16 |
8-Feb-16 |
8-Mar-16 |
7-Mar-16 |
Subsequent lump sum subscriptions/ regular RSP / switch-in to Source fund can be utilized for switching from Source fund into Target fund.
Example
SI Start Date - 28-Jan-2017 |
Last Day - Y |
SI Generation Date |
Amount |
28-Jan-17 |
1000 |
28-Feb-17 |
1000 |
31-Mar-17 |
1000 |
SI Start Date - 28-Jan-2017 |
Last Day - N |
SI Generation Date |
Amount |
28-Jan-17 |
1000 |
28-Feb-17 |
1000 |
28-Mar-17 |
1000 |
SI Start Date - 31-Jan-2017 |
Last Day – Y/N |
SI Generation Date |
Amount |
31-Jan-17 |
1000 |
28-Feb-17 |
1000 |
31-Mar-17 |
1000 |
30-Apr-17 |
1000 |
Next Processing Date
Date Format; Optional
Select the next processing date from the adjoining calendar.
In case of SI amend, the system will validate this field against the cut off days maintained. Changing Next Processing Date is not allowed if Next Processing Date is less than or equal to Business Date + Cut off Days.
If you do not set COMPUTESINPD client country, then you can amend the next processing date.
You should manually specify Next Processing Date (NPD) in case of future dated rule effective date where rule effective date is greater than Next Processing Date of amended rule.
If you set COMPUTESINPD client country, the system computes the Next Processing Date (NPD) while saving. If you amend an SI with a future dated Rule Effective Date (RED), and if the Rule Effective Date is greater than the Next Processing Date of Amended SI, then the system will auto compute the NPD for the new rule as the next nearest date after the Rule Effective Date without changing the generation day of month (in case of monthly). However, you cannot change generation day for an SI in this case.
If you manually try to change the Next Processing Date, when this client country is set, then the system displays an error message as ‘Next Processing Date cannot be changed by user’.
Note
In case of upload and gateway, Next Processing Date must be kept blank in the upload file and request xml respectively.
SI Effective Date
Date Format; Mandatory
Select the SI effective date from the adjoining calendar. If the SI effective date is greater than the current date then the next processing date is mandatory.
Note
The SI Effective date should not be during the cut-off period.
For instance, if SI start date is 8th November, and the current system date is 8th November, then the Next process date should be 8th December. If you try to amend the SI with SI effective date as 4th December, then the system displays an error message as ‘The SI Effective date should not be during the cut-off period.’.
Frequency
Mandatory
From the drop-down list, select the frequency at which the standing instruction must be processed, within the period defined between the start and end dates. The options available are as follows:
- Monthly
- Quarterly
- Half-Yearly
- Yearly
- Weekly
- Bi-Weekly
- Daily
Note
If the SI Cut-Off Day function is applicable for this installation, it will be effective only if the frequency specified in this field is ‘monthly’ or higher.
Click ‘Default Details’ button to view the following details:
- Details of transactions that could result when the standing instruction is processed
- Details of any brokers identified for the transactions
- Details of the instructions given for the transactions
- Details of any escalation for the standing instruction
- Details of any payment made for the processing of standing instructions
Last Processed Date
Display
The system displays the date when this standing instruction was last processed. For a new standing instruction, this field will be blank.
Suspension Expiry Date
Date Format; Optional
Select the suspension expiry date from the adjoining calendar.
This field will be applicable only if you select ‘SI Status’ field as ‘Pause’.
The system will automatically update SI status as ‘Active’ when the Suspension Expiry Date maintained is lesser than business date. This will be achieved as part of a BOD job.
If this field is not maintained, you need to amend SI status manually to make it active or cancel.
First Generation Date
Date Format; Optional
Enter a date on which the system should generate a transaction apart from generating on the Standard Instruction start date. This date should be lesser than the Standard Instruction start date and Greater than or equal to the application date.
The date specified here cannot be edited or amended once you save the transaction.
Fund Details
Fund ID
Alphanumeric; 6 Characters; Mandatory
Select the fund in which any transactions resulting from the standing instruction must be put through. When you specify the fund, the ISIN Code of the fund is displayed in the ISIN Code field along with the fund name.
Note
This field will be displayed only if the SI level is ‘Fund Level’.
Fund Name
Display
The system displays the fund name for the selected fund ID.
Transaction Value
Numeric; 22 Characters; Optional
Specify the transaction value.
Low Contribution Amount
Numeric; 18 Characters; Optional
Specify the SI amount to be used for transaction generation if yield calculated is greater than or equal to positive yield % maintained
This field is applicable only if you have selected ‘SI Level’ option as ‘Fund’.
The low contribution amount should be less than SI Amount.
Positive Yield %
Numeric; 5 Characters; Optional
Specify the positive yield percentage to be maintained for DRSP.
This field is applicable only if you have selected ‘SI Level’ option as ‘Fund’.
The Positive Yield % value should be greater than negative yield % maintained.
From Issued Balances
Optional
Select ‘Yes’ from the drop-down list, if you need to process transactions from issued balances. The drop-down list displays the following values:
- Yes
- No
- Both
Single Certificate?
Mandatory only if you have chosen the ‘Yes’ option in the Certificate Required field.
Select the denomination of certificates, whether single or multiple, that will be involved in the transaction, if certificates have been requested.
- For IPO and subscription, specify whether the unit holder has requested a single certificate or multiple certificates.
- For redemption, switch and transfer, specify whether a single certificate or multiple certificates are being redeemed, switched or transferred. For transfer transactions, specify whether the transferee unit holder has requested single or multiple certificates.
If you choose ‘No’ option in this field, then the certificates involved in the transaction will be reckoned in denominations governed by the maximum and minimum certificate denominations specified for the fund in the Shares Characteristics rule.
KIID Compliant
Select if the standing instruction is KIID compliant or not from the drop-down list. Following are the options available:
- Yes
- No
If SI is maintained for a single fund, then for the UH and Fund selected, the system will default ‘Yes/No’ value based on UH level mapping. In case the fund is selected is a non UCITS fund or if there is SI maintained for multiple funds at SI Fund Info tab, then this field will be blank.
In case there is no UH mapping for the UCITS fund selected, the system will default the value to ‘No’. While saving this record, then the system will display an error message as ‘The Unit holder has not received the KIID’
If the field is set to ‘Yes’, then the UH will receive the KIID. These entries where the KIID compliant is made as ‘Yes’ during maintenance will be available as part of ‘UCITS-KIID Received SI Report’.
Contribution Percentage
Numeric; 5 Characters; Optional
Indicate the percentage of holdings of the transaction that is to be generated in respect of the instruction.
High Contribution Amount
Numeric; 22 Characters; Optional
Specify the SI amount to be used for transaction generation if yield calculated is less than or equal to negative yield % maintained.
This field is applicable only if you have selected ‘SI Level’ option as ‘Fund’.
The high contribution amount should be greater than SI Amount.
Negative Yield %
Numeric; 5 Characters; Optional
Specify the negative yield percentage to be maintained for DRSP.
This field is applicable only if you have selected ‘SI Level’ option as ‘Fund’.
The Negative Yield % value should be less than negative yield % maintained. Negative yield % cannot be greater than positive yield%.
The system will not allow amendment of SI between cut-off date and next processing date.
You can specify the following fields only if you have selected ‘SI Type’ as ‘DRSP’ and ‘Transaction Type’ as ‘Subscription’:
- High Contribution Amount
- Low Contribution Amount
- Positive Yield %
- Negative Yield %
Investors can define a yield for each fund and based on:
- If computed result is greater than or equal to positive yield, the RSP amount for the month will be the Low Contribution Amount defined, else the RSP amount will be base contribution amount specified
- If computed result is less than or equal to negative yield, the RSP amount for the month will be the High Contribution Amount specified, else the RSP amount will be base contribution amount specified
- If stop account is issued for an investor account, the system will not compute the yield % and system will always use the base contribution amount.
- DRSP transactions will have a new ref type ‘45’ to enable ageing sequence and separate load mapping.
Switching between RSP and DRSP is as follows:
- DRSP can be ‘switched’ to RSP and vice versa by amending the SI maintenance and mark the ‘SI Type’ as Normal/ Dynamic.
- The system will stop yield computation if you change ‘SI Type’ from ‘Dynamic’ to ‘Normal’. If stop account is issued for the investor post yield computation, the system will stop the yield computation from subsequent cycle only.
- The amendment to switch RSP to DRSP or vice-versa can be done for the next SI generation date only (Next processing date), if the allowed amendment period is breached. This will be derived based on cut-off day’s field at system level.
Note
The system will perform the sales suitability (risk rating) check at the point of RSP/ DRSP set up and amendment (i.e. fund and amount).
Sales suitability check will not be performed during SI generation of RSP/DRSP transactions if ‘invriskcheck’ client country code is disabled.
Certificate Required?
Optional
For funds that have the certificate option as specified in the Shares Characteristics rules, specify whether the selected unit holder has requested certificates for the standing instruction transaction. If yes, then choose the Yes option in this field, and specify the number of certificates requested in the Number of Certificates field.
Price Basis
Alphanumeric; 10 Characters; Mandatory
The default price basis defined in the Distributor Price Basis Setup, if any, for the fund, transaction type, distributor and investment account type involved in the standing instruction, is displayed in this field.
If no price basis has been maintained in the Distributor Price Basis Setup, the default price basis specified for the fund and transaction type for the instruction, from the fund rules, is displayed here.
Minimum Holding Check Required?
Optional
You can use this field to indicate whether the system must perform the minimum holdings validation when the subscription transactions in respect of the standing instruction are generated.
If this option is selected for a standing instruction, the system validates that the current holdings of the investor either equal or exceed the minimum holdings value specified in the Limit for Standing Instructions defined for the fund, when the subscription transactions in respect of the standing instruction are generated.
This specification can be maintained only if the Minimum Holdings Check has been indicated as applicable for the fund for which the standing instructions are being entered.
Contra Leg Fund/Unitholder
Switch To Fund ID
Alphanumeric; 6 Characters; Optional
Specify the switch to fund ID. Alternatively, you can select switch to fund ID from the option list. The list displays all valid switch to fund ID maintained in the system.Switch To Fund Name
Switch To Fund Name
Display
The system displays the switch to fund name for the selected switch to fund ID.
To UnitHolder ID
Alphanumeric; 12 Characters; Optional
Specify the To unit holder ID. Alternatively, you can select To unit holder ID from the option list. The list displays all valid To unit holder ID maintained in the system.
Click ‘Find To UH’ button to query To unit holder ID.
To Unit Holder Name
Display
The system displays To unit holder name for the selected To unit holder ID.
2.1.3 SI Preferences Tab
Unit holders may need to have the values of transactions generated for a standing instruction to be escalated at a pre-defined frequency. This is known as escalation.
Escalation is possible only for certain transaction types like IPO and Subscription.
Click ‘SI Preferences’ tab in ‘FCIS Standing Instructions Detail’ screen.
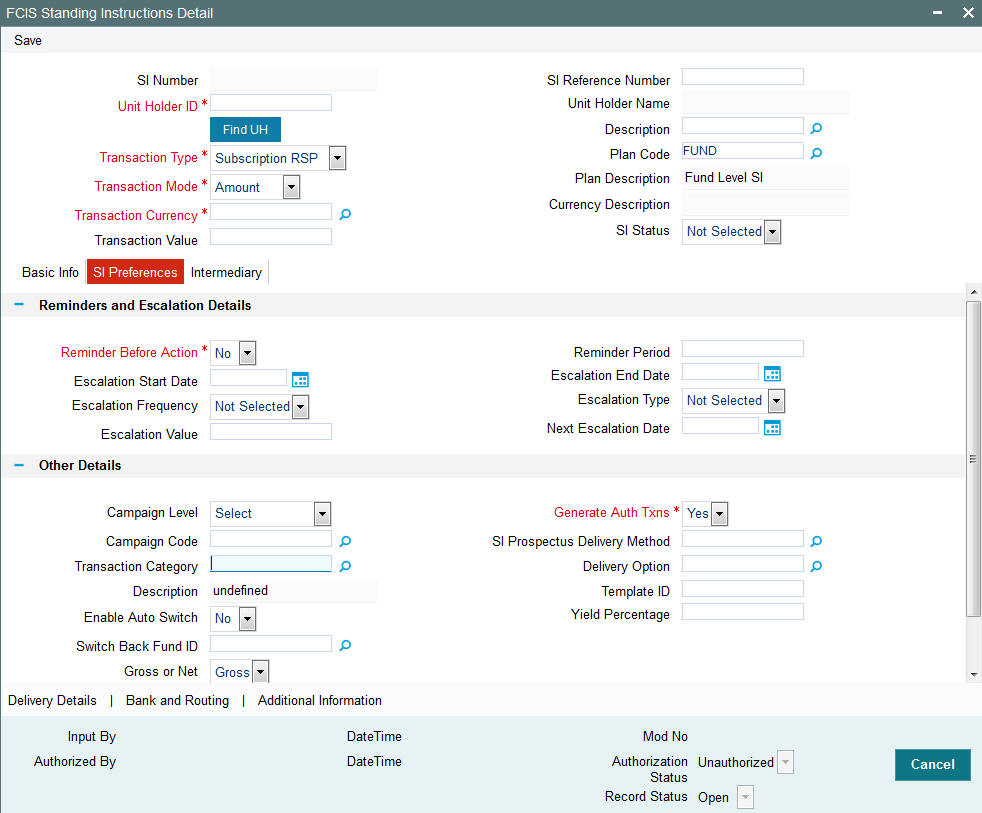
Reminders and Escalation Details
Reminder Before Action?
Mandatory
Select if the reminder before action is required or not from the drop-down list. the list displays the following values:
- Yes
- No
If you select the option as ‘Yes’, then the Unit Holder will be intimidated before SI generation.
Reminder Period
Numeric; 3 Characters; Optional
Specify a value in days to specify the requirement of reminder before the processing of the standing instruction.
Escalation Start Date
Date Format; Optional
Specify the date on which the escalation of the instruction will begin. This date has to be later than the SI Start date, but earlier than the SI End Date.
Escalation End Date
Date Format; Optional
Specify the date on which the escalation of the instruction will cease. This date has to be later than the SI Escalation Start Date, but earlier than the SI End Date.
Escalation Frequency
Optional
Select the frequency at which the escalation is to take place. You can select the desired frequency format from the drop down list. The list displays the following values:
- Monthly
- Quarterly
- Half-Yearly
- Yearly
- Weekly
- Bi-Weekly
- Daily
The escalation frequency must always be greater than or equal to the standing instruction frequency.
Escalation Type
Optional
Select whether the escalation is an amount/units-based escalation or a percentage escalation. Select the desired type from the drop down list. The list displays the following values:
- Amount/Units
- Percentage
Escalation Value
Numeric; 18 Characters; Optional
Enter the value by which the standing instruction transaction value must be escalated.
Next Escalation Date
Date Format; Optional
This is the date on which the next escalation will take place. It is updated by the system based on the standing instructions start date and the escalation frequency in the case of a new record. For records retrieved in the Amend mode, this date may be altered in the amend session. If this date is overridden manually, then next escalation will take place on the date amended by the user. If Next Escalation Date is updated, then this field given priority over Escalation Start Date
Note
If escalation is requested, then you must specify ALL the details in this section as mandatory information, to enable the system to process the escalation.
Other Details
Campaign Level
Optional
Select the campaign level from the drop-down list. The list displays the following values:
- Campaign Code
- Campaign Group
By default, campaign code will be selected.
Campaign Code
Alphanumeric; 6 Characters; Optional
Specify the campaign code to show the result based on Campaign Level selected. Alternatively, you can select campaign code from the option list. The list displays all valid campaign code maintained in the campaign maintenance.
If campaign Level is ‘Campaign Code’, then the system will tag the campaign while saving the transaction.
You can link the campaign to the subscription and switch transaction type of standing instruction. Specify the campaign to be mapped. You can also select the campaign code from the option list.
Transaction Category
Alphanumeric; 1 Character; Optional
Specify the type of transaction. Alternatively, you can select transaction category from the option list. The list displays all valid transaction category code maintained in the system.
Description
Display
The system displays the description for the selected transaction category.
Enable Auto Switch
Optional
Select if auto switch to be enabled or not from the drop-down list. The list displays the following values:
- Yes
- No
If you select ‘Yes’ option, you need to maintain the Auto switch mode sub screens maintained, else the system will display an error message.
Switch Back Fund ID
Alphanumeric; 16 Characters; Optional
Specify the fund ID for which the switch back should happen when yield is met. Alternatively, you can select switch back fund ID from the option list. The list displays all valid switch back fund ID maintained in the system.
Gross or Net
Optional
Specify whether the transaction is a gross or net transaction.
Note
If you have chosen Plan Level as the SI level then this field defaulted as ‘Gross’. You will not be allowed to change this.
Generate Auth Txns
Mandatory
Select the option Yes/No from drop-down list to indicate whether authorized/unauthorized transactions generates when the standing instruction is processed
This specification is applicable and enabled only for scrip-less funds, and for funds in which the Aging Policy is based on Transaction Receipts (from the Transaction Processing Rules for the fund).This option is not applicable for certificate-option funds in which the unit holder has requested for certificates.
SI Prospectus Delivery Method
Alphanumeric; 2 Characters’ Optional
Specify the SI prospectus delivery method. Alternatively, you can select SI prospectus delivery code from the option list. The list displays all valid SI prospectus delivery code maintained in the system.
Note
You can maintain this delivery method based on Param Code ‘SIPROSPECTUSDELIVERYMTHD’
Delivery Option
Alphanumeric; 1 Character; Optional
Specify the delivery option. Alternatively, you can select delivery option from the option list. the list displays valid delivery option maintained in the system.
Template ID
Alphanumeric; 6 Characters; Optional
Specify the template ID. Alternatively, you can select template ID maintained in the system. The list displays all valid template ID maintained in the system.
Yield Percentage
Numeric; 22 Characters; Mandatory
Specify the yield percentage mentioned by the investor and at which units in target fund achieve the yield will be switched back to source fund.
The system uses percentage (1-99) to validate the returns and switch back to source fund. This field is mandatory if you select ‘Enable Auto Switch’ field as ‘Yes’.
Counter Details
SI Auto-Termination Cumulative Counter
Alphanumeric; 3 Characters; Optional
Specify the maximum number of times the SI payment rejections are allowed before the auto termination. If you have not maintained any value, then on saving/modifying the SI transaction, the system defaults the value maintained at the ‘Plan Maintenance’ screen, if the SI level is ‘Plan’. Similarly, if the SI level is ‘Fund’, then the system defaults the value maintained in the ‘Transaction Processing Rule – Detail’ screen. However, the value available here is considered for auto termination of the standing instruction.
If you set this counter to zero, then the SI is cancelled on the very first rejection of the payment and the SI status maintained as ‘Cancel’. If there is no value maintained, then the SI will not be automatically terminated if the payment is rejected.
Note
After automatically terminating the SI, the system will set the description for the SI to ‘Cancelled due to exceeding cumulative payment rejections’.
SI Auto-Termination Consecutive Counter
Numeric; 3 Characters; Optional
Specify the maximum number of times consecutive SI payment rejections are allowed before the SI is automatically terminated. If you have not maintained any value, then on saving/modifying the SI transaction, the system defaults the value maintained at the ‘Plan Maintenance’ screen, if the SI level is ‘Plan’. Similarly, if the SI level is ‘Fund’, then the system defaults the value maintained in the ‘Transaction Processing Rule – Detail’ screen. However, the value available here is considered for auto termination of the standing instruction.
If you set this counter to zero, then the SI is cancelled on the very first rejection of the payment. If there is no value maintained, then the SI will not be automatically terminated if the payment is rejected.
Note
After automatically terminating the SI, the system will set the description for the SI to ‘Cancelled due to exceeding consecutive payment rejections’.
No. Of Cumulative Failures
Display
The system displays the number of cumulative failures.
No. Of Consecutive Failures
Display
The system displays the number of consecutive failures.
No. of SI Transaction Generated
Display
The system displays the number of SI transactions generated for the fund/plan. If this value is found to be equal to the limit set for the fund (in ‘Fixed No of SI Installments’ field in the Transaction Processing Rules) and the SI Level is ‘Fund’, then the SI will be cancelled. Similarly, where the SI Level is ‘Plan’, an SI will be cancelled if the number of SI transactions generated is found to be equal to the ‘Fixed no of SI installments’ for any of the funds under that plan”.
In both cases, after cancelling the SI, the system will update the SI Status to ‘Cancel’ and the SI Description field to ‘Cancelled due to exceeding number of maximum transactions allowed’.
2.1.4 Intermediary Tab
In this section, specify any brokers that are to be deemed as applicable for the transactions generated for the standing instruction.
Any identified brokers for the selected unit holder are displayed here, from the unit holder account profile, along with the parent brokers and the split percentages. You can alter this list, or add to it.
The split percentages that you specify for all brokers you choose for the transactions must sum up exactly to one hundred percent.
If brokers are designated as mandatory for the fund in which the standing instruction transactions are to be put through, you must specify at least one broker in this section. Click ‘SI Intermediary’ tab to enter the details
Click ‘Intermediary’ tab in ‘FCIS Standing Instructions Detail’ screen.
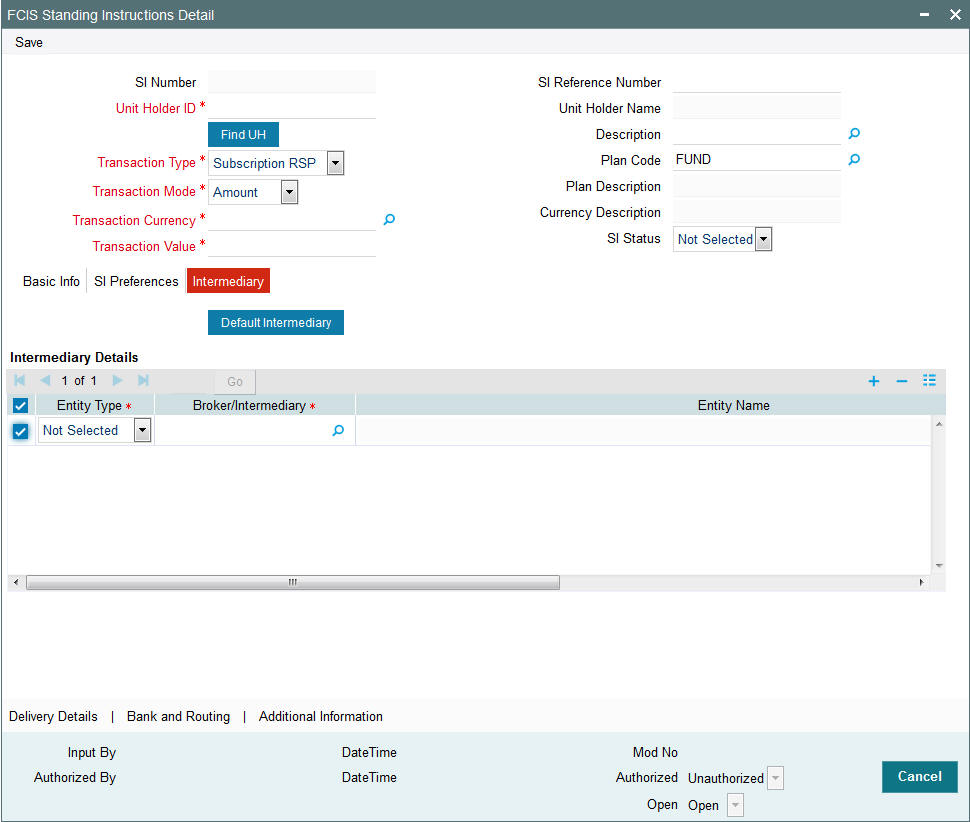
You can specify the following details:
Entity Type
Mandatory
Select the Entity Type from the drop-down list. The list displays the following values:
- Broker
- Agent
- IFA
- Account Officer
- Agency Branch
Broker/Intermediary
Alphanumeric; 12 Characters; Mandatory
You can also select the broker preferred by the investor from the list, and the corresponding information regarding the Intermediary and Parent Broker Name will automatically be populated in the adjoining fields on selection of the Broker Name.
Entity Name
Display
The system displays the entity name for the selected entity type.
Split Percentage
Numeric; 5 Characters; Optional
Specify the percentage of the commission derived for the standing instruction transaction that is to be accrued to the broker.
The split percentages that you specify for all brokers you choose for the transactions must sum up exactly to one hundred percent.
From Or To Leg
Mandatory
Select the From or To leg from the drop-down list.
Click ‘Default Intermediary’ button to default the intermediary details.
2.1.5 Delivery Details Button
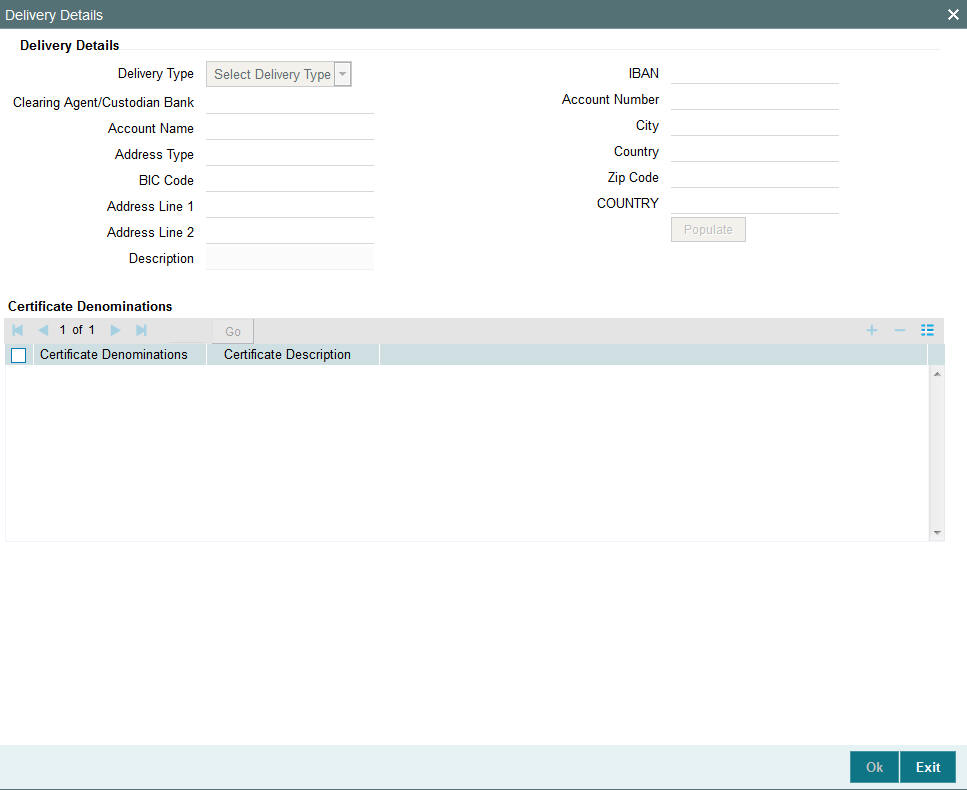
You can specify the following SI delivery details:
Delivery Details
Delivery Type
Optional
Indicate the type of delivery from the drop-down list. The options available are:
- Self
- Third Party
IBAN
Alphanumeric; 40 Characters; Optional
Specify the IBAN number.
Clearing Agent/ Custodian Bank
Alphanumeric; 12 Characters; Optional
Specify the clearing agent or custodian bank. The adjoining option list displays the valid clearing agent /custodian bank list. You can choose the appropriate one.
Account Number
Alphanumeric; 16 Characters; Optional
Specify the account number.
Account Name
Alphanumeric; 100 Characters; Optional
Specify the account name.
Address Type
Alphanumeric; 2 Characters; Optional
Specify the address type.
BIC Code
Alphanumeric; 12 Characters; Optional
Specify the BIC code.
Address Line1, 2
Alphanumeric; 80 Characters; Optional
Specify the address information in the two lines available.
Description
Display
The system displays the description of the specified country
City
Alphanumeric; 80 Characters; Optional
Indicate the name of the city.
Country
Alphanumeric; 80 Characters; Optional
Indicate the name of the country.
Zip Code
Alphanumeric; 10 Characters; Optional
Specify the zip code.
Certificate Denominations
Certificate Denominations
Alphanumeric; 200 Characters; Optional
Specify the certificate denominations.
Certificate Description
Alphanumeric; 34 Characters; Optional
Specify a description of the certificate.
2.1.6 Bank and Routing Details Button
The details of the payments made for the standing instruction transactions can be captured here. This information is only applicable for IPO, Subscription and Redemption transaction types. Click ‘Bank and Routing Details’ button to invoke ‘Bank and Routing’ screen.
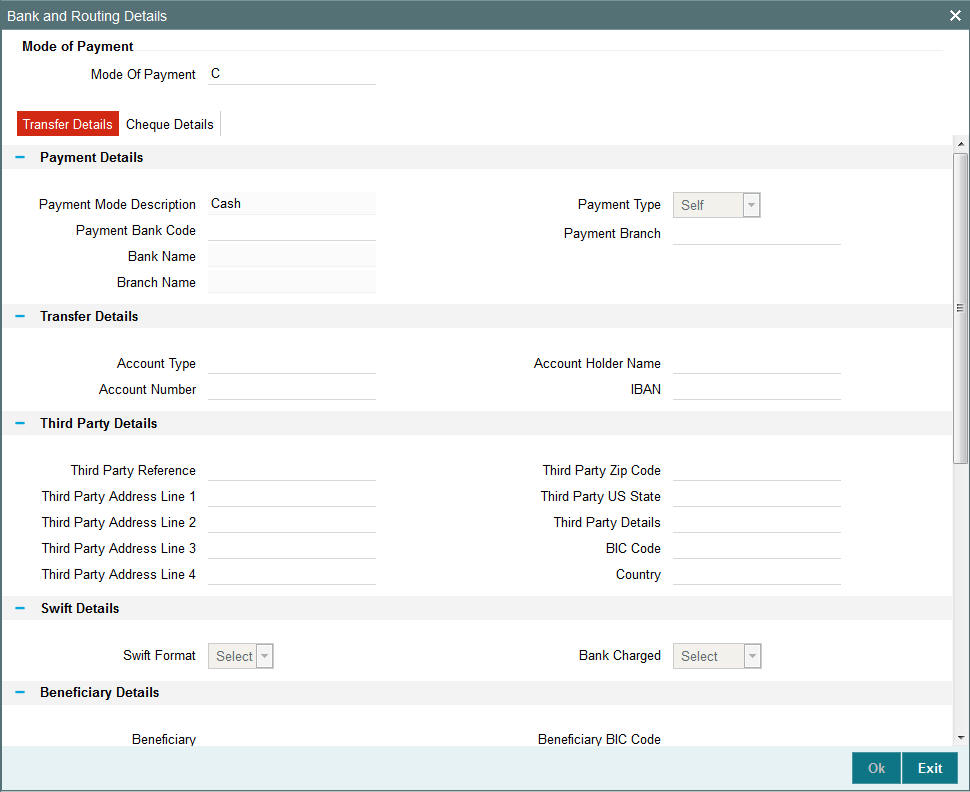
You can specify the following details:
Mode of Payment
Mode of Payment
Alphanumeric; 2 Characters; Optional
You can select it as cheque or money transfer.
Payment Mode Description
Display
The system displays the description for the selected mode of payment.
2.1.6.1 Transfer Details Tab
Click ‘Transfer Details’ tab in ‘Banking and Routing Details’ screen..
Payment Details
The payment details include the following:
- The mode through which the payment is made, either check or transfer
- The type of payment, that is, whether the payment is being made by the unit holder that has requested the transaction or by an external third party.
- The details of the bank and branch of the bank for the payment
- The details of any payment instruments such as checks, the number and date.
- In the case of payment by account transfer, the details of the bank
account to which /from which the payment is being made from:
- The maintained accounts in the Transfer Details option list in case of payment through transfer
- The accounts in the Payment Bank Account option list in case of payment through cheque
Note
The system fetches bank accounts based on the payment currency and Mode of Payment (specified in SI bank Details). If the payment currency account is not maintained, you can choose the multi-currency account available.
Payment Bank Code
Alphanumeric; 12 Characters; Optional
Specify the Payment Bank Code of the Unit Holder.
Payment Type
Optional
Select payment type made by the unit holder who has requested for the transaction or by an external third party from the drop-down list. the list displays the following values:
- Self - Select this option if the payment is being made by the unit holder
- Third Party - Select this option if the payment is being made by an external party other than the unit holder
Bank Name
Display
The system displays the Bank name of the specified payment bank based on the details maintained at ‘Entity Maintenance’ level.
Payment Branch
Alphanumeric; 12 Characters; Optional
The system displays the branch code of the bank selected.
Branch Name
Display Only
The system displays the Branch name of the specified payment branch based on the details maintained at ‘Entity Maintenance’ level.
Transfer Details
Account Type
Alphanumeric; 1 Character; Optional
When you select the bank account of the unit holder that is being used to make the payment, the type of the transfer account is displayed here.
Account Holder Name
Alphanumeric; 60 Characters; Optional
When you select the bank account of the unit holder that is being used to make the payment, the name of the holder of the transfer account is displayed here.
Account Number
Alphanumeric; 16 Characters; Optional
When you select the bank account of the unit holder that is being used to make the payment, the account number of the transfer account is displayed here.
IBAN
Alphanumeric; 40 Characters; Optional
Specify the IBAN (International Bank Account Number) of the account holder.
Third Party Details
When you select the ‘Mode of Payment’ as Third Party, you will be able to capture the details pertaining to third party. Following are the fields in the Third Party Details section.
Third Party Reference
Alphanumeric; 60 Characters; Optional
Specify the third party reference details.
Third Party Address Line 1-4
Alphanumeric; 80 Characters; Optional
Specify the third party address details.
Third Party Zip Code
Alphanumeric; 10 Characters; Optional
Specify the third party zip code details.
Third Party US State
Alphanumeric; 1 Character; Optional
Specify the third party US state code.
Third Party Details
Alphanumeric; 255 Characters; Optional
Specify the third party details.
BIC Code
Alphanumeric; 12 Characters; Optional
Specify the BIC code.
Country
Alphanumeric; 3 Characters; Optional
Specify the country code.
Swift Details
Swift Format
Optional
At the time of transaction input, the routing details specified here are picked up for the combination of fund, transaction type and transaction currency. Select the swift format from the drop-down list. The list displays the following values:
- MT103
- MT202
Bank Charged
Optional
Indicate whether the bank charges must be levied upon the beneficiary, the remitter or must be shared between the two. The options available in the drop-down list are as follows:
- Shared
- Remit
- Beneficiary
Beneficiary Details
Beneficiary
Alphanumeric; 35 Characters; Optional
Specify beneficiary details.
Beneficiary Add 1, 2, 3
Alphanumeric; 35 Characters; Optional
Enter beneficiary address. There are three lines available for this information.
Beneficiary IBAN
Alphanumeric; 35 Characters; Optional
Enter the IBAN account number of the beneficiary.
Beneficiary BIC Code
Alphanumeric; 24 Characters; Optional
Enter the BIC code of the beneficiary.
Beneficiary ACC No
Alphanumeric; 24 Characters; Optional
Enter the account number of the beneficiary.
Beneficiary Code
Alphanumeric; 24 Characters; Optional
Enter the code of the beneficiary.
Beneficiary Info
Alphanumeric; 100 Characters; Optional
Enter more information about the beneficiary.
Intermediary Details
Intermediary
Alphanumeric; 35 Characters; Optional
Specify Intermediary details.
Intermediary Add 1, 2, 3
Alphanumeric; 35 Characters; Optional
Enter Intermediary address. There are three lines available for this information.
Intermediary IBAN
Alphanumeric; 40 Characters; Optional
Enter the IBAN account number of the intermediary.
Intermediary BIC Code
Alphanumeric; 24 Characters; Optional
Enter the BIC code of the Intermediary.
Intermediary ACC No
Alphanumeric; 24 Characters; Optional
Enter the account number of the Intermediary.
Intermediary Code
Alphanumeric; 24 Characters; Optional
Enter the code of the Intermediary.
Intermediary Info
Alphanumeric; 100 Characters; Optional
Enter more information about the Intermediary.
Further Credit details
Further Credit Name
Alphanumeric; 35 Characters; Optional
Specify the further credit name.
Further Credit Acc No
Alphanumeric; 35 Characters; Optional
Specify the further credit account number.
Reference
Reference1
Alphanumeric; 35 Characters; Optional
Provide the first reference.
Reference2
Alphanumeric; 35 Characters; Optional
Provide the second reference.
2.1.6.2 Cheque Details Tab
Click ‘Cheque Details’ tab in ‘Bank and Routing Details’ screen.
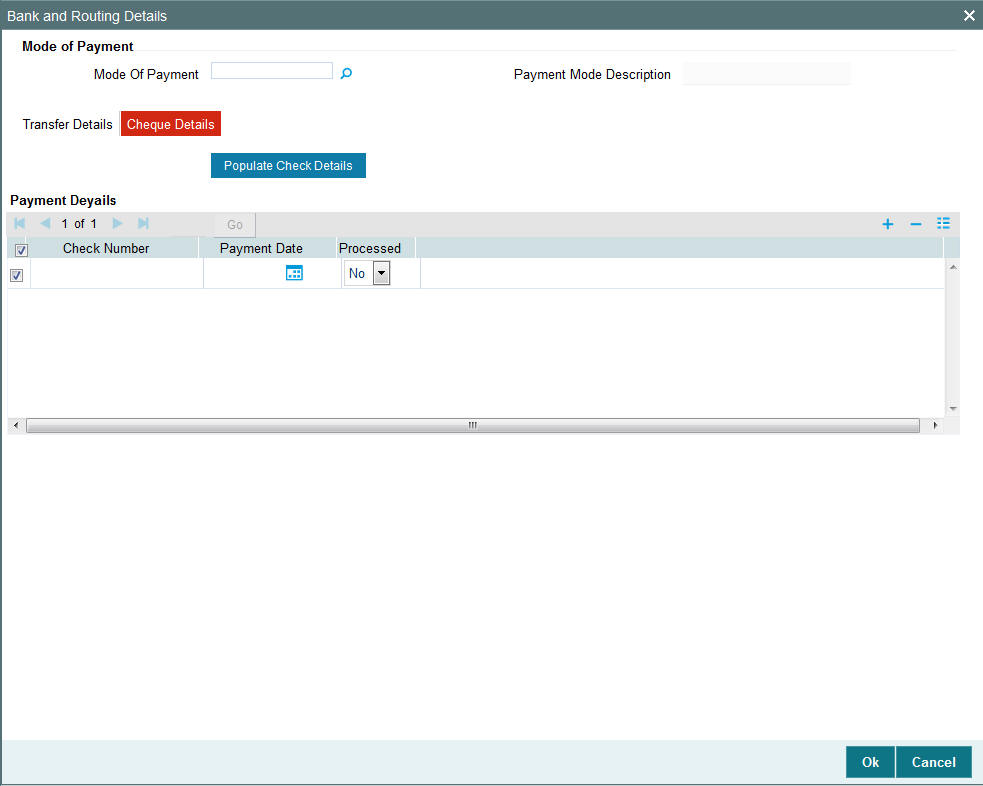
You can specify the following details:
Payment Details
Check Number
Alphanumeric; 16 Characters; Optional
Specify the check book number.
Payment Date
Date Format; Optional
Specify the payment date.
Processed
Optional
Select if the transaction is processed or not.
Click ‘Populate Check Details’ button to specify the following cheque details.
Starting Check Number
Numeric; 10 Characters; Optional
Specify the starting cheque number.
Number Of Check Leaves
Numeric; 10 Characters; Optional
Specify the number of check leaves.
Check Start Date
Date Format; Optional
Specify the cheque start date.
2.1.7 Additional Information Button
Click ‘Additional Information’ button in ‘FCIS Standing Instructions Detail’ screen to invoke ‘Additional Information’ screen.
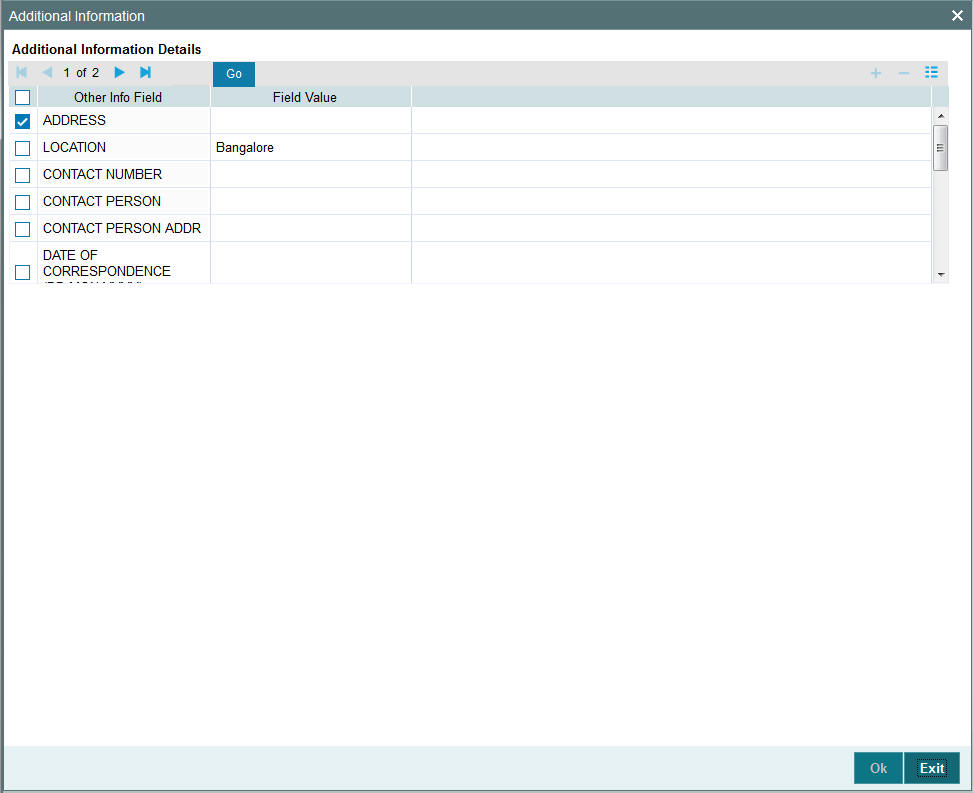
You can view the following details:
- Other Info Field
- Field Value
2.1.7.1 Validating SI Maintenance
In case of new SI maintenance, the system will validate SI start date with the cut off days maintained. The system maintains the Cut off Days at system level in Parameter Maintenance Screen (UTDPARAM) with Param Code as ‘SICUTOFFDAYS’ and Param Value as ‘RIS’.
If the SI is amended, the system will validate next processing date with the cut off days maintained. If yield is amended, system will use this revised yield specified by investor to compare against the computed yield for transactions generated after SI amend.
The system validates the investor and fund risk rating for the selected unit holder and funds based on the maintenance done in ‘Investor-Fund Risk Rating Mapping (UTDINFRR)’ screen.
The system should check the investor risk rating to fund risk rating (i.e. sales suitability check) while saving SI maintenance and display an error message.
Cut-off based SI Maintenance
You can create or amend new RSP based on the cut-off lag maintained at the system level.
While setting up a new SI or modifying an SI before authorization, the system will validate SI Start Date based on the parameter code ‘SICUTOFFDAYS’ and parameter Value ‘NORMAL’.
In Amend Mode, the system will validate Next Processing date based on the parameter code ‘SICUTOFFDAYS’ and parameter value ‘NORMAL’ maintained at Parameter Maintenance.
The system will capture the effective date of amended SI. Every SI rule will be associated with an effective date in the system.
If Fund Holiday is modified after deriving next processing date, the system will not update the next processing date. Instead, the actual SI generation will happen considering the modified fund holiday.
If amended during the cut off period, effective date must be greater than next processing date.
Cut-off days will always be system calendars days and lag is applicable for both RSP and DRSP creation and amendment. If the cut-off dates falls on Taiwan holidays, the cut-off dates will move to previous business day. For instance, cut-off days is ‘5’, RSP date is 8th say, 8March, the cut-off date will be last day of previous month, i.e., 28February. If 28 February is not a Taiwan business day, the cut-off date should be moved to 27 February or previous business day.
Modified SI rule will be effective from SI Effective date of a SI plan and amendment of SI will be allowed based on the cut-off lag maintained.
When an SI rule becomes effective on the effective date, the SI mandate values (UI and non-UI) to be carry forwarded from the previously effective maintenance will be based on the Template ID field in ‘SI Maintenance’ screen.
Example
Assume that SI cut-off day for RSP/ DRSP is maintained as 7. The system will validate the maintenance as follows:
Case# |
SI Start date |
Existing SI |
Business day |
Effective Date |
Next processing date |
Operation |
Remarks |
1 |
28-Nov-16 |
No |
20-Nov-16 |
20-Nov-16 |
Blank |
New SI creation |
SI will be created successfully |
2 |
28-Nov-16 |
No |
23-Nov-16 |
NA |
Blank |
New SI creation |
SI creation will not be allowed as SI start date is within the disallowed period. If SI start date is 28Dec, the SI creation should be allowed |
3 |
28-Jan-16 |
Yes |
20-Nov-16 |
20-Nov-16 |
28-Nov-16 |
SI Amendment (post authorization) |
SI amendment will be allowed |
4 |
28-Jan-16 |
Yes |
22-Nov-16 |
Effective date can be any date after 28-Nov-2016 |
28-Nov-16 |
SI Amendment (post authorization) |
SI amendment will be allowed only with effective date greater than Next Processing Date (28-Nov-2016) as Next processing date is within the disallowed period |
5 |
28-Jan-16 |
Yes |
10-Nov-16 |
10-Nov-16 |
12/8/2016 (this should be change to 08th Dec after post authorization) |
SI Amendment (to change the RSP date from 28th to 8th (post authorization) |
SI amendment will be allowed |
6 |
28-Jan-16 |
Yes |
11-Nov-16 |
11-Nov-16 |
11/28/2016 (this should be change to 28th Nov after post authorization) |
SI Amendment (to change the RSP date from 8 to 28th (post authorization) |
SI amendment will be allowed. |
7 |
2/8/2016 (Another RSP plan) |
Yes |
11-Nov-16 |
11-Nov-16 |
11/28/2016 (this should be change to 28th Nov after post authorization) |
SI Amendment (to change the RSP date from 8 to 28th (post authorization) |
SI amendment will be allowed |
You can amend SI maintenance as follows:
Fetch the latest available SI rule with SIID and Effective date in UTDSIN or from summary screen (UTSSIN)
- If the business day is not within the cut-off period, the system will allow amendment of SI with same date as effective date/ future date
- If business day is within the cut-off period, the system will allow amendment of SI with effective date greater than next processing date.
The list of amendable fields will be factory shipped. Along with the existing SI amendable fields the following fields will be amendable:
Field |
Description |
High Contribution Amount |
DRSP Specific |
Low Contribution Amount |
DRSP Specific |
Positive yield % |
DRSP Specific |
Negative yield % |
DRSP Specific |
SI Effective Date |
Generic |
Next Processing Date |
Generic |
Suspension expiry date |
Generic |
SI Type |
Allowed only for RSP/DRSP |
Amount |
SI Base amount |
Yield % |
Revolving investment schema |
You can amend SI mandate only for effective date greater than next processing date between cut-off date and SI generation date.
Cut-off date will be derived as follows:
Cut-off date = Next Processing Date – CUTOFFDAYS
Example
If next processing date of the SI is 28-Nov-2016, and CUTOFF days is defined as ‘7’, then you can amend the SI between ’21-Nov-2016’ till 28-Nov-2016 only if effective date greater than next processing date.
With the above setup, the system allows SI amendment between last processed date and cut-off date for the upcoming SI generation.
Last Processed Date |
Cut-off Date |
Next Process Date |
28-Oct-16 |
21-Oct-16 |
28-Nov-16 |
Amendment of SI for next cycle (28-Dec) can be done between the below mentioned dates:
Amendment from |
Amendment to |
Any Date |
21-Dec-16 |
2.1.7.2 Yield date derivation – Fund level SI
The system computes the yield and compares the latest record on (T-Y) days using the NAV as of (T-N) with holdings as of NAV date.
where,
T- SI date
Y – Yield lag, will be in system calendar days. Yield lag should not be greater than SICUTOFFDAYS. Param Code for Yield Lag is ‘YIELDLAG’
If SICUTOFFDAYS is lesser than YIELDLAG, then post yield computation, then you can amend the amount, hence the validation.
The SI Effective date should be less than or equal to Yield Computation Date, otherwise the system will not pick SI for yield computation and hence the upcoming SI generation will fail.
N – NAV lag – Actual calendar. The system will calculate the lag from RSP date. Param Code for NAV Lag is ‘NAVLAG’
The NAV date derived from NAV lag maintained must be always greater or equal to Yield computation date derived from Yield lag. You need to operationally control this validation..
NAV Lag and Yield Lag maintained are applicable to all DRSP irrespective of the SI Frequency selected.
In case of SI with daily frequency, Yield Lag must be 1 and for weekly frequency, you need to select the yield lag by considering the system holidays to avoid overlaps.
The system uses DRSP Yield Computation batch to compute yield and set the contribution based on the maintenance.
In case of fund restriction maintained as force situation where fund is frozen for new inflow/ new SI transaction’s suspension, the system will compute yield for DRSP and generate the transaction with the base amount setup. You can amend SI amount to reduce the amount when fund restriction is maintained for inflow transactions.
If the RSP/ DRSP holdings in the account is fully redeemed, the system will deem the next DRSP as the ‘first’ DRSP, generated as base contribution amount.
Example
System Holiday in Feb |
||||||
Sun |
Mon |
Tue |
Wed |
Thu |
Fri |
Sat |
|
|
|
1 |
2 |
3 |
4 |
5 |
6 |
7 |
8 |
9 |
10 |
11 |
12 |
13 |
14 |
15 |
16 |
17 |
18 |
19 |
20 |
21 |
22 |
23 |
24 |
25 |
26 |
27 |
28 |
1 |
2 |
3 |
4 |
5 |
6 |
7 |
8 |
9 |
10 |
11 |
Fund Holiday in Feb |
||||||
Sun |
Mon |
Tue |
Wed |
Thu |
Fri |
Sat |
|
|
|
1 |
2 |
3 |
4 |
5 |
6 |
7 |
8 |
9 |
10 |
11 |
12 |
13 |
14 |
15 |
16 |
17 |
18 |
19 |
20 |
21 |
22 |
23 |
24 |
25 |
26 |
27 |
28 |
1 |
2 |
3 |
4 |
Assume SI date is 28th of every month (28-Feb-2017)
Yield Lag - Y is set as 4
NAV lag - N is set as 7
Yield Computation Date (SI Date - Y) System Calendar |
22-Feb-17 |
NAV Date (SI Date – N) Actual Calendar |
17-Feb-17 |
Holdings Date |
17-Feb-17 |
As per the NAV lag maintenance, the system will derive the NAV date on 21-Feb-17 (28 Feb - 7 days) but NAV of 17-Feb-2017 will be used as 20th and 21st are fund holidays
Yield date derivation – SI – Plan level
Assume SI date is 28th of every month (28-Feb-2017)
Plan level SI with 2 offshore funds
Fund ID |
Fund Type |
Holidays |
BONFND |
Bond Fund |
23,24 |
EQYFND |
Equity fund |
20,21,24 |
Yield Lag - Y is set as 4
NAV lag - N is set as 7
Fund Holiday in Feb -BONFND |
||||||
Sun |
Mon |
Tue |
Wed |
Thu |
Fri |
Sat |
|
|
|
1 |
2 |
3 |
4 |
5 |
6 |
7 |
8 |
9 |
10 |
11 |
12 |
13 |
14 |
15 |
16 |
17 |
18 |
19 |
20 |
21 |
22 |
23 |
24 |
25 |
26 |
27 |
28 |
1 |
2 |
3 |
4 |
Fund Holiday in Feb -EQYFND |
||||||
Sun |
Mon |
Tue |
Wed |
Thu |
Fri |
Sat |
|
|
|
1 |
2 |
3 |
4 |
5 |
6 |
7 |
8 |
9 |
10 |
11 |
12 |
13 |
14 |
15 |
16 |
17 |
18 |
19 |
20 |
21 |
22 |
23 |
24 |
25 |
26 |
27 |
28 |
1 |
2 |
3 |
4 |
As per the NAV lag maintenance, for EQYFND, the system will derive the NAV date on 21-Feb-17 (28 Feb - 7 days) but NAV of 17-Feb-2017 will be used as 20th and 21st are fund holidays.
|
BONFND |
EQYFND |
Yield Computation Date (SI Date - Y) System Calendar |
22-Feb-17 |
22-Feb-17 |
NAV Date (SI Date – N) Actual Calendar |
21-Feb-17 |
17-Feb-17 |
Holdings Date |
21-Feb-17 |
17-Feb-17 |
Example for RSP on 8th and 28th
Lag Name |
Value |
For RSP Date 8th |
For RSP Date 28th |
Remarks |
SICUTOFFDATE |
8 |
31-Jan-17 |
20-Feb-17 |
Follows actual calendar |
YIELDLAG |
3 |
2-Feb-17 |
22-Feb-17 |
Follows system calendar |
NAVLAG |
7 |
1-Jan-17 |
21-Feb-17 |
Follows actual calendar and derive the NAV date. If the derived date is a holiday system will use fund calendar and derive the available price prior to derived date |
Calendar details below:
Holiday calendar for Jan |
||||||
Sun |
Mon |
Tue |
Wed |
Thu |
Fri |
Sat |
1 |
2 |
3 |
4 |
5 |
6 |
7 |
8 |
9 |
10 |
11 |
12 |
13 |
14 |
15 |
16 |
17 |
18 |
19 |
20 |
21 |
22 |
23 |
24 |
25 |
26 |
27 |
28 |
29 |
30 |
31 |
|
|
|
|
Holiday calendar for Feb |
||||||
Sun |
Mon |
Tue |
Wed |
Thu |
Fri |
Sat |
|
|
|
1 |
2 |
3 |
4 |
5 |
6 |
7 |
8 |
9 |
10 |
11 |
12 |
13 |
14 |
15 |
16 |
17 |
18 |
19 |
20 |
21 |
22 |
23 |
24 |
25 |
26 |
27 |
28 |
1 |
2 |
3 |
4 |
|
Fund Holiday |
|
System Holiday |
With the above setup, the system will generate the RSP transaction on 1st of March as 28th Feb is a fund holiday. The assumption here is, you have selected the holiday rule as ‘After’.
2.2 Standing Instructions Summary
This section contains the following topics:
- Section 2.2.1, "Retrieving Standing Instruction in Summary Screen"
- Section 2.2.2, "Viewing Standing Instruction"
- Section 2.2.3, "Deleting Standing Instruction"
- Section 2.2.4, "Authorizing Standing Instruction"
- Section 2.2.5, "Amending Standing Instruction"
- Section 2.2.6, "Authorizing Amended Standing Instruction"
2.2.1 Retrieving Standing Instruction in Summary Screen
After you have saved a standing instruction record in the Standing Instruction Detail screen, you can perform the following operations:
- Edit the instruction record as many times as necessary before having it authorized. Only the user that has entered the record can edit it.
- Have another user authorize the record.
- Delete the record.
To either edit, authorize or delete an unauthorized standing instruction, use the ‘FCIS Standing Instructions Summary’ screen. You can invoke this screen by typing ‘UTSSIN/ UTSFIN’ in the field at the top right corner of the Application tool bar and clicking on the adjoining arrow button.
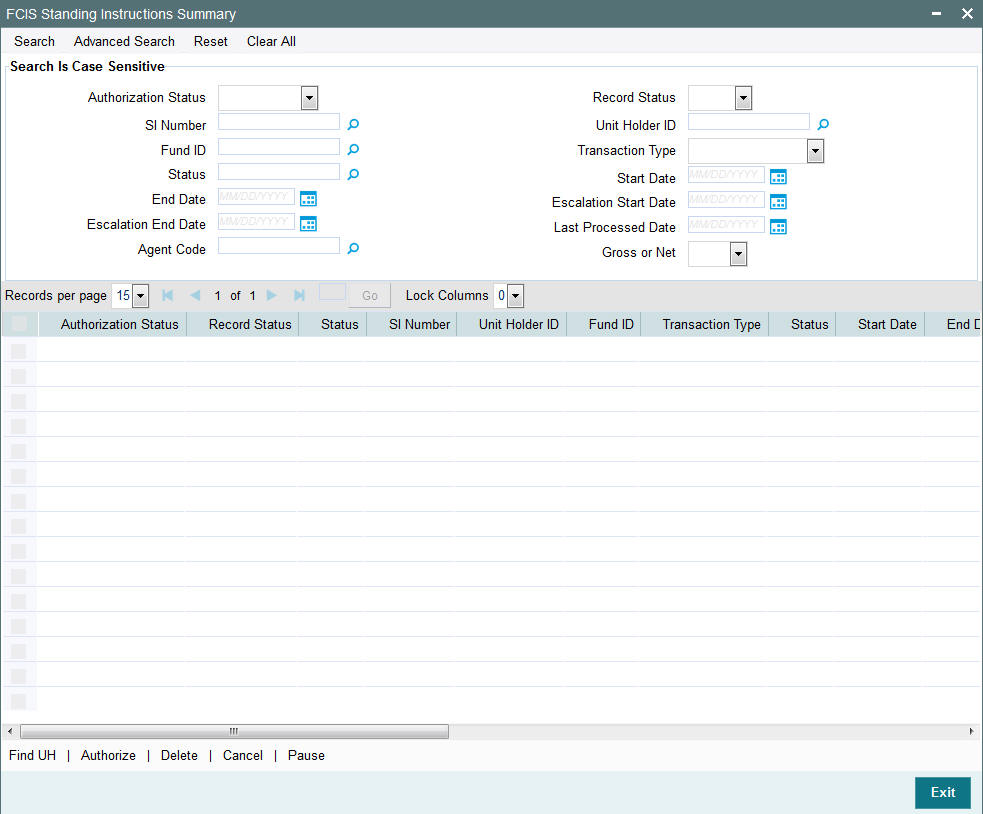
You can retrieve a previously entered record in the Standing Instructions Summary screen, as follows:
- Specify any or all of the following details in Standing Instructions Summary screen:
- The status of the record in the Authorization Status field. If you choose the “Blank Space” option, then all the records that involve the specified unit holder are retrieved.
- The status of the record in the Record Status field. If you choose the “Blank Space” option, then all the records that involve the specified unit holder are retrieved.
- SI Number
- Unit Holder ID
- Fund ID
- Transaction Type
- Status
- Start Date
- End Date
- Escalation Start Date
- Escalation End Date
- Last Processed Date
- Agent Code
- Gross or Net
Click ‘Search’ button to view the records. All records with the specified details are retrieved and displayed in the lower portion of the screen.
Note
You can also retrieve the individual record detail from the detail screen by doing query in the following manner:
- Press F7
- Input Unit Holder ID
- Press F8
You can perform Edit, Delete, Amend, Authorize, Reverse, Confirm operation by selecting from the Action list.
You can also search the record by using combination of % and alphanumeric value.
2.2.2 Viewing Standing Instruction
To view a record that you have previously entered, you must retrieve the same in the Standing Instructions Summary screen, as follows:
- Invoke the Standing Instructions Summary Screen from the Browser.
- Select the status of the record that you want to retrieve for viewing in the Authorized field. You can also view all records that are either unauthorized or authorized only, by choosing the Unauthorized / Authorized option.
- Specify any or all of the details of the record in the corresponding fields on the screen, and click ‘Search’ button. All records with the specified details are retrieved and displayed in the lower portion of the screen.
- Double click the record that you want to view in the list of displayed records. The Standing Instructions Detail screen is displayed in View mode.
2.2.3 Deleting Standing Instruction
You can delete only unauthorized records in the system. To delete a record that you have previously entered:
- Invoke the Standing Instructions Summary screen from the Browser.
- Select the status of the record that you want to retrieve for deletion.
- Specify any or all of the details and click ‘Search’ button. All records with the specified details are retrieved and displayed in the lower portion of the screen.
- Double click the record that you want to delete. The Standing Instructions Detail screen is displayed.
- Select Delete operation from the Action list. The system prompts you to confirm the deletion, and the record is deleted physically from the system database.
2.2.4 Authorizing Standing Instruction
An unauthorized Standing Instructions record must be authorized in the system for it to be processed. To authorize a record:
- Invoke the Standing Instructions Summary screen from the Browser.
- Select the status of the record that you want to retrieve for authorization. Typically, choose the Unauthorized option.
- Specify any or all of the details of the record in the corresponding fields on the screen. Click ‘Search’ button. All records with the specified details that are pending authorization are retrieved and displayed in the lower portion of the screen.
- Double click the record that you wish to authorize. The Standing Instructions Detail screen is displayed. Select Authorize operation from Action.
When the checker authorizes a record, details of validations, if any, that were overridden by the maker of the record during the Save operation, are displayed. If any of these overrides results in an error, the checker must reject the transaction.
2.2.5 Amending Standing Instruction
After a Standing Instructions record is authorized, it can be modified using the Unlock operation from Action list. To make changes to a record after authorization:
- Invoke the Standing Instructions Summary screen from the Browser.
- Select the status of the record that you wish to retrieve for amendment. You can only amend only authorized records.
- Specify any or all of the details of the Standing Instructions in the screen. All records with the specified details are retrieved and displayed in the lower portion of the screen.
- Double click the record that you want to amend. The Standing Instructions Detail screen is displayed in Amendment mode. Click the Unlock operation from the Action list to amend the record.
- Amend the necessary information. Click the Save button to save the changes.
Changes during amendment
During an amendment, you can change any of the following details of a standing instruction:
Escalation Details
The escalation details such as SI Escalation Frequency, Next Escalation Date, Escalation Type and Escalation Value may be amended.
Transfer bank details for account transfer payments
The transfer bank account details can be altered only for those standing instructions for which the Mode of Payment is Transfer.
Payment mode and check details
The Mode of Payment can be amended from Transfer to Check or vice versa during amendment of a standing instruction.
The check details cannot be altered if the checks are still unprocessed.
Broker details
The broker may be altered during amendment.
Unit Holder Bank Details
You can change the bank details of an active standing instruction. If the modified bank are attached to any active Income Distribution Setup (IDS), Standing Instruction Setup or Policy SI (Premiums or Annuities), the system displays a warning message.
Cancelling / pausing / reactivating a Standing Instruction
After a standing instruction is authorized, it could be:
- Active: This means that the instruction is still being processed, and transactions have been put through.
- Paused: The authorized instruction record exists in the database, but no processing is taking place in respect of the same
- Cancelled: The instruction has been annulled and no processing is scheduled to take place in respect of the same
During amendment of an authorized standing instruction in this screen, you can change the status of the record. You can
- Pause an active instruction, by changing the status from Active to Paused in the Instruction Status field. In such a case, all future processing in respect of the instruction will be held back and not put through, till further notice
- Cancel an active instruction, by changing the status from Active to Cancelled in the Instruction Status field. In such a case, the instruction is deemed as annulled, and future processing and scheduling for the same is stopped indefinitely. Once you cancel an active instruction, you cannot make it active again.
- Re-activate a paused instruction, by changing the status from Paused to Active in the Instruction Status field. When you do so, processing for the instruction will begin again.
2.2.6 Authorizing Amended Standing Instruction
An amended Standing Instructions record must be authorized for the amendment to be made effective in the system. The authorization of amended records can only be done from Fund Manager Module and Agency branch Module.
The process of authorization is subsequently the same as that for normal transactions.
2.3 SI Lag Maintenance Screen
This section contains the following topics:
2.3.1 Invoking SI Lag Maintenance Screen
You can maintain SI Cut off days, NAV Lag and Yield Lag at AMC level using ‘SI Lag Maintenance screen.
During SI maintenance, the system will apply SI Cut off days to an SI based on the AMC of the selected Fund.
If there are multiple funds for an SI (Plan level SI) with funds from different AMCs, the system will use the SI cut-off days and lags maintained in ‘Parameter Maintenance’ (UTDPARAM) screen.
During DRSP yield computation, the system uses the NAV Lag and Yield Lag maintained for the fund’s AMC.
If SI cut-off, NAV lag and Yield Lag are not maintained for an AMC in ‘SL Lag Maintenance’ screen, then the system will use SI Cut off days and lags maintained in ‘Parameter Maintenance’ (UTDPARAM) screen
In case of Plan level SI, if all funds belong to same AMC, and if SI cut-off and lags for this AMC is maintained to use Fund Calendar, the system will use the AMC level maintenance as follows:
For SI cut-off, the system will use the least date from the derived cut-off date for each fund.
For instance, if SI date is 28-May and cut-off for Fund A is 21-May and cut off for Fund B is 20-May depending on the fund holidays, then the system will consider the cut off day for this SI as 20-May.
Yield computation date for each fund under an SI may not be same.
For instance, if there are 2 Funds, Fund A and Fund B for an SI with SI generation date as 28-May. If yield computation date for Fund A is 24-May and Yield computation date for Fund B is 25-May, then the system will compute yield and decide the SI generation amount for Fund A and Fund B on 24-May and 25-May respectively. Total amount for the SI can be determined only after 25-May when yield computation is completed for both the funds.
The system will calculate the NAV Date for yield computation for each fund based on the fund calendar and NAV Lag maintained.
Note
The ‘SI Lag Maintenance’ is applicable only for Fund Manager.
You can invoke ‘SI Lag Maintenance’ screen by typing ‘UTDSILAG’ in the field at the top right corner of the Application tool bar and clicking on the adjoining arrow button.
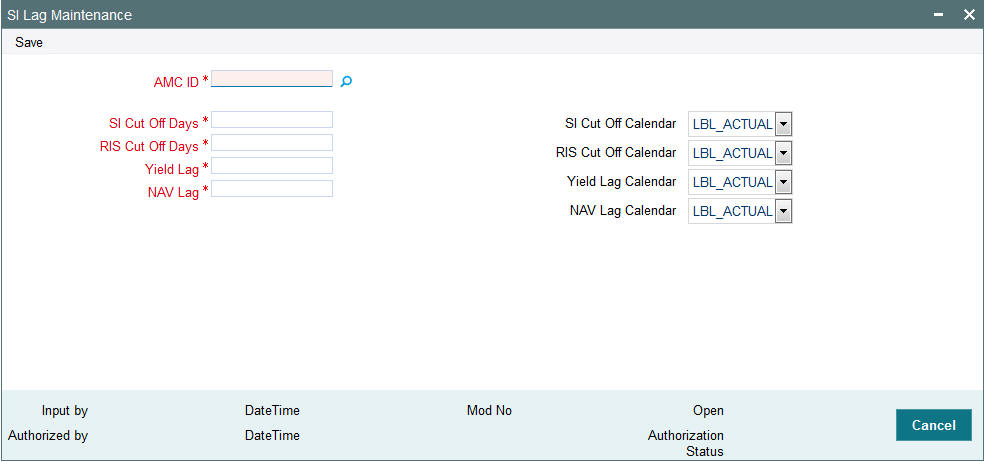
You can specify the following details:
AMC ID
Alphanumeric; 12 Characters; Mandatory
Specify the AMC ID of the AMC for which Lag needs to be maintained.
SI Cut Off Days
Numeric; 2 Characters; Mandatory
Specify the SI Cut off days to be maintained for SIs other than RIS.
SI Cut Off Calendar
Optional
Select the calendar associated with ‘SI Cut Off Days’ field from the drop-down list. The list displays the following values:
- Actual
- System
- Fund
RIS Cut Off Days
Numeric; 2 Characters; Mandatory
Specify the Cut off days to be maintained for RIS.
RIS Cut Off Calendar
Optional
Select the calendar associated with ‘RIS Cut Off Days’ field from the drop-down list. The list displays the following values:
- Actual
- System
- Fund
Yield Lag
Numeric; 2 Characters; Mandatory
Specify the yield lag to be maintained for DRSP.
Yield Lag Calendar
Optional
Select the calendar associated with ‘Yield Lag’ field from the drop-down list. The list displays the following values:
- Actual
- System
- Fund
NAV Lag
Numeric; 2 Characters; Mandatory
Specify the NAV lag to be maintained for DRSP.
NAV Lag Calendar
Mandatory
Select the calendar associated with ‘NAV Lag’ field from the drop-down list. The list displays the following values:
- Actual
- System
- Fund
During Amend operation, the system will not validate any business impact for the new value captured, as the system does not restrict or maintain any particular date for SI maintenance. The following example needs to be operationally controlled:
Example
SI generation date is 8th Feb.The SI cut off lag is maintained as 3 days (system calendar).
You can amend the cut off lag At AMC level to 2 days upto 3rd Feb.
The system will not allow you to amend SI cut off lag to 4 days at AMC level on 3rd Feb.
2.4 SI Lag Summary Screen
This section contains the following topics:
- Section 2.4.1, "Retrieving a Record in SI Lag Summary Screen"
- Section 2.4.2, "Editing SI Lag Record"
- Section 2.4.3, "Viewing SI Lag Record "
- Section 2.4.4, "Deleting SI Lag Record"
- Section 2.4.5, "Authorizing SI Lag Record "
- Section 2.4.6, "Amending SI Lag Record "
- Section 2.4.7, "Authorizing Amended SI Lag Record "
2.4.1 Retrieving a Record in SI Lag Summary Screen
You can retrieve a previously entered record in the Summary Screen, as follows:
Invoke the ‘SI Lag Summary’ screen by typing ‘UTSSILAG’ in the field at the top right corner of the Application tool bar and clicking on the adjoining arrow button and specify any or all of the following details in the corresponding details.
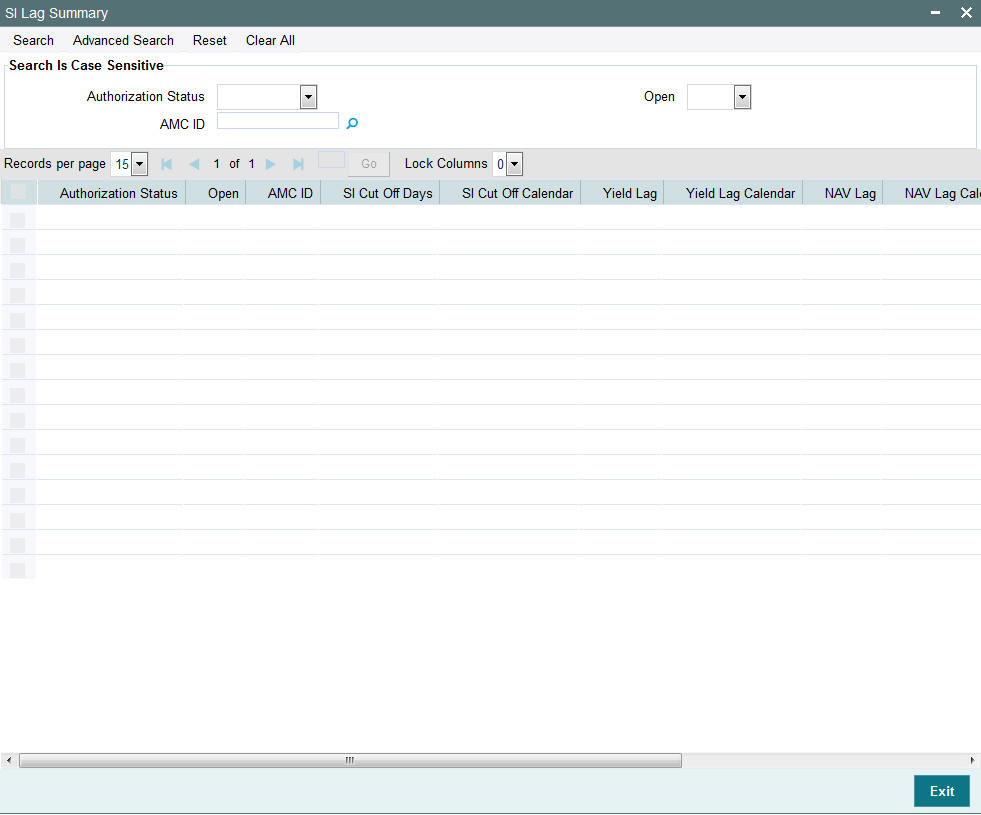
- The status of the record in the Authorization Status field. If you choose the ‘Blank Space’ option, then all the records are retrieved.
- The status of the record in the Open field. If you choose the ‘Blank Space’ option, then all records are retrieved
- AMC ID
Click ‘Search’ button to view the records. All the records with the specified details are retrieved and displayed in the lower portion of the screen.
Note
You can also retrieve the individual record detail from the detail screen by querying in the following manner:
- Press F7
- Input AMC ID
- Press F8
You can perform Edit, Delete, Amend, Authorize, Reverse, Confirm operations by selecting the operation from the Action list. You can also search a record by using a combination of % and alphanumeric value.
Note
The status field in the Records pane of the summary screen displays the bulk operation results.
2.4.2 Editing SI Lag Record
You can modify the details of SI Lag record that you have already entered into the system, provided it has not subsequently authorized. You can perform this operation as follows:
- Invoke the SI Lag Summary screen from the Browser.
- Select the status of the record that you want to retrieve for modification in the Authorization Status field. You can only modify records that are unauthorized. Accordingly, choose the Unauthorized option.
- Specify any or all of the details in the corresponding fields to retrieve the record that is to be modified.
- Click ‘Search’ button. All unauthorized records with the specified details are retrieved and displayed in the lower portion of the screen.
- Double click the record that you want to modify in the list of displayed records. The SI Lag Maintenance Detail screen is displayed.
- Select Unlock Operation from the Action list to modify the record. Modify the necessary information.
Click Save to save your changes. The SI Lag Maintenance Detail screen is closed and the changes made are reflected in the SI Lag Summary screen.
2.4.3 Viewing SI Lag Record
To view a record that you have previously input, you must retrieve the same in the SI Lag Summary screen as follows:
- Invoke the SI Lag Summary screen from the Browser.
- Select the status of the record that you want to retrieve for viewing in the Authorization Status field. You can also view all records that are either unauthorized or authorized only, by choosing the unauthorized / Authorized option.
- Specify any or all of the details of the record in the corresponding fields on the screen.
- Click ‘Search’ button. All records with the specified fields are retrieved and displayed in the lower portion of the screen.
- Double click the record that you want to view in the list of displayed records. The SI Lag Maintenance Detail screen is displayed in View mode.
2.4.4 Deleting SI Lag Record
You can delete only unauthorized records in the system. To delete a record that you have previously entered:
- Invoke the SI Lag Summary screen from the Browser.
- Select the status of the record that you want to retrieve for deletion.
- Specify any or all of the details in the corresponding fields on the screen.
- Click ‘Search’ button. All records with the specified fields are retrieved and displayed in the lower portion of the screen.
- Double click the record that you want to delete in the list of displayed records. The SI Lag Maintenance Detail screen is displayed.
- Select Delete Operation from the Action list. The system prompts you to confirm the deletion and the record is physically deleted from the system database.
2.4.5 Authorizing SI Lag Record
- An unauthorized SI Lag Maintenance record must be authorized in the system for it to be processed. To authorize a record:
- Invoke the SI Lag Summary screen from the Browser.
- Select the status of the record that you want to retrieve for authorization. Typically, choose the unauthorized option.
- Specify any or all of the details in the corresponding fields on the screen.
- Click ‘Search’ button. All records with the specified details that are pending authorization are retrieved and displayed in the lower portion of the screen.
- Double click the record that you wish to authorize. The SI Lag Maintenance Detail screen is displayed. Select Authorize operation from the Action List.
When a checker authorizes a record, details of validation, if any, that were overridden by the maker of the record during the Save operation are displayed. If any of these overrides results in an error, the checker must reject the record.
2.4.6 Amending SI Lag Record
After a SI Lag Maintenance record is authorized, it can be modified using the Unlock operation from the Action List. To make changes to a record after authorization:
- Invoke the SI Lag Summary screen from the Browser.
- Select the status of the record that you want to retrieve for authorization. You can only amend authorized records.
- Specify any or all of the details in the corresponding fields on the screen.
- Click ‘Search’ button. All records with the specified details that are pending authorization are retrieved and displayed in the lower portion of the screen.
- Double click the record that you wish to authorize. The SI Lag Maintenance Detail screen is displayed in amendment mode. Select Unlock operation from the Action List to amend the record.
- Amend the necessary information and click on Save to save the changes
2.4.7 Authorizing Amended SI Lag Record
An amended SI Lag Maintenance record must be authorized for the amendment to be made effective in the system. The authorization of amended records can be done only from Fund Manager Module and Agency Branch module.
The subsequent process of authorization is the same as that for normal transactions.
2.5 Unitholder Deal Summary
This section contains the following topics:
- Section 2.5.1, "Retrieving Deals for Investors "
- Section 2.5.2, "Viewing Deals for Investors "
- Section 2.5.3, "Deleting Deals for Investors "
- Section 2.5.4, "Authorizing Deals for Investors"
- Section 2.5.5, "Amending Deals for Investors"
- Section 2.5.6, "Authorizing Amended Deals for Investors"
- Section 2.5.7, "Processing Back Data Propagation for SI Transactions"
2.5.1 Retrieving Deals for Investors
You can view the details of all the deals set up for the unit holder in the ‘Unitholder Deal Summary’ menu. You can invoke this screen by typing ‘UTSUHDEL’ in the field at the top right corner of the Application tool bar and clicking on the adjoining arrow button.
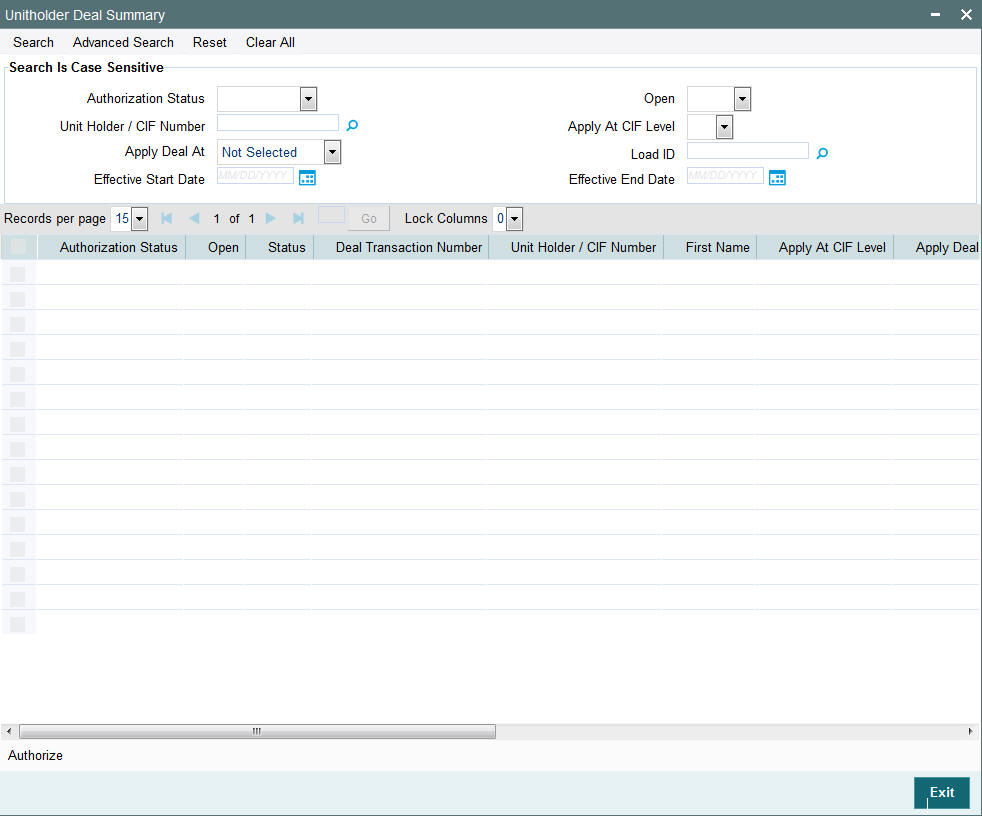
You can retrieve a previously entered record in the Unitholder Deal Summary screen, as follows:
- Specify any or all of the following details in the Unitholder Deal Summary screen:
- The status of the record in the Authorization Status field. If you choose the “Blank Space” option, then all the record that involves the specified unit holder are retrieved.
- The status of the record in the Open field. If you choose the “Blank Space” option, then all the records that involve the specified unit holder are retrieved.
- Unit Holder / CIF Number
- Apply At CIF Level
- Apply Deal At
- Load ID
- Effective Start Date
- Effective End Date
Click ‘Search’ button to view the records. All records with the specified details are retrieved and displayed in the lower portion of the screen.
Note
You can also retrieve the individual record detail from the detail screen by doing query in the following manner:
- Press F7
- Input Load ID
- Press F8
You can perform Edit, Delete, Amend, Authorize, Confirm operation by selecting from the Action list.
You can also search the record by using combination of % and alphanumeric value.
2.5.2 Viewing Deals for Investors
To view a record that you have previously entered, you must retrieve the same in the Unitholder Deal Summary screen, as follows:
- Invoke the Unitholder Deal Summary Screen from the Browser.
- Select the status of the record that you want to retrieve for viewing in the Authorized field. You can also view all records that are either unauthorized or authorized only, by choosing the Unauthorized/ Authorized option.
- Specify any or all of the details of the record in the corresponding fields on the screen, and click ‘Search’ button. All records with the specified details are retrieved and displayed in the lower portion of the screen.
- Double click the record that you want to view in the list of displayed records. The UNITHOLDERDEAL Detail screen is displayed in View mode.
2.5.3 Deleting Deals for Investors
You can delete only unauthorized records in the system. To delete a record that you have previously entered:
- Invoke the Unitholder Deal Summary screen from the Browser.
- Select the status of the record that you want to retrieve for deletion.
- Specify any or all of the details and click ‘Search’ button. All records with the specified details are retrieved and displayed in the lower portion of the screen.
- Double click the record that you want to delete. The Unitholder Deal Detail screen is displayed.
- Select Delete operation from the Action list. The system prompts you to confirm the deletion, and the record is deleted physically from the system database.
2.5.4 Authorizing Deals for Investors
An unauthorized Unitholder Deal records must be authorized in the system for it to be processed. To authorize a record:
- Invoke the Unitholder Deal Summary screen from the Browser.
- Select the status of the record that you want to retrieve for authorization. Typically, choose the Unauthorized option.
- Specify any or all of the details of the record in the corresponding fields on the screen. Click ‘Search’ button. All records with the specified details that are pending authorization are retrieved and displayed in the lower portion of the screen.
- Double click the transaction that you wish to authorize. The Unitholder Deal Detail screen is displayed. Select Authorize operation from Action.
When the checker authorizes a record, details of validations, if any, that were overridden by the maker of the record during the Save operation, are displayed. If any of these overrides results in an error, the checker must reject the transaction.
2.5.5 Amending Deals for Investors
After an Unitholder Deal record is authorized, it can be modified using the Unlock operation from Action list. To make changes to a record after authorization:
- Invoke the Unitholder Deal Summary screen from the Browser.
- Select the status of the record that you wish to retrieve for amendment. You can only amend only authorized records.
- Specify any or all of the details of the Unitholder Deal in the screen. All records with the specified details are retrieved and displayed in the lower portion of the screen.
- Double click the record that you want to amend. The Unitholder Deal Detail screen is displayed in Amendment mode. Click the Unlock operation from the Action list to amend the record.
- Amend the necessary information. Click the Save button to save the changes.
2.5.6 Authorizing Amended Deals for Investors
An amended Unitholder Deal record must be authorized for the amendment to be made effective in the system. The authorization of amended records can only be done from Fund Manager Module and Agency branch Module.
The process of authorization is subsequently the same as that for normal transactions.
When you retrieve a deal record for the purpose of amendment in this screen, it is displayed in the UH Deal Setup Detail screen, in Amend mode. All the non-editable field values are displayed as labels, while the editable fields are enabled for data entry changes.
Note
When you make changes to any authorized record in the system database through the amendment operation, the record with the amended information is saved as an unauthorized record in the system. For your amendment changes to be effective, the amended record must be subsequently authorized. When it is authorized, it is saved in the system database as an authorized record with the amendment information, and is effective.
You can cancel an existing negotiated deal by changing the status to cancel. When you authorize this change, the deal set up is nullified.
You can invoke the ‘Unitholder Deal Maintenance Detail’ screen by typing ‘UTDUHDEL’ in the field at the top right corner of the Application tool bar and clicking on the adjoining arrow button.
The Unit holder deal records matching the search criterion specified is displayed in row lists in the lower grid portion of the screen. From this results list, choose the unit holder deal that you want to view by double clicking on a record. The Unit Holder - Deal Setup screen is invoked in View mode as shown below, where you can view the details of the record.
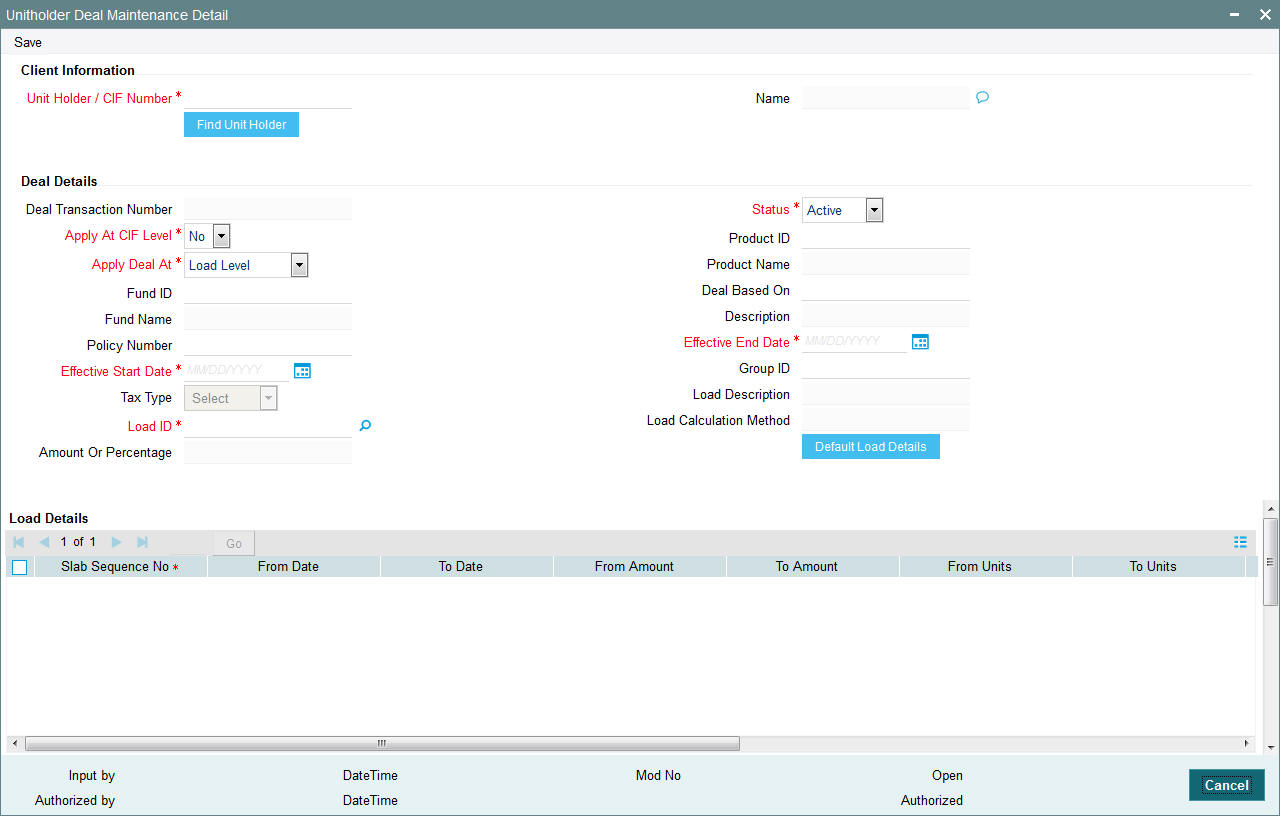
For further information on this screen, refer Deals for an investor Section” of the “Setting Up Investor Preferences” chapter.
2.5.7 Processing Back Data Propagation for SI Transactions
You can correct erroneous transactions as well as enter those that have been missed out and compute the effect these have on the current holdings of the unit holder through the back data propagation process. To facilitate this propagation process, two schemas are used – the business (or normal) schema and the report schema. You are required to enter the correct data in the business schema for the required transactions and select these for propagation, again from the business schema. The transactions will be simulated in the report schema and the results can be viewed in the business schema.
Refer the chapter ‘Back Data Propagation’ for more details on the back data propagation process.
2.6 Plan Maintenance Detail
This section contains the following topic:
2.6.1 Invoking Plan Maintenance Detail Screen
Templates are particularly useful when you are entering standing instructions for multiple funds with the same characteristics for a unit holder, wherein options and rules are applicable to all funds belonging to the investor.
You can setup Plan level SI of same fund type (Onshore/ Offshore) funds. You cannot create Plan level SI with combination of Onshore and Offshore funds.
Use the ‘Plan Maintenance Detail’ screen to create templates for standing instructions. You can invoke this screen by typing ‘UTDRSPM’ in the field at the top right corner of the Application tool bar and clicking on the adjoining arrow button.
Select 'New' from the Actions menu in the Application tool bar or click new icon to enter the details of the Plan Maintenance screen.

Plan Details
Plan Code
Alphanumeric; 6 Characters; Mandatory
Provide a unique identification for the new template you are creating, in this field.
Plan Description
Alphanumeric; 60 Characters, Mandatory
Enter descriptive text, a short phrase that qualifies the plan.
Contribution Details
In this section, specify the period during which the standing instruction is to be processed for the unit holder, the minimum contribution amount, as well as the frequency at which it must be processed.
Minimum Contribution Amount
Numeric; 30 Characters; Mandatory
Indicate the minimum value of the transaction amount that is to be generated in respect of the instruction.
Contribution Frequency
Alphanumeric; 5 Characters; Mandatory
From the option list, select the frequency at which the standing instruction must be processed. The value specified here will be defaulted to all the underlying standing instructions.
Contribution Frequency Description
Display
The system displays the description for the selected contribution frequency.
SI Auto-Termination Cumulative Counter
Alphanumeric; 3 Characters; Optional
Specify the maximum number of times the SI payment rejections are allowed before the auto termination.
SI Auto Termination Consecutive Counter
Numeric; 3 Characters; Optional
Specify the maximum number of times consecutive SI payment rejections should be allowed before the SI is automatically terminated.
Contribution Currency
Alphanumeric; 3 Characters; Mandatory
From the list, select the currency in which the transactions generated in respect of the standing instruction will be processed.
Currency Name
Display
The system displays the currency name.
Minimum Contribution Period
Alphanumeric; 5 Characters; Mandatory
From the list, select the unit in which minimum period between the Start Date and End Date of the standing instructions is to be reckoned.
Min Contribution Period Name
Display
The system displays the minimum contribution period name for the selected period.
Value
Numeric; 5 Characters; Mandatory
Specify the value of the minimum contribution period between the Start Date and End Date of the standing instructions.
Note
Minimum Contribution Period and Value should be proportionate to Contribution Frequency. For example, if the Contribution Frequency is ‘Months’ then the Minimum Contribution Period and value should be above a month’s time.
Bank Details
In this section, you specify details of any bank accounts operated for the savings plan.
Bank
Alphanumeric; 12 Characters; Optional
From the list, select the name of the bank in which the account is held.
Bank Name
Display
The system displays the name of the bank.
Branch
Alphanumeric; 12 Characters; Optional
From the list, select the name of the branch of the bank in which the account is held.
Branch Name
Display
The system displays the branch name.
Account Number
Alphanumeric; 16 Characters; Optional
Specify the number of the account for the plan in the selected bank.
Account Name
Alphanumeric; 100 Characters; Optional
Specify the name in which the account is maintained for the plan.
Pay Code
Alphanumeric; 25 Characters; Optional
Enter the pay code of the bank in which the account is held.
Payment Due Date
Date Format; Optional
Specify the date on which the payment is due. The payment date cannot be back dated.
Auto Pay Credit
Alphanumeric; 20 Characters; Optional
Specify the auto pay credit number for the savings plan.
IBAN
Alphanumeric; 40 Characters; Optional
Specify the IBAN (International Bank Account Number) of the account holder.
2.6.1.1 Fund Details Section
Fund ID
Alphanumeric; 6 Characters; Optional
Select the fund in which the transactions resulting from the standing instruction would be put through, in the investor’s account.
You can select multiple funds. However, all the funds should be from the Same AMC (or Agent in the Distributor installation).
Fund Name
Display
The name of the fund that you select will be displayed.
FUND ISIN
Display
The Fund ISIN of the fund you have chosen will be displayed.
The system will check if all the funds mapped are MIFID funds only or non-MIFID only funds.The system will display an error message if a plan is created with a combination of MIFID and non-MIFID applicable funds.
If you amend MIFID and non-MIFID as non-MIFID fund or vice versa post active SI, the system needs to update such SI and Plans operationally.
If MIFID regulated UH invests in a Non MIFID product but the underlying fund is a MIFID regulated fund; the system will derive the transaction category based on the product categorization.
After specifying the above details, click ‘Ok’ button to save the savings plan template.
2.7 Plan Maintenance Summary
This section contains the following topics:
- Section 2.7.1, "Retrieving Savings Plan in Summary screen"
- Section 2.7.2, "Editing Savings Plan"
- Section 2.7.3, "Viewing Savings Plan "
- Section 2.7.4, "Deleting Savings Plan"
- Section 2.7.5, "Authorizing Savings Plan"
- Section 2.7.6, "Amending Savings Plan"
- Section 2.7.7, "Authorizing Amended Savings Plan"
2.7.1 Retrieving Savings Plan in Summary screen
To either edit, authorize or delete an unauthorized savings plan, use the ‘Plan Maintenance Summary’ screen. You can invoke this screen by typing ‘UTSRSPM’ in the field at the top right corner of the Application tool bar and clicking on the adjoining arrow button.
The following screen is invoked:
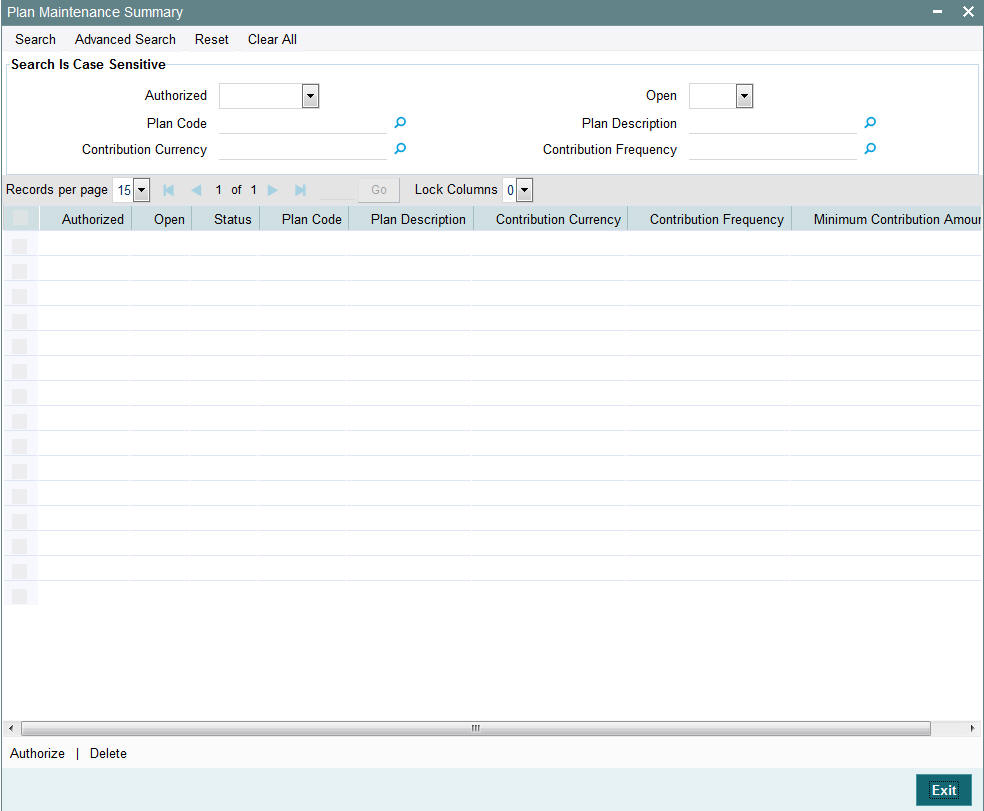
You can retrieve a previously entered record in the Plan Maintenance Summary screen, as follows:
- Specify any or all of the following details in the Plan Maintenance Summary screen:
- The status of the transaction in the Authorization Status field. If you choose the “Blank Space” option, then all the records that involve the specified unit holder are retrieved.
- The status of the record in the Open field. If you choose the “Blank Space” option, then all the records that involve the specified unit holder are retrieved.
- Plan Code
- Plan Description
- Contribution Currency
- Contribution Frequency
Click ‘Search’ button to view the records. All records with the specified details are retrieved and displayed in the lower portion of the screen.
Note
You can also retrieve the individual record detail from the detail screen by doing query in the following manner:
- Press F7
- Input the Plan Code
- Press F8
You can perform Edit, Delete, Amend, Authorize, Reverse, Confirm operation by selecting from the Action list.
You can also search the record by using combination of % and alphanumeric value.
2.7.2 Editing Savings Plan
You can modify the details of Plan Maintenance parameters that you have already entered into the system, provided it has not been subsequently authorized. You can perform this operation as follows:
- Invoke the Plan Maintenance Summary screen from the Browser.
- Select the status of the record that you want to retrieve for modification in the Authorization Status field. You can only modify records that are unauthorized. Accordingly, choose the Unauthorized option.
- Specify any or all of the details in the corresponding fields to retrieve the record that is to be modified. All unauthorized records with the specified details are retrieved and displayed in the lower portion of the screen.
- Double click the record that you want to modify in the list of displayed records. The Plan Maintenance Detail screen is displayed.
- Select Unlock Operation from Action list to modify the record. Modify the necessary information.
- Click Save to save your changes. Plan Maintenance Detail screen is closed and the changes made are reflected in the Plan Maintenance Summary screen.
2.7.3 Viewing Savings Plan
To view a record that you have previously entered, you must retrieve the same in the Plan Maintenance Summary screen, as follows:
- Invoke the Plan Maintenance Summary Screen from the Browser.
- Select the status of the record that you want to retrieve for viewing in the Authorization Status field. You can also view all records that are either unauthorized or authorized only, by choosing the Unauthorized / Authorized option.
- Specify any or all of the details of the record in the corresponding fields on the screen, and click ‘Search’ button. All records with the specified details are retrieved and displayed in the lower portion of the screen.
- Double click the record that you want to view in the list of displayed records. The Plan Maintenance Detail screen is displayed in View mode.
2.7.4 Deleting Savings Plan
You can delete only unauthorized records in the system. To delete a record that you have previously entered:
- Invoke the Plan Maintenance Summary screen from the Browser.
- Select the status of the record that you want to retrieve for deletion.
- Specify any or all of the details and click ‘Search’ button. All records with the specified details are retrieved and displayed in the lower portion of the screen.
- Double click the record that you want to delete. The Plan Maintenance Detail screen is displayed.
- Select Delete operation from the Action list. The system prompts you to confirm the deletion, and the record is deleted physically from the system database.
2.7.5 Authorizing Savings Plan
An unauthorized Plan Maintenance record must be authorized in the system for it to be processed. To authorize a record:
- Invoke the Plan Maintenance Summary screen from the Browser.
- Select the status of the record that you want to retrieve for authorization. Typically, choose the Unauthorized option.
- Specify any or all of the details of the record in the corresponding fields on the screen. Click ‘Search’ button. All records with the specified details that are pending authorization are retrieved and displayed in the lower portion of the screen.
- Double click the transaction that you wish to authorize. The Plan Maintenance Detail screen is displayed. Select Authorize operation from Action.
When the checker authorizes a record, details of validations, if any, that were overridden by the maker of the record during the Save operation, are displayed. If any of these overrides results in an error, the checker must reject the transaction.
2.7.6 Amending Savings Plan
After a Plan Maintenance record is authorized, it can be modified using the Unlock operation from Action list. To make changes to a record after authorization:
- Invoke the Plan Maintenance Summary screen from the Browser.
- Select the status of the record that you wish to retrieve for amendment. You can only amend only authorized records.
- Specify any or all of the details of the Plan Maintenance in the screen. All records with the specified details are retrieved and displayed in the lower portion of the screen.
- Double click the record that you want to amend. The Plan Maintenance Detail screen is displayed in Amendment mode. Click the Unlock operation from the Action list to amend the record.
- Amend the necessary information. Click the Save button to save the changes.
Changes during amendment
During an amendment, you can change any of the details of the savings plan except the Plan Id and the Plan Description.
2.7.7 Authorizing Amended Savings Plan
An amended Plan Maintenance record must be authorized for the amendment to be made effective in the system. The authorization of amended records can only be done from Fund Manager Module and Agency branch Module.
The process of authorization is subsequently the same as that for normal transactions.
2.8 Transaction Category Updation
This section contains the following topic:
2.8.1 Invoking Transaction Category Updation Screen
You can update transaction category using ‘Transaction Category Updation’ screen. You can invoke this screen by typing ‘UTDTXNCU’ in the field at the top right corner of the Application tool bar and clicking on the adjoining arrow button.
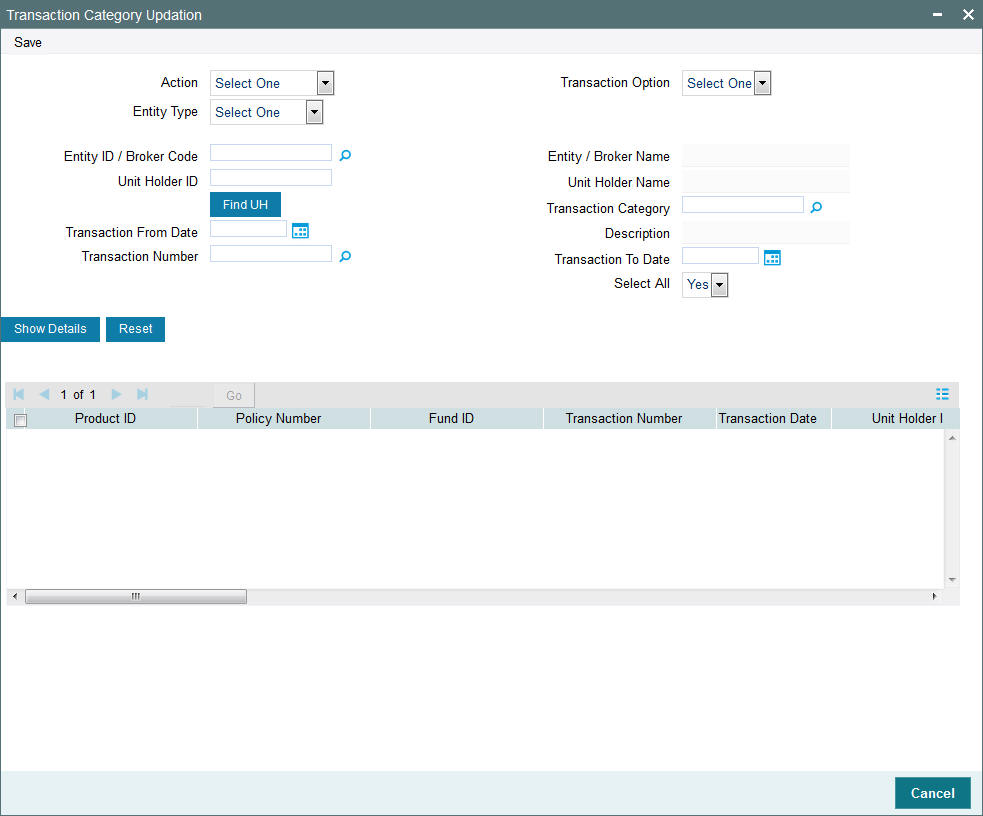
You can specify the following details:
Action
Optional
Select the transaction action from the drop-down list. The list displays the following values:
- Category Change
- Authorize
- View
- Delete
Entity Type
Optional
Select the entity type from the drop-down list. The list displays the following values:
- Agent
- Branch Code
- IFA
- Account Officer
- Broker
Transaction Option
Optional
Select the transaction option from the drop-down list. the list displays the following values:
- UT
- LEP
Entity ID / Broker Code
Alphanumeric; 9 Characters; Optional
Specify the entity ID or the broker code. Alternatively, you can select entity ID or broker code from the option list. The list displays all valid entity ID or broker code maintained in the system.
Entity / Broker Name
Display
The system displays the entity or the broker name for the selected entity ID or broker code.
Unit Holder ID
Alphanumeric; 12 Characters; Optional
Specify the unit holder ID.
You can search for unit holder ID by clicking ‘Find UH’ button in the screen.
Unit Holder Name
Display
The system displays the unit holder name for the selected unit holder ID.
Transaction Category
Alphanumeric; 1 Character; Optional
Select the transaction category from the option list. The list displays the following values:
- Legacy
- Advised Business
- Execution Only
For MIFID fund transactions, the system will update the ‘Transaction Category’ field to ‘Advised Business’ and ‘Execution Only’. The effective date for category updation will be current system date. If the transaction category is updated for a transaction, effective date will be from the category updation date.
Description
Display
The system displays the description of the selected transaction category.
Transaction From Date
Date Format; Optional
Select the transaction from date from the adjoining calendar.
Transaction To Date
Date Format; Optional
Select the transaction To date from the adjoining calendar.
Transaction Number
Alphanumeric; 16 Characters; Optional
Specify the transaction number. Alternatively, you can select transaction number from the option list. The list displays all valid transaction number maintained in the system.
Select All
Optional
Select if all the transactions has to be selected or not from the drop-down list. The list displays the following values:
- Yes
- No
After specifying the necessary details, click ‘Show Details’ button. The following details are displayed:
- Product ID
- Policy Number
- Fund ID
- Transaction Number
- Transaction Date
- Unit Holder ID
- Unit Holder Name
- Transaction Type
- Ref Type
- Transaction Category
- Date
- New Transaction Category
- Remarks
- Select
- Authorization Status
- Maker ID
- Maker DT Stamp
- Checker ID
- Checker DT Stamp