3. Maintaining Details Specific to SLT
3.1 Introduction
A diary event signifies occurrences (other than accounting entries being passed) in the life cycle of a contract, at which appropriate messages need to be generated.
The following sections explain the maintenance you have to carry out for a diary event.
3.2 Maintaining User Groups
You can identify the different types of user groups involved in loan contracts, in the ‘User Group Maintenance’ screen.
You can invoke the ‘User Group Maintenance’ screen from the application typing ’OLDUSGRP’ in the field at the top right corner of the Application tool bar and click on the adjoining arrow button.
User Group
Specify a name for the user group, by which you can identify the same easily.
Description
Give the user group a description.
User ID
Select the ID of the user that you want to include in the group.
User Name
The name of the user you select will be displayed.
3.3 Maintaining Diary Events
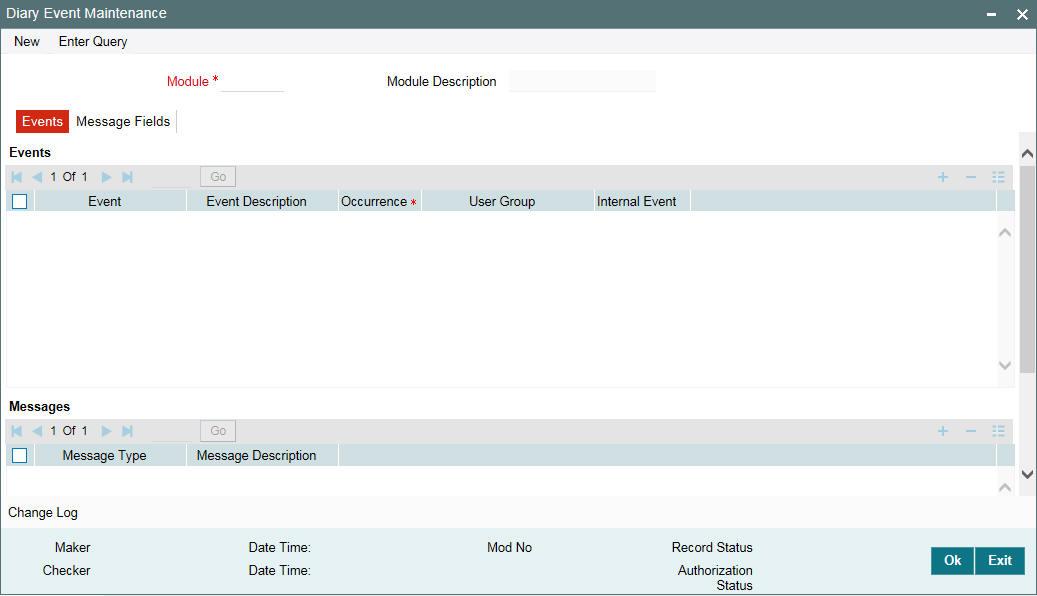
You can define the diary events to be associated with each of the loan modules in the ‘Diary Event Maintenance’ screen. A diary event signifies occurrences (other than accounting entries being passed) in the life cycle of a contract, at which appropriate messages would need to be generated.
You can invoke the ‘Diary Event Maintenance’ screen from the application typing ‘OLDDIAEV’ in the field at the top right corner of the Application tool bar and click on the adjoining arrow button.
After you have identified the diary events in the Diary Event Maintenance screen, you must also:
- Define the message types and message formats to be available for the module
- For each module, associate the appropriate message type to be generated at the occurrence of each diary event. You can do this in the Diary Event Messages screen, discussed later in this chapter.
In the Diary Event Maintenance screen, you must first specify the module to which the diary events you are defining, will apply.
In the Events tab of this screen, specify the following:
Event
Define the diary event that is to be applicable for contracts in the selected module.
Event Description
Give the event a description.
Occurrence
Specify whether the event occurs once or multiple times in the life cycle of a contract.
User Group
Select the user group to which the message should be sent out, from the option list provided. The option list includes all user groups you have maintained in the User Group Maintenance screen.
Internal Event
Select this box to indicate the event is an internal one.
Message Type
Specify the type of message to be generated for the module.
Description
Give the message type a description.
3.4 Maintaining Message Types for a Module
In the Diary Event Maintenance screen, you can maintain the message types that are to be available for generation at the occurrence of a diary event, for each loan syndication module.

When you make the appropriate message types available for each module in this manner, you can associate the available message type with the appropriate diary event applicable to a contract using the module.
In the Messages section of the Events tab, you can specify the type of message that is to be available, along with a description of the message type.
You can also maintain the desired format for each of the message types that are available for a module, by specifying the appropriate field tags. Click the ‘Message Fields’ tab in the Diary Event Maintenance screen. You can specify up to 30 field tags.
3.4.1 Maintaining User-Defined Field Tags
In the Diary Event Maintenance screen, you can maintain field tags for user-defined information, to be available for each loans module, Up to 10 different such tags can be maintained in the User Defined Fields section of the Message Fields tab. For each field tag, you must specify:
- A serial field number and tag name, which forms the identification for the user-defined field
- The type of data that can be entered in the user-defined field, as well as the date format, if it is a date type field
3.5 Associating Message Types to Events for a Module
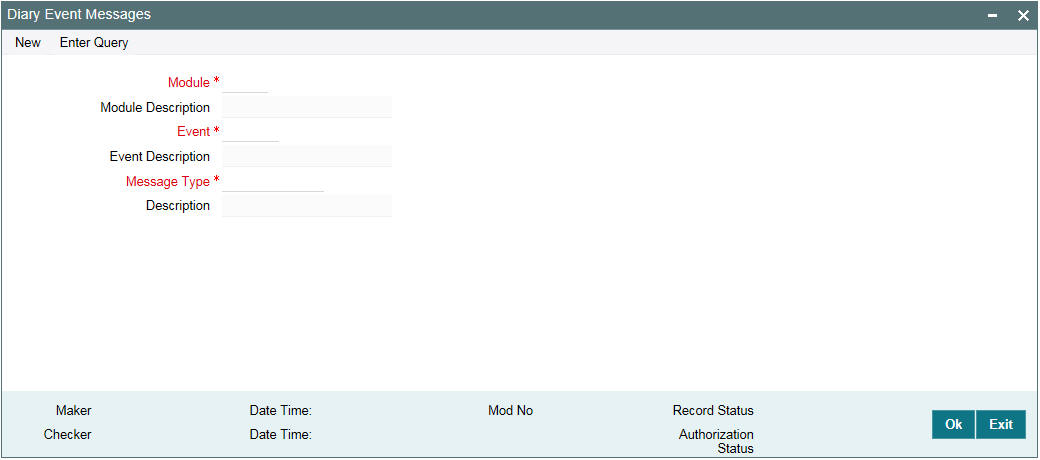
After you have defined the diary events to be applicable for a module, and also made available the requisite message types (in the Diary Event Maintenance) you can associate the type message to be used to generate messages for each diary event, in the ‘Diary Event Messages’ screen.
To an event code, you can only associate a message type that has not been already mapped. The option list against the field ‘Event’ includes the external events that you have defined and maintained details for, in the Diary Event Maintenance screen.
You can invoke the ‘Diary Event Messages’ screen from the application typing ‘’OLDDRYMS’ in the field at the top right corner of the Application tool bar and click on the adjoining arrow button.
3.5.1 Associating Diary Events
In the ’Events’ screen, you can also specify the different
diary events that needs to be processed for loan contracts using a product.
Click ‘Events’ in the Bilateral
Loans Product Definition screen to invoke the Events screen.
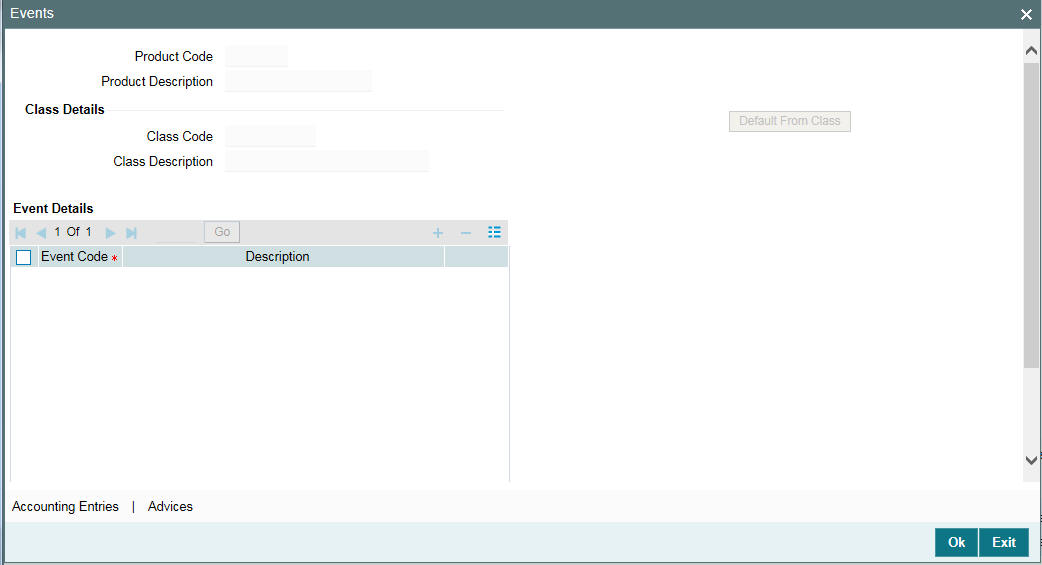
In this screen, select the code of the diary event that you want to associate with the product, in the Event Code field.
3.5.2 Specifying Diary Events for a Contract
For a loan contract, you can specify diary events to be processed. A diary event signifies occurrences (other than accounting entries being passed) in the life cycle of a contract, at which appropriate messages need to be generated.
The details for processing diary events are defined in the Diary Event Maintenance, where the appropriate message types, formats, tags, and user-defined fields are maintained. When you maintain products for borrower contracts, you also associate the diary events to be applicable to contracts using the products.
To specify the details of processing diary events for a borrower contract, you can use the Contract Diary Event screen.
You can invoke the ‘Contract Diary Events’ screen from the application typing ’OLDDRYET’ in the field at the top right corner of the Application tool bar and click on the adjoining arrow button.
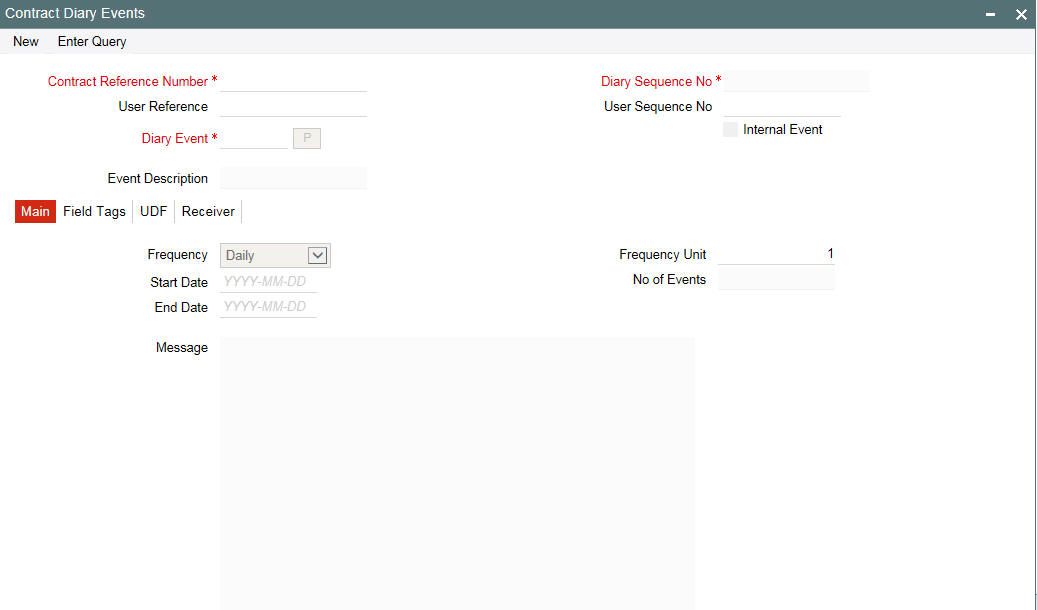
In this screen, you must select the reference number of the contract for which you want to define events. The details of the selected contract appear on the screen. You must also indicate the code of the event which you want to be processed for the contract, in the Event Code field. The option list in this field consists of diary events defined for the product that the selected contract uses. If you select an internal event, the box ‘Internal Event’ is selected.
3.5.2.1 An Event is an Internal Event
In the Contract Diary Event screen, if you have selected Internal Event check box, then:
Only ‘Main’ tab details needs to be entered.
You define the following details for each internal diary event that you associate for a contract in this screen. In the ‘Main’ tab, specify the following details:
Frequency
You must define the frequency at which the specified diary event must be processed for the selected contract - Daily, Monthly, Quarterly, Half-yearly, Yearly, and Bullet.
If the selected event can only occur once, as specified in the Event Maintenance, the frequency is defaulted to ‘Bullet’ and cannot be changed.
Frequency Unit
You can specify the units in which the specified frequency is reckoned, that is, the factor by which the frequency must be multiplied to arrive at the final diary event frequency.
If the event can only occur once, as specified in the Event Maintenance, the frequency is defaulted to ‘Bullet’ and cannot be changed, and the frequency unit can only be specified as ‘1’.
Start and end dates
The start date is the date on which the specified diary event would be processed for the first time in the life cycle of the selected contract. For events with multiple occurrences (as specified in the Event Maintenance), based on the frequency, the event would be repeated as many times as possible, till the end date that you define in this screen.
Note
If you select the Frequency Unit as ‘Bullet’, the field End Date is disabled.
The end date is the date beyond which the selected diary event is not processed again for the selected contract. For events with multiple occurrences, as specified in the Event Maintenance, you can specify an appropriate end date which is later than the start date.
If the event can only occur once, as specified in the Event Maintenance, the end date is the same as the start date and cannot be changed.
Number of events
You can specify the number of times the specified diary event must be repeated, for the selected contract. For events with multiple occurrences (as specified in the Event Maintenance), based on the frequency, the event would be repeated as many times as specified in this field, before the end date that you define in this screen.
If the event can only occur once, as specified in the Event Maintenance, this field is blank and disabled.
Message
If you have marked the event for which you are entering details here as an internal event by selecting the Internal Event check box in the Diary Event Maintenance screen, you can enter a message here in the space provided. This message serves as an internal reminder.
3.5.2.2 An Event is not an Internal Event
Note
You are not allowed to enter details in the ‘Message’ section of the ‘Main’ tab.
Main tab
In the tab ‘Main’, all fields are enabled and are as explained in the previous section.
To enter a message which is to be sent to multiple borrowers, click the ‘Borrower FFT MSG’ button. The Free Format Messages – Multiple Borrowers screen is invoked.
Note
When you click the ‘Borrower FFT MSG’ to enter a message which is to be sent to borrowers, ‘ProRata TAG Values’ button in the Free Format Message – Multiple Borrowers screen is not enabled.
For further information on the Free Format Messages – Multiple Borrowers screen, refer to the section ‘Free Format Messages for Loan Syndication Contracts’ in this chapter.
Field Tags tab
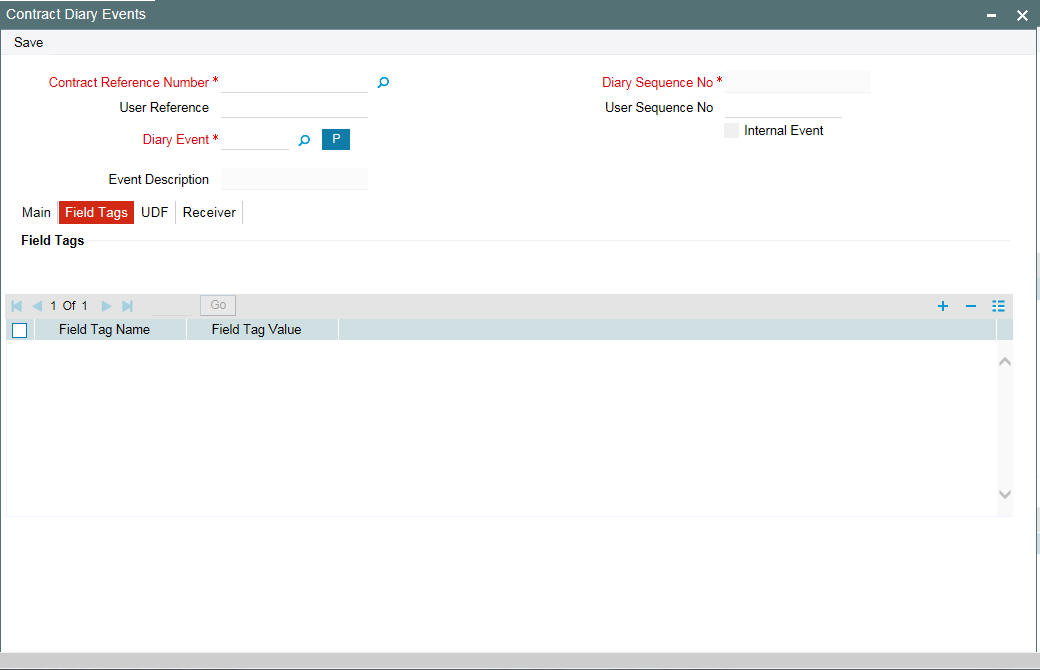
The field tags maintained in the Diary Event Maintenance for the module are displayed in the Details tab and you can specify appropriate values for these tags, up to a maximum of 35 alphanumeric characters.
UDFs tab
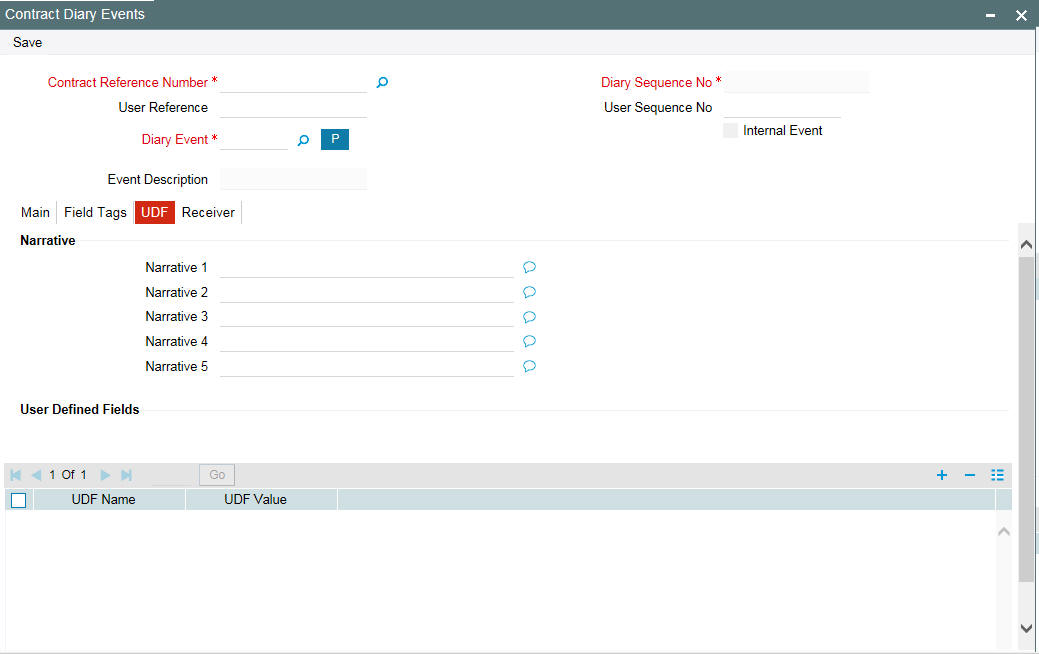
You can also specify appropriate narratives, if required, for the selected diary event that you have specified for the selected contract. You can also enter information in the UDFs displayed here.
Receiver tab
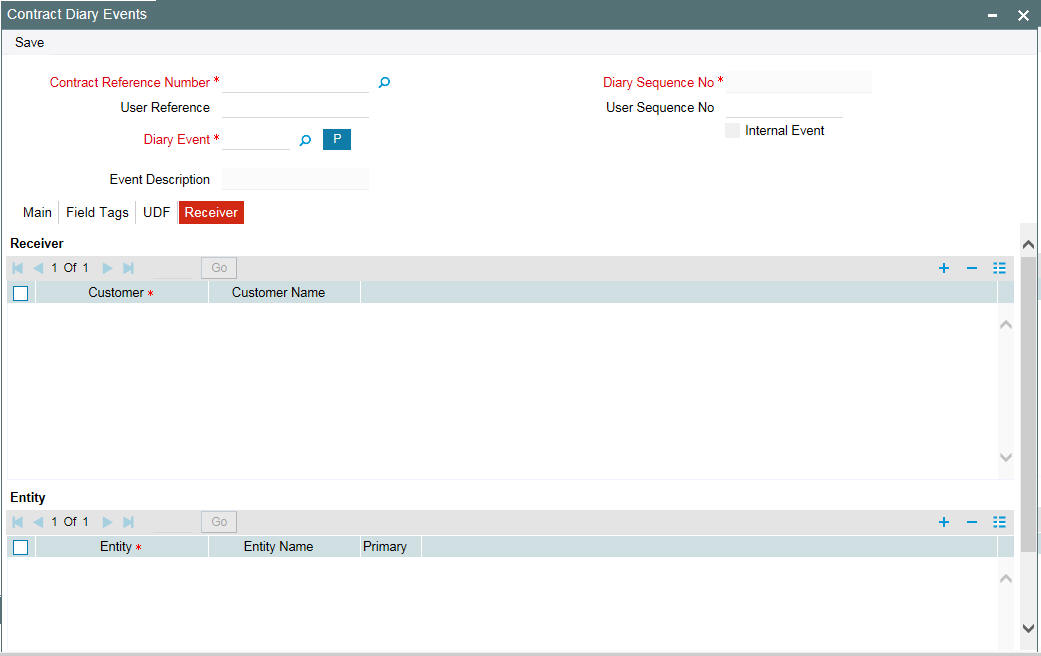
You must specify the customer who would be the recipient of the messages, as well as the entities for the recipient customer (with one primary entity). You can specify the recipient customer details in the Receiver tab. These details will be defaulted in the ‘Receiver’ tab of the Customer Diary Status screen.
3.5.3 Generating Messages for Diary Events
After you have identified the diary events to be processed for a syndication contract, you can generate messages for diary events in the Contract Diary Status screen. You can invoke the ‘Contract Diary Events Status’ screen from the application typing ’OLDDRYST’ in the field at the top right corner of the Application tool bar and click on the adjoining arrow button.
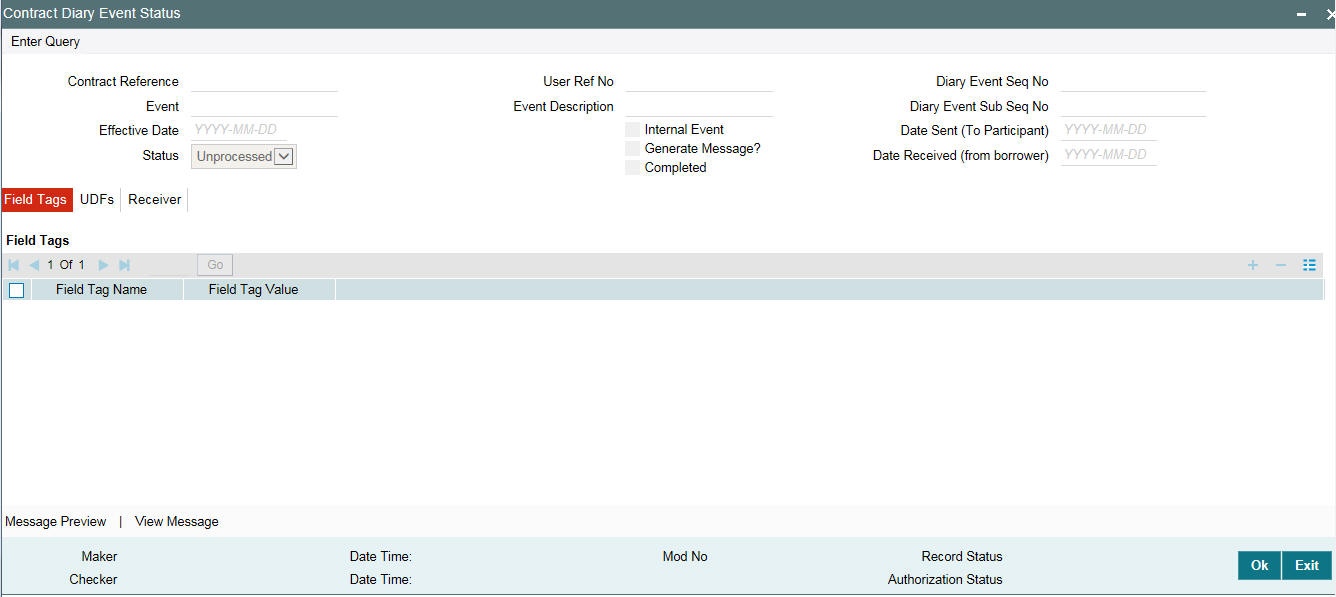
In this screen, enter the following details:
- Contract Reference Number
- Event
- Effective Date on which the changes will come into effect for the contract
The system will display the User Reference Number, Sequence Number and Sub-Sequence Number. The system will also display the status of the event; whether or not it has been processed for the contract as until the application date.
Note
If the status of an event is ‘Unprocessed’ and you want to process the same, you have to first ‘Unlock’ the record, and then change the status to ‘Processed’. Once you have changed the status, check the box ‘Gen Msg’ and save the record. When the record is authorized, the event will be processed and a message generated.
Note: If the event you select is an Internal Event (if you have selected the ‘Internal Event’ check box in the Diary Event Maintenance screen):
- The ‘Internal Event’ check box is selected
- You can enter details in the ‘Message’ tab
- When you click the ‘Message Preview’ no screen is invoked.
3.5.3.1 An Event is an Internal Event
Messages tab
This tab is enabled only if the event is an internal one (if, for the event, you have selected the ‘Internal Event’ check box in the ‘Diary Event Maintenance’ screen).
You can view the message if you have entered in the Contract Diary Event screen. This message is treated as an internal reminder. You cannot make changes to the message.
3.5.3.2 If the Event is not an Internal Event
Note
You can enter details in the ‘Field Tags’, ‘UDF’, and ‘Receiver’ tab. You cannot enter details in the ‘Message’ tab
Field Tags tab
The field tags that you have entered through the Contract Diary Event screen are displayed here. You cannot make any changes to the same.
UDFs tab
The narratives that you have maintained through the Contract Diary Event screen is displayed here. You cannot make any changes to the same. You can, however, enter information in the UDFs displayed here.
Receiver tab
The recipients of the message that you have specified in the Contract Diary Event screen are displayed here. You can make changes to the same.
When you click the ‘Borrower FFT MSG’ button, the Free Format Messages – Multiple Borrowers screen is invoked. You would have entered the details of the free format message to be sent to multiple borrowers involved in the contract, by invoking this screen through the Contract Diary Event screen. You can view these details in the screen. You are allowed to make changes to the TAG values only.
For further information on the Free Format – Multiple Borrowers screen, refer to the section Free Format Messages to Multiple Borrowers in this User Manual.
3.6 Maintaining Market Price Details
You can maintain current market price ratings for all CUSIPs involved in trade, which can be used for the revaluation of the positions associated with the CUSIP.
You can capture the market price details for CUSIPs in ‘Market Price Maintenance’ screen.
You can invoke the ‘Market Price Maintenance’ screen from the application typing ‘TLDPRCMT’ in the field at the top right corner of the Application tool bar and click on the adjoining arrow button.

The following details are displayed in this screen:
CUSIP/ISIN
Specify the CUSIP for which you need to maintain the market price details.
Market Price
Specify the market price associated with a CUSIP.
Source
Specify the source from where the market price for the CUSIP was obtained.
Note
- If the market price gets revised, the old value is retained in the history.
- You can maintain only one market price along with the source of the price, for a CUSIP.
- If you enable and process the market price upload, then the price uploaded by Hamper will also be displayed.
3.7 Free Format Messages for Loan Contracts
You can enable the system to generate free format messages with respect to loan contracts, by using either of the following options:
- Selecting a template containing pre-defined contract tags for the message
- Specifying free format text, choosing from pre-defined tags defined for the loans module
You can generate free format for multiple borrowers.
3.7.1 Free Format Messages to Multiple Borrowers
You can enable the system to generate a normal advice, as well as custom messages to borrowers through the Free Format – Multiple Borrowers screen (OLDFFMBR)
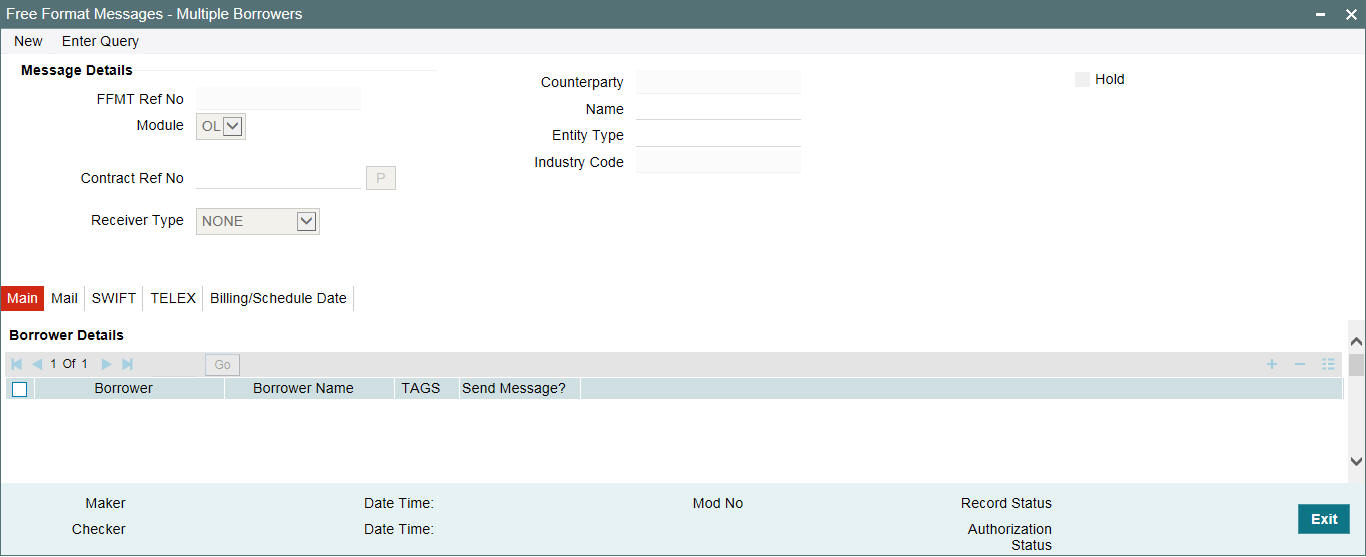
Message Type is ‘Normal’. The ‘TAGS’ button is disabled for a ‘Normal’ message.
Specify the following details in this screen:
FFMT Reference No.
This is a unique reference number generated by the system for this free format message.
Contract Ref. No.
Select the reference number of the contract from the option list.
Name
The name of the customer will be displayed when you select the Reference Number.
Counterparty
When you select the contract reference number, the counterparty of the contract will be displayed.
Media
Indicate the media through which the free format message should be transmitted. The media through which you can channel a free format message depends on the media types that you have maintained for your branch in the Media Maintenance screen. You can choose a media code from the option list that is available.
Indicating the recipient of the message
Select the recipient of the message. If you select the option ‘NONE’, the message will not be sent to anyone. If you select the option ‘ENTITY’, you will be able to select the entities to which the message should be sent. If you select the option ‘ENTITY TYPE’, you will be able to select the entity types to which the message should be sent.
Hold
Select this check box to indicate the free format message should be placed on hold. Leave it unchecked to indicate that it can be generated.
If you have indicated that messages should be generated on-line the free format message will be displayed in the Outgoing Message Browser once it is saved. You can generate it from the Browser. If you indicate that the message should be put on hold, you will first have to release the message before you generate it from the Outgoing Browser.
Borrower Details
Select the borrower to whom you would like to send the message. When you enter the contract reference number, the borrowers linked to the contract will be included in the option list. To indicate you want to send a message to a borrower, check the box ‘Message’ places along the required borrower.
Specifying Entity details for a borrower
As mentioned above, the borrowers linked to the contract number you select, are displayed. To specify the entities of the borrower who are to be sent the message, highlight the borrower. If you have selected the option ‘ENTITY’ against the field ‘Receiver’, the option list invoked will include all the entities linked to the borrower.
If you have selected the option ‘ENTITY TYPE’ against the field ‘Receiver’, the option list invoked will include all entity types linked to the borrower.
To indicate an entity is the primary entity, check the box ‘Primary’. To send a message to an entity, check the box ‘Message’.
Message
You can enter the free format message to be sent to the recipient in this section. You have the option of using one of the templates that you have maintained in the Message Format Template Maintenance screen.
Select the option ‘Template’.
You can select the template you would like to use. You can make changes to the template here.
Note
Although you are allowed to make changes to the template being used in the message, these changes will not affect the template itself. You can make changes to a template through the Message Format Template Maintenance screen alone.
3.7.2 Maintaining the Payoff Notice Components
You can maintain the message components for Payoff Notice using the ‘Payoff Notice Components’ screen. You can invoke this screen by clicking the ‘Payoff Notice’ button in the ‘Free Format Messages – Multiple Borrowers’ screen.
In this screen, system displays the following components that can be included in the Payoff Notice:
- Escrow1
- Escrow 2
- Escrow 3
- Escrow 6
- Special Penalty
- Prepayment Premium
- Statement Fee
By default, all the Payoff Notice components are checked. However, you can uncheck any component that you wish to exclude from the notice. The unchecked components are shown in the Payoff Notice with zero value.
System displays the UDF maintained in 'Payoff Fee' field for a loan or drawdown contract as the statement fee. This fee is always displayed in the Payoff Notice, independent of whether the fee is paid or not. However, you can edit the Payoff Fee (Statement Fee) amount during the Notice generation stage. If you input a value during the Notice generation stage, then system does not pick the value defined in the contract level UDF for this Fee in the Notice. if the fee needs to be waived, then you can input the value as Zero during the Notice generation stage.
Note
- For Payoff Notice, you should maintain the value of 'Notice Type' UDF as 'Payoff' in the ‘Message Format Template Maintenance’ screen.
- Only current dated and future dated Payoff Notice generation is allowed.
- Based on the specified bill date during message generation, payment projection details are provided in the Payoff Notice for loan and drawdown contracts.
3.7.2.1 Specifying Billing Date
You can specify the billing date in the ‘Billing Date’ screen. You can invoke this screen by clicking the 'Message Preview' or ‘Generate’ button in the ‘Free Format Messages – Multiple Borrowers’ screen.

Specify the following details:
Billing Date
Specify the date on which the free format message needs to be generated.
Property Code
Select the property code during Payment Notice message generation from the adjoining option list. This list displays only those property codes that are linked to the loan/drawdown selected.
This option list is enabled only if the value of 'Property Selection Required' UDF is 'Yes'. Otherwise, this option list is disabled.
The following UDFs in the 'Message Format Template Maintenance' screen are used for message generation based on the predefined parameters by the user:
UDF |
Values |
Property Selection Required |
Yes/No |
Notice Type |
Payoff/Payment/Null |
If the value of 'Property Selection Required' UDF is 'Yes', then system does the following:
- The 'Property Code' option list is enabled in the 'Free Format Messages - Multiple Borrowers' screen and property related details are shown in the notice.
- If the loan/drawdown is linked to the property and you do not select the 'Property Code' in the 'Free Format Messages - Multiple Borrowers' screen, then system displays an appropriate error message.
- If the loan/drawdown is not linked to any property, then system does not allow message generation and gives an appropriate error message.
If the value of 'Property Selection Required' UDF is 'No', then system does the following:
- The 'Property Code' option list is disabled during message generation and system shows all the properties linked to the loan/drawdown in the notice.
- If the loan/drawdown is not linked to any property, system does not allow message generation and gives an appropriate error message.
- The event 'PNTC' is used as a related event to generate the Payment Notice and Payoff Notice for loans and drawdowns. The event 'ZFMG' (Free Format Messaging) is triggered at the contract level for processing free format messages.
- The following points on Payment Notice are noteworthy:
- Payment Notice is a free format message generated manually, prior to the component due date. You should maintain a template for Payment Notice using 'Message Format Template Maintenance' screen.
- If only one property detail is required in the message, then you should maintain the value of 'Property Selection Required' UDF as ‘Yes’. During message generation, you should select the property code that needs to be displayed in the message.
- For Payment Notice, you should maintain the value of 'Notice Type' UDF as 'Payment' in the ‘Message Format Template Maintenance’ screen. On selecting the Payment Notice free format template, you can define values for user input fields.
- On clicking the 'Message Preview' or ‘Generate’ button, you can define the property code linked to the loan, date on which the free format message needs to be generated in the 'Billing Date' screen.
- Only current dated and backdated dated payment notice generation will be allowed.
- Based on the value defined for the UDF ‘Escrow Type’ at the interest class level, the escrow impounding components are identified.
-
Escrow Type
Component
ESC1
Tax escrow component
ESC2
Insurance escrow component
ESC3
Other escrow components
If there are multiple escrow components with same ‘Escrow Type’, then the balance of each component is added to arrive at the escrow balance.
While generating free format messages for borrower or participant drawdown contracts, if the UDF value for ‘COMPONENT-TYPE’ at interest class level is ‘SERVICER-FEE’ for payment or rollover notices, then system does the following:
- System displays the servicer fee (interest component) details along with main interest component will in the notices.
- The total interest due for borrower message is the sum of main interest due and servicer fee amount due.
- Total interest due for participant message is the actual main interest due excluding servicer fee amount due.
Message Type is ‘Custom’
You need to enter the details as described in the previous section.
Message
You can enter the free format message to be sent to the recipient in this section. You have the option of using one of the templates that you have maintained in the Message Format Template Maintenance screen.
Select the option ‘Template’. You can select the template you would like to use. You can make changes to the template here.
Note
Although you are allowed to make changes to the template being used in the message, these changes will not affect the template itself. You can make changes to a template through the Message Format Template Maintenance screen alone.
Select the option ‘TAGS’. The TAG List screen is invoked where you can view a list of tags and select the required ones.

When you select one of the tags, it is added at the current position of the cursor in the message body under the section ‘Message’
If you select the option ‘Custom’, the ‘TAGS’ button is enabled. When you click this button the ‘Borrower TAG Details’ screen is invoked, where you can enter the values for the tags that you have already selected from the TAG List screen.
Note
Only those Tag IDs that you have defined for the Message Type ‘Custom’ in the Free Format Message Tags screen will be available for use.
When a free format message specification is authorized, the pre-defined event for free format messages (ZFFT) is triggered, for the contract.
The pre-defined tags available for the loan syndication modules are:
- ‘_SYNREFNO_’: This tag denotes the facility reference number
- ‘_TRREFNO_’: This tag denotes the tranche reference number, and is available only for draw down contracts
- ‘_CREFNO_’: This tag denotes the contract reference number
- ‘_CAMT_’: This tag denotes the contract amount
- ‘_CCCY_’: This tag denotes the contract currency
- ‘_CDATE_’: This tag represents the contract value date
- ‘_DRDWNNO_’: This tag represents the sequence number of the draw down. This tag is available only for draw down contracts
- ‘_BRREFNO_': This tag denotes the borrower contract reference number
- ‘_MONTHTAG_’: This tag indicates the month for which the interest amount is being credited
‘_ACNOTAG_’: This tag indicates the interest amount being credited