4. Defining Attributes Specific to Loan product
This chapter contains the following sections:
- Section 4.1, "Introduction"
- Section 4.2, "Setting Product Preferences"
- Section 4.3, "Maintaining Slab/Tier Based Spread on Loan Outstanding"
- Section 4.4, "Specifying the Logic for Currency Rounding"
- Section 4.5, "Applying Tax on Liquidated Principal"
- Section 4.6, "Classification of General Ledgers based on Transaction Codes"
- Section 4.7, "Maintaining Pool Fund Details"
- Section 4.8, "Identifying a Component as a Refinance component"
- Section 4.9, "Maintaining 1098 Parameters"
4.1 Introduction
In this chapter, focuses on defining the attributes specific to a Loans product.
This section contains the following topics:
You can create a loans product in the ‘Loans and Deposits (LD) Product Definition’ screen.
You can invoke the ‘Bilateral Loans Product Definition’ screen by typing ‘OLDPRMNT’ in the field at the top right corner of the Application tool bar and clicking the adjoining arrow button.
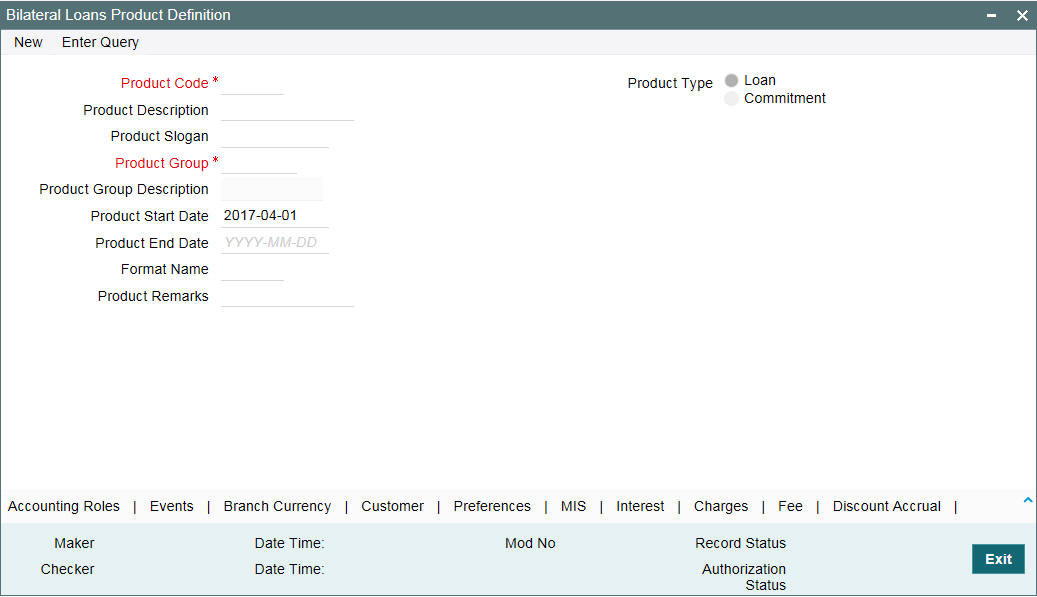
In this screen, you can enter basic information relating to a loans product such as the Product Code, the Description, and so on.
For any product you create in Oracle Lending, you can define generic attributes, such as branch, currency, and customer restrictions, interest details, tax details, and so on, by clicking on the appropriate icon in the horizontal array of icons in this screen. For a loans product, in addition to these generic attributes, you can specifically define other attributes.
You can define the attributes specific to a loans product in the LD Product Definition Main screen and the Loans Product Preferences screen. In these screens, you can specify the product type and set the product preferences respectively.
For more information on the generic attributes you define for a product, refer to the following Oracle Lending User manuals.
- Products
- Interest
- Charges and Fees
- Tax
- User Defined Fields
- Settlements
4.1.1 Specifying Product Type
The first attribute that you define for a product is its type. In the LD Product Definition screen, you can classify the products you create into the following types:
- Loans
- Commitments
When creating a loans product, you have to select the ‘Loans’ option in the Product Type field. For instance you may want to create a loan product for HFS transfer.
4.1.2 Creating a Commitment Product
In the ‘Bilateral Loans Product Definition’ screen, you can also define various types of commitments as products. A ‘commitment’ is a formal understanding between a bank and its customer that the bank is willing to advance a loan during a certain period in the future. A fee may be charged at the time of entering into this understanding. When a commitment is initiated, contingent entries are passed for the commitment amount. When a loan is disbursed against this commitment, the contingent entries are reversed and the loan-related entries are passed. However, these entries are passed only if they are defined for the product.
A commitment may be linked to more than one loan, depending on the availability of funds.
4.2 Setting Product Preferences
This section contains the following topics:
- Section 4.2.1, "Specifying the Payment Method"
- Section 4.2.2, "Indicating the Schedule Type"
- Section 4.2.3, "Setting Billing Notice Days"
- Section 4.2.4, "Specifying Grace Days to Penalty"
- Section 4.2.5, "Indicating Values to be Rekeyed during Authorization"
- Section 4.2.6, "Setting the Accrual Frequency"
- Section 4.2.7, "Specifying Tenor Related Details"
- Section 4.2.8, "Specifying Exchange Rate Variance"
- Section 4.2.9, "Specifying if Status Processing for Contract Schedules is Required"
- Section 4.2.10, "Processing Prepayment Schedule "
- Section 4.2.11, "Specifying the Status/ Revaluation during Status Change Process"
- Section 4.2.12, "Specifying Payment of Past Schedules"
- Section 4.2.13, "Allowing a Change of the Settlement Account"
- Section 4.2.14, "Liquidation of Interest on Prepaid Principal"
- Section 4.2.15, "Allowing Partial Prepayment"
- Section 4.2.16, "Restricting the Generation of Settlement Messages"
- Section 4.2.17, "Specifying the Mode of Liquidation"
- Section 4.2.18, "Allowing Partial Liquidation"
- Section 4.2.19, "Specifying the Minimum Amount for Auto Liquidation"
- Section 4.2.20, "Identifying the Rate Code to be Used for Loans in Foreign Currency"
- Section 4.2.21, "Indicating the Rate Type"
- Section 4.2.22, "Allowing Rollover"
- Section 4.2.23, "Confirming the Status of Loan Products"
- Section 4.2.24, "Applying a Block on the Limit of a Credit Line"
- Section 4.2.25, "Specifying whether the Product Is an Intra-Day Product"
- Section 4.2.26, "Identifying Products for Agency Contract Creation"
- Section 4.2.29, "Allowing Prepayment along with Overdue Schedules"
- Section 4.2.30, "Tracking Accrued Interest for Credit Utilization"
- Section 4.2.31, "Applying Prepayment Penalty"
- Section 4.2.32, "Specifying whether Prepayment of Loans is Allowed"
- Section 4.2.33, "Specifying whether Cost of Credit is Allowed"
- Section 4.2.34, "Propagating Statuses to Loans"
- Section 4.2.35, "Re-computing Schedules after a Prepayment"
- Section 4.2.36, "Hold Prepayments in Intellect Browser"
- Section 4.2.37, "Specifying if Installment Schedules should be Allowed"
- Section 4.2.38, " Specifying Additional Preference"
- Section 4.2.39, "Specifying the Reversal Transaction Type"
- Section 4.2.40, "Discounting Multiple Schedules for Discounted Loans"
- Section 4.2.41, "Indicating the Annual Effective Rate (TEA) for loans"
- Section 4.2.42, "Enabling the Customer Effective Loan Rate Option"
- Section 4.2.43, "Allowing Forward Dating"
- Section 4.2.44, "Prioritizing the Liquidation of Components"
- Section 4.2.45, "Tracking Status Changes for Loans"
- Section 4.2.46, "Maintaining the Disclosure Details"
- Section 4.2.47, "Mapping the Product to Disclosure Details"
- Section 4.2.48, "Specifying the Special Penalty Components"
- Section 4.2.49, "Maintaining UDFs"
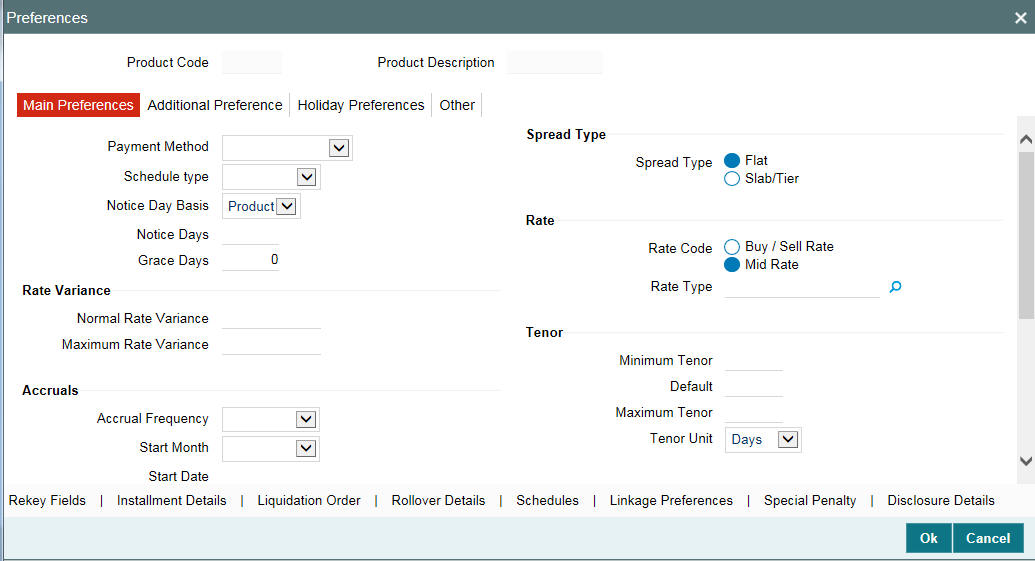
The attributes specific to a loan product are defined in the ‘Bilateral Loans Product Preferences’ screen. You can invoke this screen from the ’Bilateral Loans Product Definition’ screen by clicking ‘Preferences’ tab.
‘Preferences’ are the options that are available for a loans product. The options you choose, ultimately, shape the product.
For example, you have the option of applying tax on a product or waiving it. If you specify that tax is applied on a product, a loan involving the product inherits the attribute. However, you can change this while processing the loan.
4.2.1 Specifying the Payment Method
You have to specify whether the payment method, for the main interest, is to be bearing, discounted or true discounted. This cannot be changed at the time of processing a loan.
Bearing
The interest is liquidated on scheduled payment date(s).
Example
You have advanced Mr. Brian Williams a loan of USD 10,000 under the scheme ‘Short-term Loans for Individuals’ at 10% interest for a year. Now, under the bearing type of interest payment method, the loan of USD 10,000 is advanced to Mr. Brian Williams and the interest on it is collected over a year, which is the tenor of the loan.
Discounted
In this interest payment method, the interest payable on the loan is deducted from the principal at the time of initiating the loan.
Example
You have advanced Mr. Brian Williams a loan of USD 10,000 under the scheme ‘Short-term Loans for Industries’ at 10% interest for a year.
Under the discounted type of interest payment, the total interest (USD 1,000) calculated on USD 10,000, for the tenor of the loan, is deducted from the principal (USD 10,000) and only USD 9,000 is advanced.
True discounted
In this interest payment method, the interest is calculated on the principal in a manner differing slightly from the Discounted method. The interest rate is applied on the Principal instead of the Nominal, as is done in the Discounted method.
Example
You have advanced Mr. Brian Williams a loan of USD 10,000 under the scheme ‘Short-term Loans For Industries at 10%’ interest for a year. Under the true discounted type of interest payment, the interest amount, in absolute terms in not USD 1,000 but less than that. This is because the interest rate of 10% is not applied on USD 10,000 but on the actual amount disbursed (derived by the system) which is USD 9090.91.
In short, in Discounted method the interest is calculated on Nominal whereas in case of True discounted method, the same is calculated on the Principal.
Allow User Input Installment
During contract maintenance, you can maintain the installment amount for an amortized contact only if this box checked at the product level. This box is enabled only for the schedule type ‘Amortized’.
Allow Re-amortization
Select this check box to indicate that re-amortization is allowed. This field is enabled only if the Product schedule type is ‘Amortized’.
On Rate Revision
Select the appropriate value from the drop-down box. System displays the following values:
- I - Change Installment
- B - Change Bullet schedule
This field is enabled only for Amortized products.
On Prepayment
Select an appropriate value from the drop-down list. This field will be enabled only for Amortized products. The following values are displayed:
- Change Installment
- Change Bullet
System defaults 'Change Bullet' in this field.
4.2.2 Indicating the Schedule Type
You can indicate the type of repayment schedule that you want to have for the product. It could be any one of the following:
Amortized
Amortization is another term for Equated Installments. That is, the (main) interest is calculated for the term of the loan, clubbed with the principal and distributed into equal installments according to the frequency you specify - monthly, quarterly, and so on.
Capitalized
When you indicate capitalization for the schedules and define schedules for the various components of the loan (through the schedule definitions screens), if the repayments of principal or (main) interest are not made on a particular schedule date, they are capitalized for the next schedule. If a partial payment has been made, the unpaid amount is capitalized (the unpaid interest is added to the unpaid principal and this becomes the principal for the next schedule).
Note
For capitalization only the interest component, defined as Main Interest in the Product ICCF screen is considered.
Normal
If you indicate Normal as the schedule type, you can define your own schedules through the ‘Product Default Schedules’ screen. Click the ’Schedules’ tab to invoke this screen.
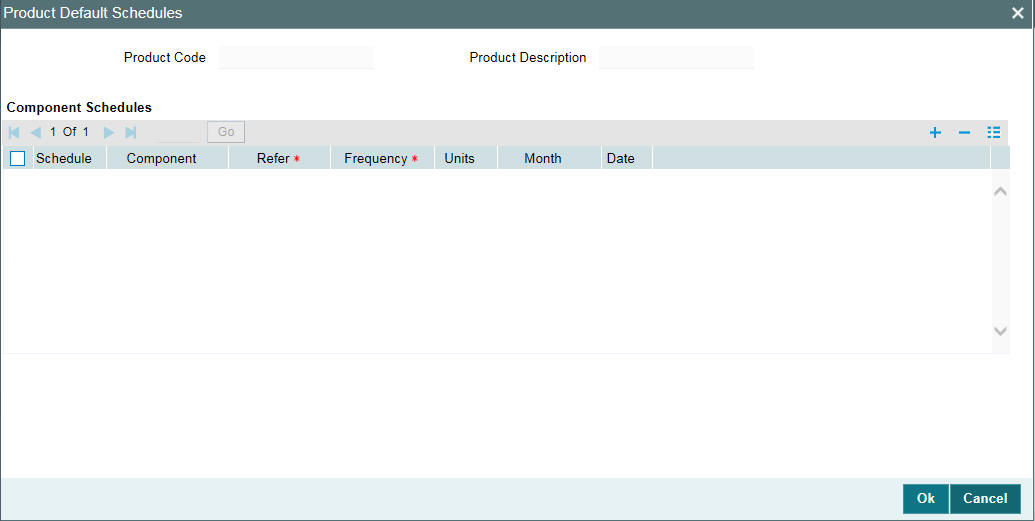
- The schedule type applies to all loans involving the product and cannot be changed during loan processing.
- The Component option list does not display components for which ‘Special Penalty Component’ is checked.
4.2.3 Setting Billing Notice Days
You have to specify the number of calendar days before the repayment date, when a Billing Notice has to be generated for the customer (as a reminder of the payment).
The billing advice is generated for the mail medium. This notice is generated for repayment of all components.
Example
If a payment has been scheduled for 30 June 1997 for Mr. Brian Williams loan of USD 10,000 at 15%, you could send him a notice 10 days before the payment is due, on 20 June 1997 as a reminder of his payment which is due on 30 June 1997.
If you have specified that a notice is to be generated on a certain day and it happens to be a holiday, then the notice will be generated depending on your holiday handling specifications in the Branch Parameters screen:
- If you have specified that automatic processes are to be carried out for holidays on the last working day, the notices slated for generation on the holiday is generated during end-of-day processing on the last working day before the holiday.
- If you have specified that the automatic processes are to be carried out on the next working day, notices slated for generation on the holiday is generated on the first working day that immediately follows the holiday, during beginning-of-day processing.
Example
Assume that the current system date is 20 June 1997, and 21 June 1997 is a holiday. You indicate that the payment notices should be generated 10 days in advance.
The notices for payments that are due on 30 June is generated, at the beginning of day (by the Automatic Contract Update function), on 20 June.
Notices meant for payments due on 1 July 1997 is generated during end-of-day processing on 20 June, if you specified that all automatic processes falling due right up to the next working date are to be processed on the System Date (today’s date). If not, the notices meant for 1 July is generated during beginning-of-day processing, on the working day immediately after the holiday, that is, 22 June.
4.2.4 Specifying Grace Days to Penalty
The ‘grace period’ specifies the period within which the penalty interest (if one has been defined for the product) is not applied, even if the repayment is made after the due date. This period is defined as a specific number of days and begins from the date the repayment becomes due.
Penalty interest will be applied on repayments made after the grace period. However, the penalty interest will be calculated for the entire period it has been outstanding (that is, from the date the payment was due).
Example
An interest repayment on Mr. Brian Williams loan is due on 15 June 1998. You have specified a grace period of 5 days, after which a penalty interest of 2% is imposed.
Now, if Mr. Williams makes the interest payment on 18 June, which falls within the grace period, he need not have to pay penal interest.
But if he makes the payment after the expiry of the grace period, that is, after 20 June, then he is charged penal interest right from 16 June and not from 20 June, the day the grace period expires.
If the payment is made within the grace period, normal interest is applied as of the scheduled repayment date.
4.2.5 Indicating Values to be Rekeyed during Authorization
You can specify the values that the authorizer of a deposit contract has to rekey when authorizing it.
All operations on a loan (input, modification, reversal, manual liquidation or manual rollover) have to be authorized:
- By a user other than the one who carried out the operation
- Before you can begin the end-of-day operations
When you invoke a loan for authorization − as a cross-checking mechanism, to ensure that you are calling the right loan − you can specify that the values of certain fields should be entered before the other details are displayed. The complete details of the loan is displayed only after the values to these fields are entered. This is called the “re-key” option. The fields for which the values have to be given are called the “re-key” fields.
If no re-key fields have been defined, the details of the loan is displayed immediately once the authorizer calls the loan for authorization.
The re-key option also serves as a means of ensuring the accuracy of inputs.
Example
At the ABC Corporation, Mr. Trevor Atkins inputs a loan of 1M USD, which has an interest of 20% and a tenor of one month. The loan involves a product for which the re-key fields assigned are the loan amount and the currency. Now, Mr. Atkins makes a mistake and enters the loan amount as 10 M USD.
When Mr. Jeffrey Hunt, who has rights to authorize the loan, selects the loan for authorization and indicates the re-key fields of loan amount and currency as 1M, and USD respectively (based on the loan document), the loan details will not be displayed.
The loan details are not be displayed if:
- The value in the field that has to be re-keyed has been entered wrongly at the time of loan processing
- The re-key value is input wrongly at the time of authorization
Now, if Mr. Trevor Atkins had input the loan currency as GBP instead of USD, then also, Mr. Jeffrey Hunt would have been denied access to the loan when he attempted to call it by entering the correct data in the re-key fields. When this happens, Mr. Hunt can inform Mr. Atkins of the mistake and have it rectified.
It could also be that Mr. Atkins has correctly captured the principal of the loan as 1M and the authorizer and Mr. Hunt makes an error while entering the re-key value. Assume Mr. Hunt enters the value as 10 M. In such a case also, the details of the loan is not displayed for authorization.
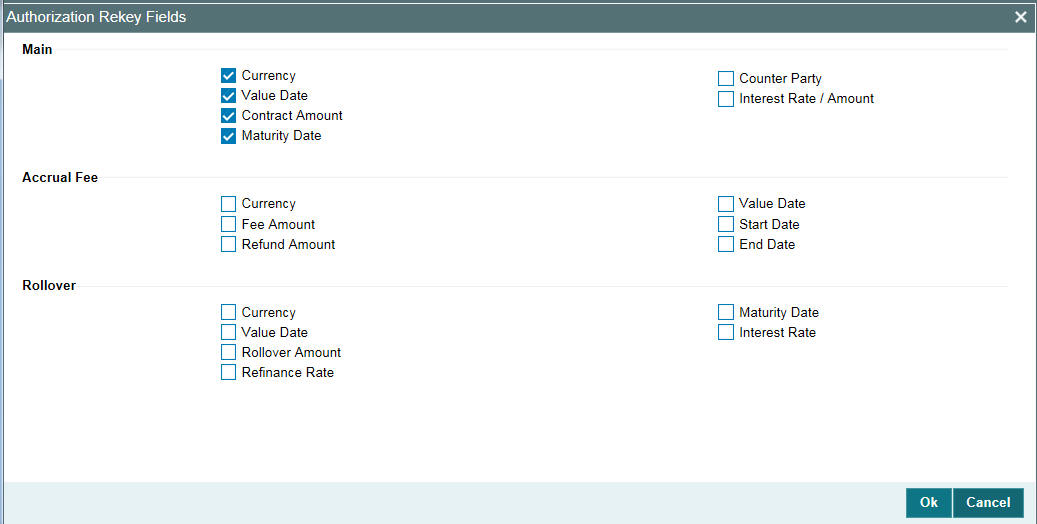
You can specify any or all of the following as re-key fields:
- Main
- Currency
- Value Date
- Contract Amount
- Maturity Date
- Interest Rate
- Accrual Fee
- Currency
- Fee Amount
- Refund Amount
- Value Date
- Start Date
- End Date
- Rollover
- Currency
- Value Date
- Rollover Amount
- Maturity Date
- Interest Rate
- Refinance Rate
Click the ‘Rekeys’ tab
in the Preferences screen to invoke the ‘Authorization Rekey Fields’
screen.
4.2.6 Setting the Accrual Frequency
Apart from the principal, you can have other components for a loan. The ‘other’ components of a loan, apart from the principal, could be the interest, charge or fees and they can be accrued over the tenor of the loan before being realized into the income account.
You can define the frequency at which you would like to accrue these components as part of the preferences that you specify.
The attributes of these ‘other’ components are defined in the ICCF sub-system of Oracle Lending. For components that have been marked for accrual, the frequency is specified in this screen (Product Preferences screen).
When you run the Automatic Contract Update function at the end of day, the system carries out the accruals according to the frequency that you specified. However, if the accrual date falls on a holiday, then the accruals are done as per your holiday handling specifications in the Branch Parameters screen. That is:
- If you have specified that automatic events are to be processed for a holiday(s) on the working day before the holiday, the accruals falling due on a holiday(s) are processed during end-of-day processing on the last working day before the holiday.
- If you have specified that the automatic events are to be processed for a holiday(s) on the working day following the holiday, the automatic events falling due on a holiday(s) are processed on the next working day, during the beginning-of-day processing.
The frequency can be one of the following:
- Daily
- Monthly
- Quarterly
- Half yearly
- Yearly
In the case of monthly, quarterly, half yearly or yearly accruals, you should specify the date on which the accruals have to be done. For example, if you specify the date as ‘30’, accruals are carried out on the 30th of the month, according to the frequency that you have defined.
If you want to fix the accrual date for the last working day of the month, you should specify the date as ‘31’ and indicate the frequency. If you indicate the frequency as monthly, the accruals are done at the end of every month - that is, on 31st for months with 31 days, on 30th for months with 30 days and on 28th or 29th, as the case may be, for February.
If you specify the frequency as quarterly and fix the accrual date as the last day of the month, then the accruals are done on the last day of the month at the end of every quarter. It works in a similar fashion for half-yearly accrual frequency.
If you set the accrual frequency as quarterly, half yearly or yearly, you have to specify the month in which the first accrual has to begin, besides the date.
Example
If you specify the frequency as half yearly, the start date as 31, and the start month as June, the system accrues the interest for the first time on 30 June 1997 for the period from 1 January to 30 June 1997, and for the second time on 31 December 1997, for the period from 1 July 1997 to 31 December 1997.
4.2.7 Specifying Tenor Related Details
You can set the minimum and maximum tenor limits for a loan product that you are creating. You can also specify a standard tenor or a default tenor.
Example
You have a product ‘Short-term Loans for the Manufacturing industry’ - ML10. This product is for short-term loans for manufacturers of iron and steel, chemicals, textiles, and so on. The loans involving this product will have a tenor of three months, six months, and so on. For such a product you can set a minimum tenor of one month and a maximum tenor of one year.
The ‘default tenor’ is the tenor that is associated with a loan involving this product. However, the default tenor applied on a loan can be changed during loan processing.
Example
You can define a default tenor for the product we just discussed, say, six months. This tenor is applicable to all contracts involving the product. However, you are allowed to specify a different tenor at the contract level.
4.2.8 Specifying Exchange Rate Variance
When a loan involves a currency conversion the rates defined for the Rate Type, that has been specified for the product, it is taken up by default (examples for Rate Type could be cash rate, borrowing rate, lending rate, and so on). This default can be changed.
You can impose some restrictions on this changed rate, as follows:
Normal variance
If the exchange rate variance exceeds the exchange rate for the Rate Type by this value (normal variance), then the system asks you for an override before proceeding to apply the exchange rate.
Maximum variance
You cannot apply an exchange rate on a loan, involving the product that you are creating, that is greater than the value that you specify as the Maximum Variance. If the exchange rate exceeds the standard rate by the maximum variance you have defined for the product, then the system does not allow you to store the contract.
Example
You have specified the normal variance as 3% and the maximum variance as 6% for Product LD01.
Now, if you apply an exchange rate on a loan involving LD01 that varies from the applicable rate maintained for the day by less than 3%, the system does NOT display an override message.
If you apply an exchange rate on a loan involving LD01 that varies from the Standard Rate by between 3% and 6%, the system displays an override message.
If you apply an exchange rate on a loan involving LD01 that varies from the day's rate by more than 6%, the system does not store the loan.
Note
The exchange rate variance is a percentage.
4.2.9 Specifying if Status Processing for Contract Schedules is Required
The status of a loan contract depends on repayments made on the loan. A repayment could mean a change in status.
Each status applicable for a contract is defined in the system. For movement to each status, you can define processing parameters, such as whether further accruals may be stopped, or accruals already made must be reversed out, and if the reporting GL must be changed when the status changes.
You can also process individual statuses and status changes for each schedule defined for a contract. In such a case, for each schedule, the accrued component amounts on the schedule that has fallen overdue, resulting in a change of status, would be moved to the transfer GL’s defined for the status.
To enable such schedule-level status processing, select the Schedule Level Status Change check box.
4.2.10 Processing Prepayment Schedule
Retain Payment Schedule
Select this check box to retain the payment schedule on the basis of LIFO and FIFO if prepayment is done on loan contract.
Note
‘FIFO’ and ‘LIFO’ fields are enabled for loan products and only if the above field is checked.
Prepayment Schedules
If prepayment is done on a loan contract, then the schedule is rebuilt on the basis of FIFO and LIFO logic.
FIFO
Select this option to rebuild the schedule on the basis of FIFO logic.
For example
Say that a loan contract is booked on a monthly and bullet frequency with schedules 11 and 1 respectively. Consider that the principal amount is USD 12000000, the value date is 01 March 2005 and the maturity date is 01 March 2006. This is shown in the table below:
Start Date |
Component |
Frequency |
No Of Schedules |
Unit |
Amount |
1 April 2005 |
Interest |
Monthly |
11 |
1 |
|
1 April 2005 |
Principal |
Monthly |
11 |
1 |
1000000 |
1 March 2006 |
Interest |
Bullet |
1 |
1 |
|
1 March 2006 |
Principal |
Bullet |
1 |
1 |
1000000 |
If you select the Prepayment Schedule as FIFO, then during prepayment made on 15 April 2005 for the amount USD 12000000 the schedules are built as given below
Start Date |
Component |
Frequency |
No Of Schedules |
Unit |
Amount |
1 April 2005 |
Interest |
Monthly |
11 |
1 |
|
1 April 2005 |
Principal |
Monthly |
1 |
1 |
1000000 |
15 April 2005 |
Principal |
Monthly |
1 |
1 |
1600000 |
1 January 2005 |
Principal |
Monthly |
1 |
1 |
400000 |
1 July 05 |
Principal |
Monthly |
8 |
1 |
1000000 |
1 March 2006 |
Interest |
Bullet |
1 |
1 |
|
1 March 2006 |
Principal |
Bullet |
1 |
1 |
1000000 |
LIFO
Select this option to rebuild the schedule on the basis of LIFO logic.
For example
Let us consider the same example as above and if LIFO is selected during the payment made on 15 April 2005, the schedules will be built as given below:
Start Date |
Component |
Frequency |
No Of Schedules |
Unit |
Amount |
1 April 2005 |
Interest |
Monthly |
11 |
1 |
|
1 April 2005 |
Principal |
Monthly |
1 |
1 |
1000000 |
15 April 2005 |
Principal |
Monthly |
1 |
1 |
1600000 |
1 May 2005 |
Principal |
Monthly |
9 |
1 |
1000000 |
1 February 2006 |
Principal |
Monthly |
1 |
1 |
400000 |
1 March 2006 |
Interest |
Bullet |
1 |
1 |
|
1 March 2006 |
PRINCIPAL |
Bullet |
1 |
1 |
0 |
4.2.11 Specifying the Status/ Revaluation during Status Change Process
During a backward status change for a loans or deposit contract, you can choose to transfer the revaluation balances through the status change process. To enable transfer of such revaluation balance, you need to specify the following preferences:
Transfer of revaluation balances
To transfer the revaluation balance during the status change of LD contracts click on this option. However, you are not allowed to specify this option if the ‘Schedule Level Status Change’ feature is enabled for this product.
In case you have opted for transfer of revaluation balances, the system validates the following details for all the accounting entries maintained for the product:
- The same account head cannot be used for a different accounting role if an account head’s internal GL type is specified as ‘Contract’
- For every accounting role, the account heads maintained for different status must belong to the same internal GL type namely Contract, Others or Normal
- It is mandatory to specify the Basis GAAP, in case ‘Transfer of Revaluation Balances’ or ‘Transfer at Historic Rate’ is enabled for the product
Transfer at historic rate
While transferring the revaluation balance, you can specify the rate that is to be used for computation. To apply the existing LCY equivalent of the FCY amount to each accounting role select this check box. If it is deselected, the system computes the LCY equivalent based on the current exchange rate.
Spread Type
You are allowed to define spread for a product. You can select the spread type as one of the following options:
- Flat
- Slab/Tier
For more information on Slab/Tier Based Spread, refer “Maintaining Slab/Tier Based Spread on Loan Outstanding” on page 45 in this chapter.
Basis GAAP
The GAAP indicator for which the LCY equivalent is taken for an accounting role during the status change needs to be maintained if you have opted for ‘Transfer of Revaluation Balances’ or ‘Transfer at Historic Rate’ for the product.
Select the Basis GAAP from the available option list.
You can specify whether tax should be applied on loans involving a product. If tax is specified for the product, you can waive it for specific loans. However, if you specify that tax is not applicable to the product, you cannot levy tax on any loan involving the product.
You can also select the type of tax applicable in the field ‘Tax Type’. Select the option ‘Withholding Tax’ if the tax is to be applied to interest income. Select the option ‘Transaction Tax’ if the tax is to be applied to transactions linked to accounts. If you select ‘Refund Tax to Customer’ check box and the tax deducted at source is more than required amount, the difference amount is refunded to the customer.
4.2.12 Specifying Payment of Past Schedules
You have to indicate whether for a back-dated loan that has schedules prior to today’s date, those schedules have to be liquidated when the loan is initiated. A back dated loan is one with a Value Date (initiation date) that is earlier than the date on which it is booked.
Example
Loans can be initiated as of
- Today
- A date in the future
- A date in the past
Today’s date is 15 October 1997. Suppose you initiate a loan of 15,000 USD today, with the Value Date (date on which the loan comes into effect) as 15 September 1997, the system passes accounting entries for initiation as of 15 September 1997.
But if there had been an interest payment schedule for 30 September 1997, for 500 USD, then if you specify that back valued schedules should be liquidated, you can make the system pass accounting entries to liquidate this schedule also, when the loan is initiated. If you specify that back dated schedules are not to be liquidated, only accrual entries will be passed till today.
Note that the entries associated with each event (initiation and liquidation in this case) are passed only if they have been defined for the product. Further, the accounts used are the ones defined for each entry.
4.2.13 Allowing a Change of the Settlement Account
Select the ‘Allow Settlement Account Change’ check box to indicate the settlement account that you specify for a contract (in the ‘Loan and Commitment - Contract Input’ screen) booked under this product, can be changed.
4.2.14 Liquidation of Interest on Prepaid Principal
If you select the ‘Liqd of Int on Prepaid Principal’ check box, you are not allowed to enter the ‘Amount’ for interest liquidation. The amount is computed and liquidated by the system. In addition, in case of prepayment, the rate is recomputed based on the contract currency, tenor and amount. You can change the preference you have specified here, in the LD Schedule Payment screen.
4.2.15 Allowing Partial Prepayment
Select the ‘Partial Prepayment Allowed’ check box to indicate a partial prepayment can be made.
4.2.16 Restricting the Generation of Settlement Messages
Oracle Lending generates the settlement messages associated with loan contracts only if you opt for generation of settlement messages at the time of defining a product. At the time of creating a product, you can indicate whether you want to generate settlement messages for contracts, which you want to process under the product that you are defining.
Select the option ‘SGEN Required’, if you want to allow generation of settlement messages. Consequently, Oracle Lending generates settlement messages for contracts associated with the product. You have to specify the number of calendar days before the repayment date, when a settlement message has to be generated for the customer (as a reminder of the payment), if you have opted for generation of settlement messages. This is specified as ‘Notice Days’ in the ‘Preferences’ screen. The system checks for the settlement days prior to the due date against the currency holiday calendar and accordingly execute the holiday treatment, if the settlement date falls on a currency holiday.
4.2.17 Specifying the Mode of Liquidation
Components of a loan can be liquidated automatically or manually. You should indicate whether the mode of liquidation of repayment schedules is to be automatic or manual. You can also indicate that certain specific components must be liquidated automatically.
If you opt for automatic liquidation, a schedule is automatically liquidated on the day it falls due, during beginning-of-day processing (by the Automatic Contract Update function). Specify Auto liquidation if you want all the components of a loan involving this product to be liquidated automatically.
If you opt for manual liquidation you have to give specific instructions for liquidation through the Manual Liquidation screen on the day you want to liquidate the schedule. Specify Manual liquidation if you want to perform a manual liquidation for all components of a loan involving this product.
If you want some specific components to be liquidated automatically in a certain prioritized order, you can specify Component liquidation. When you choose this option, you can select the components that must be liquidated automatically, and define the order in which they will be liquidated automatically. In such a case, the components not selected must be liquidated manually, by entering the payment in the Manual Liquidation screen.
Note
You can select components to be automatically liquidated only if the liquidation type chosen for the product is ‘Component’.
4.2.18 Allowing Partial Liquidation
Select the ‘Partial Liquidation Allowed’ check box to allow partial payment of amounts due on a schedule date. If this box is unchecked, then system does not allow partial settlement of components that are due. If the payment amount(s) is less than the amount(s) due, then system does not allow the payment to be saved and system displays the following error message:
‘Partial payment not allowed’.
This check box is also applicable in case of manual liquidation.
4.2.19 Specifying the Minimum Amount for Auto Liquidation
If you opt for automatic liquidation of loan schedules, you can specify a minimum amount that should be liquidated in case of partial liquidation. You can also specify the currency of the Minimum Amount for Auto Liquidation.
Your specification for a product applies to all contracts involving the product. On automatic liquidation, if a schedule amount is more than the defined Minimum Amount for Auto Liquidation, the system checks the payment account for the available balance.
If the funds available in the account exceed the defined minimum amount, the schedule is liquidated entirely or to the tune of the available funds in the account. If the funds in the payment account are less than the minimum amount specified for the product, the system calculates the tax and partially liquidates the total remaining account balance, that is, till the account balance is zero.
For example:
Say the component to be liquidated is USD 4000 and the tax amount calculated at 5% is USD 200. If the account balance is USD 3500 at the given time, the system liquidates USD 3333.33 for the component and USD 166.67 (@ 5%) as tax.
If not, the system marks the schedule as ‘pending’ until there are sufficient funds in the account.
4.2.20 Identifying the Rate Code to be Used for Loans in Foreign Currency
For loans involving currency conversions you have to identify the Rate Code, which is to be used for arriving at the conversion rate. The options available are:
- Mid Rate
- Buy/Sell rate
Your specifications apply to all contracts associated with the product. You are not allowed to change it for a specific loan.
4.2.21 Indicating the Rate Type
Specify the rate type in this field. This value is used to convert fee and charge amount from charge/fee currency to contract currency.
Anniversary Billing
Select this check box to specify that billing notices should be generated after the maturity date of the contract and on every anniversary date of maturity, if there is any amount due from the counter party.
Note
- The billing notices are generated on all anniversaries of the maturity date till the contract is completely liquidated.
- The billing is applicable only for the overdue amount and for all the components (principal, interest and fee).
- Anniversary billing option is applicable only for the fixed maturity type of loans.
4.2.22 Allowing Rollover
You should specify whether a loan, involving the product you are defining, can be rolled over into a new loan if it is not liquidated on its Maturity Date.
If you specify that rollover is allowed for the product, it is applicable to all the loans involving the product. However, at the time of processing a specific loan involving this product, you can indicate that rollover is not allowed.
However, if you specify that rollover is not allowed for a product, you cannot rollover loans involving the product.
The terms of a rolled over loan can be the same as those of the original loan or they can be different. If the terms should be different, they should be specified during loan processing.
Track Pay/Receive
Select this check box to specify that back valued activity should be tracked through Pay / Receive infrastructure.
Example
Consider a loan of 200,000 USD given to AIRBUS on December 01, 2007 with principal payment on every first of the month. The maturity date of the loan was 01-Mar-2008, Last payment was done on 01-Feb-2008 and the current scenario is depicted below:.
Schedule date |
Amount Due(USD) |
Amount Settled (USD) |
1-Jan-08 |
10,000.00 |
10,000.00 |
1-Feb-08 |
10,000.00 |
10,000.00 |
1-Mar-08 |
10,000.00 |
0.00 |
Current System date is 15-Feb-08 and a back valued VAMI with a value date as 15-Dec-2007 is done to increase the rate such that amount due for the interest gets changed. As a result of the VAMI the amount settled is adjusted automatically. The scenario after the VAMI is depicted below:
Schedule date |
Amount Due(USD) |
Amount Settled(USD) |
Pay/Receive |
1-Jan-08 |
11,000.00 |
10,000.00 |
1000.00 |
1-Feb-08 |
11,000.00 |
10,000.00 |
0.00 |
1-Mar-08 |
11,000.00 |
0.00 |
0.00 |
Prepayment After Maturity
Select this check box to specify if the value date of the payment exceeds the maturity date of the contract. You can specify a date beyond the next schedule date if the next immediate schedule date is the maturity date of the contract.
The value date of the pre-closure instruction can cross the maturity date of the contract if the contract is marked for rollover and rollover instruction of the contract is captured with Rollover mechanism as new version. The system will default the value date of the pre-closure instruction based on the holiday treatment preferences maintained for the contract.
Note
This check box is enabled only for deposit products.
Overpayment & Auto-Sch Adjustment
Select this check box to specify that overpayment and back valued activities should be allowed for a product. If amount due is changed due to rate change or back valued activities, then the amount settled is adjusted automatically by the system according to amount due. By default this check box is not selected.
Example
Consider a loan of 200,000 USD given to AIRBUS on December 01, 2007 with principal payment on every first of the month. The maturity date of the loan was 01-Feb-2008, Last payment was done on 01-Feb-2008 and the current scenario is depicted below:
Schedule date |
Amount Due(USD) |
Amount Settled (USD) |
1-Jan-08 |
10,000.00 |
10,000.00 |
1-Feb-08 |
10,000.00 |
10,000.00 |
The contract status is liquidated and the rate for the underlying rate code is changed for the effective date of 15-Dec-2007 such that amount due for the interest gets changed. As a result of the rate change, system adjusts the liquidated schedules automatically. The scenario after the VAMI is depicted below:
Schedule date |
Amount Due(USD) |
Amount Settled(USD) |
1-Jan-08 |
11,000.00 |
11,000.00 |
1-Feb-08 |
11,000.00 |
9,000.00 |
Rate change for Liquidated Schedules
Consider a loan of 200,000 USD given to AIRBUS on December 01, 2007 with principal payment on every first of the month. The maturity date of the loan was 01-Mar-2008, Last payment was done on 01-Feb-2008 and the current scenario is depicted below:
Schedule date |
Amount Due(USD) |
Amount Settled (USD) |
1-Jan-08 |
10,000.00 |
10,000.00 |
1-Feb-08 |
10,000.00 |
10,000.00 |
1-Mar-08 |
10,000.00 |
0.00 |
Current System date is 15-Feb-08 and a back valued VAMI with a value date as 15-Dec-2007 is done to increase the rate such that amount due for the interest gets changed. As a result of the VAMI the amount to be settled is adjusted automatically. The scenario after the VAMI is depicted below:
Schedule date |
Amount Due (USD) |
Amount Settled (USD) |
1-Jan-08 |
11,000.00 |
11,000.00 |
1-Feb-08 |
11,000.00 |
9,000.00 |
1-Mar-08 |
11,000.00 |
0.00 |
Note
Both ‘Track Pay/Receive’ and ‘Overpayment & Auto-Sch Adjustment’ options cannot be checked simultaneously.
On selecting the ‘Overpayment & Auto-Sch Adjustment’ check box, the system performs the following:
- Payments are allowed beyond the amendment date.
- Payments beyond any rate revision or rate fixing date can be done. If the total interest to be liquidated changes due to this, then the amount settled is adjusted automatically based on the net interest period.
- Payments beyond payment can be done. Due to this payment, if the amount due is effected then the schedules are adjusted based on the net interest paid (Amount paid-refund amount-amount reversed) automatically.
- Value dated amendment beyond rate revision/rate fixing date (only for principal increase and spread change).
4.2.23 Confirming the Status of Loan Products
Select the ‘Confirm’ check box to indicate the confirmed status for loan products. This check box is enabled only if ‘Product Type’ is ‘Loan’. By default, this check box is selected.
You can amend the ‘Confirm’ check box at the product definition level. However, this amendment does not propagate to active/liquidated contracts except for new loan booking and future processing like rollover and Value Dated Amendment (VAMI).
4.2.24 Applying a Block on the Limit of a Credit Line
You can block the limit of the credit line of a commitment contract to the extent of the amount of the commitment contract, by selecting the ‘Apply Limits Block’ check box.
Note
This is enabled only for commitment products.
Reprice Product
You can specify whether the amortized amount of the contract with the selected product can be transferred to a child contract.
Select ‘Reprice Product’ check box to indicate any contract booked under this product can be re-priced.
This field is enabled only if:
- The product is a Loan product
- You have selected the option ‘Bearing’ against the field ‘Payment Type’, the option ‘Normal’ against the field ‘Schedule Type’
When you enter a contract under a product that allows re-pricing, you have to do so through the Re-price Transaction screens. Such products are not available for contract booking through the OL Contract Online screen. You cannot transfer the unamortized amount if this option is not selected here.
4.2.25 Specifying whether the Product Is an Intra-Day Product
Select the ‘Intra-Day Product’ check box to indicate the product, for which you are specifying preferences, is an intra-day product. Once you select this box for a product, you can only enter intra-day deals under it. An intra-day deal is one wherein the Value Date and Maturity Date fall on the same day. The interest is calculated for one day.
Note
- When you enter a contract that uses an intra-day product, the fields ‘Contract Value Date’ and ‘Maturity Date’ are set to the system date in the OL Contract Online screen.
- If you select the ‘Intra-Day Product’ check box, the check box ‘Pay Past Schedules’ is deselected and disabled.
4.2.26 Identifying Products for Agency Contract Creation
You have to identify the loan products that can be used to facilitate automatic creation (Straight Through Processing - STP) of the corresponding commitment/loan contract for the tranche/drawdown booked on the agency side (LB module).
Select ‘Agency Contract’ box to identify the products. This value defaults to all contracts booked under the product. It helps in distinguishing a normal loan from an agency contract. However, if required, you can deselect this check box for a contract.
If you select this check box for the product, you have to ensure the following:
- Associate only those interest components with the loan product (in the ‘ICCF Details’ screen) for which ‘Rate Type’ is ‘Fixed’ and ‘Fixed Rate Type’ is ‘Agency’.
- Link only those fee components with the loan product for which ‘Basis Amount Tag is ‘User Input’.
For details on defining interest components, refer the section titled ‘Defining Interest Details’ in the ‘Interest’ User Manual.
The agency products defined here are available for mapping with LB products (in the ‘LB OL Product and Component Mapping’ screen).
For more details, refer the ‘Straight Through Processing’ chapter of this User Manual.
4.2.27 Specifying whether the Product is a Fed Rate Product
Select the ‘Rolling Loan’ check box to indicate the product is a Fed Rate product. The fed rate of contracts booked under Fed Rate products, changes everyday. Even if a loan has been liquidated, the option of drawing an additional loan amount is available. The contract is thus kept alive. The option of repaying an outstanding loan amount partially or fully is also available.
For a Fed Rate loan, you have to enter the Contractual Maturity Date and Contractual Effective Date in the OL Contract Online screen.
When you liquidate such contracts manually, the system displays an override message if, as a result of the transaction, the outstanding balance is reduced to zero. The contract can remain ‘Active’ despite the outstanding balance being reduced to zero as a result of the transaction.
4.2.28 Specifying whether the Contracts to be Included in 1098 Statement
Select the ‘Include in 1098 Stmt’ check box to indicate whether the underlying contracts of the Product should be included in 1098 Statement.
This value, you specify here, is not defaulted to the Contract level.
4.2.29 Allowing Prepayment along with Overdue Schedules
You can indicate whether you would like to accept payments for overdue schedules along with the pre-payments or whether you would like to split the payments.
Example
Let us assume that you have loaned a USD 10,000 to Mr. Silas Marner, a customer of your bank at 10% interest. This loan has been initiated under the Short Term Personal Loans for regular customers’ scheme.
Mr. Marner’s monthly EMI works out to USD 1010. The tenor of the loan is for a year, from January 2001 to January 2002.
In the month of March, Silar Marner informs your bank that since he will not be able to pay the amount in March, he would like to make the payment in the April schedule, along with the schedule amount due for April.
If you select this check box, you are allowed to accept the overdue amount for the month of March, along with the prepayment amount for April. If you leave this check box deselected, you are allowed to process the overdue and pre-payment amounts separately.
Note
Your specification is made applicable to all the contracts associated with this product.
4.2.30 Tracking Accrued Interest for Credit Utilization
You have to specify whether the accrued interest of loans (that has not been paid) should also be considered as the ‘utilized amount’ for the purpose of credit administration. (You could have more than one interest type of component applicable on a product. In such a case, you should designate one as the ‘main’ interest).
Note
For tracked accrued interest, in Branch Parameter (OLDBRPRM) screen, the 'Accrual Level' must be selected as 'Contract'.
The following example illustrates how this concept works.
Example
Mr. Brian Williams has taken a loan of USD 10,000 under ‘Short-term Loans for Individuals’ from you, on 1 June 1997 at 20% interest. The loan is to be liquidated on Maturity on 31 May 1998. This customer’s central liability limit is USD 11,000.
Now, Mr. Brian Williams approaches you for another loan of USD 1,000 on 31 December 1997. If you have opted to track the accrued interest, his total liability on 31 December 1997 is USD 11,167 (USD 10,000 + USD 1,167 as of 31 December − Interest calculation method Actual/365). And since the ‘utilized amount’ is above his central liability limit (USD 11,000), he is not be eligible for the second loan of USD 1,000.
However, if you have opted not to track the accrued interest on his loan, then he can go for the second loan of USD 1,000 as only the principal amount is considered as the utilized amount.
If you opt to ‘track’ accrued interest, then the interest accrued on loans is added on to the amount utilized by the customer, for credit administration.
The utilization is shown as the sum of the principal and the accrued interest in the reports generated by the credit administration (Limits) sub-system. Outstanding interest, if any, is also be shown in these reports.
4.2.31 Applying Prepayment Penalty
A prepayment is a repayment that is made before it is due. When creating a product you can indicate whether a penalty can be applied on a loan if there is a prepayment. If a principal repayment is done before the schedule date, you can charge a higher interest on the amount that is repaid before it is due. The following example explains a ‘prepayment’.
Example
Parivallal Express Services has taken a loan of USD 10,000 at 14% interest on 1 January 1998. The loan is to mature on 31 March 1998. There are three monthly payment schedules for the interest and the principal is to be paid at maturity. Now, Parivallal repays the entire principal on 31 January 1998, that is, on the first schedule date of the interest. This amounts to a prepayment.
You have advanced the loan for a period of three months and interest would have accrued on the principal for this period. But since, the principal itself has been repaid, you will be able to charge interest only for one month. You have the option of charging a prepayment penalty on the principal that was paid back before it was due. This could be in the form of a higher rate of interest (higher than 14%) for the one-month period, applied on the amount repaid in advance. Alternatively, it can be a flat amount.
For the amount that is paid before it is due, the penalty interest (it can be the rate that has to be applied in addition to the normal interest rate or a flat amount) should be specified when the repayment is being processed for the loan.
Here is another example to explain the concept:
Example
Ms. Yvonne Cousteau has a loan contract with you. The terms of this contract are as follows:
- Principal USD 10,000
- Value Date of the contract 01/01/97
- Maturity Date of the contract 31/03/97
- Interest Rate 10%
Payment schedules Principal and interest paid on maturity
If Ms. Cousteau wants to repay a part of the principal, say USD 4,000 on 15/01/97, you may want to charge a higher interest rate on this part of the principal. Let us assume you want to charge 12% interest on USD 4,000, which was prepaid on 15/01/97.
When the prepayment is done on 15/01/97, the interest amount is calculated as follows:
USD 4,000 at 12% (the amount that is prepaid) for a period from 01/01/97 to 14/01/97
USD 6,000 continues to be processed at 10% interest.
(You can specify the ‘penalty rate’, which is the percentage of interest that has to be increased from the earlier contract rate or a penalty amount as the case may be, through the manual liquidation screen. In this example, the ‘penalty rate’ is 2%.)
When defining the preferences for a product, you can only indicate whether penalty can be applied on loans involving the product. The actual penalty rate or the amount can be specified when the repayment is processed.
4.2.32 Specifying whether Prepayment of Loans is Allowed
Before indicating your preference for prepayment penalty, you need to specify whether payment of the principal before a loan schedule is allowed for the product.
If you specify that prepayment is not applicable to the product, the system does not allow prepayment of loans schedule. During manual liquidation process, the system verifies that the limit date is greater than the Application date. Subsequently, the system displays an error message.
Note
If the value date of the pre-closure instruction crosses the maturity date of the contract, then the Limit date should be blank.
4.2.33 Specifying whether Cost of Credit is Allowed
Select this check box to indicate that the system should accept cost of credit valuations from RAPID. If this is selected, the system derives the cost of credit valuations and apply these on the loans and commitments created using this product. This is applicable only to commitment products. You can change this value at the commitment level before it is authorized. After authorization, you can select this option at the commitment level if you have not selected it before. However, if you have selected it, you cannot deselect it at the product/commitment level after the authorization
4.2.34 Propagating Statuses to Loans
You can propagate the user-defined status that has been assigned to a commitment to all the active underlying loans by selecting this option at the product level. This is available only for commitment products and applicable only if the mode of changing status for the commitment and the underlying loan is manual.
If this option is selected and a new non-performing commitment is booked, the system assigns the non-performing status to any loan that is booked under this commitment. The system does not allow you to change the status to performing for the booked loan. Similarly, a loan that is booked under a commitment with status ‘performing’ is also assigned the same status, even if you have selected a non-performing status for the loan. You cannot change this status for the loan to non-performing.
If this preference is checked for a commitment, you can change it only if there are no active contracts for the commitment with the ‘Propagate Status’ preference selected. If there are such loans, then the system does not allow you to deselect the preference to ‘No’ at the commitment level.
If multiple statuses are maintained for the commitment and the underlying loans, the following need to be considered:
- The number of user defined statuses should be the same for the commitment and the loans under it. This facilitates the propagation of the last status assigned to the commitment to all the underlying loans of the commitment.
- In case of multiple status changes to the commitment contract during the same day, then during batch process the system will apply the latest status assigned to the commitment to the underlying loans
- The status change at the loan level is based on the ‘Status Sequence Number’ you have maintained for the product
4.2.35 Re-computing Schedules after a Prepayment
When defining the preferences for a product, you have to specify whether the interest on the future schedules of a loan (involving the product) has to be recalculated in case of a prepayment on a schedule (that is, when a repayment is made before its due date).
Example
You have specified repayment schedules for Parivallal Express Services for a USD 300,000 loan at 14% interest for three months as follows:
- USD 100,000 with interest on 1 January 1998
- USD 100,000 with interest on 1 February 1998
- USD 100,000 with interest on 1 March 1998
Now, Parivallal Express Services repays USD 150,000 on 1 February 1998. This leaves only USD 50,000 principal to be paid back with interest.
However, the interest would have been calculated with the expected balance of USD 100,000 on the third schedule and not the present USD 50,000. When defining the product preferences, you can opt to re-compute schedule amounts for the interest component automatically to be in tune with the principal pre-payment.
If you do not specify that schedules have to be recomputed, the interest recalculation in view of the advance payment will not be done. Parivallal will have to pay the same interest that it would have had to pay, if it had kept up with the original schedule.
4.2.36 Hold Prepayments in Intellect Browser
Select this check box to indicate that the prepayments of all those contracts done under this product are held in Intellect browser for you to enter the Break cost and then release to Intellect. You need to select this option for all those products for which Break cost is required to be input before handing off the details to Intellect.
Note
This is applicable only for the contracts through STP from Agency to Originations.
4.2.37 Specifying if Installment Schedules should be Allowed
Your bank may need to define a flexible repayment schedule for some customers who avail loans. The customer may need to repay fixed amounts on certain schedules, which you must adjust towards both interest and principal.
For such customers, for a loan contract with payment method as bearing, and normal schedules, you can define installment schedules. The amount repaid on the due date of an installment schedule is considered as inclusive of interest computed on the main component.
It is possible to have more than one installment schedule for a contract.
To define installment schedules, you must:
- Specify installment schedules as allowable, for the product in the Installment Preferences screen. Select the ‘Allow Installment’ option. When you do this, for any loan contract involving the product, you can define installment schedules.
- When you enter a loan contract using the product for which installment schedules are allowable, in the Contract Schedules screen, select “Installment” as the component, and specify the fixed amount being repaid. The interest payable on the main component is computed and deducted from the fixed amount, and the remaining portion is appropriated towards repayment of principal.
Click the ‘Installment Details’, to specify the Installment Preferences.

An example of a contract with installment schedules is shown below:
Example
The calculation of amounts due for principal and interest for main component is explained below with an example.
You have issued a loan to one of your customers, with a Value Date of 1st January 2003, which matures on 1st November 2003. The amount of the loan is 10,000 USD, the interest being charged at 10.00%, calculated on ‘Actual / 360’ basis.
Schedules for principal and interest on the loan are shown in the table below. The customer has requested you to define monthly fixed amount schedules from 1st May 2003 to 1st July 2003, and also between 1st September 2003 and 1st November 2003, when the loan matures.
Component |
Start Date |
Number of schedules |
Frequency |
Amount |
PRINCIPAL |
01-FEB-2003 |
3 |
Monthly |
500.00 |
INTEREST |
01-FEB-2003 |
3 |
Monthly |
|
INSTALMENT |
01-MAY-2003 |
2 |
Monthly |
1,000.00 |
PRINCIPAL |
01-JUL-2003 |
1 |
Daily |
1,000.00 |
INTEREST |
01-AUG-2003 |
1 |
Daily |
|
INSTALMENT |
01-SEP-2003 |
2 |
Monthly |
1,500.00 |
PRINCIPAL |
01-NOV-2003 |
1 |
Bullet |
|
INTEREST |
01-NOV-2003 |
1 |
Bullet |
|
For each schedule due date, the amount due for the interest and principal components, as computed by the system, are shown below (the installment schedules are marked):
Schedule |
Component |
Due Date |
Amount |
|
INTEREST |
01-Feb-2003 |
86.11 |
|
PRINCIPAL |
01-Feb-2003 |
500.00 |
|
INTEREST |
01-Mar-2003 |
73.89 |
|
PRINCIPAL |
01-Mar-2003 |
500.00 |
|
INTEREST |
01-Apr-2003 |
77.50 |
|
PRINCIPAL |
01-Apr-2003 |
500.00 |
Installment |
INTEREST |
01-May-2003 |
70.83 |
|
PRINCIPAL |
01-May-2003 |
929.17 |
Installment |
INTEREST |
01-Jun-2003 |
65.19 |
|
PRINCIPAL |
01-Jun-2003 |
934.81 |
|
PRINCIPAL |
01-Jul-2003 |
1,000.00 |
|
INTEREST |
01-Aug-2003 |
103.83 |
Installment |
INTEREST |
01-Sep-2003 |
48.53 |
|
PRINCIPAL |
01-Sep-2003 |
1,451.47 |
Installment |
INTEREST |
01-Oct-2003 |
34.87 |
|
PRINCIPAL |
01-Oct-2003 |
1,465.13 |
|
INTEREST |
01-Nov-2003 |
23.42 |
|
PRINCIPAL |
01-Nov-2003 |
2,719.42 |
For the installment schedules, the amount repaid is adjusted towards interest and principal.
Details of the calculation of interest on the various due dates, based on the principal being repaid are shown below:
Due Date |
Start Date |
End Date |
Days |
Basis Amount |
Interest |
01-Feb-2001 |
01-Jan-2001 |
01-Feb-2001 |
31 |
10,000.00 |
86.11 |
01-Mar-2001 |
01-Feb-2001 |
01-Mar-2001 |
28 |
9,500.00 |
73.89 |
01-Apr-2001 |
01-Mar-2001 |
01-Apr-2001 |
31 |
9,000.00 |
77.50 |
01-May-2001 |
01-Apr-2001 |
01-May-2001 |
30 |
8,500.00 |
70.83 |
01-Jun-2001 |
01-May-2001 |
01-Jun-2001 |
31 |
7,570.83 |
65.19 |
01-Aug-2001 |
01-Jun-2001 |
01-Jul-2001 |
30 |
6,636.02 |
55.30 |
01-Aug-2001 |
01-Jul-2001 |
01-Aug-2001 |
31 |
5,636.02 |
48.53 |
01-Sep-2001 |
01-Aug-2001 |
01-Sep-2001 |
31 |
5,636.02 |
48.53 |
01-Oct-2001 |
01-Sep-2001 |
01-Oct-2001 |
30 |
4,184.55 |
34.87 |
01-Nov-2001 |
01-Oct-2001 |
01-Nov-2001 |
31 |
2,719.42 |
23.42 |
4.2.38 Specifying Additional Preference
You can specify additional preferences in the ‘Additional Preferences’
screen. Click ‘Additional Preferences’
tab in the ‘Bilateral Loans Product Preferences’ screen.

Note
You can select rate fixing type as automatic or manual. By default, it is automatic
For more information on rate fixing, refer to Interest User Manual.
4.2.38.1 Holiday Treatment for Schedules
The value date or schedule date or revision date or the maturity date of a contract might fall on a local holiday defined for your branch or on a holiday specified for the currency involved in the contract.
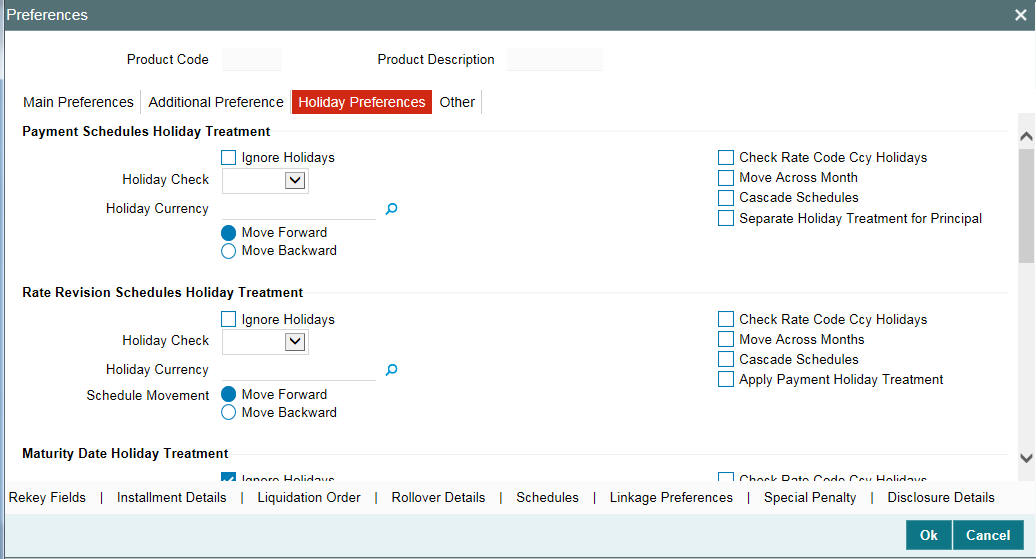
The parameter that has to be considered for holiday treatment is specified in the ‘Holiday Chk’ field. The options available are:
- Currency
Select this option if you want the system to check whether the schedule date of a contract falls on a holiday defined for the currency involved in a contract.
If you select this option, you need to specify the holiday currency code. The system checks the holiday table for that particular currency. If the system encounters a contract whose currency is same as that of holiday currency, holiday handling is done according to the specified holiday handling preferences.
- Local
Select this option if you want the system to check whether the schedule date of a contract falls on a local holiday defined for your branch. If you select this option, you are not be allowed to enter the holiday currency.
- Both
Select this option if you want the system to check for both currency and local holidays of your bank. You need to indicate the holiday currency if you select this option.
Note
The default holiday check is ‘Currency’.
4.2.38.2 Indicating the Automatic Holiday Treatment
You can choose to change maturity date whenever changes are made to the holiday calendar (for instance, a holiday is made a working day or vice versa). To specify the change in maturity date, choose the following options:
Change Maturity Schedules
In case the maturity date falls on a holiday, you can choose to change future maturity date by choosing this option.
Calendar Change affecting contracts
Whenever changes are made to the holiday calendar, you can specify the manner in which the maturity date is to be considered by choosing any one of the following options:
- From working to holiday
- From holiday to working
4.2.38.3 Holiday Treatment for Maturity Date
You also have the option of specifying holiday handling preferences if the maturity date of a contract falls on a holiday. You can select one of the following options if either the schedule date or the maturity date falls on a holiday:
- Ignore the holiday
- Specify preferences for the movement of the maturity date
Moving the schedule date/maturity date forward or backward
If you have indicated that a currency holiday should not be ignored for the contract, you need to specify whether the schedule date/maturity date should move forward to the next working day or move backward to the previous working day.
Check with the appropriate field to indicate your preference.
Move Across Months
If you have chosen to move the schedule date/maturity date of a contract falling due on a currency holiday, either forward or backward to a working day and it crosses over into a different month, the schedule date/maturity date is moved to the next month only if you indicate so in this field.
Select this field to allow movement of schedule date/maturity date of the contract across months.
Select it deselected to indicate that the loan should mature/schedule should be paid within the same month on the last or first working day of the month, depending on whether the schedule date/maturity date is over the month-end or the beginning of the month.
Note
You are also be prompted to specify holiday handling preferences in the following circumstances:
- If you amend the Maturity Date of a contract and the new date falls on a holiday
- If you manually rollover a loan and the new maturity date falls on a holiday
Holiday Treatment for Principal
You can maintain separate holiday treatment for the principal and interest components interim payment schedules.
Select the ‘Separate Holiday Treatment for Principal’ check box to maintain separate holiday treatment for the principal and interest components. Button ‘P’ is enabled when you check this option.
You can define the holiday preferences for the principal interim payment schedules in ‘Holiday Treatment for Principal Schedules’ screen.You need to specify the following options for holiday treatment of the principal component:
- Ignore Holidays – No holiday treatment for the Principal component
- Cascade Schedules – The due date arrived at by the holiday treatment will be considered as the start date for the due dates for the subsequent schedules.
- Move Across Months – Allows movement of schedule date of the contract across months.
- Move Backward – If a due date is a holiday, then the due date is moved backward to the previous working day.
- Move Forward – If a due date is a holiday, then the due date is advanced to the next working day
- The holiday check as “LOCAL”,”CCY” and “BOTH” is displayed from the Product Level
Specifying Loan Statement Generation Preferences
As part of the preferences you define for a product, you can indicate if a loan statement report needs to be generated for contracts involving the product. If loan statements are to be generated, you can indicate if the loan statements should be in a summary or detailed format.
If loan statements are to be generated for contracts involving the product, you have to indicate the frequency of statement generation. You can set the frequency to any one of the following options:
- Annual
- Semi-Annual
- Quarterly
- Monthly
- Fortnightly
- Weekly
- Daily
Based on the frequency that you specify, you can also indicate the month/weekday for the generation of the statement. Thus, if you have set the loan statement generation frequency to Annual, Semi-Annual, or Quarterly, you have to indicate the month in which the first statement is to be generated.
Similarly, if you have indicated that statement generation is to be on a fortnightly or weekly basis, you should specify the day of the week on which the statement is to be generated. For instance, if you indicate that a weekly generation should be done on Thursday, the statement is generated every week on Thursdays.
When the frequency is set to monthly, then by default, the statement is generated on the last day of every month. You can also select a different day from the drop-down menu.
Note
The product preferences that you indicate applies to all contracts involving the product. However, you can change these preferences while processing a specific contract.
4.2.38.4 Pool Funding
Pool Funding Required
Select the check box to indicate that Pool funding reference number is mandatory for contracts linked to this product.
Master Funding Required
Select the check box to indicate that Master funding reference number is mandatory for contracts linked to this product.
Note
- The check-boxes, Pool Funding Required and Master Funding Required are enabled only for products of type ‘Commitment’. By default, these check-boxes are deselected.
- For product types other than type ‘Commitment’, these check-boxes are deselected and disabled.
4.2.39 Specifying the Reversal Transaction Type
When you reverse a contract, the event-wise accounting entries of the original contract is reversed. You can specify a reversal transaction type as default transaction type for all contract or payment reversals,
All the reversal transaction types you have maintained through the Reversal Type Maintenance screen is displayed in the option list. Choose the preferred transaction type.
Revision Notice Days
Specify the notice days for rate revision to generate the rollover advice.
Note
‘LD_BRVN_ADV’ message is created along with an advice format which is attached to the event BRVN at the Product level. BRVN event gets activated when Auto Rollover Advice is generated before the rate revision date. The advice format is attached to this event.
4.2.40 Discounting Multiple Schedules for Discounted Loans
While purchasing a portfolio of discounted loans you need to discount multiple schedules. Oracle Lending allows you to combine multiple principal schedules, each having an independent amount and repayment date, in one contract.
All the principal amounts are discounted from repayment date to payment date by using the same discounting rate. The combined amount is then liquidated in parts during each repayment schedule.
Note
The interest at the end of each schedule is calculated on the installment schedule amount rather than the total outstanding principal in that schedule.
Example
A customer of portfolio purchase has a discounted loan with the following attributes:
- Loan Amount - USD 9,000
- Interest Rate - 10% p.a.
- Discounted Amount - USD 8,854.83
- Repayment schedule - 3 installments of USD 3000 each
- Origin Date - January 01, 2002
- Repayment Dates - 1st of each month
For portfolio purchase, the chronogram will be:
Due Date |
Days |
Principal Liquidated |
Interest Liquidated |
Total |
01-Feb-2002 |
31 |
USD 2,974.74 |
USD 25.26 |
USD 3,000 |
01-Mar-2002 |
59 |
USD 2,952.28 |
USD 47.72 |
USD 3,000 |
01-Apr-2002 |
90 |
USD 2,927.81 |
USD 72.19 |
USD 3,000 |
TOTALS |
USD 8,854.83 |
USD 145.17 |
USD 9,000.00 |
|
To enable the process of discounting multiple schedules while purchasing a portfolio of discounted loans you need to enable the Interest On Schedule Amount option in the Additional Preferences screen.
4.2.41 Indicating the Annual Effective Rate (TEA) for loans
The Annual Effective Rate of interest is computed in the following manner:
Annual Effective Loan Rate (TEA) =
[[{1 + (i * PPI/360)} power (360/PPI)] / (1-or)] – 1
(In this case we have used 360 as the denominator. The other options available are 365 days, Actuals or Currency. The denominator is defaulted from your specification in the Branch Conditions screen. )
Where the following are the abbreviations used.
- TEA – Annual Effective Loan Rate
- i - Annual Nominal Rate
- PPI – Interest payment periodicity
- or – Other surcharges expressed in percentage
Note
The financial charges that are not recurring, for example a flat commission charged to disbursement, are accumulated and divided by the principal amount and are included in that percentage in the ‘or’ term.
The TEA can be used for reporting in customer statements and to regulatory authorities. For printing the effective loan rate in customer advices and central bank reports you can enable the Effective Loan Rate option.
Additionally you will also need to enable this option in the MM/Loans and Deposits Branch Conditions screen.
The TEA rates are calculated during:
- Takedown
- Value Dated Amendments
- Contract amendments resulting in change of cash flows
- Partial or full liquidation or pre-payment
- Rollover
Example I
Case I
Mr. Franco Gonzalvis borrowed a sum of USD 10,000 under a Loan Scheme wherein the interest is paid by the borrower at the beginning of every month, while the principal is repaid at the end of the loan tenure. The bank charged a nominal interest of 12% p.a. Mr. Franco Gonzalvis availed of the loan on 1st Jan 2002 and agreed to repay the entire principal on 1st Jan 2003. The Bank charged a processing fee of USD 100 .In this case the TEA calculation would be as follows:
[[{1 + (i * PPI/360)} power (360/PPI)]/(1-or)] – 1
PPI or the interest payment periodicity = Duration of the contract (365 days) divided by the number of interest payments (12). (i.e., 365 / 12)
Therefore the above formula TEP=
[[{1 + (.12 * (365/12)/360)} power (360/(365/12))]/(1-.01)] – 1 = 0.138198
Note
PPI is always computed as the duration of the Contract (deposit) divided by the number of interest payments (Even if the interest payment periods are not at periodic intervals.
Case II – Prepayment of Entire Loan Amount
Suppose Mr. Gonzalvis repays the entire Loan amount on 02-Dec-2002. Then the TEA computation Repayment of the loan would be as follows:
The number of days between 1st Jan 2002 and 02 Dec-2002 =335
The number of interest payments = 12 (11 monthly payments from 1st Feb to 1st Nov and an interest payment on 2nd Dec for one day). Therefore PPI= 335/12
Thus TEP =
[[{1 + (.12 * (335/12)/360)} power (360/(335/12))]/(1-.01)] – 1=0.138254
Example II
Rate Change
Mr. Marco Van Basten borrowed a sum of USD10000 under the Loan scheme wherein the interest payments are made by the borrower on the first of every month. He borrowed the sum on the 1st of Jan 2002 when the rate was 12%. The loan repayment date is 1st Jan 2003. After 2 months on the 1st of March the rate changes to 15% (the terms of the loan– i.e. interest payment periodicity remain unaltered). Other surcharges are waived. (I.e. OS is zero)
In such cases the Nominal interest that is to be used in the above mentioned formula is computed as follows:
Nominal Interest Rate = Interest Paid /Average Deposit amount
= ((10000*0.12*2/12) + (10000*0.15*10/12))/10000
=1450/10000
=14.5%
The TEA for the above example =
[[{1 + (.145 * (335/12)/360)} power (360/ (335/12))]/ (1-0)] – 1=0.155022=15.5022%
Derivation of Nominal trate in case of Discounted or true discounted deposits In case of Discounted and True discounted deposits the Nominal rate of Interest is computed as follows:
Nominal Rate = (Interest Payable x 360)/
((Principal-Interest Payable) x Duration of contract)
(In case of discounted and true discounted the duration of the contract is equal to the interest payment periodicity)
The Nominal Rate so computed is then used to compute TEA
Example III
Discounted Loan
Mr. Andrez Sacoli borrowed a sum of USD 10000 under a Discounted Loan Scheme. At the time of the initiating the loan the prevailing interest rate was 12% for a loan of one year. ). Other surcharges are waived. (I.e. OS is zero)
TEA would be computed as follows:
The nominal Rate = (1200 x 360)/ (10000 –1200) x 365 =13.449564%
TEA= [[{1 + (.13449564 * (335/12)/360)} power (360/ (335/12))]/ (1-0)] – 1
=0.134375 = 13.4375%
Example IV
True Discounted Loan
In the case of a True discounted loan the computation will be as follows:
The Nominal Rate = (1071.43 x 360)/ (10000 –1071.43) x365= 0.118356 = 11.8356%
TEA=
[[{1 + (.118356 * (335/12)/360)} power (360/ (335/12))]/ (1-0)] – 1
= 118263 = 11.8263%
Note
In addition to enabling this option for the loan product you need to enable it for your branch through the MM/LD Branch Conditions screen.
For further details refer to the Automatic Processing chapter of this manual.
4.2.42 Enabling the Customer Effective Loan Rate Option
The Customer Effective Loan Rate (TEAC) is computed using the following formula:
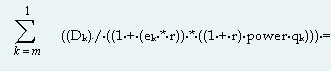
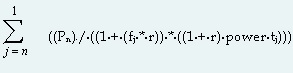
Where:
- r = TEAC
- Dk = amount of the Kth disbursements (m disbursements)
- qk = number of complete periods from the first credit transaction date to kth disbursement
- ek = fraction of period in the time interval from the first credit transaction until the kth disbursement
ek = ((DDk – DD1) /DP) – ((int (DDk – DD1)) / DP)
Where:
- DDk = Date of the kth disbursement
- DP = number of days in a payment period. This is computed by dividing the duration of the contract by the number of payments and rounding the result to the nearest number which divides 360 without leaving a remainder.
- int = Integer value.
- m = number of disbursements.
- Pj = Payment amount j.
- fj = fraction of period in the time interval from the credit transaction until payment j =
fj = ((PD1 – DD1) /DP) – ((int (PDj – DD1)) / DP)
Where:
- DDkj = Date of the kth disbursement
- DP = number of days of the payment period. This is computed by dividing the duration of the contract by the number of payments and rounding the result to the nearest number which divides 360 without leaving a remainder.
- PDj = date of the jth payment
- int = integer
- n = number of payments
The TEAC can be used for reporting in all the loan liquidation advices to the customer. For printing the customer effective loan rate in customer advices you can enable the Customer Effective Loan Rate option.
Additionally you will also need to enable this option in the MM/Loans and Deposits Branch Conditions screen. The TEAC rates are computed during:
- Takedown
- Value Dated Amendments
- Contract amendments resulting in change of cash flows
- Partial or full pre-payment
Refer to the examples given in Accounting Entries and Advices Chapter to view examples of how the TEAC is calculated.
4.2.43 Allowing Forward Dating
The Value Date of a loan (that is, the date on which it is initiated) can be:
- The date on which it is issued (booked)
- A date in the past
- A date in the future
You should indicate whether a loan involving a product can have a Value Date in the future. A loan can have a value date in the future only if you have allowed it for the product which it involves. An initiation date in the past, or today, can be indicated for any loan.
When a loan with a Value Date in the future is stored, no accounting entries are passed on the date of input. The loan is initiated by the Automatic Contract Update function during the Beginning of Day (BOD) processes on the Value Date (initiation date). All the necessary accounting entries are passed on this date.
However, if the initiation date (Value Date) falls on a holiday, the loan is initiated as per your holiday handling specifications in the Branch Parameters screen:
- If you have specified that automatic processes are to be carried out for holidays, the loan slated for initiation on the holiday is initiated during end-of-day processing on the last working day before the holiday.
- If you have specified that the automatic processes are to be carried out only till the System Date (today’s date), the loan slated for initiation on the holiday is initiated on the next working day, immediately after the holiday, during beginning-of-day processing.
4.2.44 Prioritizing the Liquidation of Components
Oracle Lending allows you to define the order of liquidation for the various loan components. You can invoke the ‘Component Liquidation Order’ screen from the Loan and Commitment Product Preferences’ screen by clicking the ‘Liquidation Order’ tab.

For a loan with automatic liquidation, the order of liquidation becomes important when funds are insufficient in the repayment account on the day of liquidation and more than one component has a schedule falling due on that day and has the same settlement account.
Under such circumstances, you may want to allot priority to the recovery of certain components. For example, you may want to recover the interest (or interest type of components) first and then the principal. The aging analysis function takes over once a component is overdue and an appropriate penalty is applied. For a component on which penalty interest has been applied, you may want to recover penalty interest first, the interest next and finally the principal.
For a loan defined with manual liquidation of components, the Liquidation Order is considered when a payment has to be automatically distributed among the various outstanding components.
Note
You can specify the liquidation order for all the interest type of components and the principal.
If you have chosen the ‘Component’ liquidation type to be applied to loans involving the product, you must select the components that must be liquidated automatically.
In the Component Liquidation Order screen, you can select the ‘Auto Liq’ box for those components that you want to be automatically liquidated. These selected components are automatically liquidated in the order assigned in this screen.
Any components for which you do not select the ‘Auto Liq’ box must be liquidated manually.
Example
For instance, in the Component Liquidation Order screen shown above, the components that will be liquidated automatically are:
- PRN-PENAL (Penalty on Principal)
- PRINCIPAL (Loan Principal)
The Penalty on Principal is liquidated first, and then the Loan Principal.
The other components, INR-PENAL (Penalty Interest) and INR (Interest) must be liquidated manually, independent of the other components.
If you do not specify the liquidation order, the components are liquidated in the following order:
- Penalty Interest
- Interest
- Principal
Note
Specifications of component-wise liquidation order made as part of Product Preferences maintenance hold true for a loan as long as it is in the NORMAL status. For each adverse status of a loan, you need to maintain the liquidation order separately.
Refer to the Products User Manual for details on maintaining liquidation order for loans in adverse status.
4.2.45 Tracking Status Changes for Loans
Oracle Lending allows you to process loan status changes by defining a separate GL/MIS reporting structure for accruals under delinquent loans. For normal loans, the following entries are passed during interest accrual:
- Debit IENC
- Credit Income
At liquidation, the entries passed are:
- Credit IENC
- Debit Customer Account
When a contract’s status deteriorates from Normal, all contracts involving the customer can be made to accrue into a different set of GLs, which are also referred to as Memo GLs instead of the regular IENC GL. When the loan moves from normal to a delinquent status you have the option of stopping accruals and redirecting future accruals into Memo GLs. Accruals in Memo GLs will have the following entries:
- Debit Memo Accrual
- Credit Memo Accrual Offset
Real accruals can also be reversed, with catch-up taking place in Memo GLs. On normalization of contracts, memo accruals get reversed and the corresponding accrual amounts get booked into Real GLs, based on contract status rules.
If you are enabling this option for a loan product that you are defining ensure that you enable this option for your branch as well.
When the status of a loan is changed from NORM to a non performing status, the system transfer the HFS (Held for Sale) balance for the asset GL & HFS GL to the new GLs applicable for the status. And all the entries related to HFS balance are posted to the new GLs.
For details of how to set up Status Rules and associate a set of status codes with a product you can refer to the Products User Manual.
4.2.46 Maintaining the Disclosure Details
The Disclosure code is defined in the ‘Disclosure Maintenance’ screen. You can invoke the ‘Disclosure Maintenance’ screen by typing ‘OLDDSMNT’ in the field at the top right corner of the Application tool bar and clicking the adjoining arrow button.
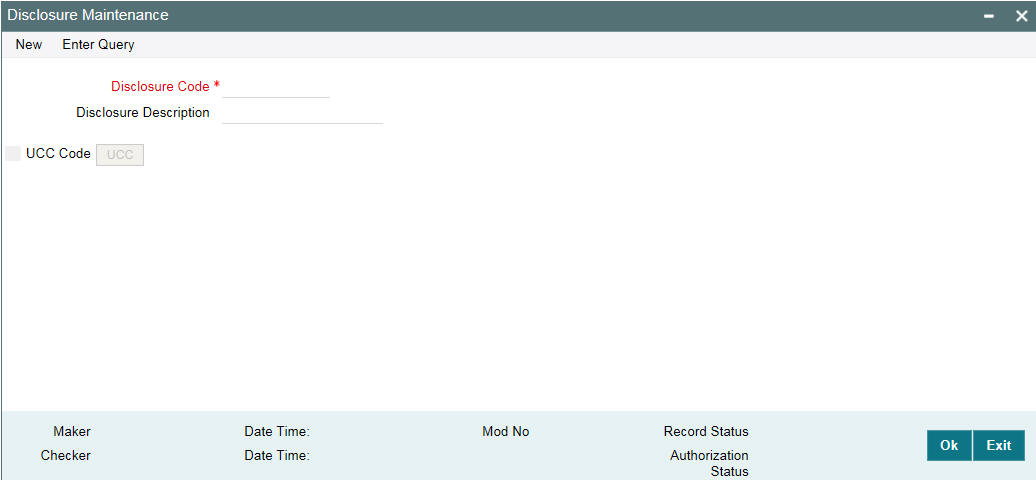
Here you can maintain the following details:
Disclosure Code
Specify the code for the reporting requirement. The reporting requirement is captured as disclosure code.
Disclosure Description
Specify the description of the reporting requirement.
UCC Code
Select this check box if the disclosure code is considered a Uniform Commercial Code (UCC). If selected, the ‘UCC’ button gets enabled.
Note
Once this check box is selected for a disclosure code and authorized, this check box is disabled and you cannot amend this check box by unlocking the record.
4.2.46.1 Maintaining UCC Details
You can maintain UCC details pertaining to a disclosure code using the ‘UCC Details’ screen. To invoke this screen, click on ‘UCC’ button on the ‘Disclosure Maintenance’ screen.

You can maintain the following details in this screen:
Expiry Date
Specify the expiry date of the UCC code. Input to this field is mandatory if you select the ‘UCC Code’ check box on the ‘Disclosure Maintenance’ screen.
Propagation Required
Select this check box if expiry date is to be propagated to all linked contracts when expiry date of UCC is modified.
All the fields can be amended on the ‘UCC Details’ screen by unlocking the Disclosure Maintenance record and clicking the ‘UCC’ button.
Note
If the UCC is not linked to any contracts, there will be no contract level impact of such amendments. If the UCC is linked to contracts, on authorization of the amendment, the new expiry date is automatically propagated to existing contracts if the ‘Propagation Required’ check box is selected. If this check box is deselected during modification, then the new expiry date is not propagated to the existing contracts.
4.2.47 Mapping the Product to Disclosure Details
Disclosure codes can be mapped to product through the ‘Product Disclosure Mapping’ screen in ‘Product Preferences’ screen. Click ‘Disclosure Details’ in the ‘Bilateral Loans Product Definition Preferences’ screen

You can specify the following details here:
Disclosure Code
Specify the disclosure code (reporting requirements) that should be mapped. The adjoining option list displays the disclosure codes that can be associated with product. Select the required disclosure code which needs to be mapped to the product.
Disclosure Description
The system displays the description of the disclosure codes.
4.2.48 Specifying the Special Penalty Components
You can select components to which late payment charges are applicable using the ‘Special Penalty Components’ screen. To invoke this screen, click the ‘Special Penalty’ tab in ‘Loans and Commitment – Product Preferences’ screen.
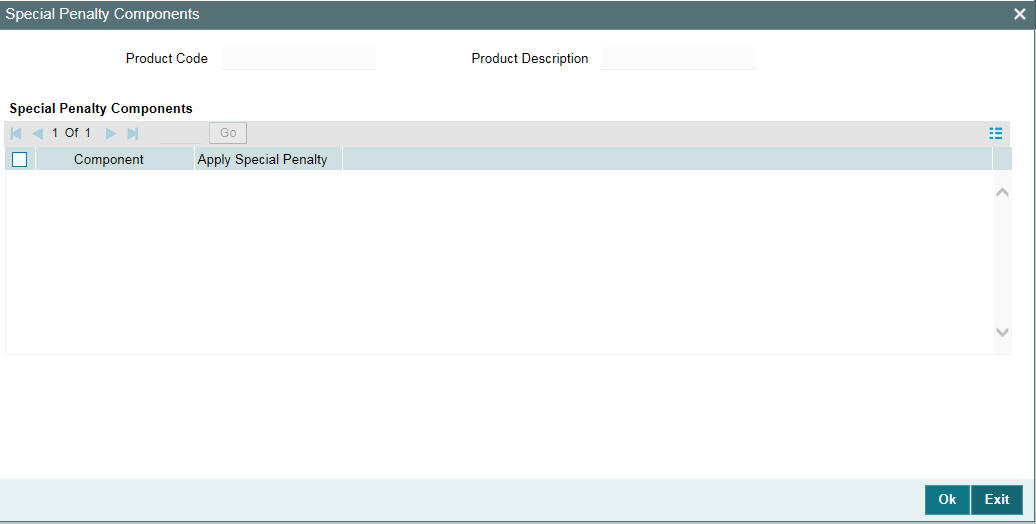
Specify the following details:
Product Details
System displays the product code and a brief description of the product.
Component
By default, system displays all components defined in the ‘Interest’ screen for the loan product. For commitment products, system defaults all components defined in the ‘Interest’ and ‘Fee’ screens (with exception of the generic component ‘PRINCIPAL’). However, you can specify the components and select the adjoining ‘Apply Special Penalty’ check box for which late payment charges are applicable.
You can amend the components list for a product by unlocking the product maintenance. This amendment does not impact the list of late payment charge components defined for existing contracts under this product. The change does not impact late payment charges already calculated based on the list of components defined at contract level.
While calculating the basis amount for late payment charges, system does not consider the excluded components even if they remain unpaid after expiry of grace period.
If you recalculate the already calculated late payment charges due to back value dated change of interest rate or principal, then during recalculation system considers the latest late payment charge components at the contract level. Therefore, the late payment charges are recalculated considering the changed rate but not the changed list of components at the product level.
Apply Special Penalty
Select this check box to indicate that system should apply special charges to the penalty component. By default, this check box is selected.
4.2.49 Maintaining UDFs
You can maintain the UDFs pertaining to the loan using the ‘Field Name to Value Definition’ screen.
You can maintain the following UDFs for loan products in this screen:
UDF Name |
Default Value |
Maximum Field Length |
INTELLECTSOURCE |
WF |
8 |
BROKERNAME |
CUST |
12 |
You should maintain these UDFs for loan products and system default these UDFs to all contracts booked under that product.
While sending the intellect message, system picks the appropriate values for the UDFs ‘INTELLECTSOURCE’ and ’BROKERNAME’. System then sends these values to Intellect. These values are displayed as Source and Broker Name respectively in the message.
The UDF ‘PAYOFF-FEE’ attached to loan and commitment products is used to determine the flat fee amount. The value maintained for this UDF for the commitment contract is inherited to all linked loan contracts during contract booking. If required, you can modify this value. If the defaulted UDF value is overwritten at the loan level, then the commitment and loan UDF values are different. In this case, the subsequent UDF changes at the commitment contract level is not propagate to the loan.
If a standalone loan is booked and linked to a commitment manually, then the UDF value at the commitment level is defaulted to the linked loan contract. However, you can modify this value at the loan level.
4.3 Maintaining Slab/Tier Based Spread on Loan Outstanding
Oracle Lending facilitates maintaining spread for a given client, branch, product, and currency combination. You are allowed to define spread for a product by choosing the spread type either ‘Flat’ or ‘Slab/Tier’ based spread type.
To maintain Slab/Tier based spread on loan outstanding, invoke the ‘Spread Maintenance’ screen from the Application Browser.
You can invoke the ‘Spread Maintenance’ screen by typing ‘OLDSPMNT’ in the field at the top right corner of the Application tool bar and clicking the adjoining arrow button.
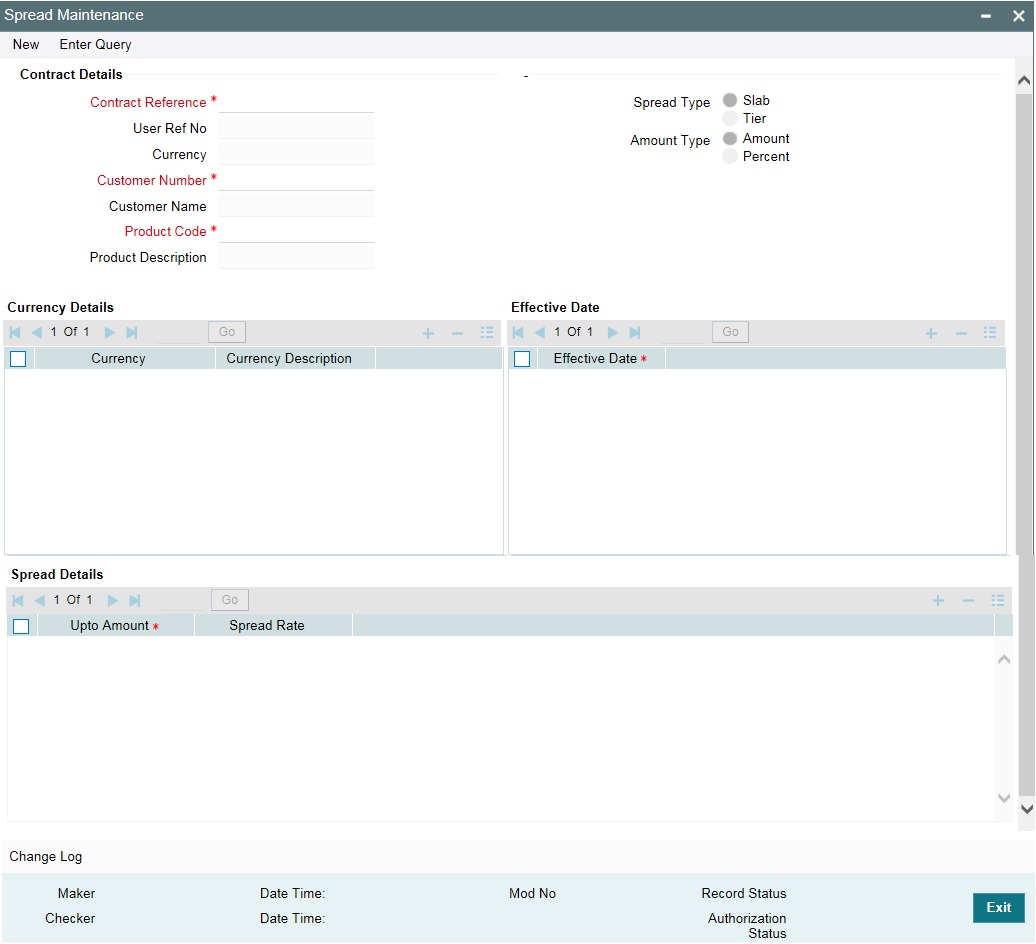
This section contains the following topics:
- Section 4.3.1, "Specifying Contract Details"
- Section 4.3.2, "Specifying Currency Details"
- Section 4.3.3, "Specifying Effective Date"
- Section 4.3.4, "Specifying the Spread Details"
- Section 4.3.5, "Impact of Loan Outstanding on Spread"
4.3.1 Specifying Contract Details
Contract Reference Number
Select the contract reference number from the adjoining option list. This field is applicable only for a contract. It is not applicable for maintenance at the Product/ Customer Number/ Currency level.
Customer Number
Select the customer number from the adjoining option list. The system populates the customer name when you select the customer number.
Product
Select the product from the adjoining option list. The system displays only those products with spread type as Slab / Tier. The system populates the product description when you select the product.
Type
Indicate the type of spread maintained for the product. You can select one of the following options:
- Slab
- Tier
- Tenor
Amount Type
Indicate the amount type maintained for the product. You can select one of the following options:
- Amount
- Percent
Department Code
The system defaults the current department in which the maintenance is being input.
Branch Code
The system defaults the current branch in which the maintenance is being input.
Treasury Source
The system defaults the current treasury source in which the maintenance is being input.
4.3.2 Specifying Currency Details
Currency
Select the appropriate currency for the contract from the adjoining option list.
Currency Description
The system defaults the currency description according to the currency selected.
4.3.3 Specifying Effective Date
Specify the effective date of the spread rate maintenance for the given combination of customer, product, branch, and currency.
4.3.4 Specifying the Spread Details
From Amount
Specify the From Amount for the slab/tier based spread.
To Amount
Specify the To Amount for the slab/tier based spread.
Spread Rate
Specify the effective spread rate for the slab/tier based spread.
You can view the same details in the ‘Loans and Commitment - Contract Input’ screen for the combination of customer, product, and branch, click the ‘ICCF’. From the ‘ICCF Details’ screen, click ‘Spread Maintenance’.
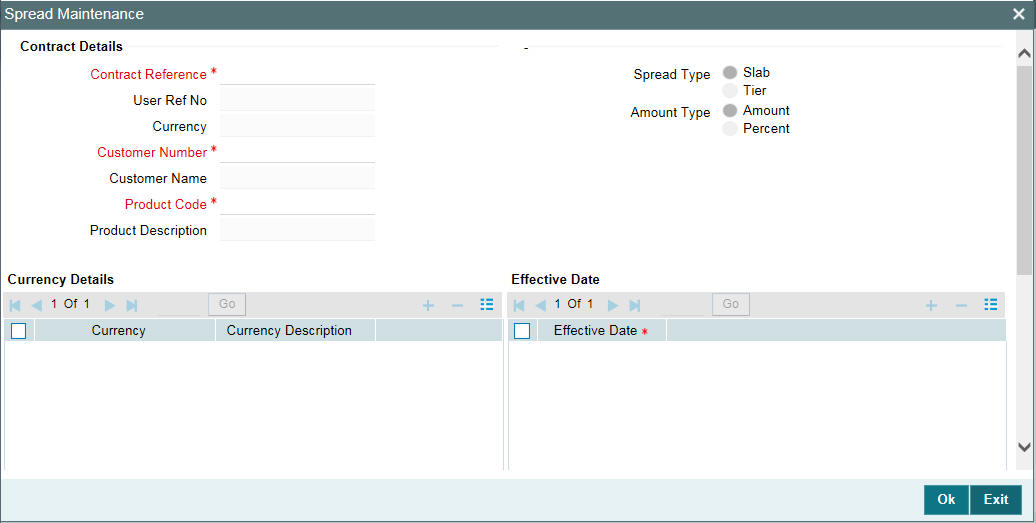
For details on defining interest components, refer to the Interest User Manual.
Here the spread is defaulted based on the maintenance done for the specific combination. You are allowed to modify the spread rate and the amount slab. This spread is considered for building the schedules for the contract.
You can use the spread maintenance screen to amend the spread maintenance after the first authorization of the contract. You cannot amend it through contract amendment. The system triggers an event called ‘SPFX’, if the spread for a contract is changed due to new rate maintenance or change in the rate maintenance.
Note
The system does not trigger the event ‘SPFX’, when the spread of the contract changes due to an activity performed on the loan which impacts the loan balance and there by changing the spread.
4.3.5 Impact of Loan Outstanding on Spread
For any change in the loan outstanding balance, the system will re-pick spread rates based on the latest outstanding amount. The loan outstanding balance will undergo changes in the following scenarios:
- VAMI – To Increase the Principal Amount
- VAMR – Vami Reversal
- LIQD – Principal payment / prepayment done
- REVP – Reversal of Payment
Note
The change in spread rate impacts the schedules of the underlying contract, as the effective interest rate changes with the change in the spread.
Example
Let us assume that a contract is booked with the following details:
- Principal Amount - 12000000
- Interest Rate – 5%
- Value Date – 28-Sep-05
- Maturity Date – 28-May-06
The spread maintained for the borrower, branch, product, and currency combination with the latest effective date with the component type as ‘Slab’ is as follows:
From Amount |
To Amount |
Spread Rate |
0 |
1000000 |
2% |
1000000 |
10000000 |
3% |
10000000 |
11000000 |
4% |
11000000 |
9999999999 |
5% |
Initially when the contract is booked the spread picked up is 5%. The principal amount due of 2000000 along with the Interest amount of 100000 is paid on 28-Oct-2005. As a result of the payment the remaining schedules are recomputed using the spread rate of 4%.
The schedules are recomputed in the following ways:
Principal |
Interest Rate |
Start Date |
End Date |
No of Days |
Interest Amount |
Daily Avg Amount |
12000000 |
10% |
28-Sep-05 |
28-Oct-05 |
30 |
100000 |
3333.333333 |
10000000 |
9% |
28-Oct-05 |
28-Nov-05 |
31 |
77500 |
2500 |
10000000 |
9% |
28-Nov-05 |
28-Dec-05 |
30 |
75000 |
2500 |
10000000 |
9% |
28-Dec-05 |
28-Jan-06 |
31 |
77500 |
2500 |
10000000 |
9% |
28-Jan-06 |
28-Feb-06 |
31 |
77500 |
2500 |
10000000 |
9% |
28-Feb-06 |
28-May-06 |
89 |
222500 |
2500 |
Similarly if the spread basis is tier, then the schedules of the contract is formed in the following manner:
Principal |
Effective Rate |
Start Date |
End Date |
No of Days |
Interest Amount |
Daily Avg Amount |
12000000 |
8.167% |
28-Sep-05 |
28-Oct-05 |
30 |
81666.67 |
2722.222 |
12000000 |
8.167% |
28-Oct-05 |
28-Nov-05 |
31 |
84388.89 |
2722.222 |
12000000 |
8.167% |
28-Nov-05 |
28-Dec-05 |
30 |
81666.67 |
2722.222 |
12000000 |
8.167% |
28-Dec-05 |
28-Jan-06 |
31 |
84388.89 |
2722.222 |
12000000 |
8.167% |
28-Jan-06 |
28-Feb-06 |
31 |
84388.89 |
2722.222 |
12000000 |
8.167% |
28-Feb-06 |
28-May-06 |
89 |
242277.8 |
2722.222 |
The effective rate of 8.167% is arrived using the weighted average logic:
The weighted rate will be calculated as below
((1000000*7%+9000000*8%+1000000*9%+1000000*10%)/12000000)*100
The result rate is used for computation of interest.
Similarly the schedules undergo changes if there is a principal payment which changes the loan balance and the effective spread rate.
The schedules built are as follows:
Principal |
Effective Rate |
Start Date |
End Date |
No of Days |
Interest Amount |
Daily Avg Amount |
12000000 |
8.167% |
28-Sep-05 |
28-Oct-05 |
30 |
81666.67 |
2722.222 |
10000000 |
8.3% |
28-Oct-05 |
28-Nov-05 |
31 |
71472.22 |
2305.555 |
10000000 |
8.3% |
28-Nov-05 |
28-Dec-05 |
30 |
69166.67 |
2305.556 |
10000000 |
8.3% |
28-Dec-05 |
28-Jan-06 |
31 |
71472.22 |
2305.555 |
10000000 |
8.3% |
28-Jan-06 |
28-Feb-06 |
31 |
71472.22 |
2305.555 |
10000000 |
8.3% |
28-Feb-06 |
28-May-06 |
89 |
205194.44 |
2305.556 |
The effective rate of 8.3% is arrived using the weighted average logic explained below:
The weighted rate is calculated as below:
((8000000*8%+1000000*9%+1000000*10%)/10000000)*100
The resultant rate is used for computation of interest.
Note
- Defaulting of spread is done only once. Any subsequent changes in spread are done through ‘Spread Maintenance’ screen.
- It is applicable only for LCY Loans.
- The tier basis is always amount based.
- In case the spread maintenance is not available then the system defaults the spread as ‘0’.
4.4 Specifying the Logic for Currency Rounding
You can maintain tenor based, currency-wise interest limits for a combination of Product and Interest Component through the ‘Interest Limits’ screen.
When an interest class for which currency-wise interest limits have been maintained is associated with a Loans product (in the Interest Definition screen), the product inherits the limits, by default. Such default limits can be modified if required, when the interest limits for the product and branch combination are maintained, in the Interest Limits screen.
For details about the Interest Limits screen, refer to the Interest User Manual.
For loans products, you can also define the following currency rounding rules in the Interest Limits screen:
- How the interest amounts in respect of the interest component in the specified currency are to be rounded – truncated, rounded up, rounded down, or rounded near
- If truncation is opted for, the number of digits after the decimal place, to which interest amounts in respect of the interest component in the specified currency must be truncated. The number of digits specified for truncation cannot exceed the allowed decimal places for the specified currency. If not specified, the number of decimals indicated in the Currency Definition for the specified currency is taken by the system.
- For the Round Up, Round Down, and Round Near options, the rounding unit, which is the lowest possible measure in which the interest amounts in respect of the interest component in the specified currency can be considered. This value cannot be less than the rounding unit for the specified currency in the Currency Definition. If not specified, the rounding unit indicated in the Currency Definition for the specified currency is taken by the system.
Note
When generic interest limits are being defined for all currencies in the ‘Interest Limits’ screen (that is, the ALL option has been selected in the Currency field), the fields relating to rounding rules are not available for definition.
4.5 Applying Tax on Liquidated Principal
Your bank may need to deduct tax on principal that is liquidated on each schedule date, for a loan. The tax may also need to be applied on any interest as well as penalty interest earned on the repaid principal.
To specify the deduction of such tax on liquidated principal, you must:
- Define a tax rule for application of the tax, and associate the rule with a tax class. You must then link the tax class to a tax scheme.
- You must then link the tax scheme defined for the application of the tax to a product, and associate the amount tag PRINCIPAL_LIQD in the ‘Product Tax Linkage Definition’ screen, as an attribute for the loan product. For any loan contracts involving the product, tax would be computed and deducted based on the liquidated principal amount.
In such a case, the basis amount that would be considered for the computation of the tax is arrived at as follows:
Basis amount = principal liquidated + interest earned on the liquidated principal amount + penalty interest earned due to non-payment of principal.
4.6 Classification of General Ledgers based on Transaction Codes
When the GL under which a component is reported is changed, along with the status of a loan, an accounting entry is passed. This accounting entry transfers the component from one GL to another.
A Transaction Code, the description of which indicates the type of accounting entry, is associated with every accounting entry in Oracle Lending. You should indicate the Transaction Code to be used for the GL transfer entries, involved in the status change.
4.7 Maintaining Pool Fund Details
You can capture the funding details using the ‘Pool Fund Maintenance’ screen.
You can invoke the ‘Pool Fund Maintenance’ screen by typing ‘OLDPOOLF’ in the field at the top right corner of the Application tool bar and clicking the adjoining arrow button.

Specify the following details:
Branch Code
System defaults the branch code of the current branch. You can query records pertaining to the current branch only.
Funding Reference Number
System generates and displays the funding reference number consisting of 16 characters.
External Ref. No
System defaults the funding ref number in this field. However, you can enter the legacy system funding reference number as free text.
Funding Ccy
Specify the funding currency.
Funding Amount
Specify the funding amount. The funding amount must be greater than zero.
Pool Available Amount
System calculates and displays the Pool Available Amount.
Counterparty
Specify the counterparty.
Facility Name
Specify the name of the facility. It is mandatory to specify the facility name.
Funding Type
Specify the funding type.
Revolving Funding
Select the check box to indicate that the funding is of 'Revolving' type.
Note
- After you link a funding maintenance to a commitment, you cannot modify the ‘Revolving funding’, ‘Funding currency’, ‘Funding Amount’, and ‘Funding Type’ values. This validation also applies even after the commitment matures.
- Existing funding maintenance cannot be closed if there are active commitment contracts linked to it.
- The status (active or closed) of a Funding reference can be tracked using the ‘Record status’ field available in the audit trail.
4.8 Identifying a Component as a Refinance component
While creating a loan product you have the option of indicating whether the accruals/liquidations involving a particular component should be tracked for refinancing. If you enable the ‘Refinancing Required’ option for a particular GL, you have to identify the actual component for the refinance component.
Note
The system creates a dummy loan product for every deposit product that you maintain and vice versa. Each time you book a loan to a customer, the corresponding deposit is initiated with the following entries:
Accounting Role |
Amount Tag |
Dr./Cr. Indicator |
LAIBGL_REF |
PRINCIPAL |
Credit |
LAIBGL_REF_OFF |
PRINCIPAL |
Debit |
Similarly, each time you book a deposit from a customer, the corresponding loan is initiated with the following entries
Accounting Role |
Amount Tag |
Dr./Cr. Indicator |
ASSETGL_REF |
PRINCIPAL |
Debit |
ASSETGL_REF_OFF |
PRINCIPAL |
Credit |
Note
For details on Upfront Fee Accrual, refer to the chapter Processing Upfront Fee Accruals in this User Manual.
4.8.1 Capturing the Reversal Transaction Type
In some occasions, you might have to reverse a contract due to insufficient funds. When you reverse a contract, the event-wise accounting entries of the original contract are reversed. You can maintain such accounting entries under a specific transaction code for all contract or payment reversals.
For this you need to maintain unique transaction codes for such reversals in Oracle Lending. This can be done through the ‘Reversal Type Maintenance’ screen.
You can invoke the ‘Reversal Type Maintenance’ screen by typing ‘OLDREVTP’ in the field at the top right corner of the Application tool bar and clicking the adjoining arrow button.
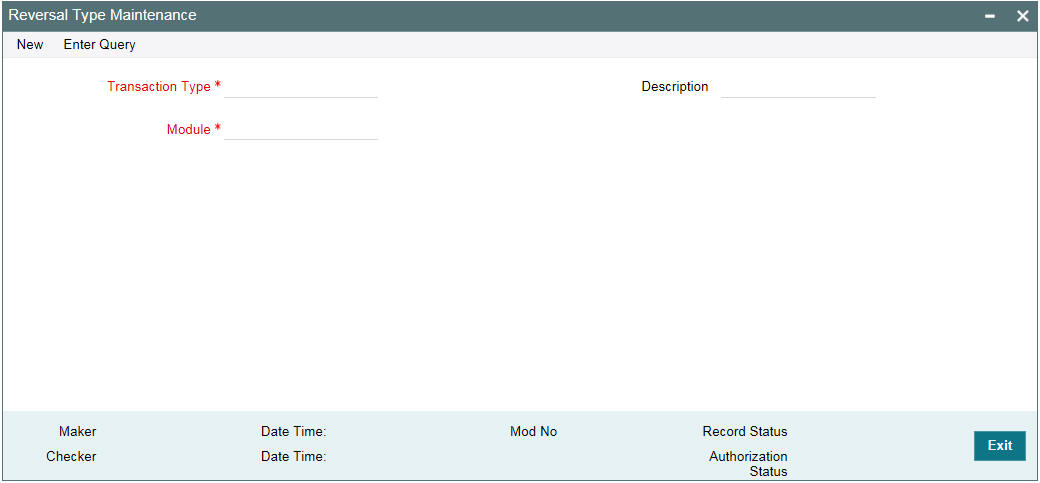
In this screen, you should capture the following reversal type details for a product:
Module
Indicate the module for which you want to maintain the transaction types. Reversal types you define through this screen is applicable to the product for which you have specified only.
Reversal Type
This is a unique Code for the reversal type.
Description
Enter a description for the transaction type that you are maintaining. This is captured for information purpose only.
4.9 Maintaining 1098 Parameters
This section contains the following topics:
You can maintain 1098 Parameter details using ‘1098’ Parameter’ screen.
You can invoke the ‘1098’ Parameter’ screen by typing ‘OLDSTMTP’ in the field at the top right corner of the Application tool bar and clicking the adjoining arrow button.

You have to specify the following details in this screen:
Branch Code
The code of the current branch is displayed in this field.
Branch TIN
Specify the Tax Payer Id.
Tax Year
Specify the tax year for which 1098 statement is generated.
Transmitter TIN
Specify the Branch TIN.
Transmitter Name
Specify the name of the transmitter.
Transmitter Control Code
Specify the transmitter control code.
Threshold Limit
Specify the threshold limit on the interest paid by the customer.
Test Tape Indicator
Select ‘T’ in case you require Test File generation for verification purposes. In case you do not select anything the system generates the file for uploading.
Company name
Specify the name of the company which is associated with the address to where the correspondence should be sent.
Company Address
Specify the address for correspondence.
Company City
Specify the city in which the company is located.
Company State
Specify the state in which the company is located.
Company ZIP Code
Specify the ZIP Code of the company.
Contact Name
Specify the name of the contact person in the bank.
Contact Number
Specify the contact number of the contact person in the bank.
Email Address
Specify the Email Address of the contact person in the bank.
First Payer Name
Specify the name of the bank.
Second Payer Name
Specify the name of the department in charge of 1098 form generation.
Payer Ship Address
Specify the address of the payer.
Payer City
Specify the city in which the payer is located.
Payer State
Specify the state in which the payer is located.
Payer ZIP Code
Specify the ZIP code of the payer.
Payer Phone
Specify the payer’s phone number.
1098 ASCII File Path
Specify the path for the generation of 1098 ASCII File.
1098 FORM Path
Specify the path for the generation of 1098 FORM.
4.9.1 Generating ASCII File
You can generate the ASCII File using, ‘ASCII File generation’ screen.
You can invoke the ‘ ASCII File generation’ screen by typing ‘OLDASTMT’ in the field at the top right corner of the Application tool bar and clicking the adjoining arrow button.
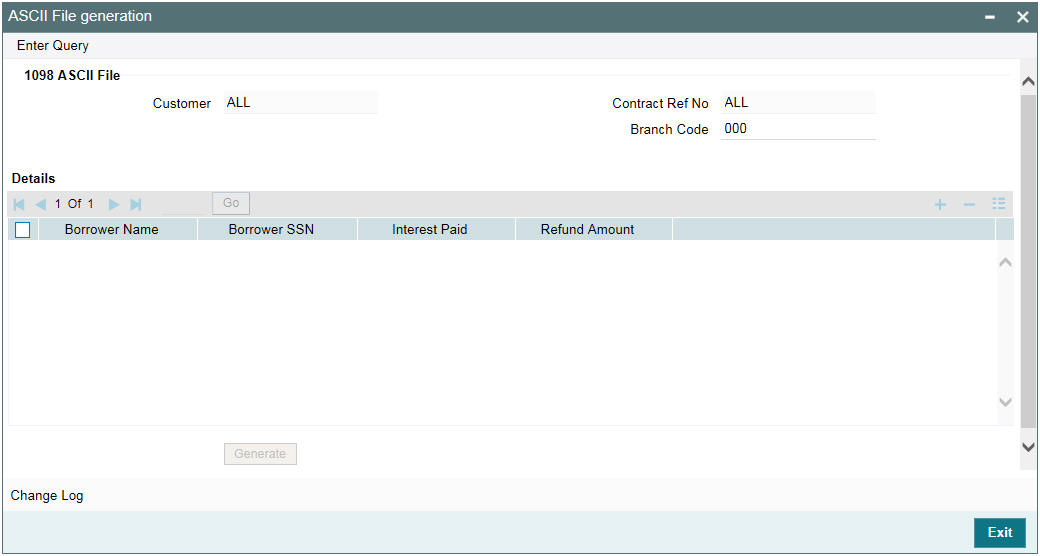
The following details of the Advice are displayed.
- Customer - This is defaulted to ‘ALL’ and you are not allowed tor amend this value.
- Contract Ref No - This is defaulted to ‘ALL’ and you are not allowed tor amend this value.
4.9.1.1 Details
The details are displayed.
- Borrower Name
- Borrower SSN
- Interest Paid
- Refund Amount
Click ‘Generate’ to generate the ASCII file across all the borrowers and across all contracts.
Note
Only those contracts booked under products with ‘Include in 1098 Statement’ selected and with the interest paid for the year greater than the threshold limit are considered for the ASCII file generation.
4.9.2 Generating 1098 Forms
You can generate 1098 forms using, ‘1098 Form’ screen.
You can invoke the ‘1098 Form’ screen by typing ‘OLDFSTMT’ in the field at the top right corner of the Application tool bar and clicking the adjoining arrow button.

The following fields are displayed in this screen:
- Customer - Individual Customer Number is displayed.
- Contract Reference No – The contract for that particular customer number is displayed.
- Branch Code – The code of the current branch is displayed.
Details
The following fields are displayed in this section:
- Contract Ref No
- Branch Code
- Borrower Name
- Borrower SSN
- Interest Paid
- Refund Amount
Generate All
Select this field to generate 1098 Form for all the contracts.
Note
Only those contracts booked under products with ‘Include in 1098 Statement’ selected and with the interest paid for the year greater than the threshold limit are considered for the 1098 Form generation.
You can override the amount paid by the borrower for a particular contract using, ‘1098 Override Interest Paid’ screen.
You can invoke the ‘1098 Override Interest Paid’ screen by typing ‘OLDOSTMT’ in the field at the top right corner of the Application tool bar and clicking the adjoining arrow button.

Contract Reference No
Specify the reference number of the contract whose amount you want to override. You can choose the appropriate contract reference number from the option list as well.
Total Interest Payment
The system displays the total interest paid for the previous year. However, you can modify this amount.
Note
The interest displayed is based on the book date of the payment (Transaction Date) and not on the schedule due date of the payment. The total amount is for all the interest components.
The following fields are displayed in this screen:
- Borrower Name
- Value date
- Maturity Date