8. Processing Repayments
This chapter contains the following sections:
- Section 8.1, "Introduction"
- Section 8.2, "Defining Schedules for a Product"
- Section 8.3, "Setting Product Schedule Preferences"
- Section 8.4, "Defining Repayment Schedules"
- Section 8.5, "Setting Loan Schedule Preferences"
- Section 8.6, "Specifying the Preferences of the Contract"
- Section 8.7, "Revision and Repayment Schedules"
- Section 8.8, "Making Manual Payments"
- Section 8.10, "Processing a Loan Payment when Contra Accounting is Applicable"
8.1 Introduction
When you disburse a loan to a customer, you also decide on the terms of the repayment of the loan.
You may have your own repayment schemes.
For example, you may prefer monthly repayments of interest and repayment of the principal on maturity, and so on.
Or
You may design repayment schedules to suit the convenience of your customer. Your customer may want to make interest repayments annually, instead of every month,
In Oracle Lending, you can customize your repayment schedules for a loan product. The same schedules, by default, apply to the loans involving the product. However, when processing a specific loan, you can change the repayment schedule, which it acquires, from the product it involves.
8.2 Defining Schedules for a Product
You can define schedules for the repayment of various components like the principal, interest, charges, and fees.
The attributes of the schedules for a product are defined through the Product Preferences screen. The following are the attributes of a repayment schedule:
- Mode of liquidation - auto or manual. This can be changed at the time of loan processing
- Recomputation of schedules when a repayment of principal is made before it is due
- Liquidation of back valued schedules upon initiation of a loan. This can be changed at the time of loan processing
- The schedule type - amortized, capitalized, or normal
The Automatic Contract Update function automatically liquidates those schedules that you have marked for auto liquidation. If schedules are marked for manual liquidation, you have to liquidate them through the Contract Schedule Payments function.
Once you specify the attributes of schedules in the Product Preferences screen, you have to define the frequency of repayments in the Product Schedules screen.
When processing a specific loan, you can define the amount of principal that has to be repaid (at the frequency you specified) and the number of such repayment schedules. You can also change the schedule details that a loan inherits from the product that it involves.
Note
If you do not define any schedules for the product, by default, the loans involving the product have bullet (or balloon) schedules. That is, all the components are liquidated on maturity.
8.3 Setting Product Schedule Preferences
You should define the attributes of the schedules for a product through the Product Preferences screen.
You can invoke the ‘Product Definition’ screen by typing ‘OLDPRMNT’ in the field at the top right corner of the Application tool bar and clicking the adjoining arrow button.
From this screen, click ‘Preferences’
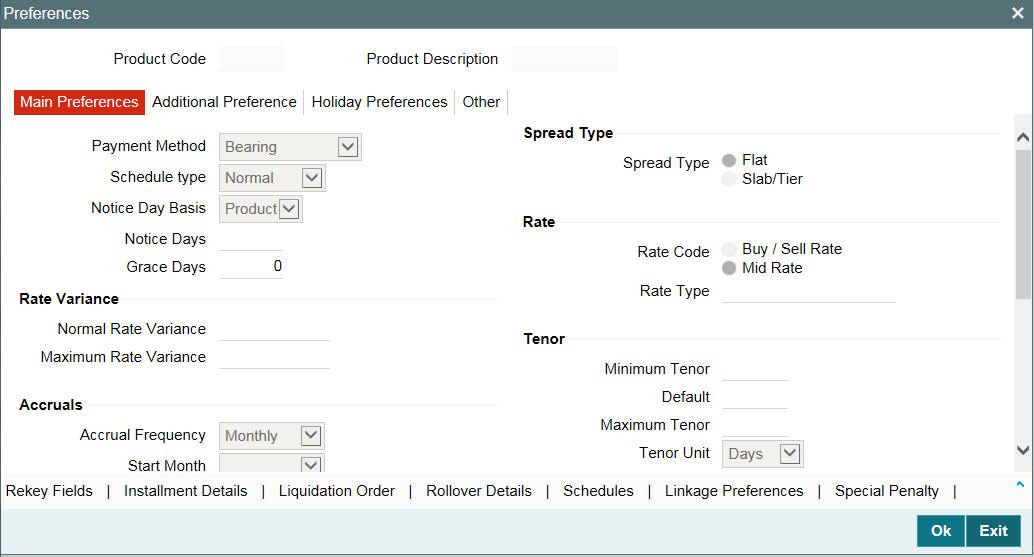
Components of a loan can be liquidated automatically or manually. On the other hand, you can also indicate that certain specific components must be liquidated automatically. In the Product Preferences screen you have to indicate whether the mode of liquidation of repayment schedules are to be automatic.
Specify Auto liquidation if you want the components of a loan (involving a product) to be liquidated automatically.
In this case, a schedule is liquidated automatically on the day it falls due, during beginning of day processing (by the Automatic Contract Update function).
Now, consider the following situation:
- You have indicated automatic liquidation
- The schedule date falls on a holiday
- You have specified (through the Contract Preferences screen) that the holiday be ignored while calculating the schedule date
In such a situation, a repayment falling on a holiday would be processed according to your specification for holiday handling (in the Loans Branch Parameters screen). It would be as follows:
- If you specified that processing has to be done on the last working day before the holiday for automatic events right up to the day before the next working day, the schedule falling on the holiday is liquidated during end of day processing on the last working day before the holiday.
- If you specified that processing has to be done only up to the System Date, then only those events scheduled for today (the last working day before the holiday) are processed. The events of the holiday are processed on the next working day after the holiday, during beginning of day processing.
If a loan has been defined for verification of funds before automatic liquidation (through the Contract On-line Preferences screen), those components whose schedule dates fall on the same day are liquidated in the order you have specified when defining the product.
If the funds are insufficient, the liquidation is done to the extent of the available balance in the repayment account. The components are liquidated in the order that you specify. This is reported in the Exception Report generated at the end of every day, automatically (by the Automatic Contract Update function).
If you have not specified that the funds be verified, and there are insufficient funds in the repayment account:
- The repayment account is put into a debit balance (if you have allowed overdraft) and the schedules for the components liquidated to the extent of the debit balance that you have allowed for the account. You can liquidate beyond the allowed debit balance for an account. The system, however, display an override message, which is recorded for audit trail purposes. Debit interest, as specified for the type of account (current or savings), is applied on the debit balance.
- If the repayment account has not been defined with overdraft, the liquidation is not processed.
The liquidation order is used when you want to liquidate the dues in a certain order: say interest first and then the principal. For example, if there is a penalty interest, you may want to recover it first.
Example
You can indicate that the repayment schedules for the principal have to be liquidated automatically if you are sure that your customer can repay the schedule amount on time.
Another scenario where you could define automatic schedules could be when the customer has a deposit the interest from which, is servicing his loan.
Recomputing schedules after a repayment in advance
You have to specify whether the interest on the future schedules of a loan has to be recalculated in case a prepayment is made on a schedule (that is, the principal repayment is made before its due date).
Example
Parivallal Express Services has taken a long-term loan with the following terms:
- Initiation on: 01 January '98
- Maturity on: 31 December '01
- Principal: USD 360,000
- Interest: fixed at 15% per annum
- Repayment: a principal of USD 10,000 every month, with interest
For the first four repayments, Parivallal Express Services pays back USD 10,000 plus the interest applicable. On the fifth monthly payment, Parivallal Express Services pays back USD 40,000 instead of the USD 10,000 that is scheduled. The interest applicable as of that day is also paid.
The prepayment of the principal entails a change in the subsequent interest schedule amounts. This is because, when the interest amount for each repayment is calculated on initiation of a loan, it is on the "expected balance" as of a payment date.
Thus, in this case, the interest amount for the first repayment is 15% p.a. on 360,000; for the second repayment is 15% on 350,000, and so on.
The prepayment changes the expected balance (in this case, USD 40,000 has been paid back instead of the scheduled USD 10,000). Thus, the interest applicable for the subsequent schedules are less, as the actual balance is less than the expected balance.
The recalculation of the subsequent interest schedules are done only if you have specified that schedules have to be redefined on a prepayment. Otherwise, the interest amounts for the subsequent schedules are the same as that calculated based on the earlier expected balance.
Note
The subsequent interest schedules are redefined. The subsequent principal schedules are marked as paid to the extent of the prepayment. In the case of an amortized schedule, the amount of repayment for the schedule immediately after the prepayment is different from the rest of the schedules.
Liquidating back valued schedules during initiation
You have to indicate whether for a back-dated loan that has schedules prior to today’s date, the schedules have to be liquidated when the loan is initiated. A back dated loan is one, which has an initiation date, which falls before today’s date.
Example
Loans can be initiated
- As of today
- A date in the future
- As of a date in the past
If today’s date is 15 October 1997, and you initiate a loan of 15,000 USD with a Value Date (date on which the loan comes into effect) as 15 September 1997, accounting entries for initiation are passed as of 15 September 1997.
Suppose that there has been an interest payment schedule for 30 September 1997, for 500 USD. If you specify that back valued schedules should be liquidated, accounting entries are passed to liquidate this schedule (too), when the loan is initiated. If you specify that back dated schedules are not to be liquidated, only accrual entries are passed till today.
Note
The entries associated with each event (initiation and liquidation in this case) are passed only if they have been defined for the product. Further, the accounts used are the ones defined for each entry.
You have to specify whether the payment method for the interest components is to be bearing, discounted, or true discounted. This cannot be changed at the time of processing a loan.
Bearing
The interest is liquidated on schedule payment date(s).
Example
You have advanced Ms Yvonne Cousteau a loan of USD 10,000, under the ‘Short Term Loans for Individuals’ scheme, at 10% interest, for a year.
Now, under the bearing type of interest payment method, the nominal (USD 10,000), which becomes the principal in this case, is advanced to Ms Cousteau and the interest on it is collected over the one year, which is the tenor of the loan.
Discounted
In this interest payment method, the interest is deducted at the time of initiating the loan.
Example
Carrying forward the example of Ms Yvonne Cousteau’s loan of USD 10,000, under the scheme ‘Short Term Loans for Individuals’, at 10% interest for a year, under the discounted type of interest payment, the total interest (Actual/Actual) calculated for the tenor of the loan, USD 1,000, is deducted from the principal (USD 10,000) and only USD 9,000 is advanced.
True discounted
In this interest payment method, the interest is calculated on the principal in a manner differing slightly from the discounted method. The interest rate is applied on the Principal instead of the Nominal, as is done in the discounted method.
Example
You have advanced Mr. Brian Williams a loan of USD 10,000 under the scheme ‘Short-term Loans For Industries at 10% interest’ for a year. Under the true discounted type of interest payment, the interest amount in absolute terms in not USD 1,000 but lesser than that. This is because the interest rate of 10% is not applied on USD 10,000 but on the actual amount disbursed (derived by the system) which is USD 9090.91.
You can define different repayment schedules for the different components according to your needs. First of all, you should specify the component for which you want to define the schedule. All components - the principal and any other component depending upon your ICCF definition for the loan — are available in the form of a picklist. You have to define schedules for each of them.
If you indicated (in the Product Preferences screen) that the Schedule Payment Type is amortized, then, you have to specify the frequency not for the principal but for the ‘amortized’ principal (principal + total (main) interest accrued on the loan, equally spread out across the number of schedules). In the picklist, you see ‘Amortized’ displayed and you have to define the frequency for this.
When defining repayment schedules for specific loans, the amount of repayment needs to be specified only for the principal. The interest, commission, and fee amounts to be calculated by the system automatically, depending on the repayment date and the principal (amount). However, for loans with special interest, you also have to provide the interest amount.
If you are entering a loan contract for which you need to define installment schedules, you have to select installment as the component. To define installment schedules the contract must be linked to a product for which installment schedules are allowed.
For more information, refer to Defining Attributes Specific to Loan Product chapter in this manual.
You can indicate whether the dates of repayment schedules should be calculated based on the Value Date (date of initiation of the loan) of the loan involving the product, or a Calendar Date.
If you specify that the Reference is the Value Date (date of initiation of the loan), the dates for schedule repayments are based on this date and the frequency.
If the Reference is specified as the Calendar Date, the dates for schedule repayments are based on the Start Date (specified by you), the Month and the Frequency. The following example illustrates this concept:
Example
A loan starts on 15 September 1997 and the frequency of repayment is monthly. If the Reference is specified as Value Date, the monthly schedule dates fall due on 15 October 1997, 15 November 1997, and so on, till the loan matures.
If the Reference is specified as Calendar Date, and the Start Date is fixed as 1 October 1997, the first repayment date is 1 October 1997. The subsequent repayment dates are 1 November 1997, 1 December 1997, and so on, till the loan matures. In this case, the interest days for the first repayment is from 15 September 1997 to 30 September 1997.
If Reference is set to Value Date (loan initiation date), you need to specify only the Frequency (monthly, quarterly, and so on.) and the unit of frequency (if you specify the frequency as monthly and the unit as 1, it means one schedule for one month). The system sets the schedule according to the Frequency and Unit of Frequency you have specified, beginning on the Value Date.
Example
If the Value Date of a loan is 10 December 1997 and you indicate the frequency as monthly and unit as 1, then the first schedule is liquidated on 10 January 1998, the next one on 10 February 1998, and so on.
For the same loan if you were to define a fortnightly schedule, you indicate the frequency as daily and unit as 15. The first schedule, in this case, is liquidated on 25 December 1997, the next one on 10 February 1998, and so on.
Specifying the frequency of schedules
For a periodic schedule, you can indicate the frequency of repayment for each component. This could be:
- Daily
- Weekly
- Monthly
- Quarterly
- Half-yearly
- Yearly
- Bullet
You can specify the number of units for the frequency you have set for a particular component.
Example
If you want a payment every 15 days, you have to specify
- The frequency as Daily
- The units as 15
For payments every three weeks, you have to define
- The frequency as weekly
- The unit as three
If you have set the Reference as Calendar Date, and the frequency as weekly, quarterly, half-yearly or annual, indicate the month in which the first schedule falls due.
If you have set the Reference as Calendar Date, you should indicate the date on which the schedule should fall due. Specify 31 to indicate that the schedule should fall due on the last day of the month (that is, 31 for months with 31 days, 30 for months with 30 days and 28 or 29, for February).
The schedule repayment dates are computed using the Frequency, (Start) Month and the (Start) Date.
Example
You have defined the frequency as quarterly, specified March as the first month, and given the date as 31.
The repayment schedules are 31 March, 30 June, 30 September, and 31 December. For a loan starting anytime before 31 March, the first liquidation is on 31 March. The Number of interest days are calculated from the Value Date to 31 March. From then on, it follows the quarterly cycle.
Similarly, you have defined the frequency for another product’s default schedules as half-yearly; indicated the month as June; and given the date as 31.
For a loan that is initiated anytime before June, the first liquidation takes place on 30 June and the next one on 31 December. For a loan initiated after 30 June, the first liquidation takes place on 31 December, and so on. The start month and date indicate the first schedule, so that subsequent schedules can be automatically set from that point on.
A schedule date:
- Should be later than or the same as the Value Date
- Cannot be beyond the Maturity Date
Further, you can have only one schedule for a component for a date.
Defining Principal schedules for discounted loans
For a discounted loan, you can define repayment schedules for the principal component.
You can specify the default schedules for the principal component in the Product Default Schedules screen when you define the product, and these schedules are defaulted to discounted loan contracts involving the product.
When you initiate a discounted loan in the Loans Contract Online screen, which uses a product for which principal component schedules have been defined, the principal schedules are applied by default, from the product definition. You can make changes to these schedules for the contract.
Note
After a discounted loan is authorized, you cannot subsequently amend any repayment schedules for principal component that have been defined for the loan.
8.3.1 Processing Overpayment and Refund of Interest/Fees
When you select the check box ‘overpayment allowed’ in the ‘Loans and Deposits 'Product Preference’ screen overpayment of interest/fee is allowed for the loan product. System calculates the overpaid amount with all the future schedules and overpayment for the bullet schedule is not allowed. If the amount due for a schedule gets changed due to principal payment, then the system adjusts the same after re-computation.
8.3.1.1 Refunding the Excess Amount
You can refund the excess amount paid at any time. You can also refund the interest / fee amount paid, even though there is no overpayment done. The overpaid amount can be refunded through the ‘LD Refund Online’ screen.
You can invoke the ‘LD Refund Online’ screen by typing ‘OLDREFND’ in the field at the top right corner of the Application tool bar and clicking the adjoining arrow button.
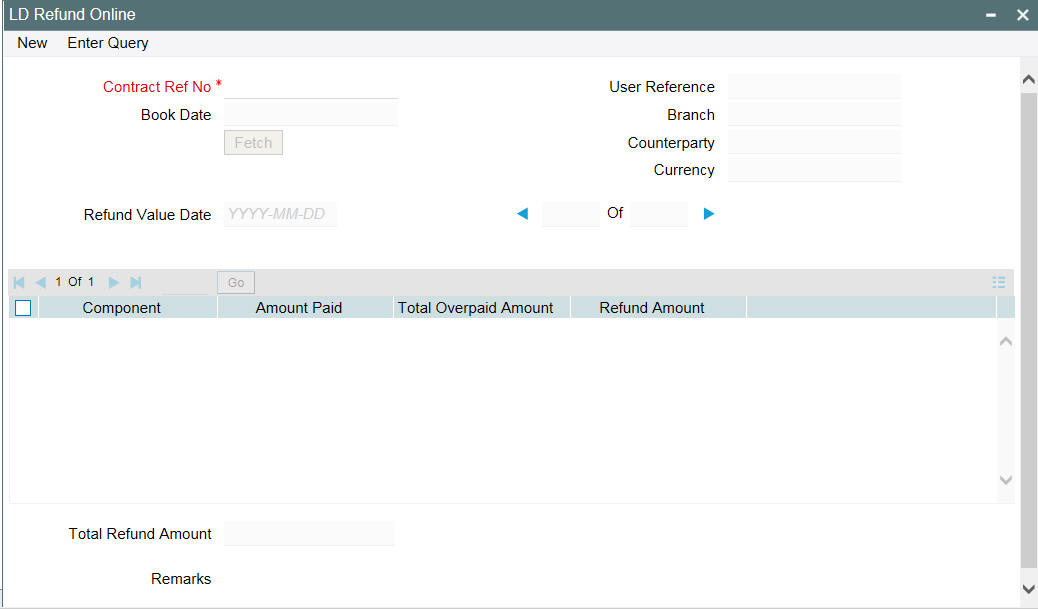
You can specify the following details in this screen.
Contract Ref No
Select the contract reference number of the loan contract for which the overpaid interest/fee amount has to be refunded. The following details of the payment get displayed:
- Value date
- Schedule Due date
- Amount due
- Amount paid
- Refund Amount
Refund Amount
Specify the amount that has to be refunded. This amount cannot be greater than the amount paid.
Note
The entries posted as part of ‘RFND’ event is for the amount entered in the ‘Refund Amount’ option.
Refund
Select this check box to unlock the screen and select ‘Refund Amount’ and save it for processing the refund.
Remarks
Enter remarks about the amount refund if any.
Refunding of Interest and Fee can be done through the same screen and at the same instance.
The following restrictions are applicable for overpayment and refund of interest/fees:
- Overpayment of fee is not applicable for ‘User Input’ type of fee.
- Payment reversal after refund is not allowed.
- During Loan Reprice, if the ‘Transfer main interest’ is selected then the excess amount paid is adjusted against the interest calculated for the period between last schedule date and the reprice date. The residual interest due amount is transferred to the reprice child contract and if the same is residual interest amount is +ve, then it is treated as acquired interest else as overpayment and gets settled on first schedule of the component of child contract. Transfer of Interest is not allowed for back valued reprice
- Refund of transferred interest (Transferred interest includes excess amount paid as well) is not allowed
- For Discounted and True Discounted loans, in case of any full or partial pre-payment is made, the system shows total interest amount paid instead of overpaid interest amount. You have to manually calculate the amount to refund. However, the system refunds the interest paid to the customer account.
8.4 Defining Repayment Schedules
The payment schedules defined for a product applies to all loans involving the product. When you process a loan in the Contract Schedules screen, the details defined for the product (which the loan involves) is displayed. You can change the schedules that a loan acquires when processing it in the Contract Schedules screen.
You can redo the schedules defined for the product, by clicking ‘Schedules’ from the ‘Product Preferences’ screen. The schedules that have not been liquidated and which fall due on the current system date, or later than the current system date, is erased and you can go on to define the new repayment schedules.
The attributes of the schedules inherited from the product can be changed for a loan through the Contract Preferences screen. However, the schedule payment type - whether amortized, capitalized, or normal — is as specified for the product. You cannot change it.
8.5 Setting Loan Schedule Preferences
Schedule preferences are the attributes of the repayment schedules defined for the loan.
The attributes that have been defined for a product are inherited by all loans involving the product. Some of these attributes can be changed. They are:
- The liquidation of schedules that fall due before the day on which the loan is booked
- The liquidation mode (auto to manual)
The following attribute defined for the product, and inherited by the contract, cannot be changed:
- The schedule type − amortized, capitalized, or normal is inherited from the product and displayed for the loan.
Through a set of fields in the Contract Preferences screen, you can specify an additional set of schedule related attributes for a loan that you are processing:
- How liquidation dates falling on holidays should be handled
- Whether schedule dates should be cascaded in case you have indicated that they (schedule dates) be moved forward or backward when they fall on a holiday
- The holiday table, of the country of the loan currency, that has to be checked before setting automatic schedules
- Whether back valued schedules should be liquidated on loan initiation
- The type of amortization, if amortization has been specified for the product and therefore, the loan
- Whether availability of funds in the repayment account has to be verified if components have the same schedule date and repayment account, and automatic liquidation has been specified
Note
(Only the attributes that deal with schedules are discussed here. Attributes like mode of status control and type of commitment which are present in this screen are dealt with in the chapters Disbursing a Loan and Commitments, respectively please refer these chapters.)
8.6 Specifying the Preferences of the Contract
Although schedules are inherited by a loan from the product, through the Contract Preferences screen, you can to define your own schedules for a loan.
A schedule date:
- Should be later than or the same as the Value Date
- You can have only one schedule for a component for a date
- It cannot be beyond the Maturity Date
8.6.1 Types of Repayment Schedules
When creating a product, you define the repayment schedules. The repayment schedule can be:
- Amortized
- Capitalized
- Normal
The schedules type that you define for the product applies to all loans involving the product. When you process a loan, the schedule type is displayed in the Contract On-line Preferences screen.
For example, if you have specified, “amortized” for the product, this is applicable to the loan too. You cannot change it.
8.6.1.1 Amortization of Payment Schedules
By specifying that your payment schedules have to be amortized over the period of repayment, you indicate that all the repayments should be in Equated Installments. These repayment schedules are drawn up by taking the Principal and the Main Component. The ‘main’ component is the one you defined for display in the Contract Details screen.
If you specify amortized schedules, schedules are set in Equated Installments according to the frequency you have defined.
Note
If a loan is to be amortized, it should have fixed type of interest and bearing interest payment method.
Capitalization
You can capitalize the interest payment on a loan by:
- Specifying the type of schedule (through the Product Preferences screen). The loan inherits this from the product
- Specifying the frequency for the capitalization through the Product Default Schedules screen. The frequency can be changed for the loan.
If the repayments of principal or interest on a loan are not made on a particular schedule date, they will be capitalized for the next schedule. The outstanding interest is added to the outstanding principal on the schedule date and this becomes the principal for the next schedule. If a partial payment has been made, the unpaid amount is capitalized (the unpaid interest is added to the unpaid principal and this becomes the principal for the next schedule).
Example
You have specified that the interest should be capitalized for Ms Yvonne Cousteau’s loan of USD 20,000 and indicated the frequency as quarterly. The first schedule date is 30 June 1998. On this date, the outstanding principal on Ms Cousteau’s loan is USD 20,000 and the outstanding interest, at 20%, is USD 986 for the first three months.
Since it is to be capitalized, this is added to the principal and USD 20,986 becomes the principal on which the interest is calculated during the next quarter.
Note
Capitalization is done only for the ‘main’ interest, and only, if it is a fixed interest of the bearing type.
Normal
If you have specified normal type of schedules, you can define your own schedules for loans involving the product.
A schedule date:
- Should be later than, or the same as, the Value Date
- Can have only one schedule for a component for a date
- Cannot be beyond the Maturity Date
8.6.2 Defining Installment Schedules for Loans
Your bank may need to define a flexible repayment schedule for some customers who avail loans. The customer may need to repay fixed amounts on certain schedules, which you must adjust towards both interest and principal.
For such loans, with payment method as bearing, and normal schedules, you can define installment schedules. The amount repaid on the due date of an installment schedule is considered as inclusive of interest computed on the main component.
It is possible to have more than one installment schedule for a contract. To define installment schedules, you must:
- Specify installment schedules as allowable, for the product, in the Product Preferences screen. Select the ‘Allow Installment Schedule’ box. When you do this, for any loan contract involving the product, you can define installment schedules.
- When you enter a loan contract using the product for which installment schedules are allowable, in the Contract Schedules screen, select “Installment” as the component, and specify the fixed amount being repaid. The interest payable on the main component is computed and deducted from the fixed amount, and the remaining portion is appropriated towards repayment of principal.
8.6.2.1 Processing Late Payment
During the payment of an overdue installment schedule, the principal and interest components are liquidated for the overdue amounts. The interest amount is recalculated on the outstanding principal for the overdue days. The Interest amount for the remaining days in the current schedule is calculated on the current principal outstanding. The principal and interest due amount for the subsequent schedules are recalculated with the new principal outstanding amount.
Note
Loan repayment happens in multiples of installment amount and there are no partial prepayments for installment loans. During multiple overdue schedules it is paid on the same value date. You need to make separate payments if the value dates are different.
Example
A contract is booked with the following details
Specifications |
Details |
Loan Amount |
1,000,000.00 |
Value Date |
1-Aug-08 |
Installment Schedule Start Date |
6-Oct-08 |
Maturity date |
31-Dec-09 |
Installment Amount |
50,000.00 |
Interest Rate |
4% |
The schedule details is below.
Schedule Date |
Outstanding Principal |
Interest Rate |
Principal Due |
Interest Due |
6-Oct-08 |
1,000,000.00 |
4% |
42,767.12 |
7,232.88 |
6-Nov-08 |
1,000,000.00 |
4% |
46,602.74 |
3,397.26 |
8-Dec-08 |
1,000,000.00 |
4% |
46,493.15 |
3,506.85 |
6-Jan-09 |
1,000,000.00 |
4% |
46,821.92 |
3,178.08 |
6-Feb-09 |
1,000,000.00 |
4% |
46,602.74 |
3,397.26 |
6-Mar-09 |
1,000,000.00 |
4% |
46,931.51 |
3,068.49 |
6-Apr-09 |
1,000,000.00 |
4% |
46,602.74 |
3,397.26 |
6-May-09 |
1,000,000.00 |
4% |
46,712.33 |
3,287.67 |
6-Jun-09 |
1,000,000.00 |
4% |
46,602.74 |
3,397.26 |
6-Jul-09 |
1,000,000.00 |
4% |
46,712.33 |
3,287.67 |
6-Aug-09 |
1,000,000.00 |
4% |
46,602.74 |
3,397.26 |
6-Sep-09 |
1,000,000.00 |
4% |
46,602.74 |
3,397.26 |
6-Oct-09 |
1,000,000.00 |
4% |
46,712.33 |
3,287.67 |
6-Nov-09 |
1,000,000.00 |
4% |
46,602.74 |
3,397.26 |
6-Dec-09 |
1,000,000.00 |
4% |
46,712.33 |
3,287.67 |
31-Dec-09 |
1,000,000.00 |
4% |
303,917.81 |
2,739.73 |
Now assuming the schedule due on 6th October is paid on the 20th October then the schedules are recalculated as below.
Interest for 14 overdue days is, 1,000,000 * 4% * (14/365) = 1,534.24
Remaining interest for schedule is 957,232.88 * 4% * (17/365) = 1,783.34
So total interest for Schedule due on 6th November is, 1534.24 + 1783.34 = 3317.58.
Principal Outstanding on 6th November is, 50,000 – 3317.58 = 46,682.42
Schedule Date |
Outstanding Principal |
Interest Rate |
Principal Due |
Interest Due |
20-Oct-08 |
1,000,000.00 |
4% |
42,767.12 |
7,232.88 |
6-Nov-08 |
957,232.88 |
4% |
46,682.42 |
3,317.58 |
8-Dec-08 |
957,232.88 |
4% |
46,643.13 |
3,356.87 |
6-Jan-09 |
957,232.88 |
4% |
46,957.84 |
3,042.16 |
6-Feb-09 |
957,232.88 |
4% |
46,748.03 |
3,251.97 |
6-Mar-09 |
957,232.88 |
4% |
47,062.74 |
2,937.26 |
6-Apr-09 |
957,232.88 |
4% |
46,748.03 |
3,251.97 |
6-May-09 |
957,232.88 |
4% |
46,852.93 |
3,147.07 |
6-Jun-09 |
957,232.88 |
4% |
46,748.03 |
3,251.97 |
6-Jul-09 |
957,232.88 |
4% |
46,852.93 |
3,147.07 |
6-Aug-09 |
957,232.88 |
4% |
46,748.03 |
3,251.97 |
6-Sep-09 |
957,232.88 |
4% |
46,748.03 |
3,251.97 |
6-Oct-09 |
957,232.88 |
4% |
46,852.93 |
3,147.07 |
6-Nov-09 |
957,232.88 |
4% |
46,748.03 |
3,251.97 |
6-Dec-09 |
957,232.88 |
4% |
46,852.93 |
3,147.07 |
31-Dec-09 |
957,232.88 |
4% |
301,986.84 |
2622.55 |
8.6.3 Specifying the Amortization Type
If you have specified that the schedule type is to be “amortized,” you should specify the method in which the amortization is to be applied.
- Reducing balance
- Rule 78
8.6.4 Liquidating Back Valued Schedules
If you specified, while defining the product, that for a back-dated loan with repayment schedules prior to today’s date, the schedules have to be liquidated when the loan is initiated, the same applies to the loan you are entering.
However, through this screen, you can choose not to liquidate back valued schedules.
Example
Loans can be initiated:
- As of today
- A date in the future
- As of a date in the past
Suppose today is 15 October 1997 and you book a loan of 15,000 USD with the value date (date on which the loan comes into effect) as 15 September 1997. Accounting entries are passed with the Initiation Date on 15 September.
But if there had been an interest payment schedule for 30 September 1997 for 500 USD, then if you specify that back valued schedules should be liquidated, the liquidation entries for this schedule is also passed.
If you specify that back dated schedules are not to be liquidated, only accrual entries are passed till today.
Note
The entries associated with each event (initiation and liquidation in this case) is passed only if they have been defined for the product. Further, the accounts used are the ones defined for each entry.
8.6.5 When the Repayment Schedule Date is a Holiday
You have specified that repayment schedules should be generated automatically once you indicate the frequency, number and the date of first repayment. When the system computes the repayment dates based on these values, there is a chance that one or more schedules fall due on a holiday. In such a case, you have two choices:
- Ignore the holiday and retain the schedule due date
- Move it either backward or forward, by specifying
If you specify that holidays are to be ignored, the schedule dates are fixed without taking the holidays into account. In such a case, if a schedule date falls on a holiday, the processing of such a schedule is determined by your holiday handling specifications for automatic processes, in the Branch Parameters screen:
- If you have specified that processing has to be done on the previous working day for automatic events right up to the day before the next working day, the schedule falling on the holiday is liquidated during end of day processing on the previous working day.
- If you have specified that processing has to be done only up to the System Date, then only the events scheduled for the System Date will be processed. The events of the holiday are processed on the next working day during beginning of day processing.
Example
A monthly repayment schedule date for Taggart Iron and Steel’s loan for USD 100,000 (for one year at 16% interest) falls on 31 October, a holiday.
If you have said Ignore Holidays by clicking this field, the schedule date remains on 31 October when the schedules are fixed. The processing of this is determined by your holiday handling specifications in the Branch Parameters screen:
- If you specified that processing has to be done today (on System date) for automatic events up to the day before the next working day, then, on 30 October itself, the schedule of 31 October is liquidated during the EOD run of the Automatic Contract Update function.
- If you have specified that processing has to be done only up to the System Date, then, on 30 October, only the events scheduled for that date are processed. This means that since the schedule date is 31 October, which is a holiday, the schedule is processed on 1 November (the next working day), during the BOD run of the Automatic Contract Update function.
8.6.6 Moving Schedules Forward or Backward
A schedule date falls on a holiday and you have not specified that holidays are to be ignored at the time of schedule definition. In such a case, you should indicate the movement of the schedule date forward or backward to the next working day, or the previous working day, respectively. Since the schedule date itself is moved to a working day, the payment is processed on the day it falls due, as of that day.
Example
For a loan, you have defined monthly schedules falling due on the following dates:
- 31 March 1999
- 30 April 1999
- 31 May 1999
30 April 1999 is a holiday. You have the following options in fixing the date for that schedule:
- You can ignore the holiday. The schedule date is still be on 30 April 1999, despite the holiday. The liquidation of the schedule is done as per your specifications in the Branch Parameters screen.
- You can move the schedule date forward to the next working day, which happens to be 1 May 1999. The schedule is liquidated during Beginning of day (BOD) processes on this date, as it is a working day. The across-the-month movement discussed subsequently comes into the picture here.
- You can move the schedule date backward. The schedule date is 29 April 1999, the last working day before the holiday. The schedule is liquidated during BOD processes on this date, as it is a working day.
8.6.7 Moving Schedule Dates across the Month
If you have chosen to move a schedule falling due on a holiday to the next working day, or to the previous working day, and it crosses over into another month, the schedule date is moved only if you so indicate. If not, the schedule date is kept in the same month.
Example
Scenario 1:
You have defined a repayment schedule that falls due on 30 April 1998. This happens to be a holiday. You indicated that in case of a holiday, the schedule date is to be moved forward to the next working day.
If you also indicated that the schedule can be moved across the month, then the schedule is automatically moved to 1 May 1998 (the next working day).
If you disallowed movement across the month, but indicated forward movement for the schedule, the schedule date falls on the holiday without any movement.
Scenario 2:
You defined a repayment schedule that falls due on 1 May 1998. This happens to be a holiday. You indicated that in case of a holiday, the schedule date is to be moved backward to the previous working day.
If you also indicated that the schedule can be moved across the month, then the schedule is automatically moved to 30 April 1998, the previous working day.
If you disallowed movement across the month, but indicated backward movement for this schedule, the schedule date falls due on the holiday without any movement. The idea being that the schedule is not moved across months.
8.6.8 Cascading Schedules
The question of cascading schedules arises only if:
- You have specified that a schedule falling due on a holiday has to be moved forward or backward
- The schedule has been defined with a definite frequency
If you have indicated that schedules should be cascaded, the schedule date for the next payable schedule will depend on how the schedule date was moved for a holiday. The following example illustrates how this concept of cascading schedules functions.
Example
A monthly schedule has been defined with backward movement and a schedule date falling due on 30 April 1998 was moved to 29 April 1998, 30 April 1998 being a holiday.
The schedule date for May depends on whether you have chosen to cascade schedules. If you have, the schedule date for May is set as 29 May 1998, as the frequency has been specified as monthly. For subsequent schedules also, 29 May 1998 is considered the last schedule date. That is, the next schedule is 29 June, the following one 29 July, and so on, until another holiday is encountered.
If you have not specified that schedules have to be cascaded, the date originally specified, is the date for drawing up the schedules. Even if the April month end schedule has been moved to 29 April 1998, the next schedule remains 30 May 1998. The following one is 30 June, and so on.
Even if another holiday is encountered, and the schedule date for that particular schedule is moved suitably, 30 remains the date for the following schedule, whenever it falls.
When you cascade schedules, the last schedule (at maturity), however, is liquidated on the original maturity date and is not changed like the interim schedules. Hence, for this particular schedule, the interest calculation days may vary from those of previous schedules, as the case may be.
8.6.9 Specifying the Holiday Currency
You can specify the country of the loan currency for which the holiday table should be checked before drawing the payment schedules related to the loan. In case a schedule falls on a holiday and you have specified that the schedule be moved forward or backward, the movement happens according to the holidays in this country.
By default, the currency to be checked is the loan currency. If a currency other than this is specified, the holiday table is checked for both the currencies.
8.6.10 Specifying the Mode of Liquidation
When creating a product, you specify the mode of liquidation − whether automatic or manual. Your specifications applies to all loans involving the product. Through the Contract Preferences screen, you can change the mode of liquidation for the loan you are processing, from automatic to manual, or vice versa.
8.6.11 Ascertaining the Availability of Funds
When the customer’s repayment account is debited automatically by the system, you can specify that the availability of funds for liquidation of the various components of a loan has to be ascertained before the liquidation is done.
This feature is of significance when:
- The components have the same schedule dates, and are serviced by a single repayment account
- The funds in the repayment account are insufficient
If the availability of funds has to be ascertained:
- All the components which are due is liquidated only if funds are available in the repayment account
- If there are insufficient funds, a partial liquidation of components
are done to the extent of funds in the account. If this is the case:
- The payment schedules for those components, which have not been liquidated, or which have been partly liquidated, is left outstanding. Aging analysis on such loans are carried out as specified for the product and an appropriate penalty applied.
- The component(s) for which funds are available is liquidated in the order you specified in the Liquidation Order screen. Here in, you may have allotted priority to the recovery of certain components. For example, you may have specified that you would like to recover the interest, commission and fees first, and then, the principal. If the liquidation order is not specified for the components, then, it is liquidated in the order Penalty Interest (if this has been applied), then Interest and finally Principal.
If availability of funds need not be ascertained and the liquidation results in the account going into a debit balance:
- All the components are liquidated only if you have allowed overdraft for the repayment account. The schedules for the components are liquidated to the extent of the debit balance that you have allowed. If the overdraft exceeds the debit balance allowed, the liquidation is done with an overdraft override that is automatically recorded.
On a repayment account that has a debit balance, debit interest as specified for the type of account (current or savings), will be applied.
- No liquidation is done (even for a partial amount) if the account has not been defined for overdraft.
Loans with payments, which have not been processed, due to non-availability of funds, appears in the Exception Report generated by the Automatic Contract Update function for the day.
Note
For the final principal payment on maturity, the availability of funds in the payment account always be verified.
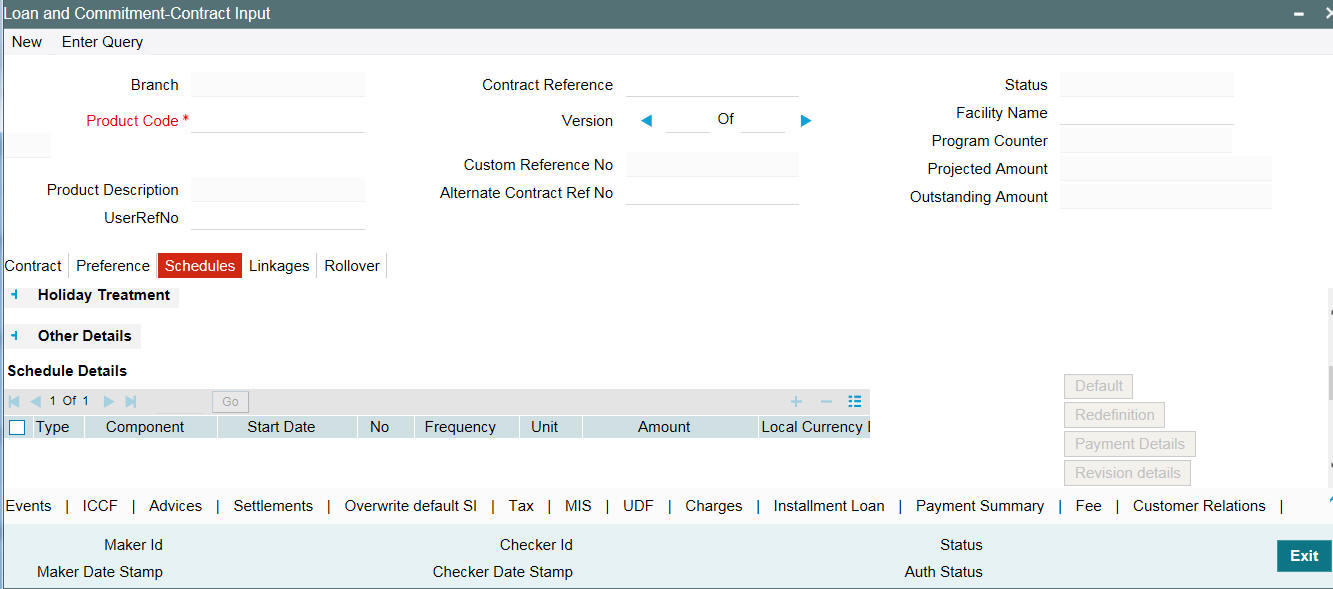
8.6.12 Invoking the Contract Schedules Screen
When you are in the ’Loan and Commitment- Contract Input’ screen, you will see sections in the screen saying, Schedules, Linkages, and Rollover. When you click on any of these, the respective screen is displayed. To go to the ‘Contract Schedules’ screen, click Schedules.
8.7 Revision and Repayment Schedules
In the Contract Schedules screen, you can define two types of schedules:
- Those for the revision of interest rates for a loan with periodic interest rates
- Those for the revision of interest rates for a loan with fixed interest rates, and
- Those for repayment of the various components
Note
To indicate a Revision schedule you can select R in the option list positioned next to the Rev field.
8.7.1 Interest Rate Revision Schedule
A Floating Rate Table - that contains the market rates for the day − is maintained in the ICCF sub-system so that the latest rates can be applied to contracts.
The market rates vary on a daily basis and are maintained in this table. The rates can be applied either every time they change or at periodic intervals. See the section on Specifying Rate Code Usage in the chapter ‘Processing Interest, Charge or Fee’. But in the case of commercial or corporate loans, these rates can be applied on a periodic basis so that you are in tune with the market rates. At the same time you do not have to apply the market rates on a daily basis.
You can specify whether the latest market rates have to be applied every time they change, or if they have to be applied periodically, by defining an attribute called the Rate Code Usage through the Product ICCF Details screen for a floating interest type. If you specify ‘auto’ rate code usage, all the rate changes made during the liquidation or accrual period is considered. If you specify ‘periodic’ rate code usage, the rates are periodically refreshed and applied according to the frequency you specify.
For a loan that has been defined with, periodic interest, you can specify the following:
- The frequency at which the periodic rate change has to be applied
- The dates on which the periodic rate change has to be applied.
8.7.2 Specifying the Rate Revision Frequency
In the LD Contract Schedules screen, select the component for which the Rate Revision frequency has to be defined (say INTEREST1). Select the ‘Rev box’ (Revision Box) to indicate that it is a rate revision schedule. Next, enter your specifications in the frequency (it could be daily, weekly, and so on.), the number, and the unit fields. In addition, give the Start Date on which the first revision has to take place.
For example, if you specify the frequency as weekly, the revision takes place every week beginning on the Start Date that you have specified.
8.7.3 Specifying the Rate Revision Dates
In the LD Contract Schedules screen, select the component for which the Rate Revision frequency has to be defined (say INTEREST1). Select the ‘Rev box’ (Revision box) to indicate that it is a rate revision schedule.
Then, instead of specifying the other schedule details like the frequency, the number and unit, indicate the date in the Start Date field. The rate revision is done on that date.
Example
A loan of USD 200,000 to Cavillieri and Barrett Finance Corporation has been initiated on 10 December 1997 and is to be repaid at Maturity on 16 December 1997. It has been defined with rate revisions and they are to be performed on the following dates:
- 12 December 1997
- 14 December 1997
- 16 December 1997
Select the component, INT1, indicate rate revision by selecting the Rev box and give the date in the Start Date field as 12 December. Then select the same component, INT1 and specify the date as 14 December. Repeat the process for the same component for 16 December.
The rates applicable on the specified dates are applied on the loan at the time of calculating interest.
You can specify the frequency through this screen. To do this, you have to specify a rate revision schedule for the component (by giving the frequency and the Start Date for the first rate revision), as well as a repayment schedule, if it is to have one.
8.7.4 Repayment Schedule
For a repayment schedule, the amount of repayment needs to be specified only for the Principal. The interest, commission, and fee components are calculated by the system automatically, depending on the repayment date and amount of the principal. However, if the interest type is Special, you should specify the interest amount. Similarly, if the loan has been defined with any other fixed amount component, you have to enter an amount for this.
The repayment schedules for the components of the loan are those defined for the product it involves. You can change the schedules for a loan when processing it.
8.7.5 Interest Repayment Schedules as Different from Rate Revision Schedules
For a loan on which floating interest has to be applied at periodic intervals, you may have to define:
- An interest rate revision schedule for the interest component
- A repayment schedule
The following example shows how this is achieved:
Example
You have a loan where for the component interest, you have to define an interest rate revision schedule for revisions every week as well as a monthly repayment schedule. The Start Date of the contract is 1 October 1997 and the End Date is 30 November 1997.
The contract has been defined with a periodic rate and the rates in the floating rate table change in the following manner:
Date |
Rate |
1 October 1997 |
12 |
12 October 1997 |
11.5 |
25 October 1997 |
11 |
15 November 1997 |
12 |
30 November 1997 |
12.5 |
Defining a frequency based rate revision schedule
To define a schedule with periodic rate code usage, through the Contract Schedules screen, mark the component as a revision schedule (by checking the Rev box) and specify the component, say INTEREST, from the drop-down list.
Give the frequency at which the interest rate has to be refreshed, say weekly. Give the Start Date, as 15 October. The first revision happens on this day, and every week from then on. Save the inputs.
Defining a date based rate revision schedule
If you were to define specific dates − 7 October, 15 October and 23 October — for the rate revisions to happen, then, through the Contract Schedules screen, mark the component as a revision schedule (by checking the Rev box) and specify the component, say INTEREST, from the drop-down list.
Specify the date on which the rate revision is to be done, in the Start Date field, as 7 October. Similarly, define the other dates, but by picking up the same component INTEREST from the drop-down list each time.
Defining a repayment schedule for the same component
Now to define a repayment schedule for the same component, INTEREST, do not check the Rev box. Choose the same component from the drop-down list. Now draw up a repayment schedule for this component. Give a value in the Start Date field, say 31 October 1997. The first interest liquidation is done on this date.
In the frequency field enter ‘monthly’ and in the unit field specify ‘1’. This means the interest repayments are done once a month beginning 31 October.
That is, for a contract defined with frequency-based periodic rates, the rates prevailing on the refresh dates are used for accruals and liquidation.
In the contract we are discussing, with the refresh frequency defined as weekly and the Start Date as 15 October, the rate applied for the interest liquidation on 31 October is as follows:
From |
To |
Rate |
1 October |
15 October |
11.5 |
16 October |
31 October |
11 |
For a contract defined with date-based Periodic rates, the rates prevailing on the specific refresh dates are used for accruals and liquidation. Shown below are the rates applicable on the specified revision dates:
Revision Date |
Rate Applicable |
7 October |
12 |
15 October |
11.5 |
23 October |
11.5 |
In the contract we are discussing, the rates applied for the interest liquidation on 31 October is as follows:
From |
To |
Rate |
1 October |
7 October |
12 |
8 October |
14 October |
12 |
15 October |
31 October |
11.5 |
8.7.6 Specifying Schedules for a Loan with a Fixed Interest Rate
You can define a revision schedule for a component of a deposit for which you have defined a fixed rate of interest. The revision schedule can be brought into effect when you change the fixed rate through an amendment.
You can specify the revision schedule for the interest component in the Contract Schedules screen. You must select ‘R’ in the “Rev” field to indicate that the schedule being defined is a revision schedule for the component.
The schedules defined for each component at the time of product definition apply to the loan. However, you can change the frequency, number, unit and the start date to suit the specific requirements of the loan that you are processing. You will have to specify the amount only if the schedule being defined involves the principal component or a special interest.
The amount for interest, commission and fee components (if they are rates) are calculated by the system automatically, depending on the start date, number of schedules, frequency and repayment amount of the principal. However, an amount can be entered here for interest only if the Interest Calculation Method has been defined as Special. The fee amount can be input only if it is a flat fee.
For a loan, you can define repayment schedules that:
- Fall due at regular intervals
- At irregular intervals
Now, if you want to define schedules that fall due at regular intervals, all you have to do is, for a component specify the start date, the frequency, the unit and the principal amount. Since you would have already registered the Maturity Date of the loan (for a fixed maturity type), in the Contract Details screen, the schedules would automatically be spread out into equal intervals.
Based on this information, the system calculates the dates on which the repayments or interest revisions fall due.
Example
Consider the following details for a loan:
A loan of USD 100,000 comes into effect on 1 January 1998 and matures on 31 October 1998. Suppose you want to have 10 monthly schedules for principal repayment, you have to specify the Start Date as 31 January 1998, the frequency as monthly, the unit as 1, and the principal amount as 10,000. The schedules would be spread out over 10 months and would fall due every month-end.
Now, you have a 15-month loan beginning 1 January 1998 and ending 31 March 1999. Suppose, you want to define four quarterly schedules and three monthly schedules for principal repayment of this loan. These are irregular schedules and the ’Number’ field assumes importance here.
Here, for the component principal, you have to give the Start Date as 31 March 1998, the frequency as quarterly and the unit as 1. The number of such schedules will be four. Hence your quarterly schedule dates will be calculated as:
- 31 March 1998 (Start Date)
- 30 June 1998
- 30 September 1998
- 31 December 1998
You have to specify for the same component − the principal − the Start date as 31 January 1999, the frequency as monthly, the unit as 1, and the number as ‘3’, if you want to fix three monthly repayment schedules after 31 December 1998. They will be calculated as falling due on:
- 31 January 1999
- 28 February 1999
- 31 March 1999
8.7.7 Redefining Schedules
Repayments that are scheduled for a date later than today can be redefined. This redefinition can be done even after the loan has come into effect and a few schedules have been liquidated.
However, schedules with a date earlier than today’s date that are yet to be liquidated cannot be rescheduled. You have to liquidate them through the Manual Liquidation function. Aging analysis and penalty processing are done on such overdue schedules.
The redefinition of schedules are done automatically on the following occasions:
- For loans with fixed interest, commission or fee rates, the schedule amounts for these components are automatically changed when there is a change in the rate.
- For a loan with amortized schedules, the schedule amounts are recalculated when there is a change in the main interest rate
- When the Maturity Date is changed - a change in the Maturity Date
is handled in the following manner:
- Extension of the Maturity Date: The principal repayment schedule that was defined for the earlier Maturity Date is moved to the new Maturity Date. Other components (interest, commission, or fee) that are dependent on the tenor of the loan are recalculated and spread equally over the rest of the repayment schedules for these components.
- Advancement of the Maturity Date: All the schedules that are beyond the new Maturity Date are advanced to the new Maturity Date. The amount of other components (interest, commission, or fee) that are dependent on the tenor of the loan is recalculated and spread equally over the rest of the repayment schedules for these components.
- When the Principal is increased: the increased amount is added on to the last principal schedule. Other components (interest, commission or fee) that are dependent on the principal of the loan are recalculated and spread equally over the rest of the repayment schedules.
- When there is a prepayment of interest and you have defined recalculation of schedules on repayment
There may be some situations wherein you would want to redefine the
schedules, i.e., you may want to change the payment dates or amounts.
In such cases, you can change the schedules by invoking the Contract
Input screen and clicking the ‘Schedules’
tab. If you click the redefinition button on the schedules screen, all
the schedules with today’s date or a date in the future is erased
and you are allowed to enter a new set of schedules.
To redefine a schedule for only one component, highlight the schedule
make the changes and click the ‘Add
Row’ button. If the schedules have already been authorized then
you have to make the changes through the Modify function.
After making the changes, you can save the redefined schedules by
clicking ‘Add Row’. To delete
a schedule (before authorization) click the
‘Delete Row’ button.
8.7.8 Authorizing a Redefined Schedule
The redefinition of schedules for a loan amounts to a modification of the contract. The contract should be authorized before you can begin the end of day processing.
For details on authorization, refer the chapter on operations on a loan.
8.7.9 Viewing Schedule Details
When you click ‘Payement Details’
in the ’Loan and Commitment - Contract Input’ screen, you
can see the Payment Schedule Details screen. Here you can view the details
of the schedules for a particular contract. To go back to the schedule
definition screen, click the ‘Exit’ button.
In this screen you can view the following details for the component:
- Contract Reference Number
- User Reference Number
- Product Code
- Counterparty
Total schedule amount across component for a schedule;
- Due Date
- Currency
- Total Amount Due
- Total Amount Settled
- Total Adjusted Amount
- Total Pay Received Amount
- Total Expected Balance
Component wise break up for each schedule date
- Component
- Amount Due
- Amount Settled
- Adjusted Amount
- Pay Received Amount
Payment details for each component for a given schedule date
- Process Date
- Value Date
- Amount Settled
- Lcy Equivalent Settled
Note
- You can view the remaining Principal balance after deducting the Principal amount due for a particular schedule.
- You can view the Interest amount in FCY and also its LCY equivalent in case of FCY Loans.
8.7.10 Viewing Revision Schedule Details
When you click ‘Revision Details’
in the ’Loan and Commitment - Contract Input’ screen, you
can see the ‘Revision Schedules ‘screen. Here you can view
the details of the revision schedules for a particular contract.

In this screen, you can see the following details for the component:
- The revision date
- Whether it has been applied
- The reset tenor
8.8 Making Manual Payments
The various components in a contract can be liquidated either automatically or manually. The mode of liquidation of each component is specified at the time of defining a product and then again, at the time of loan processing. An automatic liquidation is done, on schedule payment days, by the Automatic Contract Update program.
Even if you have defined a contract with automatic liquidation, you can liquidate it manually, one day before the schedule date.
8.8.1 Invoking the Contract Schedule Payments Screen
You can invoke the ‘Manual Payment’ screen by typing ‘OLDPMNT’ in the field at the top right corner of the Application tool bar and clicking the adjoining arrow button.

The following operations can be performed on a payment through the Contract Schedule Payments screen:
- Input of Manual payments
- Deletion manual payments
- Reversal manual payments
The manual payments made through this function can be:
- Scheduled payments, which are due
- Payments, which are made prior to a scheduled payment date. (These are called Prepayments and they can be made even if the loan has been defined for automatic liquidation of components).
- Back value dated payments, the value date for such payments cannot be earlier than the most recent schedule that was paid. If there is more than one schedule outstanding and you want to assign the value date of each schedule payment, you should enter the liquidation of each schedule separately.
- You can either link a single facility or multiple collateral/pool
to an OL contract. For the Collateral/Pool/Facility linkage, you should
specify the linked amount and linked %. Based on this contract amount
utilization takes place.
When a manual payment is done, and on Save the system decreases the utilized amount and increase the available amount as per the 'Linked Percent' entered in the contract. As per the linked percent the utilized amount decreases and the available amount will increase. For more information, refer to Linking OL contract to a facility or multiple collateral/pool section.
The value date you have entered is used for all the entries generated by the system.
8.8.2 Input of Manual Payments
Once you enter the loan reference number in the Contract Schedule Payments you can see the following details displayed on the screen:
- The counterparty (customer) code
- The currency of the loan
- The status of the loan
- The total outstanding amount as of the value date (the date on which the payment is being made)
- The version of the loan (that is the number of times that the loan has been modified)
The Value Date here is the date on which the liquidation entries are passed. When you enter a Value Date in this screen, if there are any payments due on that date, they are displayed and you can liquidate them.
If there are no schedules due on that date, the schedule becomes a prepayment. But this is only if the Value Date is not a back valued date. You can have a back valued date but it cannot be earlier than the last schedule that was paid. You can also liquidate back valued schedules by entering a Limit amount.
If the Value Date is today or a date in the future, the prepayment is processed.
The Payment Limit Date or Amount of the payment should be given at the time of payment. If you have given a payment limit date, the system shows all the components, which are due till the limit date. If you have given the amount limit in the Amount field, it shows all the schedules for the limit amount.
Example
Say for a particular contract, there are two interest schedules pending on Ms Yvonne Cousteau loan — one on 1 October 1997 and the other on 15 October 1997. The third schedule is due on 30 October 1997.
If you give the Limit date as 25 October, (today’s date) the system shows the amount due for the interest component on the schedule dates of 1 October, and 15 October.
If you give the limit date as 1 November 1997, the system shows the schedules falling on 1 October, 15 October, and 30 October, and you can liquidate them accordingly.
Since today’s date is 25 October, if you liquidate the schedule due on 30 October, it amounts to a pre-payment. You can charge a prepayment penalty rate or an amount, which you enter in this screen.
Note
While the Prepayment Limit Date is used to pick up the schedules pending as of that date, the Value Date is taken into account by the system for passing accounting entries.
Alternatively, the system picks up a schedule according to the amount being paid. You can see the next schedule, which is due, within the limit of this amount. If the amount being paid is more than the total amount payable for the next schedule, the next schedule is considered. The total amount due for these schedules is displayed.
Example
System date: 1 June:
Payment schedules for a contract are as follows:
Schedule Date |
30 June |
31 July |
30 August |
Principal |
1000 |
1000 |
1000 |
Interest |
100 |
100 |
100 |
Commission |
50 |
50 |
50 |
Fee |
20 |
20 |
20 |
For the above schedule, if a prepayment is made as of an amount, the system validates it in the following manner:
Suppose the amount paid is USD 1000. The next available schedule is as of 30 June and the total amount due is USD 1170. This schedule is taken for processing and you can make the payments.
If the amount paid is USD 1170, which is equal to the schedule amount of 30 June, again only the schedule for 30 June is taken for processing.
If the amount paid is USD 1,270, which is more than the amount due for the schedule of 30 June, the schedule of 31 July will be picked up by the system for processing. After completely liquidating the schedule of 30 June, you can liquidate the interest schedule as of 31 July, which is the next schedule.
If the amount paid is USD 1300, the schedule for 31 July is taken for processing. The complete schedule of 30 June can be liquidated along with the interest component of 31 July. The remaining USD 30 can be used to partially liquidate the commission component for 31 July.
The Disc. Rate and the Liquidated Nominal fields are used for processing T-Bills. Liquidated Nominal is the amount that you would receive when you redeem a T-Bill on the maturity date. This is also known as the face value of the T-Bill. The discount rate is used to calculate the Net Present Value (NPV) of a T-Bill when it is liquidated before the liquidation date i.e. the actual value obtained on the T-Bill when you redeem it prior to the maturity date.
The following formula may be used to arrive at the NPV:
Where,
- P is the Face Value of the T-Bill
- R is the discount rate applicable
- N is the period for which NPV is calculated
You have to enter in the Amount Paid field the actual amount being
paid. This amount can either be allocated to the various components manually,
by entering the break up of the amount against the various components,
or automatically by clicking the Allocate button. .’L’
Alternatively, you can also enter the amounts against the individual components. Click the ‘S’ button to view the Sum amount to be paid.. Click ‘P’ button to view the component wise amount to be paid on the closure date. The Principle, Main interest Component, and Tax as on the closure date are displayed. You cannot edit the displayed amounts.
The Computed amount to be paid is defaulted against the Principal and Main Interest component wise. It is disabled when the value date of the payment is after the maturity date of the contract. The system considers all the rollover preferences set in the contract level and display the amounts.
The system performs a Rollover on the maturity date of the contract. The system executes the future dated payment in the liquidation batch.Principal, Interest, and Tax amounts are liquidated.
Note
You cannot perform any other financial activity on the contract once the future dated payment is captured.
The automatic allocation is done based on the Liquidation order you have defined for the product. If you have not specified the order of liquidation for the principal and the interest type of components, the amount is allocated for liquidation in the following order:
- Penalty interest (if one has been applied)
- Interest
- Principal
Note
If a payment that covers both past and future schedules is made, the system forces you to pay out the past schedules before the future schedules are paid.
If an ICCF component is based on the outstanding principal, you cannot make a payment where the amount is more than what is due for the component as of the system date.
You can waive a portion of interest amount overdue by specifying the interest waiver amount in the field, ‘Interest Waived’ and check the field, ‘Waive Interest’ to process the interest waive. This interest waive is applicable for only main interest.
Example
Suppose a Loan Contract has the interest amount due of USD 29589.04 due as on 28-OCT-2008 which is also the scheduled due date. The amount received from the customer is USD 29000. You can waive the difference of USD 589.04, and the schedule does not go into overdue.
8.8.3 Specifying Prepayment Schedule Processing
Indicate the type of payment schedule processing that you want to maintain. You can select one of the following options:
- FIFO
- LIFO
Note
If FIFO option is selected, then the schedules are rebuilt based on the FIFO logic.
8.8.4 Handling Prepayments
When a prepayment is made for the principal, it constitutes a schedule violation of the contract. In such cases, a penalty in the form of a penalty amount for loans is charged.
The penalty amount that is entered by you are added to the liquidation amount in case of loans. The penalty amount will also be reversed in case of a reversal of prepayment with penalty.
You are allowed to enter a prepayment penalty, only if the principal is prepaid. The other components are automatically liquidated. If prepayment of a component is done, then the schedules of the components for which this component is the basis are recomputed automatically. This is illustrated in the table below.
| Component | Basis Amount | Category | |||
|---|---|---|---|---|---|
| Interest | Principal | Expected |
If principal, which is the basis for interest (which is calculated on the Expected amount of the basis component) is prepaid, then the interest (which is a component based on principal) for the future schedules are recomputed automatically.
The prepayment penalty amount does not affect any schedules of the contract
Adjustment Amount
You can collect an additional interest amount over and above the regular interest that you have charged the customer. You can enter the same in this field.
Additional Adjustment Amount
You can reimburse an additional interest amount, in case you have collected excess interest from the customer. You can enter the amount to be reimbursed in this field.
These adjustment amounts does not affect any schedules of the contract.
Prepaid Principal Interest Rate
This is the interest rate that is applied on the prepaid principal. If the final rate computed (after penalty deductions) during payment is less than 0, the rate for the payment is set to 0. For account linked deposits, the rate is recomputed based on the contract currency, tenor and amount. For interest reapplication, full rate re-computation (of Rate + Tenor Spread + Amount Spread) is done for the prepaid amount whereas for the outstanding balance, only the amount spread would be reapplied.
Liqd. of Int. on Prepaid Principal
This check box is selected if you have selected the same in the Loans and Deposits Product – Preferences screen. You can change the preference you have specified in the Contract Payment screen. If you have selected this box, you are not allowed to enter the ‘Amount’ for interest liquidation. The amount is computed and liquidated by the system. In addition, in case of prepayment, the rate is recomputed based on the contract currency, tenor, and amount.
Reapply Interest on Prepaid Amount
This check box is selected if you have selected the same in the Loans and Deposits Product – Preferences screen. You can change the preference you have specified in the Contract Payment screen. If you have selected this option, the interest on the prepaid amount is recalculated during prepayment, based on the rate applicable for the current tenor of the deposit.
Reapply Interest on Outstanding Amount
This check box is selected if you have selected the same in the Loans and Deposits Product – Preferences screen. You can change the preference you have specified in the Contract Payment screen. If you have selected this box, the interest on the outstanding amount is recalculated during prepayment. The repayment is based on the current amount spread applicable for the outstanding amount of the deposit.
Refund Tax to Customer
Select this check box if you want to refund the excess tax amount collected from the customer. The system generates the amount tags for reimbursing the excess tax deducted. If you leave this box unchecked, the amount is not refunded to the customer.
In case of an agency contract, if you make a full prepayment on the value date of the contract, the system triggers a contract reversal operation. This reversal is not sent to the Originations module through STP. The corresponding contract have to be manually reversed in the Originations module. This reversal is then be sent as a feed to the Intellect system. In case the contract is not linked to an agency, the system sends a cancel message to the Intellect system.
8.8.4.1 Handling Prepayment on Rolled-over Contracts
After rollover, you can make a prepayment for the child contract (which will be a new version on the parent contract).
For contracts where forward-dated rollover instructions are captured and prepayment is done on the value date of the contract (start of new interest period), the system sends the cancel message for new interest period to Intellect, though the contract data is not updated immediately to new interest period.
For contracts where forward-dated rollover instructions are captured and prepayment is done on the value date of the contract (start of current interest period), the system sends the cancel message for new interest period to Intellect, though the contract data is not updated for the new interest period. Additionally, it sends a cancel message for the current interest period.
8.8.5 Navigating to Other Screens
In the Contract Schedule payment screen, you have a set of icons, using which, you can navigate to the following screens:
Settlements |
Click to go to the Settlement Message Details screen |
Tax |
Click to see the Tax details screen |
Events |
Click to view the Events screen |
MIS |
Click to view the Transaction MIS Maintenance screen |
Charges |
Click to view the Contract Charge Details screen |
Breakup |
Click to view the Schedule Breakup screen |
Advices |
Click to see the Advices screen. You can suppress advices using this screen |
8.8.6 Paying Tax
When there are taxes charged on the interest, principal, and so on, the payment of the component always include the corresponding tax amount. If the payment does not include the full amount due, the proportional tax amount must be liquidated. You should input the total amount to be applied to the component. The system then calculates the corresponding tax amount (based on the tax rate) and distributes the amount paid between the component and the tax.
Example
If a customer owes USD 1000 in interest (tax inclusive), the tax rate is 10%, and he pays you USD 1000, the payment is automatically distributed into USD 909.09 (interest) and USD 90.91 (the tax component).
He will still owe you USD 90.91 in interest and USD 9.09 in tax
Total tax is always calculated on the full schedule. Therefore, if there is a rounding difference, it is adjusted in the last liquidation.
Example
In the above instance, the tax component has come to USD 90.91 for that schedule. Suppose the total tax component is USD 273. If this is paid in three schedules the total comes to USD 272.73 (90.91 + 90.91 + 90.91 = 272.73). During the last liquidation, the system rounds off the total of such schedules for tax to the nearest decimal point, that is, USD 273.
8.8.7 Viewing the Schedule Break-up Details
In the Schedule Payments screen, you can see a row of icons. Click ‘Breakup’ to view the Schedule Breakup screen.
8.8.7.1 Schedule Payment Component
In this screen, you can see the schedules being liquidated on account of this particular payment for which you are doing manual liquidation. The component getting paid is displayed.
8.8.7.2 Schedule Payment Due Date
The due date of the component being liquidated is displayed.
Example
Consider Ms Yvonne Cousteau’s loan. For the component ‘Interest’ a payment of USD 100 was due on 1 October 1997. Another payment of USD 150 was due on 15 October 1997.
Now, Ms Cousteau pays USD 125 on 20 October 1997. Since there was no schedule due on this date, you decide to do a manual payment.
Now, since you have indicated the amount paid as USD 125 in an earlier field in this screen, an Amount Paid of USD 100 is shown for 1 October. For 15 October, an amount of USD 25 is shown as the Amount Paid.
You can also see the Amounts, which are due on a particular date.
Component |
Due Date |
Basis Amount |
Amount Paid |
Interest |
1October |
100 |
100 |
Interest |
15 October |
150 |
25 |
8.8.7.3 Schedule Payment Amount Due
The amount outstanding for the component being liquidated is displayed here.
8.8.7.4 Schedule payment amount paid
You can see here the amount paid for the component as of the value date (today’s date).
Refer example in Schedule Due Date.
8.8.8 Deleting Manual Payments
Payments made using the Manual payments function can be deleted before the payment is authorized.
All the entries passed during the payment will also be deleted. All the schedules are restored to the original status. In short, the pre-payment status of the contract are restored.
From the Actions Menu, choose Delete or click ‘Delete’ in the toolbar. You are prompted to confirm the deletion. Once you confirm it, all the entries that have been saved but not authorized, are deleted.
8.8.9 Authorizing Manual Payments
You can invoke this function from the Application Browser. You should enter the Reference number, the value date of the payment and the amount paid (of those manual payments that you want to authorize). The payment details are displayed along with the overrides and an authorization will be sought. If you choose not to authorize the manual payment, the authorization screen is dismissed.
8.8.10 Reversing Manual Payments
You can reverse authorized manual payments. The system makes the following validations before reversing a payment:
- A principal payment can be reversed only if the payment date is equal to, or later than, the last interest and commission schedule due date
- An interest payment can be reversed only in the reverse chronological order of its payment.
In the Contract view screen, to reverse a payment, you have to invoke the manual payments function and specify the Contract Reference Number. You have to enter the Amount Paid. You have to click on Reverse in the Processing sub-menu of the Actions Menu.
If the payment involves accounts in different currencies, the conversion rates to be used for reversal are picked up from the contract as specified during Contract Input.
If a new payment account was specified for a component during the input of the payment, the reversal is done to the new account. If the new account is in a currency different from that of the contract and a conversion rate was specified, the rate from the payments function is used for the reversal.
The reversal of a payment may sometimes entail a change in the status of a contract. If the contract is set for automatic status change, this change is made by the system automatically.
Automatic payments made by the Automatic Contract Update program can also be reversed through the manual payments function.
You can reverse the payments of Interest/Principal at loan level at commitment level made against any kind of schedule even after the Loan/Commitment is liquidated.
Click ’Reverse’ in the
application tool bar to reverse the payments.
Fee payments made against the commitment/loans so on, can be reversed irrespective of the contract being liquidated or for the bullet schedule.
Click ’Reverse’ in the
application tool bar to reverse the payments.
Note
- The interest and principal payments arising out of rollover / re-price are not allowed for reversal.
- LIQD or FLIQ reversed should be the latest LIQD or FLIQ event.
- The auto LIQD reversal for bearing capitalized type of loans is not allowed.
8.8.11 Marking Contracts as Liquidated
You can select active commitment and loan contracts and change the status to ’Liquidated’, if the contract satisfies all criteria for liquidation status. This can be done through the ‘Mark Liquidated’ screen.
You can invoke the ‘Mark Liquidated’ screen by typing ‘OLDMKLIQ’ in the field at the top right corner of the Application tool bar and clicking the adjoining arrow button.
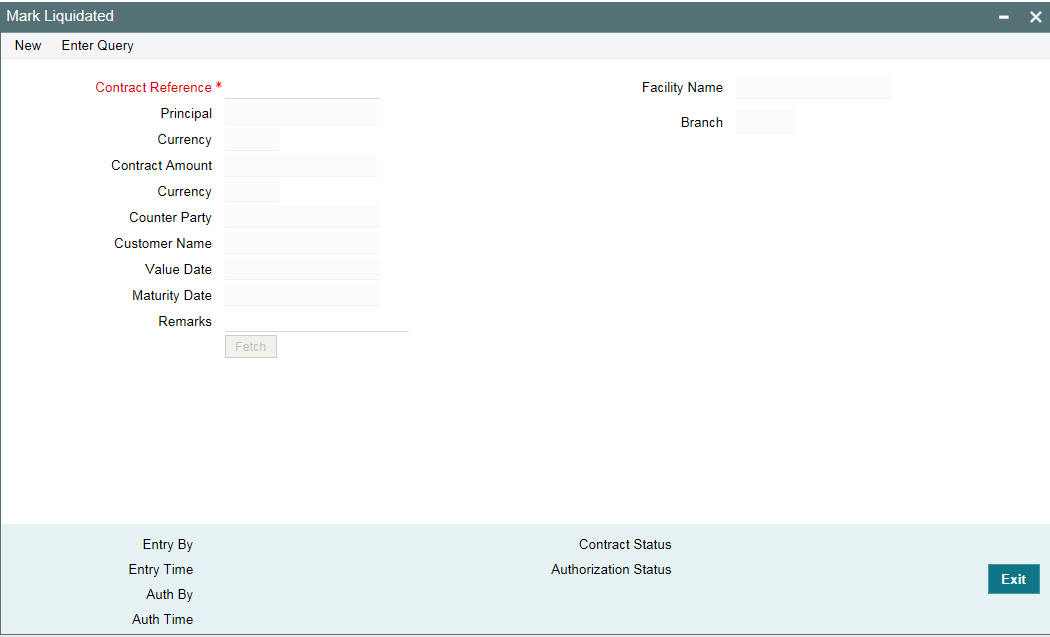
Specify the following in this screen:
Contract Ref No
Specify the contract reference number. Alternatively, you can also select it from the option list. The list displays active commitment and loan contracts.
Facility Name
System displays the facility name once the contract reference number is chosen. You cannot modify this field.
Branch
System displays the branch once the contract reference number is chosen. You cannot modify this field.
Department
System displays the department name once the contract reference number is chosen. You cannot modify this field.
Principal Outstanding
System displays the outstanding principal amount once the contract reference number is chosen. You cannot modify this field.
Contract Amount
System displays the contract amount once the contract reference number is chosen. You cannot modify this field.
Counterparty
System displays the counterparty once the contract reference number is chosen. You cannot modify this field.
Value Date
System displays the value date once the contract reference number is chosen. You cannot modify this field.
Mature Date
System displays the maturity date once the contract reference number is chosen. You cannot modify this field.
Remarks
You may add remarks if you wish to, in this field.
Note
You can only change status from ‘Active’ to ‘Liquidated’; no other status change can be done from this screen.
The following operations can be performed through this screen:
- New - This operation initiates contract status change for a contract. When you click on ‘New’ button, the ‘Contract Ref No’ is enabled and you can select the required contract to be liquidated.
- Save - During this operation, system performs the contract lock check
and if the selected contract is locked by any other user, save operation
fails.
- When there is no contract lock, system validates whether the status of the contract can be changed to ’Liquidated’. Once all validations are successful, the following override message is displayed:
Contract will be liquidated. Proceed?
- If the override is selected as ’Yes’, the contract status is changed from ‘Active’ to ‘Liquidated’ and LIQD event is registered. If the override is selected as ‘No’, save operation will fail.
- Authorization - During this operation, LIQD event is authorized.
- Delete - During this operation, saved and unauthorized status change of the contract is deleted.
Note
The branch and department code restrictions and maker and checker functionality is applicable to this screen.
8.8.11.1 Validations
The system performs the following validations during the save operation in ‘Mark Liquidated’ screen.
- Validation for loan contracts;
- Contract should be in ’Active’ and authorized status.
- There should be no outstanding amount for any Principal and Interest/Fee component.
- Validation for commitment contracts:
- Contract should be in ’Active’ and authorized status.
- There should be no outstanding amount of any Principal and Fee components.
- Commitment cannot be marked as liquidated if any underlying loans are in ‘Active’ or ‘Uninitiated’ or ‘Hold’ status.
- Maturity date of the commitment should be less than or equal to application date.
- Commitment cannot be liquidated if any Straight Through Processing (STP) failure records exist for that commitment in STP browser.
8.9 Simulating Payments
Loan payment simulation is used to view the impact on repayment schedules, tenor, and maturity date after the payment.
Payments can be saved from this payment simulation screen. Once the payment is saved, you can view the schedule details and breakup of the payment.
View Advice button displays the advice generated. In ‘Payment’ screen (OLDPMNT) if you create a new payment with same value date and limit date which is already simulated, the system populates the dues as per the simulated payment.
You can invoke the ‘Payment Simulation’ screen by typing ‘OLDPMNSI’ in the field at the top right corner of the Application tool bar and clicking the adjoining arrow button.

8.10 Processing a Loan Payment when Contra Accounting is Applicable
The interest on some loans (non performing assets) may be booked to a Contra GL. You would have indicated this by checking the box ‘Contra Accounting Applicable’, and specifying the Contra GL in the field ‘Contra GL’, in the Status Maintenance screen. This would have been indicated for a particular status of the loan. When a loan transaction is processed, the system first checks the status of the loan. For any status other than ‘NORMAL’, the system first checks if Contra Accounting is applicable. For the product, you have selected the box ‘Contra Accounting Applicable’ in the Status Maintenance screen.
If Contra Accounting is applicable, the system first process the principal amount payment and then the interest amount payment.
8.10.1 Events for Contra Accounting
Following are the accounting events for Contra Accounting:
ACCR
Dr |
Memo Income |
Component_ACCR |
Cr |
Memo Receivable |
Component_ACCR |
Dr |
Receivable |
Component_ACCR |
Cr |
Income |
Component_ACCR |
LIQD
Dr |
Customer |
PRINCIPAL_LIQD |
Cr |
Asset |
PRINCIPAL_LIQD |
Dr |
Customer |
Main_Interest_Component_LIQD |
Cr |
Receivable |
Main_Interest_Component_LIQD |
Dr |
Income |
Main_Interest_Component_CBIN |
Cr |
Cash Basis Income |
Main_Interest_Component_CBIN |
CICR (Contra Increment)
Dr |
Income |
Main_Interest_Component_CICR |
Cr |
Contra GL |
Main_Interest_Component_CICR |
CDCR (Contra Decrement)
Dr |
Contra GL |
Main_Interest_Component_CDCR |
Cr |
Income GL |
Main_Interest_Component_CDCR |
RESR
Dr |
Expense |
PRINCIPAL_RINC |
Cr |
Reserve GL |
PRINCIPAL_RINC |
Dr |
Reserve GL |
PRINCIPAL_RDEC |
Cr |
Income |
PRINCIPAL_RDEC |
8.10.2 Processing Principal Payment
When the principal payment exceeds the principal amount to be provided, the excess amount is moved from the Reserve GL or the Contra GL, and booked into the Income GL.
If the following is true:
Principal Amount Paid> (Outstanding Principal – Reserve Amount – Contra Amount);
The following are the accounting entries:
Dr |
Reserve Amount |
Write Back from Reserve |
Cr |
Income |
Write Back from Reserve |
Dr |
Contra Account |
Write Back from Contra |
Cr |
Income |
Write Back from Contra |
The system considers the Reserve GL first and then the Contra GL when moving funds to the Income GL.
The following example illustrates the same:
- Outstanding Principal – USD 100
- Reserve Amount – USD 20
- Contra Amount – USD 45
Case 1
Principal Amount Paid – USD 30
Hence, Principal Amount < (Outstanding Principal – Reserve Amount – Contra Amount)
The accounting entries are as follows:
- Dr. Customer USD 30
- Cr. Asset USD 30
Case 2
Principal Amount Paid – USD 40
Hence, Principal Amount > (Outstanding Principal – Reserve Amount – Contra Amount)
The accounting entries will be as follows:
- Dr. Customer USD 40
- Cr. Asset USD 40
- Dr. Reserve USD 5
- Cr. Income USD 5
Case 3
Principal Amount Paid – USD 70
Hence, Principal Amount > (Outstanding Principal – Reserve Amount – Contra Amount)
The accounting entries will be as follows:
- Dr. Customer USD 70
- Cr. Asset USD 70
- Dr. Reserve USD 20
- Cr. Income USD 20
- Dr. Contra USD 15
- Cr. Income USD 15
As the example illustrates, the excess amount is first written back from the Reserve GL, and then the Contra GL if necessary.
8.10.3 Processing Interest Payment
If Contra Accounting is applicable and a payment is made on an interest component, the credit entry is made in the Contra GL that you have specified in the Status Maintenance screen, and not the Income GL.
You can invoke the ‘Status Maintenance’ screen by typing ‘OLDSTATS’ in the field at the top right corner of the Application tool bar and clicking the adjoining arrow button.
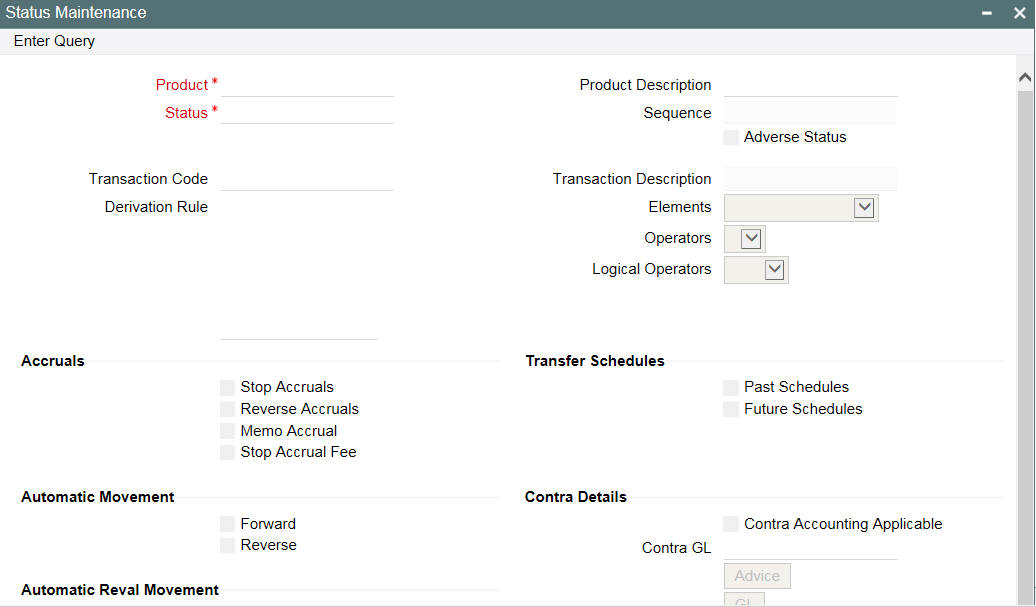
The accounting entries passed during the LIQD event are as follows:
Dr |
Customer |
Component_LIQD |
Cr |
ICCFCOMP_INC |
Component_LIQD |
Dr |
ICCFCOMP_INC |
Component_LIQD |
Cr |
Contra GL |
Component_LIQD |
8.10.4 Increasing/Decreasing Contra GL Balance
You can increase / decrease the contra GL balance for contract through the ‘Contra GL Adjustment’ screen.
You can invoke the ‘Contract GL Adjustment’ screen by typing ‘OLDCONTR’ in the field at the top right corner of the Application tool bar and clicking the adjoining arrow button.

In this screen, specify the following details:
Reference No.
Enter the Reference Number of the transaction for which you would like to reduce the contra amount.
When you enter the Reference Number, the following details will be defaulted in this screen:
- Department
- Branch
- Currency
- Treasury
- Contract Balance Amount
- Counterparty
- Contra Balance
- Status of the transaction
- Value Date of the transaction
Amount Paid
Specify the amount that is paid; this also the amount of the contra balance which is reduced or increased.
Lcy Eqvt
The Lcy equivalent is computed (if the transaction currency and the currency of the amount paid are different) and displayed. If the transaction currency and the currency amount paid are not different, the Lcy equivalent will be the value that you have entered against the field ‘Amount Paid’.
Account Dr.
The Contra GL/Income GL which should be debited is displayed here based on contra increase or decrease operation.
Account Cr.
The Contra GL/Income GL which should be credited is displayed here based on contra increase or decrease operation.
Contra GL Adjustment
Specify the type of contra GL adjustment (increase or decrease) that is to be associated with the contract. By default, the contra GL adjustment indicator is ‘Contra Decrease’. You can select one of the following options
- Contra Increase
- Contra Decrease
If the transaction is for Contra Balance Increase, then CICR event is triggered,
The accounting entries posted are as follows:
Dr INTERESTINCOME GL Main Interest_CICR
Cr Contra GL Main Interest_CICR
If the transaction is for Contra Balance Decrease, then CDCR event is triggered
The accounting entries posted are as follows:
Dr Contra GL Main Interest_CDCR
Cr INTERESTINCOME GL Main Interest_CDCR
Remarks
You may add remarks if you want to, in this field.