Cable the Netra X5-2 for Communications
After mounting the Netra X5-2 for Communications in an equipment rack and installing all components, use the following instructions to connect all appropriate data cables to the ports before powering the system up and beginning the configuration.
Oracle has qualified the following configurations of the Netra X5-2 for Communications (the onboard 10 GigE ports are configured for 1G operation):
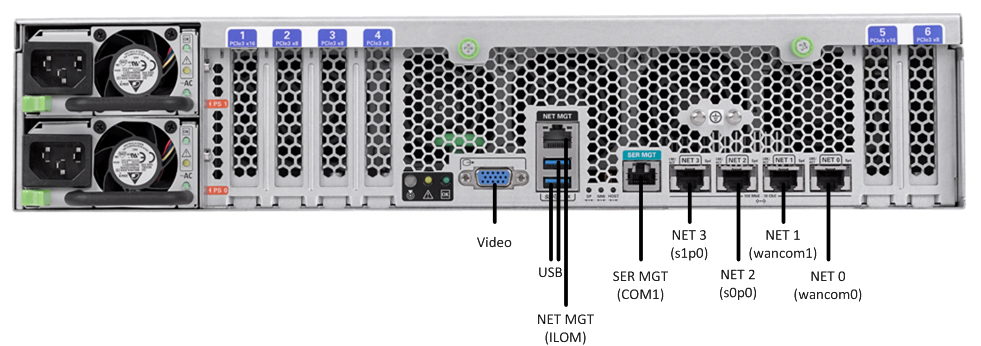
- Configuration A: Four onboard 10 GigE ports and no Quad GigE NIC
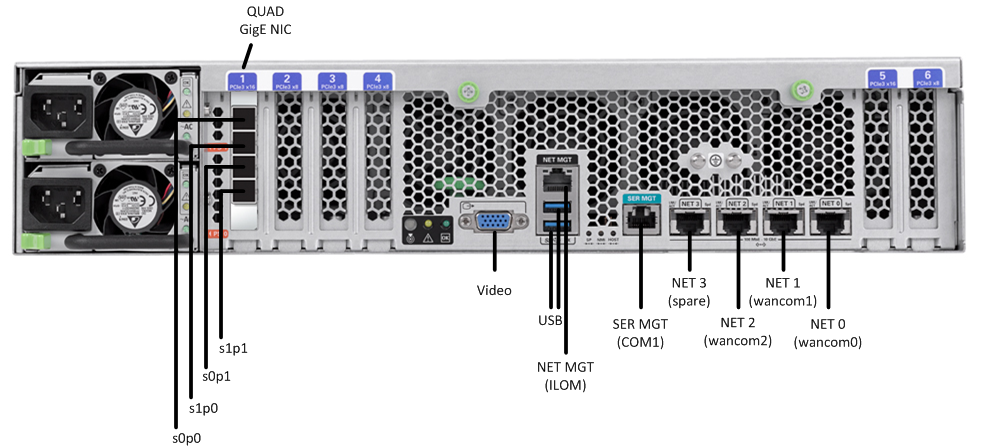
- Configuration B: Four onboard 10 GigE ports and 1 Quad GigE NIC
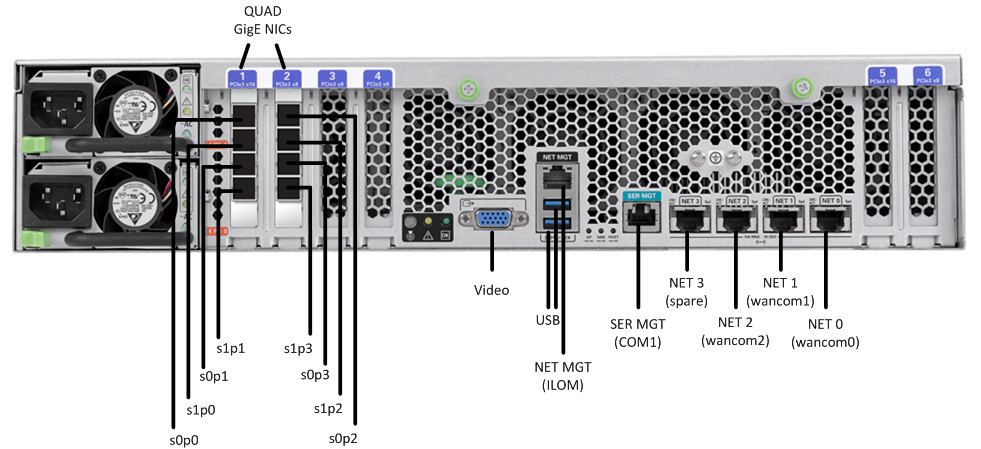
- Configuration C: Four onboard 10 GigE ports and 2 Quad GigE NICs
Figure 1-16 Netra X5-2 for Communications Configuration A (4 Onboard 10 GigE Ports)

Figure 1-17 Netra X5-2 for Communications Configuration B (4 Onboard 10 GigE Ports & 1 Quad GigE NIC)

Figure 1-18 Netra 5-2 for Communications Configuration C (4 Onboard 10 GigE Ports & 2 Quad GigE NICs)

Oracle recommends using Category 6 (or better) for all Ethernet connections.
You do not need to use every port for proper operation.
You can install and remove Ethernet and 1000BASE-T cables while the Netra X5-2 for Communication runs, but when you disconnect a cable the link is lost and the system generates an alarm.


